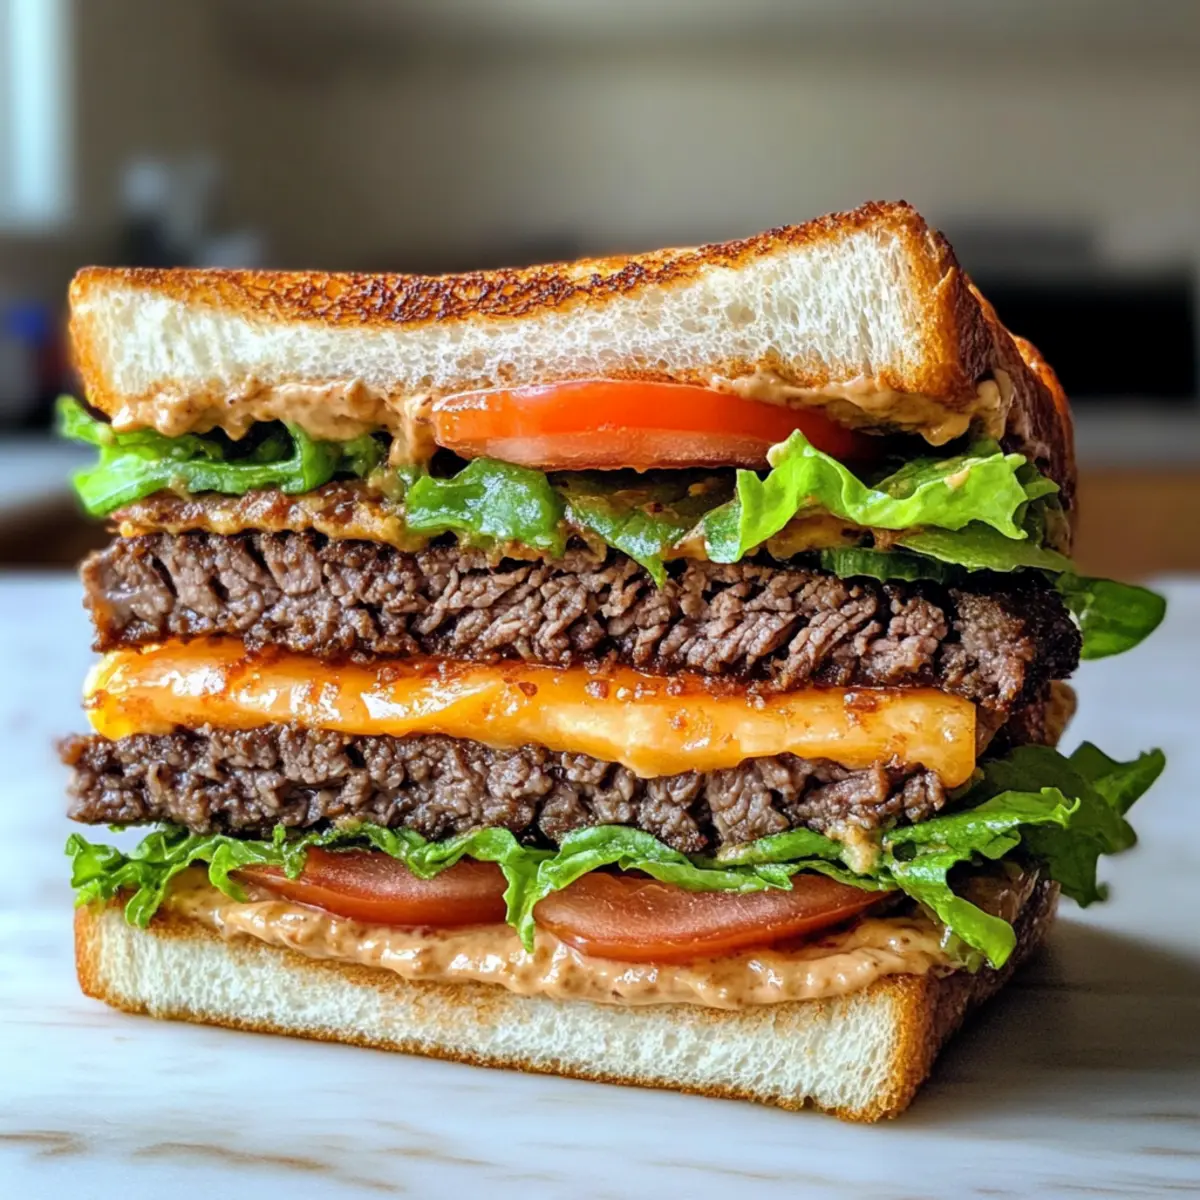
Crispy Chicken Katsu Musubi: Your New Favorite Lunch Snack

As I craved something crispy yet comforting, a picture of Chicken Katsu Musubi danced in my mind. This delightful snack offers a tempting twist on traditional sushi, featuring juicy fried chicken enveloped in a warm embrace of seasoned sushi rice and wrapped tightly in flavorful nori. Trust me when I say, it’s perfect for a quick lunch or a satisfying snack that keeps you away from fast-food temptations. In just a few simple steps, you can whip up this delicious fusion dish that’s not only easy to make but also delivers that comfort-food vibe we all love. Curious to learn how to bring a taste of Japan to your kitchen? Let’s dive into this mouthwatering recipe together!

Why is Chicken Katsu Musubi so special?

Quick and Easy: This recipe allows you to enjoy a delicious meal without spending hours in the kitchen. With just a few steps, you can create something impressive!
Savory Deliciousness: The combination of crispy fried chicken, perfectly seasoned rice, and umami-rich nori results in a flavor explosion. It’s a taste that you won’t forget!
Versatile Option: Whether you’re serving it as a light lunch or packing it for a picnic, Chicken Katsu Musubi fits any occasion. Try pairing it with pickled vegetables for a balanced meal!
Comforting Snack: This treat brings that comforting, crispy texture that will make it a family favorite, effectively keeping fast food at bay.
Make-Ahead Friendly: Prepare these delicious musubi ahead of time for quick bites throughout the week. Just remember to reheat briefly for that fresh-out-of-the-pan crunch!

Chicken Katsu Musubi Ingredients

For the Chicken
Boneless Skinless Chicken Thighs – The juicy star of the dish, offering rich flavor; feel free to use chicken breasts for a leaner alternative.
Large Eggs – Essential for binding the coating to the chicken, ensuring a crispy texture; a vegan egg alternative can serve if desired.
All-Purpose Flour – Helps create a wet batter for dredging the chicken, adding texture; gluten-free flour works as a great substitute.
Salt – Enhances all flavors; adjust to your dietary preferences.
Ground Black Pepper – Adds warmth and depth; optional based on taste preference.
Panko Breadcrumbs – Provides the deliciously crispy crust; regular breadcrumbs can be used for a different texture.
Neutral Oil (for frying) – Crucial for frying the chicken, with canola or vegetable oil being excellent options; ensure enough oil for proper frying.

For the Musubi
Nori Sheets (cut into thirds) – Wraps the musubi while imparting umami flavor; soy paper serves as a gluten-free alternative if you prefer.
Cooked Sushi Rice – The hearty base for musubi, offering substance; swap for brown rice for a healthier twist.
Tonkatsu Sauce – Adds a delightful sweetness and tang; barbecue sauce makes for a good substitute in a pinch.

Dive into making your Chicken Katsu Musubi and enjoy a satisfying, delicious snack that you and your loved ones will crave!

Step‑by‑Step Instructions for Chicken Katsu Musubi

Step 1: Pound the Chicken
Begin by placing the boneless skinless chicken thighs between two pieces of plastic wrap. Use a meat mallet to pound the chicken to an even ½-inch thickness, ensuring uniform cooking. This step is key for achieving that tender, juicy texture in your Chicken Katsu Musubi.

Step 2: Prepare the Batter
In a shallow dish, whisk together large eggs, all-purpose flour, salt, and ground black pepper until the mixture mimics pancake batter consistency. This wet batter will cling to the chicken, creating that desired crunchy coating. Make sure there are no lumps for an even application on the chicken.

Step 3: Coat the Chicken
Take each pounded chicken thigh and dip it into the wet batter, allowing any excess to drip off. Then, roll the batter-coated chicken in panko breadcrumbs until evenly coated. This step is crucial for getting that light and crispy crust that’s essential to the Chicken Katsu Musubi.

Step 4: Fry the Chicken
Heat a generous amount of neutral oil in a large skillet over medium-high heat, reaching a temperature of 350°F. Carefully place the coated chicken thighs into the hot oil, frying for 4-6 minutes on each side, or until golden brown and the internal temperature reaches 165°F. Transfer the cooked chicken to a wire rack to cool.

Step 5: Shape the Rice
On a clean surface, take an empty Spam can or a musubi mold and moisten the inside with water to prevent sticking. Place the can horizontally on a strip of nori. Scoop in ½ cup of cooked sushi rice, pressing it down firmly to form a compact layer. Gently remove the can, leaving the rice shaped and ready for assembly.

Step 6: Assemble the Musubi
Spread a layer of tonkatsu sauce over the rice, then place a piece of the crispy fried chicken on top. Carefully wrap the nori around the musubi, ensuring each layer is tight to keep everything together. Use a little water to seal the edges of the nori, making sure the delightful Chicken Katsu Musubi is secure and ready to enjoy.

How to Store and Freeze Chicken Katsu Musubi

  • Room Temperature: Chicken Katsu Musubi is best enjoyed fresh, but if necessary, it can be held at room temperature for up to 1 hour.

  • Fridge: Store any leftovers in an airtight container in the refrigerator for up to 3 days. This keeps the musubi fresh while maintaining its flavors.

  • Freezer: For longer storage, wrap each musubi tightly in plastic wrap followed by aluminum foil, then freeze for up to 1 month. Reheating is best done in a toaster oven for crispy results.

  • Reheating: To maintain the crispy texture, reheat the Chicken Katsu Musubi in a toaster oven at 350°F for about 10-12 minutes, or until heated through.

Chicken Katsu Musubi Variations

Feel free to mix and match flavors and ingredients to make this Chicken Katsu Musubi your own and take it to the next level!

  • Vegetarian: Swap chicken for tofu or a meat alternative, marinating for a few minutes to boost flavor. The crispy texture of the tofu will still create that satisfying crunch in every bite.

  • Flavored Rice: Incorporate some furikake or sesame seeds into the sushi rice for an added burst of umami. This will elevate the flavor profile, creating a delightful surprise with each mouthful.

  • Spicy Kick: Drizzle sriracha or spicy mayo on the chicken before wrapping. For heat lovers, this adds a fiery twist that complements the savory elements beautifully.

  • Crispy Addition: Use tempura flakes alongside the panko for extra crunch. This little addition will add a delightful texture that takes the musubi to a whole new level.

  • Sauce Alternatives: Instead of tonkatsu sauce, experiment with a sweet chili sauce for a different flavor experience. This delightful change will give your musubi a zesty, sweet finish that you won’t forget!

  • Garnish Upgrades: Before wrapping, top with green onions or avocado slices for a fresh twist. These ingredients not only add color but also contribute an additional layer of flavor that refreshes the palate.

  • Rice Substitution: Feel free to use quinoa or cauliflower rice for a healthier, low-carb version. Your Chicken Katsu Musubi will still deliver on flavor without the extra carbs!

While you’re at it, consider serving your Chicken Katsu Musubi alongside some homemade pickled vegetables for a colorful, nutritious companion. More ideas to explore include the comfort of Savory Chicken Cheesy Potato Drumsticks or the sweetness of Tropical Chicken Pineapple.

Expert Tips for Chicken Katsu Musubi

  • Perfect Temperature: Ensure the oil is heated to 350°F for optimal frying; too cool and the chicken will be greasy, too hot and it will burn.

  • Even Coating: When dredging the chicken, ensure it’s coated evenly with batter and panko breadcrumbs to achieve that perfect crispy texture.

  • Don’t Overcrowd: Fry chicken in batches; overcrowding the pan can lower the oil temperature, causing the coating to become soggy and unevenly cooked.

  • Firm Pressing: Press the sushi rice firmly into the mold to help form a compact shape; this prevents the musubi from falling apart when you wrap it in nori.

  • Clean Cuts: Use a wet knife to slice the assembled Chicken Katsu Musubi for clean edges; this helps prevent tearing and keeps the presentation neat.

What to Serve with Chicken Katsu Musubi?

Enhance your meal experience with these delightful pairings that complement the crispy, juicy flavors of Chicken Katsu Musubi.

  • Pickled Vegetables: These tangy bites balance the richness of fried chicken and add a refreshing crunch, enhancing every mouthful.
  • Side Salad: A mix of greens tossed with sesame dressing provides a light contrast to the hearty musubi—perfect for brightening up your plate!
  • Miso Soup: The warm, comforting essence of miso soup rounds out your meal, adding depth without overpowering the musubi’s unique flavor.
  • Edamame: Lightly salted edamame brings a nutty taste and a fun texture that pairs beautifully with the umami notes of tonkatsu sauce.
  • Furikake Rice: Elevate your sushi rice by adding furikake, a Japanese seasoning mix, to reinforce the flavors and introduce delightful hints of umami.
  • Chilled Green Tea: Refresh your palate with a cup of chilled green tea, offering a clean and crisp counterpoint to the meal’s savory elements.
  • Chocolate Mochi: End your meal on a sweet note with a soft, chewy chocolate mochi that beautifully contrasts the crispiness of Chicken Katsu Musubi.
  • Teriyaki Chicken Wings: If you’re feeling adventurous, serve some sticky teriyaki wings alongside for a party-perfect platter that’s a sure crowd-pleaser!

Make Ahead Options

These Chicken Katsu Musubi are perfect for busy home cooks looking to save time! You can prepare the fried chicken and sushi rice up to 24 hours in advance. Simply cook the chicken and let it cool completely before storing it in an airtight container in the refrigerator. The sushi rice can also be made ahead; just ensure it cools to room temperature before sealing. To maintain quality, avoid assembling the musubi until you’re ready to serve. When it’s time to enjoy, simply reheat the chicken in a toaster oven for that fresh crunch, shape your rice, and wrap it all together with nori for a delightful snack that’s just as delicious as when freshly made!

Chicken Katsu Musubi Recipe FAQs

How do I select the best chicken for Chicken Katsu Musubi?
Absolutely! When choosing chicken, opt for boneless skinless chicken thighs, which offer juiciness and flavor. If you prefer a leaner choice, chicken breasts can also be used. Look for thighs that are firm and free of dark spots; freshness is key for that delicious crispy outcome!

What’s the best way to store leftover Chicken Katsu Musubi?
Very! To keep your Chicken Katsu Musubi fresh, store leftovers in an airtight container in the refrigerator for up to 3 days. This will help maintain its flavors. If you’ve got more than you can eat, you can even wrap each musubi tightly in plastic wrap and aluminum foil to freeze for up to 1 month!

Can I freeze Chicken Katsu Musubi, and if so, how?
Absolutely! To freeze, first let the musubi cool completely. Next, wrap each piece tightly in plastic wrap, followed by aluminum foil to prevent freezer burn. When you’re ready to enjoy it, reheat in a toaster oven at 350°F for about 10-12 minutes to regain that lovely crispiness.

What should I do if my chicken coating becomes soggy?
I understand how frustrating that can be! To avoid soggy coating, ensure the oil is heated to a perfect 350°F before adding the chicken. If you’ve already cooked it and it’s soggy, try briefly reheating in a preheated toaster oven; this can help restore some of the crispiness.

Is Chicken Katsu Musubi safe for those with allergies?
Very! If you or someone you’re serving has allergies, you can make adjustments to accommodate. For example, use gluten-free flour and breadcrumbs, and a vegan egg alternative if you desire a plant-based dish. Always check the labels of your ingredients to ensure they meet any dietary restrictions.

How long can I keep Chicken Katsu Musubi at room temperature?
Great question! Chicken Katsu Musubi is best enjoyed fresh, but it can be held at room temperature for up to 1 hour. If you need to hold it longer, take care to keep it in a cool place to prevent spoilage.

Chicken Katsu Musubi

Crispy Chicken Katsu Musubi: Your New Favorite Lunch Snack

Enjoy a delightful twist on sushi with Chicken Katsu Musubi, featuring crispy chicken and seasoned sushi rice.
Prep Time 20 minutes
Cook Time 20 minutes
Cooling Time 5 minutes
Total Time 45 minutes
Servings: 4 musubi
Course: Lunch
Cuisine: Japanese
Calories: 350

Ingredients
  

For the Chicken
  • 1 pound Boneless Skinless Chicken Thighs Chicken breasts can be used for a leaner option.
  • 2 large Eggs A vegan egg alternative can serve if desired.
  • 1 cup All-Purpose Flour Gluten-free flour works as a substitute.
  • 1 teaspoon Salt Adjust to dietary preferences.
  • 1/2 teaspoon Ground Black Pepper Optional based on taste preference.
  • 1 cup Panko Breadcrumbs Regular breadcrumbs can be used.
  • 2 cups Neutral Oil For frying, canola or vegetable oil are excellent options.
For the Musubi
  • 4 sheets Nori Cut into thirds; soy paper is a gluten-free alternative.
  • 2 cups Cooked Sushi Rice Brown rice can be swapped for a healthier twist.
  • 1/4 cup Tonkatsu Sauce Barbecue sauce can be used as a substitute.

Equipment

  • Skillet
  • Meat mallet
  • Shallow dish
  • Musubi Mold or Spam Can
  • Wire rack

Method
 

Step-by-Step Instructions
  1. Pound the chicken thighs between plastic wrap to an even ½-inch thickness for uniform cooking.
  2. In a shallow dish, whisk together eggs, flour, salt, and pepper until pancake batter consistency.
  3. Dip each pounded chicken thigh into the wet batter, then roll in panko breadcrumbs until evenly coated.
  4. Heat neutral oil in a skillet over medium-high heat to 350°F. Fry chicken for 4-6 minutes per side until golden.
  5. Use a musubi mold to shape the cooked sushi rice firmly into compact layers.
  6. Spread tonkatsu sauce over the rice, place a piece of fried chicken on top, and wrap with nori.

Notes

Best enjoyed fresh, but leftovers can be stored in an airtight container for up to 3 days.

Crispy Maple Sriracha Tofu Wings for Irresistible Snacking

“Did you hear that crunch?” my friend asked as we gathered around the table, eyes wide with anticipation. Little did we know, we were about to discover the magic of Crispy Maple Sriracha Tofu Wings. These tantalizing bites strike the perfect balance of sweet and spicy, making them an absolute showstopper for game days or cozy evenings at home. What’s even better? They’re vegan, oil-free, and ready in a flash, proving that healthy eating can be utterly delicious. Whether you’re a seasoned home chef or just looking for a fun twist on traditional wings, these tofu treats are sure to impress your family and friends. Trust me, their crispy exterior and tender inside will leave you craving more. So, are you ready to dive into a recipe that’s not just satisfying, but also effortlessly adaptable? Let’s get started!

Why Will You Love These Wings?

Crispy Texture: The outside crunch complements the tender tofu, creating a mouthwatering contrast you won’t be able to resist.

Flavor Explosion: With a perfect blend of sweet maple and spicy sriracha, these wings are bursting with flavor.

Quick & Easy: You’ll whip up these Crispy French Fries in no time, making them ideal for busy weeknights.

Versatile Options: Swap in gluten-free panko for a delightful twist that caters to all dietary needs.

Crowd-Pleasing: Serve these as an appetizer or pair with salads for a family feast that will leave everyone asking for seconds!

Crispy Maple Sriracha Tofu Wings Ingredients

For the Wings
Extra Firm Tofu – The base of this recipe, ensuring a delightful texture that holds up beautifully.
Cornstarch – Essential for that irresistible crispy coating; no substitutions needed!
Soy Milk – Acts as a binder; swap with any unsweetened non-dairy milk if desired.
Panko Bread Crumbs – Adds a crunchy texture; use gluten-free panko if preferred.

For the Seasoning
Nutritional Yeast – Offers a cheesy flavor; feel free to omit if unavailable.
Garlic Powder – Enhances flavor depth; adjust according to your taste.
Onion Powder – Adds a savory touch; customize as you wish.
Smoked Paprika – Brings warmth and color to the dish; it’s a must-try!
Sea Salt – Crucial for balancing flavors; use sparingly.
Black Pepper – Provides a subtle heat that complements the dish beautifully.

For the Sauce
Maple Syrup – The star ingredient for sweetness; agave syrup makes a great substitute.
Sriracha – Adds the perfect kick of heat; adjust to meet your spice tolerance!

Embrace the magic of these Crispy Maple Sriracha Tofu Wings as a delicious, flavorful addition to your meal repertoire!

Step‑by‑Step Instructions for Crispy Maple Sriracha Tofu Wings

Step 1: Prep Tofu
Start by pressing 14 ounces of extra firm tofu for about 15 minutes to eliminate excess moisture. Once pressed, slice the tofu into triangle wing shapes that resemble traditional wings. The drier the tofu, the crispier your Crispy Maple Sriracha Tofu Wings will turn out, so this step is crucial!

Step 2: Set Up Dredging Station
Prepare three bowls for the dredging process. In the first bowl, add cornstarch; in the second, pour in unsweetened soy milk; and in the third, combine panko bread crumbs with nutritional yeast, garlic powder, onion powder, smoked paprika, sea salt, and black pepper. Place these bowls in order for an efficient coating process.

Step 3: Coat Tofu
Begin coating each tofu wing by dredging it in the cornstarch until fully covered. Next, dip the coated wing into the soy milk, ensuring it’s well-saturated. Finally, coat the tofu wing in the panko mixture, pressing lightly to ensure it sticks. Place the coated wings on a parchment-lined baking sheet as you work through all pieces.

Step 4: Bake
Preheat your oven to 450°F (230°C). Once heated, transfer the baking sheet to the oven and bake the Crispy Maple Sriracha Tofu Wings for 30 minutes. Remember to flip the wings halfway through to achieve even crispiness. The wings should turn golden brown and smell absolutely delicious!

Step 5: Prepare Sauce
While the wings are baking, prepare the sweet and spicy glaze. In a mixing bowl, whisk together maple syrup, Sriracha, a pinch of salt, and black pepper to taste. This simple but flavorful sauce will enhance the wings beautifully, adding that essential zing to your dish.

Step 6: Glaze Tofu Wings
After the initial baking time, remove the wings from the oven. Brush the pre-made maple Sriracha sauce generously on both sides of the tofu wings. Return the wings to the oven and bake for an additional 9-10 minutes, flipping them every 2-3 minutes to prevent burning while ensuring an even glaze.

Step 7: Serve
Once the Crispy Maple Sriracha Tofu Wings are beautifully caramelized and fragrant, take them out of the oven. Serve them hot, with extra sauce on the side or pair them with your favorite dip for an enticing appetizer or main course. Enjoy the delightful crunch and flavor explosion!

Crispy Maple Sriracha Tofu Wings Variations

Dive into a world of flavorful possibilities and customize your wings to suit your taste!

  • Gluten-Free: Swap panko bread crumbs for gluten-free panko to make this dish suitable for gluten-sensitive diets.

  • Spicy Twist: Add a teaspoon of cayenne pepper to your panko coating for an extra kick of heat. That fiery blast pairs beautifully with the sweetness of the maple syrup.

  • Sweetness Swap: Replace maple syrup with agave nectar for a slightly lighter sweetness that maintains the same sticky goodness.

  • Savoury Boost: Incorporate a splash of soy sauce into the soy milk for an umami flavor that truly elevates your wings.

  • BBQ Style: Instead of the maple sriracha sauce, brush your wings with your favorite BBQ sauce for a smoky alternative that retains all that crunch.

  • Herbed Up: Add fresh or dried herbs like rosemary or thyme to the panko mixture for an aromatic twist. This beautiful herbaceous scent will complement the crispy wings perfectly!

  • Buffalo Style: Drench your baked wings in buffalo sauce for a tangy, spicy alternative. It’s a classic twist that pairs well with a side of vegan ranch.

With so many delicious options, you can enjoy these Crispy Mini Beef Pies as a different choice alongside your tofu wings! Give these variations a try and create your own favorite rendition of these crispy delights!

Expert Tips for Crispy Maple Sriracha Tofu Wings

  • Press Tofu Properly: Ensure you press the tofu for at least 15 minutes. This step removes excess moisture, resulting in crispier Crispy Maple Sriracha Tofu Wings.

  • Watch the Baking Time: The maple syrup can burn quickly, so keep an eye on your wings after applying the sauce. Flip them every few minutes to prevent burning.
  • Use Parchment Paper: Line your baking sheet with parchment paper for easy cleanup and to prevent the wings from sticking, ensuring a perfect crunch.

  • Adjust Spice Level: Feel free to modify the amount of Sriracha according to your spice preference. This allows everyone to enjoy your Crispy Maple Sriracha Tofu Wings at their own heat level.

  • Reheat for Maximum Crisp: If you have leftovers, reheat the wings in an oven or air fryer to restore their crispy texture before serving again.

How to Store and Freeze Crispy Maple Sriracha Tofu Wings

Fridge: Store baked wings in an airtight container for up to 3 days. Reheat in the oven or air fryer for best results, ensuring they regain their crispiness.

Freezer: For longer storage, freeze unbaked tofu wings on a baking sheet for 1-2 hours until firm, then transfer to a freezer-safe bag. Use within 2 months for optimal taste.

Reheating: When ready to enjoy, reheat frozen wings directly from the freezer, brushing them with a bit of oil or sauce to enhance flavor.

Serving Fresh: These Crispy Maple Sriracha Tofu Wings are best enjoyed fresh, so plan to make them right before serving whenever possible.

Make Ahead Options

These Crispy Maple Sriracha Tofu Wings are perfect for meal prep enthusiasts looking to save time during their busy weeknights! You can prepare the tofu wings up to 24 hours in advance by following the first three steps: press the tofu, set up your dredging station, and coat the tofu wings. Once coated, place them on a baking sheet and refrigerate. To maintain quality, keep the wings covered to prevent moisture loss. When you’re ready to serve, preheat your oven to 450°F and bake the wings for about 30 minutes, flipping halfway. Add the glaze in the final step and enjoy a delicious meal with minimal effort!

What to Serve with Crispy Maple Sriracha Tofu Wings?

Elevate your meal night by pairing these delightful crispy bites with dishes that complement their sweet and spicy goodness.

  • Creamy Coleslaw: This crunchy, tangy side adds a refreshing balance to the heat of the tofu wings. Perfect for a vibrant dish that contrasts beautifully with the rich glaze.

  • Garlic Bread: Crunchy on the outside and buttery soft inside, garlic bread offers a comforting touch that complements the wings. The buttery flavor pairs well with the maple sriracha’s kick!

  • Baked Sweet Potatoes: Their natural sweetness echoes the maple flavor, while their fluffy texture presents a lovely counterbalance to the crispy wings. A warm hug on your plate!

  • Crispy Quinoa Salad: This nutty salad brings a grainy texture and refreshing crunch, drizzled with a citrusy vinaigrette to tone down the heat. It’s fresh and filling!

  • Veggie Platter with Hummus: A colorful assortment of fresh vegetables provides a crunchy, healthy side that pairs wonderfully with the wings’ bold flavors. Perfect for dipping alongside!

  • Coconut Rice: Creamy and subtly sweet, coconut rice complements the spiciness of the wings; it creates a harmonious blend of flavors that will keep everyone coming back for more.

  • Lemonade or Iced Tea: Refreshing beverages like iced lemon tea or classic lemonade cut through the richness of the dish and cleanse the palate between bites.

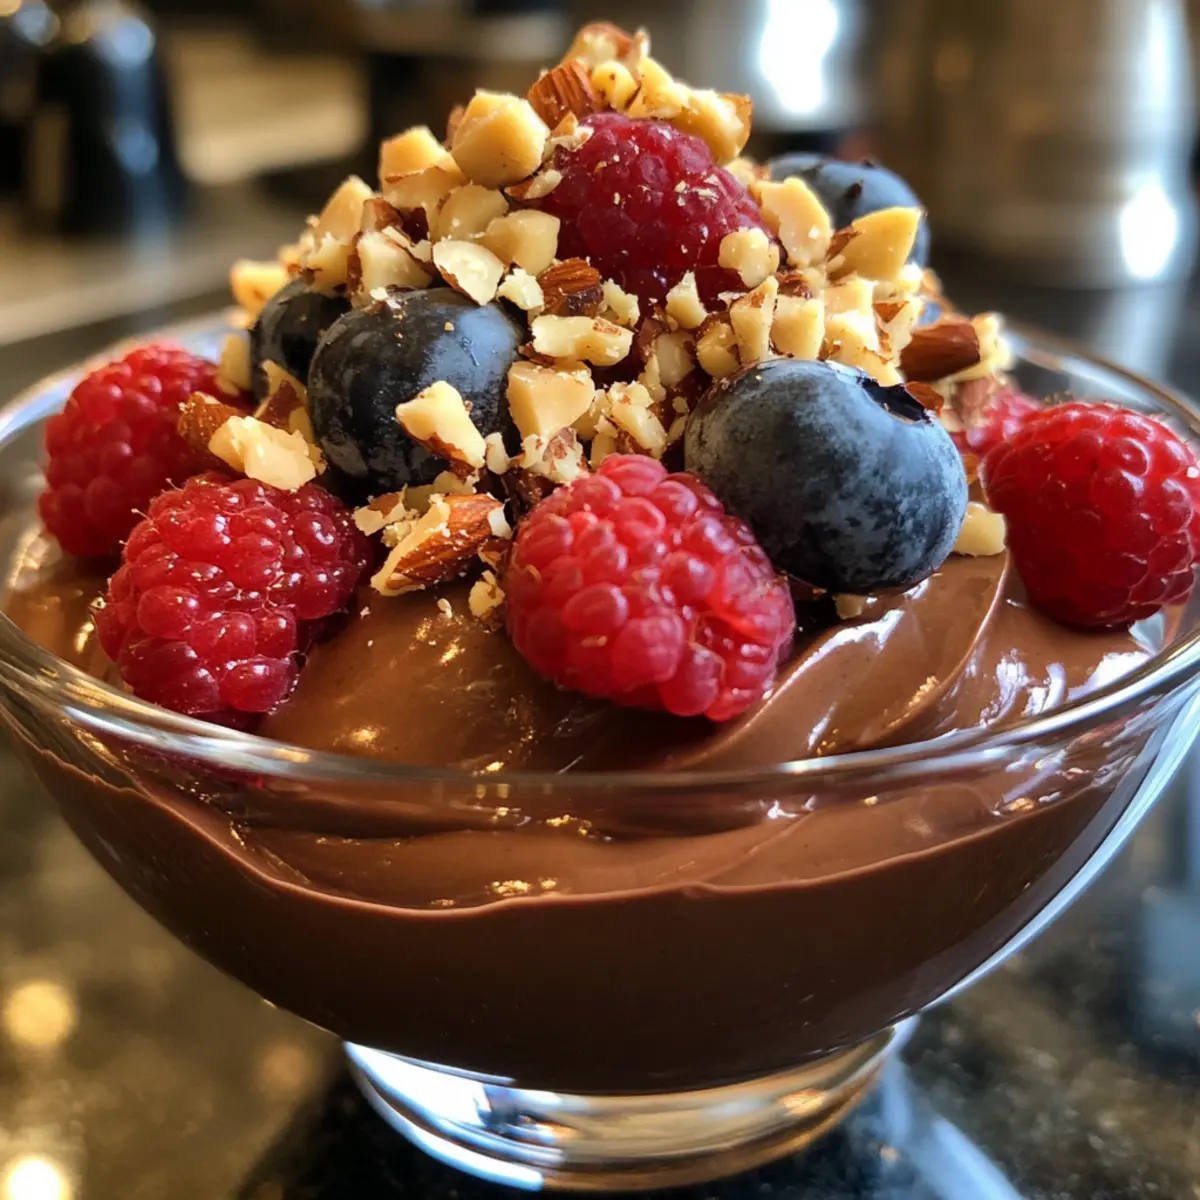
  • Chocolate Avocado Mousse: For dessert, this rich and creamy mousse offers a decadent yet healthy finish to your meal. The subtle sweetness will balance the earlier spice while providing a satisfying end!

Crispy Maple Sriracha Tofu Wings Recipe FAQs

How do I select the best tofu for this recipe?
Absolutely! For the crispiest result, always choose extra firm tofu. It’s essential because the moisture content is lower, allowing the wings to have that delightful crunch once baked. Look for tofu with minimal water content and avoid any with dark spots, which can indicate spoilage.

What are the best ways to store leftover wings?
Very! To keep those Crispy Maple Sriracha Tofu Wings fresh, store them in an airtight container in the fridge for up to 3 days. When you’re ready to enjoy them again, reheat in either the oven at 350°F for about 10-15 minutes or in an air fryer for a few minutes until they’re crispy again.

Can I freeze the baked wings for later?
Certainly! To freeze, I recommend freezing the unbaked tofu wings first. Arrange them on a baking sheet in a single layer and freeze for 1-2 hours until firm. Once they’re solid, transfer them to a freezer-safe bag and label with a date. They can be stored for up to 2 months. When ready to bake, cook straight from the freezer, adding a few extra minutes to the baking time.

What should I do if my wings don’t get crispy?
If your wings don’t turn out as crispy as you’d like, there are a few troubleshooting steps you can follow. First, ensure you pressed the tofu well to remove excess moisture. Secondly, make sure your oven is fully preheated to 450°F before baking. Lastly, flipping the wings halfway through the cooking time helps achieve an even crisp. It’s also a great idea to check them towards the end, as sugar in the sauce can burn quickly!

Are these wings safe for those with food allergies?
Definitely! These Crispy Maple Sriracha Tofu Wings are vegan and can be made gluten-free by using gluten-free panko. However, for those with soy allergies or sensitivities, I recommend using chickpea or sunflower seed tofu alternatives. Always double-check labels for any pre-packaged ingredients, like panko or sriracha, to avoid hidden allergens.

How can I customize the spice level in the wings?
The more the merrier! Start by adjusting the amount of sriracha in the sauce based on your heat preference. If you prefer milder flavors, consider reducing the sriracha and pairing the wings with a cooling dipping sauce, like ranch or a creamy coconut yogurt dip. You could also try incorporating spices like paprika or cayenne pepper for added warmth without the heat!

Crispy Maple Sriracha Tofu Wings

Crispy Maple Sriracha Tofu Wings for Irresistible Snacking

Crispy Maple Sriracha Tofu Wings are a sweet and spicy vegan snack that’s perfect for game days.
Prep Time 15 minutes
Cook Time 40 minutes
Total Time 55 minutes
Servings: 4 wings
Course: Other
Cuisine: Vegan
Calories: 150

Ingredients
  

For the Wings
  • 14 oz Extra Firm Tofu The base of this recipe, ensuring a delightful texture
  • 1 cup Cornstarch Essential for that irresistible crispy coating
  • 1 cup Soy Milk Acts as a binder; swap with unsweetened non-dairy milk if desired
  • 1 cup Panko Bread Crumbs Adds a crunchy texture; can use gluten-free panko
For the Seasoning
  • 1 tbsp Nutritional Yeast Offers a cheesy flavor; omit if unavailable
  • 1 tsp Garlic Powder Enhances flavor depth
  • 1 tsp Onion Powder Adds a savory touch
  • 1 tsp Smoked Paprika Brings warmth and color to the dish
  • 1 tsp Sea Salt Crucial for balancing flavors
  • 1 tsp Black Pepper Provides subtle heat
For the Sauce
  • 1/2 cup Maple Syrup The star ingredient for sweetness
  • 3 tbsp Sriracha Adds the perfect kick of heat

Equipment

  • oven
  • baking sheet
  • mixing bowls
  • parchment paper

Method
 

Step-by-Step Instructions
  1. Start by pressing 14 ounces of extra firm tofu for about 15 minutes to eliminate excess moisture. Once pressed, slice the tofu into triangle wing shapes.
  2. Prepare three bowls for the dredging process: cornstarch in the first, soy milk in the second, and panko mixture with nutritional yeast and spices in the third.
  3. Coat each tofu wing in cornstarch, then dip in soy milk, and finally coat with the panko mixture.
  4. Preheat your oven to 450°F (230°C). Bake the wings for 30 minutes, flipping halfway through.
  5. In a bowl, whisk together maple syrup, Sriracha, a pinch of salt, and black pepper to prepare the sauce.
  6. Brush the cooked wings with the sauce, return to the oven for an additional 9-10 minutes, flipping every 2-3 minutes.
  7. Serve hot with extra sauce or your favorite dip for an appetizer or main course.

Notes

Press tofu properly for crispiness. Watch baking time to prevent burning. Use parchment paper for easy cleanup. Adjust spice level to preference. Reheat leftovers in an oven or air fryer for best results.

Irresistible Marshmallow Peanut Butter Brownies to Indulge In

The first bite of these Marshmallow Peanut Butter Brownies transports me to a world of gooey bliss. With each rich layer of chocolate brownie cradling a sweet marshmallow fluff and creamy peanut butter filling, it’s like a warm hug on a plate. Perfect for those of us seeking a dessert that’s not just quick to whip up but also a true showstopper, this recipe combines the nostalgic comfort of brownies with an irresistible twist. Whether you’re sharing them at a gathering or savoring a quiet evening at home, these brownies are sure to delight chocolate and peanut butter lovers alike. Ready to create some magic in your kitchen? Let’s dive into these dreamy treats together!

Why are these brownies so irresistible?

Decadent Layers: Each bite delivers rich layers of chocolate brownies harmoniously combined with creamy peanut butter and fluffy marshmallow, creating an explosion of flavors that you won’t forget.

Quick and Easy: You’ll find the preparation simple, allowing you to whip these up even on a busy day—perfect for any home cook looking to impress!

Crowd-Pleasing Delight: These brownies are a sure hit at any gathering, sure to evoke “wow” responses from family and friends. Perfect to serve alongside a scoop of ice cream or warm chocolate sauce!

Texture Symphony: Get ready for a delightful play of contrasting textures—the fudgy brownie layers, gooey marshmallow, and creamy peanut butter filling meld together beautifully.

Versatile Treat: Feeling adventurous? Substitute almond butter or add nuts for a twist. If you love quick desserts, check out my Banana Bread Brownies for another inspiring recipe!

Marshmallow Peanut Butter Brownie Ingredients

• Get ready to create a delicious masterpiece!

For the Peanut Butter Filling

  • Creamy Peanut Butter – Provides richness and flavor; try a natural brand for a less sweet option.
  • Powdered Sugar – Adds sweetness and contributes to a smooth filling.
  • Unsalted Butter – Enhances creaminess; make sure it’s at room temperature for easy mixing.
  • Salt – Enhances the overall flavor profile.

For the Brownie Batter

  • All-Purpose Flour – The backbone of the brownies; can be substituted with gluten-free flour for a gluten-free treat.
  • Granulated Sugar – The primary sweetener in the brownie batter.
  • Brown Sugar – Adds moisture and depth; use dark brown sugar for richer flavor.
  • Canola Oil – Keeps the brownies moist and fudgy.
  • Pure Vanilla Extract – Elevates the flavor of the brownies.
  • Bittersweet Chocolate – The star of the show; substitute with semi-sweet for a sweeter option.
  • Dutch Process Cocoa Powder – Gives deep chocolate flavor and color.

For the Topping

  • Store-Bought Marshmallow Fluff – Adds sweetness and a chewy texture; can be homemade if you’re feeling adventurous.

Now that we’ve gathered all our ingredients, let’s get ready to create these Marshmallow Peanut Butter Brownies that will leave you and your guests speechless!

Step‑by‑Step Instructions for Marshmallow Peanut Butter Brownies

Step 1: Prepare the Peanut Butter Filling
In a mixing bowl, combine 1 cup of creamy peanut butter, 1 cup of powdered sugar, ½ cup of unsalted butter (softened), and a pinch of salt. Using a hand mixer or spatula, blend these ingredients until you achieve a smooth and creamy consistency. This luscious filling will bring a delightful richness to your Marshmallow Peanut Butter Brownies, enhancing every bite.

Step 2: Preheat and Prepare the Baking Pan
Preheat your oven to 350°F (180°C). As the oven warms up, take a 9×13 inch baking pan and grease it generously with butter or cooking spray. For easy brownie removal later, line the pan with parchment paper, allowing the edges to hang over. This will make lifting out the brownies a breeze after baking.

Step 3: Mix Dry Ingredients
In a separate bowl, whisk together 1 cup of all-purpose flour, 1 teaspoon of baking powder, and ½ teaspoon of salt. This combination will give your Marshmallow Peanut Butter Brownies structure and a slight rise. Set the dry mixture aside while you prepare the wet ingredients, ensuring everything is easily accessible for mixing.

Step 4: Combine Wet Ingredients
In another bowl, beat together 2 large eggs, 1 cup of granulated sugar, ½ cup of brown sugar, ½ cup of canola oil, and 2 teaspoons of pure vanilla extract. Use a whisk or an electric mixer to mix until the ingredients are fully combined, and the mixture appears light and slightly frothy. This step is crucial for a rich and fudgy brownie base.

Step 5: Melt Chocolate and Butter
In a saucepan over low heat, melt 8 ounces of bittersweet chocolate along with ½ cup of unsalted butter. Stir continuously until completely melted and smooth. Once melted, remove from heat and gently mix in ½ cup of Dutch process cocoa powder until fully incorporated, creating a luscious chocolate mixture for the brownies.

Step 6: Combine Wet and Dry Mixtures
Gradually pour the melted chocolate mixture into the bowl with the egg mixture, stirring until well blended. Then, add the bowl of dry ingredients and mix just until no visible flour remains. Be careful not to overmix, as this will help keep your brownies chewy and fudgy, the hallmark of perfect Marshmallow Peanut Butter Brownies.

Step 7: Layer the Brownie Batter
Pour half of the brownie batter into the prepared baking pan, spreading it evenly with a spatula. Next, dollop spoonfuls of your peanut butter filling and marshmallow fluff across the top, leaving space in between for swirling. Use a knife or toothpick to gently swirl these toppings into the brownie batter, creating a stunning marbled effect.

Step 8: Bake for the Perfect Texture
Place the pan in your preheated oven and bake for 26–32 minutes. You’ll know the Marshmallow Peanut Butter Brownies are done when the edges are set, and the top has a glossy finish. A toothpick inserted into the center should come out with moist crumbs, not wet batter—indicating that they are perfectly fudgy.

Step 9: Cool and Cut the Brownies
Once baked, remove the pan from the oven and place it on a wire rack to cool completely. This cooling period is essential for the brownies to set properly. Once cooled, use the edges of the parchment paper to lift the brownies out of the pan, and slice them into your desired bar size. Enjoy these indulgent Marshmallow Peanut Butter Brownies!

Make Ahead Options

These delightful Marshmallow Peanut Butter Brownies are perfect for meal prep, making them an excellent choice for busy home cooks! You can prepare the peanut butter filling and brownie batter up to 24 hours in advance by storing them separately in airtight containers in the refrigerator. To maintain maximum freshness, refrigerate the peanut butter filling initially to prevent separation, and keep the brownie batter covered tightly to avoid any drying. When you’re ready to bake, just layer the batter with the filling and marshmallow fluff, then bake as instructed. This simple make-ahead option allows you to enjoy freshly baked brownies with minimal effort on the day of serving!

Expert Tips for Marshmallow Peanut Butter Brownies

  • Prep Smart: Use a parchment sling for easy removal of brownies. It prevents sticking and makes cutting them a breeze.

  • Heat the Fluff: Microwave marshmallow fluff for about 15 seconds. This will make it easier to dollop and swirl into your brownie batter.

  • Fudgy Perfection: Be careful not to overmix the batter after adding the dry ingredients. This helps maintain that delightful fudgy texture in your Marshmallow Peanut Butter Brownies.

  • Adjust the Sweetness: Choose a creamy peanut butter brand with no added sugar for a less sweet filling that balances beautifully with the brownie.

  • Check for Doneness: Look for set edges and a glossy top while baking. A toothpick inserted should come out with moist crumbs for the perfect chewy brownie.

What to Serve with Marshmallow Peanut Butter Brownies

Make your dessert experience even sweeter by pairing these dreamy brownies with delightful complements!

  • Vanilla Ice Cream: A classic choice that enhances the rich chocolate and creamy peanut butter flavors, adding a cool contrast to the warm brownies.

  • Chocolate Sauce: Drizzling warm chocolate sauce over your brownies intensifies the chocolate experience and adds an extra layer of decadence.

  • Fresh Berries: The tartness of strawberries or raspberries balances the sweetness, providing a refreshing burst that elevates each rich bite.

  • Whipped Cream: Light and airy, freshly whipped cream adds softness and a touch of elegance, perfect for those who crave a creamy finish.

  • Caramel Sauce: A drizzle of rich caramel introduces a lovely sweetness and a chewy texture, creating a harmonious mix of flavors.

  • Espresso or Coffee: Serve with a shot of espresso or a rich cup of coffee; the slight bitterness can beautifully offset the sweetness of the brownies.

  • Nutty Chopped Pecans: Sprinkling chopped pecans on top adds a crunchy texture and earthy flavor that perfectly complements the creamy fillings.

  • Cold Milk: Enjoy a glass of cold milk alongside your brownies for a nostalgic, comforting combination that every childhood memory can agree on!

These pairings will not only highlight the luxurious Marshmallow Peanut Butter Brownies but also create a well-rounded dessert experience that will leave everyone craving more.

How to Store and Freeze Marshmallow Peanut Butter Brownies

  • Room Temperature: Store brownies in an airtight container at room temperature for up to 2 days to maintain their fudgy texture and flavor.
  • Fridge: If you need to keep them longer, refrigerate the brownies for an additional 1-2 days in an airtight container. This may slightly change their consistency.
  • Freezer: For longer storage, freeze the brownies wrapped tightly in plastic wrap and then in aluminum foil for up to 3 months. Thaw in the fridge before enjoying.
  • Reheating: If desired, reheat individual pieces in the microwave for about 10-15 seconds to restore their gooeyness before indulging in your Marshmallow Peanut Butter Brownies.

Marshmallow Peanut Butter Brownies Variations

Feel free to customize these Marshmallow Peanut Butter Brownies to suit your taste buds and pantry!

  • Nut-Free: Substitute creamy sunflower seed butter for peanut butter for a delicious nut-free option. The flavor will remain rich and satisfying.

  • Gluten-Free: Use a 1:1 gluten-free flour blend instead of all-purpose flour. This swap ensures that everyone can enjoy these decadent brownies without compromising texture.

  • Flavor Boost: Add a teaspoon of espresso powder to the brownie batter. This small addition enhances the chocolate flavor, making it even more indulgent.

  • Swirled Goodness: Incorporate homemade marshmallow fluff as an alternative to store-bought. It brings an extra layer of sweetness and charm to your brownies.

  • Nutty Crunch: Fold in chopped walnuts or pecans into the brownie batter for delightful crunch and a wonderful texture contrast.

  • Sweet Twist: If you prefer a sweeter treat, substitute milk chocolate for bittersweet chocolate. The brownies will have a lighter, more mellow chocolate flavor.

  • Deliciously Spicy: For a warm kick, add a pinch of cayenne pepper or cinnamon to the batter. This twist adds a surprising and delightful depth of flavor.

  • Extra Gooeyness: Dollop additional marshmallow fluff on top before baking. This creates an ultra-gooey, marshmallow-topped brownie that is simply irresistible.

As you explore these variations, know that there are endless ways to enjoy these brownies! For another rich dessert, don’t forget to check out my delightful Garlic Butter French fries that pair perfectly with just about anything!

Marshmallow Peanut Butter Brownies Recipe FAQs

How do I choose the right peanut butter?
Absolutely! Opt for a creamy peanut butter that doesn’t contain added sugar for a less sweet filling. Natural peanut butter can also enhance the flavor without overpowering the delicious chocolate in your brownies.

How should I store leftover brownies?
To keep your brownies fresh, store them in an airtight container at room temperature for up to 2 days. If you want them to last longer, refrigerate them for an additional 1-2 days. Just keep in mind that chilling may alter the texture slightly, making them less fudgy.

Can I freeze these brownies?
Yes, indeed! To freeze your brownies, first, wrap them tightly in plastic wrap, then cover them with aluminum foil to prevent freezer burn. They can be stored this way for up to 3 months. When you’re ready to enjoy, thaw them in the fridge overnight for the best results.

What should I do if my brownies come out too cakey?
No worries! If your brownies end up cakey, it might be due to overmixing the batter after adding the dry ingredients. To help maintain a fudgy texture, mix just until you see no visible flour. Additionally, check your baking time; overbaking can also lead to a cake-like consistency.

Are there any allergy considerations with this recipe?
Definitely! This recipe contains common allergens such as peanuts and gluten. For those with nut allergies, you can substitute almond butter for peanut butter, but ensure you choose a well-suited alternative. For gluten-free options, swap all-purpose flour with a gluten-free flour blend. Always read ingredient labels to accommodate any dietary restrictions, especially when sharing with others.

What’s the best way to serve these brownies?
Very good question! These brownies shine when served slightly warm with a scoop of vanilla ice cream or paired with a glass of cold milk. You can also drizzle a bit of warm chocolate sauce on top for an extra decadent touch. Enjoy your delicious Marshmallow Peanut Butter Brownies!

Marshmallow Peanut Butter Brownies

Irresistible Marshmallow Peanut Butter Brownies to Indulge In

These Marshmallow Peanut Butter Brownies combine rich chocolate layers with creamy peanut butter and fluffy marshmallow for a truly indulgent dessert.
Prep Time 20 minutes
Cook Time 30 minutes
Cooling Time 30 minutes
Total Time 1 hour 20 minutes
Servings: 12 slices
Course: Dessert
Cuisine: American
Calories: 320

Ingredients
  

Peanut Butter Filling
  • 1 cup creamy peanut butter try a natural brand for a less sweet option
  • 1 cup powdered sugar adds sweetness and contributes to a smooth filling
  • ½ cup unsalted butter softened, at room temperature for easy mixing
  • pinch salt enhances the overall flavor profile
Brownie Batter
  • 1 cup all-purpose flour can be substituted with gluten-free flour
  • 1 cup granulated sugar the primary sweetener in the brownie batter
  • ½ cup brown sugar use dark brown sugar for richer flavor
  • ½ cup canola oil keeps the brownies moist and fudgy
  • 2 teaspoons pure vanilla extract elevates the flavor of the brownies
  • 8 ounces bittersweet chocolate substitute with semi-sweet for a sweeter option
  • ½ cup Dutch process cocoa powder gives deep chocolate flavor and color
Topping
  • 1 jar store-bought marshmallow fluff can be homemade if you're feeling adventurous

Equipment

  • mixing bowl
  • 9x13 inch baking pan
  • whisk
  • electric mixer
  • Saucepan
  • spatula
  • parchment paper
  • Toothpick

Method
 

Preparation
  1. In a mixing bowl, combine the creamy peanut butter, powdered sugar, unsalted butter, and a pinch of salt. Blend until smooth and creamy.
  2. Preheat your oven to 350°F (180°C). Grease a 9x13 inch baking pan and line it with parchment paper.
  3. In a separate bowl, whisk together the all-purpose flour, baking powder, and salt.
  4. In another bowl, beat together the eggs, granulated sugar, brown sugar, canola oil, and vanilla extract until light and frothy.
  5. Melt the bittersweet chocolate and unsalted butter together in a saucepan over low heat. Stir until smooth, then mix in the cocoa powder.
  6. Gradually combine the melted chocolate mixture with the egg mixture, then fold in the dry ingredients until just combined.
  7. Pour half of the brownie batter into the prepared baking pan. Dollop spoonfuls of peanut butter filling and marshmallow fluff on top, and swirl with a knife.
  8. Bake in the preheated oven for 26-32 minutes until edges are set and a toothpick comes out with moist crumbs.
  9. Remove from the oven and cool completely in the pan on a wire rack before lifting out and slicing into bars.

Notes

Use a parchment sling for easy removal of brownies. Heat marshmallow fluff for easier spreading. Ensure not to overmix for fudginess.

Crispy Pretzel Chicken with Mustard-Cheddar Sauce Bliss

As I whipped up my latest dinner creation, the kitchen was filled with a delightful crunch that promised something special. This Pretzel Chicken with Mustard-Cheddar Sauce combines the satisfying crispy coating of pretzels with tender chicken breasts for a unique twist on a classic meal. Whether you’re cooking for family or entertaining friends, this dish is a true crowd-pleaser that can be on your table in just under 30 minutes. You’ll love the savory combination of textures, along with the creamy, tangy sauce that elevates your dining experience. Plus, it’s perfect for anyone looking to steer away from takeout while enjoying a comforting homemade dish. Isn’t it time to discover how easy gourmet can be? Dive into this recipe and make your dinner memorable!

Why is Pretzel Chicken a Game-Changer?

Uniquely Flavorful: The crunchy pretzel coating brings an unexpected twist that sets this dish apart from traditional chicken recipes. Creamy Sauce enhances the experience, making each bite a delightful blend of savory and tangy notes. Quick Prep Time: Ready in under 30 minutes, it’s perfect for busy weeknights or when you have unexpected guests. Kid-Friendly: This dish is a hit with both kids and adults, making family dinners easier and more enjoyable. Versatile Pairing Options: Serve with roasted vegetables or a fresh salad for a complete meal, or try it alongside my delicious Homemade French Sauce for that extra touch. Enjoy gourmet flavors without the hassle and make mealtime something to look forward to!

Pretzel Chicken with Mustard-Cheddar Sauce Ingredients

• This delightful recipe combines savory flavors with a simple ingredient list that makes cooking a breeze!

For the Chicken

  • Boneless, Skinless Chicken Breasts – The main protein source that stays juicy; thighs can be used for extra flavor.
  • Coarsely Crushed Pretzels – Creates a crispy breading that elevates the dish; gluten-free alternatives can be utilized.
  • All-Purpose Flour – Essential for the initial coating; substitute with gluten-free flour if needed.
  • Large Eggs – Binds the delicious pretzel coating to the chicken for a satisfying crunch.
  • Dijon Mustard – Adds a zesty flavor to the chicken and sauce; yellow mustard works as a milder option.
  • Garlic Powder – Provides a savory depth; fresh minced garlic can be swapped for a more robust flavor.
  • Onion Powder – Boosts the umami element; finely chopped onion can be a fresh alternative.
  • Salt and Pepper – Basic seasonings to enhance taste; adjust according to personal preference.

For the Mustard-Cheddar Sauce

  • Shredded Cheddar Cheese – Adds creaminess to the sauce; Monterey Jack can give a milder flavor option.
  • Milk – Helps create a smooth sauce; consider using non-dairy milk for a lactose-free version.
  • Mustard-Cheddar Sauce – A rich component that ties the dish together; ensure to make while the chicken bakes.

Enjoy crafting this Pretzel Chicken with Mustard-Cheddar Sauce that’s not only quick but bursting with flavor!

Step‑by‑Step Instructions for Pretzel Chicken with Mustard-Cheddar Sauce

Step 1: Preheat and Prepare
Begin by preheating your oven to 400°F (200°C) and lining a baking sheet with parchment paper to ensure the chicken doesn’t stick. This setup is crucial for achieving that beautiful crunchy exterior on your Pretzel Chicken. As the oven warms, gather your ingredients for a smooth cooking process.

Step 2: Season the Chicken
Take your boneless, skinless chicken breasts and season them generously with salt, pepper, garlic powder, and onion powder. Make sure each piece is well coated with these savory flavors to enhance your chicken’s taste. Set the seasoned chicken aside while you prepare the breading station.

Step 3: Set Up the Breading Station
Prepare three shallow bowls for the breading station: fill the first with all-purpose flour, the second with beaten eggs mixed with Dijon mustard, and the third with coarsely crushed pretzels. This setup streamlines the breading process for your Pretzel Chicken, ensuring an easy transition between steps.

Step 4: Bread the Chicken
Now it’s time to coat the chicken! Begin by dredging each breast in flour until fully coated. Next, dip it into the egg-mustard mixture, allowing any excess to drip off before pressing it firmly into the crushed pretzels. Ensure that each piece is evenly coated for that perfect crispy texture.

Step 5: Bake the Chicken
Arrange the breaded chicken pieces on your prepared baking sheet, making sure they are spaced apart for even cooking. Bake the chicken in the preheated oven for 25 to 30 minutes, or until they turn golden brown and reach an internal temperature of 165°F (75°C). Keep an eye on them for that perfect crunch!

Step 6: Prepare the Mustard-Cheddar Sauce
While the chicken is baking, prepare the creamy mustard-cheddar sauce. In a saucepan over medium heat, combine milk, Dijon mustard, and a splash of Worcestershire sauce. Gradually stir in shredded cheddar cheese until fully melted and smooth. Season the sauce to taste, ensuring it’s rich and flavorful.
Step 7: Serve Your Creation
Once the chicken is beautifully baked, let it rest for a few minutes to retain its juiciness. Serve the crispy Pretzel Chicken with a generous drizzle of the warm mustard-cheddar sauce over the top, elevating this dish to an exquisite homemade delight. Enjoy the wonderful mix of crunch and creaminess!

Expert Tips for Pretzel Chicken

  • Coating Consistency: Make sure each chicken piece is thoroughly coated at every step. This helps to achieve that perfect, crunchy crust on your Pretzel Chicken.

  • Temperature Check: Use a meat thermometer to ensure your chicken reaches 165°F (75°C). This guarantees juicy, well-cooked chicken while preventing dryness.

  • Resting Time: Allow the chicken to rest for a few minutes after baking. This step helps lock in moisture for extra-tender meat.

  • Flavor Boost: Feel free to add your favorite herbs or spices to the pretzel coating. This personal touch can elevate your Pretzel Chicken to new flavor heights!

  • Gluten-Free Options: If you need a gluten-free version, opt for gluten-free pretzels and flour to ensure everyone can enjoy this delectable meal.

Make Ahead Options

These Pretzel Chicken with Mustard-Cheddar Sauce are perfect for busy cooks looking to save time during the week! You can season the chicken and coat it in pretzels up to 24 hours in advance. Simply keep the breaded chicken in an airtight container in the refrigerator to maintain its crispy texture. Additionally, the mustard-cheddar sauce can be prepared in advance and stored in the fridge for up to 3 days. When you’re ready to serve, just reheat the sauce gently on the stove while baking your chicken in the oven for about 25 to 30 minutes. Following these simple steps ensures you enjoy a delicious homemade meal without the stress!

How to Store and Freeze Pretzel Chicken

  • Fridge: Store leftover Pretzel Chicken in an airtight container for up to 3 days to maintain freshness and flavor. Refrigerating promptly helps retain its quality.

  • Freezer: For longer storage, freeze the chicken in a single layer on a baking sheet until solid, then transfer it to a freezer bag. Enjoy within 2 months for the best flavor and texture.

  • Reheating: Reheat chilled or frozen chicken in a preheated oven at 350°F (175°C) until warmed through, about 15-20 minutes for refrigerated or 25-30 minutes if frozen. This method ensures that the coating stays crispy.

  • Tip: If you’ve made extra mustard-cheddar sauce, store it separately in the fridge for up to 5 days. Reheat gently on the stove before serving!

Pretzel Chicken with Mustard-Cheddar Sauce Variations

Feel free to get creative with this recipe and make it your own—an exciting twist awaits!

  • Gluten-Free: Use gluten-free pretzels and flour to easily tailor this dish for those with dietary restrictions.
    This ensures everyone can enjoy the crispy goodness without compromising flavor.

  • Cheese Variety: Swap out cheddar for Gruyère or Havarti for a rich, gourmet twist in your sauce.
    Each cheese brings its own unique flavor profile, elevating the overall experience.

  • Add Herbs: Incorporate fresh herbs such as thyme or rosemary into the pretzel coating for added depth.
    The aromatic qualities will infuse your chicken with vibrant flavors, delighting your palate.

  • Spicy Kick: Mix in a dash of cayenne pepper or hot sauce into the mustard-cheddar sauce for some heat.
    This addition brings a lovely contrast to the crispy chicken, perfect for spice lovers!

  • Vegetable Boost: Toss some finely chopped spinach or kale into your sauce for a nutritional upgrade.
    This not only enhances flavor but also adds a pop of color and health benefits to your dish.

  • BBQ Sauce Option: For a sweet and tangy variation, try substituting the mustard-cheddar sauce with BBQ sauce.
    This twist transforms the dish completely, appealing to different flavor profiles.

  • Pretzel Chicken Drumsticks: Instead of breasts, use drumsticks for a fun, bite-sized variation that’s ideal for parties.
    The cooking time will remain similar, providing a fantastic finger-food option.

For even more delicious chicken ideas, explore my recipes for Honey Chili Chicken or Savory Chicken and Cheesy Potato Drumsticks—they’re sure to please!

What to Serve with Pretzel Chicken with Mustard-Cheddar Sauce?

Elevate your dining experience by pairing this delightful chicken with complementary sides that excite the palate.

  • Creamy Mashed Potatoes: The buttery richness of mashed potatoes offers a smooth contrast to the crunchy chicken, making each bite heavenly.

  • Roasted Brussels Sprouts: Sweet, caramelized Brussels sprouts add an earthy flavor and vibrant color, bringing balance to your plate’s richness.

  • Garden Salad: A fresh salad with tangy vinaigrette cuts through the creaminess, providing a refreshing, crisp element that brightens your meal.

  • Honey Glazed Carrots: Sweet and tender, these carrots enhance the savory notes of your dish, creating a comforting harmony with each forkful.

  • Coleslaw: The crunch and tanginess from coleslaw complements the crispy chicken wonderfully while adding a delightful freshness to every bite.

  • Garlic Bread: Quick and easy, this classic side offers a buttery, garlic flavor that pairs beautifully with the sauce drizzled on the chicken.

  • Sparkling Lemonade: A refreshing, fizzy drink brings brightness to the meal, cutting through the richness of the mustard-cheddar sauce and cleansing the palate.

  • Chocolate Mousse: For dessert, this light and airy treat provides a rich finale to your meal while balancing the savory elements encountered earlier.

  • Apple Crisp: The warmth and spice of this dessert contrast beautifully with the meal, providing a comforting ending with a touch of sweetness to wrap things up.

Pretzel Chicken with Mustard-Cheddar Sauce Recipe FAQs

What type of pretzels should I use for this recipe?
Absolutely! I recommend using coarsely crushed pretzels for that extra crunch. You can opt for traditional pretzels or gluten-free options if needed. Just make sure they’re fresh and free from dark spots, which can indicate staleness.

How should I store leftover Pretzel Chicken?
Store any leftovers in an airtight container in the refrigerator for up to 3 days. This helps maintain its flavor and moisture. Just be sure to refrigerate it promptly after it has cooled down for the best results!

Can I freeze Pretzel Chicken, and how do I do it?
Very! To freeze, first lay the cooked and cooled chicken on a baking sheet, ensuring pieces don’t touch each other, and freeze until solid. Then, transfer the chicken to a freezer-safe bag or container. For optimal quality, enjoy it within 2 months. Remember to label it with the date!

How do I reheat frozen Pretzel Chicken?
To reheat, preheat your oven to 350°F (175°C). If frozen, place the chicken on a baking sheet and reheat for 25-30 minutes. For refrigerated chicken, heat for about 15-20 minutes. This method helps keep the coating crispy while ensuring the inside is warmed through.

Can I make this recipe gluten-free?
Absolutely! Use gluten-free pretzels and substitute all-purpose flour with a gluten-free flour blend. You can even choose a gluten-free mustard to make the mustard-cheddar sauce without compromising taste or texture.

What if I don’t have Dijon mustard?
If Dijon mustard isn’t on hand, yellow mustard can be your go-to substitute for a milder flavor. You can also consider spicy brown mustard for a little kick. Just remember to adjust the amount according to your taste preference!

Pretzel Chicken with Mustard-Cheddar Sauce

Crispy Pretzel Chicken with Mustard-Cheddar Sauce Bliss

This Pretzel Chicken with Mustard-Cheddar Sauce combines crispy pretzel coating with tender chicken breasts for a unique and delicious meal.
Prep Time 10 minutes
Cook Time 30 minutes
Resting Time 5 minutes
Total Time 45 minutes
Servings: 4 pieces
Course: Chicken
Cuisine: American
Calories: 350

Ingredients
  

For the Chicken
  • 4 pieces Boneless, Skinless Chicken Breasts Thighs can be used for extra flavor.
  • 2 cups Coarsely Crushed Pretzels Gluten-free alternatives can be utilized.
  • 1/2 cup All-Purpose Flour Substitute with gluten-free flour if needed.
  • 2 large Eggs Binds the pretzel coating.
  • 2 tablespoons Dijon Mustard Yellow mustard works as a milder option.
  • 1 teaspoon Garlic Powder Fresh minced garlic can be used.
  • 1 teaspoon Onion Powder Finely chopped onion can be substituted.
  • 1 teaspoon Salt Adjust according to preference.
  • 1 teaspoon Pepper Adjust according to preference.
For the Mustard-Cheddar Sauce
  • 1 cup Shredded Cheddar Cheese Monterey Jack can be used for a milder flavor.
  • 1 cup Milk Consider non-dairy milk for a lactose-free option.
  • 1/4 cup Mustard-Cheddar Sauce Ensure to make while chicken bakes.

Equipment

  • oven
  • baking sheet
  • parchment paper
  • Shallow Bowls
  • Saucepan

Method
 

Step‑by‑Step Instructions
  1. Preheat your oven to 400°F (200°C) and line a baking sheet with parchment paper.
  2. Season the chicken breasts generously with salt, pepper, garlic powder, and onion powder.
  3. Prepare the breading station with three shallow bowls: one with flour, one with beaten eggs mixed with Dijon mustard, and one with crushed pretzels.
  4. Dredge each chicken breast in flour, dip into the egg-mustard mixture, then coat with crushed pretzels.
  5. Arrange the breaded chicken on the baking sheet and bake for 25-30 minutes or until golden brown and internal temperature reaches 165°F (75°C).
  6. While the chicken is baking, prepare the sauce by combining milk, Dijon mustard, and Worcestershire sauce in a saucepan over medium heat, then stir in cheddar cheese until melted.
  7. Once the chicken is done, let it rest for a few minutes, then serve with the mustard-cheddar sauce.
Notes

For gluten-free options, use gluten-free pretzels and flour. Store leftovers in an airtight container for up to 3 days.

Crispy Honey Mustard Tofu Tenders for Flavorful Comfort Food

As I opened my fridge one weeknight, staring at the tofu lingering at the back, a spark of inspiration struck. It felt like the perfect moment to whip up something crispy and satisfying without sacrificing flavor or my wellness goals. That’s when these Honey Mustard Tofu Tenders came to life—delightfully crunchy, with a sweet and tangy zing that keeps everyone coming back for more. This recipe is a game changer, offering a quick prep time and a healthier, plant-based twist on comfort food. Whether you’re a tofu aficionado or just dipping your toes into the joys of plant-based cooking, you’ll find these tenders fitting into your dinner rotation effortlessly. Are you ready to transform your weeknight meals? Let’s dive in!

Why Are These Tofu Tenders Irresistible?

Crispy Texture: Each bite delivers a perfectly golden crust that crunches delightfully, making it hard to believe they’re plant-based!

Flavor Explosion: The combination of sweet honey and tangy mustard creates an unforgettable taste that elevates simple tofu to new heights.

Quick & Easy: With minimal prep and just a few ingredients, this recipe is a time-saver while still being impressive for your family or guests.

Customization Options: Whether you prefer a vegan version with maple syrup or want to spice things up with cayenne, the possibilities are endless!

Nutrient-Packed: Not only do these Honey Mustard Tofu Tenders satisfy your cravings, but they also pack a healthy punch, perfect for those mindful of their diet.

Crowd-Pleaser: Suitable for all palates, these tenders are sure to become a hit at your next gathering—just like Honey Chili Chicken or Honey Garlic Slow Ribs!

Honey Mustard Tofu Tenders Ingredients

For the Tenders
Firm Tofu – The star of the dish, delivering protein and texture; make sure to press it well to remove excess moisture.
Honey – Adds delightful sweetness to complement the tangy mustard; for a vegan option, substitute with maple syrup.
Mustard – Offers that essential tang; feel free to choose between yellow or Dijon mustard based on your personal taste.
Breadcrumbs – Essential for that crispy coating; opt for gluten-free breadcrumbs for a gluten-sensitive alternative.
Garlic Powder – Enhances the overall flavor; while optional, it’s highly recommended for a deeper taste.
Paprika – Adds warmth and a splash of color; a great way to elevate the visual appeal of your tenders!

Get ready to whip up some scrumptious Honey Mustard Tofu Tenders that even the pickiest eaters will love!

Step‑by‑Step Instructions for Honey Mustard Tofu Tenders

Step 1: Preheat the Oven
Begin by preheating your oven to 400°F (200°C). This high heat will ensure that your Honey Mustard Tofu Tenders achieve that perfect crispy exterior. While the oven warms up, prepare your baking sheet by lining it with parchment paper; this will prevent sticking and make cleanup a breeze.

Step 2: Prepare the Tofu
Take your firm tofu and press it for about 15 minutes to eliminate excess moisture, which will help the tenders crisp up beautifully. After pressing, cut the tofu into 1-inch wide strips, ensuring uniformity for even cooking. You want those edges to be smooth for an enticing golden brown when baked.

Step 3: Mix the Honey Mustard Sauce
In a medium bowl, whisk together 1/4 cup of honey and 1/4 cup of mustard until the mixture is smooth and well combined. This sticky, flavorful sauce will coat your tofu, bringing that sweet and tangy profile to life. Make sure every bit of the tofu gets a generous dip in this delightful concoction.

Step 4: Coat the Tofu Strips
Dunk each tofu strip into your honey mustard mixture, ensuring it’s fully covered. Next, roll the coated strips in a mixture of breadcrumbs, garlic powder, and paprika. This step is crucial for achieving that delightful crunch; the breadcrumbs will provide the perfect crispiness while the spices add flavor.

Step 5: Arrange on the Baking Sheet
Carefully place your coated tofu tenders on the lined baking sheet, giving each piece plenty of space to breathe. This spacing ensures that they bake evenly without steaming. Make sure the tenders are laid out in a single layer to encourage that sought-after crunch.

Step 6: Bake in the Oven
Slide your baking sheet into the preheated oven and bake the tenders for 25-30 minutes. Remember to flip them halfway through the baking process to achieve an even golden brown on both sides. You’ll know they’re done when they are crispy and golden, filling your kitchen with mouthwatering aromas.

Step 7: Cool Before Serving
Once your Honey Mustard Tofu Tenders are baked to perfection, remove them from the oven and let them cool for a few minutes on the baking sheet. This brief cooling period allows the tenders to firm up further, enhancing their delightful crispiness. Serve warm, and enjoy your delicious homemade comfort food!

Make Ahead Options

These Honey Mustard Tofu Tenders are ideal for busy weeknights, allowing you to prep in advance and save time! You can marinate the tofu in the honey mustard mixture up to 24 hours before baking to enhance the flavor. Simply press and cut the tofu into strips, then coat them in the mixture, and refrigerate in an airtight container. If you’re short on time, you can also prepare the breading (breadcrumbs mixed with garlic powder and paprika) and store it in a separate container for up to 3 days. When you’re ready to serve, just coat the tofu again in the breading and bake as directed for deliciously crispy tenders that are just as tasty as fresh. Enjoy the convenience of meal prep without compromising on flavor!

Honey Mustard Tofu Tenders: Variations & Substitutions

Feel free to get creative and make these Honey Mustard Tofu Tenders your own with these fun variations!

  • Vegan Swap: Use maple syrup instead of honey to keep this dish completely plant-based. It adds a lovely caramel note that complements the mustard beautifully.

  • Gluten-Free Option: Opt for gluten-free breadcrumbs to ensure that everyone can enjoy these crispy tenders without worry. This simple substitution keeps the crunch while catering to dietary needs.

  • Spice It Up: Add a pinch of cayenne pepper or chili flakes to the breadcrumb mixture for a fiery twist. A little heat elevates the flavor profile and takes your tenders to the next level.

  • Herbal Infusion: Incorporate fresh or dried herbs like thyme or rosemary into the breadcrumb coating. They lend a fragrant and earthy element that pairs wonderfully with the honey mustard.

  • Crispy Rice Layer: For an extra crunch, mix in some crushed rice cereal with your breadcrumbs. The added texture creates delightful pops in every bite, making these tenders even more addictive!

  • Asian Flair: Swap the mustard for soy sauce and garlic powder, then finish with sesame seeds for an Asian-inspired twist. These will offer a whole new flavor experience that’s equally delicious.

  • Baked Vs. Fried: If you’re feeling indulgent, try shallow frying the tenders instead of baking them for a richer flavor. Remember to adjust the cooking time accordingly to avoid overcooking.

  • Zesty Kick: Add some lemon zest to the honey mustard mixture to introduce a refreshing citrus element that brightens the flavors. This little twist can make a significant difference in flavor!

Whether you stick to the classics or experiment with these variations, you’ll find that these Honey Mustard Tofu Tenders can match any craving, just like our Honey Garlic Slow Ribs do!

Expert Tips for Honey Mustard Tofu Tenders

Press Tofu Well: Ensure you press the tofu adequately to eliminate moisture, which is key to achieving that perfect crispy texture.

Bake, Don’t Microwave: For best results, avoid microwaving the tenders when reheating; opt for the oven or air fryer instead to maintain crispiness.

Customize the Sauce: Tailor the honey to mustard ratio to suit your taste, adjusting for more sweetness or tanginess in your Honey Mustard Tofu Tenders.

Monitor Baking Time: Keep an eye on your tenders towards the end of baking; slight variations in oven temperatures can impact the crispiness.

Experiment with Spices: Feel free to explore different spices or herbs in your breadcrumb coating; this can add a unique twist to your Honey Mustard Tofu Tenders.

What to Serve with Honey Mustard Tofu Tenders

Delightfully enhance your meal experience by exploring these fantastic sides that pair beautifully with your crispy tenders.

  • Creamy Mashed Potatoes: Their velvety texture and rich flavor create a comforting balance to the crispy tenders. This classic pairing gives your meal a hearty feel that’ll keep everyone satisfied.

  • Zesty Coleslaw: A refreshing and crunchy slaw complements the rich flavors of the tenders, offering a tangy contrast that’s perfect for summer barbecues or family gatherings.

  • Roasted Seasonal Vegetables: Charred and caramelized, a mix of seasonal vegetables like bell peppers and zucchini not only taste amazing but add gorgeous color to your plate.

  • Quinoa Salad: Nutrient-dense and filling, a light quinoa salad with cherry tomatoes, cucumbers, and herbs provides a refreshing contrast and keeps your meal well-rounded.

  • Steamed Broccoli: Green and healthy, this simple side gives a satisfying crunch while enhancing the nutritional value of your meal.

  • Garlic Bread: Crispy on the outside and soft on the inside, this bread brings comforting flavors that pair delightfully with your Honey Mustard Tofu Tenders, making every bite feel indulgent.

  • Basil Lemonade: For a refreshing drink, this zesty lemonade adds a fruity brightness that cuts through the richness of the tofu, making it a delightful sip.

  • Chocolate Avocado Mousse: End on a sweet note with a creamy, decadent dessert. The richness of the mousse will be a delicious contrast to the tenders’ crispy texture.

These sides create a vibrant meal that’s sure to impress!

How to Store and Freeze Honey Mustard Tofu Tenders

Fridge: Store cooled Honey Mustard Tofu Tenders in an airtight container in the refrigerator for up to 3-4 days to maintain freshness.

Freezer: For longer storage, freeze the tenders in a single layer on a baking sheet for 1-2 hours, then transfer to a freezer-safe bag for up to 2 months.

Reheating: When ready to enjoy, reheat in the oven at 375°F (190°C) for about 10-15 minutes, or until heated through, to preserve their crispiness.

Thawing: If frozen, thaw in the refrigerator overnight before reheating for best texture and flavor.

Honey Mustard Tofu Tenders Recipe FAQs

How do I choose the right tofu for this recipe?
Absolutely! Look for firm or extra-firm tofu for these Honey Mustard Tofu Tenders. It’s important that the tofu has a substantial texture to hold up during cooking. You’ll want to avoid silken tofu, as it’s too soft and won’t give you that desirable crunchy coating.

What’s the best way to store leftover tofu tenders?
Very! After allowing your Honey Mustard Tofu Tenders to cool, store them in an airtight container in the refrigerator. They’ll stay fresh for 3 to 4 days, retaining a bit of their crispy texture. Just remember to reheat them in the oven or air fryer to revitalize that crunch!

Can I freeze these tofu tenders?
Definitely! To freeze your Honey Mustard Tofu Tenders, first, let them cool completely. Then, place the tenders on a baking sheet in a single layer and freeze for about 1-2 hours. Once frozen solid, transfer them into a freezer-safe bag or container. They’ll keep well for up to 2 months!

What should I do if my tofu isn’t crispy?
No worries! If your Honey Mustard Tofu Tenders aren’t turning out crispy, it could be due to excess moisture in the tofu; make sure you press it well before cooking. Additionally, ensure your oven is preheated adequately, and try not to overcrowd the baking sheet. Leaving enough space between the tenders allows hot air to circulate, creating that perfect crunch.

Are there any dietary considerations I should keep in mind?
Absolutely! If you’re considering allergies, note that the recipe contains honey, which is not vegan. To make it vegan, simply substitute it with maple syrup. Additionally, ensure that your breadcrumbs are labeled gluten-free if you are catering to gluten-sensitive diets. Always check the ingredient labels for any potential allergens.

How can I spice up these tofu tenders?
Very! Feel free to experiment with different spices in the breadcrumb mixture to suit your taste. Adding cayenne pepper will give your Honey Mustard Tofu Tenders a nice kick. Or, try mixing in Italian herbs, like oregano or thyme, for a fragrant twist. The more, the merrier—customization is key for this delicious recipe!

Honey Mustard Tofu Tenders

Crispy Honey Mustard Tofu Tenders for Flavorful Comfort Food

Crispy Honey Mustard Tofu Tenders are a delightful blend of flavors, perfect for anyone looking for a tasty, plant-based comfort food.
Prep Time 15 minutes
Cook Time 30 minutes
Cooling Time 5 minutes
Total Time 50 minutes
Servings: 4 tenders
Course: Other
Cuisine: Plant-Based
Calories: 180

Ingredients
  

For the Tenders
  • 1 block Firm Tofu Press for about 15 minutes.
  • 1/4 cup Honey Use maple syrup for vegan.
  • 1/4 cup Mustard Yellow or Dijon based on preference.
  • 1 cup Breadcrumbs Use gluten-free for a gluten-sensitive alternative.
  • 1 teaspoon Garlic Powder Highly recommended for flavor.
  • 1 teaspoon Paprika For color and flavor.

Equipment

  • oven
  • baking sheet
  • parchment paper
  • Medium bowl
  • whisk

Method
 

Step‑by‑Step Instructions
  1. Preheat your oven to 400°F (200°C) and line a baking sheet with parchment paper.
  2. Press the firm tofu for about 15 minutes to eliminate excess moisture and cut into 1-inch wide strips.
  3. Whisk together the honey and mustard in a medium bowl until smooth and well combined.
  4. Dunk each tofu strip into the honey mustard mixture, then roll in breadcrumbs mixed with garlic powder and paprika.
  5. Arrange the coated tofu strips on the lined baking sheet, ensuring they have space for even baking.
  6. Bake for 25-30 minutes, flipping halfway through until crispy and golden brown.
  7. Allow the tenders to cool for a few minutes before serving.

Notes

For best results, avoid microwaving reheated tenders; opt for oven or air fryer to maintain crispiness.

Roasted Red Cabbage Steaks with Garlic: A Flavorful Delight

As the oven hums softly, a delightful aroma begins to waft through my kitchen—garlic and butter mingling with earthy red cabbage, transforming it into something magical. It’s hard to believe that such a stunning dish as Roasted Red Cabbage Steaks with Garlic could come together with just four simple ingredients! This recipe is a celebration of both simplicity and flavor, making it a perfect addition to any table. In just 35 minutes, you can treat yourself and your loved ones to a hearty, nutritious vegetarian delight that’s not only eye-catching but also budget-friendly. Whether you’re looking for a quick side dish or a vibrant main event, these cabbage steaks will surely impress. So, are you ready to elevate your vegetable game? Let’s dive into this colorful dish!

Why Choose Roasted Red Cabbage Steaks?

Simplicity: With just four ingredients, this recipe is incredibly easy to whip up, allowing you to enjoy gourmet flavors without the fuss.

Budget-Friendly: Cabbage is not only nutrient-rich but also wallet-friendly, making these steaks a perfect option for anyone looking to save while eating well.

Flavor Explosion: The combination of garlic, parmesan, and roasted red cabbage creates a delightful umami flavor, sure to tantalize your taste buds.

Versatile Dish: Enjoy these steaks as a side to grilled chicken or fish, or serve alongside grains like quinoa for a complete vegetarian meal—perfect for every occasion!

Quick Preparation: Ready in only 35 minutes, this dish is ideal for busy weeknights when you crave something hearty and satisfying yet simple to prepare.

These roasted red cabbage steaks will not only brighten your plate but also your day! If you want to explore more delicious dishes featuring cabbage, check out Crisp Cabbage Cucumber or Crunchy Cabbage Carrot for a refreshing twist!

Roasted Red Cabbage Steaks Ingredients

• Just four simple ingredients!

For the Cabbage

  • Red Cabbage – The star of the dish, offering crunch, vibrant color, and essential nutrients. Keep the core intact to hold the wedges together during roasting.

For the Garlic Butter Mixture

  • Unsalted Butter – This adds rich creaminess and aids in achieving that perfect caramelization while roasting; substitutable with olive oil for a dairy-free option.
  • Garlic (Fresh, minced) – Provides an aromatic punch that beautifully complements the cabbage; don’t skip this vital ingredient for your roasted red cabbage steaks with garlic!
  • Parmesan Cheese (Finely shredded) – Delivers a savory, umami flavor that elevates the dish; nutritional yeast can be used for a vegan alternative.

For the Garnish

  • Fresh Dill or Parsley – Adds a fresh and vibrant touch; this optional garnish enhances both the flavor and visual appeal of your dish!

Step‑by‑Step Instructions for Roasted Red Cabbage Steaks with Garlic

Step 1: Preheat and Prepare
Begin by preheating your oven to 400°F (200°C). While the oven warms up, grab a rimmed baking sheet and line it with parchment paper for easy cleanup. This setup ensures your Roasted Red Cabbage Steaks with Garlic roast evenly without sticking, allowing those delicious flavors to meld beautifully.

Step 2: Cut the Cabbage
Next, take your red cabbage and carefully slice it into ¾-inch thick wedges, making sure to leave the core intact in each piece. This will keep your cabbage steaks sturdy while they roast. As you cut, you’ll notice the vibrant color and textures that will make your dish visually appealing.

Step 3: Make the Garlic Butter Mixture
In a mixing bowl, combine softened unsalted butter, minced fresh garlic, and finely shredded Parmesan cheese. Stir thoroughly until all the ingredients are well blended into a creamy mixture. This flavorful garlic butter will coat your cabbage steaks, enhancing the tasty contrast of textures as they cook.

Step 4: Coat the Cabbage Wedges
Using a spoon, generously spread the garlic and Parmesan mixture over each cabbage wedge, ensuring they are well-coated on all sides. This delicious layer not only adds flavor but also helps achieve that desirable golden-brown color on the edges as the cabbage roasts in the oven.

Step 5: Roast the Cabbage Steaks
Place the coated cabbage wedges onto your prepared baking sheet in a single layer, ensuring they have space to roast evenly. Pop the baking sheet into the preheated oven and roast for 20 minutes, turning the steaks halfway through to ensure even cooking and a perfect caramelized finish.

Step 6: Broil for a Crispy Finish
To achieve a crispy and golden top on your Roasted Red Cabbage Steaks with Garlic, switch your oven to broil for the last 2-3 minutes of cooking. Keep a close eye on them during this time, as they can quickly change from beautifully browned to burnt.

Step 7: Garnish and Serve
Once cooked, carefully remove the baking sheet from the oven and let the cabbage steaks cool slightly. For a fresh touch, garnish with chopped fresh dill or parsley and sprinkle a pinch of Maldon salt before serving. These vivid Roasted Red Cabbage Steaks will elevate any meal with their stunning presentation and delicious flavors.

Make Ahead Options

These Roasted Red Cabbage Steaks with Garlic are a fantastic option for meal prep aficionados! You can cut the cabbage into wedges and store them in an airtight container in the refrigerator up to 24 hours in advance, keeping their crunch intact. Additionally, the garlic butter mixture can be prepared and refrigerated for up to 3 days—just make sure to keep it tightly sealed to preserve flavor. When you’re ready to serve, simply coat the chilled cabbage wedges with the butter mixture and roast them as directed, ensuring you achieve the same delicious caramelization. This way, you can enjoy vibrant and mouthwatering cabbage steaks with minimal effort during your busy weeknights!

Expert Tips for Roasted Red Cabbage Steaks

  • Cut Thickness Matters: Ensure your cabbage wedges are ¾-inch thick to maintain their structure while roasting and prevent them from becoming mushy.

  • Broil Carefully: Broiling enhances crispiness, but keep a close eye during the last 2-3 minutes to avoid burning your roasted red cabbage steaks with garlic.

  • Garlic Precision: Adjust the minced garlic quantity based on your taste preference; fresh garlic brings out the best flavors, so don’t skimp!

  • Proper Storage: Store any leftovers in an airtight container in the refrigerator for up to 3 days, reheating gently to avoid sogginess.

  • Flavor Variations: Experiment with different cheeses or add spices like paprika for a unique flavor twist. These small changes can transform your dish into something new and exciting!

What to Serve with Roasted Red Cabbage Steaks with Garlic

There’s something special about creating a well-rounded meal that perfectly complements the vivid charm of roasted cabbage.

  • Creamy Mashed Potatoes: The rich and velvety texture of mashed potatoes pairs beautifully with the crunchy cabbage, creating a delightful contrast to savor.

  • Honey-Glazed Carrots: Sweet and tender, these carrots are a vibrant addition that enhances the dish’s flavor, making every bite more exciting.

  • Quinoa Salad: A protein-packed side, this salad will add a freshness to your meal, harmonizing with the roasted flavors of the cabbage.

  • Grilled Salmon: Succulent and flaky, the buttery richness of salmon contrasts and complements the tangy garlic and parmesan notes in the cabbage.

  • Garlic Bread: Crunchy and aromatic, this beloved side brings a comfort factor to your meal, perfect for scooping up those savory bits.

  • Lemon-Garlic Dressing on Greens: A refreshing salad drizzled with zesty dressing balances the richness of the cabbage steaks and adds a lovely crunch.

  • Red Wine: A light Cabernet Sauvignon beautifully enhances the savory flavors of your roasted red cabbage steaks with garlic, enriching the dining experience.

  • Chocolate Mousse: End on a sweet note with a creamy, rich mousse that provides the perfect contrast to the savory profile of the meal, leaving you feeling satisfied.

Roasted Red Cabbage Steaks Variations

Feel free to let your creativity shine by customizing these delicious roasted red cabbage steaks to suit your family’s tastes!

  • Cheese Swap: Replace Parmesan with feta or goat cheese for a tangy twist that enhances the flavor profile.

  • Spice it Up: Add paprika or cayenne to the garlic butter mixture for an exciting kick of heat that’ll awaken your taste buds!

  • Chickpea Addition: Top your cabbage steaks with cooked chickpeas before roasting, for a hearty texture boost and added protein.

  • Herb Infusion: Mix in aromatic fresh thyme or rosemary with the garlic butter for an herbal twist that adds depth and fragrance.

  • Dairy-Free Delight: Substitute olive oil for butter and use nutritional yeast instead of Parmesan for a delightful vegan-friendly version.

  • Nutty Crunch: Sprinkle toasted pine nuts or walnuts over the cabbage just before serving for a delightful crunch and nutty flavor contrast.

  • Sweet & Savory: Drizzle a touch of honey or maple syrup over the cabbage before roasting for a sweet undertone that beautifully complements the savory garlic.

  • Grainy Goodness: Serve these steaks over a bed of quinoa or farro to make a nourishing vegetarian main dish that’s truly satisfying.

With these variations, you’ll never tire of roasted red cabbage steaks! And if you’re looking for more ways to enjoy cabbage, check out Savory Cabbage Oat or whip up a delicious batch of Asian Inspired Cabbage for a flavorful change of pace!

Storage Tips for Roasted Red Cabbage Steaks with Garlic

Fridge: Store leftover roasted red cabbage steaks in an airtight container for up to 3 days. This keeps them fresh while preserving their delightful texture.

Freezer: If you want to freeze, wrap each cooled cabbage steak tightly in plastic wrap, then place them in a freezer-safe bag. They can last up to 2 months in the freezer.

Reheating: For best results, reheat gently in the oven at 350°F (175°C) for about 10 minutes to avoid sogginess, ensuring they remain crisp and flavorful.

Make-Ahead: You can prepare the garlic butter mixture in advance and store it in the fridge. Cut and store cabbage wedges ahead of time for a quick assembly when you’re ready to bake!

Roasted Red Cabbage Steaks with Garlic Recipe FAQs

What should I look for when selecting red cabbage?
Absolutely! When selecting red cabbage, look for heads that are firm and heavy with a rich, deep color. Avoid any with dark spots all over, as this can indicate spoilage. Fresh red cabbage should feel crisp and have tightly packed leaves.

How do I store leftover roasted red cabbage steaks?
Very! Store your leftover roasted red cabbage steaks in an airtight container in the refrigerator for up to 3 days. This helps maintain their texture and flavor. Just make sure to reheat them gently to keep them from becoming soggy!

Can I freeze roasted red cabbage steaks?
Yes, you can! To freeze your roasted red cabbage steaks, first allow them to cool completely. Wrap each steak tightly in plastic wrap, then place them in a freezer-safe bag. They can be stored in the freezer for up to 2 months. When you’re ready to enjoy, thaw them in the refrigerator overnight before reheating gently in the oven.

How can I troubleshoot if my cabbage steaks turn out soggy?
No worries! If your roasted red cabbage steaks come out soggy, it may be due to cutting them too thin or overcrowding the baking sheet. Always cut your wedges to about ¾-inch thick to maintain structure. Ensure there’s enough space between the wedges on the baking sheet to allow proper roasting. This helps caramelize edges while keeping the insides tender.

Are roasted red cabbage steaks safe for pets or those with allergies?
Definitely! Roasted red cabbage is safe for pets in small amounts, but avoid giving them garlic or any added seasonings. For allergies, ensure your family knows if you’re using any substitutes like dairy-free butter or nutritional yeast. Always consult with a healthcare provider if allergies are a concern.

Can I make this dish vegan?
Yes, indeed! To make these roasted red cabbage steaks with garlic vegan, simply substitute the unsalted butter with olive oil or a plant-based butter alternative. For the Parmesan cheese, opt for nutritional yeast, which adds a similar savory flavor without the dairy. Enjoy this delightful twist!

Roasted Red Cabbage Steaks with Garlic

Roasted Red Cabbage Steaks with Garlic: A Flavorful Delight

Experience the delight of Roasted Red Cabbage Steaks with Garlic, a simple yet flavorful dish made with just four ingredients.
Prep Time 15 minutes
Cook Time 20 minutes
Cooling Time 5 minutes
Total Time 40 minutes
Servings: 4 steaks
Course: Dinner
Cuisine: Vegetarian
Calories: 150

Ingredients
  

For the Cabbage
  • 1 head Red Cabbage Cut into ¾-inch thick wedges, keeping the core intact.
For the Garlic Butter Mixture
  • 3 tablespoons Unsalted Butter Softened; can substitute with olive oil for dairy-free option.
  • 3 cloves Garlic Fresh, minced
  • ½ cup Parmesan Cheese Finely shredded; nutritional yeast can be used for vegan alternative.
For the Garnish
  • to taste Fresh Dill or Parsley Optional; adds flavor and visual appeal.

Equipment

  • oven
  • baking sheet
  • parchment paper
  • mixing bowl

Method
 

Preparation
  1. Preheat your oven to 400°F (200°C). Line a rimmed baking sheet with parchment paper.
  2. Slice the red cabbage into ¾-inch thick wedges, keeping the core intact.
  3. In a mixing bowl, combine softened unsalted butter, minced garlic, and finely shredded Parmesan cheese. Stir until well blended.
  4. Generously spread the garlic and Parmesan mixture over each cabbage wedge, ensuring they are well-coated.
  5. Place the coated cabbage wedges on the prepared baking sheet in a single layer.
  6. Roast for 20 minutes, turning halfway through.
  7. Broil for an additional 2-3 minutes for a crispy finish, keeping a close eye to avoid burning.
  8. Remove from oven, let cool slightly, then garnish with fresh dill or parsley and serve.

Notes

Adjust garlic amount based on preference. Store leftovers in an airtight container for up to 3 days.

Bunny Cheesecake Strawberries: Sweet Treats for Easter Fun

With Easter just around the corner, I can’t help but get excited about whipping up delightful treats that will dazzle the family. Enter my No-Bake Bunny Cheesecake Strawberries—a playful and scrumptious dessert that perfectly captures the spirit of the season. Imagine biting into a fresh strawberry, bursting with creamy cheesecake goodness! Not only are these adorable treats easy to prepare, but they also bring a sense of joy to any gathering. Plus, you can assemble them in minutes, making them an effortless crowd-pleaser. So, are you ready to make this Easter extra special with these Bunny Cheesecake Strawberries? Let’s dive into the tasty details!

Why Are Bunny Cheesecake Strawberries So Special?

Adorable Presentation: The whimsical bunny topping makes these treats visually irresistible, perfect for festive occasions.

Quick and Easy: As a no-bake dessert, they come together in just minutes, making them an ideal choice for those busy holiday preparations.

Deliciously Decadent: The creamy cheesecake filling paired with fresh strawberries delivers a sweet, tangy flavor that’s truly delightful.

Versatile Variation: Feel free to switch up the toppings or fillings to create your own unique twist, like adding a chocolate drizzle or using flavored cream cheese! Plus, you can check out our Strawberry Cheesecake Dump for another fun strawberry dessert idea.

Family-Friendly Fun: Kids will love helping to hollow out the strawberries and top them with cute bunny grahams, making them a hit with the whole family.

Bunny Cheesecake Strawberries Ingredients

• Get ready to make these delightful treats come to life with the perfect ingredients!

For the Strawberries
Fresh Strawberries – Choose medium to large ones for easy stuffing and the best sweetness.

For the Cheesecake Filling
Soft Cream Cheese – This is essential for a creamy texture; make sure it’s softened for easy mixing. Consider substituting with mascarpone cheese for a richer flavor.
Powdered Sugar – Sweetens the cheesecake filling to perfection; honey works as a natural alternative.
Vanilla Extract – Adds a warm flavor and enhances the overall sweetness; add it for a touch of magic.

For the Topping
Bunny Grahams – These festive cookies add a whimsical crunch on top; feel free to switch with any small cookies you love.

With these Bunny Cheesecake Strawberries ingredients, you’re all set to create a tasty treat that’s bound to spread smiles this Easter!

Step‑by‑Step Instructions for Bunny Cheesecake Strawberries

Step 1: Prepare the Strawberries
Begin by thoroughly washing your fresh strawberries under cool water, then pat them dry with a paper towel. Cut off the green stems, and using a small knife or a corer, gently hollow out the inside to create a little cup. Make sure not to pierce through the bottom; this will allow you to stuff them later. Arrange the hulled strawberries on a plate, trimmed tip side down for stability.

Step 2: Make the Cheesecake Filling
In a mixing bowl, add your softened cream cheese, powdered sugar, and a splash of vanilla extract. Using an electric mixer, beat the mixture on medium speed for about 2-3 minutes, or until it’s light and fluffy. Keep an eye on the consistency; it should be smooth and creamy, perfect for stuffing into your strawberries. The delightful creaminess of your filling is what makes these Bunny Cheesecake Strawberries truly special!

Step 3: Stuff the Strawberries
To fill your strawberries with the luscious cheesecake mixture, transfer the filling into a piping bag for easy handling. If you don’t have a piping bag, a zip-top bag with a corner snipped off will work just fine. Carefully pipe the filling into each strawberry until they are generously filled, allowing it to slightly rise above the edges. This will create the perfect base for your playful bunny topping!

Step 4: Chill the Filled Strawberries
Once all your strawberries are stuffed with the cheesecake filling, arrange them on a decorative platter. Cover with plastic wrap and place them in the refrigerator for at least 3-4 hours. This chilling time allows the strawberries to firm up and the filling to set, ensuring that every bite of your Bunny Cheesecake Strawberries is cool and refreshing for those Easter celebrations.

Step 5: Serve and Garnish
Just before serving, add a whimsical touch to your delightful Bunny Cheesecake Strawberries by placing a bunny graham cracker atop each filled strawberry. If you like, sprinkle some colorful Easter sprinkles for an extra festive flair. Arrange them beautifully, and watch as your family and guests marvel at these adorable treats. The combination of fresh strawberries and creamy cheesecake will surely make for a memorable dessert!

What to Serve with Bunny Cheesecake Strawberries

These delightful, creamy treats will charm your family and friends, making your Easter celebration truly unforgettable!

  • Fluffy Whipped Cream: Enhances the sweetness and adds an airy texture, creating the perfect balance with the cheesecake strawberries. A dollop on the side or a light swirl can elevate your dessert presentation.

  • Chocolate Dipped Pretzels: Adding a salty crunch, these are great for contrast. The rich chocolate complements the creamy cheesecake filling beautifully, making every bite an adventure.

  • Fresh Fruit Salad: A refreshing mix of seasonal fruits can brighten your table. The juicy variety sings with springtime flavors and adds a healthful, colorful touch to your dessert course.

  • Mini Carrot Cakes: These spiced treats evoke a classic Easter vibe. Their moist texture harmonizes with the fresh berries while providing a nostalgic nod to spring celebrations.

  • Sparkling Lemonade: A bubbly drink choice that’s light and refreshing, it provides a zesty contrast to the sweetness of the cheesecake strawberries. The citrus notes invigorate and uplift every bite.

  • Vanilla Ice Cream: The cool, creamy addition creates a luscious pairing. Serve a scoop alongside the strawberry treats for a delightful textural contrast and an extra indulgent experience!

  • Cute Bunny Cupcakes: Themed desserts tie the meal together perfectly. With their whimsical decorations, they add a festive flair that will delight guests of all ages.

Embrace these pairings to savor the sweet moments and festive spirit this Easter!

How to Store and Freeze Bunny Cheesecake Strawberries

Fridge: Store filled Bunny Cheesecake Strawberries in an airtight container for up to 24 hours for the best flavor and texture.

Freezer: It’s not recommended to freeze these strawberries, as the texture may deteriorate once thawed. Enjoy fresh for optimal taste!

Preparation Tips: If you plan to make them ahead of time, prepare the cheesecake filling separately and fill the strawberries just a few hours before serving.

Garnishing: Add bunny grahams and any sprinkles right before serving to keep them crisp and visually appealing.

Bunny Cheesecake Strawberries Variations

Feel free to get creative and make these Bunny Cheesecake Strawberries your own with exciting variations!

  • Dairy-Free: Use cashew cream or coconut cream in place of cream cheese for a delicious dairy-free option. The result is just as creamy and delightful!

  • Chocolate Lovers: Swap in flavored cream cheese, like chocolate or hazelnut, for an indulgent twist that adds a rich, decadent flavor.

  • Nutty Texture: Replace Bunny Grahams with crushed nuts for an added crunch that complements the sweetness of the strawberries beautifully. It’s a delightful textural contrast!

  • Fruit Twists: Mix in finely chopped fruits like mango or pineapple into the cheesecake filling for a tropical twist that sings with flavor.

  • Spicy Kick: For a surprising heat, stir in a hint of cinnamon or even a pinch of cayenne into the cheesecake filling. It’s a fun twist that adds depth!

  • Fun Colors: Incorporate food coloring into the cheesecake filling to create a rainbow of options that are sure to entertain kids at your Easter gathering!

  • Sweet Drizzle: Drizzle melted chocolate or fruity syrup over the top just before serving for a burst of flavor that’s truly irresistible. This adds elegance, too.

  • Explore Sprinkles: For extra fun, add colorful sprinkles or edible glitter over your Bunny Grahams; this creates a festive touch that’s perfect for the occasion!

With these creative variations, your Bunny Cheesecake Strawberries are bound to impress! You could also explore other fruity desserts, like our delightful Strawberry Cheesecake Dump. Get inventive and have fun in the kitchen!

Expert Tips for Bunny Cheesecake Strawberries

  • Room Temperature Cream Cheese: Make sure your cream cheese is softened to room temperature for easy mixing and to achieve that fluffy texture.

  • Avoid Soggy Strawberries: Only refrigerate the strawberries after filling them. This prevents them from getting soggy over time.

  • Garnish Timing: Add your bunny grahams and sprinkles just before serving to keep them crisp and colorful, enhancing the fun presentation of your Bunny Cheesecake Strawberries.

  • Piping Tip: For neat filling, use a piping bag or a zip-top bag with a corner snipped off, ensuring a mess-free stuffing process.

  • Stability Matters: Trim the tips of the strawberries for stability; this helps them stand up beautifully on your serving platter.

Make Ahead Options

These Bunny Cheesecake Strawberries are perfect for busy home cooks looking to save time on Easter festivities! You can prepare the cheesecake filling up to 24 hours in advance—just mix the softened cream cheese, powdered sugar, and vanilla as usual, then store it in an airtight container in the refrigerator to maintain its creamy texture. Additionally, you can hull the strawberries a day ahead and keep them refrigerated to prevent browning. When you’re ready to serve, simply pipe the filling into the strawberries and garnish them with the bunny grahams just before presenting. This allows you to enjoy quality time with family while serving up these delicious treats effortlessly!

Bunny Cheesecake Strawberries Recipe FAQs

How do I choose the best strawberries for my Bunny Cheesecake Strawberries?
Absolutely! When selecting strawberries, look for medium to large ones that are firm and shiny. Freshness is key—choose berries with vibrant red color and no dark spots. The best flavor comes from strawberries that are properly ripe, offering the perfect sweetness to complement the creamy cheesecake filling.

How long can I store Bunny Cheesecake Strawberries in the fridge?
You can store your filled Bunny Cheesecake Strawberries in an airtight container for up to 24 hours. To ensure they stay fresh and maintain their delightful texture, try to avoid making them too far in advance of when you plan to serve them.

Can I freeze Bunny Cheesecake Strawberries?
No, it’s not recommended to freeze Bunny Cheesecake Strawberries. The texture of the strawberries can become mushy once thawed, ruining the delightful crunch you want. Instead, I suggest preparing the cheesecake filling ahead of time and stuffing the strawberries just a few hours before serving for the best taste and texture!

What should I do if my cream cheese mixture is too thick?
If your cheesecake filling is too thick for piping, don’t worry! You can gently mix in a teaspoon of milk or cream at a time until you reach a smoother, more manageable consistency. This adjustment will make piping much easier and ensure a fluffy filling.

Are Bunny Cheesecake Strawberries safe for everyone, including those with allergies?
When preparing Bunny Cheesecake Strawberries, be mindful of potential allergies, particularly with ingredients like cream cheese, sugar, and any cookies used for garnish. For a dairy-free alternative, you can substitute the cream cheese with a dairy-free cream cheese option. Always double-check with your guests about any food allergies or dietary restrictions to ensure everyone can enjoy these delicious treats!

Bunny Cheesecake Strawberries

Bunny Cheesecake Strawberries: Sweet Treats for Easter Fun

Bunny Cheesecake Strawberries are delightful no-bake treats that bring joy to Easter celebrations.
Prep Time 15 minutes
Chilling Time 4 hours
Total Time 4 hours 15 minutes
Servings: 12 strawberries
Course: Dessert
Cuisine: American
Calories: 100

Ingredients
  

For the Strawberries
  • 12 medium to large fresh strawberries for easy stuffing
For the Cheesecake Filling
  • 8 ounces soft cream cheese softened for easy mixing
  • 1 cup powdered sugar or honey as a natural sweetener
  • 1 teaspoon vanilla extract for flavor enhancement
For the Topping
  • 12 pieces bunny grahams or any small cookies you prefer

Equipment

  • mixing bowl
  • electric mixer
  • Piping bag
  • Zip-top bag
  • small knife or corer
  • decorative platter

Method
 

Step-by-Step Instructions
  1. Prepare the strawberries by washing, drying, and hollowing them out.
  2. Make the cheesecake filling by mixing softened cream cheese, powdered sugar, and vanilla extract until fluffy.
  3. Stuff the strawberries with the cheesecake mixture using a piping bag.
  4. Chill the filled strawberries on a platter for 3-4 hours.
  5. Serve with bunny graham crackers on top, adding sprinkles if desired.

Notes

For best texture, use room temperature cream cheese and only refrigerate after filling. Add toppings just before serving.

Creamy Miso Hummus with Shichimi Togarashi Spiced Pita

As I stood in my kitchen, the aroma of toasty spices wafting around me, I had a delightful realization: I could elevate the classic hummus experience into something extraordinary. With this silky Miso Hummus with Shichimi Togarashi Spiced Pita, my taste buds were in for a treat! This creamy, light dip, bursting with umami richness, takes mere minutes to whip up—perfect for those of us who crave something homemade yet don’t have hours to spare. Paired with crispy pita chips spiced just right, it’s an irresistible snack that’s both vegan and gluten-free. Whether you’re hosting a gathering or just enjoying a cozy night in, this recipe is bound to impress. Ready to savor a game-changing dip that will leave your friends and family asking for more?

Why is Miso Hummus so Irresistible?

Umami Delight: This creamy Miso Hummus will tantalize your taste buds with its unique savory flavor enhanced by miso and garlic.
Quick and Easy: With just 20 minutes of prep time, you can whip up this delicious dip that’s perfect for last-minute gatherings or weekend relaxation.
Versatile Enjoyment: Whether served with warm, Shichimi Togarashi spiced pita chips or fresh veggies, it’s a versatile dish that fits any occasion.
Healthy Indulgence: Vegan and gluten-free, this hummus is packed with protein and healthy fats while being free from artificial ingredients.
Crowd-Pleasing Snack: Your guests will love this twist on a classic dip; it’s bound to become a favorite at parties just like our Refreshing Cucumber Twist.

Miso Hummus with Shichimi Togarashi Ingredients

• Dive into this delicious recipe and see how easy it is to create your own creamy miso hummus at home!

For the Hummus

  • Cooked Chickpeas (450g) – The foundation for your hummus, offering a protein-rich, creamy base; canned varieties simplify your prep!
  • White Miso (40g, about 2½ tbsp) – Brings savory umami depth to your hummus, making it irresistibly delicious.
  • Tahini (60g, ¼ cup) – Adds a rich, nutty flavor that enhances the creaminess of the dip.
  • Garlic (2 tsp, 2 cloves) – Boosts flavor; crushed garlic works best for a robust taste.
  • Lemon Juice (2 tbsp, juice of half a lemon) – Provides a zesty kick that balances the richness of the other ingredients.
  • Chili Flakes (¼ tsp) – Introduces a hint of heat; substitute with shichimi togarashi to match your flavor preferences.
  • Black Pepper (to taste) – Enhances and rounds out the overall flavor profile of the hummus.
  • Ice Water (120mL, ½ cup) – Ensures a smooth and fluffy texture when blended.
  • Sesame Oil (1½ tbsp + extra for drizzling) – Brushed on pita for extra flavor while also helping the spices adhere.

For the Pita Chips

  • Pita Bread (4-5 pieces) – Your base for deliciously crispy chips; cut your pita into desired shapes.
  • Shichimi Togarashi (2 tbsp) – This Japanese spice blend infuses a delightful spiciness and citrusy note into your pita chips.

Unleash your culinary adventure with this Miso Hummus and Shichimi Togarashi Spiced Pita recipe—it’s sure to become a go-to favorite for snacking or entertaining!

Step‑by‑Step Instructions for Miso Hummus with Shichimi Togarashi Spiced Pita

Step 1: Blend the Hummus Ingredients
In a food processor, combine the cooked chickpeas, white miso, tahini, crushed garlic, lemon juice, chili flakes, and black pepper. Blend these ingredients on medium speed until the mixture is smooth, scraping down the sides as needed. This should take about 2-3 minutes. You’ll know it’s ready when you have a creamy, consistent paste that announces the potential of your Miso Hummus!

Step 2: Achieve a Silky Texture
With the processor running, gradually stream in the ice water. Continue blending for an additional 4-5 minutes until the hummus becomes light, fluffy, and incredibly silky. The air incorporated will create a dreamy texture. Stop occasionally to check if it’s to your desired creaminess—this step transforms your hummus into the delectable dip it’s meant to be!

Step 3: Preheat for the Pita Chips
While the hummus is blending, preheat your oven to 375°F (190°C) or prepare a non-stick frying pan over medium-high heat. If you opt for the oven, this temperature will help your pita chips become crispy and golden. A well-heated pan will ensure quick and even toasting, so get it nice and hot while you prepare the pita!

Step 4: Prepare the Pita Bread
Brush both sides of the pita bread generously with sesame oil, ensuring each piece is coated well. Sprinkle the shichimi togarashi evenly over both sides of the pita. This spice blend will elevate the flavor and give your chips a delightful kick. Cut the pita into triangles or strips according to your preference—make them as big or small as you like for snacking!

Step 5: Toast the Pita Chips
Place the prepared pita in the oven or in your preheated pan. Toast for about 3-5 minutes per side, or until they are golden brown and crisp. Keep an eye on the chips to avoid burning; they should be perfectly crunchy and fragrant. Once they’re done, remove them and let them cool slightly before serving alongside your velvety Miso Hummus.

Step 6: Present and Enjoy
Serve your luscious Miso Hummus in a beautiful bowl, drizzled with a touch of sesame oil for extra allure. Arrange the crispy Shichimi Togarashi spiced pita chips around the hummus for a stunning presentation. Whether you’re sharing with friends or indulging in a solo snack, this delightful combo is bound to impress with its flavors and textures!

Miso Hummus Variations & Substitutions

Feel free to let your creativity shine and customize this delicious miso hummus to suit your tastes and preferences!

  • Red Miso: Substitute white miso with red miso for a richer, more robust flavor that adds depth to the hummus.

  • Different Beans: Swap chickpeas for white beans to create a smooth and delightful bean dip variation that surprises your palate. It’s a great way to experiment with textures!

  • Herb Infusion: Blend in fresh herbs like parsley or cilantro for a fresh burst of flavor that brightens up the hummus, making it uniquely yours.

  • Nutty Twist: Add a tablespoon of peanut or almond butter for an extra layer of nutty flavor that complements the umami taste beautifully.

  • Spicy Kick: For heat lovers, feel free to increase the amount of shichimi togarashi, or use a hot chili oil for drizzling on top to elevate the heat level.

  • Flavor Fusion: Try incorporating any aromatic spices like za’atar, smoked paprika, or cumin for a unique flavor twist that pairs perfectly with the creamy texture.

  • Lemon Zest: Grate some lemon zest into the hummus for a citrusy brightness that amplifies the flavor and offers an aromatic experience.

Don’t forget to serve your miso hummus with homemade pita chips—just like the ones from our Nutty Vanilla Cake recipe for an enjoyable crunch! If you’re feeling colorful, pair it with a fresh veggie platter inspired by our Refreshing Cucumber Twist for an enticing presentation.

Tips for the Best Miso Hummus

  • Blend It Well: Ensure you blend the hummus for at least 4-5 minutes after adding ice water. This air incorporation gives your Miso Hummus a light, fluffy texture.
  • Adjust the Spice: Taste test the shichimi togarashi; a little can go a long way! Season to your preference, keeping in mind that you can always add more.
  • Use Canned Chickpeas: For convenience without sacrificing quality, opt for canned chickpeas. Just be sure to rinse and drain them thoroughly for the best outcome.
  • Customize Your Chips: Feel free to play around with different spices or flavored oils on your pita chips. Experimentation can lead to delightful surprises!
  • Keep It Fresh: Miso Hummus is best enjoyed fresh, but you can store leftovers in an airtight container for up to a week. This way, you can savor it beyond just one tasting!
  • No Extra Salt Needed: Miso itself is salty, so taste your hummus first before adding more salt. You might find it unnecessary!

Make Ahead Options

These silky Miso Hummus with Shichimi Togarashi Spiced Pita Chips are perfect for busy home cooks looking to save time! You can prepare the miso hummus up to 3 days in advance; just store it in an airtight container in the refrigerator to keep it fresh and creamy. The pita chips can also be made ahead—prepare them and store in an airtight container for up to 24 hours; although they’re best served fresh, this will save you crunch time later. When you’re ready to serve, just reheat the pita chips in a preheated oven for a few minutes to crisp them up, and munch on this delightful combination that’s just as flavorful and satisfying as when made fresh!

How to Store and Freeze Miso Hummus

Fridge: Keep your Miso Hummus in an airtight container, and it will stay fresh for up to 1 week. Always give it a good stir before serving!

Freezer: For longer storage, freeze your hummus in small portions, using freezer-safe containers or bags. It will remain good for up to 3 months.

Thawing: When you’re ready to enjoy it, transfer the frozen hummus to the fridge overnight to thaw. Re-blend with a touch of water to restore its creamy texture.

Pita Chips: These are best enjoyed fresh but can be stored in an airtight container at room temperature for up to 3 days. Reheat in the oven for crispness!

What to Serve with Silky Miso Hummus with Shichimi Togarashi Spiced Pita

Elevate your snacking experience with delightful sides and complements that enhance the flavors of this creamy dip!

  • Fresh Veggies: The crispness of raw carrots, cucumbers, and bell peppers balances the smooth texture of miso hummus, adding a refreshing crunch.

  • Crispy Roasted Chickpeas: For double the chickpea goodness, roasted chickpeas coated in your favorite spices bring extra flavor and a satisfying crunch.

  • Cucumber Salad: A light cucumber salad with a sprinkle of sesame seeds adds a vibrant freshness that contrasts beautifully with the rich, umami flavors.

  • Rice Crackers: These light, crunchy rice crackers serve as a gluten-free alternative for dipping, providing a delightful texture and mild flavor that pairs perfectly with the hummus.

  • Sweet Potato Wedges: Baked sweet potato wedges offer a slight sweetness that beautifully complements the savory miso hummus, creating a delicious balance of flavors.

  • Herbed Quinoa Salad: A quinoa salad packed with fresh herbs and citrus brings a tangy twist balancing the richness of the dip, making it a wholesome pairing.

  • Chilled Sparkling Water: To cleanse the palate between bites and keep things light, serve chilled sparkling water with a splash of lemon or lime for a refreshing drink.

  • Green Tea: A warm cup of green tea, with its subtle earthiness, enhances the flavors of the miso and spices while providing antioxidant benefits.

  • Fruit Skewers: Add a sweet touch with fruit skewers featuring juicy watermelon, pineapple, and mint; the sweetness provides a nice contrast to the savory dip.

Miso Hummus with Shichimi Togarashi Spiced Pita Recipe FAQs

What type of chickpeas should I use for the hummus?
Absolutely! You can use either canned or cooked chickpeas. If you opt for canned, just make sure to rinse and drain them well. This saves time and ensures your hummus is creamy and delicious!

How should I store leftover Miso Hummus?
Store your Miso Hummus in an airtight container in the fridge. It will stay fresh for up to 1 week. Remember to give it a good stir before serving to restore its lovely texture!

Can I freeze Miso Hummus?
Yes, you can! To freeze, portion your hummus into small freezer-safe containers or bags. It can stay good for up to 3 months. When you’re ready to enjoy, thaw it in the fridge overnight and re-blend with a touch of water to revive its creamy consistency.

How do I prevent my pita chips from getting soggy?
To keep your pita chips crispy, store them in an airtight container at room temperature. They are best eaten fresh, but if you need to store them, they can last up to 3 days. Reheat them in the oven for just a few minutes to restore their crunch!

What should I do if my hummus is too thick?
If your hummus is thicker than you’d like, simply add a tablespoon of ice water and blend again. Repeat this until you achieve your desired consistency. The key is to incorporate enough air while blending to keep it light and fluffy!

Is Miso Hummus safe for those with gluten allergies?
Yes, this recipe is gluten-free thanks to the use of naturally gluten-free chickpeas and tahini. However, make sure to check the labels of all ingredients, especially the pita bread, and opt for gluten-free varieties if needed to ensure it’s safe for your dietary preferences.

Miso Hummus with Shichimi Togarashi Spiced Pita Recipe FAQs

Miso Hummus with Shichimi Togarashi Spiced Pita

Creamy Miso Hummus with Shichimi Togarashi Spiced Pita

This Miso Hummus with Shichimi Togarashi Spiced Pita elevates classic hummus into a creamy, umami-rich experience that's perfect for snacking.
Prep Time 20 minutes
Cook Time 5 minutes
Total Time 25 minutes
Servings: 4 servings
Course: Other
Cuisine: Gluten-Free, Japanese, Vegan
Calories: 200

Ingredients
  

For the Hummus
  • 450 g Cooked Chickpeas canned varieties simplify prep
  • 40 g White Miso about 2½ tbsp
  • 60 g Tahini ¼ cup
  • 2 tsp Garlic crushed garlic works best; about 2 cloves
  • 2 tbsp Lemon Juice juice of half a lemon
  • ¼ tsp Chili Flakes substitute with shichimi togarashi for flavor
  • Black Pepper to taste
  • 120 mL Ice Water ½ cup
  • tbsp Sesame Oil extra for drizzling
For the Pita Chips
  • 4-5 pieces Pita Bread cut into desired shapes
  • 2 tbsp Shichimi Togarashi

Equipment

  • Food Processor
  • oven
  • Frying pan

Method
 

Instructions for Miso Hummus
  1. Blend the hummus ingredients in a food processor until smooth, about 2-3 minutes.
  2. With the processor running, gradually stream in the ice water and blend for another 4-5 minutes.
  3. Preheat your oven to 375°F (190°C) or prepare a non-stick frying pan over medium-high heat.
  4. Brush both sides of the pita bread with sesame oil and sprinkle with shichimi togarashi.
  5. Toast the pita chips in the oven or frying pan for 3-5 minutes per side until golden brown.
  6. Serve the Miso Hummus drizzled with sesame oil, with the spiced pita chips arranged around it.

Notes

Miso Hummus is best enjoyed fresh, but can be stored in an airtight container for up to 1 week. Freeze leftovers for up to 3 months.

Delightful Orange Cardamom Tart with Pistachio Crust

The moment I first tasted the enchanting blend of orange and cardamom in a charming café, I knew I had to recreate that experience at home. Introducing the irresistible Orange Cardamom Tart with Pistachio Crust, a stunning dessert that brings together exotic flavors in a way that will impress your family and friends. Not only is this tart a visual masterpiece, but it’s also a delightful crowd-pleaser and a comforting finish to any meal. Whether it’s a holiday gathering or a cozy family dinner, this dessert will have everyone reminiscing about its unique taste long after the last crumb is gone. Are you ready to make some delicious memories in your kitchen?

Why is this tart so special?

Exotic Flavors: The bold combination of zesty orange and warm cardamom transforms this tart into a heavenly experience.

Nutty Crunch: The pistachio crust adds a delightful crunch, providing both texture and an inviting nutty flavor.

Simple Process: With just a few steps, you can easily create this stunning dessert that looks and tastes like it came from a bakery.

Family Favorite: Perfect for gatherings, this tart is a crowd-pleaser that will have everyone asking for seconds.

Versatile Creation: Feel free to experiment with seasonal fruits or even add a chocolate twist to delight your taste buds! You might also enjoy pairing it with Cucumber Carrot Salad for a refreshing contrast.

Orange Cardamom Tart Ingredients

• Get ready to gather some delightful ingredients for your Orange Cardamom Tart with Pistachio Crust that will make your kitchen smell heavenly!

For the Crust

  • Ground Pistachios – Adds a nutty flavor and crunchy texture; almond substitutions yield a different nutty taste.
  • All-Purpose Flour – Acts as the structural base for the crust; opt for gluten-free alternatives if needed.
  • Granulated Sugar – Sweetens both the crust and filling; try brown sugar for a deeper flavor.
  • Salt – Balances flavors and enhances sweetness; sea salt gives a gourmet touch.
  • Cold Butter – Creates that perfectly flaky crust; coconut oil is a great dairy-free alternative.
  • Egg – Binds the crust together; for a vegan twist, use aquafaba or flaxseed mix.

For the Filling

  • Fresh Orange Juice and Zest – Deliver bursty citrus flavor in the filling; mix lemon and lime for a different profile.
  • Cornstarch – Thickens the filling for a creamy texture; arrowroot powder works as a great substitute.
  • Ground Cardamom – Infuses the filling with warm, exotic spice; cinnamon or nutmeg can charitably change the spice note.

For the Finishing Touch

  • Powdered Sugar – Used for dusting before serving, adding a sweet finish; no substitutions needed here for the best decor!

Step‑by‑Step Instructions for Orange Cardamom Tart with Pistachio Crust

Step 1: Prepare the Crust
In a mixing bowl, combine ground pistachios, all-purpose flour, granulated sugar, and salt. Cut in cold butter using a pastry cutter or fork until the mixture is crumbly and resembles coarse crumbs. Add the beaten egg and mix until a cohesive dough forms. Press the dough firmly into the bottom and up the sides of a tart pan with a removable bottom. Chill in the refrigerator for 30 minutes.

Step 2: Make the Filling
In a medium saucepan, combine fresh orange juice, orange zest, granulated sugar, cornstarch, and ground cardamom. Cook over medium heat, stirring continually, until the mixture thickens and bubbles, around 5-7 minutes. Remove from heat and allow it to cool slightly before stirring in the beaten eggs and cold butter until well incorporated. The filling should have a smooth and glossy texture.

Step 3: Bake the Tart
Preheat your oven to 350°F (180°C) while your tart crust is chilling. Once ready, pour the orange cardamom filling into the prepared pistachio crust. Bake in the preheated oven for 25-30 minutes, or until the filling is set and the crust is a beautiful golden brown. The edges of the tart should be lightly puffed, and the center should be firm to the touch.

Step 4: Cool and Serve
After baking, remove the tart from the oven and let it cool completely on a wire rack. This cooling process allows the filling to set perfectly. Once cooled, use a fine sieve to dust the top with powdered sugar for a visually appealing presentation. Optionally garnish with additional crushed pistachios for added flavor and texture before slicing.

What to Serve with Orange Cardamom Tart with Pistachio Crust

Complement your delightful dessert experience with these tasty pairings that enhance the exotic flavors and textures of the tart.

  • Vanilla Ice Cream: The creamy sweetness perfectly contrasts the tart’s citrusy notes, making every bite a luscious experience.

  • Whipped Cream: A dollop of fresh whipped cream adds a light, airy texture that balances the dense filling beautifully.

  • Fresh Berries: Juicy strawberries or raspberries provide a refreshing burst of flavor that brightens each slice of tart.

  • Mint Tea: The herbal aroma of mint tea complements the warm spices in the tart, offering a soothing finish to your meal.

  • Chocolate Drizzle: A rich chocolate sauce poured over the slice adds a luxurious touch that tantalizes the taste buds.

  • Citrus Salad: Combine segments of orange and grapefruit with mint for a zesty salad that echoes the tart’s flavors while refreshing the palate.

Elevate your family’s next gathering or a cozy dinner with these suggestions that promise to create a harmoniously delicious dining experience!

Orange Cardamom Tart with Pistachio Crust Variations

Feel free to let your creativity shine as you customize this delectable tart, making every bite uniquely yours!

  • Nutty Twist: Substitute ground pistachios with almonds or walnuts for a distinctly different nut flavor.
  • Chocolate Delight: Add cocoa powder to the crust or drizzle melted chocolate on top for a rich, sweet contrast.
  • Seasonal Surprise: Swap out oranges for seasonal fruits like berries or peaches, keeping the filling fresh and exciting.
  • Dairy-Free Option: Use coconut oil instead of butter in the crust to make it dairy-free while maintaining the buttery goodness.
  • Spicy Kick: For a flavor boost, add fresh ginger or a pinch of cayenne pepper to the filling for warmth.
  • Gluten-Free: Substitute all-purpose flour with a gluten-free blend to make this tart accessible for gluten-sensitive friends.
  • Creamy Layer: Top the tart with a layer of whipped coconut cream or mascarpone for added richness.
  • Herbal Hint: Infuse the filling with a hint of fresh mint or basil to elevate the classic orange flavor.

You can enjoy experimenting with these variations alongside delightful dishes like Homemade Sweet Orange to brighten your meal or explore new flavor dimensions with Nutty Vanilla Cake.

How to Store and Freeze Orange Cardamom Tart with Pistachio Crust

Fridge: Store the tart in an airtight container for up to 3 days. This helps preserve the flavors and keeps the crust from becoming soggy.

Freezer: If you want to keep it longer, wrap the tart tightly in plastic wrap and aluminum foil, then freeze for up to 2 months. To enjoy, thaw in the fridge overnight before serving.

Reheating: For the best experience, reheat slices gently in a preheated oven at 300°F (150°C) for about 10 minutes or until warmed through. This keeps the filling creamy and the crust crisp.

Prep Ahead: This Orange Cardamom Tart with Pistachio Crust can be made a day in advance for the flavors to meld, making it an excellent choice for gatherings.

Make Ahead Options

These Orange Cardamom Tart with Pistachio Crust are perfect for busy home cooks seeking to save time without sacrificing flavor! You can prepare the pistachio crust up to 24 hours in advance; just make sure to wrap it tightly in plastic wrap to maintain freshness. The filling can also be made ahead—you can refrigerate it for up to 3 days in a sealed container, allowing the flavors to meld beautifully. When you’re ready to serve, simply pour the filling into the chilled crust and bake as directed. This way, you’ll have a dessert that’s just as delicious and visually stunning, but with half the effort on the day of your special gathering!

Expert Tips for Orange Cardamom Tart

Cold Ingredients: Ensure your butter is cold when making the crust; this helps achieve the flaky texture you desire.

Don’t Overmix: Mix the dough just until combined to avoid a tough crust. Gentle handling creates the perfect texture.

Use a Tart Pan: Opt for a tart pan with a removable bottom for easy serving. It makes presentation and slicing a breeze!

Cool Completely: Let the tart cool fully before slicing to ensure the filling sets properly. This also enhances flavor.

Flavor Boosts: Experiment with spices or citrus in the filling. Just be sure to keep the balance for that signature Orange Cardamom Tart with Pistachio Crust taste.

Orange Cardamom Tart with Pistachio Crust Recipe FAQs

How do I choose ripe oranges for my tart?
Absolutely! Look for firm oranges with smooth, shiny skin and a sweet fragrance. Avoid any with dark spots or wrinkles, as these can indicate overripeness. When you squeeze them gently, they should feel slightly soft but not mushy.

What’s the best way to store the tart once it’s made?
To keep your Orange Cardamom Tart with Pistachio Crust delicious, store it in an airtight container in the refrigerator for up to 3 days. This method keeps the flavors fresh and prevents the crust from getting soggy. If you need to, you can also cover it loosely with plastic wrap.

Can I freeze this tart, and if so, how?
Certainly! To freeze the tart, wrap it tightly in plastic wrap, then in aluminum foil to protect it from freezer burn. It will stay good for up to 2 months. When you’re ready to enjoy it, simply thaw in the refrigerator overnight. If you prefer a warm tart, reheat slices in a preheated oven at 300°F (150°C) for about 10 minutes to keep the crust crisp.

What if my filling doesn’t set properly after baking?
Very good question! If your filling doesn’t set properly, it could be due to undercooking or not enough cornstarch. Make sure to cook the filling until it’s thick and bubbly for about 5-7 minutes. If you’re having difficulties with setting while baking, you can return the tart to the oven for a few minutes to help it firm up.

Are there any allergy concerns I should consider?
Definitely! This tart contains nuts (pistachios), gluten (from the flour), and eggs. For those with nut allergies, almond or walnut substitutes can work for the crust, and you can use a gluten-free flour blend instead of all-purpose flour. For a vegan-friendly version, replace the egg with aquafaba or a flaxseed mixture, and use coconut oil instead of butter.

Can I make this tart ahead of time, and how will it taste?
Absolutely! Making the Orange Cardamom Tart with Pistachio Crust a day in advance is a fantastic idea. The flavors meld beautifully overnight, allowing the tart to develop complexity and richness. When you’re ready to serve, just dust with powdered sugar and garnish if desired for a fresh presentation!

Orange Cardamom Tart with Pistachio Crust

Delightful Orange Cardamom Tart with Pistachio Crust

A stunning Orange Cardamom Tart with Pistachio Crust that combines exotic flavors to impress friends and family.
Prep Time 30 minutes
Cook Time 30 minutes
Chilling Time 30 minutes
Total Time 1 hour 30 minutes
Servings: 8 slices
Course: Dessert
Cuisine: American
Calories: 250

Ingredients
  

Crust
  • 1 cup Ground Pistachios Adds a nutty flavor and crunchy texture.
  • 1 cup All-Purpose Flour Opt for gluten-free alternatives if needed.
  • 1/4 cup Granulated Sugar Try brown sugar for a deeper flavor.
  • 1/4 teaspoon Salt Sea salt gives a gourmet touch.
  • 1/2 cup Cold Butter Coconut oil is a great dairy-free alternative.
  • 1 large Egg For a vegan twist, use aquafaba or flaxseed mix.
Filling
  • 1/2 cup Fresh Orange Juice Delivers bursty citrus flavor.
  • 1 tablespoon Orange Zest Adds extra citrus aroma.
  • 1/3 cup Granulated Sugar Balances flavor with sweetness.
  • 2 tablespoons Cornstarch Thickens the filling for a creamy texture.
  • 1 teaspoon Ground Cardamom Infuses with warm, exotic spice.
Finishing Touch
  • 1 cup Powdered Sugar For dusting before serving.

Equipment

  • mixing bowl
  • pastry cutter
  • Tart Pan with Removable Bottom
  • Saucepan
  • Wire rack
  • Fine sieve

Method
 

Preparation
  1. In a mixing bowl, combine ground pistachios, all-purpose flour, granulated sugar, and salt. Cut in cold butter using a pastry cutter or fork until crumbly. Add the egg and mix until cohesive. Press into tart pan and chill for 30 minutes.
  2. In a medium saucepan, combine orange juice, zest, sugar, cornstarch, and cardamom. Cook over medium heat until thickened, about 5-7 minutes. Remove from heat, stir in beaten egg and butter until smooth.
  3. Preheat oven to 350°F (180°C). Pour filling into the crust and bake for 25-30 minutes until filling is set and crust is golden.
  4. Once baked, cool completely on a wire rack. Dust with powdered sugar and garnish with crushed pistachios before serving.

Notes

Ensure butter is cold for a flaky crust. Use a tart pan for easy serving. Let the tart cool completely for the best flavor and texture.

Savory Stuffed Salmon Pinwheels for Effortless Elegance

In the cozy warmth of my kitchen one evening, the aroma of freshly cooked salmon wafted through the air, teasing my taste buds with promise. This is the moment I decided to create Elegant Stuffed Salmon Pinwheels, a dish that beautifully merges elegance with simplicity. These pinwheels are not only visually stunning but also surprisingly easy to prepare—perfect for making a memorable impression at dinner parties or simply elevating a weeknight meal at home. With just 40 minutes of your time, you can indulge in a gluten-free delight that strikes the ideal balance between creamy and savory. Plus, this recipe allows for creative variations, letting you experiment with fillings and techniques that reflect your personal taste. Ready to roll up your sleeves and dive into a flavor-packed experience? Let’s make it happen!

Why are Stuffed Salmon Pinwheels a Must-Try?

Deliciously Elegant: Each bite of these pinwheels delights with a combination of flaky salmon and creamy filling, making them the star of any table setting.

Quick Preparation: With only 40 minutes needed from prep to plate, you can effortlessly whip up a stunning dish even on busy nights.

Versatility at Its Finest: Customize your pinwheels with various fillings, such as spinach or fresh herbs, for a unique twist every time.

Healthy Indulgence: This gluten-free option is high in protein and healthy fats, ensuring a guilt-free meal packed with flavor.

Impress with Ease: Whether hosting friends or enjoying a cozy dinner, these pinwheels offer an impressive presentation that will have everyone asking for more. Don’t forget to check out our serving suggestions for pairing these delightful bites!

Stuffed Salmon Pinwheels Ingredients

For the Pinwheels
Salmon Fillets – The star of your dish; opt for skinless, boneless fillets for easier rolling.
Cream Cheese – Creates a rich filling; substitute with ricotta for a lighter, tangy option.
Fresh Spinach – Adds color and earthiness; cooked spinach can be used if fresh isn’t available.
Garlic – Offers depth of flavor; fresh minced garlic is best, but powder works too.
Lemon Zest – Brightens the dish with a refreshing citrus note; don’t skip this!
Parmesan Cheese – Provides a nutty flavor; Pecorino or Asiago can also be used if preferred.
Fresh Dill – Compliments salmon beautifully; feel free to swap in parsley or thyme if needed.
Salt & Pepper – Essential for seasoning; adjust according to your taste.

For Optional Serving
Lemon Butter Sauce – A light, zesty dip that pairs wonderfully with the pinwheels.
Fresh Salad – A crisp side that balances the richness of the dish.

These Stuffed Salmon Pinwheels offer not only a delectable experience but also the chance to get creative in the kitchen!

Step‑by‑Step Instructions for Stuffed Salmon Pinwheels

Step 1: Preheat the Oven
Begin by preheating your oven to 375°F (190°C), allowing it to reach the perfect temperature as you prepare the filling. This ensures that your Stuffed Salmon Pinwheels will bake evenly, developing a delicious golden exterior. While the oven is warming up, prepare your work surface and gather all your ingredients for a smooth cooking experience.

Step 2: Prepare the Filling
In a medium mixing bowl, combine the cream cheese, minced garlic, fresh spinach, lemon zest, Parmesan cheese, and chopped dill. Use a spatula to mix thoroughly until the filling is smooth and creamy. This rich mixture will be the heart of your Stuffed Salmon Pinwheels, elevating the flavor and adding delightful textures to each bite.

Step 3: Prepare the Salmon
Lay the salmon fillets flat on a clean cutting board, ensuring they are skinless and boneless for easy rolling. Use salt and pepper to season both sides generously, enhancing the natural flavor of the fish. Make sure you can see the beautiful pink color of the salmon, which shows it’s fresh and ready for the next step.

Step 4: Spread the Filling
Carefully spread a generous layer of the cream cheese filling evenly across the surface of each seasoned salmon fillet. Be careful not to overfill, as you want the filling to stay contained when rolling. The creamy mixture should almost reach the edges, ensuring every bite is bursting with flavor in your Stuffed Salmon Pinwheels.

Step 5: Roll the Salmon
Starting at one end, gently roll each salmon fillet tightly into a pinwheel shape, ensuring the filling stays inside. If needed, use toothpicks to secure the ends of the rolled salmon, preventing any filling from escaping during baking. This step is crucial for a neat presentation when you slice the pinwheels after cooking.

Step 6: Bake the Pinwheels
Place the rolled salmon pinwheels seam-side down on a parchment-lined baking sheet, ensuring they are spaced apart. Bake in the preheated oven for 20-25 minutes, or until the salmon is cooked through and flakes easily with a fork. The pinwheels should appear golden brown and bubbly, indicating they are perfectly done.

Step 7: Serve and Garnish
Once baked, allow the Stuffed Salmon Pinwheels to rest for a few minutes. Carefully remove any toothpicks, then slice each roll into rounds for beautiful presentation. Serve warm, garnished with fresh dill or a drizzle of lemon juice, enhancing the elegant appeal of this delectable dish.

Stuffed Salmon Pinwheels Variations

Feel free to make these pinwheels uniquely yours with these delicious twists and substitutions!

  • Dairy-Free: Substitute cream cheese with a dairy-free alternative like cashew cheese, maintaining the creamy texture with a nutty flavor.

  • Smoky Flavor: Add smoked paprika or a dash of liquid smoke to the filling for a subtly smoky undertone that pairs beautifully with salmon.

  • Vegetable Boost: Incorporate finely chopped bell peppers or mushrooms for added earthiness. They provide a lovely texture contrast and burst of flavor.

  • Herby Twist: Swap fresh dill for fresh basil or cilantro to lend a whole new freshness to the pinwheels, making them feel light and vibrant.

  • Spicy Kick: Fold in some crushed red pepper flakes or a drizzle of sriracha in the filling for an exciting heat that enhances the salmon’s richness.

  • Nutty Addition: Mix in finely chopped nuts, like walnuts or almonds, into the filling for a delightful crunch that will take your pinwheels to the next level.

  • Whole Grain Option: Use whole wheat or gluten-free wraps instead of salmon for a fun twist, rolling up cream cheese and vegetables for an alternative treat.

Let your creativity soar with these variations, and don’t hesitate to explore different flavors! You might even enjoy them with a vibrant fresh salad as a side to balance the richness.

How to Store and Freeze Stuffed Salmon Pinwheels

Fridge: Store leftover Stuffed Salmon Pinwheels in an airtight container for up to 3 days; reheat in the oven for the best texture.

Freezer: If you want to make-ahead, freeze unbaked pinwheels wrapped tightly in plastic wrap for up to 2 months.

Thawing: When ready to bake, thaw frozen pinwheels in the fridge overnight before cooking as per the recipe instructions.

Reheating: Reheat baked pinwheels in the oven to maintain their crispy exterior, avoiding the microwave which may make them soggy.

Expert Tips for Stuffed Salmon Pinwheels

Thaw Properly: Ensure your salmon is fully thawed if using frozen; this prevents a chewy texture and ensures even cooking.

Check Doneness: Use a meat thermometer to confirm doneness; salmon should reach an internal temperature of 145°F (63°C) for safety.

Avoid Overfilling: While it’s tempting to load the filling, too much can cause the pinwheels to burst during baking. Stick to a thin layer.

Herb Variations: Experiment with your herbs! Fresh dill pairs beautifully, but feel free to swap in vibrant parsley or thyme for a different flavor profile.

Crispy Leftovers: To maintain that delightful texture, reheat leftovers in the oven instead of the microwave. This keeps the pinwheels crispy and delicious.

Each tip aims to help you create perfect Stuffed Salmon Pinwheels that impress family and friends alike!

Make Ahead Options

These Elegant Stuffed Salmon Pinwheels are perfect for meal prep enthusiasts! You can prepare the filling (cream cheese, garlic, spinach, lemon zest, Parmesan, and dill) up to 24 hours in advance, storing it in an airtight container in the refrigerator to keep it fresh and creamy. For added convenience, assemble the pinwheels and refrigerate them for up to 3 hours prior to baking. This allows you to simply pop them in the oven when you’re ready to serve, ensuring you save time on busy nights while still enjoying a restaurant-quality dish. Just be sure to secure any toothpicks and bake as directed for delicious results that are just as delightful!

What to Serve with Elegant Stuffed Salmon Pinwheels

Enhance your dining experience with complementary sides and treats that balance the rich flavors of these stunning pinwheels.

  • Creamy Mashed Potatoes: Their buttery texture and mild flavor create a comforting contrast to the pinwheels.

  • Zesty Lemon Butter Sauce: Drizzle this bright sauce for an added layer of richness and a splash of citrus that elevates the entire meal.

  • Crisp Garden Salad: A fresh medley of greens and veggies provides a refreshing crunch that perfectly balances the creamy filling of the salmon.

  • Roasted Asparagus: Tender, roasted spears add a delightful, earthy flavor while maintaining a lightness that complements your fish beautifully.

  • Garlic Bread: Crispy, buttery slices serve as the perfect vehicle for any leftover lemon butter sauce, making it a must-have on your table.

  • Chilled White Wine: A glass of Sauvignon Blanc enhances the dish’s flavors while adding a touch of sophistication to your meal.

Include these pairings to create a multi-dimensional dining experience that will leave your guests impressed and satisfied!

Stuffed Salmon Pinwheels Recipe FAQs

What type of salmon should I use for the pinwheels?
Absolutely! For the best results, choose skinless, boneless salmon fillets. They provide a mild, flaky texture that’s perfect for rolling. If you can get fresh salmon, that’s ideal, but make sure frozen salmon is fully thawed and looks bright pink without any dark spots.

How should I store leftover Stuffed Salmon Pinwheels?
To keep your leftovers fresh, store them in an airtight container in the refrigerator for up to 3 days. When you’re ready to enjoy them again, I recommend reheating in the oven at 350°F (175°C) for about 10-15 minutes—not only does this maintain their delightful texture, but it also revives their flavor!

Can I freeze unbaked Stuffed Salmon Pinwheels?
Very! To freeze, wrap each unbaked pinwheel tightly in plastic wrap and then place them in a freezer-safe bag. They can be stored this way for up to 2 months. When you’re ready to use them, simply thaw them in the refrigerator overnight before baking according to the original recipe instructions.

What if my salmon overcooks or dries out?
No worries! To avoid overcooking your salmon, use a meat thermometer—cook until it reaches 145°F (63°C). If you accidentally overbake them, you can serve the pinwheels with a squeeze of fresh lemon juice or a side of lemon butter sauce to add moisture back to each bite.

Are there any dietary considerations I should be aware of?
Indeed! This recipe is gluten-free, making it suitable for those with gluten sensitivities. Always ensure your cream cheese and any other pre-packaged ingredients comply with dietary requirements. For allergies, watch out for the garlic and dairy, and feel free to swap these ingredients or use dairy-free alternatives to suit your needs.

How can I enhance the flavors of the stuffing?
A wonderful way to elevate the filling is to mix in finely chopped vegetables like bell peppers or mushrooms. You can also add a pinch of smoked paprika or a dash of hot sauce for a little kick. The more the merrier when it comes to experimenting with flavors in these Stuffed Salmon Pinwheels!

Stuffed Salmon Pinwheels

Savory Stuffed Salmon Pinwheels for Effortless Elegance

Delight in these elegant and easy Stuffed Salmon Pinwheels, perfect for dinner parties or a weeknight meal.
Prep Time 15 minutes
Cook Time 25 minutes
Total Time 40 minutes
Servings: 4 pinwheels
Course: Dinner
Cuisine: American
Calories: 300

Ingredients
  

For the Pinwheels
  • 4 fillets Salmon (skinless, boneless)
  • 8 oz Cream Cheese Substitute with ricotta if desired
  • 1 cup Fresh Spinach or cooked spinach
  • 2 cloves Garlic minced
  • 1 tbsp Lemon Zest Freshly grated
  • 1/4 cup Parmesan Cheese Can substitute Pecorino or Asiago
  • 2 tbsp Fresh Dill or chopped parsley/thym
  • to taste Salt
  • to taste Pepper
For Optional Serving
  • 1/2 cup Lemon Butter Sauce
  • 1 salad Fresh Salad

Equipment

  • oven
  • mixing bowl
  • baking sheet
  • parchment paper
  • spatula
  • Cutting Board

Method
 

Step-by-Step Instructions
  1. Preheat your oven to 375°F (190°C).
  2. In a medium mixing bowl, combine the cream cheese, minced garlic, fresh spinach, lemon zest, Parmesan cheese, and chopped dill. Mix until smooth.
  3. Lay the salmon fillets flat on a clean cutting board, season with salt and pepper.
  4. Spread a generous layer of the filling evenly across the seasoned salmon fillets.
  5. Starting at one end, gently roll each salmon fillet tightly into a pinwheel shape, securing the ends if needed.
  6. Place the rolled salmon pinwheels seam-side down on a parchment-lined baking sheet. Bake for 20-25 minutes.
  7. Allow the pinwheels to rest, slice into rounds, and serve warm.

Notes

Ensure salmon is fully thawed if using frozen. For best texture, reheat leftovers in the oven.