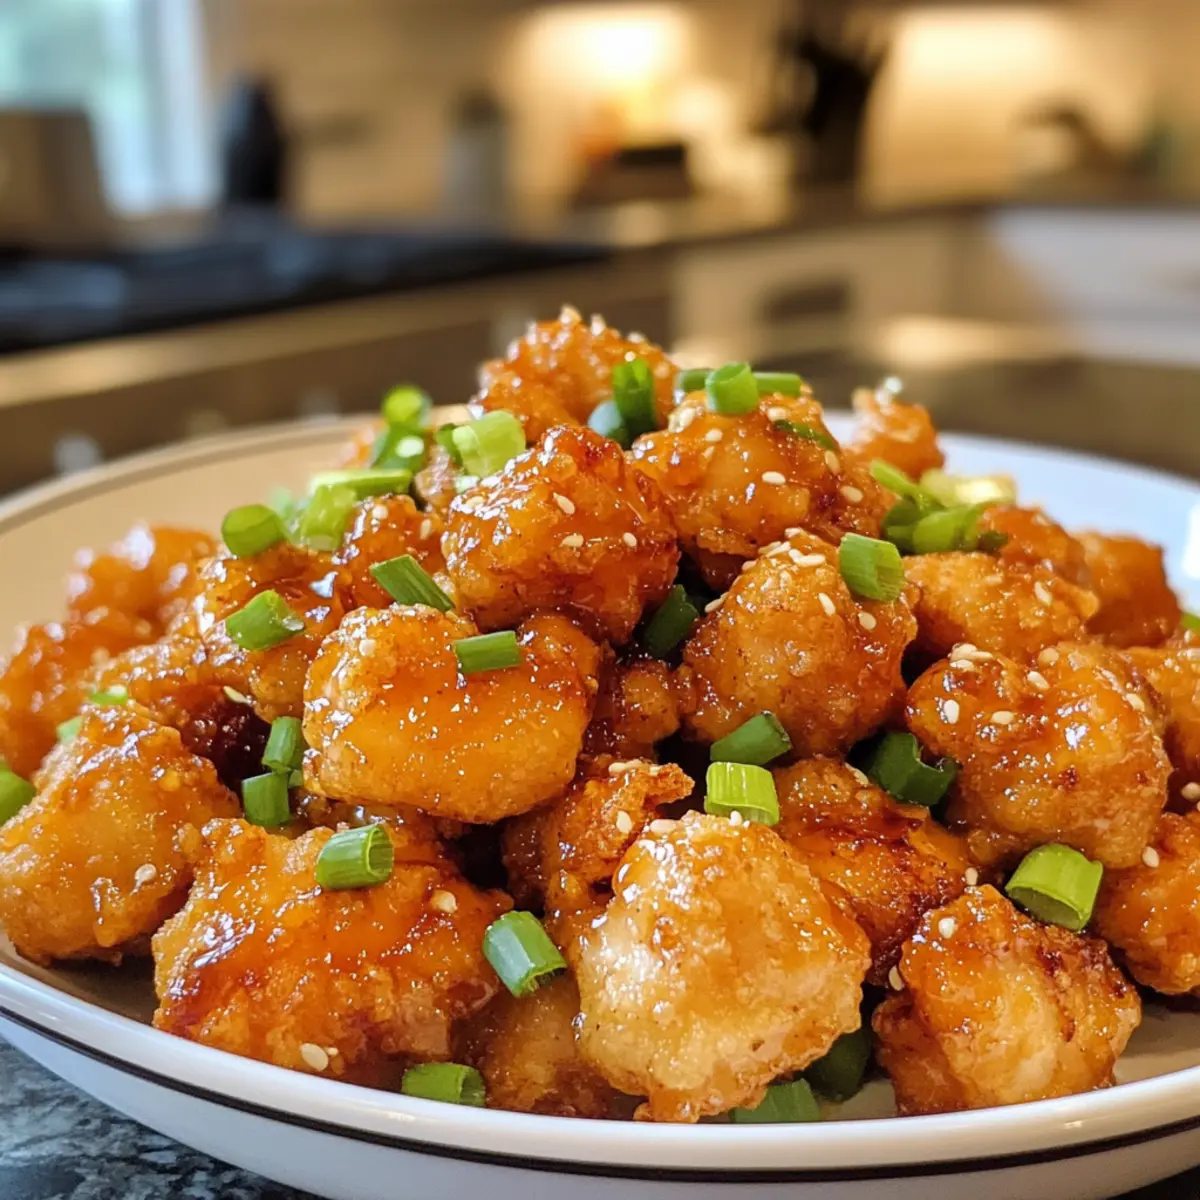
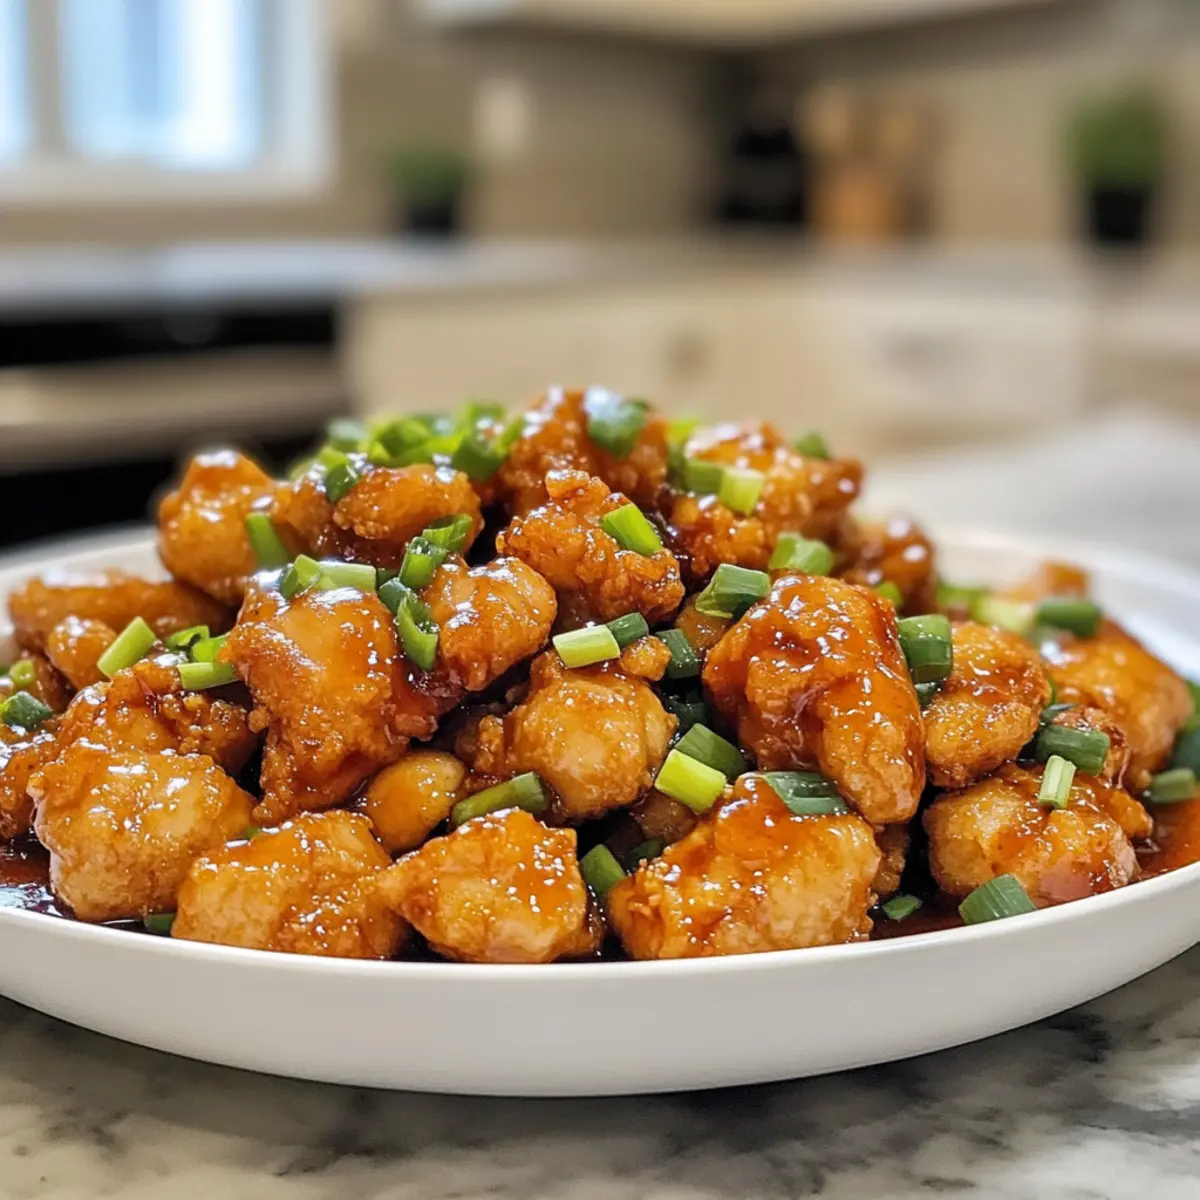
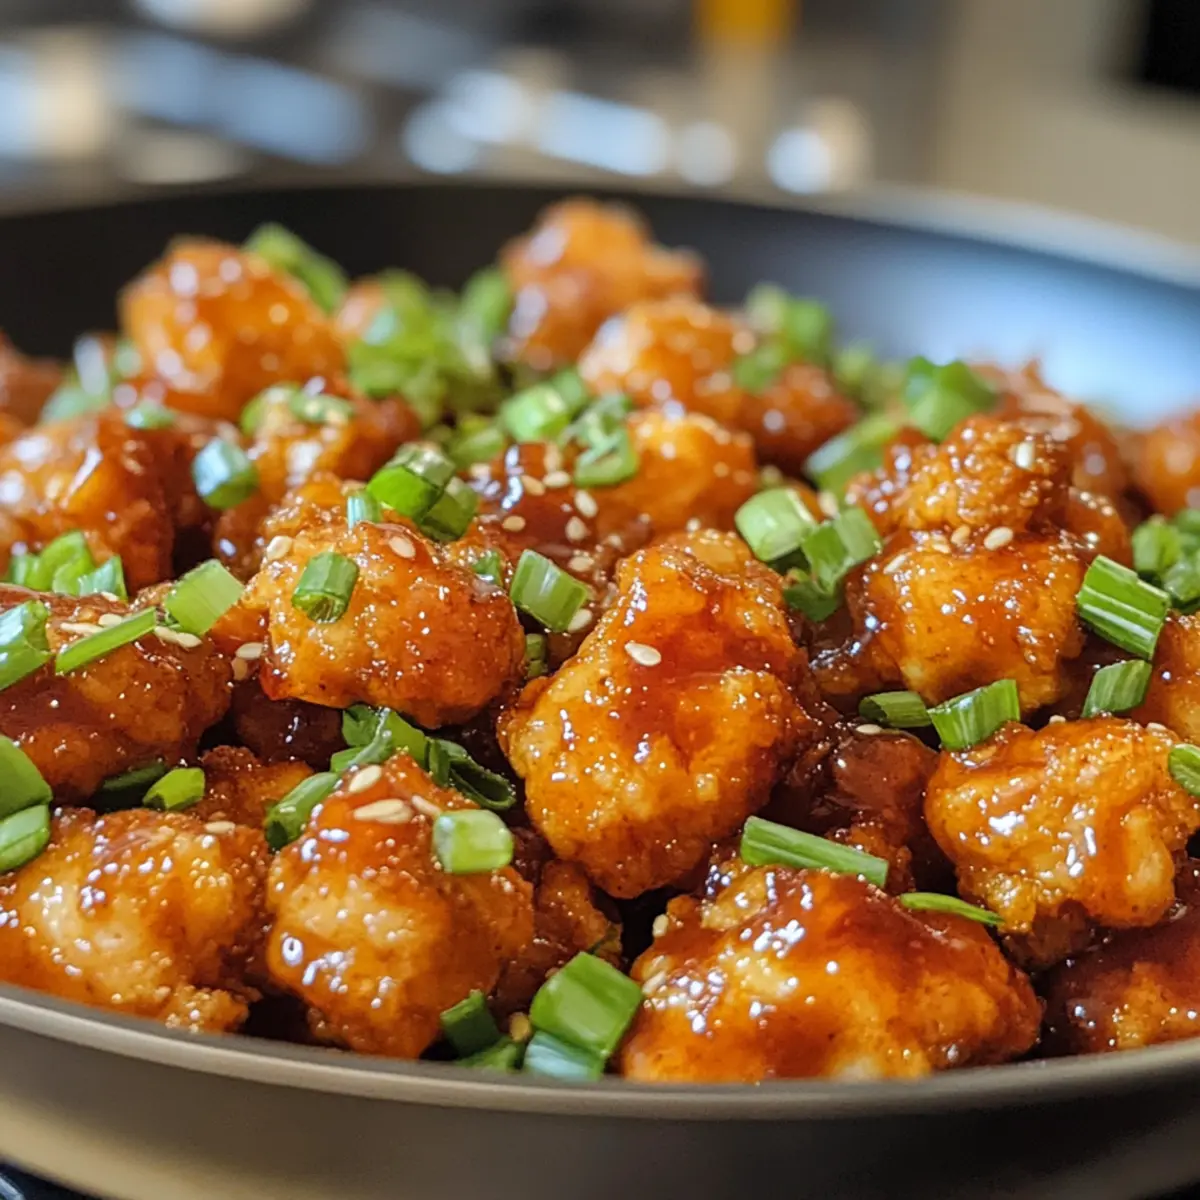
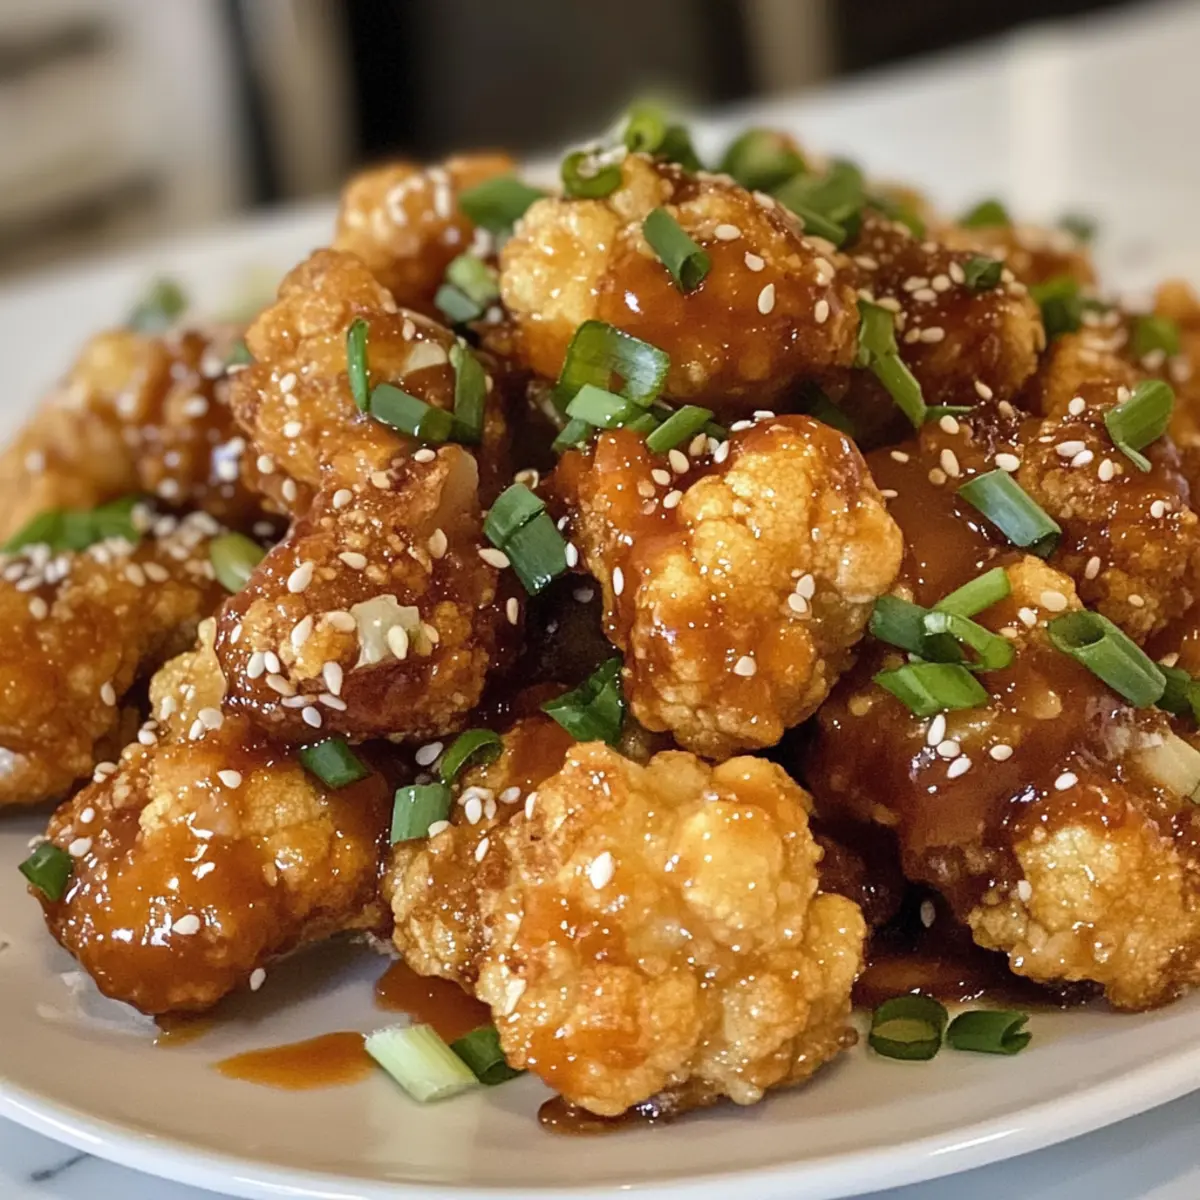
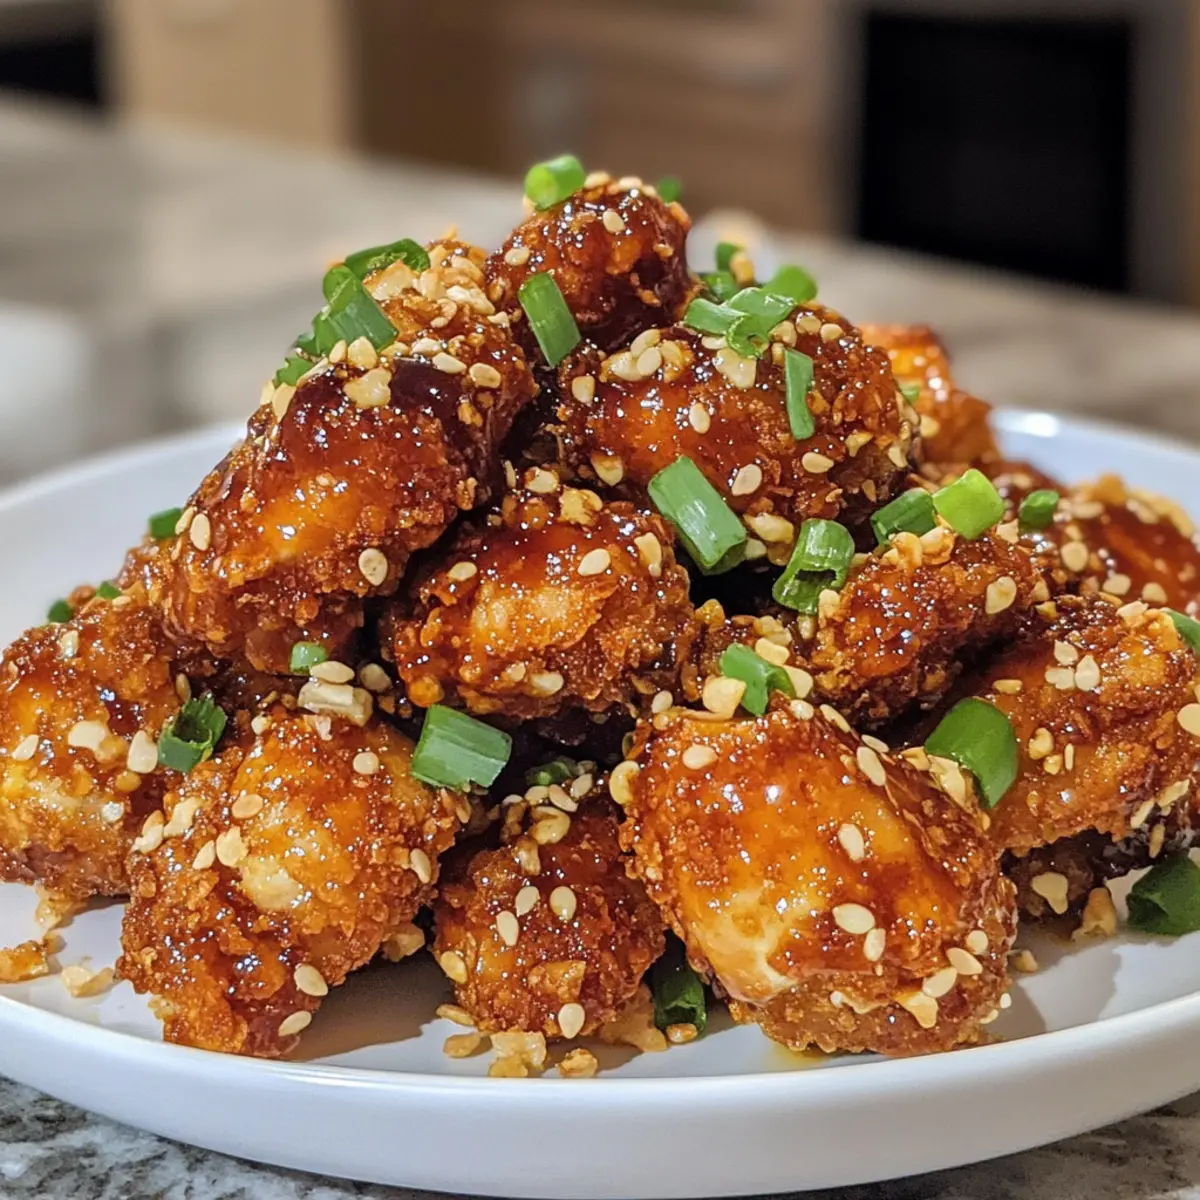
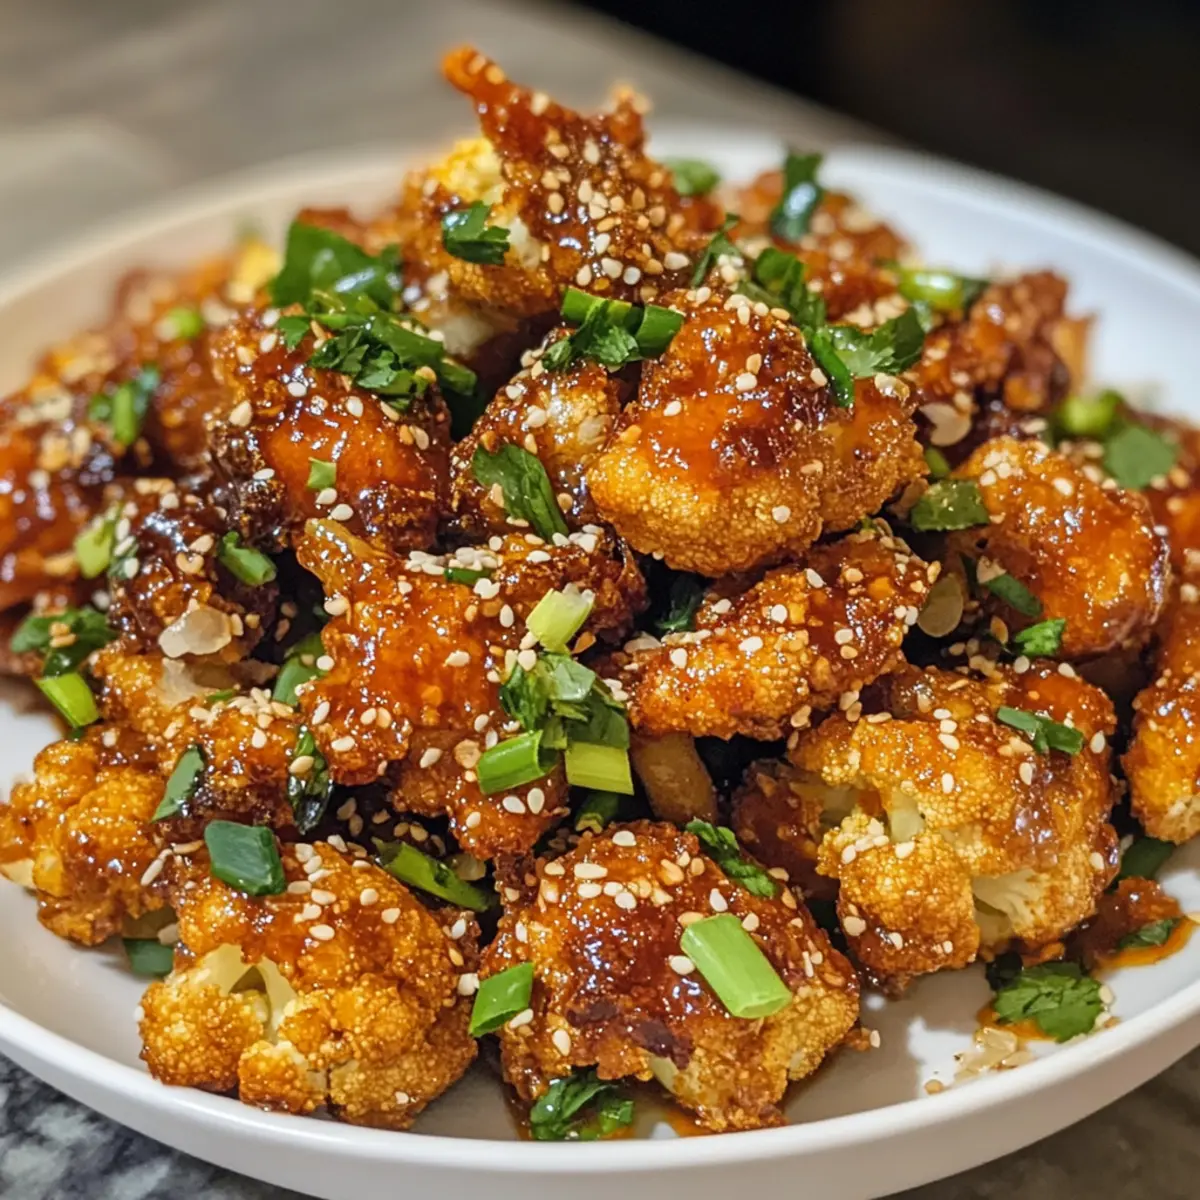
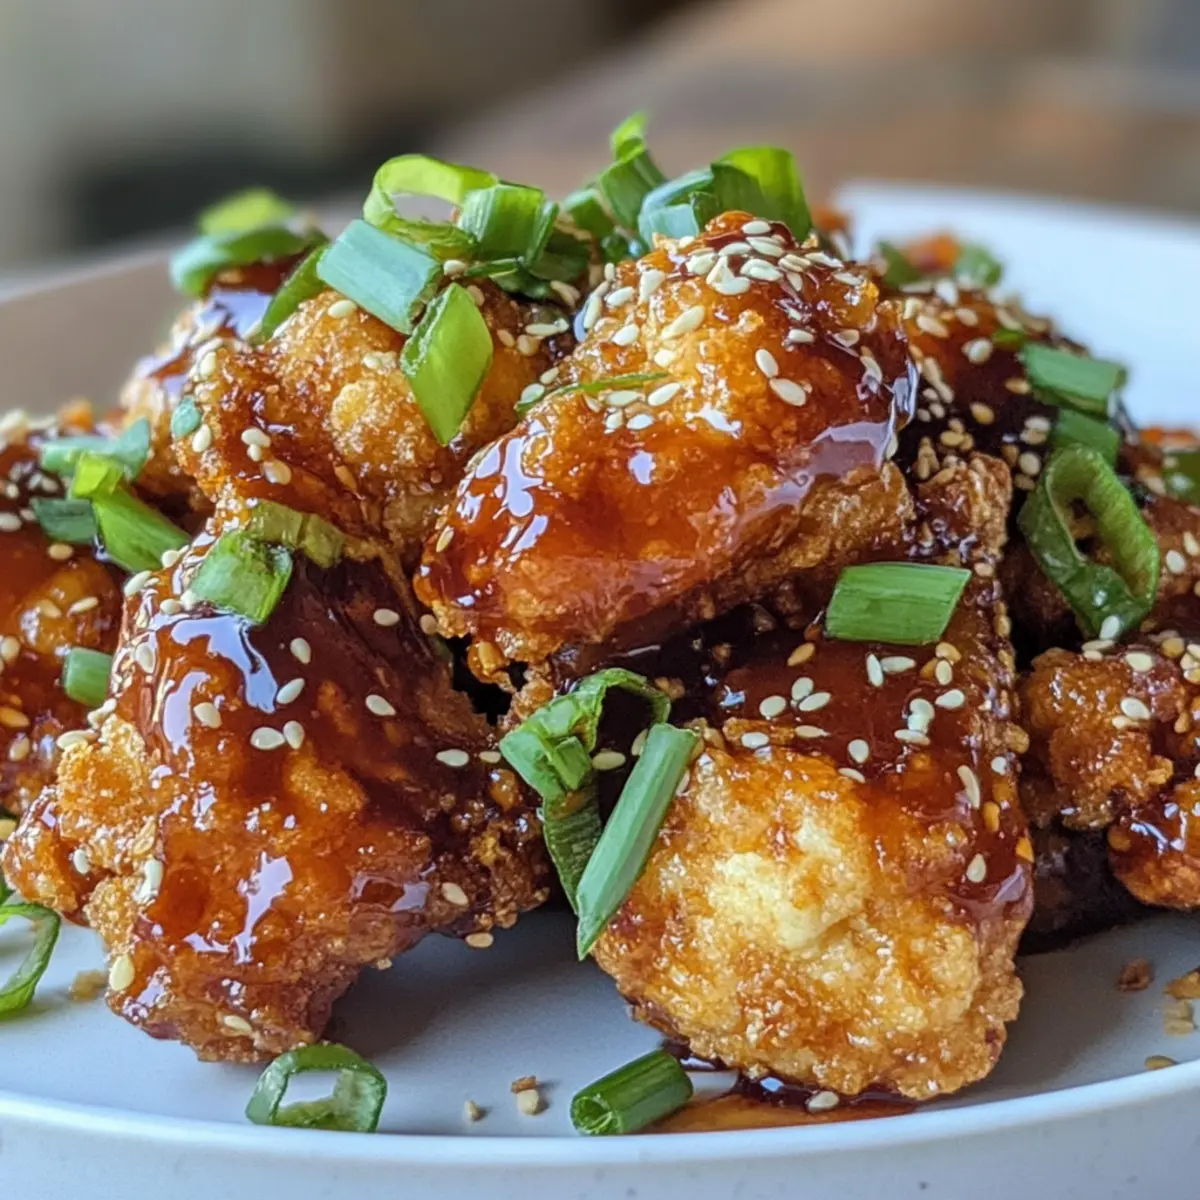
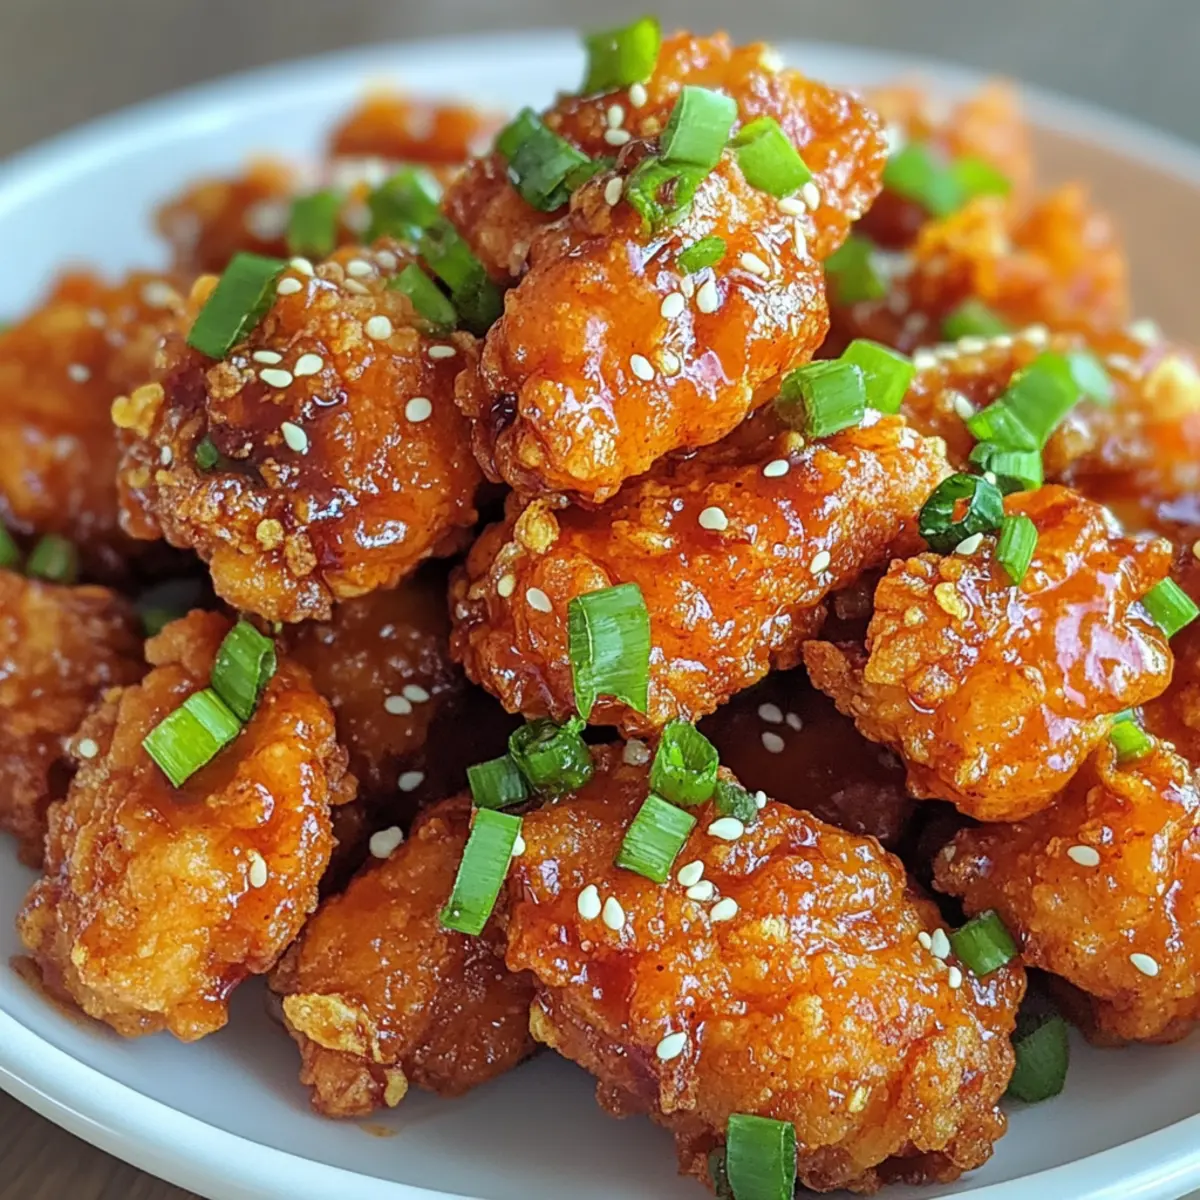
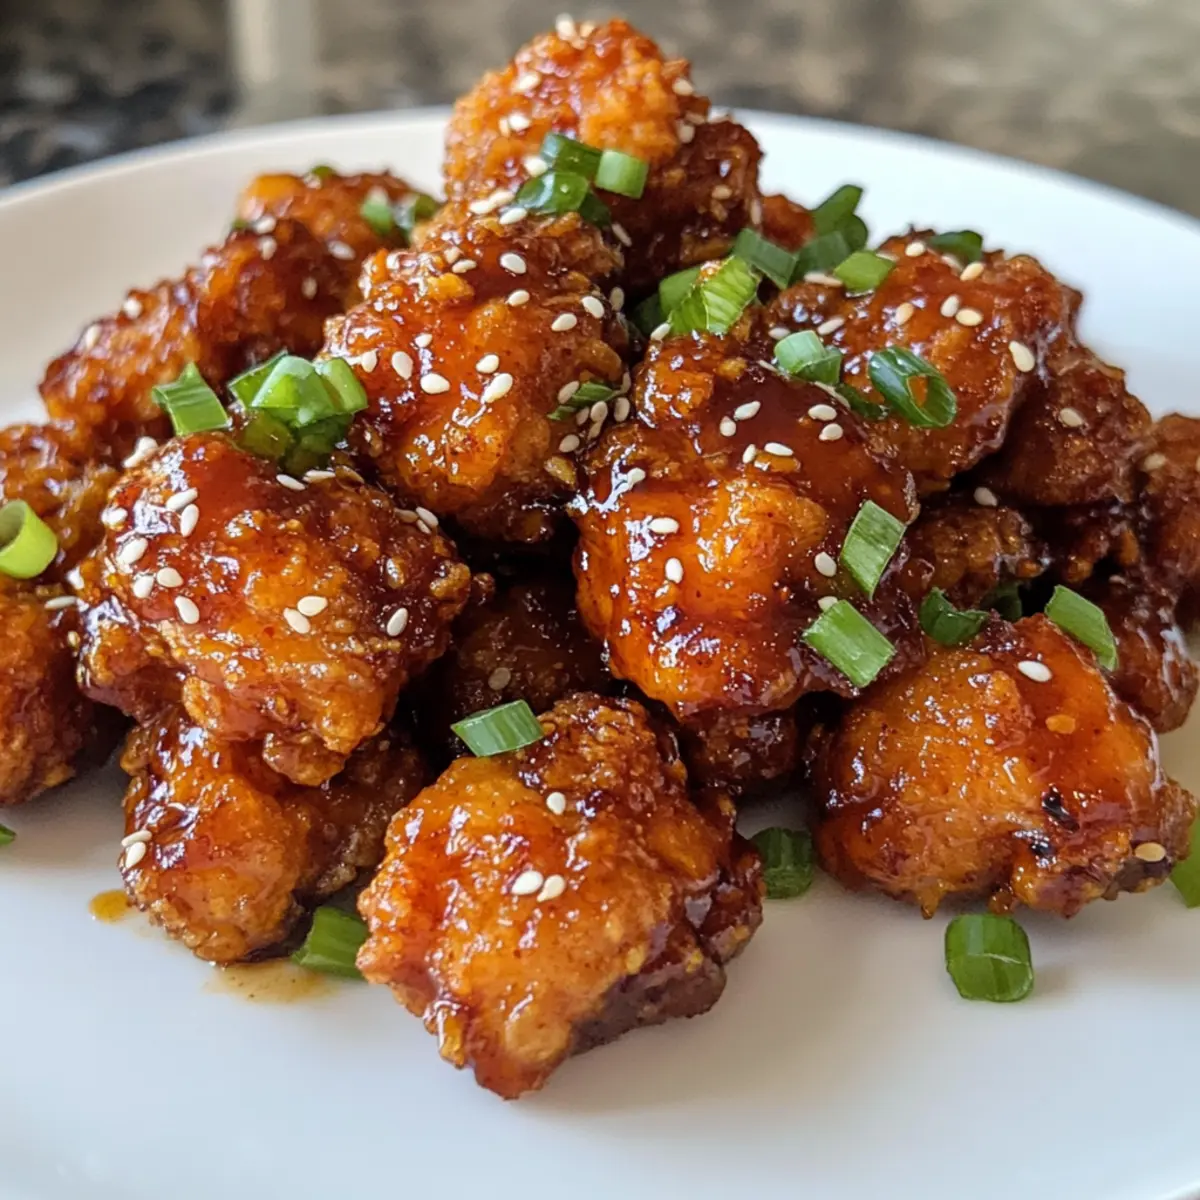
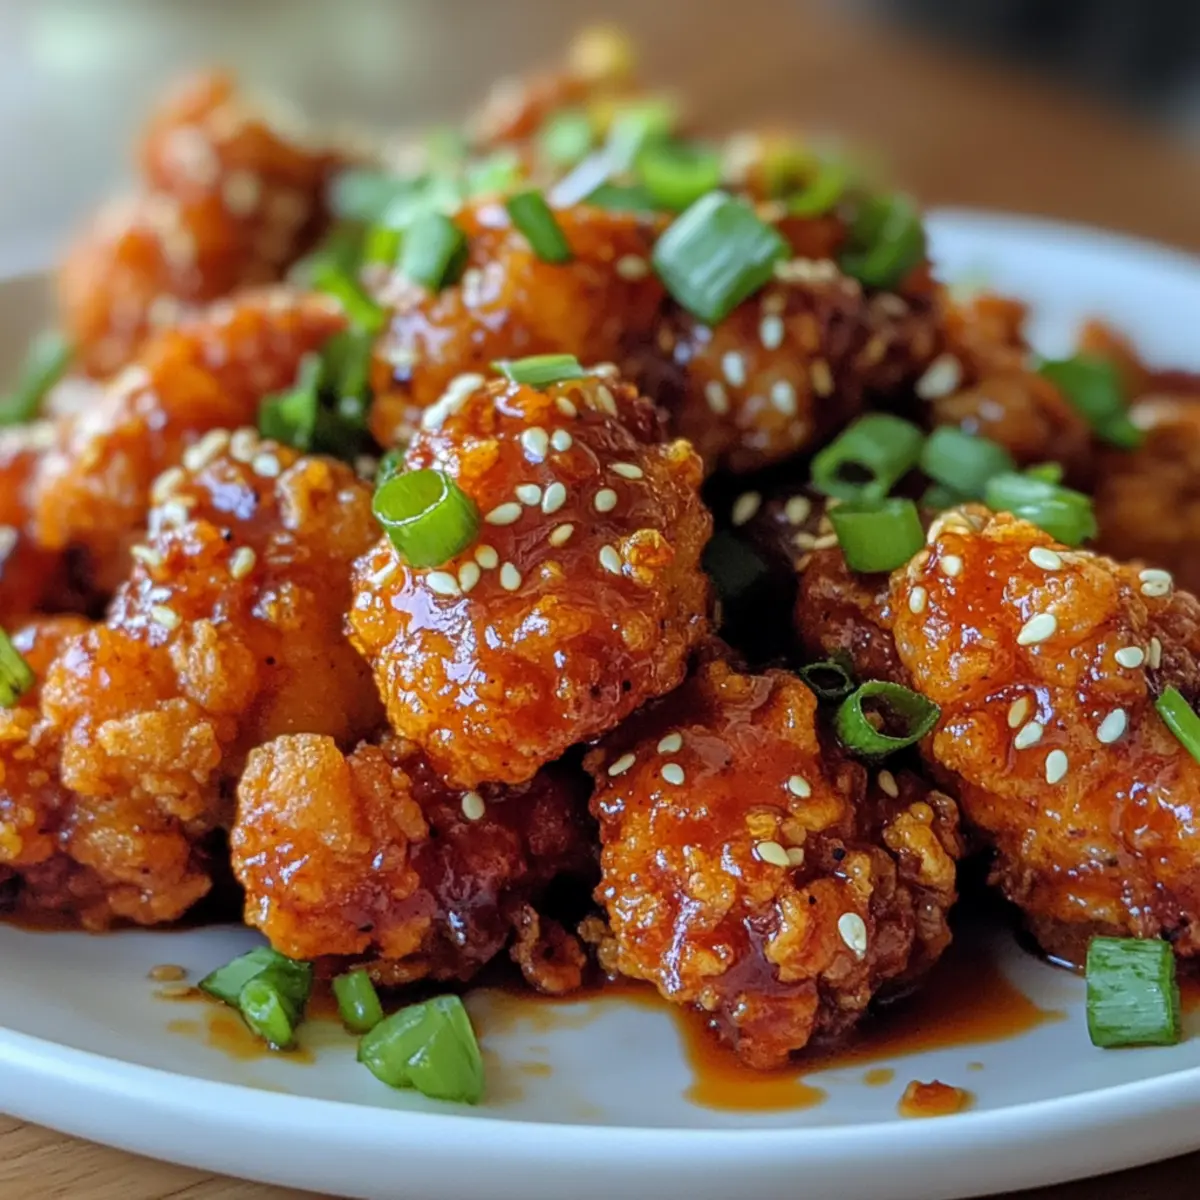
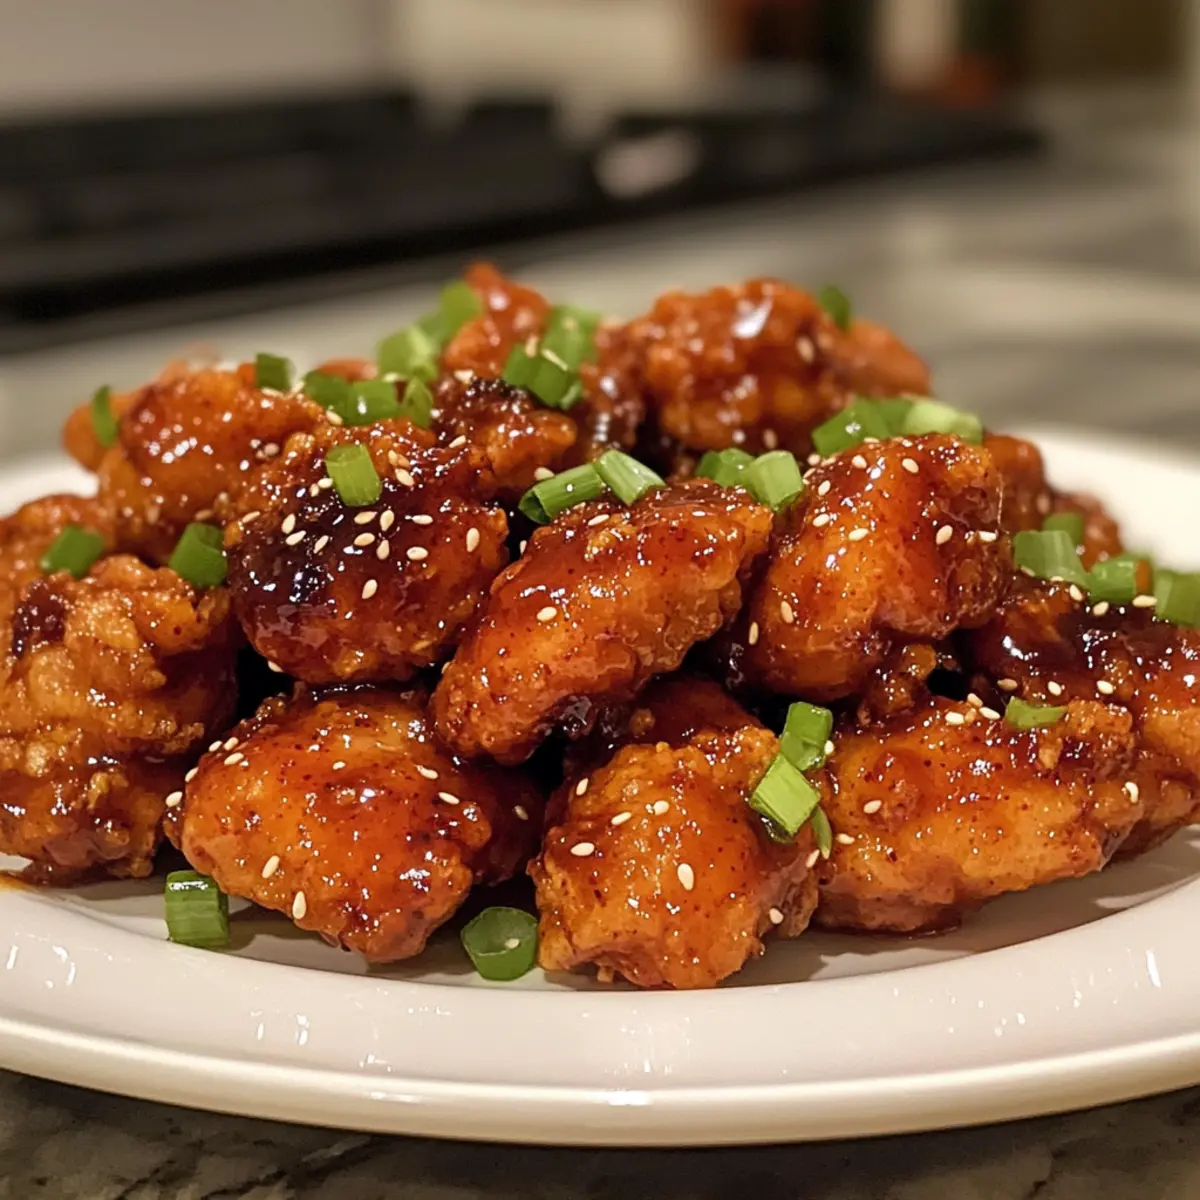
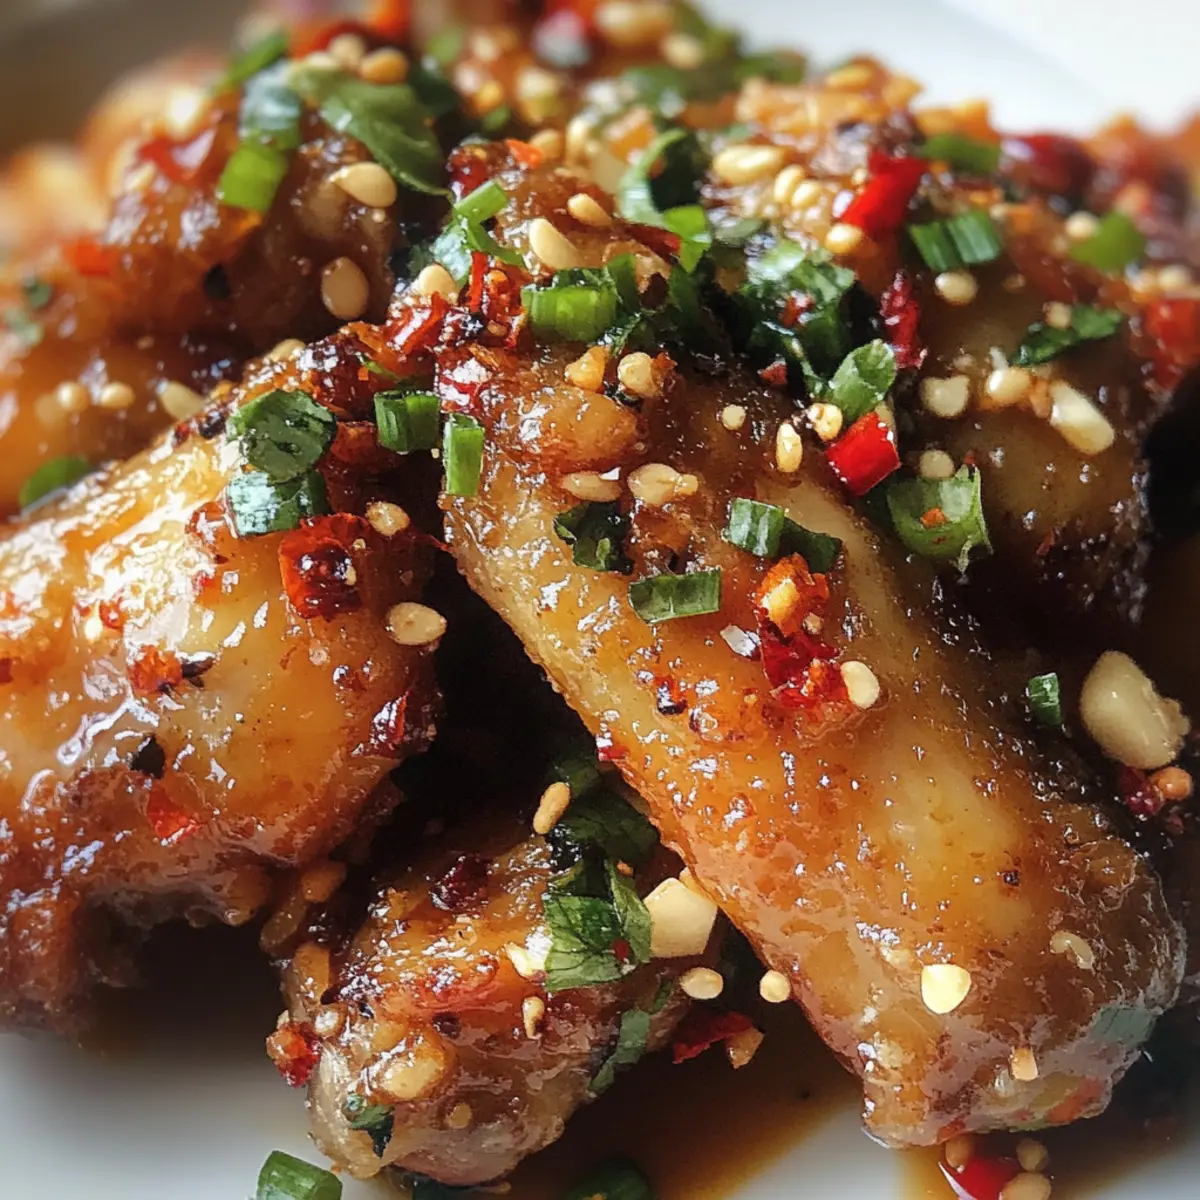
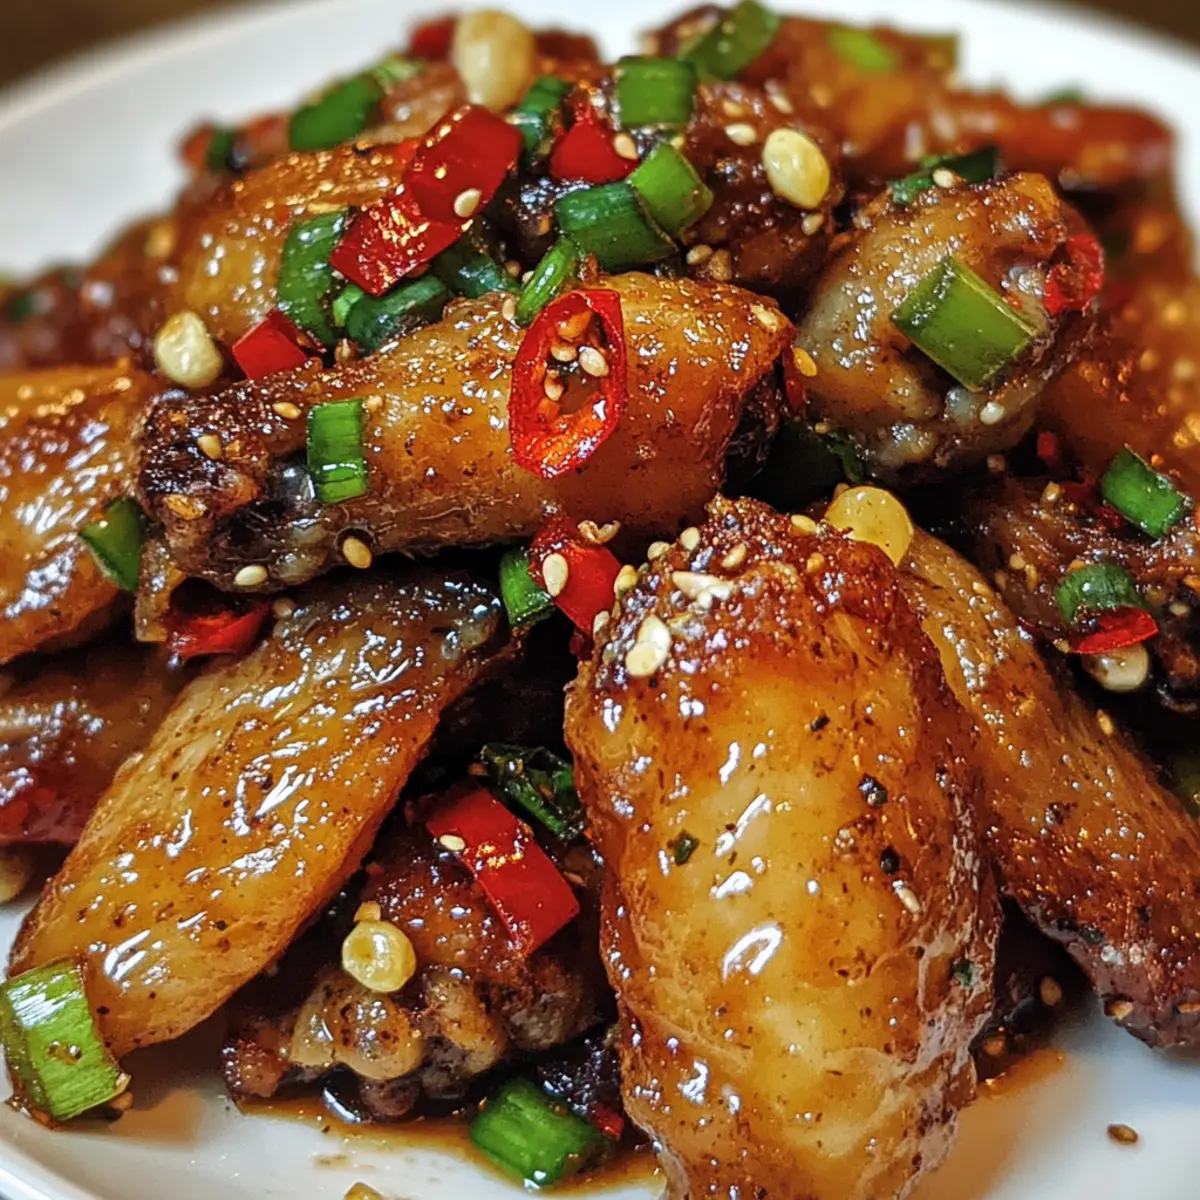
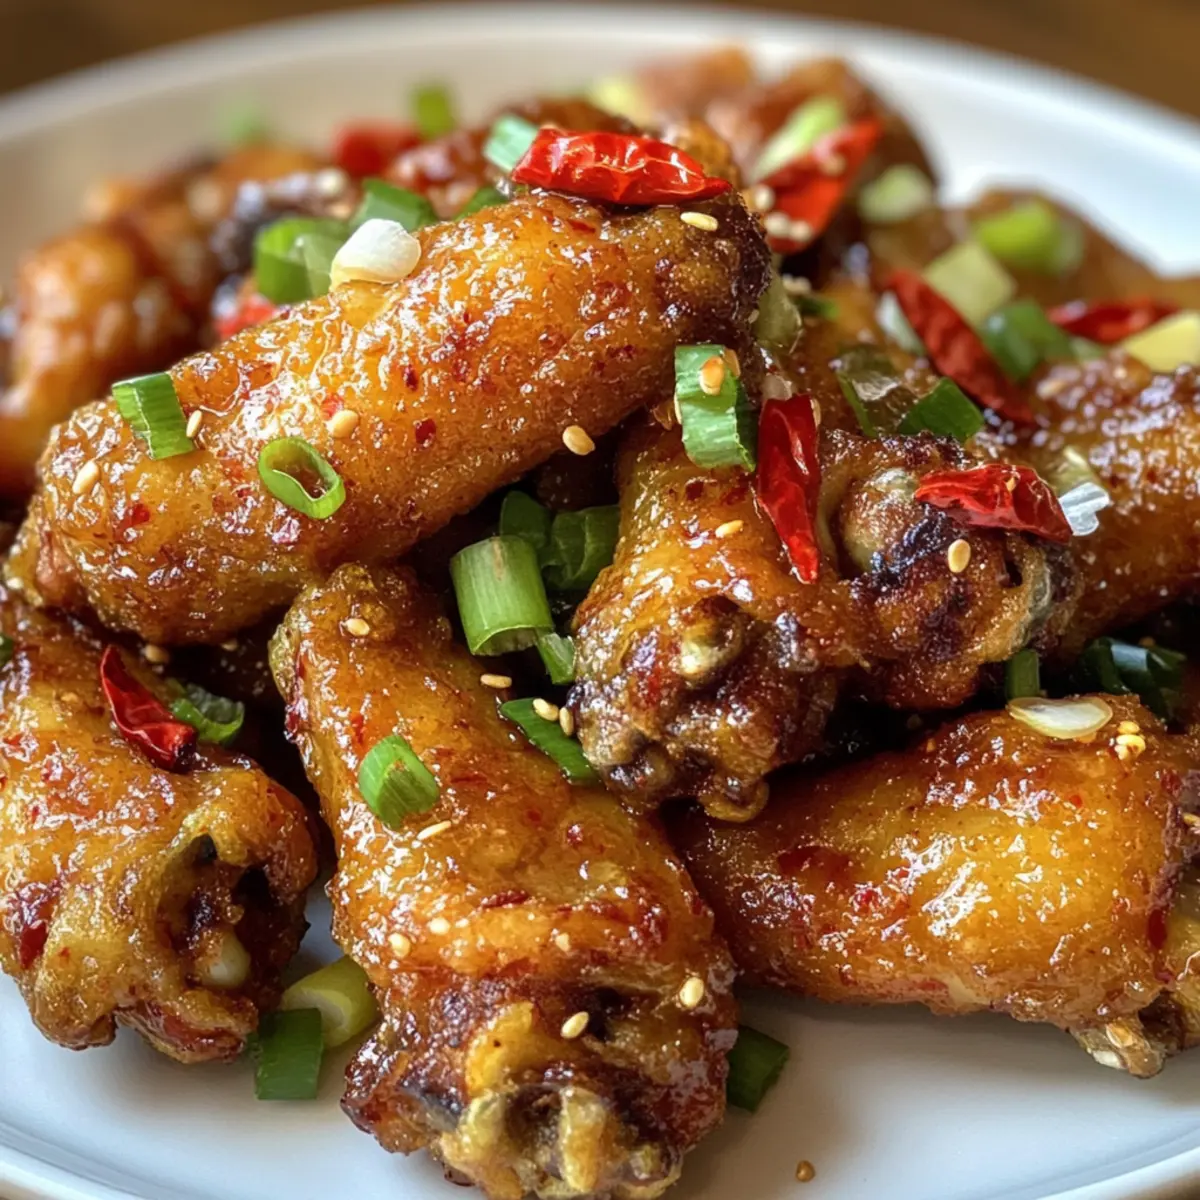
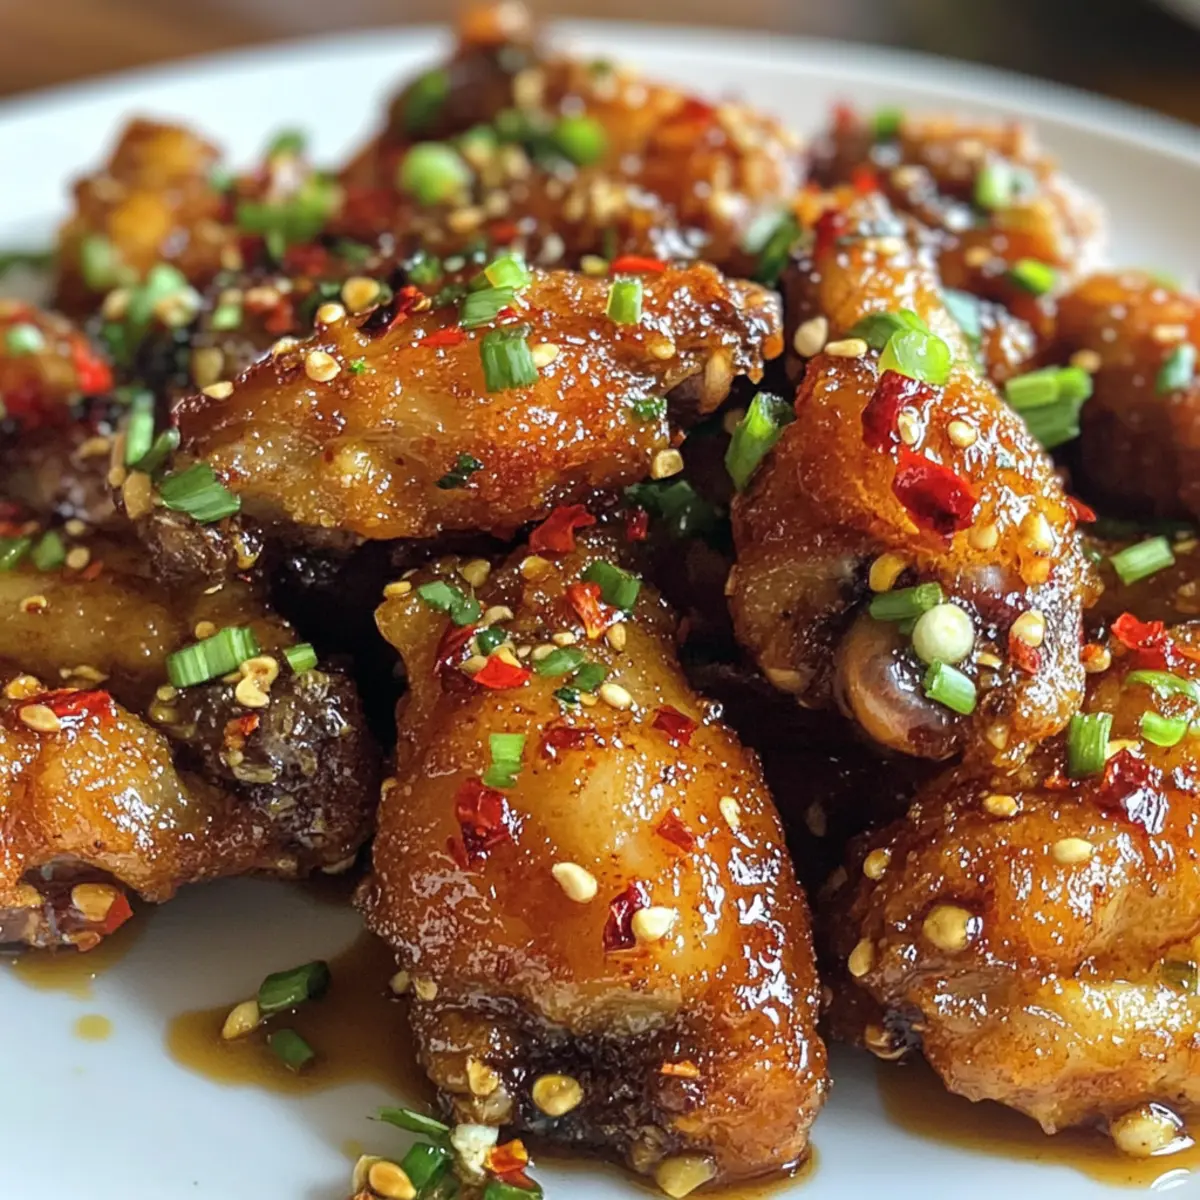
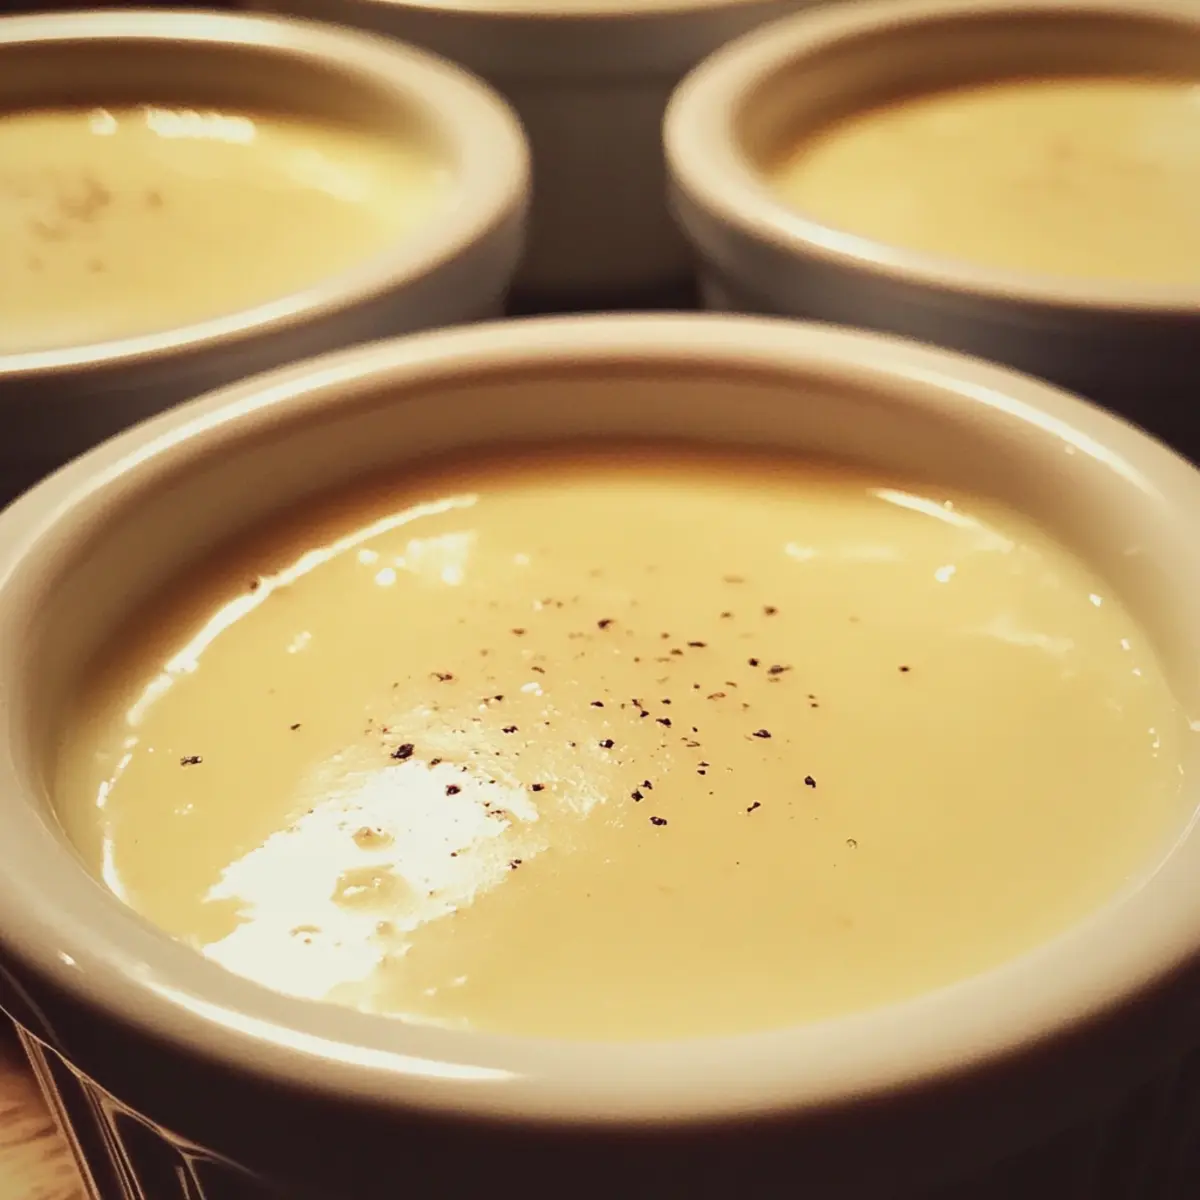
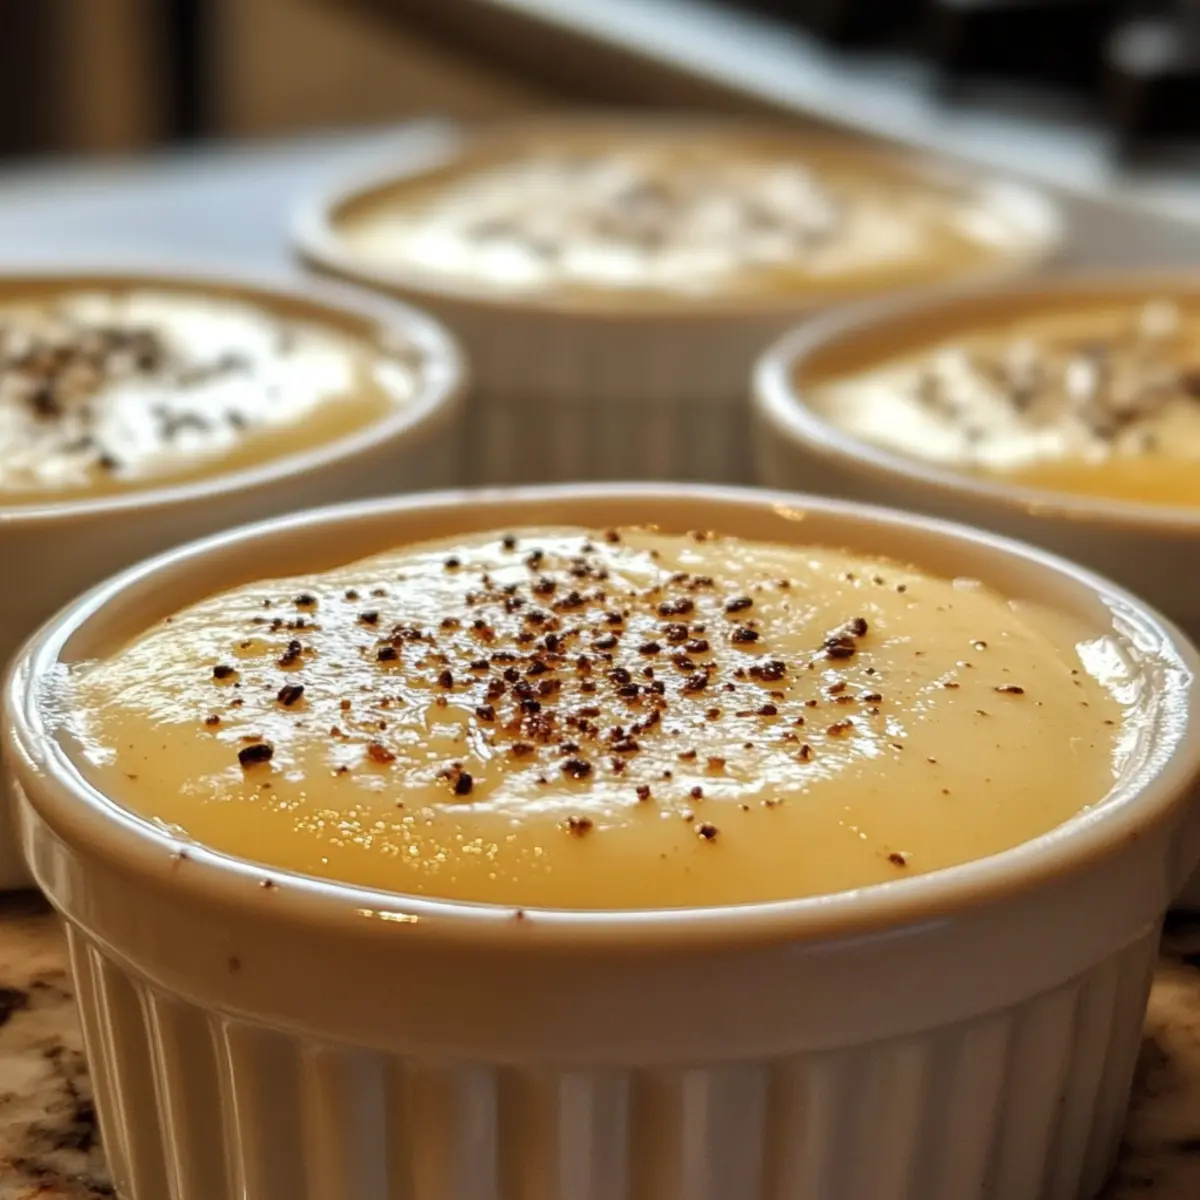
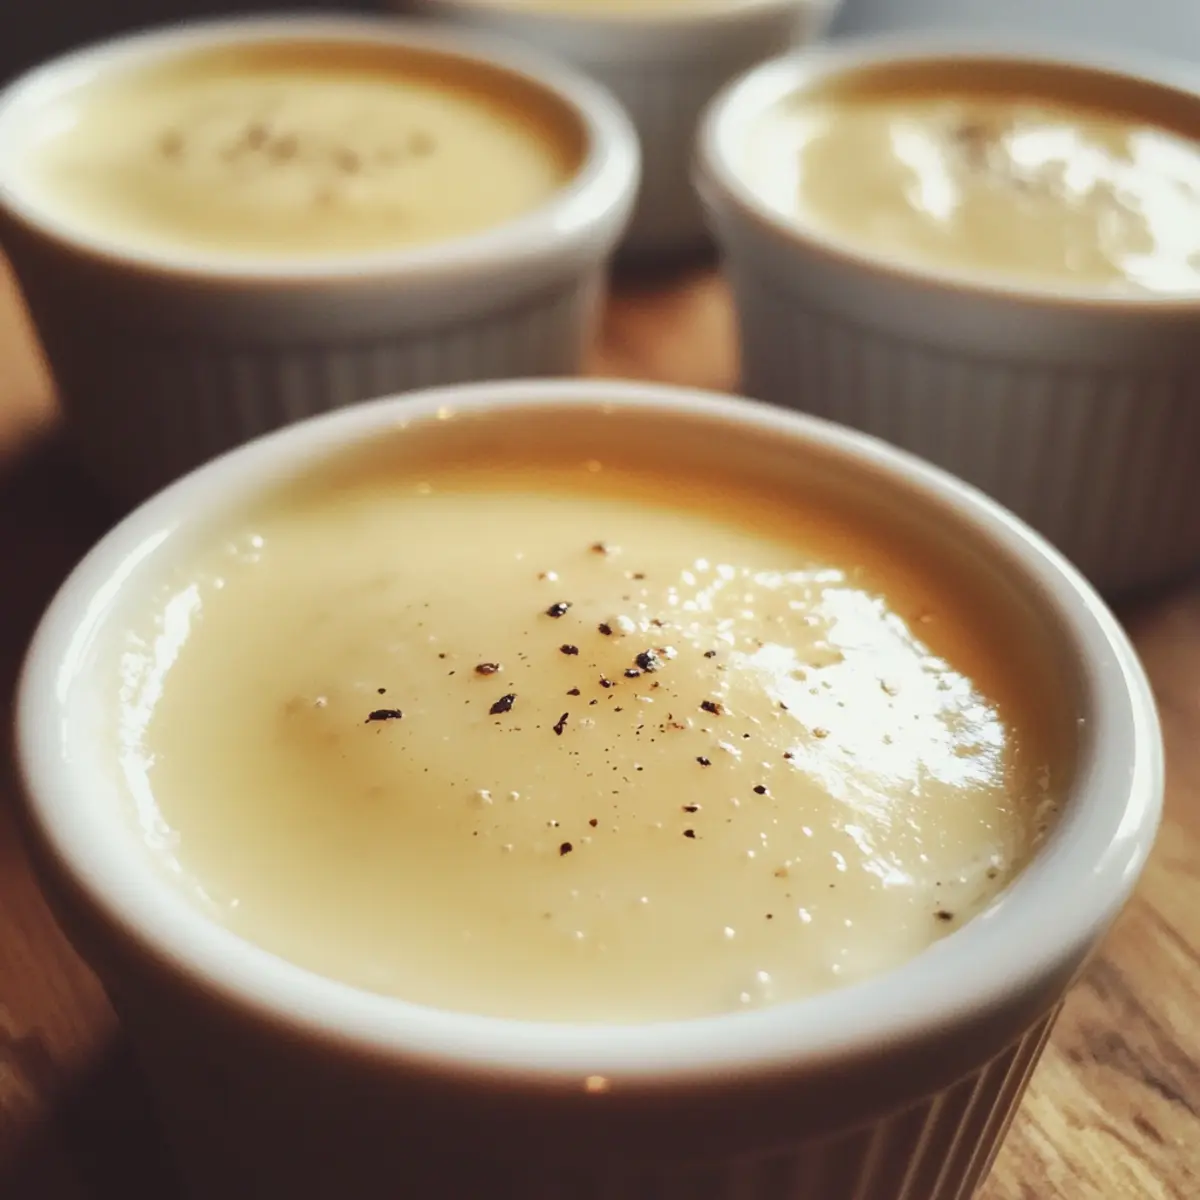
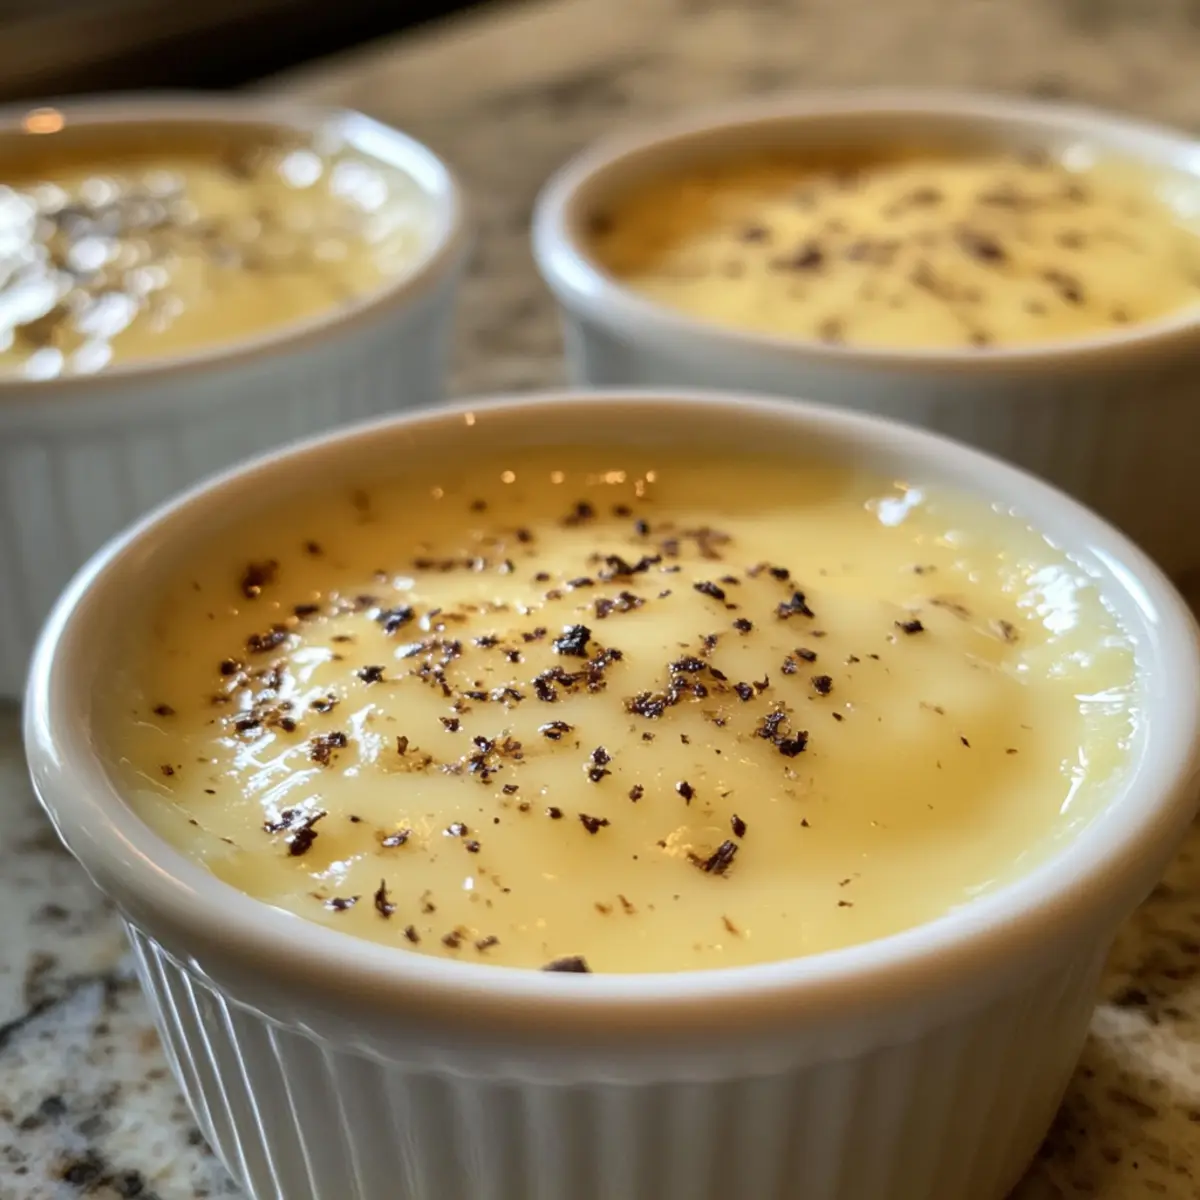
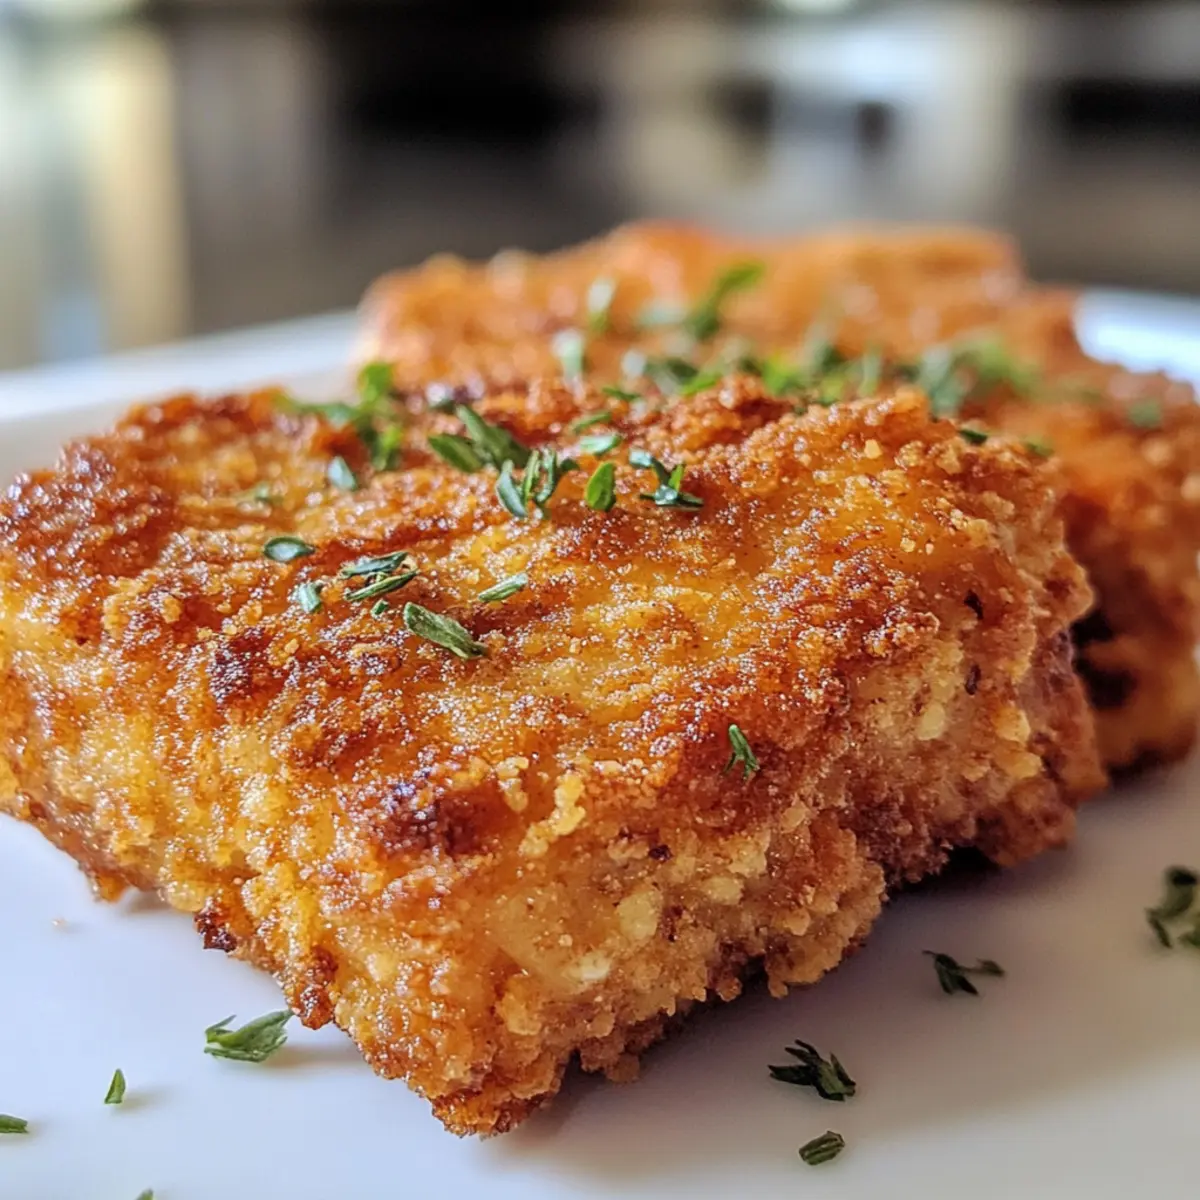
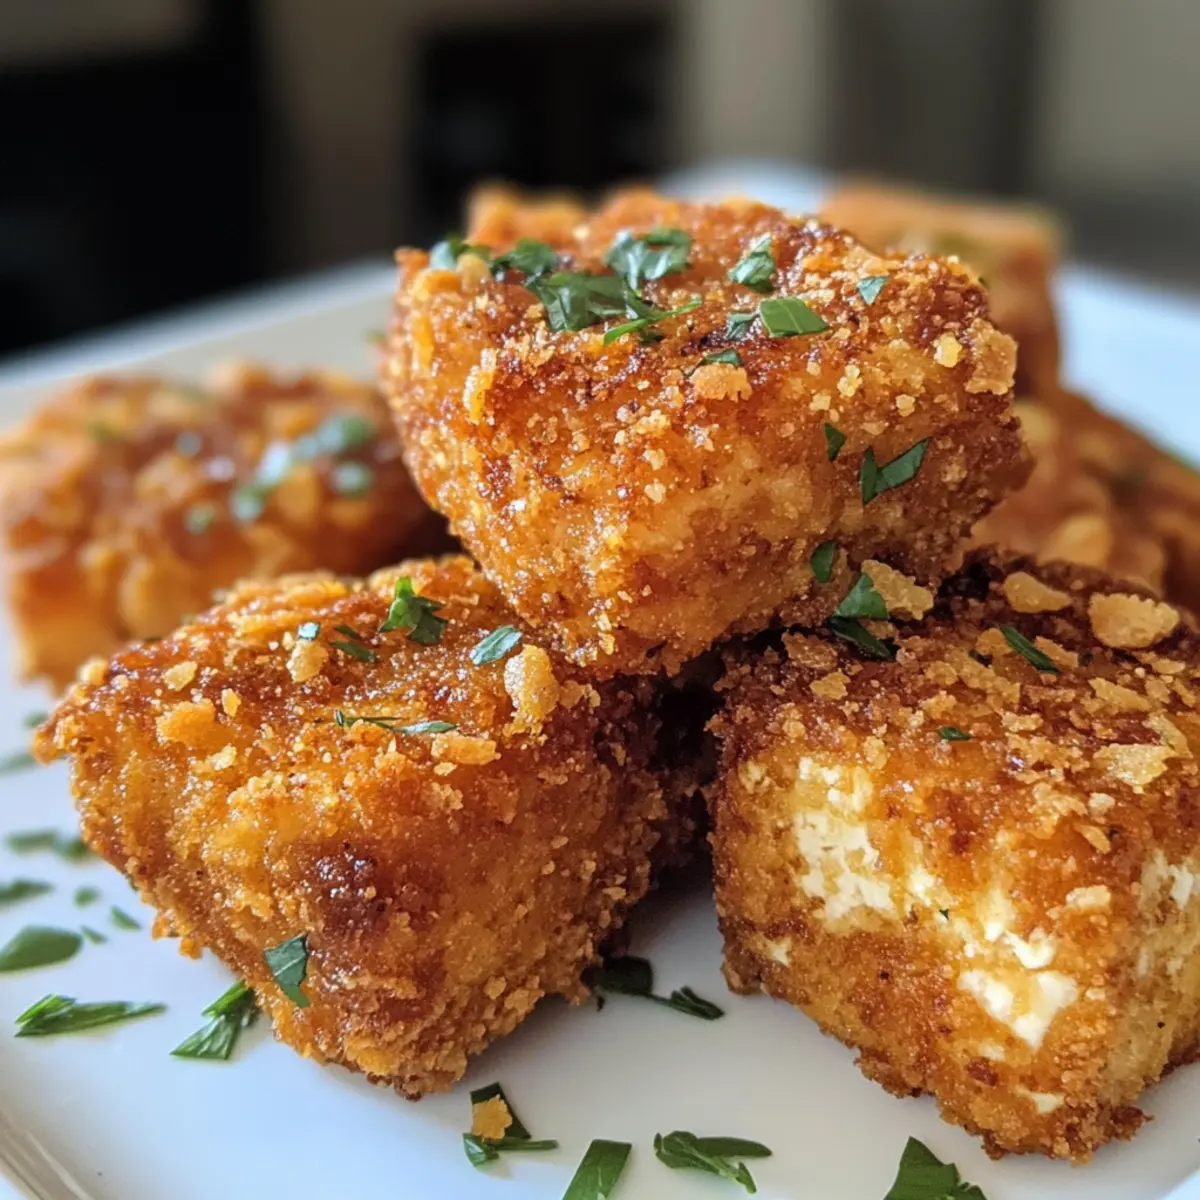
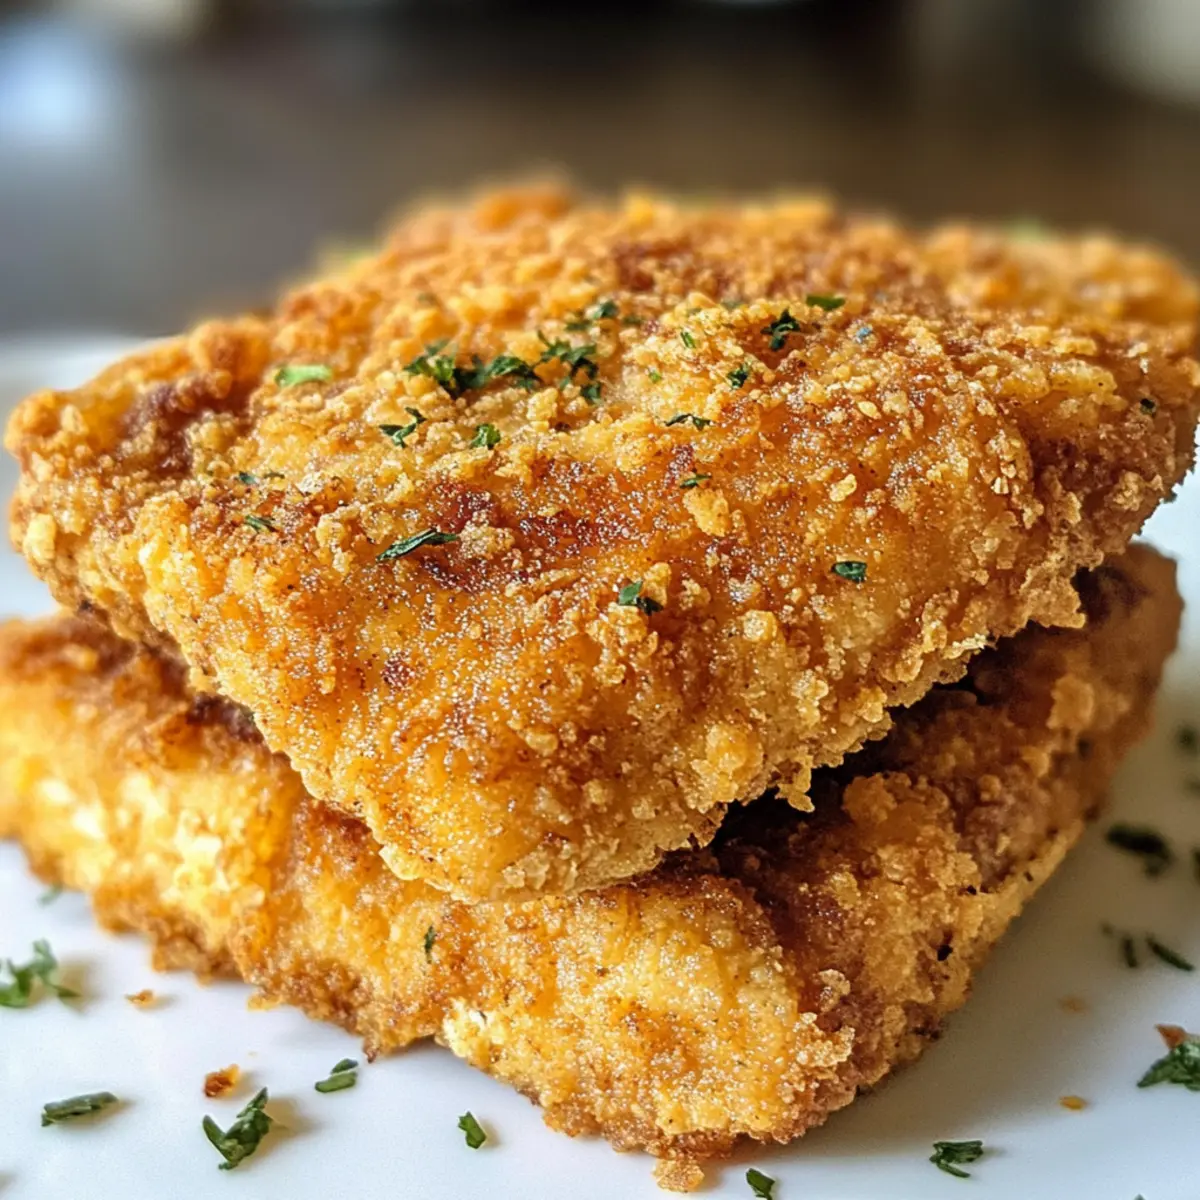
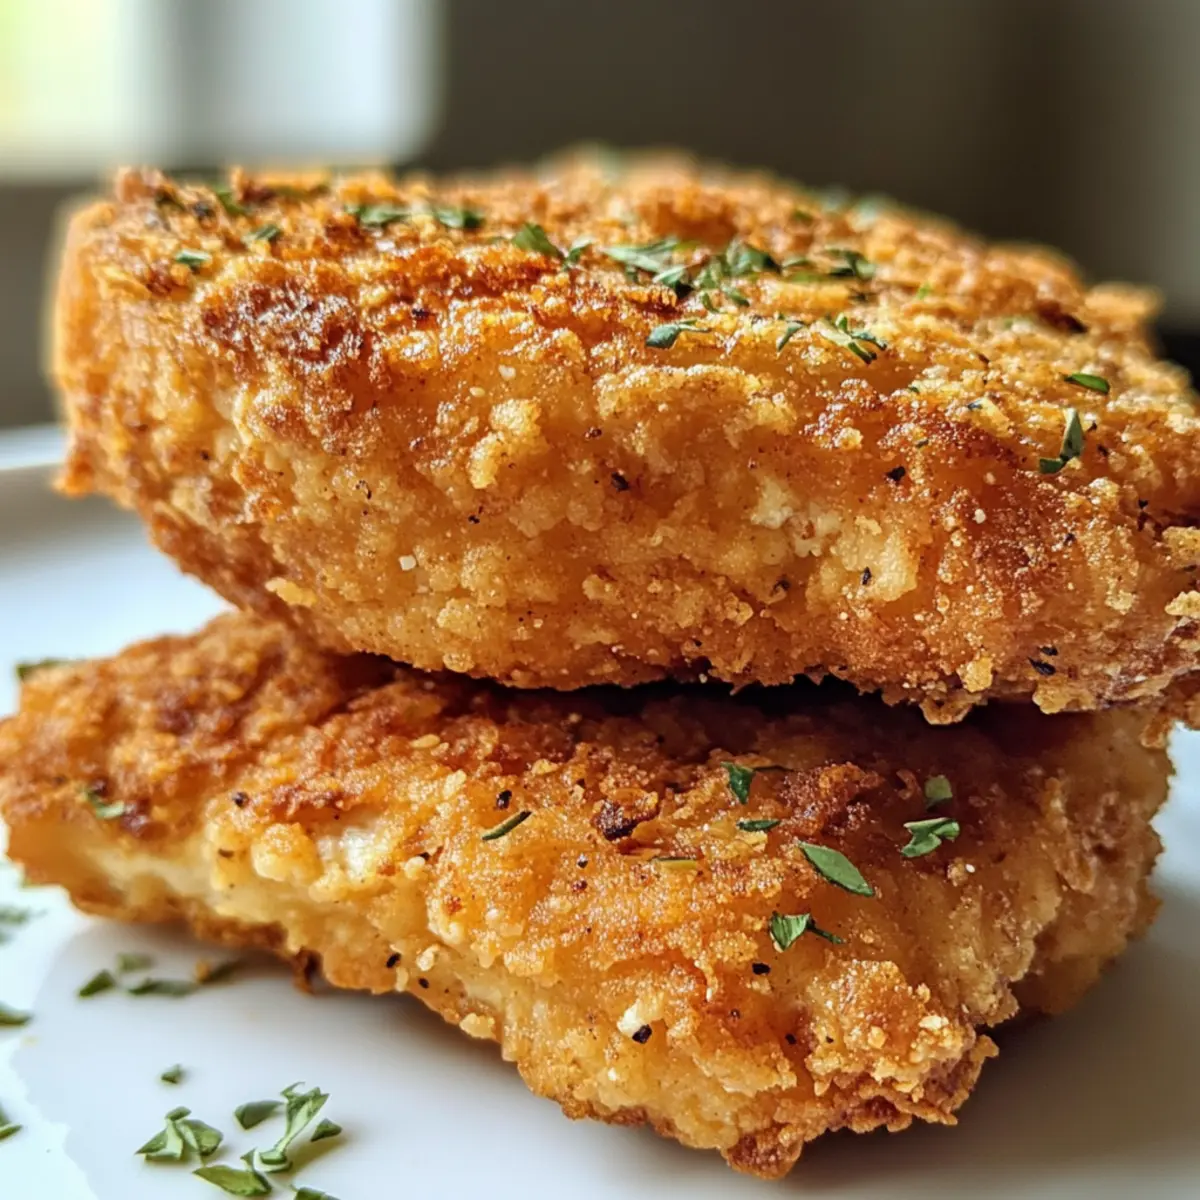
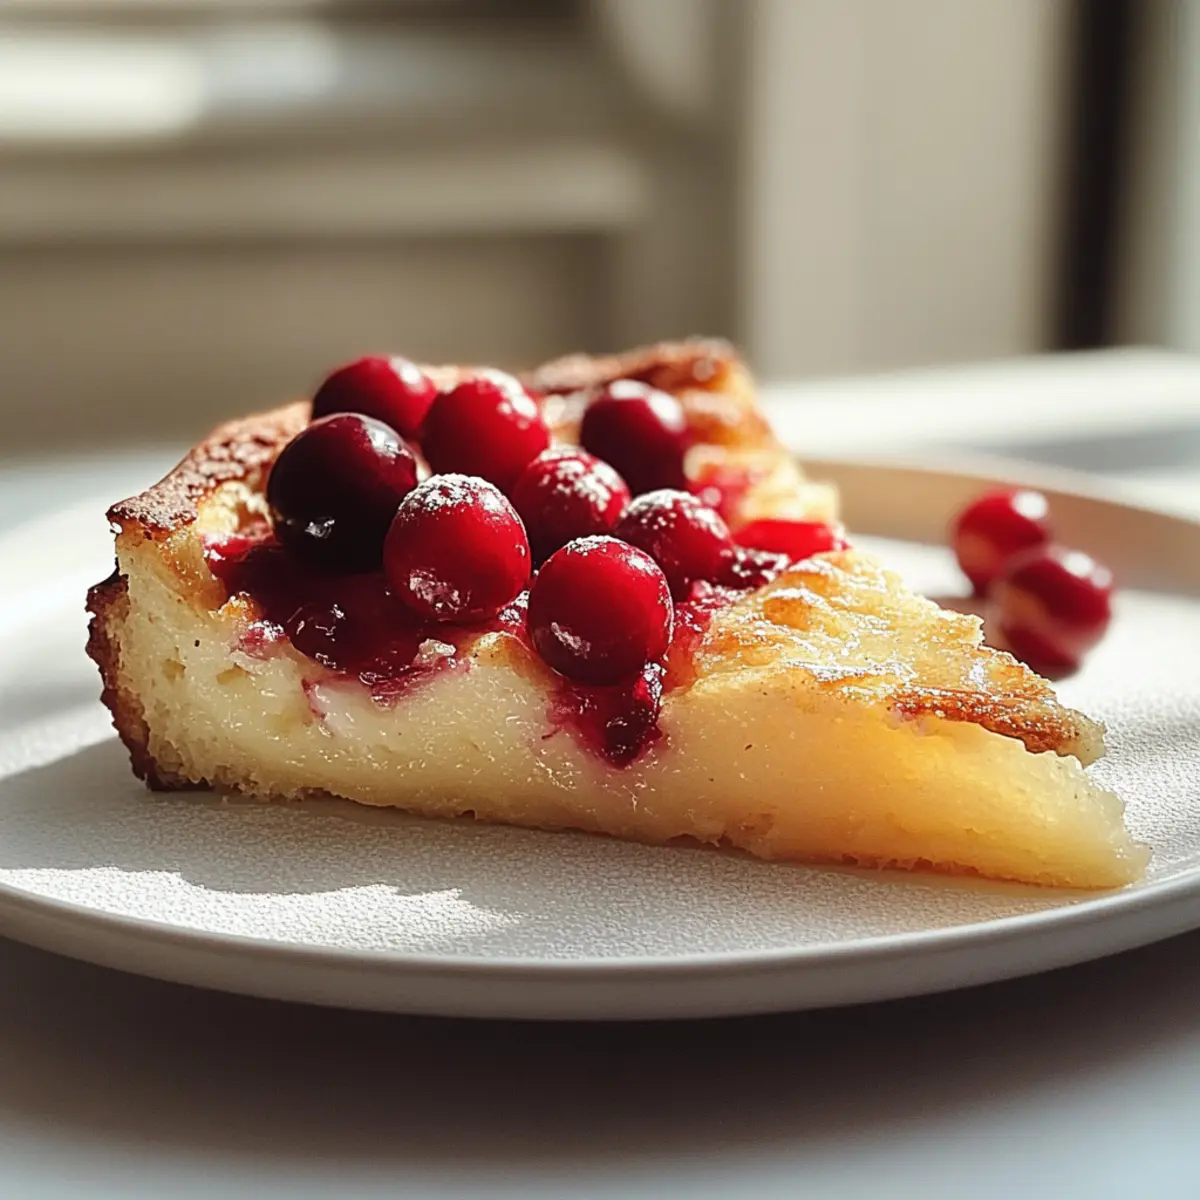
Bok Choy Fried Rice with Bacon: A Smoky Flavor Delight

As I stood in my kitchen, a craving for something cozy yet invigorating hit me—a dish that would whisk me away to the streets of Shanghai. Enter my Bok Choy Fried Rice with Bacon, a simple yet satisfying symphony of flavors and textures. This recipe swaps out traditional salted pork belly for the richer, smoky notes of shoulder bacon, transforming a classic into a cozy one-pot marvel. Not only is it gluten-free and low-fat, but it’s also incredibly quick to whip up, making it perfect for busy weeknights. With vibrant bok choy nestled among fluffy rice and crispy bacon, this dish will not only satisfy but also bring a taste of homemade comfort right to your table. Curious about how to bring this delightful recipe to life? Let’s dive in!

Why is this Bok Choy Fried Rice special?

Flavor Explosion: The smoky shoulder bacon elevates this dish, giving it a depth of flavor that transforms ordinary fried rice into an irresistible feast.

Quick & Easy: Perfect for busy evenings, this one-pot meal comes together in just 30 minutes without any complicated steps.

Nutritional Powerhouse: Packed with fiber from bok choy and a gluten-free option, it caters to various dietary needs while keeping it healthy.

Versatile and Customizable: Feel free to swap bok choy for other greens like spinach or kale, or experiment with different types of bacon for unique flavor profiles.

Crowd-Pleasing Comfort: This dish is sure to impress your family and friends, making it an ideal choice for gatherings. They’ll savor every delicious bite!

Bok Choy Fried Rice Ingredients

• Bring your taste of Shanghai home with these delicious ingredients.

For the Rice

  • Short-Grain Rice – Ideal for a sticky texture that absorbs the flavors of the dish.
  • Water – Crucial for cooking rice; maintain a ratio of 1:1.2 for perfect doneness.

For the Vegetables

  • Bok Choy – Adds a fresh, crunchy element; separate the white stems from the greens for even cooking.

For the Bacon

  • Smoked Shoulder Bacon – Provides a rich, smoky depth; feel free to use other bacon types, adjusting salt as needed.

For Seasoning

  • Salt – Enhances flavors; use sparingly since bacon is already salty.
  • Olive Oil – Helps in sautéing and adds flavor; can be substituted with vegetable oil or coconut oil.

Step‑by‑Step Instructions for Bok Choy Fried Rice with Bacon

Step 1: Prepare the Rice
Start by rinsing 1 cup of short-grain rice under cold water until the water runs clear. Combine the rice with 1.2 cups of water in a rice cooker; set it to cook. Once finished, let it sit for a few minutes to allow the rice to firm up. This step lays the foundation for a delicious Bok Choy Fried Rice with Bacon.

Step 2: Cook the Bacon
In a large non-stick frying pan, heat 2 tablespoons of olive oil over medium heat. Add 4 strips of smoked shoulder bacon, cooking them until they turn golden brown, which should take about 5-7 minutes. Ensure to flip the bacon halfway for even crispiness. Remove the bacon from the pan, leaving the rendered fat for added flavor in the next steps.

Step 3: Sauté the Bok Choy Stems
With the bacon fat still in the pan, add the white stems of 2 cups of bok choy and sauté for about 3-4 minutes, or until they become tender and slightly translucent. This will add a beautiful crunch and subtle sweetness to your Bok Choy Fried Rice with Bacon, creating a hearty base for the greens.

Step 4: Add the Bok Choy Greens
Next, incorporate the leafy green parts of the bok choy. Stir them into the pan and cook for an additional 2-3 minutes until they wilt down and brighten in color. This process not only enhances the dish’s vibrancy but also softens the greens, allowing them to blend seamlessly with the other ingredients.

Step 5: Combine All Ingredients
Now, return the reserved bacon to the pan alongside the cooked rice. Gently fold everything together, breaking up any clumps of rice. Season with a pinch of salt, keeping in mind that the bacon adds its own saltiness. Stir-fry everything for about 3-4 minutes until heated through while ensuring the bok choy is fully tender.

Step 6: Create a Crispy Base
For an extra layer of texture, press the fried rice mixture firmly into the bottom of the pan using a spatula. Allow it to cook without stirring for about 2 minutes, forming a delightful crispy crust. The crispy bottom elevates your Bok Choy Fried Rice with Bacon, giving a satisfying crunch that complements the dish’s softness.

Step 7: Serve and Garnish
Once done, remove the pan from heat, and serve your irresistibly warm Bok Choy Fried Rice with Bacon onto plates. You can garnish with additional fresh bok choy leaves or sliced green onions for a pop of color and freshness. Enjoy this comforting meal hot and share the delicious experience with family and friends!

Expert Tips for Bok Choy Fried Rice

  • Perfect Rice Texture: Rinse rice well before cooking to remove excess starch. This prevents your Bok Choy Fried Rice from becoming gummy.

  • Even Cooking: Cut bok choy stems and leaves into similar sizes to ensure they cook evenly. This way, every bite is perfectly tender.

  • Salt Awareness: Since smoked shoulder bacon is already salty, taste your dish before adding any extra salt to avoid over-seasoning.

  • Crispy Delight: For the best texture, use a non-stick skillet and allow the rice to sit without stirring for a few minutes. This creates that tasty, crispy crust.

  • Batch Cooking: This dish is great for meal prep. Make extra and store in airtight containers, keeping in mind that reheated bok choy may lose some crunch.

Bok Choy Fried Rice with Bacon Variations

Feel free to put your own spin on this delightful dish with these fun and easy variations!

  • Leafy Green Substitute: Swap bok choy for kale or spinach for a different flavor and nutrition profile.
  • Different Bacon: Try pancetta or turkey bacon for a unique twist and varying levels of smokiness.
  • Spicy Kick: Add crushed red pepper flakes or a splash of hot sauce for an exciting heat level that awakens the taste buds.
  • Protein Boost: Incorporate diced cooked chicken or tofu to enhance the protein content, making it more filling.
  • Vegetable Medley: Mix in additional veggies like bell peppers or carrots for extra color and crunch. The combination brings a lovely sweetness!
  • Coconut Oil Magic: Use coconut oil instead of olive oil for a subtle sweetness that pairs wonderfully with the savory bacon.
  • Nutty Flavor: Finish with a sprinkle of toasted sesame seeds for a delightful crunch and a nutty aroma to the dish.
  • Mix & Match: Feel free to experiment! Combine elements from different variations to create your own personalized version, just like in my refreshing cucumber and carrot salad with a twist.

Let your creativity flourish; the kitchen is your playground!

Storage Tips for Bok Choy Fried Rice with Bacon

Fridge: Store leftover Bok Choy Fried Rice in an airtight container for up to 3 days to maintain freshness and flavor.

Freezer: For longer storage, freeze portions in airtight containers or freezer bags for up to 2 months. Thaw in the fridge overnight before reheating.

Reheating: Reheat in the microwave or on the stovetop over low heat. Add a splash of water for moisture if needed, as reheated bok choy may change in texture.

Batch Cooking: Prepare extra batches for meal prep! Just remember to separate servings before freezing for quick, easy meals during busy weeks.

Make Ahead Options

These Bok Choy Fried Rice with Bacon are perfect for meal prep enthusiasts! You can cook the rice up to 24 hours in advance and store it in an airtight container in the refrigerator. Similarly, the smoked shoulder bacon can be cooked, crumbled, and kept refrigerated for up to 3 days to maintain its flavor. When you’re ready to enjoy this dish, simply sauté the bok choy and bacon together, add the pre-cooked rice, and stir-fry until heated through. For best results, reheat gently to prevent overcooking the bok choy, ensuring your fried rice remains just as delicious as the day it was made!

What to Serve with Bok Choy Fried Rice with Smoked Bacon?

Create a delightful meal that dances on the palate with these tasty pairings.

  • Crispy Spring Rolls: These light appetizers add a satisfying crunch and make a perfect starter for your main dish, enhancing the meal’s Asian flair.

  • Garlic Edamame: Steamed edamame tossed in garlic provides a simple yet flavorful bite, complementing the rice’s smokiness while adding protein.

  • Sesame Ginger Cucumber Salad: Refreshing and crisp, this salad balances the richness of bacon with its tangy, cooling notes, brightening your dining experience.

  • Miso Soup: This comforting soup warms the soul, blending umami flavors that pair nicely with the smokiness of the fried rice.

  • Spicy Szechuan Green Beans: Vibrant and lively, these green beans bring spice and a pop of color to your plate, harmonizing beautifully with the rice.

  • Chilled Green Tea: A light, refreshing beverage that cleanses the palate between bites, making it the ideal drink to enjoy with a rich dish like this.

The symphony of flavors in these pairings will elevate your dish, turning dinner into a culinary celebration!

Bok Choy Fried Rice with Smoked Bacon Recipe FAQs

How do I choose the right bok choy?
Absolutely! When selecting bok choy, look for vibrant green leaves and crisp white stems without dark spots or wilting. A fresh bok choy should feel firm to the touch. If the leaves are yellowed or the stems are soft, they may be past their prime and should be avoided.

How should I store leftover bok choy fried rice?
Very! Store any leftover Bok Choy Fried Rice in an airtight container in the refrigerator for up to 3 days. This helps maintain its flavors and textures. Just make sure the rice is cool before sealing to prevent condensation and sogginess.

Can I freeze bok choy fried rice?
Absolutely! To freeze your Bok Choy Fried Rice, allow it to cool completely, then portion it into airtight containers or freezer bags. It can be frozen for up to 2 months. When you’re ready to enjoy it again, thaw it in the refrigerator overnight. To reheat, simply microwave or heat on the stovetop, adding a splash of water to combat dryness.

Why is my bok choy fried rice mushy?
Very commonly, mushy fried rice can happen if the rice is overcooked or if you’ve added too much water during cooking. Ensure you follow the 1:1.2 rice to water ratio, and let your rice cool before frying for the best results. If using regular cooking methods instead of a rice cooker, you might also consider letting the rice sit off the heat for a few minutes before using it in the fried rice to firm it up a bit.

Is there any way to make this dish gluten-free?
Absolutely! This Bok Choy Fried Rice with Smoked Bacon is already gluten-free! Just check the labels on your bacon or any sauces you might want to add to ensure they don’t contain gluten. You can also add gluten-free soy sauce or coconut aminos for extra flavor if you wish.

Can I give bok choy to pets, like dogs?
Very good question! Bok choy is safe for dogs in moderation as it’s low in fat and calories. However, always check with your vet before introducing new foods to your pets’ diet to ensure they don’t have allergies or sensitivities.

Bok Choy Fried Rice with Bacon

Bok Choy Fried Rice with Bacon: A Smoky Flavor Delight

A delicious Bok Choy Fried Rice with Bacon, featuring smoky shoulder bacon and fresh bok choy, perfect for cozy weeknights.
Prep Time 10 minutes
Cook Time 20 minutes
Total Time 30 minutes
Servings: 4 servings
Course: Dinner
Cuisine: Asian
Calories: 360

Ingredients
  

For the Rice
  • 1 cup Short-Grain Rice Rinsed until water runs clear
  • 1.2 cups Water
For the Vegetables
  • 2 cups Bok Choy White stems separated from greens
For the Bacon
  • 4 strips Smoked Shoulder Bacon Can substitute with other types
For Seasoning
  • 1 teaspoon Salt Use sparingly due to bacon's saltiness
  • 2 tablespoons Olive Oil Can substitute with vegetable or coconut oil

Equipment

  • rice cooker
  • Non-stick frying pan

Method
 

Step-by-Step Instructions
  1. Rinse 1 cup of short-grain rice under cold water until the water runs clear. Combine with 1.2 cups of water in a rice cooker and cook.
  2. In a large non-stick frying pan, heat 2 tablespoons of olive oil over medium heat. Add 4 strips of smoked shoulder bacon and cook until golden brown, about 5-7 minutes.
  3. With the bacon fat in the pan, add the white stems of 2 cups of bok choy and sauté for about 3-4 minutes until tender.
  4. Incorporate the leafy green parts of the bok choy and cook for an additional 2-3 minutes until wilted.
  5. Return the reserved bacon to the pan with the cooked rice. Fold everything together and season with a pinch of salt. Stir-fry for 3-4 minutes until heated through.
  6. Press the fried rice mixture firmly into the bottom of the pan and cook without stirring for about 2 minutes to form a crispy crust.
  7. Remove from heat, serve onto plates, and garnish with fresh bok choy leaves or sliced green onions.

Notes

For meal prep, store in airtight containers and reheat with a splash of water to maintain moisture.

Delicious Mustard Hasselback Kielbasa Bites for Any Occasion

As the savory scent wafts through the kitchen, it’s hard not to feel that familiar sense of excitement as I pull my Mustard Hasselback Kielbasa Bites from the oven. These delightful bites are not just quick and easy to whip up but also completely customizable, making them perfect for any gathering—whether it’s game day with friends or a cozy night in with family. The crispy exterior gives way to juicy kielbasa infused with tangy mustard and a hint of sweetness, leaving everyone wanting more. From experimenting with different mustard varieties to tossing in your favorite herbs and veggies, there’s plenty of room for creativity. Are you ready to discover a new favorite go-to appetizer that’s sure to impress? Let’s dive into this delicious recipe!

Why You’ll Crave These Bites!

Irresistible flavor combinations: The tangy mustard mixed with sweet honey creates an explosion of taste that will keep everyone coming back for more.
Quick & Easy: With just a few ingredients and simple steps, you can have this delicious appetizer ready in no time—perfect for those last-minute gatherings!
Customizable Delight: Experiment with your choice of mustard and additional ingredients like cheese or veggies for a unique twist every time.
Crowd-Pleasing Snack: These savory morsels are perfect for any occasion, ensuring happy faces at your next party or cozy night in.
Perfect Finger Food: With their bite-sized portions, they’re exceptional for snacking and pair wonderfully with your favorite dips! Don’t forget to check out my Guilt-Free Energy Bites for another simple yet delicious option.

Mustard Hasselback Kielbasa Bites Ingredients

For the Kielbasa

  • Kielbasa Sausage – The star of the show, providing a juicy and flavorful base for the bites.

For the Sauce

  • Yellow Mustard – Offers that essential tang; feel free to substitute with Dijon mustard for extra sharpness or honey mustard for a sweet twist.
  • Honey – Balances the tanginess of mustard beautifully; maple syrup works well as a sweet alternative when desired.
  • Paprika – Adds a delightful smoky touch; consider using smoked paprika or cayenne for an extra kick.

For the Garnish

  • Fresh Parsley – Adds a pop of color and freshness; it’s optional but highly recommended for that finishing touch.

Whether you’re prepping for a gathering or just a cozy night in, these Mustard Hasselback Kielbasa Bites are sure to make an impression!

Step‑by‑Step Instructions for Mustard Hasselback Kielbasa Bites

Step 1: Preheat the Oven
Begin by preheating your oven to 400°F (200°C). As it warms up, grab a baking dish and lightly coat it with nonstick spray to prevent sticking. This step ensures that your Mustard Hasselback Kielbasa Bites will bake evenly and achieve that golden brown finish we’re aiming for.

Step 2: Prepare the Kielbasa
Next, take your kielbasa sausage and place it on a cutting board. Slice the sausage crosswise to create even slits, stopping just before cutting all the way through. These pockets will hold the delicious mustard mixture, allowing the flavors to meld beautifully as they bake.

Step 3: Mix the Sauce
In a small mixing bowl, combine yellow mustard, honey, and paprika. Use a whisk or spoon to blend the ingredients until smooth and well mixed. The sweet and tangy sauce is the heart of your Mustard Hasselback Kielbasa Bites, adding that irresistible flavor profile everyone will love.

Step 4: Brush on the Sauce
Once your sauce is ready, generously brush it onto the sliced kielbasa, making sure to coat each pocket well. This step is crucial for enhancing the flavors as the kielbasa bakes, plus it helps create a delightful glaze that will caramelize in the oven.

Step 5: Bake
Carefully place the prepared kielbasa bites in the greased baking dish, ensuring they’re arranged in a single layer for even cooking. Bake them in the preheated oven for 20-25 minutes, or until they are golden brown and fragrant, filling your kitchen with tempting aromas.

Step 6: Garnish & Serve
Once out of the oven, let the kielbasa bites sit for a minute to cool slightly. Then, sprinkle fresh parsley over the top for a burst of color and freshness. Serve your delicious Mustard Hasselback Kielbasa Bites warm, and watch them disappear as everyone enjoys this savory treat!

How to Store and Freeze Mustard Hasselback Kielbasa Bites

  • Fridge: Store your Mustard Hasselback Kielbasa Bites in an airtight container for up to 3 days. This keeps them fresh and ready for snacking!

  • Freezer: For longer storage, freeze the bites in a single layer on a baking sheet, then transfer to a freezer-safe container. They’ll last for up to 2 months.

  • Reheating: To retain their crispy texture, reheat in the oven at 350°F (175°C) for about 10 minutes. This helps revive that delicious crunch!

  • Thawing: If frozen, let the bites thaw in the fridge overnight before reheating for the best results. Enjoy the flavor explosion again!

Mustard Hasselback Kielbasa Bites Variations

Feel free to give your Mustard Hasselback Kielbasa Bites a personal touch and make them your own!

  • Dijon Mustard: Swap yellow mustard for Dijon to elevate the flavor with a sharper twist.
  • Honey Alternatives: Use maple syrup instead of honey for a unique sweetness that adds an interesting depth to the dish.
  • Cheesy Version: Insert cheese slices into the pockets before baking for a gooey, melty surprise. It’s a comforting choice that’s hard to resist!
  • Veggie Boost: Toss in diced bell peppers or onions for additional color and flavor; they’ll complement the kielbasa beautifully.
  • Spicy Kick: Add a teaspoon of cayenne pepper for those who enjoy a spicy bite; it takes the dish to a whole new level!
  • Turkey Kielbasa: Substitute with turkey sausage for a leaner option that doesn’t compromise on taste. This is a great way to cater to healthier preferences.
  • Herbs Galore: Sprinkle in fresh herbs like basil or thyme for an aromatic boost that’ll titillate your senses. They enhance both flavor and presentation!
  • Kid-Friendly Bites: For picky eaters, serve with a side of ketchup or barbecue sauce for dipping; it turns the bites into an exciting treat.

These variations can smoothly guide you toward creating an irresistible platter, perfect for gatherings or even a cozy night in. For another quick treat, don’t miss trying my Grandmas Homemade Bites, and enjoy a delightful blend of flavors!

Make Ahead Options

These Mustard Hasselback Kielbasa Bites are ideal for meal prep and can even be prepped up to 24 hours in advance! To save time, you can slice the kielbasa and prepare the mustard-honey sauce the day before, storing both components separately in the refrigerator. This keeps the flavors fresh and ensures your sausage stays juicy. When ready to bake, simply brush the sauce onto the sliced kielbasa and follow the baking instructions. This way, you’ll enjoy all the deliciousness with minimal effort on the day of your gathering—perfect for busy weeknights or impromptu get-togethers!

Helpful Tricks for Mustard Hasselback Kielbasa Bites

  • Mustard Variety: Try different types of mustard to enhance flavor. Whole grain adds texture, while spicy brown gives a kick!
  • Slice Evenly: Make sure your kielbasa slices are uniform for even cooking and consistent flavor absorption; this enhances your Mustard Hasselback Kielbasa Bites.
  • Reheat Correctly: To maintain crispiness, reheat leftovers in the oven instead of the microwave, preventing sogginess.
  • Add Extras: Feel free to toss in diced veggies like bell peppers or onions; they add color and flavor depth!
  • Store Properly: Keep leftover bites in an airtight container in the fridge for up to three days, and rewarm for maximum deliciousness.

What to Serve with Mustard Hasselback Kielbasa Bites

As you savor the comforting aroma of your Mustard Hasselback Kielbasa Bites, it’s time to envision the perfect accompaniments that will transform this snack into a full and delightful meal.

  • Crispy Potato Wedges: These golden wedges add a satisfying crunch. Their mild flavor pairs well, enhancing the bite of the kielbasa.
  • Tangy Coleslaw: This refreshing side brings a crisp texture and a touch of acidity that balances the richness of the kielbasa bites beautifully.
  • Grilled Vegetable Skewers: Colorful grilled veggies add freshness and a smoky flavor. They’re a light complement to the savory kielbasa.

For a heartier meal, consider serving with baked beans. The sweetness and slight smokiness of the beans create a comforting harmony that perfectly contrasts the tangy flavors of the bites.

  • Beer or Cider: A chilled lager or hard cider can elevate your meal, harmonizing well with the savory and tangy notes of the kielbasa.
  • Creamy Mustard Dip: This dip enhances the flavor while providing a creamy texture that contrasts nicely with the crispy bites. A fantastic way to keep your guests dipping!
  • Fresh Garden Salad: A simple salad with crisp greens, cherry tomatoes, and a light vinaigrette offers a refreshing burst that balances the rich flavors of the bites.

These pairing suggestions will not only enhance your dining experience but impress your guests with a well-rounded and beautifully delicious meal.

Mustard Hasselback Kielbasa Bites Recipe FAQs

How do I choose the right kielbasa?
Absolutely! When selecting kielbasa, look for fresh, high-quality sausage that has a nice, even color without any dark spots or excessive moisture. Ideally, it should be firm to the touch, indicating freshness. The most common types you’ll encounter are pork and turkey kielbasa, so choose based on your dietary preference and flavor craving!

How long can I store Mustard Hasselback Kielbasa Bites in the fridge?
Store your Mustard Hasselback Kielbasa Bites in an airtight container in the refrigerator for up to 3 days. This keeps them fresh and ready for snacking! When you’re ready to enjoy them again, simply reheat in the oven to avoid sogginess—no one wants that!

Can I freeze Mustard Hasselback Kielbasa Bites?
Yes, you can! To freeze these tasty bites, place them in a single layer on a baking sheet and pop them in the freezer until firm. Once frozen, transfer the bites to a freezer-safe container or bag. They will keep well for up to 2 months. For reheating, thaw them in the fridge overnight, then bake at 350°F (175°C) for about 10 minutes to restore their crispy allure.

What if my kielbasa isn’t cooked evenly?
Very! To ensure even cooking, be sure to slice the kielbasa uniformly before baking. Using a sharp knife, carefully create slits that are about 1/2 to 3/4 of the way through the sausage. This technique allows the flavorful mustard mixture to seep in and ensures that every bite is juicy and packed with flavor. If you find that some sections are cooking faster than others, rotate your baking dish halfway through the baking time.

Are there any dietary concerns I should know about?
Indeed! If you’re cooking for someone with allergies, it’s essential to know whether they have sensitivities to mustard or any other sauces used in the recipe. Additionally, if serving these bites to pets, it’s best to avoid sharing as foods high in sodium, like kielbasa, are not suitable for dogs. Always double-check ingredient labels when selecting sauces to ensure they meet any dietary restrictions.

Can I use different types of mustard?
Absolutely! Experimenting with various mustard types can elevate your Mustard Hasselback Kielbasa Bites. Dijon mustard adds a sharper punch, while honey mustard provides a sweet, tangy twist. If you’re feeling adventurous, whole grain mustard can add texture and character. Feel free to mix and match to create a flavor profile that suits your palate perfectly!

Mustard Hasselback Kielbasa Bites

Delicious Mustard Hasselback Kielbasa Bites for Any Occasion

Mustard Hasselback Kielbasa Bites are a quick, easy, and customizable appetizer perfect for any gathering.
Prep Time 10 minutes
Cook Time 25 minutes
Total Time 35 minutes
Servings: 4 bites
Course: Dinner
Cuisine: American
Calories: 100

Ingredients
  

For the Kielbasa
  • 1 lb Kielbasa Sausage The star of the show, juicy and flavorful.
For the Sauce
  • 1/4 cup Yellow Mustard Can substitute with Dijon or honey mustard.
  • 2 tbsp Honey Balances the mustard's tanginess.
  • 1 tsp Paprika Adds a smoky touch.
For the Garnish
  • 2 tbsp Fresh Parsley Optional but recommended for color.

Equipment

  • Baking Dish
  • mixing bowl
  • whisk
  • Cutting Board
  • Knife

Method
 

Step-by-Step Instructions
  1. Preheat your oven to 400°F (200°C) and coat a baking dish with nonstick spray.
  2. Slice the kielbasa crosswise to create slits, stopping just before cutting all the way through.
  3. In a mixing bowl, combine yellow mustard, honey, and paprika, blending until smooth.
  4. Brush the sauce generously onto the sliced kielbasa, ensuring each pocket is coated.
  5. Bake the kielbasa bites in the preheated oven for 20-25 minutes, until golden brown.
  6. Sprinkle fresh parsley over the baked kielbasa bites before serving.

Notes

Feel free to customize with different mustard varieties and add diced veggies for a unique twist.

Dill Pickle Ranch Smash Chicken Tacos with Crispy Cheese Bliss

As I sat down to savor the last bite of a weekday dinner, I couldn’t help but think about how incredibly quick and satisfying homemade meals can be. Enter my buttery Dill Pickle Ranch Smash Chicken Tacos with Crispy Cheese Lace—where crispy meets creamy in a delightful dance that will have even the busiest of cooks smiling. This easy weeknight meal is ready in under 30 minutes, perfectly tailored for those craving a comforting, flavorful dish without the hassle of fast-food lines. The combination of zesty dill pickles and savory ground chicken makes these tacos a standout choice for casual gatherings or cozy family nights. So, are you ready to whip up a taco experience that will have everyone asking for seconds?

Why Are These Tacos So Amazing?

Easy Preparation: With just 30 minutes needed from start to finish, this dish is perfect for busy weeknights.

Flavor Fusion: The combination of zesty dill pickles and creamy ranch dressing brings a bold flavor that excites the palate.

Crispy Delight: The crispy cheese lace adds an unexpected crunch, transforming each taco into a gourmet treat.

Versatile Options: Customize your tacos with various protein choices or top them with your favorite ingredients like jalapeños or fresh herbs.

Crowd-Pleasing Appeal: Perfect for gatherings or family dinners, these tacos will have everyone coming back for more. As easy to make as my Tropical Chicken Pineapple and just as satisfying as a Vegetable Bake Cheese, they’re a winning addition to your recipe collection!

Dill Pickle Ranch Smash Chicken Taco Ingredients

• Discover the delightful components that come together for a mouthwatering taco experience!

For the Chicken Filling

  • Ground chicken – Provides the main protein; feel free to substitute with ground turkey, beef, or even a plant-based alternative for a different twist.
  • Garlic powder – Adds a savory flavor that boosts the overall taste; adjust according to your personal preference.
  • Paprika – Offers warmth and color; you can substitute with smoked paprika for a subtle smoky note.
  • Salt and black pepper – Essential for enhancing flavors; adjust to achieve your desired taste.

For the Tacos

  • Small tortillas – Serve as the taco base; opt for gluten-free tortillas if you’re following a gluten-sensitive diet.
  • Shredded mozzarella or Jack cheese – Creates that irresistible crispy cheese lace; any melting cheese works well as an alternative.
  • Chopped dill pickles – Provide tangy crunch and essential flavor; sweet pickles or olives can also be utilized instead.
  • Pickle brine – Enhances flavor and moisture in the tacos; adjust quantity based on your taste preference.
  • Shredded cabbage – Adds freshness and crunch; other greens like lettuce can easily be substituted if desired.

For the Creamy Topping

  • Cottage cheese blended with ranch seasoning and lemon – Acts as a rich topping for your tacos; swap with non-dairy yogurt for a dairy-free option.

Embrace the delightful mix of flavors in these Dill Pickle Ranch Smash Chicken Tacos with Crispy Cheese Lace and make your next meal an unforgettable experience!

Step‑by‑Step Instructions for Dill Pickle Ranch Smash Chicken Tacos with Crispy Cheese

Step 1: Mix the Chicken Filling
In a large mixing bowl, combine the ground chicken with garlic powder, paprika, salt, and black pepper. Use your hands or a spatula to mix thoroughly until all ingredients are evenly incorporated. This flavorful mixture forms the base for your Dill Pickle Ranch Smash Chicken Tacos. Set aside for a moment while you prepare to cook.

Step 2: Cook the Chicken Mixture
Heat a non-stick skillet over medium heat and add the seasoned chicken mixture to the pan. Cook for about 8-10 minutes, stirring occasionally, until the chicken is fully cooked and golden brown. You’ll know it’s done when the meat reaches an internal temperature of 165°F and has a slightly crispy edge. Remove the chicken from heat and keep it warm.

Step 3: Prepare the Crispy Cheese Lace
In a separate non-stick skillet, sprinkle shredded mozzarella or Jack cheese in a thin, even layer. Heat over medium-low for roughly 3-4 minutes until the cheese bubbles and turns a light golden color. Keep a close eye on it to prevent burning. Once crispy, carefully remove the cheese lace with a spatula and set it aside on a paper towel to cool slightly.

Step 4: Warm the Tortillas
For perfectly pliable tortillas, warm them in a clean skillet over medium heat for about 30 seconds on each side. You want them to be soft but not crispy, making them easy to fold into delicious taco shapes. Do this step right before assembly for the best results with your Dill Pickle Ranch Smash Chicken Tacos.

Step 5: Assemble the Tacos
Lay a warm tortilla on a plate and generously spoon in the cooked chicken mixture. Top it with chopped dill pickles and shredded cabbage to add freshness and crunch. Repeat for each tortilla, ensuring to fill them with flavor. The combination of these components will create a deliciously satisfying taco.

Step 6: Add the Creamy Topping
In a small bowl, blend cottage cheese with ranch seasoning and a squeeze of lemon until smooth. Use this creamy mixture as a generous topping for your assembled tacos. The tanginess complements the dill pickles beautifully, making each bite of your Dill Pickle Ranch Smash Chicken Tacos amazing.

Step 7: Drizzle with Pickle Brine
Finish your tacos by drizzling a bit of pickle brine over the assembled toppings. This extra touch enhances the zesty flavor profile and ties all elements together. Finally, break off a piece of the crispy cheese lace and place it atop each taco for that irresistible crunch.

Step 8: Serve and Enjoy
Garnish your loaded Dill Pickle Ranch Smash Chicken Tacos with any extra toppings you like, such as more diced dill pickles or fresh cilantro. Serve on a large platter so everyone can join in the fun. Enjoy your wonderful creation with loved ones, happy in the knowledge that you made something truly delicious in under 30 minutes!

Dill Pickle Ranch Smash Chicken Tacos Variations

Feel free to personalize these tacos with delightful variations that tantalize your taste buds!

  • Ground Turkey: Substitute ground chicken with ground turkey for a leaner option; it still packs a flavorful punch!
    Want an alternative without compromising taste? Turkey blends beautifully with the zesty pickles!

  • Plant-Based Option: Use a plant-based ground meat alternative for a delicious vegetarian twist.
    This swap retains the flavors while catering to those looking for a meat-free experience.

  • Jalapeño Kick: Add sliced jalapeños for a spicy crunch that elevates your tacos to the next level!
    For those who relish heat, incorporating jalapeños adds a fiery twist that you’ll adore!

  • Tortilla Choices: Swap small tortillas for crunchy taco shells for an extra layer of texture.
    The contrast between the crispy shell and the tender chicken filling creates a delightful crunch!

  • Summer Freshness: Incorporate fresh corn or diced tomatoes during peak summer months to brighten your dish.
    These seasonal ingredients lend a burst of freshness that complements the zesty flavors beautifully.

  • Spicy Sauce Finish: Drizzle with a spicy sauce or Sriracha for those who like a heated kick in their tacos.
    This fiery finish adds an exciting depth, making each bite memorable!

  • Cheesy Variety: Experiment with different melting cheeses, like pepper jack for a spicy savory cheese lace.
    The gooey richness brings an indulgent element to your flavorful taco!

For more cozy dinner ideas, check out these satisfying options: Chicken Drumsticks Veggies and don’t forget to indulge your cravings with Homemade French Fries for a delicious side!

Make Ahead Options

These Dill Pickle Ranch Smash Chicken Tacos with Crispy Cheese Lace are a fantastic choice for meal prep! You can prepare the chicken mixture and creamy topping up to 3 days in advance. Simply combine the ground chicken with garlic powder, paprika, salt, and pepper, then cook it. Store it in an airtight container in the refrigerator to keep it fresh. When you’re ready to serve, warm the chicken in a skillet and assemble the tacos with your toppings. For the cheese lace, it’s best made fresh, but you can have your tortillas ready, so you can whip up a delicious dinner in no time, just as flavorful as if you made them right away!

What to Serve with Dill Pickle Ranch Smash Chicken Tacos

Dive into a delightful array of side dishes that will perfectly complement your taco experience.

  • Creamy Coleslaw: This fresh, tangy slaw adds a crunch that contrasts beautifully with the savory tacos. The creaminess brightens every bite.
  • Mexican Street Corn: Grilled corn slathered in lime and cheese brings a robust flavor that pairs well with the zesty elements of the tacos. Every bite is a party!
  • Avocado Salsa: A creamy avocado salsa brings a cooling effect, balancing the spices and richness of the tacos. It’s a flavor explosion in every scoop.
  • Spicy Black Beans: These hearty beans offer a protein-packed addition that complements the flavors of the tacos without overshadowing them. Your guests will love the kick!
  • Crispy Potatoes Wedges: Golden, crispy wedges add a comforting touch, making your taco night feel extra cozy. They’re fun to dip in any leftover ranch dressing!
  • Cucumber Salad: Light and refreshing, a simple cucumber salad provides a crisp texture that enhances the meal, cutting through richness. Each bite is a breath of fresh air.
  • Lime-infused Water: A refreshing drink option that keeps things light and bright, perfect for washing down those delicious flavors. You can never go wrong with citrus!
  • Chocolate Chip Cookies: For dessert, these sweet treats will provide a delightful finish after those flavorful tacos. They’re a comforting way to end a perfect meal.

Expert Tips for Dill Pickle Ranch Smash Chicken Tacos

Cook Thoroughly: Ensure your ground chicken is cooked to an internal temperature of 165°F for best flavor and texture.

Cheese Monitoring: Watch your cheese lace closely as it cooks; it should be bubbly and golden, not dark brown—preventing burning ensures a perfect crunch.

Customize Generously: Feel free to alter toppings based on your taste; fresh herbs or spice can elevate your Dill Pickle Ranch Smash Chicken Tacos even further!

Warm Tortillas: Always warm your tortillas just before assembly for a pliable, easy-to-fold taco. Crispy tortillas won’t hold the filling well.

Pickle Brine: Don’t skip the pickle brine drizzle! It elevates the flavor, enhancing the tangy aspect that makes these tacos special.

Storage Tips for Dill Pickle Ranch Smash Chicken Tacos

Fridge: Store leftover chicken mixture in an airtight container for up to 3-4 days. Be sure to let it cool completely before sealing to maintain optimal freshness.

Freezer: You can freeze the chicken mixture in a freezer-safe container for up to 3 months. Thaw in the fridge overnight before reheating for a quick meal.

Crispy Cheese Lace: This is best enjoyed fresh for optimal texture. If you have leftovers, reheat in the oven at 350°F for a few minutes until crisp again.

Reheating: When reheating assembled tacos, place them in a preheated oven at 350°F for about 10 minutes to warm through without making the tortillas too hard. Enjoy your Dill Pickle Ranch Smash Chicken Tacos!

Dill Pickle Ranch Smash Chicken Tacos with Crispy Cheese Recipe FAQs

How do I select the best ground chicken for this recipe?
Absolutely! Look for ground chicken that is pink and moist without any dark spots or unpleasant odor. It’s best to choose lean ground chicken for a lighter taco while maintaining moisture during cooking. If possible, opt for organic or free-range options for even better flavor.

What’s the best way to store leftover chicken mixture?
Very simply! Transfer your leftover chicken mixture to an airtight container and store it in the fridge for up to 3-4 days. Be sure to let it cool completely before sealing to keep that delightful texture intact. Just reheat it in a skillet over medium heat before serving.

Can I freeze the chicken mixture for later use?
Absolutely! You can freeze your chicken mixture in a freezer-safe container for up to 3 months. To freeze, let the mixture cool down, then scoop it into the container and label it. When you’re ready to use it, just thaw in the fridge overnight and reheat gently on the stove.

Why is my cheese lace not coming out crispy?
Ah, the key to crispy cheese lace is monitoring it closely while it cooks! Ensure your skillet isn’t too hot, and aim for a medium-low setting. Cook the cheese until it bubbles and reaches a light golden color, about 3-4 minutes. If it’s too dark or burnt, it may not give you the desired crispiness.

Are there any dietary considerations for these tacos?
Very good question! These tacos can be tailored for various dietary needs. Use gluten-free tortillas for those with gluten sensitivities, and swap the cottage cheese with non-dairy yogurt for a dairy-free option. For anyone with allergies, always double-check the ingredient labels, especially for processed items like ranch seasoning.

How can I customize the toppings for my Dill Pickle Ranch Smash Chicken Tacos?
Feel free to get creative! Consider adding sliced jalapeños for heat, avocado for creaminess, or fresh herbs like cilantro or parsley for added brightness. Don’t hesitate to incorporate seasonal ingredients like fresh corn or diced tomatoes for extra flavor and nutrition. The more the merrier!

Dill Pickle Ranch Smash Chicken Tacos with Crispy Cheese

Dill Pickle Ranch Smash Chicken Tacos with Crispy Cheese Bliss

Enjoy Dill Pickle Ranch Smash Chicken Tacos with Crispy Cheese, a quick and satisfying weeknight meal.
Prep Time 10 minutes
Cook Time 20 minutes
Total Time 30 minutes
Servings: 4 tacos
Course: Chicken
Cuisine: Mexican
Calories: 320

Ingredients
  

For the Chicken Filling
  • 1 pound Ground chicken Feel free to substitute with ground turkey or beef.
  • 1 teaspoon Garlic powder Adjust according to your personal preference.
  • 1 teaspoon Paprika Smoked paprika can be used as a substitute.
  • to taste Salt
  • to taste Black pepper
For the Tacos
  • 8 small Tortillas Opt for gluten-free if needed.
  • 1 cup Shredded mozzarella or Jack cheese Any melting cheese works.
  • 1 cup Chopped dill pickles Sweet pickles or olives can also be used.
  • 2 tablespoons Pickle brine Adjust based on taste preference.
  • 1 cup Shredded cabbage Other greens like lettuce can be substituted.
For the Creamy Topping
  • 1 cup Cottage cheese Blend with ranch seasoning and lemon.

Equipment

  • Non-Stick Skillet
  • mixing bowl
  • spatula
  • paper towel

Method
 

Step-by-Step Instructions
  1. In a large mixing bowl, combine the ground chicken with garlic powder, paprika, salt, and black pepper. Mix thoroughly until all ingredients are incorporated.
  2. Heat a non-stick skillet over medium heat and add the seasoned chicken mixture. Cook for about 8-10 minutes, stirring occasionally until fully cooked and golden brown. Remove from heat.
  3. In another non-stick skillet, sprinkle shredded cheese in a thin layer. Heat over medium-low for 3-4 minutes until bubbly and golden. Remove carefully and set aside.
  4. Warm the tortillas in a clean skillet over medium heat for about 30 seconds on each side.
  5. Assemble the tacos by laying a warm tortilla on a plate, adding cooked chicken, chopped pickles, and cabbage.
  6. Blend cottage cheese with ranch seasoning and lemon. Use as a topping for tacos.
  7. Drizzle pickle brine over toppings, add crispy cheese lace on top, and serve.
  8. Garnish with additional pickles or cilantro, serve on a platter, and enjoy!

Notes

Ensure ground chicken reaches an internal temperature of 165°F for best flavor. Customize toppings as desired. Warm tortillas right before assembly for optimal texture.

Irresistible Harissa Baked Chicken Meatballs with Couscous & Yogurt

The aroma of spices wafting through the kitchen can take you on a journey that feels like a warm hug from a distant land. Enter my Juicy Harissa Baked Chicken Meatballs with Pearl Couscous & Creamy Yogurt Sauce! With just a few simple ingredients, this dish not only brings Moroccan flair to your table but also offers a healthy, satisfying twist on traditional comfort food. Perfect for a busy weeknight, these meatballs are a quick prep option that delights both the palate and the imagination. The tender, juicy meatballs paired with chewy pearl couscous make for a deliciously filling meal, and the harissa yogurt sauce tied in adds a creamy kick that you won’t get enough of. Ready to spice up your dinner routine? Let’s dive into this flavorful adventure!

Why are these meatballs a must-try?

Comforting, Flavorful Dish: Experience a delightful blend of spicy and sweet with every bite, thanks to the rich harissa and chewy apricots.

Quick Prep: Enjoy wonderful homemade flavors with minimal effort—perfect for a weeknight dinner.

Versatile Ingredients: Easily swap chicken for turkey or even plant-based options, making it adaptable to various diets.

Crowd-Pleaser: These juicy meatballs paired with pearl couscous are sure to impress family and friends, creating a memorable mealtime experience. Pair with roasted carrots for an even heartier meal!

Harissa Baked Chicken Meatballs Ingredients

• Dive into the flavors with these essentials!

For the Meatballs

  • Ground Chicken Thigh – Provides juiciness and flavor; opt for thigh over breast for moist meatballs.
  • Shallots – Adds aromatics; substitute with onions in a pinch.
  • Garlic – Infuses robust flavor; fresh is best, but garlic powder can work too.
  • Dried Apricots – Offers a chewy sweetness; feel free to swap for raisins or dates.
  • Fresh Parsley & Dill – Brings brightness; other herbs like cilantro or basil can also be used.
  • Ground Harissa – Contributes smoky, slightly spicy flavor; harissa sauce can replace if needed.
  • Bread (for soaking) – Acts as a binder to hold moisture; any breadcrumbs will do.

For the Side

  • Pearl Couscous – A hearty side dish; regular couscous or quinoa will work as alternatives.

For the Sauce

  • Yogurt – Bases the creamy sauce; Greek yogurt provides thickness while non-dairy options are available.
  • Lemon Zest & Juice – Brightens the sauce wonderfully; lime can replace for a different twist.

This flavorful combination of ingredients brings together the essence of Harissa Baked Chicken Meatballs with Couscous & Yogurt—a delightful and healthy dinner option!

Step‑by‑Step Instructions for Harissa Baked Chicken Meatballs with Couscous & Yogurt

Step 1: Preheat the Oven
Begin by preheating your oven to 450°F (232°C), ensuring the environment is hot enough to create beautifully baked meatballs. While the oven heats, prepare a baking sheet lined with parchment paper for easy cleanup and to prevent sticking.

Step 2: Soak the Bread
In a small bowl, soak diced bread in warm water for about 5 minutes to allow it to absorb moisture. This step is crucial for keeping your Harissa Baked Chicken Meatballs tender. Once soaked, gently squeeze out the excess water and set the bread aside.

Step 3: Sauté Aromatics
Heat a tablespoon of olive oil in a medium saucepan over medium heat. Add the chopped shallots and garlic, sautéing them for 3-4 minutes until softened and fragrant. Stir in diced dried apricots and cook for an additional minute before removing the saucepan from the heat—this blend will infuse your meatballs with delectable flavor.

Step 4: Combine the Mixture
In a large mixing bowl, combine ground chicken, soaked bread, fresh parsley, dill, ground harissa, and the cooled shallot mixture. Using your hands or a wooden spoon, mix everything until just incorporated. Cover the bowl and chill the meatball mixture in the refrigerator for 20 minutes to help the flavors meld.

Step 5: Form and Bake Meatballs
After chilling, take the mixture from the fridge and form it into 15 equal meatballs, gently pressing and rolling each one for an even shape. Place the meatballs on the prepared baking sheet, lightly drizzling them with olive oil. Bake in the preheated oven for 25-30 minutes, or until they are golden brown and reach an internal temperature of 165°F (74°C).

Step 6: Cook Pearl Couscous
While the meatballs are baking, bring a pot of salted water to a boil. Add the pearl couscous and cook for about 8 minutes, or until tender but still chewy. Drain any excess water and stir in a drizzle of olive oil along with any remaining fresh herbs to enhance flavor.

Step 7: Prepare Harissa Yogurt Sauce
In a separate bowl, whisk together Greek yogurt, harissa sauce, lemon zest, and lemon juice until smooth. Season the mixture with salt to taste, creating a creamy sauce that will perfectly complement your Harissa Baked Chicken Meatballs.

Step 8: Serve and Garnish
To serve, place a generous helping of pearl couscous on each plate, followed by three to four meatballs. Top with the creamy harissa yogurt sauce and garnish with chopped pecans and additional fresh herbs for a beautiful finish, enhancing both texture and flavor of your dish.

What to Serve with Juicy Harissa Baked Chicken Meatballs with Pearl Couscous?

Imagine a lively dinner table filled with vibrant flavors and inviting aromas that tickle your senses and add a splash of excitement to your meal!

  • Roasted Carrots: Their natural sweetness and caramelization pair beautifully with the spicy meatballs, adding a contrasting flavor profile.

  • Crispy Green Salad: A refreshing mix of greens, cucumbers, and a light vinaigrette can balance the meatballs’ richness and add a crunchy texture.

  • Grilled Zucchini: The smoky notes of grilled zucchini harmonize with the Moroccan spices, complementing the warmth of harissa while adding a healthy element.

  • Couscous Salad: A chilled couscous salad with citrus dressing enhances the overall dish while echoing the pearl couscous served with the meatballs.

  • Minted Yogurt Dip: A separate cool mint yogurt dip can accentuate the flavors in the harissa yogurt sauce, providing a refreshing twist with every bite.

  • Cinnamon-Spiced Quinoa: The warm, earthy spices in quinoa tie in perfectly with the Moroccan theme, while its nutty texture provides a hearty, nutritious side.

  • Mint Tea: Serve a glass of traditional mint tea. Its sweet, herbal notes refresh the palate and create a delightful finish to your Moroccan-inspired meal.

Harissa Baked Chicken Meatballs Variations

Feel free to explore these exciting variations and substitutions that will let you personalize your dish!

  • Turkey Twist: Substitute ground chicken with ground turkey for a leaner option that still delivers flavor.

  • Plant-Based Alternative: Use plant-based ground meat for a delicious vegetarian version, perfect for Meatless Mondays.

  • Raisin Replacement: Swap dried apricots for raisins or chopped dates to add a different sweetness to your meatballs.

  • Quinoa Substitute: Replace pearl couscous with quinoa for a gluten-free accompaniment rich in protein.

  • Greek Yogurt Upgrade: Choose thick, creamy Greek yogurt for your sauce, or try a non-dairy yogurt for a lighter option.

  • Fresh Herb Mix: Use fresh cilantro or mint to bring a refreshing twist to the flavor profile, giving it a unique aromatic quality.

  • Spicy Boost: Add a pinch of cayenne or crushed red pepper to the meatball mixture for an extra kick of heat that’s sure to impress!

  • Citrus Swap: Swap lemon zest and juice for lime for a vibrant, tangy alternative that brightens your yogurt sauce beautifully.

These variations not only enhance the dish but also allow you to adjust it to your taste buds and dietary preferences. Enjoy the versatility, and if you’re looking for more ideas, pair these meatballs with roasted carrots for a well-rounded meal, or dive into another delicious creation like Homemade Chicken Pot Pie Soup!

How to Store and Freeze Harissa Baked Chicken Meatballs

Fridge: Store cooked harissa baked chicken meatballs in an airtight container for up to 3 days. This will keep them fresh and ready for a quick meal!

Freezer: You can freeze the meatballs for up to 3 months. Ensure they’re cooled, then place in a freezer-safe bag or container. Thaw in the fridge before reheating.

Reheating: To reheat, place the meatballs in a preheated oven at 350°F (175°C) for about 15-20 minutes until warmed through. This helps maintain their juicy texture.

Make-Ahead Tips: Preparing the meatball mixture ahead of time? Store in the fridge for 1-2 days before baking to infuse the flavors more deeply into the harissa baked chicken meatballs.

Make Ahead Options

These Harissa Baked Chicken Meatballs with Pearl Couscous and Yogurt Sauce are perfect for meal prep, saving you time on busy weeknights! You can prepare the meatball mixture and refrigerate it for up to 24 hours before baking, allowing the flavors to meld beautifully. Additionally, cooked meatballs can be stored in the fridge for 3 days, or freeze for longer storage; just remember to reheat in the oven to maintain that delightful texture. The pearl couscous and harissa yogurt sauce can also be made ahead and kept in the refrigerator for up to 3 days. Simply warm the couscous before serving and add the sauce fresh to keep everything just as delicious!

Expert Tips for Harissa Baked Chicken Meatballs

  • Perfect Texture: Use ground chicken thigh for a moist and juicy meatball. Avoid breast meat, as it can dry out during baking.
  • Spice It Up: For more heat, feel free to add an extra tablespoon of harissa sauce directly into the meatball mixture.
  • Dense Packing: Make sure to pack the meatballs tightly when shaping them. Loosely formed meatballs are prone to crumbling during baking.
  • Check Temperature: Always check that meatballs reach an internal temperature of 165°F (74°C) for safety and optimal texture.
  • Herb Swaps: Get creative! Substitute fresh herbs according to your taste or what’s in season to enhance your Harissa Baked Chicken Meatballs.

Harissa Baked Chicken Meatballs with Pearl Couscous and Harissa Yogurt Sauce Recipe FAQs

How do I select ripe ingredients?
Absolutely! Fresh ingredients make all the difference. For ground chicken, look for thighs that are moist, pink, and firm to the touch. Shallots should be free of dark spots and feel solid, while garlic bulbs should be firm with no soft spots. Dried apricots should be plump without excessive stickiness.

What’s the best way to store leftovers?
Very! You can store cooked harissa baked chicken meatballs in an airtight container in the fridge for up to 3 days. Ensure they’re completely cooled before storing to avoid condensation buildup. Just pop them in the microwave or oven for a quick reheat!

Can I freeze these meatballs?
Of course! To freeze your harissa baked chicken meatballs, allow them to cool completely. Place them in a freezer-safe bag or container, separating layers with parchment paper. They can be frozen for up to 3 months. Thaw overnight in the fridge before reheating in the oven for the best texture.

What should I do if my meatballs fall apart during baking?
A common issue! If your meatballs crumble, make sure to pack them tightly when forming. Also, adding extra breadcrumbs can help absorb moisture and hold them together better. Always ensure your meatball mixture is chilled before baking to help maintain shape.

Are there any allergy considerations?
Definitely! For those with dietary restrictions, you can substitute ground chicken with turkey or plant-based alternatives. Opt for gluten-free breadcrumbs if needed, and choose non-dairy yogurt for lactose-free options. Always check the ingredient labels if allergies are a concern!

Harissa Baked Chicken Meatballs with Couscous & Yogurt

Irresistible Harissa Baked Chicken Meatballs with Couscous & Yogurt

Enjoy the bold flavors of Harissa Baked Chicken Meatballs with Couscous and Yogurt, a healthy twist on comfort food.
Prep Time 20 minutes
Cook Time 40 minutes
Total Time 1 hour
Servings: 4 servings
Course: Dinner
Cuisine: Moroccan
Calories: 400

Ingredients
  

For the Meatballs
  • 1 lb Ground Chicken Thigh opt for thigh over breast for moist meatballs
  • 2 tblsp Shallots adds aromatics; substitute with onions in a pinch
  • 2 cloves Garlic fresh is best, but garlic powder can work too
  • 1/2 cup Dried Apricots feel free to swap for raisins or dates
  • 1/4 cup Fresh Parsley & Dill other herbs like cilantro or basil can also be used
  • 1 tblsp Ground Harissa can replace with harissa sauce if needed
  • 1/2 cup Bread (for soaking) any breadcrumbs will do
For the Side
  • 1 cup Pearl Couscous regular couscous or quinoa will work as alternatives
For the Sauce
  • 1 cup Yogurt Greek yogurt provides thickness while non-dairy options are available
  • 1 tblsp Lemon Zest brightens the sauce wonderfully
  • 1 tblsp Lemon Juice lime can replace for a different twist

Equipment

  • oven
  • baking sheet
  • Medium saucepan
  • mixing bowl
  • Small bowl

Method
 

Step-by-Step Instructions
  1. Preheat your oven to 450°F (232°C) and prepare a baking sheet lined with parchment paper.
  2. Soak diced bread in warm water for about 5 minutes. Squeeze out excess water and set aside.
  3. Heat olive oil in a medium saucepan and sauté shallots and garlic for 3-4 minutes. Add dried apricots and cook for an additional minute, then remove from heat.
  4. In a mixing bowl, combine ground chicken, soaked bread, herbs, ground harissa, and cooled shallot mixture. Mix until incorporated and chill for 20 minutes.
  5. Form the mixture into 15 equal meatballs and place on the baking sheet. Drizzle lightly with olive oil and bake for 25-30 minutes or until golden brown.
  6. Cook pearl couscous in boiling salted water for about 8 minutes or until tender. Drain excess water and stir in olive oil and remaining herbs.
  7. In a bowl, whisk together yogurt, harissa, lemon zest, and lemon juice. Season with salt to taste.
  8. Serve couscous on plates, top with meatballs, harissa yogurt sauce, and garnish with pecans and fresh herbs.

Notes

Store cooked meatballs in an airtight container for up to 3 days, or freeze for up to 3 months. Reheat in a preheated oven to maintain juiciness.

Orange Miso Black Rice Salad: A Fresh Twist on Vegan Meals

As I sat at my kitchen table, the sun streaming through the window, I realized the perfect dish to brighten my day: a Zesty Orange Miso Black Rice Salad. With its delightful mix of crispy vegetables and a vibrant, tangy dressing, this salad is not only a feast for the eyes but also a nourishing powerhouse. Packed with fiber-rich black rice and fresh crunch from cucumbers and cabbage, it’s both satisfying and meal prep-friendly, making it ideal for busy weeknights. Plus, its bright flavors seamlessly blend the essence of summer and the coziness of fall in every bite. Are you ready to elevate your salad game and impress your taste buds?

Why is this salad a must-try?

Vibrant Flavors: The zesty orange dressing perfectly complements the earthy black rice, creating a bright and lively taste that will awaken your palate.

Easy Meal Prep: Perfect for busy days, this salad keeps well in the fridge and can be enjoyed throughout the week. Just add avocado right before serving for ultimate freshness!

Nutritional Powerhouse: With high protein from edamame and fiber-rich black rice, this dish supports gut health while keeping you satisfied.

Versatile Base: Feel free to customize! Swap black rice for quinoa or brown rice, or mix in different proteins like baked tofu or crispy chickpeas for variety.

Colorful Presentation: The mix of textures from crunchy vegetables and creamy avocado makes this dish as appealing to the eyes as it is to the taste buds.

If you’re looking to complement this salad, try pairing it with a refreshing Crisp Cabbage and Apple Salad for a delightful meal spread!

Orange Miso Black Rice Salad Ingredients

For the Salad

  • Black Rice – The hearty base that provides nutrition and a chewy texture; substitute with quinoa for a gluten-free option.
  • Cucumbers – Adds delightful crunch and freshness; feel free to use English cucumbers or omit if desired.
  • Scallions – Offers a mild onion flavor that complements the other ingredients; shallots can also work well if you prefer.
  • Edamame – This high-protein component enriches the salad; crispy chickpeas or baked tofu can be great alternatives.
  • Cilantro – Adds a fresh herb note that brightens the dish; parsley or a mix of parsley and basil can be used for variation.
  • Avocado – Provides a creamy richness; you can choose to leave it out if preferred.
  • Miso Paste (white) – Contributes umami flavor to the dressing; yellow miso may be used for a different taste.
  • Garlic – Aromatic element that enhances flavor; adjust based on your personal taste.
  • Ginger – Adds warmth and spice; feel free to use more for an extra kick.
  • Orange (juice and zest) – Brings sweetness and acidity to the salad; limes work as a tangy substitute, though you may need to adjust the sweetness.
  • Rice Wine Vinegar – Provides essential acidity; apple cider vinegar is a perfect swap if needed.
  • Toasted Sesame Oil – Imparts deep flavor to the dressing; any preferred oil can be used.
  • Chili Oil – Adds a subtle kick; optional but recommended for flavor depth.
  • Maple Syrup – Balances the savory elements; agave syrup or another liquid sweetener can also be used.
  • Red Cabbage – Brings color and crunch; feel free to substitute with green cabbage or shredded Brussels sprouts.

This Orange Miso Black Rice Salad is not just a meal; it’s an experience of vibrant flavors and nourishing ingredients waiting to delight your taste buds!

Step‑by‑Step Instructions for Orange Miso Black Rice Salad

Step 1: Cook the Black Rice
Begin by cooking the black rice according to the package instructions. Combine 1 ¾ cups of water and a pinch of salt in a saucepan, bringing it to a boil. Once boiling, reduce the heat to low, cover the pot, and let it simmer for 30 minutes until the rice is tender. After cooking, remove the pot from heat and let it sit, covered, for 10 minutes to allow the rice to steam and become fluffy.

Step 2: Prepare the Cucumbers
While the rice is cooking, take your cucumbers and smash them lightly with the flat side of a knife or a rolling pin. Chop them into bite-sized pieces and sprinkle with a little salt to draw out excess moisture. Let them rest for about 10 minutes, ensuring they remain crisp and fresh when added to your Orange Miso Black Rice Salad.

Step 3: Combine the Salad Ingredients
Once the black rice has cooled slightly, transfer it to a large mixing bowl. Add the prepared cucumbers, chopped scallions, shelled edamame, fresh cilantro, and diced avocado if using. Gently mix all the ingredients together until well combined, creating a vibrant base full of color and texture for your salad.

Step 4: Make the Dressing
In a jar, combine white miso paste, minced garlic, grated ginger, orange juice and zest, rice wine vinegar, toasted sesame oil, chili oil, and maple syrup. Secure the lid and shake vigorously until the dressing is emulsified and creamy. You should see a vibrant orange color come together, ready to enhance the flavors of the Orange Miso Black Rice Salad.

Step 5: Dress the Salad
Pour the freshly made dressing over the salad mixture in the bowl. Toss everything together gently, ensuring that all ingredients are coated evenly with the zesty dressing. This will give your Orange Miso Black Rice Salad a mouthwatering flavor that brings out the best in each ingredient.

Step 6: Prepare the Quick Slaw
In a separate bowl, prepare the slaw by massaging thinly sliced red cabbage with chopped cilantro, a splash of rice wine vinegar, a drizzle of oil, and a pinch of salt. Massage the cabbage for about 2-3 minutes until it softens and wilts slightly, turning into a refreshing complement to the hearty rice salad.

Step 7: Serve the Salad
To serve, scoop the Orange Miso Black Rice Salad onto plates or a large serving bowl, and top it with portions of the quick slaw. This not only adds a lovely visual appeal but also layers flavors and textures beautifully, making each bite a delight for your palate.

What to Serve with Orange Miso Black Rice Salad

This colorful salad is a fantastic centerpiece for a wholesome meal, inviting vibrant flavors and textures to your table.

  • Creamy Avocado Toast: The rich creaminess of avocado toast pairs beautifully, enhancing the flavors of the salad while adding a satisfying crunch. Top with a sprinkle of chili flakes for a zesty kick!
  • Crisp Cabbage and Apple Salad: Adding an extra layer of crunch, this fresh salad brings sweet and tangy notes that beautifully complement the zesty orange dressing of the rice salad.
  • Grilled Lemongrass Tofu: The bold flavors of lemongrass-infused tofu harmonize with the salad’s rich miso dressing, making for a delightful plant-based protein option.
  • Roasted Sweet Potatoes: Their natural sweetness contrasts nicely with the tangy notes of the salad, providing a heartwarming touch that’s simply irresistible during chilly evenings.
  • Sautéed Garlic Bok Choy: This tender, vibrant green side dish adds a savory depth and a pop of color to your meal, enhancing both aesthetics and taste.
  • Sesame Ginger Quinoa: Packed with protein and featuring earthy nutty flavors, this dish ties in perfectly with the salad’s nutty undertones while providing additional nutrients.
  • Chilled Green Tea: A refreshing drink choice that complements the bright flavors of the Orange Miso Black Rice Salad; it’s soothing and revitalizing at the same time.
  • Mango Coconut Sorbet: This light, fruity dessert rounds off your meal perfectly, providing a sweet contrast to the savory, tangy elements of the salad.
  • Spicy Chickpea Hummus with Veggies: Served as an appetizer, this zesty dip pairs well and prepares your palate for the delicious flavors of the salad to come.
  • Wine Pairing: A chilled Sauvignon Blanc brings out the bright citrus notes in the salad, enhancing your dining experience with its refreshing acidity.

Explore these delightful options to create a meal that resonates with heart and flavor!

Make Ahead Options

These Orange Miso Black Rice Salad is perfect for meal prep enthusiasts looking to save time during busy weeks! You can cook the black rice and prepare all the vegetables (cucumbers, scallions, edamame, and cilantro) up to 3 days in advance, storing them separately in airtight containers in the refrigerator. For optimal freshness, dress the salad just before serving, adding the prepared dressing and avocado right at the end to maintain quality. This way, you ensure each bite tastes just as vibrant and delicious as it should. By prepping ahead, you’ll have a hearty and nutritious meal ready to go, making weeknight dinners a breeze!

How to Store and Freeze Orange Miso Black Rice Salad

Fridge: Store the salad in an airtight container for up to 3 days. For maximum freshness, keep the avocado separate and add just before serving.

Freezer: This salad is not recommended for freezing, as the texture of the vegetables may become mushy upon thawing. It’s best enjoyed fresh!

Make-Ahead: Prepare the Orange Miso Black Rice Salad a day in advance without adding the avocado. This allows the flavors to meld beautifully while keeping the vegetables crisp.

Reheating: If you prefer to eat the salad warm, gently heat the black rice in a microwave or on the stove before mixing it with the other salad ingredients.

Expert Tips for Orange Miso Black Rice Salad

  • Cucumber Care: Allow cucumbers to drain with salt for 10 minutes to prevent the salad from becoming soggy. This keeps the Orange Miso Black Rice Salad fresh and crunchy!

  • Avocado Addition: Store the salad without avocado for up to 3 days. Add fresh avocado just before serving to maintain its creaminess and vibrant color.

  • Cooking Time: Black rice takes longer to cook than white rice. Plan accordingly to ensure perfect, fluffy grains in your Orange Miso Black Rice Salad.

  • Dressing Emulsification: Shake your dressing well until it’s fully emulsified; this helps the flavors meld beautifully. A well-emulsified dressing is key for bringing this salad to life!

  • Texture Variety: Consider adding different proteins like baked tofu or crispy chickpeas for an extra layer of texture and nutrition, personalizing your Orange Miso Black Rice Salad to your taste!

Orange Miso Black Rice Salad Variations

Feel free to get creative with this recipe; your kitchen is your canvas!

  • Quinoa Swap: Replace black rice with quinoa for a quicker cooking grain that’s packed with protein.

  • Crispy Chickpeas: Add crispy chickpeas instead of edamame to elevate texture and introduce a delightful crunch.

  • Lime Twist: Use lime juice and zest instead of orange for a refreshingly tangy dressing that brightens every bite.

  • Herb Mix: Substitute cilantro with a mix of parsley and basil for a different herbal profile that brings a new flavor dimension.

  • Add Heat: Drizzle some sriracha or add diced jalapeños to up the heat level, giving your salad a spicy kick.

  • Creamy Alternatives: Swap avocado with a dollop of vegan sour cream or cashew cream for a different creamy element.

  • Nutty Flavor: Stir in sesame seeds or chopped nuts for a nutty crunch that pairs beautifully with the salad’s flavors.

Thinking about side dishes? You might enjoy pairing this salad with a cooling Crunch Cucumber Salad to balance the flavors! Or perhaps explore a hearty Garden Harvest Salad for a complete meal.

Orange Miso Black Rice Salad Recipe FAQs

How do I choose ripe ingredients for the salad?
Absolutely! For cucumbers, look for firm, smooth skins without dark spots; they should feel heavy for their size. When selecting avocados, gently squeeze; it should yield slightly to pressure, indicating ripeness. For the ginger, pick fresh, firm knobs for the best flavor.

How should I store the Orange Miso Black Rice Salad?
You can store the salad in an airtight container for up to 3 days in the fridge. To keep your salad fresh and prevent the avocado from browning, it’s best to add the avocado just before serving. This way, you’ll enjoy that creamy texture at its finest!

Can I freeze the Orange Miso Black Rice Salad?
Unfortunately, I wouldn’t recommend freezing this salad due to the delicate textures of the fresh veggies. The cucumber and cabbage may become mushy once thawed. Instead, consider making the salad a day in advance without the avocado—this helps the flavors meld beautifully while keeping everything crisp.

What if I have allergies to some ingredients?
Very! If you have allergies, you can customize the ingredients easily. Substitute edamame with cooked chickpeas or baked tofu for protein, and replace cilantro with parsley or basil if you’re sensitive to it. Always double-check ingredient labels for any hidden allergens!

How can I prevent the salad from becoming soggy?
To avoid sogginess, be sure to let the cucumbers sit with salt for about 10 minutes to draw out excess moisture, and drain them thoroughly before adding to the salad. Additionally, ensure that the salad is stored without the avocado if not immediately served to maintain a fresh, crunchy texture.

Orange Miso Black Rice Salad

Orange Miso Black Rice Salad: A Fresh Twist on Vegan Meals

This Orange Miso Black Rice Salad combines vibrant flavors and nutritious ingredients, making it a must-try vegan dish.
Prep Time 15 minutes
Cook Time 30 minutes
Resting Time 10 minutes
Total Time 55 minutes
Servings: 4 servings
Course: Lunch
Cuisine: Fusion, Vegan
Calories: 250

Ingredients
  

For the Salad
  • 1 cup Black Rice substitute with quinoa for a gluten-free option
  • 1 cup Cucumbers optional
  • 2 stalks Scallions or shallots for variation
  • 1 cup Edamame or crispy chickpeas/baked tofu as alternatives
  • 0.25 cup Cilantro or parsley/basil for variation
  • 1 medium Avocado optional
  • 2 tablespoons Miso Paste (white) yellow miso may be substituted
  • 2 cloves Garlic minced
  • 1 tablespoon Ginger grated
  • 0.5 cup Orange (juice and zest) limes can be substituted
  • 2 tablespoons Rice Wine Vinegar apple cider vinegar can be used
  • 1 tablespoon Toasted Sesame Oil or preferred oil
  • 1 teaspoon Chili Oil optional
  • 1 tablespoon Maple Syrup or agave syrup
  • 1 cup Red Cabbage or green cabbage/shredded Brussels sprouts

Equipment

  • Saucepan
  • mixing bowl
  • Jar with Lid
  • Knife
  • Cutting Board

Method
 

Step-by-Step Instructions
  1. Cook the black rice according to package instructions with water and pinch of salt; simmer for 30 minutes and let sit for 10 minutes.
  2. Prepare cucumbers by smashing lightly and cutting into pieces; sprinkle with salt and let rest for 10 minutes.
  3. Combine black rice, cucumbers, scallions, edamame, cilantro, and avocado in a large bowl; mix gently.
  4. Make dressing by shaking miso paste, garlic, ginger, orange juice and zest, vinegar, sesame oil, chili oil, and maple syrup in a jar.
  5. Pour dressing over salad mixture and toss gently until covered evenly.
  6. Prepare quick slaw by massaging cabbage with cilantro, vinegar, oil, and salt for 2-3 minutes.
  7. Serve salad topped with quick slaw for texture and visual appeal.

Notes

Allow cucumbers to drain with salt for crispiness. Store salad without avocado for up to 3 days. Black rice requires longer cooking time than white rice.

Cheesy Jalapeno Mexican Fudge That Will Wow Your Guests

It all started when I was experimenting with flavors in my kitchen, and I stumbled upon a delightful concoction that changed the way I viewed snacks. Enter Jalapeno Mexican Fudge—a cheesy low carb delight that packs a punch! This savory appetizer combines melting cheddar and Monterey Jack with the spicy kick of jalapenos, all baked to a perfect golden crust. Not only is it a showstopper for gatherings, but it’s also quick to whip up, making it an ideal choice for those busy weeknight cravings or weekend BBQs. Plus, it’s gluten-free and keto-friendly, so you can indulge without the guilt. Curious how this cheesy marvel comes together? Let’s dive into the recipe!

Why is Jalapeno Mexican Fudge a Game Changer?

Irresistible Flavor: The combination of sharp cheddar and creamy Monterey Jack creates a mouthwatering blend that is impossible to resist. Spicy Twist: With the kick of jalapenos, this dish offers a bold flavor profile that keeps your guests coming back for more.

Quick & Easy: This crowd-pleaser can be prepared in under an hour, making it a perfect choice for last-minute gatherings or weeknight treats. Versatile Dish: Serve it warm or at room temperature, and pair it with your favorite dips like salsa or guacamole for an irresistible appetizer spread.

Guilt-Free Indulgence: Being gluten-free and keto-friendly, you can enjoy this cheesy goodness without compromising your diet. Plus, it’s an exciting break from typical fast food, making it a hit for everyone at your table!

Jalapeno Mexican Fudge Ingredients

• Get ready for a zesty creation!

For the Fudge

  • Cheddar Cheese – Offers sharpness and richness; feel free to swap it out with your favorite cheese for a unique flavor.
  • Monterey Jack Cheese – Adds creaminess and a mild, delightful taste; try another semi-soft cheese if you prefer.
  • Eggs – Provides structure and richness; there’s no ideal substitution here to maintain the right texture.
  • Cream or Milk – Acts as a binding agent while adding moisture; using a dairy-free milk alternative keeps it inclusive for all diets.
  • Jalapenos – Delivers heat and flavor; modify the amount according to your spice tolerance or switch to milder peppers for a gentler kick.

Step‑by‑Step Instructions for Jalapeno Mexican Fudge

Step 1: Preheat the Oven
Begin by preheating your oven to 350°F (175°C). This temperature is crucial for achieving a beautifully golden crust on your Jalapeno Mexican Fudge. Make sure your oven is properly heated before you move on to the next step to ensure even cooking.

Step 2: Grate the Cheeses
Using a grater, shred the cheddar and Monterey Jack cheese into a large mixing bowl. Aim for finer shreds to ensure they melt smoothly together. This combination of cheeses will create that irresistible cheesy texture and flavor that makes jalapeno fudge so delightful.

Step 3: Mix in the Eggs and Cream
Add your eggs and cream (or milk) to the cheese mixture. Use a whisk to combine all ingredients thoroughly, ensuring a smooth and creamy batter. Mixing well at this stage helps bind the ingredients together and gives your Jalapeno Mexican Fudge its rich, luscious texture.

Step 4: Fold in the Jalapenos
Gently fold in your chopped jalapenos, adjusting the amount based on your heat preference. Ensure they are evenly distributed throughout the mixture to allow every bite to burst with flavor. This step is what truly gives your Jalapeno Mexican Fudge its signature kick!

Step 5: Prepare the Baking Pan
Grease a 9×13 inch baking pan with cooking spray or butter to prevent sticking. Carefully transfer the cheese and jalapeno mixture into the prepared pan, smoothing the top for an even bake. This will help achieve the desired density and golden-brown crust as it cooks.

Step 6: Bake for Perfection
Place the pan in your preheated oven and bake for 30-35 minutes. Keep an eye on it; you want the top to turn a lovely golden brown and the center to feel firm to the touch. A slightly caramelized top signals that your Jalapeno Mexican Fudge is perfectly done.

Step 7: Cool and Slice
Once baked, remove the pan from the oven and allow your Jalapeno Mexican Fudge to cool slightly. After about 10-15 minutes, slice it into squares while it’s still warm for easier cutting. This short cooling time allows the flavors to set, making it even more delicious when you serve it.

Make Ahead Options

These Jalapeno Mexican Fudge squares are perfect for those meal prep enthusiasts looking to save time! You can prepare the entire mixture up to 24 hours in advance. Simply follow the recipe until you transfer the mixture into your greased 9×13 pan, then cover and refrigerate it overnight. This helps the flavors meld beautifully. When you’re ready to bake, simply pop it in the oven straight from the fridge, adjusting the bake time if needed, and enjoy the same deliciously cheesy results! To maintain quality, ensure it’s tightly covered to avoid drying out, so this spicy treat is just as scrumptious as when freshly made.

Expert Tips for Jalapeno Mexican Fudge

  • Cheese Quality Matters: Use freshly grated cheddar and Monterey Jack cheese for the best melt and flavor. Pre-shredded cheeses contain anti-caking agents that can affect the texture.

  • Adjust Spice Level: Control the heat by modifying the amount of jalapenos. Start with less if you’re unsure, then add more based on your taste.

  • Mixing Method: Ensure thorough mixing of eggs and cream with the cheese before folding in the jalapenos. A well-mixed batter leads to a uniform texture in your Jalapeno Mexican Fudge.

  • Watch the Bake Time: Keep a close eye on the baking process. When the top is golden brown and firm but not burnt, your fudge is ready to be taken out—overbaking can lead to a dry texture.

  • Cooling Time: Allow the fudge to cool briefly before slicing. This helps it set and makes for cleaner, neater squares that are easy to serve.

What to Serve with Jalapeno Mexican Fudge

Pairing delightful flavors with this cheesy delight can truly enhance your meal experience.

  • Creamy Guacamole: This rich, creamy dip balances the heat of the jalapenos, creating a heavenly mix of textures and flavors.

  • Fresh Tomato Salsa: The acidity and brightness in salsa cut through the richness, adding a refreshing touch to this savory dish.

  • Crunchy Corn Tortilla Chips: These provide a satisfying crunch that complements the soft, gooey fudge, making every bite irresistible.

  • Savory Sausage Skewers: Marinated sausage adds a smoky flavor, making your appetizer spread hearty and filling for your guests.

  • Zesty Coleslaw: A side of coleslaw adds a crisp, crunchy texture while its tanginess balances the richness of the fudge.

  • Bubbly Sparkling Water: Pair with lime or a splash of fruit for a refreshing drink that won’t overpower the flavors of the dish.

  • Decadent Chocolate Mousse: For dessert, a rich chocolate mousse offers a decadent ending to your meal, rounding off the evening’s flavors beautifully.

Storage Tips for Jalapeno Mexican Fudge

Room Temperature: Jalapeno Mexican Fudge can sit at room temperature for up to 2 hours. If serving at parties, keep it covered to maintain freshness and prevent drying out.

Fridge: Store leftovers in an airtight container in the fridge for up to 3 days. This helps preserve the cheesy flavor and texture while keeping it safe to eat for later.

Freezer: For longer storage, freeze the fudge in an airtight container or freezer bag for up to 2 months. When ready to enjoy, thaw in the fridge overnight before reheating.

Reheating: Reheat in an oven at 350°F (175°C) for about 10–15 minutes or in the microwave for 30-60 seconds until warm. This will help maintain the deliciously gooey interior of your Jalapeno Mexican Fudge.

Jalapeno Mexican Fudge Variations

Feel free to get creative and customize your Jalapeno Mexican Fudge with these delightful twists!

  • Bell Pepper Swap: Substitute jalapenos with roasted bell peppers for a milder, sweeter flavor. This keeps your dish vibrant and accessible to spice-sensitive guests.

  • Cheese Blend: Use pepper jack cheese for an extra kick or opt for gouda for a smoky richness. Each variation provides its own unique depth and taste experience.

  • Herb Infusion: Stir in fresh herbs like cilantro or chives to add a touch of freshness and color. This simple addition can elevate the overall flavor profile and make it even more inviting.

  • Add Heat: For those who crave extra spice, incorporate diced serrano peppers. This twist amplifies the heat, giving your dish a fiery experience that spice lovers will adore.

  • Creamy Variations: Replace cream with a non-dairy alternative like cashew cream or coconut milk to make it completely dairy-free. The adaptation ensures everyone can indulge in this cheesy delight.

  • Nutty Crunch: Toss in some chopped walnuts or pecans before baking for additional texture and a nutty flavor contrast. This gives a surprising crunch that pairs perfectly with the creamy fudge.

  • Mini-Fudge Bites: Pour the mixture into miniature muffin tins instead of a large pan for bite-sized appetizers. These little delights are perfect for parties and easy to serve with dips.

  • Zesty Citrus: Add a splash of lime or lemon juice to brighten the flavors. This adds a refreshing tang that complements the richness of the cheese incredibly well.

With these variations, your Jalapeno Mexican Fudge will always be a new experience every time you make it. For more spicy inspirations, don’t forget to check out my other delicious recipes that incorporate unique ingredients!

Jalapeno Mexican Fudge Recipe FAQs

How do I select the right jalapenos for this recipe?
Absolutely! When choosing jalapenos, look for firm, glossy peppers with a vibrant green color. Avoid any that have dark spots or wrinkles. The ripeness can affect the heat level; generally, smaller peppers are spicier, while larger ones tend to be milder. If you’re unsure about spice, start with a small amount and adjust to taste.

How should I store Jalapeno Mexican Fudge once it’s made?
Jalapeno Mexican Fudge can be stored in an airtight container in the fridge for up to 3 days. Just make sure to cool it completely before placing it in the fridge to avoid condensation, which can lead to a soggy texture.

Can I freeze Jalapeno Mexican Fudge?
Absolutely! To freeze, wait for the fudge to cool completely, then cut it into squares. Wrap each piece tightly in plastic wrap and place them in an airtight freezer bag. It can keep for up to 3 months. When you’re ready to enjoy, simply thaw the squares in the fridge overnight before reheating.

What if my Jalapeno Mexican Fudge comes out too dry?
Oh no! If your fudge is on the dry side, it could be due to overbaking or using low-fat cheese. To troubleshoot, keep an eye on the baking time; it should be golden brown, not burnt. If you have a dry batch, consider serving it with a suitable dip, like guacamole or salsa, to add moisture.

Is this recipe safe for people with dairy allergies?
While Jalapeno Mexican Fudge is typically made with cheese, you can simply substitute the dairy ingredients with dairy-free alternatives, such as almond milk and a dairy-free cheese option. Be sure to check the labels for any additional allergens if you’re cooking for guests with specific dietary needs.

How long can Jalapeno Mexican Fudge sit out at room temperature?
Jalapeno Mexican Fudge can be left at room temperature for up to 2 hours during serving. Make sure to cover it to help maintain its freshness and prevent it from drying out while it’s on display for your guests!

Jalapeno Mexican Fudge

Cheesy Jalapeno Mexican Fudge That Will Wow Your Guests

This Jalapeno Mexican Fudge is a cheesy delight that packs a punch, perfect for gatherings and guilt-free snacking.
Prep Time 15 minutes
Cook Time 35 minutes
Cooling Time 15 minutes
Total Time 1 hour 5 minutes
Servings: 12 slices
Course: Dessert
Cuisine: Mexican
Calories: 200

Ingredients
  

For the Fudge
  • 2 cups Cheddar Cheese Offers sharpness and richness
  • 2 cups Monterey Jack Cheese Adds creaminess and mild taste
  • 3 large Eggs Provides structure and richness
  • 1 cup Cream or Milk Acts as binding agent
  • 2 medium Jalapenos Delivers heat and flavor

Equipment

  • oven
  • Large mixing bowl
  • grater
  • 9x13 inch baking pan
  • whisk

Method
 

Step-by-Step Instructions
  1. Preheat your oven to 350°F (175°C).
  2. Grate the cheddar and Monterey Jack cheese into a large mixing bowl.
  3. Mix in the eggs and cream (or milk) until smooth.
  4. Fold in the chopped jalapenos evenly.
  5. Grease a 9x13 inch baking pan and transfer the mixture into it.
  6. Bake for 30-35 minutes until golden brown on top.
  7. Allow to cool for 10-15 minutes before slicing.

Notes

Use freshly grated cheese for best results. Adjust jalapeno quantity based on your heat preference.

Shaved Rainbow Carrot Sesame Salad: A Colorful Crunch Delight

As I julienned those vibrant rainbow carrots, the kitchen transformed into a canvas of colors—think orange, purple, and golden hues dancing in the bowl. This Shaved Rainbow Carrot Sesame Salad is my go-to for a refreshing crunch that balances busy days with healthy eating. Not only is it a feast for the eyes, but its quick prep time makes it an ideal companion for those hectic weeknights or meal-prepping weekends. Plus, with gluten-free options using Tamari, this salad is perfect for everyone at the table. Who knew that such a delightful dish could be so effortlessly made? Are you ready to experience the vibrant joy of this healthy creation?

Why is This Salad So Appealing?

Vibrant Colors: The Shaved Rainbow Carrot Sesame Salad bursts with an array of colors that not only looks beautiful on your plate but also showcases an exciting variety of nutrients.

Quick & Easy: With minimal preparation, this salad can be whipped up in mere minutes, making it ideal for busy weeknights or casual gatherings with friends.

Versatile Dish: Perfect as a side for grilled chicken or fish, or simply toss in some quinoa for a satisfying vegan meal. It’s a canvas for your culinary creativity!

Make-Ahead Friendly: This salad stores beautifully in the fridge and can be prepped in advance, just keep the dressing separate until serving to maintain its freshness.

Healthy Ingredients: Loaded with vitamins and healthy fats from sesame oil, it’s a guilt-free indulgence that satisfies without sacrificing flavor.

For a refreshing pairing, consider adding a side of Cucumber Carrot Salad!

Shaved Rainbow Carrot Sesame Salad Ingredients

For the Salad

  • Rainbow Carrots – Provide a crunchy texture and vibrant color; substitute regular carrots for a similar taste.
  • Scallions (1/4 cup, chopped) – Add a mild onion flavor and freshness; use green onions or chives as an alternative.
  • Cilantro (2 tbsp, chopped) – Contributes a bright, herbal note; can be substituted with parsley for those who prefer a different herb.
  • Basil (2 tbsp, chopped) – Offers a sweet aromatic flavor; replace with mint if desired.

For the Dressing

  • Sesame Oil – Adds rich nuttiness; can use any neutral oil if sesame oil is unavailable.
  • Tamari or Soy Sauce – Brings saltiness; Tamari is gluten-free, while soy sauce can be used for a non-gluten-free version.
  • Rice Vinegar – Provides acidity; can substitute with apple cider vinegar or white vinegar.
  • White Miso – Offers umami flavor; substitute with tahini for a vegan alternative.
  • Sriracha – Adds heat; adjust to taste or leave out for a milder sauce.
  • Coconut Sugar – Provides sweetness; can substitute with regular sugar or maple syrup.
  • Minced Garlic – Infuses flavor; can use garlic powder as an alternative.
  • Grated Ginger – Adds a spicy kick; substitute with ground ginger if needed.
  • Sesame Seeds (1.5 tbsp) – Enhance flavor and add crunch; can substitute with hemp seeds for a nut-free option.

With these ingredients, you’re on your way to creating a refreshing Shaved Rainbow Carrot Sesame Salad that will brighten up your meals!

Step‑by‑Step Instructions for Shaved Rainbow Carrot Sesame Salad

Step 1: Toast the Sesame Seeds
Begin by preheating a medium skillet over medium heat. Add 1.5 tablespoons of sesame seeds to the pan and toast them for 5–7 minutes, stirring frequently until they turn lightly browned and fragrant. This step enhances the nutty flavor of the seeds, making your Shaved Rainbow Carrot Sesame Salad even more delicious.

Step 2: Prepare the Carrots
While the sesame seeds are toasting, wash and peel your rainbow carrots. Using either a sharp knife or a food processor fitted with a julienne blade, shave the carrots into thin strips and transfer them to a large bowl. The vibrant colors of the carrots will immediately brighten your kitchen, setting the stage for this fresh salad.

Step 3: Add the Fresh Greens
Next, chop 1/4 cup of scallions, along with 2 tablespoons each of cilantro and basil. Sprinkle these fresh herbs over the julienned carrots in the bowl. Gently toss the mixture together, allowing the flavors to intermingle, and preparing your salad for the flavorful dressing to come.

Step 4: Create the Dressing
In a blender, combine all the dressing ingredients: sesame oil, Tamari or soy sauce, rice vinegar, white miso, sriracha, coconut sugar, minced garlic, and grated ginger. Blend on high until the mixture is smooth and well combined. If you prefer, you can whisk the ingredients together in a bowl for a chunky texture—both options will work beautifully for your Shaved Rainbow Carrot Sesame Salad.

Step 5: Combine Salad and Dressing
Now that your dressing is ready, pour it over the carrot mixture in the bowl. Toss everything together thoroughly, ensuring that every piece of carrot and herb is coated with the zesty dressing. This step will elevate the flavors, making sure that your salad bursts with fresh notes in every bite.

Step 6: Chill for Best Flavor
Cover the salad and refrigerate it for at least 1 hour before serving. This allows the flavors to meld beautifully, creating a more cohesive taste in your Shaved Rainbow Carrot Sesame Salad. Chilling also gives a refreshing crunch when you sit down to enjoy this vibrant dish.

Step 7: Serve and Garnish
Finally, before serving, give the salad a quick toss to redistribute the dressing. Plate the salad and top it with additional toasted sesame seeds and a sprinkle of red pepper flakes if you desire some heat. This colorful presentation will impress your guests and family alike, making your meal a feast for both the eyes and the palate.

Variations & Substitutions for Shaved Rainbow Carrot Sesame Salad

Feel free to let your creativity shine by customizing this vibrant salad to suit your tastes and dietary needs!

  • Nut-Free: Replace sesame seeds with hemp seeds for a nut-free, protein-packed option that still adds crunch.
  • Herb Swap: Use parsley instead of cilantro for a milder herbal flavor that complements the carrots beautifully.
  • Citrus Zest: For an extra layer of freshness, add lime or lemon zest to the dressing—this brightens the flavors irresistibly!
  • Heat Level: If you enjoy a spicy kick, increase the amount of sriracha or substitute fresh chili peppers for added heat.
  • Vegan Creaminess: Blend in some avocado with the dressing for a rich, creamy texture without losing its vegan status.
  • Grain Boost: Mix in cooked quinoa to turn this side dish into a filling main course, giving it a hearty protein punch.
  • Extra Crunch: Toss in some chopped bell peppers or cucumbers for additional crunch and a pop of color—perfect for summer!
  • Sweeten Up: If you prefer a sweeter dressing, swap out coconut sugar for maple syrup which adds its own unique flavor and richness.

For a stunning addition, why not try complementing this salad with a side of Crunchy Cabbage Carrot? The blend of textures and flavors will elevate your meal!

Expert Tips for Shaved Rainbow Carrot Sesame Salad

  • Keep It Crisp: Mix the dressing separately and add only before serving to ensure your carrots maintain their crunch in the Shaved Rainbow Carrot Sesame Salad.

  • Substitution Savvy: If you don’t have one of the ingredients, feel free to substitute! For example, use apple cider vinegar if you’re out of rice vinegar.

  • Chill for Flavor: Refrigerating the salad for at least an hour enhances the flavors. Don’t rush this step; it makes a world of difference!

  • Avoid Freezing: Do not freeze the salad; carrots lose their texture and flavor when thawed, ruining your refreshing dish.

  • Taste and Adjust: Always taste your dressing before adding it to the salad to balance sweetness and spiciness according to your preference.

How to Store and Freeze Shaved Rainbow Carrot Sesame Salad

Fridge: Store the salad in an airtight container in the refrigerator for up to 3 days. To keep the ingredients fresh, keep the dressing separate until you’re ready to serve.

Freezer: Avoid freezing the salad, as the carrots and fresh herbs will lose their crisp texture and vibrant flavor upon thawing.

Reheating: This salad is best enjoyed cold, so there’s no need to reheat. Serve it chilled for the most refreshing experience.

Preparation Tips: If you’re prepping in advance, chop the vegetables and mix the dressing separately, combining them just before serving to preserve the freshness of the Shaved Rainbow Carrot Sesame Salad.

What to Serve with Shaved Rainbow Carrot Sesame Salad

Elevate your dining experience with vibrant pairings that complement the fresh, zesty notes of this salad.

  • Grilled Lemon Chicken: Juicy and tangy, this chicken will add a delightful contrast to the salad’s crunch while echoing its refreshing flavors.

  • Teriyaki Salmon: The sweet and savory glaze of teriyaki salmon brings a lovely umami element that pairs perfectly with the salad’s bright notes.

  • Tofu Skewers: Marinated and grilled, tofu skewers provide a hearty, protein-rich option that balances well with the lightness of the salad.

  • Quinoa Pilaf: This nutritious grain dish adds a delightful nutty flavor and chewy texture, making your meal satisfyingly wholesome.

  • Egg Drop Soup: A warm, comforting bowl of egg drop soup can serve as a perfect starter, contrasting beautifully with the cold crunch of the salad.

  • Peanut Sauce Spring Rolls: Fresh, crispy spring rolls with a creamy peanut sauce offer an amazing textural contrast and a dip that enhances the savory elements.

  • Spicy Szechuan Noodles: The spice from Szechuan noodles will awaken your palate and harmonize with the sesame dressing, adding excitement to your meal.

  • Mango Sticky Rice: For dessert, the sweetness of mango sticky rice rounds out the meal beautifully, providing a luscious finish to a fresh dining experience.

  • Lychee Iced Tea: Refreshing and floral, this drink complements the salad’s flavors while offering a cooling sip to balance any spicy dishes.

Make Ahead Options

This Shaved Rainbow Carrot Sesame Salad is a fantastic choice for meal prep, saving you time on busy days! You can prepare the salad components—julienned carrots, chopped scallions, cilantro, and basil—up to 24 hours in advance. Simply store them in an airtight container in the refrigerator to maintain their freshness. While you can make the dressing ahead, it’s best to keep it separate until serving to prevent the vegetables from wilting. When you’re ready to enjoy your salad, toss the prepared ingredients with the dressing, allow it to chill for about an hour for the flavors to meld, and you’ll have a delicious, crisp salad ready to go!

Shaved Rainbow Carrot Sesame Salad Recipe FAQs

How do I choose ripe and fresh carrots?
Absolutely! When selecting rainbow carrots, look for ones that are firm and have smooth skin without dark spots or blemishes. The more vibrant the color, the richer the flavor, so opt for bright orange, purple, and yellow hues. If you find any carrots with dark spots or soft spots, it’s best to skip them for a fresher salad.

How should I store the Shaved Rainbow Carrot Sesame Salad?
To keep your salad fresh, store it in an airtight container in the refrigerator for up to 3 days. For best results, keep the dressing separate to maintain the crispness of the carrots. When ready to serve, simply combine and enjoy!

Can I freeze the Shaved Rainbow Carrot Sesame Salad?
I wouldn’t recommend freezing this salad. Freezing alters the texture of carrots and fresh herbs, leading to a mushy consistency once thawed. Instead, it’s best enjoyed fresh. If you’re meal prepping, just keep the salad and dressing separate in the fridge until you’re ready to serve!

What should I do if my salad dressing is too thick?
If your dressing turns out too thick, don’t fret! Simply add a splash of water or a little extra rice vinegar to thin it out to your desired consistency. Blend again or whisk it until fully combined. This will help the dressing coat the veggies more evenly and enhance your salad experience!

Are there any allergy considerations with this salad?
Yes, if you have nut allergies, you might want to ensure that you use hemp seeds as a substitute for sesame seeds. Additionally, double-check the labels on your tamari or soy sauce to avoid gluten if that’s a concern. Always taste your ingredients and adjust the recipe based on any dietary restrictions to keep everyone safe and happy!

How can I customize this salad for different tastes?
Very! This salad is fantastic for customization. Consider adding extra vegetables like bell peppers or cucumbers for added crunch and flavor. You can also toss in cooked quinoa or beans for more protein, or even add some toasted nuts for a delightful crunch. It’s versatile, so feel free to make it your own!

Shaved Rainbow Carrot Sesame Salad

Shaved Rainbow Carrot Sesame Salad: A Colorful Crunch Delight

Discover the vibrant and healthy Shaved Rainbow Carrot Sesame Salad, perfect for a refreshing meal!
Prep Time 15 minutes
Cook Time 7 minutes
Chilling Time 1 hour
Total Time 1 hour 22 minutes
Servings: 4 servings
Course: Lunch
Cuisine: Asian, Healthy
Calories: 120

Ingredients
  

For the Salad
  • 4 medium Rainbow Carrots Can substitute with regular carrots
  • 1/4 cup Scallions Chopped; can use green onions or chives
  • 2 tbsp Cilantro Chopped; can substitute with parsley
  • 2 tbsp Basil Chopped; replace with mint if desired
For the Dressing
  • 3 tbsp Sesame Oil Can use any neutral oil if unavailable
  • 2 tbsp Tamari or Soy Sauce Tamari is gluten-free
  • 2 tbsp Rice Vinegar Can substitute with apple cider or white vinegar
  • 1 tbsp White Miso Can substitute with tahini for a vegan option
  • 1 tbsp Sriracha Adjust to taste or omit for milder sauce
  • 1 tbsp Coconut Sugar Can substitute with regular sugar or maple syrup
  • 2 cloves Minced Garlic Can use garlic powder as alternative
  • 1 tbsp Grated Ginger Can substitute with ground ginger
  • 1.5 tbsp Sesame Seeds Can substitute with hemp seeds for nut-free

Equipment

  • Medium skillet
  • Blender
  • large bowl
  • Knife

Method
 

Step-by-Step Instructions
  1. Toast the sesame seeds in a medium skillet over medium heat for 5–7 minutes until lightly browned and fragrant.
  2. Wash and peel the rainbow carrots, then julienne them into thin strips and place them in a large bowl.
  3. Chop the scallions, cilantro, and basil; sprinkle them over the carrots and toss gently.
  4. Blend all dressing ingredients together until smooth, or whisk them for a chunkier texture.
  5. Pour the dressing over the carrot mixture; toss thoroughly to coat.
  6. Cover and refrigerate for at least 1 hour before serving.
  7. Toss again before serving and garnish with additional sesame seeds and red pepper flakes if desired.

Notes

For optimal flavor, mix the dressing separately and add just before serving to maintain crunch.

Air Fried Smokey Citrus Duck: A Flavorful Valentine’s Delight

As the air fills with an inviting smoky aroma and zesty citrus notes, I can’t help but feel a wave of excitement. This Air Fried Smokey Citrus Duck is not just an easy recipe; it’s the perfect culinary centerpiece for a romantic Valentine’s dinner. Imagine locking eyes with your loved one as you serve succulent duck legs, their crispy exterior giving way to juicy tenderness, all enhanced by a vibrant orange glaze. Not only does this dish impress with its gourmet appeal, but it also offers a simple way to elevate your weeknight cooking without the fuss of complicated techniques. Whether you’re a seasoned home-chef or venturing into duck for the first time, this one-pan wonder guarantees satisfaction on every level. Are you ready to make this unforgettable meal? Let’s dive in!

Why Is This Duck Recipe So Special?

Simplicity at Its Finest: This Air Fried Smokey Citrus Duck recipe uses straightforward techniques, making it easy for anyone to follow, regardless of cooking experience.

Rich, Unique Flavors: The citrus glaze adds a delightful balance of sweet and tart, enhancing the duck’s natural richness with every bite.

One-Pan Wonder: Enjoy a stunning meal with minimal cleanup—just season, glaze, and air fry!

Versatile Pairing Options: Serve it alongside celeriac mash or your favorite roasted veggies for a comforting yet elegant dinner choice.

Perfect for Celebrations: Impress your Valentine with a gourmet dish that can easily elevate any special occasion without the stress.

Indulge in this dish, and if you’re looking for more culinary inspiration, don’t forget to check out our guide on preparing easy weeknight dinners that will have you cooking like a pro!

Air Fried Smokey Citrus Duck Ingredients

• Elevate your cooking game with these essential ingredients!

For the Duck

  • Duck Legs – These are tender and perfect for shredding when cooked to perfection.
  • Salt – Enhances the flavor; feel free to use sea salt for a gourmet touch.
  • Herbs – Customize with your favorites like thyme, rosemary, or sage for added depth.

For the Citrus Glaze

  • Fresh Oranges – The star of the dish, providing both juice and zest for a bright flavor burst.
  • Honey or Maple Syrup – Adds delightful sweetness to balance the tartness of the oranges.
  • Soy Sauce – A dash brings umami richness; for a gluten-free option, use tamari.

For the Celeriac Mash

  • Celeriac – Earthy and creamy, making it perfect for a comforting mash.
  • Butter or Olive Oil – For a rich texture; substitute with a vegan option if desired.
  • Cream or Milk – Mix in for extra creaminess; plant-based milk works well too.

Optional Add-ins

  • Garlic – Roasted or minced, this adds a fragrant kick to your mash.
  • Black Pepper – A bit of freshly cracked pepper elevates the overall flavor profile.

With these ingredients gathered, you’re one step closer to creating an unforgettable Air Fried Smokey Citrus Duck dish that will surely impress your loved ones!

Step‑by‑Step Instructions for Air Fried Smokey Citrus Duck

Step 1: Prepare the Duck Legs
Start by seasoning the duck legs generously with salt and your choice of herbs, like thyme or rosemary. Place them in the refrigerator for at least 3 hours, allowing the flavors to deeply penetrate the meat. This step is essential for achieving deliciously tender duck legs in your Air Fried Smokey Citrus Duck recipe.

Step 2: Make the Citrus Glaze
While the duck legs are marinating, prepare the citrus glaze. In a small bowl, combine freshly squeezed orange juice and zest with honey or maple syrup. Mix well, creating a bright and sticky glaze that balances sweetness and tartness. This glaze will enhance the flavor of your air-fried duck legs beautifully.

Step 3: Preheat the Air Fryer
Preheat your air fryer to 375°F (190°C) for about 5 minutes. This ensures your Air Fried Smokey Citrus Duck cooks evenly and crisps up nicely. Use the air fryer basket to help monitor the duck’s progress, and prepare the environment for that irresistible smoky aroma to fill your kitchen.

Step 4: Coat the Duck Legs
Once the air fryer is preheated, remove the duck legs from the refrigerator and brush them generously with the citrus glaze. Ensure each leg is fully coated to capture that zesty flavor during cooking. This step not only adds flavor but also helps achieve a beautiful, caramelized exterior as they cook.

Step 5: Air Fry the Duck Legs
Place the glazed duck legs in the air fryer basket, ensuring they are not overcrowded. Cook at 375°F (190°C) for about 50-60 minutes, flipping halfway through. Keep an eye on the legs; they should be golden brown and crispy on the outside while remaining tender and juicy inside.

Step 6: Prepare Celeriac Mash
While the duck is cooking, peel and chop celeriac into small cubes. Boil in salted water until tender, about 15-20 minutes. Drain and mash with butter or olive oil, and a splash of cream or milk for a creamy texture. This comforting mash pairs perfectly with the rich flavors of the Air Fried Smokey Citrus Duck.

Step 7: Plate and Serve
Once the duck legs are cooked to perfection, remove them from the air fryer. Let them rest for a few minutes before plating. Serve the succulent duck legs alongside the creamy celeriac mash and drizzle with any leftover citrus glaze for an extra burst of flavor. Enjoy this gourmet dish with your loved ones!

What to Serve with Air Fried Smokey Citrus Duck

A perfect dinner experience awaits as you complement the rich flavors of this stunning dish with delightful sides.

  • Creamy Celeriac Mash: This earthy mash brings a comforting texture, balancing the smoky richness of the duck. A must-try pairing!

  • Roasted Brussels Sprouts: These crispy, caramelized sprouts offer a delightful crunch and add a hint of bitterness that perfectly contrasts with the sweet citrus glaze.

  • Light Arugula Salad: With its peppery notes, fresh arugula tossed in a lemon vinaigrette brightens the meal, enhancing the citrus flavor profile beautifully.

  • Garlic Bread: Warm, crusty garlic bread provides a rustic touch, perfect for wiping up that luscious orange glaze left on your plate.

  • Red Wine: A glass of Pinot Noir or Merlot pairs nicely, their velvety tannins complementing the duck’s rich flavors while providing a splendid taste experience.

  • Chocolate Fondue: For dessert, indulge in a rich chocolate fondue—a sweet finish that adds a touch of romance to your Valentine’s dinner.

Enjoy your culinary adventure as these delightful complements create a memorable dining experience!

Make Ahead Options

Preparing the Air Fried Smokey Citrus Duck in advance is a fantastic way to save time for busy weeknights or special occasions! You can season the duck legs and refrigerate them for up to 24 hours, allowing the flavors to deepen. Also, the citrus glaze can be made ahead and stored in the fridge for up to 3 days; just give it a good stir before using. When you’re ready to cook, simply brush the duck legs with the glaze and air fry as directed. This approach ensures you have a delicious, stress-free meal without sacrificing flavor or quality, making your culinary experience just as delightful!

Air Fried Smokey Citrus Duck: Customize Your Dish!

Feel free to get creative and make this dish your own with these delightful variations!

  • Celeriac Substitute: Swap in creamy mashed potatoes or store-bought mash for a quick option without losing comfort.

  • Herbs: Thyme or Rosemary: These aromatic herbs can elevate the flavor profile, adding depth and a lovely herbal aroma to the dish.

  • Glaze Alternatives: Zesty Lemon or Lime: Create a refreshing twist by using lemon or lime juice, brightening up the dish with a tangy zing.

  • Fruit Add-ins: Peach or Apricot Jam: Stir a spoonful into the citrus glaze for a sweet, fruity twist that pairs beautifully with duck.

  • Heat Level: Chili Flakes: Add a pinch of chili flakes to the glaze for a spicy kick that balances the sweetness exceptionally well.

  • Texture Twist: Crispy Skin Layer: For an extra crispy finish, brush the duck legs with a little extra glaze before the final few minutes of cooking.

  • Creamy Add-ins: Sour Cream or Greek Yogurt: Mix a dollop with the celeriac mash for a creamy, tangy flavor that complements the duck beautifully.

For more exciting meal ideas that can jazz up your weeknight dinners, don’t miss checking out our guide on creating easy weeknight dinners that bring thrilling flavors into your kitchen!

Expert Tips for Air Fried Smokey Citrus Duck

  • Choose Quality Duck: Select fresh, high-quality duck legs for the best flavor and texture in your Air Fried Smokey Citrus Duck.

  • Marination Time: Allow the duck legs to marinate for at least 3 hours. This crucial step ensures the flavors penetrate deeply, resulting in tender, flavorful meat.

  • Check for Doneness: To avoid undercooked duck, ensure the meat is tender and easily shreds with a fork before serving.

  • Avoid Overcrowding: Lay the duck legs in a single layer in the air fryer basket. Overcrowding can lead to uneven cooking and less crispy skin.

  • Save the Fat: Don’t discard leftover duck fat; save it for future cooking! It’s perfect for roasting vegetables or adding flavor to other dishes.

  • Experiment with Glaze: Feel free to customize the citrus glaze by adding spices like ginger or even a splash of whiskey for a unique flavor twist!

Storage Tips for Air Fried Smokey Citrus Duck

  • Fridge: Store cooked duck in an airtight container for up to 2 days. This will help retain its moisture and flavor until you’re ready to enjoy it again.

  • Freezer: If you have leftovers, freeze the duck legs in a freezer-safe bag for up to 3 months. Be sure to remove as much air as possible to prevent freezer burn.

  • Reheating: To reheat, thaw the duck overnight in the fridge, then place in the air fryer at 350°F (175°C) for about 10-15 minutes until heated through. This revives the crispy texture while keeping the meat juicy.

  • Celeriac Mash Storage: Store any leftover celeriac mash in a separate airtight container in the fridge for up to 3 days. Reheat on the stovetop with a splash of cream or butter for added creaminess. Enjoy your Air Fried Smokey Citrus Duck at its best!

Air Fried Smokey Citrus Duck Recipe FAQs

How do I choose the right duck legs?
Absolutely! When selecting duck legs, look for ones that feel plump and have a good layer of fat beneath the skin. The skin should be smooth with no dark spots. Freshness is key, so purchase from a trusted source, especially if you’re planning a special meal.

How should I store leftover Air Fried Smokey Citrus Duck?
You can store the cooked duck in an airtight container in the refrigerator for up to 2 days. This helps keep it moist and flavorful. It’s always best to reheat it gently before serving, ensuring it doesn’t dry out.

Can I freeze the Air Fried Smokey Citrus Duck?
Very! If you have leftovers, freeze the duck legs in a freezer-safe bag for up to 3 months. When freezing, remove as much air as possible to prevent freezer burn. To reheat, thaw overnight in the fridge and air fry at 350°F (175°C) for about 10-15 minutes until heated through, restoring that delightful crispy texture.

What should I do if my duck doesn’t seem crispy enough?
No worries! If your duck legs lack crunch, ensure they are coated evenly with the glaze and are not overcrowded in the air fryer. You can always return them to the air fryer for a few extra minutes at a higher temperature (about 400°F or 200°C) to help achieve that desired crispiness.

Is this recipe suitable for gluten-free diets?
Yes! This Air Fried Smokey Citrus Duck can easily be made gluten-free. Simply substitute regular soy sauce with tamari, which is a gluten-free alternative. Always verify that any store-bought glaze ingredients are also gluten-free to keep your dish safe for those with dietary restrictions.

Air Fried Smokey Citrus Duck

Air Fried Smokey Citrus Duck: A Flavorful Valentine’s Delight

This Air Fried Smokey Citrus Duck combines rich flavors and is perfect for a memorable Valentine’s dinner.
Prep Time 3 hours
Cook Time 1 hour
Total Time 4 hours
Servings: 2 servings
Course: Dinner
Cuisine: American
Calories: 550

Ingredients
  

For the Duck
  • 2 legs Duck Legs Tender and perfect for shredding when cooked.
  • to taste Salt Enhances the flavor; feel free to use sea salt.
  • to taste Herbs Customize with favorites like thyme, rosemary, or sage.
For the Citrus Glaze
  • 2 oranges Fresh Oranges Provides both juice and zest.
  • 2 tablespoons Honey or Maple Syrup Adds sweetness to balance the tartness.
  • 1 tablespoon Soy Sauce Adds umami richness; use tamari for gluten-free.
For the Celeriac Mash
  • 1 medium Celeriac Earthy and creamy for a comforting mash.
  • 2 tablespoons Butter or Olive Oil For a rich texture; use vegan option if desired.
  • 1/4 cup Cream or Milk Mix in for extra creaminess; plant-based works too.
Optional Add-ins
  • 1 clove Garlic Roasted or minced for a fragrant kick.
  • to taste Black Pepper Freshly cracked to elevate flavor.

Equipment

  • Air Fryer

Method
 

Preparation Steps
  1. Season the duck legs generously with salt and herbs; refrigerate for 3 hours.
  2. Mix orange juice and zest with honey or maple syrup to create the citrus glaze.
  3. Preheat air fryer to 375°F (190°C) for 5 minutes.
  4. Brush the duck legs with citrus glaze.
  5. Air fry at 375°F for 50-60 minutes, flipping halfway through.
  6. Boil cubed celeriac in salted water for 15-20 minutes, then mash with butter/oil and cream/milk.
  7. Let the duck rest before plating; serve with celeriac mash and drizzle with glaze.

Notes

Opt for high-quality duck legs for the best flavor. Marination is crucial for tender meat.

Dill Pickle Ranch Smash Chicken Tacos with Crispy Cheese Bliss

“Hey, have you ever craved something that dances on the taste buds yet is simple enough for a weeknight dinner? Let me introduce you to my Dill Pickle Ranch Smash Chicken Tacos with Crispy Cheese Lace. These tacos take your typical dinner staple and elevate it to a tangy, crunchy delight! The zingy dill pickles paired with creamy ranch dressing and juicy ground chicken create a flavor explosion, while the crispy cheese lace adds a wonderful texture that will have everyone reaching for seconds. Plus, this recipe is gluten-free and can be whipped up in under 30 minutes, making it a fantastic option for busy evenings or when friends drop by unexpectedly. So, are you ready to transform taco night into something unforgettable?”

Why are These Tacos a Must-Try?

Flavor Explosion: Every bite bursts with a delightful mix of zingy dill pickles and creamy ranch, ensuring a mouthwatering experience.

Crunch Sensation: The crispy cheese lace adds an irresistible texture, making these tacos stand out from regular varieties.

Quick and Easy: Ready in under 30 minutes, this recipe transforms hectic evenings into a gourmet experience without the hassle.

Versatile Options: Feel free to swap proteins or customize toppings, making these tacos perfect for all preferences.

Crowd-Pleasing Delight: Perfect for gatherings, these Dill Pickle Ranch Smash Chicken Tacos are sure to impress friends and family alike! If you love unique and quick recipes, don’t miss out on Tropical Chicken Pineapple or our Vegetable Bake Cheese.

Dill Pickle Ranch Smash Chicken Taco Ingredients

For the Chicken Filling
Ground Chicken – This tender meat creates a satisfying base for your tacos; feel free to substitute shredded rotisserie chicken or ground turkey for variety.
Garlic Powder – A key flavor enhancer in this mix; adjust according to your taste preference for an extra kick.
Paprika – Adds a touch of mild spiciness and depth; omit if you prefer a milder taco.
Salt and Black Pepper – Essential for balanced seasoning; personalize these staples to suit your taste buds.

For the Tacos
Small Tortillas – The vessel for your delicious filling; opt for corn or gluten-free varieties to fit your dietary needs.
Shredded Mozzarella or Jack Cheese – For a divine crispy cheese lace texture; any preferred melting cheese will work in its place.
Chopped Dill Pickles – Provides that tangy punch; sweet pickles or olives can also serve as tasty alternatives.
Pickle Brine – Elevates the taco’s tartness; feel free to skip if you’re not a big fan.
Shredded Cabbage – Adds a fresh crunch; lettuce or coleslaw mix are great substitutes.
Cottage Cheese – A creamy taco topper blended with ranch seasoning; swap for dairy-free yogurt for a non-dairy option.

With the right ingredients gathered, you’re well on your way to crafting your delightful Dill Pickle Ranch Smash Chicken Tacos with Crispy Cheese lace!

Step‑by‑Step Instructions for Dill Pickle Ranch Smash Chicken Tacos with Crispy Cheese

Step 1: Prepare Chicken
In a mixing bowl, combine the ground chicken with garlic powder, paprika, salt, and pepper. Use your hands or a fork to thoroughly incorporate the seasonings into the chicken. This will enhance the flavor of your Dill Pickle Ranch Smash Chicken Tacos. Set this mixture aside while you heat your skillet.

Step 2: Cook Meat
Heat a non-stick skillet over medium heat. Once hot, add the seasoned ground chicken mixture and cook for 8–10 minutes, breaking it into small pieces with a spatula. Stir occasionally, ensuring the chicken is fully cooked and reaches a golden color, confirming it’s ready for your tasty tacos.

Step 3: Warm Tortillas
In a separate skillet, warm the small tortillas over medium-low heat for about 30 seconds on each side. Keep an eye on them to avoid burning; they should become pliable and slightly golden. This step ensures that the tortillas are soft and ready to embrace your filling for the Dill Pickle Ranch Smash Chicken Tacos.

Step 4: Make Cheese Lace
In another non-stick skillet, sprinkle shredded mozzarella or jack cheese evenly over the surface. Cook over medium-low heat until the cheese starts to bubble and turns golden, about 3–4 minutes. Carefully lift the cheese out with a spatula and place it on paper towels to cool. This crispy cheese lace will add a delightful crunch to your tacos.

Step 5: Assemble Tacos
Begin layering your tacos with a warm tortilla as the base. Add a scoop of the cooked chicken, followed by chopped dill pickles and shredded cabbage. Blend cottage cheese with a bit of ranch seasoning and lemon juice, then dollop it on top. Drizzle with pickle brine for that extra zing, and finally, crown your creation with the crispy cheese lace. Your Dill Pickle Ranch Smash Chicken Tacos are now ready to impress!

Expert Tips for Dill Pickle Ranch Smash Chicken Tacos

  • Flavor Balance: Taste your chicken mixture before cooking. Adjust the salt and spices to ensure the Dill Pickle Ranch flavors shine through.
  • Crispy Cheese Care: When making the cheese lace, use medium-low heat to prevent burning. Monitor closely for the perfect golden color.
  • Tortilla Technique: Warm tortillas in a dry skillet for the best pliability. A hot tortilla holds the filling better and enhances the overall taco experience.
  • Freshness Matters: Assemble tacos just before serving for the freshest taste and finest crunch. Store ingredients separately if making in advance.
  • Make-Ahead Option: Prepare the chicken filling a day in advance. Store in the fridge and reheat when you’re ready to make your Dill Pickle Ranch Smash Chicken Tacos.

How to Store and Freeze Dill Pickle Ranch Smash Chicken Tacos

Fridge: Store leftover chicken filling in an airtight container for up to 3–4 days. Keep cheese lace and other toppings separately to maintain freshness.

Freezer: Freeze the cooked chicken filling in a freezer-safe container for up to 2 months. Thaw in the fridge overnight before reheating.

Cheese Lace: For the best texture, it’s recommended to make cheese lace fresh. If you must store it, keep in a paper towel-lined container for up to 1 day.

Reheating: Reheat the chicken mixture on the stovetop until fully warmed, and crisp the cheese lace back in a warm skillet for a crunchy finish.

What to Serve with Dill Pickle Ranch Smash Chicken Tacos

Experience a delightful fusion of flavors and textures that will elevate your taco night to something truly special!

  • Creamy Avocado Salad: A cool, creamy salad balances the tartness of the tacos, offering a refreshing bite alongside your savory creation.
  • Zesty Coleslaw: Crunchy and tangy, coleslaw adds a crisp texture that complements the warmth of the tacos while enhancing the flavor profile.
  • Chilled Cucumber Soup: The lightness of this soup provides a refreshing contrast, making it a fun starter or side dish for your taco feast.
  • Roasted Sweet Potatoes: Their natural sweetness pairs harmoniously with the tangy and savory flavors of the tacos, adding depth to your meal.
  • Spicy Stuffed Peppers: These bring a kick to your meal with their flavorful stuffing, perfect for those looking for a bit of heat with their Dill Pickle Ranch Smash Chicken Tacos.
  • Crisp Green Salad: A simple mixed green salad topped with vinaigrette adds a fresh note that brightens up the plate, ensuring a balanced experience.

Depending on your cravings, consider pairing your tacos with a crisp lager or a refreshing limeade to round out the meal!

Make Ahead Options

These Dill Pickle Ranch Smash Chicken Tacos with Crispy Cheese Lace are a fantastic choice for meal prep! You can prepare the chicken filling (ground chicken mixed with seasonings) up to 3 days in advance and refrigerate it in an airtight container to maintain its freshness. Additionally, you can pre-make the crispy cheese lace and store it at room temperature for up to 24 hours; just ensure it’s kept away from humidity. When you’re ready to serve, simply heat the chicken in a skillet until warmed through, warm the tortillas briefly, and assemble your tacos for a delicious meal that’s just as flavorful and fresh as if you made them from scratch!

Dill Pickle Ranch Smash Chicken Taco Variations

Feel free to mix things up and create your version of these delicious tacos! Your kitchen is your playground!

  • Protein Swap: Substitute ground chicken with beef, turkey, or even plant-based meat for a different flavor experience.

  • Spice It Up: Add jalapeños or a dash of hot sauce to the chicken mix for a fiery twist that spice lovers will adore.

  • Dairy-Free Delight: Use dairy-free yogurt in place of cottage cheese and your favorite vegan cheese for a creamy, guilt-free topping.

  • Veggie Boost: Toss in seasonal veggies like bell peppers or zucchini for added color, nutrition, and crunch to your tacos.

  • Herb Infusion: Fresh herbs such as cilantro or parsley can elevate the flavor, adding a fresh burst of color and taste.

  • Crispy Variation: Create a cheesy taco shell by folding cheese on itself while cooking; enjoy a crispy alternative to traditional tortillas.

  • Pickle Variety: Experiment with sweet pickles, olives, or even relish if you’re feeling adventurous for a new tangy twist.

  • Flavor Fusion: Try adding a tablespoon of barbecue sauce or your favorite salsa to the chicken for an exciting flavor fusion.

These variations will keep your taco nights vibrant and exciting! And if you’re ever in the mood for more tasty dishes, you might want to check out my Crispy Cheese and Chili French Fries or our comforting Vegetable Bake Cheese. Enjoy experimenting!

Dill Pickle Ranch Smash Chicken Tacos with Crispy Cheese Lace Recipe FAQs

How do I choose perfectly ripe dill pickles for the recipe?
Absolutely! Look for dill pickles that are firm and free from dark spots or blemishes. If they feel soft or mushy, they’re past their prime. Choose pickles with a vibrant green color for the best crunch and flavor!

What is the best way to store leftover chicken filling?
You can store the leftover chicken filling in an airtight container in the fridge for up to 3-4 days. Be sure to cool it down before sealing to avoid condensation, which can lead to sogginess. This method keeps the flavor intact for tasty leftovers!

Can I freeze the chicken filling for later use?
Yes, you can freeze the cooked chicken filling! Place it in a freezer-safe container and it will last for up to 2 months. When you’re ready to enjoy, simply thaw it in the fridge overnight. Reheat it on the stovetop for the best results.

How should I store the cheese lace after making it?
For the best texture, make the cheese lace fresh. However, if you need to store it, keep it in a paper towel-lined container for up to 1 day. This will help absorb moisture and maintain its crispness. When ready to use, quickly crisp it in a skillet again for that delightful crunch!

Are there any dietary considerations with this recipe?
Very! This recipe is gluten-free, especially if you choose gluten-free tortillas and ensure your cottage cheese and seasoning do not contain gluten ingredients. Always check the labels for hidden sources of gluten and consider options for dairy-free toppings like yogurt if needed.

What can I do if my cheese lace burns?
Don’t worry! If the cheese lace burns, simply adjust the heat to medium-low when cooking it next time. Keep a close eye on it as it cooks, and remember—each stove varies! If you need to salvage it, you can regrate fresh cheese and try again for that perfect crispy layer.

Dill Pickle Ranch Smash Chicken Tacos with Crispy Cheese

Dill Pickle Ranch Smash Chicken Tacos with Crispy Cheese Bliss

Enjoy a flavor explosion with Dill Pickle Ranch Smash Chicken Tacos featuring crispy cheese lace, perfect for a quick weeknight dinner.
Prep Time 10 minutes
Cook Time 15 minutes
Total Time 25 minutes
Servings: 4 tacos
Course: Chicken
Cuisine: Mexican
Calories: 350

Ingredients
  

For the Chicken Filling
  • 1 pound Ground Chicken Feel free to substitute shredded rotisserie chicken or ground turkey.
  • 1 teaspoon Garlic Powder Adjust according to taste preference.
  • 1 teaspoon Paprika Omit if you prefer milder flavor.
  • 1 teaspoon Salt
  • 1 teaspoon Black Pepper
For the Tacos
  • 8 small Tortillas Opt for corn or gluten-free varieties.
  • 1 cup Shredded Mozzarella or Jack Cheese Any preferred melting cheese works.
  • 1 cup Chopped Dill Pickles Sweet pickles or olives can be alternatives.
  • 2 tablespoons Pickle Brine Skip if not preferred.
  • 1 cup Shredded Cabbage Lettuce or coleslaw mix are great substitutes.
  • 1/2 cup Cottage Cheese Swap for dairy-free yogurt if needed.

Equipment

  • Non-Stick Skillet
  • mixing bowl
  • spatula

Method
 

Step-by-Step Instructions
  1. In a mixing bowl, combine the ground chicken with garlic powder, paprika, salt, and pepper. Mix thoroughly to incorporate seasonings into the chicken.
  2. Heat a non-stick skillet over medium heat. Add the seasoned ground chicken mixture and cook for 8–10 minutes, breaking it into small pieces with a spatula.
  3. In a separate skillet, warm the small tortillas over medium-low heat for about 30 seconds on each side.
  4. In another non-stick skillet, sprinkle shredded cheese evenly and cook over medium-low heat until golden, about 3–4 minutes. Lift out with a spatula.
  5. Layer the tacos with a warm tortilla, a scoop of cooked chicken, chopped dill pickles, and shredded cabbage. Top with blended cottage cheese, drizzle with pickle brine, and crown with crispy cheese lace.

Notes

Assemble tacos just before serving for the freshest taste. Store ingredients separately if preparing in advance.

Dumpling and Smashed Cucumber Salad with Peanut Sauce Bliss

As the sun begins to dip below the horizon, my kitchen turns into a symphony of sizzling sounds and delightful aromas. Today, I’m excited to share my Quick and Customizable Dumpling and Smashed Cucumber Salad with Peanut Sauce, a vibrant dish that brings every flavor sensation to the table. Ready in just 25 minutes, this meal is perfect for those busy weeknights when you crave something nourishing without the hassle. With a delightful crunch from the smashed cucumbers and the crispy goodness of potstickers, it’s incredibly versatile, easily adapted to fit any dietary preferences—whether you need a gluten-free or nut-free option. Want to impress your family or simply treat yourself to a cozy meal? Stick around to discover how this comforting recipe can elevate your weeknight dinners!

Why Is This Dish a Must-Try?

Quick Preparation: In just 25 minutes, you’ll have a delicious meal that’s ready to serve, ideal for those hectic weeknights.

Endless Customization: The recipe offers simple swaps for gluten-free and nut-free options, allowing everyone to enjoy it.

Flavor Explosion: With the rich, creamy peanut sauce and refreshing cucumber crunch, every bite is a delightful combination of tastes and textures.

Crowd-Pleasing Appeal: Whether for family dinners or casual gatherings, this dish stands out and satisfies diverse palates.

Easy to Make: Even beginner cooks can master this dish, making it a perfect starter recipe for anyone craving homemade meals.

Dumpling and Smashed Cucumber Salad Ingredients

For the Peanut Sauce

  • Smooth Peanut Butter – Provides the creamy base for the peanut sauce; substitute with sunflower butter for a nut-free option.
  • Garlic Clove – Adds aromatic flavor; shallots provide a milder alternative if desired.
  • Just Boiled Water – Adjusts the sauce’s consistency; use less for a thicker sauce or more for a thinner dip.
  • Soy Sauce – Contributes umami and saltiness; for gluten-free, use tamari instead.
  • Rice Vinegar – Balances flavors with acidity; apple cider vinegar can be substituted.
  • Granulated Sugar – Enhances sweetness in the peanut sauce; honey or maple syrup are excellent natural alternatives.
  • Chile Crisp or Oil – Adds heat and texture; adjust according to personal spice preference.

For the Cucumber Salad

  • Persian Cucumbers – Offer freshness and crunch; regular cucumbers are acceptable substitutes.
  • Salt – Draws out moisture from cucumbers and intensifies flavor; use sparingly to avoid over-salting.

For the Dumplings

  • Frozen Potsticker Dumplings – Main protein source with delightful texture; follow package instructions for preparation.
  • Vegetable Oil – Ensures potstickers brown nicely when frying; any neutral oil will suffice.

Optional Garnishes

  • Cilantro – Provides fresh herbaceous brightness; can be omitted for a herb-free dish.
  • Toasted White Sesame Seeds or Chopped Roasted Peanuts – Adds extra crunch and flavor; optional based on preference.

Step‑by‑Step Instructions for Dumpling and Smashed Cucumber Salad with Peanut Sauce

Step 1: Prepare the Peanut Sauce
In a medium bowl, combine ½ cup of smooth peanut butter with one minced garlic clove. Gradually whisk in ¼ cup of just boiled water until smooth, adjusting the consistency to your liking. Next, stir in 2 tablespoons of soy sauce, 1 tablespoon of rice vinegar, 1 tablespoon of granulated sugar, and a drizzle of chile oil. Set the sauce aside to thicken while you prepare the rest of the dish.

Step 2: Make the Cucumber Salad
Slice 2 Persian cucumbers into rounds, then gently smash them with the flat side of a knife to release their juices. Place the smashed cucumbers in a colander and sprinkle them lightly with salt. Allow them to sit for about 10 minutes; this will help draw out excess moisture, which enhances their crunchiness and flavor in the salad.

Step 3: Cook the Potstickers
Heat 2 tablespoons of vegetable oil in a large skillet over medium heat. Arrange the frozen potsticker dumplings flat-side down in the skillet, cooking for 1-2 minutes until they turn golden brown. Carefully add ¼ cup of water to the skillet, cover with a lid, and let the dumplings steam for 3-4 minutes or until they are fully cooked and tender.

Step 4: Assemble the Dish
On a serving platter, layer the crispy potstickers and the smashed cucumber salad. Drizzle your prepared peanut sauce generously over the top, ensuring that both the potstickers and cucumbers are well-coated. For an extra pop of color and flavor, garnish with fresh cilantro, toasted sesame seeds, or chopped roasted peanuts as desired.

Expert Tips for Dumpling and Smashed Cucumber Salad

  • Perfectly Crispy Potstickers: Ensure the oil is hot before adding dumplings to achieve a golden, crispy bottom while preventing them from sticking.

  • Sauce Consistency Matters: Let the peanut sauce rest after mixing; this allows it to thicken beautifully and cling to your dumplings and cucumbers.

  • Cucumber Salting Tip: Be careful with the amount of salt on your cucumbers. Too much can result in sogginess; sprinkle lightly and let sit to enhance their natural crunch.

  • Spice to Your Taste: Adjust the amount of chile oil in the sauce based on your heat preference. This way, everyone can enjoy the dumpling and smashed cucumber salad with peanut sauce to their liking.

  • Experiment with Variety: Don’t hesitate to try different proteins like shrimp or tofu in your potstickers for a unique twist on this customizable dish.

Dumpling and Smashed Cucumber Salad Variations

Feel free to personalize your dish with these delightful twists that make every bite a new experience!

  • Nut-Free: Substitute peanut butter with sunflower butter for a creamy, nut-free peanut sauce. This allows anyone with nut allergies to relish the flavors without worry.

  • Gluten-Free: Swap soy sauce for tamari. This small change opens up this meal to those avoiding gluten, ensuring everyone at your table can join in on the fun!

  • Add Vegetables: Toss in colorful bell peppers or shredded carrots for extra nutrients and a vibrant presentation. This not only enhances the crunch but also introduces enticing colors that are sure to attract the eye.

  • Spicy Options: Mix in extra chile oil or fresh chilis right into your peanut sauce; the additional heat elevates the flavor profile wonderfully. If you’re a heat lover, this is a must-try!

  • Protein Alternatives: Experiment with different dumpling fillings like shrimp, chicken, or tofu. Each variation brings a unique twist that keeps your meals exciting and fresh.

  • Zesty Enhancements: Squeeze in some lime juice for a zesty kick before serving. This brightens all the flavors, making your dish even more refreshing.

  • Herb-Infused: Try adding fresh mint or Thai basil in place of cilantro for a unique aromatic experience. These herbs add depth to the dish that pairs beautifully with the peanut sauce.

Feel inspired? For a refreshing side, check out this Crunch Cucumber Salad to complement your meal! And if potstickers are your jam, don’t forget to try my Cabbage Cucumber Salad for an extra crunch!

Storage Tips for Dumpling and Smashed Cucumber Salad with Peanut Sauce

Fridge: Store leftover dumpling and smashed cucumber salad in airtight containers for up to 3 days. Seal tightly to maintain freshness and prevent moisture from affecting the cucumbers.

Peanut Sauce: Keep the peanut sauce in an airtight container in the refrigerator for up to 1 week. Stir well before using, as it may thicken over time.

Dumpling Reheating: Reheat potstickers by adding a splash of water in a skillet and covering it to steam for about 3–4 minutes, restoring their crispy texture.

Cucumber Salad Freshness: Consume the smashed cucumber salad within 2 days for optimal crunch and flavor. If made ahead, add sauce just before serving to prevent sogginess.

Make Ahead Options

These Dumpling and Smashed Cucumber Salad with Peanut Sauce are perfect for meal prep enthusiasts! You can prepare the peanut sauce up to 3 days in advance by mixing all the ingredients and refrigerating it in an airtight container; this saves time while ensuring the flavors deepen. The smashed cucumbers can be made 24 hours ahead—just slice and lightly salt them, letting them sit in the colander before refrigerating to maintain their crunch. When you’re ready to serve, simply fry your potstickers fresh for the best texture, then assemble your dish for that delightful, restaurant-quality result with minimal effort. Just follow these make-ahead tips, and you’ll enjoy nutritious meals with ease!

What to Serve with Dumpling and Smashed Cucumber Salad with Peanut Sauce

Pair your delightful dish with complementary sides and beverages that enhance the dining experience.

  • Steamed Jasmine Rice: This fluffy rice absorbs the rich peanut sauce, providing a comforting, neutral base that balances flavors. A perfect canvas for all that saucy goodness!

  • Fresh Spring Rolls: Filled with vibrant veggies and herbs, these rolls add a crunch and freshness that pairs beautifully with the savory dumplings. Dip them in extra peanut sauce or a light soy dressing.

  • Sesame-Infused Edamame: Lightly salted and tossed with sesame oil, these tender soybeans offer a satisfying protein boost while also carrying a subtly nutty flavor.

  • Crispy Tempura Vegetables: The light batter and crunchy texture of tempura add an exciting contrast to the dish and amplify the fresh elements of the cucumber salad. They’re an addictive snack everyone will love!

  • Spicy Thai Mango Salad: The sweetness of mango, combined with a zesty lime dressing, brightens your plate, offering a refreshing contrast to the dish’s creaminess.

  • Chilled Green Tea: Cool and subtly sweet, this drink cleanses the palate between bites, making each mouthful of dumplings and cucumber salad even more delightful.

  • Ginger-Lime Spritzer: A refreshing non-alcoholic beverage that can enhance your meal experience. Zesty flavors complement the peanut sauce while refreshing your taste buds.

  • Coconut Sorbet: For a light dessert, this tropical treat’s subtle sweetness pairs harmoniously with the Asian-inspired flavors of your main course, capping off the meal beautifully!

Dumpling and Smashed Cucumber Salad with Peanut Sauce Recipe FAQs

What type of cucumbers are best for this salad?
Persian cucumbers are ideally suited for this dish due to their crispness and thin skin. However, you can substitute with regular cucumbers—just be sure to peel them for a similar texture. Look for cucumbers that are firm and free of dark spots for optimal freshness.

How should I store leftovers of this dish?
Store the leftover dumpling and smashed cucumber salad in airtight containers for up to 3 days in the fridge. Be sure to seal tightly to maintain freshness. The peanut sauce can be refrigerated separately for up to 1 week; just give it a good stir before using as it may thicken over time.

Can I freeze the dumplings?
Absolutely! If you have leftover cooked dumplings, you can freeze them for up to 3 months. To do this, place them in a single layer on a baking sheet and freeze until solid. Then, transfer to a freezer-safe bag or container. To reheat, steam with a splash of water for about 3-4 minutes to regain their texture.

What if my peanut sauce is too thick?
If you find your peanut sauce too thick after it has rested, simply whisk in a small amount of hot water, one tablespoon at a time, until you reach your desired consistency. This allows you to customize the sauce to perfectly drizzle over your dumplings and cucumber salad.

Is this recipe suitable for those with nut allergies?
Yes! For a nut-free option, simply swap the smooth peanut butter for sunflower butter. This alternative provides a creamy texture without the nuts while still ensuring that everyone at the table can enjoy this delicious dumpling and smashed cucumber salad with peanut sauce.

Dumpling and Smashed Cucumber Salad with Peanut Sauce

Dumpling and Smashed Cucumber Salad with Peanut Sauce Bliss

Quick and Customizable Dumpling and Smashed Cucumber Salad with Peanut Sauce creates a vibrant dish perfect for nourishing weeknights.
Prep Time 15 minutes
Cook Time 10 minutes
Resting Time 5 minutes
Total Time 25 minutes
Servings: 4 servings
Course: Lunch
Cuisine: Asian
Calories: 350

Ingredients
  

Peanut Sauce
  • ½ cup smooth peanut butter substitute with sunflower butter for nut-free option
  • 1 clove garlic minced; shallots provide a milder alternative
  • ¼ cup just boiled water adjust for sauce consistency
  • 2 tablespoons soy sauce use tamari for gluten-free
  • 1 tablespoon rice vinegar apple cider vinegar can be substituted
  • 1 tablespoon granulated sugar honey or maple syrup are alternatives
  • to taste none chile crisp or oil adds heat and texture
Cucumber Salad
  • 2 pieces Persian cucumbers regular cucumbers are acceptable substitutes
  • to taste none salt draws out moisture and intensifies flavor
Dumplings
  • 1 package frozen potsticker dumplings follow package instructions for preparation
  • 2 tablespoons vegetable oil any neutral oil will suffice
Optional Garnishes
  • to taste none cilantro can be omitted
  • to taste none toasted white sesame seeds or chopped roasted peanuts adds extra crunch and flavor

Equipment

  • Medium bowl
  • large skillet
  • Colander

Method
 

Preparation Instructions
  1. In a medium bowl, combine ½ cup of smooth peanut butter with one minced garlic clove. Gradually whisk in ¼ cup of just boiled water until smooth, adjusting the consistency to your liking. Next, stir in 2 tablespoons of soy sauce, 1 tablespoon of rice vinegar, 1 tablespoon of granulated sugar, and a drizzle of chile oil. Set the sauce aside to thicken.
  2. Slice 2 Persian cucumbers into rounds, then gently smash them with the flat side of a knife. Place the smashed cucumbers in a colander, sprinkle lightly with salt, and let sit for about 10 minutes.
  3. Heat 2 tablespoons of vegetable oil in a large skillet over medium heat. Arrange the frozen potsticker dumplings flat-side down in the skillet, cooking for 1-2 minutes until golden brown. Carefully add ¼ cup of water, cover, and let steam for 3-4 minutes or until fully cooked.
  4. On a serving platter, layer the crispy potstickers and the smashed cucumber salad. Drizzle the peanut sauce generously over the top and garnish with cilantro, sesame seeds, or peanuts as desired.

Notes

Store leftovers in airtight containers; peanut sauce can last up to 1 week in the fridge. Reheat potstickers with added water for steaming.