Spicy Black Bean Burgers: Your New Favorite BBQ Delight

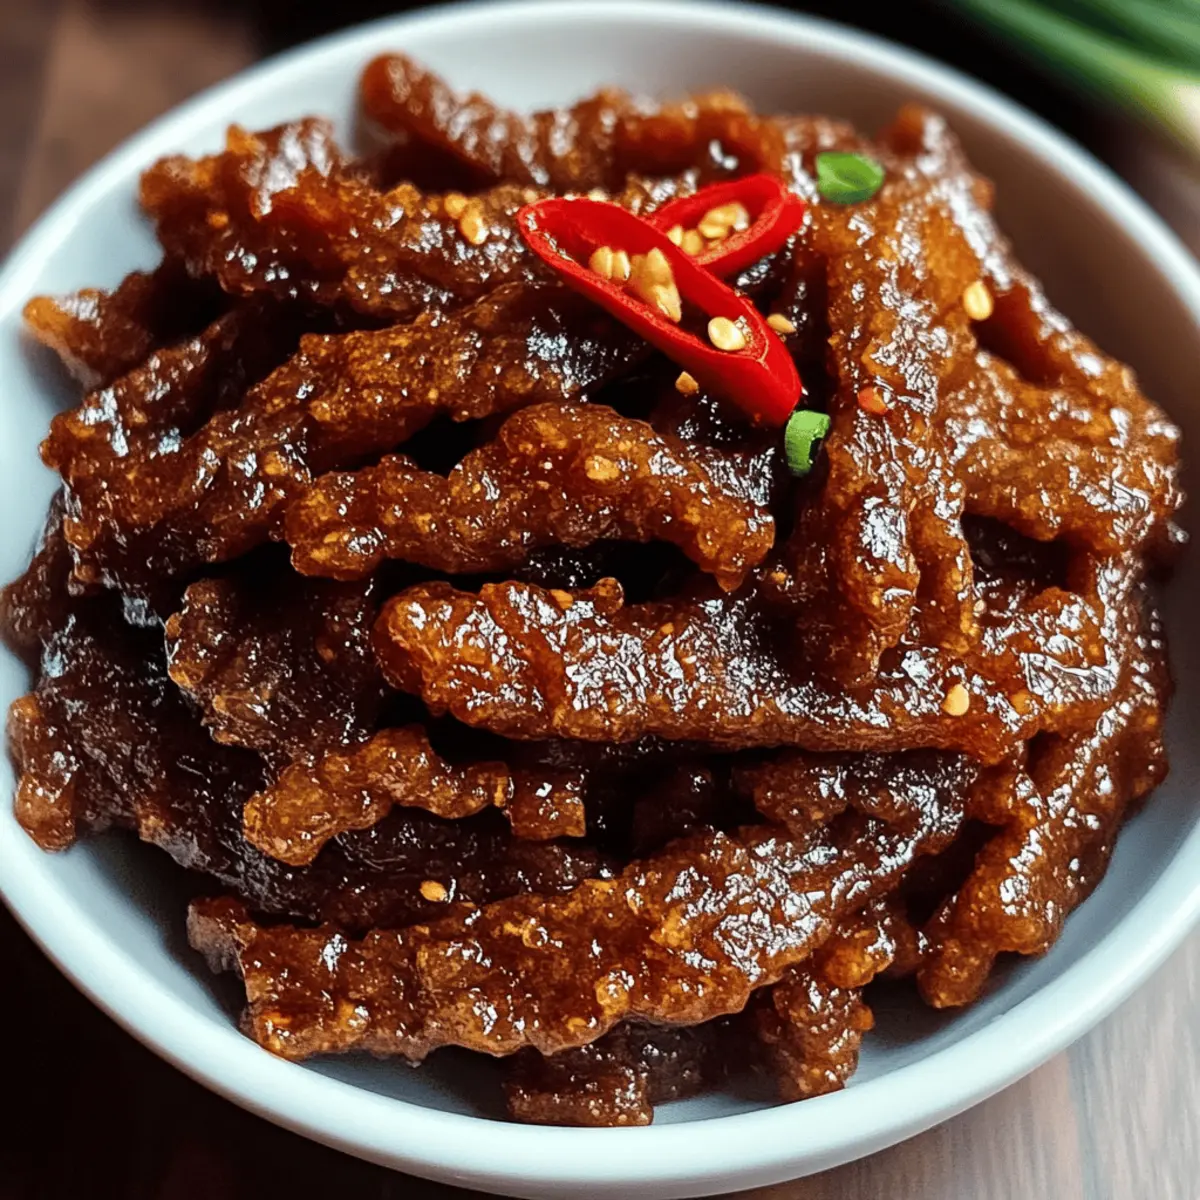
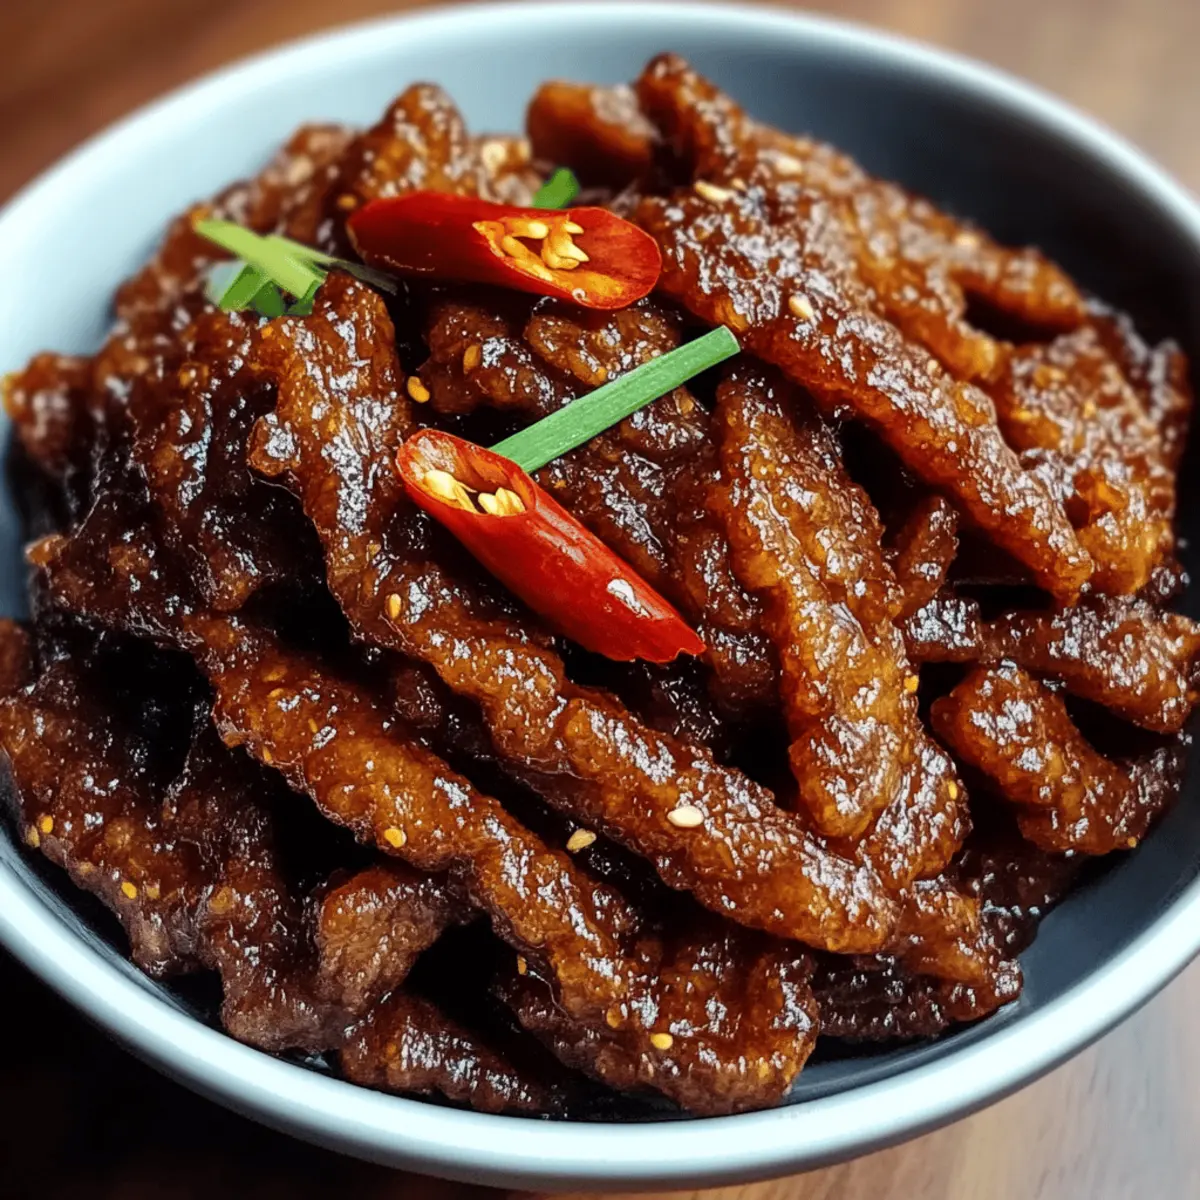
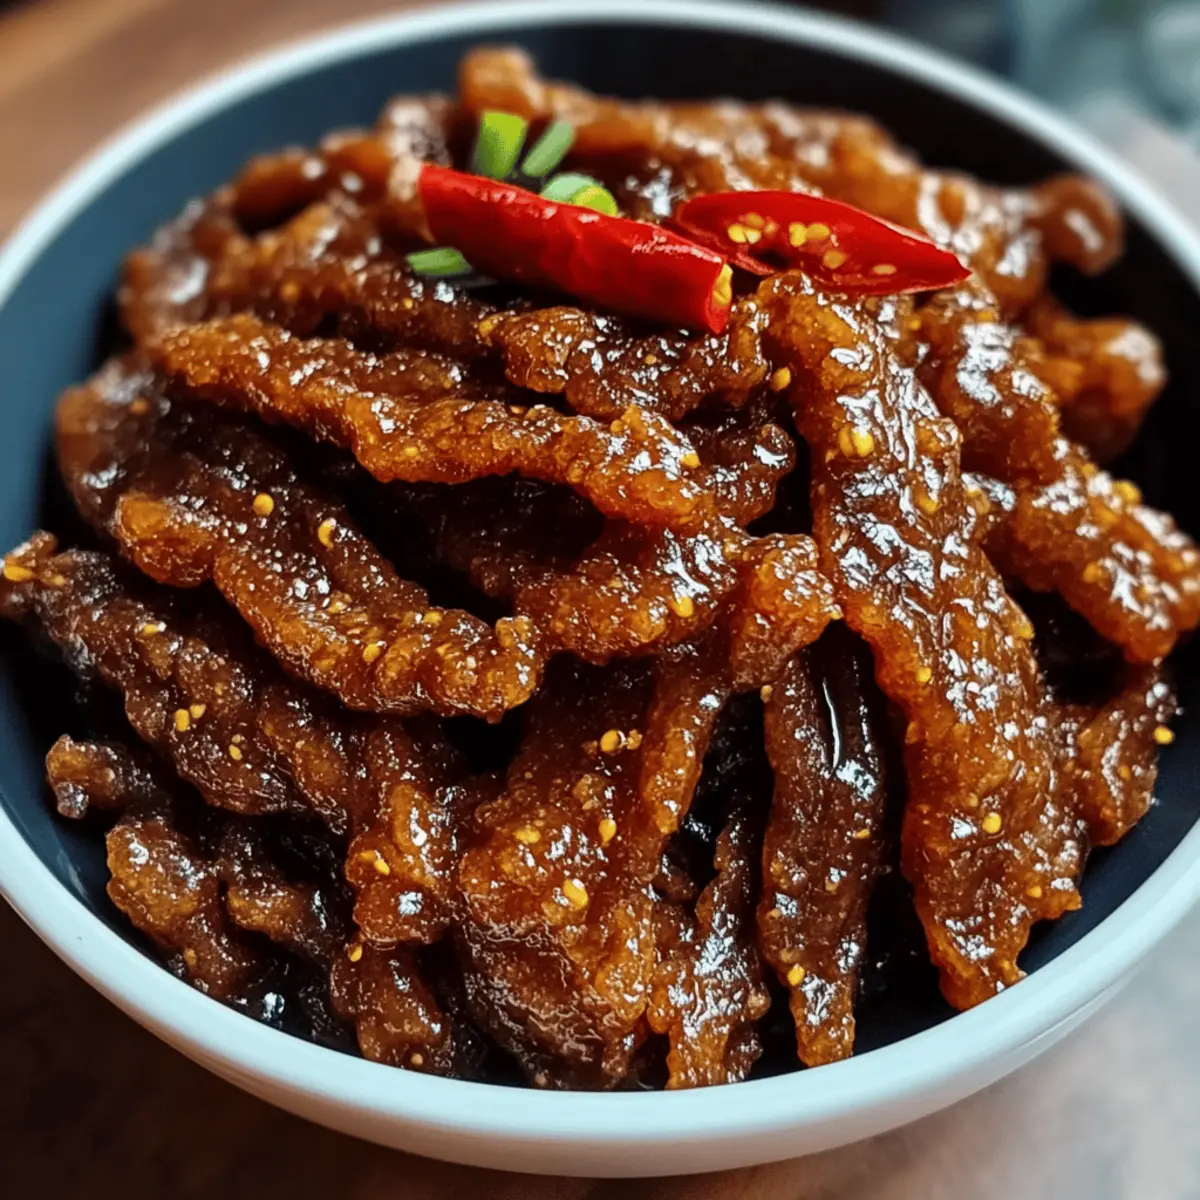
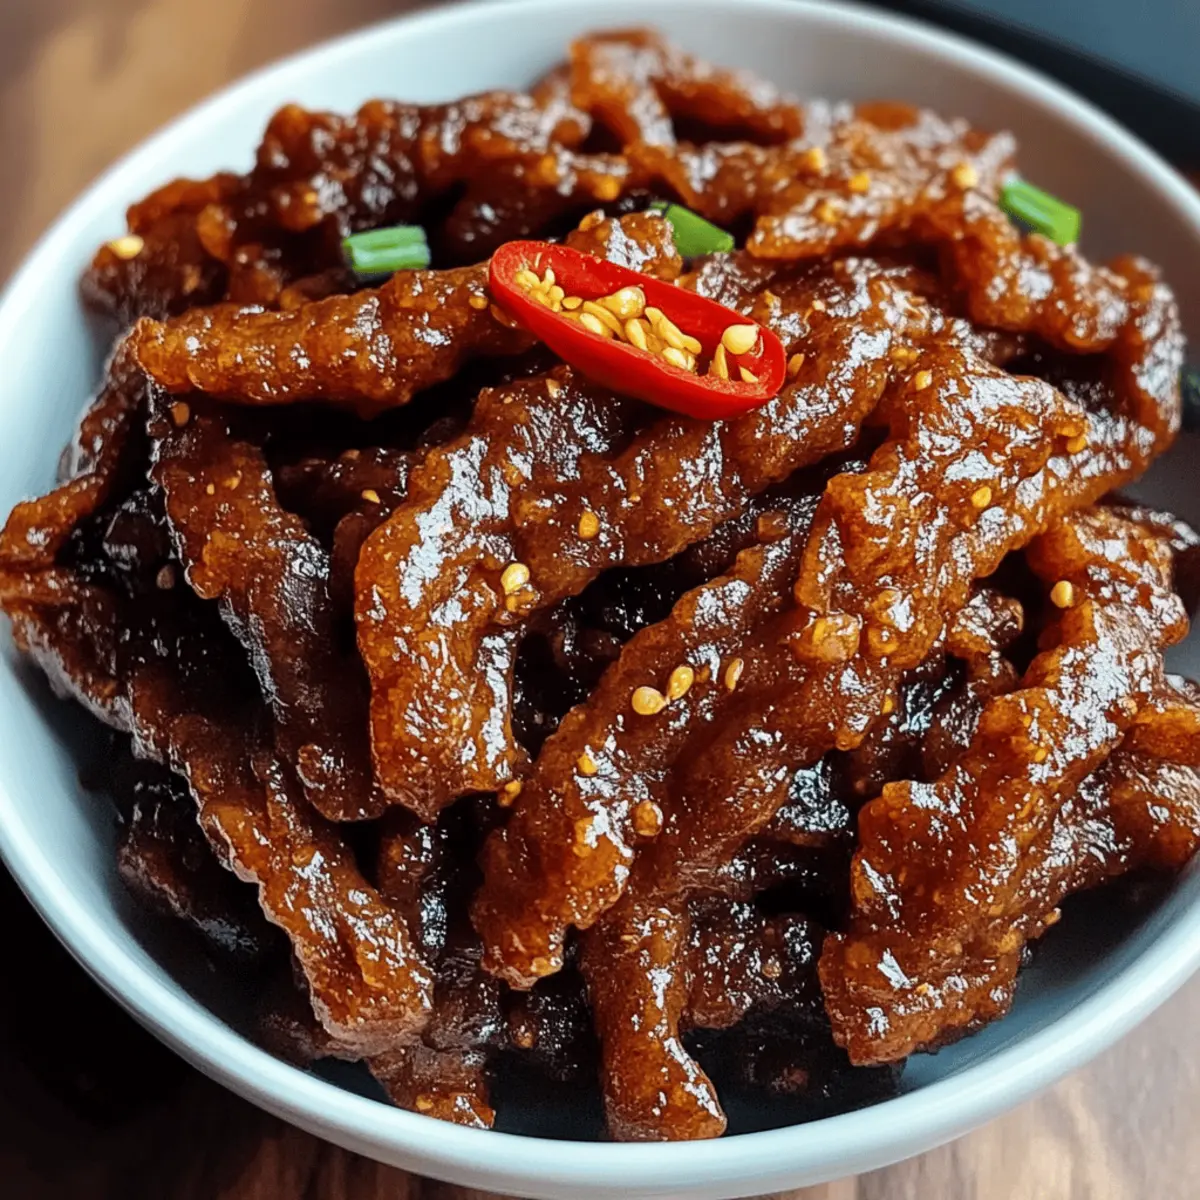
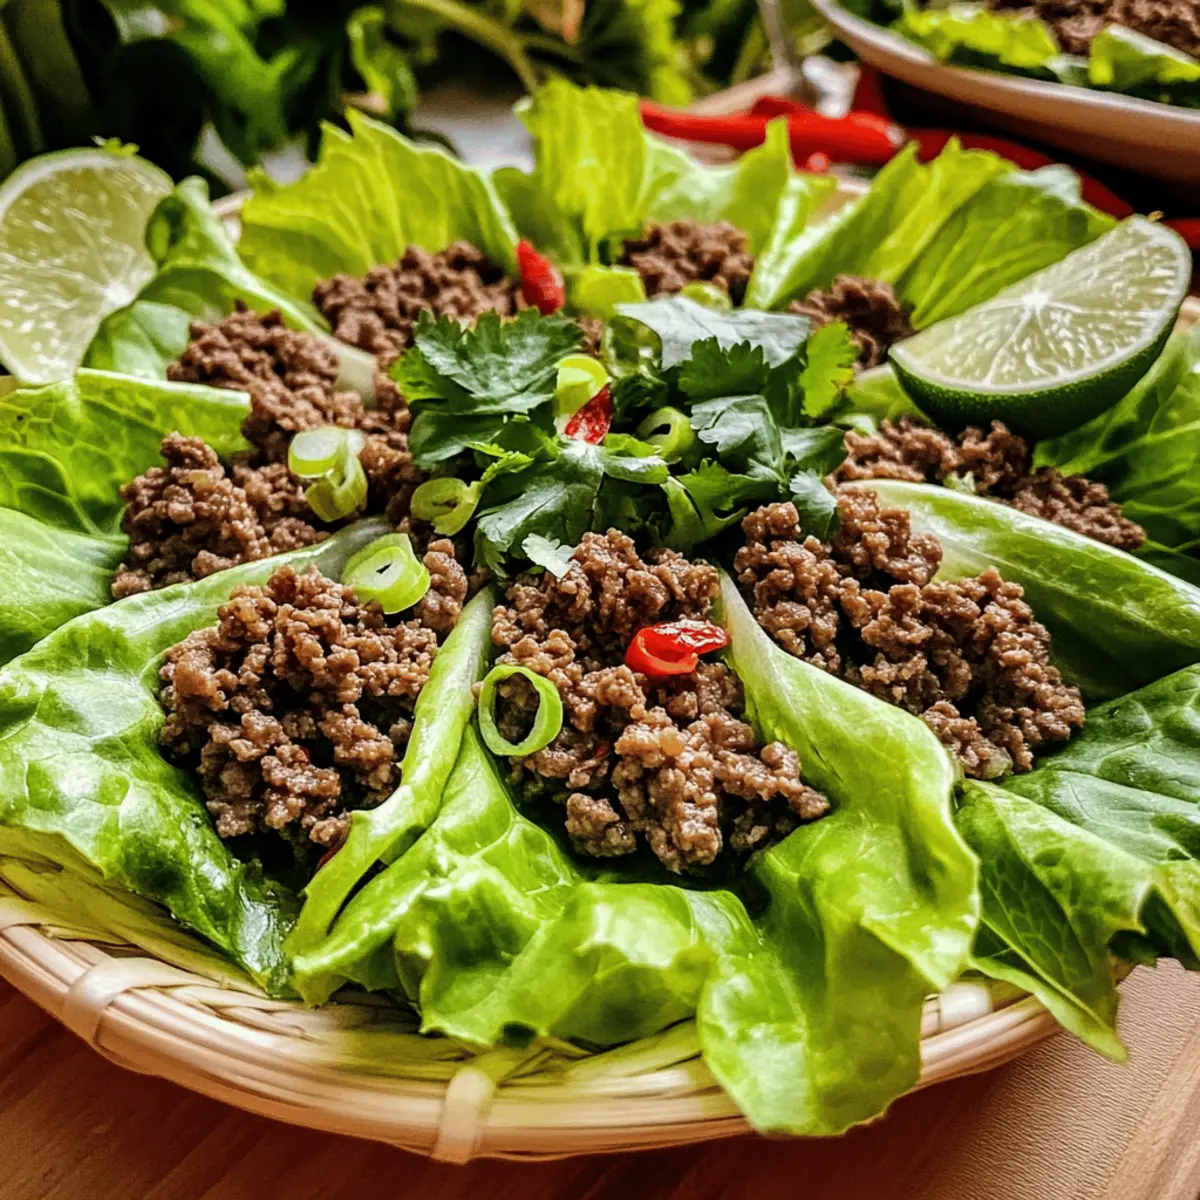
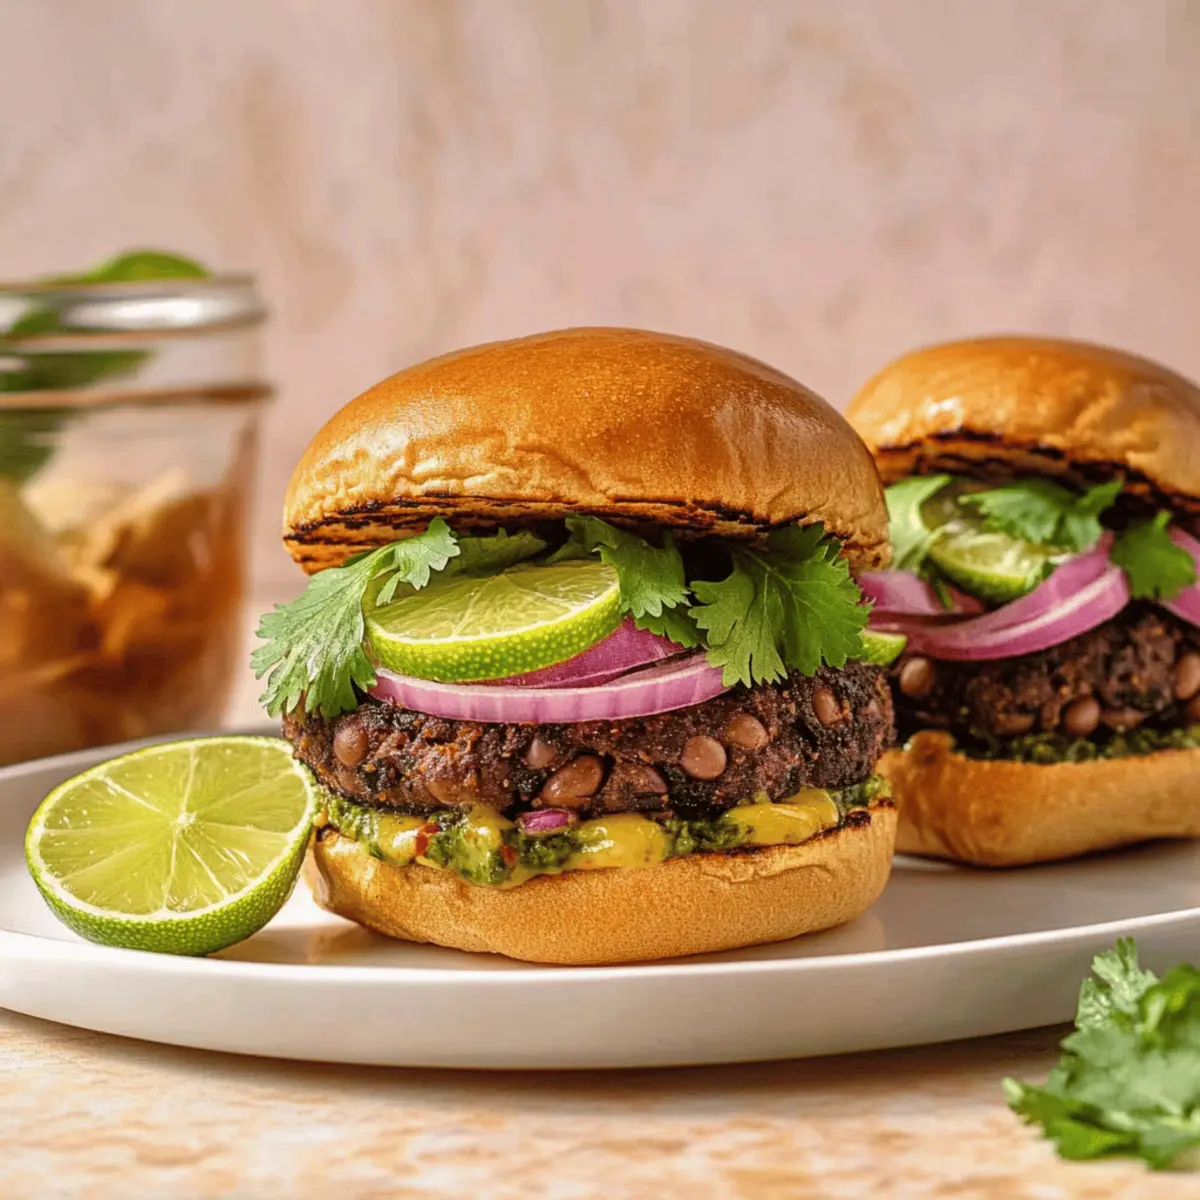
The sizzle of the grill mingles with laughter as summer BBQ season approaches, and I can’t help but raise my spatula in excitement. This time, I’m saying goodbye to ordinary burgers and welcoming my Spicy Black Bean Burgers to the table—your new best friend for a vegetarian BBQ. Picture a patty packed with jalapeño heat, bright cilantro, and zesty lime, all coming together in a mouthwatering explosion of flavor. These easy-to-make burgers not only come together in a flash but are also freezer-friendly, making meal prep a breeze. Whether you’re a dedicated vegetarian or just looking to mix things up, these patties are destined to impress even the staunchest meat lovers among us. So, are you ready to fire up your grill and give your taste buds a spicy surprise?

Why Choose Spicy Black Bean Burgers?

Deliciously Unique: This recipe reinvents the classic burger with a spicy twist, perfect for those seeking a meat-free option.

Quick and Easy: Enjoy a hassle-free cooking experience with straightforward prep that takes minimal time, making it ideal for busy weeknights or BBQ gatherings.

Freezable Convenience: Make a double batch and freeze for later! Just thaw and grill whenever cravings strike, ensuring you always have a tasty meal on hand.

Flavor Explosion: The vibrant flavors of cilantro and lime combined with a kick from jalapeño create a burger that delights the palate, making it a crowd favorite at any gathering.

Versatile & Customizable: Add your favorite toppings like avocado or salsa for extra flair, or try pairing these burgers with a refreshing Watermelon Avocado Salad for a delightful summer meal.

Spicy Black Bean Burger Ingredients

• Get ready to bring the heat!

For the Burger Mixture

  • Jalapeño – Adds heat and flavor; omit seeds for less spice.
  • Red Onion – Provides sweetness and depth; substitute with yellow onion if unavailable.
  • Garlic Cloves – Offers aromatic flavor; fresh garlic is preferred for the best taste.
  • Black Beans (2 cans, drained and rinsed about 15 oz) – Base ingredient providing protein and texture; can use other beans in a pinch like kidney beans.
  • Lime Juice (juice of ½ lime, about 1 Tbsp) – Adds acidity and brightness to balance the flavors of your spicy black bean burger.
  • Cilantro (⅓ cup) – Herb that contributes freshness and flavor; omit or substitute with parsley if preferred.
  • Cumin (2 tsp) – Spice for earthy depth; no direct substitute, but chili powder can add similarity.
  • Chili Powder (1 tsp) – Adds warmth and an extra layer of spice; tailor to your taste.
  • Red Pepper Flakes (¼ – ½ tsp) – Enhances heat to taste; adjust or omit to control spice preference.
  • Cracked Pepper (½ tsp) – Gives a peppery note; use freshly cracked for the best flavor.
  • Sea Salt (½ tsp) – Essential for flavor enhancement; adjust based on preference.
  • Breadcrumbs (⅔ cup) – Acts as a binding agent; use gluten-free or panko as alternatives.
  • Large Egg (1, lightly beaten) – Acts as a binder to maintain burger structure; can use flax egg for a vegan option.
  • Corn (½ cup) – Adds a pop of sweetness and texture; frozen corn works well too.
  • Sriracha or Hot Sauce (1 tsp optional) – An optional addition for extra spice if you like it hot!

For Cooking

  • Olive Oil (for grilling) – Helps achieve a beautiful golden crust on the burger; use a high smoke point oil for best results.

Get ready to impress at your next BBQ with these deliciously spiced black bean burgers!

Step‑by‑Step Instructions for Spicy Black Bean Burgers

Step 1: Prep Vegetables
Start by finely grinding the jalapeño, red onion, and garlic in a food processor. If you don’t have a processor, simply chop them until very fine. This should take about 1-2 minutes. Once the vegetables are ready, set them aside, and get ready to mix the rest of your ingredients for the Spicy Black Bean Burgers.

Step 2: Mix Beans & Spices
In the same food processor, add one can of drained and rinsed black beans, fresh cilantro, lime juice, cumin, chili powder, and red pepper flakes. Pulse the mixture until well combined, but leave some chunks for texture, about 10-15 seconds. The result should be a thick mixture with a few whole beans still visible, perfect for your bold black bean burgers.

Step 3: Combine Ingredients
Transfer your bean mixture into a large mixing bowl. Add the remaining can of black beans, the lightly beaten egg, breadcrumbs, corn, and any optional hot sauce if desired. Stir everything together until fully mixed. This ensures every bite of your Spicy Black Bean Burgers explodes with flavor. Aim for a cohesive texture that holds together well.

Step 4: Form Patties
Using your hands, shape the mixture into burger-sized patties, about ¾ inch thick. If the mixture feels too loose, let it chill in the refrigerator for 15 minutes to firm up. This step is essential, especially for grilling, to ensure your spicy black bean burgers hold their shape on the grill or in the pan.

Step 5: Cooking
Preheat your grill over medium heat, adding a bit of olive oil to prevent sticking, or heat a large skillet with oil on medium heat. Cook the patties for about 4-5 minutes on each side, or until they are golden brown and crispy. Keep an eye on them to prevent overcooking, achieving that perfect crispy outside while retaining moisture inside.

Step 6: Serve
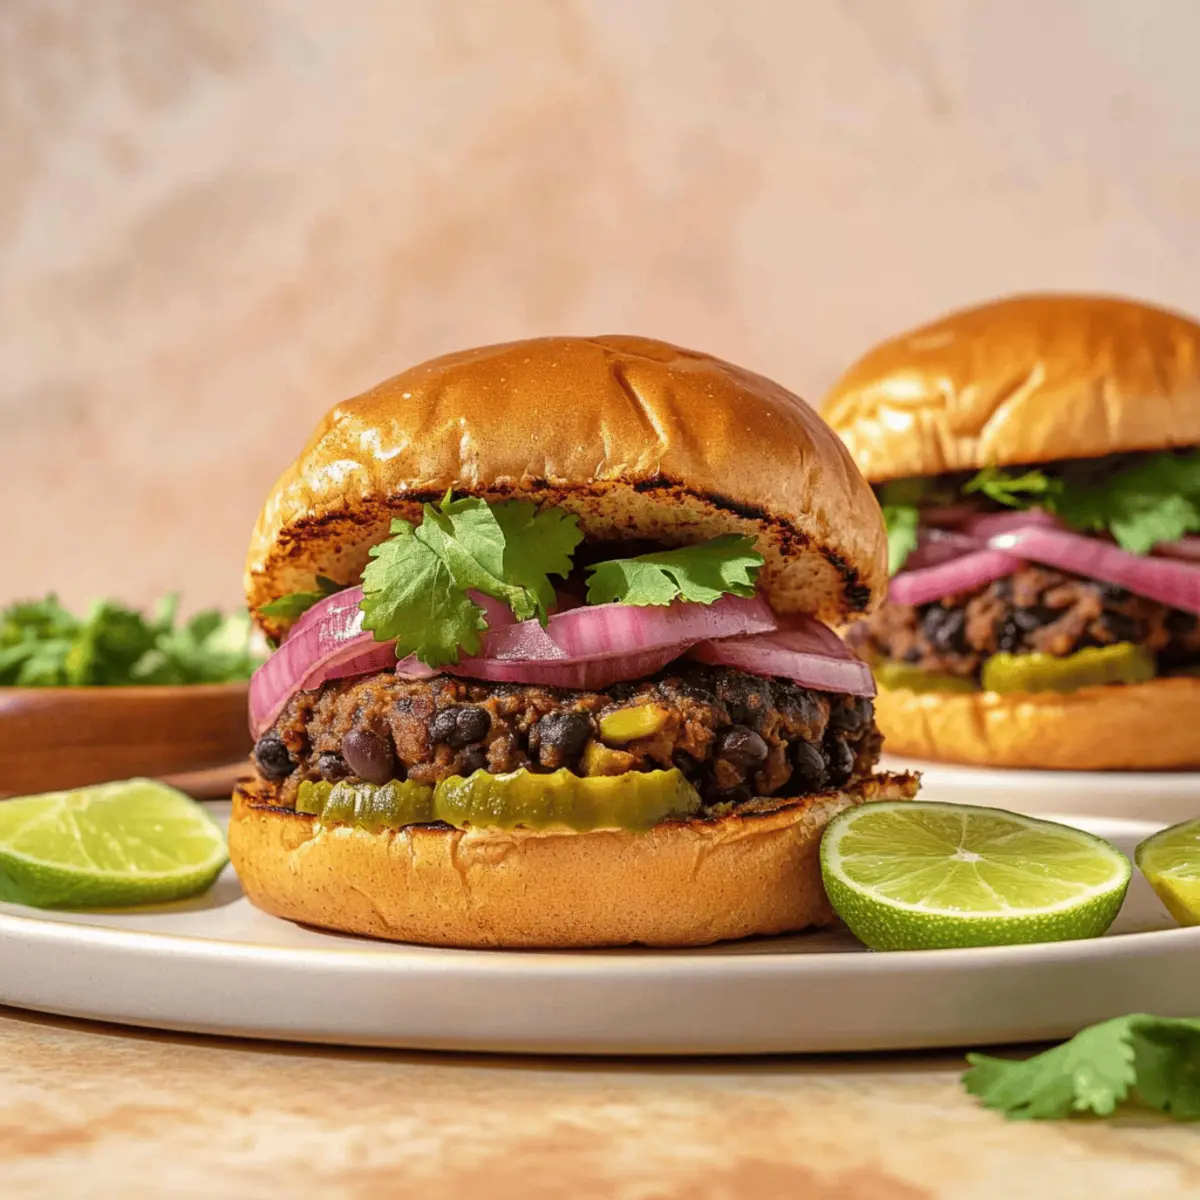
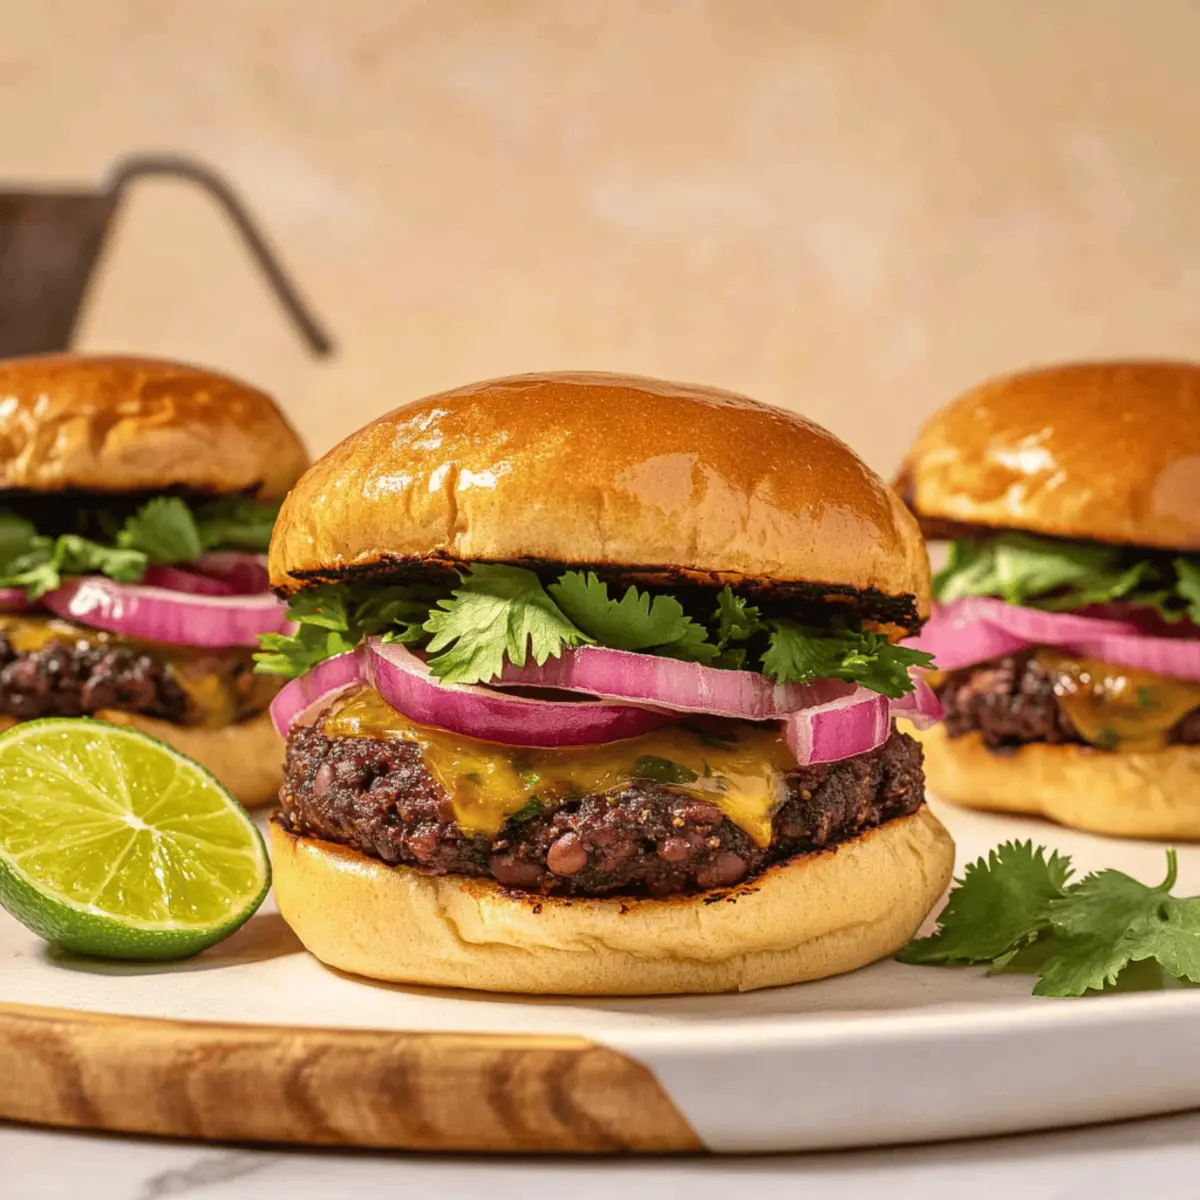
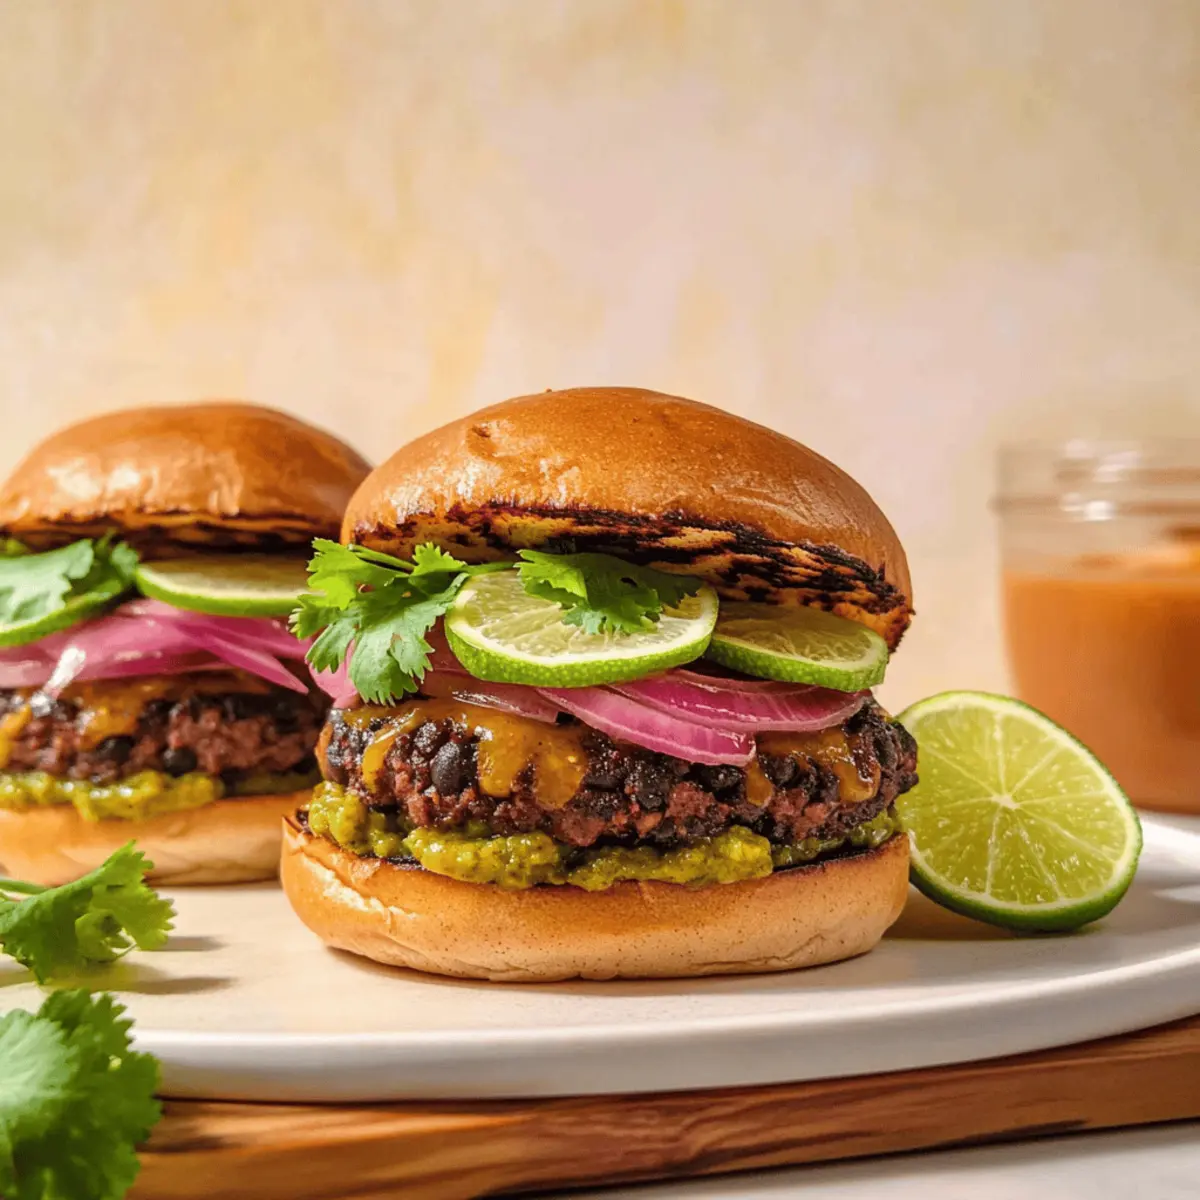
Optionally, toast buns on the grill for added flavor. Once cooked, place your Spicy Black Bean Burgers on the buns and add your favorite toppings, such as avocado, lettuce, or salsa. Enjoy the burst of flavors and watch as your burger becomes the star of your BBQ gathering!

How to Store and Freeze Spicy Black Bean Burgers

Fridge: Store cooked spicy black bean burgers in an airtight container for up to 5 days. Make sure to let them cool completely before sealing to prevent moisture build-up.

Freezer: Uncooked patties can be frozen for up to 3 months. Place them on a parchment-lined baking sheet, and freeze until solid before transferring to a freezer bag for easy access.

Reheating: Thaw frozen spicy black bean burgers in the fridge overnight or use the microwave for quick defrosting. Reheat in a skillet over medium heat for about 4-5 minutes per side until heated through.

Meal Prep: Make a double batch and freeze for quick meals! You’ll always have delicious spicy black bean burgers ready to grill whenever cravings strike.

What to Serve with Spicy Black Bean Burgers?

Savor a delightful medley of flavors by pairing these zesty burgers with complementary sides that elevate your meal experience.

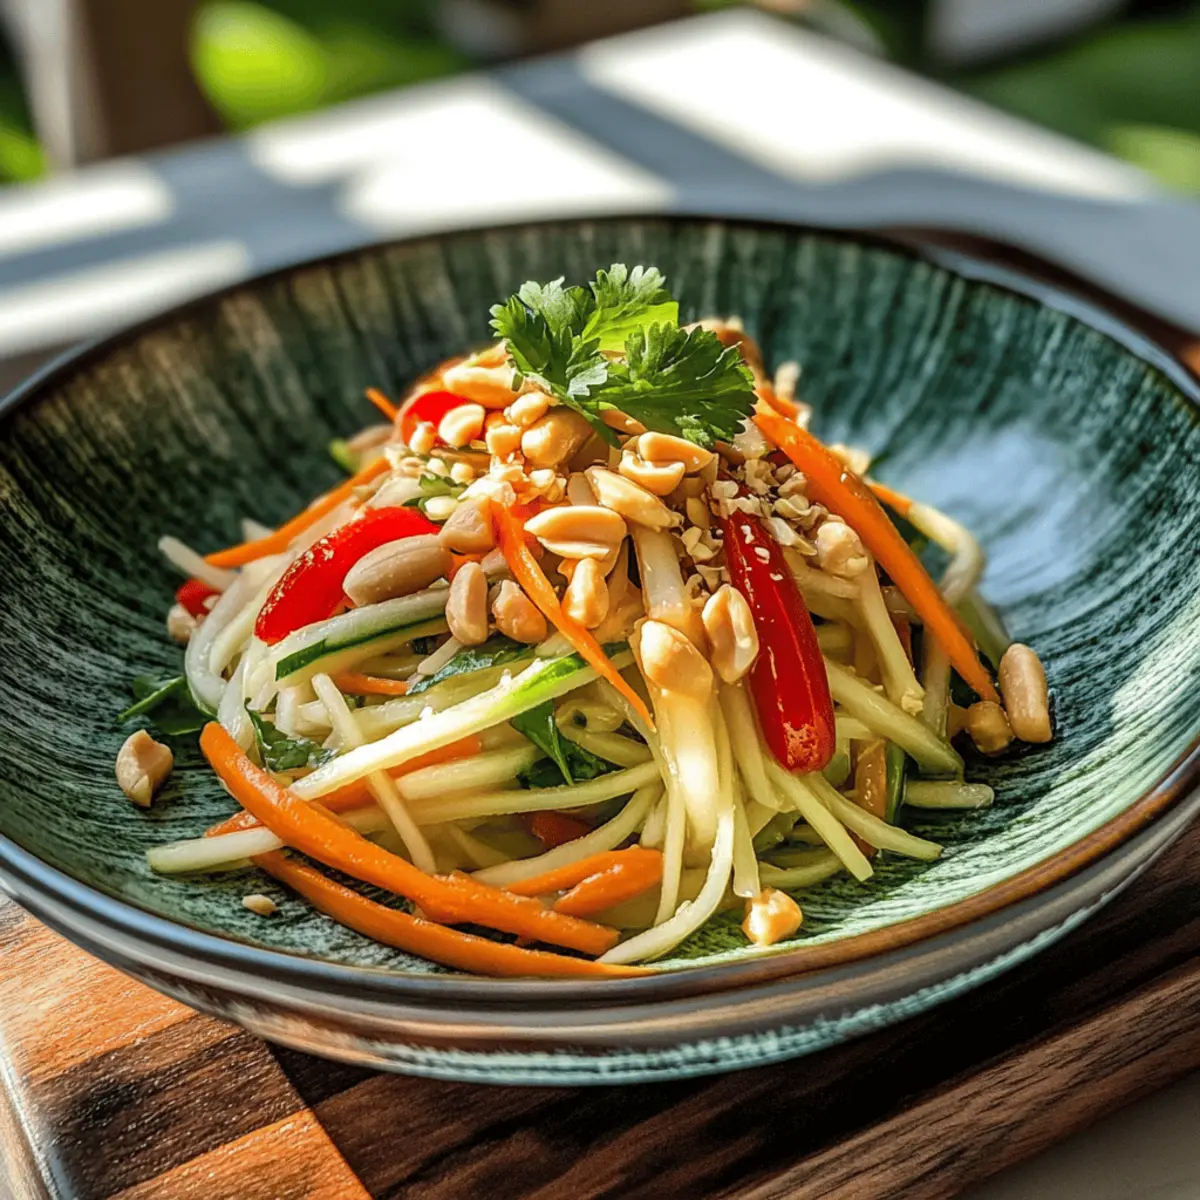
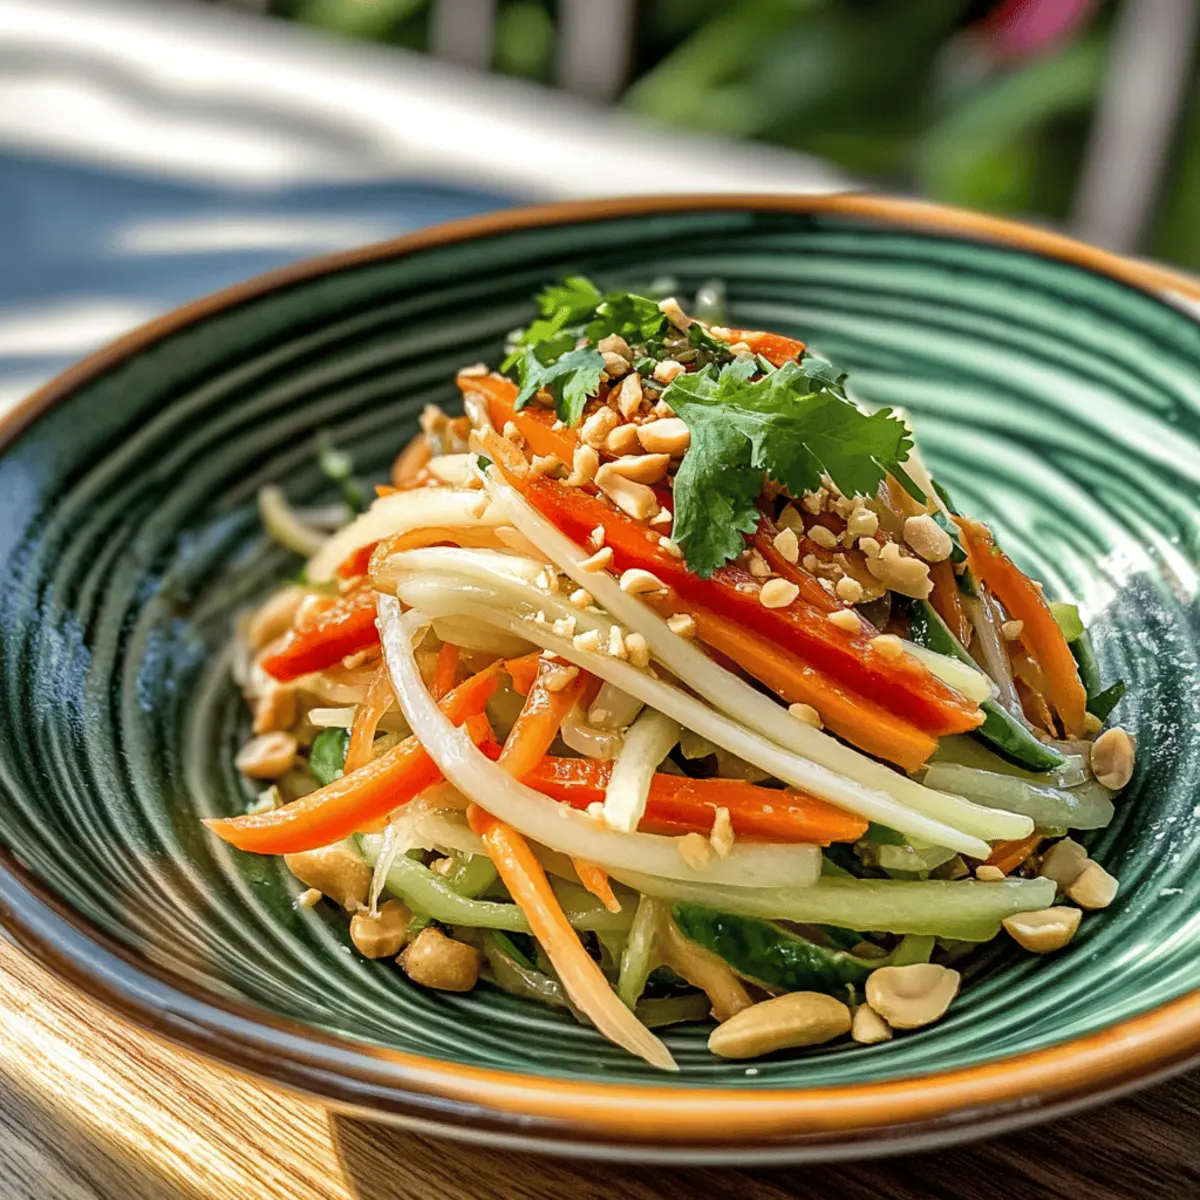
  • Creamy Avocado Salad: This refreshing dish adds a creamy texture and rich flavor, balancing the spiciness of the burgers beautifully. Toss ripe avocado with lime juice and fresh vegetables for a vibrant side.

  • Zesty Coleslaw: A crunchy and tangy slaw offers a cool contrast to the warmth of your black bean burgers. The vinegar-based dressing brings brightness, making each bite a mouthwatering experience.

  • Sweet Potato Fries: Crispy sweet potato fries provide a satisfying sweetness that pairs wonderfully with the spicy kick of the burgers. Baked or fried, they make for a hearty, crunchy side.

  • Grilled Corn on the Cob: Charring corn adds a smoky sweetness that’s impossible to resist. Brush with lime and sprinkle with cheese for an irresistible summer treat that brings out the lime citrus in the burgers.

  • Quinoa Salad: A light, protein-packed quinoa salad loaded with fresh herbs and beans can create a wholesome, nutritious meal. Tossed with a lime dressing, it enhances the flavors in the burgers.

  • Chilled Gazpacho: This vibrant, chilled tomato soup brings a refreshing element to your meal. Its coolness and rich flavors will perfectly harmonize with the warm, spicy black bean burgers.

  • Mango Salsa: Add a tropical twist with a luscious mango salsa. The sweetness and acidity cut through the spiciness, creating a delightful balance that’s perfect for warm weather BBQs.

  • Sparkling Lemonade: Refreshing and effervescent, a glass of sparkling lemonade complements the heat, providing a sweet and tangy sip between bites.

  • Chocolate Avocado Mousse: For dessert, treat yourself to a creamy chocolate mousse that’s both decadent and healthy. The chocolate flavor rounds off the meal beautifully, leaving you satisfied.

Expert Tips for Spicy Black Bean Burgers

  • Consistency Check: The mixture should be moist but not too runny. If it’s too wet, add more breadcrumbs to ensure your spicy black bean burgers hold together well.

  • Chill for Success: If your patties are hard to form, chill the mixture in the fridge for 15 minutes. This helps them firm up and makes shaping easier.

  • Heat Adjustment: If you’re sensitive to spice, deseed the jalapeño or start with less red pepper flakes. You can always add more heat later!

  • Don’t Overcook: Aim for a crispy exterior, but keep the inside moist. Overcooking can result in dry burgers; listen to your grill for optimum cooking time.

  • Freezing for Later: Make extra patties and freeze them individually. Just let them thaw before grilling, ensuring you always have tasty spicy black bean burgers ready.

Make Ahead Options

These Spicy Black Bean Burgers are perfect for meal prep, making your busy weeknights a little easier! You can prepare the burger mixture up to 24 hours in advance by combining all ingredients (except for the egg and breadcrumbs) and refrigerating it in an airtight container. To maintain quality, ensure the mixture is well-sealed to prevent drying out or absorbing odors. When you’re ready to cook, simply mix in the beaten egg and breadcrumbs, shape your patties, and grill them as usual. For longer storage, shape uncooked patties and freeze them for up to 3 months; just thaw overnight in the fridge before cooking for in no time you’ll have delicious Spicy Black Bean Burgers ready to impress!

Variations & Substitutions for Spicy Black Bean Burgers

Unlock a world of delicious possibilities with these customizable ideas that will elevate your Spicy Black Bean Burgers!

  • Cheesy Delight: Add shredded cheese to the burger mixture or melt on top while grilling for a gooey upgrade. Cheese not only enhances flavor but provides a creamy contrast to the spicy patty.

  • Corn Variation: Incorporate roasted corn for a caramelized sweetness that complements the heat. Grilled corn adds a smoky touch that pairs beautifully with the other ingredients.

  • Heat Level Boost: Swap jalapeños for serrano peppers for a fiercer kick or add more red pepper flakes for heat enthusiasts. Your taste buds will thank you for the extra zing!

  • Nutty Texture: Mix in chopped walnuts or almonds to give the burger a crunchy texture, adding depth and a nutty flavor. This adds a delightful contrast to your burger experience.

  • Herb Swaps: Replace cilantro with fresh basil for a unique twist on the flavor profile. The aromatic notes of basil bring a refreshing freshness that might surprise and delight.

  • Quinoa Boost: Replace part of the breadcrumbs with cooked quinoa for extra protein and a nutty flavor. This adds a unique texture and makes your burgers even heartier.

  • Smoky Flavor: Add smoked paprika or a dash of liquid smoke to the patty mixture for a rich, smoky flavor that transports you to a summer BBQ. This subtle boost will delight your guests.

  • Zesty Toppings: Elevate your burger with unique toppings like pickled red onions or avocado crema. These fresh additions enhance the flavor and bring a bright, creamy element to each bite.

Try experimenting with these variations to match your preferences or to surprise your family and friends at your next BBQ. For more unique flavor pairings, consider serving your burgers with a side of Spicy Green Pepper for a perfect complement to your meal!

Spicy Black Bean Burgers Recipe FAQs

How do I select the right black beans for this recipe?
Absolutely! When selecting black beans, look for canned beans that are labeled “low sodium” or “organic” for the best flavor and health benefits. Ensure the can has no dents or bulges and check the expiration date. If you’re using dried beans, make sure they are plump and firm as this ensures better texture in your black bean burgers.

What’s the best way to store leftover spicy black bean burgers?
Very! Store your cooked spicy black bean burgers in an airtight container in the refrigerator for up to 5 days. Allow them to cool completely before placing them in the container to prevent moisture buildup. If you’ve made a big batch, consider separating them with parchment paper to keep them from sticking together.

Can I freeze uncooked spicy black bean burger patties?
Absolutely! To freeze uncooked patties, place them on a parchment-lined baking sheet in a single layer and freeze until solid (about an hour). Once frozen, transfer them to a freezer bag or container. They can be stored for up to 3 months. Just remember to label the bag with the date so you know when they were made!

What can I do if my burger mixture is too wet?
Don’t worry! If your mixture feels too wet and difficult to form patties, you can add more breadcrumbs—start with a tablespoon at a time until you reach a manageable consistency. You can also chill the mixture for about 15 minutes in the fridge, as this can help firm it up before forming your spicy black bean burgers.

Are there any dietary considerations I should keep in mind?
Very! These spicy black bean burgers are vegetarian and can easily be made gluten-free by using gluten-free breadcrumbs. If you’re vegan, you can substitute the egg with a flax egg by mixing 1 tablespoon of ground flaxseed with 3 tablespoons of water and letting it sit until it thickens, which should work as a perfect binder for your burgers. Additionally, if you have allergies to specific vegetables, feel free to customize by substituting them with your favorites.

Spicy Black Bean Burgers

Spicy Black Bean Burgers: Your New Favorite BBQ Delight

These Spicy Black Bean Burgers are a delicious meat-free option, packed with flavor and perfect for any BBQ.
Prep Time 15 minutes
Cook Time 10 minutes
Chill Time 15 minutes
Total Time 40 minutes
Servings: 4 burgers
Course: Lunch
Cuisine: Vegetarian
Calories: 250

Ingredients
  

For the Burger Mixture
  • 1 Jalapeño Adds heat and flavor; omit seeds for less spice.
  • 1 medium Red Onion Provides sweetness and depth; substitute with yellow onion if unavailable.
  • 3 cloves Garlic Cloves Offers aromatic flavor; fresh garlic is preferred for the best taste.
  • 2 cans Black Beans Drained and rinsed, about 15 oz each.
  • 1 Tbsp Lime Juice Juice of ½ lime.
  • cup Cilantro Omit or substitute with parsley if preferred.
  • 2 tsp Cumin No direct substitute, but chili powder can add similarity.
  • 1 tsp Chili Powder Adds warmth and an extra layer of spice.
  • ¼ - ½ tsp Red Pepper Flakes Enhances heat to taste; adjust or omit to control spice preference.
  • ½ tsp Cracked Pepper Gives a peppery note; use freshly cracked for the best flavor.
  • ½ tsp Sea Salt Essential for flavor enhancement; adjust based on preference.
  • cup Breadcrumbs Use gluten-free or panko as alternatives.
  • 1 large Egg Lightly beaten; can use flax egg for a vegan option.
  • ½ cup Corn Frozen corn works well too.
  • 1 tsp Sriracha or Hot Sauce Optional addition for extra spice.
For Cooking
  • 1 Tbsp Olive Oil For grilling; helps achieve a golden crust.

Equipment

  • Food Processor
  • grill
  • Skillet
  • mixing bowl

Method
 

Step-by-Step Instructions for Spicy Black Bean Burgers
  1. Prep Vegetables: Finely grind the jalapeño, red onion, and garlic in a food processor. Set aside.
  2. Mix Beans & Spices: In the same processor, add one can of beans, cilantro, lime juice, cumin, chili powder, and red pepper flakes. Pulse until well combined.
  3. Combine Ingredients: Transfer to a large bowl, add remaining beans, egg, breadcrumbs, corn, and hot sauce. Mix until fully combined.
  4. Form Patties: Shape into burger-sized patties, about ¾ inch thick. Chill for 15 minutes if too loose.
  5. Cooking: Preheat grill over medium heat with some olive oil. Cook patties for 4-5 minutes on each side until golden brown.
  6. Serve: Optionally toast buns, then place burgers on them and add toppings.

Notes

Make a double batch and freeze for later enjoyment. Adjust spice levels to taste.

Delicious Ube Protein Balls with Rolled Oats for a Healthy Boost

As I stood in my kitchen, the vibrant purple of ube halaya caught my eye, instantly transporting me to a world of delightful flavors. These Easy No-Bake Ube Protein Balls with Rolled Oats are my go-to when I crave a nutritious snack that doesn’t skimp on taste. With a protein boost and naturally sweet notes, they provide a satisfying energy hit, perfect for busy days. Plus, there’s no baking involved, which means you can whip them up in minutes and still indulge in a wholesome treat. Whether you need a quick pre-workout boost or a pick-me-up during the day, these little bites will keep you feeling energized and fulfilled. Curious to give them a try? Let’s dive in!

Why are Ube Protein Balls a must-try?

Unique Flavor: The vibrant ube brings a nutty sweetness that elevates snack time beyond the ordinary.
No-Bake Convenience: Made in minutes, these easy Ube Protein Balls fit perfectly into even the busiest schedules.
Healthy Ingredients: Packed with protein and fiber, they offer a guilt-free treat that fuels your day.
Flexible Enjoyment: Perfect for a pre-workout snack or an afternoon boost, they cater to all your snacking needs.
Mouthwatering Texture: The chewy consistency, complemented by shredded coconut, creates a satisfying bite that you’ll love.
These Ube Protein Balls are not just a snack; they’re an experience you won’t want to miss! For more wholesome choices, check out my recipes for Chicken Drumsticks with Veggies or a refreshing Cucumber and Carrot Salad.

Ube Protein Balls Ingredients

For the Base

  • Rolled Oats – Provides structure and chewiness; substitute with quick oats for a smoother texture.
  • Ube Halaya – Adds flavor and natural sweetness; if unavailable, use mashed sweet potato and 1 tsp ube extract.
  • Protein Powder – Increases protein content; can be substituted with more oats or almond flour for a lower protein option.

For the Binding

  • Pitted Dates – Acts as a natural sweetener and binding agent; soak in warm water for 5 minutes if dry.
  • Almond Butter – Adds creaminess and healthy fats, making the balls delightfully rich.

For Flavor Enhancers

  • Vanilla Extract – Enhances the overall flavor profile of the protein balls.
  • Salt – Balances the sweetness for a more rounded taste.

Additions

  • Shredded Coconut – Introduces texture and a hint of sweetness; optional but highly recommended.

These Ube Protein Balls with Rolled Oats are not only delicious but also a convenient way to fuel your day. Enjoy the delightful combination of flavors and textures!

Step‑by‑Step Instructions for Easy No-Bake Ube Protein Balls with Rolled Oats

Step 1: Combine Ingredients
In a large mixing bowl, measure and add 1 cup of rolled oats, 1/2 cup of ube halaya, 1/4 cup of protein powder, 1/4 cup of shredded coconut, 1/3 cup of pitted dates, 1 tablespoon of almond butter, 1 teaspoon of vanilla extract, and a pinch of salt. Stir everything together until evenly combined, ensuring that the sweet aroma of ube fills your kitchen.

Step 2: Pulse the Mixture
Transfer the mixture to a food processor and pulse it until it forms a thick, sticky dough, taking about 30 seconds. If the mixture seems too dry or crumbly, drizzle in water, one tablespoon at a time, while pulsing until you achieve a consistency that holds together when pressed.

Step 3: Shape the Balls
Using a small cookie scoop or your hands, portion out the dough into small balls, approximately 1 inch in diameter. Roll each portion between your palms until smooth and evenly shaped. You should be able to see the vibrant purple hue from the ube peeking through.

Step 4: Chill and Serve
Place the shaped Ube Protein Balls on a parchment-lined baking sheet or plate, spacing them out so they’re not touching. Refrigerate for about 10 minutes to firm them up slightly, allowing the flavors to meld together beautifully. You can also enjoy them immediately if you’re in a hurry!

Ube Protein Balls Variations & Substitutions

Feel free to personalize your Ube Protein Balls with these delightful twists and substitutions that will keep your taste buds dancing.

  • Nut-Free: Use sunflower seed butter instead of almond butter for a delicious nut-free version.
    Make sure to check your pantry for this creamy alternative; it’s both rich and satisfying!

  • Sweetener Swap: Honey or maple syrup can replace pitted dates for a different level of sweetness.
    Just be mindful of the liquid consistency and adjust the dry ingredients accordingly for the perfect blend.

  • Texture Boost: Incorporate chia seeds or flaxseeds for added crunch and nutritional boost.
    These tiny seeds not only enhance texture but also elevate the fiber content, making them an even healthier snack option!

  • Chocolate Lovers: Add dark chocolate chips or cacao nibs for a sweet twist that chocolate enthusiasts will adore.
    This addition brings a delightful richness that balances beautifully with the ube and coconut.

  • Flavorful Infusion: Add a pinch of cinnamon or nutmeg for a warm, aromatic touch.
    These spices not only enrich the flavor profile but also add a hint of cozy comfort to every bite.

  • Shift the Base: Try using quinoa flakes instead of rolled oats for a gluten-free version with a unique texture.
    Quinoa flakes provide a different flavor direction while keeping the health benefits intact.

  • Protein Boost: Use flavored protein powder, like vanilla or chocolate, for an additional twist of flavor.
    Experimenting with different flavors can lead to exciting new combinations you’ll love!

  • Spicy Surprise: A dash of cayenne pepper or chili flakes can add a surprising kick for those who enjoy a bit of heat.
    This spicy variation creates a delicious contrast to the sweetness of ube, giving your protein balls a memorable edge.

These Ube Protein Balls can be as unique as you are. And if you’re looking for more inspiration, why not try pairing them with my Homemade Bread with Sunflower Seed Oil for a wholesome snack moment? Enjoy experimenting with your own variations!

What to Serve with Easy No-Bake Ube Protein Balls?

Elevate your snack time experience with delicious accompaniments that will perfectly complement the creamy and nutty flavor of your Ube Protein Balls.

  • Fresh Fruit Salad: A vibrant mix of berries and tropical fruits adds a refreshing contrast, enhancing the natural sweetness of the protein balls.
  • Nutty Granola: Sprinkle some nutty granola on the side for an added crunch that harmonizes beautifully with the chewy texture of your Ube Protein Balls.
  • Chia Seed Pudding: Creamy and slightly sweet, chia seed pudding makes a nutritious counterpart that fits well within your healthy snacking.
  • Yogurt Parfait: Layer some creamy yogurt with your Ube Protein Balls for a delightful breakfast twist; the tanginess from the yogurt balances the sweetness perfectly.
  • Coconut Water: Quench your thirst with a glass of chilled coconut water; its light sweetness and refreshing taste complement the delightful flavors of your snack.
  • Herbal Tea: A soothing cup of herbal tea can add a calming element to your snacking experience, making it feel like a mini-retreat during your day.
  • Dark Chocolate Dipping Sauce: For a bit of indulgence, serve with a side of melted dark chocolate; its richness provides a luxurious contrast to the wholesome protein balls.
  • Trail Mix: A handful of mixed nuts and dried fruits can create a satisfying texture and taste that pairs wonderfully with the protein-packed goodness of Ube Protein Balls.
  • Green Smoothie: A refreshing green smoothie can serve as a delightful drink option; the vibrant flavors elevate your healthy snacking to a whole new level.

Expert Tips for Ube Protein Balls

  • Perfect Consistency: Make sure to pulse the mixture just until combined; over-processing can make the Ube Protein Balls too sticky.

  • Soak Dates: If your pitted dates are dry, soaking them in warm water softens them and helps achieve a smoother texture.

  • Texture Variation: Experiment with quick oats instead of rolled oats for a smoother finish or retain the chewiness; both are delicious!

  • Batch Cooking: Double the recipe and freeze half to save time later; they thaw perfectly for a quick snack anytime.

  • Creative Add-ins: Feel free to mix in some chocolate chips or chopped nuts for extra flavor and crunch in your Ube Protein Balls.

Make Ahead Options

These Easy No-Bake Ube Protein Balls with Rolled Oats are perfect for meal prep enthusiasts! You can prepare the mixture up to 24 hours in advance and store it in the refrigerator in an airtight container to maintain freshness. Simply follow the first two steps of the recipe, then shape the mixture into balls right before serving. This keeps them just as delicious and preserves their vibrant colors. For longer storage, you can freeze the formed Ube Protein Balls and enjoy them directly from the freezer, just thawing for a few minutes before eating. They make for a quick grab-and-go snack that saves time during busy days!

Storage Tips for Ube Protein Balls

  • Room Temperature: Best enjoyed fresh; if left out, consume within 1-2 hours to maintain texture and flavor.
  • Fridge: Store in an airtight container for up to 7 days, keeping the Ube Protein Balls fresh and chewy.
  • Freezer: Freeze in a single layer, then transfer to a zip-top bag for up to 2 months; thaw for a few minutes before enjoying.
  • Reheating: These are best served cold or at room temperature; avoid microwaving as it may alter the texture.

Ube Protein Balls with Rolled Oats Recipe FAQs

What is the best way to choose ripe ube for this recipe?
Absolutely! When selecting ube, look for firm tubers with smooth, unblemished skin. Choose ones that are heavy for their size, and avoid any with dark spots or soft areas. If fresh ube isn’t available, you can also look for quality pre-made ube halaya in local Asian grocery stores or online.

How should I store leftover Ube Protein Balls?
Very! Place your Ube Protein Balls in an airtight container and store them in the refrigerator for up to 7 days. Make sure they are separated by parchment paper if they are stacked to prevent sticking. For longer storage, you can freeze them; they’ll keep well for up to 2 months.

Can I freeze Ube Protein Balls, and if so, how?
You bet! To freeze your Ube Protein Balls, first, lay them out on a baking sheet in a single layer, ensuring they’re not touching each other. Freeze them for about an hour until firm, then transfer the balls to a zip-top bag, squeezing out as much air as possible to prevent freezer burn. When you’re ready to enjoy them, simply let them thaw at room temperature for about 5-10 minutes.

What should I do if my protein ball mixture is too dry?
No worries at all! If the mixture appears crumbly and doesn’t hold together well, drizzle in water, one tablespoon at a time, and pulse again in the food processor. Repeat until the mixture forms a thick, sticky dough. Remember, it should stick together when pressed but not be overly wet; consistency is key!

Are Ube Protein Balls suitable for everyone?
Very much! These Ube Protein Balls are generally safe for most people, but if anyone has specific allergies, be cautious with the ingredients. They do contain nuts due to almond butter, so those with nut allergies can substitute it with sunflower seed butter. They are also gluten-free, provided you use certified gluten-free oats. Always check your protein powder for any potential allergens.

How can I enhance the nutrition of my Ube Protein Balls?
Absolutely! Feel free to mix in or top your Ube Protein Balls with superfoods like chia seeds, flaxseeds, or even a scoop of greens powder. This not only boosts the nutritional content but also adds a lovely texture! You can also swap the pitted dates for other dried fruits like figs or apricots if you’re looking for variety.

Ube Protein Balls with Rolled Oats

Delicious Ube Protein Balls with Rolled Oats for a Healthy Boost

These Ube Protein Balls with Rolled Oats are a tasty, nutritious snack that provides a wholesome energy boost.
Prep Time 10 minutes
Chill Time 10 minutes
Total Time 20 minutes
Servings: 12 balls
Course: Other
Cuisine: Filipino
Calories: 150

Ingredients
  

For the Base
  • 1 cup Rolled Oats or quick oats for smoother texture
  • 1/2 cup Ube Halaya or mashed sweet potato with 1 tsp ube extract
  • 1/4 cup Protein Powder or more oats/almond flour for lower protein
For the Binding
  • 1/3 cup Pitted Dates soak in warm water if dry
  • 1 tablespoon Almond Butter for creaminess and healthy fats
For Flavor Enhancers
  • 1 teaspoon Vanilla Extract
  • 1 pinch Salt
Additions
  • 1/4 cup Shredded Coconut optional but recommended

Equipment

  • mixing bowl
  • Food Processor
  • parchment paper

Method
 

Step-by-Step Instructions
  1. In a large mixing bowl, measure and add rolled oats, ube halaya, protein powder, shredded coconut, pitted dates, almond butter, vanilla extract, and salt. Stir together until combined.
  2. Transfer the mixture to a food processor and pulse until it forms a thick, sticky dough, about 30 seconds.
  3. Using a cookie scoop or hands, form the dough into small balls, about 1 inch in diameter.
  4. Place the balls on a parchment-lined baking sheet and refrigerate for about 10 minutes to firm up.

Notes

These Ube Protein Balls are a great option for a nutritious snack. Feel free to add chocolate chips or nuts for variety.

Creamy Butternut Squash Roasted Broccoli Alfredo Penne Skillet

As I stood in my kitchen, the rich, earthy aroma of roasting butternut squash filled the air, whisking me away to cozy autumn evenings. Today, I’m excited to share my Creamy Butternut Squash Broccoli Alfredo Penne Skillet—a delightful dish that not only warms the soul but also marries the creaminess of Alfredo with vibrant veggies. This recipe is a true game-changer for those busy weeknights when you crave comfort without the guilt; it’s both healthy and indulgent while being ready in just 30 minutes! You’ll love how the nutty squash and crunchy broccoli come together to create a dish that feels luxurious while sneaking in those essential nutrients. Curious how you can transform your dinner routine and delight your loved ones? Let’s dive in!

Why is this recipe a must-try?

Quick and Easy: This recipe makes a fabulous meal in just 30 minutes, perfect for those hectic weeknights.

Nutrient-Packed: The combination of butternut squash and broccoli offers a wholesome blend of vitamins and minerals, making each bite both delicious and healthy.

Creamy Indulgence: Enjoy a velvety sauce that feels rich and indulgent without any guilt, perfect for satisfying cravings.

Versatile Ingredients: With simple ingredients and potential swaps, like using zucchini noodles or different cheeses, you can personalize this dish to suit your tastes.

Crowd-Pleasing Flavor: Whether you’re feeding a family or entertaining guests, this dish appeals to everyone—from chefs to home cooks. Pair it with a refreshing salad or savor comforting broccoli for a complete meal!

Butternut Squash Roasted Broccoli Alfredo Penne Skillet Ingredients

For the Skillet

  • Butternut Squash – Adds creaminess and a vibrant color; may substitute with pumpkin or sweet potato for similar textures.
  • Fresh Broccoli Florets – Provides nutrition and crunch; substitute with cauliflower for a different flavor profile.
  • Olive Oil – Necessary for roasting vegetables and adding flavor; can use avocado oil for a high smoke point alternative.
  • Salt and Pepper – Essential for seasoning; use to taste, or substitute with garlic salt for added flavor.
  • Butter – Gives a rich base for the sauce; can replace with margarine for a dairy-free option.
  • Garlic (minced) – Adds aroma and flavor; fresh garlic is ideal; dried garlic powder can be used as an alternative.
  • White Whole Wheat Flour – Acts as a thickener for the sauce; may substitute with gluten-free flour blend for a gluten-free option.
  • Heavy Whipping Cream – Contributes to the sauce’s creaminess; swap with coconut cream for a dairy-free version.
  • Milk – Balances the creaminess and consistency of the sauce; use almond milk for a non-dairy substitute.
  • Ground Nutmeg – Adds warmth and depth to the sauce; omit if preferred or substitute with a pinch of cinnamon for a twist.
  • Grated Parmesan Cheese – Enhances flavor and adds richness; nutritional yeast can be used for a dairy-free option.
  • Cooked Penne Pasta – The main starch component; any pasta shape can work well here.
  • Fresh Parsley (minced) – For garnish and a fresh finish; can substitute with basil for a different herbal note.

This creamy butternut squash roasted broccoli alfredo penne skillet is sure to become a staple in your home!

Step‑by‑Step Instructions for Butternut Squash Roasted Broccoli Alfredo Penne Skillet

Step 1: Preheat the Oven
Begin by preheating your oven to 400°F (200°C). This temperature ensures that the vegetables will roast perfectly, enhancing their natural sweetness and flavor. While your oven is heating, prepare a baking sheet by greasing it lightly with olive oil, ensuring that the butternut squash and broccoli won’t stick as they cook.

Step 2: Roast the Vegetables
On the greased baking sheet, arrange the butternut squash cubes and fresh broccoli florets in a single layer. Drizzle the vegetables generously with olive oil, then sprinkle with salt and pepper to taste. Roast them in the preheated oven for about 20 minutes, turning halfway through, until they are tender and slightly caramelized, giving them a beautiful golden hue.

Step 3: Prepare the Alfredo Sauce
In a large skillet over medium-high heat, melt the butter until it’s bubbly and fragrant. Add the minced garlic to the skillet, sautéing it for about 1 minute until it becomes aromatic but not browned. Next, whisk in the white whole wheat flour to create a roux, stirring continuously for about 1 minute until the mixture is smooth and golden.

Step 4: Add Cream and Milk
Slowly pour in the heavy whipping cream and milk, whisking constantly to ensure a smooth consistency in your sauce. Increase the heat slightly to bring the sauce to a gentle boil, allowing it to thicken for about 2–3 minutes. You want it to coat the back of a spoon, becoming a luxurious Alfredo sauce for your Butternut Squash Roasted Broccoli Alfredo Penne Skillet.

Step 5: Blend the Sauce
Once the sauce is thickened, remove it from heat and stir in the ground nutmeg and grated Parmesan cheese. To achieve a creamy texture, blend the sauce with the roasted butternut squash using an immersion blender or transfer it to a regular blender. Blend until completely smooth and velvety, creating a rich base for your pasta dish.

Step 6: Combine the Ingredients
Return the blended sauce to the skillet over low heat, ensuring it’s warm. Stir in the cooked penne pasta and the beautifully roasted broccoli florets. Mix everything together gently, allowing the pasta to soak up the creamy sauce while seasoning with additional salt and pepper as needed.

Step 7: Serve and Garnish
Once everything is well combined and heated through, remove the skillet from the heat. Transfer your Butternut Squash Roasted Broccoli Alfredo Penne Skillet to serving plates. Garnish each plate with minced fresh parsley for an added burst of freshness. Serve warm and enjoy this nutritious and comforting dish!

Expert Tips for Butternut Squash Roasted Broccoli Alfredo Penne Skillet

  • Roasting Perfection: Ensure the vegetables are spread out in a single layer on the baking sheet. Overcrowding can cause steaming instead of roasting, affecting texture.

  • Smooth Sauce: Blend the Alfredo sauce until it’s completely velvety for the best mouthfeel. Leaving chunks can make the dish less appealing.

  • Seasoning Check: Always taste your sauce before serving. Adjust salt and pepper as needed to enhance the overall flavors of your Butternut Squash Roasted Broccoli Alfredo Penne Skillet.

  • Pasta Choice: While penne works perfectly, feel free to use other pasta shapes. Just remember to adjust cooking times according to the pasta type.

  • Make It Ahead: Consider preparing the roasted vegetables and sauce in advance. Store them separately in the fridge and combine with freshly cooked pasta for a quick dinner later!

Butternut Squash Roasted Broccoli Alfredo Variations

Feel free to let your culinary creativity shine as you adapt this recipe to your preferences!

  • Zucchini Noodles: Swap out penne for zucchini noodles for a low-carb option that’s just as delicious.
  • Pumpkin Twist: Use pumpkin puree instead of butternut squash, adding a stunning autumn flavor.
  • Cheesy Goodness: Experiment with gouda or cheddar cheese for a different cheesy spin that enhances the flavor profile.
  • Protein Boost: Toss in grilled chicken or shrimp for a hearty meal that keeps everyone satisfied.
  • Extra Greens: Add spinach or kale just before serving for an additional nutrient boost and vibrant color.
  • Spicy Kick: Sprinkle in red pepper flakes when preparing the sauce for a warm and inviting layered heat.
  • Nut-Free Version: Use sunflower seed butter instead of traditional butter to maintain creaminess without the nuts.
  • Creamy Herb Sauce: Mix in fresh herbs like thyme or sage to elevate the flavor and add aromatic depth to the dish.

Whether adding a twist to keep things interesting or adapting to dietary needs, this creamy butternut squash roasted broccoli alfredo penne skillet can be versatile and personal. And if you’re in the mood for more delicious ways to incorporate broccoli, don’t forget to check out Everyday Broccoli Patties or take a moment to savor comforting broccoli for even more inspiration!

What to Serve with Creamy Butternut Squash Roasted Broccoli Alfredo Penne Skillet

Transform your dinner experience with delightful flavors and textures that accompany this creamy, vegetable-packed dish beautifully.

  • Garlic Bread: This classic side adds a warm, buttery crunch that complements the creamy sauce beautifully. The aroma of freshly baked bread will fill your kitchen with an inviting scent.

  • Mixed Green Salad: A refreshing side with crisp greens, cherry tomatoes, and a tangy vinaigrette balances the richness of the alfredo. The crunch of fresh vegetables provides a delightful contrast.

  • Roasted Brussels Sprouts: These little gems bring a caramelized sweetness that pairs wonderfully with the nutty squash. Their crispy edges add a satisfying texture to your meal.

  • Wine Pairing: A chilled Chardonnay or Pinot Grigio accentuates the creaminess of the dish while offering a refreshing vibe. Just imagine sipping wine while enjoying the velvety flavors of the skillet!

  • Chocolate Mousse: For dessert, a light and airy chocolate mousse adds a touch of indulgence after your wholesome dinner. The rich chocolate will melt beautifully on your palate.

  • Lemon Sorbet: A palate-cleansing sorbet adds a zesty finish to your meal, refreshing your taste buds after the comforting pasta. Its bright flavors will leave you feeling elevated and satisfied.

Make Ahead Options

This Creamy Butternut Squash Roasted Broccoli Alfredo Penne Skillet is a fantastic recipe for meal prep enthusiasts! You can roast the butternut squash and broccoli up to 24 hours in advance—just store them in an airtight container in the refrigerator to maintain their freshness and prevent browning. Meanwhile, you can prepare the alfredo sauce and refrigerate it for up to 3 days. When you’re ready to serve, simply reheat the roasted vegetables and sauce in a skillet over low heat, combine them with the cooked penne pasta, and enjoy a delicious meal with minimal effort. This way, you’ll have a hearty dinner that feels just as gourmet as it would on a weeknight!

How to Store and Freeze Butternut Squash Roasted Broccoli Alfredo Penne Skillet

Refrigerator: Transfer leftovers to an airtight container and store in the fridge for up to 3 days to maintain freshness and flavor.

Freezer: For longer storage, freeze portions in airtight containers for up to 2 months. Allow the dish to cool completely before freezing to prevent freezer burn.

Reheating: To reheat, thaw in the refrigerator overnight, then warm the skillet on the stovetop over low heat, adding a splash of milk to loosen the sauce if needed.

Avoid Overfilling: When storing, don’t overfill the containers; leave space for expansion during freezing. This will help preserve the creamy texture of your Butternut Squash Roasted Broccoli Alfredo Penne Skillet.

Butternut Squash Roasted Broccoli Alfredo Penne Skillet Recipe FAQs

How do I select ripe butternut squash?
Absolutely! When selecting butternut squash, look for ones that have a smooth, firm skin free of blemishes or dark spots. The squash should feel heavy for its size and have a deep tan to cream color. Smaller squashes tend to be sweeter and more flavorful, so I often opt for those.

How should I store leftovers of the Butternut Squash Roasted Broccoli Alfredo Penne Skillet?
To keep your leftovers fresh and tasty, transfer them to an airtight container and store them in the refrigerator. They will stay good for up to 3 days. Always allow the dish to cool completely before refrigerating to maintain its creamy texture.

Can I freeze the Butternut Squash Roasted Broccoli Alfredo Penne Skillet?
Yes, you can! For freezing, make sure the dish has cooled completely. Portion the skillet in airtight containers, and it can last in the freezer for up to 2 months. When ready to eat, thaw it in the refrigerator overnight, then reheat on the stovetop over low heat, adding a splash of milk or cream if the sauce thickens too much.

What should I do if the sauce is too thick?
Very good question! If your sauce turns out too thick, just add a little more milk or cream gradually while stirring over low heat. This will help achieve that creamy consistency you desire. Keep stirring until you’ve reached the perfect texture!

Are there any dietary considerations for this recipe?
Absolutely! This recipe can easily cater to various dietary needs. For those who are dairy-free, simply substitute the heavy whipping cream with coconut cream and use nutritional yeast instead of Parmesan cheese. If you have gluten concerns, you can use a gluten-free flour blend for the sauce and choose gluten-free pasta. Always double-check the ingredient labels for any allergens.

Can I make this dish ahead of time?
Yes, very! You can prepare the roasted butternut squash and broccoli in advance, along with the Alfredo sauce. Store them separately in the refrigerator. When you’re ready to serve, just cook the pasta and combine everything together. This makes for a quick dinner option during busy nights!

Butternut Squash Roasted Broccoli Alfredo Penne Skillet

Creamy Butternut Squash Roasted Broccoli Alfredo Penne Skillet

This Butternut Squash Roasted Broccoli Alfredo Penne Skillet is a creamy, nutrient-packed dish perfect for busy weeknights.
Prep Time 10 minutes
Cook Time 20 minutes
Total Time 30 minutes
Servings: 4 servings
Course: Dinner
Cuisine: Italian
Calories: 450

Ingredients
  

For the Skillet
  • 1 medium Butternut Squash Adds creaminess and can be substituted with pumpkin or sweet potato.
  • 2 cups Fresh Broccoli Florets Can substitute with cauliflower.
  • 2 tablespoons Olive Oil Can use avocado oil.
  • to taste Salt
  • to taste Pepper Can substitute with garlic salt.
  • 2 tablespoons Butter Can replace with margarine for a dairy-free option.
  • 2 cloves Garlic (minced) Fresh garlic is ideal.
  • 2 tablespoons White Whole Wheat Flour Can substitute with gluten-free flour blend.
  • 1 cup Heavy Whipping Cream Can swap with coconut cream.
  • 1/2 cup Milk Can use almond milk.
  • 1/4 teaspoon Ground Nutmeg Can omit or substitute with cinnamon.
  • 1/2 cup Grated Parmesan Cheese Nutritional yeast can be used for dairy-free.
  • 8 ounces Cooked Penne Pasta Any pasta shape can be used.
  • 1/4 cup Fresh Parsley (minced) Can substitute with basil.

Equipment

  • oven
  • baking sheet
  • Skillet
  • Immersion Blender

Method
 

Step-by-Step Instructions
  1. Preheat your oven to 400°F (200°C). Grease a baking sheet with olive oil.
  2. Arrange butternut squash cubes and broccoli florets on the baking sheet. Drizzle with olive oil and sprinkle with salt and pepper. Roast for 20 minutes, turning halfway through.
  3. In a skillet over medium-high heat, melt the butter. Add the minced garlic and sauté for 1 minute. Whisk in flour to create a roux and cook for 1 minute.
  4. Slowly add the heavy cream and milk, whisking to combine. Increase heat to bring to a gentle boil and thicken for 2–3 minutes.
  5. Remove from heat and stir in nutmeg and Parmesan. Blend the sauce with roasted butternut squash until smooth.
  6. Return sauce to skillet over low heat. Stir in cooked penne and roasted broccoli. Mix gently and season as needed.
  7. Serve garnished with minced parsley. Enjoy!

Notes

For best results, spread vegetables in a single layer and blend sauce until velvety smooth.

Tangy Escarole “NiçOise” Salad: Quick & Flavor-Packed Delight

As the sun begins to dip below the horizon, the vibrant colors of fresh veggies remind me of lazy summer days. Enter my Giada Tangy Escarole “NiçOise” Salad—a delightful twist on a classic that’s perfect for those evenings when you crave something light yet satisfying. In just 20 minutes, this salad marries crunchy green beans, tender Yukon Gold potatoes, and a zesty dressing, making it a quick and easy option for lunch or dinner. Plus, with the flexibility to include or omit anchovies, it caters to everyone at the table, whether you’re a die-hard fish fan or a devoted vegetarian. Trust me; your taste buds deserve this burst of freshness! What’s your favorite salad topping?

Why is this salad a must-try?

Quick, Simple Prep: The beauty of this dish lies in its simplicity—your dinner can be on the table in just 20 minutes!

Vibrant, Fresh Flavors: With a mix of escarole, green beans, and potatoes, the salad bursts with color and taste, making each bite a delight.

Crowd-Pleasing: Ideal for gatherings or picnics, this salad is sure to impress guests without requiring extensive cooking. Pair it with a Crunch Cucumber Salad for a refreshing meal!

Customizable Delight: Want it vegetarian? Simply omit the anchovies and substitute with capers for that perfect zing.

Healthy Balanced Meal: Each serving is not only tasty but also packed with nutrients—a nutritious addition to any table!

Make-Ahead Friendly: Prepare all the components beforehand, and mix just before serving for a stress-free experience.

Tangy Escarole “NiçOise” Salad Ingredients

For the Dressing
Whole-Grain Mustard – Adds a delightful tang to elevate the salad’s flavor.
Extra-Virgin Olive Oil – Richness helps emulsify the dressing for a silky texture.
Cider Vinegar – Provides brightness and acidity to balance the flavors.
Kosher Salt – Enhances all the ingredients; taste and adjust as needed.

For the Salad Base
Baby Yukon Gold Potatoes – Adds heartiness; substitute with red or fingerling potatoes if desired.
Green Beans – Brings a crunch; trim and blanch until tender for best results.
Mixed Pitted Olives – Offers briny notes; halve for even distribution throughout the salad.
Escarole or Little Gems – The base of the salad; substitute with arugula or romaine for a twist.
Hard-Boiled Eggs – Contributes protein and creaminess; adjust quantity according to preference.
Anchovy Fillets (optional) – Adds a savory umami depth; replace with capers for a vegetarian version.
Freshly Ground Black Pepper – Enhances flavor with a subtle hint of spice.
Crumbled Goat Cheese (optional) – Introduces creaminess and tanginess, elevating the salad experience.

Get ready to whip up this fantastic Tangy Escarole “NiçOise” Salad that’s perfect for any occasion!

Step‑by‑Step Instructions for Tangy Escarole “NiçOise” Salad

Step 1: Cook Potatoes
Begin by placing baby Yukon Gold potatoes in a pot of salted water. Bring it to a boil and cook the potatoes for about 10-15 minutes, or until they are tender when pierced with a fork. Once cooked, drain the potatoes and allow them to cool slightly before slicing them into bite-sized pieces for your Tangy Escarole “NiçOise” Salad.

Step 2: Blanch Green Beans
While the potatoes cool, prepare a pot of boiling water for the green beans. Add the trimmed green beans and blanch them for 3-4 minutes until they turn bright green and are tender-crisp. Immediately transfer the beans to an ice water bath to stop the cooking process, preserving their vibrant color and crunch. Drain and set aside.

Step 3: Make Dressing
In a large mixing bowl, whisk together the whole-grain mustard, extra-virgin olive oil, cider vinegar, and ½ teaspoon of kosher salt, blending until combined. The goal is to create a smooth, tangy dressing that will beautifully coat the salad ingredients. Make sure to adjust the seasoning according to your taste as you prepare your Tangy Escarole “NiçOise” Salad.

Step 4: Combine Ingredients
Add the cooled Yukon Gold potatoes, blanched green beans, halved mixed pitted olives, and chopped escarole or Little Gems to the bowl containing the dressing. Gently toss all the ingredients together until every piece is evenly coated with the flavorful dressing, ensuring a delightful blend of tastes in your salad.

Step 5: Assemble Salad
To finish your Tangy Escarole “NiçOise” Salad, arrange the salad mixture on a serving platter. Halve the hard-boiled eggs and place them atop the salad. If you’re using anchovy fillets, add them next, followed by a sprinkle of crumbled goat cheese and freshly ground black pepper to elevate the flavors. Serve immediately for the best taste!

Expert Tips for Tangy Escarole “NiçOise” Salad

  • Prep Ahead: Prepare all your ingredients a day in advance, storing the dressed veggies and greens separately to keep everything crisp and fresh.

  • Cooking Timing: Avoid overcooking the potatoes. Tender is perfect, but mushy won’t work—test them with a fork for doneness!

  • Adapt to Taste: If anchovies aren’t your thing, easily swap them out for capers, adding a similar tang without the fishiness.

  • Flavor Balance: Taste your dressing before adding it to the salad. Adjust the salt and acidity to suit your palate for the best flavor enhancement.

  • Chill for Greatness: For a refreshing experience, chill your salad elements before combining. This adds a delightful coolness when served, especially in warmer months.

What to Serve with Giada Tangy Escarole “NiçOise” Salad

Enhancing the experience of this refreshing salad can transform your meal into a vibrant feast bursting with flavors and textures.

  • Crusty Baguette: The perfect side for scooping up every last bit of dressing, adding a satisfying crunch to each bite.
  • Grilled Chicken Breast: Juicy and tender, this protein-rich addition brings heartiness that balances the salad’s lightness beautifully. Serve it sliced on top for an elegant presentation.
  • Roasted Root Vegetables: Caramelized sweetness from beets and carrots offers contrast, harmonizing well with the salad’s tangy elements.
  • Quinoa Pilaf: This nutty, fluffy side rouses your tastebuds while adding fiber; it’s a delightful way to incorporate whole grains.
  • Seared Salmon: Rich and flaky, the savory flavor of salmon elevates the salad into a complete meal, perfect for special occasions.
  • Sparkling Lemonade: A bright and effervescent drink complements the salad’s zesty flavors, making the meal feel festive and refreshing.
  • Chocolate Mousse: As a light dessert, its creamy texture balances the salad’s crispness and adds a sweet finish to the meal.
  • Caprese Skewers: Colorful and bursting with flavor, these offer a delightful appetizer that echoes the freshness found in the salad.
  • Tzatziki Sauce with Pita Chips: This cool and tangy dip brings a Mediterranean flair while serving as a delightful starter before the main course.

How to Store and Freeze Tangy Escarole “NiçOise” Salad

  • Fridge: Store any leftovers in an airtight container for up to 2 days. Keep the dressing separate to maintain the freshness of the salad components.

  • Room Temperature: Do not leave the salad at room temperature for longer than 2 hours to prevent spoilage, especially if it’s a warm day.

  • Freezer: Freezing is not recommended for this Tangy Escarole “NiçOise” Salad, as the texture of the greens and other ingredients will suffer.

  • Reheating: If you’ve used cooked potatoes and want to refresh your salad, gently warm them in the microwave for about 30 seconds before mixing with fresh components.

Make Ahead Options

These Tangy Escarole “NiçOise” Salad components can be prepped in advance, making meal planning a breeze! You can cook and cool the Yukon Gold potatoes and blanch the green beans up to 24 hours ahead. Store these vegetables separately in airtight containers in the refrigerator to maintain their freshness and crunch. The dressing can also be whisked together and placed in a jar for easy access. To finish, simply combine all the ingredients with the dressing just before serving for the best taste. This way, you can enjoy a flavorful, refreshing salad without the last-minute stress, perfect for busy weeknights or gatherings!

Tangy Escarole “NiçOise” Salad Variations

Feel free to experiment and let your creativity shine with this delightful salad!

  • Greens Swap: Substitute escarole with arugula or romaine for a lighter taste. Arugula adds a peppery zest that complements the tangy dressing perfectly.

  • Vegetarian Option: Replace anchovies with capers for a vegetarian-friendly twist. This swap ensures you don’t miss the umami flavor while keeping it plant-based.

  • Flavor Boost: Toss in cherry tomatoes for a pop of sweetness and color. Their juicy burst will elevate each bite, making your salad even more vibrant.

  • Herb Infusion: Add fresh herbs like basil or parsley for a fragrant twist. These herbs not only add flavor but also provide a fresh aroma that uplifts the entire dish.

  • Nutty Crunch: Incorporate toasted pine nuts or walnuts for added texture. The delightful crunch of nuts creates a contrast with the creamy eggs and tender potatoes.

  • Spicy Kick: Drizzle in a few drops of hot sauce or sprinkle red pepper flakes for a spicy version. This adds a fiery note, tantalizing your taste buds with each mouthful.

  • Creamy Variation: Mix in a dollop of Greek yogurt or sour cream for a richer dressing. This adds creaminess that beautifully balances the tang of the mustard and vinegar.

  • Fruit Addition: Include diced avocado for a creamy texture and healthy fats. This twist not only enhances the salad but also brings a satisfying richness that makes it even more enjoyable.

Exploring these variations will keep your Tangy Escarole “NiçOise” Salad exciting every time you whip it up! If you’re craving something equally refreshing, consider trying out a lovely Cabbage Apple Salad or a Crunch Cucumber Salad to complement your meal. Enjoy!

Tangy Escarole “NiçOise” Salad Recipe FAQs

How do I choose ripe escarole?
Absolutely! Look for escarole leaves that are crisp and vibrant green. Avoid any heads with dark spots or wilting leaves, as this indicates they are past their prime. Fresh escarole should feel firm and be free from any discoloration.

What’s the best way to store leftover salad?
To keep your Tangy Escarole “NiçOise” Salad fresh, store any leftovers in an airtight container in the refrigerator for up to 2 days. It’s best to keep the dressing separate until you’re ready to eat to maintain the salad’s crunchiness and vibrant flavors.

Can I freeze this salad?
Freezing is not recommended for this salad since the greens and other fresh ingredients will lose their texture and flavor after thawing. However, if you have leftover cooked potatoes, you can freeze them for up to 3 months. Just make sure they are cooled and stored in an airtight container or freezer bag.

What if my potatoes are overcooked?
If you accidentally overcook your potatoes and they become mushy, don’t fret! Cut the remaining pieces into smaller chunks and toss them into the salad, allowing the dressing to help bind everything together. You might even find that the creaminess complements the dish nicely!

Can my pet eat escarole?
Definitely! Escarole can be a healthy treat for pets, especially for dogs. However, it’s important to ensure it’s washed thoroughly and served in moderation. If your pet has any dietary restrictions or health issues, consult your vet before introducing new foods.

Are there possible allergy concerns with this salad?
Very much! This salad contains olives and optional ingredients like anchovies and goat cheese, which can be allergenic for some individuals. Always check for allergies before serving, especially when sharing with guests. Providing alternatives like capers for the anchovies ensures everyone can enjoy this flavorful dish!

Tangy Escarole “NiçOise” Salad

Tangy Escarole “NiçOise” Salad: Quick & Flavor-Packed Delight

Enjoy the vibrant and refreshing Tangy Escarole “NiçOise” Salad, perfect for any light meal.
Prep Time 10 minutes
Cook Time 10 minutes
Total Time 20 minutes
Servings: 4 servings
Course: Lunch
Cuisine: Mediterranean
Calories: 320

Ingredients
  

For the Dressing
  • 1 tbsp Whole-Grain Mustard Adds a delightful tang
  • 3 tbsp Extra-Virgin Olive Oil For richness and emulsification
  • 2 tbsp Cider Vinegar Provides brightness and acidity
  • 0.5 tsp Kosher Salt Enhances flavor; adjust to taste
For the Salad Base
  • 1 lbs Baby Yukon Gold Potatoes Can substitute with red or fingerling
  • 8 oz Green Beans Trimmed and blanched
  • 1 cup Mixed Pitted Olives Halved for distribution
  • 5 cups Escarole or Little Gems Can substitute with arugula or romaine
  • 4 large Hard-Boiled Eggs Halved for garnish
  • 4 fillets Anchovy Fillets (optional) Can replace with capers
  • to taste Freshly Ground Black Pepper For flavor enhancement
  • 4 oz Crumbled Goat Cheese (optional) For creaminess and tanginess

Equipment

  • pot
  • mixing bowl
  • ice bath

Method
 

Step-by-Step Instructions
  1. Cook the baby Yukon Gold potatoes in a pot of salted boiling water for 10-15 minutes until tender. Drain and cool before slicing.
  2. Blanch the green beans in boiling water for 3-4 minutes until bright green and tender-crisp. Transfer to an ice bath, then drain.
  3. In a mixing bowl, whisk together the whole-grain mustard, olive oil, cider vinegar, and kosher salt until smooth.
  4. Combine the potatoes, green beans, olives, and escarole in the bowl with the dressing and toss gently to coat.
  5. Arrange the salad mixture on a platter; top with halved hard-boiled eggs, anchovy fillets (if using), goat cheese, and pepper before serving.

Notes

Best enjoyed freshly made; can prepare ingredients ahead of time for easy assembly.

Crispy Chilli Beef That Will Ignite Your Taste Buds

As I stood in my kitchen, the vibrant aroma of sautéing ginger and garlic began to transport me to bustling street markets in China. It hit me just how comforting—and delicious—homemade food can be when prepared with care. That’s the spirit behind my Crispy Chilli Beef recipe, a healthier take on a beloved classic. This dish features tender strips of beef enveloped in a light, crispy coating, all drizzled with a tangy, spicy sauce that strikes the perfect balance of flavors. With quick prep time and a satisfying crunch, it’s ideal for those busy weeknights when you’re craving something soulful yet effortless. Curious about how to whip up this crowd-pleaser in your own kitchen? Let’s dive in!

Why Is Crispy Chilli Beef a Must-Try?

Flavor Explosion: Each bite of this dish delivers a delightful mix of sweet, spicy, and savory notes that will dance on your palate.

Light Yet Satisfying: Enjoy the crispy coating without the guilt of deep frying, making it a healthier option for your family dinner.

Quick Prep Time: Perfect for busy weeknights, you can whip this up in just 30 minutes—ideal for satisfying cravings in a flash!

Crowd-Pleasing Appeal: Your loved ones will rave about this dish. Serve it alongside steamed jasmine rice or stir-fried noodles for a complete meal.

Versatile Ingredients: Swap in different cuts of beef like ribeye for a richer flavor or even try tofu for a fantastic vegetarian option.

Embark on this culinary adventure with my Crispy Chilli Beef, and don’t forget to pair it with a side of sautéed bok choy for an extra nutrient kick!

Crispy Chilli Beef Ingredients

For the Beef Coating
Thin-Cut Sirloin Steak (360g / ¾ lb) – Choose tender cuts for quick cooking; ribeye, flank, or skirt steak can add different flavors.
Egg (1 small) – Binds the cornflour to the beef for that signature crisp; consider a flax egg for a vegan option.
Cornflour (4 tbsp) – This provides the essential crunch; no substitutes will give you the desired texture.
Salt (¼ tsp) – Enhances the overall flavor; feel free to adjust according to your taste.
Black Pepper (¼ tsp) – Adds a hint of spice; swapping it for white pepper can offer a different kick.
White Pepper (⅛ tsp) – Offers a distinct heat; you can omit it if you don’t have it on hand.

For the Stir-Fry
Sunflower Oil (4 ½ tbsp total) – Neutral oil perfect for frying; switch to another neutral oil if preferred.
Onion (1 medium, sliced) – Brings sweetness and texture; green onions can substitute for a milder taste.
Red Chili (1, sliced) – Packs heat into the dish; remove seeds for a milder flavor, or opt for a less spicy variety.
Minced Ginger (1 tsp) – Adds aromatic depth; fresh ginger is ideal, but powdered can be a pinch-hitter.
Garlic Cloves (3, minced) – Complements the flavor complexity; use garlic powder (1 tsp) if fresh garlic is unavailable.

For the Sauce
Rice Vinegar (2 tbsp) – Provides tanginess; apple cider vinegar works as a suitable substitute.
Dark Soy Sauce (3 tbsp) – Infuses umami richness; consider low-sodium versions for a healthier choice.
Tomato Puree (2 tbsp) – Adds body to the sauce; ketchup can work in a pinch as a substitute.
Caster Sugar (6 tbsp) – Sweetens and balances the sauce; feel free to reduce to taste or switch for a sugar alternative.
Tomato Ketchup (2 tbsp) – Offers a sweet and tangy addition; adjust according to your sweetness preference.
Sweet Chili Sauce (2 tbsp) – Brings sweetness and spice; opt for hot chili paste for added heat.

Gather these ingredients to embark on a delightful cooking adventure creating your Crispy Chilli Beef!

Step‑by‑Step Instructions for Crispy Chilli Beef

Step 1: Prepare the Beef
Begin by slicing the thin-cut sirloin steak into strips, ensuring they’re even for consistent cooking. In a mixing bowl, whisk the small egg and coat the beef strips thoroughly. Add in the cornflour, salt, black pepper, and white pepper, then mix well until all pieces are evenly coated. This helps achieve the signature crispiness of your Crispy Chilli Beef.

Step 2: Cook the Beef
Heat 3 tablespoons of sunflower oil in a large frying pan over medium-high heat until shimmering. Carefully place the coated beef strips in the hot oil, ensuring they don’t overlap. Fry in batches for about 5-6 minutes, turning occasionally, until they are dark brown and crispy. Once cooked, transfer the beef to a paper towel-lined plate to absorb excess oil.

Step 3: Sauté the Aromatics
In the same pan, add an additional tablespoon of sunflower oil, allowing it to heat. Introduce the sliced onion and sauté for about 2 minutes until they start to become translucent. Then add the sliced red chili, minced ginger, and minced garlic, stirring continuously for about 30 seconds until fragrant and lightly golden. This creates a flavorful base for your sauce.

Step 4: Make the Sauce
Pour in the rice vinegar, dark soy sauce, tomato puree, caster sugar, tomato ketchup, and sweet chili sauce to the sautéed aromatics. Stir constantly, letting the mixture bubble for 2-3 minutes until it thickens slightly. The sauce should combine all the sweet, spicy, and savory flavors that define the deliciousness of your Crispy Chilli Beef.

Step 5: Combine & Serve
Finally, return the crispy beef to the pan, tossing it gently in the flavorful sauce. Heat everything through for another 1-2 minutes, ensuring each piece of beef is well-coated and warmed. Serve immediately on a bed of steamed jasmine rice or alongside stir-fried noodles for a nutritious and satisfying meal that everyone will love!

Storage Tips for Crispy Chilli Beef

Fridge: Store leftovers in an airtight container for up to 3 days to maintain freshness.

Freezer: For longer storage, freeze portions in an airtight container or freezer bag for up to 3 months. Thaw in the fridge overnight before reheating.

Reheating: Reheat in a hot skillet to restore crispiness, adding a touch of oil if needed. Avoid microwaving, as it can make the beef soggy.

Enjoy Fresh: While it can be stored, Crispy Chilli Beef tastes best fresh, so try to savor it right after preparation!

What to Serve With Crispy Chilli Beef

Embrace the lively flavors of Crispy Chilli Beef by pairing it with delightful sides that elevate your dining experience.

  • Steamed Jasmine Rice: Its fluffy texture soaks up the sauce, providing a comforting base for each flavorful bite.
  • Stir-Fried Noodles: A noodle dish adds a hearty complement to the crispy beef, harmonizing the meal with its deliciously rich sauce.
  • Sautéed Bok Choy: This fresh veggie not only brings vibrant color but also offers a pleasant crunch, enhancing the dish’s overall texture.
  • Cucumber Salad: Refreshing and crisp, a light cucumber salad with a tangy dressing contrasts beautifully with the spiciness of the beef.
  • Vegetable Spring Rolls: The crispy exterior of these rolls pairs perfectly with the juicy beef while adding an additional layer of flavor.
  • Chilled White Wine: A glass of chilled white wine, such as Sauvignon Blanc, complements the spices, creating a delightful balance in your meal.
  • Chocolate Mousse: Finish off on a sweet note with a rich chocolate mousse, which brings a touch of indulgence that everyone will adore.

These accompaniments create a full, satisfying meal that balances the boldness of your Crispy Chilli Beef and delights the tastebuds!

Expert Tips for Crispy Chilli Beef

Hot Pan Check: Ensure your pan is hot enough before frying to achieve that desired crispy texture. A test piece will help you gauge the temperature.

Small Batches: Fry the beef in small batches; overcrowding can cause steaming, resulting in a soggy texture instead of the crispy finish you want in your Crispy Chilli Beef.

Adjust Sweetness: Don’t hesitate to modify the sugar level in the sauce. Taste as you go, allowing you to create a flavor profile that suits your palate perfectly.

Ingredient Substitutes: Feel free to experiment with different cuts of beef like ribeye or flank to elevate the flavor. You can also try tofu for a vegetarian alternative.

Storage Awareness: If you have leftovers, store them in an airtight container, but note that reheating may compromise the crispiness. Enjoy fresh whenever possible!

Make Ahead Options

Preparing your Crispy Chilli Beef ahead of time is a fantastic way to save precious moments during busy weeknights! You can marinate the beef strips in the egg, cornflour, and seasonings up to 24 hours in advance, allowing the flavors to infuse deeply. Additionally, you can sauté the aromatic onions, chili, ginger, and garlic, then store them in an airtight container in the fridge for up to 3 days. When you’re ready to serve, simply reheat the sautéed mixture, add your sauce ingredients, and cook everything together before tossing in the crispy beef. This method ensures your dish remains just as delicious while significantly reducing cooking time when you need it most!

Crispy Chilli Beef Variations & Substitutions

Feel free to personalize your dish and create your own delicious twists with these ideas!

  • Dairy-Free: Swap the egg with a flax egg to keep it friendly for those avoiding dairy. A simple mix of flaxseed meal and water does the trick!

  • Vegetarian Delight: Replace beef with tofu or seitan, following the same preparation method for a satisfying meatless meal. This creates a wonderful texture without compromising on flavor.

  • Low-Sugar Option: Reduce the caster sugar in the sauce or substitute with a sugar alternative for a healthier option that still packs a punch of flavor.

  • Extra Heat: Add sliced jalapeños or a dash of chili flakes to amplify the spice level, bringing your dish to a whole new heat adventure. Just a little can go a long way!

  • Flavor Boost: Incorporate a splash of sesame oil in the sauce for a nutty depth that complements the other flavors perfectly. It truly elevates the dish!

  • Crispy Veggie Addition: Mix in bell peppers or broccoli during the sautéing step to add more texture and nutrition to your meal. You could also try my Crispy Vegetable Pancakes for a delightful side.

  • Different Proteins: Switch out the beef for chicken or shrimp for a different take. Each option provides a unique flavor profile while staying true to the dish’s spirit.

Experimenting with these variations can not only make your Crispy Chilli Beef more exciting but can also cater to varied dietary preferences!

Crispy Chilli Beef Recipe FAQs

What kind of beef should I use for Crispy Chilli Beef?
Absolutely! Thin-cut sirloin steak is the best choice for a tender and quick-cooking experience. However, you can also use ribeye for a richer flavor, flank for a lean option, or skirt steak for more texture, each providing distinct qualities to the dish. Choose according to your taste preference!

How should I store leftover Crispy Chilli Beef?
For optimal freshness, store leftovers in an airtight container in the fridge for up to 3 days. If you want to keep it longer, you can freeze the beef in an airtight container or freezer bag for up to 3 months. Make sure to label your container with the date to keep track!

Can I freeze Crispy Chilli Beef?
Yes, you can! To freeze, place portions in an airtight container or freezer bag, ensuring to remove as much air as possible. When you’re ready to enjoy it again, thaw overnight in the fridge. For reheating, skip the microwave to retain its crunch—just reheating in a hot skillet with a little oil works wonders to revive that crispy texture!

What can I do if my Crispy Chilli Beef isn’t getting crispy enough?
Very! If your beef isn’t crispy, there are a few reasons this may happen. First, ensure your pan is hot enough before frying; a small test piece can help determine the right temperature. Also, frying in small batches is crucial to avoid steaming, which will yield soggy beef. For extra crunch, you can double-coat the beef by repeating the egg and cornflour process before frying.

Are there any dietary considerations for this recipe?
Yes, while Crispy Chilli Beef can be enjoyed by many, it does contain gluten from the soy sauce and potential sugar depending on the sauces used. If you’re looking for a gluten-free option, there are gluten-free soy sauces available in most stores. For a vegetarian or vegan take, simply swap in tofu or seitan using the same preparation steps for delightful results!

How can I adjust the heat level in Crispy Chilli Beef?
Absolutely! To modify the heat level, you can remove the seeds from your red chili to reduce spiciness. If you fancy something milder, consider using a bell pepper or a sweet chili instead. On the flip side, if you’re feeling adventurous, try adding more red chili or even some chili flakes to the sauce for an added fiery kick!

Crispy Chilli Beef

Crispy Chilli Beef That Will Ignite Your Taste Buds

Crispy Chilli Beef is a healthier twist on a classic, featuring tender beef strips in a crispy coating with a spicy sauce.
Prep Time 30 minutes
Cook Time 15 minutes
Total Time 45 minutes
Servings: 4 servings
Course: Dinner
Cuisine: Chinese
Calories: 450

Ingredients
  

For the Beef Coating
  • 360 g Thin-Cut Sirloin Steak Choose tender cuts for quick cooking
  • 1 small Egg Binds the cornflour to the beef
  • 4 tbsp Cornflour Provides essential crunch
  • ¼ tsp Salt Enhances the overall flavor
  • ¼ tsp Black Pepper Adds a hint of spice
  • tsp White Pepper Offers distinct heat
For the Stir-Fry
  • 4.5 tbsp Sunflower Oil Neutral oil perfect for frying
  • 1 medium Onion Sliced
  • 1 Red Chili Sliced
  • 1 tsp Minced Ginger Adds aromatic depth
  • 3 Garlic Cloves Minced
For the Sauce
  • 2 tbsp Rice Vinegar Provides tanginess
  • 3 tbsp Dark Soy Sauce Infuses umami richness
  • 2 tbsp Tomato Puree Adds body to the sauce
  • 6 tbsp Caster Sugar Sweetens and balances the sauce
  • 2 tbsp Tomato Ketchup Offers a sweet and tangy addition
  • 2 tbsp Sweet Chili Sauce Brings sweetness and spice

Equipment

  • Frying pan

Method
 

Preparation
  1. Slice the thin-cut sirloin steak into strips. Whisk the egg and coat the beef strips thoroughly. Add cornflour, salt, black pepper, and white pepper. Mix well until evenly coated.
  2. Heat 3 tablespoons of sunflower oil in a frying pan over medium-high heat. Place coated beef strips in hot oil and fry for 5-6 minutes until dark brown and crispy. Transfer cooked beef to a paper towel-lined plate.
  3. In the same pan, add 1 tablespoon of sunflower oil. Sauté sliced onion for about 2 minutes. Add sliced red chili, minced ginger, and minced garlic. Stir continuously for about 30 seconds until fragrant.
  4. Pour in rice vinegar, dark soy sauce, tomato puree, caster sugar, tomato ketchup, and sweet chili sauce. Stir continuously for 2-3 minutes until it thickens slightly.
  5. Return crispy beef to the pan. Toss in the flavorful sauce and heat through for another 1-2 minutes. Serve on a bed of steamed jasmine rice or alongside stir-fried noodles.

Notes

Ensure your pan is hot enough before frying to achieve the desired crispy texture. Store leftovers in an airtight container and reheating in a skillet helps restore crispiness.

Irresistible Coffee Brownie Cheesecake for Chocolate Lovers

As I stirred the velvety cream cheese into the warm brewed coffee, a comforting aroma enveloped my kitchen, igniting memories of cozy cafés and decadent desserts. This Coffee Brownie Cheesecake is my go-to indulgence when I want to impress friends or simply treat myself. With its fudgy brownie base and a luscious coffee-infused cheesecake layer, this dessert not only satisfies sweet cravings but also gives you that delightful jolt of morning energy. What’s more, it’s surprisingly easy to make, making it a fantastic choice for both seasoned bakers and those just starting to explore the world of homemade treats. Ready to elevate your dessert game? Let’s dive into the delicious details together!

Why Is This Cake So Irresistible?

Decadent, each layer of this Coffee Brownie Cheesecake brings pure bliss, combining fudgy chocolate with creamy coffee-infused cheesecake. Crowd-pleaser, this dessert is a sure win at any gathering, captivating guests with its rich flavors. Versatile, feel free to add fruit preserves for an extra twist or make it gluten-free with a simple flour swap. Time-saving, the easy preparation allows you to whip up this stunning dessert in no time. Perfectly balanced, the luscious cheesecake layer complements the brownie base, creating harmonious bites that are both satisfying and delightful. For more chocolatey inspiration, check out my Banana Bread Brownies or treat yourself to some Coffee Chocolate Truffles!

Coffee Brownie Cheesecake Ingredients

For the Brownie Base

  • Unsalted Butter – contributes rich flavor and fudgy texture; use margarine for a dairy-free version.
  • Granulated Sugar – provides sweetness and affects overall texture.
  • Brown Sugar – adds moisture with a hint of caramel flavor; increase granulated sugar by 1/2 to 1 cup for a simpler recipe.
  • Eggs – bind ingredients and add richness; use room temperature for better incorporation.
  • Vanilla Extract – enhances overall flavor.
  • All-Purpose Flour – main dry ingredient that gives structure; use gluten-free flour if needed.
  • Unsweetened Cocoa Powder – delivers rich chocolate flavor; use Dutch-processed for a different taste.
  • Salt – balances sweetness and enhances flavors.
  • Semi-Sweet Chocolate Chips – adds extra chocolatey goodness.

For the Coffee Cheesecake Layer

  • Cream Cheese – provides creaminess and tanginess; low-fat cream cheese may alter texture.
  • Granulated Sugar – sweetens cheesecake while maintaining creaminess.
  • Eggs – bind the mixture for richness.
  • Vanilla Extract – enhances flavor similar to the brownie layer.
  • Brewed Coffee – provides the signature coffee flavor; cool coffee before use; espresso is a good alternative.
  • All-Purpose Flour – stabilizes cheesecake.

For Garnishing (optional)

  • Whipped Cream – adds lightness and aesthetics.
  • Chocolate Shavings – enhances presentation.
  • Coffee Beans – offers a gourmet touch.

Step‑by‑Step Instructions for Coffee Brownie Cheesecake

Step 1: Prepare Brownie Base
Preheat your oven to 350°F (175°C) and grease a 9-inch springform pan. In a medium saucepan, melt 1 cup of unsalted butter over low heat, then add in 1 cup of granulated sugar and 1 cup of brown sugar. Stir until combined, and remove from heat. Add in 4 large eggs and 2 teaspoons of vanilla extract, mixing well to create a smooth mixture.

Step 2: Combine Dry Ingredients
In a separate bowl, whisk together 1 cup of all-purpose flour, ½ cup of unsweetened cocoa powder, and ½ teaspoon of salt. Gradually fold the dry ingredients into the wet mixture until just combined—avoid overmixing! Finally, gently stir in 1 cup of semi-sweet chocolate chips. The brownie batter will be thick and rich, ready to pour into the prepared springform pan.

Step 3: Bake Brownie Layer
Spread the brownie batter evenly in the prepared pan, smoothing the top with a spatula. Bake in the preheated oven for 25-30 minutes, or until a toothpick inserted into the center comes out with a few moist crumbs. Once done, remove from the oven and allow the brownie base to cool completely before adding the cheesecake layer.

Step 4: Prepare Cheesecake Layer
Adjust your oven temperature down to 325°F (160°C). In a large mixing bowl, beat 16 ounces of cream cheese with an electric mixer until completely smooth. Gradually add in ¾ cup of granulated sugar, followed by 2 large eggs and 2 teaspoons of vanilla extract. Mix until it becomes a creamy batter, then slowly incorporate ½ cup of cooled brewed coffee and 2 tablespoons of flour until combined.

Step 5: Add Cheesecake Layer
Once the brownie base has cooled, pour the cheesecake batter gently over the brownie layer, spreading it evenly with a spatula. It’s important to be gentle to avoid disturbing the brownie layer beneath. With the layers beautifully combined, it’s time for the cheesecake to bake and set to perfection.

Step 6: Bake Cheesecake
Carefully place the springform pan back into the 325°F (160°C) oven and bake for 50-60 minutes. The edges should be set while the center will slightly jiggle; this indicates a perfectly creamy texture. After baking, turn off the oven and let the cheesecake cool inside for an hour before transferring it to the refrigerator to chill for at least 4 hours, preferably overnight.

Step 7: Serve Your Coffee Brownie Cheesecake
Once chilled, carefully remove the sides of the springform pan to reveal your stunning Coffee Brownie Cheesecake. For a delightful finishing touch, top each slice with dollops of whipped cream, chocolate shavings, or even coffee beans for a gourmet appeal. Enjoy the contrast of rich chocolate and luscious coffee in every bite!

Expert Tips for Coffee Brownie Cheesecake

  • Room Temperature Ingredients: Ensure all ingredients, especially cream cheese and eggs, are at room temperature for smoother batter and better incorporation.

  • Avoid Overmixing: Gently mix your brownie and cheesecake batters to prevent a dense texture. Overmixing can lead to undesirable cracks during baking.

  • Chill Before Baking: Allow your brownie base to cool completely before pouring the cheesecake layer on top. This helps maintain distinct layers and prevents merging.

  • Water Bath Method: Consider using a water bath in the oven to minimize cracks and retain moisture in your cheesecake. It helps create an even baking environment.

  • Overnight Chill: For the best flavor and texture, let your Coffee Brownie Cheesecake chill overnight in the fridge. This allows the flavors to meld beautifully.

  • Garnishing with Care: When serving, be creative with your toppings like whipped cream, chocolate shavings, or coffee beans for that extra flair and gourmet touch.

Coffee Brownie Cheesecake Variations

Feel the freedom to add your personal touch to this delectable Coffee Brownie Cheesecake with these delightful variations!

  • Dairy-Free: Substitute cream cheese with a vegan cream cheese and use almond milk for a wholesome dairy-free treat.

  • Gluten-Free: Replace all-purpose flour with a 1:1 gluten-free flour blend for a scrumptious gluten-free dessert. Enjoy the same rich flavors without worry.

  • Nutty Addition: Stir in crushed walnuts or pecans into the brownie batter for an added crunch. This gives a delightful texture contrast that will please nut lovers.

  • Fruity Twist: Swirl in some raspberry or cherry preserves into the cheesecake layer for a fruity pop of flavor. This juicy surprise will elevate each bite, making it a refreshing treat!

  • Espresso Boost: For an intensified coffee flavor, add an extra shot of espresso to the cheesecake batter. Coffee aficionados will adore the rich extra jolt!

  • Chocolate Lovers: Mix in some dark chocolate chips into the brownie layer for an even more decadent taste. The gooey chocolate chunks offer a heavenly texture that chocolate lovers crave.

  • Mini Cheesecakes: Create individual servings by using a muffin tin and adjusting the baking time to 20-25 minutes. Perfect for portion control, these bite-sized delights are great for gatherings.

For an infusion of chocolate and caffeine adventure, consider making some Coffee Chocolate Truffles for a delightful pairing or indulge in my irresistible Banana Bread Brownies as a complementary dessert!

Storage Tips for Coffee Brownie Cheesecake

  • Fridge: Store leftovers tightly wrapped in plastic or in an airtight container for up to 5 days. This will keep your Coffee Brownie Cheesecake fresh and delicious.

  • Freezer: For longer storage, freeze slices in an airtight container or wrap them individually in plastic for up to 3 months. This way, you can enjoy a slice anytime!

  • Thawing: When ready to enjoy, thaw your frozen Coffee Brownie Cheesecake in the fridge overnight for the best texture and flavor before serving.

  • Reheating: If desired, you can gently warm individual slices in the microwave for about 15-20 seconds to enhance the fudgy brownie layer.

Make Ahead Options

These Coffee Brownie Cheesecakes are perfect for busy home cooks looking to save time while still indulging in a decadent dessert! You can prepare the brownie base up to 24 hours in advance. Simply bake, cool completely, and refrigerate wrapped in plastic to maintain that fudgy texture. The cheesecake layer can also be made up to 3 days ahead; ensure it’s stored in an airtight container in the fridge to keep it fresh and creamy. When you’re ready to serve, simply slice the chilled cheesecake, garnish if desired, and enjoy this delightful treat that’s just as delicious as when freshly made!

What to Serve with Decadent Coffee Brownie Cheesecake

Indulging in a slice of this dessert is a delightful experience on its own, but pairing it with the right accompaniments can elevate your gathering to new heights.

  • Rich Vanilla Ice Cream: The creamy vanilla ice cream provides a refreshing contrast to the dense cheesecake, enhancing chocolate flavors beautifully.
  • Fresh Berries: Juicy raspberries or strawberries cut through the rich sweetness, adding a tart pop that brightens every bite.
  • Espresso: A shot of bold espresso complements the coffee notes in the cheesecake, heightening its flavors and creating a café-like experience at home.
  • Chocolate Ganache: Drizzle warm chocolate ganache over the cheesecake for an extra layer of indulgence, appealing to chocolate lovers everywhere.
  • Mint Leaves: Garnishing with fresh mint adds a vibrant touch and a hint of freshness that perks up this rich dessert.
  • Sweet Cream Topping: Offer a light and airy sweet cream alongside each slice to create a delightful contrast with the dense brownie layer.
  • Hazelnut Liqueur: For an adult twist, serve with a glass of hazelnut liqueur; it beautifully complements both coffee and chocolate.
  • Homemade Caramel Sauce: Drizzling caramel enhances the dessert’s sweetness, offering a luxurious mouthfeel with each indulgent forkful.
  • Decadent Hot Chocolate: A warm cup of rich hot chocolate creates a cozy atmosphere, perfect for those chilly evenings spent enjoying this dessert together.
  • Cinnamon-Spiced Whipped Cream: Elevate your whipped cream by adding a dash of cinnamon, which adds warmth and spice, making each bite exhilarating.

Coffee Brownie Cheesecake Recipe FAQs

How do I select ripe ingredients for this recipe?
Absolutely! For the best results, choose high-quality cream cheese and fresh eggs at room temperature, ensuring they’ll blend smoothly into your cheesecake. When it comes to granulated and brown sugars, make sure they’re free from clumps to promote even mixing. Also, opt for good-quality cocoa powder for a richer chocolate flavor.

How should I store leftovers of the Coffee Brownie Cheesecake?
You can keep your Coffee Brownie Cheesecake in the refrigerator for up to 5 days. Make sure to wrap it tightly in plastic wrap or place it in an airtight container to maintain its freshness. I often recommend using a cake dome if you have one; it keeps the cake looking great and prevents odors from impacting its flavor!

Can I freeze the Coffee Brownie Cheesecake?
Yes, you can! To freeze, cut the cheesecake into individual slices, then wrap each slice in plastic wrap followed by foil. This method will preserve flavor and prevent freezer burn, allowing you to enjoy your Coffee Brownie Cheesecake for up to 3 months. When you’re ready to indulge again, simply thaw the slices in the fridge overnight for the best texture.

What should I do if my cheesecake cracks during baking?
Very! If you find cracks on your cheesecake, it usually means it may have been overbaked. To avoid this, keep an eye on the baking times and look for a slight jiggle in the center when removing it from the oven. Using a water bath can also help maintain moisture and temperature, minimizing cracks. Remember, even if cracks appear, you can always cover your cheesecake with whipped cream or chocolate shavings to make it look beautiful!

Is this recipe suitable for those with dietary restrictions, such as gluten or dairy allergies?
Yes! You can make this Coffee Brownie Cheesecake gluten-free by substituting all-purpose flour with a gluten-free flour blend. For a dairy-free option, swap the cream cheese with a vegan cream cheese alternative and use margarine instead of butter. Just keep in mind that it may alter the texture slightly, but it’ll still be delicious!

What is the best way to serve this cheesecake?
For a delightful presentation, serve slices chilled with a dollop of whipped cream, chocolate shavings, or even a few whole coffee beans for a gourmet touch! Pairing each slice with a warm cup of coffee enhances the experience even further, creating a delightful contrast between the rich flavors. Enjoy every bite!

Coffee Brownie Cheesecake

Irresistible Coffee Brownie Cheesecake for Chocolate Lovers

This Coffee Brownie Cheesecake brings together rich chocolate and creamy coffee flavors, perfect for chocolate lovers.
Prep Time 30 minutes
Cook Time 1 hour
Chilling Time 4 hours
Total Time 5 hours 30 minutes
Servings: 12 slices
Course: Dessert
Cuisine: American
Calories: 350

Ingredients
  

For the Brownie Base
  • 1 cup Unsalted Butter use margarine for a dairy-free version.
  • 1 cup Granulated Sugar
  • 1 cup Brown Sugar increase granulated sugar by 1/2 to 1 cup for a simpler recipe.
  • 4 Eggs use room temperature for better incorporation.
  • 2 teaspoons Vanilla Extract
  • 1 cup All-Purpose Flour use gluten-free flour if needed.
  • 1/2 cup Unsweetened Cocoa Powder use Dutch-processed for a different taste.
  • 1/2 teaspoon Salt
  • 1 cup Semi-Sweet Chocolate Chips
For the Coffee Cheesecake Layer
  • 16 ounces Cream Cheese low-fat cream cheese may alter texture.
  • 3/4 cup Granulated Sugar
  • 2 Eggs
  • 2 teaspoons Vanilla Extract enhances flavor similar to the brownie layer.
  • 1/2 cup Brewed Coffee cool coffee before use; espresso is a good alternative.
  • 2 tablespoons All-Purpose Flour stabilizes cheesecake.
For Garnishing (optional)
  • Whipped Cream adds lightness and aesthetics.
  • Chocolate Shavings enhances presentation.
  • Coffee Beans offers a gourmet touch.

Equipment

  • 9-inch springform pan
  • Medium saucepan
  • mixing bowl
  • electric mixer

Method
 

Step-by-Step Instructions for Coffee Brownie Cheesecake
  1. Preheat your oven to 350°F (175°C) and grease a 9-inch springform pan. In a medium saucepan, melt 1 cup of unsalted butter over low heat, then add in 1 cup of granulated sugar and 1 cup of brown sugar. Stir until combined, and remove from heat. Add in 4 large eggs and 2 teaspoons of vanilla extract, mixing well to create a smooth mixture.
  2. In a separate bowl, whisk together 1 cup of all-purpose flour, 1/2 cup of unsweetened cocoa powder, and 1/2 teaspoon of salt. Gradually fold the dry ingredients into the wet mixture until just combined—avoid overmixing! Finally, gently stir in 1 cup of semi-sweet chocolate chips.
  3. Spread the brownie batter evenly in the prepared pan, smoothing the top with a spatula. Bake in the preheated oven for 25-30 minutes, or until a toothpick inserted into the center comes out with a few moist crumbs. Allow the brownie base to cool completely before adding the cheesecake layer.
  4. Adjust your oven temperature down to 325°F (160°C). In a large mixing bowl, beat 16 ounces of cream cheese with an electric mixer until completely smooth. Gradually add in 3/4 cup of granulated sugar, followed by 2 large eggs and 2 teaspoons of vanilla extract. Mix until it becomes a creamy batter, then slowly incorporate 1/2 cup of cooled brewed coffee and 2 tablespoons of flour until combined.
  5. Once the brownie base has cooled, pour the cheesecake batter gently over the brownie layer, spreading it evenly with a spatula. Be gentle to avoid disturbing the brownie layer beneath.
  6. Carefully place the springform pan back into the 325°F (160°C) oven and bake for 50-60 minutes. The edges should be set while the center will slightly jiggle; this indicates a perfectly creamy texture. After baking, turn off the oven and let the cheesecake cool inside for an hour before transferring it to the refrigerator to chill for at least 4 hours, preferably overnight.
  7. Once chilled, carefully remove the sides of the springform pan to reveal your stunning Coffee Brownie Cheesecake. Top each slice with dollops of whipped cream, chocolate shavings, or coffee beans for a gourmet appeal. Enjoy!

Notes

Ensure all ingredients, especially cream cheese and eggs, are at room temperature for smoother batter.

Thai Ground Beef Lettuce Wraps for a Flavorful Weeknight Meal

The first bite is like a mini vacation to the vibrant streets of Thailand. These Spicy Thai Ground Beef Lettuce Wraps not only transport you to a world of exceptional flavors but also come together in just 20 minutes, making them perfect for a quick dinner or a health-savvy snack. With their gluten-free and low-carb perks, they’re a guilt-free delight that suits a variety of diets. Picture crisp, refreshing lettuce leaves cradling a savory filling of seasoned ground beef, brightened with zesty lime and a hint of heat. As you roll these wraps up, you’ll see just how easy it is to bring a taste of authentic Thai cuisine into your home. Are you ready to wrap your hands around this deliciousness?

Why are These Lettuce Wraps a Must-Try?

Quick and Easy: Ready in just 20 minutes, these wraps are ideal for busy weeknights when you crave something fresh yet satisfying.

Gluten-Free Goodness: Perfect for those mindful of their diet, simplifying meal prep without sacrificing flavor.

Customizable Flavors: Whether you use beef, chicken, or even tofu, the choice is yours! The flexibility of ingredients makes it a delightful surprise every time.

Fresh Textures: Enjoy the crisp crunch of lettuce paired with the savory, juicy ground beef, enhanced by zesty lime and fresh herbs—pure bliss in every bite!

Family-Friendly Fun: Let everyone assemble their own wraps at the table for a fun, interactive dining experience that even picky eaters will love!

Pair them with some delicious Savory Beef Bacon for a complete meal or serve with Mini Beef Pies for a savory treat!

Thai Ground Beef Lettuce Wrap Ingredients

For the Filling

  • Ground Beef – This is the main protein source; you can substitute with chicken, turkey, or even shrimp for varied flavors.
  • Water – A small amount keeps the beef moist while cooking; adjust based on your preferred texture.
  • Toasted Rice Powder – Adds a unique nutty flavor; ground almonds can easily replace it if desired.
  • Chili Flakes – For that perfect heat; adjust the amount based on your spice preference or omit entirely.
  • Lime Juice – Provides a bright, tangy balance; lemon juice works if you’re in a pinch.
  • Fish Sauce – Infuses umami; make sure to choose gluten-free options for dietary needs.
  • White Sugar – Helps to balance the savory flavors; brown sugar can add a deeper taste.

For Freshness

  • Cilantro – This herb brightens the dish; parsley is a fine substitute if you’re not a cilantro fan.
  • Green Onions – Adds a lovely crunch; chives can be used instead for a milder flavor.
  • Shallots – Offers sweetness and depth; finely chopped onions can work in a pinch.

For the Wrap

  • Lettuce – The vessel for your delicious filling; sturdy varieties like romaine or butter lettuce are best for wrapping.

These Thai Ground Beef Lettuce Wraps are a culinary escape packed with flavor and made from easily accessible ingredients. Enjoy crafting this delightful dish!

Step‑by‑Step Instructions for Thai Ground Beef Lettuce Wraps

Step 1: Cook Ground Beef
In a large skillet over medium heat, add the ground beef and a splash of water. Cook for about 5 to 7 minutes, stirring frequently, until the beef is browned and fully cooked, with no pink remaining. As you stir, ensure the meat breaks into small pieces for an even texture, creating a juicy base for your Thai Ground Beef Lettuce Wraps.

Step 2: Season Beef
Once the ground beef is cooked, remove it from heat and transfer it to a mixing bowl. Add toasted rice powder, chili flakes, lime juice, fish sauce, and white sugar. Toss everything together until the mixture is well-coated and fragrant, about 1 to 2 minutes. The seasoning will enhance the beef’s flavor, making your Thai Ground Beef Lettuce Wraps truly delicious.

Step 3: Add Fresh Herbs
Gently fold chopped cilantro, sliced green onions, and diced shallots into the seasoned beef mixture. Mix well, so the herbs are evenly distributed throughout the filling. Take care not to over-mix, as the fresh herbs should add vibrancy and texture to your Thai Ground Beef Lettuce Wraps, creating a refreshing bite with every wrap.

Step 4: Assemble Wraps
Prepare your lettuce leaves by gently washing and drying them. Take one sturdy leaf (like romaine or butter lettuce) and place it on a plate. Spoon a generous amount of the beef mixture into the center of the leaf. Fold the sides of the lettuce over the filling and serve immediately for the best flavor and crunch, pairing with optional dipping sauces for an extra kick.

How to Store and Freeze Thai Ground Beef Lettuce Wraps

Fridge: Store leftover beef filling in an airtight container in the fridge for up to 3 days. Make sure it’s completely cooled before sealing to maintain freshness.

Freezer: Freeze the beef mixture in a freezer-safe bag or container for up to 3 months. When ready to enjoy, thaw it in the fridge overnight before reheating.

Reheating: Reheat the filling in a skillet over medium heat until warmed through. Avoid using the microwave, as it can make the ground beef rubbery.

Lettuce Storage: Keep lettuce leaves wrapped in a damp paper towel in the fridge for up to 2 days. Prepare your wraps just before serving to retain their crunch.

Thai Ground Beef Lettuce Wraps Variations

Feel free to let your creativity shine as you customize these wraps for your taste and dietary needs!

  • Vegan Option: Replace ground beef with crumbled tofu and use a vegan fish sauce alternative for a delicious plant-based twist. You won’t sacrifice flavor, and it opens a fresh avenue of taste.

  • Crunchy Veggies: Add diced bell peppers or shredded carrots to the beef mixture for an extra crunch and vibrant color. These colorful additions not only enhance the texture but lend a delightful fresh flavor.

  • Spice It Up: For those who crave a kick, try incorporating fresh diced chili peppers or sriracha into the filling. Adjust according to your heat tolerance for an exciting and fiery experience!

  • Different Proteins: Swap out the ground beef for ground chicken, turkey, or even shrimp. Each alternative brings a unique flavor profile, keeping mealtime exciting and new.

  • Nuts and Seeds: Toss in crushed peanuts or sesame seeds for additional texture and a nutty flavor. This will add an interesting crunch that elevates the simple lettuce wrap into something extra special.

  • Herb Variety: Instead of just cilantro, mix in fresh basil or mint for a refreshing twist. These aromatic herbs will enhance the flavor and transport you to a fragrant Thai market!

  • Sweet Heat Ensemble: Combine the fish sauce with a touch of honey or agave to create a sweet-salty balance, perfect for those who enjoy a hint of sweetness in savory dishes.

  • Asian Slaw Filling: Swap the meat for a mixture of shredded cabbage and carrots with some sesame dressing for a lighter, flavorful slaw that captures the essence of Asian cuisine. This refreshing mix is a crunchy delight!

For more inventive ways to enjoy ground beef, consider trying our Heirloom Beef Pancakes or get creative with Savory Beef Bacon for a unique snack!

What to Serve with Spicy Thai Ground Beef Lettuce Wraps?

Imagine transforming a simple meal into a vibrant feast by complementing these delicious wraps with delightful side dishes and drinks.

  • Steamed Jasmine Rice: A fragrant side that balances the spicy flavors of the wraps, providing a comforting touch to your meal.

  • Thai Cucumber Salad: Refreshing and light, this salad adds a crunchy texture and a hint of sweetness that beautifully contrasts the spice of the filling.

  • Grilled Pineapple Skewers: The caramelized sweetness of grilled pineapple serves as a perfect palate cleanser, enhancing the tropical essence of the Thai cuisine.

  • Coconut Milk Smoothie: Creamy and indulgent, this drink offers a sweet, mild complement that contrasts the heat of the wraps, creating a well-rounded dining experience.

  • Peanut Sauce Dipping Sauce: Rich and nutty, this sauce elevates your wraps with an additional layer of flavor, enriching every bite.

  • Thai Iced Tea: A sweet, creamy beverage with hints of spice that cools your palate while echoing the Thai theme of the meal.

  • Roasted Sweet Potato Wedges: Crispy on the outside and soft within, these wedges add a subtle sweetness, contrasting nicely to the savory beef.

  • Mini Spring Rolls: Crispy and filled with vegetables, these provide a delightful crunch and balance beautifully with the freshness of the wraps.

  • Lemongrass Infused Water: A refreshing, aromatic drink that cleanses the palate and complements the fragrant flavors of the Thai Ground Beef Lettuce Wraps.

Expert Tips for Thai Ground Beef Lettuce Wraps

  • Don’t Overcook: Ensuring the ground beef stays juicy is key; remove it from heat as soon as it’s cooked through to avoid dryness.

  • Mix It Up: Encourage creativity by letting everyone choose their filling ingredients, making these Thai Ground Beef Lettuce Wraps customizable for all taste preferences.

  • Dipping Sauces: Enhance the flavor by offering a variety of dipping sauces like sweet chili or peanut sauce; they’ll elevate your wraps to a whole new level.

  • Check Labels: If you’re catering to gluten-free individuals, always inspect fish sauce labels to confirm they’re free from gluten.

  • Choose the Right Lettuce: Opt for sturdy leaves such as romaine or butter lettuce to hold the filling better and provide a satisfying crunch with every bite.

Make Ahead Options

These Spicy Thai Ground Beef Lettuce Wraps are a fantastic choice for meal prep, allowing you to enjoy bold flavors with minimal effort. You can prepare the beef filling up to 3 days in advance—simply cook and season the ground beef as directed, then store it in an airtight container in the refrigerator. To maintain its savory goodness, ensure the mixture is completely cooled before sealing. On the day you plan to serve them, simply reheat the beef mixture in a skillet over medium heat until warmed through. Assemble your wraps with fresh lettuce right before serving for that perfect crunch, proving that satisfying meals can indeed be made ahead of time!

Thai Ground Beef Lettuce Wraps Recipe FAQs

What type of lettuce is best for wraps?
For these Thai Ground Beef Lettuce Wraps, I recommend using sturdy varieties like romaine or butter lettuce. These types are strong enough to hold the filling without tearing, ensuring a delightful crunch with each bite.

How long can I store leftover beef filling?
You can store the leftover beef filling in an airtight container in the fridge for up to 3 days. Be sure to let it cool completely before sealing to maintain its freshness and prevent bacteria growth.

Can I freeze the beef mixture?
Absolutely! You can freeze the beef mixture in a freezer-safe bag or container for up to 3 months. When you’re ready to enjoy it again, simply thaw it in the fridge overnight. To reheat, place it in a skillet over medium heat until warmed through, which helps to maintain the beef’s juicy texture.

What if I have leftovers after making the wraps?
If you have leftover lettuce after making the wraps, store the leaves wrapped in a damp paper towel in the fridge for up to 2 days. This method helps keep the lettuce crisp and fresh for your next meal. Just assemble your wraps just before serving to enjoy that perfect crunch!

What are some common substitutions for the ingredients?
You have plenty of options! If you’re looking for alternatives, ground beef can easily be replaced with chicken, turkey, pork, or shrimp. For a vegetarian version, crumbled tofu is a great substitute for beef. Additionally, if you’re not a fan of cilantro, parsley works beautifully. Customize based on your preferences to make these Thai Ground Beef Lettuce Wraps your very own!

Is this dish suitable for gluten-free diets?
Yes, these spicy Thai Ground Beef Lettuce Wraps can easily be made gluten-free. Just make sure to choose a gluten-free version of fish sauce, and check any other sauces you use to confirm they meet your dietary needs. Enjoy the vibrant flavors without any worries!

Thai Ground Beef Lettuce Wraps

Thai Ground Beef Lettuce Wraps for a Flavorful Weeknight Meal

Discover a delightful Thai Ground Beef Lettuce Wraps recipe that’s quick, gluten-free, and full of flavor—perfect for any weeknight meal.
Prep Time 10 minutes
Cook Time 10 minutes
Total Time 20 minutes
Servings: 4 wraps
Course: Dinner
Cuisine: Thai
Calories: 250

Ingredients
  

For the Filling
  • 1 pound ground beef can substitute with chicken, turkey, or shrimp
  • 2 tablespoons water adjust based on texture preference
  • 2 tablespoons toasted rice powder can substitute with ground almonds
  • 1 teaspoon chili flakes adjust based on spice preference
  • 2 tablespoons lime juice lemon juice works in a pinch
  • 1 tablespoon fish sauce choose gluten-free options
  • 1 teaspoon white sugar brown sugar can add deeper taste
For Freshness
  • 1/4 cup cilantro can substitute with parsley
  • 2 medium green onions can substitute with chives
  • 2 medium shallots finely chopped onions can work in a pinch
For the Wrap
  • 1 head lettuce sturdy varieties like romaine or butter lettuce are best

Equipment

  • large skillet

Method
 

Step-by-Step Instructions
  1. In a large skillet over medium heat, add the ground beef and a splash of water. Cook for about 5 to 7 minutes, stirring frequently, until the beef is browned and fully cooked.
  2. Once the ground beef is cooked, remove it from heat and transfer it to a mixing bowl. Add toasted rice powder, chili flakes, lime juice, fish sauce, and white sugar. Toss everything together until well-coated.
  3. Gently fold chopped cilantro, sliced green onions, and diced shallots into the seasoned beef mixture. Mix well without over-mixing.
  4. Prepare your lettuce leaves by gently washing and drying them. Take one leaf and place a generous amount of the beef mixture into the center. Fold the sides over the filling and serve immediately.

Notes

Store leftover beef filling in an airtight container in the fridge for up to 3 days. Freeze for up to 3 months. Reheat in a skillet for best results.

Cotton Candy Sushi: A Fun & Sweet No-Bake Delight

“Can you believe this whimsical dessert exists?” I recently stumbled upon a colorful delight that’s about to take your gatherings to the next level: Cotton Candy Sushi. Instead of the usual fish and rice, this playful no-bake treat swaps in fluffy cotton candy as a sweet wrap, stuffed with chewy marshmallows, vibrant gummy candies, and fresh fruit. It’s as delightful to behold as it is to eat, making it a guaranteed hit at kids’ parties, themed events, or any occasion where you want to impress. Plus, it’s incredibly quick to whip up, so you can spend less time fussing in the kitchen and more time enjoying the festivities. Who wouldn’t want to create a fun twist on dessert that’s just as lovable as it is delicious? Let’s dive into this colorful creation together, shall we?

Why is Cotton Candy Sushi So Fun?

Playful, Eye-Catching Presentation: This dessert is as visually appealing as it is tasty, making it perfect for impressing guests.

Easy No-Bake Preparation: With simple steps and no cooking required, anyone can master this fun treat in no time.

Sweet Flavor Combinations: The blend of cotton candy, fruity filling, and chewy textures creates a burst of deliciousness in every bite.

Adaptable to Personal Tastes: Customize your sushi with different candies and fruits, turning it into a unique creation every time!

Crowd-Pleaser for All Ages: Kids and adults alike will adore this whimsical dessert, adding a spark of joy to any celebration!

This delightful take on sushi offers a new way to experience sweets, ideal for your next gathering or to elevate a simple snack. And if you’re feeling adventurous, make sure to check out other dessert recipes for more inspiration!

Cotton Candy Sushi Ingredients

To create your whimsical Cotton Candy Sushi, gather these delightful ingredients!

For the Wrap

  • Cotton Candy – Serves as the outer wrap, providing sweetness and color; using freshly spun cotton candy offers the best texture.

For the Filling

  • Marshmallows – Adds a chewy texture and extra sweetness; if desired, substitute with marshmallow fluff for a creamier consistency.
  • Gummy Candies – Provides varied textures and flavors; popular choices include gummy bears and sour gummies for an extra zing!
  • Fresh Fruit (e.g., strawberries, bananas) – Adds natural sweetness and a refreshing crunch; ensure they are finely chopped to easily fit within rolls.

Step‑by‑Step Instructions for Cotton Candy Sushi

Step 1: Prepare Your Work Area
Begin by setting up a clean, cool, and dry work area to ensure your Cotton Candy Sushi can be made without any moisture interference. Gather your ingredients and have a large, flat surface ready, such as a cutting board. Lay out a parchment paper or silicone mat to prevent sticking while rolling.

Step 2: Shape the Cotton Candy
Take a generous handful of freshly spun cotton candy and gently pull and stretch it into a flat, rectangular sheet about ½ inch thick. Aim for a smooth, even surface that can easily hold the fillings. Ensure the cotton candy retains its light, airy texture, which is crucial for achieving the right balance in your sushi.

Step 3: Add the Fillings
On one edge of the cotton candy sheet, layer your choice of chopped marshmallows, colorful gummy candies, and finely diced fresh fruit. Be generous but ensure the fillings don’t spill over the edges. The vibrant colors and varied textures will create a visually appealing and delicious Cotton Candy Sushi, so arrange them in a fun and inviting way.

Step 4: Roll the Sushi
Carefully lift the edge of the cotton candy with the fillings and begin to roll it towards the opposite edge, gently tucking it in as you go to form your sushi roll. Roll tightly but not so tight that the cotton candy compresses. Watch for the fillings as you roll; they should be encapsulated within, creating a perfect dessert sushi.

Step 5: Slice the Roll
Using a sharp, serrated knife, slice the Cotton Candy Sushi roll into bite-sized pieces, approximately 1–2 inches thick. Press down gently while slicing to ensure the shapes hold together without squishing the cotton candy. Each piece should be colorful and filled with the delightful textures of your chosen fillings.

Step 6: Serve Immediately
To enjoy the best texture and flavor, serve your Cotton Candy Sushi immediately after slicing. Arrange the mini rolls on a beautiful platter for a stunning presentation that will delight your guests. The cotton candy’s melt-in-your-mouth quality combined with the sweet fillings makes this playful dessert irresistible—perfect for any gathering!

What to Serve with Cotton Candy Sushi

Treat your guests to an unforgettable experience by pairing vibrant flavors and textures alongside your delightful dessert.

  • Fruit Skewers: Fresh fruit on skewers not only adds a refreshing crunch, but complements the sweetness of the cotton candy beautifully. Choose colorful fruits for a visually appealing display.

  • Chocolate Dipping Sauce: A rich chocolate dip brings a decadent contrast to the sugary sushi. Its warmth and creamy texture will enhance each sweet bite.

  • Vanilla Ice Cream: Creamy vanilla ice cream balances the sweet flavors of the Cotton Candy Sushi, providing a cool, luscious treat. The scoop adds an element of indulgence to your dessert platter!

  • Popcorn Mix: Sweet and salty popcorn offers a fun textural contrast, adding a playful crunch to your dessert table. Consider mixing in some M&Ms for an extra candy-coated kick!

  • Lemonade: A refreshing glass of lemonade brightens the sweetness of the sushi rolls while offering a tangy touch that balances flavors. Opt for a sparkling version for fun bubbles!

  • Mini Cheesecake Bites: Light and creamy cheesecake bites are the perfect contrasting flavor to the sugary sushi. Top them with fruit or caramel for an extra layer of indulgence.

  • Sparkling Water: Infuse your sparkling water with fresh fruit or herbs for a sophisticated touch. This light drink will cleanse the palate between bites of the Cotton Candy Sushi.

  • Cotton Candy Pops: For those who adore cotton candy, consider serving light and airy cotton candy pops. They keep the theme consistent while providing an unexpected treat!

Create a whimsical dessert experience that tantalizes the taste buds and delights the eyes!

How to Store and Freeze Cotton Candy Sushi

Room Temperature: Keep leftover Cotton Candy Sushi in an airtight container at room temperature for up to 2 hours to maintain its texture and sweetness.

Fridge: If needed, store in an airtight container in the fridge for up to 1 day; however, the cotton candy may lose some of its fluffiness.

Freezer: It’s not recommended to freeze Cotton Candy Sushi, as the texture will change significantly when thawed; enjoy it fresh for the best experience.

Reheating: There’s no need to reheat; serve your Cotton Candy Sushi immediately after preparation for the ultimate sugary delight!

Cotton Candy Sushi Variations & Substitutions

Feel free to get creative and customize your Cotton Candy Sushi to match your taste and preferences!

  • Flavored Cotton Candy: Choose different cotton candy flavors, like grape or strawberry, to add a unique twist and surprise element to your dessert. Each flavor brings its own delightful essence!

  • Dairy-Free Options: Swap marshmallows for vegan marshmallows or use fruit-flavored gummy snacks for a completely dairy-free experience. It’s a simple hack that keeps the treat accessible for more guests.

  • Chocolate Crunch: Add chocolate chips or crushed cookies as a filling to introduce a rich, crunchy texture. Chocolate works wonders with cotton candy, making for an indulgent surprise.

  • Exotic Fruits: Try using seasonal or exotic fruits like kiwi, pineapple, or mango for a refreshing flavor upgrade. The vibrant colors and tastes can transform your sushi into a tropical paradise.

  • Spicy Heat: For a daring twist, incorporate spicy candies like chili mango gummies for a touch of heat that contrasts beautifully with the sweet cotton candy. It’s a bold way to elevate your dessert!

  • Nutty Delight: Introduce crushed nuts into your filling for added crunch and a nutty flavor that complements the sweetness of the cotton candy. Think almonds or pistachios for a sophisticated touch.

  • Zesty Citrus: Add a sprinkle of lemon or lime zest to the fillings for a zesty kick that awakens the palate. This brightness really enhances the overall flavor profile of your sushi.

  • Mini Sushi Rolls: For a fun presentation, create mini rolls with tiny cotton candy wraps and smaller portions of filling. Perfect for a bite-sized treat at parties, these little sushi delights can be a hit among your guests.

As you explore these variations, don’t forget to check out other delightful dessert recipes for more ideas on how to sweeten up your culinary adventures!

Expert Tips for Cotton Candy Sushi

  • Freshness is Key: Serve your Cotton Candy Sushi immediately after preparation to enjoy the best texture. Cotton candy dissolves quickly when exposed to air.

  • Roll Gently: When rolling your cotton candy, do so gently to prevent tearing. A light touch keeps the airy texture intact.

  • Avoid Moisture: Ensure your hands and work surface are dry. Moisture can cause the cotton candy to stick or lose shape.

  • Creative Fillings: Feel free to be adventurous with your fillings! Experiment with various fruits and candies to create your unique Cotton Candy Sushi each time.

  • Slice Carefully: Use a sharp serrated knife to cut the rolls, applying gentle pressure to maintain the integrity of the cotton candy and fillings.

Make Ahead Options

These playful Cotton Candy Sushi rolls are perfect for busy home cooks looking to save time during party preparations! You can prep the fillings, including chopped marshmallows, gummy candies, and fresh fruit, up to 24 hours in advance. Simply store them in airtight containers in the refrigerator to maintain their freshness. However, it’s best to keep the cotton candy separate and only roll it just before serving to prevent it from dissolving. When you’re ready to impress your guests, quickly shape the cotton candy, add your prepped fillings, roll, and slice into delightful pieces. With this make-ahead strategy, you’ll enjoy a stress-free dessert preparation that tastes just as delicious!

Cotton Candy Sushi Recipe FAQs

What type of cotton candy is best for this recipe?
Absolutely! For the best results, I recommend using freshly spun cotton candy. Look for vibrant colors and avoid any that have dark spots or are overly sticky, as they may indicate age or moisture.

How should I store leftover Cotton Candy Sushi?
To maintain its fluffy texture, store leftover Cotton Candy Sushi in an airtight container at room temperature for up to 2 hours. If you need to store it longer, you can refrigerate it, but be aware that it may lose some of its delightful fluffiness. In the fridge, it’s best consumed within 1 day.

Can I freeze Cotton Candy Sushi?
Not really! I never recommend freezing Cotton Candy Sushi, as the texture changes drastically upon thawing. The cotton candy will lose its airy quality and might become soggy, ruining the delightful experience. Enjoy it fresh for the best flavor!

What if my cotton candy tears while rolling?
No worries, it happens! If your cotton candy tears while rolling, just use small pieces to patch the area. Alternatively, you can create a “Sushi Bowl” by layering your fillings in a bowl and topping it with cotton candy, allowing for a fun deconstructed version.

Are there any dietary considerations for Cotton Candy Sushi?
Definitely! If you’re catering to dietary restrictions, ensure that the marshmallows and gummy candies are gluten-free, as some brands may use wheat-based products. For a fun twist, consider using vegan marshmallows if you’re aiming for a plant-based treat!

Cotton Candy Sushi

Cotton Candy Sushi: A Fun & Sweet No-Bake Delight

Experience the whimsical Cotton Candy Sushi, a fun dessert that’s colorful, easy to make, and perfectly sweet.
Prep Time 15 minutes
Total Time 15 minutes
Servings: 8 pieces
Course: Dessert
Calories: 120

Ingredients
  

For the Wrap
  • 1 large handful Cotton Candy Freshly spun for best texture
For the Filling
  • 1 cup Marshmallows Substitute with marshmallow fluff if desired
  • 1 cup Gummy Candies Varieties like gummy bears and sour gummies recommended
  • 1 cup Fresh Fruit Finely chopped (e.g., strawberries, bananas)

Equipment

  • Cutting Board
  • sharp serrated knife
  • parchment paper or silicone mat

Method
 

Step-by-Step Instructions for Cotton Candy Sushi
  1. Begin by setting up a clean, cool, and dry work area. Gather your ingredients and have a large, flat surface ready.
  2. Take a generous handful of freshly spun cotton candy and gently pull and stretch it into a flat, rectangular sheet about ½ inch thick.
  3. On one edge of the cotton candy sheet, layer your choice of chopped marshmallows, colorful gummy candies, and finely diced fresh fruit.
  4. Carefully lift the edge of the cotton candy with the fillings and begin to roll it towards the opposite edge, gently tucking it in as you roll.
  5. Using a sharp, serrated knife, slice the Cotton Candy Sushi roll into bite-sized pieces, approximately 1–2 inches thick.
  6. Serve your Cotton Candy Sushi immediately after slicing for the best texture and flavor.

Notes

Serve immediately for the best texture; cotton candy dissolves quickly when exposed to air.

Green Papaya Salad: Refreshing Crunch with Tangy Twist

Standing in the kitchen, the vibrant hues of fresh green papaya catch my eye—a quick reminder of summer days spent enjoying fresh salads. Today, I’m excited to whip up my Crunchy Green Papaya Salad with Tangy Lime Dressing, a dish that embodies brightness and flavor. With its crisp, refreshing texture, this gluten-free and low-calorie salad is perfect for those warm afternoons when you crave something light yet satisfying. It’s not just quick to prepare, taking only 20 minutes, but it also offers endless customization options, whether you prefer a kick of spice or a sweeter profile. How will you make it your own?

Why is this Green Papaya Salad a Must-Try?

Vibrant Colors: The stunning presentation of bright green papaya and colorful herbs makes this salad a feast for the eyes and a sure crowd-pleaser.

Customizable Flavors: You can easily adjust the heat level or add proteins like grilled shrimp or tofu, ensuring there’s something for every palate.

Quick to Prepare: In just 20 minutes, you can whip up this refreshing dish, making it ideal for busy weeknights or last-minute gatherings.

Healthy & Delicious: This salad is loaded with vitamins and lowest in calories, perfect for those looking for a guilt-free dining experience.

Get ready to enjoy a delightful light meal or a side dish alongside your favorite grilled meats! For more fresh flavor ideas, check out my Crisp Cabbage and Apple Salad or try a Refreshing Cucumber and Carrot Salad with a Twist.

Green Papaya Salad Ingredients

• Get ready to create a vibrant dish!

For the Salad

  • Green Papaya – Provides a crisp texture and serves as the salad’s base; substitute with green mango or kohlrabi if unavailable.
  • Carrots – Contributes sweetness and color; feel free to omit if preferred.
  • Fresh Herbs (e.g., cilantro, mint) – Adds freshness and flavor; customize according to personal preference.
  • Scallions – Provides crunch and a mild onion flavor; may substitute with red onion for a stronger taste.
  • Chili – Adds heat; adjust to taste or omit for a milder salad.

For the Dressing

  • Lime Juice – Adds tanginess to enhance flavor; adjust amount for desired acidity.
  • Fish Sauce – Develops a umami character; for a vegan option, substitute with soy sauce or coconut aminos.
  • Maple Syrup – Balances the saltiness of fish sauce with sweetness; can replace with honey or agave syrup for a vegan-friendly choice.
  • Garlic – Adds aromatic depth; minced shallots can be used as an alternative.

For the Topping

  • Roasted Peanuts – Offers crunch and richness; swap for sesame seeds or omit for a nut-free option.

Step‑by‑Step Instructions for Green Papaya Salad

Step 1: Prepare the Papaya
Start by peeling and seeding the green papaya. Using a julienne peeler, mandoline, or grater, shred it into thin strips, which should resemble noodle-like textures. To maintain its crispness, soak the shredded papaya in a bowl of cold water for approximately 10 minutes. This simple preparation ensures that your Green Papaya Salad has that perfect crunch!

Step 2: Make the Dressing
In a small mixing bowl, whisk together fresh lime juice, fish sauce, maple syrup, minced garlic, and if desired, a splash of vinegar for extra tang. Let the dressing sit for about 5 minutes to allow the flavors to meld. Taste and adjust the acidity or sweetness based on your preferences—this step is key to a well-balanced Green Papaya Salad!

Step 3: Combine the Vegetables
Drain the soaked papaya and gently pat it dry with a clean kitchen towel to remove excess water. In a large mixing bowl, combine the shredded papaya with finely shredded carrots, chopped fresh herbs, sliced scallions, and diced chili for that spicy kick. Toss everything together lightly, ensuring a colorful and inviting medley.

Step 4: Dress the Salad
Pour the prepared dressing over the combined vegetables in the large bowl. Toss everything gently but thoroughly, ensuring the shredded papaya and other vegetables are evenly coated in the tangy dressing. This step is vital for the flavors to penetrate each layer of the Green Papaya Salad, resulting in a harmonious taste.

Step 5: Serve the Salad
Transfer the vibrant salad onto a serving platter or individual bowls. Finish by garnishing with a sprinkle of roasted peanuts for an extra crunch. For the best experience, serve immediately, or let the salad sit in the refrigerator for about 10 minutes to further meld the flavors. Your refreshing Green Papaya Salad is now ready to delight your taste buds!

Expert Tips for Green Papaya Salad

  • Choose the Right Papaya: Ensure your green papaya is firm and not too ripe; a good texture is crucial for a satisfying crunch in your salad.

  • Adjusting Acidity: Start with less lime juice when making the dressing; you can always add more to fit your taste for the Green Papaya Salad.

  • Soak for Crispness: Don’t skip soaking the shredded papaya in cold water to maintain its crunch. This will enhance your salad’s texture.

  • Customizable Heat: Add chili gradually; taste as you go to achieve your desired spice level for this refreshing dish.

  • Flavor Marination: If time permits, refrigerate the salad for 10 minutes before serving to let the flavors meld beautifully.

  • Nut-Free Variation: For a nut-free version, simply omit the roasted peanuts or substitute with toasted sunflower seeds for added crunch.

Make Ahead Options

These Green Papaya Salad components are perfect for meal prep, making your busy weeknights a little easier! You can shred the green papaya, carrots, and herbs up to 24 hours in advance; just store them in separate airtight containers in the refrigerator to maintain their freshness and prevent wilting. The dressing can be prepared ahead as well—mix all ingredients, then refrigerate in a sealed jar for up to 3 days. When you’re ready to serve, simply combine the prepped veggies, toss with the dressing, and finish with roasted peanuts for that delightful crunch. This way, you can enjoy a delicious, homemade Green Papaya Salad with minimal effort at mealtime!

How to Store and Freeze Green Papaya Salad

Fridge: Store the salad in an airtight container for up to 2 days, but keep the dressing separate to maintain the crunch of the papaya.

Freezer: Freezing is not recommended due to the salad’s texture; the papaya will become mushy upon thawing, affecting the overall quality.

Preparation: For optimal freshness, prepare the components separately and combine right before serving to keep the salad crisp and delightful.

Reheating: This dish is best served cold and should not be reheated, as the salad’s refreshing qualities shine when fresh.

What to Serve with Crunchy Green Papaya Salad?

This delightful Green Papaya Salad is the perfect start to a meal or a vibrant side dish to accompany your main course.

  • Grilled Shrimp: The smoky, charred flavor from grilled shrimp pairs beautifully with the tangy dressing, adding a satisfying protein component.

  • Crispy Spring Rolls: These light, crunchy rolls bring a contrasting texture to the salad, making each bite a delightful adventure. Served with a sweet dipping sauce, they perfectly complement the zesty flavors.

  • Tangy Quinoa Salad: A side of hearty quinoa tossed with citrus vinaigrette maintains the freshness and adds a nutty flavor, enhancing the overall dining experience.

  • Spicy Tofu Skewers: Marinated and grilled, these skewers add a touch of heat, creating a perfect balance with the refreshing crunch of the papaya salad.

  • Vietnamese Pho: This aromatic noodle soup’s warmth and rich flavors contrast the salad’s cool brightness, allowing for a rich culinary experience.

  • Mango Sorbet: A refreshing dessert that mirrors the sweet notes in the salad, mango sorbet concludes the meal on a light and uplifting note.

  • Herbal Iced Tea: Cool herbal iced tea serves as a refreshing drink complement, enhancing the salad’s refreshing taste without overwhelming flavors.

Green Papaya Salad Variations

Feel free to unleash your creativity and personalize your salad experience with these delicious ideas!

  • Protein Boost: Add grilled shrimp, tofu, or shredded chicken for a heartier meal. A little extra protein transforms this fresh dish into a satisfying main course.
  • Vegan Delight: To make this salad vegan, simply replace fish sauce with soy sauce or coconut aminos. This swap retains great flavor while honoring plant-based preferences.
  • Crispy Add-Ons: Introduce crispy shallots or fried garlic to enhance the texture and flavor. They bring a delightful crunch that elevates the entire dish with every bite!
  • Flavorful Dressing Twists: Try using lime-infused olive oil instead of regular olive oil for a zesty twist in your dressing. You’ll love the extra zing it adds to the salad!
  • Nut-Free Option: For those with nut allergies, swap roasted peanuts for toasted sunflower seeds or omit them altogether while still providing a crunchy texture.
  • Hearty Grains: Mix in cooked quinoa or brown rice for a wholesome base. Combining grains with fresh veggies creates a filling, nutritious meal that is truly satisfying.
  • Herb Variations: Experiment with different fresh herbs—like basil or parsley—instead of cilantro or mint. These swaps can lead to exciting new aroma and flavor combinations.
  • Adjustable Heat Levels: If you prefer milder or spicier flavors, vary the amount of chili pepper or switch to a milder pepper like bell pepper for a completely different taste.

For more salad inspiration, consider trying my Crunch Cucumber Salad or a vibrant Garden Harvest Salad as delicious accompaniments!

Green Papaya Salad Recipe FAQs

What kind of papaya should I use for this salad?
Absolutely! Look for green papaya that is firm and unripe for the best texture in your salad. A ripe papaya can be too soft and sweet, which isn’t ideal here. If you can’t find green papaya, feel free to substitute it with green mango or kohlrabi, both of which will provide a similar crunch and flavor profile.

How should I store leftover Green Papaya Salad?
For sure! Store the salad in an airtight container in the refrigerator for up to 2 days. To maintain the crunchy texture, keep the dressing separate and only mix it with the salad right before serving. This way, your salad will stay fresh and vibrant!

Can I freeze Green Papaya Salad?
Very important question! Freezing is not recommended because the texture of the papaya will turn mushy once thawed, compromising the delightful crunch of your salad. Instead, prepare the ingredients separately and combine them just before serving for the best experience.

What if I want to reduce the spice level?
No worries! If you prefer a milder Green Papaya Salad, simply adjust the amount of chili used. Start with just a tiny pinch of chili flakes and taste as you go. You can always add more but it’s hard to take it out once it’s in! Alternatively, you can omit the chili altogether for a refreshing salad with no heat at all.

Is this dish safe for my food allergies?
Absolutely, you can customize this recipe! The primary concern would be the fish sauce, which contains seafood. If anyone in your household has seafood allergies, simply substitute fish sauce with soy sauce or coconut aminos for a vegan-friendly and allergy-safe option. Be sure to check the labels of any additional ingredients for potential allergens, too!

How long will the salad stay fresh if prepared ahead of time?
Great question! If you make the salad in advance, it should ideally be eaten within 2 days for optimum freshness. Remember to store the dressing separately to avoid soggy papaya. If possible, refrigerate the salad for about 10 minutes before serving to let all the flavors meld beautifully without compromising the crispiness.

Green Papaya Salad

Green Papaya Salad: Refreshing Crunch with Tangy Twist

This Green Papaya Salad offers a refreshing crunch and tangy twist, perfect for warm afternoons.
Prep Time 20 minutes
Chill Time 10 minutes
Total Time 30 minutes
Servings: 4 servings
Course: Lunch
Cuisine: Asian
Calories: 120

Ingredients
  

For the Salad
  • 1 medium green papaya substitute with green mango or kohlrabi if unavailable
  • 2 medium carrots feel free to omit if preferred
  • 1 cup fresh herbs (e.g., cilantro, mint) customize according to personal preference
  • 2 stalks scallions may substitute with red onion for a stronger taste
  • 1 medium chili add to taste or omit for a milder salad
For the Dressing
  • 2 tablespoons lime juice adjust for desired acidity
  • 1 tablespoon fish sauce substitute with soy sauce or coconut aminos for vegan option
  • 1 tablespoon maple syrup replace with honey or agave syrup for vegan-friendly choice
  • 1 clove garlic minced shallots can be used as an alternative
For the Topping
  • 1/4 cup roasted peanuts swap for sesame seeds or omit for nut-free option

Equipment

  • julienne peeler
  • mixing bowl
  • mandoline
  • grater
  • whisk

Method
 

Step-by-Step Instructions
  1. Start by peeling and seeding the green papaya. Using a julienne peeler, mandoline, or grater, shred it into thin strips. Soak in cold water for 10 minutes for crispness.
  2. In a small mixing bowl, whisk together lime juice, fish sauce, maple syrup, minced garlic, and optional vinegar. Let the dressing sit for 5 minutes to meld.
  3. Drain the soaked papaya and pat it dry. In a large bowl, combine shredded papaya with carrots, herbs, scallions, and chili. Toss lightly.
  4. Pour the dressing over the vegetables and toss gently to coat evenly.
  5. Transfer the salad to a serving platter or bowls, garnish with roasted peanuts, and serve immediately or let chill for 10 minutes.

Notes

Store salad in an airtight container for up to 2 days, keeping dressing separate to maintain crunch. Freezing is not recommended.

Cozy Gingerbread Pancakes that Spark Holiday Joy

The scent of cinnamon and ginger swirling through the kitchen instantly transports me back to warm holiday mornings, where everything felt just right. These Gingerbread Pancakes are my go-to recipe when I want to wrap my family in the comforting embrace of cozy flavors and festive spirit. Made fluffy with buttermilk and enriched with the rich, deep taste of molasses, these pancakes are not just delicious—they bring a joyful energy to any breakfast table. Perfect for a Christmas morning feast or any chilly day that calls for a little indulgence, this recipe is both quick to whip up and crowd-pleasing. Trust me, once you serve these to loved ones, they’ll be begging for seconds! What cozy memories will you create with each stack?

Why Are Gingerbread Pancakes So Special?

Irresistible flavor: These pancakes are bursting with warm spices like cinnamon and ginger, elevating breakfast to a whole new level.
Quick and easy: With simple steps and common ingredients, you’ll have them on your table in no time, ready for those busy holiday mornings.
Versatile toppings: Top them with whipped gingerbread butter or drench them in maple syrup—your family can customize their pancakes!
Crowd-pleaser: Perfect for family gatherings or cozy brunches, these Gingerbread Pancakes will delight everyone.
Moist and fluffy: The buttermilk and molasses ensure each bite is light yet rich, making them truly memorable.
Imagine surprising your loved ones with a festive breakfast that feels like a warm hug; they’ll be asking for these sweet treats from now on! For more pancake inspiration, check out our Savory Vegetable Cheese Pancakes for a delicious twist!

Gingerbread Pancakes Ingredients

• Delight in these warm, festive flavors!

For the Pancakes

  • All-Purpose Flour – Essential for structure; can be swapped with gluten-free flour for a gluten-free treat.
  • Granulated Sugar – Balances flavors; try brown sugar for added moisture and a richer taste.
  • Baking Powder – This leavening agent makes the pancakes fluffy; ensure it’s fresh for the best rise.
  • Ground Cinnamon – Adds warmth and a signature gingerbread essence; pumpkin pie spice can be a delightful alternative.
  • Ground Ginger – Intensifies the gingerbread profile; fresh ginger can be used for a robust flavor boost.
  • Kosher Salt – Essential for balancing sweetness and enhancing overall flavor.
  • Buttermilk – Adds moisture and tenderness; a mixture of milk and lemon juice can be used in a pinch.
  • Large Egg – Acts as a binding agent; a flax egg can be substituted for a vegan version.
  • Unsalted Butter – Provides richness and flavor; vegetable oil can be a dairy-free option.
  • Molasses – This is key to achieving that distinct gingerbread flavor; consider blackstrap molasses for a deeper richness.

For Serving

  • Maple Syrup – The classic topping that enhances flavor; feel free to explore other syrup options for variety.

With these ingredients at the ready, you’re one step closer to crafting your delicious Gingerbread Pancakes!

Step‑by‑Step Instructions for Gingerbread Pancakes

Step 1: Mix Dry Ingredients
In a large bowl, whisk together 1 ½ cups of all-purpose flour, 2 tablespoons of granulated sugar, 1 tablespoon of baking powder, 2 teaspoons of ground cinnamon, 1 teaspoon of ground ginger, and ½ teaspoon of kosher salt until well combined. The mixture should be free of lumps, and the spices should be evenly distributed—this is the base for your flavorful Gingerbread Pancakes.

Step 2: Combine Wet Ingredients
In a separate bowl, blend together 1 ¼ cups of buttermilk, 1 large egg, ¼ cup of melted unsalted butter, and ¼ cup of molasses until smooth and cohesive. Ensure your butter isn’t too hot to avoid cooking the egg. The mixture should appear glossy and well-mixed, adding both richness and moisture to your Gingerbread Pancakes.

Step 3: Mix Wet and Dry Ingredients
Carefully pour the wet ingredients into the bowl containing the dry ingredients. Gently stir with a spatula until just combined, making sure to leave a few lumps for a fluffy texture. If the batter appears too thick, add a splash of buttermilk to adjust consistency. Avoid overmixing to ensure your Gingerbread Pancakes turn out light and airy.

Step 4: Preheat and Prepare Skillet
Heat a nonstick skillet or griddle over medium heat until a drop of water sizzles upon contact. Lightly spray the surface with cooking spray to prevent sticking, ensuring an even cook for your pancakes. This step is crucial for achieving that perfect golden-brown exterior on each fluffy Gingerbread Pancake.

Step 5: Cook Pancakes
Pour about ⅓ cup of batter onto the skillet for each pancake, leaving space in between. Cook for about 3-4 minutes, or until bubbles form on the surface and the edges look set. The pancakes should be golden underneath before flipping; this visual cue indicates they are ready to turn.

Step 6: Flip and Finish Cooking
Carefully flip each pancake using a spatula, cooking for another 3-4 minutes until they are beautifully golden brown on both sides. Check for doneness by gently pressing the center; it should spring back. If they’re not done, give them a bit more time on the skillet to achieve that perfect fluffy texture.

Step 7: Continue Cooking Remaining Batter
Wipe down the skillet with a paper towel between batches if needed to maintain an even cooking surface. Repeat the pouring and cooking process until all the batter is used, ensuring each pancake receives its fair share of delicious gingerbread flavor.

Step 8: Serve and Enjoy
Once all pancakes are cooked, serve them warm with a drizzle of maple syrup or your favorite toppings. These Gingerbread Pancakes are perfect for cozy winter mornings, bringing the festive spirit to your breakfast table with every bite!

How to Store and Freeze Gingerbread Pancakes

  • Room Temperature: Store leftover Gingerbread Pancakes on a plate, covered with foil, for up to 2 hours for freshness.

  • Fridge: Place cooled pancakes in an airtight container in the refrigerator for up to 5 days to maintain their delightful flavor and texture.

  • Freezer: Freeze individual pancakes separated by parchment paper in a freezer-safe bag for up to 2 months. Thaw overnight in the fridge when ready to enjoy.

  • Reheating: Reheat pancakes in the microwave for about 30-60 seconds or in a preheated skillet for a couple of minutes on each side until warm throughout.

Expert Tips for Gingerbread Pancakes

  • Batter Resting: Letting the batter sit for 5-10 minutes before cooking allows the gluten to relax, resulting in fluffier Gingerbread Pancakes.

  • Correct Mixing: Avoid overmixing; a few lumps are fine. Overmixing can lead to dense pancakes instead of the light, airy texture you desire.

  • Skillet Temperature: Make sure your skillet is properly heated—medium heat works best. A test drop of water should sizzle upon contact to ensure even cooking.

  • Measuring Flour: Be gentle when measuring flour; too much can lead to dry pancakes. Spoon it into the measuring cup and level it off with a knife for accuracy.

  • Adapting for Dogs: For a delicious variation, try adding finely chopped nuts or chocolate chips to the batter for extra texture and flavor in your Gingerbread Pancakes.

  • Substitutions: Experiment with swapping out molasses for honey for a different sweetness, or mix in some pumpkin puree for a festive twist!

Make Ahead Options

These Gingerbread Pancakes are perfect for busy home cooks looking to save time during the holidays! You can easily prepare the batter ahead of time and refrigerate it for up to 24 hours. Simply mix your dry ingredients and wet ingredients separately, store them in airtight containers, then combine them right before cooking to maintain that fluffy texture. Additionally, any leftover pancakes can be refrigerated for up to 5 days or frozen for up to 2 months. When you’re ready to serve, simply reheat them in a toaster or microwave for a quick breakfast that tastes just as delightful as the day they were made!

What to Serve with Gingerbread Pancakes

These delightful pancakes create the perfect holiday breakfast experience that will leave everyone feeling warm and cherished.

  • Whipped Gingerbread Butter: This creamy, spiced butter adds an irresistible richness that perfectly complements the pancakes’ warm flavors.

  • Crispy Bacon Strips: The salty crunch of bacon balances the sweetness of the pancakes, creating a delightful contrast that’s hard to resist.

  • Sautéed Apples with Cinnamon: Tender, caramelized apples introduce a fresh, fruity element that elevates the pancakes to a whole new level of deliciousness.

  • Spiced Chai Tea: The aromatic blend of spices in chai tea pairs beautifully with the pancake’s gingerbread essence, making for a cozy beverage option.

  • Fresh Berry Medley: A burst of tangy berries adds a refreshing touch, cutting through the pancake’s sweetness while brightening up the plate.

  • Maple Syrup Drizzle: A classic choice—traditional maple syrup enhances the pancakes with its smooth texture and rich, sweet flavor.

  • Vanilla Yogurt: Add a dollop of creamy vanilla yogurt for a tangy contrast and a boost of protein to start the day right.

  • Chocolate Chip Cookies: For a festive twist, serve with chocolate chip cookies for dessert-like fun that will delight both kids and adults alike.

Your holiday breakfast table will be complete with these incredible pairings, ensuring your loved ones feel pampered and satisfied!

Gingerbread Pancakes Variations & Substitutions

Feel free to make these Gingerbread Pancakes your own, customizing them with delightful twists that suit your taste!

  • Dairy-Free: Substitute buttermilk with almond milk combined with a tablespoon of vinegar for a creamy, dairy-free version.
    For a cozy dairy-free pancake, use coconut oil instead of butter. They’ll still taste rich and festive!

  • Gluten-Free: Swap all-purpose flour with a gluten-free flour blend to create a gluten-free delight everyone can enjoy.
    It’s a great way to share the joy, ensuring your gluten-sensitive friends don’t miss out on this festive treat!

  • Pumpkin Spice: Replace ground ginger with more cinnamon and add ½ cup of pumpkin puree for a pumpkin gingerbread flavor.
    This twist captures autumn’s essence and gives a warm, moist texture you’ll love!

  • Choco-Lovers: Mix in ½ cup of chocolate chips into the batter for a rich, sweet surprise in each bite.
    Chocolate brings a delightful contrast to the spices, making mornings even sweeter!

  • Nutty Add-In: Stir in ¼ cup of chopped nuts, like pecans or walnuts, for a delightful crunch and added texture.
    The nutty flavor pairs beautifully with the spices, enhancing the overall experience!

  • Molasses Alternative: Use honey or agave syrup instead of molasses for a lighter sweetness and a unique flavor profile.
    This makes for a different, yet still scrumptious pancake that’s oh-so-good!

  • Spiced Up: Add a pinch of cayenne or a splash of vanilla extract to the batter for a subtle heat or depth of sweetness.
    It’s a simple way to add an unexpected zing that sparks even more joy at the breakfast table!

  • Savory Twist: Consider swapping out traditional toppings for a savory option like crispy bacon or a dollop of cream cheese.
    This elevates your pancakes for brunch and brings a unique perspective to the classic recipe!

Enjoy exploring these variations, and don’t hesitate to check out our Savory Zucchini Pancakes with Fresh Herbs for an utterly delicious change of pace!

Gingerbread Pancakes Recipe FAQs

What type of flour should I use for Gingerbread Pancakes?
For the best texture, I recommend using all-purpose flour, which gives the pancakes structure and fluffiness. If you need a gluten-free option, feel free to substitute with a gluten-free flour blend. Just ensure the blend contains xanthum gum for optimal results!

How can I store leftover Gingerbread Pancakes?
Leftover Gingerbread Pancakes can be stored in the refrigerator for up to 5 days! Just place them in an airtight container to maintain their delicious flavor and texture. If you’re planning to keep them longer, consider freezing them instead.

Can I freeze Gingerbread Pancakes?
Absolutely! To freeze, lay your pancakes flat on a baking sheet in a single layer first so they don’t stick together. Once they’re completely frozen, stack them with parchment paper between each pancake, then place them in a freezer-safe bag. They can be frozen for up to 2 months. Simply thaw overnight in the fridge before reheating!

What should I do if my pancake batter is too thick?
If you find your batter is too thick, don’t worry! Just add a splash of buttermilk and stir gently until you reach your desired consistency. Remember, it’s better to have a slightly thicker batter than an overly runny one, as thicker batter leads to fluffier pancakes.

Are Gingerbread Pancakes safe for pets?
Generally, it’s best to avoid sharing Gingerbread Pancakes with your furry friends, especially if they have spices like ginger and cinnamon. While the pancakes themselves aren’t toxic, always be cautious with herbs and spices as they can upset pets’ stomachs. Consult your vet if you’re unsure!

Can I make the pancake batter in advance?
Yes! You can prepare the batter and store it in the refrigerator for up to 24 hours before cooking. Just give it a little stir before pouring onto the skillet, as it may thicken slightly while chilling. This is a great way to save time on busy mornings!

Gingerbread Pancakes

Cozy Gingerbread Pancakes that Spark Holiday Joy

Delicious Gingerbread Pancakes infused with warm spices for a festive breakfast experience.
Prep Time 10 minutes
Cook Time 20 minutes
Batter Resting Time 5 minutes
Total Time 35 minutes
Servings: 4 pancakes
Course: Breakfast
Cuisine: American
Calories: 180

Ingredients
  

For the Pancakes
  • 1.5 cups All-Purpose Flour Can be swapped with gluten-free flour.
  • 2 tablespoons Granulated Sugar Brown sugar can be used for added moisture.
  • 1 tablespoon Baking Powder Ensure it's fresh for the best rise.
  • 2 teaspoons Ground Cinnamon Pumpkin pie spice is a delightful alternative.
  • 1 teaspoon Ground Ginger Fresh ginger can be used for a robust flavor.
  • 0.5 teaspoon Kosher Salt Essential for balancing sweetness.
  • 1.25 cups Buttermilk Milk and lemon juice can be used in a pinch.
  • 1 large Egg A flax egg can be substituted for a vegan version.
  • 0.25 cups Unsalted Butter Vegetable oil can be a dairy-free option.
  • 0.25 cups Molasses Consider blackstrap molasses for deeper richness.
For Serving
  • to taste Maple Syrup Feel free to explore other syrup options for variety.

Equipment

  • large bowl
  • whisk
  • nonstick skillet
  • spatula
  • Measuring cups
  • Measuring spoons

Method
 

Step-by-Step Instructions
  1. Mix dry ingredients: In a large bowl, whisk together flour, sugar, baking powder, cinnamon, ginger, and salt until combined.
  2. Combine wet ingredients: In a separate bowl, blend buttermilk, egg, melted butter, and molasses until smooth.
  3. Mix wet and dry ingredients: Pour wet ingredients into dry ingredients and stir until just combined.
  4. Preheat and prepare skillet: Heat a nonstick skillet over medium heat, lightly spray with cooking spray.
  5. Cook pancakes: Pour about ⅓ cup of batter onto the skillet, cook for about 3-4 minutes until bubbles form.
  6. Flip and finish cooking: Flip each pancake and cook for another 3-4 minutes until golden brown.
  7. Continue cooking remaining batter: Repeat the pouring and cooking process until all batter is used.
  8. Serve and enjoy: Serve warm with maple syrup or toppings of choice.

Notes

Letting the batter sit for 5-10 minutes before cooking allows for fluffier pancakes. A few lumps in the batter are okay to avoid dense pancakes.