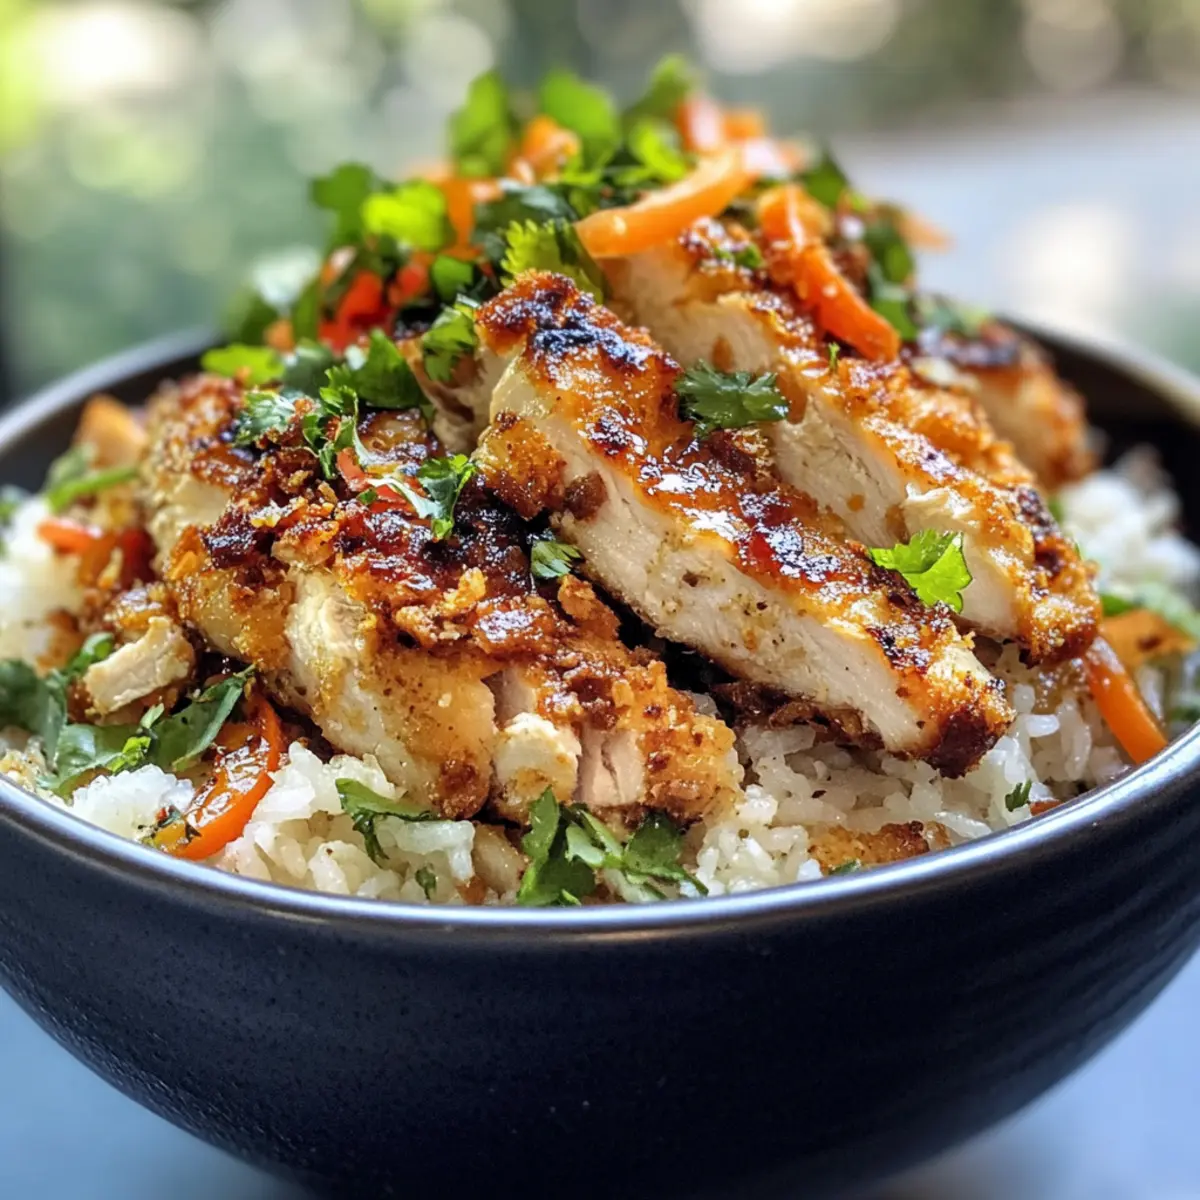
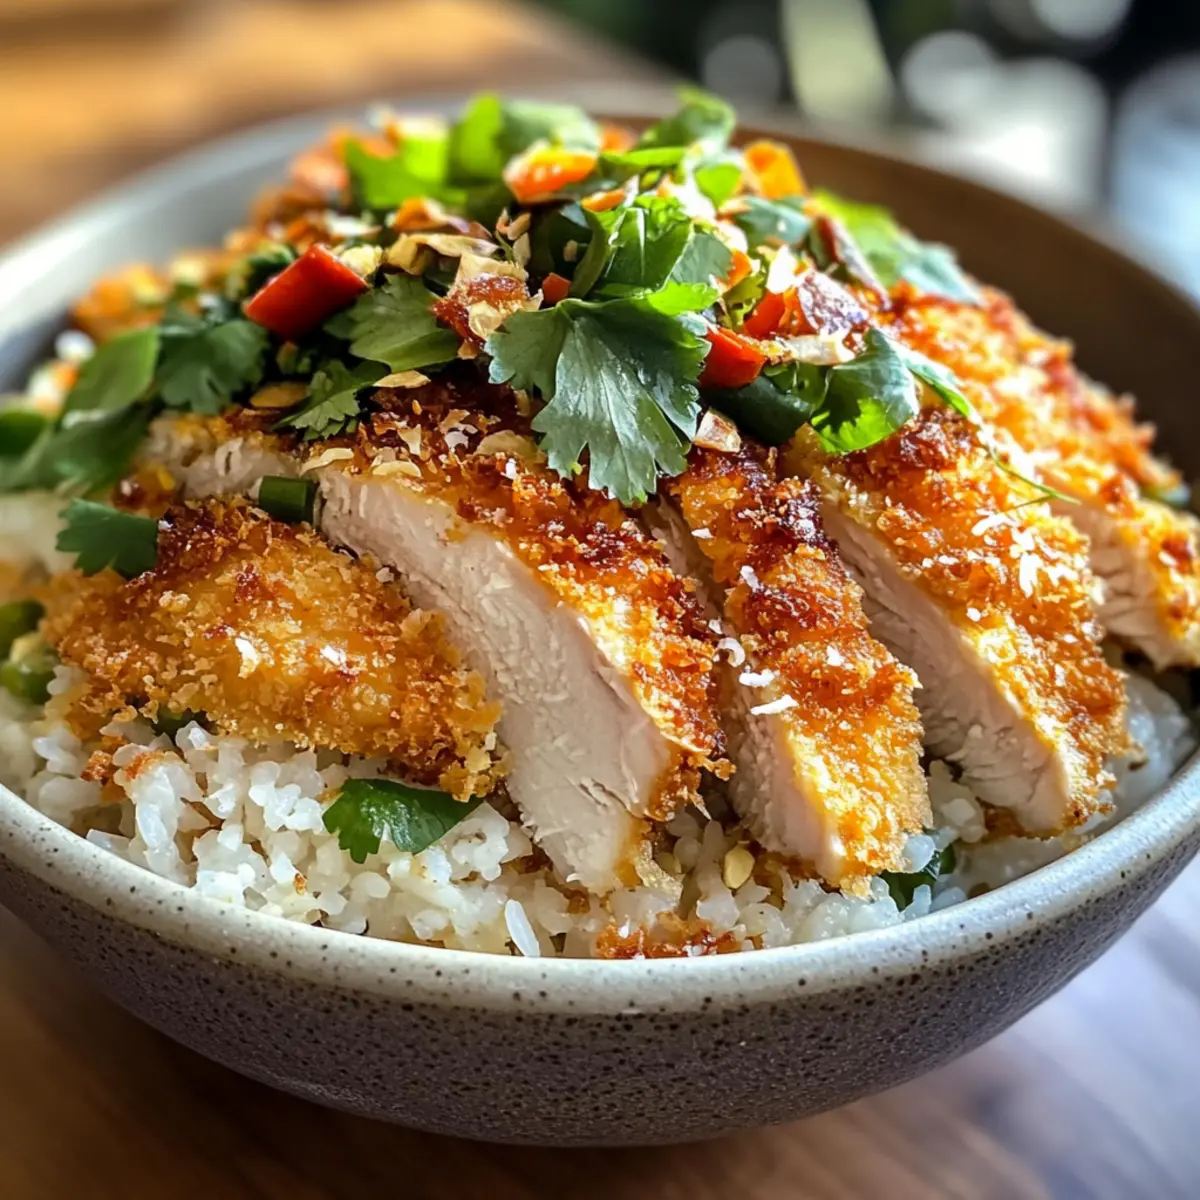
As I stood in my kitchen, the enticing aroma of coconut milk filled the air, instantly transporting me to sun-kissed tropical shores. This Easy Coconut Chicken Rice Bowl has quickly become my go-to recipe when I crave the comforting satisfaction of takeout without the hassle. With crispy chicken perched atop fluffy coconut-infused rice, this dish not only offers an unbeatable flavor combo but also comes together in a flash—perfect for those busy weeknights. You’ll appreciate how effortlessly this meal transforms pantry staples into something truly delightful. Plus, it’s customizable, allowing you to sneak in extra veggies or switch up the protein to suit your taste. Curious about how to whip up this quick, better-than-takeout dinner? Let’s dive in!
Why is this recipe a must-try?
Quick and Easy: This Coconut Chicken Rice Bowl comes together in under 30 minutes, making it ideal for busy weeknights. Crispy Perfection: The chicken turns out perfectly crispy, providing a delightful texture contrast to the soft, fluffy rice. Flavorful Twist: Infusing coconut flavors into the rice elevates this dish to a tropical treat. Customizable: Add your favorite veggies or switch to tofu for a vegetarian delight. Satisfying Comfort: It’s a cozy meal that leaves you feeling satisfied, rivaling your favorite takeout! If you’re also looking to branch out, consider this Savory Chicken Cheesy option for another fantastic weeknight dinner.
Coconut Chicken Rice Bowl Ingredients
• Here’s everything you need for a delightful homemade meal!
For the Chicken
- Chicken Breast – This lean protein becomes juicy and crispy when cooked properly; chicken thighs are a great alternative for added flavor.
- Oil – A high smoke-point oil, like canola or vegetable, ensures perfect frying for that crispy finish.
For the Rice
- Rice – Jasmine or basmati rice works wonders for fluffiness; brown rice offers a hearty option but requires a longer cooking time.
- Coconut Milk – Adds a creamy texture and a tropical flavor that makes this Coconut Chicken Rice Bowl stand out; opt for high-quality coconut milk for best results.
For the Seasoning
- Salt – Essential for enhancing the flavor; don’t skip this step!
- Pepper – Adds a hint of spice; freshly ground black pepper is best.
- Fresh Herbs (like cilantro or green onions) – These brighten up the dish and offer a dash of freshness to finish your bowl.
For Extra Nutrition (Optional)
- Vegetables – Throw in whatever you have on hand, like bell peppers or snap peas, to add color and nutrition; they’re a wonderful way to sneak in more greens!
Enjoy bringing this vibrant Coconut Chicken Rice Bowl to life in your kitchen!
Step‑by‑Step Instructions for Coconut Chicken Rice Bowl
Step 1: Prepare Rice
Begin by rinsing 1 cup of jasmine or basmati rice under cold water until the water runs clear to remove excess starch. In a saucepan, combine the rinsed rice with 1 cup of coconut milk and cook over medium heat. Bring to a gentle simmer, then reduce heat to low, cover, and let it cook for about 15-20 minutes until the rice is fluffy and absorbs the coconut flavor beautifully.
Step 2: Season and Cook Chicken
While the rice is cooking, season 1 pound of chicken breast with salt and pepper, ensuring an even coat. In a large skillet, heat 2 tablespoons of oil over medium-high heat. Once hot, add the chicken to the pan and cook for about 6-8 minutes on each side until it turns golden brown and reaches an internal temperature of 165°F.
Step 3: Combine Ingredients
Once both the chicken and rice are fully cooked, remove the chicken from the skillet and let it rest for a few minutes before slicing it into bite-sized pieces. In a large bowl, combine the fluffy coconut rice with any optional vegetables, mixing gently to incorporate the flavors.
Step 4: Serve and Garnish
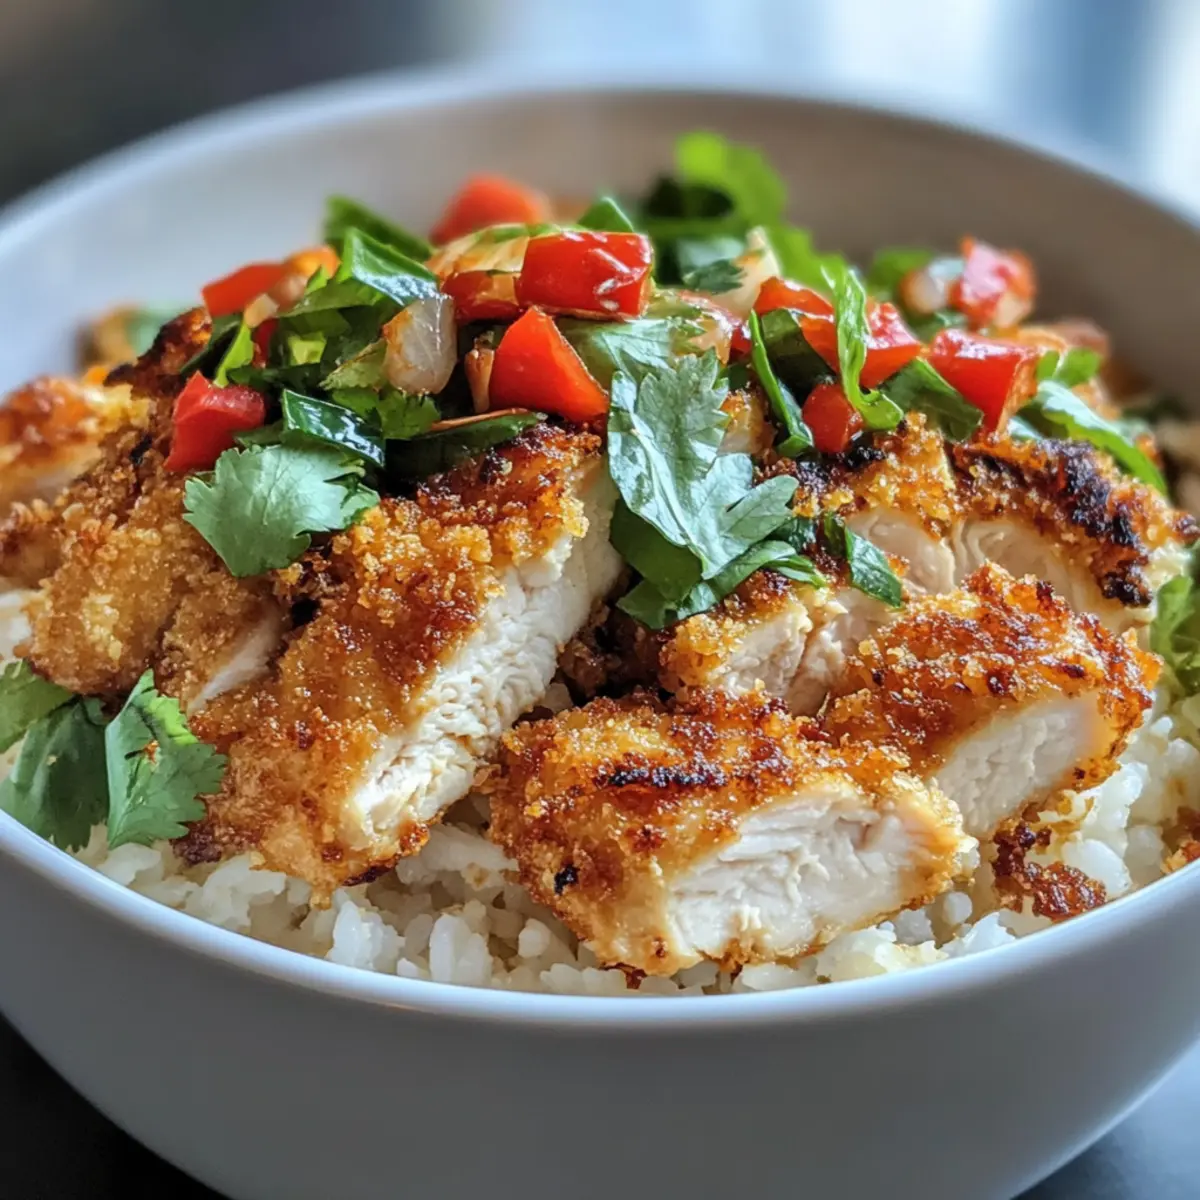
To assemble your Coconut Chicken Rice Bowl, scoop a generous portion of the coconut rice into each serving bowl. Top it with sliced crispy chicken and a sprinkle of fresh herbs like cilantro or green onions for a burst of freshness. Enjoy your homemade Coconut Chicken Rice Bowl that rivals takeout!

Coconut Chicken Rice Bowl Variations
Feel free to get creative with your Coconut Chicken Rice Bowl—there are endless ways to tailor it to your family’s taste!
-
Vegetarian: Swap out the chicken for cubed tofu, pressing it first to eliminate excess moisture. It’ll soak up all that delicious coconut goodness!
-
Grain Switch: Use quinoa instead of rice for a nutty flavor. This adds protein and is a delightful twist on the traditional base.
-
Nutty Flavor: Stir in chopped cashews or peanuts for a crunchy texture and extra nuttiness that beautifully complements the creamy coconut.
-
Spicy Kick: Add sliced jalapeños or a drizzle of sriracha to the mix for a fiery finish. Just remember, a little goes a long way!
-
Herbicious Delight: Experiment with fresh herbs like basil or mint alongside cilantro for a refreshing taste. Each bite will be like a mini herb garden in your mouth!
-
Flavor Infusion: Consider adding a splash of fish sauce for an umami hit that evokes the essence of Southeast Asian cuisine. You can imagine the depth it brings!
-
Tropical Twist: Throw in some diced pineapple while cooking the chicken for a sweet and savory explosion! It’s like a vacation in a bowl.
-
Creamy Addition: Use a dollop of Greek yogurt or coconut yogurt as a topping for added creaminess that elevates each bite. It’s the simplest way to make a memorable meal even more indulgent.
If you’re excited about more comforting, homemade meals, don’t miss out on trying the Honey Chili Chicken for a lovely dinner option that’s sure to delight your family!
Make Ahead Options
These Easy Coconut Chicken Rice Bowls are perfect for meal prep enthusiasts looking to save time! You can cook the chicken and rice up to 3 days in advance, refrigerating them separately to maintain their crispy and fluffy textures. Simply season and cook the chicken as instructed, then let it cool before slicing. Cook the rice with coconut milk as usual, and once cooled, store in an airtight container. When you’re ready to enjoy, just reheat the chicken and rice together in the microwave or on the stovetop for a few minutes, adding a splash of coconut milk if needed to keep the rice moist. This way, you’ll have a delicious dinner ready in minutes, just as satisfying as when freshly made!
Expert Tips for Coconut Chicken Rice Bowl
- Crispy Chicken Secrets: Ensure the oil is hot enough before adding the chicken to achieve that golden, crispy texture without drying it out.
- Rice Perfection: Rinse the rice thoroughly to remove excess starch, resulting in a light, fluffy texture that absorbs the coconut flavors beautifully.
- Flavor Boost: Add a splash of lime juice or zest right before serving for an extra layer of brightness in your Coconut Chicken Rice Bowl.
- Vegetable Variety: Feel free to mix and match veggies based on what’s in your fridge; adding bell peppers or snap peas elevates both nutrition and color.
- Storage Solution: Refrigerate leftovers in an airtight container for up to 4 days—reheat gently to keep the chicken juicy and the rice fluffy.
How to Store and Freeze Coconut Chicken Rice Bowl
Fridge: Store leftovers in an airtight container for up to 4 days. The chicken remains juicy, while the rice maintains its fluffy texture when reheated properly.
Freezer: For longer storage, freeze individual portions in airtight containers or freezer bags for up to 3 months. Remember to label with the date for easy tracking!
Reheating: To enjoy this delightful Coconut Chicken Rice Bowl again, reheat in the oven at 350°F for about 15-20 minutes until heated through. Alternatively, microwave in short bursts, stirring in between.
Assembly Tip: If freezing, consider storing the chicken and rice separately; this keeps everything fresher and allows flexible meal options when you’re ready to use them!
What to Serve with Easy Coconut Chicken Rice Bowl
As you dream up the ideal side dishes, think about flavors and textures that will enhance your cozy meal and leave you delighted.
- Garlic Green Beans: Sautéed in olive oil with garlic, they bring a fresh, crisp texture that perfectly complements the fluffy rice.
- Mango Salad: A refreshing salad with ripe mango, lime, and cilantro, adding a bright, sweet contrast to the savory chicken.
- Crispy Spring Rolls: These crunchy snacks offer an exciting texture and can be easily filled with your favorite veggies for extra freshness.
- Pineapple Salsa: Tangy pineapple salsa adds sweetness and a tropical touch, enhancing the coconut flavor of your bowl.
- Coconut Curried Vegetables: Roasted or sautéed vegetables with coconut curry spices create a wonderful harmony with the main dish.
- Chilled Coconut Water: This hydrating drink echoes the coconut theme and cleansing, refreshing flavor complements the meal beautifully.
- Lime Wedges: Serve fresh lime wedges on the side; a squeeze brightens the flavors and adds a zesty kick to each bite.
- Chocolate Coconut Pudding: Finish with a rich dessert that ties in the coconut theme, offering a delightful end to the meal.
Coconut Chicken Rice Bowl Recipe FAQs
How should I choose ripe coconut milk?
Absolutely! When selecting coconut milk, look for high-quality brands in cans or cartons that have a creamy consistency. Avoid those with dark spots or an off smell, which may indicate spoilage. Check the expiration date on the packaging to ensure freshness.
What is the best way to store leftover Coconut Chicken Rice Bowl?
Very! Store leftovers in an airtight container in the fridge for up to 4 days. Make sure to let your bowl cool to room temperature before sealing it to prevent condensation, which can make your rice soggy.
Can I freeze the Coconut Chicken Rice Bowl?
Yes, you can! To freeze, portion the chicken and rice into separate airtight containers or freezer bags. This helps maintain texture and flavor. It can be frozen for up to 3 months. When you’re ready to enjoy it, reheat in the oven at 350°F for about 15-20 minutes or microwave in short intervals, stirring in between.
What can I do if my chicken isn’t getting crispy?
If your chicken isn’t crispy, ensure that the oil is hot enough before adding the chicken; it should sizzle upon contact. If you’re still having trouble, try using a larger pan to avoid overcrowding, which can cause steaming instead of frying. Lastly, consider pressing the chicken down gently while cooking for better contact with the pan.
Is this recipe suitable for those with dietary restrictions?
Definitely! This Coconut Chicken Rice Bowl can easily be made gluten-free by ensuring all ingredients, especially sauces, are certified gluten-free. For a dairy-free option, the recipe already uses coconut milk. If you have nut allergies, ensure that your chosen oil is nut-free. For a vegetarian alternative, simply replace the chicken with tofu or chickpeas!
How do I know if my rice is cooked perfectly?
Great question! When your rice has absorbed all the coconut milk and is fluffy, it’s ready! It typically takes about 15-20 minutes after simmering on low heat. You can check by gently fluffing with a fork; it should be tender but not mushy. Adjusting the cooking time based on your stove and rice type can make all the difference!
Coconut Chicken Rice Bowl: A Cozy Takeout Classic Redefined
Ingredients
Equipment
Method
- Begin by rinsing the rice under cold water until the water runs clear. Combine the rinsed rice with coconut milk in a saucepan and cook over medium heat, bringing to a gentle simmer, then reduce heat to low, cover, and cook for 15-20 minutes until fluffy.
- While the rice is cooking, season the chicken with salt and pepper. Heat oil in a large skillet over medium-high heat, add chicken, and cook for 6-8 minutes on each side until golden brown and cooked through.
- Once both chicken and rice are cooked, let the chicken rest before slicing it. Combine the fluffy coconut rice with any optional vegetables in a large bowl.
- To serve, scoop a portion of coconut rice into each bowl, top with sliced chicken, and garnish with fresh herbs.