As I rummaged through my fridge, searching for inspiration, I stumbled upon a beautiful zucchini waiting to be transformed. That’s when I knew I had to share my favorite Air Fryer Zucchini Recipes with you. These crispy creations not only satisfy your snack cravings but also serve as wholesome sides, thanks to the air fryer’s ability to achieve the perfect crunch without excessive oil. Whether you’re in the mood for zucchini sticks, patties, or even fries, these recipes are a delightful way to enjoy this versatile vegetable. They’re quick to whip up and cater to a low-carb lifestyle, making them ideal for anyone looking to embrace healthier eating without sacrificing flavor. Curious about how to bring out the best in your zucchini today? Let’s dive into these mouthwatering variations!

Why Choose Air Fryer Zucchini Recipes?
Delightfully Crispy: With the air fryer, you’ll achieve that perfect crunch without the guilt of frying.
Versatile Variations: From sticks to patties, this recipe offers something for everyone—great for both snacks and sides.
Healthier Choice: These low-carb delights are not only light but also packed with essential vitamins, making them a smart addition to your meals.
Quick to Prepare: Ready in just minutes, these recipes fit perfectly into your busy lifestyle without sacrificing flavor!
Crowd-Pleasing Appeal: Impress family and friends with these delicious bites; they’ll be begging for your secret! Pair them with sauces from our Savory Zucchini Pancakes or Cheesy Zucchini Rolls for the ultimate indulgence.
Air Fryer Zucchini Ingredients
• For Zucchini Sticks
- Zucchini – Choose firm, fresh zucchinis for optimal texture and moisture control.
- Olive Oil – A light drizzle helps achieve that coveted golden crisp; you can swap for avocado oil for a high smoke point.
- Panko Breadcrumbs – Provides an irresistible crunch; substitute with gluten-free breadcrumbs if needed.
- Parmesan Cheese – Adds a savory flavor and enhances browning; use nutritional yeast for a dairy-free option.
- Seasonings (e.g., salt, pepper) – Elevate the flavor; experiment with garlic powder or Italian herbs for extra zest.
• For Zucchini Patties
- Zucchini – Shred and squeeze out moisture to ensure crispy patties.
- Egg – Acts as a binder for your patties; use a flax egg for a vegan alternative.
- Flour (All-Purpose or Almond) – Helps bind the ingredients; choose almond flour for a low-carb option.
- Seasonings (e.g., garlic salt, onion powder) – Add depth to your patties; feel free to mix in fresh herbs for brightness.
• For Zucchini Fries
- Zucchini – Cut into thin wedges for a fries-like shape.
- Cornstarch – A light dusting helps to absorb moisture, promoting crispiness.
- Olive Oil – Helps the coating adhere and crisp up; a small amount is all you need.
- Spices (Paprika, Cayenne) – For a spicy twist, add these to the coating mixture; they’ll enhance the flavor profile!
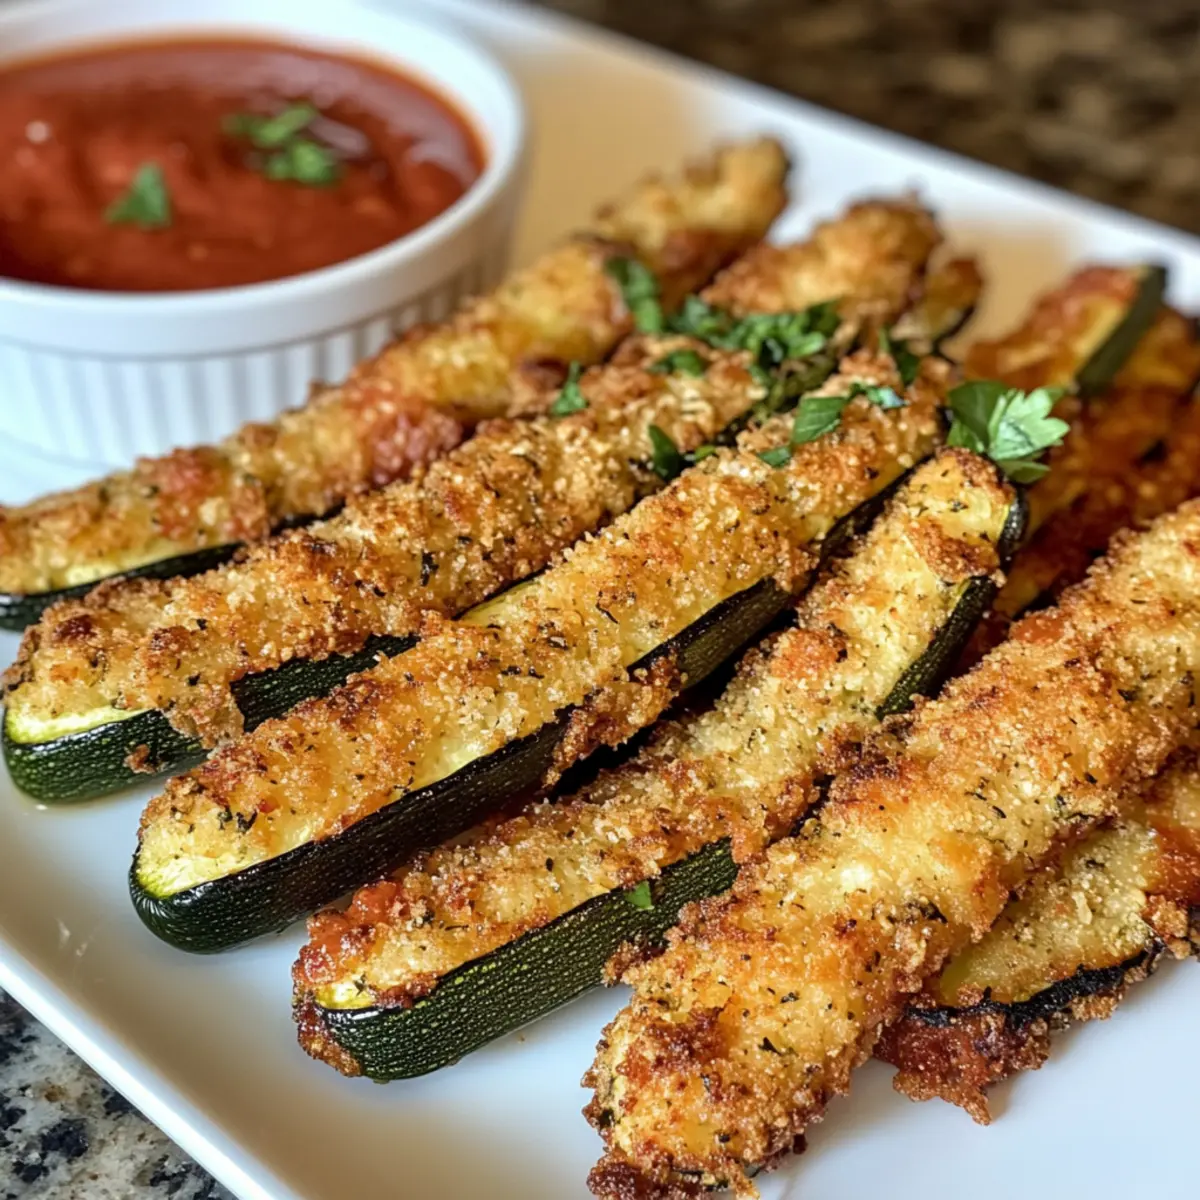
These Air Fryer Zucchini Recipes promise to deliver delightful crunch in every bite!
Step‑by‑Step Instructions for Air Fryer Zucchini Recipes
Step 1: Prepare the Zucchini
Start by washing and drying your fresh zucchinis thoroughly. Once clean, cut them into your preferred shapes—sticks, patties, or wedges—aiming for uniform sizes. This ensures even cooking. Lay the cut zucchini pieces on a clean kitchen towel to remove any excess moisture, preparing them for that delightful crunch in your air fryer.
Step 2: Remove Excess Moisture
To achieve that irresistible crispy texture in your Air Fryer Zucchini Recipes, it’s crucial to eliminate any leftover moisture. Use a clean cloth or paper towel to pat the cut zucchini pieces dry. You can also squeeze them gently to release more water, enhancing crispiness during cooking. This step is vital for perfect results!
Step 3: Coat the Zucchini
In a large mixing bowl, combine your zucchini pieces with a light drizzle of olive oil, ensuring they’re evenly coated. Then, add in panko breadcrumbs, grated Parmesan, and your choice of seasonings such as salt and pepper. Mix well to ensure each piece is thoroughly coated, allowing that amazing crunch to develop in the air fryer.
Step 4: Arrange in the Air Fryer
Preheat your air fryer to 400°F (200°C) for about 5 minutes. Once ready, place the coated zucchini pieces in the air fryer basket in a single layer, making sure not to overcrowd them. This allows hot air to circulate freely for even cooking and perfect crispiness.
Step 5: Cook the Zucchini
Cook the zucchini in the air fryer at 400°F (200°C) for about 8 to 12 minutes, checking halfway through. You should see golden edges forming as the zucchini cooks. At this point, shake the basket gently to reposition the pieces, ensuring even browning and maintaining that crispy texture you desire.
Step 6: Check for Doneness
As the cooking time nears completion, keep a close eye on your Air Fryer Zucchini Recipes. The zucchini should be golden brown and tender—these are key visual indicators of doneness. If needed, you can add a couple more minutes, but remember to rely on sight rather than just the timer for optimal texture.
Step 7: Serve Immediately
Once cooked to perfection, carefully remove the crispy zucchini from the air fryer and transfer them to a serving platter. Enjoy these delightful bites hot, perhaps with a side of marinara or ranch dressing for dipping. They make for a fantastic snack or a healthy side dish that your family will love!

How to Store and Freeze Air Fryer Zucchini
-
Room Temperature: Air fryer zucchini is best enjoyed fresh, but if left out, it can stay at room temperature for up to 2 hours before it needs to be refrigerated.
-
Fridge: Store any leftover air fryer zucchini in an airtight container in the refrigerator for up to 3 days. This will preserve its flavor and prevent it from drying out.
-
Freezer: For longer storage, freeze cooked zucchini in a single layer on a baking sheet until solid, then transfer to a freezer-safe bag for up to 3 months. Reheat directly from frozen for best results.
-
Reheating: To restore crispiness, reheat your air fryer zucchini in the air fryer at 375°F for about 5-7 minutes. Enjoy them warm as if they were just made!
Expert Tips for Air Fryer Zucchini Recipes
-
Dry Thoroughly: Always ensure zucchini pieces are completely dry before coating; excess moisture can lead to soggy results.
-
Single Layer Cooking: Avoid overcrowding the air fryer basket; this helps achieve that irresistible crispiness in your Air Fryer Zucchini Recipes.
-
Visual Cues: Focus on visual checks for doneness rather than just the timer—golden edges and tenderness are key!
-
Experiment with Coatings: Feel free to mix and match seasonings and breading to add your own twist; keep it fun and flavorful!
-
Use Fresh Veggies: Choose firm and fresh zucchinis for the best texture and moisture control, enhancing the success of your dish.
What to Serve with Crispy Air Fryer Zucchini: 5 Irresistible Variations
Elevate your meal with delightful accompaniments that complement the crunchy goodness of these zucchini treats.
-
Creamy Dipping Sauces: Pair with homemade ranch or tangy marinara to enhance flavors and add a fun, interactive element to your dish. The refreshing creaminess contrasts beautifully with the crispiness of the zucchini.
-
Quinoa Salad: A refreshing and nutty quinoa salad with cherry tomatoes, cucumber, and a light dressing balances the zucchini’s crunch with nourishing ingredients, creating a wholesome meal.
-
Grilled Chicken: Juicy grilled chicken seasoned with herbs adds a savory touch to your meal. The tender meat complements the crispy texture of the zucchini, creating a comforting dish.
-
Caesar Salad: A classic Caesar salad brings a rich, garlicky flavor profile that pairs lovingly with the lightness of the air-fried zucchini, making every bite satisfying.
-
Garlic Bread: Warm, crusty garlic bread with melted butter offers a satisfying contrast to the zucchini’s crunch. It’s perfect for mopping up any extra dip!
-
Wine Pairing: A chilled Sauvignon Blanc or a light Pinot Grigio enhances the overall dining experience with their crisp, refreshing notes, making them the perfect sip alongside your crispy bites.
Air Fryer Zucchini Recipes Variations
Customize your air fryer zucchini creations with these delightful twists, adding unique flavors and textures that’ll tantalize your taste buds!
-
Dairy-Free: Use nutritional yeast instead of parmesan to keep it cheesy without dairy. This adds a nutty flavor that enhances the overall dish.
-
Gluten-Free: Substitute traditional panko with gluten-free breadcrumbs. Your zucchini will remain crunchy and delicious while catering to dietary preferences.
-
Spicy Kick: Sprinkle in chili powder or cayenne pepper for an added heat. These spices will elevate your zucchini, giving every bite a delightful zing.
-
Flavor Boost: Mix in your favorite dried herbs like oregano or basil to the coating mix. This infusion of flavors transforms the dish into a savory explosion.
-
Vegetable Medley: Toss in other veggies with your zucchini, such as bell peppers or carrots, for added color and nutrition. This refreshing mix diversifies the texture and flavor, creating a vibrant dish.
-
Zesty Citrus: Add a squeeze of lemon juice or zest to the coating mixture. The citrus brightens flavors and balances the richness, enhancing each bite!
-
Cheese Lovers: Try using a mixture of mozzarella and parmesan for a melty, cheesy crust. This combination creates a rich and satisfying layer that makes for an indulgent snack.
-
Savory Addition: For a hearty twist, mix in cooked quinoa or cooked lentils to your patties. This not only boosts protein but also creates a fulfilling meal option.
These variations promise to keep your air fryer zucchini experiences fresh and exciting! Looking for more inspiration? Check out our Savory Zucchini Pancakes or indulge in Cheesy Zucchini Rolls for even more delectable creations!
Make Ahead Options
These Air Fryer Zucchini Recipes are perfect for busy home cooks looking to simplify meal prep! You can slice and coat the zucchini up to 24 hours in advance. Just wash and cut your zucchini into sticks, patties, or fries, then toss them with olive oil, breadcrumbs, and seasonings as usual. Store the prepped zucchini in an airtight container in the refrigerator to maintain their quality and prevent browning. When you’re ready to serve, simply place them in the preheated air fryer and cook for about 8 to 12 minutes until golden and crispy. This way, you can enjoy delicious air-fried zucchini with minimal effort on your busy weeknights!
Air Fryer Zucchini Recipes Recipe FAQs
How do I choose the best zucchini for air frying?
Absolutely! When selecting zucchini, look for firm, vibrant green zucchinis without any dark spots or blemishes, as these indicate ripeness. Smaller zucchinis are usually more tender and flavorful, making them ideal for air frying. For best results, aim for zucchinis that feel heavy for their size.
What’s the best way to store leftover air fryer zucchini?
To keep your air fryer zucchini fresh, store any leftovers in an airtight container in the refrigerator for up to 3 days. This helps maintain their flavor and prevents them from drying out. When ready to enjoy them again, simply reheat in your air fryer for that delightful crunch!
Can I freeze cooked zucchini from the air fryer?
Certainly! For freezing air fryer zucchini, first allow them to cool completely. Then, spread them in a single layer on a baking sheet and freeze until solid (about 1-2 hours). Once frozen, transfer them to a freezer-safe bag for up to 3 months. When ready to eat, you can reheat directly from frozen in your air fryer at 375°F for about 5-7 minutes, restoring that crispy texture.
Why did my air fryer zucchini turn out soggy?
The main culprit for soggy zucchini often comes down to excess moisture. Be sure to dry the zucchini thoroughly before coating it. I recommend patting them down with a clean towel and even squeezing them gently to remove any leftover water. Also, ensure your air fryer basket isn’t overcrowded, as this restricts airflow and can result in soggy results.
Are air fryer zucchini recipes suitable for pets?
Zucchini is generally safe for pets in moderation, but be sure to serve them plain—avoid any added oils, seasonings, or cheese. If your pet is unfamiliar with zucchini, introduce it in small amounts to watch for any adverse reactions. However, if your pet has any known allergies or dietary restrictions, consult your vet before offering new foods.
Can I use frozen zucchini for these recipes?
While you can technically use frozen zucchini, I recommend using fresh for the best texture and crispiness. If using frozen zucchini, let them thaw completely and drain excess moisture before following the recipe. However, be mindful that they may not achieve the same level of crispiness as freshly cut zucchini.

Air Fryer Zucchini Recipes: 5 Crispy Delights You’ll Love
Ingredients
Equipment
Method
- Prepare the Zucchini: Wash and dry zucchinis, then cut into preferred shapes—sticks, patties, or wedges.
- Remove Excess Moisture: Pat zucchini pieces dry with a cloth or paper towel.
- Coat the Zucchini: Mix zucchini with olive oil, panko breadcrumbs, Parmesan, and seasonings in a large bowl.
- Arrange in the Air Fryer: Preheat air fryer to 400°F (200°C) and arrange zucchini pieces in a single layer.
- Cook the Zucchini: Cook for 8 to 12 minutes, checking halfway through for even cooking.
- Check for Doneness: Ensure zucchini is golden brown and tender before removing.
- Serve Immediately: Transfer cooked zucchini to a platter and serve hot, optionally with dipping sauces.