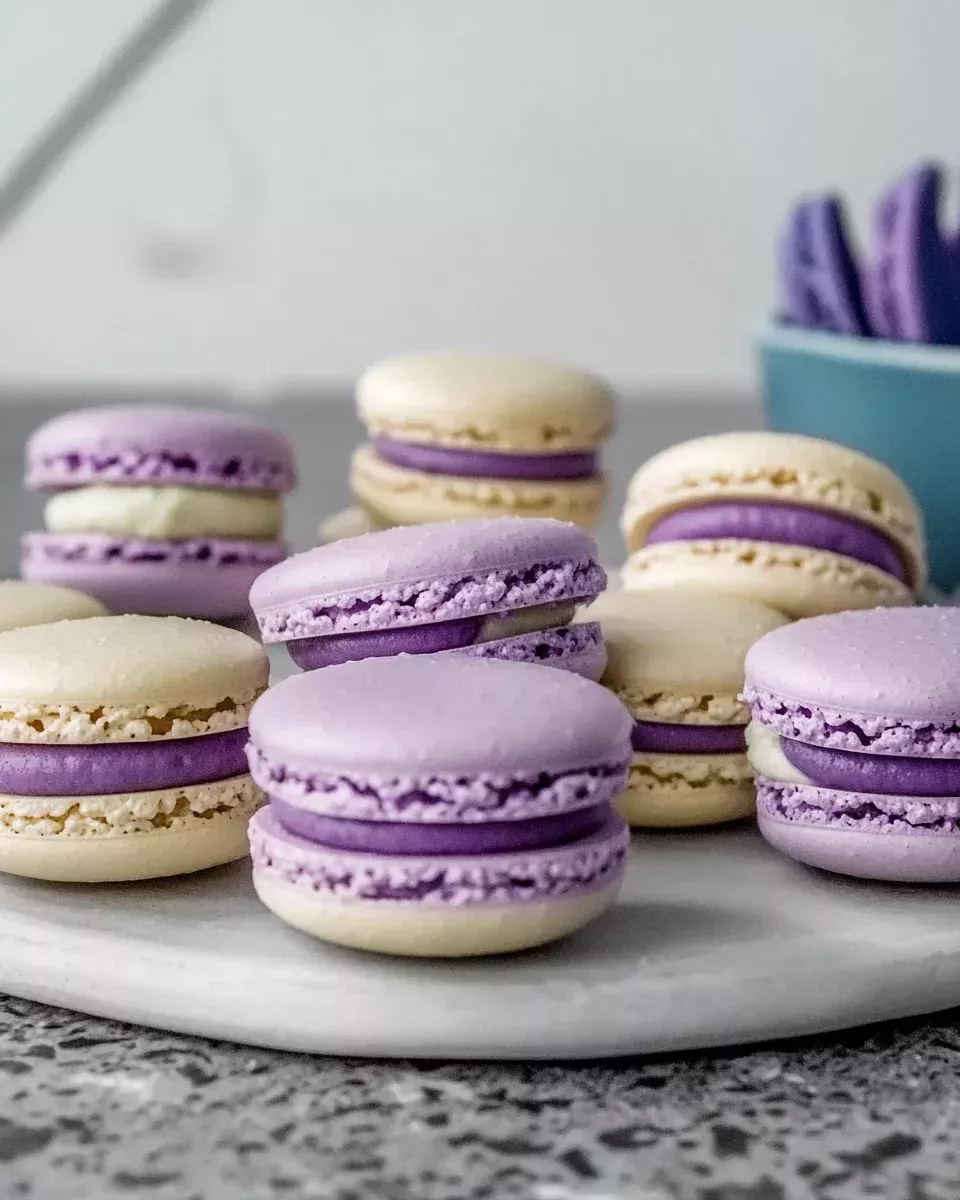
Chocolate Almond Macarons: Irresistibly Easy Recipe!

Ah, the sweet allure of Chocolate Almond Macarons! Just saying the name makes my taste buds dance with anticipation. These delightful treats are like little bites of heaven, perfect for those moments when you need a quick pick-me-up or want to impress your loved ones with a homemade dessert. As a busy mom myself, I know how precious time can be, and this recipe is a lifesaver. It’s simple, yet sophisticated, and the combination of rich chocolate and nutty almond is simply irresistible. Let’s dive into this culinary adventure together!

Why You’ll Love This Chocolate Almond Macarons

These Chocolate Almond Macarons are a dream come true for any dessert lover. They’re not just delicious; they’re a breeze to make, even on a hectic day. The crispy shell paired with a luscious chocolate ganache filling is a match made in heaven. Plus, they’re gluten-free, making them a delightful treat for everyone. Trust me, once you try them, you’ll be hooked!

Ingredients Chocolate Almond Macarons

Creating these Chocolate Almond Macarons is a delightful journey, and it all starts with the right ingredients. Here’s what you’ll need:

  • Almond Flour: This gives the macarons their signature nutty flavor and smooth texture. You can make your own by grinding blanched almonds.
  • Powdered Sugar: Essential for that melt-in-your-mouth sweetness and smoothness. It blends seamlessly with almond flour.
  • Cocoa Powder: Adds a rich chocolatey depth. Opt for unsweetened for the best balance.
  • Egg Whites: The backbone of the macaron shell. Ensure they’re at room temperature for optimal whipping.
  • Granulated Sugar: Helps stabilize the meringue, giving the macarons their structure.
  • Vanilla Extract: A hint of vanilla enhances the overall flavor profile. Feel free to experiment with other extracts.
  • Pinch of Salt: Balances the sweetness and enhances the chocolate flavor.
  • Chocolate Ganache: The luscious filling that ties everything together. You can use store-bought or homemade.

For exact quantities, scroll to the bottom of the article where you can print the full recipe. Happy baking!

How to Make Chocolate Almond Macarons

Preparing the Dry Ingredients

First things first, let’s get those dry ingredients ready. Sift together the almond flour, powdered sugar, and cocoa powder into a bowl. This step is crucial for achieving that smooth, delicate texture we all love in macarons. Trust me, you don’t want any lumps sneaking into your batter!

Whipping the Egg Whites

Now, onto the egg whites. In a separate bowl, beat the egg whites with a pinch of salt until they become foamy. Gradually add the granulated sugar, a little at a time, while continuing to beat. You’re aiming for stiff peaks here, which should take about 5-7 minutes. This is where the magic happens, as the meringue gives the macarons their structure.

Combining Ingredients

With your meringue ready, it’s time to gently fold in the dry ingredients. Do this in three additions, being careful not to deflate the mixture. The batter should flow like lava and form a ribbon when lifted. This consistency is key to perfect macarons, so take your time and be gentle.

Piping the Macarons

Transfer the batter to a piping bag fitted with a round tip. Pipe small circles, about 1.5 inches in diameter, onto parchment-lined baking sheets. Leave some space between each macaron to allow for spreading. Once piped, tap the baking sheets firmly on the counter to release any air bubbles. Let them sit at room temperature for 30-60 minutes until a skin forms on the surface.

Baking and Cooling

Preheat your oven to 300°F (150°C). Bake the macarons for 15-20 minutes, rotating the sheets halfway through. You’ll know they’re done when they’ve risen and formed a ‘foot.’ Allow them to cool completely on the baking sheets before gently removing them. Patience is key here, as removing them too soon can lead to breakage.

Filling the Macarons

Once cooled, it’s time to fill these beauties. Pair the macarons by size and fill them with chocolate ganache. Press them together gently to avoid cracking. The ganache acts as the glue, holding the macarons together and adding that luscious, chocolatey goodness. And there you have it, your homemade Chocolate Almond Macarons are ready to enjoy!

Tips for Success

  • Ensure your egg whites are at room temperature for better volume.
  • Sift dry ingredients twice to avoid lumps in the batter.
  • Use a kitchen scale for precise measurements.
  • Let piped macarons rest until a skin forms to prevent cracking.
  • Rotate baking sheets halfway through for even baking.
  • Practice patience; macarons improve with practice!

Equipment Needed

  • Mixing Bowls: Essential for combining ingredients. Use any size that fits your needs.
  • Electric Mixer: A hand or stand mixer works for whipping egg whites.
  • Sifter: Ensures a smooth batter by removing lumps.
  • Piping Bag: A ziplock bag with a snipped corner can substitute.
  • Baking Sheets: Line with parchment paper for easy removal.
  • Oven Thermometer: Ensures accurate baking temperature.

Variations

  • Flavor Twist: Add a teaspoon of almond or peppermint extract to the meringue for a unique flavor profile.
  • Colorful Macarons: Use gel food coloring to tint the batter for festive occasions.
  • Nut-Free Option: Substitute almond flour with sunflower seed flour for a nut-free version.
  • Vegan Macarons: Replace egg whites with aquafaba (chickpea brine) for a plant-based treat.
  • Different Fillings: Try fruit preserves, flavored buttercream, or caramel for a delightful surprise.

Serving Suggestions

  • Tea Time Delight: Pair these macarons with a cup of Earl Grey or chamomile tea for a soothing afternoon treat.
  • Elegant Presentation: Arrange on a tiered dessert stand for a sophisticated touch at gatherings.
  • Wine Pairing: Enjoy with a glass of sweet dessert wine like Moscato for a luxurious experience.
  • Fruit Garnish: Serve alongside fresh berries to complement the rich chocolate flavor.

FAQs about Chocolate Almond Macarons

How do I prevent my macarons from cracking?

Cracking can be a common issue, but it’s easily avoidable. Ensure your piped macarons rest until a skin forms on the surface before baking. This step is crucial as it helps prevent cracking. Also, check your oven temperature with an oven thermometer to ensure it’s accurate, as too high a temperature can cause cracks.

Can I make Chocolate Almond Macarons without almond flour?

Yes, you can substitute almond flour with sunflower seed flour for a nut-free version. The texture and flavor will be slightly different, but it’s a great alternative for those with nut allergies. Just make sure to sift the sunflower seed flour well to avoid any lumps.

Why are my macarons hollow?

Hollow macarons can result from overmixing the batter or baking at too high a temperature. Aim for a batter that flows like lava and forms a ribbon when lifted. Also, ensure your oven is at the correct temperature by using an oven thermometer. Rotating the baking sheets halfway through can also help achieve even baking.

How long can I store Chocolate Almond Macarons?

These delightful treats can be stored in an airtight container in the refrigerator for up to a week. For longer storage, freeze them for up to three months. Just make sure to bring them to room temperature before serving to enjoy their full flavor and texture.

Can I use different fillings for my macarons?

Absolutely! While chocolate ganache is a classic choice, feel free to experiment with other fillings like fruit preserves, flavored buttercream, or caramel. Each filling offers a unique twist, making your macarons even more delightful and versatile.

Final Thoughts

Embarking on the journey of making Chocolate Almond Macarons is like crafting little pieces of edible art. Each step, from whipping the egg whites to piping the batter, is a dance of precision and creativity. The joy of biting into that first macaron, with its delicate shell and rich ganache, is truly unparalleled. These treats are more than just a dessert; they’re a testament to the magic of baking. Whether you’re sharing them with loved ones or savoring them solo, these macarons are sure to bring a smile to your face and warmth to your heart. Happy baking!
Chocolate Almond Macarons
Paul

Chocolate Almond Macarons: Irresistibly Easy Recipe!

These Chocolate Almond Macarons are a delightful treat, combining the rich flavors of chocolate and almond in a delicate, crispy shell filled with luscious chocolate ganache.
Prep Time 30 minutes
Cook Time 20 minutes
Total Time 1 hour 30 minutes
Servings: 24 macarons (12 filled pairs)
Course: Dessert
Cuisine: French
Calories: 150

Ingredients
  

  • 1 ½ cups almond flour
  • 1 ½ cups powdered sugar
  • ½ cup cocoa powder
  • 4 large egg whites room temperature
  • 1 cup granulated sugar
  • ½ teaspoon vanilla extract
  • Pinch of salt
  • Chocolate ganache for filling

Method
 

  1. Preheat your oven to 300°F (150°C) and line two baking sheets with parchment paper.
  2. In a bowl, sift together the almond flour, powdered sugar, and cocoa powder. Set aside.
  3. In a separate bowl, beat the egg whites with a pinch of salt until foamy. Gradually add the granulated sugar while continuing to beat until stiff peaks form. This should take about 5-7 minutes.
  4. Gently fold the dry ingredients into the meringue in three additions, being careful not to deflate the mixture. The batter should flow like lava and form a ribbon when lifted.
  5. Transfer the batter to a piping bag fitted with a round tip. Pipe small circles (about 1.5 inches in diameter) onto the prepared baking sheets, leaving space between each macaron.
  6. Tap the baking sheets firmly on the counter to release any air bubbles. Let the macarons sit at room temperature for 30-60 minutes until a skin forms on the surface.
  7. Bake in the preheated oven for 15-20 minutes, rotating the sheets halfway through. The macarons are done when they have risen and formed a ‘foot.’
  8. Allow the macarons to cool completely on the baking sheets before gently removing them.
  9. Once cooled, pair the macarons and fill them with chocolate ganache. Press them together gently.

Notes

  • For a flavored macaron, add 1 teaspoon of your favorite extract (like almond or peppermint) to the meringue before folding in the dry ingredients.
  • Experiment with different fillings such as fruit preserves, buttercream, or flavored ganaches to create a variety of macarons.


Easter Memories and the Magic of Rice Krispie Treat Eggs

Easter has always been a time of joy, renewal, and, of course, sweet treats. I vividly remember waking up on Easter morning as a child, running down the stairs, and finding a basket brimming with colorful candies, chocolate bunnies, and—my absolute favorite—homemade Rice Krispie treats shaped like Easter eggs. My grandmother made them every year, pressing the warm, gooey marshmallow mixture into egg-shaped molds with her flour-dusted hands. She would let me help, my tiny fingers sticking together as I eagerly packed the mixture into plastic eggs, impatiently waiting for them to set.

The best part? Biting into one and discovering a hidden surprise inside—a little chocolate candy or a peanut butter filling that made each bite even more special. These weren’t just desserts; they were edible memories, infused with love, tradition, and the simple pleasure of creating something beautiful.

Now, I carry on that tradition with my own family, making these Rice Krispie Treat Easter Eggs every year. The process is simple, but the result is magical—crispy, chewy, and bursting with pastel colors that brighten up any Easter table. Whether you’re making them for your kids, a holiday gathering, or just to relive childhood nostalgia, these treats bring a sense of warmth and togetherness that only homemade desserts can provide.

Why Rice Krispie Treat Easter Eggs Are a Must-Try

Easter is filled with classic treats, from chocolate eggs to sugar-dusted marshmallow Peeps. But there’s something uniquely delightful about Rice Krispie Treat Easter Eggs. Here’s why they deserve a spot in your Easter traditions:

1. A Fun and Festive Twist on a Classic

Traditional Rice Krispie treats are delicious on their own, but shaping them into eggs adds a playful touch. The bright colors make them eye-catching, and their soft, chewy texture pairs perfectly with a light crunch. They’re great for Easter baskets, dessert tables, or even as a fun activity for kids.

2. Quick and Easy to Make

Unlike baked goods that require precise measurements and oven time, these treats come together in under an hour. A few ingredients, a microwave, and a little molding, and you’ve got a batch of festive Easter goodies.

3. Customizable for Every Taste

One of the best parts of this recipe is its versatility. You can change up the colors, add mix-ins, drizzle with melted chocolate, or even hide small candies inside. The possibilities are endless, allowing you to make them as simple or extravagant as you like.

4. Perfect for Kids and Family Bonding

Easter is all about family, and this recipe is a wonderful way to get kids involved in the kitchen. They’ll love mixing the colors, shaping the eggs, and—of course—eating them! Plus, since the recipe doesn’t involve an oven or sharp tools, it’s a safe and fun activity for little hands.

5. A Nostalgic Treat That Brings Back Memories

For many of us, Rice Krispie treats are tied to childhood. Whether they remind you of school bake sales, sleepovers, or holiday gatherings, they carry a sense of nostalgia. Making them in the shape of Easter eggs adds another layer of sentimental value, making them a wonderful tradition to pass down through generations.

Creative Variations to Try

While the classic Rice Krispie Treat Easter Eggs are delicious on their own, here are some creative ways to take them up a notch:

Chocolate-Dipped Krispie Eggs

Leave the crispy eggs uncolored and dip half of each one in melted chocolate or colored candy melts. Sprinkle with crushed nuts, coconut flakes, or festive sprinkles for added texture and flavor.

Stuffed Surprise Eggs

Before sealing the plastic eggs, press a small chocolate candy, mini marshmallow, or even a peanut butter cup into the center. When someone takes a bite, they’ll get a sweet surprise inside!

Speckled Egg Design

For a more natural look, mix in a tiny amount of cocoa powder or black gel food coloring with a toothbrush to “speckle” the eggs. This creates a beautiful, pastel speckled effect similar to real Easter eggs.

Marbled Easter Eggs

Instead of fully mixing in the food coloring, lightly swirl multiple colors together before pressing the mixture into the molds. This will create a marbled effect that looks artistic and unique.

Cereal Mix-Ins

Experiment with different types of cereals—fruity-flavored rice cereal for a burst of flavor, or even a chocolate version for a richer taste.

Drizzle and Decorate

Once the eggs have set, drizzle them with white or dark chocolate and top with crushed candies, edible glitter, or shredded coconut for a decorative touch.

Ingredients – The Magic Mix

  • Butter – 6 tablespoons, divided
  • Marshmallows – 5 cups, divided (mini works best)
  • Rice Krispie Cereal – 6 cups, divided
  • Gel Food Coloring – Neon pink, neon green, purple, and yellow
  • Plastic Easter Eggs – For shaping the treats
  • Non-Stick Spray – To prevent sticking

Directions – Crafting the Crispy Eggs

  1. Melt the Marshmallow Magic
    • In a microwave-safe bowl, melt 1 ½ tablespoons of butter with 1 ¼ cups of marshmallows for 45 seconds.
    • Stir until smooth, then add 3 drops of your chosen gel food coloring and mix well.
  2. Coat the Crunch
    • Stir 1 ½ cups of Rice Krispie cereal into the marshmallow mixture until fully coated.
  3. Shape the Eggs
    • Lightly spray the plastic Easter eggs with non-stick spray.
    • Tightly pack the coated cereal into each side of the egg mold, close it, and let it sit for 10 minutes.
  4. Unveil the Treats
    • Gently remove the treats from the plastic eggs and set them aside.
  5. Repeat and Customize
    • Repeat steps 1-4 for each color variation.

Nutritional Breakdown – A Sweet Indulgence (Per batch total)

  • Calories: 2435 kcal
  • Carbohydrates: 448g
  • Protein: 19g
  • Fat: 72g
  • Saturated Fat: 44g
  • Trans Fat: 3g
  • Cholesterol: 181mg
  • Sodium: 1785mg
  • Potassium: 249mg
  • Fiber: 1g
  • Sugar: 232g
  • Vitamin A: 13275 IU
  • Vitamin C: 106mg
  • Calcium: 40mg
  • Iron: 52mg

These colorful, crispy Easter eggs are an easy and fun treat that adds a festive touch to any celebration!

Frequently Asked Questions (FAQs)

Can I make these treats without plastic eggs?

Yes! If you don’t have plastic Easter eggs, simply grease your hands with butter or non-stick spray and shape the treats into eggs by hand. You can also use silicone molds for a more uniform shape.

How do I prevent the marshmallow mixture from sticking?

The key is to lightly coat your hands and any molds with non-stick cooking spray or butter before handling the mixture. This prevents it from sticking and makes shaping much easier.

Can I make these ahead of time?

Absolutely! These treats stay fresh for up to 3 days when stored in an airtight container at room temperature. If you need them to last longer, refrigerate them, but be sure to let them sit at room temperature for a few minutes before serving to soften.

Can I use regular marshmallows instead of mini marshmallows?

Yes, but they may take longer to melt. If using large marshmallows, cut them into smaller pieces for easier melting.

How do I make them extra gooey?

For softer, extra-gooey treats, slightly increase the amount of marshmallows and butter in the recipe. This will make them more chewy and less firm.

Are these treats gluten-free?

Rice Krispie cereal is often made with malt flavoring, which contains gluten. However, there are gluten-free rice cereals available that can be used as a substitute. Always check ingredient labels if making these for someone with dietary restrictions.

Can I add different flavors?

Yes! A few drops of vanilla extract, almond extract, or even a pinch of cinnamon can enhance the flavor. If you’re a chocolate lover, mix in cocoa powder or chocolate chips for a richer taste.

What’s the best way to store leftovers?

Keep them in an airtight container at room temperature for up to three days. If stacking them, place a sheet of wax paper between layers to prevent sticking. Avoid refrigerating for long periods, as they can become too hard.

Conclusion – A Treat That Creates Lasting Memories

Easter is a time of celebration, and what better way to make it extra special than with homemade Rice Krispie Treat Easter Eggs? They’re more than just a dessert; they’re a symbol of creativity, tradition, and family bonding. Whether you’re making them with your children, surprising a loved one, or simply indulging in a nostalgic treat, these crispy, marshmallowy delights are guaranteed to bring smiles.

So gather your ingredients, put on some festive music, and start shaping your own batch of colorful Easter eggs. And who knows? Maybe years from now, someone in your family will be carrying on this same tradition, remembering the joy of making these sweet treats together.

aiting

Easter Memories and the Magic of Rice Krispie Treat Eggs

These Festive Rice Krispie Easter Eggs are a fun and colorful twist on the classic treat! Shaped like Easter eggs and made with marshmallows, crispy rice cereal, and vibrant gel food coloring, they bring a pop of springtime cheer to any celebration. Perfect for kids and adults alike, these no-bake treats are easy to make and great for Easter gatherings!
Prep Time 10 minutes
Cook Time 5 minutes
Total Time 15 minutes
Servings: 12 Easter egg treats
Course: Dessert
Cuisine: American

Ingredients
  

  • 6 tablespoons butter divided
  • 5 cups marshmallows divided (mini marshmallows work best)
  • 6 cups Rice Krispie cereal divided
  • Neon gel food coloring pink, green, purple, yellow
  • Plastic Easter eggs for shaping the treats
  • Non-stick spray to prevent sticking

Method
 

  1. Melt the Marshmallow Magic
  2. In a microwave-safe bowl, melt 1 ½ tablespoons of butter with 1 ¼ cups of marshmallows for 45 seconds.
  3. Stir until smooth, then add 3 drops of your chosen gel food coloring and mix well.
  4. Coat the Crunch
  5. Stir 1 ½ cups of Rice Krispie cereal into the marshmallow mixture until fully coated.
  6. Shape the Eggs
  7. Lightly spray the plastic Easter eggs with non-stick spray.
  8. Tightly pack the coated cereal into each side of the egg mold, close it, and let it sit for 10 minutes.
  9. Unveil the Treats
  10. Gently remove the treats from the plastic eggs and set them aside.
  11. Repeat and Customize
  12. Repeat steps 1-4 for each color variation.

Notes

  • For extra fun, drizzle melted chocolate or sprinkles over the finished eggs.
  • If you don’t have plastic eggs, shape the treats by hand using buttered hands or silicone molds.
  • Store in an airtight container at room temperature for up to 3 days.
  • Mix and match colors for a vibrant Easter display!

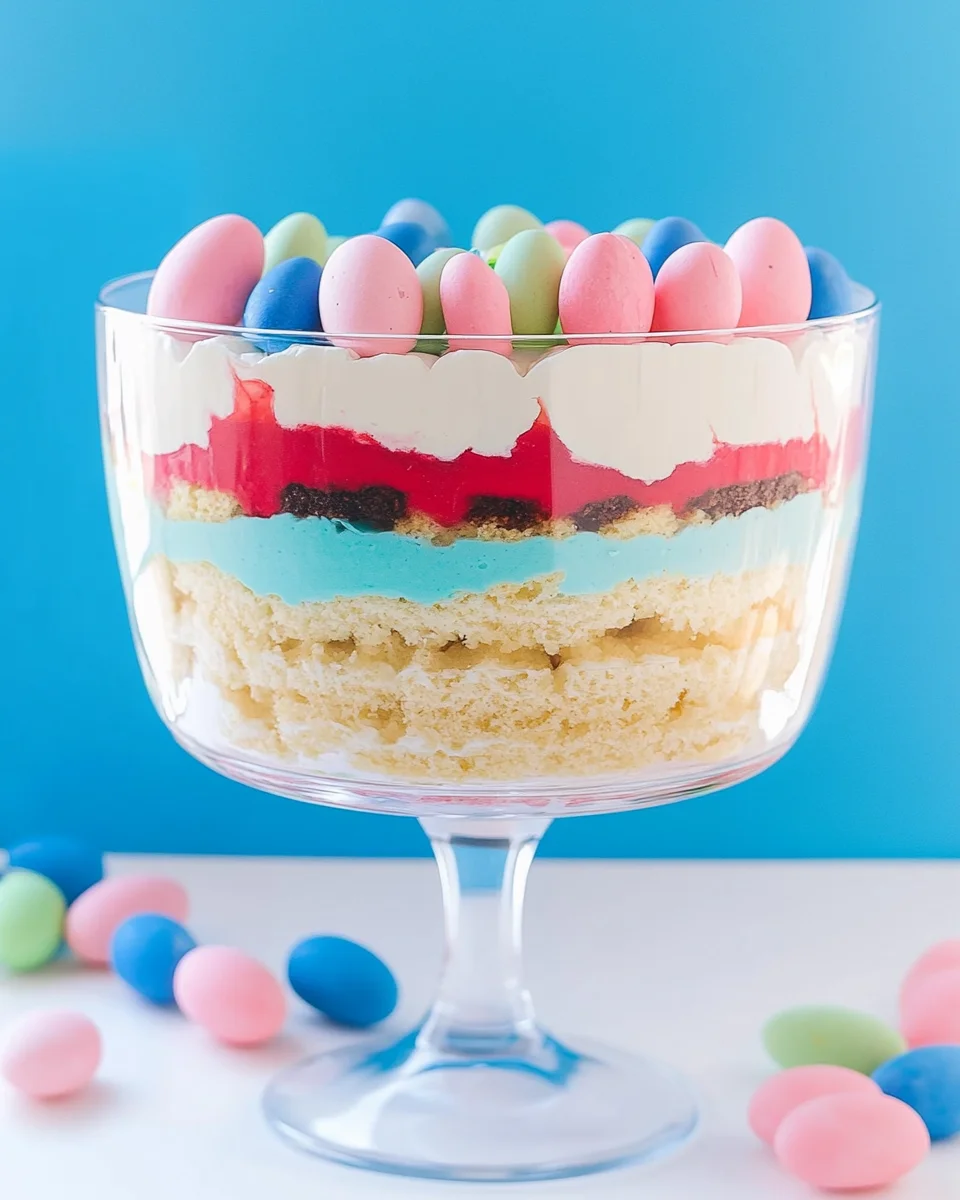
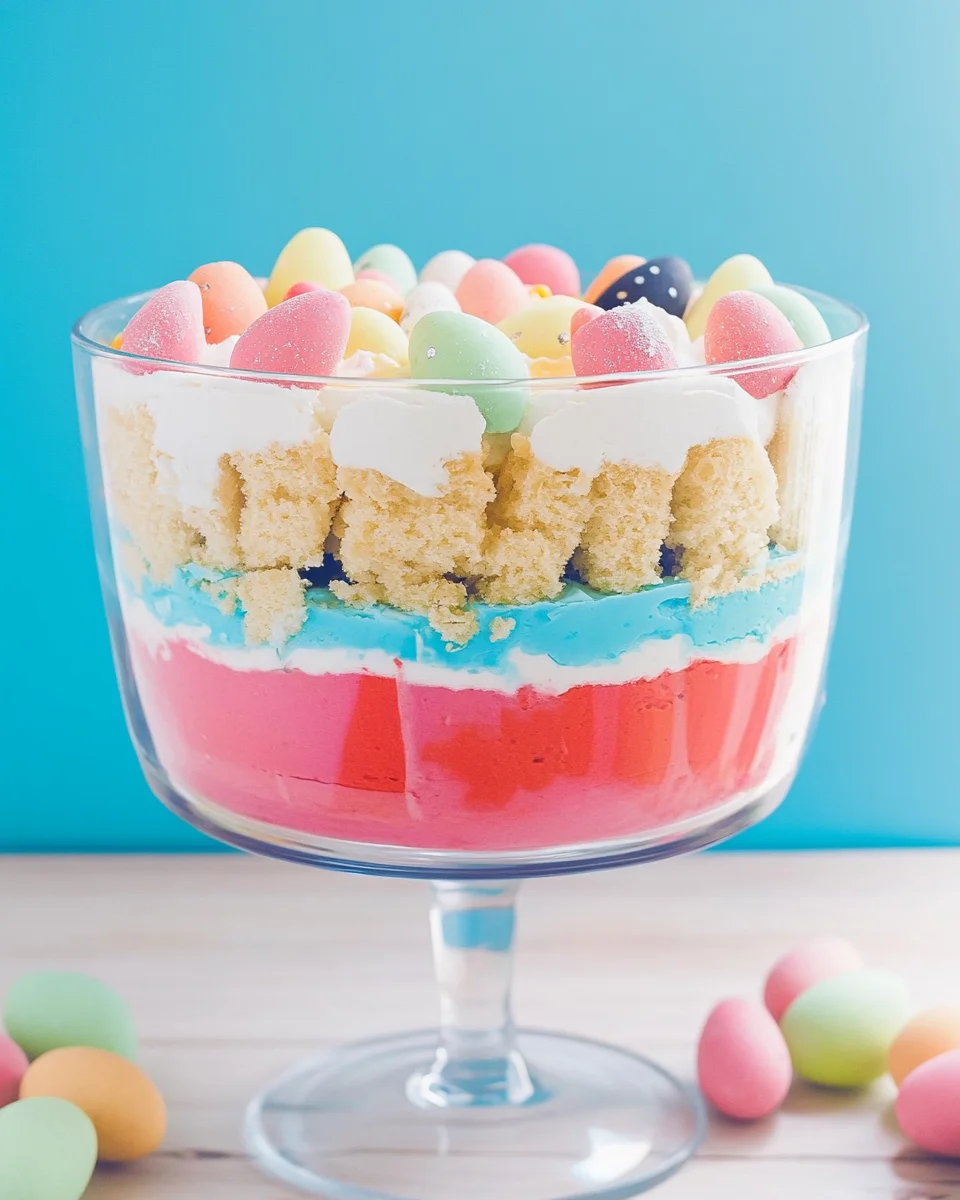
Easter Trifle: A Show-Stopping Dessert for Spring Celebrations

A Sweet Tradition That Brings Back Memories

Growing up, Easter was always one of the most magical times of the year. It wasn’t just about the egg hunts, the pastel-colored dresses, or the joyful gatherings—it was about the food, the traditions, and the moments we shared as a family. My grandmother, the heart of our holiday celebrations, had a way of making every dish feel like it had a story. Among all the treats on the dessert table, her layered trifle always stole the show.

She never followed a written recipe; instead, she built it layer by layer, improvising as she went. One year, she let me help, showing me how to carefully place each ingredient to create a perfect balance of flavors and textures. The cake was always light and fluffy, the pudding rich and creamy, and the whipped topping soft as a cloud. But what made it truly special was the final touch—tiny chocolate eggs nestled into edible candy grass, turning the trifle into a festive centerpiece.

This Easter Trifle recipe is inspired by those cherished memories. It’s not just a dessert; it’s an experience, a tradition waiting to be passed down. Whether you’re making it for a large family gathering or a small intimate brunch, this dessert will bring color, joy, and nostalgia to your Easter table.

Why You’ll Love This Easter Trifle

Trifles are one of the easiest yet most visually stunning desserts you can make. They require minimal effort but deliver maximum impact, making them a perfect addition to any holiday spread. Here’s why this Easter Trifle will become a favorite in your home:

  • Beautiful Presentation: The layers of pastel-colored pudding, fluffy whipped topping, and cake cubes make this dessert look like a work of art.
  • Simple and Quick to Assemble: After baking the cake, the assembly takes just minutes. No complicated techniques required.
  • Customizable: This recipe can be easily adapted for different flavors, colors, and occasions.
  • Great for Make-Ahead Prep: Since it needs time to chill, it’s an ideal dessert to prepare in advance, freeing up time on the day of your celebration.
  • Loved by All Ages: Kids and adults alike will be drawn to the fun, colorful layers and the whimsical candy nests on top.

Ingredients – A Symphony of Sweetness

  • Cake Layer:
    • 1 box Funfetti or Rainbow Chip cake mix (prepared according to package directions)
    • 1 cup water
    • ½ cup vegetable oil
    • 3 eggs
  • Creamy Pudding Layers:
    • 2 (3.4-ounce) packages vanilla instant pudding mix
    • 4 cups whole milk
    • Blue & pink food coloring
  • Whipped Topping:
    • 1 (16-ounce) container Cool Whip (thawed)
  • Festive Decorations:
    • Edible candy grass (green, pink, and blue)
    • Easter egg candies (Whoppers Robin Eggs, Cadbury Eggs, large jellybeans, or similar)

Directions – Crafting a Show-Stopping Dessert

Step 1: Bake and Cut the Cake

  • Bake the cake according to package instructions, using parchment paper for easy removal.
  • Let it cool for 10 minutes, then transfer to a cooling rack.
  • Once fully cooled, cut into 1-inch cubes.

Step 2: Prepare the Pudding

  • Make the pudding following package directions, keeping each batch in a separate bowl.
  • Add a few drops of blue food coloring to one bowl and pink to the other, adjusting for desired pastel shades.

Step 3: Assemble the Layers

  • Place half of the cake cubes at the bottom of a trifle dish, filling gaps tightly.
  • Spoon the blue pudding over the cake, then add 2 cups of whipped topping.
  • Repeat the layers with the remaining cake, pink pudding, and the rest of the whipped topping.
  • Refrigerate for at least 4 hours.

Step 4: Create the Candy Bird Nests

  • Roll small bundles of edible candy grass tightly into nest shapes (2 of each color).
  • Before serving, place 6 nests on top of the trifle, adding 3 candy eggs in each.

Step 5: Serve and Enjoy!

  • Keep refrigerated until ready to serve. Best enjoyed within 3 days.

Nutritional Breakdown – A Sweet Treat in Every Bite

  • Calories: 210 per serving
  • Carbohydrates: 33g
  • Protein: 5g
  • Fat: 6g (Saturated Fat: 3g)
  • Sugar: 23g
  • Cholesterol: 49mg
  • Sodium: 285mg
  • Calcium: 113mg

This Easter Trifle is as delightful to look at as it is to eat—layered with vibrant colors, fluffy textures, and a whimsical nest topping. Perfect for spring celebrations!

Frequently Asked Questions

1. Can I Make This Trifle Ahead of Time?

Yes! In fact, it’s best to assemble it at least four hours in advance so the flavors can meld together. If you’re short on time, you can bake the cake and make the pudding a day before, then assemble the trifle the next day.

2. How Do I Keep the Layers Clean and Defined?

To ensure your layers stay distinct and visually appealing:

  • Pack the cake pieces tightly in each layer to prevent the pudding from seeping through.
  • Spread each pudding and whipped topping layer evenly with a spoon or spatula before adding the next layer.
  • Chill the trifle for a few hours before serving to help set the layers.

3. Can I Make Mini Trifles Instead of One Large Dish?

Absolutely! Mini trifles are a great option for individual servings. Use small dessert glasses or mason jars and layer the ingredients just as you would in a larger trifle dish.

4. What Other Cake Flavors Can I Use?

While Funfetti or Rainbow Chip cake adds a festive touch, you can substitute it with other light-colored cakes such as:

  • Lemon Cake – Adds a bright, citrusy contrast.
  • White Cake or Vanilla Cake – A neutral base that lets the pastel pudding shine.
  • Angel Food Cake – A light and airy option that absorbs the flavors beautifully.

5. What Other Pudding Flavors Can I Try?

Vanilla pudding is a great base for adding food coloring, but you can also use:

  • White Chocolate Pudding – For an even creamier texture and more vibrant colors.
  • Banana Pudding – Adds a subtle fruitiness.
  • Lemon Pudding – Pairs wonderfully with a lemon cake base.

6. Can I Use Homemade Whipped Cream Instead of Store-Bought?

Yes! If you prefer homemade, whip 1 cup of heavy whipping cream with ⅓ cup powdered sugar and 1 teaspoon of vanilla extract until stiff peaks form. Keep it refrigerated until ready to use.

7. What Are Some Fun Variations for Other Holidays?

One of the best things about trifles is their versatility. You can switch up the colors and decorations to match different holidays:

  • Christmas: Use red and green pudding layers and decorate with holiday sprinkles.
  • Fourth of July: Try red and blue pudding with white whipped topping and fresh berries.
  • Halloween: Use orange and purple pudding and top with candy pumpkins or spooky sprinkles.

Pro Tips for the Perfect Easter Trifle

  • Chill Before Serving: This allows the flavors to blend and makes the trifle easier to scoop without falling apart.
  • Use a Serrated Knife to Cut the Cake: This helps maintain clean edges and prevents the cake from crumbling too much.
  • Keep the Cake Cubed, Not Crumbled: Cubes hold their shape better and make the trifle more structured.
  • Tightly Roll the Candy Grass Nests: If they’re too loose, they might not hold their shape. Use the whipped topping to help secure them in place.
  • Store Properly: Keep the trifle covered in the refrigerator. It’s best enjoyed within three days.

Making It a Family Tradition

What makes this Easter Trifle truly special isn’t just its appearance or taste—it’s the experience of making it together. If you have little ones at home, let them join in the fun! Kids love helping mix the pudding, layering the ingredients, and, of course, decorating with candy eggs.

Growing up, my siblings and I always argued over who got to place the final candy eggs on top. It was a small, simple moment, but looking back, those are the memories that stand out. Now, as I make this trifle with my own family, I see the same excitement in my children’s eyes. The best part is, no matter how you layer it, no matter if a little pudding spills over or a nest isn’t perfectly shaped, the joy of making it together is what truly matters.

Final Thoughts

Easter is a time of renewal, celebration, and togetherness, and nothing brings people together quite like a beautiful, delicious dessert. This Easter Trifle is more than just a sweet treat—it’s a tradition waiting to be created. With its vibrant layers, whimsical candy nests, and rich flavors, it’s bound to become a staple on your holiday table.

So, as you gather with loved ones this Easter, take a moment to savor not just the flavors but the memories being made. Whether you’re sharing stories, laughing over an egg hunt, or simply enjoying a quiet moment with a spoonful of trifle, these are the moments that make holidays truly special.

aiting

Easter Trifle: A Show-Stopping Dessert for Spring Celebrations

This Easter Trifle Delight is a stunning and festive dessert layered with pastel-colored vanilla pudding, fluffy cake cubes, and creamy whipped topping. Topped with edible candy grass and Easter egg candies, this whimsical treat is as fun to make as it is to eat. Perfect for spring celebrations and guaranteed to be a showstopper at your Easter gathering!
Prep Time 20 minutes
Cook Time 25 minutes
Total Time 4 hours 45 minutes
Servings: 12 servings
Course: Dessert
Cuisine: American

Ingredients
  

Cake Layer:
  • 1 box Funfetti or Rainbow Chip cake mix prepared according to package directions
  • 1 cup water
  • ½ cup vegetable oil
  • 3 eggs
Creamy Pudding Layers:
  • 2 3.4-ounce packages vanilla instant pudding mix
  • 4 cups whole milk
  • Blue & pink food coloring
Whipped Topping:
  • 1 16-ounce container Cool Whip (thawed)
Festive Decorations:
  • Edible candy grass green, pink, and blue
  • Easter egg candies Whoppers Robin Eggs, Cadbury Eggs, large jellybeans, or similar

Method
 

  1. Bake and Cut the Cake
  2. Bake the cake according to package instructions, using parchment paper for easy removal.
  3. Let it cool for 10 minutes, then transfer to a cooling rack.
  4. Once fully cooled, cut into 1-inch cubes.
  5. Prepare the Pudding
  6. Make the pudding following package directions, keeping each batch in a separate bowl.
  7. Add a few drops of blue food coloring to one bowl and pink food coloring to the other, adjusting for desired pastel shades.
  8. Assemble the Layers
  9. Place half of the cake cubes at the bottom of a trifle dish, filling gaps tightly.
  10. Spoon the blue pudding over the cake, then add 2 cups of whipped topping.
  11. Repeat the layers with the remaining cake, pink pudding, and the rest of the whipped topping.
  12. Refrigerate for at least 4 hours to allow flavors to meld.
  13. Create the Candy Bird Nests
  14. Roll small bundles of edible candy grass tightly into nest shapes (2 of each color).
  15. Before serving, place 6 nests on top of the trifle, adding 3 candy eggs in each.
  16. Serve and Enjoy!
  17. Keep refrigerated until ready to serve. Best enjoyed within 3 days.

Notes

  • Make it ahead! This trifle tastes even better after a full day in the fridge.
  • Switch up the colors! Try pastel yellow or lavender pudding for variety.
  • Use homemade whipped cream instead of Cool Whip for a fresher taste.
  • Swap cake flavors – white cake, yellow cake, or even chocolate cake work well!

Beef Skillet Enchiladas: A Comforting, One-Pan Dinner for Busy Nights

A Taste of Home in Every Bite

There’s something about a home-cooked meal that brings a sense of warmth and comfort, especially after a long, exhausting day. For me, skillet enchiladas have always been a symbol of togetherness. I still remember coming home from school to the aroma of sizzling ground beef, rich spices, and melted cheese filling our kitchen. My mother, always short on time but never short on creativity, would throw together a dish using whatever ingredients we had on hand. This dish wasn’t just food; it was love served in a pan.

Now, as an adult balancing work, family, and the chaos of daily life, I find myself reaching for that same simplicity. This Beef Skillet Enchilada recipe is one of my go-to meals when I need something delicious but don’t have the energy for complicated steps. It has all the flavors of traditional enchiladas—savory, cheesy, and slightly spicy—without the fuss of rolling tortillas or baking multiple dishes. It’s the kind of meal that makes you slow down, savor the moment, and appreciate the magic of good food.

If you’re looking for a meal that will bring your family together while keeping your cooking time minimal, this dish is for you.

Why This Recipe Works for Everyone

One-Pan Simplicity

Who doesn’t love a meal that comes together in just one pan? Traditional enchiladas require multiple steps, including filling, rolling, and baking tortillas. This recipe eliminates the extra work while keeping all the incredible flavors intact. Everything cooks in a single skillet, making both preparation and cleanup a breeze.

Packed with Wholesome Ingredients

Despite its indulgent taste, this recipe is well-balanced with lean protein, fiber-rich beans, and fresh vegetables. The combination of bell peppers, zucchini, and corn adds a nutritious boost while enhancing the texture of the dish. Plus, the use of corn tortillas keeps it naturally gluten-free.

Crowd-Pleasing Comfort Food

This dish is a guaranteed hit with both adults and kids. The cheesy, saucy goodness is hard to resist, and the ability to customize toppings—like avocado, sour cream, and jalapeños—makes it perfect for different tastes.

Great for Meal Prepping

Leftovers reheat beautifully, making this a fantastic meal to prepare ahead of time. Whether you enjoy it for lunch the next day or freeze portions for future meals, it remains just as flavorful and satisfying.

The Flavor-Packed Cast: Ingredients

  • Cooking Essentials: Cooking spray, ½ tsp olive oil
  • Protein Power: 1 lb lean ground beef
  • Vibrant Veggies: 1 small red bell pepper (diced), 1 medium zucchini (diced), 6 green onions (thinly sliced, white/light green and dark green parts separated)
  • Bold Seasonings: 1 tsp chili powder, 1 tsp ground cumin, ½ tsp garlic powder, ½ tsp dried oregano
  • Saucy Goodness: 2 cups (15-16 oz) jarred or canned red enchilada sauce
  • Hearty Additions: 1 (15 oz) can black beans (rinsed and drained), 1 cup frozen corn
  • Tortilla Magic: 8 (6-inch) corn tortillas (cut into 6 wedges, about 8 oz total)
  • Cheesy Indulgence: 1 ½ cups shredded Mexican blend cheese, divided
  • Toppings Galore: Green onion tops, fresh cilantro, sour cream, diced tomatoes, diced or sliced avocado

Sizzling Simplicity: Directions

  1. Preheat & Prep – Heat oven to 425°F. Place a large oven-safe skillet over medium-high heat, spray with cooking spray, and add olive oil.
  2. Sauté & Brown – Add ground beef, bell pepper, zucchini, and white/light green parts of green onions. Cook for about 8 minutes, breaking up the beef, until the meat is browned and the zucchini is tender.
  3. Spice It Up – Turn off the heat and stir in chili powder, garlic powder, oregano, enchilada sauce, black beans, corn, and ½ cup of shredded cheese.
  4. Tortilla Toss – Gently fold in the tortilla wedges, making sure they are evenly coated in the sauce.
  5. Cheese, Please! – Sprinkle the remaining 1 cup of shredded cheese over the top.
  6. Bake to Perfection – Place the skillet in the oven and bake for 10-15 minutes until the cheese is melted and bubbly.
  7. The Grand Finale – Remove from the oven and garnish with green onion tops, cilantro, diced tomatoes, and avocado. Serve with sour cream if desired.

Nutritional Breakdown: The Healthy Scoop

  • Serving Size: 1 ½ cups
  • Calories: 371
  • Fat: 12g (Saturated Fat: 5g)
  • Sodium: 882mg
  • Carbohydrates: 39g (Fiber: 8g, Sugar: 5g)
  • Protein: 31g
  • Cholesterol: 62mg

This one-pan wonder is packed with bold flavors, wholesome ingredients, and easy clean-up—perfect for busy weeknights!

Common Questions About Beef Skillet Enchiladas

Can I use a different type of meat?

Absolutely! While this recipe calls for lean ground beef, you can easily substitute ground turkey, chicken, or even a plant-based alternative for a vegetarian version. If using turkey or chicken, consider adding a bit more seasoning to enhance the depth of flavor.

What’s the best way to store leftovers?

Once cooled, store leftovers in an airtight container in the refrigerator for up to 5 days. To reheat, simply warm the enchiladas in a skillet over medium heat or in the microwave until heated through.

Can I freeze this dish?

Yes! This recipe freezes well. Store it in a freezer-safe container for up to three months. When ready to eat, thaw it overnight in the refrigerator and reheat in the oven or on the stovetop.

Can I make this recipe dairy-free?

Yes! Simply swap the shredded cheese for a dairy-free alternative or omit it altogether. You can also use dairy-free sour cream or avocado as a creamy topping.

Are there any low-carb options?

If you’re watching your carb intake, consider using low-carb tortillas or reducing the number of tortillas in the recipe. You could also serve the beef mixture over cauliflower rice for a lower-carb alternative.

What can I serve with skillet enchiladas?

This dish is satisfying on its own, but if you want to round out the meal, consider serving it with:

  • A side salad with a tangy lime vinaigrette
  • Spanish or cilantro-lime rice
  • Guacamole and chips
  • Roasted vegetables for extra fiber and nutrients

Tips for Making the Best Skillet Enchiladas

Use Fresh Ingredients

While this recipe is flexible, fresh vegetables and high-quality enchilada sauce make a huge difference in the final taste. If time allows, try making homemade enchilada sauce for a richer, more authentic flavor.

Layer the Flavors

To get the best depth of flavor, let the spices toast slightly in the pan before adding the sauce. This simple trick enhances the warmth and complexity of the dish.

Don’t Overload the Skillet

It can be tempting to add extra tortillas or cheese, but balance is key. Too many tortillas can absorb too much sauce, leaving the dish dry. Stick to the recommended amount for the best texture.

Make It Your Own

One of the best things about this recipe is its versatility. Customize it by:

  • Adding sautéed mushrooms or spinach for extra veggies
  • Mixing in a little chorizo for a smoky, spicy kick
  • Using green enchilada sauce instead of red for a different flavor profile

The Heart of the Dish: A Story in Every Bite

Food has an incredible way of bringing people together. Whether it’s a casual weeknight dinner or a cozy weekend meal, this Beef Skillet Enchiladas recipe is a reminder that great meals don’t have to be complicated.

For me, this dish carries memories of laughter around the dinner table, late-night leftovers after movie marathons, and the simple joy of watching my loved ones savor each bite. It’s proof that sometimes, the most comforting meals come from the easiest recipes.

So, the next time you find yourself craving something hearty and delicious, let this skillet enchilada recipe be your go-to. It’s a dish that doesn’t just feed your body but warms your soul—one skillet, one bite, and one memory at a time.

aiting

Beef Skillet Enchiladas: A Comforting, One-Pan Dinner for Busy Nights

This one-pan beef skillet enchiladas dish is a game-changer for busy weeknights! Packed with bold Mexican flavors, lean ground beef, vibrant veggies, and gooey cheese, this skillet meal delivers comfort and convenience in every bite. With just one pan and 30 minutes, you can enjoy a wholesome, satisfying meal that’s perfect for the whole family.
Prep Time 10 minutes
Cook Time 20 minutes
Total Time 30 minutes
Servings: 4 servings
Course: Main Dish
Cuisine: Mexican-inspired

Ingredients
  

Cooking Essentials:
  • Cooking spray
  • ½ tsp olive oil
Protein Power:
  • 1 lb lean ground beef
Vibrant Veggies:
  • 1 small red bell pepper diced
  • 1 medium zucchini diced
  • 6 green onions thinly sliced (white/light green and dark green parts separated)
Bold Seasonings:
  • 1 tsp chili powder
  • 1 tsp ground cumin
  • ½ tsp garlic powder
  • ½ tsp dried oregano
Saucy Goodness:
  • 2 cups 15-16 oz jarred or canned red enchilada sauce
Hearty Additions:
  • 1 15 oz can black beans, rinsed and drained
  • 1 cup frozen corn
Tortilla Magic:
  • 8 6-inch corn tortillas, cut into 6 wedges (about 8 oz total)
Cheesy Indulgence:
  • 1 ½ cups shredded Mexican blend cheese divided
Toppings Galore:
  • Green onion tops
  • Fresh cilantro
  • Sour cream
  • Diced tomatoes
  • Diced or sliced avocado

Method
 

  1. Preheat & Prep – Heat oven to 425°F. Place a large oven-safe skillet over medium-high heat, spray with cooking spray, and add olive oil.
  2. Sauté & Brown – Add ground beef, bell pepper, zucchini, and white/light green parts of green onions. Cook for about 8 minutes, breaking up the beef, until the meat is browned and the zucchini is tender.
  3. Spice It Up – Turn off the heat and stir in chili powder, garlic powder, oregano, enchilada sauce, black beans, corn, and ½ cup of shredded cheese.
  4. Tortilla Toss – Gently fold in the tortilla wedges, making sure they are evenly coated in the sauce.
  5. Cheese, Please! – Sprinkle the remaining 1 cup of shredded cheese over the top.
  6. Bake to Perfection – Place the skillet in the oven and bake for 10-15 minutes until the cheese is melted and bubbly.
  7. The Grand Finale – Remove from the oven and garnish with green onion tops, cilantro, diced tomatoes, and avocado. Serve with sour cream if desired.

Notes

  • For a spicier kick, add chopped jalapeños or a pinch of cayenne.
  • Swap ground beef for ground turkey or shredded chicken for a lighter version.
  • Leftovers store well! Keep in an airtight container in the fridge for up to 3 days.
  • Pair with a side of rice, refried beans, or a crisp salad.

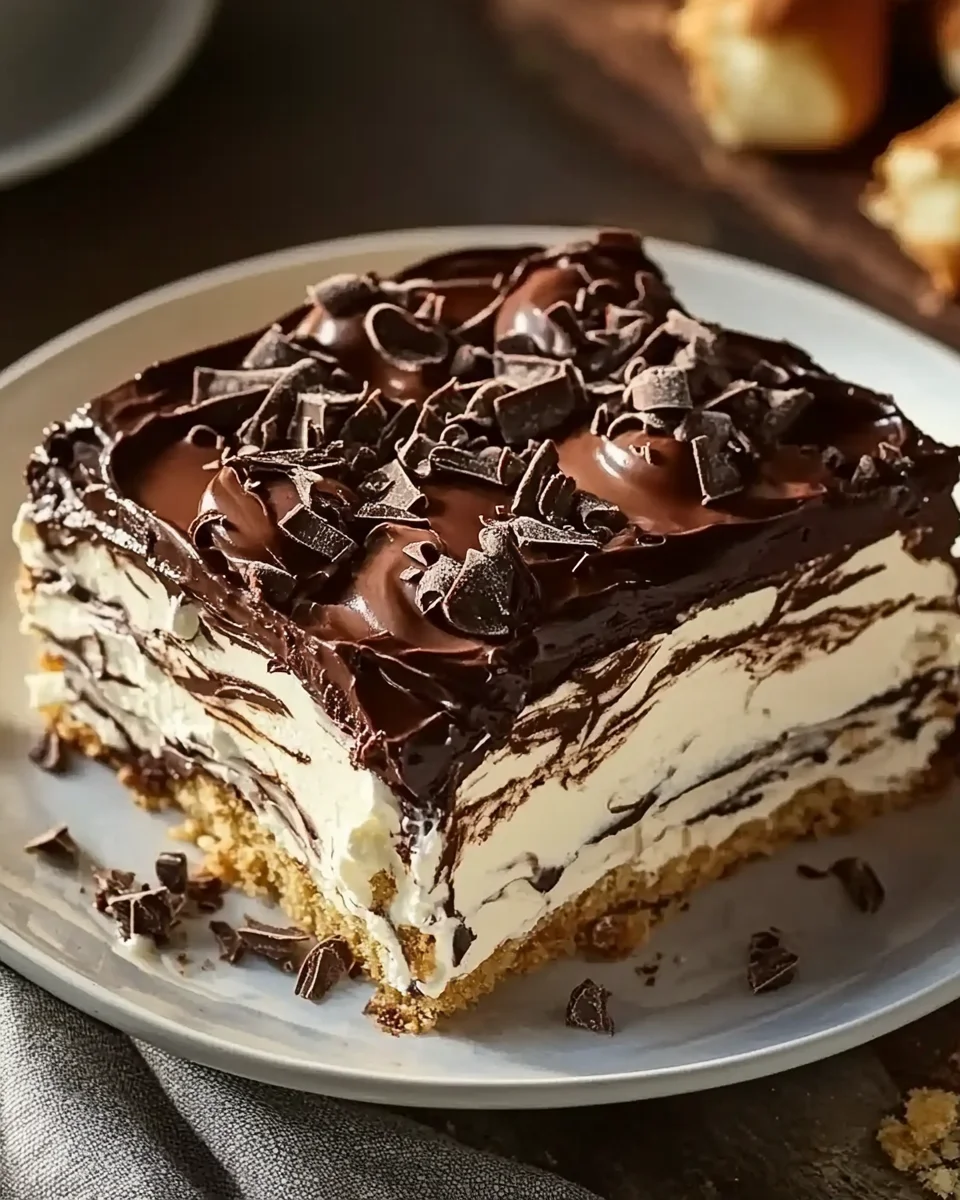
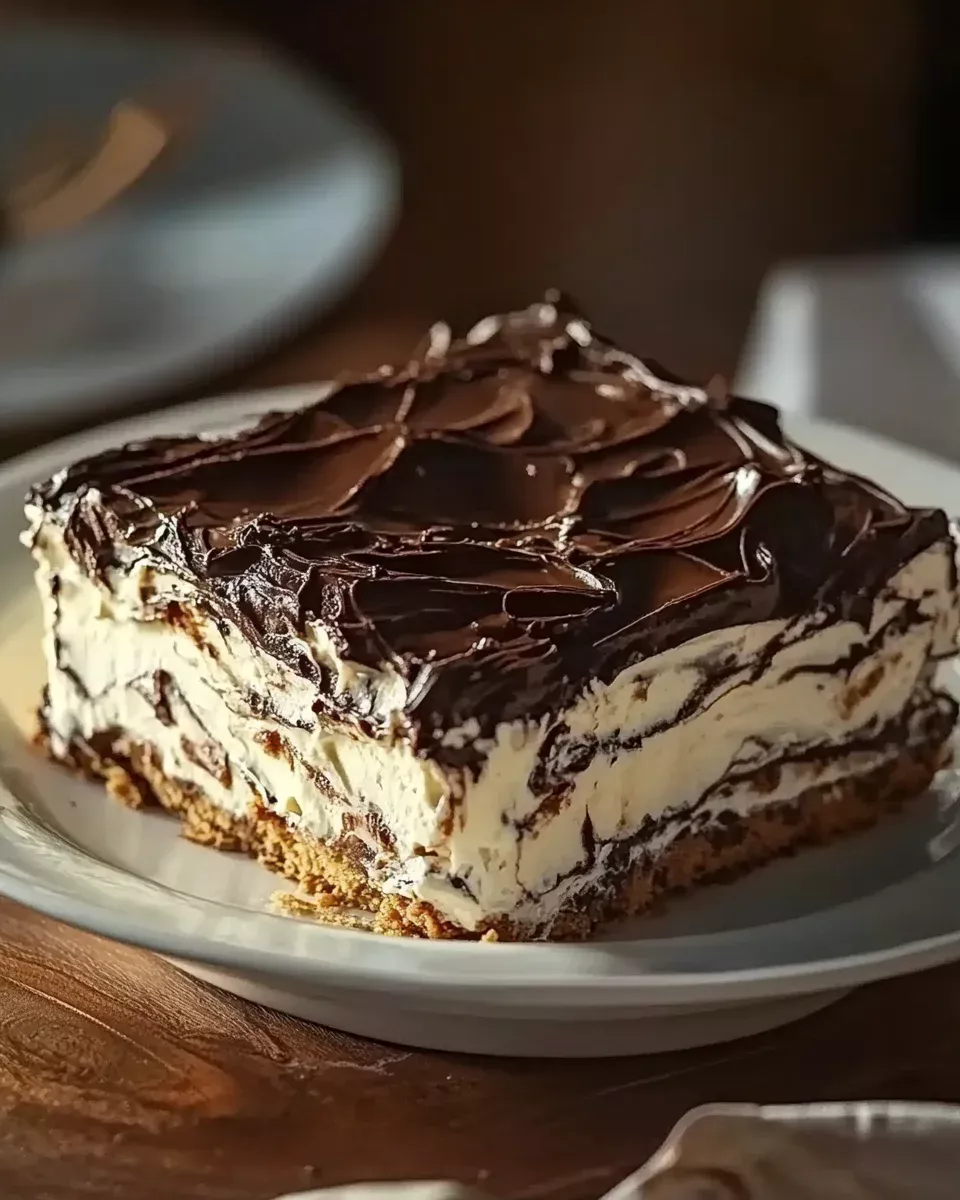
No-Bake Chocolate Éclair Cake: A Timeless Dessert for Every Occasion

A Sweet Memory in Every Bite

There’s something magical about certain desserts—they don’t just satisfy your sweet tooth, but they take you on a nostalgic journey. For me, the first time I had No-Bake Chocolate Éclair Cake was at a summer family gathering. My grandmother, who always had a knack for whipping up the most indulgent treats, placed a chilled dish on the table, covered in a glossy layer of chocolate frosting. I remember the way the first forkful melted in my mouth—the creamy vanilla pudding, the softened graham crackers, the rich chocolate topping—it was perfection.

Years later, as I searched for simple yet impressive desserts to make for my own family, this no-bake wonder resurfaced. It wasn’t just about the taste; it was about the feeling. The ease of preparation, the anticipation of waiting for it to set, and the joy of sharing it with loved ones made it an instant favorite in my household.

This cake is proof that you don’t need fancy techniques or complicated ingredients to create something extraordinary. Whether you’re making it for a potluck, a birthday, or just a quiet night in, it’s a dessert that never disappoints.

Why This Cake Stands Out

No Oven? No Problem!
The beauty of this dessert lies in its simplicity. No baking, no complicated steps—just a few ingredients layered together and left to chill. Whether you’re a seasoned baker or someone who avoids the oven altogether, this recipe is effortlessly achievable.

Layers of Flavor and Texture
Each layer plays a crucial role in making this cake a masterpiece. The graham crackers soften into a cake-like consistency, the vanilla pudding brings creaminess, and the rich chocolate frosting ties everything together with a decadent finish.

A Dessert for Any Season
While this cake is a summer staple due to its refreshing chilled texture, it’s also a hit during the holidays. No matter the occasion, it fits right in—a light yet satisfying treat after a heavy meal or a fun alternative to traditional cakes.

Tips for the Perfect No-Bake Éclair Cake

Choose Quality Ingredients
Since this recipe has only a handful of ingredients, their quality matters. Opt for good-quality instant pudding, fresh milk, and real butter for the frosting. If possible, use homemade whipped cream instead of store-bought whipped topping for an even richer taste.

Let It Chill Completely
Patience is key. The longer the cake sits in the refrigerator, the better the graham crackers absorb the pudding, creating a soft, cake-like texture. Overnight chilling is ideal for the best results.

Enhance the Flavor

  • Add a teaspoon of espresso powder to the chocolate frosting for a deeper, bolder chocolate taste.
  • Sprinkle crushed nuts on top for a bit of crunch.
  • Swap vanilla pudding for chocolate or banana-flavored pudding for a fun twist.

Serving Suggestions

  • Pair It With Fresh Fruits: Serve with fresh strawberries, raspberries, or bananas for a refreshing contrast.
  • Garnish with Style: A drizzle of caramel sauce, a dusting of cocoa powder, or chocolate shavings can take this cake to the next level.
  • Serve It Frozen: For a firmer, ice cream-like consistency, pop the cake in the freezer for an hour before serving.

Ingredients

For the Pudding Layer:

  • 2 (3.4 oz) boxes instant vanilla pudding mix
  • 3 cups cold milk
  • 1 (8 oz) container whipped topping, thawed
  • 1 box graham crackers

For the Chocolate Frosting:

  • 1/3 cup unsweetened cocoa powder
  • 1 cup powdered sugar
  • 2 tablespoons unsalted butter, melted
  • 3 tablespoons milk
  • 1 teaspoon vanilla extract

Directions

1. Whip Up the Creamy Pudding:

  • In a large bowl, whisk together the vanilla pudding mix and cold milk until smooth and thick.
  • Gently fold in the whipped topping to create a luscious, creamy mixture.

2. Build the Layers of Goodness:

  • In a 9×13-inch baking dish, arrange a single layer of graham crackers to cover the bottom.
  • Spread half of the pudding mixture evenly over the graham crackers.
  • Add another layer of graham crackers, followed by the remaining pudding mixture.
  • Finish with a final layer of graham crackers on top.

3. Create the Chocolatey Crown:

  • In a medium bowl, whisk together cocoa powder and powdered sugar.
  • Stir in melted butter, milk, and vanilla extract until smooth. Add more milk if needed for spreadability.

4. Bring It All Together:

  • Spread the chocolate frosting evenly over the top layer of graham crackers.
  • Cover and refrigerate for at least 4 hours, preferably overnight, to allow the layers to set.

5. Slice and Savor:

  • Once chilled, cut into 12 servings and enjoy this effortless, decadent dessert.

Nutritional Breakdown (Per Serving)

  • Calories: ~250-300
  • Carbohydrates: ~40g
  • Protein: ~3g
  • Fat: ~10g
  • Sugar: ~25g
  • Fiber: ~1g

This no-bake delight is perfect for any occasion—easy to make, rich in flavor, and guaranteed to impress!

Frequently Asked Questions

Can I Make This Cake Ahead of Time?
Yes! In fact, making it a day in advance is recommended. The extra time allows the layers to set properly, making it even more delicious.

How Long Does It Last in the Fridge?
If stored in an airtight container, this cake can last up to 4 days in the refrigerator. However, it’s best enjoyed within the first 48 hours when the texture is at its peak.

Can I Freeze It?
Yes, you can freeze it for up to two months. Just wrap it tightly with plastic wrap and aluminum foil to prevent freezer burn. Thaw in the refrigerator overnight before serving.

What If I Don’t Have Graham Crackers?
You can substitute graham crackers with digestive biscuits, vanilla wafers, or even ladyfingers. Each alternative will give the cake a slightly different texture but will work just as well.

Can I Make It Dairy-Free?
Absolutely! Swap out the milk for almond, oat, or coconut milk, and use a dairy-free whipped topping. For the frosting, choose a dairy-free butter alternative.

How Can I Make It Less Sweet?
If you prefer a less sweet dessert, reduce the powdered sugar in the frosting or use unsweetened cocoa powder to balance the sweetness. You can also opt for sugar-free pudding mix and graham crackers.

Can I Add Other Flavors?
Yes! A layer of sliced bananas or strawberries between the pudding layers adds freshness. A drizzle of peanut butter or caramel sauce between the layers can make it even more indulgent.

A Dessert That Feels Like Home

There’s something about No-Bake Chocolate Éclair Cake that makes it more than just a dessert—it’s a reminder of childhood treats, family gatherings, and the joy of sharing good food with loved ones.

Its simplicity is its charm, proving that some of the best desserts don’t require hours in the kitchen. Whether you’re serving it at a party or enjoying a slice with a cup of coffee on a quiet afternoon, this cake has a way of making any moment feel special.

So the next time you need a dessert that’s both easy and unforgettable, let this no-bake delight take center stage. After all, the best recipes aren’t just about taste—they’re about the memories they create.

aiting

No-Bake Chocolate Éclair Cake: A Timeless Dessert for Every Occasion

This No-Bake Chocolate Eclair Cake is the ultimate easy-to-make, crowd-pleasing dessert! Layers of creamy vanilla pudding, buttery graham crackers, and rich chocolate frosting come together effortlessly in this decadent treat. With no oven required, this is the perfect make-ahead dessert for potlucks, holidays, or whenever you’re craving something sweet!
Prep Time 15 minutes
Total Time 4 hours 15 minutes
Servings: 12 servings
Course: Dessert
Cuisine: American

Ingredients
  

For the Pudding Layer:
  • 2 3.4 oz boxes instant vanilla pudding mix
  • 3 cups cold milk
  • 1 8 oz container whipped topping, thawed
  • 1 box graham crackers
For the Chocolate Frosting:
  • 1/3 cup unsweetened cocoa powder
  • 1 cup powdered sugar
  • 2 tablespoons unsalted butter melted
  • 3 tablespoons milk
  • 1 teaspoon vanilla extract
  •  

Method
 

Whip Up the Creamy Pudding:
  1. In a large bowl, whisk together the vanilla pudding mix and cold milk until smooth and thick.
  2. Gently fold in the whipped topping to create a luscious, creamy mixture.
Build the Layers of Goodness:
  1. In a 9×13-inch baking dish, arrange a single layer of graham crackers to cover the bottom.
  2. Spread half of the pudding mixture evenly over the graham crackers.
  3. Add another layer of graham crackers, followed by the remaining pudding mixture.
  4. Finish with a final layer of graham crackers on top.
Create the Chocolatey Crown:
  1. In a medium bowl, whisk together cocoa powder and powdered sugar.
  2. Stir in melted butter, milk, and vanilla extract until smooth. Add more milk if needed for spreadability.
Bring It All Together:
  1. Spread the chocolate frosting evenly over the top layer of graham crackers.
  2. Cover and refrigerate for at least 4 hours, preferably overnight, to allow the layers to set.
Slice and Savor:
  1. Once chilled, cut into 12 servings and enjoy this effortless, decadent dessert.

Notes

  • For a twist, swap vanilla pudding for chocolate or butterscotch pudding.
  • Chilling overnight enhances the texture and flavor, making it even more delicious.
  • Store leftovers in the fridge for up to 3 days.
  • Try adding a sprinkle of crushed nuts or mini chocolate chips on top for extra texture!

Lentil Bread – A Gluten-Free Protein-Packed Delight

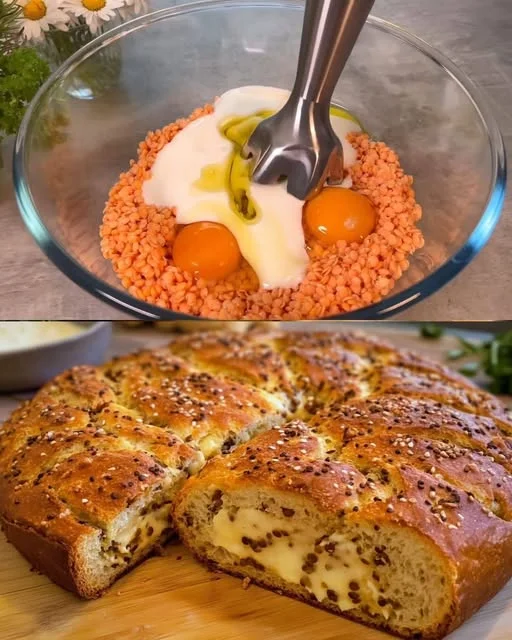
There is something truly comforting about the smell of fresh bread baking in the oven. It fills the kitchen with warmth, signaling that something nourishing and delicious is on its way. For many of us, bread is more than just food—it’s tradition, it’s family, it’s the foundation of so many meals. But what if you could enjoy a loaf that is not only soft and satisfying but also gluten-free, high in protein, and packed with nutrients? That’s where Lentil Bread comes in.

My journey with lentil bread started when I was searching for an alternative to regular bread that could provide more protein and fiber without the need for wheat flour. I grew up in a home where lentils were a staple—my grandmother would cook them into hearty soups, stews, and even patties. But using them in bread? That was something I had never tried.

One day, inspired by the simplicity of whole-food ingredients, I decided to experiment. The result was a beautifully soft, slightly dense, and incredibly flavorful bread that felt as comforting as a traditional loaf but with a rich, earthy depth from the lentils. With the addition of yogurt for moisture, eggs for structure, and feta cheese for a salty, creamy contrast, this bread became an instant favorite.

Now, every time I bake it, I’m reminded that food doesn’t have to be complicated to be nourishing. It’s a bread that celebrates simplicity, health, and tradition—a wholesome staple for anyone looking for something different yet deeply satisfying.

Why You’ll Love This Recipe

1. Naturally Gluten-Free and High in Protein

Unlike traditional bread, this lentil bread is completely flour-free and made from red lentils, which are rich in plant-based protein and fiber.

2. Soft, Moist, and Packed with Flavor

Thanks to yogurt, eggs, and feta cheese, this bread has a soft texture with a slight tanginess and a hint of saltiness from the cheese.

3. Easy to Make with Simple Ingredients

This recipe doesn’t require yeast or kneading, making it a quick and fuss-free alternative to traditional bread.

4. Perfect for a Healthy Diet

Rich in fiber, protein, and complex carbohydrates, this bread is ideal for those looking to stay full longer while maintaining a balanced diet.

5. Versatile and Customizable

You can enjoy this bread plain, toasted, or paired with sweet or savory toppings—and even customize it with herbs, seeds, or different cheeses.

Ingredients

IngredientQuantity
Red lentils2 cups (360g)
Large eggs3
Olive oil50g (3½ tbsp)
Yogurt1 glass (200g)
Feta cheese125g (crumbled or cubed)
Baking powder1 teaspoon
Salt½ teaspoon
Black pepper½ teaspoon
Cumin (optional)½ teaspoon

Directions

  1. Soak & Blend the Lentils – Rinse the red lentils and soak them in water for 2–3 hours. Drain and blend until smooth.
  2. Prepare the Batter – In a bowl, whisk eggs, yogurt, olive oil, baking powder, salt, and spices. Mix in the blended lentils and crumbled feta cheese.
  3. Bake to Perfection – Pour the batter into a greased loaf pan and bake in a preheated oven at 350°F (175°C) for 40–45 minutes, or until golden and firm.
  4. Cool & Serve – Let the bread cool before slicing. Serve warm with butter, hummus, or your favorite spread.

Nutritional Information (Per Slice – Approx. 1 of 10 Servings)

NutrientAmount
Calories190 kcal
Carbohydrates20 g
Protein10 g
Fat8 g
Saturated Fat2.5 g
Fiber4 g
Sugar2 g
Sodium220 mg

Tips for the Perfect Lentil Bread

1. Soak the Lentils for a Smooth Texture

Red lentils need to be soaked for at least 2–3 hours before blending. This makes them soft enough to create a smooth batter and ensures even baking.

2. Use a Blender or Food Processor

A good-quality blender or food processor is essential to break down the soaked lentils into a creamy batter without leaving any grainy texture.

3. Don’t Skip the Yogurt

Yogurt helps keep the bread moist and tender while adding a slight tang that complements the lentils beautifully.

4. Crumble the Feta Evenly

If you want little bursts of salty, creamy cheese throughout the bread, make sure to evenly distribute the feta before baking.

5. Let the Bread Cool Before Slicing

Once baked, allow the bread to cool for at least 15 minutes before slicing to ensure it holds its shape.

How to Enjoy Lentil Bread

This gluten-free lentil bread is incredibly versatile, making it a fantastic addition to any meal. Here are some delicious ways to enjoy it:

1. Toasted with Butter or Olive Oil

Crisp up a slice and spread it with butter or a drizzle of olive oil for a simple yet satisfying snack.

2. Served with Hummus or Avocado

Pair it with hummus or mashed avocado for a high-protein, fiber-rich meal.

3. As a Base for Open-Faced Sandwiches

Top it with smoked salmon, cheese, or fresh vegetables for a healthy, nutrient-dense sandwich.

4. Alongside Soups and Stews

The heartiness of this bread makes it the perfect companion to warm, comforting soups and stews.

5. Sweetened with Honey and Nuts

For a sweet twist, drizzle with honey and top with crushed nuts for a satisfying breakfast or dessert.

Frequently Asked Questions (FAQs)

Q: Can I use green or brown lentils instead of red lentils?

Red lentils are best for this recipe because they cook quickly and blend into a smooth batter. Green or brown lentils may result in a grainier texture.

Q: Do I need to cook the lentils before using them?

No, soaking them is enough! Cooking the lentils would make the batter too wet and affect the texture of the bread.

Q: Can I make this recipe dairy-free?

Yes! Replace the yogurt with a dairy-free yogurt or coconut cream and omit the feta cheese or use a plant-based alternative.

Q: How long does lentil bread last?

Store it in an airtight container at room temperature for up to 2 days or in the fridge for up to 5 days. You can also freeze slices and toast them when needed.

Q: Can I use this bread for sandwiches?

Yes! It holds up well for sandwiches, though it is slightly denser than regular bread. It works especially well for open-faced sandwiches.

Q: Can I add herbs or seeds?

Absolutely! Fresh or dried herbs like rosemary, thyme, or basil add great flavor. You can also mix in seeds like chia, flax, or sunflower seeds for extra texture and nutrients.

Q: Can I make this bread vegan?

Since eggs help bind the ingredients together, you would need a substitute like flax eggs (1 tablespoon ground flaxseed + 3 tablespoons water per egg). However, the texture may be slightly different.

Q: What’s the best way to reheat lentil bread?

For best results, reheat slices in the toaster or oven at 350°F (175°C) for 5 minutes to regain their crispness.

Why This Lentil Bread Deserves a Place in Your Kitchen

Few recipes bring together simplicity, nutrition, and deliciousness the way this Lentil Bread does. It’s a healthy, gluten-free alternative to traditional bread, yet it doesn’t compromise on flavor or texture.

✔ Naturally gluten-free and packed with plant-based protein
✔ Soft, moist, and flavorful with a slight tang from yogurt and feta
✔ No yeast, no kneading, and no complicated techniques
✔ Customizable with different flavors, herbs, or seeds
✔ Perfect for sandwiches, toast, or pairing with soups and dips

If you’re looking for a nutritious homemade bread that’s easy to make and filled with wholesome ingredients, this recipe is for you. Whether you’re following a gluten-free diet or simply looking for a more nourishing way to enjoy bread, this lentil bread will quickly become a favorite in your home.

Soak your lentils, preheat your oven, and get ready to enjoy a slice of hearty, protein-packed goodness!

Amal

Lentil Bread – A Gluten-Free Protein-Packed Delight

This Lentil Bread is a soft, hearty, and naturally gluten-free alternative to traditional bread. Made with protein-rich red lentils, creamy yogurt, and savory feta cheese, it’s packed with nutrients while remaining light and flavorful. Perfect for sandwiches, toast, or served alongside soups and salads, this wholesome, flourless bread is easy to make and incredibly satisfying.
Prep Time 10 minutes
Cook Time 45 minutes
Total Time 55 minutes
Servings: 10 slices
Course: Bread
Cuisine: International

Ingredients
  

For the Lentil Bread:
  • 2 cups 360g red lentils
  • 3 large eggs
  • 50 g 3½ tbsp olive oil
  • 1 glass 200g yogurt
  • 125 g feta cheese crumbled or cubed
  • 1 teaspoon baking powder
  • ½ teaspoon salt
  • ½ teaspoon black pepper
  • ½ teaspoon cumin optional

Method
 

  1. Soak & Blend the Lentils – Rinse the lentils and soak them in water for 2–3 hours. Drain and blend until smooth.
  2. Prepare the Batter – In a large bowl, whisk together eggs, yogurt, olive oil, baking powder, salt, and black pepper. Stir in the blended lentils and crumbled feta.
  3. Bake the Bread – Pour the mixture into a greased loaf pan and bake in a preheated oven at 350°F (175°C) for 40–45 minutes, or until golden brown and firm.
  4. Cool & Serve – Let the bread cool for at least 15 minutes before slicing. Enjoy warm or toasted with your favorite spreads.

Notes

  • For extra flavor, add chopped herbs like rosemary, thyme, or basil to the batter.
  • If you prefer a firmer texture, refrigerate the loaf for a few hours before slicing.
  • Store in an airtight container in the fridge for up to 5 days or freeze for longer storage.
  • Delicious with hummus, avocado, or soft cheese for a satisfying snack.

Golden Puff Pastry Apple Slices – A Flaky and Sweet Delight

Some desserts have a way of transporting us back to cherished moments, reminding us of the warmth of home and the joy of simple pleasures. For me, puff pastry apple slices are one of those comforting treats that never fail to bring back childhood memories.

I remember the aroma of cinnamon and apples filling the kitchen as my grandmother baked her famous apple pastries. She never used complicated recipes—just buttery pastry, fresh apples, and a sprinkle of sugar and spice. The magic happened in the oven, where the puff pastry turned golden and flaky, encasing the tender, caramelized apples inside.

Every time I make this recipe, it brings back those moments of sitting by the kitchen table, eagerly waiting for the pastries to cool just enough to take the first bite. It’s amazing how something so simple can be so deeply satisfying. Whether you’re making these for a holiday gathering, a cozy weekend treat, or just because you’re craving something sweet, these puff pastry apple slices are sure to become a favorite in your home too.

Why You’ll Love This Recipe

1. Quick and Easy to Make

With store-bought puff pastry, there’s no need for hours of preparation. This recipe comes together in just a few simple steps, making it perfect for both beginner and experienced bakers.

2. Classic Flavors with a Warm, Spiced Twist

Crisp, buttery pastry meets the comforting flavors of cinnamon, sugar, and fresh apples, creating a balance of sweetness and warmth in every bite.

3. Flaky, Buttery, and Irresistible

Puff pastry bakes into delicate, golden layers, making the perfect contrast to the soft, juicy apple filling.

4. Versatile for Any Occasion

These pastries work well for breakfast, dessert, or an afternoon snack. Pair them with coffee, tea, or even a scoop of vanilla ice cream for an indulgent treat.

5. Customizable with Endless Variations

This recipe serves as a great base for creativity. Add nuts, caramel, or even a drizzle of honey for extra texture and flavor.

Ingredients

For the Apple Slices

IngredientQuantity
Apples2 to 3 large
Puff pastry2 rolls (approx. 500g / 17.6 oz)
Egg, whisked1
Sugar100g (½ cup)
Cinnamon1 teaspoon (5g)

Optional for Garnish

IngredientQuantity (Optional)
Powdered sugarFor dusting
Caramel sauceFor drizzling
Slivered almondsFor extra crunch

Directions

  1. Prepare the Apples – Peel, core, and slice the apples thinly. Toss them with sugar and cinnamon until well coated.
  2. Roll Out the Pastry – Unroll the puff pastry sheets and cut them into equal rectangles or strips.
  3. Assemble the Pastries – Arrange apple slices on half of the pastry pieces, then place another pastry layer on top. Press the edges together with a fork to seal.
  4. Brush & Bake – Brush the tops with whisked egg for a golden finish. Bake in a preheated oven at 375°F (190°C) for 20–25 minutes, or until golden brown and flaky.
  5. Garnish & Serve – Let the pastries cool slightly before dusting with powdered sugar or drizzling with caramel.

Nutritional Information (Per Serving – Approx. 1 Slice)

NutrientAmount
Calories250 kcal
Carbohydrates35 g
Protein4 g
Fat10 g
Saturated Fat5 g
Fiber2 g
Sugar15 g
Sodium120 mg

Secrets to the Perfect Puff Pastry Apple Slices

1. Choose the Right Apples

The type of apple you use affects the texture and flavor of the final dish. Granny Smith, Honeycrisp, or Pink Lady apples hold up well during baking, offering a balance of tartness and sweetness.

2. Keep the Puff Pastry Cold

For the best results, work with chilled puff pastry. Warm dough becomes sticky and won’t puff up properly in the oven. If needed, refrigerate it for 10 minutes before handling.

3. Thinly Slice the Apples

Thin, even apple slices bake faster and soften perfectly, ensuring every bite has a tender texture inside the crispy pastry.

4. Don’t Overload the Pastry

Too many apples can lead to soggy pastry. A single layer of apples allows the pastry to stay crisp and flaky.

5. Egg Wash for a Golden Crust

Brushing the pastry with a whisked egg before baking enhances its golden color and gives it a bakery-style shine.

6. Let Them Cool Slightly Before Serving

These pastries are best enjoyed warm but not piping hot. Letting them cool for a few minutes allows the filling to settle while keeping the pastry crisp.

Serving Suggestions – How to Elevate Your Apple Pastries

These flaky apple slices are delicious on their own, but here are some ways to make them even more special:

1. Dust with Powdered Sugar

A light dusting of powdered sugar adds a touch of sweetness and enhances the presentation.

2. Drizzle with Caramel or Honey

For extra indulgence, drizzle with homemade caramel sauce or a spoonful of warm honey.

3. Serve with Ice Cream or Whipped Cream

A scoop of vanilla ice cream or a dollop of whipped cream makes these pastries even more decadent.

4. Add Nuts for Extra Crunch

Sprinkle chopped walnuts, pecans, or almonds over the apples before baking for added texture.

5. Pair with Coffee or Tea

Enjoy these puff pastry apple slices with a cup of coffee, chai tea, or spiced cider for a cozy afternoon treat.

Frequently Asked Questions (FAQs)

Q: Can I make these apple pastries ahead of time?

Yes! You can assemble them a few hours in advance, store them in the refrigerator, and bake when ready. They are best served fresh, but leftovers can be reheated in the oven.

Q: Can I use frozen puff pastry?

Absolutely! If using frozen puff pastry, thaw it in the refrigerator for a few hours before rolling it out.

Q: How do I prevent the puff pastry from getting soggy?

  • Use firm apples that don’t release too much juice.
  • Toss apple slices with cinnamon and sugar, then drain any excess liquid before placing them on the pastry.
  • Bake at a high temperature (375°F/190°C) so the pastry crisps up quickly.

Q: Can I use a different type of fruit?

Yes! This recipe works well with pears, peaches, or berries for a different twist on the classic.

Q: How long do these pastries stay fresh?

They are best enjoyed fresh out of the oven, but they can be stored in an airtight container at room temperature for up to 2 days. Reheat in the oven for a few minutes to crisp them up.

Q: Can I freeze the baked pastries?

Yes! Once baked and cooled, place them in an airtight container and freeze for up to 2 months. Reheat in the oven at 350°F (175°C) for 10 minutes before serving.

Q: Can I add a glaze instead of caramel or powdered sugar?

Yes! A simple glaze made from powdered sugar and milk or lemon juice adds a nice finishing touch.

Why These Apple Pastries Deserve a Spot in Your Recipe Collection

These Golden Puff Pastry Apple Slices are the perfect example of how simple ingredients can create something truly special. The combination of flaky, buttery pastry, spiced apples, and a touch of sweetness makes them an instant classic.

✔ Quick and easy with minimal ingredients
✔ Crispy, golden, and bakery-quality
✔ Warm, spiced flavors perfect for any season
✔ Versatile and customizable
✔ A nostalgic, homemade treat that feels like a hug

If you’re looking for an effortless yet impressive dessert that will delight family and friends, this is it. Whether enjoyed fresh from the oven with a hot cup of tea or served at a special gathering, these flaky apple pastries will bring warmth, comfort, and a taste of home to every bite.

So grab your apples and puff pastry, preheat your oven, and enjoy the simple pleasure of homemade baking!

Amal

Golden Puff Pastry Apple Slices – A Flaky and Sweet Delight

These Puff Pastry Apple Slices are a perfect blend of flaky, buttery layers and sweet cinnamon-spiced apples. With just a handful of ingredients, you can create a crispy, golden pastry filled with tender, caramelized apples—ideal for breakfast, dessert, or a cozy afternoon treat. Quick, easy, and absolutely irresistible!
Prep Time 15 minutes
Cook Time 25 minutes
Total Time 40 minutes
Servings: 4 servings
Course: Dessert
Cuisine: International

Ingredients
  

For the Apple Slices:
  • 2 to 3 large apples
  • 2 rolls of puff pastry approx. 500g / 17.6 oz
  • 1 egg whisked
  • 100 g ½ cup sugar
  • 1 teaspoon 5g cinnamon
Optional for Garnish:
  • Powdered sugar for dusting
  • Caramel sauce for drizzling
  • Slivered almonds for crunch

Method
 

  1. Prepare the Apples – Peel, core, and slice the apples thinly. Toss them with sugar and cinnamon.
  2. Roll Out the Puff Pastry – Unroll the puff pastry and cut it into even rectangles or strips.
  3. Assemble the Slices – Place apple slices on half of the pastry pieces, then cover with another pastry layer. Press the edges together with a fork to seal.
  4. Brush & Bake – Brush the tops with whisked egg and bake in a preheated oven at 375°F (190°C) for 20–25 minutes, or until golden brown.
  5. Garnish & Serve – Let cool slightly, then dust with powdered sugar or drizzle with caramel sauce.

Notes

  • For extra crispiness, chill the assembled pastries for 10 minutes before baking.
  • To prevent sogginess, use firm apples like Granny Smith or Honeycrisp that don’t release too much juice.
  • Reheat leftovers in the oven at 350°F (175°C) for a few minutes to restore crispiness.
  • Pair with ice cream or whipped cream for an indulgent twist.

Zesty Lime-Infused Apple Cake – A Refreshing Citrus Delight

Baking has always been a comforting ritual in my family. The smell of apples and warm spices filling the kitchen was a sign that something special was in the oven. But one day, I decided to take a classic apple cake and give it a bright, citrusy twist—and that’s how this Lime-Scented Apple Cake was born.

I first made this cake on a rainy afternoon, looking for a way to bring a little sunshine into the day. Apples and cinnamon were the usual go-to, but I wanted something lighter, fresher, and with a unique flavor profile. Lime seemed like the perfect addition—its vibrant zest and juice balanced the sweetness of the apples and added a fragrant, refreshing touch.

The first bite was everything I hoped for. The cake was moist, tender, and delicately sweet, with just the right amount of citrus tang. The apples softened beautifully while baking, adding bursts of natural sweetness. It quickly became a favorite in my home, requested for weekend brunches, afternoon tea, and even special occasions.

This lime-infused apple cake is proof that small changes can elevate a classic recipe into something extraordinary. Whether you’re baking for yourself, family, or friends, this cake is sure to be a bright and flavorful treat that everyone will love.

Why You’ll Love This Recipe

1. A Unique Twist on a Classic

Apple cakes are a beloved staple, but the addition of lime zest and juice adds an unexpected freshness that makes this recipe stand out.

2. Light, Moist, and Flavorful

With beaten egg whites folded into the batter, this cake has a light and fluffy texture, making it soft yet satisfyingly rich.

3. Easy to Make with Simple Ingredients

You don’t need any fancy ingredients—just flour, eggs, butter, apples, and lime to create a cake that tastes like something from a bakery.

4. Perfect for Any Occasion

Whether served as a breakfast cake, an afternoon snack, or a light dessert, this cake is versatile and always a crowd-pleaser.

5. Naturally Balanced Flavors

The sweetness of apples and the tangy brightness of lime create a perfect harmony, making this cake deliciously refreshing without being overly sweet.

Ingredients

For the Cake Batter:

IngredientQuantity
Egg whites2 (reserved from custard layer)
Eggs2 whole
Sugar2/5 cup (100g)
All-purpose flour1 cup (125g)
Baking powder1 teaspoon
Salt1/4 teaspoon
Unsalted butter, melted1/4 cup (60g)
Lime zest1 teaspoon
Lime juice2 tablespoons
Vanilla extract1 teaspoon
Apples, peeled and sliced2 medium

Directions

  1. Preheat & Prepare – Preheat oven to 350°F (175°C). Grease and line a cake pan with parchment paper.
  2. Whisk the Eggs – In a large bowl, beat the egg whites until soft peaks form. In another bowl, whisk whole eggs with sugar until light and fluffy.
  3. Combine the Ingredients – Fold the beaten egg whites into the egg-sugar mixture. Add melted butter, lime zest, and lime juice. Gently mix in flour, baking powder, and salt.
  4. Assemble the Cake – Pour the batter into the prepared pan and layer the sliced apples evenly on top.
  5. Bake to Perfection – Bake for 30–35 minutes until golden and a toothpick inserted in the center comes out clean.
  6. Cool & Serve – Let the cake cool before slicing. Dust with powdered sugar or drizzle with a lime glaze for extra flavor.

Nutritional Information (Per Slice – Approx. 1 of 8 Servings)

NutrientAmount
Calories210 kcal
Carbohydrates35 g
Protein4 g
Fat7 g
Saturated Fat4 g
Fiber2 g
Sugar18 g
Sodium120 mg

Secrets to a Perfect Lime-Scented Apple Cake

1. Choose the Right Apples

For the best flavor and texture, use firm, slightly tart apples like Granny Smith, Honeycrisp, or Pink Lady. They hold their shape well during baking and balance the sweetness of the cake.

2. Don’t Skip the Lime Zest

Most of the lime’s fragrance and depth of flavor come from its zest, so make sure to use fresh limes and zest them just before adding them to the batter.

3. Whip the Egg Whites Separately

Separating the egg whites and beating them before folding them into the batter creates a light and airy texture, ensuring the cake stays soft.

4. Use Melted Butter for Extra Moisture

Unlike creamed butter, melted butter helps keep the cake extra moist and tender without making it too dense.

5. Let the Cake Cool Before Slicing

Lime juice in the batter adds extra moisture, so letting the cake fully cool before cutting ensures clean slices and the best texture.

How to Serve This Cake

This lime-scented apple cake is delicious on its own, but here are a few ways to make it even more special:

1. With a Dusting of Powdered Sugar

A light dusting of powdered sugar enhances the cake’s sweetness without overpowering the citrus notes.

2. Topped with Whipped Cream or Greek Yogurt

A dollop of lightly sweetened whipped cream or tangy Greek yogurt complements the bright lime flavor.

3. Drizzled with a Simple Lime Glaze

For an extra burst of citrus, mix powdered sugar with fresh lime juice to create a thin glaze to drizzle over the cake.

4. Served with Fresh Berries

Pairing this cake with strawberries, raspberries, or blueberries adds a fresh, fruity contrast.

5. Warmed Up with a Scoop of Ice Cream

For a more indulgent treat, serve warm slices of cake with vanilla or coconut ice cream for a tropical touch.

Frequently Asked Questions (FAQs)

Q: Can I make this cake ahead of time?

Yes! This cake stays fresh for up to 3 days at room temperature when stored in an airtight container. It also tastes even better the next day as the flavors develop.

Q: Can I freeze this cake?

Absolutely! Wrap individual slices or the whole cake tightly in plastic wrap and freeze for up to 2 months. Thaw at room temperature before serving.

Q: Can I use lemons instead of limes?

Yes! Lemons provide a similar citrus brightness, though they have a slightly different tangy profile.

Q: What type of flour works best?

All-purpose flour works perfectly, but for a lighter texture, you can substitute cake flour for a more delicate crumb.

Q: Can I make this cake gluten-free?

Yes! Simply replace the flour with a 1:1 gluten-free flour blend, and the results will be just as delicious.

Q: How do I prevent the apples from sinking?

To keep apple slices evenly distributed, toss them in a tablespoon of flour before folding them into the batter.

Q: Can I add spices like cinnamon or nutmeg?

Definitely! A pinch of cinnamon or nutmeg enhances the apple flavor without overpowering the lime.

Q: Can I use a different type of sweetener?

Yes! You can substitute sugar with coconut sugar, honey, or maple syrup, but keep in mind that liquid sweeteners may slightly alter the texture.

Why This Cake Should Be Your Next Bake

This Zesty Lime-Infused Apple Cake is more than just a dessert—it’s a celebration of fresh, vibrant flavors. The combination of sweet apples and bright citrus makes every bite refreshing, comforting, and unforgettable.

✔ Light, moist, and full of fresh flavors
✔ Simple ingredients, easy-to-follow recipe
✔ Perfect for breakfast, tea time, or dessert
✔ A unique twist on a traditional apple cake
✔ Customizable with different fruits, spices, or toppings

Whether you’re baking for a gathering, a weekend treat, or just because you love citrusy desserts, this cake will quickly become a favorite. It’s proof that with a few simple ingredients and a touch of creativity, you can create something truly special.

So preheat your oven, grab some apples and limes, and enjoy a slice of homemade happiness.

Amal

Zesty Lime-Infused Apple Cake – A Refreshing Citrus Delight

This Lime-Scented Apple Cake is a delightful twist on the classic apple cake, featuring tender apples, a hint of lime zest, and a light, fluffy texture. The citrusy aroma perfectly complements the natural sweetness of the apples, making this cake moist, refreshing, and absolutely irresistible. Perfect for an afternoon tea or a light dessert, this cake is sure to impress!
Prep Time 15 minutes
Cook Time 35 minutes
Total Time 50 minutes
Servings: 8 servings
Course: Dessert
Cuisine: International

Ingredients
  

For the Cake Batter:
  • 2 egg whites reserved from custard layer
  • 2 whole eggs
  • 2/5 cup 100g sugar
  • 1 cup 125g all-purpose flour
  • 1 teaspoon baking powder
  • ¼ teaspoon salt
  • ¼ cup 60g unsalted butter, melted
  • 1 teaspoon lime zest
  • 2 tablespoons lime juice
  • 1 teaspoon vanilla extract
  • 2 medium apples peeled and sliced

Method
 

  1. Preheat & Prepare – Preheat oven to 350°F (175°C) and grease a cake pan with butter or line it with parchment paper.
  2. Whisk the Eggs – In a bowl, beat the egg whites until soft peaks form. In another bowl, whisk the whole eggs with sugar until light and fluffy.
  3. Mix the Batter – Fold the beaten egg whites into the egg-sugar mixture. Add melted butter, lime zest, lime juice, and vanilla extract. Gently mix in the flour, baking powder, and salt.
  4. Assemble & Bake – Pour the batter into the prepared pan and arrange the sliced apples on top. Bake for 30–35 minutes or until a toothpick inserted in the center comes out clean.
  5. Cool & Serve – Let the cake cool before slicing. Dust with powdered sugar or drizzle with a lime glaze for extra flavor.

Notes

  • Use tart apples like Granny Smith or Honeycrisp for the best flavor balance.
  • Toss apple slices with a little flour to prevent them from sinking to the bottom.
  • Store in an airtight container at room temperature for up to 3 days or refrigerate for longer freshness.
  • Serve with whipped cream, Greek yogurt, or a scoop of vanilla ice cream for an extra indulgence.

Crisp Cabbage & Apple Salad with Zesty Lemon Dressing

Some recipes are more than just food—they bring back memories, traditions, and moments of warmth. This Cabbage and Apple Salad is one of those dishes for me. It reminds me of late summer afternoons at my grandmother’s house, where she would prepare fresh salads using whatever seasonal produce she had on hand. Her salads were always simple yet full of flavor, combining crisp vegetables, a touch of sweetness, and a bright dressing that made every bite refreshing.

She always believed that a great salad should be more than just a side dish—it should be a perfect balance of textures and flavors. The crunch of cabbage, the natural sweetness of apples and carrots, the refreshing bite of cucumber, and the zesty tang of lemon dressing all come together in this recipe. It’s a dish that proves that healthy food can be incredibly delicious and satisfying.

Whenever I make this salad, I feel like I’m carrying on a tradition of celebrating fresh ingredients in their purest form. It’s a salad that’s perfect for any occasion—whether served at a summer picnic, alongside a hearty dinner, or as a light, refreshing meal on its own.

Why You’ll Love This Recipe

1. Fresh, Light, and Full of Flavor

This salad is incredibly refreshing with its crunchy vegetables, crisp apples, and tangy lemon dressing. Every bite is a burst of brightness.

2. Packed with Nutrients

Cabbage is rich in fiber, vitamin C, and antioxidants, while apples add natural sweetness and extra vitamins. Carrots provide beta-carotene, and the lemon dressing enhances digestion and boosts immunity.

3. Quick and Easy to Make

With just a few ingredients and minimal prep time, this salad comes together in under 10 minutes—perfect for busy days or last-minute meal prep.

4. Versatile and Customizable

This salad is delicious on its own, but you can easily customize it with additional ingredients like nuts, dried fruit, or different dressings to suit your taste.

5. A Perfect Side Dish or Standalone Meal

Pair it with grilled chicken, fish, or a hearty grain like quinoa for a complete meal, or enjoy it as a refreshing side dish with any main course.

Ingredients

IngredientQuantity
Cabbage, shredded1/3 portion
Carrot, julienned or grated1 large
Cucumber, julienned or thinly sliced1
Apple, julienned or thinly sliced1
Lemon juice2 tablespoons
Olive oil1 tablespoon
Honey (or maple syrup)1 teaspoon
SaltTo taste
Black pepperTo taste
Fresh parsley, chopped (optional)1 tablespoon

Directions

  1. Prepare the Vegetables – Shred the cabbage, julienne or grate the carrot, and thinly slice the cucumber and apple.
  2. Make the Dressing – In a small bowl, whisk together lemon juice, olive oil, honey, salt, and black pepper.
  3. Toss Everything Together – Combine all the ingredients in a large bowl, drizzle with the dressing, and toss until evenly coated.
  4. Serve & Enjoy – Garnish with fresh parsley if desired and serve immediately for a crisp and refreshing salad.

Nutritional Information (Per Serving – Approx. 1 Cup)

NutrientAmount
Calories80 kcal
Carbohydrates12 g
Protein1.5 g
Fat3.5 g
Fiber3 g
Sugar7 g
Sodium80 mg

Tips for the Best Cabbage and Apple Salad

1. Use Fresh, Crisp Ingredients

For the best texture, choose fresh, firm cabbage, crunchy apples, and crisp cucumbers. Avoid wilted cabbage or overly soft apples.

2. Slice Everything Evenly

Thin, uniform slices ensure that every bite has the perfect balance of flavors and textures. A sharp knife or mandoline slicer works best.

3. Let the Salad Sit for a Few Minutes

Allowing the salad to rest for 5–10 minutes after mixing helps the flavors meld together while keeping everything crisp.

4. Adjust the Sweetness and Acidity to Your Liking

If you prefer a sweeter salad, add a drizzle of honey or a handful of raisins. If you like it tangier, increase the lemon juice or add a splash of apple cider vinegar.

5. Add a Crunchy Element

For extra texture, toss in toasted almonds, walnuts, or sunflower seeds just before serving.

Delicious Variations & Additions

1. Creamy Cabbage and Apple Salad

Mix in Greek yogurt or mayonnaise with the dressing for a richer, creamier texture.

2. Spiced Autumn Version

Add a pinch of cinnamon and nutmeg, along with dried cranberries and pecans, for a fall-inspired salad.

3. Asian-Inspired Twist

Swap lemon juice for rice vinegar, add sesame seeds, and toss in shredded red cabbage and a drizzle of sesame oil for an Asian-style slaw.

4. Protein-Packed Option

Make it a complete meal by adding grilled chicken, chickpeas, or crumbled feta cheese.

5. Avocado and Herb Infusion

Mix in sliced avocado and fresh herbs like mint or cilantro for a creamy, herbaceous variation.

What to Serve with This Salad

This light and crisp salad pairs well with a variety of dishes:

1. Grilled Proteins

Serve alongside grilled chicken, fish, or shrimp for a healthy, balanced meal.

2. Sandwiches or Wraps

This salad makes a great companion to sandwiches, wraps, or burgers for added freshness.

3. Soups or Stews

Pair it with hearty soups like lentil, minestrone, or butternut squash soup for a contrast of textures.

4. Grain Bowls

Mix it into a quinoa or farro bowl with nuts and seeds for an extra-filling dish.

5. Holiday or BBQ Side

This salad is a perfect side dish for holiday feasts or summer barbecues, bringing a refreshing contrast to rich mains.

FAQs: Everything You Need to Know

Q: Can I make this salad ahead of time?

Yes! This salad stays fresh in the fridge for up to 24 hours. Store it in an airtight container and toss it again before serving to refresh the flavors.

Q: What type of apple works best?

Crisp, slightly tart apples like Granny Smith, Honeycrisp, or Pink Lady work best, as they hold their texture and balance the sweetness.

Q: Can I use red cabbage instead of green?

Absolutely! Red cabbage adds a pop of color and a slightly stronger flavor, making the salad even more vibrant.

Q: What if I don’t have honey?

You can substitute honey with maple syrup, agave, or even a teaspoon of sugar for a touch of sweetness.

Q: Can I make this salad vegan?

Yes! This salad is naturally vegan. Just ensure your dressing ingredients, like honey, are plant-based or replace it with maple syrup or agave.

Q: How do I keep apples from browning?

Toss the sliced apples with a bit of lemon juice before adding them to the salad. This helps preserve their color and freshness.

Q: Can I add cheese to this salad?

Yes! Crumbled feta, goat cheese, or shredded parmesan complement the flavors beautifully.

Q: How can I make it more filling?

Adding chickpeas, avocado, or cooked quinoa will turn this salad into a more substantial meal.

Why This Salad is a Must-Try

This Crisp Cabbage & Apple Salad with Zesty Lemon Dressing is a dish that proves healthy food doesn’t have to be boring. With its perfect blend of crunch, sweetness, and tangy citrus, it’s a salad that refreshes, nourishes, and satisfies.

✔ Quick and easy to make
✔ Naturally healthy, vegan, and gluten-free
✔ Full of vitamins, fiber, and antioxidants
✔ Perfect as a light meal or a side dish
✔ Easily customizable to fit any season or occasion

So the next time you’re looking for a vibrant, flavorful, and nutritious salad, give this recipe a try. Whether you serve it as a side, a meal, or a refreshing snack, this salad will bring a burst of freshness to your table.

Amal

Crisp Cabbage & Apple Salad with Zesty Lemon Dressing

This Crisp Cabbage & Apple Salad is a refreshing mix of crunchy cabbage, sweet apples, and a tangy lemon dressing. It’s light, healthy, and bursting with fresh flavors, making it the perfect side dish or standalone salad. Whether paired with grilled meats or enjoyed on its own, this salad is a delicious way to add color and nutrients to your meal.
Prep Time 10 minutes
Total Time 10 minutes
Servings: 4 servings
Course: Salad
Cuisine: International

Ingredients
  

For the Salad:
  • 1/3 portion cabbage shredded
  • 1 large carrot julienned or grated
  • 1 cucumber julienned or thinly sliced
  • 1 apple julienned or thinly sliced
For the Lemon Dressing:
  • 2 tablespoons lemon juice
  • 1 tablespoon olive oil
  • 1 teaspoon honey or maple syrup
  • Salt to taste
  • Black pepper to taste
  • 1 tablespoon fresh parsley chopped (optional)

Method
 

  1. Prepare the Salad – Shred the cabbage, julienne or grate the carrot, and slice the cucumber and apple.
  2. Make the Dressing – In a small bowl, whisk together lemon juice, olive oil, honey, salt, and black pepper.
  3. Toss & Serve – In a large bowl, combine all the salad ingredients, drizzle with the dressing, and toss until evenly coated.
  4. Garnish & Enjoy – Sprinkle with fresh parsley if desired and serve immediately.

Notes

  • For extra crunch, add chopped nuts like walnuts or almonds.
  • To prevent apples from browning, toss them in a little lemon juice before adding to the salad.
  • Make it heartier by adding feta cheese or chickpeas.
  • Store leftovers in an airtight container for up to 24 hours in the fridge.

Gourmet Stuffed Chicken Legs with Melted Cheese & Pineapple Glaze

There is something deeply satisfying about taking a humble ingredient like chicken legs and turning it into a dish that feels indulgent and sophisticated. I still remember the first time I made stuffed chicken legs—it was an experiment, inspired by a dish I had at a small bistro that specialized in elevating classic comfort foods.

The moment I sliced into the perfectly golden chicken, revealing the gooey melted cheese inside, I knew I had stumbled upon something special. The combination of juicy chicken, creamy cheese, and the slight crispness from pan-searing made it rich and satisfying, yet still balanced. But what truly made the dish unforgettable was the sweet and tangy pineapple glaze drizzled over the top. The hint of natural sweetness from the fruit, combined with a touch of soy sauce and honey, created an irresistible contrast to the savory, smoky chicken.

Since then, this Gourmet Stuffed Chicken Legs Recipe has become a go-to for special dinners—whether it’s a cozy meal at home or an occasion where I want to impress guests without spending hours in the kitchen. The best part? It looks elegant but is surprisingly easy to make.

Why You’ll Love This Recipe

1. A Perfect Balance of Flavors

This dish brings together savory, smoky, sweet, and creamy elements. The cheese-stuffed chicken is hearty and rich, while the pineapple glaze adds a burst of freshness and contrast.

2. Elevates Simple Ingredients

Chicken legs are affordable and packed with flavor, but stuffing them with cheese and finishing with a glaze transforms them into a gourmet dish that looks and tastes restaurant-worthy.

3. Crispy Outside, Juicy Inside

Pan-searing before baking gives the chicken a beautiful golden crust, while the cheese inside keeps the meat moist and tender.

4. Ideal for Special Occasions or Weeknight Dinners

This dish is fancy enough for a dinner party yet simple enough for a family meal when you want something more exciting than plain baked chicken.

5. Pairs Well with a Variety of Sides

From roasted vegetables and mashed potatoes to fresh salads and rice, these stuffed chicken legs go with almost anything, making it a versatile addition to your cooking repertoire.

Ingredients

For the Chicken Legs

IngredientQuantity
Chicken legs, deboned4 large
Cheese (mozzarella, gouda, or cheddar), shredded150g (5 oz)
Garlic, minced2 cloves
Salt1 teaspoon
Black pepper½ teaspoon
Smoked paprika1 teaspoon
Olive oil1 tablespoon

For the Pineapple Sauce

IngredientQuantity
Pineapple juice1 cup
Honey2 tablespoons
Soy sauce1 tablespoon
Dijon mustard1 teaspoon
Chili flakes (optional)½ teaspoon
Cornstarch (mixed with 1 tablespoon water)1 teaspoon

Directions

  1. Season the Chicken – Rub the deboned chicken legs with salt, pepper, paprika, and minced garlic.
  2. Stuff with Cheese – Place shredded cheese inside each chicken leg and fold or roll tightly. Secure with toothpicks or kitchen twine.
  3. Sear for a Golden Crust – Heat olive oil in a pan over medium heat. Sear the stuffed chicken legs on all sides until golden brown.
  4. Bake to Perfection – Transfer the chicken to a preheated oven at 375°F (190°C) and bake for 20–25 minutes until cooked through.
  5. Prepare the Pineapple Sauce – In a saucepan, combine pineapple juice, honey, soy sauce, Dijon mustard, and chili flakes. Simmer for a few minutes, then add cornstarch slurry and stir until thickened.
  6. Glaze & Serve – Brush the baked chicken with the pineapple sauce and serve warm with extra sauce on the side.

Nutritional Information (Per Serving – Approx. 1 Stuffed Chicken Leg)

NutrientAmount
Calories320 kcal
Carbohydrates10 g
Protein35 g
Fat15 g
Saturated Fat6 g
Fiber1 g
Sugar8 g
Sodium480 mg

Tips for Perfectly Stuffed Chicken Legs

1. Choose the Right Cheese

A cheese that melts well, such as mozzarella, gouda, or cheddar, works best for stuffing. Mozzarella gives a classic stretch, gouda adds a hint of smokiness, and cheddar brings sharpness.

2. Debone Carefully for Easy Stuffing

If your butcher hasn’t deboned the chicken legs for you, take your time removing the bone while keeping the meat intact. A small sharp knife helps make precise cuts.

3. Secure the Chicken Properly

To prevent the cheese from leaking out while cooking, use toothpicks or kitchen twine to seal the stuffed chicken legs tightly.

4. Sear for Extra Flavor

Pan-searing before baking locks in moisture and adds a crispy outer layer, giving the chicken a rich golden-brown color.

5. Simmer the Pineapple Glaze for Depth

Reducing the glaze for a few minutes intensifies the flavors, ensuring that the sweet and tangy notes complement the savory chicken perfectly.

Best Side Dishes to Serve with Stuffed Chicken Legs

1. Garlic Butter Mashed Potatoes

The creamy, buttery texture of mashed potatoes balances the richness of the cheese-stuffed chicken and absorbs the delicious pineapple glaze.

2. Roasted Vegetables

A side of roasted asparagus, carrots, or Brussels sprouts adds earthiness and a touch of caramelization that pairs well with the dish.

3. Coconut Rice

For a tropical-inspired meal, coconut-infused rice brings out the pineapple flavors while adding a mild sweetness.

4. Fresh Green Salad

A light arugula or spinach salad with a lemon vinaigrette helps cut through the richness of the dish, making for a well-balanced meal.

5. Crusty Bread

Use freshly baked bread to soak up the extra sauce, ensuring that none of the delicious glaze goes to waste.

FAQs: Everything You Need to Know

Q: Can I use chicken breasts instead of chicken legs?

Yes! While chicken legs have more flavor and remain juicier, boneless chicken breasts can also be stuffed using the same technique. Simply butterfly them, stuff with cheese, and secure the edges before cooking.

Q: Can I make this dish ahead of time?

Yes! You can stuff and season the chicken legs up to a day in advance. Store them in the fridge and sear/bake when ready to serve. The pineapple glaze can also be made ahead and reheated before serving.

Q: What if I don’t have fresh pineapple juice?

You can substitute with canned pineapple juice, but try to use an unsweetened variety to control the sweetness of the glaze.

Q: How do I know when the chicken is fully cooked?

Use a meat thermometer to check that the internal temperature of the chicken reaches 165°F (75°C). If you don’t have a thermometer, the juices should run clear when pierced with a knife.

Q: Can I make this dish spicier?

Yes! Add extra chili flakes, cayenne pepper, or a dash of hot sauce to the pineapple glaze for a spicier kick.

Q: What’s the best way to reheat leftovers?

For the best texture, reheat the chicken in an oven at 350°F (175°C) for 10–15 minutes. Microwaving can make the cheese filling less creamy.

Q: Can I grill instead of baking?

Yes! Grill over medium heat for about 20 minutes, turning occasionally, until the chicken is fully cooked and the skin is crisp. Brush with the pineapple glaze during the last few minutes of grilling.

Why This Dish Deserves a Spot on Your Dinner Table

Few dishes strike the perfect balance between comfort and elegance the way these Gourmet Stuffed Chicken Legs do. The combination of tender chicken, rich melted cheese, and a bright, tangy pineapple glaze creates a dish that is both indulgent and well-balanced.

✔ A creative way to elevate simple chicken legs
✔ A perfect balance of savory, sweet, and smoky flavors
✔ Crispy on the outside, juicy and cheesy inside
✔ Impressive enough for a dinner party, easy enough for a weeknight meal

Whether you’re treating yourself to a gourmet meal at home or cooking for guests, this recipe guarantees bold flavors and an unforgettable dining experience.

So go ahead—slice into that golden chicken leg, watch the melted cheese ooze out, and savor the sweet, tangy glaze. This dish proves that simple ingredients can create something truly spectacular.

Amal

Gourmet Stuffed Chicken Legs with Melted Cheese & Pineapple Glaze

These Gourmet Stuffed Chicken Legs are packed with creamy melted cheese, seared to golden perfection, and glazed with a sweet and tangy pineapple sauce. Juicy on the inside, crispy on the outside, and bursting with flavor, this dish is perfect for an elegant dinner or a special family meal.
Prep Time 15 minutes
Cook Time 25 minutes
Total Time 40 minutes
Servings: 4 servings
Course: Main Dish
Cuisine: International

Ingredients
  

For the Chicken Legs:
  • 4 large chicken legs deboned
  • 150 g 5 oz shredded cheese (mozzarella, gouda, or cheddar)
  • 2 cloves garlic minced
  • 1 teaspoon salt
  • ½ teaspoon black pepper
  • 1 teaspoon smoked paprika
  • 1 tablespoon olive oil
For the Pineapple Sauce:
  • 1 cup pineapple juice
  • 2 tablespoons honey
  • 1 tablespoon soy sauce
  • 1 teaspoon Dijon mustard
  • ½ teaspoon chili flakes optional
  • 1 teaspoon cornstarch mixed with 1 tablespoon water

Method
 

  1. Season the Chicken – Rub the deboned chicken legs with salt, pepper, paprika, and minced garlic.
  2. Stuff with Cheese – Place shredded cheese inside each chicken leg, fold or roll tightly, and secure with toothpicks or kitchen twine.
  3. Sear to Perfection – Heat olive oil in a pan over medium heat. Sear the stuffed chicken legs until golden brown on all sides.
  4. Bake Until Juicy – Transfer to a preheated oven at 375°F (190°C) and bake for 20–25 minutes until fully cooked.
  5. Prepare the Pineapple Sauce – In a saucepan, combine pineapple juice, honey, soy sauce, Dijon mustard, and chili flakes. Simmer until slightly thickened, then stir in the cornstarch slurry.
  6. Glaze & Serve – Brush the baked chicken with the pineapple sauce and serve with extra sauce on the side.

Notes

  • For extra crispiness, broil the chicken for the last 3 minutes of baking.
  • Use a meat thermometer to check for doneness—the internal temperature should reach 165°F (75°C).
  • Let the chicken rest for 5 minutes before slicing to keep the juices inside.
  • Serve with roasted vegetables, mashed potatoes, or coconut rice for a complete meal.

Stay Connected

Get recipes via email: