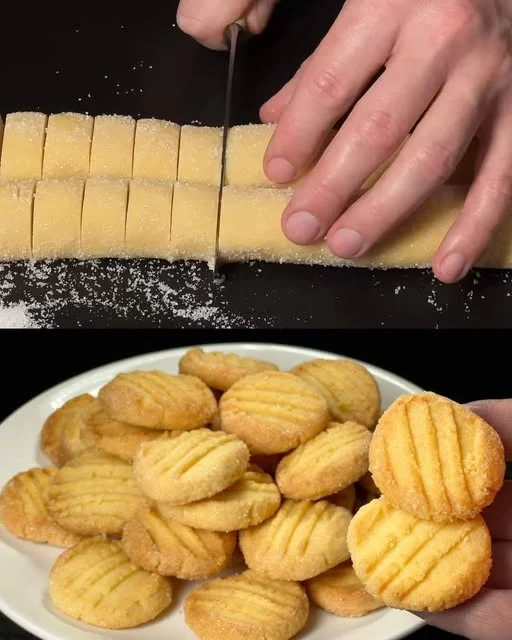
Buttery Bliss: The Irresistible Charm of Melt-in-Your-Mouth Cookies

Some recipes are more than just instructions on a page—they carry memories, emotions, and a sense of home. For me, these delicate, buttery cookies that melt in your mouth are one of those recipes.

As a child, my grandmother would bake these cookies on lazy Sunday afternoons. The smell of warm butter and sugar would drift through the house, drawing me into the kitchen where she’d be rolling the soft dough between her hands. She never used a measuring scale, just her instincts and a lifetime of experience. She always said that the best cookies weren’t just made with butter and flour but with patience and love.

I remember the anticipation of waiting for the cookies to cool, the way they crumbled the moment they touched my tongue, and the comforting sweetness that lingered after every bite. Those cookies weren’t just a treat; they were an experience—simple, elegant, and unforgettable.

Now, every time I bake them, I’m transported back to that warm kitchen, back to a time when life was simpler, and happiness could be found in something as small as a perfectly baked cookie. Whether you’re baking these for a special occasion or just to enjoy with a cup of tea, I hope they bring a little bit of that same warmth into your home.

Why You’ll Love These Cookies

1. Delicate and Buttery Texture

These cookies don’t just crumble—they dissolve in your mouth, leaving behind a rich, buttery flavor. The balance between flour, butter, and sugar creates a texture so soft that it feels almost like a sweet cloud.

2. Perfect for Any Occasion

Whether it’s a holiday gathering, a tea-time treat, or just a personal indulgence, these cookies fit every moment. They are elegant enough for a party but simple enough to make on a whim.

3. Minimal Ingredients, Maximum Flavor

With only a handful of pantry staples—flour, butter, and sugar—you can create a batch of cookies that taste like they came from a high-end bakery. The beauty of this recipe lies in its simplicity.

4. Easy to Make and Customize

This dough is incredibly forgiving, making it perfect for bakers of all skill levels. You can also get creative by adding different flavors like vanilla, citrus zest, or even a dusting of cinnamon.

5. A Classic Recipe That Never Gets Old

Some cookies are trends, but these are timeless. Generations have enjoyed variations of this recipe, and it continues to be a favorite across cultures.

Ingredients

IngredientQuantity
Flour250 g
Butter170 g
Sugar100 g (50 g for dough + 50 g for sprinkling)
Vanilla extract (optional)1 tsp
Salt (optional)A pinch

Directions

  1. Prepare the Dough
    • In a mixing bowl, cream the butter and 50 g of sugar until light and fluffy.
    • Gradually add the flour, mixing until a soft dough forms. If using, add vanilla extract and a pinch of salt for extra flavor.
  2. Shape the Cookies
    • Roll the dough into small balls and slightly flatten them. Alternatively, shape them using a cookie cutter.
    • Arrange the cookies on a baking sheet lined with parchment paper.
  3. Bake to Perfection
    • Preheat the oven to 350°F (175°C).
    • Bake for 12-15 minutes or until the edges are lightly golden.
  4. Final Touch
    • While still warm, sprinkle the remaining 50 g of sugar over the cookies for a delicate sweetness.
    • Let them cool completely before serving.

Nutritional Information (Per Cookie, Approx.)

NutrientAmount
Calories120 kcal
Protein1.5 g
Carbohydrates14 g
Fats7 g
Sugars5 g
Sodium10 mg

Secrets to Achieving the Perfect Melt-in-Your-Mouth Texture

1. Use High-Quality Butter

Since butter is the star ingredient, using a good-quality, high-fat butter will make a significant difference in both taste and texture. European-style butter with at least 82% fat content works best.

2. Don’t Overwork the Dough

The key to achieving that delicate, crumbly texture is to mix the ingredients just until combined. Overmixing can lead to tough cookies, which is the opposite of what we want.

3. Chill the Dough for Better Structure

While not strictly necessary, chilling the dough for 20-30 minutes before baking helps the cookies hold their shape and enhances their texture.

4. Bake at the Right Temperature

A moderate oven temperature (around 350°F or 175°C) ensures that the cookies bake evenly without browning too quickly. The goal is a pale, delicate cookie with just a hint of golden edges.

5. Let Them Cool Before Handling

These cookies are incredibly delicate when they come out of the oven. Let them cool on the baking sheet for a few minutes before transferring them to a wire rack. This helps them set properly without breaking.

Creative Variations to Try

1. Vanilla Bean Bliss

Add a teaspoon of vanilla bean paste for an extra layer of depth and aroma. The tiny flecks of vanilla bean also give the cookies a beautiful speckled look.

2. Lemon Zest Elegance

A bit of lemon zest mixed into the dough brightens up the flavor, making these cookies perfect for spring and summer gatherings.

3. Almond Perfection

Substituting part of the flour with finely ground almonds gives the cookies a subtle nutty undertone and enhances their crumbly texture.

4. Cinnamon Sugar Coating

For a warm, spiced twist, roll the cookies in cinnamon sugar before baking. This creates a slightly crisp exterior with a cozy, festive flavor.

5. Chocolate-Dipped Indulgence

Once cooled, dip half of each cookie in melted dark chocolate and let them set. The slight bitterness of the chocolate perfectly balances the buttery sweetness of the cookie.

Frequently Asked Questions

1. Can I make these cookies ahead of time?

Yes! These cookies store beautifully. You can make the dough ahead and refrigerate it for up to 3 days before baking. Alternatively, baked cookies can be stored in an airtight container for up to a week.

2. Can I freeze the dough?

Absolutely. Roll the dough into a log, wrap it tightly in plastic wrap, and freeze for up to 2 months. When ready to bake, slice the dough into rounds and bake straight from frozen, adding a minute or two to the baking time.

3. What’s the best way to store these cookies?

Store them in an airtight container at room temperature. If you prefer a softer texture, add a slice of bread to the container—it helps maintain moisture without making the cookies soggy.

4. Can I use margarine instead of butter?

While you can technically use margarine, the flavor and texture won’t be the same. Butter gives these cookies their rich, melt-in-your-mouth quality, so it’s highly recommended.

5. How do I make these cookies extra light and airy?

Using powdered sugar instead of granulated sugar can make the cookies even more delicate. The fine texture of powdered sugar helps create an even softer crumb.

6. Why did my cookies spread too much?

If your cookies spread too much, it could be due to using overly soft butter or not chilling the dough before baking. Try refrigerating the shaped cookies for 15 minutes before putting them in the oven.

Final Thoughts: A Cookie for Every Moment

Few things in life compare to the simple pleasure of a buttery, delicate cookie that melts in your mouth. These cookies are more than just a treat; they are a reminder that sometimes, the most uncomplicated recipes bring the most joy.

Whether you’re baking these for a special occasion, as a thoughtful homemade gift, or simply as a personal indulgence, they are guaranteed to bring warmth and comfort with every bite. Their delicate texture and rich flavor make them a timeless classic—one that will be loved for generations to come.

So go ahead, whip up a batch, and savor the bliss of a cookie that truly melts in your mouth. And if you’re anything like me, you might just find yourself sneaking one (or three) straight from the baking sheet before they even have a chance to cool.
Amal

Buttery Bliss: The Irresistible Charm of Melt-in-Your-Mouth Cookies

These delicate, buttery cookies crumble and melt the moment they touch your tongue. Made with just a few simple ingredients, they are rich, tender, and irresistibly sweet. Whether served with tea, coffee, or enjoyed as a quick treat, these cookies bring warmth and comfort with every bite.
Prep Time 10 minutes
Cook Time 15 minutes
Total Time 25 minutes
Servings: 20 -24 cookies
Course: Dessert
Cuisine: International

Ingredients
  

  • 250 g flour
  • 170 g butter softened
  • 100 g sugar 50 g for the dough + 50 g for sprinkling
  • 1 tsp vanilla extract optional
  • A pinch of salt optional

Method
 

  1. In a mixing bowl, cream the butter and 50 g of sugar together until light and fluffy.
  2. Add the flour gradually, mixing until a soft dough forms. Stir in vanilla extract and salt if using.
  3. Roll the dough into small balls and gently flatten them, or shape them with a cookie cutter.
  4. Place the cookies on a parchment-lined baking sheet and sprinkle with the remaining 50 g of sugar.
  5. Preheat the oven to 350°F (175°C) and bake for 12-15 minutes, or until the edges are lightly golden.
  6. Allow the cookies to cool on the baking sheet for a few minutes before transferring them to a wire rack.
  7. Serve and enjoy with tea, coffee, or as a sweet snack.

Notes

  • For an extra light texture, substitute half of the flour with cornstarch.
  • To enhance the flavor, add lemon or orange zest to the dough.
  • Store in an airtight container at room temperature for up to a week.
  • These cookies freeze well—store them in a sealed bag and thaw at room temperature before serving.
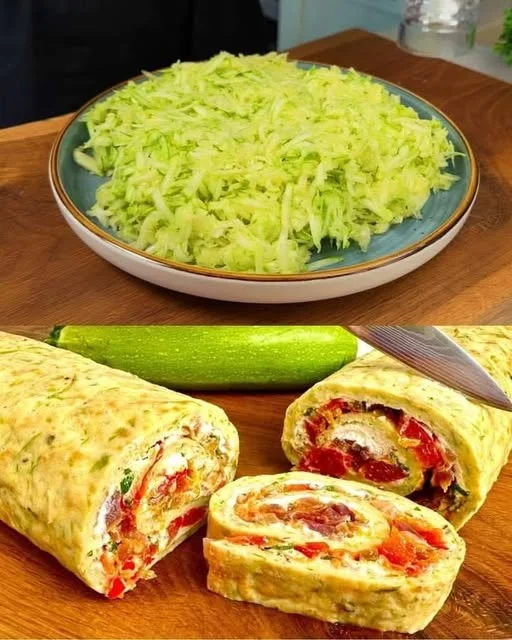
Crispy Garden Bites: Savory Zucchini Fritters with Ricotta and Fresh Vegetables

Growing up, summer meant one thing in my family—an abundance of zucchini. My grandmother’s backyard garden seemed to produce endless green treasures, and we had to get creative to use them all. While zucchini bread and grilled zucchini were always part of the rotation, my absolute favorite way to enjoy this vegetable was in the form of crispy, golden fritters.

I remember standing on a stool in my grandmother’s kitchen, watching as she effortlessly grated zucchini, squeezing out the excess moisture with a practiced hand. She would mix it with eggs, flour, and whatever cheese she had on hand—sometimes feta, sometimes ricotta—before frying small patties in a pan. The aroma of garlic and onions sizzling in olive oil filled the kitchen, and I knew something delicious was about to hit the table.

We would eat those fritters straight from the pan, barely waiting for them to cool. The contrast of a crispy exterior with a soft, flavorful center was pure magic. And the best part? They were simple, made from ingredients we always had, yet tasted like something truly special.

Now, every time I make zucchini fritters, I’m reminded of those warm summer days, of family gathered around the kitchen, and of how the simplest recipes often bring the greatest joy. Whether you’re looking for a new way to use zucchini or simply want a delicious, easy-to-make dish, these fritters will not disappoint.

Why You’ll Love These Zucchini Fritters

Perfectly Crispy, Soft, and Flavorful

The best zucchini fritters have a crisp, golden-brown crust that gives way to a soft, flavorful interior. The ricotta adds a subtle creaminess, while garlic and green onions provide a savory depth that keeps you coming back for more.

A Versatile Dish for Any Occasion

These fritters work as a quick snack, a satisfying appetizer, or even a light main course. Serve them with a fresh salad for a complete meal or pair them with a dipping sauce for a crowd-pleasing party snack.

A Healthier Alternative to Traditional Fried Foods

Unlike deep-fried foods, these fritters use just a small amount of olive oil for pan-frying. Zucchini is naturally low in calories and high in fiber, making these a nutritious choice without sacrificing flavor. Plus, you can bake or air-fry them for an even lighter version.

Great for Using Up Extra Zucchini

If you have a garden overflowing with zucchini or find yourself with extra from the store, these fritters are an excellent way to use them up. They freeze well too, so you can always have a batch ready to reheat.

Ingredients

IngredientQuantity
Zucchini2 pcs (medium-sized)
SaltTo taste
Eggs4 pcs
Ricotta cheese150 g (⅔ cup)
All-purpose flour80 g (⅔ cup)
Garlic (minced)2 cloves
Green onions (chopped)2 stalks
Carrot (grated)1 small
Black pepper½ tsp
Olive oilFor frying

Directions

  1. Prepare the Zucchini
    • Grate the zucchini and sprinkle with salt. Let it sit for 10 minutes, then squeeze out excess moisture using a clean towel.
  2. Make the Batter
    • In a bowl, beat the eggs, then mix in ricotta cheese, minced garlic, green onions, grated carrot, black pepper, and flour. Add the squeezed zucchini and mix until well combined.
  3. Fry the Fritters
    • Heat olive oil in a pan over medium heat. Spoon small portions of the batter into the pan, flattening them slightly.
    • Fry for 2-3 minutes per side, or until golden brown and crispy.
  4. Serve and Enjoy
    • Drain on paper towels and serve warm with sour cream, yogurt, or a light salad.

Nutritional Information (Per Serving, Approx.)

NutrientAmount
Calories180 kcal
Protein9 g
Carbohydrates15 g
Fats10 g
Fiber2 g
Sodium320 mg

Tips for the Best Zucchini Fritters

1. Remove Excess Moisture

Zucchini contains a lot of water, which can make the batter too wet and prevent the fritters from crisping up. The key is to grate the zucchini, sprinkle it with salt, and let it sit for about 10 minutes. Then, squeeze out as much moisture as possible using a clean kitchen towel. This simple step makes all the difference!

2. Use Ricotta for Creaminess

Ricotta cheese adds a subtle creaminess to the fritters, making them soft and flavorful without being too dense. If you don’t have ricotta, you can substitute feta for a saltier, more tangy version.

3. Season Well

Zucchini has a mild flavor on its own, so don’t be afraid to season the batter generously. Garlic, green onions, black pepper, and even a pinch of smoked paprika can elevate the taste.

4. Don’t Overcrowd the Pan

When frying the fritters, give them space in the pan. Overcrowding lowers the oil temperature, making them soggy instead of crispy. Cook them in batches for the best texture.

5. Serve Immediately for Maximum Crispiness

These fritters are best enjoyed fresh from the pan while they’re still crispy. If you need to keep them warm, place them on a baking sheet in a low oven (200°F or 90°C) until serving.

Delicious Ways to Serve Zucchini Fritters

Classic with Sour Cream or Yogurt

A dollop of sour cream or Greek yogurt adds a cool, creamy contrast to the crispy fritters. Add a squeeze of lemon for extra brightness.

With a Fresh Salad

Pair the fritters with a simple salad of cherry tomatoes, cucumbers, and fresh herbs for a light and refreshing meal.

As a Sandwich Filling

Tuck a few fritters into a pita with lettuce, tzatziki, and sliced cucumbers for a delicious vegetarian sandwich.

Topped with Poached Eggs

Turn these fritters into a brunch-worthy dish by topping them with poached eggs and a drizzle of hollandaise sauce.

Dipped in Spicy Aioli

For a bolder flavor, serve them with a spicy aioli or a harissa yogurt dip.

Frequently Asked Questions

1. Can I make these fritters ahead of time?

Yes! You can prepare the batter ahead of time and store it in the refrigerator for up to 24 hours before frying. You can also fry the fritters and reheat them in the oven at 350°F (175°C) for about 10 minutes before serving.

2. Can I freeze zucchini fritters?

Absolutely. To freeze, place the cooked fritters in a single layer on a baking sheet until solid, then transfer them to a freezer-safe bag. Reheat in the oven or air fryer until crispy again.

3. Can I bake or air-fry these instead of pan-frying?

Yes! To bake, place the fritters on a parchment-lined baking sheet, brush with olive oil, and bake at 400°F (200°C) for about 20 minutes, flipping halfway through. For the air fryer, cook at 375°F (190°C) for 10-12 minutes, shaking the basket halfway through.

4. How do I keep my fritters from being too wet?

The key is squeezing out as much water from the grated zucchini as possible. If the batter still seems too wet, add a little more flour to help bind it together.

5. Can I add other vegetables to the fritters?

Definitely! Try adding grated carrots, chopped spinach, or even sweet corn for extra flavor and texture.

Final Thoughts: A Simple Recipe with Endless Possibilities

Zucchini fritters are one of those dishes that prove simple ingredients can create something truly delicious. They are light yet satisfying, crispy yet soft, and endlessly customizable to suit any palate. Whether you’re making them for a quick snack, a side dish, or a full meal, these fritters always deliver.

For me, they will always bring back memories of warm summer days and my grandmother’s kitchen, where the best recipes were the ones made with love. I hope that when you make these, they bring a bit of that warmth and joy to your table too.

So the next time you have a couple of zucchinis sitting in your fridge, don’t let them go to waste—turn them into a batch of crispy, flavorful fritters that everyone will love!

Amal

Crispy Garden Bites: Savory Zucchini Fritters with Ricotta and Fresh Vegetables

These crispy zucchini fritters are packed with fresh vegetables and creamy ricotta, making them a light yet satisfying dish. With a perfectly golden crust and a soft, flavorful center, they’re great as a snack, appetizer, or side dish. Serve them with a dollop of sour cream or a zesty yogurt dip for an irresistible treat!
Prep Time 15 minutes
Cook Time 10 minutes
Total Time 25 minutes
Servings: 4 servings
Course: Appetizer
Cuisine: International

Ingredients
  

  • 2 medium-sized zucchini grated
  • Salt to taste
  • 4 eggs
  • 150 g ⅔ cup ricotta cheese
  • 80 g ⅔ cup all-purpose flour
  • 2 cloves garlic minced
  • 2 green onions chopped
  • 1 small carrot grated
  • ½ tsp black pepper
  • Olive oil for frying

Method
 

  1. Grate the zucchini and sprinkle with salt. Let it sit for 10 minutes, then squeeze out excess moisture using a clean kitchen towel.
  2. In a bowl, beat the eggs and mix in ricotta cheese, garlic, green onions, grated carrot, black pepper, and flour. Stir until combined.
  3. Fold in the drained zucchini and mix well to form a thick batter.
  4. Heat olive oil in a pan over medium heat. Spoon small portions of the batter into the pan, flattening them slightly.
  5. Fry for 2-3 minutes per side, or until golden brown and crispy.
  6. Remove and drain on paper towels. Serve warm with sour cream, yogurt, or a fresh salad.

Notes

  • For extra crunch, add 2 tablespoons of breadcrumbs to the batter.
  • To make them gluten-free, use almond flour or chickpea flour instead of all-purpose flour.
  • These fritters can be baked at 400°F (200°C) for 20-25 minutes or air-fried at 375°F (190°C) for 10-12 minutes.
  • Store leftovers in an airtight container in the refrigerator for up to 3 days.

Golden Bites of Comfort: The Magic of Crispy Potato Croquettes

There’s something truly special about potatoes. They have a way of bringing comfort, whether mashed, fried, or baked. But for me, potato croquettes are more than just a dish; they’re a cherished memory.

Growing up, my grandmother had a way of turning simple ingredients into something magical. She never needed fancy kitchen gadgets or complicated recipes—just her hands, a few pantry staples, and a deep sense of love for feeding her family. One of my favorite things she made was crispy potato croquettes. I remember standing on my tiptoes, watching her carefully shape each croquette, dipping them in breadcrumbs before frying them to a perfect golden brown. The kitchen would fill with a warm, irresistible aroma, and I knew something delicious was about to happen.

Now, every time I make potato croquettes, I feel like I’m bringing a little piece of my childhood back to life. Whether you’re making them for a cozy family dinner, a gathering with friends, or simply to enjoy with a warm cup of tea, these golden bites of comfort never fail to bring joy.

Let’s dive into what makes these croquettes so special, from their irresistible texture to creative variations and useful cooking tips.

Why Potato Croquettes Are a Must-Try

The Perfect Crunch

Potato croquettes strike a beautiful balance between a crispy, golden-brown exterior and a soft, flavorful interior. The contrast between the crunchy coating and the fluffy potato filling is what makes them so addictive. Every bite is a textural delight!

A Versatile Treat for Any Occasion

One of the best things about potato croquettes is their versatility. They can be served as an appetizer, a side dish, or even a light meal. Pair them with a dipping sauce, serve them alongside a fresh salad, or enjoy them with a warm bowl of soup.

Budget-Friendly and Made from Pantry Staples

Potatoes, eggs, breadcrumbs, and a bit of seasoning—that’s all you need. These croquettes are incredibly budget-friendly, making them perfect for families looking for delicious meals without breaking the bank.

Easy to Customize

While classic potato croquettes are delicious on their own, they also serve as a blank canvas for creativity. You can add cheese, herbs, spices, or even mix in vegetables for added flavor and nutrition.

Ingredients

For the Potato Croquettes

IngredientQuantity
Potatoes (peeled and boiled)700 g (1.5 lbs)
Salt1 tsp
Cornstarch25 g (2 tbsp)
Eggs (beaten)2
Breadcrumbs100 g (1 cup)
Black pepper (optional)½ tsp
Garlic powder (optional)½ tsp
Parmesan cheese (optional)30 g (¼ cup)
Oil (for frying)As needed

Directions

  1. Prepare the Potatoes
    • Mash the boiled potatoes in a large bowl until smooth. Add salt, cornstarch, and any optional seasonings like black pepper, garlic powder, or Parmesan cheese. Mix well.
  2. Shape the Croquettes
    • Take small portions of the mixture and shape them into cylindrical or round croquettes.
  3. Coat the Croquettes
    • Dip each croquette into the beaten eggs, ensuring it’s fully coated.
    • Roll it in breadcrumbs until evenly covered.
  4. Fry Until Golden
    • Heat oil in a deep pan over medium heat.
    • Fry the croquettes in batches until golden brown and crispy, about 2-3 minutes per side.
    • Remove and drain on paper towels.
  5. Serve and Enjoy
    • Serve hot with your favorite dipping sauce, such as garlic aioli, spicy ketchup, or sour cream.

Nutritional Information (Per Serving, Approx.)

NutrientAmount
Calories220 kcal
Protein5 g
Carbohydrates30 g
Fats9 g
Fiber3 g
Sodium350 mg

The Secret to the Best Potato Croquettes

Choosing the Right Potatoes

For the best results, use starchy potatoes like Russet or Yukon Gold. These varieties are fluffy and light, making them ideal for croquettes. Waxy potatoes tend to be too firm and can result in a dense texture.

The Importance of Seasoning

Potatoes have a mild flavor, so proper seasoning is key. Adding a touch of garlic powder, black pepper, or Parmesan cheese can elevate the taste. Don’t forget the salt—it enhances the overall flavor!

Getting the Perfect Coating

A crispy exterior is what sets a great croquette apart. To achieve this, make sure to coat each croquette properly:

  1. Dip in beaten eggs to help the breadcrumbs stick.
  2. Roll in fine breadcrumbs for an even, golden crust.
  3. If you want extra crunch, double-coat them by repeating the egg and breadcrumb steps.

Frying for the Perfect Crunch

  • Use the right oil: Neutral oils like vegetable, canola, or sunflower oil work best. They have a high smoke point and don’t overpower the flavor.
  • Maintain the right temperature: The oil should be around 350°F (175°C). If it’s too hot, the croquettes will brown too quickly and remain raw inside. If it’s too cool, they’ll absorb too much oil and turn greasy.
  • Fry in batches: Overcrowding the pan lowers the oil temperature, leading to uneven frying.

Baking or Air-Frying for a Healthier Option

If you want a lighter alternative, you can bake or air-fry the croquettes.

  • Baking: Preheat the oven to 400°F (200°C) and bake for 20-25 minutes, flipping halfway through.
  • Air-frying: Set the air fryer to 375°F (190°C) and cook for 10-12 minutes, shaking the basket halfway through.

Creative Variations to Try

Cheesy Potato Croquettes

Mix shredded cheese into the mashed potatoes before shaping them. Cheddar, mozzarella, or Gruyère melt beautifully and add an irresistible gooey center.

Herb-Infused Croquettes

Add chopped fresh herbs like parsley, chives, or dill to the potato mixture. This enhances the flavor and gives the croquettes a fresh, aromatic twist.

Spicy Croquettes

If you love a bit of heat, add a dash of cayenne pepper, smoked paprika, or finely chopped jalapeños to the mix.

Stuffed Croquettes

For a surprise inside, stuff the croquettes with small cubes of cheese, cooked minced meat, or sautéed mushrooms before frying.

Sweet Potato Croquettes

Swap regular potatoes for sweet potatoes for a naturally sweet and slightly healthier version. Pair with a honey-mustard dip for a delicious contrast.

Frequently Asked Questions

1. Can I make potato croquettes ahead of time?

Yes! You can prepare the croquettes up to the coating stage and store them in the refrigerator for up to 24 hours before frying. You can also freeze them for longer storage.

2. How do I freeze potato croquettes?

To freeze, place the breaded croquettes on a tray lined with parchment paper and freeze until solid. Then transfer them to a freezer bag or airtight container. When ready to eat, fry them straight from frozen—no need to thaw!

3. Can I use leftover mashed potatoes?

Absolutely! If you have leftover mashed potatoes, just mix in cornstarch and an egg to help bind the mixture, then proceed with shaping and coating.

4. How do I prevent the croquettes from falling apart?

If your croquettes are too soft and falling apart, chill them in the refrigerator for 30 minutes before frying. This helps them firm up and hold their shape.

5. What sauces go well with potato croquettes?

Potato croquettes pair well with a variety of dipping sauces, including:

  • Garlic aioli
  • Spicy ketchup
  • Sour cream and chives
  • Honey mustard
  • Barbecue sauce

Final Thoughts: A Dish That Brings People Together

Potato croquettes are more than just a snack or side dish—they’re a symbol of warmth, comfort, and tradition. Whether you grew up eating them or are discovering them for the first time, their crispy, golden exterior and soft, flavorful center make them a dish that’s impossible to resist.

Making them from scratch allows you to get creative, adjusting the flavors to suit your taste. They’re a perfect choice for family dinners, casual gatherings, or just those moments when you crave something deliciously crispy. And with easy make-ahead and freezing options, they’re also a convenient choice for busy days.

So next time you have some potatoes on hand, give these croquettes a try. Whether you enjoy them plain, stuffed, or paired with your favorite dip, they’re sure to bring a little extra joy to your table—just like they did for me all those years ago.

Amal

Golden Bites of Comfort: The Magic of Crispy Potato Croquettes

Crispy on the outside, soft and flavorful on the inside, these easy potato croquettes are the perfect snack, appetizer, or side dish. Made with mashed potatoes, coated in golden breadcrumbs, and fried to perfection, they are a delicious way to turn simple ingredients into a crowd-pleasing dish. Serve them with your favorite dipping sauce for an irresistible treat!
Prep Time 15 minutes
Cook Time 10 minutes
Total Time 25 minutes
Servings: 4 servings
Course: Snack
Cuisine: International

Ingredients
  

  • 700 g 1.5 lbs potatoes, peeled and boiled
  • 1 tsp salt
  • 25 g 2 tbsp cornstarch
  • 2 eggs beaten
  • 100 g 1 cup breadcrumbs
  • ½ tsp black pepper optional
  • ½ tsp garlic powder optional
  • 30 g ¼ cup Parmesan cheese (optional)
  • Oil for frying

Method
 

  1. Mash the boiled potatoes in a large bowl until smooth. Add salt, cornstarch, and any optional seasonings like black pepper, garlic powder, or Parmesan cheese. Mix well.
  2. Take small portions of the mixture and shape them into cylindrical or round croquettes.
  3. Dip each croquette into the beaten eggs, then roll in breadcrumbs until fully coated.
  4. Heat oil in a deep pan over medium heat. Fry the croquettes in batches for about 2-3 minutes per side, or until golden brown and crispy.
  5. Remove and drain on paper towels. Serve hot with your favorite dipping sauce.

Notes

  • For a healthier option, bake at 400°F (200°C) for 20-25 minutes or air-fry at 375°F (190°C) for 10-12 minutes.
  • Freeze uncooked croquettes on a tray, then transfer to a freezer bag for up to 2 months. Fry from frozen, adding an extra minute to the cooking time.
  • Add cheese or herbs to the mixture for extra flavor.

A Taste of Home: The Magic of Cottage Cheese, Banana, and Cookie No-Bake Dessert

There’s something truly special about desserts that don’t require an oven. They remind me of my childhood summers when my grandmother would make the most delicious sweets without ever turning on the stove. One of my favorites was a simple, creamy, no-bake dessert made with cottage cheese, bananas, and butter cookies. It was effortless yet indulgent, the kind of treat that could bring comfort on the rainiest days or serve as the perfect ending to a family meal.

This dessert is more than just a combination of ingredients—it’s a nostalgic embrace, a reminder of the small joys that make life sweet. It’s perfect for those who crave something rich but don’t want the hassle of baking. Whether you’re making it for a family gathering, a quick treat for yourself, or a dessert to impress guests, this recipe delivers.

Now, let’s dive into what makes this dessert so special, from its health benefits to variations and frequently asked questions.

Why This Dessert Stands Out

No-Bake Simplicity

One of the biggest appeals of this dessert is its simplicity. You don’t need to be an expert baker or spend hours in the kitchen to create something delightful. A few ingredients, a blender, and a little patience while it chills in the fridge are all you need.

Balanced Flavors and Textures

This dessert strikes the perfect balance between creamy, crunchy, and fruity. The cottage cheese mixture provides a rich, velvety base, the bananas add natural sweetness, and the cookies bring a satisfying crunch that softens slightly over time, blending beautifully with the other textures.

A Healthier Indulgence

Compared to traditional baked goods loaded with butter and refined flour, this no-bake treat is a lighter alternative. Cottage cheese is packed with protein and calcium, bananas offer natural sweetness and potassium, and dark chocolate (if used as a topping) brings antioxidants. While condensed milk does add some sugar, the overall nutritional profile is much better than many store-bought desserts.

Customizable to Your Taste

The beauty of this dessert is its versatility. Want a more tropical flavor? Add shredded coconut or a splash of coconut milk. Prefer a nutty crunch? Sprinkle chopped walnuts or almonds between the layers. Love a bit of spice? A dash of cinnamon can work wonders. You can easily tweak it to suit your preferences without compromising its deliciousness.

Ingredients

IngredientQuantity
Cottage cheese400 g
Sour cream5 tablespoons
Condensed milk150 g
Bananas2 (ripe)
Vanilla extract1 teaspoon
Butter cookies200 g
Dark chocolate50 g (for topping)

Directions

  1. Prepare the Base
    • Crush the butter cookies into small crumbs. You can use a food processor or place them in a ziplock bag and crush them with a rolling pin.
  2. Blend the Creamy Mixture
    • In a blender or food processor, combine the cottage cheese, sour cream, condensed milk, and vanilla extract. Blend until smooth and creamy.
  3. Layer the Dessert
    • In a serving dish or individual cups, place a layer of crushed cookies.
    • Slice the bananas thinly and add a layer on top of the cookies.
    • Pour a layer of the cottage cheese mixture over the bananas.
  4. Repeat and Chill
    • Continue layering until all ingredients are used, finishing with the creamy mixture on top.
    • Refrigerate for at least 2 hours to allow the flavors to meld.
  5. Final Touch
    • Melt the dark chocolate and drizzle it over the chilled dessert before serving.

Nutritional Information (Per Serving)

NutrientAmount (Approx.)
Calories280 kcal
Protein12 g
Carbohydrates35 g
Sugars20 g
Fats10 g
Fiber2 g

Health Benefits of Key Ingredients

Cottage Cheese: The Protein Powerhouse

Cottage cheese is often underrated in desserts, but it’s an excellent choice. It provides a creamy texture while being lower in fat than heavy cream. Plus, it’s packed with protein, making this dessert a more filling option compared to traditional puddings or cakes. It also contains calcium, which is essential for strong bones.

Bananas: Nature’s Sweetener

Bananas add natural sweetness, which means you don’t have to use excessive sugar. They also contain fiber, vitamins B6 and C, and potassium, which helps regulate blood pressure and muscle function. Additionally, bananas help create a smooth, pudding-like consistency when blended into the dessert.

Butter Cookies: A Comforting Crunch

While cookies may not be the healthiest ingredient, they bring nostalgia and texture to this dessert. Opt for whole grain or oat-based cookies for a slightly healthier twist, or even try using graham crackers for a similar effect.

Dark Chocolate: The Finishing Touch

If you choose to drizzle melted dark chocolate on top, you’re adding not just a delicious touch but also a dose of antioxidants. Dark chocolate has been linked to heart health, improved mood, and even brain function.

Creative Variations to Try

Chocolate Banana Bliss

If you’re a chocolate lover, mix a tablespoon of cocoa powder into the cottage cheese mixture and add an extra layer of chocolate shavings between the banana slices. The result is a rich, mousse-like treat with a banana-chocolate harmony.

Berry Delight

Swap bananas for mixed berries like strawberries, blueberries, or raspberries. The tartness of the berries balances the sweetness of the condensed milk beautifully. This version is also visually stunning, with pops of red and blue in every bite.

Nutty Indulgence

For a more decadent version, sprinkle crushed hazelnuts or almonds between the layers. A drizzle of almond or peanut butter on top can add an extra layer of flavor.

Coconut Dream

Replace some of the sour cream with coconut cream and add shredded coconut between the layers. This variation has a tropical feel that pairs beautifully with bananas.

Frequently Asked Questions

1. Can I make this dessert ahead of time?

Absolutely! In fact, it tastes even better after a few hours in the fridge, as the flavors meld together, and the cookies soften slightly. You can prepare it a day in advance and store it in the refrigerator until serving.

2. Can I use Greek yogurt instead of sour cream?

Yes! Greek yogurt is a great substitute for sour cream, offering the same tangy flavor with more protein and probiotics. It works just as well in this dessert.

3. What type of cookies work best for this recipe?

Butter cookies, graham crackers, or even ladyfingers work well. The key is to use a cookie that will soften slightly but still provide a bit of texture.

4. Is this dessert suitable for kids?

Definitely! It’s a fantastic treat for kids since it contains natural ingredients like bananas and cottage cheese. You can reduce the amount of condensed milk if you want to cut back on sugar.

5. How can I make this dessert vegan?

To make a vegan version, use plant-based cottage cheese, coconut cream instead of sour cream, and sweetened condensed coconut milk instead of regular condensed milk. Use vegan cookies and dark chocolate without dairy.

6. Can I freeze this dessert?

Yes, you can freeze it, though the texture may change slightly. If frozen, let it sit at room temperature for 10–15 minutes before eating for the best experience. It turns into a creamy frozen treat similar to ice cream.

Final Thoughts: A Dessert for Every Occasion

The beauty of this no-bake cottage cheese, banana, and cookie dessert is that it’s as simple as it is delicious. It’s proof that you don’t need fancy techniques or expensive ingredients to create something memorable. Whether it’s for a last-minute dinner party, a quick family dessert, or just a personal treat, this dish delivers comfort in every bite.

More than anything, this dessert is about joy. It’s about those quiet moments when you take a spoonful and let the flavors transport you to childhood memories, family gatherings, or simply a much-needed break from a busy day. So the next time you’re craving something sweet yet effortless, give this recipe a try—you might just find yourself making it over and over again.

Amal

A Taste of Home: The Magic of Cottage Cheese, Banana, and Cookie No-Bake Dessert

This no-bake cottage cheese, banana, and cookie dessert is a creamy, sweet, and refreshing treat that requires no oven time. Layers of smooth cottage cheese filling, ripe bananas, and crunchy cookies come together effortlessly for a dessert that’s both nostalgic and satisfying. Perfect for a quick family treat or an easy make-ahead dessert for any occasion!
Prep Time 10 minutes
Cook Time 2 hours
Total Time 2 hours 10 minutes
Servings: 4 servings
Course: Dessert
Cuisine: International

Ingredients
  

  • 400 g cottage cheese
  • 5 tablespoons sour cream
  • 150 g condensed milk
  • 2 ripe bananas sliced
  • 1 teaspoon vanilla extract
  • 200 g butter cookies crushed
  • 50 g dark chocolate melted (for topping)

Method
 

  1. Crush the cookies – Place the butter cookies in a food processor or a ziplock bag and crush them into small crumbs.
  2. Blend the creamy mixture – In a blender, combine cottage cheese, sour cream, condensed milk, and vanilla extract. Blend until smooth.
  3. Layer the dessert – In a serving dish or individual cups, start with a layer of crushed cookies, followed by a layer of sliced bananas, and then a layer of the cottage cheese mixture. Repeat until all ingredients are used, ending with the creamy layer on top.
  4. Chill – Cover and refrigerate for at least 2 hours to let the flavors meld.
  5. Finish with chocolate – Drizzle melted dark chocolate over the top before serving. Enjoy chilled!

Notes

  • For extra crunch, sprinkle chopped nuts between the layers.
  • Swap bananas for berries for a tangier version.
  • This dessert can be made a day ahead for even better flavor.
  • Store leftovers in the refrigerator for up to 2 days.

Top 6 Sweet Easter Celebration: Delightful Treats to Try

Easter has always been a time of joy, renewal, and—let’s be honest—irresistible sweets! Whether it’s the excitement of an egg hunt, the warmth of family gatherings, or simply the excuse to indulge, there’s something magical about this holiday. Growing up, I remember the kitchen buzzing with activity, the air filled with the scent of chocolate, vanilla, and sugary delights. This year, I’m sharing six delightful Easter recipes that are not only festive but also fun to make!

Whether you love the nostalgia of Easter Cathedral Candy, the creamy decadence of Easy No-Bake Easter Fudge, or the stunning swirls of an Easter Swiss Roll Cake with Colorful Marbled Sponge, there’s a treat here for everyone. Perhaps you’re in the mood for a refreshing Easter Jello Pie, the playful whimsy of Cotton Candy Cheesecake, or the classic charm of a New Zealand-style Easter Lolly Cake.

Click on any of the recipes below to dive into the details and bring a little extra sweetness to your Easter celebration!

White Chicken Enchiladas Recipe

These creamy White Chicken Enchiladas are filled with shredded chicken and Monterey Jack cheese, then topped with a rich sour cream and green chili sauce. Perfect for a cozy weeknight dinner or when you’re craving something cheesy and comforting!

View Recipe

White Chicken Enchiladas Recipe

These creamy White Chicken Enchiladas are filled with shredded chicken and Monterey Jack cheese, then topped with a rich sour cream and green chili sauce. Perfect for a cozy weeknight dinner or when you’re craving something cheesy and comforting!

View Recipe

White Chicken Enchiladas Recipe

These creamy White Chicken Enchiladas are filled with shredded chicken and Monterey Jack cheese, then topped with a rich sour cream and green chili sauce. Perfect for a cozy weeknight dinner or when you’re craving something cheesy and comforting!

View Recipe

White Chicken Enchiladas Recipe

These creamy White Chicken Enchiladas are filled with shredded chicken and Monterey Jack cheese, then topped with a rich sour cream and green chili sauce. Perfect for a cozy weeknight dinner or when you’re craving something cheesy and comforting!

View Recipe

White Chicken Enchiladas Recipe

These creamy White Chicken Enchiladas are filled with shredded chicken and Monterey Jack cheese, then topped with a rich sour cream and green chili sauce. Perfect for a cozy weeknight dinner or when you’re craving something cheesy and comforting!

View Recipe

White Chicken Enchiladas Recipe

These creamy White Chicken Enchiladas are filled with shredded chicken and Monterey Jack cheese, then topped with a rich sour cream and green chili sauce. Perfect for a cozy weeknight dinner or when you’re craving something cheesy and comforting!

View Recipe

Bunny Paw Print Cookies: A Sweet Easter Memory

A Tradition Baked with Love

Some of my fondest childhood memories are tied to the kitchen, where my grandmother would patiently teach me the art of baking. The warmth of the oven, the scent of sugar and vanilla filling the air, and the joy of sneaking a taste of the cookie dough before it was baked—these moments made every holiday special.

One Easter, she surprised us with something different—cookies shaped like little bunny paws. She said they were left behind by the Easter Bunny himself, and my siblings and I, wide-eyed with excitement, were convinced we had proof that he had visited our home. Years later, when I had children of my own, I wanted to pass on that same magic. Bunny Paw Print Cookies became a cherished Easter tradition, one that my kids now eagerly look forward to every year.

These cookies are more than just a dessert; they represent love, laughter, and the joy of family. They are a reminder that sometimes, the simplest things—a bit of dough, a sprinkle of sugar, and a whole lot of imagination—can create the most lasting memories.

The Story Behind Bunny Paw Print Cookies

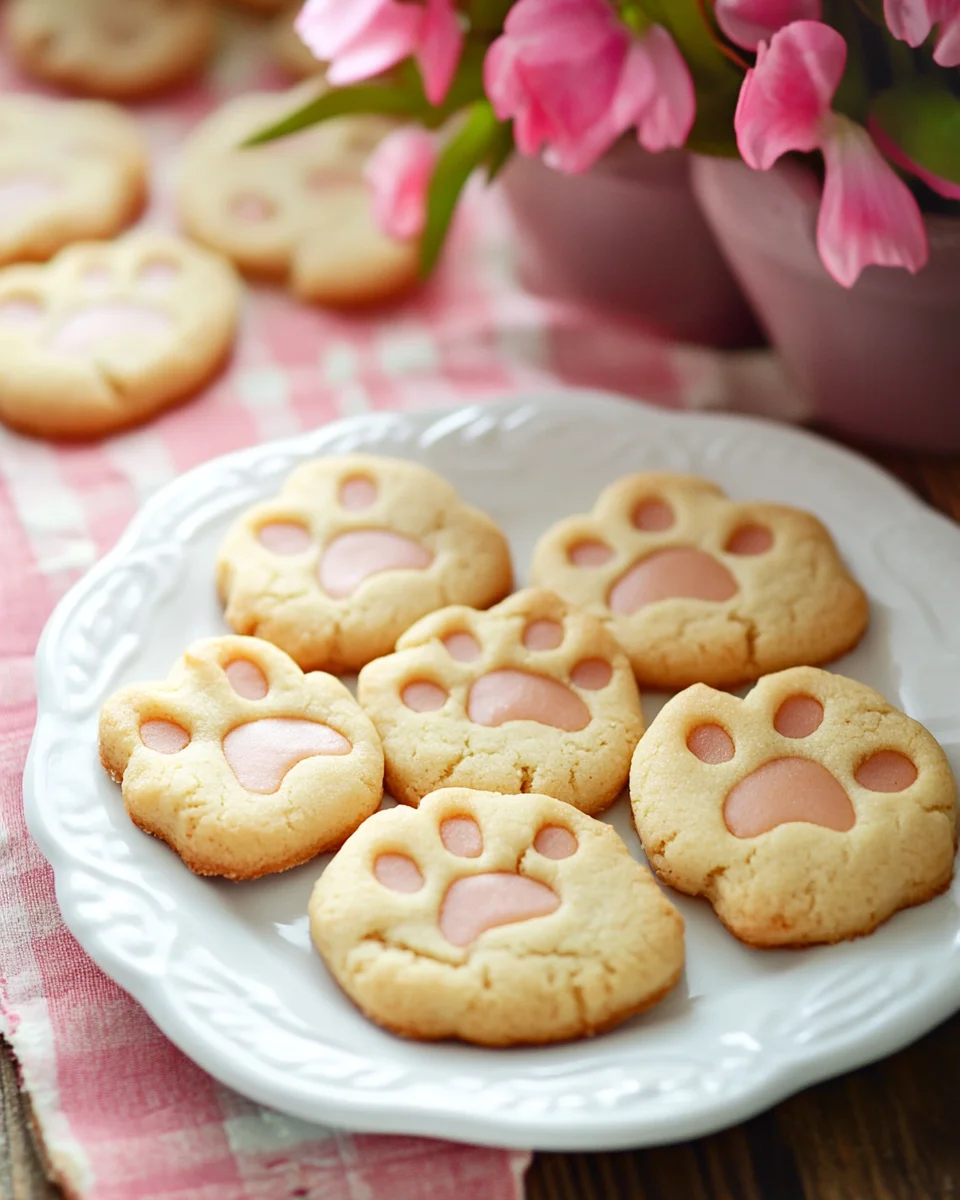
Bunny Paw Print Cookies are a whimsical take on traditional sugar cookies, designed to look like the footprints of an Easter Bunny. Soft, buttery, and lightly sweetened, they have a melt-in-your-mouth texture that pairs beautifully with a simple homemade icing. Their adorable design makes them a favorite among children, and they add a delightful touch to any Easter celebration.

What makes these cookies extra special is their interactive nature. Kids love rolling the dough into little balls, arranging them into paw prints, and helping decorate with pastel-colored icing. They are not only fun to make but also an enjoyable way to bond with family during the Easter season.

Baking Tips for the Perfect Bunny Paw Print Cookies

1. Use Room Temperature Ingredients

To achieve the best texture, ensure that the butter and egg are at room temperature before mixing. This helps create a smooth dough and prevents it from becoming too stiff.

2. Don’t Overbake

These cookies should be soft and slightly chewy. Since ovens vary, check them at the 7-minute mark. They may look slightly underdone, but they will continue to set as they cool.

3. Make Perfect Paw Prints

Pressing the indentations into the cookies right after baking is key. Use the back of a tablespoon for the foot and a teaspoon for the toes while the cookies are still warm. This ensures the icing sits neatly in the grooves.

4. Get Creative with Colors

While classic pink icing gives the cookies a traditional Easter look, feel free to experiment with different pastel shades like lavender, baby blue, or mint green for a festive variety.

5. Use a Piping Bag for Neat Icing

For clean and precise icing application, use a piping bag or a plastic sandwich bag with the tip snipped off. This prevents mess and ensures the paw prints look neat.

Fun Variations to Try

1. Chocolate Bunny Paw Prints

For a richer variation, replace half of the flour with cocoa powder to create a chocolate version of the cookies. Use white or light pink icing for contrast.

2. Coconut-Coated Paws

After adding the icing, dip the cookies in shredded coconut for a fuzzy, bunny-like effect. This adds both texture and flavor.

3. Sprinkle Surprise

For extra fun, sprinkle sanding sugar or edible glitter over the icing while it’s still wet for a sparkly finish.

4. Lemon or Almond Twist

Swap out the vanilla extract for lemon or almond extract to give the cookies a unique flavor profile.

5. Mini Bunny Paws

Make smaller bite-sized versions by halving the dough portions and using a smaller spoon for the indentations. These are perfect for little hands and Easter party platters.

How to Store and Keep Fresh

  • Room Temperature: Store cookies in an airtight container for up to 5 days. Layer them between sheets of parchment paper to prevent sticking.
  • Refrigerator: If you need to keep them longer, store in the fridge for up to 1 week, though they may lose a bit of softness.
  • Freezing: Both the unbaked dough and baked cookies freeze well. Wrap unbaked dough tightly and store for up to 3 months. Baked cookies can be frozen for up to 2 months; just thaw at room temperature before serving.
Serving Suggestions

  • Easter Brunch Centerpiece: Arrange these cookies on a pastel platter alongside fresh fruit and tea sandwiches for a charming Easter table.
  • Gift-Worthy Treats: Package them in decorative boxes or clear treat bags tied with ribbons for adorable homemade Easter gifts.
  • Dessert Board Addition: Serve alongside chocolate eggs, marshmallow bunnies, and Easter cupcakes for a stunning holiday dessert board.
  • Pairing Idea: Enjoy them with a glass of milk, a warm cup of tea, or even a creamy hot chocolate for a comforting treat.

Whimsical Ingredients

For the Cookies:

  • 1 cup butter, softened
  • 1 1/2 cups powdered sugar
  • 1 egg
  • 1 tsp vanilla extract
  • 1/2 tsp almond extract
  • 2 1/2 cups all-purpose flour
  • 1 tsp baking soda
  • 1 tsp cream of tartar

For the Icing:

  • 2 cups powdered sugar
  • 2 Tbsp milk (plus an extra 1 tsp if needed)
  • 1/2 tsp vanilla extract
  • 5-6 drops red food coloring

Magic in the Making

  1. Mix the Magic: In a mixer, cream together the butter and powdered sugar. Add the egg, vanilla, and almond extract, then mix until smooth.
  2. Dry Ingredients Dance: In a separate bowl, whisk together flour, baking soda, and cream of tartar. Gradually add to the butter mixture and blend until fully combined.
  3. Shape the Paws:
    • Use a tablespoon of dough to roll a large ball for the “foot.”
    • Roll three teaspoon-sized balls to create the “toes” and arrange them next to the foot on a baking sheet.
    • Gently flatten the foot slightly with your fingers for even baking.
  4. Bake to Perfection: Bake at 375°F for 7-8 minutes—no longer!
  5. Paw Print Impressions: Immediately after baking, use a tablespoon to press an indent in the foot and a teaspoon to press indents in the toes. Let cookies cool.
  6. Whip Up the Icing: In a bowl, beat together powdered sugar, milk, vanilla, and food coloring until smooth.
  7. Decorate with Delight: Pipe icing into the indents using a piping bag or a plastic bag with the corner snipped.
  8. Let Set & Enjoy: Allow icing to set before serving these adorable Easter treats!

A Peek at the Goodness

While exact nutrition values may vary, here’s a general estimate per cookie:

  • Calories: ~150
  • Fat: ~7g
  • Carbohydrates: ~20g
  • Sugar: ~12g
  • Protein: ~1g

These Bunny Paw Print Cookies are a fun, festive, and delicious way to celebrate Easter!

Frequently Asked Questions

1. Can I Make These Cookies Ahead of Time?

Yes! You can prepare the dough a day in advance and refrigerate it. If it’s too firm after chilling, let it sit at room temperature for about 10 minutes before rolling.

2. Why Did My Cookies Spread Too Much?

If your cookies spread too much, it could be due to overly softened butter or not enough flour. Be sure to measure accurately and refrigerate the dough for 15-20 minutes before baking if needed.

3. Can I Use Store-Bought Icing?

Absolutely! While homemade icing gives the best flavor, store-bought royal icing or decorating gels work as a quick alternative.

4. What If My Cookies Crack?

Cookies may crack if the dough is too dry. Ensure you’re using softened butter and not overmixing the dough. Also, press the indentations gently to avoid breaking the surface.

5. Can I Make These Without Almond Extract?

Yes! You can simply increase the vanilla extract or substitute another flavor, like lemon or orange.

6. How Can I Make These Healthier?

Try reducing the sugar slightly or using a whole wheat flour blend. You can also experiment with natural food coloring for the icing.

A Sweet Easter Tradition Worth Keeping

Bunny Paw Print Cookies are more than just a dessert; they’re a symbol of holiday joy, creativity, and togetherness. Whether you’re baking them with children, gifting them to loved ones, or simply indulging in a bit of nostalgic fun, these cookies bring warmth and happiness to any Easter celebration.

The best part? Every time you make them, you’re creating cherished memories—ones that, just like those soft, buttery cookies, will linger long after the last crumb has been enjoyed. So gather your loved ones, roll up your sleeves, and start a tradition of your own.

Happy Easter and happy baking!

aiting

Bunny Paw Print Cookies: A Sweet Easter Memory

Hop into Easter with these Bunny Paw Print Cookies—soft, buttery treats shaped like adorable bunny paws! Topped with a sweet pink icing, these festive cookies are perfect for holiday gatherings, kids’ activities, or simply adding a touch of magic to your dessert table.
Prep Time 15 minutes
Cook Time 8 minutes
Total Time 23 minutes
Servings: 24 cookies
Course: Dessert
Cuisine: American

Ingredients
  

For the Cookies:
  • 1 cup butter softened
  • 1 1/2 cups powdered sugar
  • 1 egg
  • 1 teaspoon vanilla extract
  • 1/2 teaspoon almond extract
  • 2 1/2 cups all-purpose flour
  • 1 teaspoon baking soda
  • 1 teaspoon cream of tartar
For the Icing:
  • 2 cups powdered sugar
  • 2 tablespoons milk plus an extra 1 teaspoon if needed
  • 1/2 teaspoon vanilla extract
  • 5-6 drops red food coloring

Method
 

  1. Cream the Butter & Sugar – In a mixer, beat together the butter and powdered sugar until smooth. Add the egg, vanilla extract, and almond extract, mixing until fully combined.
  2. Combine the Dry Ingredients – In a separate bowl, whisk together flour, baking soda, and cream of tartar. Gradually add this mixture to the butter mixture, blending until fully incorporated.
  3. Shape the Bunny Paws –
  4. Roll a tablespoon-sized dough ball for the “foot.”
  5. Roll three teaspoon-sized dough balls for the “toes” and arrange them next to the foot on a baking sheet.
  6. Gently flatten the foot slightly with your fingers for even baking.
  7. Bake to Perfection – Preheat oven to 375°F (190°C) and bake for 7-8 minutes—do not overbake!
  8. Make the Paw Prints – Right after baking, use a tablespoon to press an indent into the foot and a teaspoon to press indents into the toes. Let cookies cool completely before decorating.
  9. Prepare the Icing – In a bowl, whisk together powdered sugar, milk, vanilla extract, and red food coloring until smooth. Adjust consistency by adding more milk if needed.
  10. Decorate the Cookies – Pipe the icing into the indents using a piping bag or a plastic bag with a small corner snipped off.
  11. Let the Icing Set & Enjoy – Allow icing to fully set before serving these delightful Easter treats!

Notes

  • Store cookies in an airtight container at room temperature for up to 5 days.
  • Swap almond extract for additional vanilla extract if preferred.
  • Use gel food coloring for a more vibrant pink hue.

The Magic of Easter Bunny Sugar Cookies

Growing up, Easter was always a special time in my family. It wasn’t just about the Easter egg hunts or the excitement of finding a chocolate bunny hidden in the backyard—it was about tradition. My grandmother had a way of turning the simplest moments into something magical, and one of my favorite memories was baking sugar cookies with her every spring. The sweet aroma of vanilla and butter filled the kitchen as we rolled out the dough, cutting each cookie into fun shapes, dusting them with sprinkles, and giggling as we sneaked bites of raw dough when she wasn’t looking.

Now, as a parent, I find myself recreating that magic with my own children. These Chocolate-Dipped Easter Bunny Sugar Cookies have become a staple in our home, not just because they taste incredible, but because they bring people together. Whether you’re baking them with little hands eager to help or making them as a delightful surprise for an Easter gathering, these cookies capture the joy of the season in every bite.

Why You’ll Love These Easter Bunny Sugar Cookies

Easter baking should be easy, fun, and, most importantly, delicious. These cookies check all the boxes. Here’s why they are a must-try:

  • Perfectly Soft Texture – These cookies have a delicate crisp edge with a soft, buttery center that melts in your mouth.
  • Festive and Fun – The pastel sprinkles and chocolate dip make them a visually stunning treat that fits right in with Easter festivities.
  • Kid-Friendly Recipe – From mixing the dough to cutting out bunnies and decorating with sprinkles, kids will love getting involved.
  • Simple Ingredients, Big Flavor – Made with pantry staples, these cookies are full of rich vanilla and buttery goodness.
  • Versatile for Any Occasion – Though perfect for Easter, you can swap out the cookie cutter shape and sprinkle colors to make them suitable for any holiday or celebration.

The Secret to the Perfect Sugar Cookie

Anyone who has baked sugar cookies before knows that they can be a bit finicky. Too much flour, and they turn out dry. Too little chilling time, and they spread too much. Here are some key tips to ensure success every time:

1. Measure Flour Correctly

One of the most common mistakes in baking sugar cookies is adding too much flour. The best way to measure is by using the spoon-and-level method—spoon the flour into the measuring cup, then level it off with a knife. Avoid scooping directly from the bag, as this compacts the flour and leads to dense cookies.

2. Don’t Skip the Chilling Step

Refrigerating the dough is crucial for two reasons: it allows the butter to firm up, preventing the cookies from spreading too much in the oven, and it enhances the flavor. Ideally, chill the dough for at least an hour, but overnight is even better.

3. Rolling Out Dough with Plastic Wrap

Instead of using extra flour when rolling out your dough, try placing it between two sheets of plastic wrap. This prevents sticking without adding excess flour, which can make the cookies tough.

4. Even Thickness is Key

For uniform baking, aim to roll the dough to about ⅓-inch thickness. If your cookies are too thin, they’ll bake too quickly and become crisp rather than soft. If they’re too thick, they may not bake evenly.

5. Watch the Bake Time Carefully

Sugar cookies are best when they are just barely golden on the edges. Overbaking will make them crunchy instead of soft. Check them around the 8-minute mark and remove them once they are set but still slightly soft in the center—they will continue to firm up as they cool.

Customizing Your Easter Bunny Cookies

One of the best things about these cookies is that they are completely customizable! Here are a few creative ideas to make them your own:

1. Alternative Toppings

Not a fan of chocolate-dipped cookies? Try these instead:

  • Buttercream Frosting – Pipe pastel-colored buttercream on top for a whimsical, fluffy look.
  • Royal Icing – Decorate with detailed designs using royal icing for a professional finish.
  • Colored Sanding Sugar – Sprinkle colored sugar over a thin glaze for a sparkly effect.

2. Flavor Twists

While the classic vanilla flavor is always a hit, consider these variations:

  • Lemon Zest – Add a teaspoon of fresh lemon zest for a bright, citrusy twist.
  • Almond Extract – Swap half of the vanilla for almond extract for a nutty depth.
  • Coconut Flakes – Sprinkle coconut on the chocolate-dipped section for a tropical touch.

3. Shape Variations

If you don’t have a bunny-shaped cookie cutter, don’t worry! You can use any Easter-themed shape, such as:

  • Eggs
  • Chicks
  • Flowers
  • Carrots

Ingredients

For the Cookies:

  • 3 cups all-purpose flour
  • 2 teaspoons baking powder
  • 1 teaspoon salt
  • 1 cup unsalted butter, room temperature
  • 1 cup granulated sugar
  • 1 large egg, room temperature
  • 2 teaspoons vanilla extract
  • ½ cup pastel sprinkles (plus more for decorating)

For the Chocolate Coating:

  • 1 cup semisweet chocolate chips
  • 1 teaspoon vegetable shortening (if needed for consistency)

Directions

Step 1: Mix the Dry Ingredients
In a medium bowl, whisk together the flour, baking powder, and salt. Set aside.

Step 2: Cream the Butter and Sugar
Using a stand mixer with the paddle attachment (or a hand mixer), cream the butter until smooth. Add sugar and beat until light and fluffy.

Step 3: Combine Wet and Dry Ingredients
Mix in the egg and vanilla until fully incorporated. Gradually add the flour mixture, one cup at a time, until just combined. Gently fold in the pastel sprinkles.

Step 4: Chill the Dough
Divide the dough into two large balls, wrap in plastic wrap, and flatten into thick disks. Refrigerate for at least one hour or overnight.

Step 5: Roll and Cut
Preheat oven to 350°F (175°C). Line a baking sheet with parchment paper. Roll out the chilled dough between plastic wrap (or on a lightly floured surface) to ⅓-inch thickness. Use a bunny-shaped cookie cutter to cut out cookies and place them on the prepared baking sheet.

Step 6: Bake and Cool
Bake for 8-10 minutes or until edges are just lightly golden. Let cookies cool on the sheet for a few minutes before transferring to a wire rack.

Step 7: Dip in Chocolate
Melt the chocolate chips in a microwave-safe bowl for 60 seconds, stirring until smooth. If the chocolate is too thick, add a teaspoon of vegetable shortening.

Step 8: Decorate
Dip each cooled cookie partially in melted chocolate, then sprinkle extra pastel sprinkles on top. Place cookies back on the wire rack until the chocolate sets.

Nutritional Information (Per Cookie)

  • Calories: 202
  • Total Fat: 11g
  • Saturated Fat: 6g
  • Cholesterol: 29mg
  • Sodium: 150mg
  • Carbohydrates: 26g
  • Fiber: 1g
  • Sugar: 13g
  • Protein: 2g

Enjoy these adorable and delicious Easter Bunny Sugar Cookies—perfect for your holiday dessert table!

Frequently Asked Questions

1. Can I Make These Cookies Ahead of Time?

Yes! These cookies store beautifully. You can make them up to 2 weeks in advance and keep them in an airtight container in the fridge. If you want to keep them longer, freeze them for up to 3 months.

2. Can I Freeze the Dough?

Absolutely. After making the dough, shape it into flattened disks, wrap in plastic wrap, and store in a freezer bag. When ready to bake, thaw the dough in the refrigerator overnight before rolling and cutting.

3. What’s the Best Chocolate for Dipping?

Semi-sweet chocolate chips work great, but you can also use dark, white, or even colored candy melts for a more festive look. If your melted chocolate is too thick, add a teaspoon of vegetable shortening to thin it out.

4. Can I Make These Cookies Gluten-Free?

Yes! Simply substitute the all-purpose flour with a 1:1 gluten-free flour blend. Make sure it contains xanthan gum for the best texture.

5. Why Did My Cookies Spread Too Much?

If your cookies spread too much, the butter may have been too warm. Make sure to chill your dough thoroughly before baking. Additionally, avoid overmixing the dough, as this can cause spreading.

The Sweetest Easter Tradition

Baking is more than just mixing ingredients—it’s about creating moments, traditions, and memories that last a lifetime. These Easter Bunny Sugar Cookies aren’t just delicious; they bring joy to those who make and share them. Whether you’re baking with family, surprising a friend, or simply indulging in a sweet treat for yourself, these cookies add a touch of magic to the holiday.

So gather your ingredients, roll out the dough, and let the scent of freshly baked sugar cookies fill your home. And as you take that first bite—soft, buttery, with a hint of crunch from the sprinkles—know that you’re not just enjoying a cookie. You’re carrying on a tradition of love, warmth, and Easter cheer.

aiting

The Magic of Easter Bunny Sugar Cookies

Celebrate Easter with these Chocolate-Dipped Easter Sugar Cookies—buttery, soft, and full of festive pastel sprinkles. Dipped in rich chocolate for a sweet finishing touch, these adorable bunny-shaped treats are perfect for springtime celebrations!
Prep Time 15 minutes
Cook Time 10 minutes
Servings: 24 cookies
Course: Dessert
Cuisine: American

Ingredients
  

For the Cookies:
  • 3 cups all-purpose flour
  • 2 teaspoons baking powder
  • 1 teaspoon salt
  • 1 cup unsalted butter room temperature
  • 1 cup granulated sugar
  • 1 large egg room temperature
  • 2 teaspoons vanilla extract
  • ½ cup pastel sprinkles plus more for decorating
For the Chocolate Coating:
  • 1 cup semisweet chocolate chips
  • 1 teaspoon vegetable shortening if needed for consistency

Method
 

  1. edients – In a medium bowl, whisk together flour, baking powder, and salt. Set aside.
  2. Cream the Butter & Sugar – Using a stand mixer with a paddle attachment (or a hand mixer), beat the butter until smooth. Add sugar and continue beating until light and fluffy.
  3. Combine Wet & Dry Ingredients – Mix in the egg and vanilla until fully incorporated. Gradually add the flour mixture, one cup at a time, mixing until just combined. Gently fold in pastel sprinkles.
  4. Chill the Dough – Divide the dough into two large balls, wrap in plastic wrap, and flatten into thick disks. Refrigerate for at least one hour or overnight.
  5. Roll & Cut the Cookies – Preheat oven to 350°F (175°C). Line a baking sheet with parchment paper. Roll out the chilled dough between plastic wrap (or on a lightly floured surface) to ⅓-inch thickness. Use a bunny-shaped cookie cutter to cut out cookies and place them on the prepared baking sheet.
  6. Bake & Cool – Bake for 8-10 minutes or until edges are just lightly golden. Let cookies cool on the sheet for a few minutes before transferring to a wire rack.
  7. Dip in Chocolate – Melt chocolate chips in a microwave-safe bowl for 60 seconds, stirring until smooth. If needed, add a teaspoon of vegetable shortening for a smoother consistency.
  8. Decorate – Dip each cooled cookie partially in melted chocolate, then sprinkle with extra pastel sprinkles. Place cookies back on the wire rack until the chocolate sets.

Notes

  • Store in an airtight container at room temperature for up to 5 days or freeze for up to 3 months.
  • For extra fun, drizzle additional white or dark chocolate over the cookies after dipping.
  • These cookies make great Easter gifts when wrapped in decorative bags!

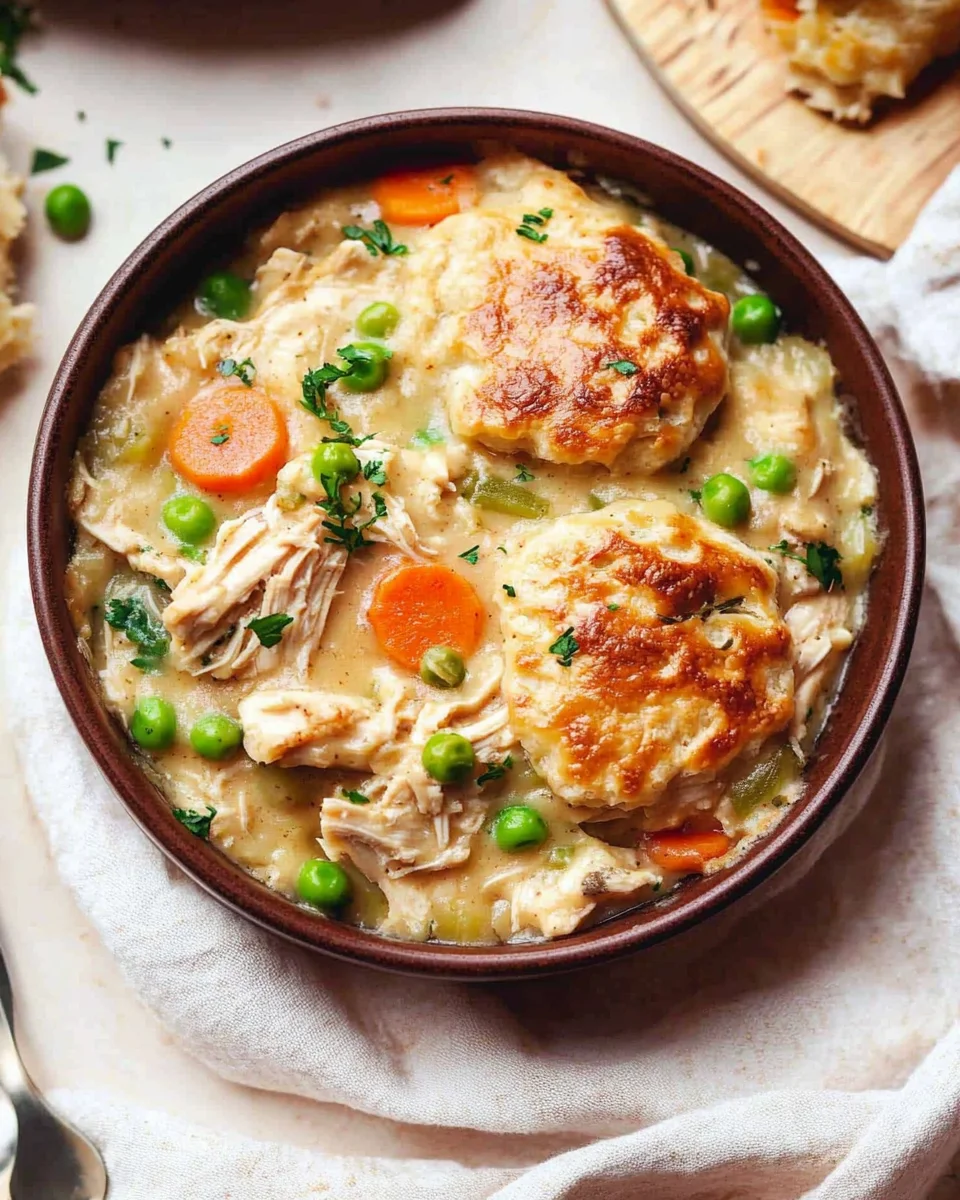
Crustless Chicken Pot Pie: A Comforting Classic Without the Extra Fuss

A Taste of Home in Every Spoonful

There’s something undeniably comforting about a warm bowl of chicken pot pie. The creamy texture, the rich flavors, the familiar blend of vegetables, tender chicken, and savory broth—it all brings back memories of cozy family dinners. For me, chicken pot pie was a staple in my childhood home. My grandmother made it from scratch, rolling out the pie crust with expert hands, filling the house with the scent of butter, herbs, and slow-cooked goodness.

But as life got busier, homemade pot pies became more of a special occasion meal. Between work, family responsibilities, and the ever-growing to-do list, the time-consuming process of making the perfect crust felt like a luxury I couldn’t afford. That’s when I discovered the magic of a crustless version. It had all the heartwarming flavors of my grandmother’s recipe but without the added work of making and baking a crust.

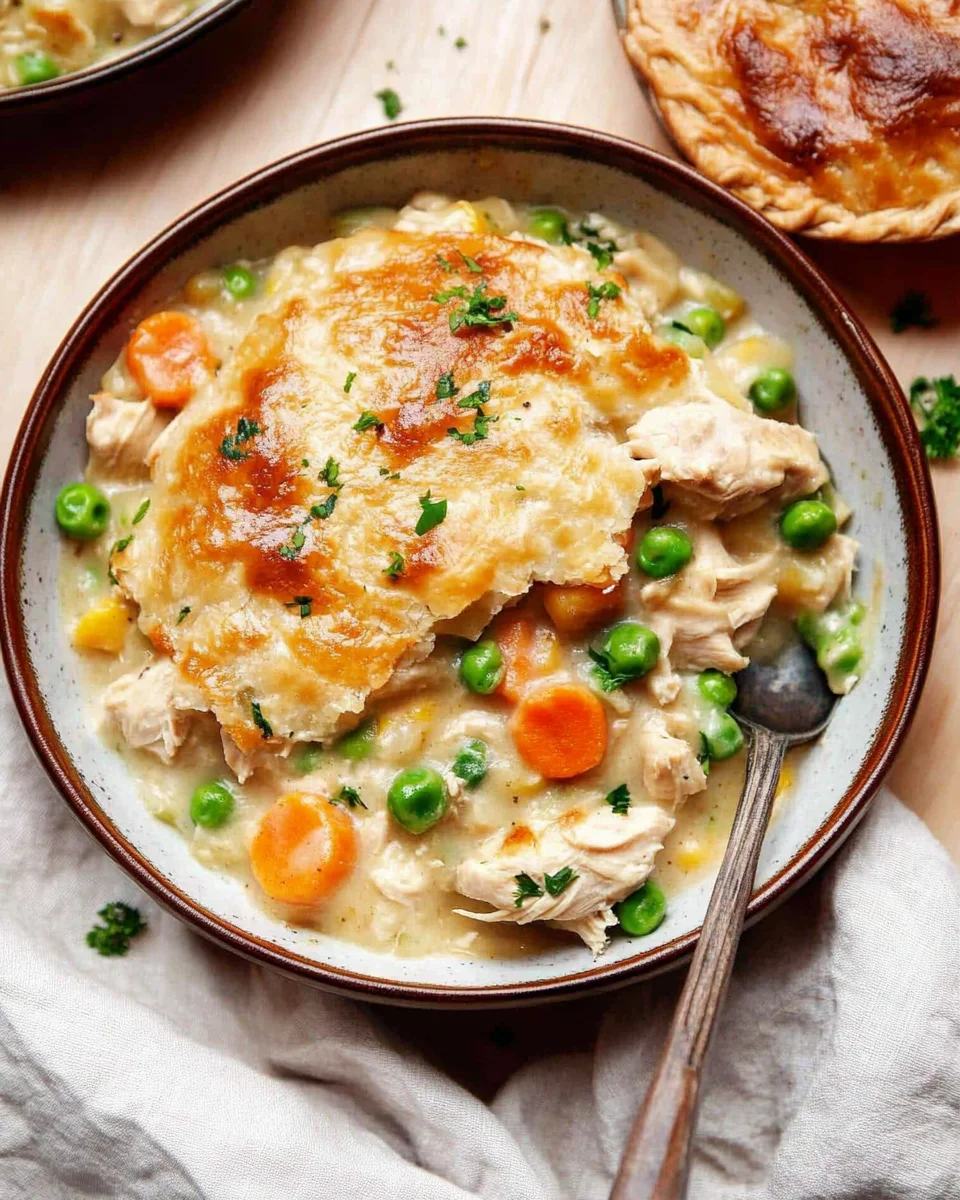
Now, crustless chicken pot pie is a go-to in my household. It’s quick, made in one pot, and still gives that same nostalgic comfort. It’s a meal that brings people together, whether it’s a casual weeknight dinner or a meal prepped ahead of time for busy days. If you love creamy, hearty, and wholesome dishes, this recipe will quickly become a favorite in your kitchen too.

Why Crustless Chicken Pot Pie is a Must-Try

This dish is more than just a time-saver. It’s a healthier take on a classic, with fewer carbs and fats while keeping all the rich flavors intact. Here’s why you’ll love it:

  • Less Work, Same Flavor – Traditional chicken pot pie requires making or buying a crust, rolling it out, and baking it separately. This version skips that step while keeping the creamy, savory filling intact.
  • One-Pot Wonder – No need to juggle multiple dishes—this meal comes together in a single pot, making cleanup effortless.
  • Healthy & Wholesome – Packed with lean protein, fiber-rich vegetables, and nourishing broth, this meal is both filling and nutritious.
  • Perfect for Meal Prep – Stores well in the fridge and freezes beautifully, so you can enjoy a home-cooked meal any night of the week.
  • Customizable – Whether you want to make it dairy-free, gluten-free, or add your favorite vegetables, this recipe is incredibly versatile.

What Makes This Recipe Stand Out?

Many recipes claim to be “quick and easy,” but this one truly delivers. With a 30-minute cook time and minimal prep, it’s ideal for anyone who loves homemade meals but doesn’t always have the time to make them from scratch.

Unlike many creamy soups that rely on heavy cream, this recipe uses milk and a flour-based roux to achieve a velvety texture. It’s lighter but still satisfying. Plus, the use of sweet potatoes or Yukon gold potatoes adds natural creaminess and a subtle sweetness that balances the savory flavors beautifully.

One of the best parts of this dish is that it doesn’t sacrifice texture or taste. The thickened broth mimics the creamy filling of a traditional pot pie, and the combination of shredded chicken, tender vegetables, and herbs makes it taste just as indulgent as the classic version.

Wholesome Ingredients for a Cozy Meal

  • Butter – 1-2 tbsp (unsalted preferred)
  • Onion – 1 small yellow onion, chopped
  • Carrots – 2 large, sliced into coins
  • Celery – 2 large sticks, sliced (~½ cup)
  • Garlic – 3 large cloves, minced
  • Flour – ⅓ cup whole wheat or all-purpose (gluten-free if needed)
  • Chicken Stock – 4 cups, low-sodium
  • Milk – 1 cup (skim, 2%, or whole; dairy-free alternatives work)
  • Sweet Potatoes – 1½ cups (~1 medium), diced into small cubes (or Yukon potatoes)
  • Salt – 1 tsp, plus more to taste
  • Black Pepper – ½ tsp, plus more to taste
  • Thyme – 1-2 tbsp fresh or 1 tsp dried
  • Cooked Chicken – 3-4 cups, shredded (rotisserie recommended)
  • Frozen Peas – 1 cup
  • Fresh Parsley – ¼ cup, finely chopped
  • Baby Spinach – 2-4 cups, chopped (optional)

Simple Steps to One-Pot Perfection

1. Sauté the Base:
Melt butter in a large pot over medium-low heat. Add chopped onion, carrots, and celery, cooking for 6-8 minutes until soft. Stir every minute. Add minced garlic for the last 30 seconds and mix well.

2. Create the Roux:
Sprinkle in flour and stir until vegetables are coated. Cook for 1 minute.

3. Build the Broth:
Pour in chicken stock, milk, sweet potatoes, salt, pepper, and thyme. Stir well. Bring to a boil, then reduce heat and let it simmer for 15-20 minutes, stirring every few minutes until potatoes are tender.

4. Add the Protein & Greens:
Mix in shredded chicken, frozen peas, parsley, and optional spinach. Simmer for 5 more minutes. Adjust seasoning to taste.

5. Serve & Enjoy:
Remove from heat and ladle into bowls. Pair with a biscuit, garlic bread, or toasted bread.

Nutritional Breakdown (Per Serving)

  • Calories: 309 kcal
  • Carbohydrates: 25g
  • Protein: 32g
  • Fat: 10g
  • Saturated Fat: 3g
  • Fiber: 5g
  • Sodium: 476mg
  • Vitamin A: 11,398 IU
  • Vitamin C: 23mg
  • Calcium: 129mg
  • Iron: 3mg

This hearty, crustless chicken pot pie soup is perfect for meal prep, family dinners, or cozy nights in. Store leftovers in the fridge for up to 5 days or freeze for up to 3 months. Reheat on the stovetop for the best flavor.

FAQs About Crustless Chicken Pot Pie

1. Can I Make This Recipe Gluten-Free?

Yes! Simply swap the flour for a gluten-free all-purpose flour blend. Everything else in the recipe is naturally gluten-free, making it an easy modification for those with dietary restrictions.

2. What Can I Use Instead of Sweet Potatoes?

If you’re not a fan of sweet potatoes, Yukon gold, russet, or baby potatoes work just as well. Butternut squash is another great alternative if you’re looking for a slightly different flavor.

3. Can I Use Uncooked Chicken Instead of Rotisserie Chicken?

Absolutely. If you’re using raw chicken breasts, simply cut them into bite-sized pieces and cook them in the pot before adding the flour and broth. This ensures the chicken is fully cooked while still absorbing all the flavors of the dish.

4. How Long Can I Store Leftovers?

This dish keeps well in the refrigerator for up to 5 days in an airtight container. It can also be frozen for up to 3 months. When reheating, do so over medium heat on the stovetop or in the microwave in 30-second intervals, stirring between each round.

5. Can I Make This Dairy-Free?

Yes! Substitute butter with olive oil or vegan butter and use an unsweetened dairy-free milk like almond, cashew, or oat milk. The result will be just as creamy and delicious.

6. How Can I Make This Recipe Even More Flavorful?

If you love bold flavors, consider adding a pinch of smoked paprika, a dash of Worcestershire sauce, or a splash of white wine while cooking the vegetables. Fresh herbs like rosemary and sage also pair beautifully with the dish.

7. What Can I Serve with Crustless Chicken Pot Pie?

Since this dish is already packed with protein and vegetables, it doesn’t need much to complete the meal. However, it pairs wonderfully with:

  • Biscuits or Garlic Bread – Perfect for dipping into the creamy broth.
  • Side Salad – A simple green salad with a tangy vinaigrette balances the richness of the dish.
  • Roasted Vegetables – If you want to add more veggies, roasted Brussels sprouts or asparagus make a great side.

8. Can I Make This in a Slow Cooker?

Yes, but with a few adjustments. Cook the chicken and vegetables in the slow cooker on low for 6-7 hours or high for 3-4 hours, then whisk in the flour and milk during the last 30 minutes to thicken the broth.

Tips to Elevate Your Crustless Chicken Pot Pie

  • Use Homemade Stock – If you have time, making your own chicken stock adds an extra layer of depth and richness to the dish.
  • Don’t Skip the Flour – This is key to getting the creamy consistency that makes pot pie filling so comforting.
  • Stir Regularly – Since this dish thickens as it cooks, stirring frequently prevents it from sticking to the bottom of the pot.
  • Garnish for Extra Freshness – A sprinkle of fresh parsley or thyme right before serving enhances both the flavor and presentation.

Conclusion: A Meal That Feels Like Home

Crustless chicken pot pie is more than just a quick dinner—it’s a dish that brings warmth, comfort, and nostalgia to the table. Whether it reminds you of home-cooked meals from your childhood or becomes a new favorite in your household, it’s the kind of recipe that stays with you.

By skipping the crust, you not only make the dish easier and healthier, but you also highlight the creamy, hearty filling that makes pot pie so beloved. Whether you’re making this on a chilly night, meal prepping for the week, or simply looking for a wholesome dish that feels like a hug in a bowl, this recipe delivers every time.

aiting

Crustless Chicken Pot Pie: A Comforting Classic Without the Extra Fuss

Enjoy the comforting flavors of Chicken Pot Pie without the crust! This hearty, creamy, one-pot meal is packed with tender chicken, vibrant vegetables, and a rich, flavorful broth. Perfect for meal prep, cozy dinners, or anytime you crave a warm, nourishing dish.
Prep Time 10 minutes
Cook Time 30 minutes
Total Time 40 minutes
Servings: 6 servings
Course: Soup
Cuisine: American

Ingredients
  

Short & Engaging Description:
  • Enjoy the comforting flavors of Chicken Pot Pie without the crust! This hearty creamy, one-pot meal is packed with tender chicken, vibrant vegetables, and a rich, flavorful broth. Perfect for meal prep, cozy dinners, or anytime you crave a warm, nourishing dish.

Method
 

  1. Sauté the Vegetables – Melt butter in a large pot over medium-low heat. Add chopped onion, carrots, and celery, cooking for 6-8 minutes until softened. Stir every minute. Add minced garlic for the last 30 seconds and mix well.
  2. Make the Roux – Sprinkle in flour and stir until vegetables are coated. Cook for 1 minute to remove the raw flour taste.
  3. Add the Broth & Potatoes – Pour in chicken stock, milk, sweet potatoes, salt, pepper, and thyme. Stir well. Bring to a gentle boil, then reduce heat and let it simmer for 15-20 minutes, stirring occasionally, until the potatoes are tender.
  4. Incorporate the Chicken & Greens – Mix in shredded chicken, frozen peas, parsley, and optional spinach. Simmer for 5 more minutes until heated through. Adjust seasoning to taste.
  5. Serve & Enjoy – Remove from heat and ladle into bowls. Pair with a biscuit, garlic bread, or toasted bread for the ultimate comforting meal.

Notes

  • Storage: Refrigerate in an airtight container for up to 5 days or freeze for up to 3 months. Reheat gently on the stovetop.
  • Thickening Tip: If you prefer a thicker consistency, mash some of the cooked sweet potatoes or add a cornstarch slurry.
  • Substitutions: Swap sweet potatoes for Yukon golds or add mushrooms for an earthy depth of flavor.

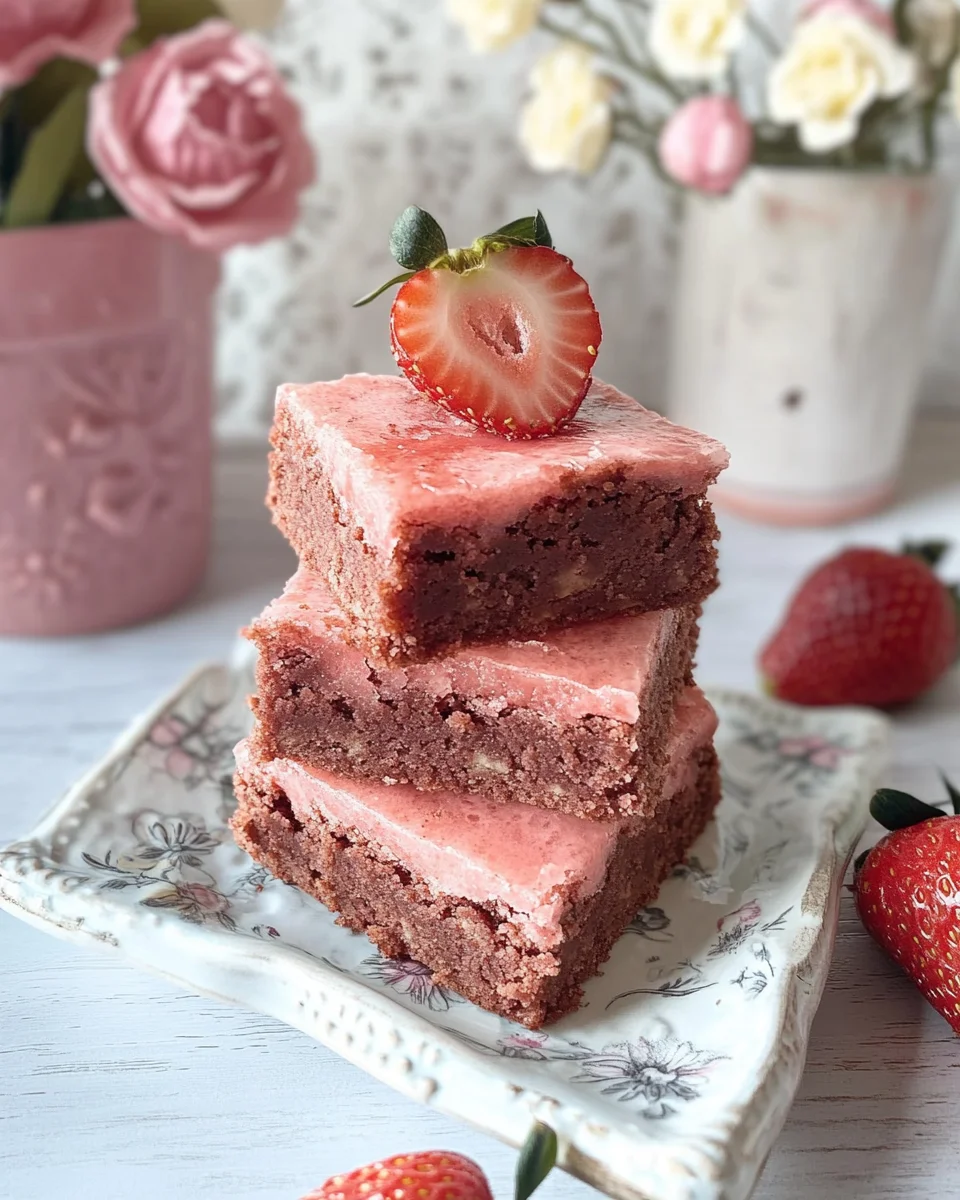
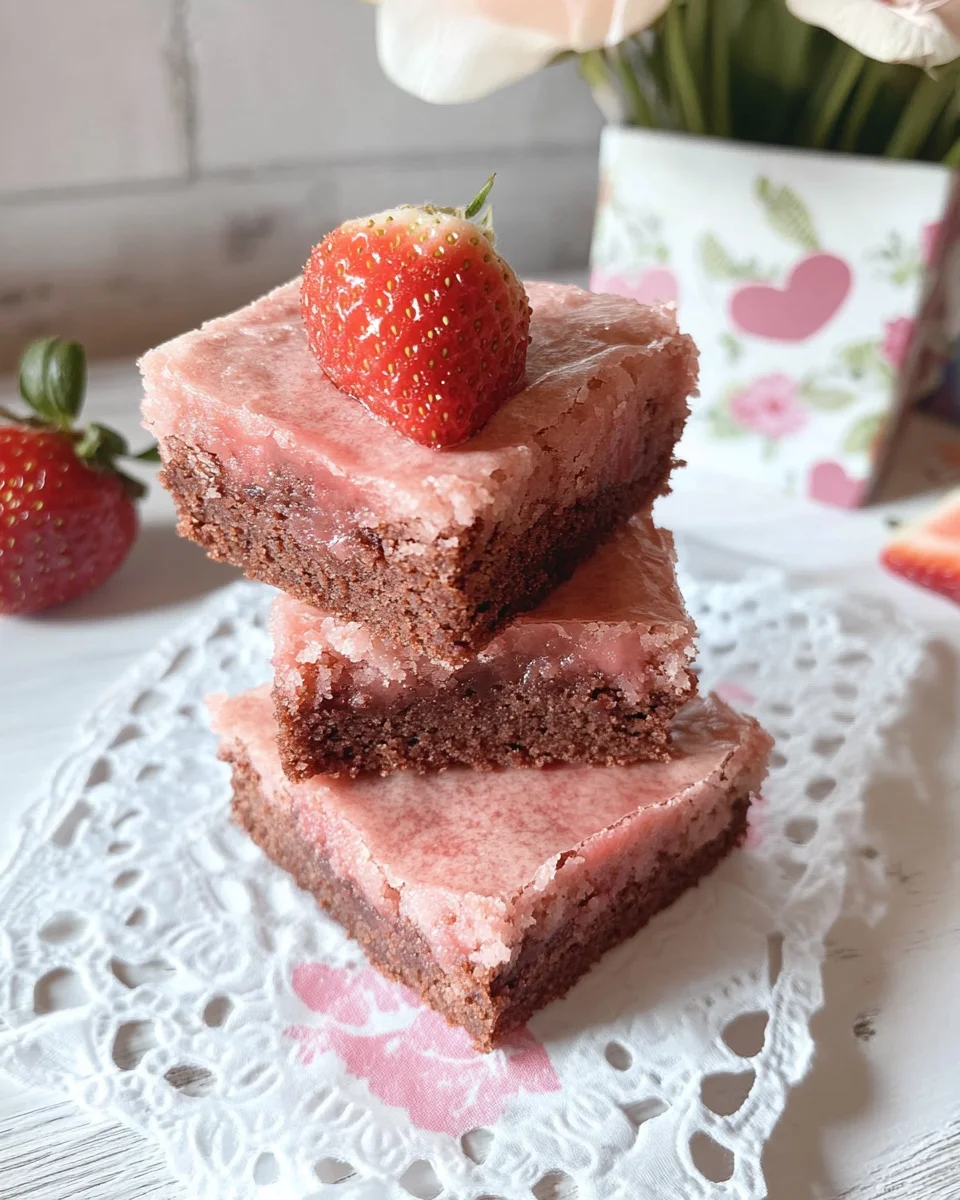
Strawberry Sweetheart Brownies: A Love Story in Dessert Form

A Bite of Nostalgia and Love

Growing up, my grandmother had a way of making every occasion feel magical with food. Whether it was birthdays, holidays, or even just a rainy afternoon, she believed that a sweet treat could make anything better. One of my fondest memories is of the pink-hued desserts she would make every spring, using the juiciest strawberries from her backyard garden. The aroma of fresh berries mixed with warm vanilla would fill the kitchen, creating an unspoken promise of something delicious to come.

Years later, I found myself searching for a dessert that could recreate that feeling—a treat that wasn’t just about taste, but about warmth, nostalgia, and love. That’s when I came across these Strawberry Sweetheart Brownies. Unlike your traditional chocolate brownie, these are a beautiful shade of pink, bursting with real strawberry flavor and the creamy sweetness of white chocolate. They are the perfect way to say “I love you” without words, making them ideal for Valentine’s Day, anniversaries, or simply a cozy evening with a cup of tea.

Let’s dive into what makes these brownies so special, including tips, variations, and answers to common questions you might have before making them.

What Makes Strawberry Sweetheart Brownies Unique?

Brownies are typically known for their rich, chocolatey goodness, but these Strawberry Sweetheart Brownies take a different approach. They bring together the fudgy texture of classic brownies with the light, fruity essence of fresh strawberries and the smoothness of white chocolate.

Here’s what sets them apart:

  • Fresh Strawberry Purée – Unlike artificial strawberry-flavored desserts, these brownies use real strawberries, giving them a natural and vibrant taste.
  • White Chocolate Base – Instead of cocoa, these brownies rely on melted white chocolate for richness, adding depth to the flavor profile.
  • Soft and Fudgy Texture – Just like a traditional brownie, they are soft in the center, slightly chewy around the edges, and topped with a glossy, sweet strawberry icing.
  • Heart-Shaped Appeal – While you can bake them in any pan, using a heart-shaped cake pan makes them perfect for romantic occasions or special treats.

Pro Tips for Perfect Strawberry Brownies

Even though this recipe is straightforward, a few expert tips can help you get the best possible results:

  1. Use Fresh, Ripe Strawberries – The quality of your strawberries affects the flavor. Look for berries that are deep red, juicy, and fragrant for the best results.
  2. Strain the Purée – Removing seeds from the purée ensures a smooth batter and icing without unwanted texture.
  3. Watch the Baking Time – Overbaking can result in dry brownies. The toothpick should come out with a few moist crumbs, not wet batter.
  4. Let Them Cool Before Icing – The icing sets best when applied to completely cooled brownies, preventing it from becoming too runny.
  5. Enhance the Color Naturally – If you want a more vibrant pink color without food coloring, try adding a teaspoon of beet juice or a touch of raspberry purée.

Creative Variations to Try

While these brownies are already delightful as they are, you can always add your own twist to make them even more special:

  • Chocolate Strawberry Brownies – Drizzle melted dark chocolate over the top or fold in white chocolate chips for added texture.
  • Berry Bliss – Mix in some raspberries or blueberries for a multi-berry flavor.
  • Nutty Indulgence – Add crushed almonds or pecans to the batter for a slight crunch.
  • Cheesecake Swirl – Swirl in a mixture of cream cheese, sugar, and vanilla for a marbled effect.
  • Lemon Kissed – Add a teaspoon of lemon zest for a slight citrus contrast to the sweetness.

Ingredients

For the Strawberry Brownies:

  • 7 tablespoons (3 1/2 ounces) unsalted butter, cubed
  • 6 ounces white chocolate, finely chopped
  • 3/4 cup (5 1/4 ounces) sugar
  • 1/4 teaspoon fine sea salt
  • 1 large egg
  • 2 large egg yolks
  • 1/2 cup (4 ounces) strawberry purée, divided
  • 1/2 teaspoon pure vanilla extract
  • 1/2 teaspoon pure strawberry extract
  • 1 petite pea-sized drop of pink gel food color (optional)
  • 1 1/2 cups (6 3/4 ounces) all-purpose flour, sifted

For the Strawberry Icing:

  • 3/4 cup (3 ounces) powdered sugar, sifted
  • 1 tablespoon unsalted butter, melted
  • 2 tablespoons reserved strawberry purée
  • 1/4 teaspoon pure vanilla extract
  • 1/4 teaspoon pure strawberry extract
  • A dash of fine sea salt

Directions

For the Strawberry Brownies:

  1. Preheat the oven to 325ºF. Line the bottom of an 8-inch heart-shaped cake pan with parchment paper and spray the insides with nonstick spray.
  2. In a large heat-safe bowl, melt the butter and white chocolate together. Do this carefully over a pan of barely simmering water or in the microwave in 20-second intervals, stirring each time to prevent overheating.
  3. Stir in the sugar and salt until well combined.
  4. Add the egg and egg yolks, whisking until smooth.
  5. Pass the strawberry purée through a sieve to remove seeds. Set aside 2 tablespoons for the icing. Add the remaining purée to the batter and mix well.
  6. Stir in the vanilla extract, strawberry extract, and food coloring (if using) until fully incorporated.
  7. Gently fold in the sifted flour, mixing until just combined.
  8. Pour the batter into the prepared pan and bake for 25-30 minutes. The brownies are done when a toothpick inserted in the center comes out with a few moist crumbs. Do not overbake.
  9. Let the brownies cool in the pan before removing and icing.

For the Strawberry Icing:

  1. In a small bowl, whisk together all icing ingredients until smooth.
  2. Spread over the cooled brownies and let set before slicing.

Nutritional Highlights

(Approximate values per serving)

  • Calories: ~250
  • Fat: 12g
  • Carbohydrates: 33g
  • Protein: 3g
  • Sugar: 21g

These Strawberry Sweetheart Brownies are a delightful blend of white chocolate and fresh strawberries, offering a fudgy texture with a sweet, fruity finish. Perfect for sharing with loved ones or savoring all to yourself.

FAQs About Strawberry Sweetheart Brownies

1. Can I use frozen strawberries instead of fresh ones?

Yes! If fresh strawberries aren’t in season, you can use frozen strawberries. Just make sure to thaw and drain them well before puréeing to prevent excess liquid from affecting the batter’s consistency.

2. How do I store these brownies?

Store them in an airtight container at room temperature for up to 2 days or refrigerate them for up to a week. If refrigerated, let them sit at room temperature for a few minutes before serving to soften.

3. Can I freeze these brownies?

Yes! Wrap individual pieces in plastic wrap, then store them in an airtight container in the freezer for up to 2 months. Thaw at room temperature before eating.

4. What if I don’t have a heart-shaped pan?

No problem! An 8-inch round cake pan works perfectly, or you can use a square baking dish and cut the brownies into heart shapes using a cookie cutter.

5. Why is my batter too thick?

White chocolate-based batters can be thicker than regular brownie batter. If it feels too thick, you can add a tablespoon of milk to loosen it slightly.

6. Can I make these gluten-free?

Absolutely! Substitute the all-purpose flour with a 1:1 gluten-free baking blend for a gluten-free version.

7. Is the pink food coloring necessary?

Not at all! The food coloring is optional and only enhances the pink hue. The brownies will still taste delicious without it.

8. Can I make this recipe dairy-free?

Yes, with a few modifications. Use dairy-free butter and replace white chocolate with a dairy-free alternative. For the icing, use a plant-based butter substitute.

9. What’s the best way to serve these brownies?

These brownies taste amazing on their own, but you can also:

  • Serve them with a scoop of vanilla ice cream.
  • Pair them with fresh strawberries and whipped cream.
  • Drizzle them with white or dark chocolate for extra indulgence.

Final Thoughts: A Treat to Share and Savor

Baking has always been more than just a way to satisfy a sweet tooth—it’s a way to create memories, share love, and bring joy to those around us. Strawberry Sweetheart Brownies are the kind of dessert that does exactly that. They are sweet but not overpowering, rich but balanced, and most importantly, made with real ingredients that highlight the beauty of simple flavors.

Whether you’re baking these for someone special, for a festive gathering, or simply as a treat for yourself, they are bound to bring smiles. After all, some of the best moments in life are shared over something warm, sweet, and made with love.

So go ahead, preheat that oven, and whip up a batch of these strawberry-filled delights. Your kitchen will be filled with the scent of nostalgia, and your heart will be filled with joy.

aiting

Strawberry Sweetheart Brownies: A Love Story in Dessert Form

These Strawberry Sweetheart Brownies are a love letter in dessert form—fudgy, sweet, and infused with fresh strawberry flavor. A luscious combination of white chocolate and strawberries, topped with a dreamy strawberry icing, makes these perfect for special occasions or just indulging in a little extra sweetness.
Prep Time 15 minutes
Cook Time 30 minutes
Total Time 45 minutes
Servings: 12 brownies
Course: Dessert
Cuisine: American

Ingredients
  

For the Strawberry Brownies:
  • 7 tablespoons 3 1/2 ounces unsalted butter, cubed
  • 6 ounces white chocolate finely chopped
  • 3/4 cup 5 1/4 ounces sugar
  • 1/4 teaspoon fine sea salt
  • 1 large egg
  • 2 large egg yolks
  • 1/2 cup 4 ounces strawberry purée, divided
  • 1/2 teaspoon pure vanilla extract
  • 1/2 teaspoon pure strawberry extract
  • 1 petite pea-sized drop of pink gel food color optional
  • 1 1/2 cups 6 3/4 ounces all-purpose flour, sifted
For the Strawberry Icing:
  • 3/4 cup 3 ounces powdered sugar, sifted
  • 1 tablespoon unsalted butter melted
  • 2 tablespoons reserved strawberry purée
  • 1/4 teaspoon pure vanilla extract
  • 1/4 teaspoon pure strawberry extract
  • A dash of fine sea salt

Method
 

For the Strawberry Brownies:
  1. Preheat & Prepare – Preheat the oven to 325ºF (163ºC). Line the bottom of an 8-inch heart-shaped cake pan with parchment paper and spray the insides with nonstick spray.
  2. Melt the Chocolate & Butter – In a large heat-safe bowl, melt the butter and white chocolate together. Do this carefully over a pan of barely simmering water or in the microwave in 20-second intervals, stirring each time.
  3. Mix the Base – Stir in the sugar and salt until well combined.
  4. Incorporate the Eggs – Add the egg and egg yolks, whisking until smooth.
  5. Add the Strawberry Flavor – Pass the strawberry purée through a sieve to remove seeds. Set aside 2 tablespoons for the icing. Add the remaining purée to the batter and mix well.
  6. Enhance with Extracts – Stir in the vanilla extract, strawberry extract, and food coloring (if using) until fully incorporated.
  7. Fold in Flour – Gently fold in the sifted flour, mixing until just combined. Do not overmix.
  8. Bake – Pour the batter into the prepared pan and bake for 25-30 minutes, or until a toothpick inserted in the center comes out with a few moist crumbs. Avoid overbaking.
  9. Cool Completely – Let the brownies cool in the pan before removing and icing.
For the Strawberry Icing:
  1. Make the Icing – In a small bowl, whisk together powdered sugar, melted butter, reserved strawberry purée, vanilla extract, strawberry extract, and salt until smooth.
  2. Glaze & Set – Spread over the cooled brownies and let set before slicing.

Notes

  • Store in an airtight container at room temperature for up to 3 days or refrigerate for up to a week.
  • Enhance the flavor by using fresh, ripe strawberries for the purée.
  • For a decorative touch, add heart-shaped sprinkles or a drizzle of melted white chocolate.

White Chocolate Raspberry Bliss Bites: A Sweet Memory in Every Bite

I still remember the first time I made these White Chocolate Raspberry Bliss Bites. It was a chilly winter afternoon, and I wanted to surprise my grandmother with something special. She had always been the one to fill our home with the comforting aroma of freshly baked goods, but as she got older, she preferred simpler, no-fuss desserts. I knew she loved raspberries and white chocolate, so I set out to create something that would capture those flavors while being easy to make.

As I dipped each cheesecake ball into the smooth, melted chocolate, I thought about how food connects us to people, places, and memories. These little treats reminded me of the raspberry bushes she used to tend in her backyard, the same ones we’d pick from every summer, our fingers stained red as we popped the freshest berries into our mouths. When I presented her with a plate of these bite-sized delights, her eyes lit up. She took a bite, savored the creamy filling, and smiled—one of those genuine, heartwarming smiles that make everything worth it.

Since then, this recipe has become a staple in my kitchen, perfect for gatherings, gifts, or just a moment of sweet indulgence. Whether you’re making them for yourself or sharing them with loved ones, these cheesecake bites are a reminder that the simplest recipes often hold the most meaning.

Why You’ll Love This Recipe

No-Bake Convenience

Baking can be a joy, but sometimes you just want something easy yet delicious. These bliss bites require no oven time, making them a fantastic choice for those who want a quick and mess-free dessert.

Perfectly Balanced Flavors

The tangy raspberries cut through the richness of the cream cheese, while the white chocolate adds just the right amount of sweetness. Each bite is a harmonious blend of flavors and textures.

Aesthetic and Elegant

Their beautiful white chocolate shell, accented by a sprinkle of freeze-dried raspberry powder, makes these treats as visually stunning as they are tasty. Whether for a wedding, baby shower, or holiday platter, they add a touch of sophistication.

Great for Gifting and Entertaining

Homemade gifts always feel more special, and these cheesecake bites are no exception. Pack them in a decorative box, and you have a thoughtful treat for friends and family.

Expert Tips for the Perfect Bliss Bites

1. Use High-Quality Ingredients

Since this is a simple recipe, the quality of your ingredients makes a huge difference. Opt for full-fat cream cheese for a rich texture and high-quality white chocolate for a smooth, luxurious finish.

2. Keep Everything Chilled

One of the keys to success with this recipe is keeping the cheesecake mixture and shaped balls cold before dipping. This prevents them from falling apart and ensures a clean, smooth chocolate coating.

3. Work Quickly with the Chocolate

White chocolate can be temperamental—it tends to seize up if overheated or exposed to moisture. Melt it gently in short intervals, stirring between each, and dip the cheesecake balls while they’re still frozen to maintain their shape.

4. Customize the Flavors

Want to switch things up? Try using dark chocolate for a richer contrast, or swap raspberries for strawberries or blackberries. You can also mix in finely chopped nuts for added texture.

5. Experiment with Garnishes

A light dusting of crushed freeze-dried raspberries enhances both the flavor and visual appeal. You can also try edible glitter, shredded coconut, or even a drizzle of contrasting chocolate for a decorative touch.

What You’ll Need

Cheesecake Magic

  • 8 oz cream cheese, softened
  • 1/4 cup powdered sugar
  • 1 teaspoon vanilla extract
  • 1/4 cup fresh raspberries, mashed (or raspberry preserves)

Silky Chocolate Coating

  • 1 cup white chocolate chips or melting wafers
  • 1 tablespoon coconut oil or shortening (optional, for smoother melting)

Finishing Touches

  • Freeze-dried raspberry powder or crushed freeze-dried raspberries
  • White chocolate drizzle (optional)

How to Make the Magic Happen

1. Whip Up the Filling

  • In a medium bowl, beat cream cheese, powdered sugar, and vanilla extract until smooth.
  • Gently fold in the mashed raspberries until well combined.
  • Chill for 30 minutes to firm up.

2. Shape the Bites

  • Scoop about 1 tablespoon of the mixture and roll it into a ball.
  • Place on a parchment-lined baking sheet.
  • Freeze for 1 hour to solidify.

3. Coat in White Chocolate

  • Melt white chocolate chips with coconut oil in 20-second microwave intervals, stirring in between.
  • Using a fork or toothpick, dip each frozen cheesecake ball into the melted chocolate, ensuring full coverage.
  • Let excess chocolate drip off before placing back on the baking sheet.

4. Add the Final Touches

  • While the chocolate is still wet, sprinkle with freeze-dried raspberry powder or drizzle with additional melted white chocolate.
  • Refrigerate for at least 30 minutes to fully set.

Nutrition at a Glance (Per Serving, Approximate)

  • Calories: 120
  • Fat: 8g
  • Carbohydrates: 10g
  • Protein: 2g
  • Sugar: 8g

These White Chocolate Raspberry Bliss Bites are a simple yet elegant treat that’s sure to impress. Store them in the fridge for up to 5 days or freeze for longer indulgence.

Frequently Asked Questions

1. Can I Use Frozen Raspberries Instead of Fresh?

Yes, but make sure to thaw and pat them dry before mashing. Too much moisture can make the cheesecake mixture too soft, making it difficult to shape.

2. Why Is My Cheesecake Mixture Too Soft to Roll?

This can happen if the cream cheese was over-softened or if there’s too much moisture from the raspberries. Chilling the mixture for an extra 15-30 minutes should help. If the problem persists, try adding a bit more powdered sugar or even finely crushed graham crackers to firm it up.

3. How Long Do These Cheesecake Bites Last?

Stored in an airtight container in the refrigerator, they will stay fresh for up to five days. If you need to keep them longer, you can freeze them for up to three months. Just thaw in the fridge before serving.

4. My White Chocolate Coating Is Too Thick—How Can I Fix It?

If the melted white chocolate seems too thick for dipping, add a teaspoon of coconut oil or shortening. This will help create a thinner, smoother consistency for coating.

5. Can I Make These Dairy-Free or Vegan?

Absolutely! Use dairy-free cream cheese and white chocolate alternatives. There are several plant-based cream cheeses that work well in this recipe, and dairy-free white chocolate chips are available in many health food stores.

6. Can I Make These in Advance?

Yes! These are a great make-ahead dessert. You can roll and freeze the cheesecake balls ahead of time, then coat them in chocolate the day before serving for the freshest taste.

7. What Can I Do If My Cheesecake Balls Crack After Dipping?

This usually happens if the chocolate is too hot or if the cheesecake balls have started to thaw too much before dipping. Keep the balls frozen until right before dipping, and let the chocolate cool slightly before using.

Creative Variations

Berry Medley Bites

Instead of just raspberries, try mixing in a combination of berries like blueberries, blackberries, and strawberries for a more complex fruit flavor.

Chocolate Lover’s Edition

For those who love an extra dose of chocolate, use a dark chocolate coating instead of white. You can even add a teaspoon of cocoa powder to the cheesecake mixture for a more decadent experience.

Nutty Delight

Mix in finely chopped toasted almonds, hazelnuts, or pistachios for a nutty crunch. You can also roll the finished bites in crushed nuts instead of freeze-dried raspberries.

Festive Holiday Treats

For Christmas, drizzle with green and red-tinted white chocolate. For Valentine’s Day, shape them into hearts instead of round balls. These little changes make them perfect for any occasion.

Conclusion: A Sweet Treat for Every Occasion

White Chocolate Raspberry Bliss Bites are more than just a dessert—they’re a reminder of how food brings us together and connects us to cherished memories. Whether you’re making these as a thoughtful gift, a party treat, or simply for yourself, each bite is a perfect blend of creamy, fruity, and sweet flavors.

From their effortless preparation to their luxurious taste, these cheesecake bites prove that sometimes, the simplest desserts are the most satisfying. So the next time you want to create a moment of joy—whether for yourself or someone else—whip up a batch of these little gems. After all, a bite-sized treat can hold a world of sweetness and nostalgia in just one taste.

aiting

White Chocolate Raspberry Bliss Bites: A Sweet Memory in Every Bite

Indulge in the White Chocolate Raspberry Bliss Bites, a dreamy no-bake treat that combines rich cheesecake, tart raspberries, and a silky white chocolate shell. Perfect for parties, gifting, or simply treating yourself to a bite of luxury!
Prep Time 15 minutes
Servings: 12 bites
Course: Dessert
Cuisine: American

Ingredients
  

For the Cheesecake Filling:
  • 8 oz cream cheese softened
  • 1/4 cup powdered sugar
  • 1 teaspoon vanilla extract
  • 1/4 cup fresh raspberries mashed (or raspberry preserves)
For the White Chocolate Coating:
  • 1 cup white chocolate chips or melting wafers
  • 1 tablespoon coconut oil or shortening optional, for smoother melting
For Garnish:
  • Freeze-dried raspberry powder or crushed freeze-dried raspberries
  • White chocolate drizzle optional

Method
 

  1. Prepare the Cheesecake Filling – In a medium bowl, beat cream cheese, powdered sugar, and vanilla extract until smooth. Fold in the mashed raspberries until well combined. Chill for 30 minutes to firm up.
  2. Form the Bites – Scoop about 1 tablespoon of the mixture and roll it into a ball. Place on a parchment-lined baking sheet and freeze for 1 hour to solidify.
  3. Melt the White Chocolate – In a microwave-safe bowl, melt white chocolate chips with coconut oil in 20-second intervals, stirring between each until smooth.
  4. Coat the Bites – Using a fork or toothpick, dip each frozen cheesecake ball into the melted white chocolate, ensuring full coverage. Let excess drip off before placing back on the baking sheet.
  5. Garnish & Set – While the chocolate is still wet, sprinkle with freeze-dried raspberry powder or drizzle with additional melted white chocolate. Refrigerate for at least 30 minutes to fully set.

Notes

  • Store in an airtight container in the refrigerator for up to 5 days.
  • Freeze for up to 1 month and thaw in the fridge before serving.
  • For a variation, swap raspberries for strawberries or blueberries.
  • Use high-quality white chocolate for the best taste and texture.

Stay Connected

Get recipes via email: