Skinny Chicken and Avocado Caesar Salad: A Guilt-Free Classic

A Salad That Became a Family Tradition

There’s something nostalgic about a Caesar salad. For me, it brings back memories of weekend lunches with my grandmother, who had a knack for turning simple ingredients into a meal that felt special. She would make a classic Caesar salad, complete with a rich, creamy dressing and golden croutons toasted to perfection. But as I grew older and became more conscious of what I was eating, I found myself torn. Could I still enjoy this childhood favorite without feeling weighed down afterward?

That’s when I discovered a way to make Caesar salad not just delicious, but also healthier. By swapping heavy dressing for a Greek yogurt-based version, adding lean protein like grilled chicken, and throwing in creamy avocado for extra richness, I found the perfect balance between indulgence and nutrition. This Skinny Chicken and Avocado Caesar Salad is a meal that doesn’t leave you feeling guilty—but still delivers on flavor and satisfaction.

Why This Salad Is a Game-Changer

A Perfect Balance of Protein, Healthy Fats, and Crunch

One of the biggest problems with traditional salads is that they can leave you feeling hungry an hour later. But this version? It’s packed with protein from grilled chicken, eggs, and Greek yogurt. The avocado brings healthy monounsaturated fats that keep you full and satisfied, while crispy bacon and toasted ciabatta add that irresistible crunch.

A Lighter Yet Creamy Dressing

The secret to making this salad healthier without sacrificing flavor lies in the dressing. Traditional Caesar dressing is made with mayonnaise and sometimes even heavy cream, making it high in fat and calories. This version swaps in Greek yogurt, which not only reduces the fat content but also adds a boost of protein and probiotics for gut health. The result is a dressing that’s creamy, tangy, and packed with flavor—without the guilt.

Health Benefits of This Salad

Lean, High-Quality Protein

  • Chicken breast is one of the best sources of lean protein, essential for muscle maintenance, satiety, and metabolism.
  • Eggs provide additional protein along with essential vitamins like B12 and choline, which support brain function.

Heart-Healthy Fats

  • Avocado is loaded with monounsaturated fats, which help lower bad cholesterol and promote heart health.
  • Olive oil, used in both the dressing and for toasting the bread, is another excellent source of these healthy fats.

Nutrient-Dense Greens

  • Romaine or baby cos lettuce isn’t just a crunchy base—it’s packed with vitamins A and K, essential for skin health and bone strength.
  • Parmesan cheese, when used in moderation, provides calcium and umami flavor without overwhelming the dish.

Got it! Let me try again to retrieve the recipe for you. One moment.

What You’ll Need – Ingredients

For the Salad:

  • ½ loaf ciabatta, sliced
  • 1 lb skinless, boneless chicken breast fillets (halved horizontally to make 4 fillets)
  • 1 tbsp garlic powder
  • 2 tbsp dried parsley flakes
  • 1 pinch salt
  • 7 oz shortcut bacon, cut into strips
  • 2 large eggs, boiled (soft or hard, sliced)
  • 2 heads baby cos lettuce, washed and dried
  • 1 medium avocado, sliced
  • ½ cup shaved Parmesan cheese

For the Dressing:

  • ⅔ cup Greek yogurt
  • 1 tbsp olive oil
  • 2 cloves garlic, crushed
  • 2 fillets anchovy, finely chopped (or sub with 2 tbsp black pitted olives + 1 tsp fish sauce)
  • ½ large lemon, juiced
  • 3 tbsp freshly grated Parmesan cheese
  • Salt and pepper, to taste

Step-by-Step – Directions

  1. Crisp Up the Bread – Preheat your oven to grill/broil on medium-high heat. Place the ciabatta slices on an oven tray, drizzle with olive oil, and toast until crispy.
  2. Sizzle the Chicken & Bacon – While the bread toasts, season the chicken fillets with garlic powder, parsley, and salt. Heat a non-stick grill pan with a drizzle of olive oil and cook the chicken until golden on both sides. Remove and set aside. In the same pan, fry the bacon strips until crispy.
  3. Boil the Eggs – While cooking the bacon, boil your eggs to your preferred doneness.
  4. Whisk the Dressing – In a bowl, combine Greek yogurt, olive oil, garlic, anchovies (or olive substitute), lemon juice, and Parmesan. Whisk well and season with salt and pepper to taste.
  5. Assemble the Salad – In a large bowl, toss together the lettuce, sliced chicken, crispy bacon, eggs, avocado, shaved Parmesan, and toasted bread pieces. Drizzle with the creamy dressing, mix well, and serve immediately.

The Good Stuff – Nutritional Breakdown

  • Calories: 559 kcal
  • Carbohydrates: 40g
  • Protein: 54g
  • Fat: 20g
  • Saturated Fat: 5g
  • Cholesterol: 163mg
  • Sodium: 1,672mg
  • Fiber: 5g
  • Vitamin A: 1,519 IU
  • Vitamin C: 9mg
  • Calcium: 217mg
  • Iron: 2mg

Enjoy this light yet satisfying take on a classic Caesar salad! Let me know if you need modifications.

Frequently Asked Questions

1. Can I Make This Salad Ahead of Time?

Yes! However, it’s best to store the components separately and assemble just before serving. Keep the dressing in an airtight container, and only slice the avocado fresh to prevent browning.

2. What Can I Use Instead of Chicken?

This salad is incredibly versatile. You can substitute grilled shrimp, salmon, or even tofu for a plant-based version.

3. How Can I Make It Dairy-Free?

To make this salad dairy-free, swap the Greek yogurt in the dressing for a dairy-free alternative like coconut yogurt or a cashew-based Caesar dressing. Use nutritional yeast instead of Parmesan cheese for a similar savory flavor.

4. Is There a Low-Carb Version?

Yes! Simply leave out the ciabatta croutons or swap them for roasted chickpeas or toasted almonds for a crunchy alternative.

5. Can I Use Store-Bought Caesar Dressing?

Of course! While homemade dressing is fresher and healthier, a high-quality, light Caesar dressing can be a great time-saver. Just be mindful of added sugars and preservatives in store-bought versions.

Creative Variations to Try

Grilled Shrimp Avocado Caesar

Swap the chicken for grilled shrimp seasoned with garlic and paprika for a seafood twist.

Spicy Chipotle Caesar

Add a teaspoon of chipotle powder or a splash of hot sauce to the dressing for a smoky, spicy kick.

Mediterranean Caesar Salad

Replace bacon with sun-dried tomatoes and add some kalamata olives for a Mediterranean-inspired flavor profile.

Kale and Quinoa Caesar

Mix in some massaged kale and cooked quinoa for an extra fiber boost, making it even more filling and nutritious.

Why You’ll Love This Salad

This Skinny Chicken and Avocado Caesar Salad proves that healthy eating doesn’t mean sacrificing flavor. It’s creamy, crispy, salty, and refreshing all at once. Whether you’re making it for a weekday lunch, a weekend brunch, or even a light dinner, this salad delivers satisfaction without the heaviness of traditional Caesar salads.

And for me, it’s more than just a meal—it’s a way to enjoy an old favorite in a new, nourishing way. Every time I make it, I’m reminded of those childhood lunches, but now with a version I feel good about eating.

So the next time you’re craving a Caesar salad, give this lighter take a try. You just might find it becomes a new favorite in your home, too.

Would you like me to refine any sections or add more details? Let me know how I can make it perfect for your website!

aiting

Skinny Chicken and Avocado Caesar Salad: A Guilt-Free Classic

Elevate your salad game with this vibrant twist on a classic Caesar. Juicy grilled chicken, crispy bacon, and perfectly boiled eggs mingle with crisp baby cos lettuce, creamy avocado slices, and crunchy ciabatta croutons—all tossed in a tangy, Greek yogurt-based Caesar dressing. This salad is light yet satisfying, making it the perfect choice for a fresh lunch or dinner.
Prep Time 15 minutes
Cook Time 15 minutes
Total Time 30 minutes
Course: Salad
Cuisine: Fusion

Ingredients
  

  • For the salad you’ll need:• ½ loaf ciabatta, sliced• 1 lb skinless, boneless chicken breast fillets (halved horizontally to yield 4 fillets)• 1 tbsp garlic powder• 2 tbsp dried parsley flakes• A pinch of salt• 7 oz shortcut bacon, cut into strips• 2 large eggs, boiled (soft or hard, as you prefer) and sliced• 2 heads baby cos lettuce, washed and dried• 1 medium avocado, sliced• ½ cup shaved Parmesan cheese
  • For the dressing mix together:• ⅔ cup Greek yogurt• 1 tbsp olive oil• 2 cloves garlic, crushed• 2 anchovy fillets, finely chopped (or substitute with 2 tbsp black pitted olives plus 1 tsp fish sauce)• Juice from ½ a large lemon• 3 tbsp freshly grated Parmesan cheese• Salt and pepper, to taste

Method
 

  1. Crisp Up the Bread: Preheat your oven to a medium-high grill/broil setting. Arrange the ciabatta slices on a baking tray, drizzle with olive oil, and toast until golden and crunchy.
  2. Sizzle the Chicken & Bacon: Season the chicken fillets with garlic powder, dried parsley, and a pinch of salt. Heat a non-stick grill pan with a drizzle of olive oil, then cook the chicken until it’s golden on both sides; set aside. In the same pan, fry the bacon strips until they’re perfectly crisp.
  3. Boil the Eggs: Boil the eggs to your desired doneness. Once cooled, slice them into rounds.
  4. Whisk the Dressing: In a bowl, combine Greek yogurt, olive oil, crushed garlic, anchovies (or the olive substitute), lemon juice, and Parmesan cheese. Whisk until smooth and season with salt and pepper.
  5. Assemble the Salad: In a large bowl, toss together the baby cos lettuce, sliced chicken, crispy bacon, eggs, avocado slices, shaved Parmesan, and toasted ciabatta pieces. Drizzle over the creamy dressing, gently mix, and serve immediately.

Notes

• For the best texture, enjoy the salad right after assembling so the ciabatta croutons stay crisp.
• Feel free to adjust the seasoning in the dressing to match your taste preference.
• The combination of warm grilled elements and fresh veggies creates a delightful contrast in every bite.


Bocadillo with Tuna: A Taste of Simplicity and Comfort

A Sandwich That Feels Like Home

Some of the best food memories are tied to the simplest of dishes. For me, the Bocadillo with Tuna is one of those meals that instantly transports me back to childhood. I remember lazy summer afternoons when my grandmother would bring out a fresh loaf of bread, a can of tuna, and whatever ingredients she had on hand. With swift and practiced hands, she would assemble a sandwich that was somehow always perfect—soft bread, flavorful tuna, crunchy vegetables, and just the right amount of sauce.

It wasn’t anything fancy, but that was the beauty of it. A bocadillo doesn’t need to be complicated. It’s a humble, satisfying meal that has been enjoyed for generations, offering nourishment and comfort in every bite. Whether you’re making it as a quick lunch, a picnic snack, or a travel-friendly meal, this sandwich is proof that simple ingredients, when combined thoughtfully, can create something truly special.

The Story Behind the Bocadillo

A bocadillo is a traditional Spanish sandwich made with crusty bread, usually a baguette or a similar type of roll, and a variety of fillings. Unlike soft sandwiches made with sliced bread, bocadillos have a rustic charm, offering a satisfying bite with a slightly crisp exterior and a tender interior.

While the most common versions include jamón (Spanish ham), cheese, or omelets, the Bocadillo with Tuna has become a popular variation due to its simplicity, affordability, and high nutritional value. It is widely enjoyed across Spain and other Mediterranean countries, often served in cafés, school lunchboxes, and even as a quick dinner at home.

What makes it so special is its adaptability. Every family, café, and region has its own way of making a bocadillo, adding unique twists that reflect local tastes and traditions.

Customizing Your Bocadillo: Endless Possibilities

One of the greatest things about a Bocadillo with Tuna is that you can tweak it to suit your preferences. Here are some creative ways to customize your sandwich:

1. Bread Selection: The Foundation of Flavor

  • Classic baguette – Crisp on the outside, soft inside, perfect for a traditional bocadillo.
  • Ciabatta – A rustic Italian bread with a chewy texture that absorbs flavors well.
  • Soft rolls – If you prefer a gentler bite, go for brioche or sandwich buns.
  • Whole grain or seeded bread – For a healthier option with added fiber and nutrients.

2. Tuna Variations: Bold or Mild?

  • Canned tuna in olive oil – Rich and flavorful, ideal for an authentic Mediterranean taste.
  • Water-packed tuna – A lighter choice for those watching their calorie intake.
  • Fresh grilled tuna – Elevate your bocadillo by using freshly seared tuna steaks.

3. Sauce Options: A Touch of Creaminess or Spice

  • Classic mayonnaise – A simple, creamy addition that complements tuna beautifully.
  • Aioli – Garlic-infused mayo for an extra punch of flavor.
  • Harissa or sriracha mayo – For those who love a spicy kick.
  • Yogurt-based sauce – A lighter alternative with a tangy twist.

4. Add Some Crunch and Freshness

  • Lettuce or arugula – Adds a fresh, crisp texture.
  • Pickles or capers – A hint of acidity to balance the richness of the tuna.
  • Red onion or shallots – For a sharp, slightly sweet contrast.
  • Cucumber slices – A refreshing addition that keeps the sandwich light.

5. Extra Protein and Texture

  • Hard-boiled eggs – A classic Spanish addition for extra richness.
  • Grated cheese – Manchego or cheddar work wonderfully.
  • Avocado slices – A creamy, nutrient-dense upgrade.

The beauty of the bocadillo lies in its adaptability. You can make it as simple or as gourmet as you like, depending on your mood and what ingredients you have on hand.

Why This Sandwich Is More Than Just a Quick Meal

1. A Nutritional Powerhouse

A Bocadillo with Tuna isn’t just delicious—it’s packed with nutrients. Tuna is an excellent source of lean protein, omega-3 fatty acids, and essential vitamins like B12 and D. The vegetables add fiber and antioxidants, while whole grain bread provides sustained energy.

2. A Meal for Any Occasion

This sandwich is perfect for:

  • Quick lunches – Easy to prepare and satisfying.
  • Picnics and outdoor adventures – Travels well and doesn’t require reheating.
  • Post-workout meals – A great source of protein for muscle recovery.
  • Lazy dinner nights – When you want something delicious but low-effort.

3. Budget-Friendly Goodness

A Bocadillo with Tuna proves that good food doesn’t have to be expensive. Canned tuna is an affordable protein source, and most of the other ingredients are pantry staples.

Ingredients

For the Bread (Dough):
  • 400 g flour
  • 100 g fine semolina
  • 10 g instant yeast
  • 8 g salt
  • 12 g granulated sugar
  • 30 ml sunflower oil
  • 100 g yogurt
  • 215 ml water
For the Filling:
  • Lettuce
  • Tuna
  • Fried diced potatoes
  • Boiled egg
  • Tomato sauce
  • Pickle
  • Red onion
  • Green olives
  • Sauce of choice

Step-by-Step: Crafting the Perfect Bocadillo

  1. Prepare the Dough
    In a deep bowl, mix flour, semolina, yeast, salt, sugar, sunflower oil, yogurt, and water. Knead for 10-12 minutes until smooth.
  2. Let It Rise
    Cover the dough and let it rise in a warm place for about an hour or until doubled in size.
  3. Shape the Buns
    Divide the dough into 7 equal pieces (around 120 g each). Roll each into an oval shape (24×12 cm), then fold it closed lengthwise.
  4. Final Proofing
    Dip one side of each dough piece in semolina, place them on a lined baking sheet, and let them rise for another 30 minutes until doubled in size.
  5. Bake to Perfection
    Preheat the oven to 200℃ and bake for 10-15 minutes until golden brown. Once out of the oven, cover with a tea towel to keep them soft.
  6. Assemble the Bocadillo
    Slice the buns open and fill with lettuce, tuna, fried potatoes, boiled egg, tomato sauce, pickle, red onion, green olives, and your favorite sauce.

Nutritional Perks: A Healthy Indulgence

  • Protein Power – Tuna and eggs provide essential proteins for muscle growth and repair.
  • Fiber Boost – Lettuce and pickles add fiber for digestive health.
  • Healthy Fats – Olives and sunflower oil contribute to heart-healthy fats.
  • Energy-Packed – Potatoes and bread offer complex carbohydrates for sustained energy.

Enjoy your homemade Bocadillo with Tuna—a perfect balance of taste and nutrition in every bite!

FAQs: Everything You Need to Know

1. Can I make a bocadillo in advance?

Yes! You can prepare the sandwich a few hours ahead, but if using wet ingredients like tomatoes or sauce, consider packing them separately to avoid soggy bread.

2. What’s the best tuna to use?

For the most authentic taste, use canned tuna in olive oil. It has a richer flavor and softer texture. If you prefer a lighter option, water-packed tuna works well too.

3. How do I store leftovers?

If you have extra bocadillos, wrap them tightly in foil or place them in an airtight container in the fridge. They are best eaten within 24 hours.

4. Can I make this sandwich gluten-free?

Absolutely! Just swap the bread for a gluten-free roll or wrap.

5. What can I serve with a Bocadillo with Tuna?

It pairs beautifully with:

  • A simple green salad
  • Crispy potato chips or fries
  • A bowl of gazpacho (Spanish cold tomato soup)
  • Marinated olives and cheese for a tapas-style meal

Final Thoughts: The Joy of Simple, Good Food

There’s something deeply satisfying about a Bocadillo with Tuna. It’s a sandwich that doesn’t try too hard yet manages to deliver on every front—taste, texture, nutrition, and nostalgia. Whether you make it with the simplest ingredients or give it a gourmet twist, it remains a celebration of honest, wholesome food.

So the next time you’re looking for a quick, delicious meal, skip the store-bought sandwiches and make your own bocadillo. You’ll taste the difference in every bite.

aiting

Bocadillo with Tuna: A Taste of Simplicity and Comfort

Discover a harmonious blend of textures and flavors with this homemade bocadillo. Freshly baked, soft buns cradle a vibrant mix of crisp lettuce, savory tuna, crispy fried potatoes, a perfectly boiled egg, tangy tomato sauce, zesty pickles, sharp red onion, and briny green olives—all tied together with your favorite sauce. This hearty yet healthy treat is ideal for a fulfilling lunch or an indulgent snack.
Prep Time 20 minutes
Servings: 7 buns
Course: Sandwich / Bocadillo
Cuisine: Spanish-Inspired / Fusion

Ingredients
  

  • For the Bread Dough:• 400 g flour• 100 g fine semolina• 10 g instant yeast• 8 g salt• 12 g granulated sugar• 30 ml sunflower oil• 100 g yogurt• 215 ml water
  • For the Filling:• Lettuce• Tuna• Fried diced potatoes• Boiled egg• Tomato sauce• Pickle• Red onion• Green olives• Sauce of choice

Method
 

  1. Prepare the Dough: In a deep bowl, combine flour, semolina, yeast, salt, sugar, sunflower oil, yogurt, and water. Knead the mixture for 10–12 minutes until the dough becomes smooth and elastic.
  2. Let It Rise: Cover the bowl with a clean cloth and let the dough rise in a warm spot for about 1 hour, or until it has doubled in size.
  3. Shape the Buns: Divide the dough into 7 equal portions (approximately 120 g each). Roll each portion into an oval shape, roughly 24 x 12 cm, then fold each oval closed lengthwise to form a bun.
  4. Final Proofing: Lightly dip one side of each bun in semolina, place them on a baking sheet lined with parchment paper, and let them rise for another 30 minutes until they have doubled again.
  5. Bake to Perfection: Preheat your oven to 200℃ (about 392°F). Bake the buns for 10–15 minutes until they turn a lovely golden brown. Once baked, cover them with a tea towel to maintain their softness.
  6. Assemble the Bocadillo: Slice open each bun and layer with lettuce, tuna, fried diced potatoes, sliced boiled egg, tomato sauce, pickle, red onion, green olives, and finish with your favorite sauce.

Notes

• The combination of tuna and egg delivers a robust protein punch, while the fresh vegetables and semolina-infused bread add a nutritious fiber boost.
• For the best flavor, assemble your bocadillo just before serving to enjoy the contrast between the warm, soft bread and the cool, crisp filling.

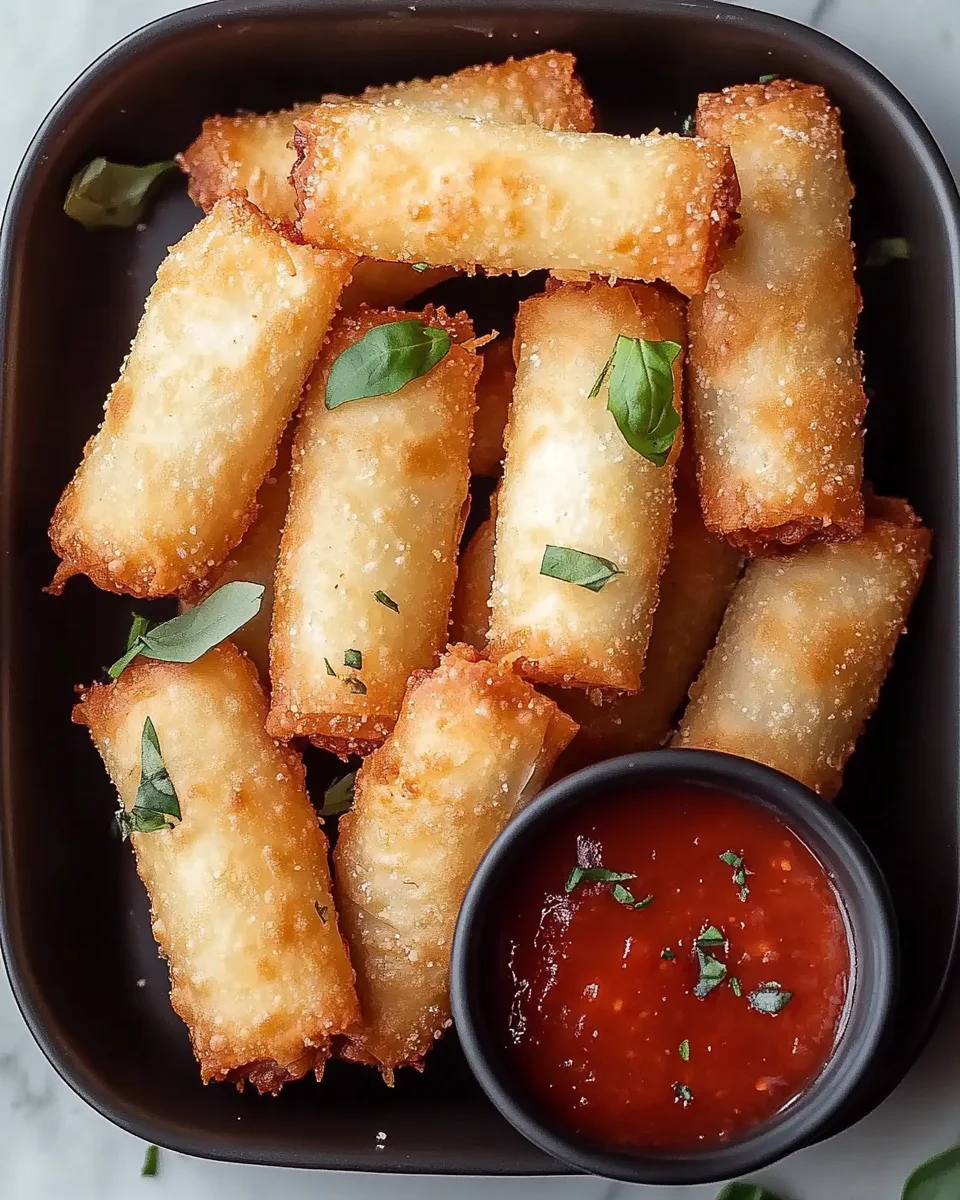
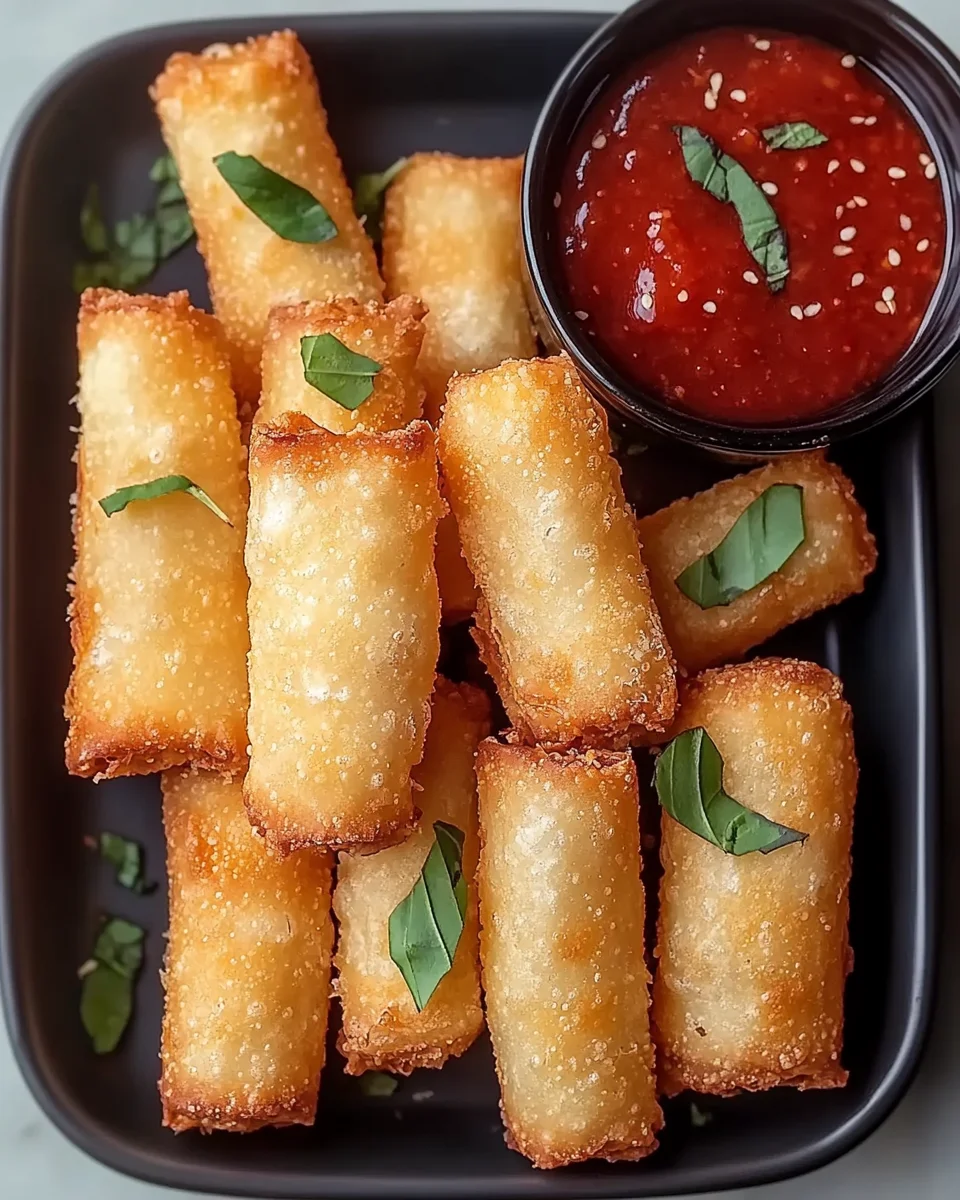
Crispy, Cheesy, and Irresistible: Wonton Mozzarella Sticks

A Bite of Nostalgia: How These Mozzarella Sticks Became a Family Favorite

Growing up, my family had a tradition of making snacks together on the weekends. My mom, always looking for creative ways to keep things fun in the kitchen, introduced me to mozzarella sticks at an early age. We’d coat cheese in breadcrumbs, fry them up, and sit around the table with marinara sauce, eagerly awaiting the first bite.

But one evening, in the midst of a kitchen experiment gone wrong—where our breadcrumbs wouldn’t stick properly—she had an idea. Instead of the traditional method, she pulled out a pack of wonton wrappers from the fridge and suggested we try wrapping the cheese in those. The result? A mozzarella stick with an ultra-crispy shell that was lighter, flakier, and even more satisfying than the usual version.

Ever since that night, wonton mozzarella sticks have been my go-to snack for parties, movie nights, and casual gatherings. They’re easy, require just a handful of ingredients, and deliver an incredible crunch with that perfect cheese pull. Now, let’s dive into what makes them so special and how you can make them at home.

Why Wonton Wrappers? The Secret to the Ultimate Crunch

Traditional mozzarella sticks rely on breadcrumbs for their crispy coating, but wonton wrappers bring something different to the table. They are:

  • Thin and delicate, creating an airy, shatteringly crisp bite
  • Easier to work with than a three-step breading process
  • Perfect for sealing in cheese, reducing the risk of melting leaks
  • Less greasy, since they absorb less oil than breadcrumbs

The result? A mozzarella stick that feels lighter but still delivers on flavor and crunch. If you’ve never tried this method before, you’re in for a treat.

Choosing the Best Mozzarella for Maximum Cheese Pull

The best mozzarella sticks have a gooey, stretchy interior, and the type of cheese you use plays a big role in achieving this.

Best option: String cheese

  • Pre-portioned and easy to wrap
  • Designed to hold its shape while melting
  • Stretches beautifully without becoming overly gooey

Alternative: Block mozzarella

  • Can be cut into sticks
  • Whole milk mozzarella melts better than low-moisture versions
  • Requires a bit more effort to portion correctly

If you’re feeling adventurous, you can also experiment with cheddar, pepper jack, or gouda for a different flavor profile—but be aware that some cheeses melt faster than mozzarella and might require adjustments in frying time.

Common Mistakes and How to Avoid Them

Even though this recipe is simple, a few things can go wrong. Here’s how to prevent them:

1. Cheese Leaking Out

  • Make sure to seal the edges properly by brushing them with egg wash and pressing firmly.
  • Avoid air pockets, as they can cause the wrapper to burst.
  • Use cold string cheese—warm cheese melts too quickly and may escape.

2. Soggy or Greasy Mozzarella Sticks

  • Keep the oil at the right temperature (350°F/175°C)—too hot and the outside burns before the cheese melts, too cool and the sticks absorb too much oil.
  • Fry in small batches to prevent temperature drops in the oil.

3. Wonton Wrappers Tearing

  • Don’t overfill—too much cheese can make sealing difficult.
  • Keep wrappers moist but not wet—if they dry out, they become brittle and crack.

Creative Variations to Try

Once you’ve mastered the classic version, it’s time to get creative!

1. Spicy Kick Mozzarella Sticks

  • Add a sprinkle of chili flakes inside each wrapper before sealing.
  • Serve with sriracha mayo instead of marinara sauce.

2. Garlic Butter Mozzarella Sticks

  • Brush the wrappers with garlic butter before frying.
  • Sprinkle with grated Parmesan right after they come out of the oil.

3. Air-Fryer Wonton Mozzarella Sticks

  • Lightly spray with oil and air-fry at 375°F (190°C) for 5-7 minutes, flipping halfway through.
  • A great option for those who want a lighter, less greasy version.

Serving Suggestions: The Perfect Pairings

1. Dipping Sauces

While marinara sauce is a classic, try these alternatives:

  • Ranch dressing for a creamy contrast
  • Spicy honey for a sweet and savory balance
  • Garlic aioli for extra richness

2. Party Platter Ideas

These mozzarella sticks are perfect for game-day spreads. Serve them alongside:

  • Buffalo wings
  • Jalapeño poppers
  • Loaded nachos

3. Light and Fresh Complements

Balance the richness with a fresh side like:

  • A crisp Caesar salad
  • Sliced cucumbers and cherry tomatoes
  • Pickled vegetables for acidity

How to Store and Reheat for Later

1. Refrigerating Leftovers

  • Store in an airtight container in the fridge for up to 2 days.
  • Keep in mind that they lose their crispiness over time.

2. Freezing for Meal Prep

  • Assemble the sticks but don’t fry them.
  • Freeze on a baking sheet, then transfer to a freezer bag.
  • Fry directly from frozen, adding an extra minute to the cooking time.

3. Reheating for Maximum Crunch

  • Oven: Bake at 350°F (175°C) for 5-7 minutes.
  • Air fryer: Heat at 375°F (190°C) for 2-3 minutes.
  • Avoid the microwave—it makes them soggy and rubbery.

Ingredients: A Simple Yet Flavorful Lineup

  • 1 cup cooking oil (vegetable, canola, or peanut oil)
  • 1 large egg, whisked
  • 4 string cheese sticks, cut in half
  • 8 wonton wrappers
  • 1/2 cup marinara sauce (store-bought or homemade)

Directions: From Prep to Crispy Perfection

Step 1: Heat the Oil

  • In a medium skillet, heat vegetable oil to 325°F (163°C).
  • Make sure the oil is deep enough to cover the mozzarella sticks halfway.

Step 2: Prepare the Egg Wash

  • In a small bowl, whisk together the egg and 1 tablespoon of water.
  • This mixture helps seal the wonton wrappers securely.

Step 3: Wrap the Cheese

  • Lay one wonton wrapper flat and brush the edges with egg wash.
  • Place a halved string cheese stick in the center.
  • Fold the bottom edge over the cheese, then roll tightly to enclose it completely.
  • Press firmly to seal, ensuring no air pockets remain.
  • Repeat with the remaining cheese and wrappers.

Step 4: Fry to Golden Perfection

  • Carefully place the wrapped mozzarella sticks into the heated skillet.
  • Fry until golden brown and crispy, about 1-2 minutes per side.
  • Monitor closely to prevent burning.

Step 5: Drain and Serve

  • Transfer the fried mozzarella sticks to a plate lined with paper towels to absorb excess oil.
  • Serve immediately with warm marinara sauce for dipping.

Nutritional Breakdown: Indulgent but Worth It

(Estimated for the entire recipe without optional ingredients)

  • Calories: 1300-1500
  • Protein: 40-50g
  • Fat: 120-130g
  • Carbohydrates: 40-50g

Enjoy these crispy, cheesy bites as a perfect party snack or game-day treat!

Frequently Asked Questions

1. Can I bake these instead of frying?

Yes! Brush them with oil and bake at 375°F (190°C) for 10-12 minutes, flipping halfway through.

2. What oil is best for frying?

Use a neutral oil with a high smoke point, such as vegetable, canola, or peanut oil. Avoid olive oil, as it burns too quickly.

3. Can I use egg roll wrappers instead?

Yes, but you’ll need to cut them down to size and adjust frying time since they’re thicker.

4. Why is my cheese not melting properly?

Your oil might be too hot—try lowering the temperature slightly. Also, make sure your cheese isn’t too cold when frying.

5. How do I prevent air bubbles in the wrapper?

Press out as much air as possible when sealing. Air pockets expand during frying, which can cause uneven cooking.

Final Thoughts: A Snack Worth Sharing

Wonton mozzarella sticks are the ultimate comfort food—crispy, cheesy, and incredibly easy to make. Whether you’re cooking for a crowd, looking for a new game-day snack, or simply craving something delicious, this recipe delivers every time.

So, the next time you’re in the mood for something crunchy and gooey, skip the frozen store-bought version and make these from scratch. They’re quick, fun to prepare, and always a hit. Plus, nothing beats that satisfying cheese pull.

Now, what are you waiting for? Gather your ingredients and get frying—you won’t regret it.

aiting

Crispy, Cheesy, and Irresistible: Wonton Mozzarella Sticks

Savor these irresistible, crunchy-on-the-outside, melty-on-the-inside wonton mozzarella sticks—a playful twist on a classic snack that’s perfect for parties, game days, or any time you crave a cheesy bite!
Prep Time 10 minutes
Cook Time 6 minutes
Total Time 16 minutes
Servings: 8 crispy mozzarella sticks
Course: Appetizer, Snack
Cuisine: Fusion

Ingredients
  

  • 1 cup cooking oil vegetable, canola, or peanut• 1 large egg, whisked with 1 tablespoon water (for the egg wash)• 4 string cheese sticks, each cut in half• 8 wonton wrappers• 1/2 cup marinara sauce (choose your favorite—store-bought or homemade)

Method
 

  1. Heat the Oil: In a medium skillet, heat the oil to 325°F (163°C). Ensure there’s enough oil so that the mozzarella sticks are partially submerged during frying.
  2. Prepare the Egg Wash: In a small bowl, whisk the egg with 1 tablespoon water. This mixture will help seal the wonton wrappers.
  3. Wrap the Cheese: Lay a wonton wrapper flat and brush its edges with the egg wash. Place a halved string cheese stick in the center. Fold the bottom edge over the cheese, then roll the wrapper tightly, pressing firmly to seal and eliminate any air pockets. Repeat this process for all cheese pieces.
  4. Fry to Golden Perfection: Carefully place the wrapped cheese into the heated oil. Fry for about 1–2 minutes on each side until they turn golden brown and crispy. Keep a close eye to avoid burning.
  5. Drain and Serve: Remove the mozzarella sticks with a slotted spoon and let them drain on paper towels. Serve immediately with warm marinara sauce for dipping.

Notes

• Keep a close watch during frying as these treats cook very quickly.
• For best results, ensure the oil temperature remains steady.
• Enjoy these crispy delights while they’re hot for that perfect gooey cheese pull!

Cheddar Chive and Zucchini Quick Bread

Have you ever craved something warm, cheesy, and comforting that comes together without the fuss of kneading or waiting for dough to rise? That’s exactly what you get with Cheddar Chive and Zucchini Quick Bread. This savory bread is perfect when you want to whip up something hearty for breakfast, a side dish, or even a quick snack. Imagine slicing into a loaf that’s tender, loaded with cheddar cheese, fresh chives, and moist zucchini—every bite is a burst of flavor and satisfaction.

I remember the first time I baked this bread. The kitchen was filled with the irresistible aroma of melted cheese and fresh herbs. It quickly became my go-to recipe for family gatherings and lazy weekend mornings. If you’re looking for a way to sneak some veggies into your meals while indulging in cheesy goodness, this recipe is for you. Best of all, it’s simple, quick, and requires no special equipment. Let’s dive into what makes this bread so special and how you can make it at home.

Why You’ll Love This Cheddar Chive and Zucchini Quick Bread

  • Quick and easy: No yeast or rising time required.
  • Flavor-packed: Combines the richness of cheddar, the freshness of chives, and the moisture of zucchini.
  • Versatile: Perfect for breakfast, brunch, or a savory snack.
  • Kid-friendly: A tasty way to add vegetables to your diet.
  • Freezer-friendly: Make a loaf and save some for later.

Ingredients

IngredientAmount
Zucchini (shredded, unsqueezed)1 ½ cups
Chives (diced)¼ cup
Eggs (large)2
Sour cream¾ cup
Butter (melted, cooled)¼ cup
Cheddar cheese (shredded)1 ½ cups
All-purpose flour2 cups
Baking powder1 ½ teaspoons
Baking soda½ teaspoon
Salt½ teaspoon
Garlic powder½ teaspoon

Step-by-Step Instructions

Step 1: Prepare Your Oven and Pan

Preheat your oven to 350°F (175°C). Grease a 9×5-inch loaf pan or line it with parchment paper for easy removal.

Step 2: Shred the Zucchini

Grate the zucchini using a box grater. Don’t squeeze out the moisture; the liquid helps keep the bread moist and tender.

Step 3: Mix the Wet Ingredients

In a large bowl, whisk together the eggs, sour cream, and melted butter until smooth. Stir in the shredded zucchini and diced chives.

Step 4: Combine the Dry Ingredients

In another bowl, whisk together the flour, baking powder, baking soda, salt, and garlic powder.

Step 5: Mix Everything Together

Gradually add the dry ingredients to the wet mixture, stirring until just combined. Be careful not to overmix. Fold in the shredded cheddar cheese until evenly distributed.

Step 6: Bake the Bread

Pour the batter into the prepared loaf pan and smooth the top with a spatula. Bake for 50-60 minutes or until a toothpick inserted into the center comes out clean.

Step 7: Cool and Serve

Let the bread cool in the pan for 10 minutes before transferring it to a wire rack. Slice and enjoy warm or at room temperature.

Tips for Success

  • Use fresh zucchini: Freshly grated zucchini adds moisture and texture.
  • Don’t overmix: Overmixing can make the bread dense. Stir until ingredients are just combined.
  • Cool completely: Allow the bread to cool before slicing to avoid crumbling.
  • Customize: Add cooked bacon bits or swap chives for green onions for variety.

Nutritional Information (Per Serving)

NutrientAmount
Calories250 kcal
Total Fat14 g
Saturated Fat8 g
Carbohydrates22 g
Sugars2 g
Protein9 g
Sodium400 mg

Note: Nutritional values are approximate and may vary depending on ingredients used.

Creative Variations

Bacon and Cheddar Twist

Add ½ cup of cooked, crumbled bacon to the batter for a smoky, savory flavor.

Spicy Version

Mix in 1 teaspoon of red pepper flakes or diced jalapeños for some heat.

Herb Medley

Replace chives with a mix of fresh parsley, dill, and basil for a herbaceous loaf.

Gluten-Free Option

Use a 1:1 gluten-free flour blend to make this bread suitable for gluten-sensitive eaters.

Serving and Storage

Serving Suggestions

  • Enjoy warm with a pat of butter.
  • Serve alongside soups, salads, or roasted meats.
  • Toast slices for a crispy breakfast treat.

Storage Tips

  • Room temperature: Store in an airtight container for up to 3 days.
  • Refrigerator: Keeps well for up to a week.
  • Freezer: Freeze slices in a zip-top bag for up to 3 months. Thaw and reheat as needed.

FAQs About Cheddar Chive and Zucchini Quick Bread

1. Can I use yellow squash instead of zucchini?

Yes, yellow squash works well and has a similar texture and flavor.

2. Do I need to peel the zucchini?

No, the skin is thin and adds color and nutrients.

3. Can I use Greek yogurt instead of sour cream?

Absolutely. Greek yogurt provides a similar tang and texture.

4. How can I make this bread healthier?

Use whole wheat flour for added fiber and reduce the cheese slightly.

5. Can I make muffins with this recipe?

Yes, simply divide the batter into a muffin tin and bake for 20-25 minutes.

6. What’s the best way to reheat this bread?

Toast slices or warm them in the oven at 300°F (150°C) for 10 minutes.

Final Thoughts and Next Steps

Baking Cheddar Chive and Zucchini Quick Bread is more than just making a loaf—it’s about bringing warmth, flavor, and joy to your kitchen. This versatile bread suits any occasion, from casual breakfasts to fancy dinners. Its combination of cheesy goodness and fresh herbs is irresistible, and the zucchini keeps it perfectly moist.

So why not try it yourself? Gather your ingredients, preheat your oven, and let the delightful aroma of fresh-baked bread fill your home. Once you’ve made it, don’t be surprised if it becomes a staple in your kitchen—you might even find yourself baking a double batch next time!

Cheddar Chive and Zucchini Quick Bread

Cheddar Chive and Zucchini Quick Bread is a savory, cheesy, and moist bread that’s perfect for breakfast, brunch, or a comforting snack. Made with fresh zucchini, sharp cheddar cheese, and fragrant chives, this quick bread requires no yeast or long wait times. It’s a flavorful, easy-to-make recipe that pairs beautifully with soups, salads, or can be enjoyed on its own.
Prep Time 15 minutes
Resting Time 1 hour
Total Time 1 hour 15 minutes
Servings: 6
Course: Dessert
Cuisine: American
Calories: 250

Ingredients
  

  • 1 ½ cups of shredded zucchini do not squeeze out the moisture
  • ¼ cup of diced chives
  • 2 large eggs
  • ¾ cup of sour cream
  • ¼ cup of melted and cooled butter
  • 1 ½ cups of shredded cheddar cheese
  • 2 cups of all-purpose flour
  • 1 ½ teaspoons of baking powder
  • ½ teaspoon of baking soda
  • ½ teaspoon of salt
  • ½ teaspoon of garlic powder

Method
 

  1. Preheat and Prep: Preheat your oven to 350°F (175°C). Grease a 9×5-inch loaf pan or line it with parchment paper for easy removal.
  2. Prepare the Zucchini: Shred the zucchini with a grater. Do not squeeze out the moisture, as it keeps the bread tender and moist.
  3. Mix Wet Ingredients: In a large bowl, whisk together the eggs, sour cream, and melted butter until smooth. Stir in the shredded zucchini and diced chives.
  4. Combine Dry Ingredients: In a separate bowl, whisk the flour, baking powder, baking soda, salt, and garlic powder until well combined.
  5. Combine Wet and Dry Ingredients: Gradually add the dry mixture to the wet ingredients, stirring gently until just combined. Fold in the shredded cheddar cheese evenly throughout the batter.
  6. Bake: Pour the batter into the prepared loaf pan and smooth the top with a spatula. Bake for 50-60 minutes, or until a toothpick inserted into the center comes out clean.
  7. Cool and Serve: Let the bread cool in the pan for 10 minutes, then transfer to a wire rack to cool completely. Slice and enjoy warm or at room temperature.

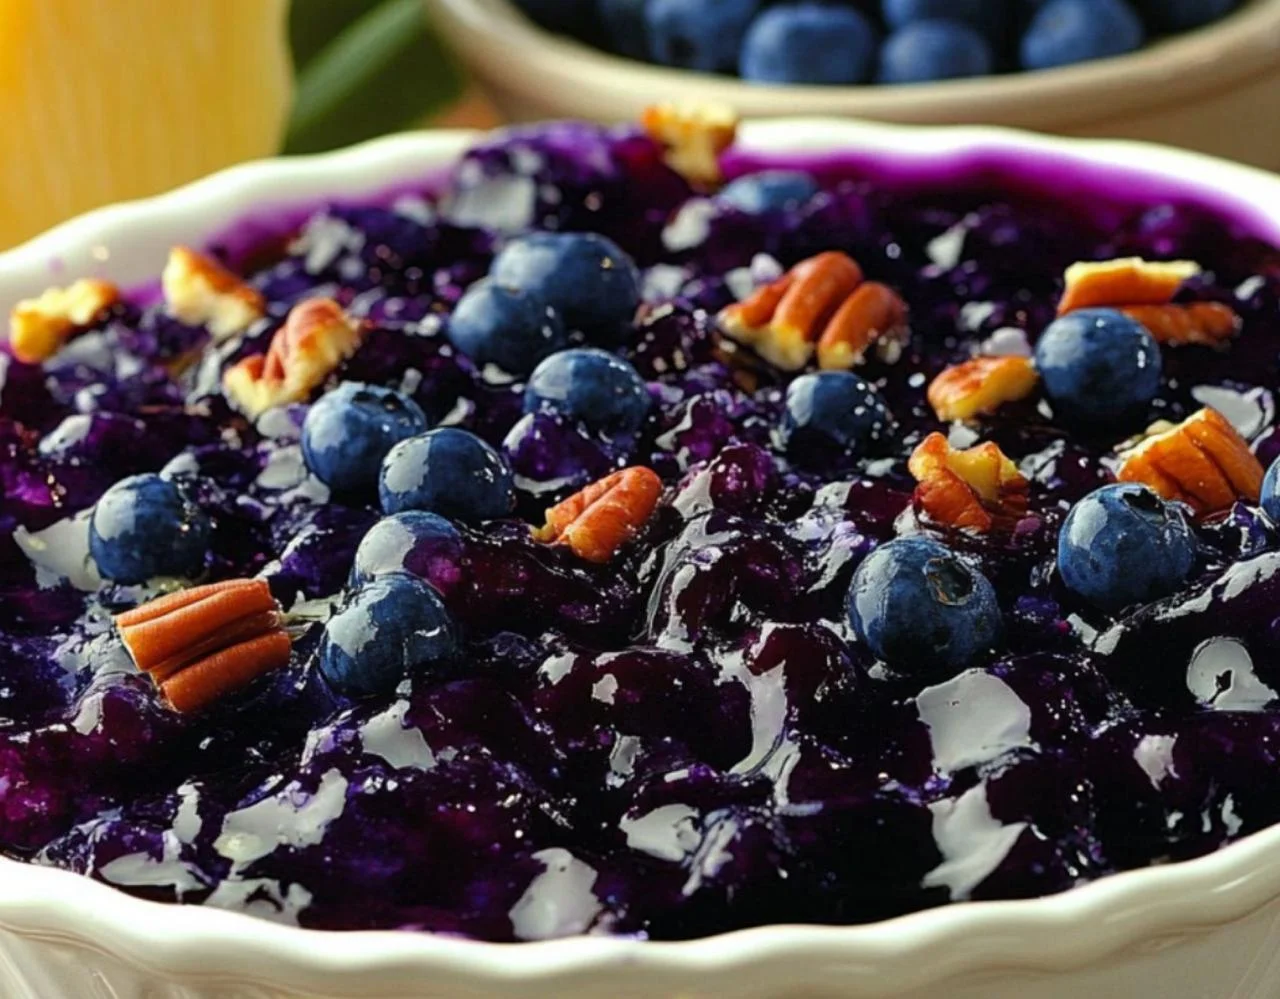
Blueberry Jell-O Salad

Have you ever tasted a dessert that instantly brought back warm memories of family gatherings and holiday dinners? That’s how it feels when you dig into a slice of Blueberry Jell-O Salad. Whether you remember it from your grandmother’s table or you’re discovering it for the first time, this classic treat never fails to impress. It’s colorful, refreshing, and just the right mix of sweet and tangy.

Imagine a luscious layer of fruity Jell-O combined with crushed pineapple, blueberry pie filling, and fresh blueberries, topped with a creamy layer of sweetened cream cheese and sour cream. It’s a dessert that not only looks stunning on the table but also tastes like a bite of nostalgia. Whether you’re making it for a potluck, a holiday feast, or just because you deserve a delicious treat, Blueberry Jell-O Salad is sure to become a new favorite in your recipe collection.

Why You’ll Love This Blueberry Jell-O Salad

  • Easy to make: Minimal prep time with simple steps.
  • Perfect for gatherings: Feeds a crowd and is always a hit at potlucks.
  • Beautiful presentation: Vibrant layers make it an eye-catching dish.
  • Versatile: Can be served as a dessert or a sweet side dish.
  • Make-ahead friendly: Prepares perfectly the day before an event.

Ingredients

Here’s what you’ll need to create this delightful Blueberry Jell-O Salad:

ComponentIngredientAmount
Blueberry JELL-O SaladCrushed pineapple (drained, juice reserved)1 (16-ounce) can
Boiling water1 cup
Grape or berry-blue JELL-O gelatin2 boxes (3 ounces each)
Blueberry pie filling1 (16-ounce) can
Fresh blueberries (washed)½ cup
Pecans (chopped)¼ cup
Cream Cheese ToppingCream cheese (softened, chopped into blocks)1 (8-ounce) package
Granulated sugar½ cup
Sour cream8 ounces
Pure vanilla extract1 teaspoon

How to Make Blueberry Jell-O Salad

Step 1: Prepare the JELL-O Base

Start by draining the crushed pineapple, reserving the juice. In a medium mixing bowl, dissolve the JELL-O gelatin in one cup of boiling water, stirring until fully dissolved. Add the reserved pineapple juice to the mixture, stirring to combine.

Step 2: Add the Fruits and Nuts

Stir in the drained crushed pineapple, blueberry pie filling, and fresh blueberries. Add the chopped pecans for a bit of crunch. Mix everything gently to ensure even distribution of ingredients.

Step 3: Set the JELL-O Layer

Pour the mixture into a 9×13-inch dish or your preferred serving dish. Refrigerate for at least 4 hours, or until the gelatin is fully set.

Step 4: Make the Cream Cheese Topping

While the JELL-O layer is chilling, prepare the topping. In a mixing bowl, beat the softened cream cheese with the granulated sugar until smooth and creamy. Add the sour cream and vanilla extract, continuing to mix until the topping is fluffy and well combined.

Step 5: Top the Salad and Chill Again

Once the JELL-O layer is set, spread the cream cheese mixture evenly over the top. Return the dish to the refrigerator and chill for an additional hour before serving.

Step 6: Serve and Enjoy

Cut into squares or scoop onto plates and serve. You can garnish with extra blueberries or pecans for added flair.

Tips for Success

  • Use room temperature cream cheese to avoid lumps in the topping.
  • Refrigerate long enough to ensure both layers set properly.
  • Customize with nuts or fruits to suit your taste preferences.
  • Serve cold for the best texture and flavor.
  • Use sugar-free gelatin for a lower-sugar option without sacrificing taste.

Nutritional Information (Per Serving)

NutrientAmount
Calories280 kcal
Total Fat12 g
Saturated Fat7 g
Carbohydrates38 g
Sugars29 g
Protein3 g
Sodium180 mg

Note: Nutritional values are estimates and may vary based on specific ingredients used.

Creative Variations

Strawberry Twist

Replace the blueberry pie filling with strawberry pie filling and use strawberry JELL-O for a berry-packed treat.

Nut-Free Version

Skip the pecans if you’re serving someone with nut allergies.

Dairy-Free Topping

Use a dairy-free cream cheese alternative and coconut-based yogurt instead of sour cream for a dairy-free option.

Citrus Boost

Add a tablespoon of lemon zest to the cream cheese topping for a bright, citrusy flavor.

Serving and Storage

Serving Suggestions

  • Serve chilled with a garnish of fresh blueberries or mint leaves.
  • Pair with coffee or tea for a delightful dessert experience.
  • Perfect for picnics, family dinners, and holiday feasts.

Storage Tips

  • Refrigerator: Store covered in the fridge for up to 5 days.
  • Freezer: Freezing is not recommended as it can affect the texture.

FAQs About Blueberry Jell-O Salad

1. Can I make this recipe ahead of time?

Yes! It’s best made a day in advance to let the flavors meld and the layers set.

2. Can I use fresh pineapple instead of canned?

Fresh pineapple contains enzymes that prevent gelatin from setting, so stick with canned for best results.

3. How do I make the salad less sweet?

Use sugar-free JELL-O and reduce the sugar in the cream cheese topping.

4. Can I use different nuts?

Absolutely. Walnuts or almonds can be used as alternatives to pecans.

5. Is it possible to make a smaller batch?

Yes, simply halve the ingredients and use an 8×8-inch dish.

6. Can I substitute Greek yogurt for sour cream?

Yes, Greek yogurt works well and adds a slight tangy flavor.

Final Thoughts and Next Steps

There’s something magical about serving a dish that not only tastes delicious but also brings smiles to everyone around the table. Blueberry Jell-O Salad is that kind of recipe—easy to make, beautifully vibrant, and bursting with flavor. It’s a nostalgic treat that feels both familiar and fresh, making it perfect for holidays, family dinners, or any day you want to add a little joy to your menu.

So, why wait? Gather your ingredients and whip up this delightful dessert that’s sure to become a household favorite. Don’t be surprised if you find yourself making it again and again!

Blueberry Jell-O Salad

Blueberry Jell-O Salad is a vibrant, fruity dessert made with layers of blueberry gelatin, crushed pineapple, blueberry pie filling, and fresh blueberries, topped with a creamy, sweetened cream cheese layer. Perfect for potlucks, family gatherings, or holidays, this refreshing and colorful treat is easy to prepare, make-ahead friendly, and sure to be a crowd-pleaser.
Prep Time 20 minutes
Resting Time 5 hours
Servings: 6
Course: Dessert
Cuisine: American
Calories: 250

Ingredients
  

For the Blueberry JELL-O Salad you will need:
  • 1 16-ounce can of crushed pineapple (drain and reserve the juice)
  • 1 cup of boiling water
  • 2 boxes 3 ounces each of grape or berry-blue JELL-O gelatin (sugar-free can be substituted)
  • 1 16-ounce can of blueberry pie filling
  • ½ cup of fresh blueberries washed
  • ¼ cup of chopped pecans
For the Cream Cheese Topping gather:
  • 1 8-ounce package of cream cheese, softened and chopped into blocks
  • ½ cup of granulated sugar
  • 8 ounces of sour cream
  • 1 teaspoon of pure vanilla extract

Method
 

  1. Prepare the JELL-O Layer: Dissolve JELL-O gelatin in boiling water. Stir in reserved pineapple juice. Add crushed pineapple, blueberry pie filling, fresh blueberries, and pecans. Pour mixture into a 9×13-inch dish and refrigerate until set (about 4 hours).
  2. Make the Cream Cheese Topping: Beat softened cream cheese with granulated sugar until smooth. Add sour cream and vanilla extract; mix until fluffy.
  3. Assemble and Chill: Spread the cream cheese mixture over the set JELL-O layer. Refrigerate for another hour before serving.
  4. Serve: Slice into squares or scoop to serve. Garnish with extra blueberries or pecans if desired.

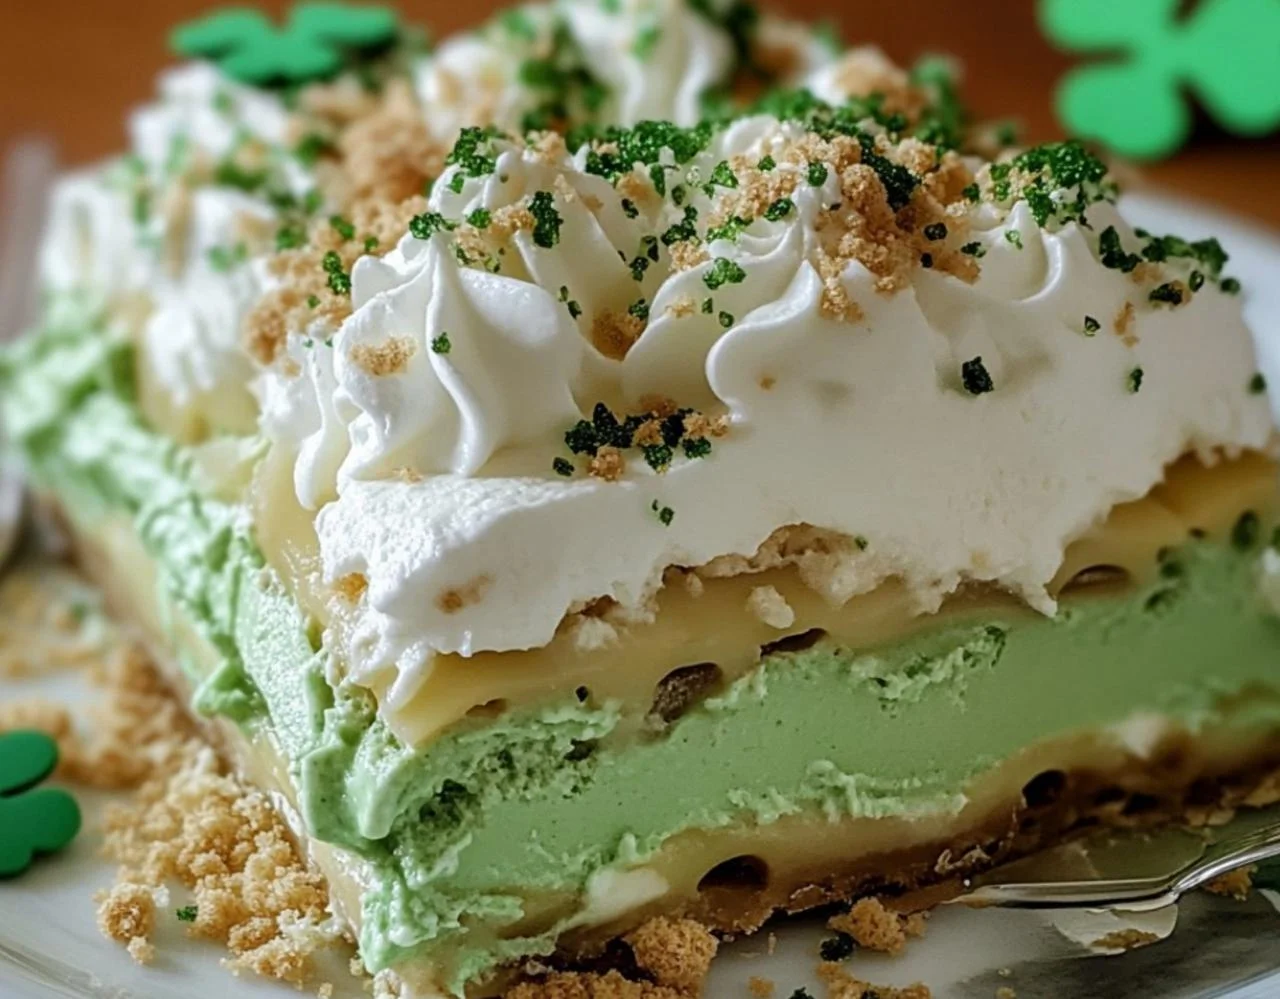
Shamrock Shake Dessert Lasagna

Have you ever tasted a dessert so festive and delicious that it instantly became a family favorite? That’s exactly what happened when I made this Shamrock Shake Dessert Lasagna. Inspired by the beloved seasonal shake, this no-bake dessert layers a crunchy Oreo crust, a creamy mint filling, and a rich chocolate topping to create a showstopping treat perfect for St. Patrick’s Day—or any time you’re craving something sweet and refreshing.

This dessert isn’t just about flavor; it’s about creating something that brings joy and excitement to your table. Picture the smiles as you unveil those vibrant green layers or the “oohs” and “aahs” when guests take their first bite. Whether you’re making it for a family dinner, a festive gathering, or just because, this Shamrock Shake Dessert Lasagna is a recipe you’ll find yourself returning to year after year.

Why You’ll Love This Shamrock Shake Dessert Lasagna

  • No baking required: Perfect for when you want a hassle-free dessert.
  • Minty fresh and chocolatey: A winning flavor combination.
  • Kid-friendly: Little hands can help with the layering and decorating.
  • Eye-catching presentation: Those green layers are sure to impress!
  • Great for make-ahead: Prepare it in advance for stress-free entertaining.

Ingredients

Here’s what you’ll need to bring this festive dessert to life:

Ingredient Table

ComponentIngredientsAmount
CrustOreo cookie crumbs1 ½ cups
Unsalted butter (melted)6 tablespoons
Mint FillingCream cheese (softened)8 oz
Powdered sugar1 cup
Vanilla extract1 teaspoon
Peppermint extract1 teaspoon
Whipped topping (Cool Whip)2 cups
Green food coloring2–3 drops
Chocolate ToppingSemi-sweet chocolate chips1 cup
Heavy cream2 tablespoons
GarnishExtra whipped topping, chocolate shavingsAs desired

How to Make Shamrock Shake Dessert Lasagna

Step 1: Make the Oreo Crust

Crush the Oreo cookies into fine crumbs using a food processor or by placing them in a zip-top bag and crushing them with a rolling pin. In a bowl, combine the crumbs with melted butter. Press the mixture firmly into the bottom of a 9×13-inch pan to form a solid crust. Chill in the refrigerator while preparing the next layer.

Step 2: Prepare the Mint Filling

In a mixing bowl, beat the softened cream cheese until smooth. Gradually add powdered sugar, mixing until well combined. Stir in vanilla and peppermint extracts. Fold in the whipped topping gently, adding green food coloring until you reach your desired shade of green. Spread this mixture evenly over the chilled crust.

Step 3: Make the Chocolate Topping

Melt the chocolate chips with heavy cream using a double boiler or in the microwave (in 30-second intervals, stirring between each). Pour the smooth, melted chocolate over the mint layer, spreading it gently with a spatula.

Step 4: Garnish and Set

Top with extra whipped topping, chocolate shavings, or sprinkles for added flair. Refrigerate for at least 4 hours or until fully set.

Step 5: Serve and Enjoy

Once set, slice into squares and serve. Watch how quickly it disappears!

Tips for Success

  • Use room temperature cream cheese for a smooth filling.
  • Crush the cookies finely to ensure a firm crust.
  • Chill between layers to prevent mixing and achieve distinct layers.
  • Don’t overheat the chocolate to keep it silky and spreadable.
  • Customize the garnish with festive sprinkles or crushed mint candies.

Nutritional Information (Per Serving)

NutrientAmount
Calories320 kcal
Total Fat18 g
Saturated Fat10 g
Carbohydrates38 g
Sugars25 g
Protein3 g
Sodium150 mg

Note: Nutritional values are approximate and vary based on specific ingredients used.

Creative Variations

Mint Chocolate Chip Twist

Fold in mini chocolate chips to the mint layer for added texture.

Oreo Mint Crust Upgrade

Use mint-flavored Oreos for an extra minty base.

White Chocolate Topping

Replace the semi-sweet chocolate with melted white chocolate for a different flavor profile.

Gluten-Free Option

Use gluten-free sandwich cookies for the crust.

Serving and Storage

Serving Suggestions

  • Serve chilled for the best texture.
  • Pair with a hot cup of coffee or mint tea.
  • Add a scoop of vanilla ice cream for extra indulgence.

Storage Tips

  • Refrigerator: Store in an airtight container for up to 5 days.
  • Freezer: Freeze for up to 1 month; thaw in the refrigerator before serving.

FAQs About Shamrock Shake Dessert Lasagna

1. Can I make this dessert ahead of time?

Yes! Prepare it a day in advance and keep it refrigerated until serving.

2. Can I use fresh whipped cream instead of Cool Whip?

Absolutely, just ensure it’s stabilized to maintain the layers.

3. How can I make this dessert less sweet?

Reduce the powdered sugar in the filling or use dark chocolate for the topping.

4. Can I skip the green food coloring?

Yes, the dessert will still taste delicious without the color.

5. What’s the best way to cut clean slices?

Use a sharp knife dipped in warm water and wiped dry between cuts.

6. Can I use a different extract if I don’t like peppermint?

Try vanilla mint, almond, or even orange extract for a unique twist.

Final Thoughts and Next Steps

Making this Shamrock Shake Dessert Lasagna isn’t just about creating a dessert—it’s about making memories. From the vibrant green layers to the cool mint flavor, this no-bake treat is a celebration in every bite. It’s simple enough to whip up on a whim yet impressive enough to grace your holiday table.

So, what are you waiting for? Gather your ingredients, put on your favorite music, and create a dessert that’s as fun to make as it is to eat. Don’t be surprised if your guests ask for seconds—or the recipe!

Shamrock Shake Dessert Lasagna

This Shamrock Shake Dessert Lasagna is a no-bake, minty, and chocolatey layered dessert inspired by the classic Shamrock Shake. With a crunchy Oreo crust, a creamy mint filling, and a rich chocolate topping, it’s the perfect festive treat for St. Patrick’s Day or any occasion where you want to impress with minimal effort.
Prep Time 20 minutes
Resting Time 4 hours
Total Time 4 hours 20 minutes
Servings: 10
Course: Dessert
Cuisine: American
Calories: 350

Ingredients
  

For the Crust:
  • 1 ½ cups Oreo cookie crumbs about 15–20 cookies
  • 6 tablespoons unsalted butter melted
For the Mint Filling:
  • 8 oz cream cheese softened
  • 1 cup powdered sugar
  • 1 teaspoon vanilla extract
  • 1 teaspoon peppermint extract
  • 2 cups whipped topping Cool Whip
  • 2 –3 drops green food coloring optional, but adds a festive touch
For the Chocolate Topping:
  • 1 cup semi-sweet chocolate chips
  • 2 tablespoons heavy cream
For Garnish:
  • Extra whipped topping
  • Chocolate shavings or sprinkles for extra pizzazz

Method
 

  1. Make the Crust: Crush Oreo cookies into fine crumbs and mix with melted butter. Press into the bottom of a 9×13-inch pan and chill.
  2. Prepare the Mint Filling: Beat softened cream cheese until smooth. Mix in powdered sugar, vanilla, and peppermint extracts. Fold in whipped topping and food coloring. Spread over the crust.
  3. Make the Chocolate Topping: Melt chocolate chips with heavy cream. Pour and spread evenly over the mint layer.
  4. Garnish and Set: Add extra whipped topping, chocolate shavings, or sprinkles. Chill for at least 4 hours.
  5. Serve: Slice and enjoy your festive creation!

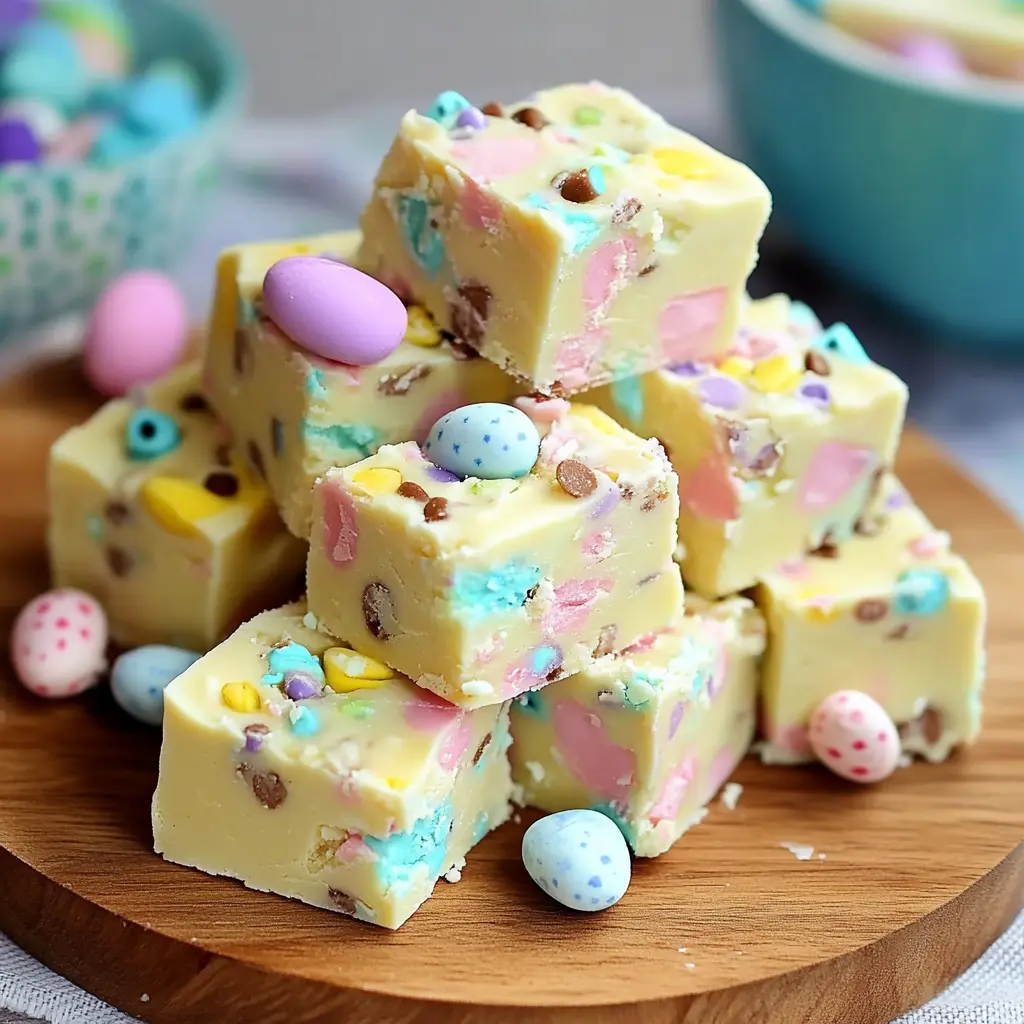
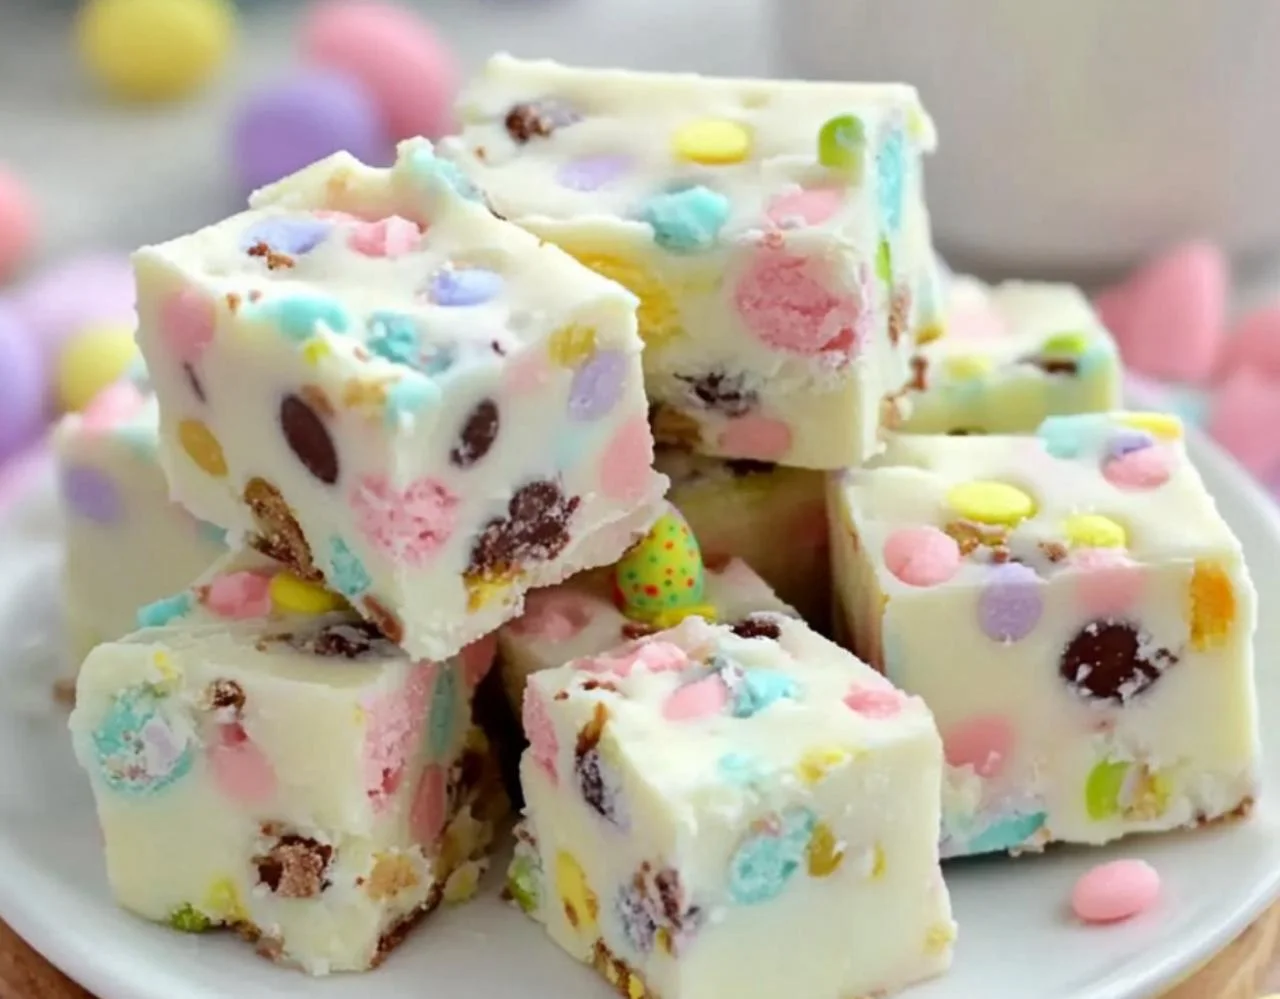
Easy No-Bake Easter Fudge: Festive Fun—This One’s a Must-Try!

You know that feeling when you create something so delicious it vanishes before you can even grab a second piece? That’s exactly what happened with this Easy No-Bake Easter Fudge. I whipped up a batch for a family gathering, thinking there would be leftovers to enjoy the next day—but nope, it was gone faster than the Easter egg hunt ended! If you’re looking for a simple yet festive treat that requires no oven and minimal prep, you’ve just found your new go-to recipe.

This fudge is smooth, creamy, and packed with colorful surprises. The pastel mini marshmallows and crushed mini chocolate eggs give it a festive touch, making it perfect for Easter celebrations, school parties, or just a sweet springtime indulgence. Ready to dive in? Let’s get started!

Why You’ll Love This Easy No-Bake Easter Fudge

  • Quick and simple: Only a few ingredients and minimal equipment are required.
  • No baking needed: Perfect when you don’t want to turn on the oven.
  • Festive and colorful: A treat that looks just as good as it tastes.
  • Kid-friendly: Little ones will love helping with the stirring and decorating.
  • Great for gifting: Wrap up slices for friends, neighbors, or teachers.

Ingredients You’ll Need

Here’s everything you need to create this mouthwatering fudge:

IngredientAmount
White chocolate chips3 cups
Sweetened condensed milk (14 oz can)1 can
Vanilla extract1 teaspoon
Pastel-colored mini marshmallows1 cup
Crushed mini chocolate eggs½ cup
Salt¼ teaspoon
Additional mini eggs & sprinklesFor decoration (optional)

Step-by-Step Guide to Making Your Easter Fudge

Step 1: Prepare Your Pan

Line an 8×8-inch baking pan with parchment paper, leaving an overhang on the sides to lift the fudge out easily later. Lightly grease the paper to prevent sticking.

Step 2: Melt the White Chocolate

In a medium saucepan over low heat, combine the white chocolate chips and sweetened condensed milk. Stir constantly until the chocolate is fully melted and smooth. Be patient—this step is key to that silky texture.

Step 3: Add Vanilla and Salt

Remove the mixture from heat and stir in the vanilla extract and salt. These simple additions balance the sweetness and enhance the flavor.

Step 4: Fold in the Fun Ingredients

Gently fold in the pastel-colored mini marshmallows and crushed mini chocolate eggs. Be careful not to overmix; you want to keep the marshmallows from melting into the fudge completely.

Step 5: Pour and Spread

Pour the mixture into your prepared pan, spreading it evenly with a spatula. Press additional mini eggs and sprinkles on top for extra color and crunch.

Step 6: Chill and Set

Refrigerate the fudge for at least 2 hours, or until firm. The hardest part is waiting, but trust me—it’s worth it!

Step 7: Slice and Enjoy

Once set, lift the fudge out of the pan using the parchment overhang. Cut into squares and watch them disappear faster than you can say, “Happy Easter!”

Tips for Perfect Easter Fudge Every Time

Use High-Quality Chocolate

Your fudge’s creaminess depends on the chocolate quality. Premium white chocolate chips melt smoother and taste richer.

Don’t Rush the Melting Process

Melting the chocolate slowly over low heat prevents burning and ensures a velvety texture.

Customize with Your Favorite Mix-Ins

While mini marshmallows and mini eggs are festive, you can swap them for chopped nuts, dried fruit, or colorful candies.

Add a Pop of Color

Gel food coloring can give the fudge a pastel swirl effect. Just add a few drops before folding in the mix-ins

Nutritional Information (Per Serving)

NutrientAmount
Calories210 kcal
Total Fat9 g
Saturated Fat5 g
Carbohydrates30 g
Sugars25 g
Protein2 g
Sodium70 mg

Note: Nutritional values are estimates and may vary based on ingredients used.

Creative Variations to Try

Chocolate Lover’s Twist

Swap half the white chocolate for milk or dark chocolate chips for a richer flavor.

Peanut Butter Delight

Add a swirl of peanut butter before setting for a salty-sweet combo.

Spring Garden Fudge

Use flower-shaped sprinkles and green-tinted coconut flakes for a garden-themed treat.

Common Mistakes and How to Avoid Them

Overheating the Chocolate

Melting too quickly causes grainy fudge. Keep the heat low and stir constantly.

Adding Marshmallows Too Soon

Mix them in after removing from heat to avoid melting into gooey blobs.

Skipping the Salt

Even a pinch of salt enhances the overall flavor and cuts through the sweetness.

Serving and Storing Your Easter Fudge

Serving Suggestions

  • Arrange on a festive platter for your Easter brunch table.
  • Wrap in cellophane bags tied with pastel ribbons for thoughtful gifts.
  • Add to Easter baskets for a homemade touch.

Storage Tips

  • Refrigerator: Store in an airtight container for up to 2 weeks.
  • Freezer: Freeze for up to 3 months. Thaw in the fridge before serving.

FAQs About Easy No-Bake Easter Fudge

1. Can I use milk chocolate instead of white chocolate?

Yes! It will change the flavor profile but still taste delicious.

2. How long does the fudge need to set?

At least 2 hours in the refrigerator. Overnight is even better for a firmer texture.

3. Can I make this fudge dairy-free?

Yes, use dairy-free chocolate and sweetened condensed coconut milk for a similar result.

4. What if I don’t have mini chocolate eggs?

Crushed chocolate candies, chopped chocolate bars, or colorful sprinkles work just as well.

5. Is it safe for kids to help with this recipe?

Absolutely! Kids can help stir (with supervision) and decorate the top.

6. How do I cut the fudge neatly?

Use a sharp knife dipped in warm water and wiped dry between cuts for clean slices.

Final Thoughts and Next Steps

Making this Easy No-Bake Easter Fudge isn’t just about creating a sweet treat—it’s about bringing joy to your table and smiles to everyone’s faces. Whether you’re sharing it with family, gifting it to friends, or indulging in a piece yourself, you’ll love how quickly it comes together and how fast it disappears!

Ready to whip up a batch? Gather your ingredients, put on your favorite spring playlist, and get started. And don’t forget to save yourself a piece before it’s all gone!

Easy No-Bake Easter Fudge: Festive Fun—This One’s a Must-Try!

This Easy No-Bake Easter Fudge is a quick, festive treat that’s creamy, colorful, and perfect for Easter celebrations. With just a handful of ingredients and no oven required, it’s a fun recipe for both kids and adults to make. The combination of white chocolate, pastel mini marshmallows, and crushed mini chocolate eggs creates a sweet treat that disappears fast at any gathering!
Prep Time 10 minutes
Resting Time 2 hours
Total Time 2 hours 10 minutes
Servings: 6
Course: Dessert
Cuisine: American
Calories: 210

Ingredients
  

  • 3 cups of white chocolate chips
  • 1 can 14 oz of sweetened condensed milk,
  • 1 teaspoon of vanilla extract
  • 1 cup of pastel-colored mini marshmallows
  • ½ cup of crushed mini chocolate eggs like Cadbury Mini Eggs,
  • ¼ teaspoon of salt
  • Additional mini eggs and sprinkles for decoration.

Method
 

  1. Prepare the Pan: Line an 8×8-inch baking pan with parchment paper, leaving an overhang for easy removal.
  2. Melt the Chocolate: In a medium saucepan over low heat, melt the white chocolate chips with the sweetened condensed milk. Stir constantly until smooth.
  3. Add Flavoring: Remove from heat and stir in vanilla extract and salt.
  4. Mix in Marshmallows and Mini Eggs: Gently fold in the mini marshmallows and crushed mini chocolate eggs without overmixing.
  5. Spread in Pan: Pour the mixture into the prepared pan and smooth the top with a spatula.
  6. Decorate: Press additional mini eggs and sprinkles on top for a festive finish.
  7. Chill: Refrigerate for at least 2 hours until fully set.
  8. Serve: Lift the fudge out, cut into squares, and enjoy!

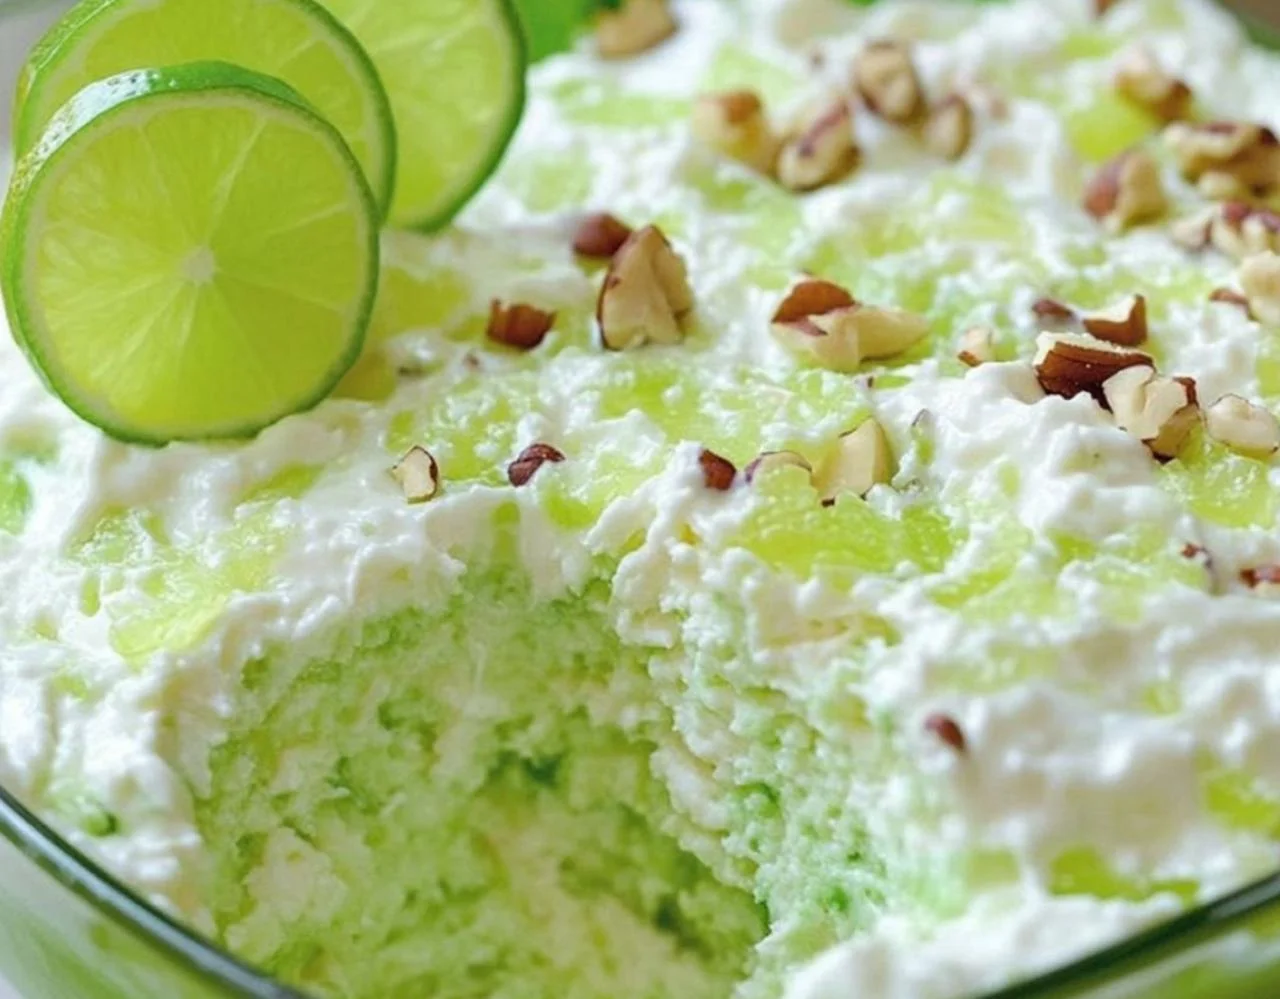
Shamrock Salad Recipe: Creamy, Crunchy, and Citrusy Goodness for Your Next Family Dinner

Why You’ll Love This Shamrock Salad

Have you ever prepared a dish that surprises everyone at the table, including the pickiest eaters? Shamrock Salad is that delightful combination of creamy texture, refreshing citrus notes, and a satisfying crunch. Whether you’re looking to add something unique to your holiday spread or just want a refreshing side for a family meal, this salad is bound to impress. It’s vibrant, flavorful, and perfect for any occasion.

Ingredients

IngredientQuantity
Lime-flavored gelatin1 (3-ounce) package
Boiling water1 cup
Evaporated milk⅔ cup
Crushed pineapple (with juice)1 (9-ounce) can
Fresh lemon juice1 tablespoon
Cottage cheese1 (12-ounce) container
Finely chopped celery½ cup
Mayonnaise½ cup
Finely chopped pecans½ cup
Lettuce leaves10
Lime slices (for garnish)10

Step-by-Step Instructions

1. Prepare the Gelatin Base

  • In a medium bowl, dissolve the lime-flavored gelatin in 1 cup of boiling water. Stir until fully dissolved.
  • Let the mixture cool to room temperature.

2. Create the Creamy Mixture

  • In another large bowl, combine evaporated milk, crushed pineapple with juice, and fresh lemon juice. Stir well.
  • Add cottage cheese, mayonnaise, and finely chopped celery. Mix until smooth.

3. Combine and Chill

  • Slowly add the cooled gelatin mixture to the creamy base, stirring constantly to prevent lumps.
  • Fold in finely chopped pecans for that extra crunch.
  • Pour the mixture into a serving dish or mold. Refrigerate for at least 2 hours or until set.

4. Serve and Garnish

  • Once set, serve the Shamrock Salad on fresh lettuce leaves.
  • Garnish with lime slices for a pop of color and added citrus flair.

Tips for the Perfect Shamrock Salad

  • Use Fresh Ingredients: Fresh lemon juice makes a noticeable difference in flavor.
  • Chill Thoroughly: Allow enough chill time for the salad to set properly.
  • Texture Control: Chop celery and pecans finely for a smoother texture.
  • Customize Garnish: Add fresh herbs like mint for an extra touch of freshness.
  • Serve Cold: This salad is best enjoyed when fully chilled.

Creative Variations to Try

  • Add Fresh Fruit: Incorporate diced apples or grapes for added sweetness.
  • Make It Lighter: Substitute Greek yogurt for mayonnaise to reduce calories.
  • Extra Crunch: Add more nuts like walnuts or almonds for variety.
  • Sweet Twist: Use marshmallows for a dessert-like version.
  • Tropical Spin: Swap lime gelatin for pineapple gelatin for a fruity twist.

Nutritional Information (Per Serving)

NutrientAmount
Calories220
Total Fat15g
Saturated Fat4g
Carbohydrates18g
Sugars14g
Protein6g
Sodium200mg

Why Shamrock Salad is Perfect for Any Occasion

  • Holiday Dinners: Its vibrant green color makes it ideal for St. Patrick’s Day or festive occasions.
  • Family Gatherings: A guaranteed crowd-pleaser for all ages.
  • Potlucks: Easy to transport and serve, making it perfect for shared meals.
  • Quick Prep: Minimal prep time with maximum flavor payoff.

Frequently Asked Questions (FAQ)

1. Can I make Shamrock Salad a day ahead?
Yes! In fact, making it a day ahead allows the flavors to meld better. Just keep it refrigerated until ready to serve.

2. Can I substitute fresh pineapple for canned?
Fresh pineapple can be used, but the juice from canned pineapple helps with the gelatin setting process.

3. How do I prevent the gelatin from separating?
Make sure the gelatin mixture cools to room temperature before combining with other ingredients to avoid separation.

4. Is there a dairy-free version?
Yes, you can use dairy-free alternatives for evaporated milk, cottage cheese, and mayonnaise.

5. Can I use other types of nuts?
Absolutely! Walnuts, almonds, or even pistachios work well in this recipe.

6. How long will leftovers last?
Stored in an airtight container, Shamrock Salad will last up to 3 days in the refrigerator.

Final Thoughts and Call to Action

Shamrock Salad is more than just a pretty dish—it’s a delightful blend of flavors and textures that brings joy to every table. Whether you’re preparing it for a holiday celebration or a simple family dinner, this salad is sure to become a favorite. Ready to surprise your guests with something refreshingly unique? Gather your ingredients and whip up this creamy, crunchy, and citrusy goodness today!

Shamrock Salad Recipe: Creamy, Crunchy, and Citrusy Goodness for Your Next Family Dinner

The Shamrock Salad Recipe is a delightful blend of creamy, crunchy, and citrusy flavors, perfect for family dinners, holiday celebrations, and potlucks. Made with lime-flavored gelatin, cottage cheese, crushed pineapple, and chopped pecans, this vibrant green salad is easy to prepare and highly refreshing.
Prep Time 20 minutes
Resting Time 2 hours
Total Time 2 hours 20 minutes
Servings: 10
Course: Salad
Cuisine: American
Calories: 250

Ingredients
  

  • 1 3-ounce package lime-flavored gelatin
  • 1 cup boiling water
  • ⅔ cup evaporated milk
  • 1 9-ounce can crushed pineapple (with juice)
  • 1 tablespoon fresh lemon juice
  • 1 12-ounce container cottage cheese
  • ½ cup finely chopped celery
  • ½ cup mayonnaise
  • ½ cup finely chopped pecans
  • 10 lettuce leaves for serving
  • 10 lime slices for garnish

Method
 

Prepare the Gelatin Base
  1. Dissolve the lime-flavored gelatin in 1 cup of boiling water. Stir until fully dissolved.
  2. Allow the mixture to cool to room temperature.
Make the Creamy Mixture
  1. In a large mixing bowl, combine evaporated milk, crushed pineapple with juice, and fresh lemon juice. Mix well.
  2. Add cottage cheese, mayonnaise, and finely chopped celery. Stir until smooth and evenly mixed.
Combine and Chill
  1. Gradually pour the cooled gelatin mixture into the creamy base, stirring continuously to prevent lumps.
  2. Fold in finely chopped pecans for added crunch.
  3. Pour the mixture into a serving dish or mold. Refrigerate for at least 2 hours or until the salad is set.
Serve and Garnish
  1. Once set, serve the Shamrock Salad on individual lettuce leaves.
  2. Garnish each serving with a slice of lime for a fresh citrus touch.

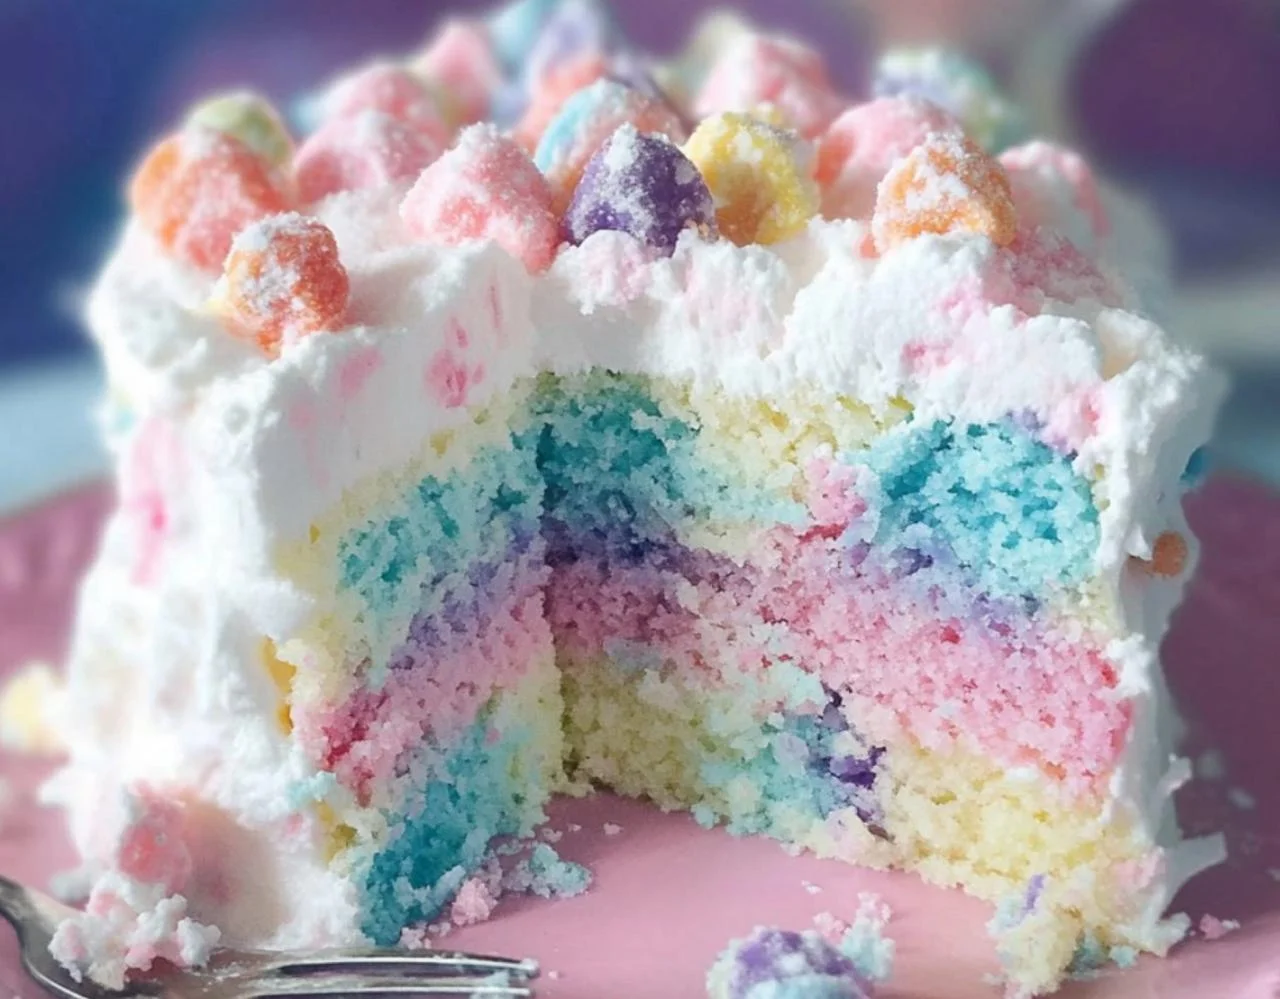
Cotton Candy Cake: A Magical, Fluffy Cake Bursting with Cotton Candy Flavor and Dreamy Pastel Colors!

Why You’ll Fall in Love with This Cotton Candy Cake

Have you ever tasted a dessert that instantly takes you back to childhood fairs, spinning rides, and the sweet scent of cotton candy floating through the air? This Cotton Candy Cake isn’t just a dessert; it’s a journey into your most cherished memories. Imagine slicing into a pastel masterpiece that looks as magical as it tastes, with every bite offering a fluffy, melt-in-your-mouth texture and the nostalgic sweetness of cotton candy. Whether you’re celebrating a birthday, planning a whimsical party, or just need a pick-me-up, this cake promises smiles, gasps of delight, and empty plates.

Ingredients You’ll Need

For the Cake:

IngredientQuantity
All-purpose flour2 ½ cups
Baking powder2 ½ teaspoons
Salt½ teaspoon
Unsalted butter (softened)1 cup
Granulated sugar1 ¾ cups
Egg whites4 large
Vanilla extract1 teaspoon
Cotton candy extract1 teaspoon (or to taste)
Whole milk1 cup
Pink food coloringAs needed
Blue food coloringAs needed

For the Cotton Candy Frosting:

IngredientQuantity
Unsalted butter (softened)1 cup
Powdered sugar4 cups
Heavy cream (or milk)2 tablespoons
Vanilla extract1 teaspoon
Cotton candy extract1 teaspoon
Pink & blue food coloringAs needed
Cotton candy (for garnish)As desired

Step-by-Step Instructions

1. Preparing the Cake Batter

  • Preheat your oven to 350°F (175°C). Grease and line three 8-inch round cake pans with parchment paper.
  • In a medium bowl, whisk together flour, baking powder, and salt.
  • In a large mixing bowl, beat the softened butter and granulated sugar until light and fluffy.
  • Add egg whites one at a time, beating well after each addition.
  • Stir in vanilla and cotton candy extracts.
  • Alternately add the flour mixture and milk to the butter mixture, beginning and ending with flour. Mix until just combined.
  • Divide batter evenly into two bowls. Color one portion pink and the other blue.
  • Pour batters into prepared pans, swirling gently for a marble effect or layering for distinct colors.
  • Bake for 25-30 minutes or until a toothpick inserted comes out clean. Cool completely before frosting.

2. Making the Cotton Candy Frosting

  • Beat butter until creamy and smooth.
  • Gradually add powdered sugar, mixing on low to prevent clouds of sugar.
  • Stir in heavy cream, vanilla, and cotton candy extracts until fluffy.
  • Divide frosting into two portions. Tint one pink and the other blue.

3. Assembling and Decorating Your Cake

  • Place one cake layer on your serving plate. Spread a layer of frosting on top.
  • Repeat with remaining layers, alternating colors if desired.
  • Frost the outside with a combination of pink and blue frosting, swirling for a dreamy look.
  • Garnish with wisps of cotton candy just before serving.

Tips for the Perfect Cotton Candy Cake

  • Room Temperature Ingredients: Ensure butter, milk, and eggs are at room temperature for smooth batter.
  • Avoid Overmixing: Overmixing can make the cake dense. Mix until just combined.
  • Frosting Consistency: If frosting is too thick, add a touch more cream; if too thin, add powdered sugar.
  • Adding Cotton Candy: Place cotton candy garnish right before serving to prevent it from melting into the frosting.

Creative Variations and Ideas

  • Cupcake Version: Use the same batter and bake in cupcake liners for about 18-20 minutes.
  • Surprise Inside: Add colorful sprinkles or mini marshmallows between layers for a fun surprise.
  • Drizzle Effect: Top with a white chocolate or pastel-colored ganache drizzle.
  • Edible Glitter: Sprinkle with edible glitter for extra magic.

Why Cotton Candy Cake Is Perfect for Any Occasion

  • Birthdays: A pastel dream perfect for kids and adults.
  • Baby Showers: Gender reveal? Let the inside color reveal the surprise.
  • Tea Parties: Impress your guests with a whimsical, sweet treat.
  • Everyday Joy: Who needs a reason to enjoy a bit of nostalgia?

Nutritional Information (Approximate per slice)

NutrientAmount
Calories420
Fat18g
Saturated Fat11g
Carbohydrates60g
Sugar45g
Protein4g
Sodium180mg

Frequently Asked Questions (FAQ)

1. Can I use store-bought cotton candy instead of extract?
Cotton candy extract provides a stronger, more consistent flavor. Using actual cotton candy in the batter is not recommended as it melts and can affect texture.

2. How should I store the Cotton Candy Cake?
Store in an airtight container at room temperature for up to 2 days or refrigerated for up to 5 days. Let it come to room temperature before serving.

3. Can I freeze the cake?
Yes! Freeze unfrosted layers wrapped in plastic wrap for up to 2 months. Thaw before frosting and serving.

4. How can I prevent the cotton candy garnish from melting?
Add the cotton candy garnish just before serving to keep it fluffy and prevent it from dissolving.

5. Is there a substitute for cotton candy extract?
If you can’t find cotton candy extract, vanilla extract with a hint of raspberry extract can mimic the flavor.

6. Can I make this cake gluten-free?
Yes, use a 1:1 gluten-free flour blend. Baking times may vary slightly, so keep an eye on the oven.

Final Thoughts and Call to Action

Nothing brings people together quite like a homemade cake. This Cotton Candy Cake offers a magical combination of flavors, colors, and nostalgia that your family and friends will rave about. Perfect for parties, special occasions, or whenever you need a little whimsy, it’s sure to brighten any day.

Ready to bring some magic into your kitchen? Gather your ingredients, put on your favorite playlist, and let the baking adventure begin!

Cotton Candy Cake: A Magical, Fluffy Cake Bursting with Cotton Candy Flavor and Dreamy Pastel Colors!

A light, fluffy cake bursting with cotton candy flavor and dreamy pastel colors. This cake is perfect for birthdays, celebrations, or anytime you need a nostalgic treat.
Prep Time 20 minutes
Cook Time 30 minutes
Total Time 50 minutes
Servings: 12
Course: Dessert
Cuisine: American
Calories: 350

Ingredients
  

For the Cake:
  • 2 ½ cups all-purpose flour
  • 2 ½ teaspoons baking powder
  • ½ teaspoon salt
  • 1 cup unsalted butter softened
  • 1 ¾ cups granulated sugar
  • 4 large egg whites
  • 1 teaspoon vanilla extract
  • 1 teaspoon cotton candy extract or to taste
  • 1 cup whole milk
  • Pink food coloring
  • Blue food coloring
For the Cotton Candy Frosting:
  • 1 cup unsalted butter softened
  • 4 cups powdered sugar
  • 2 tablespoons heavy cream or milk
  • 1 teaspoon vanilla extract
  • 1 teaspoon cotton candy extract
  • Pink food coloring
  • Blue food coloring
  • Cotton candy for garnish

Method
 

Make the Cake:
  1. Preheat your oven to 350°F (175°C). Grease and line three 8-inch round cake pans with parchment paper.
  2. In a medium bowl, whisk together flour, baking powder, and salt.
  3. In a large mixing bowl, beat butter and sugar until light and fluffy.
  4. Add egg whites one at a time, mixing well after each addition.
  5. Stir in vanilla and cotton candy extracts.
  6. Alternate adding the flour mixture and milk to the butter mixture, starting and ending with flour. Mix until just combined.
  7. Divide batter into two bowls. Tint one pink and the other blue.
  8. Pour into prepared pans. Swirl batters for a marble effect or layer for distinct colors.
  9. Bake for 25-30 minutes or until a toothpick comes out clean. Cool completely.
Make the Frosting:
  1. Beat butter until smooth.
  2. Gradually add powdered sugar, mixing on low.
  3. Stir in heavy cream, vanilla, and cotton candy extracts. Beat until fluffy.
  4. Divide frosting into two bowls. Color one pink and the other blue.
Assemble and Decorate:
  1. Place a cake layer on a serving plate. Spread frosting on top.
  2. Repeat with remaining layers.
  3. Frost the outside with swirls of pink and blue frosting.
  4. Garnish with cotton candy before serving.

Easter Oreos: A Whimsical Treat for the Holiday Season

A Sweet Memory of Easter Celebrations

As a child, Easter was always a magical time in my house. The scent of fresh blooms filled the air, pastel-colored baskets lined the kitchen counter, and the thrill of the annual Easter egg hunt never got old. But the highlight of the day was always the dessert table. My grandmother had a knack for turning simple treats into edible works of art, and among my favorites were chocolate-covered Oreos decorated to match the season. She would transform ordinary cookies into adorable bunnies, chicks, and speckled eggs, each one a tiny masterpiece.

Now, as an adult, I find myself carrying on that tradition. There’s something incredibly nostalgic about dipping Oreos into melted chocolate, carefully placing the tiny candy eyes, and watching them transform into festive Easter delights. These Easter Oreos aren’t just cookies—they are memories in the making. Whether you’re creating them for a family gathering, Easter baskets, or simply to bring a little joy to your home, they are a delightful way to celebrate the season.

Why These Easter Oreos are a Must-Try

A Fun and Easy Treat for All Ages

One of the best things about making Easter Oreos is how simple they are to prepare. Unlike complex baked goods that require precise measurements and baking times, these cookies involve minimal effort and zero baking. That makes them an excellent choice for kids, who love to get involved in decorating. Sprinkling sugar on bunny ears or placing tiny candy feet on chicks can turn into a fun-filled family activity.

Perfect for Easter Baskets and Gift Giving

Handmade treats always feel more special than store-bought candy. Whether you’re assembling Easter baskets for little ones or preparing thoughtful gifts for neighbors and friends, these festive Oreos are a charming addition. Wrapped in clear cellophane bags with a pastel ribbon, they look as good as they taste.

Versatile and Customizable

These cookies offer endless possibilities for creativity. While the classic designs include bunnies, chicks, and Easter eggs, you can experiment with different themes. Try using lavender and mint-colored chocolate for a spring-inspired twist, or add edible glitter for a touch of sparkle. The options are limitless, allowing you to tailor the cookies to your own style.

Tips for Making the Perfect Easter Oreos

Choosing the Right Chocolate

The key to smooth and glossy chocolate-covered Oreos lies in selecting the right chocolate. Belgian white chocolate is an excellent choice, but candy melts work just as well. If using white chocolate chips, add a small amount of coconut oil or vegetable shortening to achieve a silky consistency.

The Art of Dipping

Dipping Oreos in melted chocolate can get messy, but a few tricks make it easier:

  • Use a fork to lower the cookie into the chocolate, ensuring full coverage.
  • Tap the fork gently against the bowl’s edge to remove excess chocolate.
  • Place the dipped Oreo on a wax-paper-lined tray and avoid touching it until it sets completely.

Decorating Like a Pro

  • Use tweezers for precise placement: Small sprinkles and decorations can be difficult to handle with fingers. Using clean kitchen tweezers helps position eyes, noses, and other details without smudging.
  • Work while the chocolate is still wet: Decorations adhere best when the chocolate hasn’t yet hardened, so move quickly when adding sprinkles and embellishments.
  • Freeze for fast setting: If you’re short on time, pop the decorated Oreos into the freezer for about 10 minutes. This speeds up the hardening process and prevents accidental smudging.

Whimsical Ingredients for a Sweet Delight

  • 8 Oreo cookies (or chocolate sandwich cookies)
  • Oil-based candy color (white, yellow, pink, and light blue)
  • ½ cup melted Belgian white chocolate (for Bunny Oreo, colored white)
  • ½ cup melted Belgian white chocolate (for Chick Oreo, colored yellow)
  • ½ cup melted Belgian white chocolate (for Easter Egg Oreo, colored pink)
  • ½ cup melted Belgian white chocolate (for Easter Egg Oreo, colored blue)
  • Assorted sprinkles
  • Pink sanding sugar

Step-by-Step Magic to Make Easter Oreos

Bunny Oreo Bliss
  1. Melt ½ cup white chocolate in a microwave-safe bowl in 20-second intervals, stirring until smooth.
  2. Mix in white candy color to achieve the desired shade.
  3. Using a fork, dip an Oreo into the melted chocolate, ensuring full coverage, and let excess chocolate drip off. Place it on wax paper.
  4. While the chocolate is still wet, add black sprinkles for the eyes and a pink heart sprinkle for the nose.
  5. Pipe two bunny ears and two paws using melted white chocolate onto wax paper, then sprinkle them with pink sanding sugar.
  6. Freeze for 10 minutes until set, then attach ears and feet using melted chocolate. Let set completely.
Chirpy Chick Oreo
  1. Melt ½ cup white chocolate in 20-second increments and stir until smooth.
  2. Mix in yellow candy color until the desired hue is reached.
  3. Dip an Oreo in the yellow chocolate, ensuring it’s fully covered, then place it on wax paper.
  4. While still wet, add black nonpareil sprinkles for eyes and an orange round sprinkle for the nose.
  5. Carefully add three orange jimmies per foot to create tiny chick legs. Let set completely.
Easter Egg Oreo Extravaganza
  1. Melt ½ cup white chocolate each in two bowls in 20-second increments, stirring until smooth.
  2. Mix pink candy color in one bowl and blue in the other.
  3. Using a fork, dip Oreos in pink or blue chocolate, ensuring full coverage. Place them on wax paper and freeze for 10 minutes.
  4. Fill a piping bag with melted pink or blue chocolate and pipe zig-zag or line patterns on set Oreos.
  5. Sprinkle with decorative sprinkles while the chocolate is still wet.
  6. Allow to set completely before serving.

Nutritious Bites of Easter Joy

(Per 1 Oreo serving)

  • Calories: 234 kcal
  • Carbohydrates: 28g
  • Protein: 3g
  • Fat: 13g
  • Saturated Fat: 7g
  • Sodium: 76mg
  • Sugar: 24g
  • Calcium: 68mg
  • Iron: 2mg

Store these festive delights in an airtight container at room temperature for up to 2 weeks.

Enjoy making and sharing these adorable, chocolate-covered Easter Oreos with friends and family!

Frequently Asked Questions

1. How far in advance can I make these Easter Oreos?

These chocolate-covered Oreos can be made up to two weeks in advance if stored properly. Keep them in an airtight container at room temperature, away from direct sunlight or heat sources. Avoid refrigeration, as it can cause condensation and make the chocolate look dull.

2. Can I use regular food coloring instead of oil-based candy color?

No, regular liquid or gel food coloring does not mix well with chocolate. It can cause the chocolate to seize, creating a grainy texture. Always use oil-based candy color for smooth and even coloring.

3. What can I use instead of Oreos?

If you want to try something different, consider using:

  • Golden Oreos for a vanilla twist.
  • Homemade sugar cookies for a from-scratch version.
  • Ritz cracker peanut butter sandwiches for a sweet and salty combination.

4. How do I prevent my chocolate from getting too thick?

If your melted chocolate thickens too quickly, add a small amount of coconut oil or vegetable shortening and stir until smooth. This helps maintain a dipping consistency.

5. Can I freeze decorated Oreos?

While freezing is possible, it’s not always recommended. The chocolate may develop condensation when thawing, which can affect the appearance. If you must freeze them, store in an airtight container with wax paper between layers and allow them to thaw at room temperature before serving.

6. What is the best way to package these for gifts?

For gifting, place the Oreos in clear treat bags or decorative boxes, using shredded paper or parchment paper to cushion them. If adding them to an Easter basket, consider packing them in a single layer to prevent smudging or breakage.

7. How can I make these Oreos allergy-friendly?

For a nut-free version, ensure that your chocolate and decorations are free from cross-contamination warnings. If making a dairy-free version, use dairy-free white chocolate and check ingredient labels carefully.

Making Easter Memories One Cookie at a Time

Baking and decorating treats is about more than just creating something delicious—it’s about making memories. These Easter Oreos embody the spirit of the holiday: bright, joyful, and made with love. Whether you’re preparing them for an Easter celebration, a classroom party, or simply as a fun weekend project, they bring happiness to anyone who sees and tastes them.

So gather your sprinkles, melt your chocolate, and let your creativity shine. Who knows? Maybe one day, a little one in your family will look back on these cookies as a cherished part of their own Easter traditions—just as I do now.

aiting

Easter Oreos: A Whimsical Treat for the Holiday Season

Celebrate Easter with these adorable, chocolate-covered Oreos! These whimsical treats come in Bunny, Chick, and Easter Egg designs, each coated in smooth Belgian white chocolate and decorated with festive colors and sprinkles. A fun, creative, and delicious way to spread holiday cheer!
Prep Time 15 minutes
Total Time 15 minutes
Servings: 8 decorated Oreos
Course: Dessert
Cuisine: American

Ingredients
  

  • 8 Oreo cookies or chocolate sandwich cookies, oil-based candy color (white, yellow, pink, and light blue), ½ cup melted Belgian white chocolate (for Bunny Oreo, colored white), ½ cup melted Belgian white chocolate (for Chick Oreo, colored yellow), ½ cup melted Belgian white chocolate (for Easter Egg Oreo, colored pink), ½ cup melted Belgian white chocolate (for Easter Egg Oreo, colored blue), assorted sprinkles, pink sanding sugar.

Method
 

  1. Bunny Oreo Bliss
  2. Melt ½ cup white chocolate in a microwave-safe bowl in 20-second intervals, stirring until smooth.
  3. Mix in white candy color to achieve the desired shade.
  4. Using a fork, dip an Oreo into the melted chocolate, ensuring full coverage, and let excess chocolate drip off. Place it on wax paper.
  5. While the chocolate is still wet, add black sprinkles for the eyes and a pink heart sprinkle for the nose.
  6. Pipe two bunny ears and two paws using melted white chocolate onto wax paper, then sprinkle them with pink sanding sugar.
  7. Freeze for 10 minutes until set, then attach ears and feet using melted chocolate. Let set completely.
Chirpy Chick Oreo
  1. Melt ½ cup white chocolate in 20-second increments and stir until smooth.
  2. Mix in yellow candy color until the desired hue is reached.
  3. Dip an Oreo in the yellow chocolate, ensuring it’s fully covered, then place it on wax paper.
  4. While still wet, add black nonpareil sprinkles for eyes and an orange round sprinkle for the nose.
  5. Carefully add three orange jimmies per foot to create tiny chick legs. Let set completely.
Easter Egg Oreo Extravaganza
  1. Melt ½ cup white chocolate each in two bowls in 20-second increments, stirring until smooth.
  2. Mix pink candy color in one bowl and blue in the other.
  3. Using a fork, dip Oreos in pink or blue chocolate, ensuring full coverage. Place them on wax paper and freeze for 10 minutes.
  4. Fill a piping bag with melted pink or blue chocolate and pipe zig-zag or line patterns on set Oreos.
  5. Sprinkle with decorative sprinkles while the chocolate is still wet.
  6. Allow to set completely before serving.

Notes

  • Storage: Keep in an airtight container at room temperature for up to 2 weeks.
  • Customization: Try different colors and designs for a unique Easter-themed look.
  • Make-ahead tip: Melted chocolate can be prepared in advance and stored at room temperature.
Enjoy making and sharing these adorable, festive Easter Oreos with friends and family!

Stay Connected

Get recipes via email: