Hawaiian Shoyu Chicken Recipe is a must-try dish!

Hawaiian Shoyu Chicken is a delightful dish that brings the flavors of the islands right to your kitchen. This recipe features tender, juicy chicken thighs marinated in a savory blend of soy sauce, brown sugar, and spices. The result is a sweet and salty flavor that is simply irresistible. The chicken is baked to perfection, allowing the marinade to caramelize and create a delicious glaze. It’s a dish that not only satisfies your taste buds but also fills your home with a wonderful aroma.

The Cultural Significance of Hawaiian Shoyu Chicken

This dish is more than just a meal; it represents the rich culinary heritage of Hawaii. Shoyu, which means soy sauce in Japanese, reflects the influence of Asian cultures on Hawaiian cuisine. The combination of flavors in Hawaiian Shoyu Chicken showcases the island’s unique blend of traditions. Families often gather to enjoy this dish during special occasions and celebrations, making it a staple in many Hawaiian households. Sharing a plate of Hawaiian Shoyu Chicken is a way to connect with loved ones and celebrate the spirit of aloha.

Ingredients for Hawaiian Shoyu Chicken Recipe

To create the mouthwatering Hawaiian Shoyu Chicken, you’ll need a few simple yet flavorful ingredients. Each component plays a vital role in achieving that perfect balance of sweet and savory. Here’s what you’ll need:

  • 2 pounds bone-in chicken thighs, skin-on: The chicken thighs provide rich flavor and tenderness.
  • 1 cup soy sauce: This is the base of the marinade, giving the dish its signature umami taste.
  • 1/2 cup brown sugar: Adds sweetness and helps create a beautiful glaze.
  • 1/4 cup rice vinegar: This ingredient adds a touch of acidity, balancing the sweetness of the sugar.
  • 1/4 cup water: Helps to dilute the marinade for even coating.
  • 4 cloves garlic, minced: Garlic brings a wonderful aroma and depth of flavor.
  • 1 tablespoon fresh ginger, grated: Ginger adds a warm, spicy note that complements the other flavors.
  • 1/2 teaspoon black pepper: A pinch of black pepper enhances the overall taste.
  • 1/2 teaspoon sesame oil: This oil adds a nutty flavor that rounds out the dish.
  • 2 green onions, sliced (for garnish): Fresh green onions add a pop of color and freshness.
  • Sesame seeds (for garnish): These seeds provide a delightful crunch and visual appeal.

Gathering these ingredients is the first step toward making a delicious Hawaiian Shoyu Chicken. Each item contributes to the dish’s unique flavor profile, ensuring a delightful dining experience for you and your loved ones.

Step-by-Step Preparation of Hawaiian Shoyu Chicken Recipe

Step 1: Marinating the Chicken

Marinating the chicken is a crucial step in this Hawaiian Shoyu Chicken recipe. Start by whisking together the soy sauce, brown sugar, rice vinegar, water, minced garlic, grated ginger, black pepper, and sesame oil in a large bowl. Make sure the sugar dissolves completely. Once your marinade is ready, add the bone-in chicken thighs. Ensure each piece is well coated with the marinade. Cover the bowl with plastic wrap and refrigerate it for at least one hour. For the best flavor, let it marinate overnight. This allows the chicken to absorb all those delicious flavors.

Step 2: Cooking the Chicken

After marinating, it’s time to cook the chicken. Preheat your oven to 375°F (190°C). While the oven heats up, take the chicken out of the marinade. Place the chicken thighs in a baking dish, skin side up. Make sure they are arranged in a single layer for even cooking. Don’t forget to reserve the marinade for later use. Bake the chicken in the preheated oven for about 30 minutes. This initial cooking time helps to lock in the moisture and flavor.

Step 3: Preparing the Sauce

While the chicken is baking, you can prepare the sauce. Pour the reserved marinade into a saucepan and bring it to a boil over medium-high heat. Once it reaches a boil, reduce the heat and let it simmer for about 10 minutes. This simmering process thickens the sauce and intensifies the flavors. Keep an eye on it to prevent burning. The result will be a rich, flavorful sauce that will enhance your chicken.

Step 4: Combining Ingredients

After the chicken has baked for 30 minutes, it’s time to add the sauce. Brush the thickened marinade generously over the chicken thighs. This step adds an extra layer of flavor and helps create a beautiful glaze. Return the chicken to the oven for an additional 15-20 minutes. Make sure the chicken reaches an internal temperature of 165°F (75°C) to ensure it’s fully cooked. The skin should be golden brown and crispy, making it even more appetizing.

Step 5: Serving the Dish

Once the chicken is cooked, remove it from the oven and let it rest for about 5 minutes. This resting period allows the juices to redistribute, keeping the chicken moist. To serve, place the chicken on a platter and garnish it with sliced green onions and sesame seeds. These garnishes not only add color but also a fresh crunch. Serve your Hawaiian Shoyu Chicken with steamed rice or grilled vegetables for a complete meal. Enjoy the delightful flavors and the smiles it brings to your table!

Variations of Hawaiian Shoyu Chicken Recipe

Alternative Ingredients

While the traditional Hawaiian Shoyu Chicken recipe is delicious as is, you can easily customize it to suit your taste. Here are some alternative ingredients you might consider:

  • Chicken Breasts: If you prefer leaner meat, swap the thighs for boneless, skinless chicken breasts. Just remember to adjust the cooking time, as breasts cook faster.
  • Honey or Maple Syrup: For a different sweetener, try using honey or maple syrup instead of brown sugar. This will add a unique flavor twist.
  • Apple Cider Vinegar: If you don’t have rice vinegar, apple cider vinegar can be a great substitute. It adds a fruity note to the marinade.
  • Fresh Herbs: Adding fresh herbs like cilantro or basil can enhance the dish’s freshness. Sprinkle them on top just before serving.
  • Vegetables: You can also add vegetables like bell peppers or snap peas to the baking dish. They will soak up the marinade and add color to your meal.

These alternative ingredients can help you create a Hawaiian Shoyu Chicken that fits your preferences while still delivering that delightful flavor.

Cooking Methods

There are several ways to cook Hawaiian Shoyu Chicken, each offering a unique taste and texture. Here are some popular cooking methods:

  • Grilling: For a smoky flavor, grill the marinated chicken thighs over medium heat. This method gives the chicken a nice char and enhances the overall taste.
  • Slow Cooking: If you have more time, consider using a slow cooker. Place the marinated chicken in the slow cooker and cook on low for 6-8 hours. The result will be incredibly tender chicken that falls off the bone.
  • Stovetop: You can also cook the chicken in a skillet on the stovetop. Heat some oil in a pan, add the chicken, and cook until browned on both sides. Then, pour in the marinade and simmer until cooked through.

Each cooking method brings out different flavors and textures, allowing you to enjoy Hawaiian Shoyu Chicken in various ways. Feel free to experiment and find your favorite!

Cooking Note for Hawaiian Shoyu Chicken Recipe

When preparing Hawaiian Shoyu Chicken, there are a few important cooking notes to keep in mind. These tips will help ensure that your dish turns out perfectly every time.

First, always use bone-in, skin-on chicken thighs for the best flavor and moisture. The bones add richness, while the skin helps to keep the chicken juicy during cooking. If you choose to use boneless or skinless chicken, be aware that the cooking time may need to be adjusted to prevent drying out.

Next, marinating the chicken is essential. The longer you marinate, the more flavorful your chicken will be. If you have the time, aim for an overnight soak. This allows the flavors to penetrate deeply into the meat, resulting in a more delicious dish.

When baking, make sure to arrange the chicken thighs in a single layer in the baking dish. This ensures even cooking and allows the skin to crisp up nicely. If the chicken is crowded, it may steam instead of bake, leading to a less desirable texture.

Lastly, always check the internal temperature of the chicken. Using a meat thermometer is the best way to ensure it reaches 165°F (75°C). This guarantees that the chicken is safe to eat and perfectly cooked. Letting the chicken rest for a few minutes after baking is also crucial. This resting time allows the juices to redistribute, making each bite tender and juicy.

By following these cooking notes, you’ll be well on your way to creating a mouthwatering Hawaiian Shoyu Chicken that will impress your family and friends!

Serving Suggestions for Hawaiian Shoyu Chicken Recipe

When it comes to serving Hawaiian Shoyu Chicken, the options are as delightful as the dish itself. This flavorful chicken pairs beautifully with a variety of sides, enhancing your dining experience. Here are some serving suggestions to consider:

  • Steamed Rice: A classic choice, steamed white or brown rice is perfect for soaking up the delicious sauce. The rice balances the savory flavors of the chicken, making each bite satisfying.
  • Grilled Vegetables: Add a healthy touch by serving the chicken alongside grilled vegetables. Bell peppers, zucchini, and asparagus are great options. Their smoky flavor complements the sweetness of the chicken.
  • Coleslaw: A refreshing coleslaw can provide a crunchy contrast to the tender chicken. The crispness of cabbage and carrots, dressed in a tangy vinaigrette, adds a nice balance to the meal.
  • Pineapple Salsa: For a tropical twist, consider a pineapple salsa. The sweetness of the pineapple, combined with lime juice and cilantro, brightens the dish and adds a burst of flavor.
  • Macaroni Salad: A Hawaiian favorite, macaroni salad is a creamy side that pairs well with the savory chicken. Its rich texture complements the dish perfectly.

Don’t forget to garnish your Hawaiian Shoyu Chicken with sliced green onions and sesame seeds before serving. This not only adds visual appeal but also enhances the flavor profile. Whether you’re hosting a family dinner or a casual gathering, these serving suggestions will elevate your meal and impress your guests. Enjoy the delightful combination of flavors and the spirit of aloha at your table!

Tips for Perfecting Your Hawaiian Shoyu Chicken Recipe

To make your Hawaiian Shoyu Chicken truly unforgettable, consider these helpful tips. Each suggestion will enhance the flavor and texture of your dish, ensuring a delightful experience for everyone at the table.

  • Use Fresh Ingredients: Fresh garlic and ginger can significantly elevate the flavor of your marinade. Opt for fresh over powdered versions whenever possible. The vibrant taste of fresh ingredients will make your dish stand out.
  • Adjust Sweetness: If you prefer a sweeter chicken, feel free to increase the amount of brown sugar or honey in the marinade. Conversely, if you like it less sweet, reduce the sugar. Tailor the recipe to your taste!
  • Marinate Longer: For the best flavor, marinate the chicken overnight. This allows the flavors to penetrate deeply, resulting in a more flavorful dish. If you’re short on time, aim for at least 1 hour.
  • Don’t Skip the Resting Time: After baking, let the chicken rest for about 5 minutes before serving. This resting period allows the juices to redistribute, making the chicken more tender and juicy.
  • Experiment with Garnishes: While green onions and sesame seeds are traditional garnishes, feel free to get creative! Chopped cilantro, crushed peanuts, or even a drizzle of chili oil can add a unique twist to your dish.
  • Serve with a Side of Aloha: Hawaiian Shoyu Chicken is best enjoyed with a warm smile and good company. Share the meal with family and friends to truly embrace the spirit of aloha.

By following these tips, you’ll be well on your way to mastering the art of Hawaiian Shoyu Chicken. Each bite will be bursting with flavor, making it a dish everyone will love. Enjoy the process and the delicious results!

Breakdown of Time for Hawaiian Shoyu Chicken Recipe

Prep Time

The prep time for Hawaiian Shoyu Chicken is quite manageable. You’ll spend about 15 minutes gathering and measuring your ingredients. Then, whisking together the marinade and coating the chicken will take another 10 minutes. In total, you can expect to spend around 25 minutes on preparation. However, remember that marinating the chicken is essential for flavor, so plan to let it sit for at least 1 hour, or ideally overnight.

Cooking Time

Once your chicken is marinated, the cooking time is straightforward. Preheating the oven will take about 10 minutes. After that, the chicken needs to bake for 30 minutes initially. Then, you’ll brush it with the thickened marinade and return it to the oven for an additional 15-20 minutes. In total, the cooking time is approximately 55-60 minutes, including the preheating time.

Total Time

When you combine the prep time and cooking time, the total time for making Hawaiian Shoyu Chicken is around 1 hour and 20 minutes, not including the marinating time. If you choose to marinate overnight, you can prepare the chicken in just over an hour the next day. This makes it a great option for a weeknight dinner or a special occasion. With a little planning, you can enjoy this delicious dish with minimal fuss!

Nutritional Information for Hawaiian Shoyu Chicken Recipe

Calories

When enjoying Hawaiian Shoyu Chicken, it’s good to be aware of its caloric content. Each serving contains approximately 360 calories. This makes it a satisfying option for a meal without being overly heavy. The balance of flavors and nutrients in this dish ensures that you can enjoy a delicious meal while keeping your calorie intake in check.

Protein

Protein is an essential part of any diet, and Hawaiian Shoyu Chicken delivers on this front. Each serving provides about 25 grams of protein. This high protein content is primarily due to the chicken thighs, which are a great source of lean protein. Including protein in your meals helps to keep you feeling full and supports muscle health, making this dish a nutritious choice for any occasion.

Sodium

While Hawaiian Shoyu Chicken is flavorful, it’s important to consider its sodium content. Each serving contains around 1,200 milligrams of sodium. This is largely due to the soy sauce used in the marinade. If you’re watching your sodium intake, you can opt for low-sodium soy sauce to reduce the overall sodium level. Balancing this dish with fresh vegetables or a side of rice can also help manage sodium consumption while still enjoying the rich flavors of this Hawaiian classic.

FAQs about Hawaiian Shoyu Chicken Recipe

Can I use other types of chicken for this recipe?

Absolutely! While the recipe calls for bone-in, skin-on chicken thighs, you can use other types of chicken. Boneless, skinless chicken breasts are a great alternative if you prefer leaner meat. Just remember to adjust the cooking time, as breasts cook faster than thighs. You can also use chicken drumsticks or wings for a fun twist. Each type of chicken will bring its own unique flavor and texture to the dish, so feel free to experiment!

How long should I marinate the chicken?

For the best flavor, marinate the chicken for at least 1 hour. However, if you have the time, letting it sit overnight is ideal. This longer marinating time allows the chicken to absorb all the delicious flavors from the marinade, resulting in a more flavorful dish. Just be sure to keep it covered in the refrigerator while marinating to ensure food safety.

What can I serve with Hawaiian Shoyu Chicken?

Hawaiian Shoyu Chicken pairs wonderfully with a variety of sides. Steamed rice is a classic choice, as it soaks up the savory sauce beautifully. You can also serve it with grilled vegetables for a healthy touch or a refreshing coleslaw for some crunch. For a tropical twist, consider adding pineapple salsa or macaroni salad. These sides will complement the flavors of the chicken and create a well-rounded meal that everyone will enjoy!

Can I make Hawaiian Shoyu Chicken in advance?

Yes, you can make Hawaiian Shoyu Chicken in advance! You can marinate the chicken a day ahead and store it in the refrigerator. When you’re ready to cook, simply follow the baking instructions. If you have leftovers, they can be stored in an airtight container in the fridge for up to 3 days. Reheat gently in the oven or microwave before serving. This makes it a convenient option for meal prep or busy weeknights!

Conclusion on Hawaiian Shoyu Chicken Recipe

In conclusion, the Hawaiian Shoyu Chicken recipe is a delightful way to bring the flavors of Hawaii into your home. This dish is not only easy to prepare but also offers a wonderful balance of sweet and savory tastes that will please any palate. The marinated chicken, baked to perfection, creates a mouthwatering experience that is sure to impress family and friends alike.

As you explore this recipe, remember that the key to success lies in the marination process. Allowing the chicken to soak in the flavorful marinade enhances its taste and tenderness. Additionally, feel free to experiment with alternative ingredients and cooking methods to make the dish your own. Whether you choose to grill, slow cook, or bake, each method brings a unique twist to this classic recipe.

Serving Hawaiian Shoyu Chicken with a variety of sides can elevate your meal even further. From steamed rice to grilled vegetables, the options are endless. Don’t forget to garnish with fresh green onions and sesame seeds for that extra touch of flavor and presentation.

Finally, this dish is not just about the food; it’s about sharing moments with loved ones. The spirit of aloha is captured in every bite, making it a perfect choice for gatherings and celebrations. So, gather your ingredients, follow the steps, and enjoy the deliciousness of Hawaiian Shoyu Chicken. Your taste buds will thank you!

Paul

Hawaiian Shoyu Chicken Recipe is a must-try dish!

This Hawaiian Shoyu Chicken is a sweet and savory island-style dish that’s finger-licking good! Made with juicy bone-in chicken thighs marinated in a soy, ginger, and garlic glaze, then oven-baked until sticky and caramelized, this easy recipe captures the heart of Hawaiian comfort food. Serve it over fluffy rice or with grilled pineapple for a tropical weeknight dinner that brings serious flavor.
Prep Time 10 minutes
Cook Time 35 minutes
Total Time 45 minutes
Servings: 4 servings
Course: Main Dish
Cuisine: Hawaiian

Ingredients
  

  • 5 chicken thighs bone-in and skin-on
  • 3 tablespoons low-sodium soy sauce
  • 2 tablespoons water
  • ¼ cup packed brown sugar
  • 2 cloves garlic minced
  • 1 tablespoon fresh ginger minced
  • ½ yellow onion minced
  • ¼ teaspoon crushed red pepper flakes

Method
 

  1. Marinate the Chicken:In a large bowl or resealable plastic bag, combine the soy sauce, water, brown sugar, garlic, ginger, onion, and red pepper flakes. Add the chicken thighs and turn to coat. Cover and marinate in the refrigerator overnight for best flavor (or at least 2 hours).
  2. Prepare to Bake:Preheat the oven to 375°F (190°C). Transfer the marinated chicken to a baking dish and pour the leftover marinade over the top.
  3. Bake Until Tender:Bake for 30 to 35 minutes, or until the internal temperature of the chicken reaches 165°F (74°C) and the sauce has thickened into a sticky glaze.
  4. Garnish and Serve:Plate the chicken and spoon over the thickened glaze. Garnish with chopped green onions or sesame seeds, if desired. Serve hot with white rice, grilled pineapple, or a fresh green salad.

Notes

  • Marinate Overnight: For maximum flavor, let the chicken sit overnight in the marinade. The longer it soaks, the deeper the taste.
  • Use Boneless Thighs: You can substitute boneless thighs for quicker cooking—reduce the bake time to around 25 minutes.
  • Grill Option: This chicken can also be grilled for a slightly smoky flavor—just brush it with the thickened marinade as it cooks.
  • Make It Spicier: Add extra red pepper flakes or a dash of sriracha to bring up the heat level.

Jamaican Brown Stew Chicken Recipe is a must-try dish!

Jamaican Brown Stew Chicken is more than just a meal; it’s a celebration of flavors and culture. This dish is a staple in Jamaican households, known for its rich, savory taste and vibrant colors. The combination of spices, fresh vegetables, and tender chicken creates a delightful experience for your taste buds. Whether you’re enjoying it at a family gathering or a cozy dinner at home, this recipe brings warmth and joy to the table.

What Makes Jamaican Brown Stew Chicken Unique?

What sets Jamaican Brown Stew Chicken apart from other chicken dishes? It’s all about the marinade and cooking method. The chicken is seasoned with a blend of spices, including garlic, thyme, and allspice, which infuse it with deep flavors. The browning process adds a beautiful color and enhances the taste, making each bite irresistible.

Another unique aspect is the use of Scotch bonnet pepper. This pepper adds a distinct heat that is characteristic of Jamaican cuisine. However, you can control the spice level by adjusting how long you leave the pepper in the stew. The addition of vegetables like bell peppers and carrots not only adds nutrition but also a pop of color, making the dish visually appealing.

In essence, Jamaican Brown Stew Chicken is a perfect blend of spices, heat, and comfort. It’s a dish that tells a story of tradition and love, making it a must-try for anyone looking to explore Caribbean flavors. So, let’s dive into the ingredients and get started on this delicious journey!

Ingredients for Jamaican Brown Stew Chicken Recipe

To create the perfect Jamaican Brown Stew Chicken, you’ll need a variety of fresh ingredients that come together to create a symphony of flavors. Here’s what you’ll need:

  • 2 pounds chicken pieces (bone-in, skin-on preferred for extra flavor)
  • 1 teaspoon salt
  • 1 teaspoon black pepper
  • 1 teaspoon garlic powder
  • 1 teaspoon onion powder
  • 1 teaspoon paprika
  • 1 teaspoon dried thyme
  • 1 tablespoon vegetable oil
  • 1 medium onion, sliced
  • 2 cloves garlic, minced
  • 1 bell pepper, sliced (any color for a vibrant look)
  • 1 carrot, sliced
  • 2 green onions, chopped
  • 1 Scotch bonnet pepper (whole, for that authentic heat)
  • 1 can (14 ounces) diced tomatoes
  • 1 cup chicken broth
  • 2 tablespoons soy sauce
  • 1 tablespoon brown sugar
  • 1 tablespoon vinegar (white or apple cider)
  • 1 teaspoon allspice
  • Fresh parsley for garnish (optional)

These ingredients not only provide flavor but also contribute to the dish’s nutritional value. The chicken serves as a great source of protein, while the vegetables add essential vitamins and minerals. The spices, especially the Scotch bonnet pepper, give the dish its signature kick, making it a delightful experience for your palate.

Now that you have your ingredients ready, let’s move on to the step-by-step preparation of this mouthwatering Jamaican Brown Stew Chicken!

Step-by-Step Preparation of Jamaican Brown Stew Chicken Recipe

Now that you have gathered all your ingredients, it’s time to dive into the cooking process. Each step is crucial for achieving that authentic Jamaican flavor. Follow along as we break down the preparation into easy-to-follow steps!

Step 1: Marinating the Chicken

First things first, marinating the chicken is essential. In a large bowl, combine the chicken pieces with salt, black pepper, garlic powder, onion powder, paprika, and dried thyme. Make sure every piece is well-coated with the spices. This step allows the chicken to absorb all those wonderful flavors. For the best results, let it marinate for at least 30 minutes. However, if you have time, marinating overnight in the refrigerator will deepen the flavor even more.

Step 2: Browning the Chicken

Next, heat the vegetable oil in a large skillet or Dutch oven over medium-high heat. Once the oil is hot, carefully add the marinated chicken pieces. Brown them on all sides for about 5-7 minutes. This step is important as it locks in the juices and adds a beautiful golden color. After browning, remove the chicken from the skillet and set it aside. This will help build layers of flavor in your stew.

Step 3: Sautéing the Vegetables

In the same skillet, it’s time to sauté the vegetables. Add the sliced onion, minced garlic, bell pepper, and carrot. Sauté these for about 5 minutes until they soften. The aroma will fill your kitchen, making it hard to resist! This step not only enhances the flavor but also adds a lovely texture to the dish.

Step 4: Combining Ingredients

Now, return the browned chicken to the skillet. It’s time to bring everything together! Add the whole Scotch bonnet pepper, diced tomatoes, chicken broth, soy sauce, brown sugar, vinegar, and allspice. Stir everything to combine well. The mixture should look vibrant and inviting. This is where the magic happens, as all the flavors meld together.

Step 5: Simmering the Stew

Bring the mixture to a boil, then reduce the heat to low. Cover the skillet and let it simmer for 30-40 minutes. This slow cooking allows the chicken to become tender and soak up all the delicious flavors. Stir occasionally and check if you need to add more broth to prevent sticking. Once the chicken is cooked through, you can remove the Scotch bonnet pepper if you prefer a milder heat.

And there you have it! Your Jamaican Brown Stew Chicken is almost ready to serve. The rich aroma and colorful presentation will surely impress your family and friends. Let’s explore some variations to make this dish even more exciting!

Variations of Jamaican Brown Stew Chicken Recipe

While the traditional Jamaican Brown Stew Chicken is a beloved classic, there are many ways to put a twist on this dish. Whether you want to try different proteins or explore vegetarian options, these variations will keep your meals exciting and flavorful. Let’s take a closer look!

Alternative Proteins

If you’re looking to switch things up, consider using alternative proteins. Here are a few options:

  • Pork: Substitute chicken with pork shoulder or pork chops. The cooking time may vary, so ensure the pork is tender before serving.
  • Beef: Use beef stew meat for a heartier version. Brown the beef just like the chicken and follow the same steps for a delicious twist.
  • Fish: For a lighter option, try using firm fish like snapper or tilapia. Cook the fish for a shorter time to prevent it from breaking apart.

These alternative proteins can bring new flavors and textures to your Jamaican Brown Stew. Each option offers a unique taste while still capturing the essence of the original recipe.

Vegetarian Options

For those who prefer a plant-based meal, there are fantastic vegetarian options to consider. Here are some ideas:

  • Firm Tofu: Replace chicken with firm tofu. Cut it into cubes and marinate just like the chicken. Sauté until golden before adding to the stew.
  • Tempeh: Tempeh is another great substitute. It has a nutty flavor and a firm texture that holds up well in stews.
  • Vegetable Medley: Use a mix of your favorite vegetables, such as zucchini, eggplant, and mushrooms. This will create a colorful and nutritious dish.

These vegetarian variations not only cater to different dietary preferences but also allow you to enjoy the rich flavors of Jamaican cuisine without meat. Feel free to experiment with spices and ingredients to make it your own!

Cooking Note for Jamaican Brown Stew Chicken Recipe

When preparing Jamaican Brown Stew Chicken, there are a few important cooking notes to keep in mind. These tips will help you achieve the best results and ensure that your dish is bursting with flavor.

First, always choose high-quality chicken. Bone-in, skin-on pieces are recommended for their rich flavor and moisture. The bones add depth to the stew, while the skin helps to keep the chicken juicy during cooking.

Next, marinating the chicken is crucial. The longer you let it sit with the spices, the more flavorful it will be. If you can, marinate overnight. This allows the spices to penetrate the meat, resulting in a more delicious dish.

When browning the chicken, make sure not to overcrowd the skillet. If you add too many pieces at once, the chicken will steam instead of brown. This can prevent that beautiful golden color and rich flavor from developing. Brown the chicken in batches if necessary.

As you sauté the vegetables, keep an eye on the heat. You want them to soften without burning. Stirring frequently will help achieve the perfect texture and flavor.

Lastly, don’t rush the simmering process. Allowing the stew to cook slowly helps the flavors meld together beautifully. Stir occasionally and check the liquid level. If it looks too thick, add a splash of chicken broth to keep it from sticking.

By following these cooking notes, you’ll create a Jamaican Brown Stew Chicken that is not only delicious but also a true representation of this beloved dish. Enjoy the process and the wonderful aromas that fill your kitchen!

Serving Suggestions for Jamaican Brown Stew Chicken Recipe

Once your Jamaican Brown Stew Chicken is ready, it’s time to think about how to serve it. This dish is not only flavorful but also versatile, making it a great centerpiece for any meal. Here are some delightful serving suggestions to enhance your dining experience:

  • Rice and Peas: A classic pairing! Serve your stew over a bed of rice and peas. The creamy coconut milk and tender beans complement the savory chicken perfectly.
  • Fried Plantains: Sweet fried plantains add a lovely contrast to the spicy stew. Their sweetness balances the heat from the Scotch bonnet pepper.
  • Coleslaw: A refreshing coleslaw can provide a crunchy texture and a cool contrast to the warm stew. Use a tangy dressing to brighten the flavors.
  • Steamed Vegetables: For a healthier option, serve with a side of steamed vegetables. Broccoli, carrots, and green beans work well and add color to your plate.
  • Flatbreads: Consider serving with warm flatbreads or roti. They are perfect for scooping up the delicious sauce and chicken.

Don’t forget to garnish your Jamaican Brown Stew Chicken with fresh parsley or chopped green onions before serving. This adds a pop of color and freshness to the dish. You can also provide extra Scotch bonnet pepper on the side for those who enjoy an extra kick!

With these serving suggestions, your Jamaican Brown Stew Chicken will not only taste amazing but also look inviting on the table. Enjoy sharing this delightful dish with family and friends, and watch as they savor every bite!

Tips for Perfecting Jamaican Brown Stew Chicken Recipe

To truly master the art of making Jamaican Brown Stew Chicken, a few tips can elevate your dish from good to great. These simple yet effective suggestions will help you achieve the best flavor and texture, ensuring that your stew is a hit every time. Let’s explore some key tips!

First, always use fresh ingredients. Fresh herbs, spices, and vegetables make a significant difference in flavor. For instance, using fresh thyme instead of dried can enhance the aroma and taste of your stew. Similarly, fresh garlic and onions will provide a more robust flavor profile.

Next, don’t skip the marinating step. Marinating the chicken not only infuses it with flavor but also helps to tenderize the meat. If you can, let it marinate overnight. This extra time allows the spices to penetrate deeply, resulting in a more flavorful dish.

When browning the chicken, ensure your skillet is hot enough. A hot skillet will create a nice sear, locking in the juices and adding depth to the flavor. If the chicken sticks to the pan, it’s a sign that it’s not ready to be flipped yet. Patience is key!

Another important tip is to adjust the heat level to your preference. The Scotch bonnet pepper adds a unique heat, but you can control it by how long you leave it in the stew. For a milder flavor, remove it after 10-15 minutes of cooking. If you love spice, feel free to leave it in for the entire simmering time.

Lastly, taste as you go! This is crucial in cooking. As the stew simmers, take a moment to taste it. You can adjust the seasoning by adding more salt, pepper, or even a splash of vinegar for acidity. This will help you achieve a balanced flavor that suits your palate.

By following these tips, you’ll be well on your way to creating a delicious Jamaican Brown Stew Chicken that will impress everyone at your table. Enjoy the cooking process and the delightful aromas that fill your kitchen!

Breakdown of Time for Jamaican Brown Stew Chicken Recipe

Understanding the time required for each step in the Jamaican Brown Stew Chicken recipe can help you plan your cooking efficiently. Here’s a breakdown of the time you’ll need for preparation and cooking:

Prep Time

The prep time for this delicious dish is approximately 40 minutes. This includes:

  • Marinating the Chicken: 30 minutes (or overnight for deeper flavor)
  • Chopping Vegetables: 10 minutes

While marinating, you can use the time to prepare your vegetables and gather all the ingredients. This will make the cooking process smoother and more enjoyable.

Cooking Time

The cooking time for Jamaican Brown Stew Chicken is about 40-50 minutes. This includes:

  • Browning the Chicken: 5-7 minutes
  • Sautéing the Vegetables: 5 minutes
  • Simmering the Stew: 30-40 minutes

During the simmering phase, the chicken becomes tender and absorbs all the wonderful flavors from the spices and vegetables.

Total Time

In total, you can expect to spend around 1 hour and 20 minutes to 1 hour and 30 minutes on this recipe, including both prep and cooking time. If you choose to marinate the chicken overnight, the total time will be longer, but the hands-on cooking time remains the same.

With this time breakdown, you can easily plan your cooking session. Whether you’re preparing a family meal or hosting friends, knowing how long each step takes will help you serve a delicious Jamaican Brown Stew Chicken with confidence!

Nutritional Information for Jamaican Brown Stew Chicken Recipe

Understanding the nutritional content of your meals is essential for maintaining a balanced diet. Jamaican Brown Stew Chicken is not only delicious but also packed with nutrients. Here’s a breakdown of the key nutritional information per serving:

Calories

350 calories. This makes it a satisfying meal that can fit into various dietary plans. The combination of chicken, vegetables, and spices provides a hearty dish without excessive calories.

Protein

28 grams of protein per serving. The chicken serves as an excellent source of high-quality protein, making this dish a great option for those looking to increase their protein intake.

Sodium

600 milligrams per serving. This amount can vary based on the soy sauce and chicken broth used. If you’re watching your sodium intake, consider using low-sodium soy sauce and broth to keep the flavor while reducing the salt content.

Overall, Jamaican Brown Stew Chicken is a nutritious choice that provides a good balance of calories, protein, and essential nutrients. Enjoy this flavorful dish while being mindful of your dietary needs!

FAQs about Jamaican Brown Stew Chicken Recipe

What is the best way to store leftover Jamaican Brown Stew Chicken?

Storing leftover Jamaican Brown Stew Chicken is simple! First, let the stew cool down to room temperature. Then, transfer it to an airtight container. You can keep it in the refrigerator for up to 3-4 days. If you want to store it for a longer period, consider freezing it. Place the stew in a freezer-safe container or bag, and it can last for up to 3 months. When you’re ready to enjoy it again, simply thaw it in the refrigerator overnight and reheat on the stove or in the microwave.

Can I make Jamaican Brown Stew Chicken in advance?

Absolutely! Making Jamaican Brown Stew Chicken in advance is a great idea. In fact, the flavors often improve after sitting for a day. You can prepare the stew a day or two ahead of time and store it in the refrigerator. Just reheat it gently on the stove before serving. If you’re planning to freeze it, make sure to cool it completely before freezing. This way, you can enjoy a delicious homemade meal without the hassle of cooking from scratch on busy days!

What sides pair well with Jamaican Brown Stew Chicken?

Jamaican Brown Stew Chicken is versatile and pairs well with various sides. Here are some popular options:

  • Rice and Peas: This classic combination is a must-try! The creamy coconut rice complements the savory stew perfectly.
  • Fried Plantains: Sweet fried plantains add a delightful contrast to the spicy chicken.
  • Coleslaw: A refreshing coleslaw provides a crunchy texture and balances the flavors of the stew.
  • Steamed Vegetables: Broccoli, carrots, and green beans make for a healthy and colorful side.
  • Flatbreads: Warm flatbreads or roti are perfect for scooping up the delicious sauce.

These sides not only enhance the meal but also create a beautiful presentation on your table!

How spicy is Jamaican Brown Stew Chicken?

The spice level of Jamaican Brown Stew Chicken can vary based on how you use the Scotch bonnet pepper. This pepper is known for its heat, so if you leave it whole in the stew, it will impart a moderate level of spice. If you prefer a milder flavor, you can remove the pepper after 10-15 minutes of cooking. Alternatively, if you love heat, feel free to leave it in for the entire simmering time. Adjusting the amount of pepper and cooking time allows you to customize the spice level to your liking!

Conclusion on Jamaican Brown Stew Chicken Recipe

In conclusion, Jamaican Brown Stew Chicken is a delightful dish that brings together rich flavors, vibrant colors, and a touch of Caribbean culture. This recipe is not just about cooking; it’s about creating a memorable experience for you and your loved ones. The combination of marinated chicken, fresh vegetables, and aromatic spices creates a meal that is both comforting and satisfying.

As you prepare this dish, remember that the key lies in the marination and the slow simmering process. These steps allow the flavors to meld beautifully, resulting in tender chicken that is bursting with taste. Whether you choose to stick to the traditional recipe or explore the various variations, each bite will transport you to the sunny shores of Jamaica.

Moreover, the versatility of Jamaican Brown Stew Chicken makes it suitable for any occasion. Whether it’s a family dinner, a festive gathering, or a cozy night in, this dish is sure to impress. Pair it with your favorite sides, and you have a complete meal that everyone will love.

So, gather your ingredients, roll up your sleeves, and embark on this culinary adventure. Enjoy the process, savor the aromas, and most importantly, share the joy of Jamaican Brown Stew Chicken with those around you. Happy cooking!

Paul

Jamaican Brown Stew Chicken Recipe is a must-try dish!

Bring the soul of the Caribbean to your kitchen with this rich and savory Jamaican Brown Stew Chicken. Marinated in bold spices, then braised until tender in a luscious brown gravy with bell peppers and a hint of Scotch bonnet heat, this one-pot wonder is a comforting, flavor-packed dish perfect for weeknight dinners or special occasions.
Prep Time 15 minutes
Cook Time 1 hour
Total Time 1 hour 15 minutes
Servings: 6 servings
Course: Main Dish
Cuisine: Caribbean, Jamaican

Ingredients
  

For the Chicken Marinade:
  • 3 pounds bone-in chicken thighs and/or drumsticks skin-on or skinless
  • 1 cup chopped onion
  • ½ cup sliced scallions white and green parts
  • 6 cloves garlic minced or grated
  • 1 tablespoon finely minced fresh ginger
  • 1 tablespoon packed brown sugar light or dark
  • 2 teaspoons browning sauce store-bought or homemade
  • teaspoons kosher salt
  • 1 teaspoon paprika
  • ½ teaspoon ground Jamaican allspice
  • ½ teaspoon dried thyme
  • ½ teaspoon ground black pepper
  • 2 bay leaves
For the Brown Stew:
  • 2 tablespoons canola or vegetable oil
  • 2 cups chicken broth or stock
  • 1 red orange, or yellow bell pepper, thinly sliced
  • 1 whole Scotch bonnet or habanero pepper left whole, not cut
  • ¼ cup ketchup

Method
 

  1. Marinate the Chicken:In a large mixing bowl or plastic bag, combine chicken with onion, scallions, garlic, ginger, brown sugar, browning sauce, salt, paprika, allspice, thyme, black pepper, and bay leaves. Toss to coat evenly. Cover and refrigerate for at least 1 hour, or preferably overnight.
  2. Prep for Cooking:Remove chicken from the fridge and allow to sit at room temperature for about 10 minutes. Scrape off most of the marinade (but save it for later).
  3. Brown the Chicken:In a large Dutch oven or heavy-bottomed pot, heat oil over medium-high heat. Brown the chicken on both sides for about 2–3 minutes per side until golden brown. Remove and set aside. Discard any excess fat, leaving about 2 tablespoons in the pot.
  4. Deglaze and Build the Sauce:Add the reserved marinade to the pot and sauté for 1–2 minutes until fragrant. Pour in the chicken broth, scraping up any brown bits. Stir in the sliced bell pepper, whole Scotch bonnet or habanero pepper, and ketchup.
  5. Simmer and Stew:Return the browned chicken to the pot, ensuring it is mostly submerged. Stir to coat, bring to a boil, then reduce heat to low. Cover and simmer for 45 minutes, flipping the chicken occasionally. For a thicker sauce, simmer uncovered for an additional 10–15 minutes.
  6. Final Seasoning:Remove bay leaves and the whole Scotch bonnet pepper before serving. Taste and adjust seasoning if needed. Serve hot with white rice, Jamaican rice and peas, or coconut rice.

Notes

  • Scotch Bonnet Substitute: If you can’t find Scotch bonnet, use habanero for similar heat—or omit it for a milder version.
  • Make It Thicker: Simmering uncovered at the end will help the sauce reduce and intensify the flavors.
  • Marinate Overnight: The longer the chicken marinates, the deeper the flavor—don’t skip it if you want authenticity!
  • Serving Tip: This dish is traditionally served with rice and peas, plantains, or steamed cabbage for a full Jamaican meal experience.

Caprese Stuffed Ground Chicken Recipe is a must-try!

What is Caprese Stuffed Ground Chicken?

Caprese Stuffed Ground Chicken is a delightful dish that combines the classic flavors of a Caprese salad with the heartiness of ground chicken. This recipe features juicy chicken patties filled with fresh ingredients like cherry tomatoes, mozzarella, and basil. The result is a flavorful meal that is both satisfying and healthy.

This dish is perfect for family dinners or gatherings with friends. It’s easy to prepare and can be on your table in no time. The combination of fresh ingredients not only makes it delicious but also adds a vibrant touch to your plate. Plus, it’s a great way to sneak in some extra veggies!

Whether you’re a seasoned cook or just starting out, this Caprese Stuffed Ground Chicken recipe is simple to follow. With just a few steps, you can create a meal that impresses everyone. So, let’s dive into the ingredients and get cooking!

Ingredients for Caprese Stuffed Ground Chicken Recipe

To create the delicious Caprese Stuffed Ground Chicken, you’ll need a few fresh ingredients. Here’s a complete list to help you gather everything you need:

  • 1 pound ground chicken: This is the main protein for your dish. Ground chicken is lean and cooks quickly.
  • 1 cup cherry tomatoes, halved: These sweet tomatoes add a burst of flavor and color.
  • 1 cup fresh mozzarella balls, halved: Creamy mozzarella brings a delightful texture and taste.
  • 1/2 cup fresh basil leaves, chopped: Basil adds a fragrant, herbal note that complements the other ingredients.
  • 2 cloves garlic, minced: Garlic enhances the overall flavor with its aromatic qualities.
  • 1 teaspoon dried oregano: This herb adds a warm, earthy flavor to the chicken.
  • 1 teaspoon salt: Salt is essential for bringing out the flavors in your dish.
  • 1/2 teaspoon black pepper: A little pepper adds a hint of spice.
  • 2 tablespoons balsamic glaze: This sweet and tangy glaze is drizzled on top for a finishing touch.
  • 1 tablespoon olive oil: Olive oil is used for cooking the patties and adds richness.

These ingredients come together to create a mouthwatering meal that is sure to please everyone at the table. Make sure to use fresh ingredients for the best flavor. Now that you have everything ready, let’s move on to the preparation steps!

Step-by-Step Preparation of Caprese Stuffed Ground Chicken Recipe

Step 1: Preparing the Ground Chicken Mixture

To start, grab a large mixing bowl. Add the pound of ground chicken to the bowl. Next, toss in the minced garlic, dried oregano, salt, and black pepper. Using your hands or a spoon, mix everything together until well combined. Make sure the spices are evenly distributed throughout the chicken. This step is crucial as it sets the flavor base for your patties. Once mixed, you can move on to the next step!

Step 2: Making the Caprese Filling

Now, let’s prepare the delicious Caprese filling. In a separate bowl, combine the halved cherry tomatoes, mozzarella balls, and chopped basil leaves. Gently stir the mixture to ensure the ingredients are well mixed. This filling is what makes your stuffed chicken so special. The fresh tomatoes and mozzarella will melt beautifully, creating a delightful surprise inside each patty. Once your filling is ready, it’s time to stuff the chicken!

Step 3: Stuffing the Chicken

Take the ground chicken mixture and divide it into four equal portions. Shape each portion into a patty, making sure they are about the same size. Now, create a small indentation in the center of each patty. Spoon a generous amount of the Caprese filling into the indentation. Carefully fold the edges of the patty over the filling to seal it. Make sure there are no gaps, as this will keep the filling from leaking out during cooking. Repeat this process for all the patties. Your stuffed chicken is almost ready!

Step 4: Cooking the Stuffed Chicken

Heat the olive oil in an oven-safe skillet over medium heat. Once the oil is hot, gently place the stuffed patties in the skillet. Cook them for about 4-5 minutes on each side until they are nicely browned. This step adds a lovely color and flavor to the chicken. After browning, drizzle the balsamic glaze over the patties. Then, transfer the skillet to your preheated oven. Bake for 15-20 minutes, or until the internal temperature reaches 165°F. This ensures your chicken is fully cooked and safe to eat. Once done, let the patties rest for a few minutes before serving. Enjoy your delicious Caprese Stuffed Ground Chicken!

Variations of Caprese Stuffed Ground Chicken Recipe

Alternative Fillings for Caprese Stuffed Ground Chicken

If you want to mix things up, there are plenty of alternative fillings you can try for your Caprese Stuffed Ground Chicken. Here are a few ideas:

  • Spinach and Feta: Swap out the tomatoes and mozzarella for fresh spinach and crumbled feta cheese. This combination adds a Mediterranean twist to your dish.
  • Pesto and Sun-Dried Tomatoes: Use pesto sauce instead of garlic and oregano, and add chopped sun-dried tomatoes for a burst of flavor.
  • Mushroom and Swiss: Sauté some mushrooms and mix them with Swiss cheese for a rich, earthy filling that pairs well with chicken.
  • Roasted Red Peppers and Goat Cheese: For a tangy flavor, try roasted red peppers with creamy goat cheese. This combination is sure to impress!

Feel free to get creative! You can mix and match ingredients based on your preferences. The key is to maintain a balance of flavors and textures. Each variation will give your Caprese Stuffed Ground Chicken a unique twist, making it a versatile dish for any occasion.

Different Cooking Methods for Caprese Stuffed Ground Chicken

While the oven method is popular, there are other cooking techniques you can use to prepare your Caprese Stuffed Ground Chicken. Here are a few options:

  • Grilling: For a smoky flavor, grill the stuffed patties on a barbecue. Just make sure to keep an eye on them to prevent flare-ups.
  • Air Frying: If you have an air fryer, this is a great option! Cook the stuffed patties at 375°F for about 12-15 minutes, flipping halfway through.
  • Slow Cooking: For a hands-off approach, place the stuffed patties in a slow cooker with some marinara sauce. Cook on low for 4-6 hours for tender, flavorful chicken.
  • Pan-Frying: Instead of baking, you can pan-fry the patties in a skillet until cooked through. This method gives a crispy exterior while keeping the inside juicy.

Each cooking method brings out different flavors and textures in the chicken. Choose the one that best fits your cooking style and enjoy a delicious meal!

Cooking Note for Caprese Stuffed Ground Chicken Recipe

When preparing your Caprese Stuffed Ground Chicken, there are a few important cooking notes to keep in mind. These tips will help ensure that your dish turns out perfectly every time.

First, always check the freshness of your ingredients. Fresh basil, ripe cherry tomatoes, and high-quality mozzarella will enhance the overall flavor of your dish. Using fresh ingredients not only improves taste but also adds nutritional value.

Next, be mindful of the cooking temperature. Ground chicken should be cooked to an internal temperature of 165°F to ensure it is safe to eat. Using a meat thermometer can help you accurately check the temperature without cutting into the patties.

Additionally, if you find that your patties are falling apart while cooking, consider adding a binding agent. A beaten egg or some breadcrumbs can help hold the mixture together, making it easier to handle.

Lastly, let the stuffed chicken rest for a few minutes after cooking. This allows the juices to redistribute, making each bite tender and juicy. It also gives the balsamic glaze a moment to set, enhancing the flavor profile of your dish.

By following these cooking notes, you’ll create a delicious Caprese Stuffed Ground Chicken that is sure to impress your family and friends!

Serving Suggestions for Caprese Stuffed Ground Chicken Recipe

Once your Caprese Stuffed Ground Chicken is ready, it’s time to think about how to serve it. This dish is not only delicious but also visually appealing, making it perfect for any occasion. Here are some serving suggestions to elevate your meal:

  • Fresh Salad: Pair your stuffed chicken with a light salad. A simple arugula or mixed greens salad with a lemon vinaigrette complements the flavors beautifully.
  • Garlic Bread: Serve with warm garlic bread on the side. The crispy texture and buttery flavor make a delightful addition to the meal.
  • Roasted Vegetables: Consider roasting seasonal vegetables like zucchini, bell peppers, or asparagus. Their natural sweetness pairs well with the savory chicken.
  • Pasta: A side of pasta tossed in olive oil and garlic can be a hearty accompaniment. You can also add some cherry tomatoes and basil for a cohesive flavor.
  • Quinoa or Rice: For a healthy option, serve the stuffed chicken over a bed of quinoa or brown rice. This adds a nutritious element to your plate.
  • Caprese Salad: For a true Caprese experience, serve a side of Caprese salad with fresh mozzarella, tomatoes, and basil drizzled with balsamic glaze.

Don’t forget to drizzle a little extra balsamic glaze over the stuffed chicken before serving. This adds a beautiful finish and enhances the dish’s flavor. With these serving suggestions, your Caprese Stuffed Ground Chicken will be a hit at any dinner table!

Tips for Perfecting Your Caprese Stuffed Ground Chicken Recipe

To make your Caprese Stuffed Ground Chicken truly shine, consider these helpful tips. They will ensure that your dish is not only delicious but also visually appealing and satisfying.

  • Use Fresh Ingredients: Always opt for fresh basil, ripe cherry tomatoes, and high-quality mozzarella. Fresh ingredients enhance the flavor and nutritional value of your dish.
  • Don’t Overmix: When combining the ground chicken with spices, mix just until combined. Overmixing can lead to tough patties. You want them to be tender and juicy!
  • Chill the Mixture: If you have time, chill the stuffed patties in the refrigerator for about 30 minutes before cooking. This helps them hold their shape better during cooking.
  • Experiment with Seasonings: Feel free to add your favorite herbs and spices to the ground chicken mixture. A pinch of red pepper flakes can add a nice kick!
  • Check for Doneness: Use a meat thermometer to ensure the internal temperature reaches 165°F. This guarantees that your chicken is safe to eat and perfectly cooked.
  • Let It Rest: After cooking, let the stuffed chicken rest for a few minutes. This allows the juices to redistribute, making each bite more flavorful and juicy.
  • Presentation Matters: When serving, slice the stuffed chicken in half to reveal the colorful filling. This not only looks great but also showcases the delicious ingredients inside.
  • Pair with the Right Sauce: Consider serving your Caprese Stuffed Ground Chicken with a side of marinara or pesto sauce for dipping. This adds an extra layer of flavor.

By following these tips, you’ll elevate your Caprese Stuffed Ground Chicken to a whole new level. Your family and friends will be impressed with your culinary skills, and you’ll enjoy a delightful meal every time!

Breakdown of Time for Caprese Stuffed Ground Chicken Recipe

Prep Time

Preparing your Caprese Stuffed Ground Chicken is quick and easy! The prep time for this recipe is approximately 15-20 minutes. During this time, you will gather all your ingredients, mix the ground chicken with spices, and prepare the delicious Caprese filling. This step is essential for ensuring that everything is ready for cooking. So, take your time to chop the tomatoes, basil, and mozzarella, as fresh ingredients make all the difference!

Cooking Time

Once your ingredients are prepped, the cooking time is about 25-30 minutes. This includes browning the stuffed patties in the skillet for about 8-10 minutes and then baking them in the oven for 15-20 minutes. The combination of these cooking methods ensures that your chicken is perfectly cooked and full of flavor. Remember to check the internal temperature to ensure it reaches 165°F for safe consumption.

Total Time

In total, you can expect to spend around 45-50 minutes from start to finish. This includes both prep and cooking time. With such a quick turnaround, you can enjoy a delicious and healthy meal without spending hours in the kitchen. Whether it’s a weeknight dinner or a special occasion, this Caprese Stuffed Ground Chicken recipe is a fantastic choice that fits into your busy schedule!

Nutritional Information for Caprese Stuffed Ground Chicken Recipe

Calories

When it comes to enjoying a delicious meal, knowing the calorie content can help you make informed choices. Each serving of the Caprese Stuffed Ground Chicken contains approximately 320 calories. This makes it a satisfying option that won’t weigh you down. The balance of protein and healthy fats in this dish provides energy while keeping you feeling full and satisfied.

Protein

Protein is an essential nutrient that supports muscle growth and repair. In this recipe, each serving boasts an impressive 34 grams of protein. Ground chicken is a lean source of protein, making it a great choice for those looking to maintain or build muscle. Pairing it with fresh ingredients like mozzarella and basil not only enhances the flavor but also adds nutritional value to your meal.

Sodium

Monitoring sodium intake is important for maintaining heart health. Each serving of the Caprese Stuffed Ground Chicken contains about 600 milligrams of sodium. This amount is reasonable for a flavorful dish, especially considering the use of salt and balsamic glaze. If you’re watching your sodium levels, you can easily adjust the recipe by using low-sodium options for the glaze or reducing the added salt.

Overall, this Caprese Stuffed Ground Chicken recipe is a nutritious choice that fits well into a balanced diet. With its combination of protein, healthy fats, and fresh ingredients, it’s a meal that you can feel good about serving to your family and friends!

FAQs about Caprese Stuffed Ground Chicken Recipe

Can I use turkey instead of chicken for this recipe?

Absolutely! You can use ground turkey instead of ground chicken for this Caprese Stuffed Ground Chicken recipe. Turkey is a lean protein option that works well in this dish. Just keep in mind that turkey may have a slightly different flavor and texture. However, it will still be delicious when combined with the fresh ingredients like tomatoes, mozzarella, and basil. Feel free to make the swap and enjoy a tasty meal!

What can I serve with Caprese Stuffed Ground Chicken?

There are many delightful options to serve alongside your Caprese Stuffed Ground Chicken. A fresh salad, like arugula or mixed greens, pairs beautifully with the flavors of the dish. You can also consider serving garlic bread for a comforting touch. Roasted vegetables or a side of pasta tossed in olive oil and garlic can complement the meal nicely. For a healthy option, quinoa or brown rice works well too. Don’t forget to drizzle some extra balsamic glaze over the chicken for added flavor!

How do I store leftovers of Caprese Stuffed Ground Chicken?

Storing leftovers of your Caprese Stuffed Ground Chicken is easy! Allow the chicken to cool completely before placing it in an airtight container. You can store it in the refrigerator for up to 3-4 days. If you want to keep it longer, consider freezing the stuffed chicken. Wrap each patty tightly in plastic wrap and then place them in a freezer-safe bag. They can be frozen for up to 3 months. When you’re ready to enjoy them again, simply thaw in the refrigerator overnight and reheat in the oven or microwave until warmed through.

Conclusion on Caprese Stuffed Ground Chicken Recipe

In conclusion, the Caprese Stuffed Ground Chicken recipe is a fantastic way to enjoy a healthy and flavorful meal. With its combination of fresh ingredients and simple preparation, this dish is perfect for any occasion. Whether you’re cooking for your family on a busy weeknight or impressing guests at a dinner party, this recipe is sure to be a hit.

The juicy ground chicken, paired with the vibrant flavors of cherry tomatoes, creamy mozzarella, and fragrant basil, creates a delightful experience for your taste buds. Plus, the versatility of this recipe allows you to experiment with different fillings and cooking methods, making it a staple in your kitchen.

Remember to use fresh ingredients for the best flavor and nutritional value. With just a few tips and tricks, you can elevate your Caprese Stuffed Ground Chicken to new heights. So, gather your ingredients, follow the steps, and enjoy a delicious meal that everyone will love!

We hope you give this recipe a try and share it with your loved ones. Happy cooking!

Paul

Caprese Stuffed Ground Chicken Recipe is a must-try!

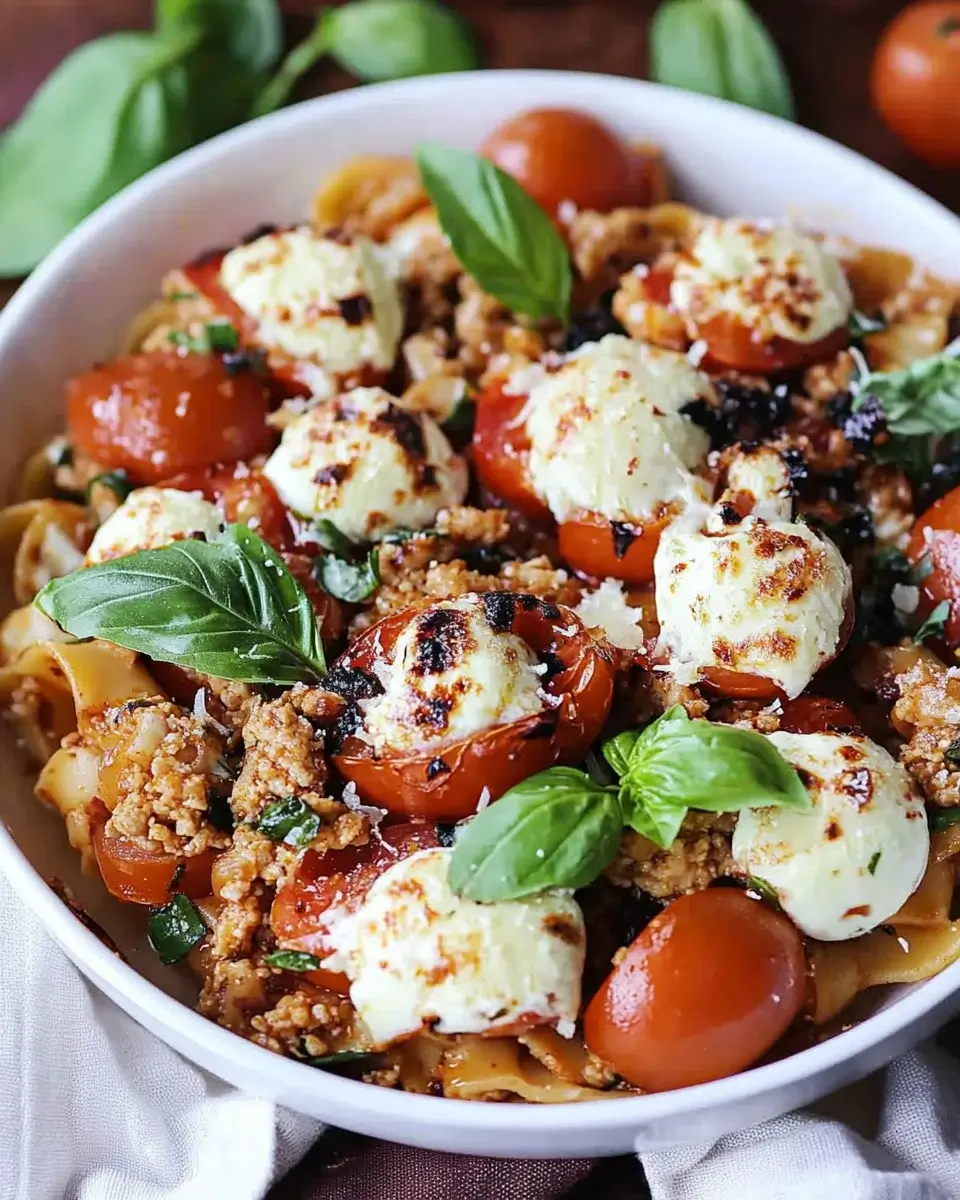
This Ground Chicken Caprese skillet is a quick and flavorful one-pan meal that brings together the savory richness of seasoned ground chicken, gooey mozzarella, and sweet blistered cherry tomatoes. Finished with fresh basil and a drizzle of balsamic glaze, it’s a 15-minute masterpiece perfect for busy weeknights or casual entertaining.
Prep Time 5 minutes
Cook Time 10 minutes
Total Time 15 minutes
Servings: 4 –6 servings
Course: Main Dish
Cuisine: Italian-American

Ingredients
  

  • 1 tablespoon olive oil
  • ½ cup diced onion
  • 1 tablespoon chopped garlic
  • 2 pounds ground chicken
  • 1 teaspoon kosher salt
  • ½ teaspoon dried oregano
  • ½ teaspoon dried basil
  • ½ teaspoon dried parsley
  • 8 ounces tomato sauce or marinara
  • 1 tablespoon balsamic vinegar
  • 8 ounces mozzarella pearls or torn fresh mozzarella
  • 10 ounces cherry tomatoes halved
  • Fresh chopped basil for garnish
  • Balsamic glaze for garnish
  • Grated parmesan cheese for garnish

Method
 

  1. Preheat Oven:Set your oven to 500°F to prepare for broiling.
  2. Cook Aromatics:Heat olive oil in a large oven-safe skillet over medium heat. Add the diced onion and sauté for about 5 minutes until softened. Stir in chopped garlic and cook for an additional minute.
  3. Brown the Chicken:Add ground chicken to the skillet. Break it apart with a spoon and cook until fully browned and cooked through. Drain any excess liquid if necessary.
  4. Season and Simmer:Sprinkle in salt, oregano, basil, and parsley. Stir well. Add tomato sauce and balsamic vinegar, mixing to combine everything evenly.
  5. Add Toppings:Scatter mozzarella pearls and halved cherry tomatoes across the top of the ground chicken mixture.
  6. Bake Until Bubbling:Transfer the skillet to the preheated oven. Bake for 7–8 minutes until the cheese is melted and the tomatoes are blistered.
  7. Finish and Serve:Remove from oven and top with freshly chopped basil, a generous drizzle of balsamic glaze, and grated parmesan. Serve hot straight from the skillet or over pasta, rice, or toasted bread.

Notes

  • This dish is low-carb as-is and can be served without pasta.
  • Try adding baby spinach or arugula for extra greens.
  • Mozzarella pearls melt quickly, but torn fresh mozzarella works just as well.
  • Balsamic glaze adds a sweet-savory finish—don’t skip it!
  • Leftovers reheat well and are great in a wrap or sandwich.

A Bowl of Comfort: The Hearty Vegetable Stew That Reminds Me of Home

Growing up, there were nights when my family was too busy to sit down to a big meal, but my mother always found a way to prepare something comforting and nourishing. I can still remember the smell of her vegetable stews simmering on the stove, filling the house with warmth and a sense of calm. It was more than just food—it was a ritual, an act of love, and a reminder that no matter how busy or hectic life got, there was always a moment to pause, to nourish the body, and to reconnect with the ones we loved.

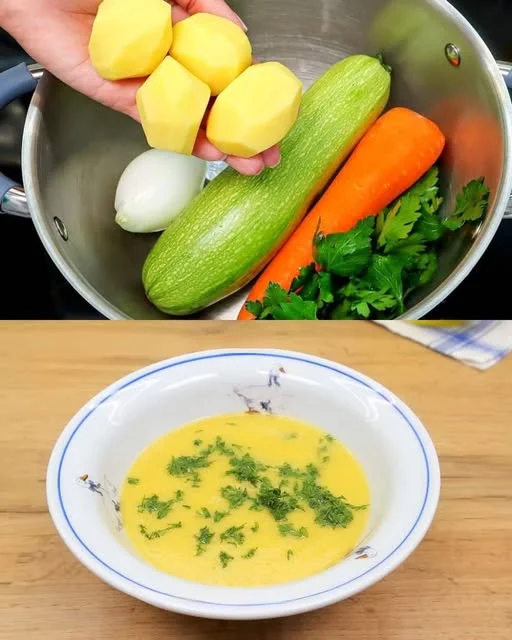
I was never too young to understand the power of a warm meal, and the vegetable stew she made was one of those dishes that became ingrained in my memory. Simple, fresh ingredients like potatoes, carrots, and zucchini, combined in a pot with fragrant garlic, onions, and fresh parsley, transformed into something so much more than the sum of its parts. Each spoonful was comforting, soothing, and satisfying—qualities I’ve come to cherish in every bowl of vegetable stew I make.

Today, as an adult, I find myself reaching for the same hearty vegetable stew when I need something quick, nourishing, and light. It’s a dish that feels like home, a dish that brings back memories of shared meals with family, laughter, and the love that fills a kitchen when it’s alive with cooking. It’s simple, but it’s everything I need on those busy evenings when I crave something wholesome but not heavy. And every time I make it, I’m reminded of the timeless comfort of a homemade meal.

The Beauty of Simple Ingredients

There’s something magical about dishes that rely on simple ingredients, and vegetable stew is the epitome of that magic. In today’s world of complex recipes and fast food, there’s a certain beauty in the simplicity of a vegetable-based dish that doesn’t rely on an abundance of exotic ingredients or complicated techniques.

The beauty of this vegetable stew lies in the fact that it doesn’t need anything fancy. The main ingredients are vegetables—potatoes, carrots, and zucchini—along with the essentials: olive oil, onion, garlic, salt, and water. Despite the humble ingredients, the stew becomes a flavorful and satisfying dish thanks to the way the vegetables meld together and absorb the fragrant spices. The olive oil gives it a rich, savory base, while the garlic and onion add depth and warmth. The tomatoes bring a burst of brightness and color, while the fresh parsley is the perfect finishing touch, offering both flavor and a touch of freshness.

For those of us who’ve grown up with homemade meals, the ingredients in this stew are familiar and comforting. They are staples that remind us of home cooking and the joy of creating something with love and care.

Ingredients:

IngredientQuantity
Potatoes5-7
Onion1
Olive oilTo taste
Carrot1
Zucchini2-3
Water700 ml (2.5 cups)
Fresh parsley (chopped)To taste
BreadTo serve
Tomatoes1-2
GarlicTo taste
SaltTo taste

Directions:

  1. Prepare the Vegetables: Peel and chop the potatoes, carrot, and zucchini into bite-sized pieces. Finely chop the onion and garlic.
  2. Sauté the Onion and Garlic: Heat olive oil in a large pot over medium heat. Add the chopped onion and garlic, and sauté until they become fragrant and translucent.
  3. Add the Vegetables: Add the chopped potatoes, carrots, and zucchini to the pot. Stir to combine, then cook for 2-3 minutes.
  4. Add Water and Simmer: Pour in the water and bring the mixture to a boil. Reduce the heat and let it simmer for 20-25 minutes, or until the vegetables are tender.
  5. Season: Chop the tomatoes and add them to the stew, along with salt to taste. Continue cooking for another 5 minutes.
  6. Serve: Ladle the stew into bowls, garnish with freshly chopped parsley, and serve with slices of bread for a comforting meal.

Nutritional Information (per serving):

NutrientAmount
Calories150 kcal
Protein3 g
Carbohydrates30 g
Fat5 g
Fiber4 g
Sugars5 g

A Versatile Dish for Every Season

One of the things I love most about vegetable stew is its versatility. It’s a dish that can be made year-round, adjusting slightly to suit the season or the vegetables you have available. In the colder months, when root vegetables are in abundance, I load up the stew with more potatoes, carrots, and onions. In the summer, when zucchini is plentiful, I let it shine in the stew, adding a lightness that’s perfect for warmer weather.

You can also adjust the recipe to suit your dietary preferences or needs. Whether you’re looking for a vegan dish, gluten-free meal, or something that pairs well with a slice of crusty bread, vegetable stew can easily be adapted to meet those needs. It’s a wonderfully flexible dish that can be adjusted to your taste, ensuring that it always feels fresh and exciting.

The Health Benefits of Vegetable Stew

Vegetable stew is not only comforting, but it’s also incredibly healthy. Packed with nutrient-rich vegetables, this stew provides a variety of vitamins and minerals that are essential for good health. Potatoes are an excellent source of potassium, which supports healthy muscle and nerve function, while carrots are rich in beta-carotene, which supports eye health and immune function. Zucchini is full of water and antioxidants, which help hydrate the body and protect against cellular damage.

Olive oil, the base for this stew, is rich in healthy fats that support heart health. Garlic and onions, both commonly found in Mediterranean diets, are known for their anti-inflammatory and immune-boosting properties. Fresh parsley adds an extra dose of vitamins and antioxidants, ensuring that this dish not only nourishes the body but also supports overall well-being.

Vegetable stew is naturally low in calories and packed with fiber, making it a filling dish that won’t leave you feeling sluggish. Whether you’re trying to eat lighter or simply want a nourishing meal that provides sustained energy, this stew is the perfect option.

FAQs About Vegetable Stew

Can I make this stew ahead of time?
Yes, vegetable stew actually tastes even better when allowed to sit for a few hours or overnight. The flavors meld together over time, making the stew richer and more flavorful. You can easily prepare it in advance and store it in the refrigerator for up to 3 days. It also freezes well, so you can store individual servings for later.

What other vegetables can I add to this stew?
The beauty of this recipe is its versatility. You can add any number of vegetables, such as bell peppers, parsnips, sweet potatoes, or green beans. If you have leftover vegetables in your fridge, this stew is the perfect dish to use them up.

Can I make this stew spicy?
Absolutely! If you enjoy spicy foods, you can add chili flakes, cayenne pepper, or even fresh jalapeños to the stew to give it a kick. Adjust the heat level to suit your personal preference.

Is this stew suitable for vegans?
Yes, this vegetable stew is naturally vegan. It contains no animal products, making it a perfect option for those following a plant-based diet.

Can I add protein to this stew?
If you want to make the stew more filling, you can add protein such as lentils, beans, or even tofu. Adding a protein source can turn this dish into a hearty and satisfying main course.

Conclusion: The Comfort of a Homemade Meal

As I sit down to enjoy a bowl of vegetable stew, I’m reminded of the power of food to bring people together. It’s not just about the ingredients or the flavors—it’s about the memories, the connections, and the moments of comfort that a meal can create. This vegetable stew is more than just a recipe; it’s a reflection of home, of love, and of the importance of nourishing both body and soul. Whether you’re making it for yourself or sharing it with others, this stew will always have a place at the table, offering warmth, comfort, and a taste of home with every bite.

With its simple, fresh ingredients and comforting flavors, vegetable stew is a timeless dish that can be enjoyed by anyone, anywhere. It’s a meal that’s not only healthy and satisfying but also deeply rooted in the traditions of family and home-cooked goodness.

Amal

A Bowl of Comfort: The Hearty Vegetable Stew That Reminds Me of Home

This light vegetable stew is packed with simple, fresh ingredients that bring warmth and nourishment to the table. With tender potatoes, zucchini, and carrots simmered in a gentle garlic-infused broth, it’s the perfect quick dinner for a cozy night. Balanced, comforting, and delightfully rustic—this is one of those meals you’ll keep coming back to.
Prep Time 15 minutes
Cook Time 25 minutes
Total Time 40 minutes
Servings: 4 –6 servings
Course: Soup
Cuisine: Mediterranean-Inspired

Ingredients
  

  • 5 –7 potatoes peeled and diced
  • 1 onion finely chopped
  • Olive oil to taste
  • 1 carrot peeled and sliced
  • 2 –3 zucchini chopped
  • 700 ml 2.5 cups water
  • Fresh parsley chopped (for garnish)
  • Bread for serving
  • 1 –2 tomatoes chopped
  • Garlic minced (to taste)
  • Salt to taste

Method
 

  1. In a large pot, heat a drizzle of olive oil over medium heat. Sauté the chopped onion and garlic until fragrant and translucent.
  2. Add the carrots, potatoes, and zucchini to the pot. Stir and let cook for a couple of minutes.
  3. Add the chopped tomatoes and stir to combine.
  4. Pour in the water, add a pinch of salt, and bring the mixture to a boil.
  5. Reduce the heat and let the stew simmer for about 20–25 minutes, or until the vegetables are tender.
  6. Taste and adjust seasoning if needed. Serve hot, garnished with chopped fresh parsley and slices of warm bread on the side.

Notes

  • For extra depth, add a dash of paprika or a vegetable bouillon cube to the simmering water.
  • Feel free to toss in any other veggies you have on hand, like bell peppers or green beans.
  • This stew is even better the next day as the flavors deepen.

Crispy Veggie Fritters: A Heartwarming Tradition That Brings Comfort and Flavor

There’s a certain magic that happens when simple ingredients are combined and transformed into something extraordinary. Growing up, I often found myself in the kitchen with my mother, experimenting with whatever fresh vegetables we had on hand. I’ll never forget the first time we made fritters together. It was a rainy afternoon, and we were searching for ways to use up the bounty of vegetables we had in our fridge. With the comforting aroma of fresh herbs and sizzling vegetables filling the air, we created our first batch of veggie fritters. The combination of grated zucchini, potatoes, and carrots brought out the natural sweetness of the vegetables, while the cheese added a rich, savory depth that made each bite irresistible.

As the years passed, I kept experimenting with the recipe, adding my own touches to the fritters while keeping the essence of my mother’s cooking close to my heart. These crispy veggie fritters, with their golden, crunchy exterior and soft, flavorful interior, became a staple in my household. They’re versatile, easy to make, and always bring comfort—whether as a snack, appetizer, or a side dish for any meal. I often make them for family gatherings, and each time I do, I’m reminded of those rainy afternoons spent in the kitchen, creating something simple yet unforgettable.

Why These Veggie Fritters Stand Out

What makes these fritters truly special is how they balance the sweetness of vegetables with the richness of Suluguni cheese. Suluguni cheese is a semi-soft cheese that’s commonly used in Eastern European and Caucasian cuisine. It has a slightly tangy, salty flavor that perfectly complements the neutral taste of the vegetables. When grated, Suluguni adds a layer of depth to the fritters, giving them a delightful savory flavor that makes them stand out from other veggie fritters.

The vegetables—zucchini, potatoes, and carrots—each bring something unique to the table. Zucchini is soft, hydrating, and mild, while potatoes provide heartiness and texture. Carrots, with their natural sweetness, tie everything together, making the fritters not only flavorful but also visually appealing with their vibrant color.

Together, these ingredients create a balance that’s both nutritious and delicious. The beauty of this recipe lies in its simplicity. There’s no need for complicated ingredients or fancy equipment. Just fresh, wholesome produce, a few pantry staples, and a bit of creativity. These fritters are easy to make and are always a hit, whether you’re serving them at a family dinner or taking them to a potluck.

Ingredients:

IngredientQuantity
Zucchini1
Potatoes2
Carrot1
Suluguni cheese (grated)100g
Spring onion (chopped)To taste
Eggs2
SaltTo taste
Black pepperTo taste

Directions:

  1. Prepare Vegetables: Grate the zucchini, potatoes, and carrot using a coarse grater. Place the grated vegetables into a clean kitchen towel or cheesecloth and squeeze out any excess moisture.
  2. Mix the Ingredients: In a large bowl, combine the grated vegetables, grated Suluguni cheese, chopped spring onion, and eggs. Season with salt and black pepper to taste. Mix everything together until well combined.
  3. Fry the Fritters: Heat a little oil in a frying pan over medium heat. Using a spoon, form small portions of the mixture into patties and carefully place them in the pan. Fry the fritters for 3-4 minutes on each side, or until golden and crispy.
  4. Drain and Serve: Remove the fritters from the pan and place them on paper towels to drain any excess oil. Serve immediately with your favorite dipping sauce or as a side dish.

Nutritional Information (per fritter):

NutrientAmount
Calories90 kcal
Protein4 g
Carbohydrates12 g
Fat4 g
Fiber2 g
Sugars3 g

The Health Benefits of These Veggie Fritters

These veggie fritters aren’t just tasty—they’re also packed with essential nutrients. Potatoes are a great source of vitamins like vitamin C, B6, and potassium. They’re also rich in fiber, which can help with digestion and promote satiety. Zucchini is a low-calorie vegetable that’s high in antioxidants and water, making it a great addition to any meal for added hydration and nutritional value. Carrots are an excellent source of beta-carotene, which supports eye health and immune function.

The addition of Suluguni cheese offers a good dose of protein and calcium, which are essential for maintaining strong bones and muscle health. Furthermore, the cheese gives the fritters a rich, satisfying flavor, reducing the need for added fats or sauces.

These fritters are also flexible when it comes to dietary preferences. They’re naturally vegetarian and can be easily adapted for vegan diets by substituting the eggs with flaxseed or chia seed egg replacers and using a dairy-free cheese alternative. This makes them a versatile option for a wide range of dietary needs.

FAQs About Veggie Fritters

Can I use other types of cheese?
While Suluguni cheese is traditional for this recipe, it can be substituted with other cheeses such as mozzarella, feta, or even cheddar. Each cheese will bring its own flavor profile to the fritters, so feel free to experiment and find the cheese you prefer.

Can I make these fritters ahead of time?
Yes, you can prepare the fritters ahead of time! Simply form the fritters and store them in the refrigerator for up to 24 hours before frying. Alternatively, you can freeze the fritters after they’ve been shaped but before frying. When you’re ready to cook them, just fry them directly from the freezer—no need to thaw!

How can I make these fritters gluten-free?
This recipe is naturally gluten-free because it doesn’t rely on any flour or breadcrumbs. If you’d like to make them a little crispier, you can add a tablespoon or two of gluten-free flour or cornstarch to the mixture.

Can I add other vegetables?
Absolutely! These fritters are incredibly versatile, and you can add vegetables like spinach, corn, or bell peppers to the mixture for extra flavor and nutrition. Just be sure to remove excess moisture from the vegetables before adding them to the mixture.

How do I store leftover fritters?
Store any leftover fritters in an airtight container in the refrigerator for up to 3 days. You can also freeze them for up to 2 months. To reheat, simply warm them in a hot skillet or in the oven to maintain their crispiness.

Can I make these fritters without eggs?
Yes! To make these fritters egg-free, use a flaxseed or chia seed egg replacement. Simply mix one tablespoon of ground flaxseed or chia seeds with 3 tablespoons of water, and let it sit for 5 minutes to form a gel-like consistency. This will bind the fritter mixture together just as eggs do.

Versatility: Enjoy Fritters in Different Ways

While these fritters are perfect as a snack or appetizer, they can easily be incorporated into a full meal. Serve them alongside a fresh green salad for a light lunch or dinner. Pair them with a tangy yogurt-based dip or a spicy salsa for extra flavor. They can also be served with a dollop of sour cream, which adds a creamy contrast to the crispy fritters.

For a heartier meal, these fritters can be used as a filling for a sandwich. Take two fritters and sandwich them between slices of whole grain bread, along with some fresh greens and your favorite spread for a quick, delicious lunch. The fritters can also be served as a side dish to grilled meats or roasted vegetables, making them a great addition to any dinner table.

Conclusion: A Taste of Comfort in Every Bite

These crispy veggie fritters are more than just a recipe—they’re a reminder of the joy of cooking, the simplicity of fresh ingredients, and the comfort of sharing food with loved ones. Whether you’re making them for a family meal, a casual gathering, or just to enjoy as a snack, they’ll always bring a sense of warmth and satisfaction. The combination of zucchini, potatoes, carrots, and Suluguni cheese creates a dish that’s both nutritious and irresistibly delicious, proving that sometimes the simplest ingredients are the most powerful.

So, the next time you find yourself with a few extra vegetables in your fridge, turn them into these crispy fritters. You’ll be amazed at how such humble ingredients can come together to create something truly memorable. The magic is in the combination, the love you put into making them, and the memories you create around the table.

Amal

Crispy Veggie Fritters: A Heartwarming Tradition That Brings Comfort and Flavor

These crispy veggie fritters are a delightful combination of grated zucchini, potatoes, carrots, and the rich flavor of Suluguni cheese. Lightly seasoned and perfectly crispy on the outside with a tender, flavorful interior, they’re perfect as a snack, appetizer, or a side dish to complement your meals. Easy to make and full of wholesome ingredients, these fritters are sure to become a favorite in your kitchen.
Prep Time 10 minutes
Cook Time 15 minutes
Total Time 25 minutes
Servings: 12 fritters
Course: Snack
Cuisine: European-inspired

Ingredients
  

  • 1 zucchini grated
  • 2 potatoes grated
  • 1 carrot grated
  • 100 g Suluguni cheese grated
  • Spring onion chopped (to taste)
  • 2 eggs
  • Salt to taste
  • Black pepper to taste

Method
 

  1. Prepare the Vegetables: Grate the zucchini, potatoes, and carrot. Once grated, place the vegetables in a clean towel and squeeze out any excess moisture to prevent soggy fritters.
  2. Mix the Ingredients: In a large mixing bowl, combine the grated vegetables, grated Suluguni cheese, chopped spring onion, and eggs. Season with salt and black pepper to taste. Stir well until the mixture is evenly combined.
  3. Form Fritters: Heat a little oil in a frying pan over medium heat. Using a spoon, form small patties from the mixture and gently place them in the hot pan.
  4. Fry the Fritters: Cook the fritters for 3-4 minutes on each side or until they are golden brown and crispy.
  5. Drain and Serve: Remove the fritters from the pan and place them on a paper towel to drain excess oil. Serve immediately while hot and crispy.

Notes

  • To avoid soggy fritters, ensure that you remove as much moisture as possible from the grated vegetables.
  • You can substitute Suluguni cheese with mozzarella or feta for a different flavor.
  • For a healthier version, you can bake the fritters in the oven instead of frying them. Place the fritters on a parchment-lined baking sheet and bake at 375°F (190°C) for 20-25 minutes, flipping halfway through.
  • If you prefer to make these fritters ahead of time, you can refrigerate the uncooked fritters for up to 24 hours or freeze them for longer storage.

Banana Muffins: A Sweet and Nutty Journey to Comfort

There’s something undeniably comforting about the smell of freshly baked muffins wafting through the house. I still remember the mornings I spent with my grandmother, learning to bake in her warm kitchen. She would always use whatever ingredients were at hand, often swapping out traditional flour for alternatives like almond flour. One morning, we had a bunch of overripe bananas that nobody wanted to eat, and she suggested we make banana muffins. We didn’t have a recipe at the time, but with a bit of experimentation, we created a simple, yet deeply satisfying muffin that quickly became a family favorite.

These banana muffins, made with almond flour, hold a special place in my heart. They’re the perfect mix of sweet and nutty, with just the right amount of moisture from the bananas. I’ve since added my own twist to the recipe, but the essence of those mornings with my grandmother remains. What started as a way to salvage overripe bananas has turned into a treasured recipe I turn to on busy mornings, lazy weekends, or when I need something that feels like a hug from the inside out.

Why Almond Flour?

You might wonder what makes almond flour the star of this banana muffin recipe. While traditional muffins are often made with wheat flour, almond flour offers a gluten-free alternative that adds a nutty richness to the muffins. It also gives these muffins a lighter, fluffier texture compared to the denser, heavier outcome you might expect from all-purpose flour. Almond flour is made from finely ground almonds, and it contains more protein and fiber than typical wheat flour, making these muffins not only gluten-free but also more nutritious.

For those who are mindful of their carbohydrate intake or want a recipe that’s naturally lower in glycemic index, almond flour is a great option. It doesn’t spike blood sugar as quickly as regular flour might, which can help you feel full longer and keep your energy levels steady throughout the day.

Ingredients:

IngredientQuantity
Mashed bananas170g (about 3/4 cup)
Whole eggs2 (about 55g each)
Dark brown sugar50g (about 1/4 cup)
Vanilla extract1/2 tsp
Almond flour200g (about 2 cups)

Directions:

  1. Preheat the Oven and Prepare Muffin Tin: Preheat your oven to 350°F (175°C) and grease or line a muffin tin with paper liners.
  2. Mix Wet Ingredients: In a large bowl, combine the mashed bananas, eggs, dark brown sugar, and vanilla extract. Stir well until fully combined.
  3. Add Almond Flour: Gradually mix in the almond flour, ensuring there are no lumps and the batter is smooth.
  4. Fill the Muffin Tin: Pour the batter evenly into the muffin tin, filling each cup about two-thirds full.
  5. Bake the Muffins: Place the muffin tin in the preheated oven and bake for 18-22 minutes, or until a toothpick inserted into the center of a muffin comes out clean.
  6. Cool and Serve: Allow the muffins to cool for a few minutes in the tin before transferring them to a wire rack to cool completely. Enjoy!

Nutritional Information (per muffin):

NutrientAmount
Calories180 kcal
Protein5 g
Carbohydrates21 g
Fat10 g
Fiber3 g
Sugars12 g

The Role of Bananas: Sweetness and Moisture

The bananas in these muffins do more than just sweeten the batter—they provide natural moisture that helps keep the muffins soft and tender. Ripe bananas are packed with natural sugars, which give these muffins their subtle sweetness. Unlike refined sugar, the sugar from bananas comes with added nutrients like potassium, vitamin C, and dietary fiber, making these muffins a healthier option than many others that rely on processed sugars.

Using overripe bananas is key in this recipe. When bananas are left to ripen past their usual yellow stage, they become incredibly sweet, making them perfect for baking. The sugar content of the bananas increases as they ripen, and their texture softens, which helps them blend seamlessly into the muffin batter, creating a more moist and flavorful result.

Health Benefits and Why You’ll Love These Muffins

These banana muffins aren’t just a delicious treat—they’re also a healthier option compared to traditional baked goods. Thanks to the almond flour, they’re naturally gluten-free, making them a great choice for anyone following a gluten-free diet. The bananas add a natural sweetness without the need for added sugar, and the muffins are packed with healthy fats from the almonds.

Almond flour is also a good source of vitamin E, magnesium, and antioxidants, all of which are important for maintaining a healthy body. Plus, almond flour has a lower glycemic index than regular flour, which means these muffins are less likely to cause spikes in your blood sugar levels. They provide a steady release of energy, making them a perfect choice for breakfast, a snack, or a post-workout treat.

In addition, this recipe uses only a small amount of dark brown sugar, so you’re not overwhelmed with an excess of sweetness. The natural flavors from the bananas and the nutty richness from the almond flour take center stage, with the brown sugar adding a touch of caramelized depth. The result is a muffin that’s perfectly balanced and won’t leave you feeling sluggish or weighed down after you eat it.

A Versatile Recipe: Customizing Your Muffins

One of the best parts about this banana muffin recipe is its versatility. While the base ingredients are simple, there are endless possibilities to customize these muffins according to your preferences. For example, you could add in chocolate chips, chopped nuts, or dried fruit for extra texture and flavor. Cinnamon or nutmeg would complement the bananas beautifully if you’re looking for a warming, spiced note in your muffins.

For those who like a little extra crunch, adding chopped walnuts or slivered almonds into the batter can give the muffins an added layer of texture. Alternatively, you can top the muffins with a sprinkling of oats or seeds before baking for an extra bite.

This recipe also works as a great base for making mini muffins. You can simply divide the batter among smaller muffin cups, and they’ll bake in a fraction of the time, making them perfect for little hands or for when you’re craving just one bite-sized treat.

Storing and Freezing Banana Muffins

If you’ve made a large batch of these banana muffins, you’ll want to know how to store them properly. After baking, allow the muffins to cool completely before storing them in an airtight container. They can be kept at room temperature for up to 2 days or refrigerated for up to 5 days. To keep them fresher for longer, you can also freeze them. Simply wrap the muffins tightly in plastic wrap or store them in a freezer-safe bag, and they’ll last for up to 3 months.

When you’re ready to eat them, simply defrost the muffins at room temperature or pop them in the microwave for a few seconds to enjoy them warm, just as if they were freshly baked. This makes them perfect for meal prep or for those days when you want a quick and easy breakfast or snack.

Frequently Asked Questions

Can I substitute almond flour with another type of flour? Yes, you can use other flours such as coconut flour or oat flour, but the texture and taste may vary. Almond flour is the best option for a soft, moist muffin that holds together well. If you’re not gluten-free, you can substitute all-purpose flour as well.

Can I make these muffins without eggs? If you’re looking for an egg-free version, you can substitute the eggs with flax eggs (1 tablespoon of flaxseed meal mixed with 2 tablespoons of water for each egg) or applesauce. However, the texture may be slightly different, and the muffins might be a bit denser.

Can I add other fruits to this recipe? Absolutely! You can experiment with adding other fruits, like blueberries, strawberries, or even diced apples. Just be sure to adjust the moisture content accordingly—if you’re adding a lot of extra fruit, you might need to reduce the number of bananas slightly or add a bit more almond flour.

Conclusion: A Comforting, Healthy Treat

These banana muffins are a true reminder that sometimes the simplest recipes hold the most joy. With just a handful of ingredients, you can create something that is both delicious and nutritious. Whether you’re using up overripe bananas or simply craving something comforting to start your day, this recipe is one you’ll return to again and again.

The muffins are rich in nutrients, naturally sweetened with bananas, and made with almond flour for a gluten-free option that’s both light and filling. They are not just a breakfast treat—they’re a versatile snack that can be customized to fit your preferences. The best part? They’re easy to make and can be enjoyed by anyone, whether you’re following a specific diet or just looking for something wholesome to enjoy with your morning coffee.

From my kitchen to yours, I hope these banana muffins bring as much comfort and joy as they have to me over the years.

Amal

Banana Muffins: A Sweet and Nutty Journey to Comfort

These banana muffins are the perfect blend of sweetness and texture, with the richness of almond flour and the natural sweetness of ripe bananas. They’re not just gluten-free, but they also offer a healthy dose of protein, fiber, and healthy fats. Whether you’re looking for a nutritious breakfast or a satisfying snack, these muffins are sure to hit the spot. Quick to prepare, they’re a delightful addition to any morning routine!
Prep Time 5 minutes
Cook Time 25 minutes
Total Time 30 minutes
Servings: 12 muffins
Course: Breakfast
Cuisine: American

Ingredients
  

  • 170 g mashed bananas about 3/4 cup
  • 2 whole eggs about 55g each
  • 50 g dark brown sugar about 1/4 cup
  • 1/2 tsp vanilla extract
  • 200 g almond flour about 2 cups

Method
 

  1. Preheat Oven and Prepare Muffin Tin: Preheat your oven to 350°F (175°C) and grease or line a muffin tin with paper liners.
  2. Mix Wet Ingredients: In a large bowl, combine the mashed bananas, eggs, dark brown sugar, and vanilla extract. Stir until fully combined.
  3. Add Almond Flour: Gradually mix in the almond flour until the batter is smooth and there are no lumps.
  4. Fill Muffin Tin: Pour the batter evenly into the muffin tin, filling each cup about two-thirds full.
  5. Bake the Muffins: Place the muffin tin in the preheated oven and bake for 18-22 minutes, or until a toothpick inserted into the center of a muffin comes out clean.
  6. Cool and Serve: Allow the muffins to cool in the tin for a few minutes before transferring them to a wire rack to cool completely. Enjoy!

Notes

  • For best results, use very ripe bananas as they provide the best sweetness and moisture for the muffins.
  • You can substitute the almond flour with other flour types, but this will alter the texture and flavor.
  • Add-ins like chocolate chips, nuts, or dried fruit can be mixed into the batter for extra flavor and texture.
  • Store muffins in an airtight container at room temperature for up to 3 days, or freeze for longer storage.

Recipe That Saved My Morning! Breakfast in 5 Minutes

Sometimes, the simplest meals hold the most power to make a difference in our day. For me, one of those moments came on a particularly hectic morning when I was running late for work, barely awake, and struggling to put together a nutritious breakfast. The thought of spending time preparing something complex felt overwhelming, but I didn’t want to skip the most important meal of the day. That’s when I remembered a quick and comforting recipe my grandmother used to make. It was something so simple, yet so satisfying: a slice of crispy bacon, melted cheese, and a perfectly fried egg sandwiched between toasted bread.

In those moments of chaos, there’s something truly special about food that can ground you. This breakfast is more than just a combination of ingredients; it’s a reminder of how little moments of care can make all the difference. A few minutes in the kitchen, a dash of salt, and the joy of knowing you’re starting your day off right—this recipe became a lifesaver that morning, and it’s continued to be my go-to breakfast when I need something fast but still full of flavor and nutrition.

The Beauty of Simplicity

At its core, this breakfast is built around one of the most basic and beloved comfort food combinations: bread, bacon, cheese, and eggs. But sometimes, the simplest dishes are the ones that deliver the most satisfaction. The crispy bacon provides a satisfying crunch, the gooey melted cheese adds a rich creaminess, and the perfectly fried egg with its silky yolk offers a touch of indulgence. Together, these elements come together to create a meal that’s not only easy to make but is surprisingly filling and flavorful.

The best part? It only takes five minutes from start to finish, which means you can enjoy a hearty breakfast even on the busiest of mornings. In a world where time seems to be constantly slipping away, it’s a small but powerful reminder that you don’t need to spend hours in the kitchen to eat something delicious.

Ingredients:

IngredientQuantity
Slices of bread6
Slices of cheese6
Slices of bacon6
Eggs4
SaltTo taste
Black pepperTo taste
ParsleyFor garnish
Green onionFor garnish

Directions:

  1. Cook the Bacon: In a pan over medium heat, cook the bacon slices until they are crispy and golden. Remove from the pan and set aside on paper towels to drain excess fat.
  2. Prepare the Toast: In the same pan, toast the slices of bread for about 1-2 minutes on each side until they are golden brown. You can also use a toaster if preferred.
  3. Fry the Eggs: While the bread is toasting, crack the eggs into the pan and cook them sunny-side up or to your desired doneness. Season with salt and black pepper.
  4. Assemble the Breakfast: Place a slice of cheese on each piece of toast. Add a slice of bacon on top of the cheese, and then carefully place a fried egg on top of the bacon. Season with a pinch more salt and pepper, if desired.
  5. Garnish and Serve: Sprinkle with freshly chopped parsley and green onions for added flavor and color. Serve immediately!

Nutritional Information (per serving):

NutrientAmount
Calories400 kcal
Protein23 g
Carbohydrates32 g
Fat23 g
Fiber2 g
Sugars2 g

Quick, Nourishing, and Energizing

When you’re pressed for time, one of the biggest challenges is finding something that will keep you full and energized throughout the morning. This breakfast does just that. The eggs provide a great source of protein, which helps keep you feeling full and satisfied. The bacon adds healthy fats, while the cheese adds a creamy texture and a savory bite. The bread offers carbohydrates to give you that quick energy boost you need to get through the day.

Because it’s so well-balanced, this breakfast is not only quick but also nourishing. Unlike a sugary cereal or processed snack, it provides a steady release of energy without leaving you feeling sluggish or crashing later. Whether you’re heading out the door to tackle a busy workday or preparing for a weekend of errands, this meal is a great way to fuel your body.

Why Bacon, Eggs, and Cheese?

There’s a reason the combination of bacon, eggs, and cheese has been a breakfast staple for so long—it’s because it just works. These ingredients, when paired together, create a harmonious balance of flavors and textures. The salty, crispy bacon contrasts perfectly with the smooth, velvety eggs, while the cheese adds a rich and indulgent element to the dish. The bread acts as the perfect vessel to hold everything together, adding a satisfying crunch with every bite.

This combination also appeals to a wide variety of tastes, making it a versatile choice for just about anyone. If you prefer a different type of cheese, you can easily substitute cheddar, mozzarella, or even a slice of creamy Swiss. For those who want to reduce their meat intake, turkey bacon or a vegetarian alternative can also work perfectly. This dish offers endless possibilities for customization, making it a reliable go-to for whatever you have in your fridge.

How This Recipe Can Fit Into Your Routine

The beauty of this quick breakfast is that it’s not only fast but also adaptable. You can enjoy it as part of your morning routine or even turn it into a snack later in the day. On weekends, when you have a bit more time, you can turn it into a more elaborate meal by adding some fresh herbs, sautéed vegetables, or a drizzle of hot sauce to give it an extra kick.

For those with dietary restrictions or preferences, this recipe is easily customizable. Want to make it gluten-free? Simply swap the bread for a gluten-free alternative. Looking for a lower-fat option? Opt for leaner bacon or skip the cheese entirely. The versatility of this meal makes it perfect for anyone, no matter their taste or dietary needs.

Frequently Asked Questions

1. Can I make this breakfast in advance?

While this breakfast is best served fresh and hot, there are ways to prepare parts of it ahead of time to make the process even faster in the morning. You can cook the bacon and store it in the refrigerator for up to 3 days. Similarly, you can fry the eggs in advance, store them in the fridge, and reheat them in the microwave. Toast the bread fresh in the morning for the best texture.

2. Can I use a different type of bread?

Absolutely! The choice of bread is entirely up to you. While traditional white or whole wheat bread works wonderfully, you can opt for sourdough, rye, or even a bagel for added texture and flavor. The key is to pick a bread that will hold up well to the bacon, cheese, and egg without becoming soggy.

3. Is there a way to make this recipe healthier?

There are plenty of ways to make this breakfast lighter if you’re looking for a healthier version. You can switch out the bacon for turkey bacon or a vegetarian option, use a lower-fat cheese, or opt for a whole grain or low-carb bread. You could also skip the cheese entirely for a lower-calorie option and still enjoy the rich flavors of the eggs and bacon.

4. Can I freeze this breakfast for later?

While the toast and bacon can be frozen and reheated, eggs generally don’t freeze well in their cooked form without altering the texture. However, you can freeze cooked bacon and toast the bread separately, and then reassemble and heat up the eggs on the day you plan to eat it.

5. Can I add vegetables to this recipe?

Definitely! If you want to add more nutrients or simply love the combination of vegetables with your eggs, feel free to include some sautéed spinach, mushrooms, tomatoes, or avocado slices. These additions will not only increase the flavor but also boost the nutritional value of your breakfast.

Conclusion: The Power of a Simple Breakfast

In a world that often feels rushed and chaotic, sometimes the simplest meals can have the biggest impact. This breakfast of bacon, cheese, eggs, and toast has saved me on more mornings than I can count. It’s quick, satisfying, and full of flavor—just what you need to start your day right. Whether you’re looking to fuel up for a busy day ahead or just need a quick pick-me-up, this recipe is a perfect reminder that food doesn’t have to be complicated to be amazing.

The next time you find yourself scrambling for time and need a meal that will keep you going, remember that the perfect breakfast doesn’t need to be a time-consuming endeavor. With just a few ingredients and a little creativity, you can whip up a delicious meal in minutes and still enjoy the simple pleasure of a hearty, comforting breakfast.

Amal

Recipe That Saved My Morning! Breakfast in 5 Minutes

If you’re looking for a quick, delicious, and satisfying breakfast, this recipe is the answer! A combination of crispy bacon, melted cheese, and a perfectly fried egg sandwiched between toasted bread, all prepared in just 5 minutes. This meal is not only quick but also packs a punch in terms of flavor and nutrition, making it the perfect way to start your day!
Prep Time 5 minutes
Cook Time 5 minutes
Total Time 10 minutes
Servings: 4 –6 servings
Course: Breakfast
Cuisine: American

Ingredients
  

  • 6 slices of bread
  • 6 slices of cheese
  • 6 slices of bacon
  • 4 eggs
  • Salt to taste
  • Black pepper to taste
  • Fresh parsley for garnish
  • Green onion for garnish

Method
 

  1. Cook the Bacon: In a pan over medium heat, cook the bacon until crispy. Once cooked, remove from the pan and set aside on paper towels to drain excess fat.
  2. Toast the Bread: In the same pan, toast the bread for 1-2 minutes on each side until golden brown. Alternatively, you can use a toaster for a quicker option.
  3. Fry the Eggs: While the bread is toasting, crack the eggs into the pan and cook to your preferred doneness (sunny-side-up, scrambled, etc.). Season with salt and black pepper.
  4. Assemble the Breakfast: Place a slice of cheese on each piece of toasted bread. Add a slice of bacon on top of the cheese, followed by a fried egg. Season with additional salt and pepper if desired.
  5. Garnish and Serve: Garnish with freshly chopped parsley and green onion. Serve immediately for a quick, satisfying breakfast.

Notes

  • If you’re short on time, pre-cook the bacon in advance and store it in the fridge for up to 3 days.
  • You can use any type of cheese you prefer, such as cheddar, mozzarella, or Swiss, depending on your taste.
  • For a healthier version, consider using turkey bacon or a low-fat cheese option.
  • You can easily make this breakfast gluten-free by using a gluten-free bread substitute.

Custard Cream Filled Rose Rolls: A Journey of Sweet Comfort

There’s something magical about the way certain foods can transport us back to a simpler time, evoke memories of laughter, and fill our hearts with warmth. For me, the smell of freshly baked custard cream-filled rose rolls takes me back to my childhood, sitting at my grandmother’s kitchen table, surrounded by the rich aromas of vanilla, butter, and freshly baked dough. My grandmother’s kitchen was always a place of solace. The rolling pin would gently glide over the dough, the rhythmic sound of it filling the room, and the act of stirring the custard over the stove felt like a loving ritual. She would hum a gentle tune as she poured the creamy custard into freshly baked rolls, crafting them into perfect rose shapes with such ease that it seemed like magic. It was in these moments that I learned that food isn’t just about taste – it’s about the love and intention poured into each step.

As I grew older, the significance of these small moments stayed with me, and I realized how much joy simple recipes could bring to the people around me. The custard cream-filled rose rolls, with their perfect balance of a crispy, golden crust and the delicate, creamy filling, became a symbol of comfort and love. It’s not just the recipe itself but the stories it carries that make it unforgettable. This recipe, just like my grandmother’s kitchen, is a space where memories are made, and the sweet scents of nostalgia fill the air.

The Beauty of the Rose Roll Shape

One of the most distinctive aspects of these custard cream-filled rose rolls is their shape. The elegant spirals of dough mimic the soft petals of a blooming rose, making them a feast for both the eyes and the palate. This visually striking formation isn’t just for show; it enhances the eating experience. The way the custard cream seeps into the layers of dough creates a beautiful contrast between the slightly crisp outer layers and the smooth, rich custard within.

When preparing these rolls, the dough is rolled, folded, and nestled into a spiral, which results in a delicate, almost ethereal texture. The rolls bake to a perfect golden brown, and when you pull them apart, you see the custard cream spill out, making each bite more indulgent than the last. The shape is symbolic of the beauty of simplicity — a reminder that the best things in life are often the most uncomplicated.

Ingredients:

IngredientQuantity
Milk500 ml (2 cups)
Eggs2
Sugar100 g (1/2 cup)
Cornstarch30 g (3 1/2 tbsp)
SaltA pinch
Vanilla extract2 tsp

Directions:

  1. Prepare the Custard: In a medium saucepan, whisk together the milk, eggs, sugar, cornstarch, and salt until smooth. Place the saucepan over medium heat and continue to whisk constantly as the mixture begins to thicken. Once thickened to a creamy consistency, remove from heat and stir in the vanilla extract. Let it cool slightly.
  2. Make the Rose Rolls: Roll out your dough to a flat sheet, then spoon a generous amount of custard in the center of each dough portion. Fold the dough around the custard to form a roll. Place the rolls in a greased baking dish, ensuring they are snugly fit together.
  3. Baking: Preheat your oven to 350°F (175°C). Bake the rolls for 25-30 minutes or until golden brown and puffed. The rolls should be lightly crispy on the outside with a soft, custardy interior.
  4. Cool & Serve: Let the rolls cool slightly before serving. You can drizzle with extra custard or dust with powdered sugar for an extra touch.

Nutritional Information (per serving):

NutrientAmount
Calories220 kcal
Protein5 g
Carbohydrates30 g
Fat9 g
Fiber1 g
Sugars15 g

Why Custard?

Custard is a classic dessert filling that never goes out of style. The combination of eggs, milk, and sugar creates a rich, velvety texture that perfectly complements the fluffy, soft dough of the rolls. It’s a flavor that evokes nostalgia, yet still feels fresh and indulgent. Custard has been a staple in many cultures for centuries, and its versatility knows no bounds. It can be used in everything from tarts and pies to puddings and cakes. However, it’s in these rose rolls that custard truly shines — as the creamy center that takes each bite to a new level of decadence.

The beauty of custard is that it’s not too sweet but has just enough richness to make it feel like a treat. Its smoothness pairs beautifully with the airy, slightly chewy texture of the dough, while the vanilla extract adds a depth of flavor that ties it all together. The result is a delicate dessert that feels luxurious without being overwhelming.

A Timeless Recipe for Every Occasion

Custard cream-filled rose rolls are not only a nostalgic treat; they’re versatile enough to serve on any occasion. Whether you’re preparing a special dessert for a family gathering, celebrating a holiday, or simply treating yourself on a Sunday afternoon, these rolls are sure to impress. Their beauty makes them a perfect centerpiece for a dessert table, and their delightful flavor will leave your guests asking for more.

The rolls can be enjoyed at any time of the day, whether as a sweet breakfast treat with a cup of coffee or as an after-dinner indulgence. The combination of delicate dough and rich custard provides the perfect balance between lightness and indulgence. If you’re looking to add a bit of elegance to a special meal, these rolls are the way to go.

Frequently Asked Questions

1. Can I use store-bought dough for this recipe?

Yes, you can absolutely use store-bought dough if you’re looking for a quicker option. However, making the dough from scratch adds an extra layer of satisfaction and allows you to control the texture and flavor. If you opt for store-bought dough, ensure it’s a dough meant for sweet pastries to maintain the flavor balance of the custard.

2. Can I make the custard ahead of time?

Yes, the custard can be made ahead of time. In fact, making the custard the day before you bake the rolls allows the flavors to meld together and creates a richer, deeper taste. Once made, store the custard in an airtight container in the refrigerator for up to two days. When you’re ready to use it, let it come to room temperature before adding it to the dough.

3. Can I freeze the custard cream-filled rose rolls?

Yes, you can freeze the rolls either before or after baking. To freeze them before baking, prepare the rolls as instructed, place them on a baking sheet, and freeze them for about an hour. Once frozen, transfer them to an airtight container or freezer bag and store for up to three months. When you’re ready to bake, simply place them on a baking sheet, thaw them for 30 minutes, and bake as instructed.

If you choose to freeze them after baking, ensure they are completely cooled before wrapping them tightly in plastic wrap or storing them in an airtight container. Reheat them in a 350°F (175°C) oven for about 10-15 minutes to restore their crispness.

4. Can I add fruit or other flavors to the custard?

Absolutely! While custard on its own is already delicious, you can get creative with your flavorings. Adding a hint of lemon zest or a splash of almond extract can elevate the flavor. For a fruity twist, consider adding a dollop of raspberry or strawberry jam to the center of the custard before rolling up the dough. Fresh fruit like berries also pairs wonderfully with custard.

5. What if my rolls don’t rise properly?

There are several reasons your rolls might not rise as expected. The most common reasons are either the yeast is old or the dough wasn’t allowed to rise in a warm enough environment. Ensure you’re using fresh yeast, and try letting the dough rise in a warm spot, such as near the oven or in a turned-off oven with the light on. The dough should double in size before baking.

6. Can I make these rolls gluten-free?

Yes, you can make a gluten-free version of these rolls by using a gluten-free all-purpose flour blend in place of the regular flour. Be sure to also use gluten-free cornstarch in the custard. While the texture may differ slightly from the original, it should still be delicious!

The Perfect Finish: Why These Rolls Are So Special

The beauty of these custard cream-filled rose rolls lies in their simplicity. Despite being relatively easy to make, they give off an air of sophistication that makes them feel like a special treat. The combination of delicate dough, smooth custard, and the sweet aroma that fills the kitchen while they bake creates an experience that is about more than just the food itself. It’s a celebration of comfort, nostalgia, and the joy that simple pleasures bring.

Food has a unique way of connecting us to our past, and these rolls, much like my grandmother’s kitchen, are an invitation to slow down, enjoy the process, and savor each bite. They remind us that no matter how fast-paced our lives get, there is always room for a moment of sweetness.

Conclusion: A Recipe for Making Memories

There are a few recipes that stay with us, passed down through generations, serving as a touchstone to memories that span years or even decades. Custard cream-filled rose rolls are more than just a dessert; they’re a reflection of love, tradition, and the joy that comes from creating something beautiful with your own hands. Whether you’re baking these rolls for a special occasion or simply because you want to indulge in something that feels like a warm hug, they carry with them a sense of timelessness.

As you take the time to craft these rolls and experience their delicious flavors, I hope you’ll find that they’re more than just a treat — they’re a way to connect with those who came before you and to create new memories with those you love. Because, at the end of the day, the best recipes are the ones that leave a lasting impression on both your taste buds and your heart.

Amal

Custard Cream Filled Rose Rolls: A Journey of Sweet Comfort

Indulge in the delicate, sweet comfort of these custard cream-filled rose rolls. With a golden, flaky exterior and a rich, creamy custard center, they offer the perfect balance of lightness and decadence. Shaped into beautiful rose spirals, these rolls are not just a treat for the taste buds but a feast for the eyes as well.
Prep Time 30 minutes
Cook Time 30 minutes
Total Time 1 hour
Servings: 12 -14 rolls
Course: Dessert
Cuisine: European-inspired

Ingredients
  

  • 500 ml 2 cups milk
  • 2 eggs
  • 100 g 1/2 cup sugar
  • 30 g 3 1/2 tbsp cornstarch
  • A pinch of salt
  • 2 tsp vanilla extract

Method
 

  1. Make the Custard: In a medium saucepan, whisk together the milk, eggs, sugar, cornstarch, and salt until smooth. Place the saucepan over medium heat and cook, whisking constantly, until the custard thickens. Once it reaches a creamy consistency, remove from heat and stir in the vanilla extract. Let it cool slightly.
  2. Prepare the Dough: Roll out your dough on a lightly floured surface to about 1/4 inch thickness. Cut into even strips or squares.
  3. Assemble the Rolls: Place a spoonful of the cooled custard mixture in the center of each piece of dough. Roll up the dough to encase the custard, creating a rose shape. Place the rolls in a greased baking dish.
  4. Bake the Rolls: Preheat your oven to 350°F (175°C). Bake the rolls for 25-30 minutes or until golden brown and puffed.
  5. Cool and Serve: Allow the rolls to cool slightly before serving. Optionally, dust with powdered sugar or drizzle with extra custard for an added touch of sweetness.

Notes

  • If you’re short on time, you can use store-bought dough, though making the dough from scratch gives the rolls a more authentic texture and flavor.
  • For a more intense vanilla flavor, feel free to increase the amount of vanilla extract slightly.
  • These rolls are best served warm but can be stored in an airtight container for up to two days.
  • You can also freeze the rolls after baking and reheat them in the oven when needed for a quick treat.

The Heart of the Kitchen: Memories of Turkish Bread

I have fond memories of childhood mornings spent in my grandmother’s kitchen, where the smell of freshly baked bread would fill the house. My grandmother, a woman of grace and patience, was a master in the art of bread-making. I remember her hands, worn from years of baking, moving effortlessly across the dough as she worked with practiced ease. But there was one thing she always told me: “The simplest recipes often bring the greatest joy.” This No-Oven Turkish Bread is a perfect example of that sentiment.

There’s something magical about baking bread, especially without an oven. The process feels intimate, like you’re connecting with generations of bakers who made do with what they had. I remember watching my grandmother make her bread, kneading it with love, then cooking it on a simple stovetop. It was soft, golden brown, and perfect with a dollop of honey or a smear of butter. This recipe was a cherished memory passed down over the years, and today, it still takes me back to those mornings in her kitchen.

While many associate bread baking with the complicated process of using an oven, this No-Oven Turkish Bread keeps the spirit of simplicity and tradition alive. It’s a comforting recipe that anyone can make, even if they don’t have an oven or much baking experience. The best part? It requires minimal ingredients, and you can prepare it in a fraction of the time it takes for a traditional oven-baked loaf.

Why Choose No-Oven Turkish Bread?

The appeal of this No-Oven Turkish Bread lies in its ease of preparation and the incredible softness it offers. Unlike some bread recipes that can feel dense or heavy, this one produces a fluffy, tender loaf that’s perfect for any occasion. And unlike traditional breads that take hours of kneading, rising, and baking, this bread is ready in about an hour, making it an ideal choice for busy individuals or those just getting started in the kitchen.

A Versatile Recipe for All Occasions

No-Oven Turkish Bread is incredibly versatile. You can enjoy it fresh from the pan for breakfast, serve it as a side with soup or stew, or use it for sandwiches. It’s soft enough to pull apart, making it great for dipping into olive oil or hummus. You can also add a variety of toppings or fillings, such as herbs, garlic, or cheese, to make it your own.

Here are a few ideas for how to enjoy it:

  • Breakfast: Serve with a smear of butter or jam for a comforting start to your day.
  • With Dips: Pair with hummus, baba ganoush, or a simple olive oil dip for a healthy snack.
  • As a Side: This bread complements soups and stews beautifully, offering a perfect balance to rich, hearty dishes.
  • For Sandwiches: It’s the perfect texture for making wraps or sandwiches, especially when paired with your favorite fillings.

Why It Works Without an Oven

Traditional Turkish bread, or “pide,” is usually baked in a brick oven, giving it that characteristic soft, fluffy texture with a slightly crispy exterior. However, this no-oven method achieves the same result without the need for a large oven. The stovetop method allows the dough to steam and cook from both sides, resulting in a light, pillowy texture that’s just as satisfying as the baked version.

Using a skillet or a non-stick pan mimics the effect of an oven, providing enough heat to cook the bread evenly without drying it out. The addition of a little oil or butter for brushing at the end gives the bread a rich flavor and a slight crispness on the outside, making it irresistible.

Ingredients

IngredientAmount
All-Purpose Flour3 ½ cups (450g)
Warm Water1 cup (250ml)
Dry Yeast2 tsp (7g)
Salt1 tsp
Vegetable Oil or Olive Oil2 tbsp
Greek Yogurt (optional for softness)2 tbsp
Butter or Olive Oil (for brushing)2 tbsp

Directions

  1. Prepare the Dough: In a large bowl, combine the warm water, dry yeast, and a pinch of sugar. Let it sit for 5–10 minutes until it becomes frothy.
  2. Mix in the Ingredients: Add the flour, salt, vegetable oil, and Greek yogurt (if using) to the yeast mixture. Mix together until the dough begins to form.
  3. Knead the Dough: Transfer the dough onto a floured surface and knead for about 5–7 minutes until it’s smooth and elastic. Add a little more flour if needed.
  4. Let the Dough Rise: Place the dough back into the bowl and cover it with a damp cloth. Let it rise in a warm place for 1–1.5 hours, or until it has doubled in size.
  5. Shape the Dough: Punch down the risen dough and divide it into equal portions. Roll each portion into a ball and flatten them into round discs about 1/2-inch thick.
  6. Cook the Bread: Heat a skillet or non-stick pan over medium heat. Brush it lightly with butter or olive oil. Place the dough discs into the pan and cook for 2–3 minutes on each side, until golden brown and cooked through.
  7. Brush and Serve: Once cooked, remove the bread from the pan and brush it with more melted butter or olive oil for a soft, flavorful finish.

Nutritional Information (Per Serving)

NutrientAmount
Calories150 kcal
Protein4 g
Fat5 g
Carbohydrates22 g
Fiber1 g
Sugar1 g

Tips for Perfecting Your No-Oven Turkish Bread

While this recipe is simple, there are a few tips that can help you make the perfect loaf every time:

1. Use Warm Water for Yeast Activation

For the yeast to bloom properly, make sure you use warm water (about 110°F or 45°C). If the water is too hot, it will kill the yeast, and if it’s too cold, the yeast won’t activate properly. When mixed with sugar, the yeast will start to bubble and froth, signaling that it’s ready to work its magic.

2. Let the Dough Rise in a Warm Place

While you don’t need to wait for hours like you would with traditional bread, allowing the dough to rise for 1 to 1.5 hours is crucial for achieving that soft, airy texture. Place the dough in a warm area, away from drafts, to encourage the yeast to do its work.

3. Don’t Over-Knead the Dough

Kneading helps develop the gluten in the dough, but over-kneading can make the bread dense and tough. Aim to knead the dough for about 5–7 minutes, or until it becomes smooth and elastic.

4. Cook on Medium Heat

When cooking the bread on the stovetop, be sure to keep the heat at medium. Too high of a heat can burn the bread before it cooks through, while too low of heat can result in a soggy, undercooked loaf. Medium heat provides the perfect balance for golden-brown perfection.

5. Experiment with Flavors

While the classic Turkish bread is delicious on its own, feel free to get creative. Add a handful of chopped herbs (like rosemary or thyme) into the dough for extra flavor. You can also experiment with adding a bit of garlic or onion powder for a savory twist.

Frequently Asked Questions (FAQs)

Can I use a different type of flour?

Yes! While all-purpose flour is the most common for this recipe, you can experiment with whole wheat flour or a gluten-free flour blend. Keep in mind that using a different type of flour may alter the texture slightly, so adjust the water accordingly if needed.

Can I skip the Greek yogurt?

Greek yogurt is optional in this recipe and is typically added for extra softness. If you prefer a dairy-free version or just don’t have yogurt on hand, you can omit it, and the bread will still turn out beautifully.

What should I serve with No-Oven Turkish Bread?

This bread pairs wonderfully with hummus, baba ganoush, or any variety of dips. It’s also great as a side for soups, stews, or grilled meats, or you can use it as the base for a delicious sandwich.

How long can I store this bread?

This bread is best enjoyed fresh, but you can store leftovers in an airtight container for up to 2 days at room temperature. For longer storage, wrap it in plastic wrap and freeze it. When ready to use, simply reheat it in a skillet or microwave for a few seconds.

Can I make this bread without yeast?

While yeast helps the dough rise and gives it a soft, airy texture, you can try making this bread with baking powder instead. Keep in mind that the texture will be different, but it will still result in a delicious, pillowy flatbread.

Conclusion: A Bread for All Occasions

Making this No-Oven Turkish Bread is not only a simple and satisfying experience, but it also connects us to an age-old tradition of bread-making. With its soft, airy texture and the rich flavor from olive oil or butter, it’s a recipe that’s sure to become a staple in your kitchen. Whether you’re a beginner baker or a seasoned pro, this bread is a reminder that sometimes, the simplest things are the most delicious. So, roll up your sleeves, heat up your pan, and enjoy the taste of homemade bread — no oven required.

Amal

The Heart of the Kitchen: Memories of Turkish Bread

This No-Oven Turkish Bread is quick, easy, and incredibly soft! Made with a few simple ingredients and cooked right on the stovetop, it’s the perfect bread for any occasion—no oven required.
Prep Time 10 minutes
Cook Time 20 minutes
Total Time 1 hour 30 minutes
Servings: 8 -10 servings
Course: Snack
Cuisine: Turkish-Inspired

Ingredients
  

  • 3 ½ cups 450g all-purpose flour
  • 1 cup 250ml warm water
  • 2 tsp 7g dry yeast
  • 1 tsp salt
  • 2 tbsp vegetable oil or olive oil
  • 2 tbsp Greek yogurt optional, for extra softness
  • 2 tbsp butter or olive oil for brushing

Method
 

  1. Prepare the Dough: In a bowl, combine the warm water, dry yeast, and a pinch of sugar. Let it sit for 5–10 minutes until it becomes frothy.
  2. Add Flour and Mix: Add the flour, salt, and vegetable oil (and yogurt, if using) to the yeast mixture. Stir until a dough begins to form.
  3. Knead: Transfer the dough to a floured surface and knead for 5–7 minutes until smooth and elastic.
  4. Let It Rise: Place the dough in a lightly oiled bowl, cover it with a damp cloth, and let it rise for 1–1.5 hours or until doubled in size.
  5. Shape the Dough: Punch the dough down and divide it into small balls. Flatten each ball into a disc, about 1/2 inch thick.
  6. Cook the Bread: Heat a non-stick skillet over medium heat. Brush with butter or olive oil. Place the dough discs into the skillet and cook each side for 2–3 minutes, until golden and cooked through.
  7. Serve: Brush the bread with extra butter or olive oil for a soft, flavorful finish.

Notes

  • Topping Ideas: Try adding herbs like rosemary or thyme to the dough for extra flavor. You can also top it with sesame seeds before cooking.
  • Storage: Keep leftovers in an airtight container for up to 3 days at room temperature. You can also freeze the bread for up to a month.
  • Tip for Softness: Greek yogurt in the dough adds a deliciously soft texture, but it’s optional.

A Slice of Comfort: The Journey to Simplicity in the Kitchen

It’s funny how some recipes hold more meaning than others. For me, this Super Simple Yogurt Cake brings back memories of early mornings spent baking with my grandmother in her cozy kitchen. I remember her standing at the counter, effortlessly combining ingredients as if she knew magic. She wasn’t one for complicated desserts — she believed in the power of simplicity, of allowing each ingredient to shine.

I was only a child then, but I remember how the aroma of that soft, sweet cake would fill the house. The texture was light as air, the flavor just tangy enough to leave a lingering comfort. The best part? It only took minutes to prepare. I used to wonder how something so delicious could come from such a simple combination of eggs, yogurt, and flour.

Now, whenever I make this yogurt cake, I’m transported back to those mornings. It reminds me that we don’t always need complexity to create something special. This cake is a testament to the power of simplicity — a small indulgence that turns an ordinary day into something extraordinary.

Why This Yogurt Cake Will Steal Your Heart

There’s something about the combination of yogurt and eggs that makes this cake so unique. It’s light, fluffy, and subtly tangy, with the perfect balance of sweetness. But beyond the flavors, this cake represents a philosophy I believe in deeply: simplicity is often the most beautiful solution.

A Versatile Cake for Any Occasion

One of the best things about this cake is its versatility. It’s the kind of recipe you can turn to when you need something quick and satisfying, but it’s also elegant enough to serve at a special gathering. Whether you’re hosting a brunch, celebrating a birthday, or just treating yourself to a moment of indulgence, this yogurt cake delivers.

Here are just a few ways you can enjoy it:

  • Breakfast Delight: Slice it up with a cup of coffee or tea. Its mild sweetness is the perfect way to start the day without overwhelming your senses.
  • Dessert Option: Serve it after a light dinner for an easy but impressive dessert. A sprinkle of powdered sugar or a dollop of whipped cream elevates it beautifully.
  • For the Family: Bake it over the weekend and watch your kids (and partner) enjoy it as a cozy afternoon snack.

It’s also a great base for flavor variations. You can easily add vanilla extract, citrus zest, or even a bit of cocoa powder for a chocolate version. Top it with fresh berries, a drizzle of honey, or even a smear of fruit preserves for extra flair.

Ingredients

IngredientAmount
Plain or Greek Yogurt2 cups (500 g)
Eggs (separated into whites and yolks)4 large
Flour (All-Purpose or Self-Rising)1/2 cup (65 g)

Directions

  1. Preheat the Oven:
    Set your oven to 170°C (340°F) and line a small round or loaf baking pan with parchment paper.
  2. Mix the Yolks and Yogurt:
    In a large bowl, whisk together the egg yolks and yogurt until smooth. Sift in the flour and stir until just combined.
  3. Whip the Egg Whites:
    In a separate clean bowl, beat the egg whites until stiff peaks form. This gives the cake its fluffy texture.
  4. Fold Gently:
    Carefully fold the whipped egg whites into the yogurt mixture in three parts, using a spatula. Don’t overmix — a light hand keeps the cake airy.
  5. Bake to Perfection:
    Pour the batter into your prepared pan and bake for 35–40 minutes, or until golden and a toothpick inserted in the center comes out clean.
  6. Cool & Serve:
    Let the cake cool in the pan for 10 minutes before transferring to a wire rack. Enjoy warm or chilled with a dusting of powdered sugar or fresh fruit.

Nutritional Breakdown (Per Serving, based on 8 servings)

NutrientAmount
Calories120–140 kcal
Protein6–8 g
Fat5–6 g
Carbohydrates10–12 g
Fiber0–1 g
Sugar (natural from yogurt)3–5 g

The Secrets Behind the Simple Ingredients

While this yogurt cake seems like an ordinary recipe at first glance, it’s the simplicity of the ingredients that makes it extraordinary. Each one plays a crucial role in creating the texture, flavor, and richness.

Greek Yogurt: The Unsung Hero

Yogurt is the backbone of this recipe. Greek yogurt, in particular, is thick and creamy, lending moisture and richness to the cake. Its tangy flavor adds a slight depth, keeping the cake from being overly sweet. If you use regular yogurt, you’ll still get a delicious result, but Greek yogurt brings that extra level of creaminess that makes this cake so indulgent.

Eggs: The Binding Force

Eggs do more than just bind the ingredients together; they provide structure and lift. The egg whites, when whipped to stiff peaks, help the cake rise and stay fluffy. Meanwhile, the egg yolks contribute to the cake’s golden color and rich, soft crumb. The balance of eggs is what gives this cake its texture — tender and delicate but not too airy.

Flour: The Foundation

All-purpose flour serves as the base that holds everything together. It provides structure without being too heavy. Since we’re using just half a cup, the flour doesn’t overwhelm the other ingredients. It’s the glue that binds everything, allowing the yogurt and eggs to truly shine.

The Art of Making This Cake Perfect Every Time

While this yogurt cake is undeniably simple, there are still a few tips and tricks to ensure it turns out perfect every time.

Tip 1: Don’t Overmix the Batter

The beauty of this cake lies in its delicate texture. To achieve this, it’s important not to overmix the batter. Once you combine the wet and dry ingredients, stir gently until they’re just combined. Overmixing will cause the cake to become dense and heavy, so a light hand is essential.

Tip 2: Be Patient with the Eggs

Whipping the egg whites to stiff peaks is a crucial step. This is what makes the cake rise and gives it that light, fluffy texture. If you don’t have an electric mixer, use a whisk — just be prepared for a workout! If your egg whites don’t hold their shape, the cake will be flat rather than airy.

Tip 3: Baking Time is Key

As with most cakes, the exact baking time may vary depending on your oven and the size of your pan. To check for doneness, insert a toothpick into the center of the cake. If it comes out clean or with just a few crumbs, the cake is ready. If it comes out wet, give it a few more minutes.

FAQs: Answering Your Yogurt Cake Questions

Can I use a different type of yogurt?

Yes, you can substitute Greek yogurt with regular yogurt. However, keep in mind that Greek yogurt has a thicker consistency, which contributes to the cake’s texture. If you use regular yogurt, you may need to adjust the baking time slightly.

Can I add flavorings to this cake?

Absolutely! This yogurt cake is incredibly versatile. You can add vanilla extract, lemon zest, or even a bit of cinnamon to the batter. For a chocolate version, you could mix in cocoa powder. Fresh fruit, like berries, also makes a great addition — either mixed into the batter or as a topping.

Is this cake suitable for special diets?

This cake can be adapted for different dietary needs:

  • For a gluten-free version, use a gluten-free all-purpose flour blend.
  • For a dairy-free option, use a dairy-free yogurt and a plant-based egg replacer.

How can I store this cake?

Store your yogurt cake in an airtight container at room temperature for up to 3 days. It also freezes well for up to a month. Simply wrap it in plastic wrap and aluminum foil, then place it in a freezer-safe bag. Thaw it at room temperature before serving.

Can I make this cake ahead of time?

Yes, this cake actually improves with a little resting time. The flavors develop, and the texture becomes even more tender. You can easily bake it the day before and store it covered.

Conclusion: Embrace the Simple Joy of Baking

This Super Simple Yogurt Cake is more than just a recipe; it’s a lesson in the power of simplicity. Sometimes, the best things in life don’t require complex techniques or hard-to-find ingredients. With just a few pantry staples, you can create a dessert that feels special and comforting — something that will be loved by everyone at the table.

When I make this cake, I’m reminded of the joy of cooking for those I love, and how sometimes, the simplest things can make the biggest impact. So, go ahead — give it a try. Whether you’re baking for yourself, for your family, or for someone special, this cake will undoubtedly bring a smile to your face. Happy baking!

Amal

A Slice of Comfort: The Journey to Simplicity in the Kitchen

This Super Simple Yogurt Cake is a light and fluffy dessert that’s quick to prepare yet indulgent enough to satisfy your sweet cravings. With just a handful of ingredients, it’s a perfect treat for any time of day.
Prep Time 10 minutes
Cook Time 40 minutes
Total Time 50 minutes
Servings: 8 -10 servings
Course: Dessert
Cuisine: International

Ingredients
  

  • 2 cups 500 g plain or Greek yogurt
  • 4 large eggs separated
  • 1/2 cup 65 g all-purpose or self-rising flour

Method
 

  1. Preheat the Oven: Preheat your oven to 170°C (340°F). Grease a small round or loaf pan, or line it with parchment paper.
  2. Mix Yogurt and Egg Yolks: In a large bowl, whisk together the egg yolks and yogurt until smooth. Add in the flour and stir until combined.
  3. Whip the Egg Whites: In a separate bowl, beat the egg whites until stiff peaks form.
  4. Combine Mixtures: Gently fold the whipped egg whites into the yogurt mixture. Be careful not to overmix — just fold until combined.
  5. Bake: Pour the batter into the prepared pan and smooth the top. Bake for 35–40 minutes, or until the cake is golden brown and a toothpick inserted into the center comes out clean.
  6. Cool and Serve: Let the cake cool for 10 minutes in the pan before transferring it to a wire rack. Slice and serve warm or at room temperature.

Notes

  • Flavor Variations: You can add vanilla extract, lemon zest, or even a bit of cocoa powder to change up the flavor profile.
  • Topping Ideas: Serve the cake with powdered sugar, whipped cream, or fresh berries to elevate its flavor and presentation.
  • Storage: Store leftovers in an airtight container for up to 3 days at room temperature or refrigerate for longer freshness.

Stay Connected

Get recipes via email: