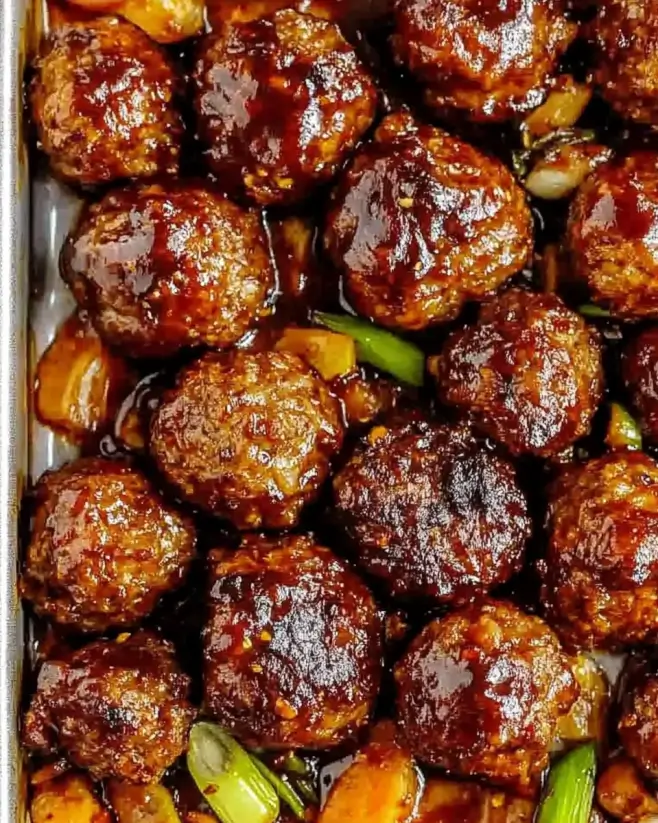
Introduction to Korean BBQ Meatballs
There’s something magical about the aroma of Korean BBQ wafting through the kitchen. It takes me back to family gatherings where laughter mingled with the sizzle of meat on the grill. Now, I can bring that same joy home with these Korean BBQ Meatballs. This recipe is a quick solution for busy weeknights or a delightful dish to impress your loved ones. With just a handful of ingredients and minimal prep time, you’ll have a flavorful meal that’s sure to please. Let’s dive into this easy and delicious recipe that will elevate your dinner game!
Why You’ll Love This Korean BBQ Meatballs
These Korean BBQ Meatballs are a game-changer for any home cook. They come together in just 30 minutes, making them perfect for those hectic evenings. The combination of savory flavors and a hint of sweetness creates a taste explosion that will have everyone asking for seconds. Plus, they’re versatile enough to serve as an appetizer or a main dish, ensuring they fit seamlessly into any meal plan. You’ll love how easy they are to whip up!
Ingredients for Korean BBQ Meatballs
Gathering the right ingredients is the first step to creating these mouthwatering Korean BBQ Meatballs. Here’s what you’ll need:
- Ground beef: The star of the show! Choose a good quality ground beef for a juicy texture.
- Breadcrumbs: These help bind the meatballs together while adding a nice texture.
- Green onions: Finely chopped, they add a fresh, mild onion flavor that brightens the dish.
- Soy sauce: This brings a savory umami kick, essential for that authentic Korean flavor.
- Brown sugar: A touch of sweetness balances the saltiness of the soy sauce, creating depth.
- Sesame oil: Just a tablespoon adds a nutty aroma that’s characteristic of Korean cuisine.
- Minced garlic: Fresh garlic infuses the meatballs with a robust flavor that’s hard to resist.
- Grated ginger: This adds a warm, spicy note that complements the other flavors beautifully.
- Black pepper: A simple seasoning that enhances the overall taste without overpowering it.
- Red pepper flakes (optional): For those who like a little heat, these can spice things up!
- Sesame seeds (for garnish): These add a lovely crunch and a touch of elegance when serving.
For those looking to mix things up, consider substituting ground turkey or chicken for a lighter option. You can also sneak in finely chopped veggies like bell peppers or carrots for added nutrition and flavor. Exact measurements for these ingredients can be found at the bottom of the article, ready for printing!
How to Make Korean BBQ Meatballs
Creating these Korean BBQ Meatballs is a straightforward process that anyone can master. Follow these simple steps, and you’ll have a delicious dish ready in no time!
Step 1: Preheat the Oven
Start by preheating your oven to 400°F. This step is crucial for even cooking. A hot oven ensures that the meatballs brown nicely on the outside while remaining juicy on the inside. Trust me, you want that perfect texture!
Step 2: Mix the Ingredients
In a large mixing bowl, combine all your ingredients. Gently mix the ground beef, breadcrumbs, green onions, soy sauce, brown sugar, sesame oil, garlic, ginger, black pepper, and red pepper flakes. Be careful not to overmix; just combine until everything is evenly distributed. Overmixing can lead to tough meatballs, and nobody wants that!
Step 3: Shape the Meatballs
Now it’s time to shape your meatballs. Grab a small amount of the mixture and roll it into a ball about 1 inch in diameter. This size is perfect for even cooking and easy eating. Use wet hands to prevent sticking, and place them on a baking sheet lined with parchment paper. This makes cleanup a breeze!
Step 4: Bake the Meatballs
Pop the baking sheet into your preheated oven and bake for 15-20 minutes. Keep an eye on them! You’ll know they’re done when they’re browned on the outside and cooked through. A meat thermometer should read 160°F in the center. This ensures they’re safe to eat and perfectly juicy.
Step 5: Prepare the Dipping Sauce
While the meatballs are baking, whip up a quick dipping sauce. Mix some additional soy sauce with a splash of sesame oil and a sprinkle of sesame seeds. For a twist, add a dash of chili sauce or honey for sweetness. This sauce elevates the flavor and adds a delightful touch!
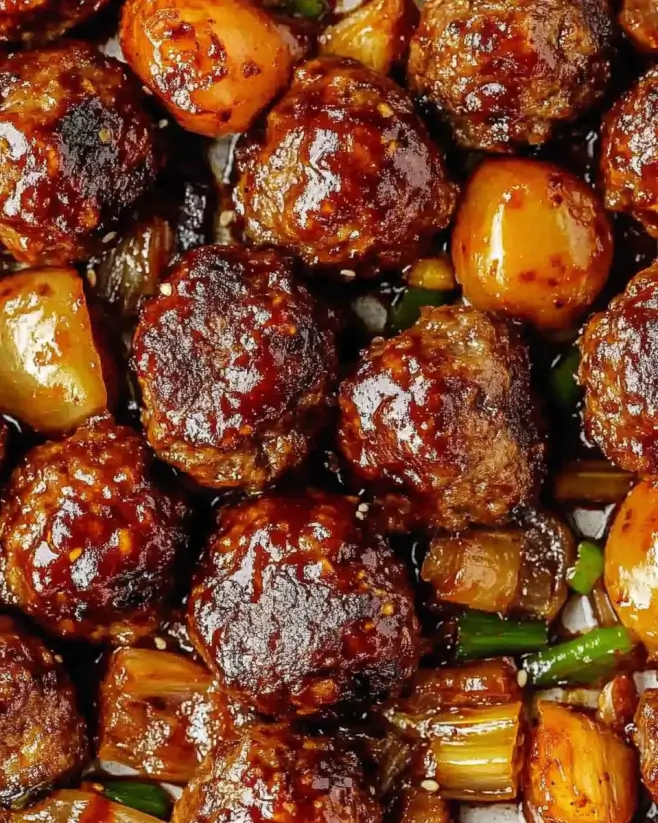
Step 6: Serve and Garnish
Once your meatballs are cooked, let them cool for a few minutes. Serve them warm, garnished with sesame seeds and extra green onions for a pop of color. Presentation matters! Arrange them on a platter, and watch your guests’ eyes light up. Enjoy the compliments!
Tips for Success
- Use a cookie scoop for uniform meatballs; they’ll cook evenly.
- Chill the meat mixture for 15 minutes before shaping to make it easier to handle.
- Experiment with different ground meats for unique flavors.
- Don’t skip the resting time after baking; it helps the meatballs firm up.
- Double the recipe and freeze extras for quick meals later!
Equipment Needed
- Baking sheet: A standard sheet works, but a rimmed one prevents spills.
- Parchment paper: Use it for easy cleanup; aluminum foil is a good alternative.
- Mixing bowl: Any large bowl will do; a stand mixer can save time.
- Cookie scoop: For uniform meatballs; a tablespoon works in a pinch.
Variations
- Spicy Korean BBQ Meatballs: Add more red pepper flakes or a splash of gochujang for an extra kick.
- Vegetarian Option: Substitute ground beef with a mix of lentils and mushrooms for a hearty, plant-based version.
- Asian Fusion: Incorporate chopped water chestnuts and cilantro for a fresh twist.
- Gluten-Free: Use gluten-free breadcrumbs and tamari instead of soy sauce to keep it celiac-friendly.
- Sweet and Sour: Mix in pineapple chunks or serve with a sweet and sour sauce for a tropical flair.
Serving Suggestions
- Steamed rice: Serve the meatballs over fluffy white or brown rice to soak up the delicious sauce.
- Pickled vegetables: Add a side of tangy pickled cucumbers or radishes for a refreshing contrast.
- Cold beer: Pair with a light lager or a crisp IPA to complement the flavors.
- Garnish: Top with extra green onions and sesame seeds for an appealing presentation.
FAQs about Korean BBQ Meatballs
Can I use ground turkey instead of beef for Korean BBQ Meatballs?
Absolutely! Ground turkey is a great alternative for a lighter option. Just keep in mind that it may require a bit more seasoning to achieve that rich flavor.
How do I know when the meatballs are fully cooked?
The best way to check is by using a meat thermometer. The internal temperature should reach 160°F. If you don’t have one, cut a meatball in half; it should be no longer pink inside.
Can I make Korean BBQ Meatballs ahead of time?
Yes! You can prepare the meatballs and refrigerate them before baking. They can also be frozen for later use. Just thaw and bake when you’re ready to enjoy!
What can I serve with Korean BBQ Meatballs?
These meatballs pair wonderfully with steamed rice, pickled vegetables, or even in a lettuce wrap for a fun twist. They’re versatile enough to fit any meal!
Are Korean BBQ Meatballs gluten-free?
To make them gluten-free, simply use gluten-free breadcrumbs and tamari instead of soy sauce. This way, everyone can enjoy this delicious dish!
Final Thoughts
Cooking these Korean BBQ Meatballs is more than just preparing a meal; it’s about creating memories. The delightful blend of flavors and the aroma that fills your kitchen will transport you to a bustling Korean BBQ restaurant. Whether you’re serving them at a family dinner or enjoying them as a late-night snack, these meatballs bring joy to every occasion. Plus, the ease of preparation means you can focus on what truly matters—sharing good food and laughter with loved ones. So roll up your sleeves, get cooking, and savor the deliciousness that awaits!
Korean BBQ Meatballs: A Delicious and Easy Recipe!
Ingredients
Method
- Preheat your oven to 400°F.
- In a large mixing bowl, combine the ground beef, breadcrumbs, green onions, soy sauce, brown sugar, sesame oil, garlic, ginger, black pepper, and red pepper flakes (if using). Mix until just combined; do not overmix.
- Shape the mixture into meatballs, about 1 inch in diameter, and place them on a baking sheet lined with parchment paper.
- Bake for 15-20 minutes or until the meatballs are cooked through and browned on the outside.
- While the meatballs are baking, prepare a dipping sauce by mixing additional soy sauce with a splash of sesame oil and a sprinkle of sesame seeds.
- Once cooked, remove the meatballs from the oven and let them cool for a few minutes. Serve warm, garnished with sesame seeds and additional green onions if desired.
Notes
- For a healthier option, substitute ground turkey or chicken for the beef.
- You can also add finely chopped vegetables like bell peppers or carrots to the meat mixture for added nutrition and flavor.