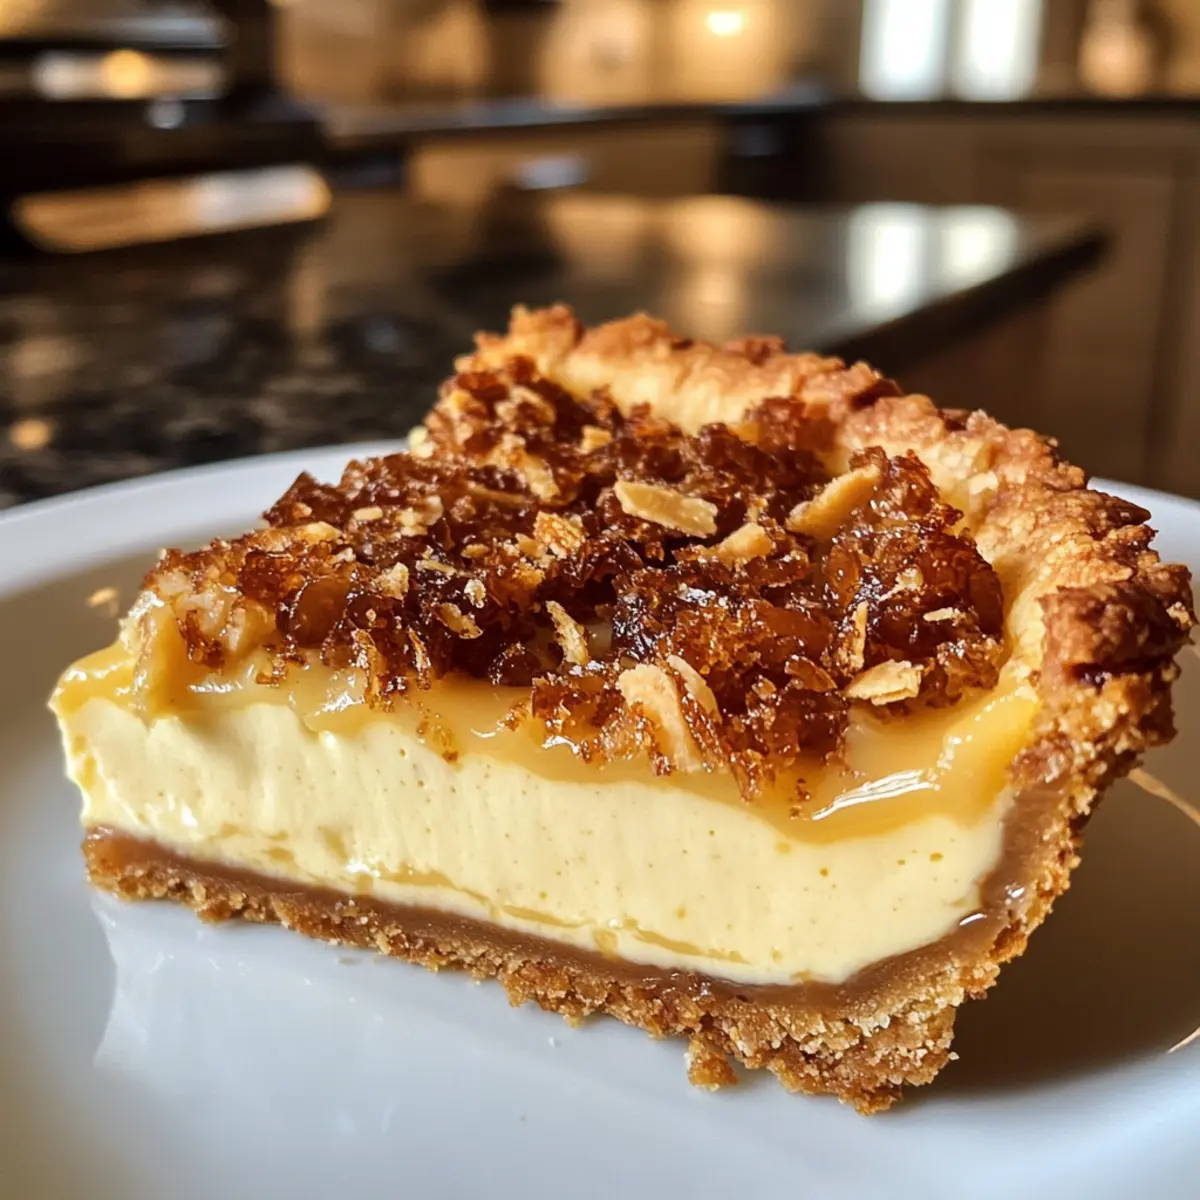
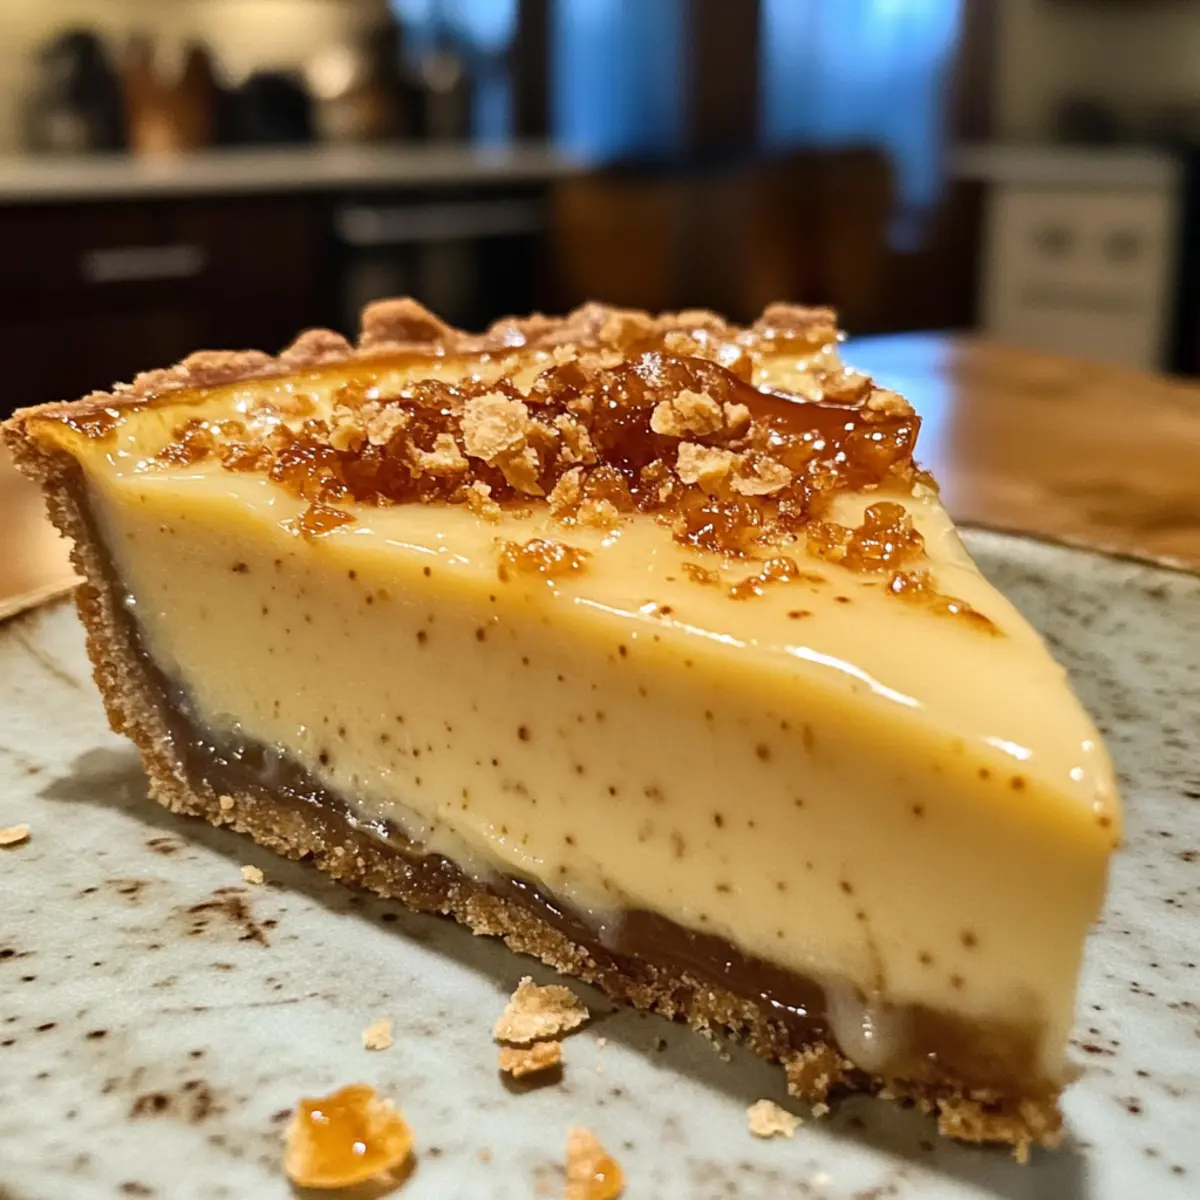
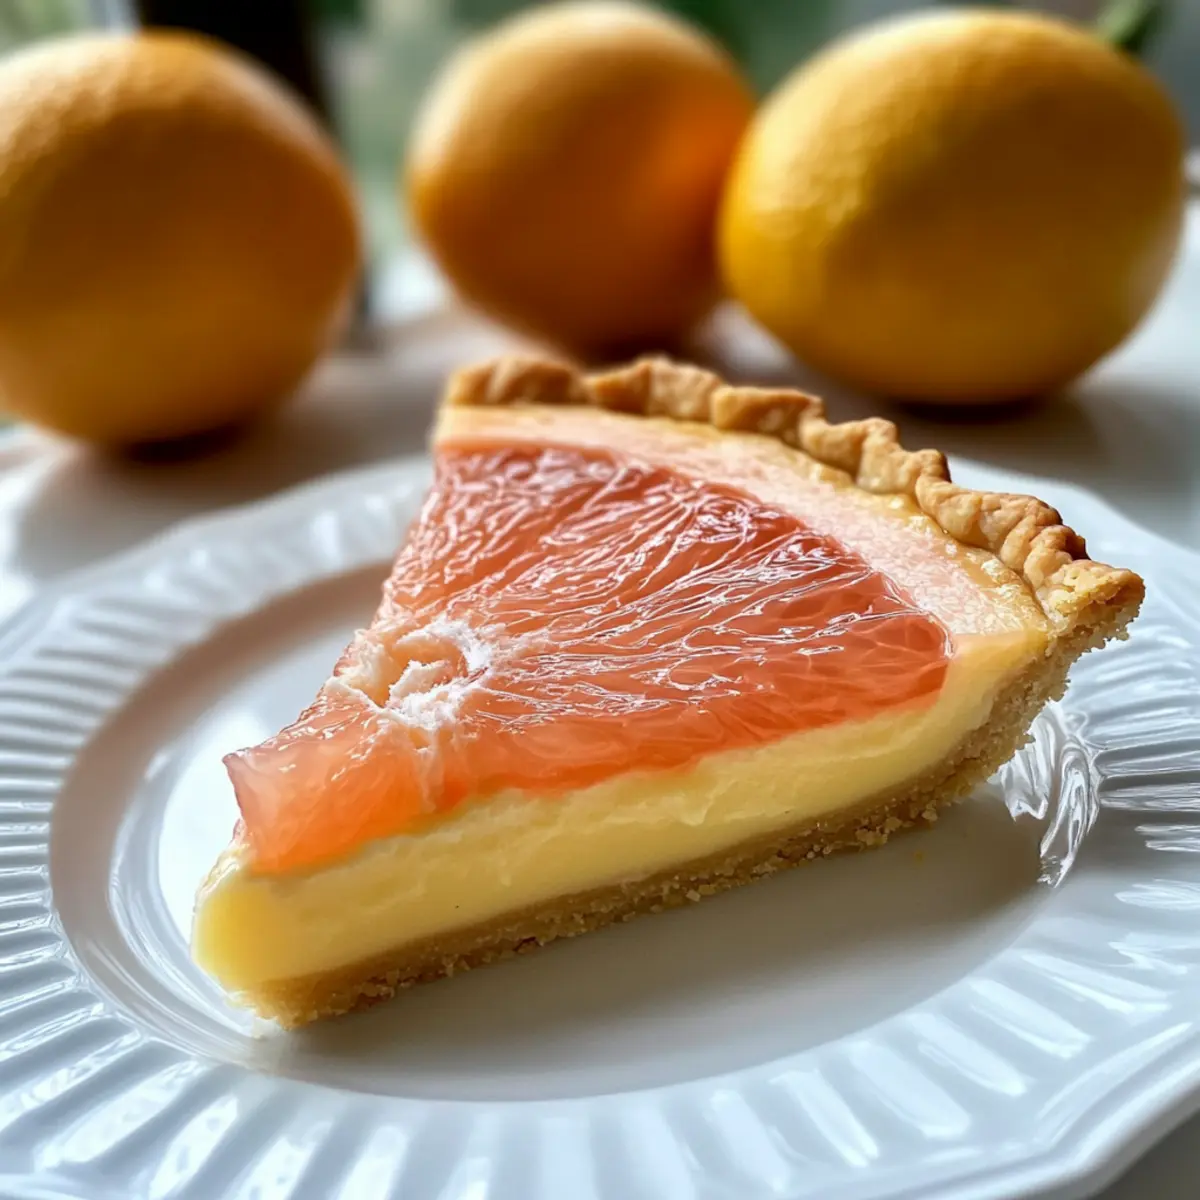
While preparing for a weekend gathering, I overheard my friends raving about the zingy goodness of citrus desserts—it sparked an idea! Enter the Zesty Grapefruit Curd Tart, a showstopper that marries sweet and tart flavors in a buttery, flaky crust. Its vibrant grapefruit filling not only evokes the essence of summer but also offers a refreshing twist that’s perfect for any occasion. What I love most about this recipe is that it’s incredibly easy to make, and it always impresses guests with its stunning presentation. Whether you’re hosting a brunch or simply treating yourself, this tart is sure to brighten your day. Ready to dive into a slice of zesty happiness? Let’s get started on this delightful journey!

Why Is This Tart So Irresistible?
Bright, Citrus Flavor: The zesty grapefruit curd offers a delightful balance of sweetness and tang that perfectly complements warm days.
Visually Stunning: This tart isn’t just delicious; its pale pink filling creates a stunning centerpiece that will have your guests reaching for their phones to snap a picture!
Easy to Make: With minimal ingredients and straightforward steps, even novice bakers can achieve a bakery-level finish without fuss.
Versatile Options: Switch it up! Try using lemon or lime for a different twist or layer in cream cheese for added richness.
Perfect for Any Occasion: Whether a brunch with friends or a cozy dessert for two, this tart’s refreshing flavor and elegant presentation make it a crowd-pleaser.
Zesty Grapefruit Curd Tart Ingredients
Ready to create your own Zesty Grapefruit Curd Tart? Here’s everything you need!
For the Crust
- Butter – Use cold butter for a crumbly, flaky texture that forms the perfect crust.
- Flour – All-purpose flour is recommended for a stable base that holds its shape.
- Powdered Sugar – Sweetens the crust while maintaining its tender consistency.
- Salt – A pinch is essential to enhance the flavors in both the crust and curd.
For the Curd
- Grapefruit – Fresh, juicy grapefruits are key for vibrant, zesty flavor in your curd.
- Eggs – Room temperature eggs help the curd thicken evenly for the ideal texture.
- Sugar – Granulated sugar balances the tartness of the grapefruit, ensuring a lively and sweet flavor.
- Cornstarch – Although optional, it’s recommended for achieving a thicker and creamier curd.
Dive into making this refreshing dessert that beautifully balances sweetness and zest!
Step‑by‑Step Instructions for Zesty Grapefruit Curd Tart
Step 1: Prepare the Crust
In a large mixing bowl, combine the all-purpose flour, powdered sugar, and a pinch of salt. Cut in the cold butter using a pastry cutter or your fingers until the mixture resembles coarse crumbs. Press the mixture evenly into a 9-inch tart pan, ensuring the sides are well-formed. Chill in the refrigerator for about 30 minutes while you preheat the oven to 350°F (175°C).
Step 2: Blind Bake
Once chilled, use a fork to prick the bottom of the crust to prevent bubbling. Place the tart pan in the preheated oven and bake for 20-25 minutes, or until the edges are lightly golden. Keep a close eye on the crust as it bakes, as you want it golden but not overly browned. Remove from the oven and let it cool completely.
Step 3: Make the Curd
In a medium saucepan, whisk together the fresh grapefruit juice, grapefruit zest, sugar, eggs, and a pinch of salt. Place the saucepan over low heat and stir constantly for 10-15 minutes, until the mixture thickens and coats the back of a spoon. Be patient and watch for steam to rise without letting it boil, as this can curdle your zesty grapefruit curd.
Step 4: Strain & Fill
Once thickened, remove the saucepan from the heat and strain the mixture through a fine sieve into a bowl to eliminate any lumps. Pour the smooth grapefruit curd gently into the cooled tart crust, spreading it evenly with a spatula. Cover the tart with plastic wrap and refrigerate for about 2 hours, allowing the curd to set fully.
Step 5: Serve
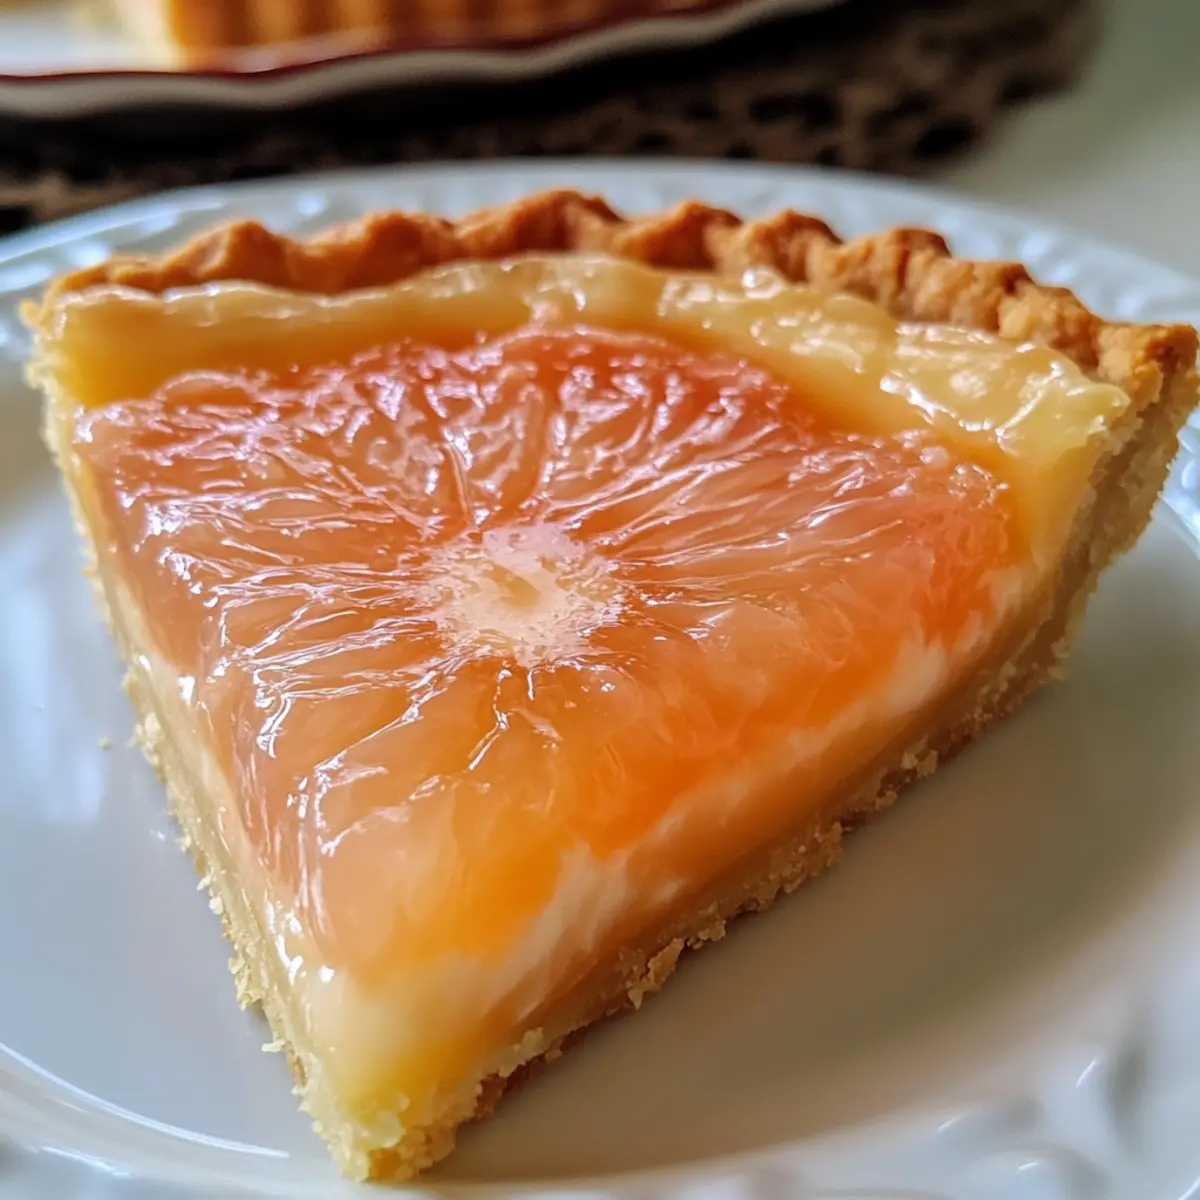
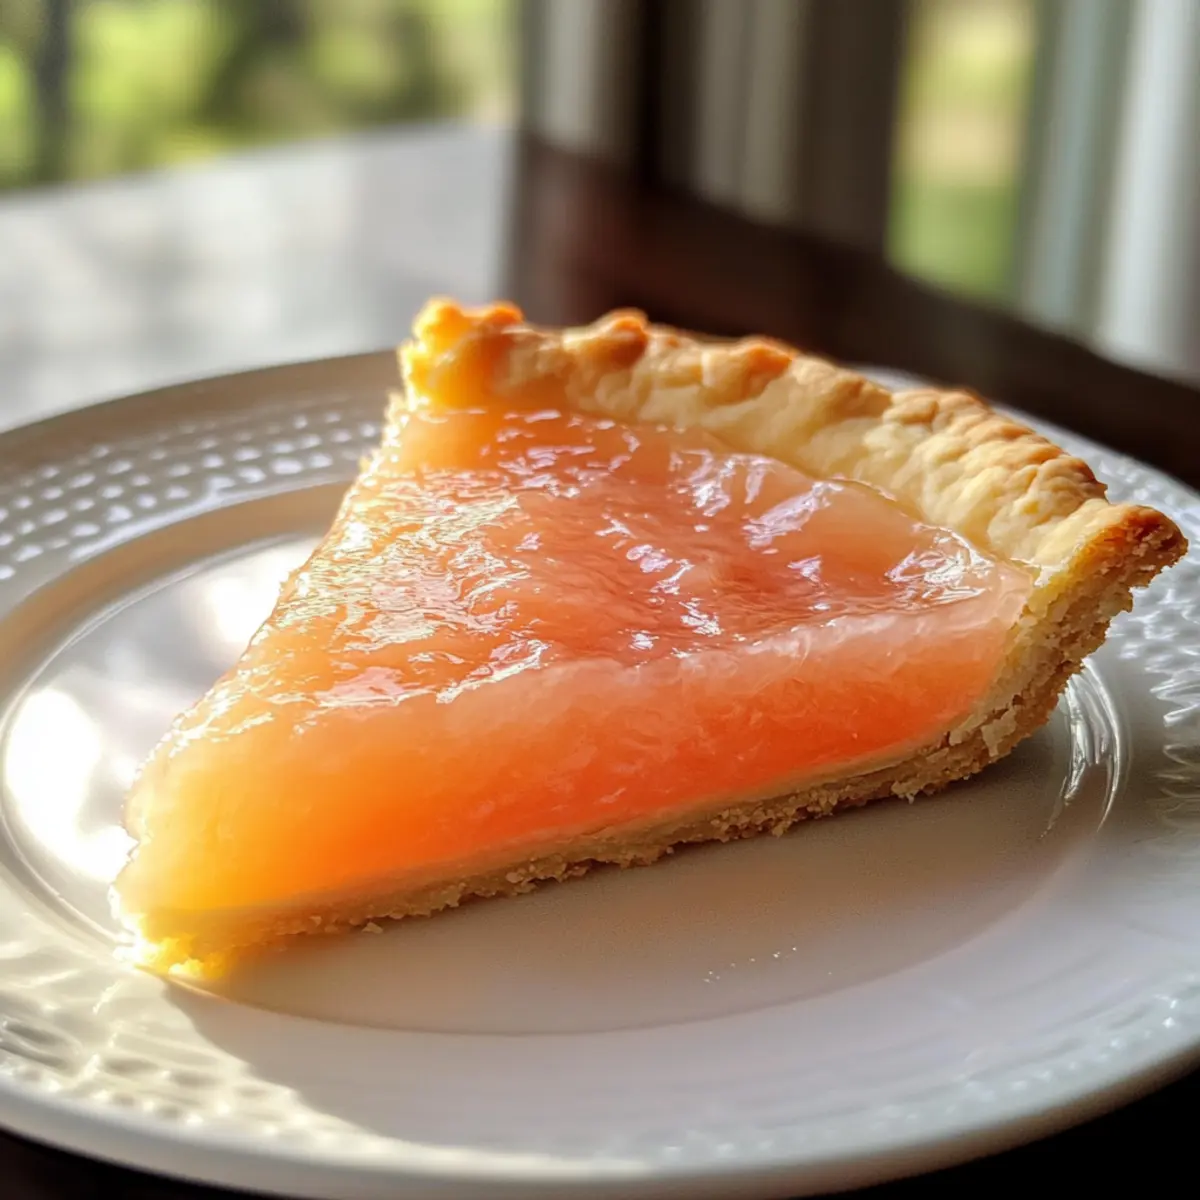
Once the tart has set, remove it from the refrigerator and garnish with fresh grapefruit slices or whipped cream for a bright touch. Carefully slice the zesty grapefruit curd tart and serve chilled for a refreshing dessert that’s sure to delight your guests. Enjoy the burst of citrus flavors!
Make Ahead Options
These Zesty Grapefruit Curd Tarts are an excellent choice for those looking to save time during busy weeks! You can prepare the tart crust up to 24 hours in advance by baking it, cooling it completely, and storing it in an airtight container at room temperature. Additionally, the grapefruit curd can be made up to 3 days ahead; simply refrigerate it in an airtight container to maintain its freshness and vibrant flavor. When you’re ready to serve, pour the chilled curd into the pre-baked crust, and allow it to set in the refrigerator for about 2 hours. This way, you’ll have a beautiful, refreshing dessert waiting for you with minimal effort when it’s time to impress your guests!
Zesty Grapefruit Curd Tart Variations
Feel free to get creative and make this zesty grapefruit curd tart your own with these fun twists!
- Citrus Swap: Substitute lemon or lime for grapefruit for an entirely different citrus experience. You can mix and match, even blending citrus for a unique flavor profile!
- Creamy Addition: Add a layer of cream cheese to the curd for a richer, more indulgent filling. The tanginess of cream cheese pairs beautifully with the citrus.
- Lower Sugar: Use alternative sweeteners like agave or stevia to create a lower-sugar version of the curd. This is a great option for those watching their sugar intake.
- Herb Infusion: Infuse your curd with fresh herbs like basil or mint for an unexpected flavor twist. Just muddle the herbs in the juice before cooking for an aromatic experience!
- Nutty Crust: Replace some of the all-purpose flour with almond flour for a nutty flavor and interesting texture. It adds a lovely depth to your tart crust!
- Spice it Up: Add a touch of ground ginger or cinnamon to the curd for a warm spice twist. Just a pinch can elevate the tart, bringing warmth to the citrus bright flavor!
- Extra Zest: Use a combination of grapefruit and orange zest for a layered citrus sensation that adds complexity. The sweetness of orange balances the tartness beautifully.
- Chilled Topping: Serve the tart with homemade whipped cream infusing a hint of vanilla or a dollop of Greek yogurt for a tangy contrast. It’s the perfect pairing that enhances the dessert!
With these delightful variations, you can enjoy each bite of the zesty grapefruit curd tart in completely new ways! If you’re looking for additional recipe ideas, check out my easy lemon tart or a refreshing citrus salad to accompany your tart.
Tips for the Best Zesty Grapefruit Curd Tart
- Fresh Ingredients: Always use fresh grapefruit for the most vibrant flavor. Avoid bottled juice, as it can result in a bland curd.
- Chill the Crust: Allow your crust to chill before baking. This step helps prevent shrinkage and maintains the tart’s shape during baking.
- Patient Heating: Cook the curd over low heat and stir constantly, ensuring it thickens evenly without boiling. This prevents curdling for a smooth consistency.
- Strain for Smoothness: Straining the curd is crucial. It removes any undissolved egg bits, resulting in a silky-smooth grapefruit curd that melts in your mouth.
- Prep Ahead: For even easier serving, you can make the crust a day in advance. Just fill it with curd before serving for a fresh dessert experience.
- Garnishing Delights: Don’t skimp on the garnishes! Fresh grapefruit slices or a dollop of whipped cream adds a beautiful finishing touch to your zesty grapefruit curd tart.
Storage Tips for Zesty Grapefruit Curd Tart
- Fridge: Store the tart in an airtight container for up to 3 days. This will keep the tart fresh and maintain the creamy texture of the grapefruit curd.
- Freezer: If you need to keep it longer, freeze slices wrapped tightly in plastic wrap and aluminum foil for up to 2 months. Thaw in the fridge before serving.
- Reheating: This dessert is best enjoyed cold, so no reheating is necessary. Just let it sit at room temperature for a few minutes before slicing if it’s been stored in the fridge.
- Covering: Always cover the tart to prevent it from absorbing other odors in the fridge, which could alter the refreshing taste of your zesty grapefruit curd tart.
What to Serve with Refreshing Grapefruit Curd Tart
Enhance your meal experience with complementary dishes that celebrate the refreshing flavors of citrus.
- Creamy Mashed Potatoes: These smooth, buttery potatoes provide a rich contrast to the tartness of grapefruit, balancing flavors beautifully.
- Arugula Salad with Citrus Vinaigrette: The peppery greens and tangy dressing mirror the tart’s brightness for a refreshing pairing.
- Honey-Glazed Carrots: The sweetness of honey complements grapefruit’s zesty bite, creating a harmonious flavor contrast on your plate.
- Grilled Shrimp Skewers: Tender and lightly charred shrimp pair perfectly with the tart for a delightful seafood accompaniment.
- Savory Cheese Platter: Include mild cheeses like brie or goat cheese to provide a rich, creamy backdrop that enhances the citrus notes.
- Coconut Sorbet: This light, refreshing dessert offers a tropical twist that complements the tart’s flavors while cooling your palate.
- Sparkling Water with Lime: A bubbly, citrus-infused drink brightens the meal experience and refreshes your taste buds.
- Lemon Bars: For a sweet addition, these tangy treats echo the citrus theme while offering delightful textural variety.
- Herb-Infused Grilled Chicken: The subtle herbs elevate the dish’s profile, while the juicy chicken won’t overshadow the tart’s bright flavors.
Zesty Grapefruit Curd Tart Recipe FAQs
What type of grapefruit should I use for the curd?
Absolutely! Fresh, juicy grapefruits are the star of this tart. Look for grapefruits that feel heavy for their size and have a smooth skin without any dark spots or blemishes. The zest and juice from these fresh fruits will provide the vibrant and zesty flavor you desire.
How should I store leftover tart?
Very important! Store the Zesty Grapefruit Curd Tart in an airtight container in the refrigerator for up to 3 days. This will help keep the curd fresh and maintain its creamy texture. If you have any leftover slices, layer them with parchment paper to prevent sticking.
Can I freeze the tart for later?
Absolutely! If you’d like to keep the tart longer, you can freeze it. Wrap individual slices tightly in plastic wrap, then in aluminum foil to prevent freezer burn. It’s best enjoyed within 2 months. When ready to eat, thaw overnight in the refrigerator.
What if my curd isn’t thickening properly?
No worries! If your curd isn’t thickening, ensure that you’re cooking it over low heat and stirring constantly. After about 10-15 minutes, it should thicken enough to coat the back of a spoon. If you’re still having trouble, you can mix a tablespoon of cornstarch with some cold grapefruit juice and stir it into the curd mixture during cooking. This will help thicken it up nicely!
Is this dessert suitable for people with citrus allergies?
Very considerate of you to ask! This Zesty Grapefruit Curd Tart is not suitable for those with citrus allergies; however, you can substitute other fruit juices, like raspberry or blueberry, to create a different flavor profile. Just make sure to adjust sugar levels based on the tartness of the fruit used.
Can I prepare the tart in advance?
Absolutely! You can make the crust a day ahead and fill it with the grapefruit curd right before serving. This way, you can save time on the day of your gathering. Just be sure to chill it well once filled, allowing it to set properly before serving!
Delightful Zesty Grapefruit Curd Tart for Bright Days
Ingredients
Equipment
Method
- In a large mixing bowl, combine flour, powdered sugar, and salt. Cut in the cold butter until mixture resembles coarse crumbs.
- Press the mixture evenly into a 9-inch tart pan. Chill in the refrigerator for 30 minutes.
- Preheat the oven to 350°F (175°C).
- Blind bake the crust for 20-25 minutes until edges are lightly golden. Let cool.
- In a medium saucepan, whisk together grapefruit juice, grapefruit zest, sugar, eggs, and salt.
- Cook over low heat, stirring constantly for 10-15 minutes until thickened.
- Strain the mixture through a fine sieve into a bowl to eliminate lumps.
- Pour the smooth grapefruit curd into the cooled tart crust.
- Cover the tart with plastic wrap and refrigerate for 2 hours to set.
- Garnish with grapefruit slices or whipped cream before serving.