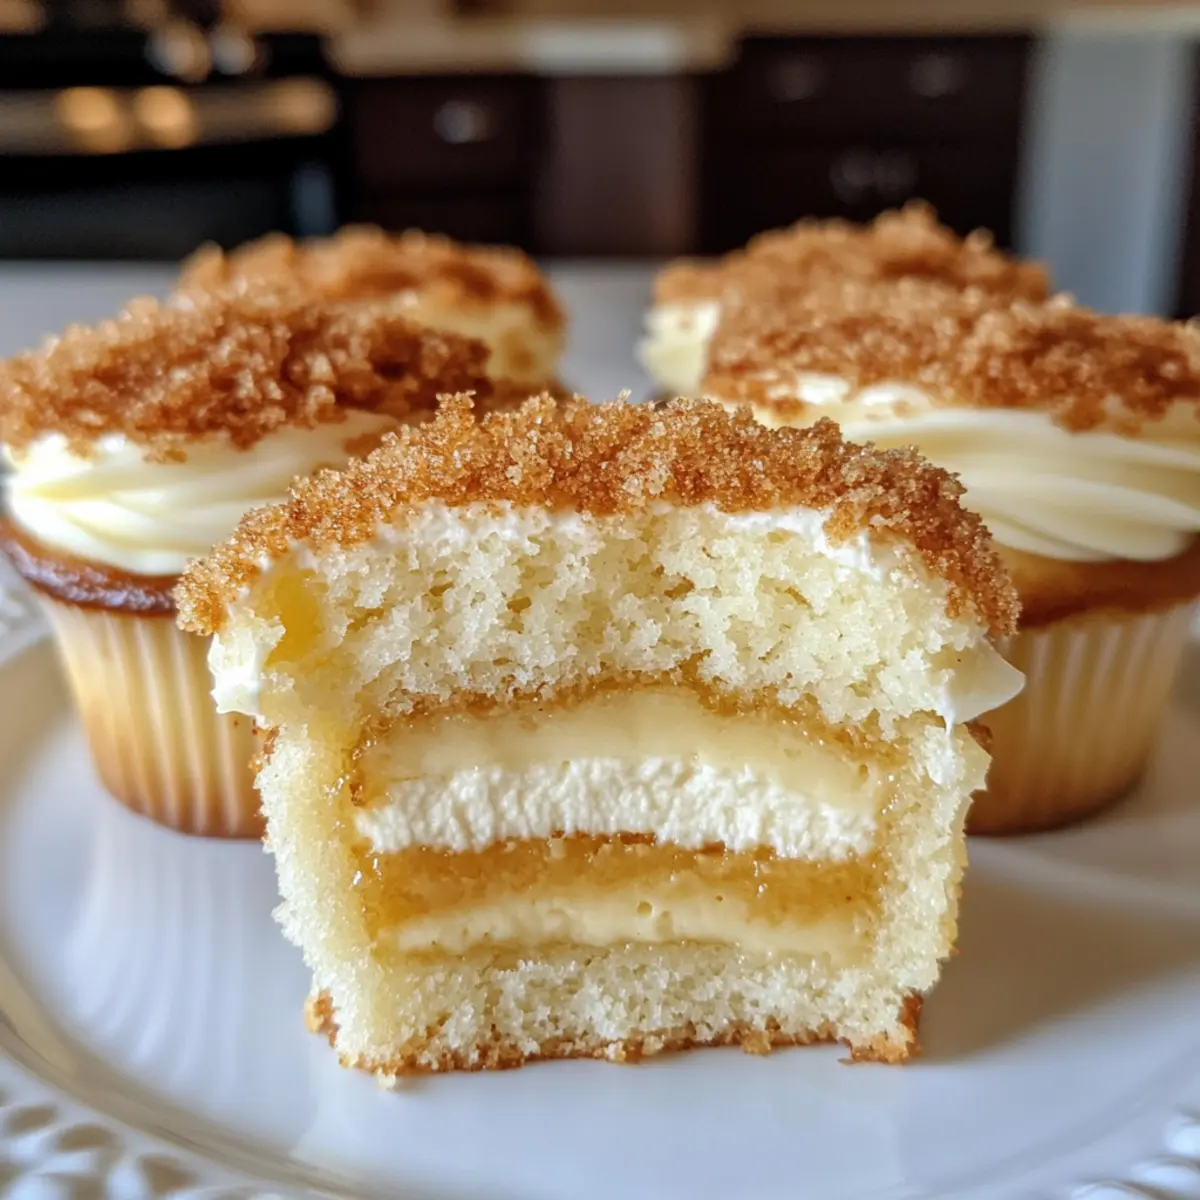
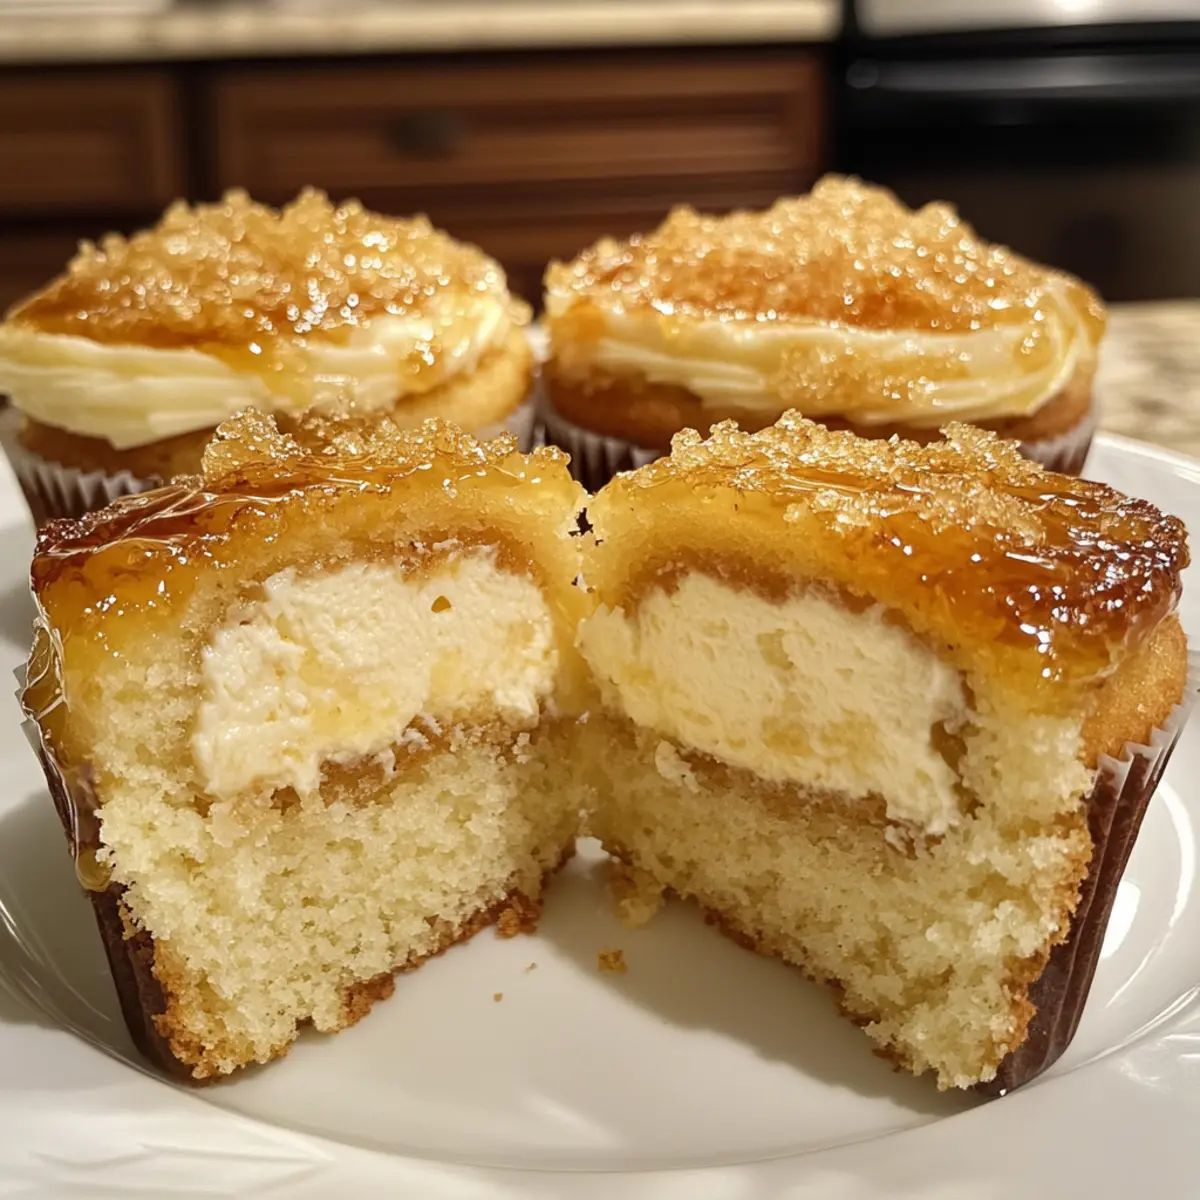
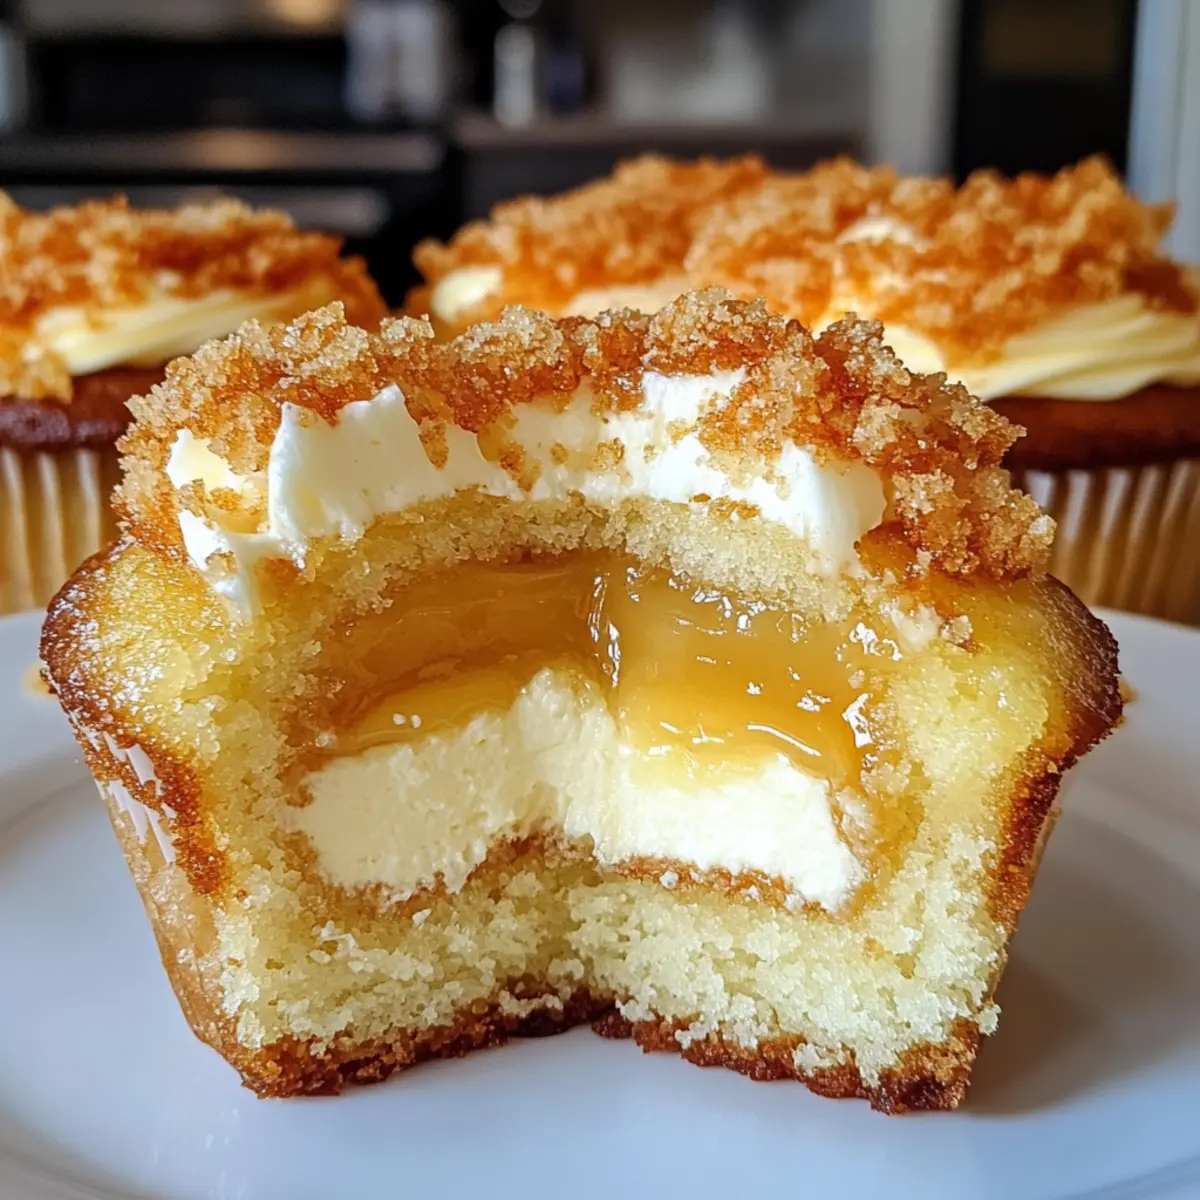
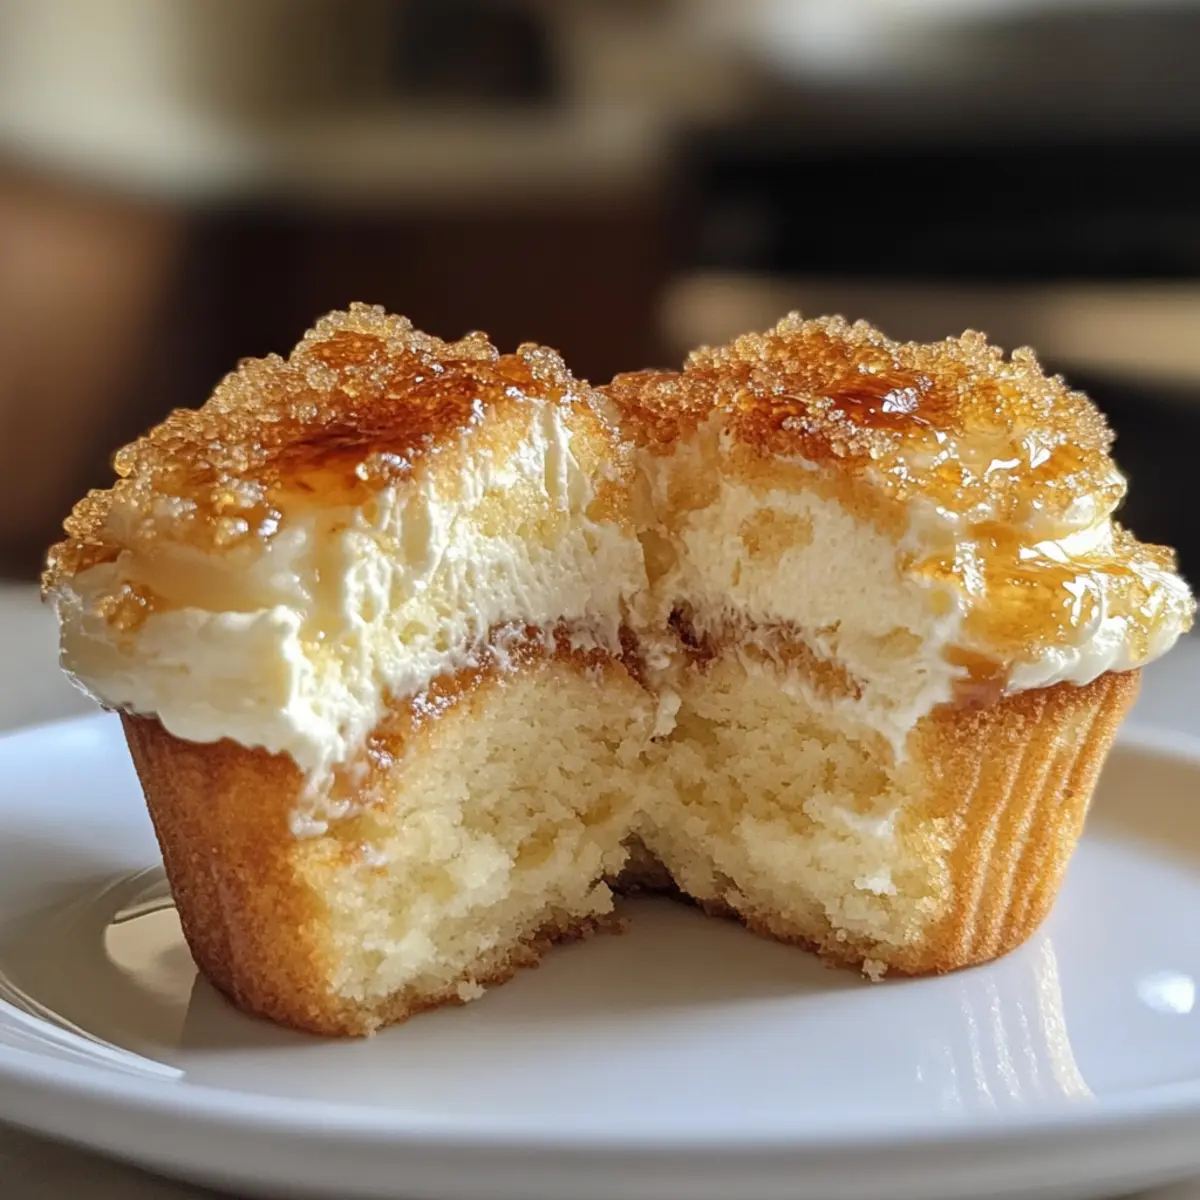
Irresistible Cowboy Caviar Jalapeno Popper Cheese Log Recipe

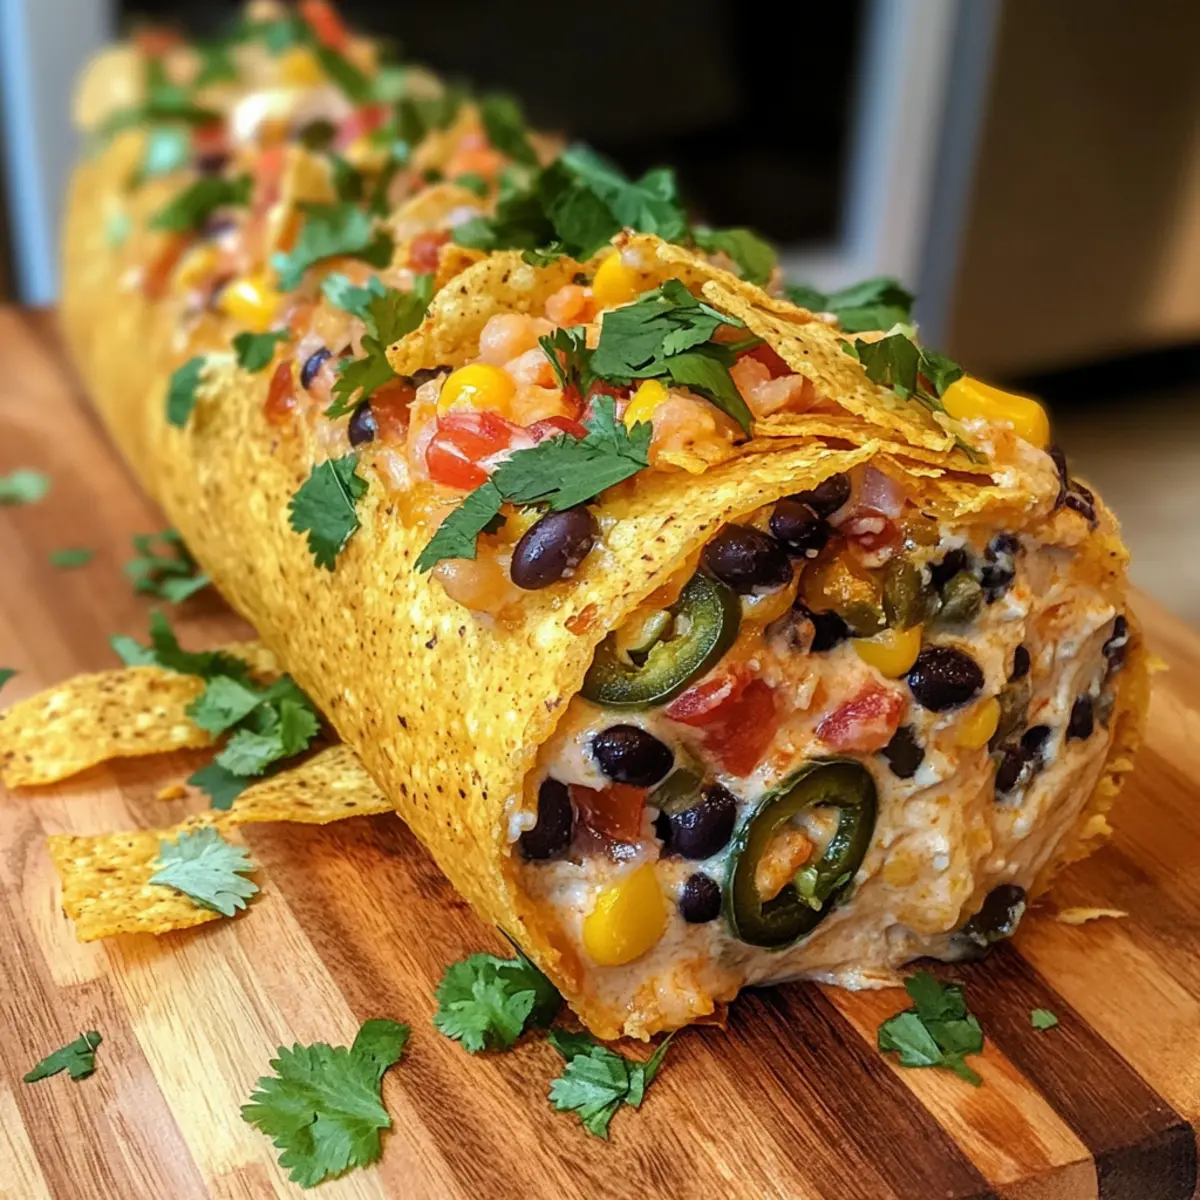
As I was wandering through the vibrant aisles of my local market, the colors and scents of fresh ingredients sparked a delicious idea: a Cowboy Caviar Jalapeno Popper Cheese Log. This playful twist on a classic cheese log combines creamy cheeses with a rainbow of fresh veggies and a hint of spice, all wrapped in a crispy layer of tortilla chips. Perfect for entertaining or satisfying snack cravings, this Tex-Mex appetizer is not only quick to whip up but also caters to both vegetarians and those who love a bit of heat. Whether you’re hosting a casual get-together or simply want to elevate your snack game, this dish promises to be a hit. Are you ready to dive into a flavorful adventure? Let’s get started!
Why is this cheese log a must-try?

Bursting with Flavor: This Cowboy Caviar Jalapeno Popper Cheese Log combines creamy cheese and fresh veggies for a taste sensation that will linger on your palate.

Quick to Prepare: With minimal prep time, you can have this crowd-pleaser on the table in just a few simple steps, making it ideal for spontaneous gatherings.

Versatile Appetizer: Serve it alongside colorful vegetable sticks or with extra tortilla chips, enhancing your snack spread while accommodating various dietary needs.

Textural Delight: Enjoy the creamy interior snuggled inside the crunchy tortilla chip coating, taking your tastebuds on a delightful crunch expedition.

Looking for more Tex-Mex ideas? Check out our Savory Cheese Egg Toast Recipe or learn how to make a delicious Savory Vegetable Cheese Pancake for more exciting flavors!

Cowboy Caviar Jalapeno Popper Cheese Log Ingredients

For the Cheese Mixture

  • Cream Cheese – Provides creaminess and acts as the base; you can substitute with Neufchâtel cheese for a lighter version.
  • Cheddar Cheese – Adds sharpness and flavor; try using pepper jack cheese for an extra spicy kick.
  • Jalapeños – Offer heat and a fresh, crisp texture; choose between fresh or pickled jalapeños based on your preference.
  • Black Beans – Contribute protein and heartiness; rinse canned beans before using to reduce sodium.
  • Corn – Adds sweetness and crunch; frozen corn works well if fresh isn’t available.
  • Bell Peppers (varied colors) – Provide crunch and sweetness; substitute with any mild pepper for a different flavor profile.

For the Coating

  • Tortilla Chips – Encase the cheese log, adding saltiness and crunch; opt for baked chips for a healthier variant.

For Garnish

  • Cilantro – Enhances freshness; feel free to omit if you’re not a fan due to taste preferences.

With these simple yet vibrant ingredients, your Cowboy Caviar Jalapeno Popper Cheese Log will come alive with Tex-Mex flair!

Step‑by‑Step Instructions for Cowboy Caviar Jalapeno Popper Cheese Log

Step 1: Combine Ingredients
In a large mixing bowl, blend together 8 ounces of softened cream cheese, 1 cup of shredded cheddar cheese, 1 diced jalapeño (or more for heat), 1 cup of drained and rinsed black beans, 1 cup of corn, and 1 cup of finely diced bell peppers. Use a sturdy spatula to mix until the colors are beautifully merged and the ingredients are evenly distributed, about 3-4 minutes.

Step 2: Shape the Log
With your mixture ready, lay a large piece of plastic wrap on your work surface. Gently scoop the cheese mixture onto the center of the wrap and use the plastic to shape it into a tight cylindrical log. Roll it up securely, twisting the ends of the wrap to help it hold its shape.

Step 3: Chill the Log
Place the wrapped cheese log in the refrigerator for at least 2 hours. This chilling time is crucial as it allows the flavors of the Cowboy Caviar Jalapeno Popper Cheese Log to meld together beautifully while firming up the texture, making slicing easier.

Step 4: Coat with Tortilla Chips
Once the cheese log is set, remove it from the refrigerator and unwrap it from the plastic wrap. On a large plate, spread out 1-2 cups of crushed tortilla chips. Roll the cheese log in the chips until it’s evenly coated, ensuring every bite will have that delightful crunch.

Step 5: Garnish and Serve
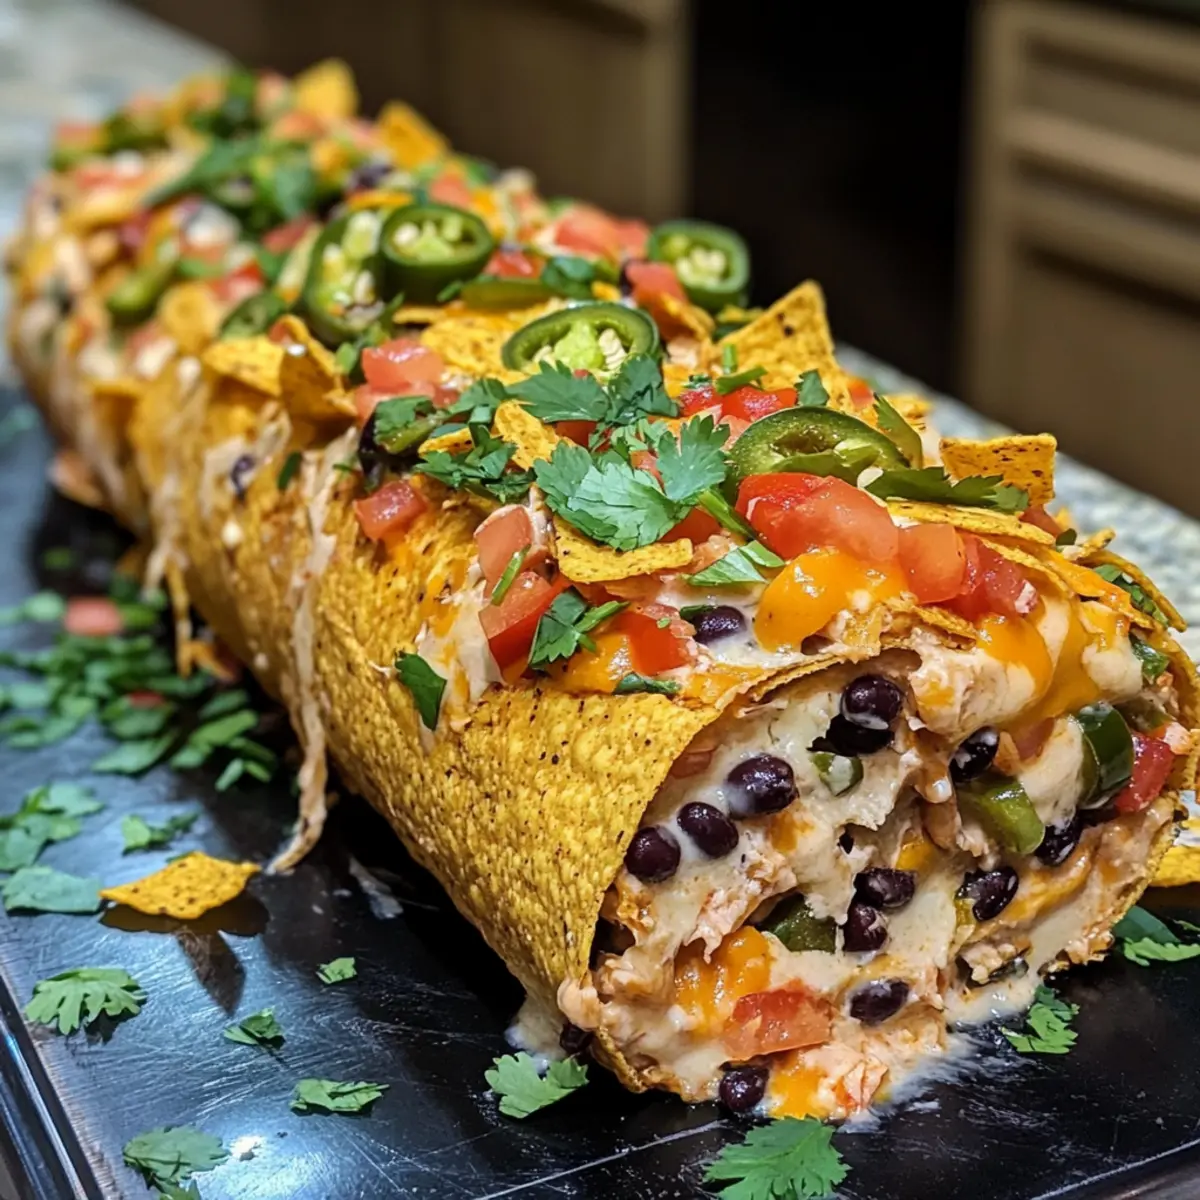
After rolling, transfer your beautiful Cowboy Caviar Jalapeno Popper Cheese Log to a serving platter. Sprinkle fresh, chopped cilantro over the top for a pop of color and added freshness. Serve it with an array of colorful vegetable sticks or extra tortilla chips for dipping and enjoying!

Storage Tips for Cowboy Caviar Jalapeno Popper Cheese Log

  • Fridge: Store your Cowboy Caviar Jalapeno Popper Cheese Log wrapped tightly in plastic wrap for up to 3 days. This keeps it fresh and delicious, perfect for snacking later!
  • Freezer: If you want to enjoy it later, freeze the cheese log wrapped in plastic and then foil for up to 2 months. Thaw in the fridge overnight before serving.
  • Reheating: If you prefer a warm version, slice and briefly microwave pieces for about 15-20 seconds to warm through, but enjoy it cold for the best texture!
  • Serving Tip: Refresh the log with a sprinkle of fresh cilantro right before serving to enhance flavor and visual appeal!

Cowboy Caviar Jalapeno Popper Cheese Log Variations

Feel free to get creative with this Cowboy Caviar Jalapeno Popper Cheese Log and make it your own!

  • Bean Swap: Replace black beans with kidney beans or chickpeas for a hearty twist. They add a different texture while keeping the protein intact.

  • Spicy Cheese: Use pepper jack cheese instead of cheddar for an extra kick that will tantalize your taste buds. Spice fans will love this fiery version!

  • Fresh Additions: Toss in some diced tomatoes or avocados for added freshness and creaminess. Not only do they boost flavor, but they also bring vibrant color to the log.

  • Pickled Twist: Incorporate pickled jalapeños instead of fresh for a tangy accent. The zesty flavor will add a delightful tang to every bite.

  • Herb Variations: Mix in chopped fresh herbs like parsley or dill for a different aromatic profile. Each herb will impart its unique flavor, making each log a new adventure.

  • Crunchy Coating: Swap regular tortilla chips for spicy or flavored varieties to elevate the crunch factor. This simple change can turn your cheese log into a serious showstopper.

  • Cream Cheese Alternatives: If you’re looking for a lighter option, try using Neufchâtel cheese. It provides the same creaminess while cutting down on calories.

  • Add Nutty Flavor: Sprinkle some toasted pumpkin seeds or chopped walnuts on top for a lovely crunch and a nutty flavor that pairs beautifully with the cheese and veggies.

For more creative ideas, consider exploring our Savory Vegetable Cheese Pancakes or dive into a delightful Milky Coconut Cheese Dessert for something sweet!

Expert Tips for Cowboy Caviar Jalapeno Popper Cheese Log

  • Chill Time Matters: Be sure to chill the cheese log for at least 2 hours. This helps the flavors meld and ensures easier slicing.
  • Texture Perfected: Avoid overmixing to maintain a delightful texture in your Cowboy Caviar Jalapeno Popper Cheese Log; it’s all about that creamy and crunchy balance!
  • Seasoning Check: Taste the mixture before shaping to adjust the seasoning. Add salt, lime juice, or extra jalapeños based on your flavor preference.
  • Creative Substitutions: Don’t hesitate to swap out ingredients! Try kidney beans or different cheeses for unique flavor variations.
  • Garnish with Love: Fresh cilantro brightens the log’s appearance and flavor, but feel free to omit if it’s not your favorite herb.

Make Ahead Options

This Cowboy Caviar Jalapeno Popper Cheese Log is perfect for meal prep, allowing you to enjoy its vibrant flavors on busy weeknights! You can prepare the cheese mixture up to 24 hours in advance and shape it into a log, wrapping it tightly in plastic wrap to maintain its freshness. Additionally, you can chop the veggies and store them separately in an airtight container in the refrigerator for up to 3 days. When you’re ready to serve, simply roll the chilled log in crushed tortilla chips and garnish it with fresh cilantro just before enjoying. This way, you’ll have a delightful appetizer ready with minimal effort!

What to Serve with Cowboy Caviar Jalapeno Popper Cheese Log?

Elevate your gathering with deliciously complementary dishes that pair beautifully with this flavorful Tex-Mex treat.

  • Fresh Veggie Platter: A colorful mix of carrots, bell peppers, and cucumber sticks provides a refreshing crunch, perfect for dipping.

  • Guacamole: Creamy and zesty, this rich avocado dip enhances the Tex-Mex theme while balancing the cheese log’s spice.

  • Spicy Salsa: A vibrant, chunky salsa brings a burst of flavor to the table and adds a zesty contrast to the creamy cheese.

  • Chilled White Wine: A crisp, chilled Sauvignon Blanc or Pinot Grigio complements the richness of the cheese log, enhancing your dining experience.

  • Corn Salsa: This sweet and spicy corn dish echoes the log’s ingredients while adding a delightful fresh element to your spread.

  • Cilantro Lime Rice: This aromatic side dish infuses every bite with herbal freshness, pairing perfectly with the cheese log’s flavors and textures.

  • Margaritas: A classic drink choice, these refreshing cocktails provide a citrusy kick that perfectly balances the richness of the cheese log.

  • Chocolate Dessert: A small piece of chocolate cake or brownies adds a sweet finish to your meal, contrasting beautifully with the savory cheese log.
Cowboy Caviar Jalapeno Popper Cheese Log Recipe FAQs

How do I select ripe ingredients for the cheese log?
Absolutely! For the best flavor, choose firm, bright bell peppers with smooth skin. Jalapeños should be vibrant green and free of dark spots. If you’re using corn, fresh or frozen is great, just ensure it’s sweet and juicy. I often pick fresh veggies with pops of color for that added visual appeal!

How should I store leftovers?
Very good question! Store any leftover Cowboy Caviar Jalapeno Popper Cheese Log tightly wrapped in plastic wrap in the refrigerator for up to 3 days. This keeps it fresh while ensuring you can savor every bite. If you notice any moisture or separation, don’t worry; just give it a good stir before serving again!

Can I freeze the cheese log and how?
Of course! To freeze your Cowboy Caviar Jalapeno Popper Cheese Log, first wrap it tightly in plastic wrap, making sure it’s sealed well. Then, wrap it again in aluminum foil to prevent freezer burn. It can be frozen for up to 2 months. When you’re ready to enjoy it, just move it to the refrigerator overnight to thaw. Once thawed, it’s best served cold for optimal taste!

What if my mixture is too runny?
A common concern! If your cheese mixture ends up too runny, try adding a bit more cream cheese until you reach a thicker consistency. Additionally, incorporating more finely diced vegetables can help absorb excess moisture. Remember, a firm cheese log is key; you want it to hold its shape well once chilled.

Is this recipe suitable for vegetarians?
Yes, indeed! The Cowboy Caviar Jalapeno Popper Cheese Log is entirely vegetarian-friendly, as it’s packed with colorful veggies and cheeses. If you or your guests have dietary restrictions or preferences, be sure to double-check the cheese labels for any animal-based rennet. Enjoy with peace of mind for your vegetarian friends!

Can my pet have any leftovers?
Great thought! While the cheese log is packed with delightful ingredients for humans, it’s best to keep it away from pets, especially due to the jalapeños. Spicy foods can upset your furry friend’s stomach. If you want to share a snack with your pet, consider some fresh, plain bell peppers or a small piece of cheese as a treat instead!
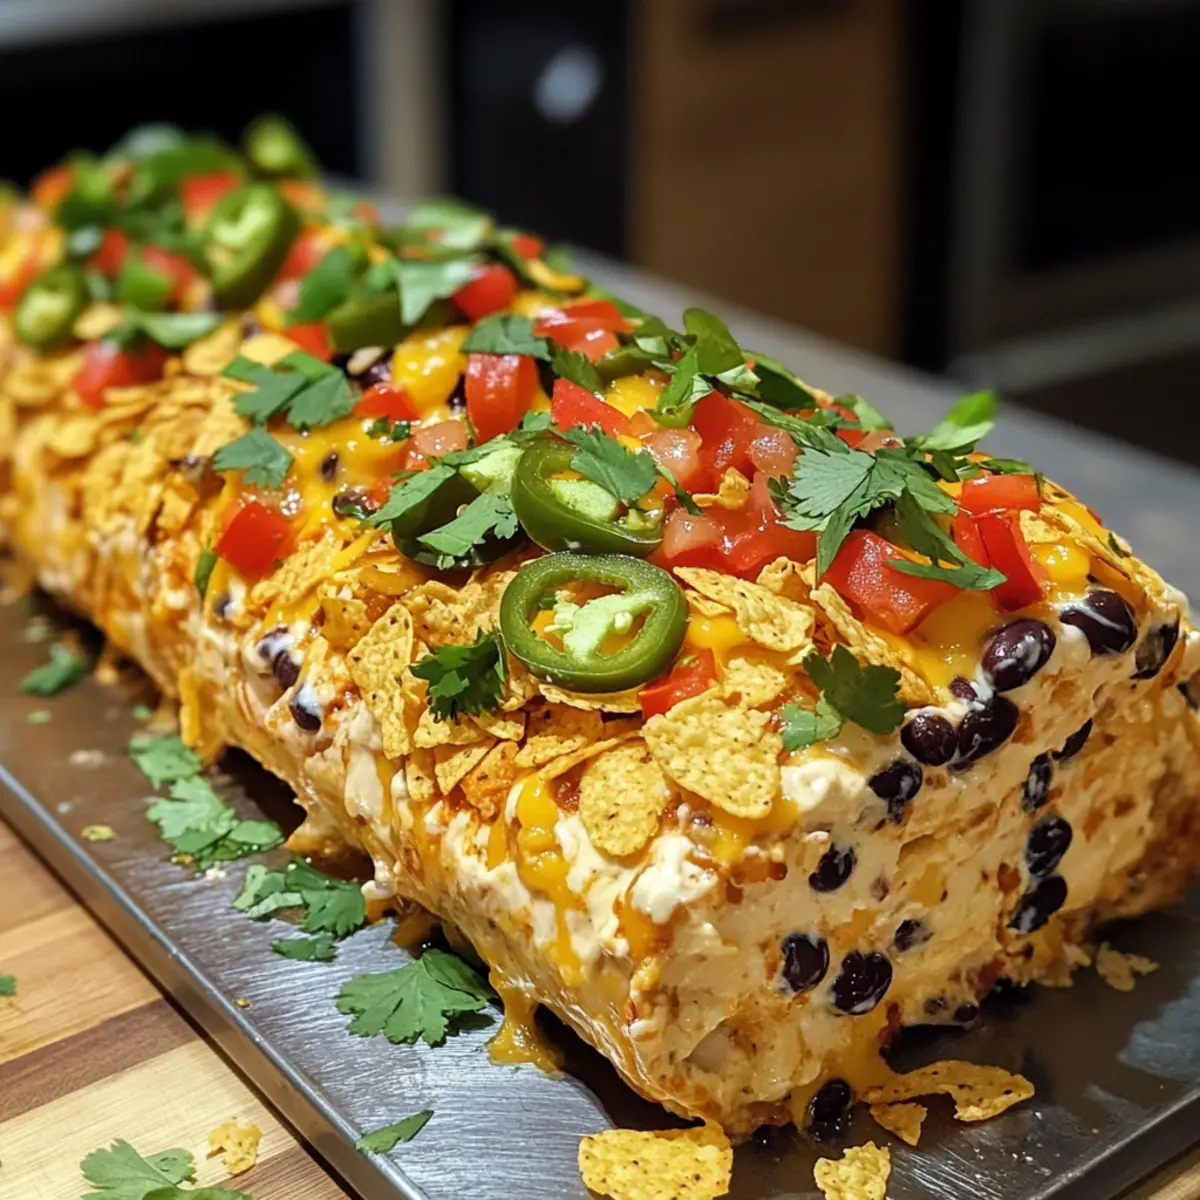
Cowboy Caviar Jalapeno Popper Cheese Log

Irresistible Cowboy Caviar Jalapeno Popper Cheese Log Recipe

This Cowboy Caviar Jalapeno Popper Cheese Log is a delightful Tex-Mex appetizer combining creamy cheeses and fresh veggies with a spicy kick.
Prep Time 15 minutes
Chill Time 2 hours
Total Time 2 hours 15 minutes
Servings: 8 slices
Course: Other
Cuisine: Tex-Mex
Calories: 250

Ingredients
  

For the Cheese Mixture
  • 8 ounces cream cheese softened
  • 1 cup cheddar cheese shredded
  • 1 piece jalapeño diced; use more for heat
  • 1 cup black beans drained and rinsed
  • 1 cup corn fresh or frozen
  • 1 cup bell peppers finely diced; varied colors
For the Coating
  • 1-2 cups tortilla chips crushed
For Garnish
  • to taste cilantro chopped; optional

Equipment

  • Large mixing bowl
  • plastic wrap
  • sturdy spatula
  • large plate

Method
 

Step-by-Step Instructions
  1. In a large mixing bowl, blend together 8 ounces of softened cream cheese, 1 cup of shredded cheddar cheese, 1 diced jalapeño (or more for heat), 1 cup of drained and rinsed black beans, 1 cup of corn, and 1 cup of finely diced bell peppers. Use a sturdy spatula to mix until the colors are beautifully merged and the ingredients are evenly distributed, about 3-4 minutes.
  2. Lay a large piece of plastic wrap on your work surface. Gently scoop the cheese mixture onto the center of the wrap and use the plastic to shape it into a tight cylindrical log. Roll it up securely, twisting the ends of the wrap to help it hold its shape.
  3. Place the wrapped cheese log in the refrigerator for at least 2 hours. This chilling time is crucial as it allows the flavors of the Cowboy Caviar Jalapeno Popper Cheese Log to meld together beautifully while firming up the texture, making slicing easier.
  4. Once the cheese log is set, remove it from the refrigerator and unwrap it from the plastic wrap. On a large plate, spread out 1-2 cups of crushed tortilla chips. Roll the cheese log in the chips until it's evenly coated, ensuring every bite will have that delightful crunch.
  5. Transfer your beautiful Cowboy Caviar Jalapeno Popper Cheese Log to a serving platter. Sprinkle fresh, chopped cilantro over the top for a pop of color and added freshness. Serve it with an array of colorful vegetable sticks or extra tortilla chips for dipping and enjoying!
Notes

Chill time is essential for flavor melding and easier slicing. Adjust seasoning based on personal preference. Enjoy cold for best texture!

Sushi Rolls Made Simple: Fresh Flavors in 15 Minutes

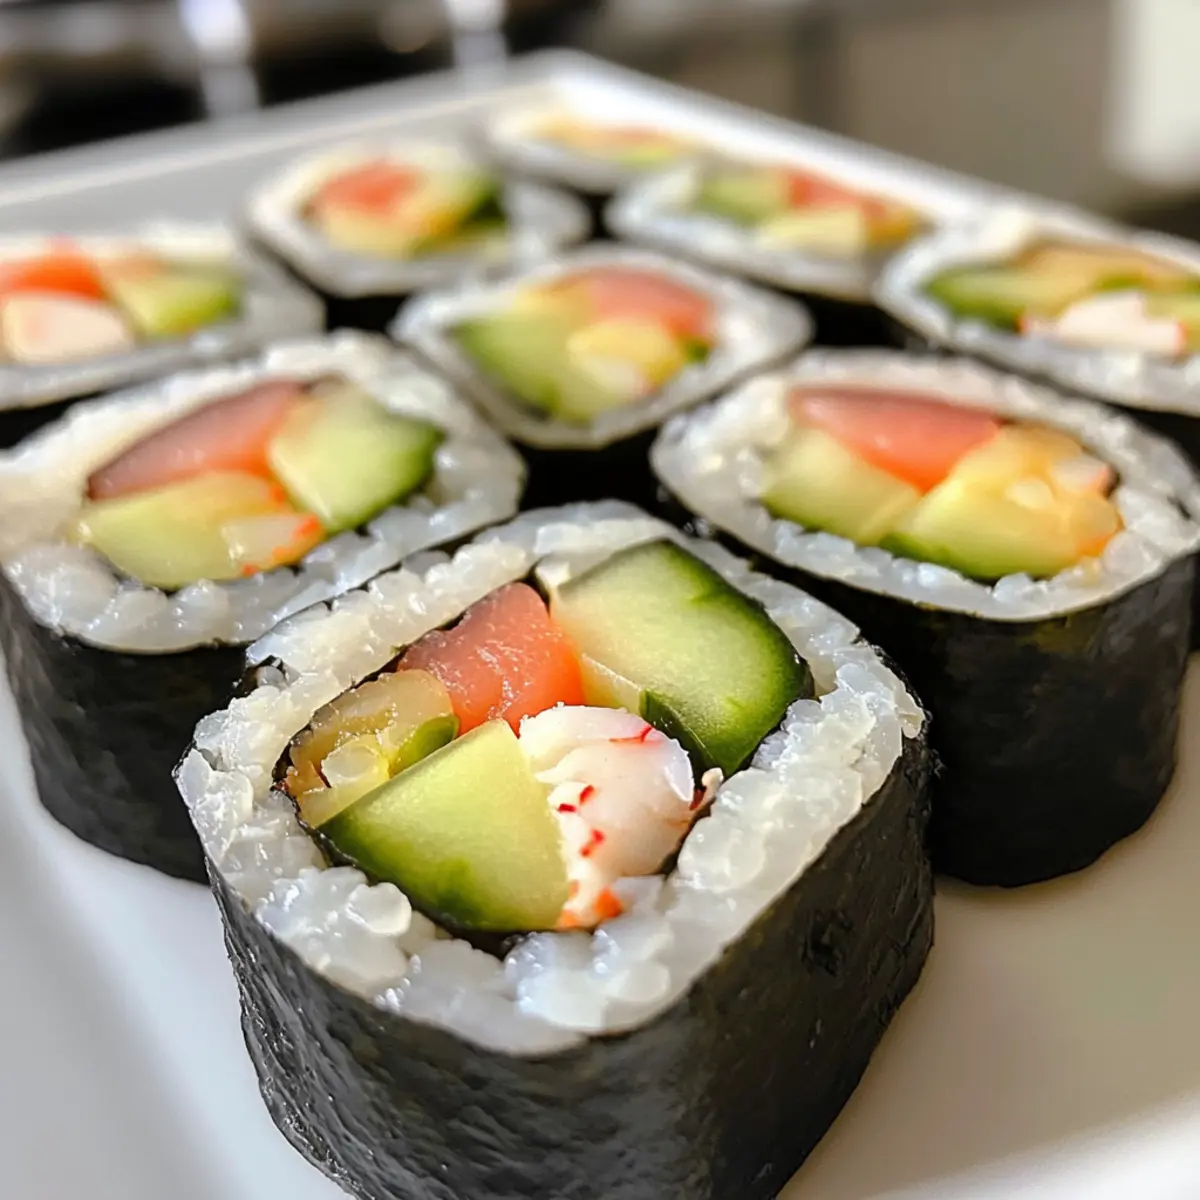
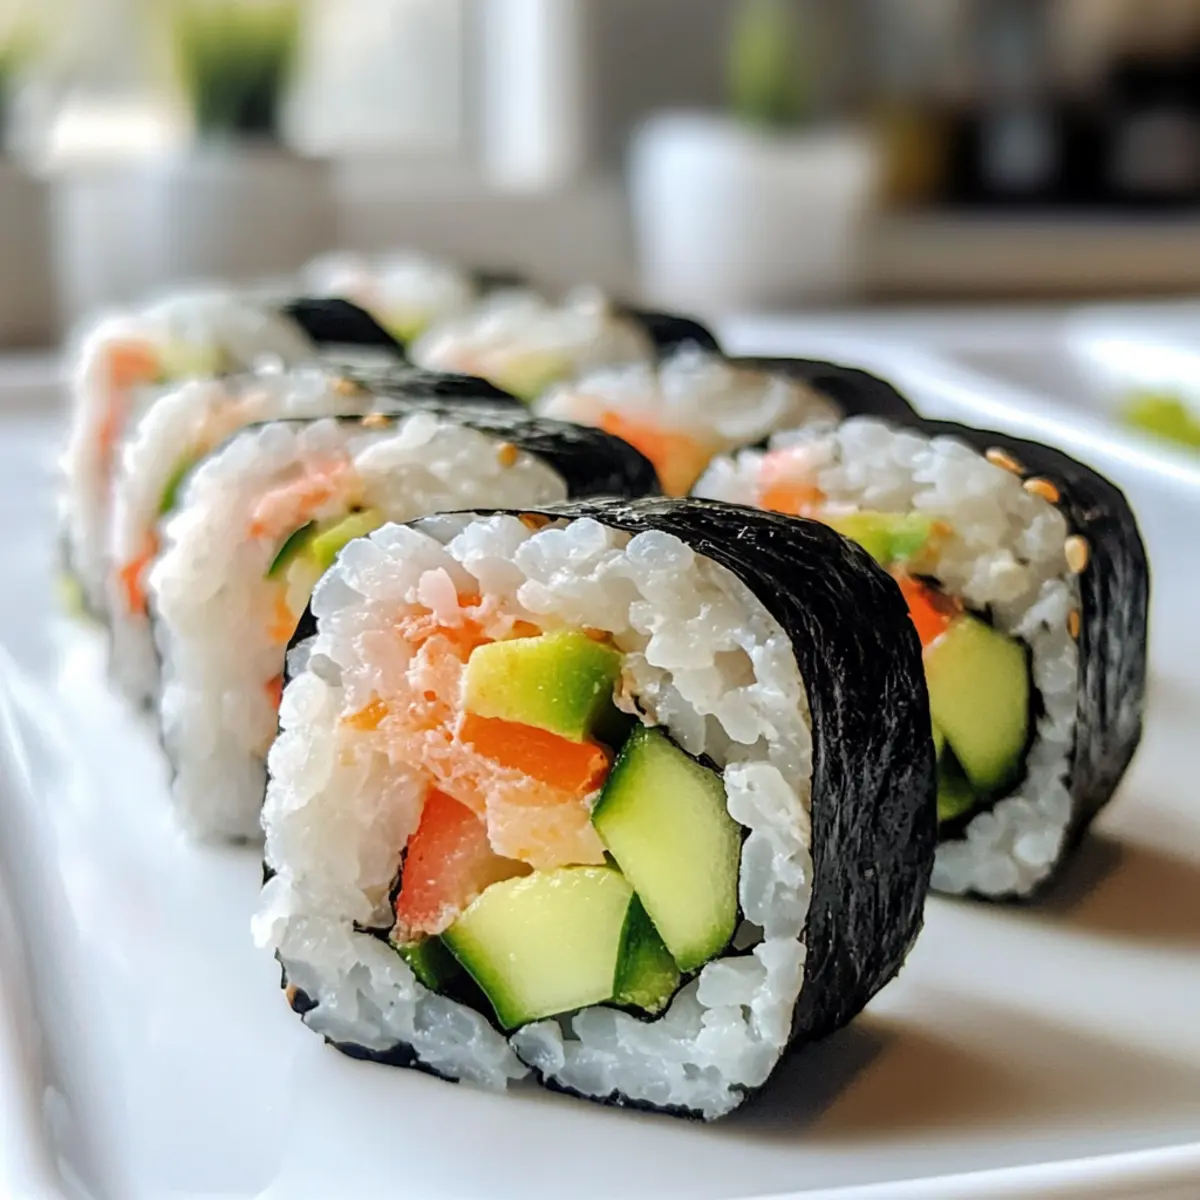
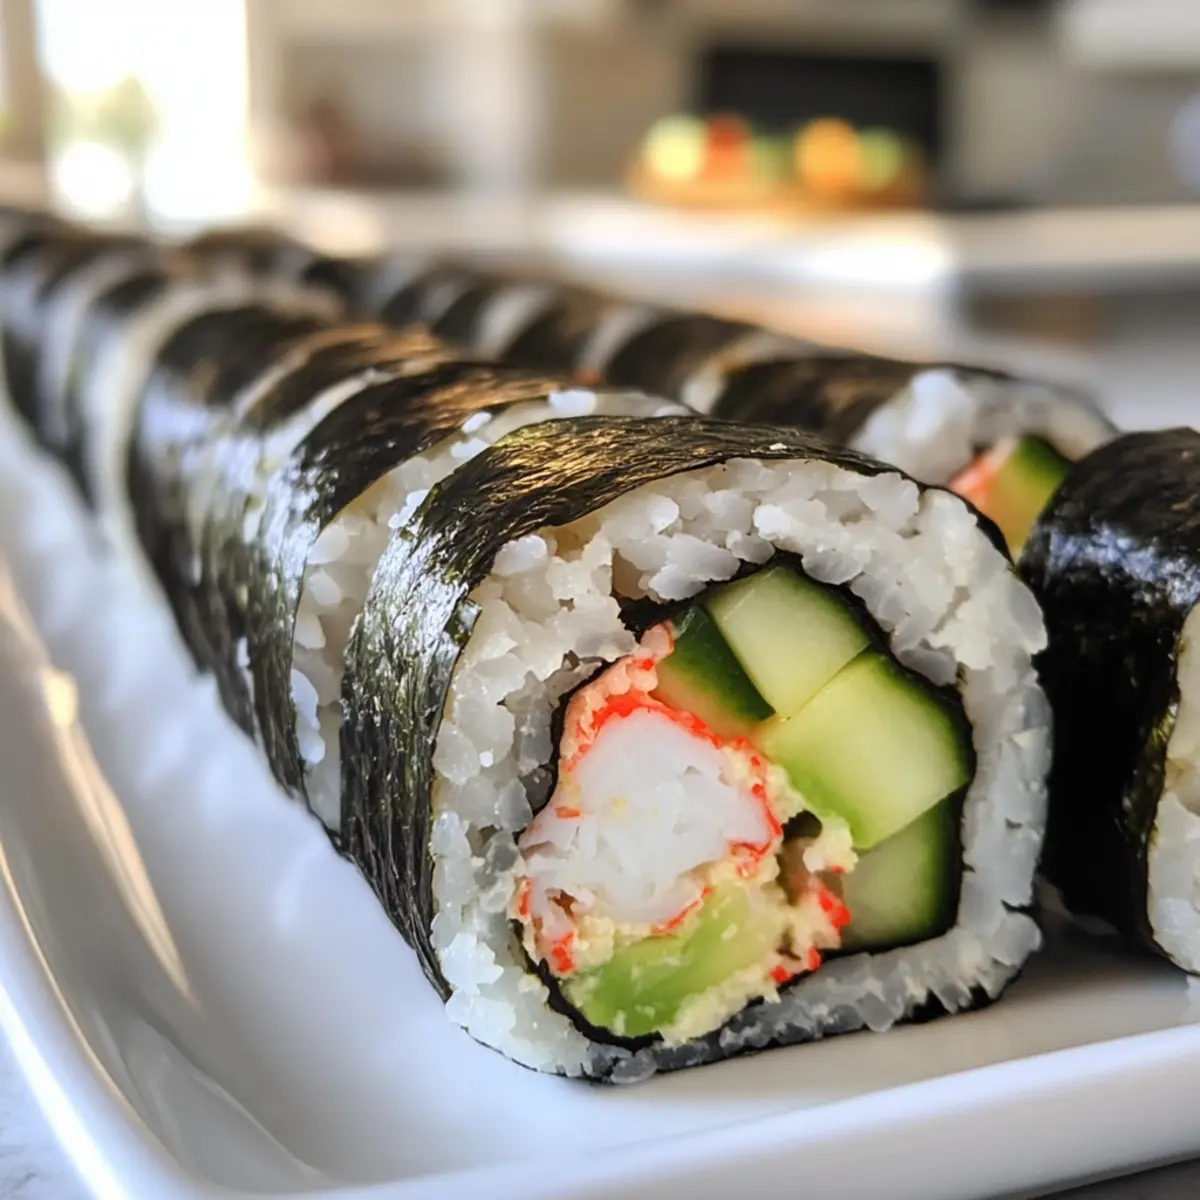
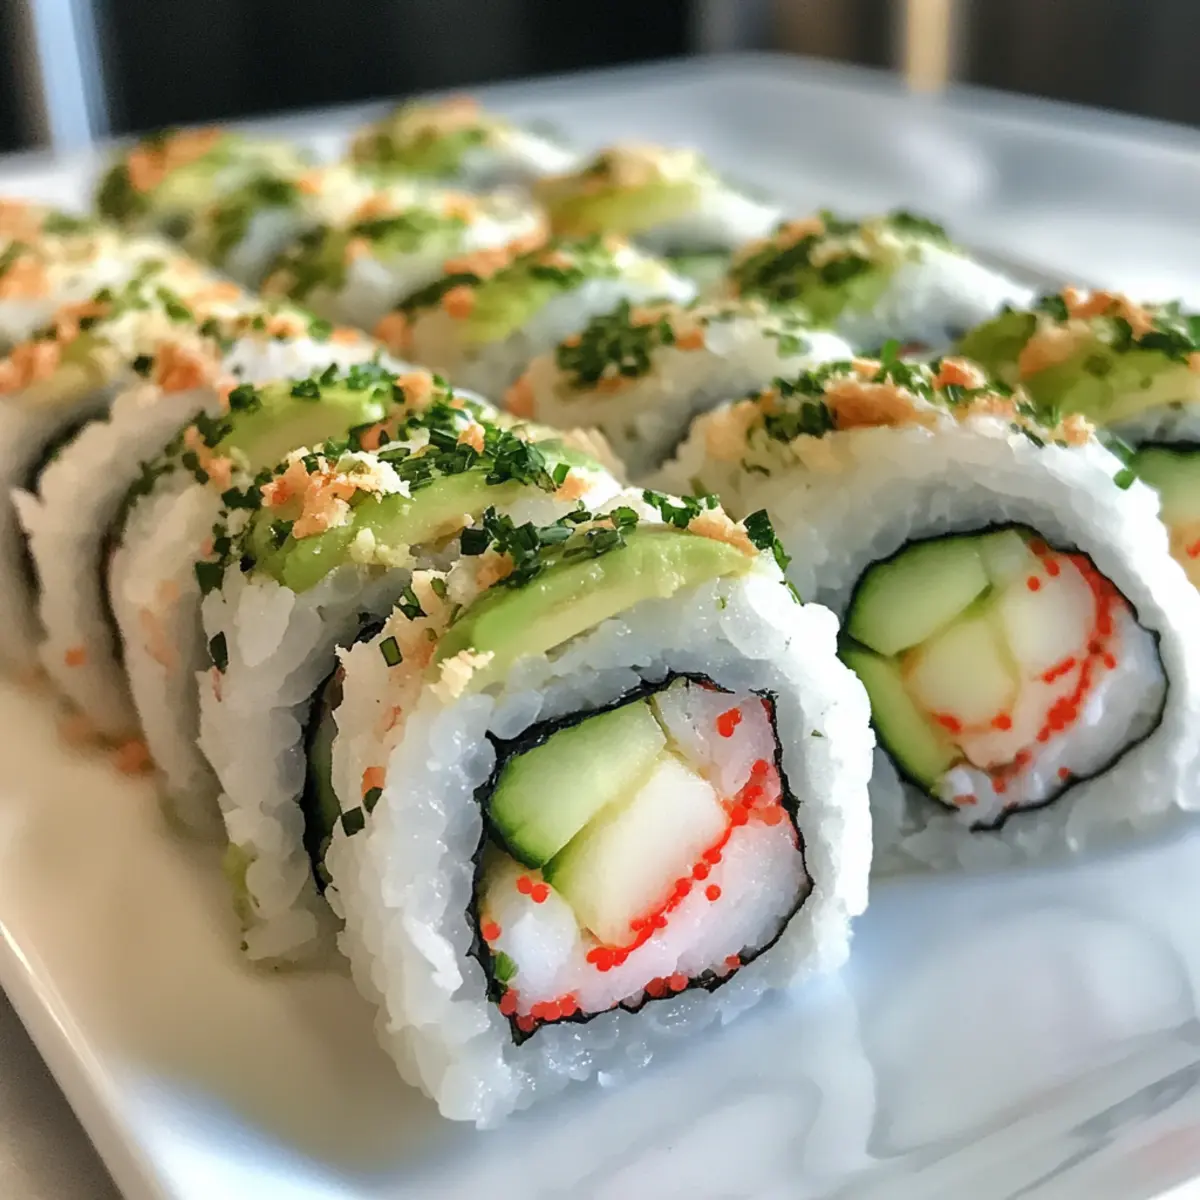
As I stepped into my kitchen, the world of sushi beckoned—its vibrant colors and fresh flavors inspired me to create something deliciously memorable. With these Quick and Easy Sushi Rolls for Beginners, you’ll experience the art of sushi-making without the fuss. Imagine seasoned sushi rice wrapped around creamy avocado, crunchy cucumber, and savory imitation crab, all coming together in a matter of minutes. This recipe embraces the joy of cooking at home, making it an ideal choice for casual get-togethers or those busy weeknights when you crave something delightful yet effortless. You’ll discover that making sushi at home is not only quick but incredibly satisfying. Are you ready to roll your way to a delicious meal?

Why Make Sushi Rolls at Home?

Freshness, effortlessly bringing vibrant flavors to your dining table with each bite. Quick preparation means you can whip these up in just 15 minutes, ideal for lunch or a weeknight dinner. Customizable fillings allow you to get creative—swap in fresh crab or even tofu for a vegetarian option! Crowd-pleaser appeal makes these sushi rolls perfect for gatherings or casual entertaining, and if you’re looking for more scrumptious ideas, don’t miss out on our Homemade Chicken Rolls or Savory Beef Rolls.

Sushi Rolls Ingredients

• Discover the essential elements for perfect sushi rolls!

For the Rice

  • Sushi Rice – Short-grain Japanese rice is key for that sticky texture; Arborio rice works if needed.
  • Rice Vinegar – Adds a tangy flavor, crucial for authentic sushi taste.
  • Sugar – Balances the acidity of the rice vinegar; use granulated sugar for a simple solution.
  • Salt – Enhances all the flavors; don’t skip this step!

For the Wrap

  • Nori Sheets – Provides a chewy base; always opt for fresh, unbleached nori for best results.

For the Filling

  • Avocado – Ensure you choose ripe ones for a creamy texture.
  • Cucumber – Diced uniformly, it adds a nice crunch; Persian cucumbers work well for their thin skin.
  • Imitation Crab – Offers a seafood element without breaking the bank; substitute with fresh crab or tofu for variety.

Embrace the delicious world of sushi rolls and get ready to impress!

Step‑by‑Step Instructions for Quick and Easy Sushi Rolls for Beginners

Step 1: Prepare Sushi Rice
Rinse 1 cup of short-grain sushi rice under cold water until the water runs clear, about 3-4 times. Cook the rice according to the package directions, typically 20 minutes, then transfer it to a shallow dish. While still warm, gently fold in a mixture of rice vinegar, sugar, and salt, letting it cool to room temperature for about 10 minutes.

Step 2: Assemble the Filling
In a mixing bowl, combine diced cucumber and ripe avocado, ensuring the pieces are uniform for even texture. Add 6-8 ounces of imitation crab, gently folding in a splash of soy sauce and sesame oil for added flavor. This colorful filling will add a delightful crunch and creaminess to your sushi rolls.

Step 3: Roll the Sushi
Lay down a nori sheet, shiny side facing down, on a bamboo sushi mat. With damp hands, evenly spread 1/2 cup of the seasoned sushi rice over the nori, leaving a 1-inch border at the top. Position 2 tablespoons of your filling along the bottom edge, then, using the mat, roll the sushi tightly away from you, sealing it with a little water on the nori edge.

Step 4: Cut and Serve
Once the sushi roll is completed, use a sharp knife to slice it into bite-sized pieces, about 1-2 inches thick, for optimal enjoyment. If desired, refrigerate the rolls for 10 minutes before serving to improve firmness. Pair your freshly made sushi rolls with soy sauce, wasabi, and pickled ginger for a complete dining experience.

Make Ahead Options

These quick and easy sushi rolls are perfect for busy weeknights and meal prep enthusiasts! You can prepare the sushi rice and filling up to 24 hours in advance. Simply make the sushi rice as directed, then store it in an airtight container in the refrigerator for up to 3 days; keep it slightly moist to maintain texture. The filling—diced cucumber, avocado, and imitation crab—can also be assembled ahead of time, just make sure to add a splash of lemon juice to the avocado to prevent browning. When you’re ready to serve, roll the sushi and slice it into pieces; you’ll have restaurant-quality sushi rolls with minimal effort!

Helpful Tricks for Sushi Rolls

  • Perfect Rice Texture: Ensure sushi rice is slightly sticky but not wet. Too dry rice can lead to difficult rolling, while overly wet rice can result in soggy sushi rolls.

  • Nori Handling: Avoid over-wetting nori sheets, as this can make them fragile and tricky to work with. Keep them dry and crisp to maintain the roll’s integrity.

  • Chill the Filling: For optimal flavors, chill your filling ingredients before assembling. This will enhance the overall freshness and keep the sushi rolls cool.

  • Sharp Knife Use: Use a sharp knife to slice your sushi rolls. A dull knife may mash the roll, making it less visually appealing and more challenging to eat.

  • Experiment with Fillings: Feel free to swap in various ingredients! Try fresh crab, tofu, or colorful veggies to create unique flavor profiles in your sushi rolls.

What to Serve with Quick and Easy Sushi Rolls for Beginners

Transform your sushi rolls into a complete dining experience with delightful complements that enhance every bite.

  • Soy Sauce: Essential for dipping, it adds a savory depth, balancing the freshness of the rolls.

  • Pickled Ginger: A perfect palate cleanser between bites, its zingy sweetness elevates the flavor profile beautifully.

  • Wasabi: For those who crave a spicy kick, wasabi contrasts the creamy avocado and the umami-rich crab, giving each bite an exciting punch.

  • Sesame Salad: Light and crisp, a simple salad of mixed greens with sesame dressing adds texture and brightens your meal.

  • Miso Soup: Warm and comforting, miso soup provides a flavorful counterpart, soothing the palate with its umami notes.

  • Edamame: These tender soybeans offer a satisfying snack; simply seasoned with sea salt, they create a balanced protein-rich side.

  • Green Tea: A calming beverage, green tea pairs well with sushi, refreshing the palate while enhancing the experience with its earthy tones.

  • Chocolate Mochi: As a sweet finish, these chewy, rice-based desserts complement the savory sushi, delivering a delightful texture and flavor contrast.

Sushi Rolls Variations & Substitutions

Feel free to explore these fun twists and swaps to make the sushi rolls truly your own, bringing freshness and excitement to your kitchen!

  • Fresh Crab: Swap imitation crab for fresh lump crab or lump meat for a luxurious touch. The sweetness of fresh crab really elevates your rolls!

  • Smoked Salmon: Use smoked salmon to add a savory, rich flavor, and its creamy texture pairs beautifully with avocado.

  • Vegetable Boost: Add sliced carrots, bell peppers, or radishes for an extra crunch and a vibrant pop of color, creating a garden-fresh experience.

  • Tofu: For a vegetarian-friendly option, replace seafood with firm or silken tofu. Marinate in soy sauce for added flavor that’ll surprise you!

  • Spicy Kick: Mix the filling with sriracha or a spicy mayo for that delicious heat, turning your sushi into a fiery favorite!

  • Quinoa: Substitute sushi rice with cooked quinoa for a more wholesome base. This twist adds a nutty flavor and a boost in protein.

  • Sesame Seeds: Roll the outside of your sushi in toasted sesame seeds for a nutty flavor and delightful crunchy texture.

  • Nori Alternatives: Try using soy paper or cucumber wraps instead of traditional nori for a gluten-free or lighter option.

If you’re eager for more culinary inspiration, check out our scrumptious Savory Beef Rolls or treat yourself with decadent Coconut Chocolate Rolls. Embrace your inner chef and make this sushi experience uniquely yours!

How to Store and Freeze Sushi Rolls

Fridge: Store sushi rolls in a sealed container in the refrigerator for up to 2 days. Place a damp paper towel inside to help maintain moisture and freshness.

Freezer: Sushi rolls can be frozen for up to 1 month. Wrap securely in plastic wrap and then aluminum foil to prevent freezer burn.

Reheating: If frozen, thaw in the fridge overnight. For a fresh taste, enjoy the sushi cold rather than reheating; it may lose its texture.

Serving: Always serve sushi rolls fresh for the best flavor. If preparing in advance, consider wrapping and refrigerating to keep them tasty and convenient.

Sushi Rolls for Beginners Recipe FAQs

How do I know if my avocado is ripe?
Absolutely! When selecting avocados, look for ones that yield slightly to gentle pressure—indicating they’re ripe and ready to be enjoyed. Avoid avocados with dark spots all over or a mushy texture, as these indicate overripeness. If you have an avocado that is still firm, you can place it in a paper bag at room temperature for a couple of days to speed up the ripening process.

How do I store leftover sushi rolls?
Very! To keep your sushi rolls fresh, store them in a sealed container in the refrigerator for up to 2 days. I recommend including a damp paper towel in the container to maintain moisture; this helps prevent the rice from hardening. If you’re concerned about the nori getting too soggy, consider wrapping the rolls in plastic wrap before placing them in the container.

Can I freeze sushi rolls?
Indeed! Sushi rolls can be frozen for up to 1 month. Here’s how to do it step-by-step:

  1. Wrap each sushi roll tightly in plastic wrap to lock in freshness.
  2. Follow up with a layer of aluminum foil to prevent freezer burn.
  3. Label with the date and type of filling for easy identification later.
    When you’re ready to enjoy, thaw the rolls in the refrigerator overnight; I recommend eating them cold for the best texture!

What should I do if my sushi rolls fall apart when I’m rolling them?
Totally normal! If you find that your sushi rolls aren’t holding together, double-check that you’re using enough seasoned rice—1/2 cup per roll is usually ideal. Ensure your rice is not too dry; it should be slightly sticky, which helps bind everything together. Additionally, as you roll, press gently but firmly, using the bamboo mat for support. With some practice, you’ll get the hang of it!

Are there any dietary considerations I should know about?
Very much so! If you or your guests have allergies, always use caution when selecting ingredients. Imitation crab contains seafood, which can be an allergen for some, so consider going with tofu or cooked shrimp instead for a seafood-free option. Avocado is a safe choice for most, but if you’re preparing sushi for pets, remember that avocado can be harmful to certain animals, so please keep them away from your sushi preparations.

What type of sushi rice should I use?
Absolutely vital! For the best sushi rolls, use short-grain Japanese rice, specifically labeled as sushi rice. Its sticky texture is essential for holding rolls together. If you can’t find sushi rice, Arborio rice is a suitable alternative, though it won’t have the same flavor. Make sure to rinse the rice thoroughly until the water runs clear to remove excess starch; this step is key for achieving the right texture!

Sushi Rolls

Sushi Rolls Made Simple: Fresh Flavors in 15 Minutes

Experience the joy of sushi-making at home with these quick and easy sushi rolls filled with fresh ingredients.
Prep Time 15 minutes
Cook Time 20 minutes
Cooling Time 10 minutes
Total Time 45 minutes
Servings: 2 rolls
Course: Lunch
Cuisine: Japanese
Calories: 250

Ingredients
  

For the Rice
  • 1 cup Sushi Rice Short-grain Japanese rice or Arborio rice
  • 2 tbsp Rice Vinegar Adds tangy flavor
  • 1 tbsp Sugar Granulated sugar for balance
  • 1 tsp Salt Enhances flavors
For the Wrap
  • 1 sheet Nori Sheets Fresh and unbleached
For the Filling
  • 1 medium Avocado Ripe for creaminess
  • 1 medium Cucumber Diced uniformly
  • 6-8 oz Imitation Crab Or substitute with fresh crab or tofu

Equipment

  • bamboo sushi mat
  • sharp knife

Method
 

Step-by-Step Instructions
  1. Rinse sushi rice under cold water until clear, then cook according to package directions.
  2. Fold in rice vinegar, sugar, and salt while rice is warm and let cool to room temperature.
  3. Combine diced cucumber, avocado, and imitation crab in a bowl with a splash of soy sauce and sesame oil.
  4. Lay nori sheet on sushi mat, spread rice, and add filling along the edge before rolling tightly.
  5. Slice roll into bite-sized pieces with a sharp knife and serve with soy sauce, wasabi, and pickled ginger.

Notes

Store sushi rolls in a sealed container in the fridge for up to 2 days, or freeze for 1 month. Enjoy cold rather than reheated.

Homemade Hawaiian Roll Garlic Bread That’s Irresistibly Cheesy

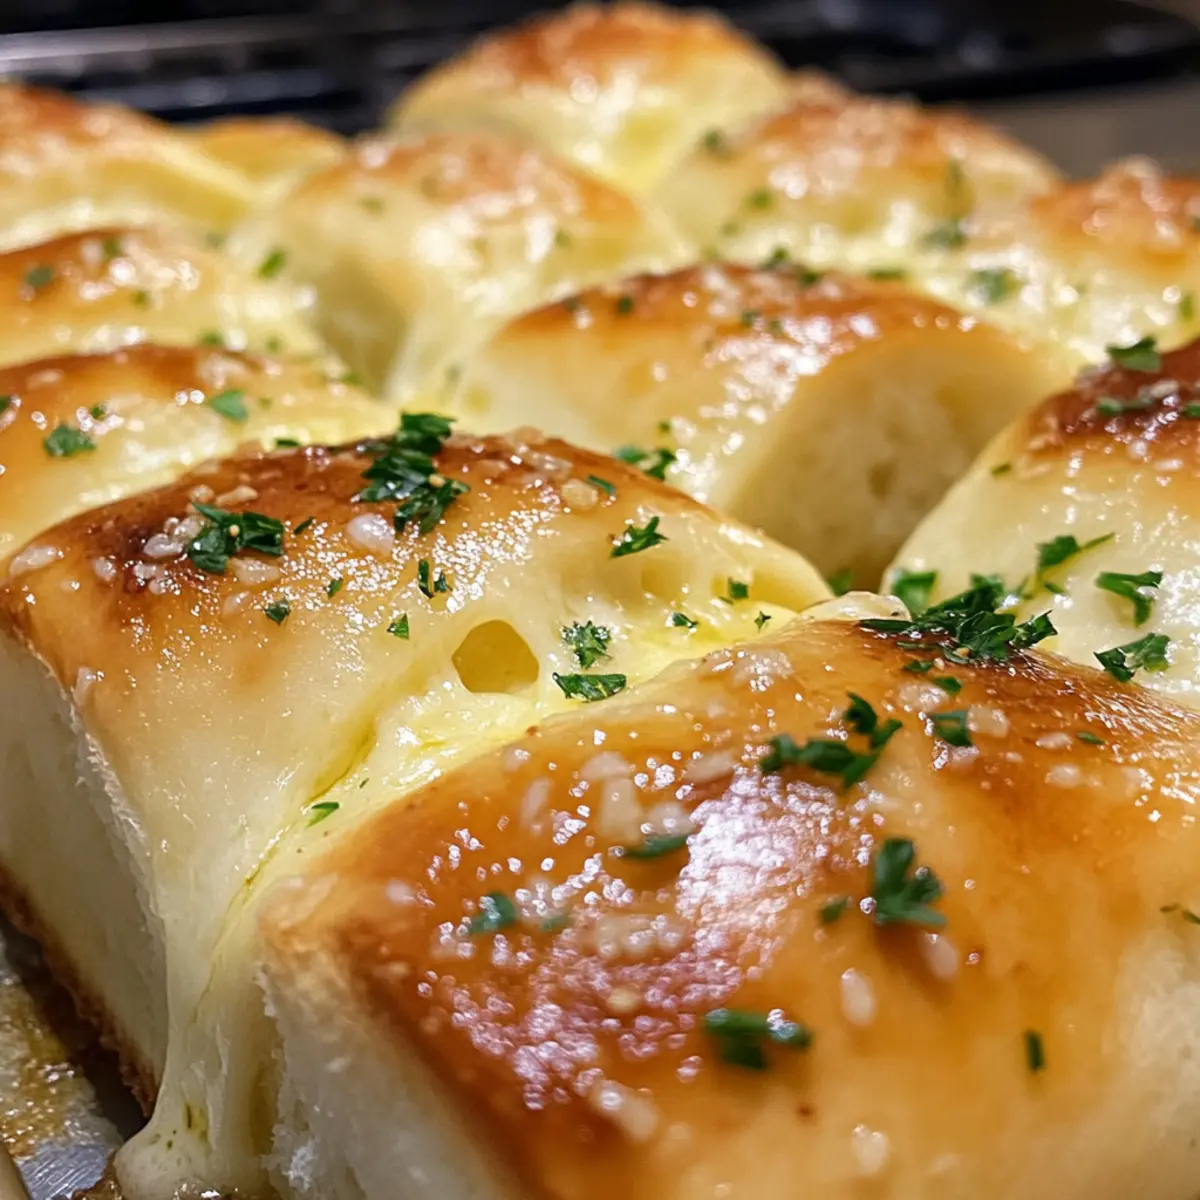
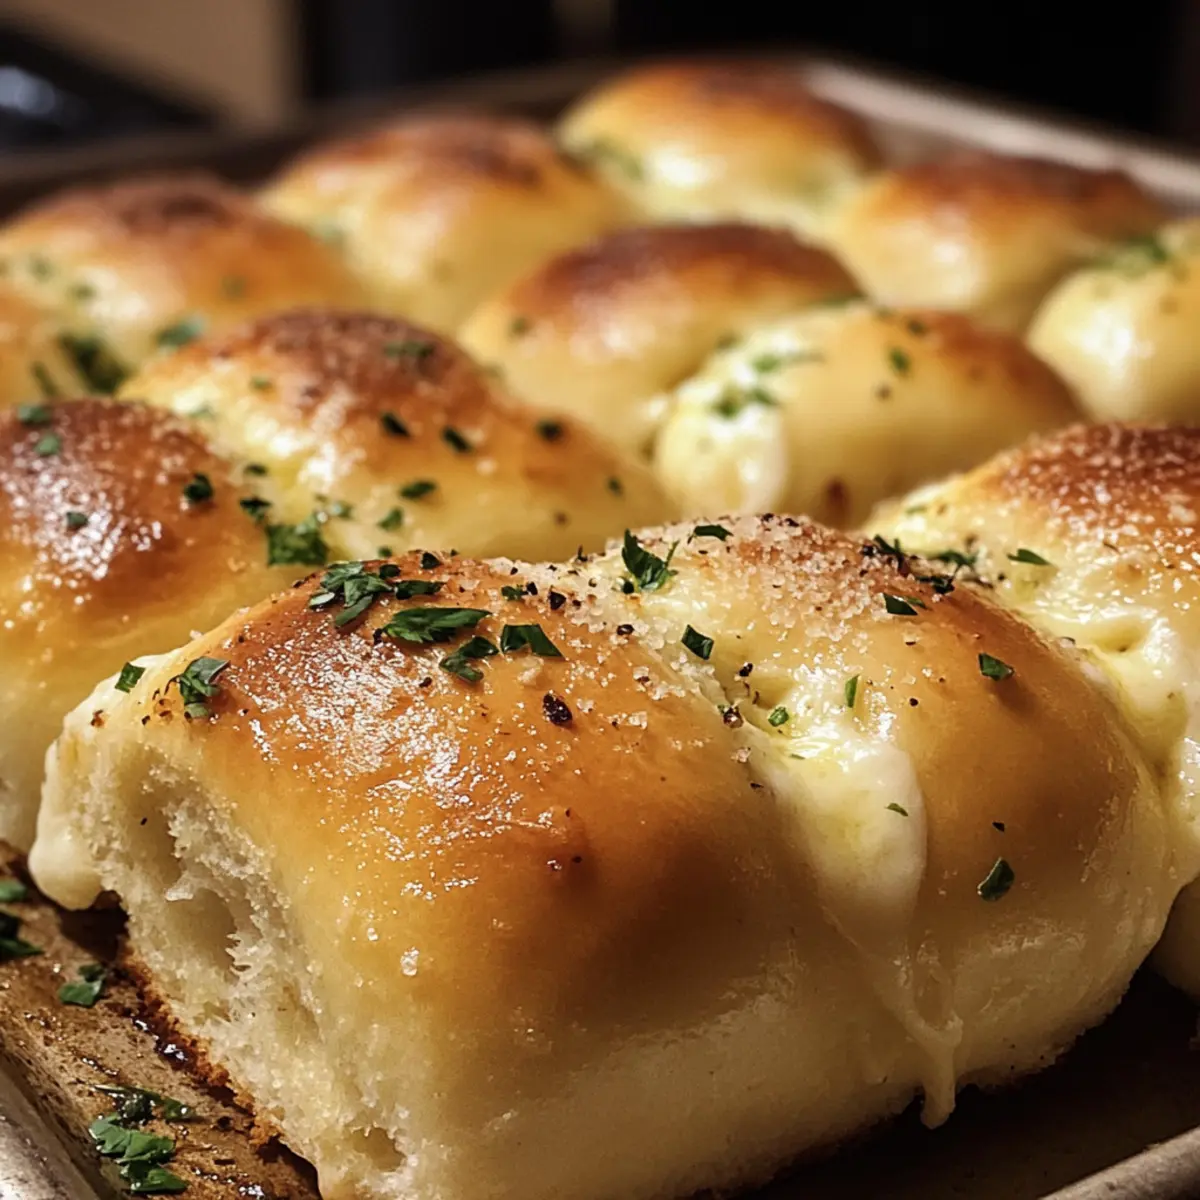
The aroma of roasted garlic and melted cheese fills the air as I pull a tray of Homemade Hawaiian Roll Garlic Bread from the oven. It’s incredible how quickly these soft, sweet rolls transform into a savory, cheesy delight that brings smiles all around. Perfect for game day, family dinners, or just an indulgent snack, this recipe is not only quick and easy, but it also strikes a comforting chord that takes you back to those cherished kitchen moments. With gooey mozzarella and a buttery herb blend, each bite is a delicious surprise waiting to happen. Ready to elevate your bread game with this effortless twist? Let’s get started!

Why is Hawaiian Roll Garlic Bread a Must-Try?

Irresistible Flavor: The marriage of sweet Hawaiian rolls and savory garlic transforms basic bread into a gourmet experience.

Quick & Easy: With minimal prep time, you can have this savory delight on the table in under 20 minutes, making it perfect for those busy weeknights.

Crowd-Pleasing Appeal: It’s hard to resist the gooey, cheesy goodness that everyone loves, whether it’s for a family meal or a party appetizer like Homemade Chicken Rolls.

Versatile Options: Feel free to mix things up—try different cheeses or herbs to suit your taste. Pair this recipe with refreshing sides like Herb Garlic Bread for a complete meal.

Comforting Aroma: The scent of melted garlic butter and herbs wafting through your kitchen will bring back nostalgic memories and make your space feel like home.

Perfect Texture: Enjoy the contrast of fluffy rolls and crispy edges with gooey cheese that pulls apart beautifully, resembling a delectable pull-apart bread.

Homemade Hawaiian Roll Garlic Bread Ingredients

• Get ready to whip up a dreamy loaf!

For the Garlic Butter Mixture

  • Unsalted Butter – Melted to provide richness and enhance flavors when combined with garlic.
  • Extra Virgin Olive Oil – Adds depth of flavor to the garlic butter.
  • Fresh Garlic (4 cloves) – Always use freshly minced for the best aromatic impact.
  • Italian Seasoning – Offers a blend of herbs that pair beautifully with the garlic and rolls.
  • Honey (1/2 teaspoon) – Brings a hint of sweetness to balance the savory flavors.
  • Red Pepper Flakes (optional) – Adds a gentle heat; omit for a milder garlic bread flavor.

For the Rolls

  • Hawaiian Rolls – The delightful base that provides sweetness and a soft texture; look for connected rolls for effortless slicing.

For the Cheesy Filling

  • Shredded Mozzarella Cheese – Essential for that gooey, creamy consistency; freshly grated is best for melt quality.
  • Grated Parmesan Cheese – Adds a savory, umami kick; can be swapped with pecorino for a sharper taste.

For Garnishing

  • Fresh Parsley – Adds a burst of color and freshness to the finished garlic bread.
  • Kosher Salt – Balances flavors and enhances the overall taste of the ingredients.

Once you have all your ingredients ready, get excited for what’s just around the corner: a deliciously cheesy Homemade Hawaiian Roll Garlic Bread that will impress everyone at your table!

Step‑by‑Step Instructions for Homemade Hawaiian Roll Garlic Bread

Step 1: Prepare Garlic Butter Mixture
In a medium bowl, melt unsalted butter and combine it with extra virgin olive oil, minced garlic, Italian seasoning, chopped fresh parsley, grated Parmesan cheese, kosher salt, honey, and optional red pepper flakes. Mix well to ensure all flavors meld together beautifully. Let it sit for a few minutes while you prepare the rolls, allowing the garlic to infuse into the butter.

Step 2: Preheat Oven
Set your oven to 350°F (175°C) to preheat. This temperature will enable the buttery goodness of your Homemade Hawaiian Roll Garlic Bread to bake evenly, creating that golden brown crust we all love. It’s essential to preheat the oven so the rolls bake perfectly while remaining soft on the inside.

Step 3: Arrange Rolls
Take a 9×13-inch baking dish and gently place the connected Hawaiian rolls inside, slightly pulling them apart to give them space to expand. Ensure they fit snugly in the dish; this will help hold in moisture while baking, leading to that deliciously soft, pillowy texture we desire in this garlic bread.

Step 4: Slice Rolls
With a sharp knife, carefully cut a shallow X shape on the top of each Hawaiian roll, taking care not to separate them completely. This technique allows the garlic butter mixture and cheese to seep into the rolls, creating a more flavorful and cheesy result. Visualize deep enough cuts to create delicious pockets for stuffing!
Step 5: Stuff Cheese
Grab your shredded mozzarella cheese and distribute it evenly among the sliced rolls, pushing some into the cuts you just made. Aim for generous portions, letting the cheese melt and create gooey, stretchy bites when it bakes. The combination of soft Hawaiian rolls and melty cheese is an irresistible highlight!

Step 6: Pour Garlic Butter
Drizzle the aromatic garlic butter mixture generously over the rolls, making sure it seeps into every nook and cranny. This step is crucial for flavor—allow that rich garlic butter to work its magic on the Hawaiian rolls. You can also brush some butter in-between the rolls for extra flavor infusion!

Step 7: Bake
Place your prepared baking dish in the preheated oven and bake for 7-8 minutes. Keep a close eye on your Homemade Hawaiian Roll Garlic Bread as it cooks; it’s done when the rolls are golden brown, and the cheese is bubbly. Start checking around the 6-minute mark to avoid burning since the sugar in the rolls can caramelize quickly.

Step 8: Cool & Serve
Once baking is complete, remove the dish from the oven and let it cool for 1-2 minutes. This short cooling period allows the cheese to set slightly, making it easier to pull apart while serving. Serve warm and watch everyone dive into this cheesy, buttery delight that’s sure to be a hit!

Expert Tips for Homemade Hawaiian Roll Garlic Bread

  • Keep Rolls Intact: Avoid cutting the rolls completely; this ensures they stay together and makes for easy serving and pulling apart.

  • Moderate Butter Heat: Let your melted butter cool slightly before mixing in the garlic to prevent bitterness and ensure a harmonious flavor in your Homemade Hawaiian Roll Garlic Bread.

  • Monitor Baking Time: Start checking on your garlic bread at the 6-minute mark; the sugar in the rolls can caramelize quickly, and you want that perfect golden crust!

  • Flavor Infusion: Brush some garlic butter mixture in between the rolls before baking for an even more flavorful experience, allowing the buttery goodness to seep through.

  • Cheese Choices: Feel free to play around with different cheeses like gouda or cheddar for unique twists on this classic recipe—you can make it as gourmet as you desire!

Make Ahead Options

Preparing Homemade Hawaiian Roll Garlic Bread in advance is a fantastic way to simplify your meal prep! You can prepare the garlic butter mixture and slice the rolls up to 24 hours ahead. Simply store the butter mixture in an airtight container in the fridge and keep the sliced rolls covered to prevent drying. When you’re ready to bake, stuff the rolls with mozzarella cheese and drizzle with the garlic butter. Bake straight from the refrigerator, adding an extra minute or two to baking time if needed. This method ensures that your garlic bread remains just as delicious and gooey for game night or family gatherings, saving you valuable time and effort!

Storage Tips for Homemade Hawaiian Roll Garlic Bread

Fridge: Store any leftovers in an airtight container in the refrigerator for up to 3 days to maintain freshness.

Freezer: For longer storage, freeze unbaked or baked rolls in a well-sealed freezer bag for up to 2 months. Thaw in the fridge before reheating.

Reheating: To enjoy your homemade Hawaiian roll garlic bread again, reheat in a 350°F oven for 5-7 minutes or warm in a microwave for 20-30 seconds until heated through.

Refreshing Flavor: Drizzle a bit of olive oil or additional garlic butter over the bread before reheating to revitalize its delicious flavor and texture!

Homemade Hawaiian Roll Garlic Bread Variations

Customize your Homemade Hawaiian Roll Garlic Bread to explore exciting flavors that entice your taste buds!

  • Cheese Swap: Use different types of cheese like gouda or cheddar for a unique taste that surprises every bite. The melty texture remains, but the flavor is uniquely yours.

  • Savory Buns: Substitute Hawaiian rolls with savory bread rolls for a less sweet base, inviting a delightful new taste profile. This twist makes it great for those looking for something a bit bolder.

  • Herb Variation: Swap fresh parsley with aromatic herbs like basil or chives to give your garlic bread a fresh twist. Each herb offers its aromatic magic!

  • Spice it Up: For a punch of flavor, toss in crushed red pepper flakes or even a drizzle of spicy chili oil. Bring the heat to balance the sweetness of the rolls and keep taste buds dancing.

  • Garlic Galore: Increase the amount of fresh garlic for a more robust flavor. If you’re a garlic lover, this is the perfect enhancement to satisfy that craving.

  • Season with Style: Introduce a blend of spices such as smoked paprika or even Italian seasoning variations for a unique flavor. A dash of creativity can take your garlic bread to gourmet heights.

  • Sourdough Switch: Try using sourdough rolls for a tangy, chewy twist! This variation pairs perfectly with the cheesy goodness, creating a texture that’s truly heavenly.

  • Add Vegetables: For added nutrition, feel free to throw in some sautéed spinach or sun-dried tomatoes between the rolls. They not only enhance the flavor but also packs in some wholesome goodness.

As you dive into these options, be sure to check out the delightful pairing with a comforting bowl of Homemade Chicken Pot Pie Soup or a slice of Herb Garlic Bread!

What to Serve with Homemade Hawaiian Roll Garlic Bread

There’s nothing quite like a warm, cheesy loaf to inspire perfect pairings that tantalize the taste buds.

  • Creamy Pasta: A rich fettuccine alfredo brings a silky contrast to the cheesy bread, elevating your dining experience to Italian heaven.
  • Garden Salad: A refreshing side salad with crisp greens and a light vinaigrette offers a bright counterbalance to the rich flavors of the garlic bread.
  • Marinara Sauce: Serve warm marinara on the side for dipping, adding a zesty, tangy kick that pairs beautifully with the buttery garlic flavors.
  • Grilled Vegetables: Roasted seasonal vegetables provide a smokey flavor, adding a delightful crunch and fresh element to your meal.
  • Soup: A warm, hearty tomato basil soup can turn your garlic bread into a cozy meal that’s perfect for any chilly evening.
  • Sparkling Wine: A light, bubbly wine complements the rich flavors of the garlic bread while enhancing the overall dining experience.
  • Savory Meatballs: Juicy meatballs simmered in a robust sauce create a satisfying combination alongside each cheesy morsel.
  • Chocolate Mousse: For dessert, serve a light chocolate mousse to wrap up your meal with a creamy, sweet note that delights the senses.

Homemade Hawaiian Roll Garlic Bread Recipe FAQs

What should I look for when selecting Hawaiian rolls?
Absolutely! When choosing Hawaiian rolls, I recommend opting for a brand like King’s Hawaiian or a similar variety. Look for rolls that are soft and have a golden color without any dark spots or visible preservatives. Connected rolls make slicing and serving much easier, providing that delightful pull-apart experience we’re after.

How should I store leftovers of the garlic bread?
You can store any leftovers in an airtight container in the refrigerator for up to 3 days. It’s important to keep the container sealed to prevent the rolls from becoming dry. Alternatively, if you have more than you can finish, consider freezing them for longer storage.

Can I freeze the Homemade Hawaiian Roll Garlic Bread?
Yes, indeed! You have two options for freezing: If you want to freeze the unbaked rolls, prepare them up to stuffing the cheese and pouring the garlic butter, then wrap tightly in plastic wrap or foil and place in a freezer bag for up to 2 months. When ready to bake, thaw them in the fridge overnight before continuing with the baking instructions. For baked rolls, simply wrap and freeze them once cooled, and re-bake from frozen at 350°F for about 10-15 minutes for the best results.

What if my garlic bread turns out too greasy?
Very common! If you find that your garlic bread is greasier than desired, consider reducing the amount of butter or oil next time. Start with half the amount and adjust according to your preference. It’s also beneficial to let the garlic butter mixture cool slightly before pouring over the rolls; this helps it adhere better without excess pooling. If you are serving the rolls directly out of the oven, place them on a cooling rack for a minute to let any excess oil drain before serving.

Are there any dietary considerations for making this recipe?
Yes! If you or your guests have dietary restrictions, there are several alternatives you can explore. For dairy-free versions, try using vegan butter and a dairy-free cheese substitute. If you’re concerned about gluten, you can seek out gluten-free Hawaiian rolls, though they might not provide the same sweetness. Always double-check ingredient labels for allergens like nuts or gluten. Also, steer clear of using honey if serving to pets, especially dogs, as it’s generally not recommended for them.

Homemade Hawaiian Roll Garlic Bread

Homemade Hawaiian Roll Garlic Bread That's Irresistibly Cheesy

An indulgent dish of Homemade Hawaiian Roll Garlic Bread infused with roasted garlic and oozing cheese, perfect for family gatherings or game day.
Prep Time 10 minutes
Cook Time 8 minutes
Total Time 18 minutes
Servings: 8 pieces
Course: Dinner
Cuisine: American
Calories: 250

Ingredients
  

For the Garlic Butter Mixture
  • 1/2 cup Unsalted Butter Melted
  • 1 tablespoon Extra Virgin Olive Oil
  • 4 cloves Fresh Garlic Minced
  • 1 teaspoon Italian Seasoning
  • 1/2 teaspoon Honey
  • 1/4 teaspoon Red Pepper Flakes Optional
For the Rolls
  • 12 rolls Hawaiian Rolls Connected rolls for easy slicing
For the Cheesy Filling
  • 2 cups Shredded Mozzarella Cheese Freshly grated
  • 1/2 cup Grated Parmesan Cheese
For Garnishing
  • 2 tablespoons Fresh Parsley Chopped
  • 1 teaspoon Kosher Salt

Equipment

  • 9x13-inch baking dish
  • Medium bowl
  • sharp knife

Method
 

Step-by-Step Instructions
  1. In a medium bowl, melt unsalted butter and combine it with extra virgin olive oil, minced garlic, Italian seasoning, chopped fresh parsley, grated Parmesan cheese, kosher salt, honey, and optional red pepper flakes. Mix well.
  2. Set your oven to 350°F (175°C) to preheat.
  3. Take a 9x13-inch baking dish and gently place the connected Hawaiian rolls inside.
  4. Carefully cut a shallow X shape on the top of each Hawaiian roll.
  5. Distribute shredded mozzarella cheese evenly among the sliced rolls.
  6. Drizzle the garlic butter mixture generously over the rolls.
  7. Place your prepared baking dish in the preheated oven and bake for 7-8 minutes.
  8. Remove the dish from the oven and let it cool for 1-2 minutes before serving.

Notes

Keep rolls intact to ensure ease of serving. Monitor baking time to achieve perfect golden crust.

Crispy Smoked Brisket Hash with Runny Eggs for Cozy Brunches

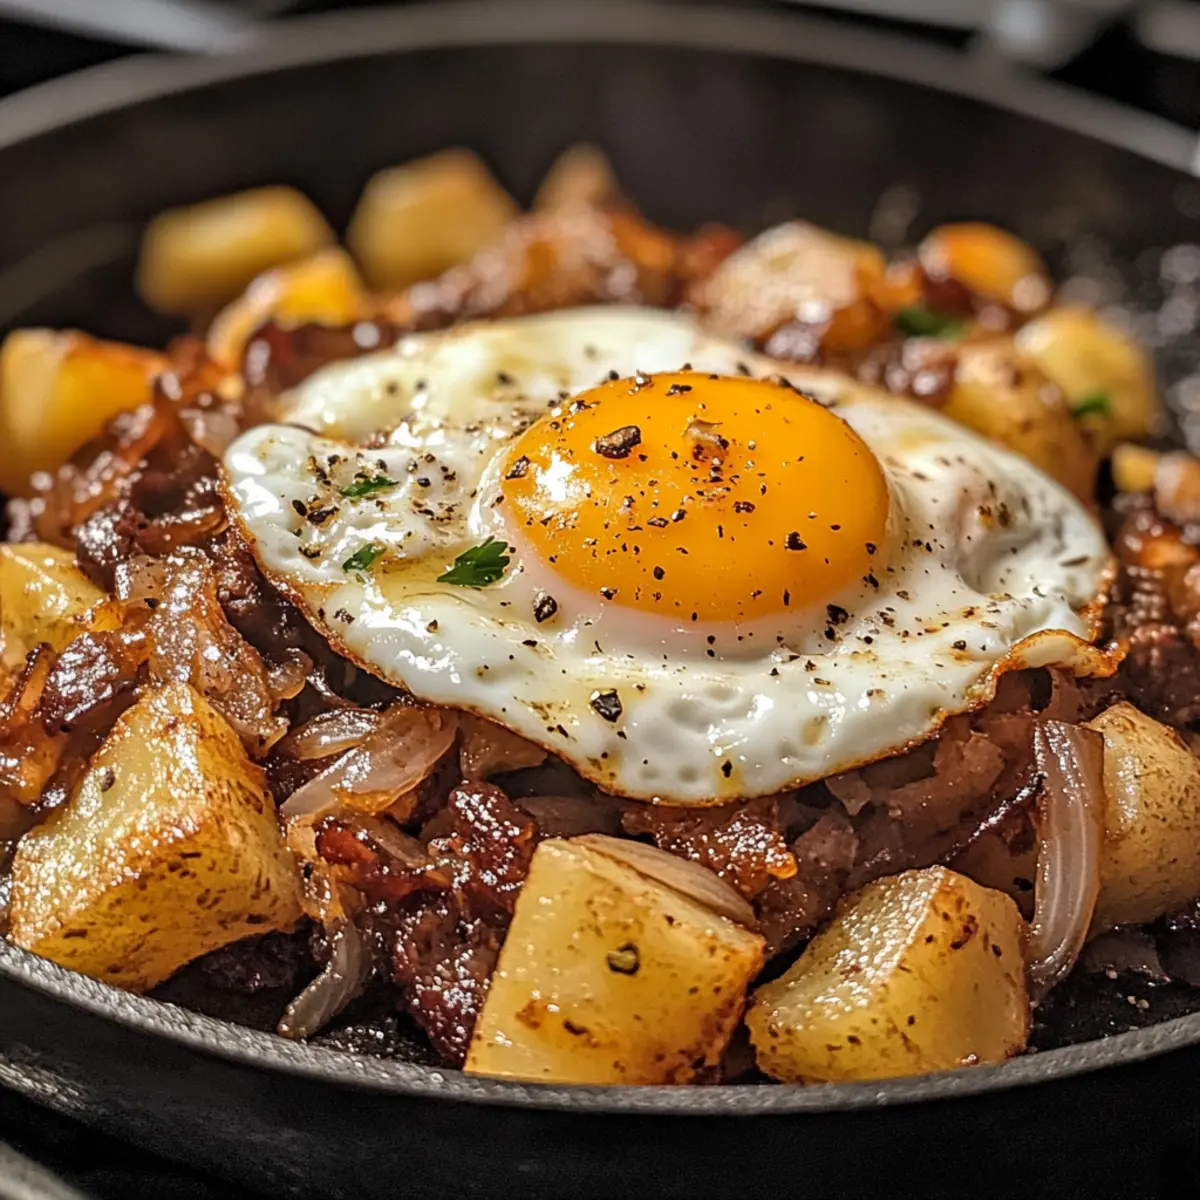
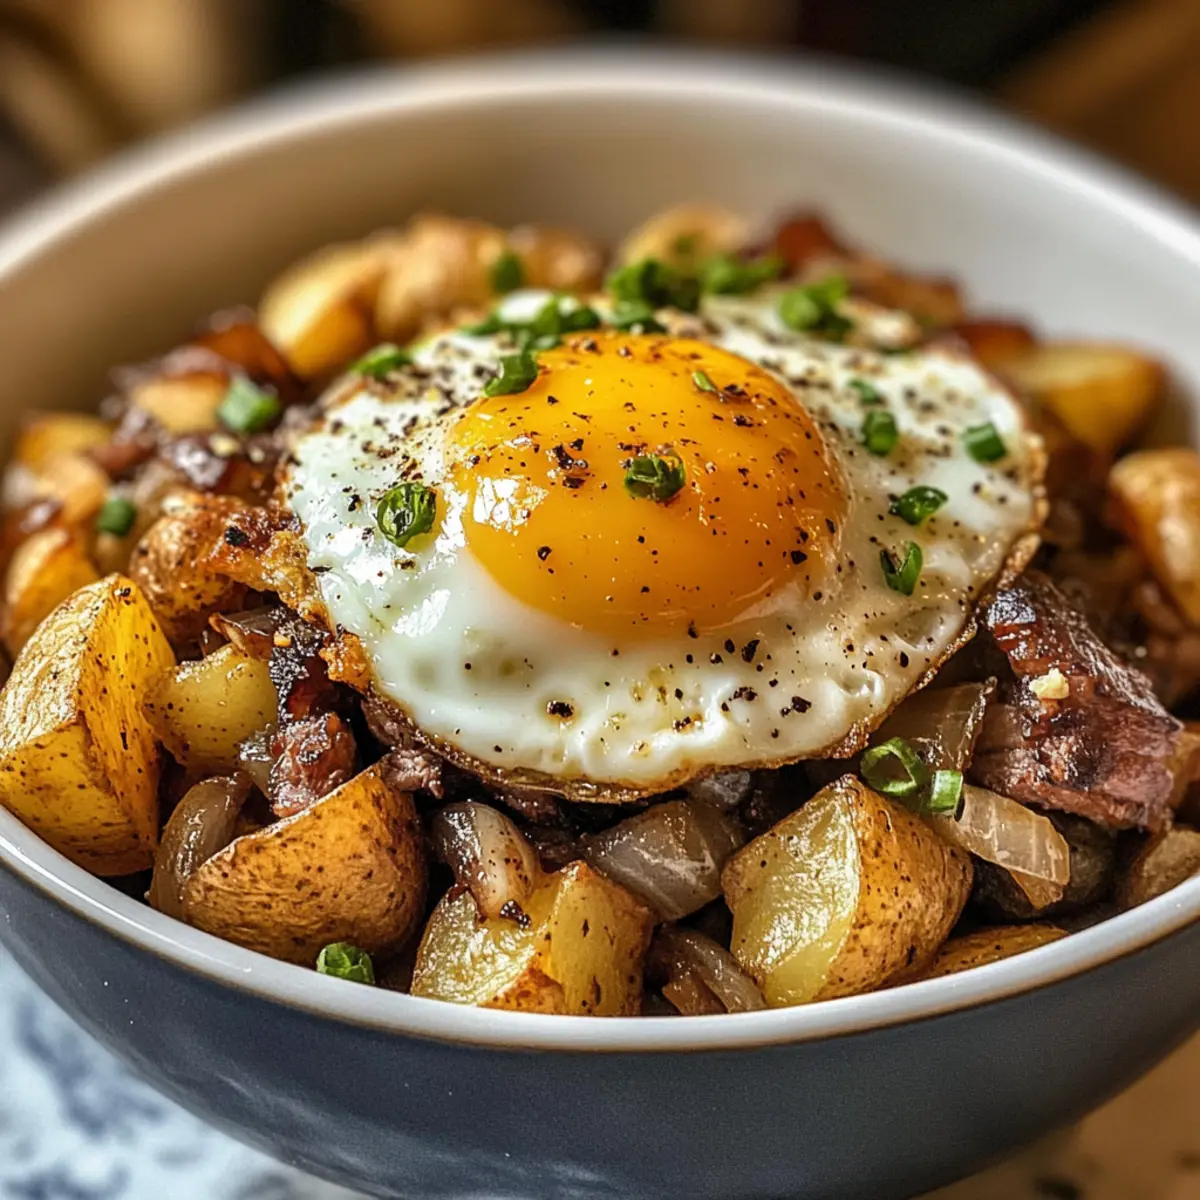
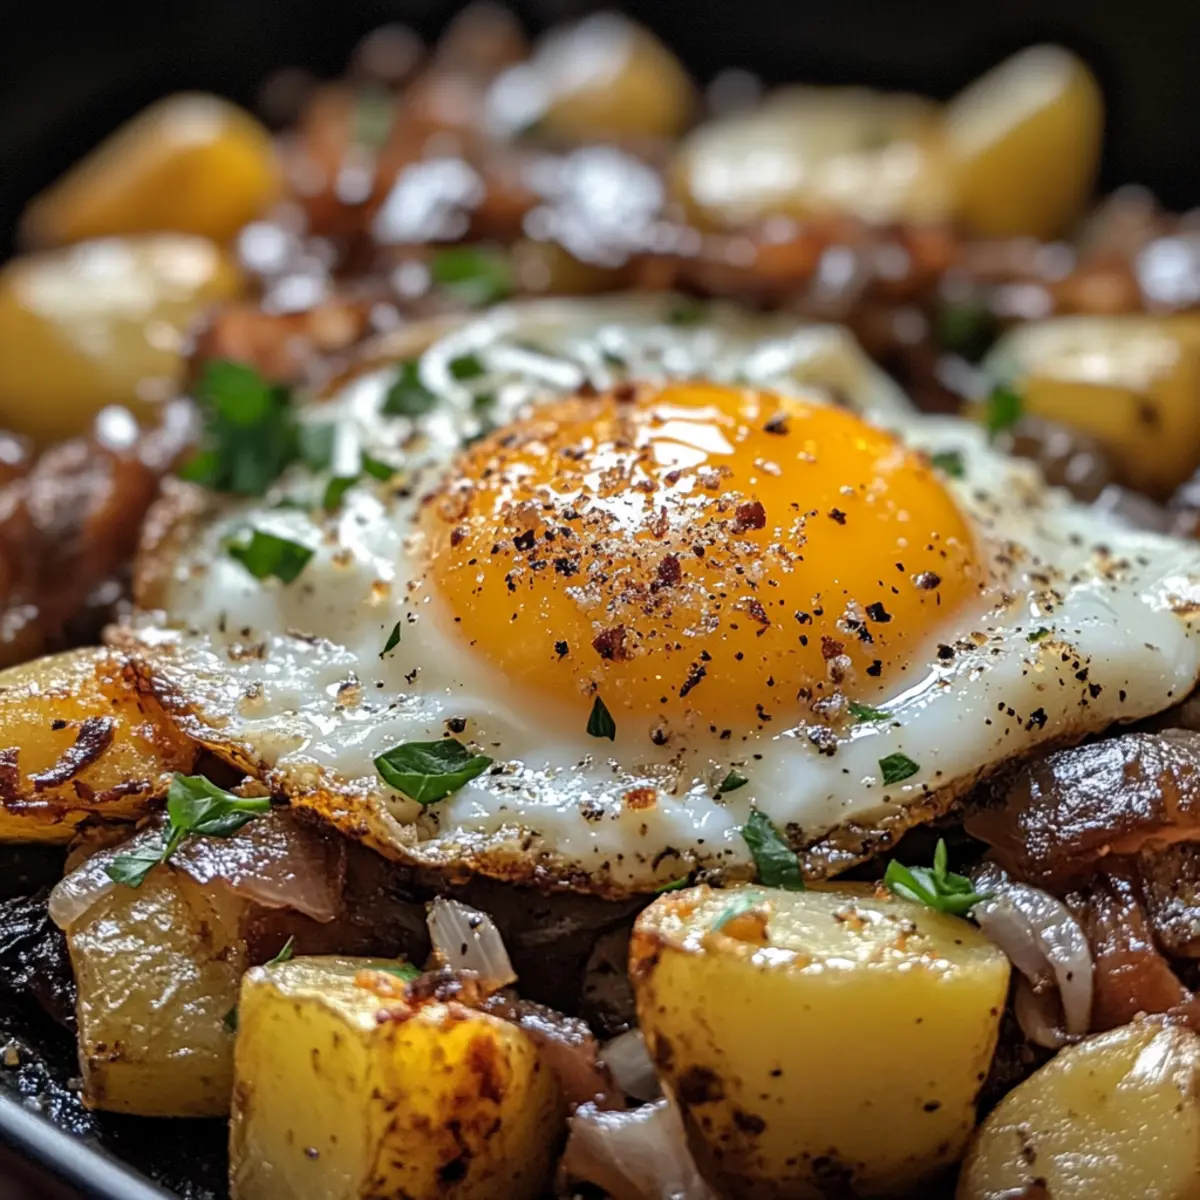
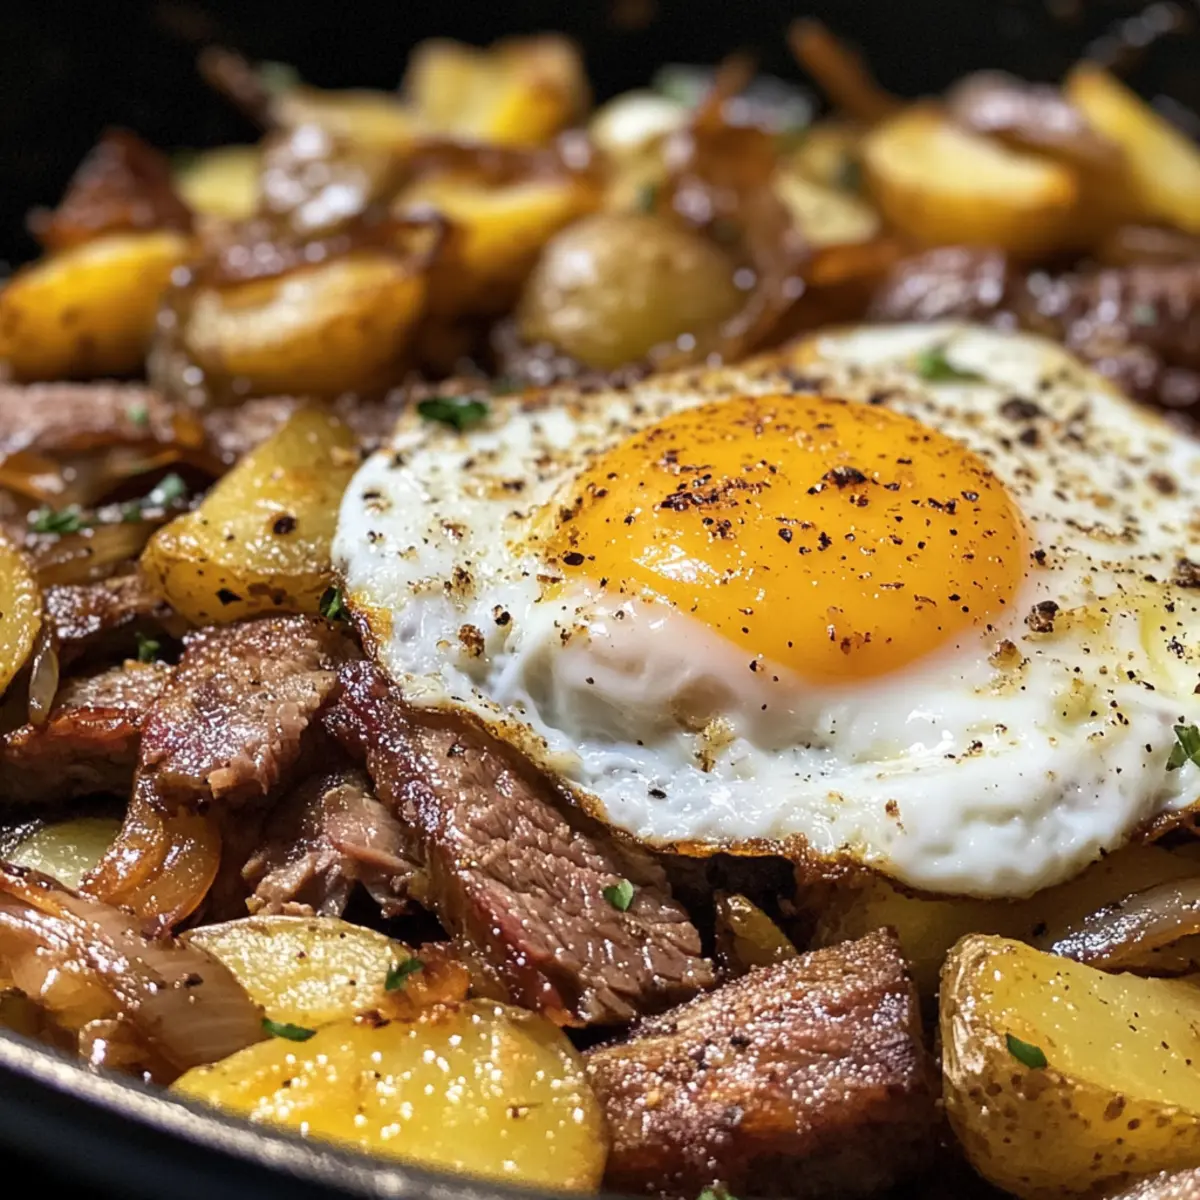
The smell of smoky brisket wafting through the kitchen draws everyone in like a warm hug. One morning, with leftovers staring me down, I decided to transform them into something truly special: Crispy Smoked Brisket Hash with Runny Eggs. This dish combines tender, seasoned brisket with crispy potatoes and sweet caramelized onions, creating a hearty breakfast that’s perfect for leisurely weekends or a quick brunch gathering. Not only is it a fantastic way to utilize those leftover bits, but it’s also gluten-free and boosts your morning with the protein-packed goodness of eggs—a true crowd-pleaser! Who wouldn’t want a plate that’s as comforting as a rustic start to the day? Ready to liven up your brunch game and impress your loved ones? Let’s dive into this mouthwatering recipe together!

Why is this brisket hash irresistible?

Hearty, delicious comfort: Your taste buds will celebrate this perfect combination of crispy potatoes, rich smoked brisket, and creamy runny eggs—a breakfast masterpiece.

Simplicity at its core: Quick to whip up, this dish is designed for everyone, from novice cooks to seasoned chefs.

Flavor-packed variations: Switch it up by adding colorful bell peppers or experimenting with spices like smoked paprika for an extra kick!

Perfect for leftovers: Transform that leftover brisket into a mouthwatering meal that everyone will rave about. Looking for more creative ways to use brisket? Check out these Crispy Mini Beef Pies to make the most of your cuts!

Crowd-pleaser appeal: Whether you’re serving family or hosting friends, you’ll impress them with this deliciously satisfying brunch option.

Crispy Smoked Brisket Hash Ingredients

For the Hash

  • Smoked Brisket – Provides rich, smoky flavor and protein; leftover brisket works perfectly here.
  • Potatoes – A must-have base ingredient that adds texture; be sure to dry them well before cooking for extra crispiness.
  • Onions – Adds a touch of sweetness and depth; caramelize for the best flavor.
  • Butter – Adds lush richness; substitute with olive oil for a dairy-free option.
  • Smoked Paprika – Enhances the smoky flavor; feel free to swap in chili powder for extra heat.

For the Eggs

  • Eggs – The star topping, contributing creaminess; fresh eggs yield the best texture; you can poach or fry them separately as an alternative.

Step‑by‑Step Instructions for Crispy Smoked Brisket Hash with Runny Eggs

Step 1: Prep Potatoes and Brisket
Start by cutting the potatoes into small, uniform cubes to ensure even cooking. Let your leftover smoked brisket sit at room temperature while you prepare the rest, allowing it to warm slightly for better flavor infusion later.

Step 2: Cook Potatoes
Heat a large cast iron skillet over medium heat and add butter, letting it melt completely. Once the butter is bubbling, add the cubed potatoes, making sure to spread them out in a single layer. Cook for about 15-20 minutes, stirring occasionally until they are golden brown and crispy on the outside.

Step 3: Add Onions
Stir in the diced onions after the potatoes have started to crisp up. Cook the mixture for an additional 5-7 minutes, stirring regularly, until the onions are soft and caramelized, creating a beautiful depth of flavor for your crispy smoked brisket hash.

Step 4: Incorporate Brisket
Next, carefully add the warm smoked brisket to the skillet, mixing it in with the potatoes and onions. Continue cooking for another 3-5 minutes, stirring gently until the brisket is heated through and the edges become slightly crispy.

Step 5: Cook Eggs
Create small wells in the hash mixture and crack the eggs directly onto the potatoes and brisket. Cover the skillet with a lid to create steam, cooking the eggs for about 4-6 minutes. Keep an eye on them until the whites are set, while the yolks remain runny, perfect for this comforting breakfast dish.

Storage Tips for Crispy Smoked Brisket Hash with Runny Eggs

Fridge: Store leftovers in an airtight container for up to 3 days. Reheat gently in a skillet to keep the potatoes crispy and eggs runny.

Freezer: Portion out the brisket hash, wrap securely, and freeze for up to 2 months. When ready to eat, thaw in the fridge overnight before reheating.

Reheating: For best results, reheat on the stove over low heat, stirring occasionally to warm evenly. Avoid using the microwave as it can make the hash soggy.

Tips: Always ensure the dish is completely cool before storing to maintain freshness, and enjoy your crispy smoked brisket hash to the fullest!

Expert Tips

Crispy Potatoes: Ensure your potatoes are thoroughly dried before adding them to the skillet. This avoids steaming and helps achieve that crunchy texture in your crispy smoked brisket hash.

Heat Control: Adjust the heat as needed when adding the brisket to maintain crispiness. A higher heat can help caramelize without burning the potatoes.

Check Eggs Frequently: Cover the skillet while cooking eggs but check frequently to avoid overcooking. You want those delightful runny yolks to complement the hash perfectly.

Avoid Overcrowding: When cooking potatoes, give them space in the skillet—overcrowding can lead to sogginess rather than that sought-after crunch.

Experiment with Flavors: Don’t hesitate to add variations to your crispy smoked brisket hash; try different spices or add in fresh vegetables like bell peppers for added color and nutrition.

What to Serve with Crispy Smoked Brisket Hash with Runny Eggs

Elevate your breakfast experience by pairing it with delightful sides that complement the richness of the hash.

  • Toasted Sourdough: The crusty warmth of sourdough perfectly balances the creamy runny eggs and smoky brisket. It’s the ideal canvas for mopping up every delicious bite.

  • Fresh Green Salad: A light salad with mixed greens adds a refreshing crunch, brightening the meal with citrus vinaigrette that contrasts beautifully with the hearty hash.

  • Roasted Asparagus: Tender, slightly charred asparagus gives a fresh, green element that complements the richness. Toss with simple olive oil and lemon for an extra zing.

  • Spicy Roasted Tomatoes: Oven-roasted tomatoes with a hint of spice bring sweetness and acidity to contrast the dish’s smokiness, enhancing the overall flavor profile.

  • Homemade Hot Sauce: A dash of your favorite hot sauce adds a delightful kick, bringing an exciting layer of flavor that pairs well with the crispy hash and eggs.

  • Creamy Avocado Toast: The buttery richness of avocado on a slice of whole-grain toast creates a creamy texture and adds healthy fats, making your meal even more satisfying.

  • Iced Coffee or Mimosas: Keep the brunch beverages flowing! Refreshing iced coffee or fizzy mimosas with orange juice are perfect complements to this indulgent breakfast feast.

  • Mini Chocolate Croissants: For a sweet finish, serve flaky mini croissants filled with chocolate. Their delicate sweetness is a delightful way to round off this comforting brunch experience.

Make Ahead Options

These Crispy Smoked Brisket Hash with Runny Eggs are perfect for busy home cooks looking to save time during hectic weekday mornings! You can prep the potatoes and onions up to 24 hours in advance by dicing the potatoes and caramelizing the onions. Simply store them in an airtight container in the refrigerator to retain their freshness. When ready to serve, heat a cast iron skillet, add the potatoes and onions, followed by the warmed brisket, and cook until crispy. Finally, create wells for the eggs, cover, and cook until the yolks are runny for a comforting, delicious meal that feels just as good as freshly made!

Crispy Smoked Brisket Hash Variations

Feel free to play around with these variations and create your own delightful twist on this comforting dish!

  • Vegetarian: Swap in sautéed mushrooms or black beans for a hearty, meat-free alternative.

  • Spicy Kick: Add diced jalapeños or a shake of cayenne pepper for an electrifying heat that wakes up your taste buds!

  • Different Cheese: Sprinkle some crumbled feta or a handful of cheddar for a delightful creamy finish that complements the smoky flavors beautifully. Whether you opt for a sharp cheddar or a tangy feta, cheese can elevate this dish to new heights.

  • Sweet & Savory: Toss in some sweet diced potatoes along with regular ones for a unique twist and an added layer of flavor for a sweet-savory contrast.

  • Herb Infusion: Experiment with fresh herbs like cilantro or parsley stirred in just before serving to add freshness and vibrancy to your crispy smoked brisket hash.

  • Alternative Eggs: Try poaching or frying your eggs for a different presentation and texture. Each method adds its own charm, so why not play around to see which you like best?

  • Sourdough Scoops: Serve the brisket hash inside toasted sourdough bowls or alongside for a delightful crunch that balances the soft textures beautifully.

These delectable variations are perfect ways to customize your Crispy Smoked Brisket Hash with Runny Eggs. And if you’re ever looking for more inspiration, consider trying out some of these Crispy Cheese and Chili French Fries or a plate of Vegetable Pancakes to round out your brunch spread!

Crispy Smoked Brisket Hash with Runny Eggs Recipe FAQs

How do I select the best smoked brisket for the hash?
Absolutely! Look for brisket that’s nicely marbled with fat, as this will ensure tenderness and flavor. A good brisket will be dark and smoky on the outside with a nice pink smoke ring inside. If possible, use leftovers from a recent barbecue, as the smoky flavor shines through beautifully in this hash.

How should I store leftovers from the brisket hash?
Leftovers should be stored in an airtight container in the fridge for up to 3 days. To maintain crispness, gently reheat the hash in a skillet over medium-low heat. Remember to stir occasionally, allowing everything to warm up evenly without losing that crunchy texture!

Can I freeze the crispy smoked brisket hash?
Definitely! To freeze, portion the brisket hash into freezer-safe containers or wrap securely in plastic wrap and aluminum foil. It will keep well for up to 2 months. When you’re ready to enjoy it, thaw it in the refrigerator overnight, then reheat thoroughly in a skillet, adding a splash of water or broth if needed for moisture.

What should I do if my potatoes become soggy while cooking?
If your potatoes turn out soggy, it could be due to excess moisture. To remedy this, ensure your potatoes are completely dried after cutting, and avoid overcrowding the skillet—it’s best to cook in batches. If they’ve already been cooked, you can try placing them on a paper towel to absorb moisture before crisping them up again in a hot skillet.

Are there any dietary considerations for this recipe?
Very! This crispy smoked brisket hash can easily be made gluten-free by ensuring your smoked brisket and any spices you use are gluten-free certified. For those avoiding dairy, simply substitute butter with olive oil. If you’re cooking for someone with egg allergies, you can either skip the eggs or top with avocado slices for that creamy finish!

Crispy Smoked Brisket Hash with Runny Eggs

Crispy Smoked Brisket Hash with Runny Eggs for Cozy Brunches

Enjoy a delightful Crispy Smoked Brisket Hash with Runny Eggs, combining rich flavors and textures for a perfect brunch.
Prep Time 10 minutes
Cook Time 30 minutes
Total Time 40 minutes
Servings: 4 servings
Course: Breakfast
Cuisine: American
Calories: 450

Ingredients
  

For the Hash
  • 2 cups Smoked Brisket leftover brisket works perfectly
  • 2 large Potatoes cubed and dried well
  • 1 large Onion diced
  • 2 tablespoons Butter or olive oil for dairy-free option
  • 1 teaspoon Smoked Paprika can swap with chili powder
For the Eggs
  • 4 large Eggs fresh eggs yield the best texture

Equipment

  • cast iron skillet

Method
 

Step‑by‑Step Instructions
  1. Cut the potatoes into small, uniform cubes and let the brisket sit at room temperature.
  2. Heat a cast iron skillet over medium heat, add butter, and melt completely. Add the potatoes in a single layer and cook for 15-20 minutes.
  3. Stir in the diced onions after the potatoes have crisped up and cook for an additional 5-7 minutes until caramelized.
  4. Carefully add the warm smoked brisket and mix in with the potatoes and onions. Cook for another 3-5 minutes until heated through.
  5. Create small wells in the hash and crack the eggs on top. Cover with a lid and cook for 4-6 minutes until whites are set and yolks remain runny.

Notes

Ensure potatoes are thoroughly dried for optimal crispiness and keep an eye on the eggs to avoid overcooking.

Decadent Cinco de Mayo Tres Leches Cake for Your Celebration

As the clock strikes five, the tantalizing aroma of fresh cake fills the air, signaling the start of something truly special. This Classic Cinco de Mayo Tres Leches Cake transforms any gathering into a celebration, with its soft and airy texture soaking up a delightful blend of three creamy milks. Perfectly pairing lightness with sumptuous richness, it offers a beautiful centerpiece for your table that both captivates and comforts. Not only is this dessert easy to prepare ahead of time—a little chill in the fridge allows the flavors to mingle—but it’s also guaranteed to be a crowd-pleaser at any festive occasion. How do you envision serving your slice of this delightful cake?

Why is Tres Leches Cake a Must-Try?

Exquisite Flavors: The indulgent blend of three milks transforms this cake into a creamy delight that dances on your palate.

Versatile Options: Easily customize your Tres Leches with berry toppings or citrus drizzles to suit any occasion or preference. Pair it with a refreshing Sky Jelly Cake for a delightful dessert table!

Easy Make-Ahead: Prepare it in advance to let the flavors deepen, saving you time on the day of your celebration.

Perfect for Celebrations: This iconic Mexican dessert embodies festivity and abundance, making it an ideal choice for gatherings like Cinco de Mayo.

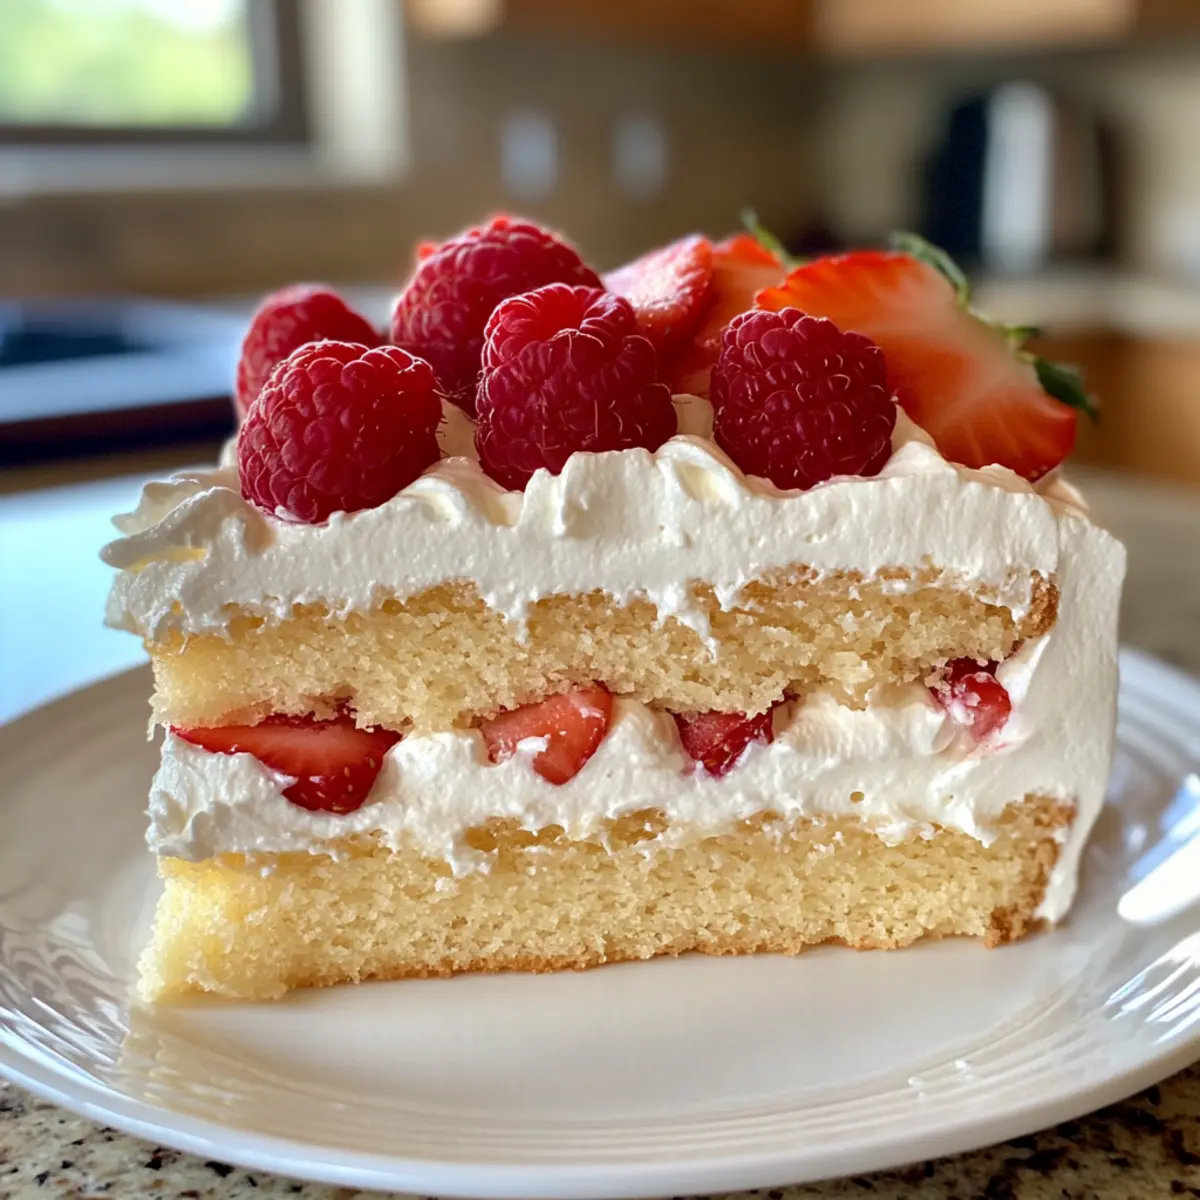
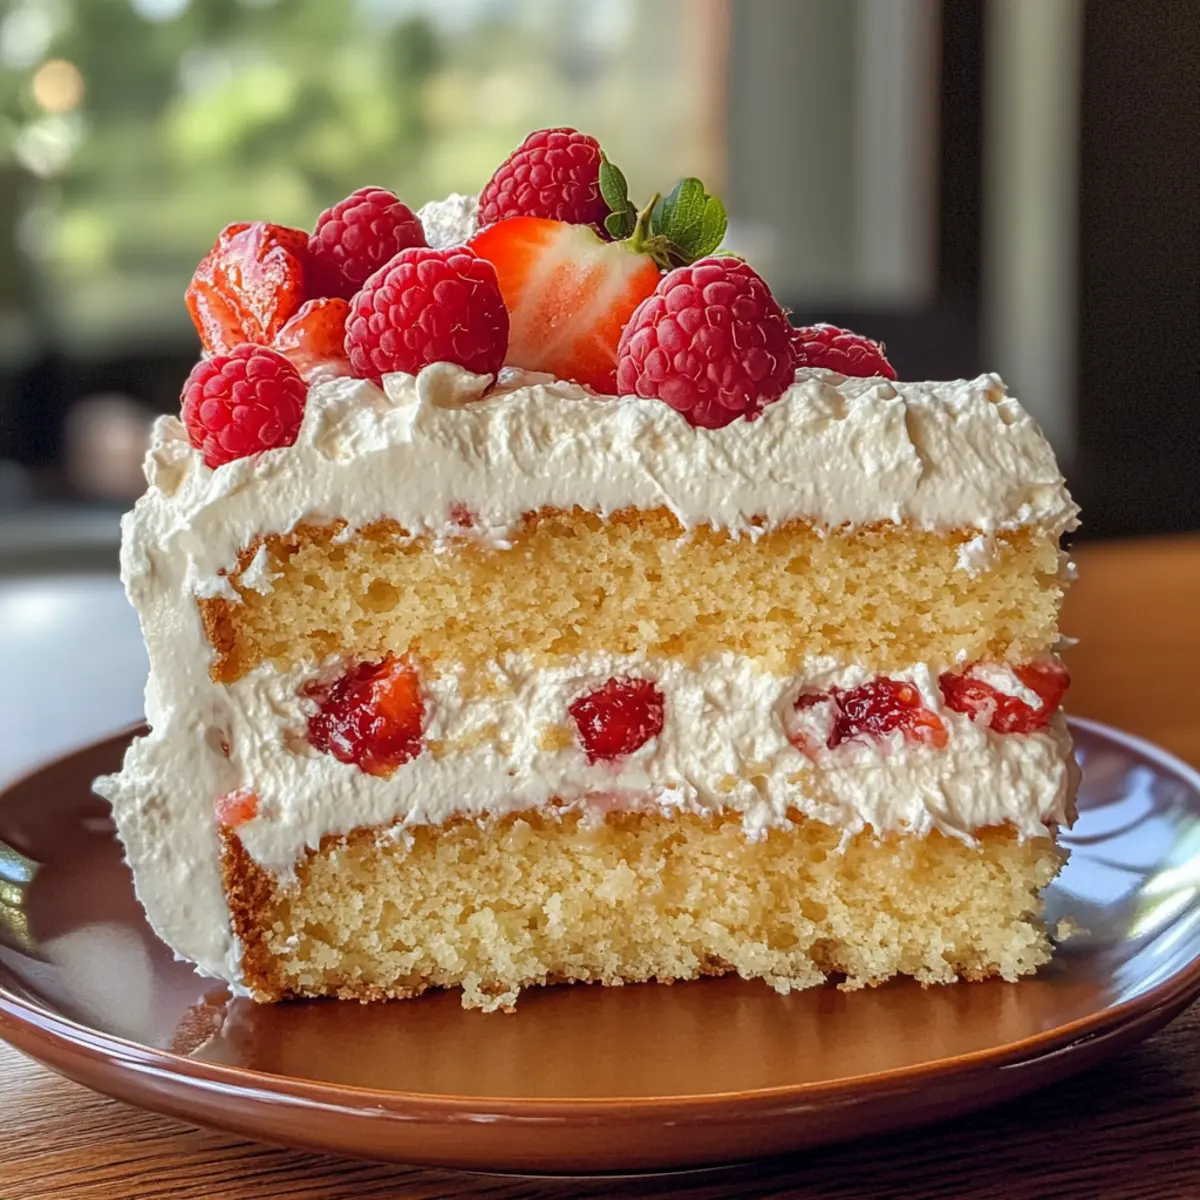
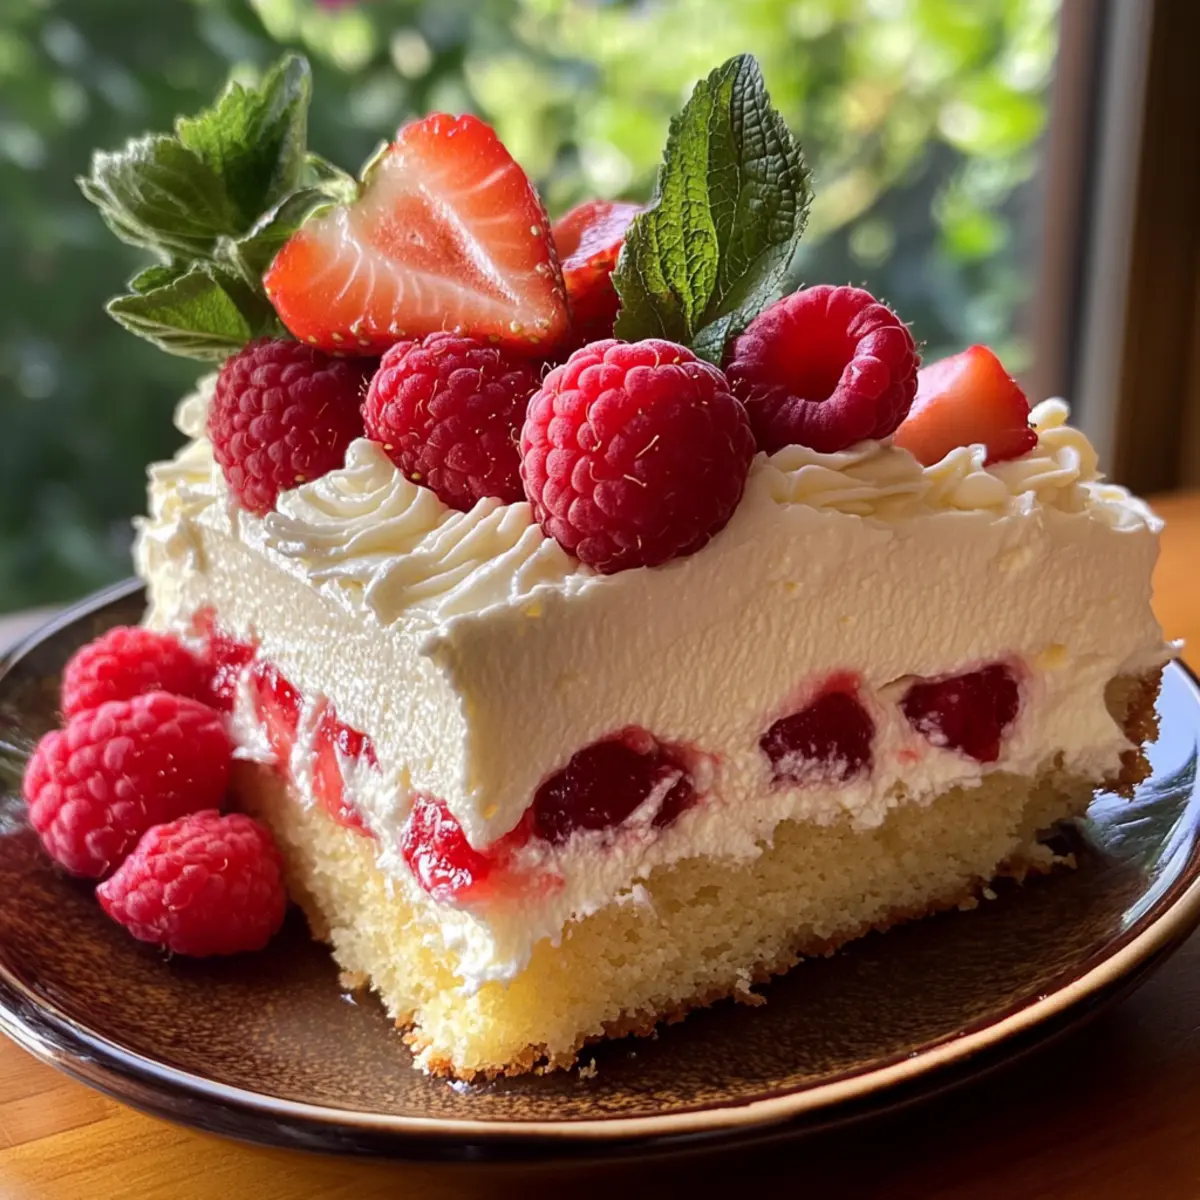
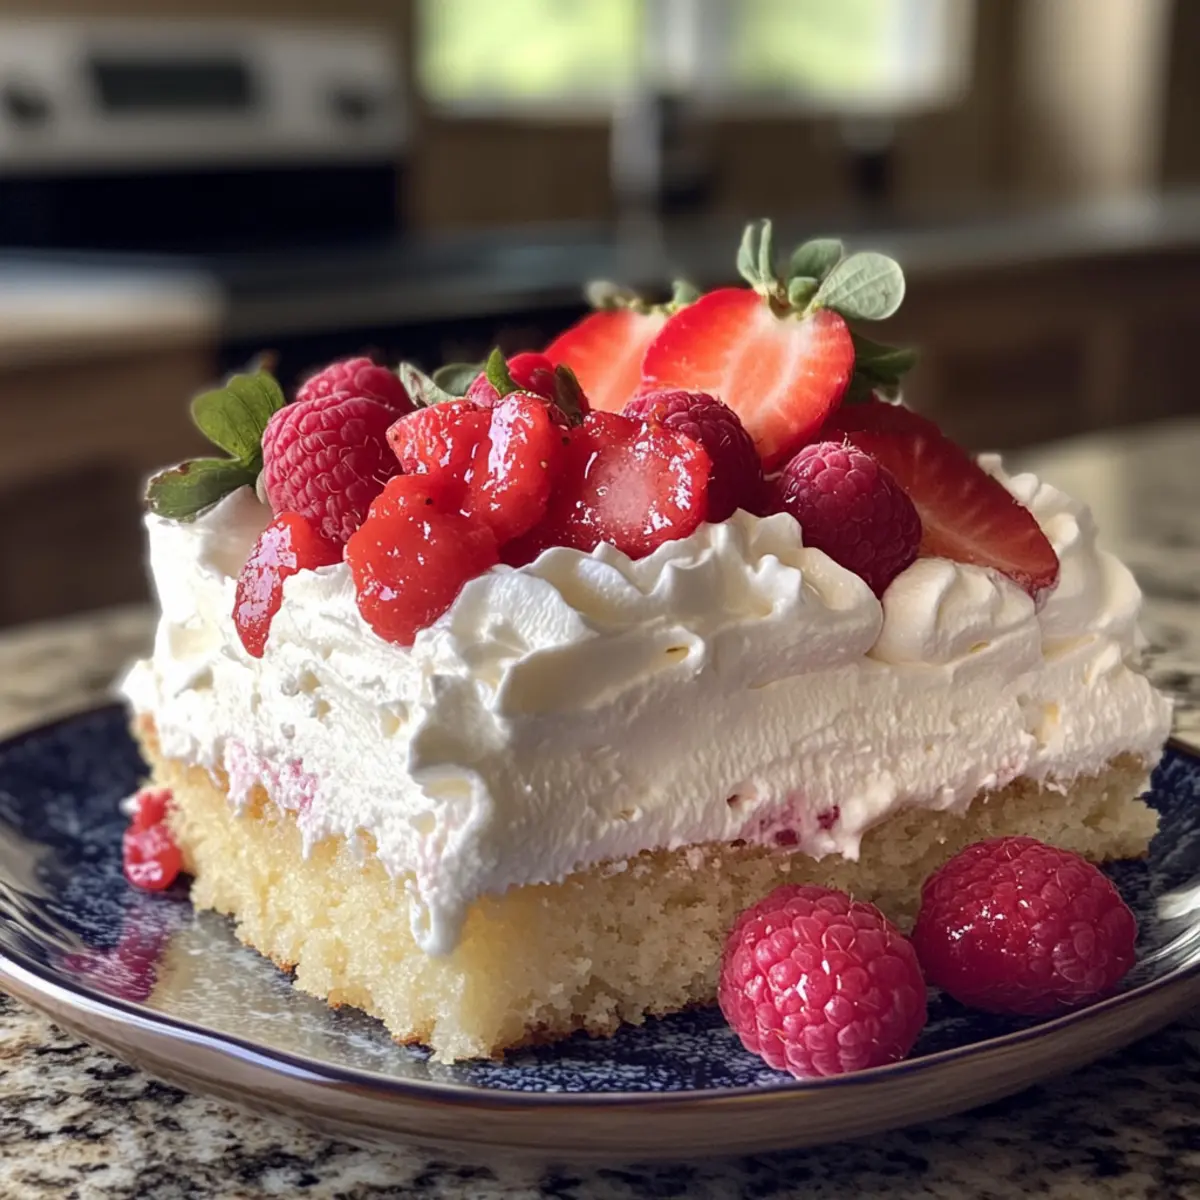
Visual Appeal: The fresh strawberries and raspberries on top not only enhance the flavor but also make for a stunning presentation. Your guests won’t be able to resist snapping a picture before indulging!

Let this Classic Cinco de Mayo Tres Leches Cake redefine your dessert experience!

Cinco de Mayo Tres Leches Cake Ingredients

  1. For the Cake
  • All-Purpose Flour – Provides the essential structure; swap for a gluten-free blend if needed.
  • Baking Powder – This is your leavening hero, ensuring your cake remains light and fluffy.
  • Salt – A vital player that enhances the flavors throughout.
  • Eggs (separated) – The secret to lift; whip the egg whites until stiff peaks form for the best results.
  • Granulated Sugar – Sweetens the cake and contributes to its moistness; stick to granulated, not powdered, for the batter.
  • Whole Milk – Adds richness and moisture; consider a non-dairy option for lactose-free needs.
  • Vanilla Extract – A splash of this enhances the entire flavor profile; opt for pure vanilla for the best taste.
  1. For the Milk Soak
  • Sweetened Condensed Milk (14 oz) – The sweet soul of your soak, adding a luscious creaminess.
  • Evaporated Milk (12 oz) – This enhances richness, perfectly complementing the condensed milk.
  • Heavy Cream (0.5 cup) – Elevates the soak’s richness; feel free to experiment with coconut milk for a tropical twist.
  1. For the Topping
  • Heavy Whipping Cream (1 cup) – This fluffy topping completes the cake; whip until soft peaks form for the perfect finish.
  • Powdered Sugar (2 tbsp) – Sweetens the whipped cream; adjust based on the sweetness of your berries.
  • Fresh Strawberries and Raspberries – Add vibrant freshness and lovely color, best when added right before serving.
  • Fresh Mint – A lovely garnish that enhances flavor and presentation, making your cake even more inviting.

Craft your Cinco de Mayo Tres Leches Cake with these ingredients and watch it become the star of your celebration!

Step‑by‑Step Instructions for Cinco de Mayo Tres Leches Cake

Step 1: Bake the Sponge
Preheat your oven to 350°F (175°C) and grease a 9×13 inch pan. In a mixing bowl, whisk together the all-purpose flour, baking powder, and salt. In another bowl, beat the egg whites until they form stiff peaks. In a separate bowl, combine the egg yolks and granulated sugar, mixing until light and fluffy, then alternate adding the dry ingredients and milk. Gently fold in the whipped egg whites, pour the batter into the prepared pan, and bake for 22-25 minutes, or until a toothpick comes out clean.

Step 2: Cool and Soak
Once your cake is baked, allow it to cool in the pan for 10 minutes. Using a fork, poke holes all over the top of the cake to allow the milk soak to penetrate. In a bowl, combine the sweetened condensed milk, evaporated milk, and heavy cream until well mixed. Slowly pour the milk mixture over the warm cake, letting it absorb for at least 30 minutes before transferring it to the refrigerator to chill for a minimum of 2 hours.

Step 3: Finish and Serve
When you’re ready to serve your Cinco de Mayo Tres Leches Cake, whip the heavy whipping cream with powdered sugar and vanilla extract until soft peaks form. Spread the whipped cream evenly over the chilled cake. For a burst of color and flavor, top with fresh strawberries and raspberries, and add a sprinkle of fresh mint just before serving to elevate its presentation and taste.

Cinco de Mayo Tres Leches Cake Variations

Feel free to get creative and customize your Tres Leches Cake to make it truly your own!

  • Gluten-Free: Use a gluten-free flour blend to ensure everyone can enjoy this delightful dessert. The same delicious texture is still achievable with the right mix!
  • Coconut Tropical: Substitute heavy cream with coconut cream for a rich, tropical vibe. Pair it with toasted coconut flakes for extra texture and a flavorful twist.
  • Berry Medley: Experiment with assorted berries such as blueberries or blackberries. Adding a burst of flavor will keep each bite fresh and exciting!
  • Citrus Burst: Add citrus zest from oranges or limes in the batter and soaking milk for a refreshing zing. It brightens up the sweetness beautifully!
  • Choco-Drizzle: Drizzle melted chocolate over the whipped cream topping for a decadent variation. It’s a heavenly complement that chocolate lovers can’t resist.
  • Spiced Flavors: Mix in a pinch of cinnamon to the milk soaking mixture for warmth and depth. It’s the perfect touch that adds an intriguing layer of flavor!
  • Nutty Flavor: Blend in crushed nuts like almonds or pecans into the whipped cream for a delightful crunch. You can even sprinkle them on top for a gorgeous finish.
  • Layered Delight: Create a layered version by making two cakes—one with vanilla and one with chocolate. Alternate layers and stack for an impressive dessert centerpiece.

Feel the joy of exploring different flavors and textures! Consider pairing your creation with the easy-to-make Nutty Vanilla Cake for an extraordinary dessert table. Indulge in this culinary adventure and make your Tres Leches Cake truly unique!

Expert Tips for Tres Leches Cake

  • Proper Soaking Time: Allow the cake to soak for at least 2 hours; cutting it too early could lead to a soggy texture instead of a delightful, moist one.

  • Stiff Peaks Needed: Ensure your egg whites are whipped to stiff peaks for the best rise. This is key for the light, airy consistency of the cake.

  • Cover While Chilling: After the first hour in the refrigerator, cover the cake to prevent it from drying out; it helps maintain that delicious moisture.

  • Add Berries Before Serving: For the freshest taste and best presentation, add strawberries and raspberries just before serving your Cinco de Mayo Tres Leches Cake.

  • Experiment with Flavors: Don’t hesitate to experiment by adding citrus zest or different berries to the topping for a unique twist on this classic cake!

Make Ahead Options

These Classic Cinco de Mayo Tres Leches Cakes are perfect for meal prep enthusiasts! You can bake the sponge cake up to 24 hours in advance and store it, tightly covered, at room temperature for optimal texture. Once baked and cooled, poke holes in the cake and pour over the milk soak (sweetened condensed milk, evaporated milk, and heavy cream), allowing it to absorb in the refrigerator for up to 3 days before serving. Just remember to keep the cake covered to maintain moisture and flavor. When you’re ready to impress your guests, whip up the cream topping, spread it over the soaked cake, and add fresh berries right before serving for that delightful burst of flavor. Enjoy the ease of having this delicious dessert ready and waiting for your celebration!

What to Serve with Classic Cinco de Mayo Tres Leches Cake?

Elevate your celebration with delightful pairings that complement the moist sweetness of this traditional cake.

  • Creamy Mexican Horchata: This refreshing rice-based drink balances the cake’s sweetness and adds a cultural flair to your dessert table.
  • Zesty Lime Sorbet: A light and tangy sorbet contrasts the rich cake while cleansing the palate between bites.
  • Fresh Fruit Salad: Featuring colorful berries and citrus, this dish adds a burst of freshness that harmonizes beautifully with the cake’s flavors.
  • Spiced Coffee: The warmth of a cinnamon-infused coffee will enhance the cake’s rich milkiness and provide an inviting atmosphere.
  • Chocolate Dipped Strawberries: These luscious treats bring a fun twist with their contrasting sweetness and rich chocolate coating, enticing everyone to indulge.
  • Coconut Flan: Rich and creamy, this traditional dessert adds an extra layer of tropical flavor while echoing the cake’s milky goodness.
  • Cinnamon Sugar Churros: Crispy on the outside and soft on the inside, these cinnamon-sugar treats bring a satisfying crunch alongside the cake’s softness.
  • Vanilla Ice Cream: Melting over the cake, the ice cream adds a delightful creaminess that harmonizes with the three-milk soak beautifully.
  • Tropical Fruit Punch: A vibrant mix of fruits offers a refreshing sip that enhances the cake’s tropical notes.
  • Sweet Mint Tea: Brimming with refreshing herbs, this tranquil drink will revive the senses and accentuate the cake’s mint garnish.

Storage Tips for Cinco de Mayo Tres Leches Cake

Fridge: Store the cake covered in the refrigerator for up to 3 days. This helps maintain its moisture and flavor, allowing it to be enjoyed fresh for your guests.

Freezer: If you need to store it longer, freeze the cake (without fresh toppings) for up to 2 months. Wrap it tightly in plastic wrap and aluminum foil to avoid freezer burn.

Thawing: When you’re ready to serve the frozen cake, simply transfer it to the fridge overnight to thaw. This gentle method helps preserve its delicate texture.

Reheating: This cake is best served chilled. However, if you desire a warm slice, you can gently heat it in the microwave for about 10-15 seconds. Just be careful not to overdo it!

Cinco de Mayo Tres Leches Cake Recipe FAQs

What type of milk should I use for the soaking mixture?
The traditional soaking mixture for Tres Leches Cake requires sweetened condensed milk, evaporated milk, and heavy cream. If you’re looking for a lighter option, consider exchanging the heavy cream with half-and-half or coconut milk to add a unique flavor twist!

How can I ensure my cake stays moist while stored?
To keep your Cinco de Mayo Tres Leches Cake moist, wrap the cake tightly in plastic wrap or cover it well with a lid in the refrigerator. It will last for up to 3 days this way, remaining delicious and flavorful!

Can I freeze Tres Leches Cake?
Absolutely! You can freeze your Cinco de Mayo Tres Leches Cake (without fresh toppings) for up to 2 months. Wrap it in plastic wrap and aluminum foil to avoid freezer burn. When ready to indulge, thaw it in the fridge overnight to preserve its lovely texture.

What should I do if my cake is too soggy?
If you find your cake becomes overly soggy, it may have soaked up too much liquid. To remedy this, serve it chilled and try adding a layer of whipped cream to absorb some of the excess moisture while enhancing the flavor. When making it again, allow the soaking time to be managed more carefully!

Can I make Tres Leches Cake gluten-free?
Yes! To make a gluten-free version of your Cinco de Mayo Tres Leches Cake, simply replace all-purpose flour with a gluten-free flour blend. It’s important to check the blend contains xanthan gum to ensure the cake retains its delightful texture.

Is it safe for pets?
While this cake is a delectable treat for humans, it’s important to note that the combination of milk and sugar can upset your pet’s stomach. It’s best to keep this irresistible dessert out of your furry friends’ reach!

Cinco de Mayo Tres Leches Cake

Decadent Cinco de Mayo Tres Leches Cake for Your Celebration

This Cinco de Mayo Tres Leches Cake features a soft texture soaked in three creamy milks, perfect for festive celebrations.
Prep Time 30 minutes
Cook Time 25 minutes
Soaking Time 30 minutes
Total Time 1 hour 25 minutes
Servings: 12 slices
Course: Dessert
Cuisine: Mexican
Calories: 350

Ingredients
  

For the Cake
  • 2 cups All-Purpose Flour Swap for a gluten-free blend if needed.
  • 2 tbsp Baking Powder This is your leavening hero.
  • 1/2 tsp Salt Enhances flavors.
  • 5 large Eggs (separated) Whip egg whites until stiff peaks.
  • 1 cup Granulated Sugar Stick to granulated, not powdered.
  • 1 cup Whole Milk Consider a non-dairy option.
  • 2 tsp Vanilla Extract Opt for pure vanilla for best taste.
For the Milk Soak
  • 14 oz Sweetened Condensed Milk Adds a luscious creaminess.
  • 12 oz Evaporated Milk Enhances richness.
  • 0.5 cup Heavy Cream Feel free to experiment with coconut milk.
For the Topping
  • 1 cup Heavy Whipping Cream Whip until soft peaks.
  • 2 tbsp Powdered Sugar Adjust based on sweetness of berries.
  • 1 cup Fresh Strawberries Add vibrant freshness.
  • 1 cup Fresh Raspberries Add vibrant freshness.
  • 1/4 cup Fresh Mint Enhances flavor and presentation.

Equipment

  • 9x13 inch pan
  • mixing bowls
  • Mixer
  • Fork

Method
 

Preparation
  1. Preheat your oven to 350°F (175°C) and grease a 9x13 inch pan.
  2. In a mixing bowl, whisk together the all-purpose flour, baking powder, and salt.
  3. In another bowl, beat the egg whites until they form stiff peaks.
  4. In a separate bowl, combine the egg yolks and granulated sugar, mixing until light and fluffy.
  5. Alternate adding the dry ingredients and milk, then gently fold in the whipped egg whites.
  6. Pour the batter into the prepared pan and bake for 22-25 minutes, or until a toothpick comes out clean.
Soaking
  1. Once your cake is baked, allow it to cool in the pan for 10 minutes.
  2. Using a fork, poke holes all over the top of the cake.
  3. In a bowl, combine sweetened condensed milk, evaporated milk, and heavy cream until well mixed.
  4. Slowly pour the milk mixture over the warm cake and let it absorb for at least 30 minutes.
  5. Transfer to the refrigerator to chill for a minimum of 2 hours.
Serving
  1. Whip the heavy whipping cream with powdered sugar and vanilla extract until soft peaks form.
  2. Spread the whipped cream evenly over the chilled cake.
  3. Top with fresh strawberries and raspberries, and add fresh mint just before serving.

Notes

Allow the cake to soak for at least 2 hours. Ensure egg whites are whipped to stiff peaks for the best rise.

Indulge in Vanilla Bean Creme Brulee Cheesecake Cupcakes

As I stood in my kitchen, the sweet scent of vanilla swirled around me like a warm embrace, instantly lifting my spirits. That’s when I knew it was time to whip up a batch of decadent Vanilla Bean Creme Brulee Cheesecake Cupcakes. These delightful confections are the perfect marriage of rich cheesecake and tender cupcakes, topped with a satisfyingly crisp caramel shell that adds a touch of elegance. What makes them truly irresistible is their surprisingly simple preparation, making them an ideal choice for both family gatherings and special occasions. Plus, with easy variations like gluten-free or vegan options, everyone can indulge in this scrumptious dessert. Are you ready to elevate your dessert game and impress your loved ones with these divine cupcakes? Let’s dive into the recipe!

Why are these cupcakes a must-try?

Decadent Delight: Each bite offers a harmonious blend of rich cheesecake and fluffy cupcake, making them a true showstopper at any gathering.

Easy Preparation: With straightforward steps, you can whip up these luxurious treats without breaking a sweat!

Versatile Options: Enjoy endless variations—whether you prefer gluten-free or vegan versions, or even a delightful chocolate twist.

Crowd Pleaser: These cupcakes are sure to impress guests of all ages, making them perfect for celebrations or casual get-togethers.

Elegant Finish: The crisp caramelized topping adds a touch of sophistication, elevating your dessert from ordinary to extraordinary.

Perfect Pairing: Serve with fresh berries or a scoop of vanilla ice cream for an unforgettable dessert experience! Looking for more delicious options? You might also love our Nutty Vanilla Cake with Creamy Filling or Classic Cream Puffs with Vanilla Cream Filling.

Vanilla Bean Creme Brulee Cheesecake Cupcakes Ingredients

For the Cupcakes

  • All-Purpose Flour – Provides structure; substitute with gluten-free flour for a suitable option.
  • Granulated Sugar – Sweetens the cupcake and filling; consider coconut sugar for a healthier alternative.
  • Salt – Balances sweetness and enhances flavors; don’t skip this step!
  • Baking Powder – Acts as a leavening agent; always check its freshness for the best rise.
  • Unsalted Butter – Adds richness and moisture; can be swapped with margarine or vegan butter for a dairy-free version.
  • Large Eggs – Binds and adds moisture; for vegan, replace with 1/4 cup unsweetened applesauce or a flax egg.
  • Buttermilk – Ensures a moist crumb; substitute with regular milk and 1 tsp vinegar for DIY buttermilk.
  • Vanilla Extract – Provides deep flavor; opt for pure vanilla extract or vanilla bean paste for the best results.

For the Filling

  • Cream Cheese – Creates a creamy filling; low-fat cream cheese lightens the indulgence without sacrificing flavor.
  • Granulated Sugar (for filling) – Sweetens the cheesecake mixture; reduce if you prefer a less sweet filling.
  • Vanilla Bean Paste – Intensifies vanilla flavor; can substitute with pure vanilla extract but adjust the amount accordingly.

For the Topping

  • Granulated Sugar (for topping) – Caramelizes to create a crisp topping; apply a fine, even layer for optimal melting.

These Vanilla Bean Creme Brulee Cheesecake Cupcakes are not just a dessert; they’re a celebration on a plate! Ready to wow your loved ones? Let’s get baking!

Step‑by‑Step Instructions for Vanilla Bean Creme Brulee Cheesecake Cupcakes

Step 1: Preheat and Prepare
Begin by preheating your oven to 350°F (175°C). Line a standard muffin tin with cupcake liners to prepare for the batter. You want to create a cozy environment for your Vanilla Bean Creme Brulee Cheesecake Cupcakes to rise perfectly, so place the muffin tin aside for now while we mix the batter.

Step 2: Cream the Butter and Sugar
In a large mixing bowl, cream together ½ cup of softened unsalted butter with 1 cup of granulated sugar using a hand mixer. Beat until the mixture is light and fluffy, approximately 3-5 minutes. This important first step ensures your cupcakes will have a delightful texture. Scrape down the sides of the bowl occasionally for even mixing.

Step 3: Incorporate the Eggs and Buttermilk
Add 2 large eggs, one at a time, to the creamed butter and sugar, mixing well after each addition. Then, pour in ½ cup of buttermilk and 1 teaspoon of vanilla extract. Beat until fully combined; the mixture should be smooth and creamy, exuding a rich vanilla aroma that sets the mood for these decadent cupcakes.

Step 4: Combine Dry Ingredients
In a separate bowl, whisk together 1 ½ cups of all-purpose flour, 1 ½ teaspoons of baking powder, and ¼ teaspoon of salt. Gradually add the dry ingredients to the wet mixture, mixing gently until just combined. It’s crucial not to overmix here; you want to maintain a light and airy texture in your Vanilla Bean Creme Brulee Cheesecake Cupcakes.

Step 5: Fill the Cupcake Liners
Evenly fill each cupcake liner in the prepared muffin tin with about half of the batter. This allows room for the cheesecake filling that will be added next. Aim for a neat presentation as you work your way through the liners, creating a delicious base for your cupcakes.

Step 6: Mix the Cheesecake Filling
In a separate mixing bowl, blend 8 oz of cream cheese with ½ cup of granulated sugar until smooth. Incorporate 1 large egg, 1 tablespoon of all-purpose flour, and 1 tablespoon of vanilla bean paste into the mixture. Blend well until it achieves a creamy consistency, ensuring that every bite of your cheesecake filling will be luscious.

Step 7: Assemble the Cupcakes
Carefully spoon the cheesecake filling over the cupcake batter in each liner, filling them about three-quarters full. This layering technique allows for a beautiful, creamy center in your Vanilla Bean Creme Brulee Cheesecake Cupcakes. Be sure to do this gently to avoid mixing the two components.

Step 8: Bake to Perfection
Place the muffin tin in the preheated oven and bake for 25-30 minutes. Keep an eye on them; the cupcakes should be puffed and lightly golden, and a toothpick inserted into the center should come out clean. The warm aroma wafting through your kitchen will have everyone eagerly anticipating these delightful treats.

Step 9: Cool and Prepare for Topping
After baking, remove the tin from the oven and let the cupcakes cool in the tin for 10 minutes. Then, transfer them to a wire rack to cool completely. This cooling step is essential before you add the luscious caramel crust, ensuring that it adheres nicely to the cupcakes.

Step 10: Add the Caramelized Topping
Once the cupcakes are completely cool, sprinkle an even layer of granulated sugar over the top of each cupcake. Using a kitchen torch or broiler, caramelize the sugar until it turns golden and crisp. Watch closely to avoid burning; this elegant finish is what makes your Vanilla Bean Creme Brulee Cheesecake Cupcakes truly shine.

Vanilla Bean Creme Brulee Cheesecake Cupcakes Variations

Discover the delightful ways you can customize your Vanilla Bean Creme Brulee Cheesecake Cupcakes to suit your tastes and dietary needs.

  • Gluten-Free: Replace all-purpose flour with a 1:1 gluten-free baking blend for a deliciously inclusive treat.
  • Vegan: Substitute eggs with flax eggs (1 tablespoon flaxseed meal + 2.5 tablespoons water) and use dairy-free cream cheese for a compassionate version.
  • Chocolate Twist: Swap out some of the flour for cocoa powder to transform the cupcakes into a rich chocolate delight.
  • Citrus Burst: Add the zest of an orange or lemon to the batter for a refreshing citrus kick that brightens every bite.
  • Berry Infusion: Mix in fresh berries into the cheesecake filling for added sweetness and a pop of flavor; try strawberries or raspberries!
  • Nutty Variation: Incorporate crushed walnuts or pecans into the batter for added crunch and a delightful nutty flavor profile.
  • Caramel Swirl: Drizzle store-bought or homemade caramel sauce into the batter before baking for an extra layer of sweetness.
  • Spiced Fall Version: Add a pinch of pumpkin spice or cinnamon to warm up the flavors, perfect for cozy gatherings or holidays.

Feel free to get creative with these variations! If you’re in the mood for something different, why not whip up our Strawberry Cheesecake Dump Cake Delight for an equally tempting dessert? Enjoy each delicious bite!

How to Store and Freeze Vanilla Bean Creme Brulee Cheesecake Cupcakes

Refrigeration: Store cupcakes in an airtight container in the fridge for up to 3 days. This keeps the vanilla bean flavors vibrant and the cheesecake filling creamy.

Freezing: To freeze, place the cupcakes in a single layer on a baking sheet until firm, then wrap each cupcake individually in plastic wrap and transfer to a freezer-safe bag. They can be frozen for up to one month.

Thawing: When ready to enjoy, remove from the freezer and let thaw in the fridge overnight. Avoid freezing with the caramel topping; add it just before serving for perfect crunch.

Reheating: If desired, warm for a few seconds in the microwave to enhance the cupcake’s textures. Enjoy your Vanilla Bean Creme Brulee Cheesecake Cupcakes fresh even after storage!

Make Ahead Options

These Vanilla Bean Creme Brulee Cheesecake Cupcakes are a dream for meal prep lovers! You can prepare the cupcake batter and cheesecake filling up to 24 hours in advance. Simply refrigerate both components separately in airtight containers to maintain their freshness. When you’re ready to bake, fill the cupcake liners with the batter, followed by the cheesecake filling, and pop them in the oven. For serving, remember to add the caramelized sugar topping right before enjoyment—this keeps it crisp and delightful. Following these steps ensures you have a decadent dessert prepared with minimal effort, making it perfect for busy weeknights or special occasions.

What to Serve with Vanilla Bean Creme Brulee Cheesecake Cupcakes

These delightful cupcakes call for a feast of flavors that will round out your dessert table perfectly!

  • Fresh Berries: Juicy strawberries or raspberries provide a refreshing contrast to the rich flavors of the cupcakes. The acidity of the berries beautifully balances the sweetness, creating a harmonious bite.

  • Vanilla Ice Cream: A scoop of creamy vanilla ice cream adds a smooth, cool element that pairs wonderfully with the warm caramelized topping. The classic combination of vanilla flavors is irresistible!

  • Chocolate Ganache: Drizzling rich chocolate ganache over the top introduces a decadent layer of flavor that complements the vanilla in the cupcakes while providing an invitingly contrasting texture.

  • Whipped Cream: Light and fluffy whipped cream enhances the cupcakes’ richness without overwhelming them. It’s simply delightful to dollop on top for that perfect, creamy finish.

  • Espresso or Coffee: A cup of freshly brewed espresso creates a sophisticated pairing, as the bitterness of the coffee enhances the sweetness of the cupcakes while grounding the dessert experience.

  • Homemade Caramel Sauce: For those who crave extra indulgence, serve with a drizzle of homemade caramel sauce. It echoes the cupcakes’ caramel notes and makes each bite feel luscious and luxurious.

  • Miniature Fruit Tarts: Adding these tarts creates an elegant dessert assortment that welcomes a medley of flavors, balancing the creamy, rich cupcakes with bright, citrusy notes.

  • Sparkling Wine: A glass of bubbly sparkling wine or champagne can elevate your dessert experience, adding a festive touch that pairs beautifully with the indulgent treat, perfect for special occasions!

Expert Tips for Vanilla Bean Creme Brulee Cheesecake Cupcakes

  • Room Temperature Ingredients: Ensure eggs and butter are at room temperature. This allows for better emulsification, creating a smooth batter for your cupcakes.

  • Don’t Overmix: Mix the batter just until combined. Overmixing can lead to denser cupcakes; you want them fluffy and light.

  • Sugar Layering: When caramelizing, sprinkle a fine layer of sugar on top to achieve an even, golden crust. Too much sugar can lead to burning.

  • Cooling Time: Let the cupcakes cool entirely before adding the caramel topping. This helps the crust adhere properly and keeps it crunchy longer.

  • Flavor Infusion: Experiment with different flavor variations! You can infuse your Vanilla Bean Creme Brulee Cheesecake Cupcakes with chocolate or fruit for a unique twist.

Vanilla Bean Creme Brulee Cheesecake Cupcakes Recipe FAQs

How can I tell if my ingredients are ripe or fresh?
Absolutely! For the best results in your Vanilla Bean Creme Brulee Cheesecake Cupcakes, select fresh ingredients. Look for eggs that are uncracked and in good condition. When it comes to butter, ensure it’s not showing signs of discoloration. For your flour, check the expiration date and smell it; any off or sour scent indicates it may not be fresh. Fresh ingredients will provide optimal flavor and texture in your cupcakes!

How should I store the cupcakes after baking?
Very easy! To preserve your Vanilla Bean Creme Brulee Cheesecake Cupcakes, allow them to cool completely, then transfer them to an airtight container. You can refrigerate them for up to 3 days, keeping their creamy filling and vanilla flavors intact. Just be sure not to add the caramel topping until you’re ready to serve, to maintain that satisfying crunch!

Can I freeze the cupcakes for future enjoyment?
Of course! To freeze your Vanilla Bean Creme Brulee Cheesecake Cupcakes, first cool them completely. Next, place them in a single layer on a baking sheet until firm. Wrap each cupcake individually in plastic wrap and transfer to a freezer-safe bag or container. They’ll stay delicious for up to one month. Remember, skip the caramel topping before freezing and add that just before serving for that perfect finish!

What if my cupcakes don’t rise or are too dense?
Oh no! A common reason for cupcakes not rising can be overmixing the batter. Mix just until combined after adding dry ingredients; this keeps them fluffy! Also, ensure your baking powder is fresh—check the expiration date. If they still turn out dense, maybe your butter wasn’t softened enough or your oven didn’t preheat correctly. Room temperature ingredients typically provide the best texture!

Are there any dietary considerations I should be aware of?
Absolutely! To cater to different dietary needs, you can easily make these Vanilla Bean Creme Brulee Cheesecake Cupcakes gluten-free by substituting all-purpose flour with a gluten-free blend. For dairy-free options, use plant-based block cream cheese and vegan butter. Vegans can replace eggs with 1/4 cup of unsweetened applesauce or a flax egg. Just be sure to adjust the sugar and flavors to taste for each alternative!

Vanilla Bean Creme Brulee Cheesecake Cupcakes

Indulge in Vanilla Bean Creme Brulee Cheesecake Cupcakes

Decadent Vanilla Bean Creme Brulee Cheesecake Cupcakes that blend rich cheesecake with fluffy cupcakes and a crisp caramel shell.
Prep Time 30 minutes
Cook Time 30 minutes
Cooling Time 10 minutes
Total Time 1 hour 10 minutes
Servings: 12 cupcakes
Course: Dessert
Cuisine: American
Calories: 350

Ingredients
  

For the Cupcakes
  • 1 ½ cups All-Purpose Flour Can substitute with gluten-free flour.
  • 1 cup Granulated Sugar Coconut sugar can be used as an alternative.
  • ¼ teaspoon Salt
  • 1 ½ teaspoons Baking Powder
  • ½ cup Unsalted Butter Can be swapped with margarine or vegan butter.
  • 2 large Eggs For vegan use 1/4 cup unsweetened applesauce.
  • ½ cup Buttermilk Can substitute with regular milk + 1 tsp vinegar.
  • 1 teaspoon Vanilla Extract Opt for pure vanilla extract or vanilla bean paste.
For the Filling
  • 8 oz Cream Cheese Low-fat cream cheese can be used.
  • ½ cup Granulated Sugar Reduce if you prefer a less sweet filling.
  • 1 tablespoon Vanilla Bean Paste Can be substituted with pure vanilla extract.
For the Topping
  • ½ cup Granulated Sugar Apply a fine layer for optimal melting.

Equipment

  • muffin tin
  • mixing bowls
  • hand mixer
  • Kitchen torch

Method
 

Step‑by‑Step Instructions
  1. Preheat your oven to 350°F (175°C). Line a standard muffin tin with cupcake liners.
  2. Cream together ½ cup of softened unsalted butter with 1 cup of granulated sugar until light and fluffy (3-5 minutes).
  3. Add 2 large eggs one at a time, mixing well after each. Pour in ½ cup of buttermilk and 1 teaspoon of vanilla extract.
  4. Whisk together 1 ½ cups of flour, 1 ½ teaspoons of baking powder, and ¼ teaspoon of salt. Gradually add to wet mixture until just combined.
  5. Fill each cupcake liner with about half of the batter.
  6. Blend 8 oz of cream cheese with ½ cup of granulated sugar, 1 large egg, 1 tablespoon of flour, and 1 tablespoon of vanilla bean paste.
  7. Spoon the cheesecake filling over the cupcake batter in each liner.
  8. Bake for 25-30 minutes until puffed and golden. A toothpick should come out clean.
  9. Let the cupcakes cool in the tin for 10 minutes before transferring to a wire rack to cool completely.
  10. Sprinkle an even layer of granulated sugar atop each cupcake and caramelize using a kitchen torch or broiler.

Notes

Let cupcakes cool before adding the caramel topping for best texture and flavor.

Delightful Watermelon Rose Drink for a Refreshing Summer Sip

As I took my first sip, the cool watermelon mingled with fragrant rose syrup, instantly transporting me to a sun-drenched afternoon in a bustling summer market. This is the magic of Mohabbat Ka Sharbat, a refreshing watermelon rose drink that’s not just a treat for the palate but a feast for the eyes! This delightful concoction is perfect for hot days and summer gatherings, offering a satisfying blend of flavors that everyone can enjoy. Plus, it’s incredibly easy to whip up and customizable to suit any dietary preference, making it a go-to choice for both seasoned chefs and busy home cooks. Imagine serving a drink that’s as versatile as it is refreshing—what’s not to love? Are you ready to mix up something extraordinary?

Why Is This Watermelon Rose Drink Special?

Refreshing and invigorating, this Mohabbat Ka Sharbat is the ultimate summer thirst-quencher. Vibrant colors and fragrant notes make it a feast for the senses, perfect for impressing guests. Customizable to your taste, it caters to both the vegan crowd and those craving creamy indulgence. Quick to prepare, it’s an ideal option for busy days or spontaneous gatherings. For a different vibe, try this alongside a Fruity Tapioca Drink or pair it with light snacks for a complete summer experience. You’ll fall in love with each delightful layer!

Watermelon Rose Drink Ingredients

Note: Gather these ingredients for a refreshing watermelon rose drink that’s perfect for summer!

For the Base

  • Watermelon (1 cup, diced) – Adds natural sweetness and a refreshing flavor; substitute with cantaloupe if necessary.
  • Cold Milk (2 cups) – Provides creaminess and balance; for a vegan option, use coconut, almond, or cashew milk.
  • Rooh Afza Syrup (3 tablespoons) – Imparts floral sweetness and vibrant color; any rose syrup can substitute for a similar effect.
  • Sugar (optional, 2 tablespoons) – Adjust sweetness to taste; consider using honey or maple syrup for a natural alternative.
  • Cardamom Powder (½ teaspoon) – Introduces warm, spicy notes; optional for an added flavor twist.

For the Chill

  • Ice Cubes (20 pieces) – Keeps the drink chilled and refreshing on a hot day.

For the Garnish

  • Garnishes (Edible Rose Petals, Mint Leaves, Watermelon Slices) – Elevates visual appeal and adds freshness; feel free to get creative with your presentation.

Step‑by‑Step Instructions for Watermelon Rose Drink

Step 1: Prepare Watermelon
Begin by cutting your watermelon into small, bite-sized cubes. Approximately 1 cup should suffice for this refreshing watermelon rose drink. Set the diced watermelon aside in a mixing bowl; a vibrant pink hue is ideal as it indicates sweetness and freshness, perfect for our upcoming steps.

Step 2: Mix the Base
In a large mixing bowl, combine 2 cups of cold milk, 3 tablespoons of Rooh Afza syrup, and ½ teaspoon of cardamom powder. Whisk the ingredients together until fully blended, achieving a smooth, pinkish mixture within about 2–3 minutes. If you prefer a sweeter taste, feel free to add 2 tablespoons of sugar to enhance the flavor, ensuring it’s dissolved completely.

Step 3: Chill the Mixture
Once your base mix is smooth and well-blended, add approximately 20 ice cubes to the bowl. Stir gently for about 1–2 minutes until the ice has chilled the mixture thoroughly, transforming it into a refreshing beverage that radiates a delightful pink color, inviting you to the next step.

Step 4: Fold in Watermelon
Carefully fold the diced watermelon into your chilled milk mixture. Use a spatula to combine gently, ensuring that the watermelon is evenly distributed without mashing. This process should take about 2 minutes. The colorful chunks should be visible, adding a visual appeal to your watermelon rose drink.

Step 5: Serve and Garnish
Pour the watermelon rose drink into tall glasses, filling them generously to showcase the beautiful layers. Garnish each glass with edible rose petals, mint leaves, and a few extra watermelon slices on top for an elegant touch. This final presentation enhances the drink’s aesthetic, making it perfect for summer gatherings.

Step 6: Enjoy Immediately
Serve your refreshing watermelon rose drink immediately. The combination of creamy milk, floral overtones, and the cooling addition of ice makes for an enticing summertime treat. Encourage everyone to enjoy the drink fresh, as the flavors are most vibrant when served right away.

Make Ahead Options

These refreshing Mohabbat Ka Sharbat are perfect for busy home cooks looking to save time on hot summer days! You can prepare the milk mixture (cold milk, rooh afza syrup, sugar, and cardamom powder) up to 24 hours in advance—just store it in an airtight container in the refrigerator to maintain its flavor and freshness. The diced watermelon can be chopped and refrigerated separately to preserve its juiciness. When you’re ready to enjoy the Watermelon Rose Drink, simply combine the chilled milk mixture with ice and fold in the watermelon right before serving. This way, you’ll have a gorgeous, refreshing drink with minimal effort, making your summer gatherings a breeze!

Storage Tips for Watermelon Rose Drink

Fridge: Store leftover watermelon rose drink in an airtight container for up to 1 day. Enjoy it chilled for the freshest flavor.

Freezer: While freezing is not recommended for the watermelon rose drink due to the milk, any excess watermelon can be frozen for future smoothies or drinks.

Reheating: This drink is best served cold, so there’s no need for reheating. Serve immediately after preparation for optimal taste and texture.

Garnishes: Keep garnishes separate and add them just before serving to maintain freshness and visual appeal in your stunning watermelon rose drink.

Expert Tips for the Watermelon Rose Drink

  • Chill the Milk: Before starting, make sure the milk is cold for a refreshing taste; this enhances the overall enjoyment of your watermelon rose drink.

  • Sweetness Control: Taste as you mix! Adjust the sugar or other sweeteners like honey according to your preference for a balanced flavor in your watermelon rose drink.

  • Garnish Creatively: Use a variety of garnishes, such as edible flowers or colorful fruits; these not only enhance the presentation but also make your drink more appealing.

  • Mind the Ice: If preparing in advance, add ice cubes just before serving to avoid diluting the flavors; serve immediately for that fresh, vibrant experience.

  • Try Variations: Feel free to experiment! Add soaked sabja seeds or a scoop of ice cream for a delightful twist to your watermelon rose drink.

What to Serve with Refreshing Mohabbat Ka Sharbat?

Imagine a sun-kissed afternoon filled with laughter; it’s the perfect moment to create a joyful feast for friends and family.

  • Cucumber Sandwiches: Light and refreshing, these sandwiches complement the drink’s flavors while providing a crisp counterpoint.

  • Fruit Chaat: A vibrant fruit salad featuring seasonal fruits will enhance the drink’s fruity notes, creating a colorful platter.

  • Samosas: These crunchy pastries offer a delightful contrast to the creamy drink, making them an irresistible pairing.

  • Puffed Rice Snacks: Light, airy bites with spices add fun texture, balancing Mohabbat Ka Sharbat’s creamy sweetness.

  • Mint Chutney: A zesty sauce for dipping adds another layer of flavor, refreshing your palate between sips of the sweet, rosy drink.

  • Chaat Papri: Crispy wafers topped with yogurt and spices create a tasty, tangy contrast that enhances the drink’s sweetness, making it truly indulgent.

  • Lassi: Complement the drink with a yogurt-based beverage for a delightful fusion of flavors that keeps the thirst-quenching experience going.

  • Rose Ice Cream: For dessert, serve rose-flavored ice cream to elevate the floral notes of your watermelon rose drink and offer a cool end to the meal.

Watermelon Rose Drink Variations

Feel free to mix things up and make this delightful watermelon rose drink uniquely yours!

  • Vegan Twist: Swap regular milk for coconut, almond, or cashew milk for a creamy dairy-free experience.
  • Flavor Boost: Add a splash of lime juice to introduce a zesty element that enhances the sweetness of watermelon.
  • Extra Texture: Fold in soaked sabja (basil) seeds for an exciting crunch and an extra layer of health benefits. These tiny seeds add an enjoyable chewiness to your drink!
  • Fruity Add-In: Toss in diced strawberries or mango for a tropical bang, giving the drink additional layers of fruity goodness.
  • Ice Cream Delight: Top your drink with a scoop of rose-flavored or vanilla ice cream to transform it into a luscious treat that will impress your guests.
  • Spicy Kick: For a little heat, sprinkle in a pinch of chili powder or cayenne for a surprising contrast to the sweet floral notes.
  • Chilled Jelly: Incorporate small cubes of flavored jelly for a fun twist that adds both texture and intrigue.
  • Nutty Crumble: Blend in some crushed pistachios or almonds for a nutty crunch that elevates the overall drinking experience.

If you’re looking for even more refreshing treats to serve, consider pairing this drink with a Fruity Tapioca Drink or light summer snacks to satisfy every craving!

Watermelon Rose Drink Recipe FAQs

How do I choose the best watermelon for this drink?
Absolutely! Look for a watermelon that feels heavy for its size and has a creamy yellow spot on one side, indicating ripeness. Avoid melons with dark spots or a dull skin, as they may be overripe. A ripe watermelon will have a sweet, fragrant aroma.

How should I store leftover watermelon rose drink?
For optimal freshness, store any leftover watermelon rose drink in an airtight container in the refrigerator for up to 1 day. Enjoy chilled, but do note that the flavors are best when served fresh. Mixing well before serving can help revive some of the original taste.

Can I freeze watermelon for later use in this drink?
Very! You can freeze leftover diced watermelon for use in future smoothies or drinks. Cut the watermelon into cubes and spread them on a baking sheet to freeze individually for about 2 hours. Once frozen, transfer them to a freezer-safe bag, and they can be stored for up to 3 months. Just remember, you should not freeze the entire drink as the milk may separate when thawed.

What can I replace Rooh Afza syrup with?
If you don’t have Rooh Afza, you can substitute it with any quality rose syrup. Alternatively, you can make your own by simmering sugar with dried rose petals in water until it thickens. For extra flavor, consider adding a few drops of rose essence.

Is this drink suitable for those with allergies?
Certainly! This watermelon rose drink can be made allergy-friendly by using dairy-free alternatives like almond or coconut milk for those who are lactose intolerant. Always check for gluten-free labels if you use flavored syrups or store-bought ingredients. Remember to avoid any added sugar or toppings that may trigger allergies.

Can I add other ingredients to customize the flavor?
The more, the merrier! Feel free to add soaked sabja seeds for texture or even a scoop of ice cream to make this drink more indulgent. You can also experiment with different fruits like blueberries or strawberries for a fun twist. Enjoy the process of creating your perfect watermelon rose drink!

Watermelon Rose Drink

Delightful Watermelon Rose Drink for a Refreshing Summer Sip

Enjoy a refreshing Watermelon Rose Drink, known as Mohabbat Ka Sharbat, for a delightful summer treat that's both delicious and visually stunning.
Prep Time 10 minutes
Chilling Time 2 minutes
Total Time 12 minutes
Servings: 4 glasses
Course: Drinks
Cuisine: Indian
Calories: 150

Ingredients
  

For the Base
  • 1 cup Watermelon, diced Adds natural sweetness and a refreshing flavor; substitute with cantaloupe if necessary.
  • 2 cups Cold Milk Provides creaminess; for vegan option, use coconut, almond, or cashew milk.
  • 3 tablespoons Rooh Afza Syrup Imparts floral sweetness and vibrant color; any rose syrup can substitute.
  • 2 tablespoons Sugar Adjust sweetness to taste; consider using honey or maple syrup as alternatives.
  • ½ teaspoon Cardamom Powder Optional for an added flavor twist.
For the Chill
  • 20 pieces Ice Cubes Keeps the drink chilled and refreshing.
For the Garnish
  • Edible Rose Petals Elevates visual appeal.
  • Mint Leaves Adds freshness.
  • Watermelon Slices For garnish.

Equipment

  • mixing bowl
  • spatula
  • whisk
  • Tall glasses

Method
 

Step-by-Step Instructions for Watermelon Rose Drink
  1. Prepare Watermelon: Dice watermelon into small cubes and set aside in a mixing bowl.
  2. Mix the Base: Combine cold milk, Rooh Afza syrup, and cardamom powder in a large bowl and whisk until smooth.
  3. Chill the Mixture: Add ice cubes to the mixture and stir gently for about 1-2 minutes.
  4. Fold in Watermelon: Gently fold the watermelon cubes into the chilled mixture.
  5. Serve and Garnish: Pour the drink into glasses and garnish with rose petals, mint, and watermelon slices.
  6. Enjoy Immediately: Serve the drink fresh for the best flavor.

Notes

Chill the milk before use for a refreshing taste and adjust sweetness to preference. Garnish creatively for a more appealing presentation.

One-Pot Egg Roll Soup Cozy Comfort for Chilly Nights

As the chill of autumn settles in, there’s nothing quite like a warm, comforting bowl of soup to brighten your day. This Easy One-Pot Egg Roll Soup Cozy Comfort is a delightful twist on traditional flavors, seamlessly bringing together tender pork, crisp cabbage, and vibrant carrots in one simple meal. One of the best parts? It’s incredibly easy to make, making it perfect for those busy weeknights or cozy weekends when you crave something hearty without all the fuss. Not only is it a crowd-pleaser that will warm hearts and bellies, but it’s also a fantastic way to transform classic takeout flavors into a nourishing homemade dish. So, who’s ready to discover this bowl of cozy goodness that’s sure to become a new favorite?

Why is One-Pot Soup So Comforting?

Simplicity at its best: This Easy One-Pot Egg Roll Soup requires minimal prep, making it a breeze for even the busiest home cooks.
Comforting flavors: The rich combination of pork, cabbage, and carrots creates a warm hug in every bowl.
Time-saving: With everything made in one pot, you’ll spend less time cleaning and more time enjoying your meal.
Versatile cooking: Feel free to swap in your favorite veggies or proteins, like adding Savory Cheese Egg or experimenting with different spices to suit your taste.
Perfect for gatherings: This cozy dish is a hit for family dinners or gatherings, ensuring no one leaves the table hungry.
Make-ahead happiness: Prepare it ahead of time, and let the flavors meld overnight for a next-day feast that tastes even better!

One-Pot Egg Roll Soup Ingredients

  • For the Soup Base
    Pork – Ground pork provides richness and protein; for a leaner option, substitute with ground turkey or chicken.
    Cabbage – Fresh green or Napa cabbage adds crunch and vital flavor; feel free to swap in savoy cabbage if preferred.
    Carrots – These not only bring natural sweetness but also a delightful pop of color; pre-packaged shredded carrots can save you time.
    Broth – Use chicken or vegetable broth as the flavorful base; for a vegetarian version, stick with vegetable broth.

  • For Freshness
    Green Onions – These lend a fresh, mild onion flavor and are best added just before serving for vibrant brightness.

  • For Extra Flavor
    Additional Spices (like garlic or ginger) – Fresh garlic and ginger elevate the flavor profile, making your Easy One-Pot Egg Roll Soup cozy comfort in every spoonful!

Step‑by‑Step Instructions for One-Pot Egg Roll Soup Cozy Comfort

Step 1: Sauté Pork
In a large pot, heat a splash of oil over medium heat. Add the ground pork and cook for about 5-7 minutes, breaking it apart with a wooden spoon until it’s fully browned and no longer pink. This step is crucial for locking in the flavors of your One-Pot Egg Roll Soup, so make sure to stir occasionally for even cooking.

Step 2: Add Vegetables
Once the pork is cooked, stir in the chopped cabbage and sliced carrots. Continue to sauté for another 4-5 minutes, allowing the vegetables to soften and release their flavors. You’ll know they’re ready when the cabbage is slightly wilted and the carrots are tender yet still vibrant, adding a lovely crunch to your cozy soup.

Step 3: Add Broth
Pour in 4 cups of chicken or vegetable broth and increase the heat to bring the mixture to a gentle boil. Once boiling, reduce the heat and let it simmer uncovered for about 10 minutes. This simmering allows the flavors of the pork and vegetables to meld beautifully together, resulting in a rich broth that embodies the essence of your One-Pot Egg Roll Soup.

Step 4: Season & Serve
After simmering, taste your One-Pot Egg Roll Soup and adjust the seasoning with salt and pepper as needed. Serve the soup hot in bowls, garnishing each serving with a sprinkle of fresh green onions. The bright green onions add a pop of color and flavor, making each spoonful of this cozy comfort dish even more delightful.

How to Store and Freeze One-Pot Egg Roll Soup

Fridge: Store your One-Pot Egg Roll Soup in an airtight container for up to 3 days. Make sure to let it cool completely before sealing to maintain freshness.

Freezer: For longer storage, freeze the soup in suitable containers for up to 2 months. Ensure the containers are labeled and dated to keep track of your cozy comfort meal.

Thawing: To enjoy later, thaw the soup overnight in the fridge. This gradual process helps preserve the flavors and consistency.

Reheating: Reheat the soup on the stovetop over medium heat, stirring occasionally until heated through. You can add a splash of broth if it’s too thick.

What to Serve with Easy One-Pot Egg Roll Soup

As you enjoy the warm embrace of this cozy comfort soup, think about delightful pairings that will elevate your meal further.

  • Crispy Wontons: Perfectly crispy, these wontons offer a delightful crunch that contrasts beautifully with the soup’s warmth. Dip them into the broth for added flavor and texture; it’s like a crunchy hug with each bite!

  • Steamed Rice: A bed of fluffy rice soaks up the comforting broth, turning your bowl into a heartier meal. It’s a classic pairing that embraces the flavors of the egg roll soup perfectly.

  • Garlic Bread: The buttery, toasted edges of garlic bread provide a crispy counterpart to the smooth soup. Each buttery bite complements the savory elements of the soup, making this combo simply irresistible.

  • Asian Slaw: A refreshing side of Asian slaw adds a crisp, tangy element to your meal. The bright flavors and crunch of cabbage and carrots compliment the cozy soup, creating a harmonious balance.

  • Hot Green Tea: Enjoy this soothing beverage alongside the soup for a calming touch. The gentle notes of green tea will enhance your dining experience, warming you inside and out.

  • Fruit Salad: Lighten the meal with a vibrant fruit salad for a refreshing contrast. The natural sweetness of fruits like pineapple and mandarin orange will beautifully complement the savory soup, brightening the palate.

  • Eggrolls: For a classic twist, serve traditional eggrolls alongside the soup. Their crunchy exterior and savory filling echo the comforting flavors of the soup, creating a delightful meal experience.

  • Pickled Vegetables: A side of tangy pickled veggies adds a zesty contrast that cuts through the richness of the soup. This brightens the taste and introduces a new flavor dimension!

Embrace the cozy goodness of your One-Pot Egg Roll Soup, and watch as these pairings transform your meal into a delightful feast.

One-Pot Egg Roll Soup Cozy Comfort Variations

Feel free to get creative and make this recipe your own, enhancing its deliciousness with a few simple swaps!

  • Dairy-Free: Use coconut aminos or tamari in place of regular soy sauce for a non-dairy option that still packs a punch.
  • Vegetarian: Replace the ground pork with crumbled tofu or tempeh for a hearty yet meatless dish that retains the great texture.
  • Spice it Up: Add crushed red pepper flakes or a sprinkle of sriracha for an extra kick of heat, perfect for those chilly evenings!
  • Flavor Twist: Mix in a tablespoon of hoisin sauce for a touch of sweetness that will elevate the overall flavor profile.
  • Crunchy Toppings: Top with crispy fried onions or wonton strips to add delightful texture and crunch to each bite!
  • Herb Infusion: Add fresh cilantro or basil just before serving to enhance freshness; these herbs brighten the dish beautifully.
  • Extra Veggies: Toss in some baby spinach or snap peas during the last couple of minutes of cooking for an added pop of color and nutrients.
  • Savory Pairing: Serve alongside Crunchy Cucumber Egg for a refreshing contrast to the warm soup, enhancing your dining experience.

Make Ahead Options

These Easy One-Pot Egg Roll Soup cozy comfort bowls are perfect for meal prep enthusiasts! You can chop the vegetables (cabbage and carrots) up to 24 hours in advance and store them in an airtight container in the refrigerator. Additionally, you can brown the pork ahead of time and refrigerate it for up to 3 days before cooking. When you’re ready to enjoy your soup, simply heat the cooked pork in a pot, add the vegetables, pour in the broth, and simmer for about 10 minutes until everything is warmed through and the flavors meld beautifully. For best results, add the fresh green onions just before serving to maintain their vibrant flavor and texture. This will ensure your Easy One-Pot Egg Roll Soup remains just as delicious as if it were made from scratch in one go!

Expert Tips for One-Pot Egg Roll Soup

  • Perfect Pork: Ensure the ground pork is well-browned before adding veggies; this locks in flavor and enhances your One-Pot Egg Roll Soup’s richness.

  • Vegetable Varieties: Feel free to play with different veggies! Adding bell peppers or snap peas can boost texture, keeping your cozy comfort dish exciting.

  • Broth Boost: If you want more depth, consider adding a splash of soy sauce or sesame oil to the broth for an extra layer of flavor.

  • Fresh Garnish: Adding green onions at the last minute retains their crunch and freshness, giving your soup the perfect finishing touch.

  • Storage Smarts: This soup can be made a day ahead! Store it in the fridge for up to 3 days; the flavors will develop even more overnight.

One-Pot Egg Roll Soup Cozy Comfort Recipe FAQs

How do I select the right cabbage for this recipe?
Absolutely! For your One-Pot Egg Roll Soup, I recommend using fresh green cabbage or Napa cabbage, as they provide the best flavor and crunch. Make sure to choose heads that are firm and heavy for their size, with no dark spots or wilting leaves. If you can’t find these, savoy cabbage works as a good alternative.

What is the best way to store leftover soup?
Very! You can store your One-Pot Egg Roll Soup in an airtight container in the fridge for up to 3 days. Allow it to cool completely before sealing it. If you want to make it ahead, this will allow the flavors to deepen wonderfully overnight!

Can I freeze the One-Pot Egg Roll Soup?
Absolutely! To freeze your soup, first let it cool completely. Then, scoop individual servings into freezer-safe containers. Make sure to leave some space at the top of each container for expansion as it freezes. Label and date them, and you can keep your cozy comfort meal for up to 2 months.

How can I prevent the soup from becoming too watery during cooking?
To avoid excess liquid, make sure to sauté the pork properly until it’s fully browned, which helps lock in the flavors and moisture. Additionally, if you find your broth too watery after simmering, you can let it reduce for a few more minutes uncovered, stirring occasionally. This will enhance the depth of flavor and create a richer broth.

Are there any dietary considerations I should keep in mind?
Definitely! If you’re making this for friends or family with dietary restrictions, consider using ground turkey or chicken instead of pork for a leaner option. For vegan alternatives, use plant-based proteins and vegetable broth. Always check the labels for any allergies related to soy sauce or specific spices used in your recipe.

One-Pot Egg Roll Soup Cozy Comfort

One-Pot Egg Roll Soup Cozy Comfort for Chilly Nights

Enjoy a warm bowl of One-Pot Egg Roll Soup, a cozy comfort for chilly nights with tender pork, crisp cabbage, and vibrant carrots.
Prep Time 10 minutes
Cook Time 25 minutes
Total Time 35 minutes
Servings: 4 bowls
Course: Dinner
Cuisine: Asian
Calories: 350

Ingredients
  

For the Soup Base
  • 1 pound Ground pork Substitute with ground turkey or chicken for a leaner option.
  • 4 cups Cabbage Fresh green or Napa cabbage; savoy cabbage can be used.
  • 2 cups Carrots Pre-packaged shredded carrots can save time.
  • 4 cups Broth Use chicken or vegetable broth.
For Freshness
  • 4 stalks Green onions Add just before serving for freshness.
For Extra Flavor
  • 1 tablespoon Garlic Fresh garlic enhances flavor.
  • 1 tablespoon Ginger Fresh ginger elevates the flavor profile.

Equipment

  • Large pot

Method
 

Cooking Instructions
  1. In a large pot, heat a splash of oil over medium heat. Add the ground pork and cook for about 5-7 minutes, breaking it apart with a wooden spoon until fully browned and no longer pink.
  2. Once the pork is cooked, stir in the chopped cabbage and sliced carrots. Sauté for another 4-5 minutes until the vegetables soften.
  3. Pour in 4 cups of chicken or vegetable broth and bring to a gentle boil. Reduce heat and simmer uncovered for about 10 minutes.
  4. Taste and adjust seasoning with salt and pepper. Serve hot, garnishing each bowl with fresh green onions.

Notes

This soup can be made a day ahead; store it in the fridge for up to 3 days. Flavors develop overnight.

Whipped Pink Lemonade: Your Refreshing Summer Mocktail Delight

As I rubbed the sleep from my eyes on a scorching summer afternoon, the thought of icy, refreshing Whipped Pink Lemonade danced through my mind. This cheerful mocktail not only boasts a delightful blend of tart lemonade and creamy topping, but it also comes together in just 10 minutes—perfect for those busy days when you crave something special. With its vibrant pink hue and airy texture, this drink will impress family and friends at any gathering. Plus, it can easily adapt to your favorite drink mixes, making it a true crowd-pleaser all season long. Are you ready to whip up this playful twist on a classic summer staple?

Why Choose Whipped Pink Lemonade?

Easy Preparation: This refreshing mocktail comes together in just 10 minutes, making it a fantastic option for those last-minute gatherings.

Creamy Twist: The airy whipped topping adds a delightful texture, transforming traditional lemonade into a dreamy beverage.

Endless Variability: With different powdered drink mixes, you can create your own unique lemonade flavors for any taste preference, whether fruity or tangy.

Family-Friendly Fun: Kids and adults alike will love this colorful drink, offering a sweet treat without any alcohol.

Perfect for Entertaining: Impress your guests with this stunning drink that looks as good as it tastes, making it a show-stopper at summer parties and barbecues.

Quick Refreshment: Ideal for hot days or lazy afternoons, this Whipped Pink Lemonade ensures everyone stays cool and hydrated.

Whipped Pink Lemonade Ingredients

For the Topping

  • Pink Lemonade Mix – This adds the signature color and sweet-tart flavor; feel free to substitute with any flavored powdered drink mix for a twist.
  • Heavy Whipping Cream – Essential for achieving that fluffy texture; no substitutions are recommended for the best results.

For the Lemonade Base

  • Pink Lemonade Mix – This flavors the refreshing drink; use the same type as in the topping for a harmonious taste.
  • Water – Necessary to dilute the lemonade base; it keeps your drink refreshing and hydrating.
  • Ice – Ensures the drink stays chilled and revitalizing; fill your glasses about ⅔ full for that perfect sip.

Whipped Pink Lemonade is the perfect summer mocktail that your whole family can enjoy!

Step‑by‑Step Instructions for Whipped Pink Lemonade

Step 1: Chill Your Equipment
Begin by chilling your mixing bowl and beaters in the freezer for 10–15 minutes. This quick cooling process is crucial for achieving that perfect fluffy topping for your Whipped Pink Lemonade. You’ll know they’re ready when the bowl feels cold to the touch, paving the way for your cream to whip beautifully.

Step 2: Whip the Cream
Once your bowl and beaters are chilled, add the heavy whipping cream and ¼ cup of pink lemonade mix to the bowl. Using an electric mixer, whip on high speed until you see stiff peaks forming, which will take about 3–5 minutes. The mixture should look light and airy, ready to elevate your drink to new heights.

Step 3: Prepare the Lemonade Base
For each serving of your refreshing Whipped Pink Lemonade, combine 1 tablespoon of pink lemonade mix with ¾ cup of water in a glass. Stir well until the lemonade mix is fully dissolved, creating a vibrant and tangy base. This step is essential for ensuring that each sip is perfectly flavored and refreshing.

Step 4: Assemble the Drink
Fill each glass with ice, about two-thirds full, to give your Whipped Pink Lemonade that icy chill. Make sure the ice is ample enough to keep the lemonade cool as you enjoy it. The contrast of the cold ice against the sweet, tangy lemonade will have your taste buds dancing with anticipation.

Step 5: Top with Whipped Cream
Generously spoon the whipped topping over the lemonade in each glass. Let it float delicately on top, allowing the colors to create a stunning visual. This luscious layer not only adds a creamy texture but also invites everyone to dig into this delightful summer mocktail.

Step 6: Serve and Enjoy!
Serve the Whipped Pink Lemonade immediately for the best experience. Encourage guests to stir the whipped topping into the lemonade before sipping to blend the flavors perfectly. The result is a joyful, refreshing drink that is sure to be a hit at any summer gathering!

Make Ahead Options

Whipped Pink Lemonade is a fantastic choice for those looking to save time during bustling summer days! You can prepare the lemonade base up to 24 hours in advance by mixing 1 tablespoon of pink lemonade mix with ¾ cup of water for each serving, then refrigerating it until serving time. For the fluffy topping, it’s best to whip it fresh, but you can make it up to 3 hours ahead and keep it covered in the fridge, noting that it will be at its peak quality when freshly whipped. When ready to serve, fill glasses with ice, pour in the chilled lemonade base, and top with the whipped cream for a delightful treat that’s just as delicious as when first made!

Expert Tips for Whipped Pink Lemonade

Chill for Success: Ensure your mixing bowl and beaters are properly chilled; this will help the cream whip to a stable, fluffy texture.

Use Full-Fat Cream: Opt for full-fat heavy whipping cream to guarantee stability and richness in your whipped topping, creating the perfect complement to your lemonade.

Avoid Overwhipping: Stop whipping as soon as you see stiff peaks. Overwhipping can lead to a grainy texture, which isn’t ideal for your Whipped Pink Lemonade.

Consistent Mix: Use the same pink lemonade mix for both the base and topping to maintain a harmonious flavor profile throughout the drink.

Quick Fix: If your whipped topping deflates, a quick whisk can help restore some of its fluffiness, but freshly whipped is always the best choice.

Presentation Matters: For a stunning presentation, spoon the whipped topping gently on the lemonade, allowing the colors to contrast beautifully in each glass.

What to Serve with Whipped Pink Lemonade

Refreshingly delightful, elevate your gathering with versatile pairings that complement every sip of this dreamy mocktail.

  • Colorful Fruit Platter: Bright, juicy fruits like strawberries, watermelon, and pineapple create a visual feast and harmonious sweetness with the lemonade.
  • Mini Sandwiches: Savory bites filled with turkey, cream cheese, and cucumber bring a satisfying contrast to the sweet tang of the drink; perfect for any occasion.
  • Veggie Sticks and Hummus: Crunchy, fresh vegetables served with creamy hummus offer a light and healthy contrast that enhances the overall summer spread.
  • Chilled Shrimp Cocktail: The subtle sweetness of shrimp can balance the tartness of the lemonade, making it a surprising yet delightful pairing.
  • Pineapple Coconut Muffins: These tropical treats provide a hint of sunshine and a complementary flavor profile for your refreshing drink.
  • Sparkling Water: Serve this mocktail alongside some fizzy sparkling water to keep the refreshment going while adding a sophisticated touch.
  • Chocolate Chip Cookies: The classic sweetness of warm cookies adds a delightful comfort alongside the tangy mocktail, embracing a nostalgic treat vibe.

Whipped Pink Lemonade Variations & Substitutions

Feel free to unleash your creativity and tailor this delightful mocktail to your taste buds with these fun variations!

  • Fruity Twists: Substitute pink lemonade mix with tropical flavors like passion fruit or mango for a vibrant, island-inspired drink.
  • Berry Boost: Incorporate fresh or frozen berries like raspberries or strawberries into the lemonade for an added burst of fruity goodness. Blend or muddle them in before adding ice!
  • Minty Fresh: Add fresh mint leaves to your lemonade base for a refreshing twist, balancing the sweetness with a hint of herbal flavor. It’s summertime in a glass!
  • Coconut Cream: For an exotic touch, swap half of the heavy cream for coconut cream, creating a dreamy tropical vibe that transports you to the beach.
  • Sugar-Free Option: Use sugar-free powdered lemonade mix to keep the sweetness without the calories. Just note that it might slightly affect the texture of your whipped topping.
  • Spiced Up: Add a pinch of cayenne pepper or ground ginger to the lemonade to give it an unexpected kick and warm dimension. Just a little goes a long way!
  • Creamy Vegan Version: Substitute heavy whipping cream with canned coconut milk or aquafaba for a delightful vegan version that’s just as creamy and satisfying.
  • Fizzy Delight: Add a splash of lemon-lime soda or sparkling water to the lemonade base for a fizzy finish that adds extra fun to your mocktail experience.

These variations can truly make your Whipped Pink Lemonade a unique centerpiece at any gathering!

How to Store and Freeze Whipped Pink Lemonade

Fridge: Store any leftover Whipped Pink Lemonade in an airtight container in the fridge for up to 2 days. The whipped topping is best enjoyed fresh but can hold its texture for a short time.

Freezer: While it’s not ideal to freeze this mocktail, if you must, pour the lemonade base into ice cube trays for storage. The topping should remain whipped and fresh when stored in the fridge but can be remade easily when needed.

Reheating: If your lemonade base has been stored, simply allow it to thaw in the fridge overnight before enjoying. Stir well to recombine the flavors for a refreshing drink experience.

Tip: While the lemonade base can be made ahead and chilled for up to 24 hours, remember that freshly whipped cream holds its texture best when enjoyed immediately with your Whipped Pink Lemonade.

Whipped Pink Lemonade Recipe FAQs

What is the best way to choose ripe ingredients for Whipped Pink Lemonade?
Absolutely! For the best flavor in your Whipped Pink Lemonade, ensure that your pink lemonade mix is fresh and not expired. When selecting powdered mixes, check the packaging for any signs of clumping or dark spots, indicating that they may have gone stale. Fresh ice is also key; make sure it is clean and odorless to maintain the drink’s refreshing taste.

How should I store leftover Whipped Pink Lemonade?
Very! If you have any leftover Whipped Pink Lemonade, store it in an airtight container in the fridge for up to 2 days. However, the whipped topping is best enjoyed fresh, as it may lose some of its delightful fluffiness over time. I often suggest enjoying the remaining lemonade base within a day or two to maintain its vibrant flavor.

Can I freeze Whipped Pink Lemonade?
Yes, you can! While it’s not ideal to freeze the entire mocktail due to the whipped topping, you can pour the lemonade base into ice cube trays for storage. This method allows you to enjoy the flavors later when blended with a fresh whipped topping. Simply thaw the lemonade cubes in the fridge overnight and prepare a fresh batch of whipped cream when you’re ready to serve.

What common troubleshooting tips should I keep in mind when making Whipped Pink Lemonade?
If your whipped topping doesn’t thickening as expected, make sure that your bowl and beaters were properly chilled prior to whipping. If it deflates, a quick whisk can help restore some of its fluffiness, though it’s always best freshly whipped. If the topping becomes grainy, you might have overwhipped the cream—so I recommend stopping as soon as stiff peaks form, to keep that light and airy texture.

Are there any dietary considerations I should be aware of?
Absolutely! If you’re serving Whipped Pink Lemonade to guests with dietary restrictions, opt for sugar-free lemonade mixes to accommodate those watching their sugar intake. Additionally, always check for any allergies related to dairy if you’re using heavy cream for the topping. While this drink is family-friendly, be sure to adapt your ingredients for any specific dietary needs.

Can I prepare the lemonade base ahead of time?
Yes! You can prepare the lemonade base up to 24 hours in advance. Just ensure it is kept chilled in the fridge until you’re ready to serve. For the best experience, make the whipped topping fresh right before serving, as cream tastes best right after it’s whipped. This way, you’ll have a beautifully layered and flavorful Whipped Pink Lemonade to enjoy!

Whipped Pink Lemonade

Whipped Pink Lemonade: Your Refreshing Summer Mocktail Delight

Whipped Pink Lemonade is a delightful summer mocktail that combines creamy topping and tart lemonade, perfect for hot afternoons.
Prep Time 10 minutes
Total Time 10 minutes
Servings: 4 glasses
Course: Drinks
Cuisine: American
Calories: 180

Ingredients
  

For the Topping
  • ¼ cup Pink Lemonade Mix substitute with any flavored powdered drink mix for a twist
  • 1 cup Heavy Whipping Cream essential for fluffy texture
For the Lemonade Base
  • 1 tablespoon Pink Lemonade Mix same type as in the topping for harmony
  • ¾ cup Water to dilute the lemonade base

Equipment

  • mixing bowl
  • electric mixer
  • glasses

Method
 

Step‑by‑Step Instructions for Whipped Pink Lemonade
  1. Begin by chilling your mixing bowl and beaters in the freezer for 10–15 minutes.
  2. Add the heavy whipping cream and ¼ cup of pink lemonade mix to the bowl. Whip on high speed until stiff peaks form, about 3–5 minutes.
  3. Combine 1 tablespoon of pink lemonade mix with ¾ cup of water in a glass and stir until dissolved.
  4. Fill each glass with ice, about two-thirds full.
  5. Spoon the whipped topping over the lemonade in each glass.
  6. Serve immediately and encourage guests to stir the whipped topping into the lemonade before sipping.

Notes

Ensure to chill the mixing bowl and beaters properly for the best whipped topping texture.

No-Bake Firecracker Strawberry Lemonade Popsicles for Summer Bliss

As I sat on my porch sipping lemonade on a sweltering summer afternoon, I realized there was an even better way to enjoy that iconic flavor. That’s when the idea for No-Bake Firecracker Strawberry Lemonade Popsicles sparked to life! This delightful recipe combines sweet strawberries, zesty lemon, and effervescent sparkling water, creating a refreshing treat that’s not only easy to make but also perfect for beating the heat. With no baking involved, it’s an ideal choice for anyone looking for a quick, crowd-pleasing dessert that can cater to gluten-free and vegan diets. So, why not elevate your summer gatherings with these fizzy, flavor-packed pops? Are you ready to dive into this delightful homemade creation?

Why Are These Popsicles a Must-Try?

Refreshing, packed with the vibrant flavors of strawberries and lemon, these popsicles are the quintessential summer treat that your taste buds will adore. No-Bake Convenience allows you to whip them up quickly—perfect for busy days. Healthy Ingredients mean you can indulge without guilt, and they cater to various diets, including gluten-free and vegan options. Customizable with endless mix-in ideas like mint or tropical fruits, everyone can enjoy a personalized flavor. Don’t forget to check out my Strawberry Cheesecake Dump for another fun dessert idea!

No-Bake Firecracker Strawberry Lemonade Popsicle Ingredients

For the Popsicles

Strawberries – Essential for sweetness and vibrant color; use fresh, ripe strawberries for peak flavor.
Lemon Juice – Adds tanginess and brightness; freshly squeezed lemons give the best taste.
Honey (or Maple Syrup) – Provides sweetness; for a vegan option, substitute with agave syrup and adjust to taste.
Sparkling Water – Adds fizzy lightness; chill before mixing to retain fizz.

For Optional Flavor Boosts

Ginger Powder – Introducing warmth and spice; enhance the popsicle’s taste profile with just a pinch.
Mint Leaves – Fresh mint can add a refreshing hint; chop finely before adding for a delightful twist.
Coconut Water – For a different flavor profile without the fizz; substitute for sparkling water if desired.

These No-Bake Firecracker Strawberry Lemonade Popsicles are a deliciously refreshing treat, perfect for your summer gatherings!

Step‑by‑Step Instructions for No-Bake Firecracker Strawberry Lemonade Popsicles

Step 1: Prepare Strawberry Mixture
Begin by washing and hulling 2 cups of fresh strawberries. In a blender, combine the strawberries and blend until smooth for about 1-2 minutes. If you prefer a seedless texture, pour the mixture through a fine mesh sieve into a bowl. You should have a vibrant, thick strawberry puree ready to enhance your No-Bake Firecracker Strawberry Lemonade Popsicles.

Step 2: Mix Ingredients
Next, stir in 1/2 cup of freshly squeezed lemon juice and 1/4 cup of honey or maple syrup into the strawberry puree. Use a whisk to ensure everything is well combined, tasting as you go to adjust sweetness if necessary. The mixture should have a delightful balance of sweetness and tanginess, perfect for your popsicles.

Step 3: Add Sparkling Water
Gently fold in 2 cups of chilled sparkling water to the strawberry-lemon mixture. Be careful not to over-mix; you want to maintain its fizzy texture. The mixture should be light and airy, bursting with flavor. This is what makes your No-Bake Firecracker Strawberry Lemonade Popsicles refreshing and fun!

Step 4: Mold and Freeze
Pour the delicious mixture into popsicle molds, filling each about three-quarters full. Insert popsicle sticks and freeze the molds flat for at least 6 hours, or until completely solid. Look for a firm texture when you gently push on the popsicle; this ensures they are ready to be enjoyed!

Step 5: Serve
Once frozen solid, remove the popsicles from the molds by running warm water over the outside of the mold for a few seconds if needed. Pull them out gently, and serve immediately for a refreshing treat. These No-Bake Firecracker Strawberry Lemonade Popsicles are perfect for summer days, bringing joy and coolness in every bite.

Make Ahead Options

These No-Bake Firecracker Strawberry Lemonade Popsicles are ideal for meal prep, making them a perfect addition to your busy summer schedule! You can prepare the strawberry mixture and store it in the refrigerator for up to 24 hours before adding the sparkling water and freezing. Just blend 2 cups of strawberries with 1/2 cup of lemon juice and 1/4 cup of honey (or maple syrup), then refrigerate the mixture in an airtight container. When you’re ready to finish, gently fold in 2 cups of chilled sparkling water before pouring it into the molds for freezing. This way, you’ll have refreshing popsicles ready to serve with minimal effort, just as delicious as if you made them from scratch that day!

No-Bake Firecracker Strawberry Lemonade Popsicles Variations

Feel free to let your creativity shine and adapt this delightful recipe to your taste preferences!

  • Tropical Twist: Substitute strawberries with fresh mango or pineapple for a sweet, island-inspired flavor.

  • Minty Fresh: Chopped fresh mint can be added for a refreshing lift and a cooling aroma. This takes your popsicles to another level of refreshment!

  • Ginger Zing: Add a pinch of ginger powder to introduce a warm spice that beautifully complements the sweetness of the strawberries.

  • Coconut Flare: Swap sparkling water for coconut water to create a tropical flavor profile without the fizz.

  • Berry Medley: Mix in other berries like blueberries or raspberries with strawberries for an explosion of color and taste in your popsicles.

  • Fruit Layering: Create layers by pouring strawberry mixture followed by a layer of lemon juice and sparkling water mixture for a stunning visual and added flavor depth.

  • Lower Sugar: Substitute honey or maple syrup with stevia or a sugar alternative for a lighter version of this popsicle, perfect for those watching their sugar intake.

While you’re on the journey of fun and refreshing treats, don’t forget to explore my easy Grandmas Homemade Bites for a delightful no-bake dessert or consider crafting a light and refreshing option like my Heavenly No-Bake Cake. Happy customizing!

How to Store and Freeze No-Bake Firecracker Strawberry Lemonade Popsicles

Airtight Container: Store any leftover popsicles in an airtight container to prevent freezer burn and maintain their delightful flavor.

Freezer: These popsicles keep well in the freezer for up to 2 weeks, but they are best enjoyed within the first few days for optimal freshness.

Serving Notes: When ready to enjoy, remove from the freezer and let them sit at room temperature for a few minutes if needed for easier removal from molds.

Reheating or Refreezing: If you’ve leftover melted popsicles, do not refreeze them to ensure the best texture; it’s advisable to consume them fresh for the ultimate taste experience.

What to Serve with No-Bake Firecracker Strawberry Lemonade Popsicles

Nothing beats a hot summer day like these delightful popsicles, offering a refreshing burst of fruity flavor with every bite.

  • Fresh Fruit Salad: A medley of seasonal fruits complements the popsicles’ vibrancy, enhancing the overall refreshing experience.

  • Light Green Salad: Crisp greens with a zesty lemon vinaigrette provide a fresh, crunchy contrast to the popsicles’ sweetness.

  • Grilled Chicken Skewers: Juicy, herb-marinated chicken offers a savory balance to the tangy popsicles, making for a perfect summer meal.

  • Mint Lemonade: This invigorating drink mirrors the popsicles’ flavor profile, providing a refreshing sip to cool you down.

  • Coconut Yogurt Parfait: Layer creamy yogurt with granola and fruit, creating a delightful contrast to the icy popsicles while keeping the tropical vibe alive.

  • Chilled Cucumber Soup: A smooth, cool soup enhances the summer feel, offering a savory backdrop to the sweet and tangy treats.

For those looking to elevate their summer gatherings, these pairings create a light, satisfying meal that perfectly showcases your No-Bake Firecracker Strawberry Lemonade Popsicles!

Expert Tips for No-Bake Firecracker Strawberry Lemonade Popsicles

  • Use Fresh Berries: Fresh strawberries yield the best flavor; if they’re out of season, opt for thawed frozen strawberries for a similar taste.

  • Chill Sparkling Water: Ensure the sparkling water is thoroughly chilled before mixing to maintain the fizz, enhancing your popsicle experience.

  • Avoid Over-Mixing: Gently fold in the sparkling water—over-mixing can deflate the bubbles, affecting the lovely fizzy texture you desire in these popsicles.

  • Leave to Freeze: Don’t rush the freezing process! For a perfect texture, they need at least 6 hours in the freezer to become solid and enjoyable.

  • Room Temperature Tip: If your popsicles are hard to remove from the molds, let them sit at room temperature for a few minutes to ease the process.

No-Bake Firecracker Strawberry Lemonade Popsicles Recipe FAQs

What type of strawberries should I use for the best flavor?
Absolutely! For the sweetest and most vibrant flavor, always choose fresh, ripe strawberries. When strawberries are in season, they will enhance the taste of your No-Bake Firecracker Strawberry Lemonade Popsicles dramatically. If fresh strawberries are unavailable, thawed frozen strawberries can be a good substitute, providing a similar taste.

How should I store leftover popsicles, and how long do they last in the freezer?
Very good question! Store any leftover popsicles in an airtight container or a freezer-safe bag to prevent freezer burn and preserve their delightful flavor. They can be kept for up to 2 weeks in the freezer, but they are best enjoyed within the first few days for optimal freshness and taste.

Can I freeze the popsicle mixture ahead of time?
Certainly! If you prefer to prepare the mixture ahead of time, simply blend and mix your ingredients as directed, then pour them into the molds. Freeze for at least 6 hours, and you’ll have a refreshing treat waiting for you when it’s hot outside. If the mixture is not frozen completely, the texture will be slushy rather than firm.

What should I do if my popsicles are hard to remove from the molds?
This can happen occasionally! If you’re struggling to pull them out, simply run warm water over the outside of the popsicle molds for a few seconds. This gentle warming will help loosen the popsicles. If they still don’t budge, letting them sit at room temperature for a few minutes can also ease the removal process.

Are there any dietary considerations I need to know?
Yes! These No-Bake Firecracker Strawberry Lemonade Popsicles are quite versatile. While they are gluten-free, you can easily make them vegan by substituting honey with agave syrup. Just keep in mind that when serving these popsicles, avoid any cross-contamination with allergens if you’re hosting guests with specific dietary needs.

No-Bake Firecracker Strawberry Lemonade Popsicles

No-Bake Firecracker Strawberry Lemonade Popsicles for Summer Bliss

A refreshing treat perfect for summer, No-Bake Firecracker Strawberry Lemonade Popsicles combine sweet strawberries, zesty lemon, and sparkling water.
Prep Time 15 minutes
Freezing Time 6 hours
Total Time 6 hours 15 minutes
Servings: 6 popsicles
Course: Dessert
Cuisine: American
Calories: 80

Ingredients
  

For the Popsicles
  • 2 cups fresh strawberries washed and hulled
  • 1/2 cup fresh lemon juice preferably freshly squeezed
  • 1/4 cup honey or maple syrup adjust to taste, or use agave syrup for vegan
  • 2 cups chilled sparkling water chill before mixing to retain fizz
For Optional Flavor Boosts
  • 1/2 teaspoon ginger powder optional
  • 1/4 cup mint leaves finely chopped optional
  • 2 cups coconut water substitute for sparkling water if desired

Equipment

  • Blender
  • popsicle molds
  • Measuring cups
  • whisk
  • Fine Mesh Sieve

Method
 

Step-by-Step Instructions
  1. Wash and hull fresh strawberries, blend until smooth, and strain if desired.
  2. Stir in fresh lemon juice and honey or maple syrup to the strawberry puree.
  3. Fold in chilled sparkling water gently to maintain fizz.
  4. Pour mixture into molds, insert sticks, and freeze for at least 6 hours.
  5. To serve, run warm water over molds to release popsicles.

Notes

These popsicles are best enjoyed fresh, but can be stored in an airtight container in the freezer for up to 2 weeks. Let sit at room temperature if hard to remove from molds.