Vegan Sesame Yaki Udon Noodles for Quick Comfort Cooking

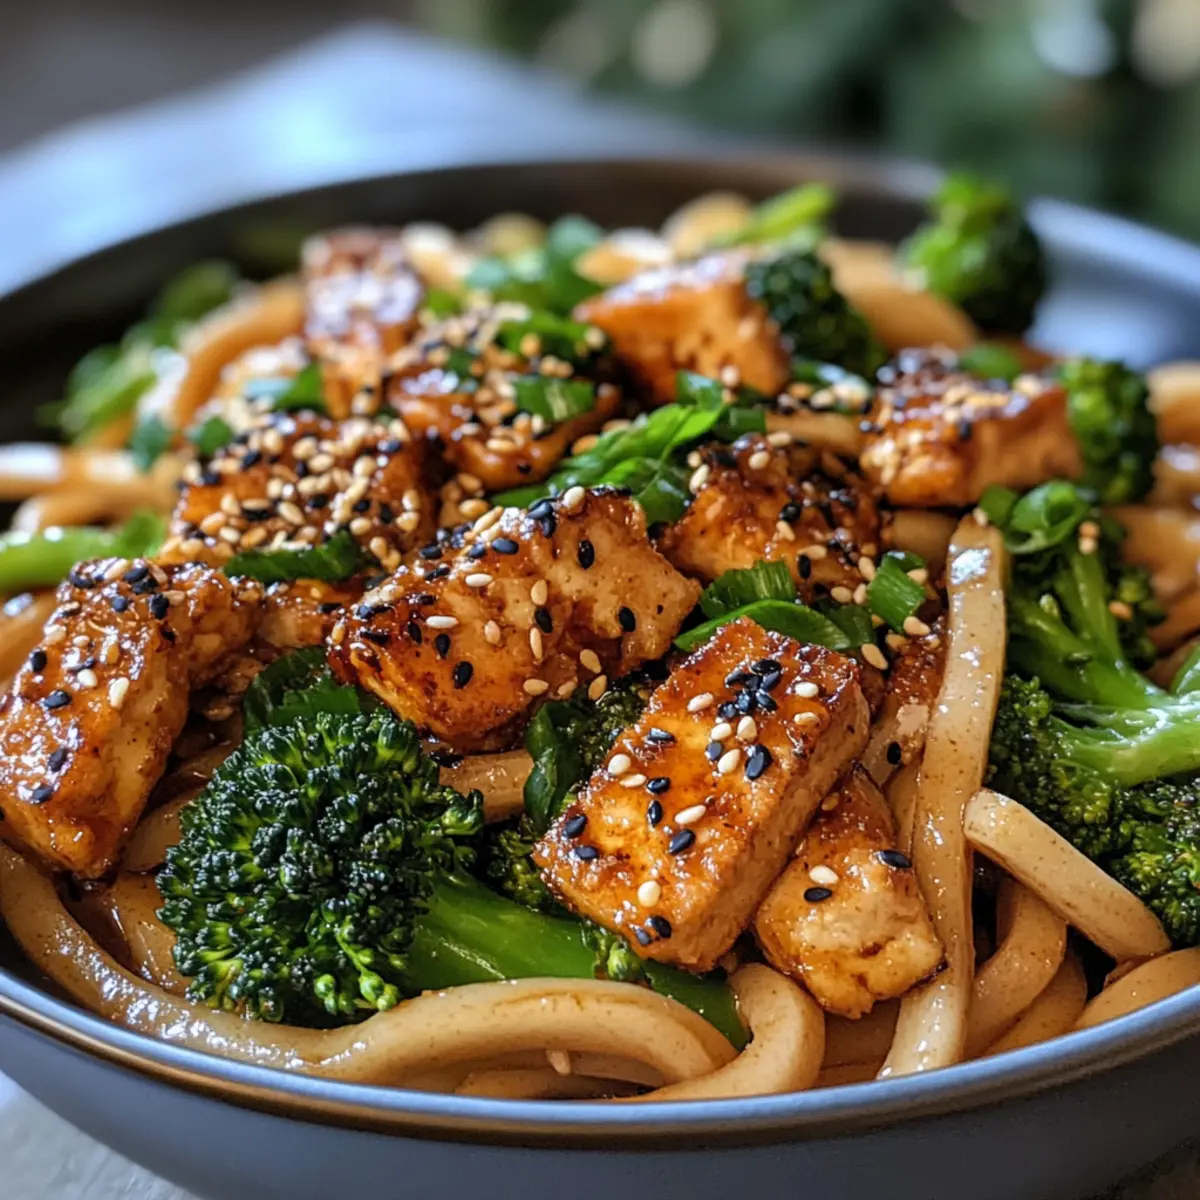
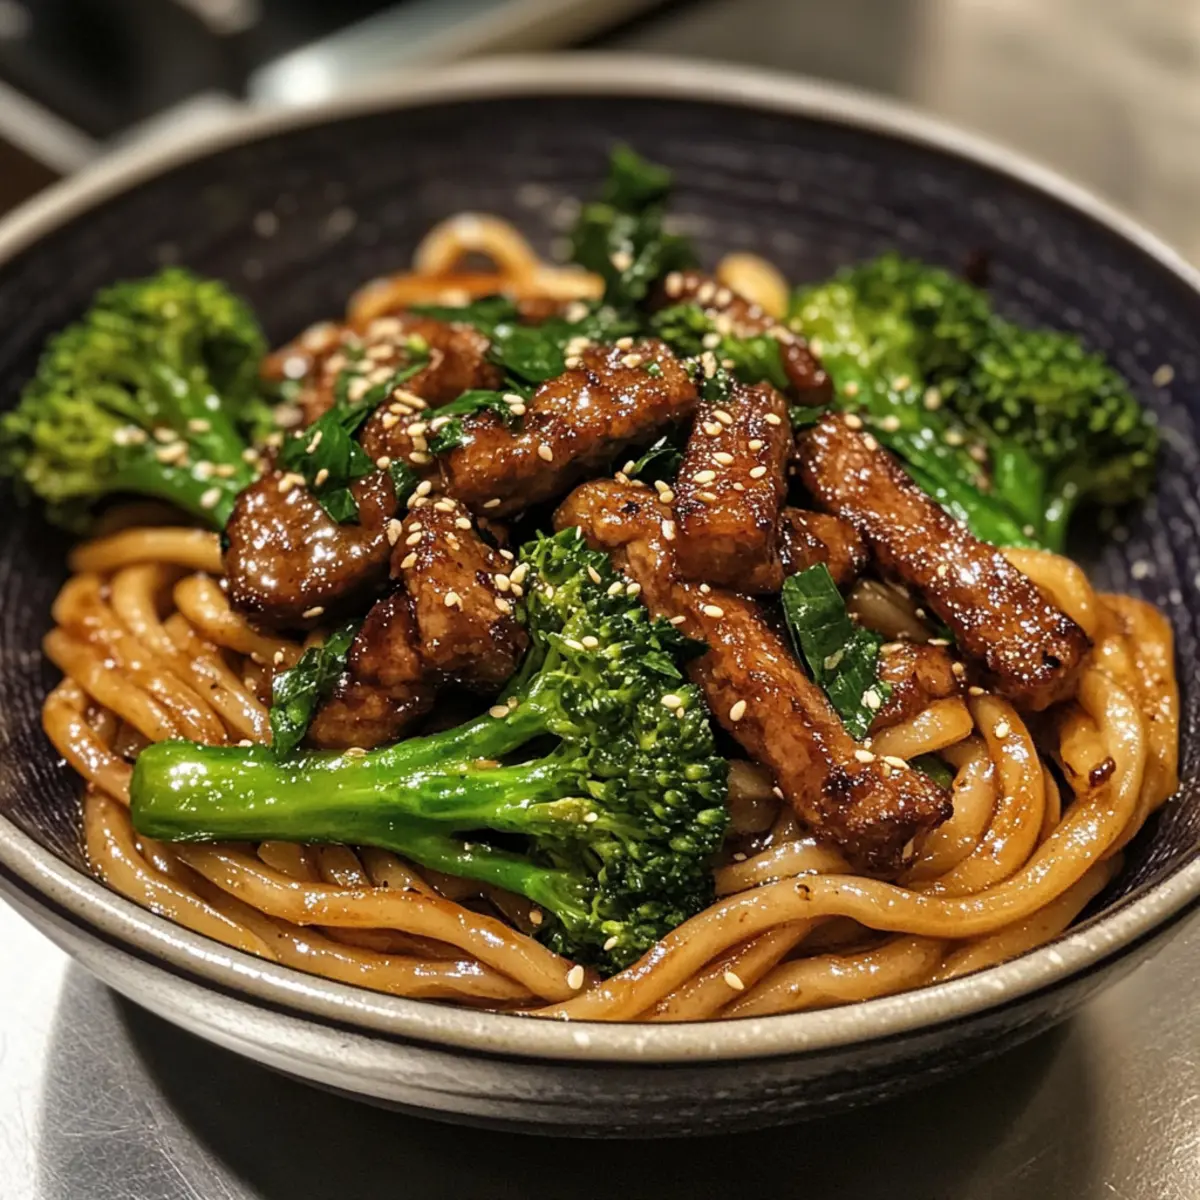
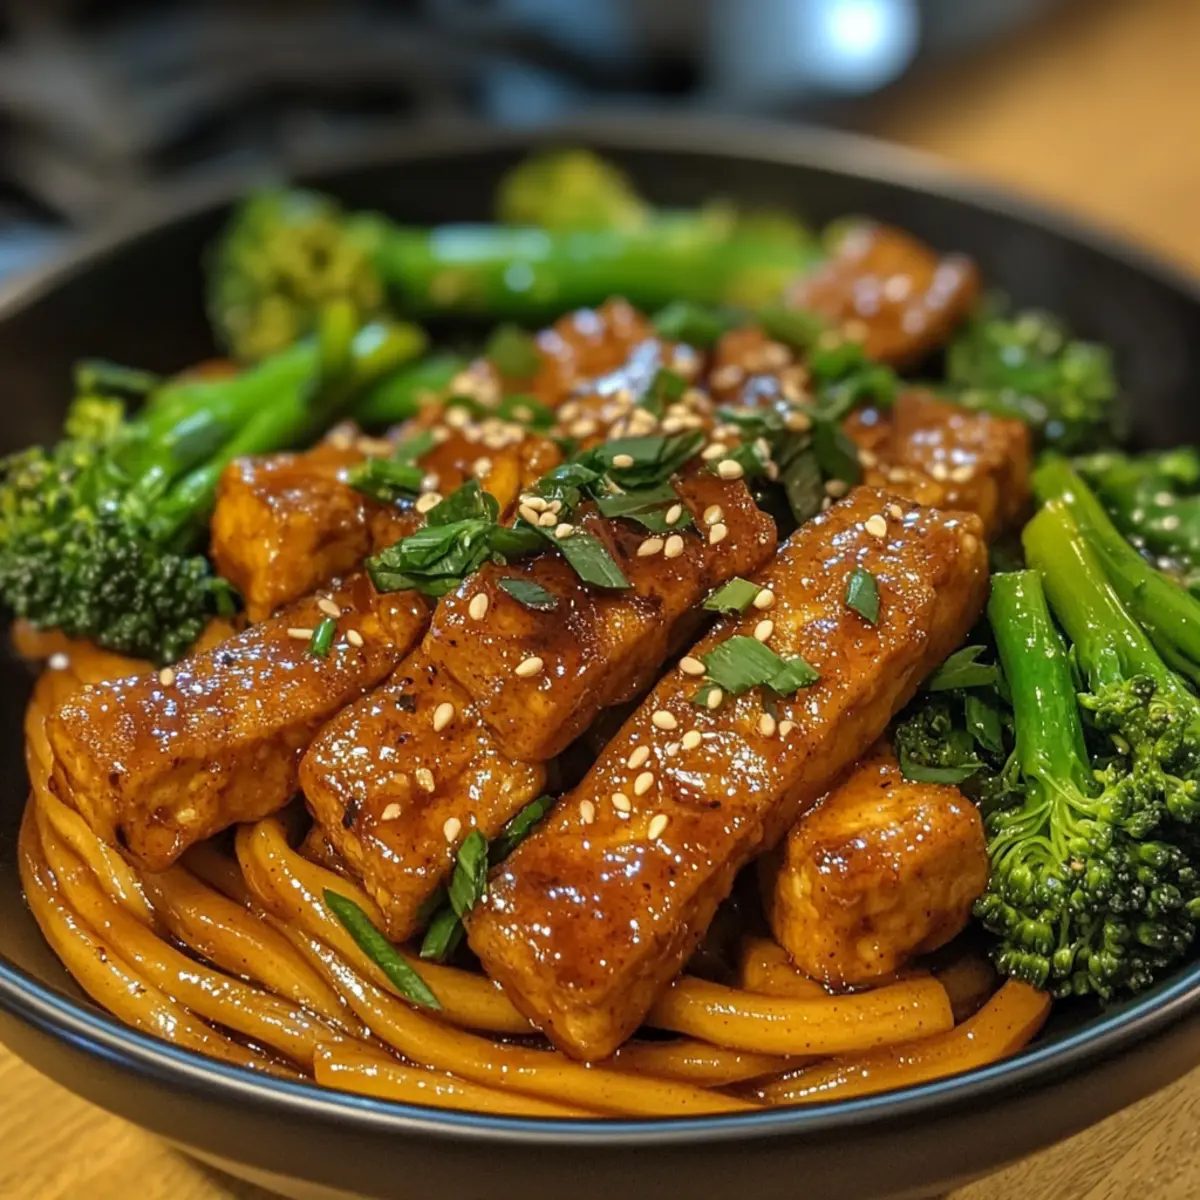
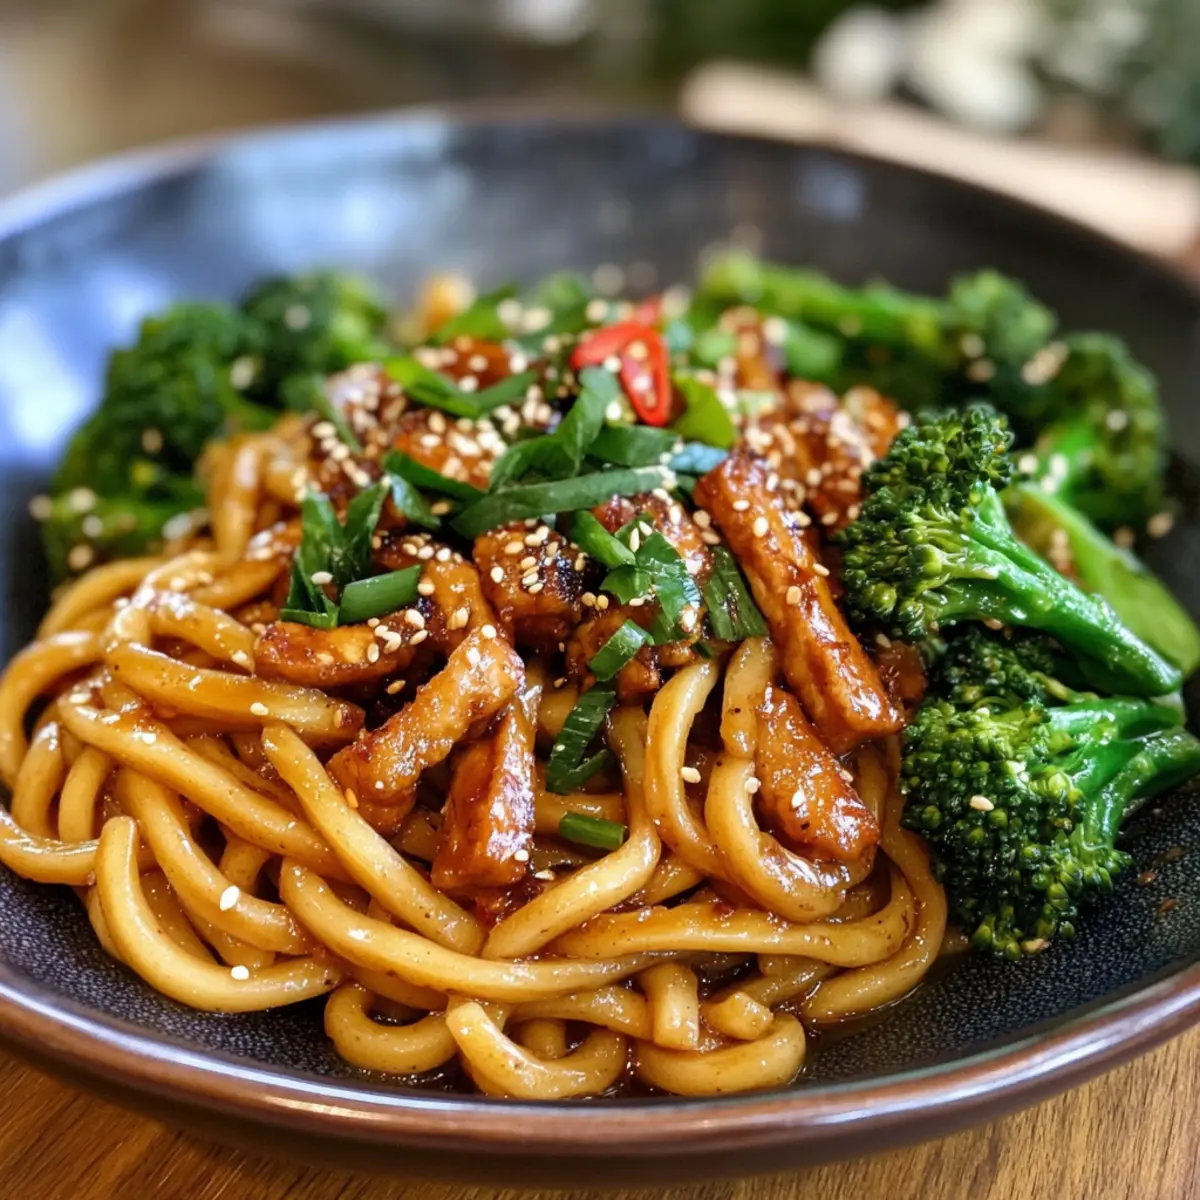
Walking through a bustling Asian market, the air was thick with mouthwatering aromas, captivating my senses and igniting my passion for homemade cooking. That’s when I stumbled upon a vibrant display of udon noodles, instantly inspiring me to create a comforting and delicious meal: Vegan Sesame Yaki Udon Noodles. This dish is not only quick to prepare, but it also offers a delightful twist on traditional comfort food—perfect for busy weeknights when you crave something wholesome. With thick and chewy udon noodles enveloped in a savory sesame garlic sauce, paired with fresh vegetables like broccolini and customizable protein options like seitan or baked tofu, you’ll find yourself reaching for seconds. Are you ready to transform your dinner routine into a nourishing and flavorful experience?

Why You’ll Crave This Dish?

Quick and Easy: In just under 30 minutes, you can whip up a satisfying meal that’s perfect for even the busiest nights.

Comforting Flavors: The savory sesame garlic sauce envelops thick udon noodles, delivering a warm and hearty experience you’ll look forward to.

Versatile Proteins: Choose between homemade seitan beef strips or baked tofu for a great protein punch. Not a fan of those? Try adding your favorite veggies for a unique twist!

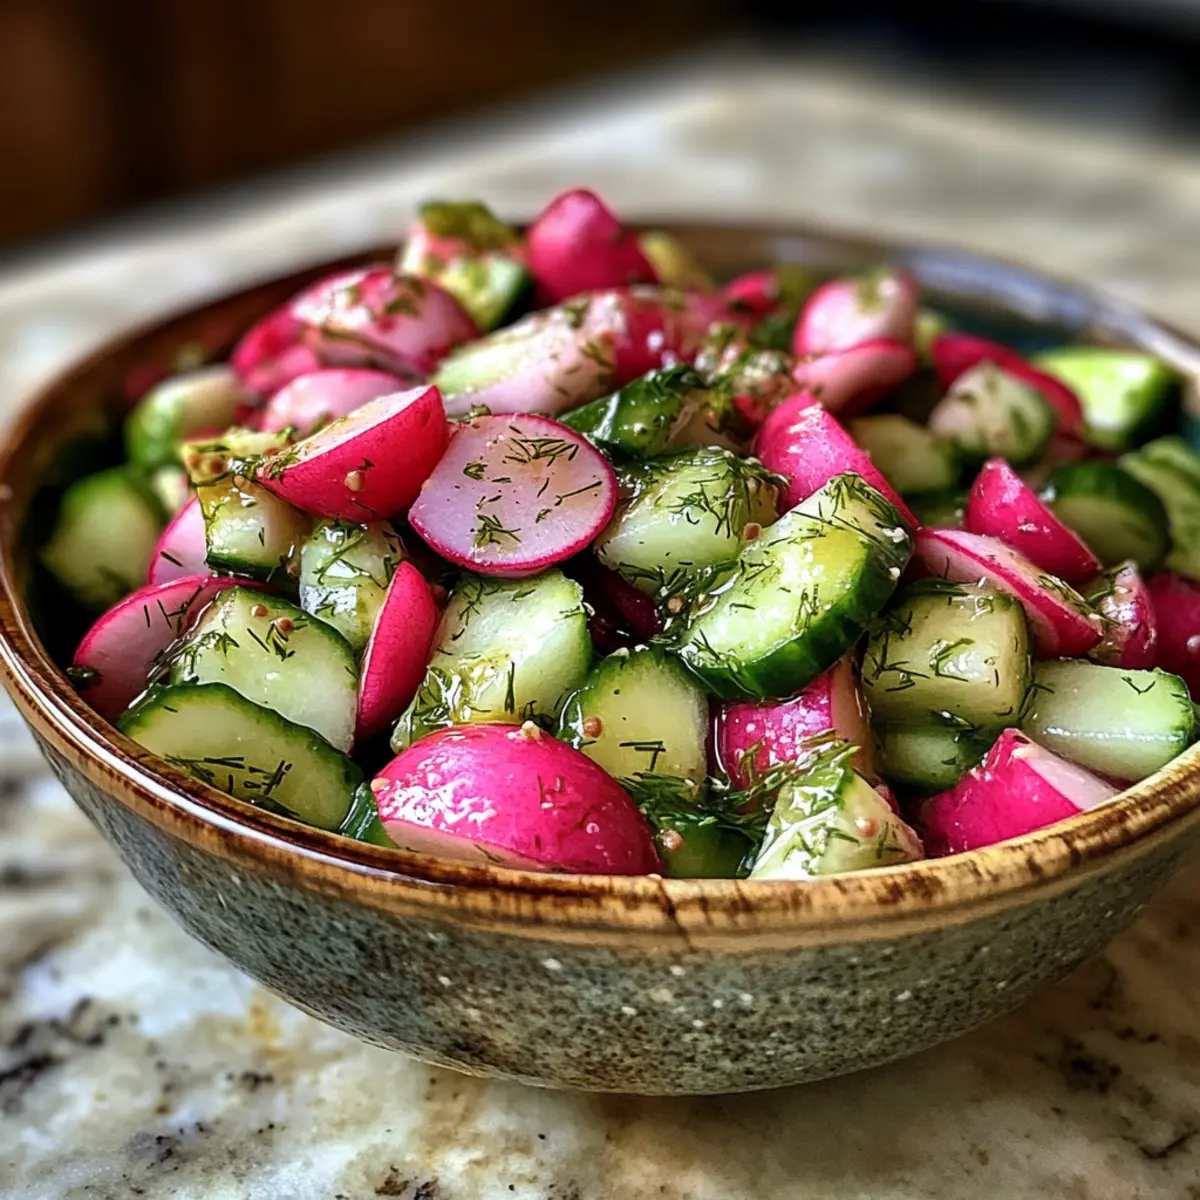
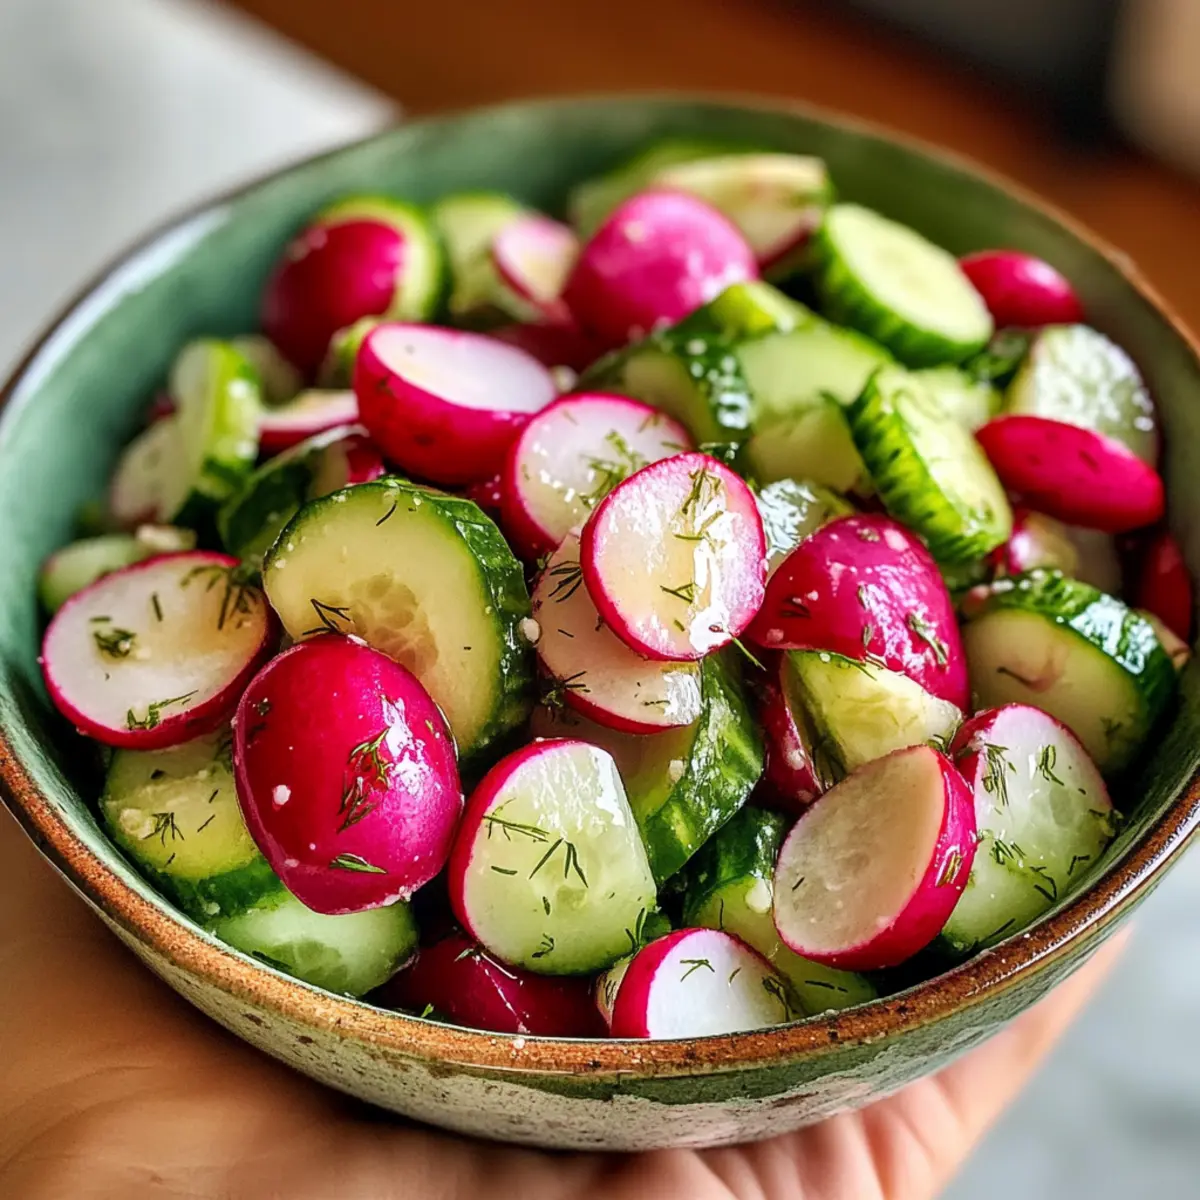
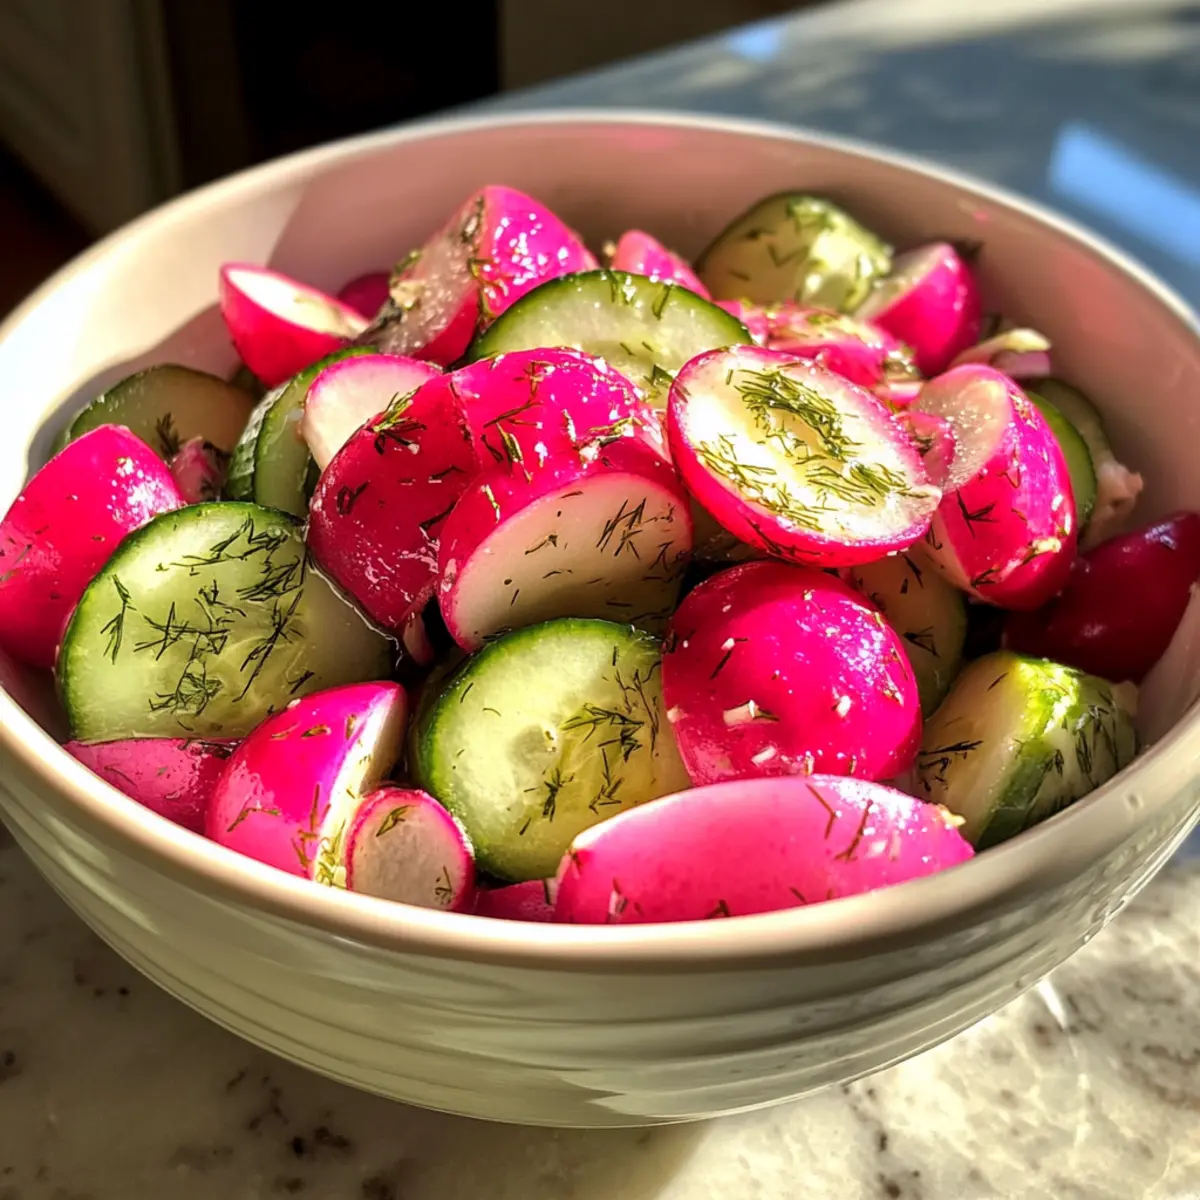
Healthy & Nutritious: Packed with fresh broccolini and balanced ingredients, these noodles not only taste great but also nourish your body. Consider pairing them with a refreshing Cabbage Cucumber Salad for even more vibrant nutrition.

Crowd-Pleaser: This dish is perfect for families or gatherings, ensuring everyone leaves the table happy and satisfied!

Vegan Sesame Yaki Udon Noodles Ingredients

For the Noodles
Fresh Udon Noodles – Thick, chewy noodles that soak up the sauce beautifully; quick-cooking types save time.
Yellow Onion – Adds a natural sweetness; chop a medium onion for a flavor base.

For the Sauce
Sesame Oil – Infuses a nutty flavor into the dish; substitute with a neutral oil if desired.
Toasted Sesame Oil – Enhances the rich, savory taste; use sparingly to avoid overpowering the dish.
Rice Vinegar – Balances flavors with a hint of acidity; adjust to taste.
Garlic – Minced for robust flavor; it works wonders with the other sauce ingredients.
Ginger – Finely grated for a fragrant kick; fresh ginger elevates the dish’s taste.
Soy Sauce – Adds essential saltiness; opt for dark soy for a richer flavor profile.
Agave Nectar or Maple Syrup – Provides sweetness to balance the savory elements; adjust to suit your palate.
Sambal Oelek or Sriracha – Adds a spicy kick; feel free to adjust the heat level!
Water – Helps to adjust the sauce consistency for perfect coating.
Cornstarch – A thickening agent; mix with water to create a slurry before adding to the sauce.

For the Vegetables
Broccolini or Broccoli – Adds a satisfying crunch and nutrition; swap in any favorite veggies you have on hand.

For the Protein
Homemade Seitan Beef or Baked Tofu – Both provide texture and protein; prepare in advance for ease.

Step‑by‑Step Instructions for Vegan Sesame Yaki Udon Noodles

Step 1: Prepare the Protein
If you’re using homemade seitan or baked tofu for your Vegan Sesame Yaki Udon Noodles, prepare it first. For seitan, ensure it’s cooked and ready to go; for tofu, cube it and bake until crispy, about 25 minutes at 400°F. This step sets the stage for a satisfying texture in your dish.

Step 2: Sauté the Onion
In a large skillet or wok, heat 2 tablespoons of sesame oil over medium heat. Add the chopped yellow onion and sauté for about 5 minutes, stirring occasionally, until it becomes soft and translucent. The aroma will fill your kitchen, creating the perfect base for your noodles.

Step 3: Cook the Broccolini
Now, toss in the chopped broccolini and a few tablespoons of water into the skillet with the onions. Cover and cook for 6-8 minutes, until the broccolini is tender and bright green. You’ll know they’re ready when they’re vibrant and still have a slight crisp to them.

Step 4: Mix the Sauce
While the vegetables are cooking, prepare the sauce. In a separate bowl, whisk together toasted sesame oil, rice vinegar, minced garlic, grated ginger, soy sauce, agave nectar, and sambal oelek. This sauce mixture will add depth and flavor to your Vegan Sesame Yaki Udon Noodles.

Step 5: Prepare the Noodles
Bring a pot of water to a boil, then add the fresh udon noodles. Follow the package instructions—typically just 2 minutes—until they are fully cooked. Keep an eye on them; you want them soft but not mushy. Drain and set aside for the next step.

Step 6: Combine Noodles and Sauce
Add the drained udon noodles to the skillet with the sautéed onion and broccolini. Cover the skillet for 2-3 minutes to help loosen the noodles. Then, add half of the sauce mixture and toss everything gently to coat the noodles evenly.

Step 7: Add the Protein
Stir in your prepared seitan or baked tofu along with the remaining sauce. Cook for an additional 3-4 minutes, allowing the sauce to thicken and envelop the noodles and vegetables. You’ll know it’s done when the sauce clings nicely to everything, creating a glossy finish.

Step 8: Serve and Garnish
Remove the skillet from heat and serve the Vegan Sesame Yaki Udon Noodles hot. Garnish with fresh cilantro, sliced green onions, and a sprinkle of sesame seeds for an appealing presentation. This dish not only looks vibrant but is sure to delight every palate at your table!

How to Store and Freeze Vegan Sesame Yaki Udon Noodles

Fridge: Store leftovers in an airtight container for up to 5 days. Reheat gently in a skillet over medium heat to maintain the noodle texture.

Freezer: Freeze portions in freezer-safe bags or containers for up to 3 months. Allow to cool completely before freezing to prevent ice crystals.

Reheating: For best results, thaw overnight in the fridge before reheating. Heat in a skillet with a splash of water or broth to revive the noodles and sauce.

Labeling: Don’t forget to label your containers with the date for optimal freshness and to remind you of those delicious Vegan Sesame Yaki Udon Noodles waiting to be enjoyed!

What to Serve with Easy Vegan Sesame Yaki Udon Noodles

Enjoy your culinary adventure by complementing those rich, savory noodles with delightful dishes that elevate your meal.

  • Crispy Vegan Spring Rolls: These delightful bites offer a crunchy texture and can be filled with fresh veggies, making them a perfect starter.

  • Miso Soup: The warm, umami flavors of this broth create a comforting balance with the noodles while providing a deliciously light starter.

  • Cabbage Cucumber Salad: A refreshing option that adds a revitalizing crunch and brightness, enhancing the overall flavor experience of your meal.

  • Avocado Edamame Salad: With creamy avocado and protein-packed edamame, this salad brings a satisfying creaminess that contrasts beautifully with the noodles.

  • Steamed Bok Choy: Lightly steamed bok choy adds a tender and vibrant green element, tying both texture and nutrition into your hearty meal.

  • Chilled Green Tea: The subtle, earthy flavors of green tea not only refresh you but also cleanse the palate, enhancing your overall dining experience.

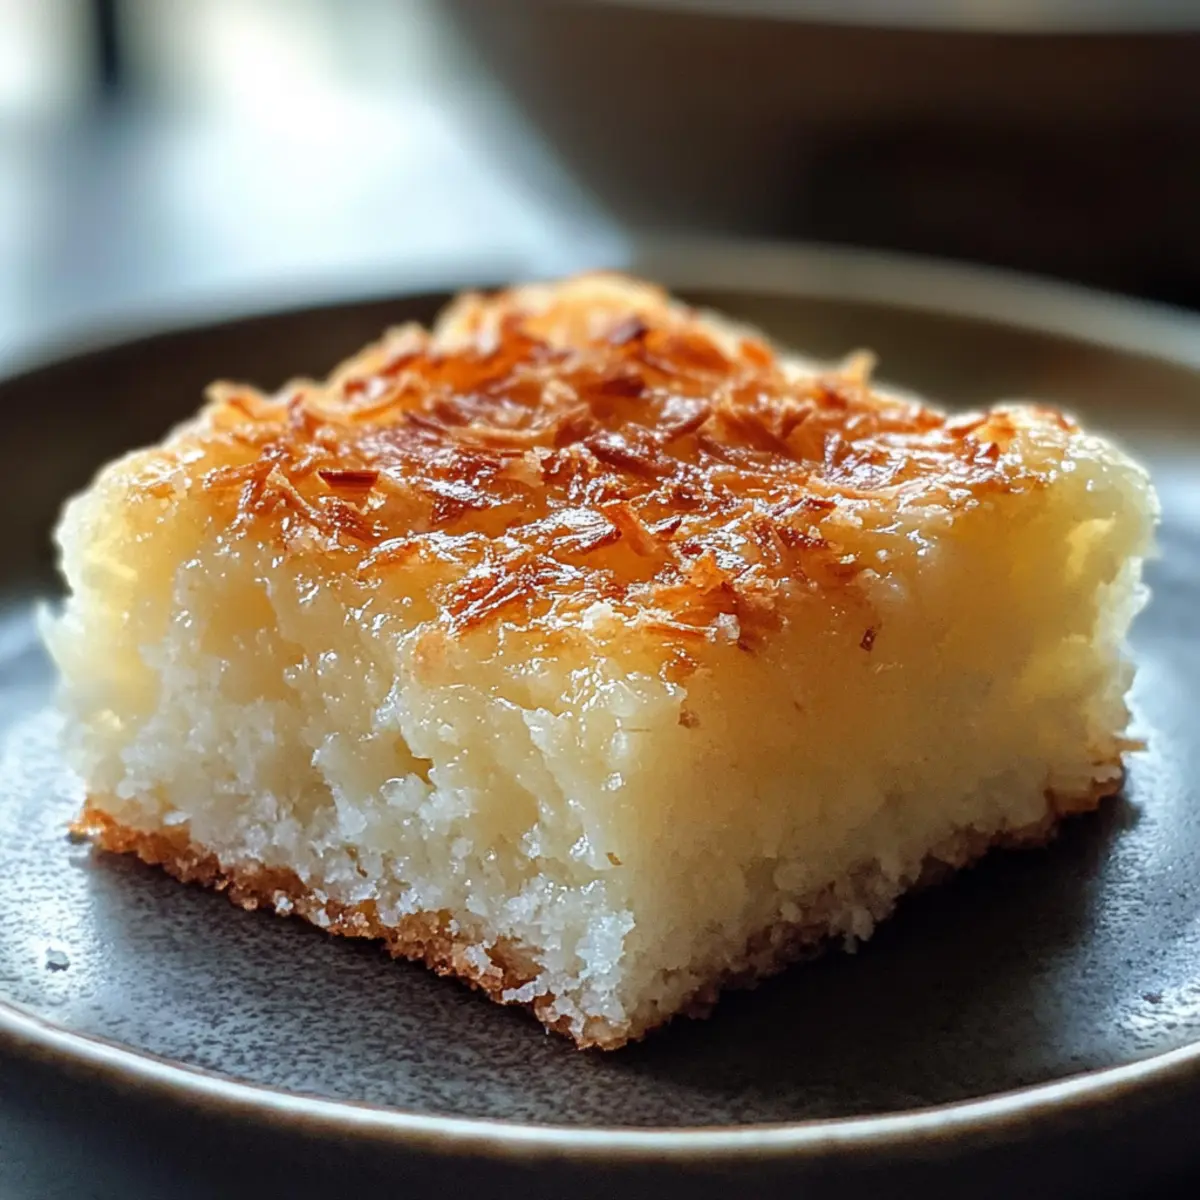
  • Mango Sticky Rice: For a sweet finish, this classic dessert combines luscious mango and sticky rice, perfectly contrasting the meal’s savory notes.

  • Sriracha Lime Soda: A unique, spicy-sweet drink that connects the dish’s heat with its savory flavors, making each sip as memorable as the last bite.

  • Sesame Cookies: These crunchy treats bring a delightful finish, tying in the sesame theme while providing a satisfying sweet bite after your nourishing noodles.

Expert Tips for the Best Vegan Sesame Yaki Udon Noodles

  • Fresh Noodles Matter: Using quick-cooking fresh udon noodles ensures that they are perfectly chewy, helping to create the ideal texture for your Vegan Sesame Yaki Udon Noodles.

  • Prep Ahead: If you plan to use homemade seitan or baked tofu, prepare them in advance. This not only saves time but also enhances the overall flavors.

  • Watch the Heat: When sautéing, cook the onions over medium heat. Too high of a temperature can burn them, leading to a bitter taste that could overpower your dish.

  • Adjust Spice Wisely: If you’re unsure about the desired heat level, start with a small amount of sambal oelek or sriracha and adjust it in later. Remember, you can always add more, but you can’t take it out!

  • Veggie Variations: Feel free to swap out broccolini for your favorite veggies; just remember to cook them until they’re tender yet still crisp, adding that satisfying crunch to your Vegan Sesame Yaki Udon Noodles.

Vegan Sesame Yaki Udon Noodles Variations

Feel free to customize these noodles to your taste, and let your culinary creativity shine!

  • Protein Swap: Opt for tempeh instead of seitan or tofu for a nuttier flavor and extra protein. Tempeh crisps up beautifully when sautéed and adds an amazing depth to the dish.

  • Veggie Delight: Replace broccolini with colorful bell peppers or snow peas for a vibrant, crunchy contrast that bursts with color and taste. These options will not only enhance your meal’s visual appeal but also bring additional nutrients.

  • Spicy Upgrade: If you like a kick, add more Sambal Oelek or Sriracha to the sauce to spice it up! Just remember, a little extra heat can go a long way in making your noodles truly memorable.

  • Noodle Variety: Don’t have udon noodles? Rice noodles are a fantastic alternative! Prepare them according to the package instructions for a delightful twist that still soaks up the sauce beautifully.

  • Creamy Finish: For a creamy sauce, stir in a spoonful of peanut or almond butter into your sauce mixture. This adds a smooth, rich texture that takes your dish to the next level, making it incredibly satisfying.

  • Flavor Boost: Enhance the flavor profile by incorporating toasted sesame seeds directly into the stir-fry. They add an extra crunch and a nutty undertone that will elevate each bite.

  • Herbed Version: Toss in fresh herbs such as basil or cilantro right before serving for a fragrant and fresh finish. These herbs elevate the dish not just in flavor but also in aroma.

  • Vegetarian Option: If you’re not strictly vegan, sprinkle some grated Parmesan cheese on top for an umami boost. This will create an exciting fusion that adds a delightful savory note.

And of course, if you’re looking to balance the flavors with a fresh side, pair your noodles with a vibrant Cabbage Cucumber Salad to create a wholesome meal that’s sure to brighten your dinner table!

Make Ahead Options

These Vegan Sesame Yaki Udon Noodles are perfect for meal prep enthusiasts! You can prepare the vegan protein—whether seitan or baked tofu—up to 3 days in advance to save time. Chop the vegetables and store them in an airtight container in the refrigerator for up to 24 hours while keeping the sauce components ready in a separate container. To prevent browning, store cut veggies properly and combine the sauce ingredients without the cornstarch until you’re ready to cook. When you’re set to serve, simply sauté the onions and broccolini, cook the noodles, mix everything together, and pour in the pre-made sauce. This way, you enjoy delicious, homemade Vegan Sesame Yaki Udon Noodles with minimal effort on busy weeknights!

Vegan Sesame Yaki Udon Noodles Recipe FAQs

What type of udon noodles should I use?
Absolutely! For the best texture, I always recommend using fresh udon noodles, especially the quick-cooking varieties that only take about 2 minutes to prepare. They soak up the sauce beautifully and maintain a delightful chewiness. If fresh isn’t available, opt for dry udon noodles or rice noodles; just be sure to follow their package instructions for cooking.

How should I store leftovers?
Once you’ve enjoyed your Vegan Sesame Yaki Udon Noodles, store any leftovers in an airtight container in the fridge for up to 5 days. Just be sure to reheat them gently in a skillet over medium heat to avoid losing that wonderful noodle texture. Add a splash of water or broth to help retain moisture!

Can I freeze this dish?
Yes! You can freeze your Vegan Sesame Yaki Udon Noodles for up to 3 months. To freeze, let the noodles cool completely before placing them in freezer-safe bags or containers. I often label them with the date for easy reference. When ready to enjoy, thaw overnight in the fridge, then reheat in a skillet with a splash of water or broth to bring them back to life.

What can I do if the sauce is too thick?
If you find your sauce has become too thick, simply add a little warm water or vegetable broth to the skillet while reheating. Stir gently to combine until you achieve your desired consistency. This is a common issue, but a little water can work wonders!

Are there any dietary considerations for this recipe?
Absolutely! This recipe is vegan-friendly, making it perfect for those avoiding animal products. However, if you have allergies, be cautious with soy sauce as it contains gluten. Look for gluten-free soy sauce or tamari as an alternative. Additionally, if sharing with pets, avoid giving them anything containing garlic, as it’s not safe for them.

Can I use different vegetables in this dish?
The more the merrier! Feel free to experiment with a variety of vegetables in your Vegan Sesame Yaki Udon Noodles. Bell peppers, bok choy, or snap peas are great options and can add a burst of color and flavor. Just remember to cook them until they’re tender yet still crisp for that perfect texture!

Vegan Sesame Yaki Udon Noodles

Vegan Sesame Yaki Udon Noodles for Quick Comfort Cooking

Enjoy quick and nutritious Vegan Sesame Yaki Udon Noodles, a comforting dish perfect for busy weeknights.
Prep Time 10 minutes
Cook Time 20 minutes
Total Time 30 minutes
Servings: 4 servings
Course: Dinner
Cuisine: Asian
Calories: 400

Ingredients
  

For the Noodles
  • 400 grams Fresh Udon Noodles Thick, chewy noodles that soak up the sauce beautifully; quick-cooking types save time.
  • 1 medium Yellow Onion Adds a natural sweetness; chop a medium onion for a flavor base.
For the Sauce
  • 2 tablespoons Sesame Oil Infuses a nutty flavor into the dish; substitute with a neutral oil if desired.
  • 1 tablespoon Toasted Sesame Oil Enhances the rich, savory taste; use sparingly to avoid overpowering the dish.
  • 2 tablespoons Rice Vinegar Balances flavors with a hint of acidity; adjust to taste.
  • 3 cloves Garlic Minced for robust flavor.
  • 1 tablespoon Ginger Finely grated for a fragrant kick.
  • 4 tablespoons Soy Sauce Adds essential saltiness; opt for dark soy for a richer flavor profile.
  • 1 tablespoon Agave Nectar or Maple Syrup Provides sweetness to balance the savory elements.
  • 1 teaspoon Sambal Oelek or Sriracha Adds a spicy kick; feel free to adjust the heat level!
  • 1/2 cup Water Helps to adjust the sauce consistency for perfect coating.
  • 1 tablespoon Cornstarch A thickening agent; mix with water to create a slurry before adding to the sauce.
For the Vegetables
  • 200 grams Broccolini Adds a satisfying crunch and nutrition.
For the Protein
  • 200 grams Homemade Seitan Beef or Baked Tofu Both provide texture and protein.

Equipment

  • large skillet or wok
  • pot
  • mixing bowl

Method
 

Step-by-Step Instructions
  1. Prepare the protein by cooking seitan or baking tofu until crispy.
  2. In a large skillet or wok, heat sesame oil and sauté the chopped yellow onion until soft.
  3. Add broccolini and water, cover, and cook until tender.
  4. In a separate bowl, whisk together the sauce ingredients.
  5. Boil water and cook udon noodles following package instructions, then drain.
  6. Combine noodles and sautéed vegetables, adding half of the sauce.
  7. Stir in the protein and remaining sauce, cooking until thickened.
  8. Serve hot, garnished with cilantro, green onions, and sesame seeds.

Notes

Fresh noodles matter; prep ahead to enhance flavors. Adjust spice levels as desired.

Delicious White Christmas Pie: A Creamy Holiday Delight

As I pulled the coconut-infused filling from the mixing bowl, I was instantly transformed back to my grandmother’s kitchen, where the scent of baked goods filled the air. This Creamy White Christmas Pie captures that comforting nostalgia beautifully, blending rich flavors of almond and vanilla with a luscious, silky texture. With its non-dairy option and fresh strawberry topping, this festive pie not only delights the senses but also fits seamlessly into any gathering, making it a quick and impressive addition to your holiday table. It’s a crowd-pleaser that invites everyone to savor the moment—what holiday spread would be complete without it? Ready to create your own slice of seasonal joy? Let’s dive into the recipe!

Why is White Christmas Pie a must-try?

Holiday Nostalgia: This Creamy White Christmas Pie evokes warm memories, filling your home with delightful aromas reminiscent of holiday gatherings.
Indulging Flavor Profile: A rich coconut filling captures the essence of the season, perfectly balanced by almond and vanilla.
Versatile Choices: Love coconut? You’re in luck! Prefer a lighter twist? Opt for a dairy-free version with coconut milk or cream.
Visual Feast: Adorned with vibrant strawberries and fluffy whipped cream, this pie is a show-stopper, perfect for festive occasions.
Quick Preparation: With a simple recipe and make-ahead option, you’ll have more time to enjoy gatherings without the stress. Looking for more festive desserts? Check out Apple Pie or those delightful Mini Beef Pies to round out your menu!

White Christmas Pie Ingredients

For the Crust

  • Unsalted Butter – Provides richness and flavor; ensure it’s cold for optimal flakiness.
  • All-Purpose Flour – The main structural component of the crust; no direct substitutions recommended.
  • Kosher Salt – Enhances flavor; can substitute with table salt.
  • Granulated Sugar – Adds sweetness to the crust; brown sugar can impart a deeper flavor.
  • Vegetable Shortening – Creates a flaky texture; can substitute with additional butter if preferred.
  • Ice Cold Water – Binds the dough; use more as needed for desired consistency.

For the Filling

  • Unflavored Gelatin – Provides structure to the filling; no direct substitutes, but agar-agar can be a vegan option.
  • Water – Activates the gelatin.
  • Granulated Sugar – Sweetens the filling; can reduce the amount for a less sweet profile.
  • All-Purpose Flour – Thickens the filling.
  • Salt – Balances sweetness within the filling.
  • Whole Milk – Adds creaminess; coconut milk can be used for a non-dairy option.
  • Almond Extract – Adds depth of flavor; vanilla extract can work as an alternative.
  • Vanilla Extract – Enhances the overall flavor profile.
  • Heavy Cream – Whipped for topping; can be replaced with coconut cream for a lighter version.
  • Egg Whites – Contributes to the filling’s structure; ensure they are beaten to stiff peaks.
  • Cream of Tartar – Stabilizes egg whites; can be omitted when using pasteurized egg whites.
  • Shredded Coconut – Provides texture and flavor; choose sweetened or unsweetened based on your preference.

For the Topping

  • Heavy Cream – For a fluffy whipped topping; confectioners’ sugar can be added for sweetness.
  • Fresh Strawberries – Topped & tossed with confectioners’ sugar for a bright, fruity sauce.

Ready to create your delightful White Christmas Pie? Let’s get cooking!

Step‑by‑Step Instructions for White Christmas Pie

Step 1: Prepare the Pie Crust
Start by freezing ½ cup of unsalted butter while you combine 1 ½ cups of all-purpose flour, ½ teaspoon of kosher salt, and ¼ cup of granulated sugar in a food processor. Once the butter is chilled, add it along with ¼ cup of vegetable shortening, pulsing until the mixture resembles coarse crumbs. Gradually drizzle in ice-cold water, about 3-4 tablespoons, until a dough forms. Wrap in plastic and refrigerate for at least 30 minutes.

Step 2: Blind Bake the Crust
Preheat your oven to 400°F (200°C). Roll out the chilled crust on a floured surface until it’s about ⅛ inch thick, then fit it into a 9-inch pie plate. Freeze it for another 15 minutes. Line the crust with parchment paper and fill it with pie weights (or dried beans). Bake for 15 minutes, then remove the weights and parchment. Bake for an additional 8-10 minutes until golden brown. Let it cool completely at room temperature.

Step 3: Make the Filling
In a small bowl, sprinkle 1 tablespoon of unflavored gelatin over ¼ cup of cold water and let it bloom. In a saucepan, combine ½ cup of granulated sugar, ¼ cup of all-purpose flour, and a pinch of salt with 2 cups of whole milk. Cook over medium heat, stirring constantly until thickened, about 5 minutes. Remove from heat, add the bloomed gelatin, 1 teaspoon of almond extract, and 1 teaspoon of vanilla extract, then cool the mixture over an ice bath.

Step 4: Incorporate the Coconut and Cream
Once the filling mixture is cool, gently fold in 1 cup of whipped heavy cream, 3 beaten egg whites (with a pinch of cream of tartar), and 1 cup of shredded coconut until fully integrated. The filling should be light and fluffy yet hold its structure. Pour this creamy coconut mixture into the cooled crust, smoothing the top for an even finish.

Step 5: Chill the Pie
Cover the pie with plastic wrap and refrigerate it for at least 4 hours, or overnight, until fully set. This step is essential for achieving that perfect creamy texture in your White Christmas Pie. While it chills, it will firm up beautifully for slicing later.

Step 6: Prepare the Topping
In a medium bowl, whip 1 cup of heavy cream until soft peaks form. For added sweetness, fold in 2 tablespoons of confectioners’ sugar if desired. When ready to serve, pipe or spread the whipped cream over the chilled pie. Sprinkle shredded coconut on top for decoration and prepare fresh strawberries tossed in a bit of confectioners’ sugar for a vibrant garnish.

Step 7: Serve the Pie
Once decorated, slice the White Christmas Pie with a sharp knife and serve each piece with a side of the sweetened strawberries. This delightful pie can be kept in the refrigerator for up to 3 days, maintaining its festive cheer for any gathering. Enjoy this creamy holiday treat that speaks to nostalgia and celebration!

Make Ahead Options

This White Christmas Pie is a fantastic choice for meal prep, allowing you to enjoy more time with loved ones during the festive season. To prep in advance, you can make the crust and filling up to 24 hours before serving; just be sure to refrigerate the pie for optimal texture and flavor. If you prefer, you can also prepare the filling and store it in the fridge for up to 3 days before assembly. To maintain quality, keep the whipped cream separate until you’re ready to serve, ensuring it stays fluffy. When it’s time to impress your guests, simply add the toppings and slice for a delightful treat that tastes just as fresh!

How to Store and Freeze White Christmas Pie

Fridge: Store leftover White Christmas Pie covered with plastic wrap or in an airtight container for up to 3 days. Keep an eye on the freshness of the strawberries to ensure they remain vibrant.

Freezer: If you want to freeze your pie, wrap it tightly in plastic wrap and then foil for up to 1 month. Thaw in the refrigerator before serving for the best texture.

Reheating: This pie is best served chilled, so no reheating is necessary. If desired, let it sit at room temperature for about 15-20 minutes before serving to enhance the flavors.

Make-Ahead: The pie can be made a day in advance; simply add the strawberries and whipped cream topping right before serving to keep everything fresh and delightful.

Expert Tips for White Christmas Pie

  • Cold Ingredients: Ensure that all ingredients are cold, especially the butter, for a flaky, tender crust. Warm ingredients can lead to a dense texture.
  • Don’t Rush Cooling: Patience is key! Allow your filling to chill thoroughly before pouring it into the crust—this promotes a better set and texture.
  • Proper Egg Whites: When beating egg whites, make sure no yolks are present; even a small bit can prevent them from reaching stiff peaks essential for a light filling.
  • Adjust Sweetness: Taste the filling before adding the full amount of sugar. This helps avoid an overly sweet White Christmas Pie and tailors it to your preference.
  • Whipped Topping Technique: When whipping cream, stop once soft peaks form to ensure it pipes or spreads beautifully without becoming grainy.

White Christmas Pie Variations

Feel free to get creative and make this White Christmas Pie uniquely yours with these delightful twists!

  • Dairy-Free: Substitute whole milk and heavy cream with full-fat coconut milk and coconut cream for a plant-based option.
  • Chocolate Delight: Swap shredded coconut for white chocolate chips. This adds a sweet, creamy richness that’s simply irresistible.
  • Fruity Burst: Mix in your favorite berries, like raspberries or blueberries, along with the coconut for a vibrant flavor contrast.
  • Nutty Flavor: Add finely chopped nuts, such as almonds or pecans, to the crust for an added crunch and rustic charm.
  • Zesty Twist: Incorporate the zest of a lime or lemon into the filling. The citrus will cut through the creaminess, offering a refreshing tang.
  • Flavored Extract Upgrade: Replace almond extract with hazelnut or coconut extract for a different flavor profile that sings holiday cheer.
  • Spicy Kick: Introduce a pinch of cinnamon or nutmeg to the filling for a warm, spicy note that complements the pie beautifully.
  • White Chocolate Ganache: Drizzle a simple white chocolate ganache over the whipped cream for dramatic flair and decadent goodness.

If you’re looking for more delightful recipes to complement this dessert, why not try it with a delicious Chicken Pot Pie or wrap up your meal with a classic Apple Pie? Each variation brings its own festive charm to your table!

What to Serve with Creamy White Christmas Pie

As you prepare to delight your guests with this stunning dessert, consider adding a few complementary dishes that enhance its festive charm.

  • Fresh Fruit Salad: A mix of seasonal fruits brings brightness and freshness, balancing the rich creaminess of the pie.
  • Coconut Macaroons: These sweet treats echo the coconut flavor while adding crunch, perfect for those who love a chewy texture.
  • Merry Mulled Wine: This warm and spiced beverage pairs beautifully with the pie, inviting a cozy touch to your gathering.
  • Chocolate Fondue: A decadent option for dipping strawberries or bananas creates a delightful contrast to the pie’s flavors.
  • Shortbread Cookies: Their crumbly texture and buttery taste provide a lovely pairing alongside the silky filling.
  • Pineapple Sorbet: A refreshing sorbet acts as a palate cleanser, making each bite of pie even more enjoyable.
  • Godiva Chocolate Liqueur: This indulgent drink pairs beautifully, enhancing the pie’s festive atmosphere with luscious flavors.
  • Coconut Rum Punch: A light and fruity drink that complements the tropical notes, making every bite of pie even sweeter.

White Christmas Pie Recipe FAQs

How do I choose the right coconut for my White Christmas Pie?
Absolutely! For the best flavor and texture, opt for unsweetened shredded coconut which allows the creamy filling to shine. If you prefer a sweeter taste, sweetened coconut can also be used. Be sure to check for freshness by looking for a package without dark spots or signs of moisture.

How should I store leftover White Christmas Pie?
You can store any leftovers covered with plastic wrap or in an airtight container in the refrigerator for up to 3 days. Make sure to monitor the strawberries, as their freshness can diminish quickly. If they start to look dull or mushy, it’s best to remove them to keep the pie looking appealing.

Can I freeze White Christmas Pie, and how?
Yes, you can! To freeze your White Christmas Pie, wrap it tightly in plastic wrap and then in aluminum foil, ensuring it’s completely sealed to prevent freezer burn. It can be stored this way for up to 1 month. When you’re ready to enjoy it, simply thaw it overnight in the refrigerator before serving.

What should I do if my filling doesn’t set properly?
Very! If your filling doesn’t set as expected, it could be due to insufficient chilling time or a mismeasurement of gelatin. To remedy this, try adding more melted gelatin to the filling mixture if it’s still warm or runny. Warm the mixture gently, then re-chill it in the refrigerator for an additional few hours until it reaches the desired consistency.

Are there any dietary considerations for my guests with allergies?
Definitely! If you have guests who are allergic to eggs or dairy, make simple substitutions: replace the heavy cream with coconut cream and use a plant-based milk like almond or oat milk in the filling. Also, for a vegan option, use agar-agar instead of gelatin. Always double-check to ensure all ingredients, especially extracts and creams, are free from allergens to keep everyone safe.

Can I make this pie ahead of time?
Of course! I often make this pie a day in advance. Prepare the filling and crust as directed, then refrigerate it overnight. Just remember to add the fresh strawberries and whipped cream topping just before serving to maintain their freshness and vibrant appeal. This way, you’ll have a lovely dessert ready to impress your guests without the last-minute rush!

White Christmas Pie

Delicious White Christmas Pie: A Creamy Holiday Delight

This White Christmas Pie is a creamy holiday delight combining coconut, almond, and vanilla flavors, perfect for festive gatherings.
Prep Time 30 minutes
Cook Time 25 minutes
Chilling Time 4 hours
Total Time 4 hours 55 minutes
Servings: 8 slices
Course: Dessert
Cuisine: American
Calories: 350

Ingredients
  

For the Crust
  • ½ cup unsalted butter cold
  • 1 ½ cups all-purpose flour
  • ½ teaspoon kosher salt or table salt
  • ¼ cup granulated sugar
  • ¼ cup vegetable shortening or additional butter
  • 3-4 tablespoons ice cold water more as needed
For the Filling
  • 1 tablespoon unflavored gelatin
  • ¼ cup water for blooming gelatin
  • ½ cup granulated sugar can reduce for less sweetness
  • ¼ cup all-purpose flour
  • a pinch salt
  • 2 cups whole milk or coconut milk for non-dairy
  • 1 teaspoon almond extract or vanilla extract
  • 1 teaspoon vanilla extract
  • 1 cup heavy cream whipped
  • 3 egg whites beaten to stiff peaks
  • a pinch cream of tartar omit for pasteurized egg whites
  • 1 cup shredded coconut sweetened or unsweetened
For the Topping
  • 1 cup heavy cream for whipped topping
  • 2 tablespoons confectioners' sugar for added sweetness
  • fresh strawberries for garnish, tossed with confectioners' sugar

Equipment

  • Food Processor
  • 9-inch pie plate
  • Saucepan
  • Medium bowl
  • whisk
  • plastic wrap
  • parchment paper

Method
 

Step-by-Step Instructions
  1. Start by freezing ½ cup of unsalted butter while you combine 1 ½ cups of all-purpose flour, ½ teaspoon of kosher salt, and ¼ cup of granulated sugar in a food processor. Once the butter is chilled, add it along with ¼ cup of vegetable shortening, pulsing until the mixture resembles coarse crumbs. Gradually drizzle in ice-cold water, about 3-4 tablespoons, until a dough forms. Wrap in plastic and refrigerate for at least 30 minutes.
  2. Preheat your oven to 400°F (200°C). Roll out the chilled crust on a floured surface until it’s about ⅛ inch thick, then fit it into a 9-inch pie plate. Freeze it for another 15 minutes. Line the crust with parchment paper and fill it with pie weights or dried beans. Bake for 15 minutes, then remove the weights and parchment. Bake for another 8-10 minutes until golden brown. Let it cool completely at room temperature.
  3. In a small bowl, sprinkle 1 tablespoon of unflavored gelatin over ¼ cup of cold water and let it bloom. In a saucepan, combine ½ cup of granulated sugar, ¼ cup of all-purpose flour, and a pinch of salt with 2 cups of whole milk. Cook over medium heat, stirring constantly until thickened, about 5 minutes. Remove from heat, add the bloomed gelatin, 1 teaspoon of almond extract, and 1 teaspoon of vanilla extract, then cool the mixture over an ice bath.
  4. Once the filling mixture is cool, gently fold in 1 cup of whipped heavy cream, 3 beaten egg whites (with a pinch of cream of tartar), and 1 cup of shredded coconut until fully integrated. The filling should be light and fluffy yet hold its structure. Pour this creamy coconut mixture into the cooled crust, smoothing the top for an even finish.
  5. Cover the pie with plastic wrap and refrigerate it for at least 4 hours, or overnight, until fully set. This step is essential for achieving that perfect creamy texture in your White Christmas Pie. While it chills, it will firm up beautifully for slicing later.
  6. In a medium bowl, whip 1 cup of heavy cream until soft peaks form. For added sweetness, fold in 2 tablespoons of confectioners' sugar if desired. When ready to serve, pipe or spread the whipped cream over the chilled pie. Sprinkle shredded coconut on top for decoration and prepare fresh strawberries tossed in a bit of confectioners' sugar for a vibrant garnish.
  7. Once decorated, slice the White Christmas Pie with a sharp knife and serve each piece with a side of the sweetened strawberries. This delightful pie can be kept in the refrigerator for up to 3 days, maintaining its festive cheer for any gathering.

Notes

Ensure all ingredients are cold to achieve a flaky crust and a perfect texture for the filling.

Irresistible Eggnog Cheesecake Cookie Cups for Holiday Bliss

As I stood in my kitchen, the fragrant aroma of gingerbread began to swirl around me, instantly transporting me to a cozy holiday gathering with friends and family. Today, I’m excited to share my Chewy Eggnog Cheesecake Cookie Cups, a delightful fusion of soft gingerbread cookie cups filled with a creamy eggnog cheesecake that’s just too good to resist. These no-bake treats not only capture the essence of festive cheer but are also a breeze to whip up, making them the perfect crowd-pleasers for any gathering. Plus, they can be frozen for last-minute indulgence, ensuring you always have a sweet surprise on hand. Intrigued? Let’s dive into this delightful recipe!

Why You’ll Crave These Cookie Cups?

Irresistible Flavor: These Eggnog Cheesecake Cookie Cups combine the holiday warmth of gingerbread with a luscious, creamy filling that’s simply addictive.
No-Bake Ease: Creating a festive dessert doesn’t need to be time-consuming – this no-bake cheesecake is effortlessly quick and convenient!
Freezable Goodness: Make ahead and freeze for spontaneous celebrations; you’ll always have a delicious treat ready when friends drop by!
Crowd-Pleasing Delight: Dazzle your guests at holiday gatherings with a unique and delightful dessert that gets everyone talking!
Ultimate Comfort: Embrace the cozy, seasonal vibes that will remind you of warm gatherings, festive celebrations, and sweet nostalgia.

Eggnog Cheesecake Cookie Cups Ingredients

Unlock the secret to these festive delights with the perfect ingredients!

For the Gingerbread Cookie Cups
All-Purpose Flour – Provides structure to your cookie cups; remember to sift for a lighter texture.
Baking Soda – Ensures a soft and chewy cookie; don’t skip this for the right lift!
Ground Cinnamon – Infuses warm, holiday flavors that evoke cozy memories.
Ground Ginger – Enhances the classic gingerbread taste; feel free to adjust according to your spice preference.
Ground Cloves – Offers depth; use sparingly, as a little goes a long way.
Salt – Balances sweetness, enhancing the overall flavor profile.
Unsalted Butter – Adds richness and moisture; allow it to reach room temperature for easy mixing.
Light Brown Sugar – Sweetens and imparts a hint of caramel flavor perfect for gingerbread.
Fancy Molasses – A must for authentic gingerbread flavor; avoid blackstrap for a milder note.
Egg – Binds the ingredients and adds moisture; use room temperature for smoother blending.

For the Eggnog Cheesecake Filling
Heavy Whipping Cream – Creates a luscious, fluffy texture; make sure it’s chilled for optimal whipping.
Cream Cheese – The base of your cheesecake filling; soften it to avoid lumps for a silky consistency.
Granulated Sugar – Sweetens the filling; adjust to suit your taste preference.
Eggnog – Infuses your filling with that quintessential holiday flavor; feel free to swap in alternatives if needed.
Ground Nutmeg – Adds an aromatic touch; just a pinch is all you need to enhance your eggnog.
Ground Cinnamon – Complements the filling’s spice profile; adjust to your liking.

With these ingredients, your Eggnog Cheesecake Cookie Cups are sure to become a holiday favorite! Enjoy creating these memorable treats that will fill your home with warmth and festive cheer.

Step‑by‑Step Instructions for Eggnog Cheesecake Cookie Cups

Step 1: Prepare Cookie Cups
Preheat your oven to 350°F (175°C) and grease 2 muffin tins to prevent sticking. In a mixing bowl, whisk together all-purpose flour, baking soda, ground cinnamon, ground ginger, ground cloves, and salt until well combined. In a separate mixer, cream together softened unsalted butter, fancy molasses, and light brown sugar until the mixture is light and fluffy. Add in one room-temperature egg and blend until well incorporated.

Step 2: Combine Ingredients
Gradually add the dry ingredient mixture into the wet ingredients, mixing gently until just combined. Avoid overmixing to ensure your cookie cups remain chewy. Scoop the dough evenly into the prepared muffin tins, flattening it slightly with your fingers. Bake in the preheated oven for 9-10 minutes, watching closely until they are mostly set but still soft in the center to retain that delightful chewiness.

Step 3: Create Wells and Cool
Once baked, immediately use a small jar or the handle of a wooden spoon to press lightly in the middle of each cookie to create wells for the cheesecake filling. Allow the cookie cups to cool in the pan for 10 minutes before transferring them to wire racks to cool completely. As they cool, the cookie cups will set up nicely, forming the perfect base for your luscious eggnog cheesecake filling.

Step 4: Make Cheesecake Filling
While your cookie cups cool, prepare the eggnog cheesecake filling. In a cold mixing bowl, whip heavy whipping cream until stiff peaks form, and set aside. In another bowl, beat softened cream cheese with granulated sugar until smooth and creamy. Slowly incorporate the eggnog along with a pinch of ground nutmeg and ground cinnamon, blending until all ingredients are well mixed and smooth.

Step 5: Fold in Whipped Cream
Gently fold the whipped cream into the cream cheese mixture using a spatula, ensuring to keep the light and airy texture. This step is crucial for achieving that perfect, fluffy cheesecake filling that will complement the chewy gingerbread cookie cups beautifully. Be cautious not to overmix; fold until just combined for the best results.

Step 6: Assemble and Chill
Now it’s time to assemble your Eggnog Cheesecake Cookie Cups! Pipe or scoop the creamy cheesecake filling into each cooled cookie cup, generously filling the wells. Once filled, cover the cookie cups with plastic wrap and chill in the refrigerator for at least 2 hours to allow the cheesecake to set properly. This chilling step helps the flavors meld beautifully, ensuring a delightful bite every time.

Eggnog Cheesecake Cookie Cups Variations

Get ready to transform your Eggnog Cheesecake Cookie Cups with these delightful twists that will keep your taste buds dancing!

  • Gluten-Free: Use a gluten-free flour blend instead of all-purpose flour for an equally delicious version.

  • Chocolate Delight: Mix in cocoa powder to the gingerbread dough for a rich, chocolatey flavor that pairs beautifully with the cheesecake filling.

  • Spice It Up: Add a hint of cayenne pepper to your gingerbread cookie batter for a surprising, warm kick that ignites the flavor!

  • Fruit-Filled: Fold in dried cranberries or chopped apples into the cheesecake filling for a pop of tartness amidst the creamy goodness.

  • Nutty Crunch: Incorporate chopped walnuts or pecans into the cookie base for added texture and a nutty flavor that complements the holiday spices.

  • Cream Cheese Swirl: Swirl in a flavored cream cheese (like vanilla or pumpkin spice) into the cheesecake filling for a delightful twist that makes each bite unique.

  • Mini-Bites: Opt for smaller muffin tins to create mini cookie cups. Perfect for party platters or quick snacking!

  • Dairy-Free: Substitute cream cheese with cashew cream and heavy whipping cream with coconut whipped cream for a delightful dairy-free version.

These variations not only add a personal touch but also invite creativity in your holiday baking. If you’re looking for more sweet treats, consider trying my Nutty Chocolate Date Cookies or indulge in a silky Strawberry Cheesecake Dump that will make your gatherings even sweeter!

Make Ahead Options

These Eggnog Cheesecake Cookie Cups are perfect for meal prep, making your busy holiday season a little easier! You can prepare the gingerbread cookie cups up to 24 hours in advance; simply bake them, create the wells, and store in an airtight container at room temperature. The cheesecake filling can be made up to 3 days ahead; just refrigerate it in a covered bowl to keep it fresh. When you’re ready to serve, fill the cookie cups with the chilled cheesecake filling and let them sit for about 30 minutes before serving to enhance the flavors. This way, you’ll enjoy the same delightful taste while saving time for other holiday festivities!

Expert Tips for Eggnog Cheesecake Cookie Cups

  • Perfect Measurements: Always measure your dry ingredients correctly, especially flour, to ensure your Eggnog Cheesecake Cookie Cups have the right texture.

  • Room Temperature Ingredients: Use room temperature butter and egg for smooth mixing; this helps create a light, fluffy texture in both the cookie cups and cheesecake filling.

  • Avoid Overbaking: Keep an eye on the cookie cups while baking; they should be soft in the center. Overbaking will lead to a hard texture instead of the desired chewiness.

  • Whip Cream Correctly: For the best cheesecake filling, make sure your heavy whipping cream is cold and whip it until stiff peaks form; this ensures a light and airy filling.

  • Chill Before Serving: Allow the filled cookie cups to chill in the refrigerator for at least 2 hours. This allows the flavors to meld and ensures a structured filling that’s easy to serve.

  • Storage Tips: Keep any leftovers stored in an airtight container in the fridge for 2-3 days, or freeze them for up to 2 months to enjoy later.

How to Store and Freeze Eggnog Cheesecake Cookie Cups

Fridge: Keep your Eggnog Cheesecake Cookie Cups in an airtight container for up to 3 days to maintain their freshness and flavor.

Freezer: For longer storage, freeze the filled cookie cups for up to 2 months. To prevent freezer burn, wrap each one individually in plastic wrap before placing them in a freezer-safe container.

Thawing: When ready to enjoy, thaw in the refrigerator for a few hours or overnight, allowing the flavors to revive beautifully.

Reheating: These treats are best enjoyed cold. However, if you prefer a warm treat, gently heat the cookie cups in the oven at a low temperature for a few minutes before serving.

What to Serve with Chewy Eggnog Cheesecake Cookie Cups

Looking to enhance your holiday dessert spread? Pairing your delightful treats with complementary sides can elevate your celebratory mood even more!

  • Creamy Mashed Potatoes: Their velvety texture provides a comforting contrast to the delicate cheesecake filling while balancing out the flavors.
  • Spiced Apple Cider: A warm cup of homemade cider infused with cinnamon and cloves harmonizes beautifully with the spices in the cookie cups—perfect as a festive drink!
  • Roasted Brussels Sprouts: Crispy, caramelized brussels sprouts add a savory crunch that offsets the sweetness of the eggnog filling, making each bite more exciting.
  • Chocolate Dipped Fruit: Bright, juicy strawberries or bananas drizzled in chocolate offer a refreshing bite that cleanses the palate between the rich cookie and cheesecake.
  • Festive Cheese Board: A selection of cheeses, nuts, and dried fruits sets a casual but elegant vibe, creating a beautiful contrast to the dessert.
  • Gingerbread Lattes: This cozy, spiced coffee will have everyone feeling festive and can easily complement the ginger flavor in your cookie cups.
  • Whipped Cream Topping: Adding more whipped cream with a sprinkle of nutmeg on top enhances the presentation while echoing the creamy cheesecake filling.
  • Caramel Sauce: A drizzle of homemade caramel can add richness and a decadent touch, making it an indulgent treat for every holiday gathering.

Eggnog Cheesecake Cookie Cups Recipe FAQs

What should I look for when selecting the eggs for this recipe?
Absolutely! When selecting eggs, choose ones that are fresh and have clean, intact shells. Look for eggs with a “best by” date that is as far away as possible. Room temperature eggs work best for this recipe, as they blend more smoothly into the batter, creating a better texture for your cookie cups.

How should I store the Eggnog Cheesecake Cookie Cups?
Very important! Store your filled Eggnog Cheesecake Cookie Cups in an airtight container in the refrigerator, where they’ll stay fresh for about 2-3 days. This keeps the flavors intact and ensures that your treats remain delightfully creamy!

Can I freeze the Eggnog Cheesecake Cookie Cups?
Absolutely! To freeze, wrap each filled cookie cup individually in plastic wrap to prevent freezer burn. Place them in a freezer-safe container or bag. They can be frozen for up to 2 months. When ready to enjoy, simply thaw them in the refrigerator for a few hours or overnight to revive their delicious flavor and texture!

I noticed my cookie cups became hard after baking. What did I do wrong?
Ah, that’s a common concern! If your Eggnog Cheesecake Cookie Cups are hard, it might be due to overbaking. Make sure to check them at the 9-minute mark; they should look soft in the center when you take them out. They’ll continue to firm up a bit as they cool. Also, ensure your oven is properly calibrated to prevent cooking them longer than necessary.

Are there any allergy considerations with this recipe?
Absolutely! This recipe contains common allergens such as eggs, dairy, and gluten due to the all-purpose flour. If you have allergies, consider using gluten-free all-purpose flour and dairy-free cream cheese alternatives to enjoy these delicious treats safely. Always check labels for potential cross-contamination if severe allergies are a concern.

Eggnog Cheesecake Cookie Cups

Irresistible Eggnog Cheesecake Cookie Cups for Holiday Bliss

Delight in these Eggnog Cheesecake Cookie Cups, a perfect festive treat for any gathering.
Prep Time 20 minutes
Cook Time 10 minutes
Chilling Time 2 hours
Total Time 2 hours 30 minutes
Servings: 12 cookie cups
Course: Dessert
Cuisine: American
Calories: 200

Ingredients
  

For the Gingerbread Cookie Cups
  • 2 cups All-Purpose Flour sifted
  • 1 teaspoon Baking Soda
  • 2 teaspoons Ground Cinnamon
  • 1 teaspoon Ground Ginger
  • 1/2 teaspoon Ground Cloves
  • 1/4 teaspoon Salt
  • 1/2 cup Unsalted Butter softened
  • 1/2 cup Light Brown Sugar
  • 1/4 cup Fancy Molasses
  • 1 large Egg room temperature
For the Eggnog Cheesecake Filling
  • 1 cup Heavy Whipping Cream chilled
  • 8 ounces Cream Cheese softened
  • 1/2 cup Granulated Sugar
  • 1 cup Eggnog
  • 1/2 teaspoon Ground Nutmeg just a pinch
  • 1/2 teaspoon Ground Cinnamon adjust to liking

Equipment

  • mixing bowl
  • muffin tins
  • electric mixer
  • spatula

Method
 

Step‑by‑Step Instructions for Eggnog Cheesecake Cookie Cups
  1. Preheat your oven to 350°F (175°C) and grease 2 muffin tins to prevent sticking.
  2. Whisk together all-purpose flour, baking soda, ground cinnamon, ground ginger, ground cloves, and salt until well combined.
  3. Cream together softened unsalted butter, fancy molasses, and light brown sugar until light and fluffy.
  4. Add in the room-temperature egg and blend until well incorporated.
  5. Gradually add the dry mixture into the wet ingredients, mixing gently until just combined. Avoid overmixing.
  6. Scoop the dough evenly into the prepared muffin tins and flatten it slightly.
  7. Bake for 9-10 minutes until mostly set but still soft in the center.
  8. Immediately press lightly in the middle of each cookie to create wells for the cheesecake filling.
  9. Cool the cookie cups in the pan for 10 minutes before transferring them to wire racks.
  10. For the filling, whip heavy cream until stiff peaks form and set aside.
  11. Beat softened cream cheese with granulated sugar until smooth and creamy.
  12. Incorporate eggnog along with ground nutmeg and ground cinnamon until well mixed.
  13. Gently fold in the whipped cream into the cream cheese mixture.
  14. Pipe or scoop the cheesecake filling into each cooled cookie cup generously filling the wells.
  15. Cover with plastic wrap and chill in the refrigerator for at least 2 hours.

Notes

Store leftovers in an airtight container in the fridge for 2-3 days, or freeze for up to 2 months.

Creamy Marry Me Shrimp Pasta That Steals Hearts Fast

The aroma hits you before you even step into the kitchen – a tantalizing blend of garlic and sun-dried tomatoes that whispers promises of something special. Enter the Marry Me Shrimp Pasta, a creamy delight that transforms a simple evening into a romantic feast. Perfect for date nights or when you just want to impress with minimal effort, this quick meal comes together in about 30 minutes, making it a go-to for those busy weeks. Imagine juicy shrimp nestled in perfectly cooked pasta, all enveloped in a luscious sauce that will leave your guests clamoring for more. Ready to make your dinner unforgettable? Let’s dive into this flavorful journey!

What’s So Special About This Pasta?

Quick and Easy: With just 30 minutes from start to finish, this dish is ideal for busy weeknights or spontaneous date nights.

Irresistible Flavor: The harmonious blend of creamy sun-dried tomato sauce and garlic-infused shrimp creates a flavor explosion that’s mouthwateringly memorable.

Versatile Ingredients: Swap the shrimp for chicken or even tofu, making this a flexible dish to suit your dietary needs or preferences.

Crowd-Pleasing Delight: This Marry Me Shrimp Pasta is sure to impress family and friends, making it a staple for gatherings and dinner parties.

Comfort in Every Bite: The creamy texture and rich aromas evoke the feel of a cozy Italian restaurant right in your own kitchen. Dive into cooking with confidence and don’t forget to check out other quick meals perfect for your busy lifestyle!

Marry Me Shrimp Pasta Ingredients

For the Pasta
Rigatoni – The perfect base for capturing the creamy sauce; any pasta shape can be a great alternative!

For the Shrimp
Olive Oil & Unsalted Butter – For a flavorful sear and sauté; all olive oil works for a dairy-free dish.
Shrimp – Juicy and tender, medium to large shrimp are preferred for a satisfying bite.
Salt and Black Pepper – Essential for seasoning; adjust cups according to your taste.

For the Sauce
Garlic Powder – Convenient flavor booster; feel free to use minced garlic instead for a fresh touch.
Sweet Paprika – Adds depth and a sprinkle of sweetness; smoked paprika can change up the flavor profile.
Garlic – Fresh cloves that enhance the overall taste; modify the amount based on your love for garlic.
Sun-Dried Tomatoes – These are the star players for flavor; remember to drain them well before adding!
Italian Seasoning – A blend of herbs that enriches the sauce; substitute dried thyme or oregano as needed.
Flour – Helps thicken the sauce; cornstarch is a gluten-free alternative if required.
Low Sodium Chicken Broth – The sauce base that adds loved flavor; vegetable broth or dry white wine work beautifully.
Heavy Cream – This is what makes the sauce decadent; coconut cream or cashew cream can be a dairy-free substitute.
Double Concentrated Tomato Paste – Enhances the dish’s flavor; it adds a natural sweetness to balance the creaminess.
Lemon Juice – Brightens the richness with a touch of acidity; you can also use vinegar if that’s what you have on hand.
Chopped Basil Leaves – Freshness that’s absolutely necessary; parsley can stand in for basil if needed.
Grated Parmesan – Provides savory depth and creaminess; pecorino or asiago can be swapped in for a twist.
Chili Flakes – Add a spicy kick if you’re feeling adventurous!

This delightful Marry Me Shrimp Pasta is not only quick to make but also packs a punch of flavor that’s sure to impress!

Step‑by‑Step Instructions for Marry Me Shrimp Pasta

Step 1: Prep Ingredients
Start by peeling and deveining the shrimp, then season them with salt, black pepper, garlic powder, and sweet paprika, mixing well. Next, mince the garlic, chop the sun-dried tomatoes, and slice the fresh basil leaves. Having these ingredients prepped ensures you can smoothly transition into cooking your delicious Marry Me Shrimp Pasta.

Step 2: Cook Pasta
Bring a large pot of salted water to a rolling boil, then add the rigatoni. Cook it for about 8–10 minutes, or until al dente, stirring occasionally to prevent sticking. Once cooked, drain the pasta in a colander, but don’t forget to save a cup of the pasta water. Set the drained pasta aside and prepare for the next flavorful step.

Step 3: Sear Shrimp
In a large skillet, heat 2 tablespoons of olive oil and 1 tablespoon of unsalted butter over medium-high heat until hot and shimmering. Carefully add the seasoned shrimp and cook for 1 minute per side until they turn pink and opaque. Once done, remove the shrimp from the skillet and set them aside on a plate, leaving the flavorful drippings in the pan.

Step 4: Sauté Garlic
In the same skillet, lower the heat slightly and add the minced garlic. Sauté for about 1 minute, stirring constantly, until fragrant and golden. Be cautious not to burn the garlic, as it can turn bitter. This step infuses the base of your Marry Me Shrimp Pasta with aromatic flavors, setting the stage for the delicious sauce to come.

Step 5: Create Sauce
Add the chopped sun-dried tomatoes and Italian seasoning to the skillet, cooking for about 1 minute while stirring. Then, sprinkle in the flour and stir well, cooking for another minute to slightly brown it. Next, slowly pour in 1 cup of low sodium chicken broth, using a wooden spoon to deglaze the pan, scraping up any flavorful bits. Simmer the mix for 2 minutes until it thickens slightly.

Step 6: Finish Sauce
Reduce heat to low and stir in 1 cup of heavy cream and 2 tablespoons of double concentrated tomato paste. Let the sauce simmer for an additional 3 minutes, stirring often, until it’s creamy and heated through. The mixture should be thick enough to coat the back of a spoon, creating that luxurious texture for your heavenly Marry Me Shrimp Pasta.

Step 7: Combine
Toss the reserved pasta, cooked shrimp, 2 tablespoons of lemon juice, chopped basil, and ½ cup of grated Parmesan into the sauce in the skillet. Mix well over low heat, allowing everything to heat through and combine beautifully for about 2 minutes. Add reserved pasta water a little at a time, if needed, to reach your desired sauce consistency.

Step 8: Serve
Scoop generous portions of your Marry Me Shrimp Pasta onto plates and garnish with extra basil, a sprinkle of Parmesan cheese, and a pinch of chili flakes for an added kick. Serve this delicious dish while hot, making sure to enjoy every rich, creamy bite!

Storage Tips for Marry Me Shrimp Pasta

Fridge: Store any leftovers in an airtight container for up to 2 days to maintain freshness and flavor.

Freezer: For longer storage, freeze the Marry Me Shrimp Pasta in a freezer-safe container for up to 2 months. Thaw overnight in the fridge before reheating.

Reheating: Gently reheat in a skillet over low heat, adding a splash of water or milk to revive the creamy texture as needed.

Room Temperature: Avoid leaving the pasta out at room temperature for more than 2 hours to prevent spoilage.

Expert Tips for Marry Me Shrimp Pasta

  • Perfect Shrimp Texture: Cook shrimp until just pink and opaque; overcooking can make them rubbery. Timing is essential in this Marry Me Shrimp Pasta!

  • Drain Sun-Dried Tomatoes: Ensure they are properly drained before adding them to the sauce. This prevents an overly oily texture in your dish.

  • Pasta Water Magic: Save a cup of pasta cooking water. Adding it gradually can help adjust the sauce consistency, making it creamy without being too thick.

  • Garlic Control: If using fresh garlic, be careful not to burn it while sautéing. A little bit of monitoring goes a long way in preserving flavor.

  • Taste as You Go: Season to your preference throughout the cooking process; adjustments can create a more personalized flavor in your Marry Me Shrimp Pasta.

  • Creative Swaps: Don’t hesitate to switch up proteins or veggies. This versatility allows you to cater the dish to your tastes or dietary needs without losing its charm!

Marry Me Shrimp Pasta Variations

Feel free to explore these delightful twists that will make your Marry Me Shrimp Pasta experience even more special!

  • Protein Play: Swap shrimp with chicken or tofu for a different protein delight. Each option brings its unique flavor profile while keeping the dish equally satisfying.

  • Zucchini Noodles: Use spiralized zucchini for a low-carb version. This light swap creates a refreshing meal that’s still comforting!

  • Vegetable Boost: Add spinach, bell peppers, or mushrooms to enhance flavor and nutrients. A pop of color always brightens up the dish, too.

  • Cheese Swap: Substitute Parmesan with pecorino or asiago for a sharper taste. Each cheese brings its own character that’ll surprise your taste buds.

  • Creamy Alternatives: Experiment with cashew cream or coconut milk for a dairy-free twist. Both options keep the creaminess without compromising flavor.

  • Heat It Up: Add more chili flakes or a dash of hot sauce for extra spice. A little heat can elevate the whole dish to new heights!

  • Wine Infusion: Replace chicken broth with dry white wine for a fancier sauce. This twist can enhance both flavor and romance for date nights.

  • Herb Variations: Instead of basil, try fresh parsley, cilantro, or dill for a fresh herb variation that revitalizes the entire dish. Each herb can create a new culinary experience!

Take your Marry Me Shrimp Pasta to the next level with these variations and watch as it becomes a favorite in your kitchen!

What to Serve with Marry Me Shrimp Pasta

Elevate your meal by pairing this creamy, dreamy dish with sides that complement its rich flavors.

  • Garlic Bread: The warm, buttery goodness of garlic bread perfectly soaks up every drop of the luscious sauce.
  • Fresh Green Salad: A light salad with mixed greens, tomatoes, and a zesty vinaigrette adds a refreshing contrast to the creamy pasta.
  • Roasted Vegetables: Caramelized roasted veggies like zucchini and bell peppers bring a delightful crunch and earthy flavors that enhance the dish.
  • Sautéed Spinach: Lightly sautéed spinach adds a vibrant touch and a healthy, leafy element that balances the richness of the pasta.
  • Chilled White Wine: A glass of crisp Sauvignon Blanc or Pinot Grigio elevates the dining experience, enhancing the dish’s flavors beautifully.
  • Chocolate Mousse: End the meal on a sweet note with a silky chocolate mousse; its richness pairs wonderfully with the savory pasta.

Enjoy crafting a complete and memorable dining experience with these perfect accompaniments!

Make Ahead Options

These Marry Me Shrimp Pasta delights are perfect for meal prep enthusiasts! You can prepare the shrimp and sun-dried tomato sauce up to 24 hours in advance, ensuring that the flavors meld beautifully overnight. Simply season the shrimp, cook them until just pink, and store in an airtight container in the refrigerator alongside the prepared sauce; this helps maintain the shrimp’s tenderness. When you’re ready to serve, cook your pasta and heat the sauce on the stove, then toss in the shrimp, lemon juice, basil, and Parmesan for just a couple of minutes until everything is warmed through. This way, you’ll have a romantic dinner on the table with minimal effort and time!

Marry Me Shrimp Pasta Recipe FAQs

How do I select the best shrimp for my Marry Me Shrimp Pasta?
Absolutely! Look for medium to large shrimp that are firm and translucent, with a mild ocean scent. Avoid any shrimp that smell overly fishy or have dark spots on the shells, as this indicates they aren’t fresh. If you’re opting for frozen shrimp, ensure they are properly thawed before cooking for the best texture.

What is the best way to store leftovers of Marry Me Shrimp Pasta?
Very good question! Store any leftover Marry Me Shrimp Pasta in an airtight container in the refrigerator for up to 2 days. Be sure to let it cool to room temperature before sealing the container. For best reheating, place it in a skillet over low heat, adding a splash of water or milk to keep the sauce creamy.

Can I freeze Marry Me Shrimp Pasta, and how should I do it?
Absolutely! To freeze your Marry Me Shrimp Pasta, wait until it cools completely and then transfer it into a freezer-safe container or heavy-duty freezer bags. It can be stored for up to 2 months. When you’re ready to eat, thaw it overnight in the refrigerator, and reheat gently in a skillet, adding a bit of liquid as needed to regain creaminess.

What should I do if my sauce is too thick?
If you find that your sauce for Marry Me Shrimp Pasta is too thick after it’s cooked, no worries! Simply add a little of the reserved pasta water gradually until you reach the desired consistency. Start with a tablespoon at a time and stir well, as this will help thin it out while enhancing the overall flavor.

Can I use other types of pasta for Marry Me Shrimp Pasta?
Definitely! While rigatoni is fantastic for holding the creamy sauce, feel free to switch it up with other pasta types like penne, farfalle, or even gluten-free options. Just make sure to adjust the cooking time according to the pasta you’ve chosen so it’s al dente.

Are there any dietary considerations I should be aware of when making Marry Me Shrimp Pasta?
Very much so! If you’re making this dish for someone with food allergies or dietary preferences, consider substituting the heavy cream with coconut cream or cashew cream for a dairy-free option. You can also replace the shrimp with chicken or tofu, making it suitable for different diets. Always check the ingredients to ensure they align with any allergy restrictions!

Marry Me Shrimp Pasta

Creamy Marry Me Shrimp Pasta That Steals Hearts Fast

Marry Me Shrimp Pasta is a creamy delight that transforms a simple evening into a romantic feast in just 30 minutes.
Prep Time 10 minutes
Cook Time 20 minutes
Total Time 30 minutes
Servings: 4 servings
Course: Dinner
Cuisine: Italian
Calories: 500

Ingredients
  

For the Pasta
  • 12 ounces Rigatoni any pasta shape can be a great alternative
For the Shrimp
  • 2 tablespoons Olive Oil can use all olive oil for a dairy-free dish
  • 1 tablespoon Unsalted Butter
  • 1 pound Medium to large shrimp juicy and tender preferred
  • to taste Salt essential for seasoning
  • to taste Black Pepper essential for seasoning
For the Sauce
  • 1 teaspoon Garlic Powder or use minced garlic for a fresh touch
  • 1 teaspoon Sweet Paprika smoked paprika can change flavor profile
  • 3 cloves Garlic fresh cloves enhance taste
  • 1 cup Sun-Dried Tomatoes drain them well before adding
  • 1 teaspoon Italian Seasoning substitute dried thyme or oregano as needed
  • 2 tablespoons Flour cornstarch is a gluten-free alternative
  • 1 cup Low Sodium Chicken Broth or use vegetable broth or dry white wine
  • 1 cup Heavy Cream coconut or cashew cream for a dairy-free substitute
  • 2 tablespoons Double Concentrated Tomato Paste
  • 2 tablespoons Lemon Juice can substitute vinegar
  • ¼ cup Chopped Basil Leaves parsley can substitute basil
  • ½ cup Grated Parmesan pecorino or asiago can be used
  • to taste Chili Flakes for added spice

Equipment

  • Large pot
  • Colander
  • large skillet
  • Wooden Spoon

Method
 

Step‑by‑Step Instructions for Marry Me Shrimp Pasta
  1. Start by peeling and deveining the shrimp, then season them with salt, black pepper, garlic powder, and sweet paprika, mixing well. Mince the garlic, chop sun-dried tomatoes, and slice fresh basil leaves.
  2. Bring a large pot of salted water to a boil, then add rigatoni. Cook for about 8–10 minutes until al dente, stirring occasionally. Drain pasta, saving a cup of pasta water.
  3. In a skillet, heat olive oil and unsalted butter over medium-high heat. Add seasoned shrimp and cook for 1 minute per side until pink and opaque. Set shrimp aside, leaving drippings in the pan.
  4. In the same skillet, lower heat and add minced garlic. Sauté for about 1 minute, stirring until fragrant. Careful not to burn garlic.
  5. Add sun-dried tomatoes and Italian seasoning to skillet. Cook for about 1 minute while stirring. Sprinkle in flour and stir well, cooking for another minute.
  6. Slowly pour in chicken broth, deglazing the pan and scraping flavorful bits. Simmer for 2 minutes until thickened slightly.
  7. Reduce heat to low, and stir in heavy cream and double concentrated tomato paste. Simmer for 3 minutes until creamy and heated through.
  8. Toss reserved pasta, cooked shrimp, lemon juice, chopped basil, and grated Parmesan into the sauce. Heat through for about 2 minutes, adding pasta water if necessary for sauce consistency.
  9. Serve on plates, garnished with extra basil, Parmesan, and chili flakes. Enjoy every bite!

Notes

Ensure the shrimp is cooked just until pink and opaque to maintain tenderness. Use reserved pasta water to adjust sauce consistency as needed.

Dewy Dill Delight Radish and Cucumber Salad for Fresh Flavor

As the first rays of spring sun warm the earth, I find myself craving lighter fare that captures the essence of the season. Enter my Dewy Dill Delight Radish and Cucumber Salad. This refreshing dish seamlessly blends the crispness of garden-fresh cucumbers with the zesty bite of radishes, all brought together by a luscious honey mustard vinaigrette. With its quick prep time, this salad is not only a vibrant addition to your table but also a make-ahead wonder that brightens any meal. Perfect for picnics, barbecues, or simply a weeknight dinner, I can’t help but fall in love with its simplicity and flavor. Are you ready to elevate your salad game this spring?

Why Is This Salad a Must-Try?

Freshness beckons with each bite of this Dewy Dill Delight Radish and Cucumber Salad, bringing garden-to-table flavors directly to your plate. Versatile enough for any occasion, it pairs beautifully with grilled meats or can stand alone as a light meal. Quick preparation makes it a go-to, allowing you to whip it up in minutes, while its make-ahead appeal ensures you can enjoy it throughout the week. Visually stunning, the vibrant colors not only entice the eyes but also tantalize the taste buds. If you’re looking for more refreshing ideas, check out this delightful Cucumber Carrot Salad for another light option!

Dewy Dill Delight Radish and Cucumber Salad Ingredients

For the Salad
Cucumbers – Choose Persian cucumbers for a petite size and crisp sweetness that enhances the salad’s crunch.
Radishes – Opt for red varieties like Cherry Belle or a delightful mix of Purple Plum and Pink Beauty for that perfect spicy bite.
Fresh Dill – This herb brings a bright, aromatic flavor; adjust the amount to match your palate.
Fresh Chives – Their mild onion flavor adds depth; enjoy their freshness as one of spring’s first herbs.

For the Dressing
Whole Grain Mustard – Provides a textured base and earthy flavor to the vinaigrette that perfectly complements the salad.
Honey – A dash of sweetness that balances the bitterness of radishes, elevating the overall flavor.
Vinegar – A splash enhances the tartness; use apple cider or white wine vinegar for an extra zing.

Indulge in this Dewy Dill Delight Radish and Cucumber Salad that’s not only fresh but also a make-ahead masterpiece!

Step‑by‑Step Instructions for Dewy Dill Delight Radish and Cucumber Salad

Step 1: Prepare the Vegetables
Begin by washing the cucumbers and radishes under cool running water, removing any dirt. Slice the cucumbers into thin, even rounds, approximately ⅛ inch thick for optimal crunch. Next, cut the radishes into similar thin slices to ensure a harmonious texture throughout the Dewy Dill Delight Radish and Cucumber Salad. Set aside the prepared vegetables in a large mixing bowl.

Step 2: Make the Dressing
In a medium bowl, whisk together a generous spoonful of whole grain mustard and a tablespoon of honey until fully combined. Add a splash of your favorite vinegar, such as apple cider or white wine vinegar, to the mixture and continue whisking until the dressing is smooth and emulsified. The dressing should be slightly thick but pourable, creating a wonderful balance for the salad.

Step 3: Combine Salad Components
Once your vegetables are sliced and the dressing is ready, add the radishes and cucumbers from the mixing bowl to a larger bowl. Gently toss in a handful of fresh dill and a few chopped chives, enhancing the salad’s flavor profile. Ensure all veggies are evenly distributed, as this will create a delightful melange of tastes and textures in your Dewy Dill Delight Radish and Cucumber Salad.

Step 4: Dress the Salad
Pour the honey mustard vinaigrette over the vegetable mixture in the large bowl. With a gentle hand, toss the ingredients together softly to ensure the cucumbers and radishes are well-coated with the dressing. Aim for an even distribution of the vinaigrette to enhance every delicious bite of the salad, highlighting the fresh ingredients.

Step 5: Chill & Serve
To maximize the flavor infusion, cover the bowl with plastic wrap or transfer the salad to an airtight container. Refrigerate for at least 30 minutes to allow the flavors of the Dewy Dill Delight Radish and Cucumber Salad to meld and the vegetables to crisp slightly. Serve chilled or at room temperature for a refreshing side dish that brightens up any meal.

Dewy Dill Delight Salad Variations

Feel free to unleash your creativity and tailor this salad to your taste preferences!

  • Crunchy Swap: Replace radishes with jicama for a sweet, crunchy twist that’s equally refreshing.
  • Herb Infusion: Add fresh mint or parsley instead of dill for a fragrant flavor upgrade that sings of spring.
  • Spicy Kick: Toss in thinly sliced jalapeños for a hint of heat that contrasts beautifully with the salad’s crispness.
  • Nutty Addition: Scatter toasted sunflower seeds or almonds on top for an exciting crunch and a nutritious boost.
  • Creamy Dressing: Mix in a splash of yogurt to the dressing for a creamy texture that adds a tangy layer of flavor.
  • Vegan Version: Substitute honey with agave syrup or maple syrup for a completely plant-based dressing without sacrificing sweetness.
  • Colorful Twist: Introduce colorful bell peppers or carrots for an eye-catching, vibrant addition that enhances the texture.
  • Flavor Boost: Experiment with a splash of lemon juice instead of vinegar, adding zest that lightens the entire dish.

For another refreshing idea, consider making a delightful Cabbage Cucumber Salad that’s just as vibrant and perfect for warm days.

Expert Tips for Dewy Dill Delight Salad

  • Fresh Ingredients: Use the freshest cucumbers and radishes available to enhance the salad’s flavor and crunch. Avoid limp vegetables for the best texture.

  • Adjust the Dressing: If you prefer a less sweet vinaigrette, reduce the honey. Taste as you go to ensure the dressing complements your personal palette.

  • Slice Just Before Serving: For ultimate freshness, slice the cucumbers and radishes right before serving, although the dressing can be made ahead. This keeps the vegetables crisp.

  • Herb Variations: Feel free to substitute fresh dill with parsley or mint for a different twist on the classic Dewy Dill Delight Radish and Cucumber Salad.

  • Serve It Right: To maintain its freshness and visual appeal, serve the salad immediately after chilling, garnishing with extra herbs for a vibrant finish.

What to Serve with Dewy Dill Delight Radish and Cucumber Salad

This vibrant salad sets the stage for a delightful meal bursting with springtime freshness.

  • Grilled Lemon Chicken: Juicy and zesty, this chicken provides a hearty, flavorful contrast to the salad’s crispness. The bright lemon ties the dish together beautifully.

  • Savory Quinoa Medley: A nutty quinoa dish enriched with herbs offers a delightful texture and protein boost, making your meal feel more complete.

  • Roasted Garlic Potatoes: Golden-brown and buttery, these potatoes bring a comforting warmth that beautifully complements the refreshing salad, creating the ideal balance.

  • Herbed Flatbreads: Light and fluffy, warm flatbreads served with a drizzle of olive oil are perfect for scooping up salad. Their mild flavor allows the salad to shine.

  • Sparkling Water with Lime: A refreshing drink choice that cleanses the palate and enhances the bright flavors of the Dewy Dill Delight Radish and Cucumber Salad without overpowering it.

  • Chocolate-Covered Strawberries: For dessert, these sweet treats add a dash of indulgence that contrasts the freshness of the salad, making for a well-rounded meal experience.

How to Store and Freeze Dewy Dill Delight Radish and Cucumber Salad

  • Fridge: Store in an airtight container for up to 4-5 days. Proper sealing will maintain freshness and prevent the salad from wilting.

  • Make-Ahead: You can prepare the dressing up to 3 days in advance. Keep it separate until you’re ready to serve to ensure your salad stays crisp and vibrant.

  • Freezer: This salad is not recommended for freezing due to the high water content of cucumbers and radishes, which can affect texture when thawed.

  • Reheating: There’s no need for reheating! Serve the Dewy Dill Delight Radish and Cucumber Salad chilled for that refreshing crunch.

Make Ahead Options

This Dewy Dill Delight Radish and Cucumber Salad is a fantastic choice for busy home cooks looking to save time without sacrificing flavor! You can slice the cucumbers and radishes up to 24 hours in advance, storing them in an airtight container in the refrigerator to maintain their crispness. Additionally, prepare the honey mustard vinaigrette a day ahead; it holds well for up to 3 days. Just make sure to give it a good shake before adding to the salad. When ready to serve, simply toss the vegetables with the dressing and a sprinkle of fresh dill and chives for refreshing, vibrant flavors. Enjoy effortless meal planning with this delightful salad ready to brighten your table!

Dewy Dill Delight Radish and Cucumber Salad Recipe FAQs

What types of cucumbers are best for this salad?
Absolutely! Persian cucumbers are recommended for their petite size and sweetness, providing the perfect crunch. They tend to have fewer seeds and a thinner skin, making them ideal for this refreshing salad.

How long can I store the Dewy Dill Delight Radish and Cucumber Salad?
You can store this salad in an airtight container in the refrigerator for up to 4-5 days. Just be sure to keep it sealed properly to maintain its texture and freshness. The flavors will continue to develop but avoid letting it sit too long to prevent wilting.

Can I freeze this salad for later use?
Unfortunately, freezing is not advised for this Dewy Dill Delight Radish and Cucumber Salad. Due to the high water content in cucumbers and radishes, freezing can make them mushy and alter their refreshing crunch when thawed. Enjoy it fresh instead!

What should I do if my dressing is too sweet?
If you find your vinaigrette too sweet for your liking, you can easily balance it out. Start by adding a bit more vinegar—apple cider or white wine vinegar works wonderfully. Additionally, whisk in a pinch of salt, which can help mute the sweetness and enhance the overall flavor of the dressing.

Are there any dietary concerns I should consider?
If you or your guests have allergies, take note of the ingredients. This salad is naturally gluten-free and vegetarian. However, those with mustard allergies should substitute the whole grain mustard with a dressing that suits their dietary needs. Always check labels on store-bought ingredients if you’re unsure.

How do I ensure my radishes and cucumbers stay crisp?
To keep the veggies crisp, slice the radishes and cucumbers just before serving. If you’re preparing in advance, store the dressing separately and add it right before serving. This way, you preserve that delightful crunch and freshness in your Dewy Dill Delight Radish and Cucumber Salad!

Dewy Dill Delight Radish and Cucumber Salad

Dewy Dill Delight Radish and Cucumber Salad for Fresh Flavor

Enjoy the refreshing Dewy Dill Delight Radish and Cucumber Salad, a perfect combination of crisp cucumbers and zesty radishes.
Prep Time 10 minutes
Chill Time 30 minutes
Total Time 40 minutes
Servings: 4 servings
Course: Lunch
Cuisine: American
Calories: 120

Ingredients
  

For the Salad
  • 2 cups cucumbers preferably Persian
  • 1 cup radishes red varieties like Cherry Belle or a mix of Purple Plum and Pink Beauty
  • ¼ cup fresh dill adjust to taste
  • ¼ cup fresh chives
For the Dressing
  • 2 tablespoons whole grain mustard
  • 1 tablespoon honey
  • 2 tablespoons vinegar apple cider or white wine vinegar

Equipment

  • Large mixing bowl
  • Medium bowl
  • whisk

Method
 

Step-by-Step Instructions
  1. Wash the cucumbers and radishes under cool running water. Slice cucumbers into thin rounds and radishes into similar thin slices. Set aside.
  2. In a medium bowl, whisk together whole grain mustard and honey until combined. Add vinegar and whisk until smooth.
  3. Add radishes and cucumbers to a large bowl. Toss in fresh dill and chives.
  4. Pour the dressing over the vegetable mixture and gently toss to coat.
  5. Cover and refrigerate for at least 30 minutes before serving.

Notes

For ultimate freshness, slice the cucumbers and radishes right before serving. Adjust the sweetness of the dressing to your preference.

Bibingka – Filipino Coconut Cake for Sweet Tropical Bliss

As the sweet aroma of baking fills my kitchen, I can’t help but feel transported to festive celebrations under the warm sun of the Philippines, where Bibingka—Filipino Coconut Cake—is a cherished staple. This delicious dessert, crafted with gluten-free sweet rice flour, brings a unique spongy texture and rich coconut flavor that’s both comforting and indulgent. Whether you’re seeking a delightful family gathering treat or a special indulgence after a long day, this recipe is a quick triumph that delivers on both taste and nostalgia. With just a handful of simple ingredients, you can whip up a gluten-free confection that’s sure to become a beloved favorite. Curious about how to bring a slice of tropical paradise into your home? Let’s dive into creating this unforgettable Bibingka!

Why is Bibingka So Irresistible?

Unique experience: This Bibingka isn’t just another dessert; it delivers tropical delight right to your plate, making it perfect for gatherings.
Gluten-free goodness: Made with sweet rice flour, it’s an excellent choice for those seeking gluten-free options without compromising on flavor.
Elevated simplicity: With just a few easy steps, you can create a treat that’s both comforting and exotic—ideal for any home cook!
Shareable indulgence: Serve it warm with a dollop of coconut whipped cream, and watch it disappear quickly at any gathering. Whether you’re exploring more Filipino delights or would like to try something similar to a Milky Coconut Cheese treat, you’ll adore this cake’s charm!

Bibingka – Filipino Coconut Cake Ingredients

For the Cake

  • Cream Cheese – Adds richness and enhances the cake’s moisture.
  • Granulated Sugar – Sweetens the cake; can substitute with coconut sugar for a deeper flavor.
  • Eggs – Providing structure and lift; important for creating a light texture.
  • Sweet Rice Flour – The primary flour; ensures the unique texture of the Bibingka.
  • Baking Powder – Helps the cake rise; essential for achieving that delightful fluffiness.
  • Butter (melted) – Adds fat and flavor; can substitute with coconut oil for a dairy-free version.
  • Vanilla Extract – Enhances flavor; opt for pure vanilla for the best results.
  • Cream of Coconut – Provides richness and sweetness; do not substitute this with coconut milk.
  • Milk – Moistens the batter; can replace with a non-dairy option if needed.
  • Crushed Pineapple (canned, undrained) – Contributes tropical flavors and moisture; fresh pineapple can be substituted.

For the Topping

  • Brown Sugar – Adds a caramelized crunch that enhances the cake’s surface.
  • Granulated Sugar (for topping) – Mixed with brown sugar for additional sweetness and texture.

Step‑by‑Step Instructions for Bibingka – Filipino Coconut Cake

Step 1: Preheat the Oven
Preheat your oven to 350°F (175°C) to ensure an even baking environment for your Bibingka. This warm temperature will help the cake rise beautifully and develop a golden crust. While the oven heats, prepare your ingredients so you can dive into the next steps immediately.

Step 2: Cream the Cheese and Sugar
In a large mixing bowl, beat together the cream cheese and granulated sugar until the mixture is smooth and creamy. This should take about 3-5 minutes using an electric mixer on medium speed. The goal is to create a fluffy base that will contribute to the cake’s richness, so ensure there are no lumps remaining.

Step 3: Incorporate the Eggs
Add the eggs to the cream cheese mixture one at a time, mixing well after each addition. This step is crucial for achieving a light and airy texture in your Bibingka. Continue beating until each egg is fully incorporated, which should take about 2-3 minutes.

Step 4: Mix in Dry Ingredients
Gradually add the sweet rice flour and baking powder into the bowl. Mix gently on low speed until the batter is smooth, and be careful to avoid lumps. This is important to maintain the unique sticky texture that makes Bibingka so special, so take your time here.

Step 5: Add Remaining Ingredients
Once the dry ingredients are fully combined, pour in the melted butter, vanilla extract, cream of coconut, milk, and crushed pineapple. Stir the mixture gently until everything is well incorporated, creating a rich and moist batter that captures all the delightful flavors of tropical coconut and pineapple.

Step 6: Prepare the Pan
Grease a 13×9 inch baking pan generously to prevent sticking, ensuring a smooth release when serving. Carefully pour the Bibingka batter into the prepared pan, spreading it out evenly with a spatula. The batter will be thick, so take your time to create a uniform surface.

Step 7: Add the Toppings
Sprinkle an even layer of brown sugar and granulated sugar over the top of the batter. This sugar topping will caramelize as it bakes, creating a delightful sweet and crunchy finish that contrasts beautifully with the soft texture of the Bibingka.

Step 8: Bake the Bibingka
Place the pan in the preheated oven and bake for 1 hour, or until the top of the cake is lightly golden and a toothpick inserted into the center comes out clean. Keep an eye on it in the last few minutes to avoid over-baking; the perfect Bibingka is slightly soft but fully set.

Step 9: Cool and Serve
Once baked, remove the pan from the oven and allow it to cool for at least 15-20 minutes. This resting period will make cutting the cake easier. Slice the Bibingka into squares and serve warm, allowing everyone to enjoy this traditional Filipino coconut cake!

Expert Tips for Bibingka

  • Gentle Mixing: Always mix the batter gently when adding sweet rice flour to prevent it from becoming too airy and messy. This helps achieve the right texture for your Bibingka.

  • Use Cream of Coconut: Be sure to use cream of coconut instead of coconut milk for the best flavor and consistency. This will ensure your cake is rich and sweet.

  • Keep an Eye on Baking Time: Baking in mini pans? Adjust the time to 25-30 minutes. Check for doneness by ensuring the top is lightly golden and a toothpick comes out clean.

  • Perfect Toppings: For the topping, create an even layer of brown sugar and granulated sugar so that it caramelizes evenly. A well-caramelized top enhances the beauty and flavor of your Bibingka.

  • Store Properly: If you have leftovers, store your Bibingka in an airtight container in the fridge for up to 5 days. It can also be frozen for up to 3 months.

  • Reheat for Best Flavor: To enjoy your Bibingka at its best, warm it gently in the microwave or oven before serving. The flavors just pop when it’s warmed!

What to Serve with Bibingka – Filipino Coconut Cake

Elevate your experience with thoughtful pairings that bring out the best of this delightful cake.

  • Coconut Whipped Cream: A dollop on warm Bibingka enhances the creamy coconut flavor while adding a touch of indulgence.
  • Mango Slices: Juicy, sweet mangoes provide a refreshing contrast to the dense cake, complimenting the tropical vibe perfectly.
  • Pineapple Salsa: A fresh pineapple salsa brings a zesty twist, balancing the sweetness of the Bibingka with a burst of citrusy joy.

For a dessert spread, why not arrange a tropical fruit platter? Serve it alongside your Bibingka to create a vibrant, colorful feast.

  • Traditional Filipino Coffee: A warm cup of coffee with nutty undertones pairs beautifully, enhancing the cake’s rich coconut flavor.
  • Ube Jam: The sweet, nutty flavor of ube jam drizzled over slices adds an exotic touch and visual appeal.
  • Lemonade or Calamansi Juice: Perfectly refreshing and slightly tart, these beverages sharpen the cake’s sweetness, making each bite more enjoyable.

These pairings create a feast for the senses, perfect for sharing the joy and warmth that comes with every bite of Bibingka!

Make Ahead Options

These Bibingka – Filipino Coconut Cakes are perfect for busy home cooks looking to save time! You can prepare the batter up to 24 hours in advance by mixing all the ingredients (except for the toppings) and storing it in an airtight container in the refrigerator. This not only allows the flavors to meld beautifully but also ensures that your cake is just as delightful when baked. When you’re ready to serve, simply preheat your oven and pour the batter into the greased pan before sprinkling the brown and granulated sugars on top. Bake as directed, and you’ll have warm, tropical bliss with minimal daily fuss!

How to Store and Freeze Bibingka

Fridge: Keep your Bibingka in an airtight container for up to 5 days. This will retain its delightful texture and flavor, making it a perfect revisit to tropical bliss!

Freezer: Wrap the Bibingka tightly in plastic wrap, then place it in a freezer-safe container. It can be frozen for up to 3 months without losing its unique texture and taste.

Reheating: To enjoy, simply warm individual slices in the microwave for about 10-15 seconds or bake at 350°F (175°C) for 10 minutes. A warm-up brings back its delightful flavors, making each bite feel fresh and inviting.

Bibingka – Filipino Coconut Cake Variations

Feel free to get creative with this Bibingka recipe and adapt it to your taste preferences—each twist adds its own delicious story!

  • Mango Twist: Replace half the crushed pineapple with mango puree for a rich fruit flavor. The tropical sweetness of mango brings a new dimension to this classic dessert.

  • Maple Sweetness: Use maple syrup instead of granulated sugar for a wonderful, earthy sweetness. It not only adds depth but also complements the coconut beautifully.

  • Greek Yogurt Upgrade: Swap out cream cheese for Greek yogurt to lighten up the cake while ensuring it remains moist and creamy. You might even find you like this version better!

  • Nutty Flavor: Add finely chopped nuts, like cashews or almonds, to the batter for an extra crunch. These nuts provide a delightful contrast to the cake’s soft texture while enhancing the flavor profile. A sprinkle on top could also add a nice touch!

  • Chocolate Bliss: For a chocolate spin, fold in mini chocolate chips into the batter. The creamy chocolate balances the coconut sweetness and will surprise and delight every time!

  • Cinnamon Dusting: Serve your Bibingka with a sprinkle of cinnamon on top before baking for a warm, aromatic note that perfectly complements the coconut and pineapple. This easy addition can transport your taste buds to the tropics!

  • Spicy Kick: Add a pinch of cayenne or chopped chili to the batter for those who crave a little heat. This twist transforms the dessert into a sweet and spicy adventure!

  • Creamy Coconut Topping: Instead of the standard sugar topping, make a creamy coconut whipped topping for serving. It adds a luscious, tropical element that’s simply divine! You can pair this with a classic cake like Nutty Vanilla Cake for a Hawaiian-themed dessert spread!

Bibingka – Filipino Coconut Cake Recipe FAQs

What type of sweet rice flour should I use?
Absolutely! You should use “glutinous rice flour” for the most authentic Bibingka experience. It has the right starch content to give the cake its signature sticky and chewy texture. Look for brands that specify “sweet rice flour” to ensure you’re getting the right one!

How should I store leftover Bibingka?
Very simply, store your Bibingka in an airtight container in the refrigerator for up to 5 days. This will help maintain its moist texture and delightful flavor. If you want to keep it longer, consider freezing it.

Can I freeze Bibingka, and how do I do it?
Of course! To freeze your Bibingka, wrap it tightly in plastic wrap, ensuring no air gets in, and then place it in an airtight freezer-safe container. It can be frozen for up to 3 months. When you’re ready to enjoy it again, just thaw it in the fridge overnight, then warm it in the microwave or oven before serving to bring back its wonderful taste!

What should I do if my Bibingka comes out too dense?
If your Bibingka turns out denser than expected, it may have been overmixed while combining the wet and dry ingredients. Always mix gently to avoid incorporating too much air and disrupting the cake’s structure. Next time, watch your baking time; baking a bit longer might help achieve a lighter texture as well!

Is Bibingka suitable for those with dietary restrictions?
Absolutely! This Bibingka recipe is gluten-free due to the use of sweet rice flour, making it a great treat for those with gluten sensitivities. However, keep in mind that ingredients like cream cheese and milk can be substituted with non-dairy alternatives for a lactose-free version. Just ensure that all components are certified gluten-free, especially if allergies are a concern. Enjoy your tasty slice of tropical paradise!

Bibingka – Filipino Coconut Cake

Bibingka – Filipino Coconut Cake for Sweet Tropical Bliss

Bibingka is a delicious Filipino coconut cake that captures the essence of tropical celebrations with its spongy texture and rich coconut flavor.
Prep Time 20 minutes
Cook Time 1 hour
Cooling Time 20 minutes
Total Time 1 hour 40 minutes
Servings: 8 slices
Course: Dessert
Cuisine: Filipino
Calories: 250

Ingredients
  

For the Cake
  • 8 ounces Cream Cheese Adds richness and enhances moisture.
  • 1 cup Granulated Sugar Can substitute with coconut sugar.
  • 3 Eggs Provides structure and lift.
  • 2 cups Sweet Rice Flour The primary flour ensuring unique texture.
  • 2 teaspoons Baking Powder Helps the cake rise.
  • 1/2 cup Butter (melted) Can substitute with coconut oil.
  • 1 teaspoon Vanilla Extract Opt for pure vanilla for best results.
  • 1 cup Cream of Coconut Do not substitute with coconut milk.
  • 1 cup Milk Can be replaced with a non-dairy option.
  • 1 cup Crushed Pineapple (canned, undrained) Contributes tropical flavors.
For the Topping
  • 1/4 cup Brown Sugar Adds caramelized crunch.
  • 1/4 cup Granulated Sugar (for topping) Mixed with brown sugar for added texture.

Equipment

  • Large mixing bowl
  • electric mixer
  • Baking pan (13x9 inch)

Method
 

Step-by-Step Instructions
  1. Preheat your oven to 350°F (175°C).
  2. Beat together the cream cheese and granulated sugar until smooth and creamy.
  3. Add the eggs one at a time, mixing well after each addition.
  4. Gradually add the sweet rice flour and baking powder; mix until smooth.
  5. Add melted butter, vanilla extract, cream of coconut, milk, and crushed pineapple; stir well.
  6. Grease a 13x9 inch baking pan and pour in the batter, spreading evenly.
  7. Sprinkle brown sugar and granulated sugar over the top.
  8. Bake for 1 hour or until lightly golden and a toothpick comes out clean.
  9. Cool for at least 15-20 minutes before slicing and serving warm.

Notes

Gentle mixing helps achieve the right texture. Use cream of coconut instead of coconut milk for best flavor. Baking time may vary; adjust for mini pans. Store leftovers in an airtight container.

Savory Birria Enchiladas: Bold Flavors in Every Bite

As I rummaged through my recipe box, I stumbled upon a hidden gem that instantly transported me back to vibrant family gatherings: Birria Enchiladas. This dish seamlessly blends the rich, savory depth of traditional birria with the comforting embrace of cheesy enchiladas—a true flavor fusion! What I love most about these Birria Enchiladas is their versatility; whether you opt for tender goat, hearty beef, or even a plant-based spin, everyone will be delightfully satisfied. Plus, they come together quickly, making them the perfect choice for both weeknight dinners and special occasions. Ready to impress your loved ones with this deliciously innovative comfort food? Let’s dive into this mouthwatering adventure together!

Why Are Birria Enchiladas So Irresistible?

Flavor Fusion: Each bite bursts with rich, savory flavors that capture the essence of traditional Mexican cuisine, enhancing your dinner table with an exciting twist.
Quick Preparation: These enchiladas come together in just under an hour, making them an ideal option for busy weeknights or last-minute gatherings.
Endless Customization: Whether you’re a fan of goat, beef, or a vegetarian option, this dish is easy to tailor to suit every palate, ensuring everyone enjoys their meal.
Crowd-Pleaser: Perfect for entertaining, these enchiladas warm hearts and fill bellies, proving to be a hit among family and friends alike.
Comforting Appeal: With melty cheese and hearty filling, they provide the ultimate comfort food experience—a dish loved by all ages. Don’t forget to pair with a refreshing drink for an unforgettable meal!

Birria Enchiladas Ingredients

For the Filling

  • Shredded Birria Meat – Provides savory, umami flavors; substitute with beef or hearty vegetables for variations.
  • Birria Broth – Enhances moisture and flavor throughout the dish; use homemade for authenticity or store-bought as a time-saver.

For the Wrap

  • Corn Tortillas – Essential for authentic texture and taste; flour tortillas can be used as a substitute in a pinch.
  • Cheese (e.g., Oaxaca or mozzarella) – Adds a creamy, melty element; aged cheddar works well for a bolder flavor.

For the Garnish

  • Chopped Onion – Offers freshness and a crisp texture, helping to balance the richness of the filling.
  • Fresh Cilantro – Adds a burst of color and earthy flavor; feel free to skip if you’re not a fan!
  • Lime Wedges – Adds a citrusy zing to balance flavors; squeeze over the top just before serving for the best impact.

These Birria Enchiladas are not just a meal; they’re a celebration of flavors waiting to be enjoyed!

Step‑by‑Step Instructions for Birria Enchiladas

Step 1: Prepare the Birria
Start by cooking your choice of meat—beef, goat, or a hearty vegetarian option—slowly in a mixture of spices and birria broth, allowing it to simmer for about 2-3 hours or until tender. Ensure the meat shreds easily by using two forks to pull it apart. This flavorful filling is the heart of your delicious Birria Enchiladas.

Step 2: Soften the Tortillas
In a large skillet over medium heat, warm the corn tortillas for about 30 seconds on each side until pliable yet firm enough to hold the filling. You can also wrap them in a damp paper towel and microwave them for about 20-30 seconds. This step is crucial to prevent cracking while you assemble your tasty Birria Enchiladas.

Step 3: Assemble the Enchiladas
Take a warmed tortilla and place a generous amount of shredded birria meat and a sprinkle of cheese in the center. Carefully roll the tortilla tightly, folding the ends in to secure the filling. Continue this process until all the tortillas are filled and rolled, ensuring you have a beautiful batch of Birria Enchiladas ready for baking.

Step 4: Bake the Enchiladas
Preheat your oven to 350°F (175°C). In a baking dish, arrange the rolled enchiladas seam-side down in a single layer. Pour the reserved birria broth evenly over the top, immersing the tortillas slightly. Top with more cheese for that extra gooey goodness, then bake for about 20-25 minutes. Look for a bubbly, golden brown top to know they are ready.

Step 5: Garnish and Serve
Once baked, remove the dish from the oven and let it sit for 5 minutes. Serve the warm Birria Enchiladas topped with finely chopped onion, fresh cilantro, and a few wedges of lime on the side. The lime will enhance the flavors and add a refreshing touch to your comforting meal. Enjoy every bite of these flavorful enchiladas!

Expert Tips for Birria Enchiladas

  • Quality Meat Matters: Always use high-quality meat for your birria to ensure the best flavor. Poor quality can lead to a bland dish.

  • Tortilla Technique: Avoid tearing by properly warming your corn tortillas. This prevents them from cracking when you roll the Birria Enchiladas.

  • Seasoning Check: Taste your birria filling before assembly. Adjust the seasoning to your liking; this step can make a substantial difference in the final dish.

  • Make Ahead: Prepare the birria filling a day in advance to save time. It also allows flavors to meld beautifully!

  • Baking Perfection: Let the enchiladas rest for a few minutes post-baking. This helps them set and makes serving easier without falling apart.

What to Serve with Juicy Birria Enchiladas

Imagine a vibrant dinner table filled with dishes that enhance the exciting flavors of birria enchiladas while offering delightful contrasts.

  • Cilantro Lime Rice: This zesty rice complements the savory richness of the enchiladas, providing a refreshing balance and texture with every bite.
  • Refried Beans: Creamy and comforting, refried beans add a heartiness that pairs beautifully with the flavors and textures of birria enchiladas.
  • Mexican Street Corn (Elote): The sweetness of charred corn topped with creamy sauce and chili powder enhances the dish’s complexity, making every meal a fiesta.
  • Guacamole: Creamy and bright, guacamole made with ripe avocados and a squeeze of lime offers a luscious contrast to the savory enchiladas.
  • Pico de Gallo: This fresh salsa bursts with bright flavors, adding a necessary crunch and tang that enhances the overall experience of birria enchiladas.
  • Hibiscus Agua Fresca: A refreshing drink that contrasts the warm, rich flavors of your meal, this floral beverage cleanses the palate beautifully.
  • Churros with Chocolate Sauce: As a sweet finale, these crispy, sugary treats offer the perfect sweet complement, closing your meal on a delicious note.

Serve these delightful pairings alongside your birria enchiladas for a memorable spread that will have everyone coming back for seconds!

Make Ahead Options

These Birria Enchiladas are a fantastic option for meal prep enthusiasts looking to save time during busy weeknights! You can prepare the birria filling up to 3 days in advance; just refrigerate it in an airtight container to maintain its flavors. Additionally, you can assemble the enchiladas up to 24 hours ahead by placing them in a baking dish, covering them tightly, and storing them in the fridge. When you’re ready to enjoy, simply preheat your oven to 350°F (175°C) and bake them directly from the cold state for about 25-30 minutes, allowing the cheese to melt beautifully. These steps ensure that your Birria Enchiladas are just as delicious, providing you with hassle-free, comforting meals when you need them most!

Birria Enchiladas Variations & Substitutions

Let your creativity shine by customizing these delicious enchiladas to suit your taste buds and dietary needs!

  • Goat Meat: Use tender goat meat for a more traditional flavor that enhances the rich essence of birria.
  • Beef Option: Switch to beef for a hearty alternative; it holds flavors beautifully and is widely loved.
  • Vegetarian Delight: Try roasted vegetables or lentils for a veggie-packed twist, infused with the spices of traditional birria.
  • Spice Levels: Adjust the spice in your birria broth to customize heat—add more chili or opt for mild spices for a family-friendly meal.
  • Cheese Variations: Swap Oaxaca cheese for Monterey Jack for a milder flavor, or go bold with a blend of sharp cheddar for that extra zing.
  • Tortilla Alternatives: If you’re feeling adventurous, use whole wheat or spinach tortillas for a nutritious twist on these classic enchiladas.
  • Add Fresh Elements: Top your enchiladas with fresh avocado slices for a creamy contrast, or serve with a side of mango salsa for a tropical touch.
  • Sauce Options: Drizzle with a tangy tomatillo sauce to add zest, or keep it traditional with extra birria broth poured over before serving!

Have fun exploring these variations and feel free to check out creative side dishes to serve alongside your enchiladas for a delightful meal experience.

How to Store and Freeze Birria Enchiladas

Fridge: Store leftover Birria Enchiladas in an airtight container for up to 3 days. Reheat in the oven at 350°F to restore their texture.

Freezer: For longer storage, freeze assembled but unbaked enchiladas in a tightly sealed container or freezer bag for up to 2 months. Thaw overnight in the fridge before baking.

Reheating: To reheat, bake thawed enchiladas at 350°F for 25-30 minutes until heated through and the cheese is bubbly.

Prep Ahead: The birria filling can be made up to 2 days in advance and kept in the fridge, making it easy to whip up these delicious Birria Enchiladas whenever you’re ready to enjoy them!

Birria Enchiladas Recipe FAQs

What type of meat is best for Birria Enchiladas?
Absolutely! While goat meat is the traditional choice for birria, you can use beef for a hearty option or even create a delicious vegetarian version using roasted vegetables or legumes. The key is to choose a meat that shreds well and absorbs the spices beautifully.

How long can I store leftover Birria Enchiladas?
Very! You can store leftover Birria Enchiladas in an airtight container in the fridge for up to 3 days. When you’re ready to enjoy them again, simply pop them back in the oven at 350°F for about 15-20 minutes to restore their softness and warmth.

Can I freeze Birria Enchiladas?
Definitely! For longer storage, freeze assembled but unbaked Birria Enchiladas in a tightly sealed container or freezer bag for up to 2 months. When you’re ready to bake, thaw them overnight in the fridge, then bake at 350°F for 25-30 minutes until bubbly and heated through.

What should I do if my tortillas crack while assembling?
Oh no! If your tortillas crack, don’t worry. It’s usually a sign they weren’t warmed enough. Make sure to either heat them in a skillet for about 30 seconds on each side or wrap them in a damp paper towel and microwave for about 20-30 seconds to make them pliable. This will make assembly much easier.

Are there any allergy considerations for Birria Enchiladas?
Yes! If you’re cooking for someone with dietary restrictions, be sure to check the ingredients in your tortillas and cheese, as some brands may contain gluten or dairy allergens. For a gluten-free option, look for certified gluten-free tortillas. And for a dairy-free version, try using plant-based cheese alternatives that will melt well.

Can I prepare the Birria filling in advance?
Absolutely! I often make the birria filling up to 2 days ahead of time and store it in the fridge. This not only saves you time during the week but also allows the flavors to deepen, making your Birria Enchiladas even tastier when you’re ready to assemble and bake them!

Birria Enchiladas

Savory Birria Enchiladas: Bold Flavors in Every Bite

Experience rich Birria Enchiladas with savory depth and cheesy comfort in every bite.
Prep Time 30 minutes
Cook Time 25 minutes
Resting Time 5 minutes
Total Time 1 hour
Servings: 4 enchiladas
Course: Dinner
Cuisine: Mexican
Calories: 350

Ingredients
  

For the Filling
  • 2-3 cups Shredded Birria Meat Substitute with beef or hearty vegetables for variations.
  • 1 cup Birria Broth Use homemade for authenticity or store-bought as a time-saver.
For the Wrap
  • 10-12 count Corn Tortillas Flour tortillas can be used as a substitute in a pinch.
  • 2 cups Cheese (e.g., Oaxaca or mozzarella) Aged cheddar works well for a bolder flavor.
For the Garnish
  • 1 cup Chopped Onion Offers freshness and a crisp texture.
  • 1/2 cup Fresh Cilantro Feel free to skip if you're not a fan.
  • 2 count Lime Wedges Squeeze over the top before serving.

Equipment

  • Skillet
  • oven
  • Baking Dish
  • Microwave

Method
 

Step-by-Step Instructions
  1. Prepare the Birria by cooking your choice of meat slowly in a mixture of spices and birria broth for about 2-3 hours until tender.
  2. Soften the tortillas in a large skillet over medium heat for about 30 seconds on each side or microwave them for 20-30 seconds.
  3. Assemble the enchiladas by placing a generous amount of shredded birria meat and a sprinkle of cheese in the center of each warmed tortilla.
  4. Bake the enchiladas in a preheated oven at 350°F for about 20-25 minutes, until the top is bubbly and golden brown.
  5. Garnish and serve the enchiladas topped with chopped onion, cilantro, and lime wedges on the side.

Notes

These enchiladas can be made ahead and stored in the fridge or freezer for easy meals.

Savory Potsticker Noodle Bowls in Under 30 Minutes

As the delightful aroma of stir-fried vegetables fills the kitchen, I can’t help but feel a wave of excitement wash over me. Today, I’m sharing my go-to recipe for Potsticker Noodle Bowls, a vibrant dish that seamlessly combines juicy potstickers with an array of colorful veggies and chewy noodles. This one-pan dinner is not only a crowd-pleaser, but it also comes together in just under 30 minutes—perfect for those busy weeknights when you’re craving the comforting taste of takeout without the hassle. Plus, with the flexibility to use pork, chicken, or veggie potstickers, and swap in your favorite noodles, it’s a recipe that’s as adaptable as it is delicious. Are you ready to transform your dinner routine? Let’s dive in!

Why are Potsticker Noodle Bowls a Must-Try?

Quick preparation: In just under 30 minutes, you’ll have a delicious, satisfying meal on the table—ideal for those busy weeknights.

Versatile ingredients: You can easily customize these bowls with pork, chicken, or veggie potstickers and a variety of noodles like lo mein or ramen.

One-pan wonder: Enjoy the simplicity of this one-pan dinner, making cleanup a breeze while savoring rich, umami flavors.

Crowd-pleaser: Perfect for family dinners or impressing guests, this dish strikes a balance of taste and presentation that everyone loves.

Nutrient-packed: With fresh vegetables like spinach and carrots, you can feel good about serving a meal that’s both flavorful and nutritious.

Discover more about similar quick recipes in our article on easy one-pan dishes to keep your cooking exciting!

Potsticker Noodle Bowls Ingredients

For the Potstickers
Frozen Potstickers (16 oz) – Main protein source providing savory flavor; choose pork, chicken, or veggie based on preference.

For the Noodles
Lo Mein Noodles (8 oz) – Base of the dish offering chewy texture; substitute with spaghetti or gluten-free noodles as needed.

For the Stir-Fry
Sesame Oil (1 tbsp) – Adds depth of flavor and enhances stir-frying; can be replaced with vegetable oil if necessary.
Garlic (2 cloves, minced) – Provides aromatic flavor that enhances the dish’s depth; fresh is preferred, but garlic powder can substitute in a pinch.
Shredded Carrots (1 cup) – Adds sweetness and crunch; swap with bell peppers or snap peas for variation.
Shredded Red Cabbage (1 cup) – Contributes color and crunch; can be replaced with green cabbage or omitted if unavailable.
Baby Spinach or Chopped Bok Choy (2 cups) – Offers nutrients and a green element to the bowl; either can be substituted for one another.

For the Flavoring
Green Onions (3, sliced) – For garnish, adding freshness and color; chives can serve as an alternative.
Soy Sauce (2 tbsp) – Provides umami flavor; use gluten-free soy sauce or tamari for gluten-free versions.
Oyster Sauce (1 tbsp, optional) – Adds complexity; omit for a vegetarian dish or substitute with hoisin sauce for a vegan option.
Rice Vinegar (1 tsp) – Offers acidity to balance flavors; lemon juice can be a substitute.
Sugar (1 tsp) – Balances savory notes; can be adjusted to taste or substituted with honey or a sugar alternative.
Black Pepper (1/2 tsp) – Adds a touch of heat; can adjust according to preference.

For Garnish
Sesame Seeds (for garnish, optional) – Adds visual appeal and a nutty flavor; omit if allergic.

Now that you have all the essentials for these delicious Potsticker Noodle Bowls, you’re just a few steps away from creating a delightful dish that your family will adore!

Step‑by‑Step Instructions for Potsticker Noodle Bowls

Step 1: Cook Potstickers
In a large non-stick skillet, heat a splash of water over medium heat. Add the frozen potstickers, placing them flat side down, and cook for 3-4 minutes until the bottoms are golden brown. Once browned, cover the skillet with a lid and let them steam for another 5-6 minutes until heated through. Remove the potstickers and set them aside, keeping them warm.

Step 2: Prepare Noodles
In a separate pot, bring salted water to a boil, then add the lo mein noodles. Cook for about 5-7 minutes or until al dente, stirring occasionally. Once cooked, drain the noodles in a colander and return them to the pot. Drizzle with sesame oil immediately to prevent them from sticking together, tossing gently to coat.

Step 3: Stir-Fry Vegetables
Using the same skillet, heat 1 tablespoon of sesame oil over medium heat, then add minced garlic. Sauté for about 30 seconds until fragrant, and then toss in the shredded carrots and red cabbage. Stir-fry for 2-3 minutes until the vegetables soften and turn vibrant. Add the baby spinach or chopped bok choy, stirring until wilted, about 1-2 minutes.

Step 4: Combine Ingredients
Add the cooked noodles to the skillet with vegetables, stirring to mix everything evenly. In a small bowl, whisk together the soy sauce, optional oyster sauce, rice vinegar, sugar, and black pepper. Pour this mixture over the noodle and vegetable medley, tossing well to ensure everything is evenly coated and heated.

Step 5: Finish Dish
Return the cooked potstickers to the skillet, gently folding them into the noodle mixture. Allow everything to heat together for an additional minute. Once combined, remove from heat, and garnish with sliced green onions and optional sesame seeds. Serve your fragrant Potsticker Noodle Bowls hot and enjoy the delightful flavors!

Tips for the Best Potsticker Noodle Bowls

  • Proper Browning: Ensure potstickers are well browned for the best texture. This helps create that delightful crispiness before steaming.

  • Al Dente Noodles: Boil noodles just until al dente to avoid overcooking. Different noodles may require slight adjustments in cooking time.

  • Reheat with Care: Avoid microwaving leftovers for too long, as it may toughen the potstickers. Instead, reheat gently in a skillet with a splash of water or soy sauce.

  • Flavor Balance: Adjust soy sauce and sugar according to your taste. A touch of sweetness balances the umami in the Potsticker Noodle Bowls beautifully.

  • Vegetable Variety: Feel free to mix and match vegetables based on availability. Fresh, seasonal choices not only enhance flavor but also the dish’s nutrition.

Make Ahead Options

These Potsticker Noodle Bowls are perfect for meal prep aficionados who want to save time during busy weeknights! You can prepare the stir-fried vegetables and cooked noodles up to 24 hours ahead, storing them separately in the refrigerator to maintain freshness. For the potstickers, simply cook and refrigerate them as well; they’ll stay delicious and juicy. When you’re ready to serve, reheat the veggies and noodles in a skillet with a splash of water or soy sauce for added flavor. Finally, toss in the potstickers and warm everything together for a tasty meal that tastes just as good as when freshly made!

Potsticker Noodle Bowls Variations

Feel free to get creative and customize your Potsticker Noodle Bowls with these exciting variations that will electrify your taste buds!

  • Dairy-Free: Avoid any dairy by not using oyster sauce, or replace it with a dash of soy sauce for a creamy alternative.

  • Gluten-Free: Choose certified gluten-free potstickers and replace noodles with rice noodles or zucchini noodles for a lighter option.

  • Add Heat: Spice things up! Incorporate sliced jalapeños or drizzle with sriracha to bring a fiery kick to your bowl.

  • Vegetable Medley: Experiment with seasonal vegetables like bok choy, bell peppers, or snap peas for enhanced flavor and nutrition.

  • Lighter Base: Swap lo mein noodles for spiralized zucchini or spaghetti squash to create a lighter, veggie-focused dish.

  • Herb Infusion: Elevate the aroma by adding fresh herbs like cilantro or basil just before serving for an additional layer of flavor.

  • Protein Boost: Add cubed tofu, shrimp, or cooked chicken breast for a heartier version that makes it even more satisfying for a family meal.

  • Nutty Crunch: Top your bowls with crushed peanuts or toasted sesame seeds to introduce a delightful crunch that complements the soft textures.

For more tips on experimenting with flavors, check out our suggestions on easy substitutions in stir-fry dishes to elevate your cooking experience!

What to Serve with Quick and Easy Potsticker Noodle Bowls

Aromatic flavors, vibrant colors, and a comforting warmth make this dish the perfect centerpiece for your dinner table.

  • Chilled Cucumber Salad: Refreshing yet light, this salad adds a crispy crunch that balances the warmth and umami of the noodle bowls.

  • Miso Soup: Silky and savory, enjoy this warm soup alongside your noodle bowls for a traditional touch that enhances the meal’s flavors.

  • Steamed Edamame: These sweet and buttery pods offer a delightful texture and are packed with protein, making them a satisfying side.

  • Garlic Bok Choy: Sautéed to perfection, this dish brings a savory depth and bright freshness to each bite, enhancing the overall experience.

  • Spring Rolls: With their crispy outer shell and crunch of fresh veggies, they add delightful contrast and are a fun, handheld side.

  • Fruity Green Tea: Pair your meal with a glass of slightly sweetened, chilled green tea to cleanse the palate and complement the dish’s flavors.

  • Chocolate Mousse: For dessert, indulge in a rich yet light chocolate mousse; its creaminess leaves a satisfying finish to your meal.

  • Sesame Noodles: A side of these silky, nutty noodles provides additional comfort and complements the Asian-inspired flavors beautifully.

How to Store and Freeze Potsticker Noodle Bowls

Fridge: Store leftovers in an airtight container in the fridge for up to 3 days. Reheat gently in a skillet for the best texture, adding a splash of water or soy sauce.

Freezer: If you’ve made a larger batch, freeze individual portions in freezer-safe bags for up to 2 months. Lay flat to freeze for easy storage.

Thawing: When ready to enjoy, thaw in the refrigerator overnight. Reheat in a skillet on medium heat until warmed through, ensuring the dumplings retain their delightful texture.

Quality Check: For the freshest taste, it’s recommended to consume your Potsticker Noodle Bowls within the specified timeframes as flavors may diminish over time.

Potsticker Noodle Bowls Recipe FAQs

How do I choose the best potstickers?
Absolutely! When selecting potstickers, look for those that are well-sealed and have no dark spots on the packaging. If you’re buying fresh ones, check for a firm texture and vibrant colors. For frozen options, try to choose brands with fewer preservatives for a healthier choice.

How should I store leftovers from my Potsticker Noodle Bowls?
To keep your Potsticker Noodle Bowls fresh, store any leftovers in an airtight container in the fridge for up to 3 days. Make sure to reheat them gently in a skillet over medium heat to maintain that delightful texture. Add a splash of water or soy sauce to keep everything moist!

Can I freeze Potsticker Noodle Bowls?
Definitely! If you want to freeze your Potsticker Noodle Bowls, portion them out into freezer-safe bags or containers. Lay them flat in the freezer, where they can stay fresh for up to 2 months. When you’re ready to enjoy, simply thaw them in the refrigerator overnight and reheat in a skillet until warmed through.

What should I do if the potstickers are tough after reheating?
Reheating potstickers can sometimes lead to a tough texture if done improperly. To avoid this, try reheating them on the stovetop rather than the microwave. Add a small amount of water or soy sauce to the pan, cover with a lid, and heat over medium. This method helps steam the dumplings while keeping them tender.

Are there any dietary considerations for Potsticker Noodle Bowls?
Very much so! If you’re cooking for someone with gluten intolerances, be sure to use gluten-free potstickers and tamari instead of regular soy sauce. Always check labels for allergens like sesame seeds, which some people may be allergic to. Don’t hesitate to customize this dish with your dietary needs in mind.

What vegetables can I substitute in Potsticker Noodle Bowls?
The more the merrier! You can easily swap or add vegetables to suit your taste or what’s in season. Bell peppers, snap peas, broccoli, or zucchini can all work beautifully. Just make sure to sauté them until tender, adjusting the cooking time based on their thickness.

Potsticker Noodle Bowls

Savory Potsticker Noodle Bowls in Under 30 Minutes

Delicious Potsticker Noodle Bowls made with savory potstickers, colorful veggies, and chewy noodles, perfect for busy weeknights.
Prep Time 10 minutes
Cook Time 20 minutes
Total Time 30 minutes
Servings: 4 bowls
Course: Dinner
Cuisine: Asian
Calories: 400

Ingredients
  

For the Potstickers
  • 16 oz Frozen Potstickers Choose pork, chicken, or veggie based on preference.
For the Noodles
  • 8 oz Lo Mein Noodles Substitute with spaghetti or gluten-free noodles as needed.
For the Stir-Fry
  • 1 tbsp Sesame Oil Can be replaced with vegetable oil if necessary.
  • 2 cloves Garlic Minced; fresh is preferred, but garlic powder can substitute in a pinch.
  • 1 cup Shredded Carrots Swap with bell peppers or snap peas for variation.
  • 1 cup Shredded Red Cabbage Can be replaced with green cabbage or omitted if unavailable.
  • 2 cups Baby Spinach or Chopped Bok Choy Either can be substituted for one another.
For the Flavoring
  • 3 Green Onions Sliced; chives can serve as an alternative.
  • 2 tbsp Soy Sauce Use gluten-free soy sauce or tamari for gluten-free versions.
  • 1 tbsp Oyster Sauce Optional; omit for a vegetarian dish or substitute with hoisin sauce for a vegan option.
  • 1 tsp Rice Vinegar Offers acidity to balance flavors; lemon juice can be a substitute.
  • 1 tsp Sugar Can be adjusted to taste or substituted with honey or a sugar alternative.
  • 1/2 tsp Black Pepper Adds a touch of heat; can adjust according to preference.
For Garnish
  • Sesame Seeds For garnish, optional; omit if allergic.

Equipment

  • Non-Stick Skillet
  • pot
  • Colander

Method
 

Step-by-Step Instructions
  1. In a large non-stick skillet, heat a splash of water over medium heat. Add the frozen potstickers, placing them flat side down, and cook for 3-4 minutes until the bottoms are golden brown. Once browned, cover the skillet with a lid and let them steam for another 5-6 minutes until heated through. Remove the potstickers and set them aside, keeping them warm.
  2. In a separate pot, bring salted water to a boil, then add the lo mein noodles. Cook for about 5-7 minutes or until al dente, stirring occasionally. Once cooked, drain the noodles in a colander and return them to the pot. Drizzle with sesame oil immediately to prevent them from sticking together, tossing gently to coat.
  3. Using the same skillet, heat 1 tablespoon of sesame oil over medium heat, then add minced garlic. Sauté for about 30 seconds until fragrant, and then toss in the shredded carrots and red cabbage. Stir-fry for 2-3 minutes until the vegetables soften and turn vibrant. Add the baby spinach or chopped bok choy, stirring until wilted, about 1-2 minutes.
  4. Add the cooked noodles to the skillet with vegetables, stirring to mix everything evenly. In a small bowl, whisk together the soy sauce, optional oyster sauce, rice vinegar, sugar, and black pepper. Pour this mixture over the noodle and vegetable medley, tossing well to ensure everything is evenly coated and heated.
  5. Return the cooked potstickers to the skillet, gently folding them into the noodle mixture. Allow everything to heat together for an additional minute. Once combined, remove from heat, and garnish with sliced green onions and optional sesame seeds. Serve your fragrant Potsticker Noodle Bowls hot and enjoy the delightful flavors!

Notes

Feel free to mix and match vegetables based on availability. Fresh, seasonal choices not only enhance flavor but also the dish's nutrition.

Delightful Mango Pudding: No-Bake and Oh-So Creamy!

As the sun casts a warm glow outside, I find myself dreaming of a dessert that wraps you in a tropical embrace—Mango Pudding! This charming no-bake treat combines smooth creaminess with the irresistible sweetness of mango, making it an ideal choice for any occasion. With only five ingredients and the convenience of canned mango pulp, this easy dessert is not only a crowd-pleaser but also a delightful way to satisfy your sweet cravings without spending hours in the kitchen. Imagine serving it chilled in lovely ramekins or cutting it into wobbly cubes for a fun presentation! Are you ready to elevate your dessert game and bring a taste of the tropics to your table?

Why is Mango Pudding a Must-Try?

Simplicity is key: This no-bake dessert is incredibly easy to whip up, requiring just five ingredients that you likely already have at home. Exotic flavor: The sweet and creamy taste of mango brings a tropical twist to your dessert table, perfect for impressing guests. Versatility: Feel free to swap in other fruit pulps or add unique garnishes to make it your own! Crowd-pleaser: With its delightful jelly-like texture, this pudding is a hit at gatherings and celebrations. If you’re looking for more creamy desserts, don’t miss out on our Vanilla Pudding or try a luscious Caramel Milk Pudding for more variety!

Mango Pudding Ingredients

For the Pudding Base
Gelatin – A thickener that gives structure to the pudding; use agar-agar for a vegetarian option but adjust according to package instructions.
Sugar – Sweetens the pudding, balancing the tartness of lemon and enhancing the mango flavor; adjust based on the sweetness of your mango pulp.
Boiling Water – Essential for dissolving gelatin and sugar effectively; always use freshly boiled water for the best texture.
Evaporated Milk – Adds creaminess without excess fat; swap with coconut milk for a lighter, dairy-free version.
Mango Pulp – The star ingredient that delivers the delicious fruity flavor; choosing canned pulp (especially Kesar) ensures a smooth and consistent pudding.

Embrace the tropical bliss of Mango Pudding, and let this delightful dessert brighten your table!

Step‑by‑Step Instructions for Mango Pudding

Step 1: Prepare Gelatin Mixture
Begin by combining 2 tablespoons of gelatin and ½ cup of sugar in a large mixing bowl. Pour in 1 cup of boiling water, stirring vigorously for about 2 minutes until the gelatin and sugar have completely dissolved. You should notice a clear liquid forming—this is the base for your creamy Mango Pudding.

Step 2: Mix in Creamy Ingredients
Next, add 1 cup of evaporated milk, 1 cup of mango pulp, and the juice of half a lemon to the gelatin mixture. Whisk these ingredients together until the blend is smooth and well-combined, without any lumps. The vibrant mango color will start to shine through—this is a sign you’re on the right track to a delicious dessert!

Step 3: Choose Your Molding Method
Prepare your molds by choosing a silicone mold for easy release or individual ramekins for serving. Carefully pour the mango pudding mixture into your chosen containers, filling them about three-quarters full. If using a mold, remember to cover it with plastic wrap to prevent any unwanted flavors from the fridge while the pudding sets.

Step 4: Chill Until Set
Place the filled molds or ramekins in the refrigerator and allow them to chill for at least 2 hours. This step is crucial for achieving the right texture—check that the pudding is firm and holds its shape. You’ll want a nice wobbly consistency that indicates your Mango Pudding is set properly and ready to impress your guests!

Step 5: Serve with Style
Once set, gently remove the mango pudding from the molds by inverting them onto serving plates or simply serve directly from the ramekins. Garnish with mint leaves or shredded coconut for a fun presentation. This Mango Pudding is now a delightful treat perfect for any occasion, sure to bring smiles to your table!

Mango Pudding Variations & Substitutions

Feel free to let your creativity flow and customize your Mango Pudding with these delightful twists!

  • Dairy-Free: Substitute evaporated milk with coconut milk for a creamy, vegan-friendly version. The coconut’s richness pairs beautifully with mango’s fruity sweetness.
  • Flavor Fusion: Experiment by replacing mango pulp with other fruit pulps like passionfruit or peach for an exotic twist. Each substitution brings its own unique flavor journey to this lovely dessert.
  • Extra Texture: Top your pudding with shredded coconut or diced fresh fruits such as kiwi or strawberries. These add vibrant color and a fun chewy texture that elevates the pudding experience.
  • Spice it Up: Add a pinch of cardamom or a sprinkle of cinnamon to the pudding mixture before setting. This will imbue your dessert with warm, aromatic notes that dance on the palate.
  • Garnish Inspiration: Try drizzling some homemade mango sauce on top before serving. Just blend fresh mango with a hint of sugar and a squeeze of lemon for a delightful finishing touch.
  • Heat Level: For those who enjoy a little kick, consider adding a touch of finely chopped chili or cayenne pepper to the pudding mix. It adds an unexpected layer of flavor that pairs well with the sweetness of the mango.
  • No Gelatin? If you prefer a plant-based option, swap gelatin for agar-agar, following the package instructions closely for the best results. It’s a wonderful alternative that keeps the pudding’s integrity without losing its creamy texture.

If you’re a fan of creamy desserts, be sure to check out our luscious recipes for Vanilla Pudding and irresistible Caramel Milk Pudding. Happy cooking!

How to Store and Freeze Mango Pudding

Fridge: Store in an airtight container for up to 3 days. This helps maintain the creamy texture while preventing any odors from affecting the pudding.

Freezer: Avoid freezing mango pudding as it can alter the smooth, jelly-like consistency. The texture may become grainy upon thawing.

Reheating: It’s best enjoyed cold straight from the fridge, so no reheating is necessary. If desired, you can serve at room temperature for a softer texture.

Make Ahead Options

These Creamy Mango Pudding cups are perfect for meal prep enthusiasts! You can prepare the pudding mixture up to 24 hours in advance, making it ideal for busy weeknights. Simply follow the initial steps to combine the gelatin, sugar, and boiling water, then whisk in the evaporated milk, mango pulp, and lemon juice. Pour the mixture into your chosen molds or ramekins, then cover tightly with plastic wrap before refrigerating. To maintain the pudding’s quality, make sure it’s chilled thoroughly and consumes it within 3 days. When ready to serve, simply garnish with mint leaves or shredded coconut, and your tropical treat will taste just as delicious as when freshly made!

Expert Tips for Mango Pudding

  • Silicone Molds: Using silicone molds allows for easy release; glass containers can stick and make serving difficult.
  • Lemon Juice: Always use fresh lemon juice to ensure the right tartness; bottled lemon juice lacks the vibrant flavor needed for your mango pudding.
  • Chill Time: Do not rush the chilling process! Allow at least 2 hours in the refrigerator to achieve the perfect jelly-like texture that isn’t wobbly.
  • Ingredient Quality: Choose high-quality canned mango pulp, like Kesar, for the best flavor and consistency in your pudding.
  • Adjust Sweetness: Taste your mixture before pouring into molds; if the mango is sweet, you may need less sugar than the recipe suggests.

What to Serve with Creamy Mango Pudding?

Treat your taste buds to a delightful and colorful spread when serving this tropical dessert!

  • Coconut Whipped Cream: Perfectly light and airy, this creamy topping enhances the tropical flavors and adds a touch of indulgence.

  • Fresh Fruit Salad: A refreshing medley of seasonal fruits offers a contrasting texture and vibrant colors that elevate the dessert experience.

  • Crispy Biscotti: The crunchy, nutty profile of biscotti provides a satisfying contrast to the smoothness of the pudding and keeps every bite exciting.

  • Mint-Infused Iced Tea: A cool, refreshing drink with a hint of mint balances the sweetness of the pudding and enhances the tropical vibe.

  • Baklava: This sweet, flaky pastry pairs beautifully with the pudding, offering a delightful fusion of flavors and textures for a luxurious finish.

  • Chilled White Wine: A glass of chilled Sauvignon Blanc or Riesling complements the fruity notes of the mango, making for a sophisticated pairing.

  • Chocolate Drizzle: A simple drizzle of melted chocolate adds richness and decadence, contrasting beautifully with the lightness of the pudding.

  • Pineapple Sorbet: A scoop of this fruity sorbet cleanses the palate while mirroring the tropical notes found in the mango pudding, perfect for a summery delight.

This exciting assortment of pairings will ensure your Mango Pudding soirée is unforgettable!

Mango Pudding Recipe FAQs

How do I choose ripe mangoes for my pudding?
When selecting fresh mangoes, look for fruits that are slightly soft to the touch, with a sweet fragrance. Flesh should be vibrant in color without any dark spots or blemishes. If you use canned mango pulp, opt for varieties like Kesar for a smooth texture and rich flavor.

How should I store my mango pudding?
Store your mango pudding in an airtight container in the refrigerator for up to 3 days. It’s best enjoyed chilled, allowing the creamy texture to shine. Avoid leaving it uncovered, as it may absorb odors from the fridge, altering its delightful taste.

Can I freeze mango pudding?
I recommend against freezing mango pudding, as it can change the texture from smooth and creamy to grainy and unappetizing upon thawing. For the best experience, keep it refrigerated and savor it fresh!

What should I do if my pudding doesn’t set properly?
If your mango pudding doesn’t set, it may be due to insufficient gelatin dissolution. Ensure that you fully dissolve the gelatin and sugar in boiling water and allow it to chill adequately for at least 2 hours. If it still doesn’t firm up, it may require a bit more gelatin next time—typically an extra teaspoon can help.

Are there any dietary considerations I should keep in mind?
Absolutely! If you’re catering to dietary restrictions, consider using agar-agar instead of gelatin for a vegetarian option, and coconut milk for a dairy-free alternative. Additionally, always check the canned mango pulp for added sugars that may affect your recipe if anyone has allergies or health concerns regarding sweetness.

How can I enhance the flavors of mango pudding?
You can really amp up the flavor by adding spices like cardamom or vanilla to the mixture. Alternatively, consider using a bit of grated coconut on top for added texture or a splash of orange juice along with lemon for a more complex citrus flavor.

Mango Pudding

Delightful Mango Pudding: No-Bake and Oh-So Creamy!

Mango Pudding is a creamy, no-bake dessert perfect for satisfying your sweet cravings with a tropical twist.
Prep Time 15 minutes
Chill Time 2 hours
Total Time 2 hours 15 minutes
Servings: 4 servings
Course: Dessert
Cuisine: Tropical
Calories: 150

Ingredients
  

For the Pudding Base
  • 2 tablespoons gelatin Use agar-agar for a vegetarian option.
  • 0.5 cup sugar Adjust based on sweetness of mango pulp.
  • 1 cup boiling water Use freshly boiled water.
  • 1 cup evaporated milk Can substitute with coconut milk.
  • 1 cup mango pulp Canned pulp for best texture.

Equipment

  • mixing bowl
  • Silicone Molds or Ramekins

Method
 

Step-by-Step Instructions for Mango Pudding
  1. Combine 2 tablespoons of gelatin and ½ cup of sugar in a large mixing bowl. Pour in 1 cup of boiling water, stirring vigorously until completely dissolved.
  2. Add 1 cup of evaporated milk, 1 cup of mango pulp, and juice of half a lemon to the mixture. Whisk until smooth and well-combined.
  3. Pour the mixture into chosen molds or ramekins, filling them about three-quarters full.
  4. Chill in the refrigerator for at least 2 hours to set properly.
  5. Once set, gently remove from molds or serve directly from ramekins. Garnish with mint leaves or shredded coconut.

Notes

Silicone molds are recommended for easy release. Always use fresh lemon juice for the best flavor.

Grinch Heart Rice Krispies Treats for Festive Family Fun

As I rummaged through my kitchen this holiday season, my eyes landed on a bag of marshmallows and a box of Rice Krispies—magic was brewing! That’s when I knew I had to whip up my festive Grinch Heart Rice Krispies Treats. These delightful, heart-shaped goodies are not only a festive twist on a beloved classic, but they also come together in just 10 minutes! Perfect for family gatherings or holiday parties, these treats are packed with chewy sweetness and a burst of color thanks to a pop of red candy in the center. Plus, they’re oh-so-simple to make, making them ideal for little helpers eager to get into the holiday spirit. So, are you ready to add a little Grinchy cheer to your cookie platter this year?

Why Make Grinch Heart Rice Krispies Treats?

Fun and Festive: These treats are an absolute showstopper at any holiday gathering, brimming with vibrant colors and a playful heart shape that instantly brings smiles!
Quick to Prepare: In just 10 minutes, you can whip up a delightful batch—perfect for busy holiday schedules or last-minute plans.
Kid-Friendly Fun: Let the little ones join in on the fun! They’ll love helping shape and decorate the treats, making it a memorable family activity.
Versatile Shapes: While we’re showcasing hearts, feel free to get creative—try Christmas trees or even stars for varied holiday themes!
Deliciously Chewy: A mouthwatering combination of gooey marshmallows and crunchy Rice Krispies, each bite offers a delightful contrast that everyone will adore.
For another festive favorite, don’t miss out on our Hearty Spaghetti with Homemade Meatballs—it’s a warm, comforting dinner that pairs perfectly with these sweet treats!

Grinch Heart Rice Krispies Treats Ingredients

For the Treats
Butter – This adds richness and moisture, making the treats delightfully chewy.
Marshmallows – As the main binding agent, they create that signature soft and gooey texture; mini marshmallows melt faster!
Rice Krispies cereal – These provide the essential crunch and structure that make Rice Krispies Treats so iconic.
Green food coloring – Used to achieve that fun Grinch green color; add more for a brighter hue or less for a subtler shade.
Small red candies – These are perfect for adding a decorative and sweet touch to the heart of each treat.

For Variations
Christmas tree cookie cutter – Use this for a festive twist and decorate with icing if you’re feeling creative!
Edible glitter or sprinkles – Sprinkle these on top for extra holiday cheer and sparkle.
Natural coloring options – If you prefer a healthier spin, swap the green food coloring for natural alternatives!

These Grinch Heart Rice Krispies Treats will surely bring joy and color to your holiday celebrations!

Step‑by‑Step Instructions for Grinch Heart Rice Krispies Treats

Step 1: Melt Butter
In a large saucepan over low heat, melt 3 tablespoons of butter, stirring continuously to ensure it doesn’t brown. This process should take about 2-3 minutes. Once fully melted, the butter should appear glossy and smooth, creating a luscious base for your Grinch Heart Rice Krispies Treats.

Step 2: Add Marshmallows
Stir in 10 ounces of mini marshmallows, mixing well until they begin to melt into the butter. Continue stirring for an additional 3-4 minutes until the marshmallows are completely melted and the mixture is bubbly. It should have a creamy, sticky consistency, perfect for binding the treats together.

Step 3: Color Mixture
Remove the saucepan from heat and add a few drops of green food coloring to the melted marshmallow mixture. Stir vigorously until the color is evenly distributed and reaches your desired shade of Grinch green. Aim for a vibrant hue to embody the festive spirit, as this color will make your Rice Krispies Treats truly pop!

Step 4: Incorporate Rice Krispies
Gently fold in 6 cups of Rice Krispies cereal using a spatula until all the cereal is evenly coated with the green marshmallow mixture. Be careful not to crush the cereal while mixing, which should take about 2 minutes. The mixture should be sticky and cohesive, ready for shaping into heart forms.

Step 5: Shape Treats
Line a cookie sheet with wax paper and pour the Rice Krispies mixture onto it, spreading it out evenly to about an inch thick. Use a spatula to smooth the top and make it level. Let the mixture cool for about 5-10 minutes until it is slightly firm but still warm enough to shape without cracking.

Step 6: Cut Out Hearts
With a heart-shaped cookie cutter, press down firmly in the cooled mixture to cut out heart shapes. Carefully transfer each heart-shaped treat to a clean piece of wax paper, ensuring they hold their form. Continue this process until all the mixture has been cut into delightful Grinch hearts, adding an extra festive touch to your treats.

Step 7: Add Candies
To finish your Grinch Heart Rice Krispies Treats, gently press a small red candy into the center of each heart. This colorful addition will not only enhance the visual appeal but also provide a sweet surprise with every bite. Allow the treats to set for another few minutes before serving to ensure the candies adhere well.

Expert Tips for Grinch Heart Rice Krispies Treats

  • Fresh Marshmallows: Ensure your marshmallows are fresh to maintain maximum stickiness and a delightful chewy texture in your Grinch Heart Rice Krispies Treats.

  • Avoid Over-Melting: Take care not to melt the marshmallows too much, as this can make the mixture rubbery rather than gooey. Gentle heat is key!

  • Work Quickly: The marshmallow mixture sets fast! It’s essential to mix and shape quickly after combining the Rice Krispies to preserve the flexibility needed for shaping.

  • Cool Slightly: Allow your mixture to cool for just a few minutes before cutting out shapes. Too hot, and it’ll be hard to handle; too cool, and it won’t mold properly.

  • Experiment with Shapes: While hearts are festive, feel free to use different cookie cutter shapes to keep the fun alive and cater to various holiday themes!

Make Ahead Options

These Grinch Heart Rice Krispies Treats are fantastic for meal prep, taking the stress out of your holiday baking! You can prepare the mixture and cut it into hearts up to 24 hours in advance, just be sure to store them in an airtight container at room temperature to maintain their optimal texture. To keep them fresh, wait until just before serving to press the red candies into the center of each heart, ensuring a vibrant presentation. When you’re ready to enjoy these treats, simply arrange them on a festive platter, and you’ll have a delightful dessert that looks and tastes just as good as if you made it on the spot!

Storage Tips for Grinch Heart Rice Krispies Treats

Room Temperature: Store the Grinch Heart Rice Krispies Treats in an airtight container at room temperature for up to 3 days to maintain their chewy texture and freshness.

Freezer: For longer storage, freeze the treats in a single layer on a baking sheet. Once frozen, transfer them to an airtight container and freeze for up to 1 month.

Defrosting: To enjoy frozen treats, simply take them out and let them thaw at room temperature for about 15-20 minutes before serving.

Reheating: If desired, gently warm in the microwave for about 10 seconds to restore some softness, being careful not to overheat them.

What to Serve with Grinch Heart Rice Krispies Treats?

These delightful festive treats are sure to bring a smile to your holiday gatherings, but pairing them with the right accompaniments can elevate the experience even further.

  • Hot Cocoa: The rich, warm flavors of cocoa complement the sweetness of the treats and create a cozy vibe.
  • Whipped Cream: A dollop of freshly whipped cream adds a creamy element that contrasts beautifully with the chewy treats.
  • Fruit Salad: A bright mix of seasonal fruits offers a refreshing balance to the sweetness, enhancing the overall taste.
  • Festive Holiday Punch: A fruity punch, whether it’s non-alcoholic or with a splash of champagne, provides a bubbly, celebratory drink option.
  • Chocolate-Dipped Pretzels: The salty crunch of pretzels dipped in chocolate adds a delightful contrast—a great sweet-and-salty combination.
  • Gingerbread Cookies: These spicy, festive favorites harmonize with the holiday theme and add a different texture to your dessert spread.
  • Spiced Apple Cider: Warm cider with cinnamon and cloves creates a comforting drink that pairs perfectly with these sweet treats.
  • Mini Cupcakes: Individual cupcakes allow for variety in flavors and decorations, making your dessert table even more festive.
  • Caramel Sauce: Drizzling warm caramel over the treats adds a decadent touch, bringing rich sweetness that complements the marshmallow flavor.

Grinch Heart Rice Krispies Treats Variations

Embrace your creative side and let these delightful treats shine with personalized twists that tantalize the taste buds!

  • Christmas Tree Shapes:
    Use a Christmas tree cookie cutter instead of hearts and decorate with colorful icing for added fun and cheer.

  • Sprinkles Galore:
    Top your treats with festive sprinkles or edible glitter to add a playful sparkle that elevates their holiday charm.

  • Natural Colorings:
    Swap out the green food coloring for natural alternatives like spirulina or matcha for a healthier spin on the classic flavor.

  • Nutty Crunch:
    Fold in some chopped nuts like almonds or pecans for a delightful crunch that contrasts beautifully with the chewy texture.

  • Marshmallow Swirl:
    Add a swirl of melted chocolate or creamy peanut butter into the marshmallow mixture for a delectable flavor punch.

  • Heat it Up:
    Add a pinch of cayenne pepper or chili powder to the melted marshmallow mixture for a surprising kick that balances the sweetness.

  • Flavored Rice Cereal:
    Try using chocolate-flavored Rice Krispies for a unique twist that brings extra richness to the overall taste.

  • Mini Treats:
    Make smaller bite-sized treats using a mini heart-shaped cutter, perfect for a delightful treat platter that everyone can enjoy!

If you’re feeling adventurous, why not pair these sweet treats with a comforting bowl of Sizzling Rice Wrapped Hotdogs with Cheese and Seaweed for a fun, family-friendly feast?

Grinch Heart Rice Krispies Treats Recipe FAQs

How do I choose ripe ingredients for Grinch Heart Rice Krispies Treats?
Absolutely! For this recipe, the most important ingredient is the marshmallows. Look for fresh, soft marshmallows without any hard spots or dark spots all over. They should be fluffy and easy to squeeze in your hand. This ensures they melt beautifully, resulting in that gooey perfect texture we’re aiming for!

How should I store Grinch Heart Rice Krispies Treats, and how long do they last?
For the best taste and texture, store your Grinch Heart Rice Krispies Treats in an airtight container at room temperature for up to 3 days. After this time, they may become a bit stale. If you want to keep them longer, I recommend freezing them! Just remember to wrap them well to avoid freezer burn.

Can I freeze Grinch Heart Rice Krispies Treats? If so, how?
Absolutely! To freeze your treats, first cut them into heart shapes and place them in a single layer on a baking sheet lined with parchment paper. Freeze them for about 1-2 hours until solid. Then, transfer them to an airtight container or freezer-safe bag, layering parchment paper between layers. They’ll be good for up to 1 month in the freezer. To enjoy, simply let them thaw at room temperature for 15-20 minutes before serving.

What should I do if my Rice Krispies mixture is too sticky?
If you find that your Rice Krispies mixture is too sticky and difficult to shape, it might be that the marshmallow was overheated or you’re working in a very humid environment. In this case, you can lightly grease your hands with cooking spray or butter to help form the shapes. Also, chilling the mixture in the refrigerator for about 10 minutes can help it firm up without losing its deliciousness!

Is this recipe suitable for kids with allergies?
Very! This recipe does contain butter and marshmallows, which can include allergens like dairy and gelatin. If you’re making these treats for a child with allergies, look for dairy-free butter and marshmallows made without gelatin. Additionally, you can omit the red candies or find allergy-friendly alternatives to ensure everyone can enjoy the festive fun!

Grinch Heart Rice Krispies Treats

Grinch Heart Rice Krispies Treats for Festive Family Fun

Delight in Grinch Heart Rice Krispies Treats, a festive twist on a classic marshmallow treat that’s easy to make and perfect for holiday fun.
Prep Time 10 minutes
Cooling Time 5 minutes
Total Time 15 minutes
Servings: 12 treats
Course: Dessert
Cuisine: American
Calories: 120

Ingredients
  

For the Treats
  • 3 tablespoons butter
  • 10 ounces mini marshmallows
  • 6 cups Rice Krispies cereal
  • a few drops green food coloring add more for a brighter hue
  • small red candies for decoration
For Variations
  • Christmas tree cookie cutter use for fun shapes
  • edible glitter or sprinkles for extra holiday cheer
  • natural coloring options for a healthier spin

Equipment

  • Large saucepan
  • spatula
  • heart-shaped cookie cutter
  • Wax paper

Method
 

Step-by-Step Instructions
  1. In a large saucepan over low heat, melt the butter, stirring continuously to ensure it doesn't brown. This process should take about 2-3 minutes.
  2. Stir in the mini marshmallows, mixing well until they begin to melt into the butter. Continue stirring for an additional 3-4 minutes until completely melted and bubbly.
  3. Remove from heat and add a few drops of green food coloring. Stir vigorously until color is evenly distributed.
  4. Gently fold in the Rice Krispies cereal using a spatula until all cereal is evenly coated.
  5. Line a cookie sheet with wax paper and pour the mixture onto it, spreading it out evenly to about an inch thick. Let it cool for about 5-10 minutes.
  6. Use a heart-shaped cookie cutter to cut out heart shapes from the cooled mixture and transfer them to clean wax paper.
  7. Gently press a small red candy into the center of each heart and allow the treats to set for a few minutes before serving.

Notes

Store in airtight container at room temperature for up to 3 days. Can freeze for longer storage.