Holiday Vanilla Pudding Cake Cookies for Festive Cheer

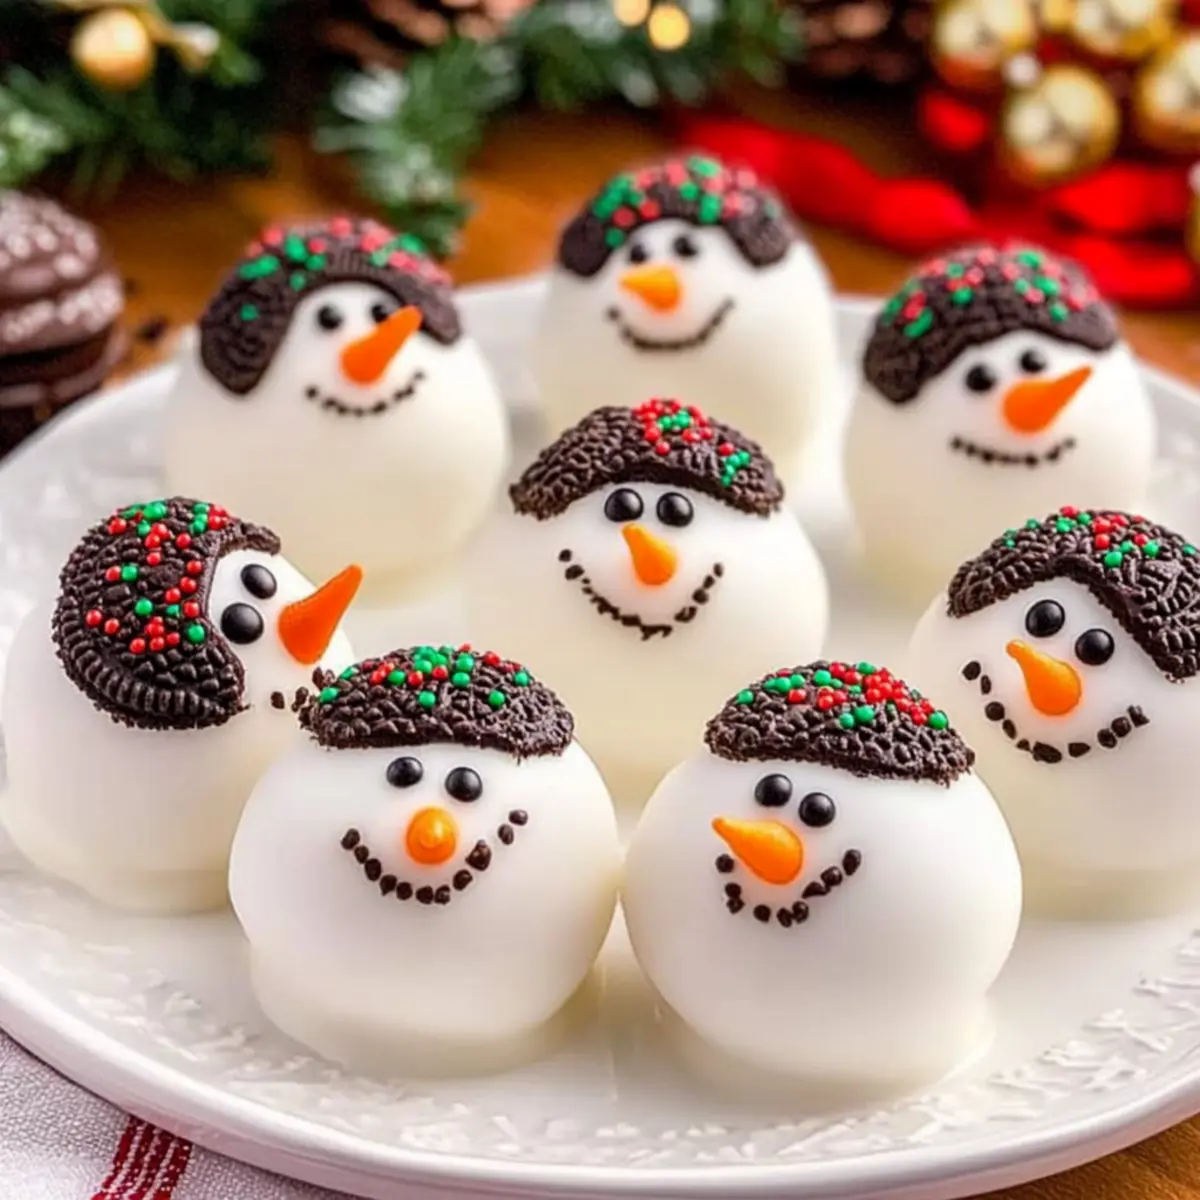
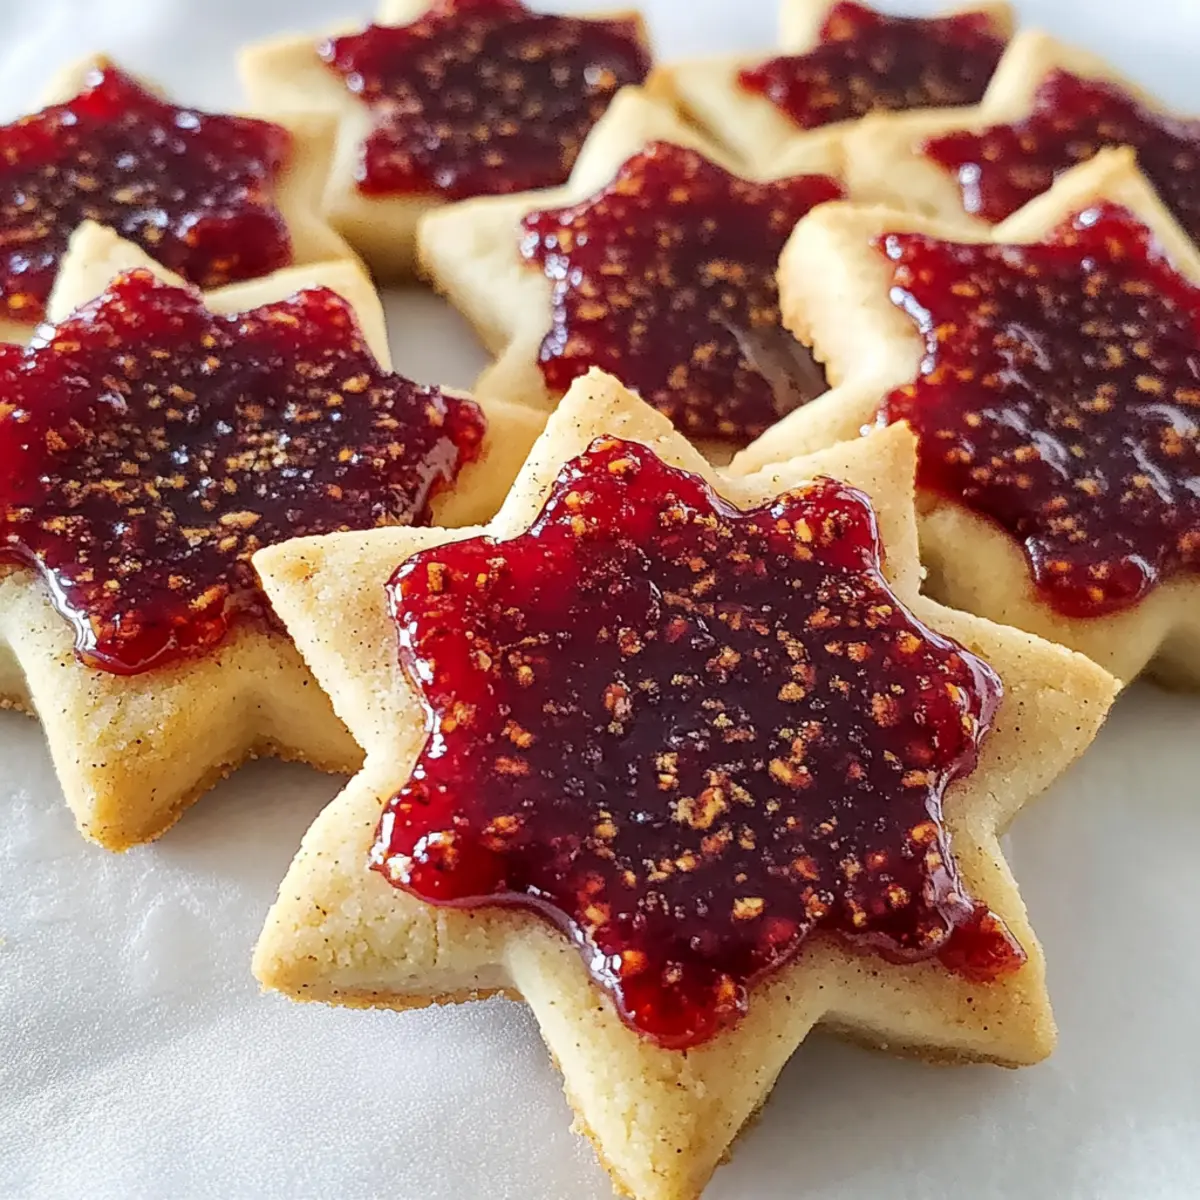
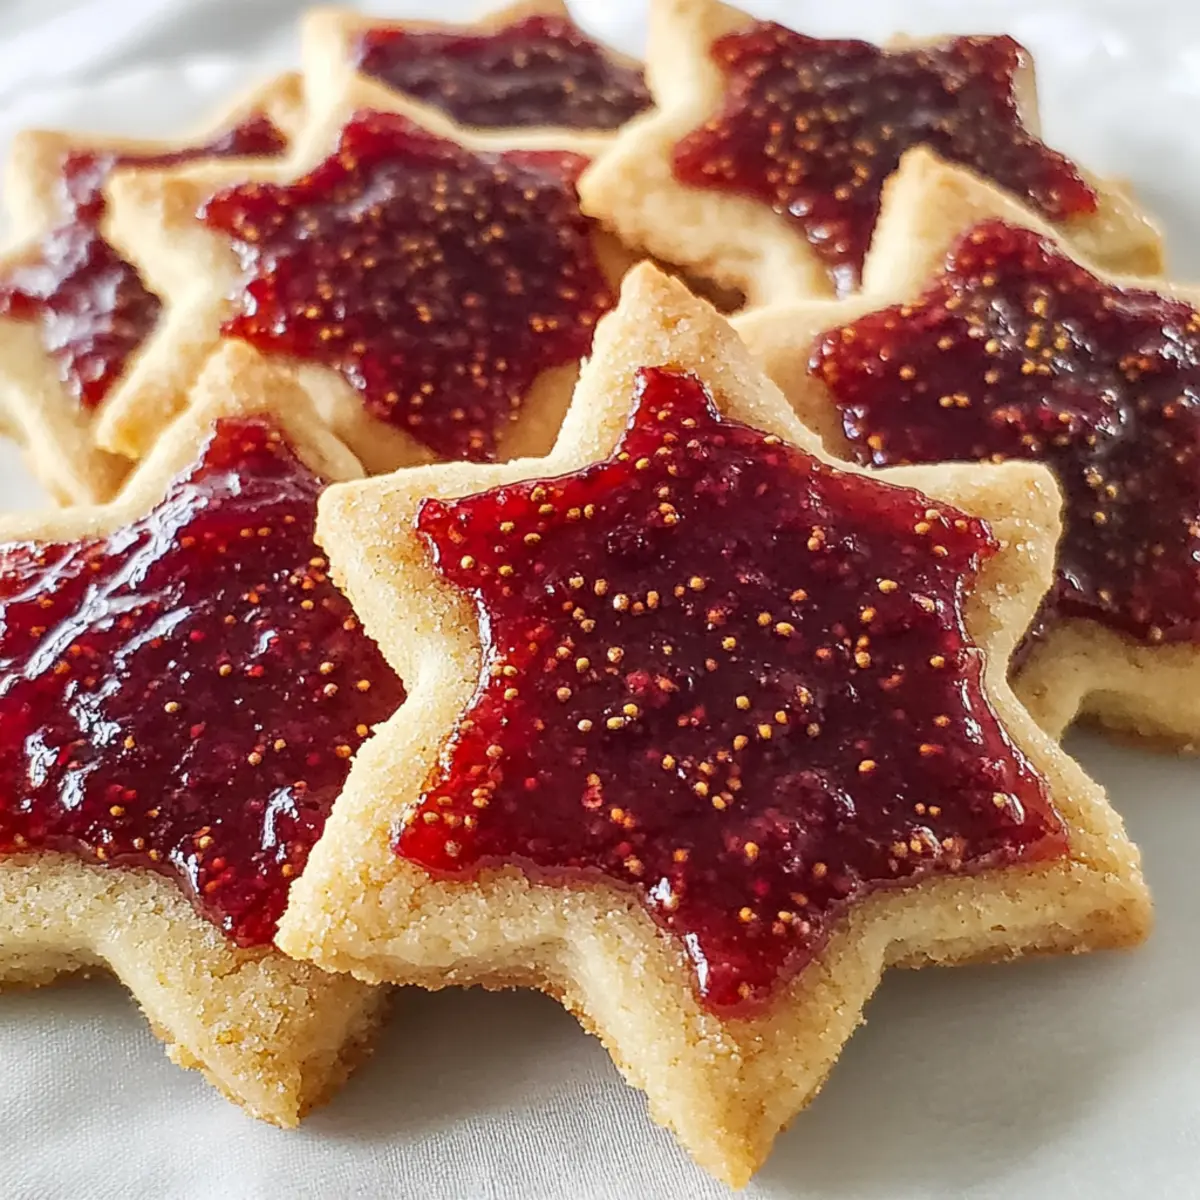
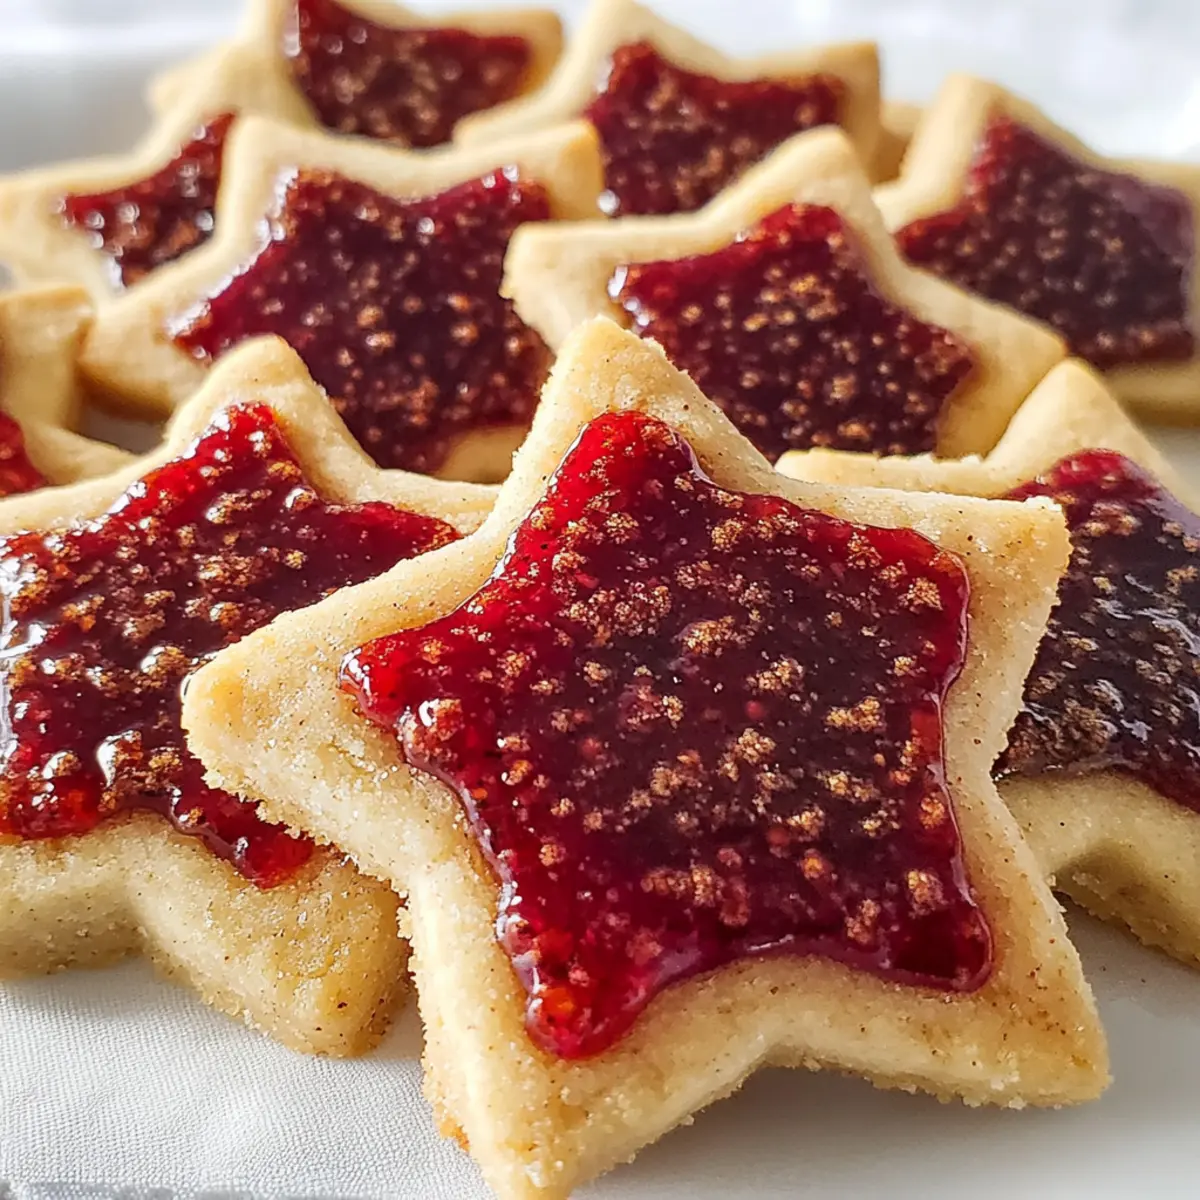
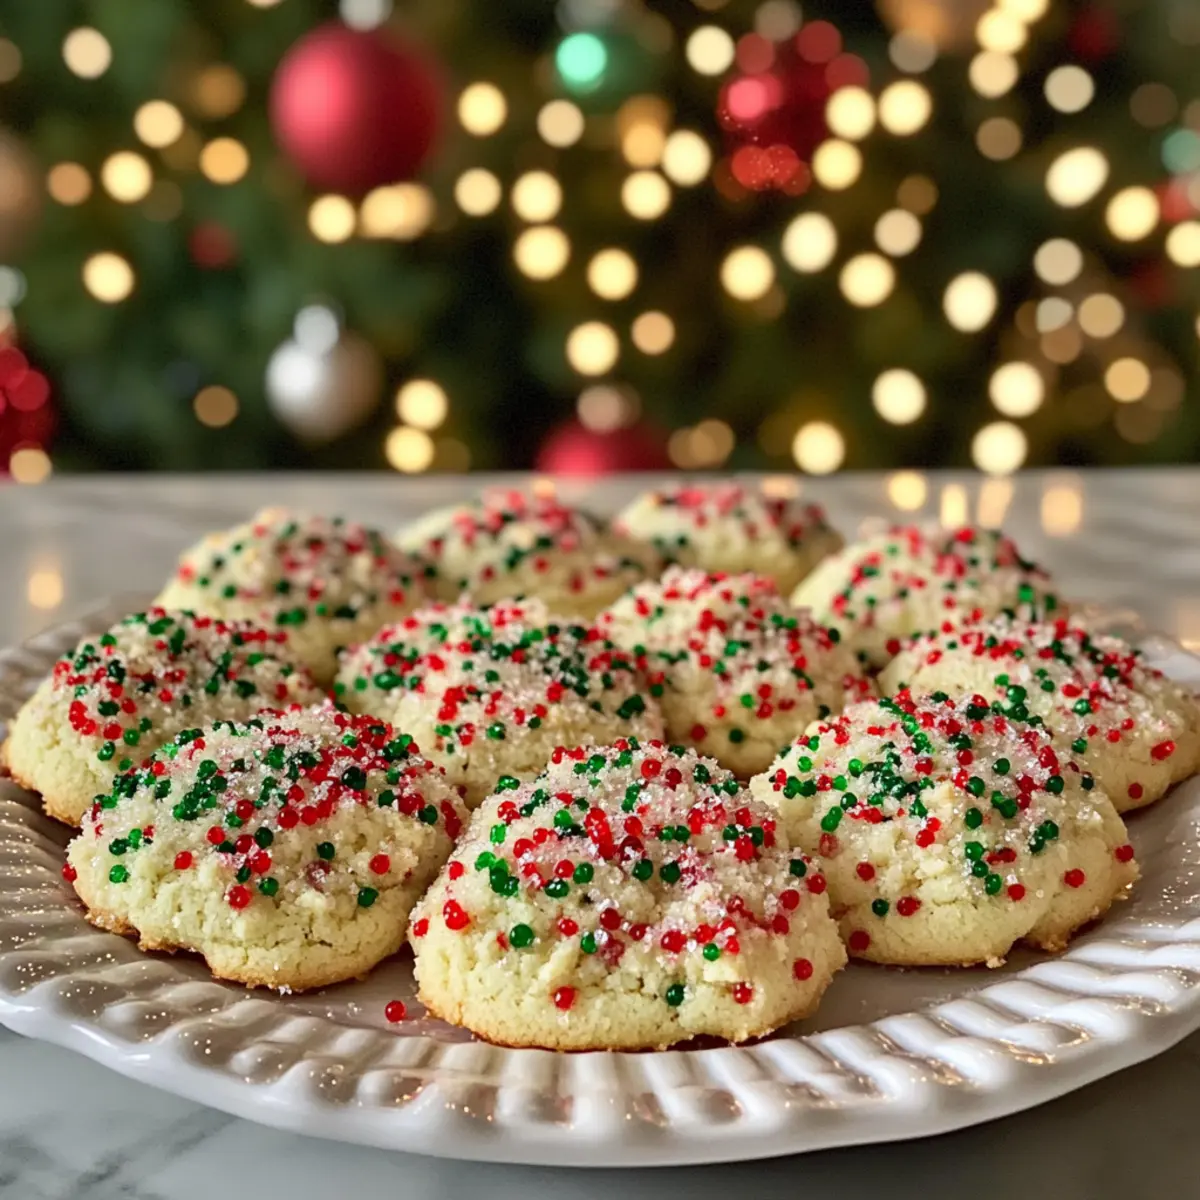
The kitchen is filled with joyous aromas, a blend of nostalgia and holiday cheer that tugs at my heartstrings. As the festive season approaches, I find myself reminiscing about special moments spent baking with loved ones. One of my favorite go-tos are these Holiday Vanilla Pudding Cake Cookies, the perfect semi-homemade delight that instantly brings smiles. With just a handful of pantry staples, you’ll whip up soft, chewy cookies that are not only a breeze to make but also a stunning addition to your holiday spread. They’re versatile and can be tailored to your taste by swapping in different cake and pudding flavors, allowing for endless creative fun. So, whether you’re planning a family gathering or looking for quick holiday treats to please a crowd, these cookies are sure to impress. Are you ready to bake a batch that will spread joy on every plate?

Why are these cookies a holiday must?

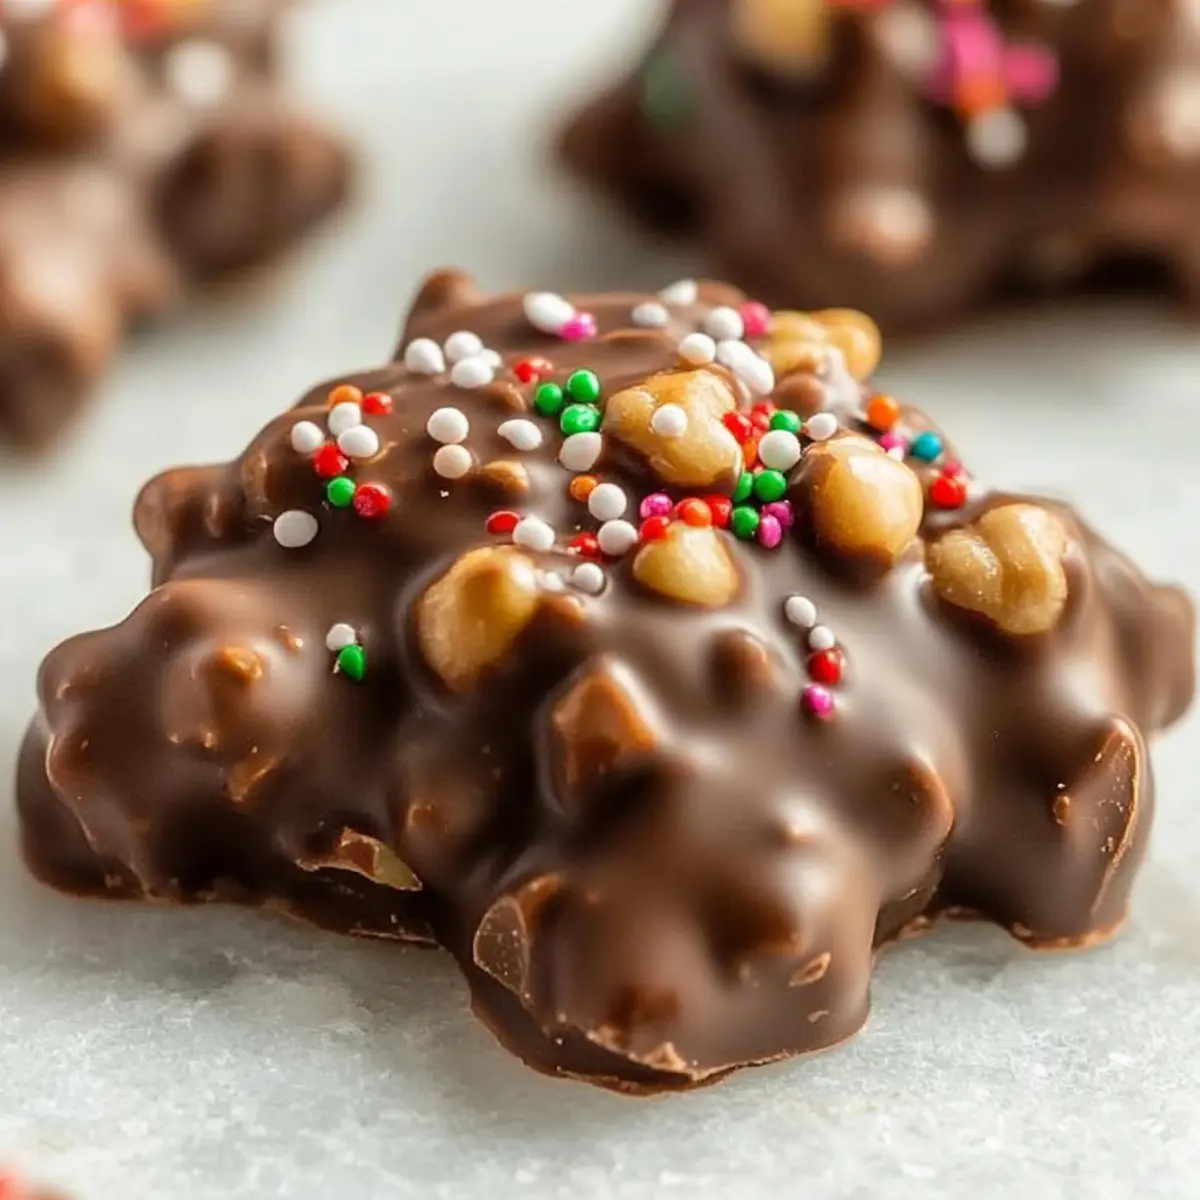
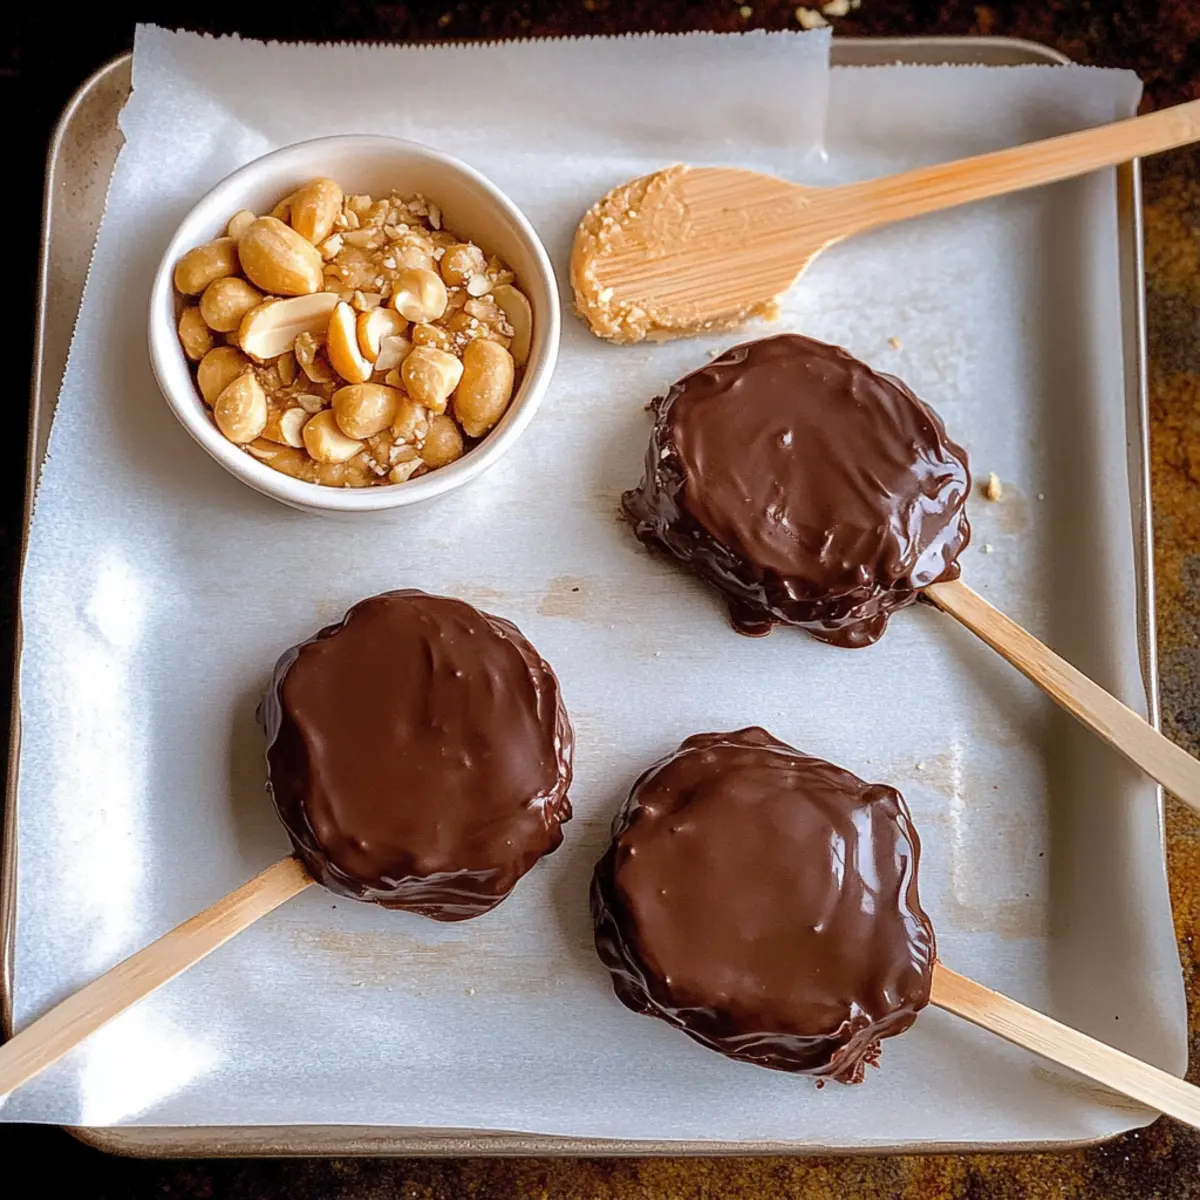
Irresistible Festivity: These Holiday Vanilla Pudding Cake Cookies bring the festive spirit to your kitchen with their bright colors and delicious flavor. Quick and Easy: With simple ingredients and minimal prep, these cookies come together in no time. Endless Variations: Feel free to experiment with different cake and pudding flavors, giving you a chance to customize your treats. Crowd-Pleasing Delight: Perfect for parties, these cookies will brighten up any cookie platter and bring smiles to family and friends alike. Perfect for Gift Giving: Package them up as sweet gifts – everyone loves receiving homemade goodies. Whether you want something classic like these cookies or a twist on flavors, you might also enjoy my Nutty Vanilla Cake for a different but equally delightful treat!

Holiday Vanilla Pudding Cake Cookies Ingredients

• Find everything you need for these scrumptious cookies right in your pantry!

For the Cookie Dough

  • White Cake Mix – Provides structure and sweetness; feel free to swap for flavors like lemon or chocolate for a fun twist.
  • Vanilla Instant Pudding Mix – Enhances creaminess and richness; try other pudding flavors to change up the taste profile.
  • Eggs – Acts as a binder and adds moisture; no substitutions recommended for this role.
  • Butter (softened) – Contributes to flavor and a chewy texture; margarine works for a dairy-free version.
  • Milk – Adds necessary moisture for dough consistency; almond or soy milk can serve as a dairy-free alternative.

For Decoration

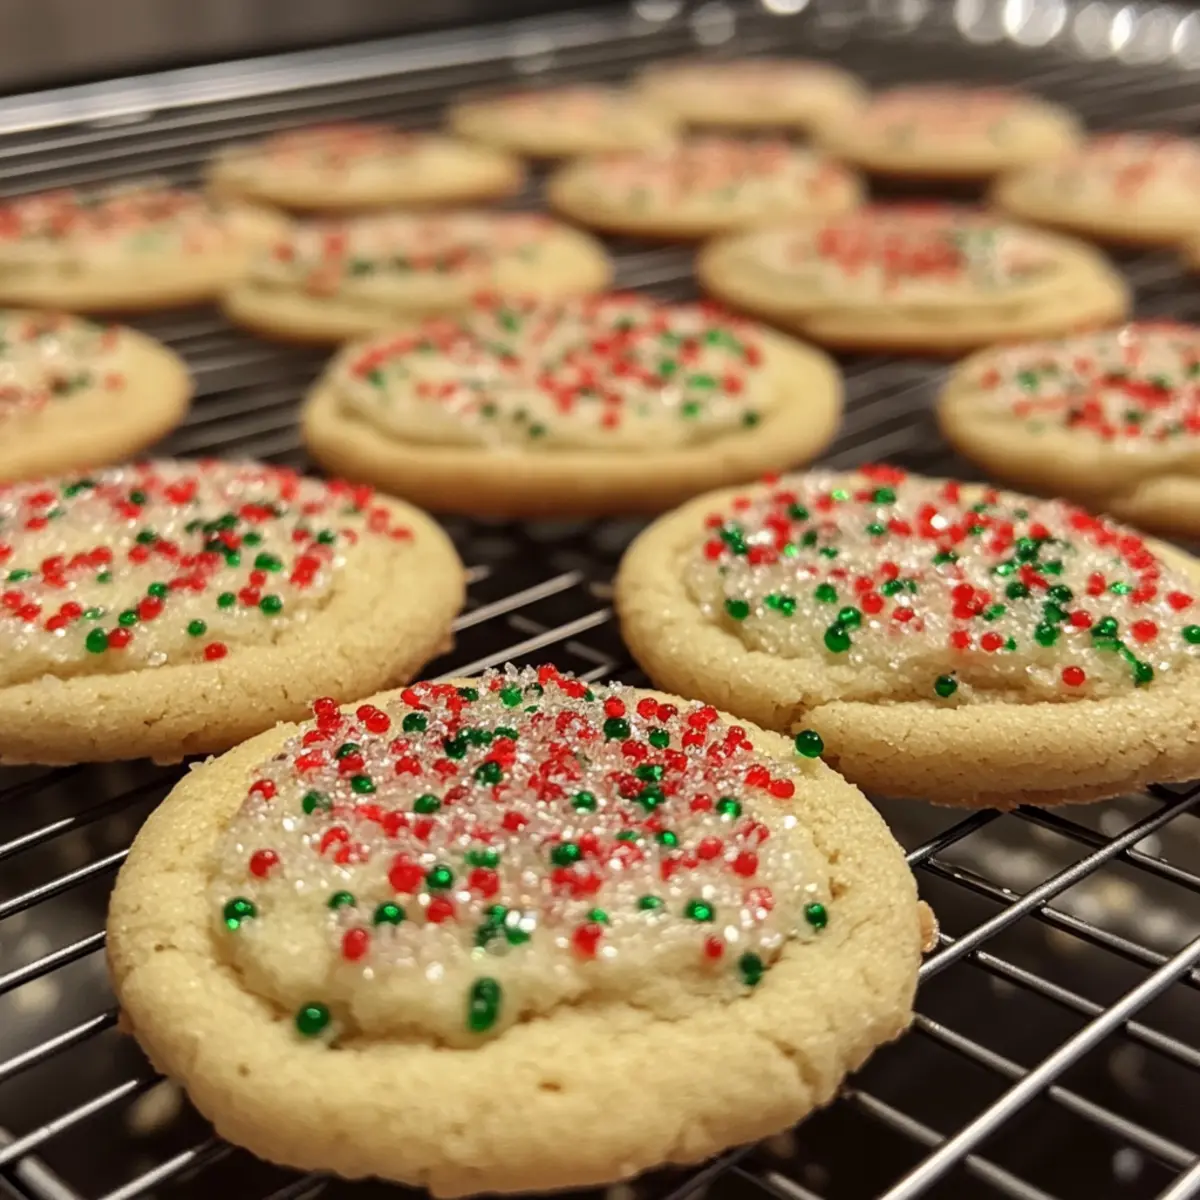
  • Red & Green Decorating Sugars – Adds festive color and crunch; colored sprinkles can replace these for added flair.

Step‑by‑Step Instructions for Holiday Vanilla Pudding Cake Cookies

Step 1: Preheat Oven
Begin by preheating your oven to 350°F (175°C). While the oven warms up, prepare a baking sheet by lightly coating it with cooking spray or lining it with parchment paper. This ensures your Holiday Vanilla Pudding Cake Cookies won’t stick as they bake and will slide off easily when done.

Step 2: Mix the Dough
In a large mixing bowl, combine the white cake mix and vanilla instant pudding mix. Crack in the eggs and add the softened butter and milk. Mix everything together until it forms a thick, creamy dough that’s evenly blended. This will create the soft and chewy base for your cookies, perfect for the festive season.

Step 3: Prepare the Sugars
While the dough is resting, grab a small bowl and combine your red and green decorating sugars. If you wish to use separate colors or sprinkles, feel free to get creative! Set this bowl aside, as you’ll need it shortly to give your Holiday Vanilla Pudding Cake Cookies that festive flair.

Step 4: Scoop the Dough
Using a tablespoon, scoop out portions of the cookie dough and roll them into balls. Aim for tablespoon-sized portions to ensure even baking. Once shaped, roll each ball in the colorful decorating sugars, fully coating them. This step adds a delightful crunch and a pop of color to your cookies.

Step 5: Arrange on Baking Sheet
Place the coated dough balls on the prepared baking sheet, making sure to leave about 2 inches of space between each one. This spacing allows the cookies to spread properly as they bake, ensuring a beautifully shaped Holiday Vanilla Pudding Cake Cookie that maintains its vibrant sugary coat.

Step 6: Bake the Cookies
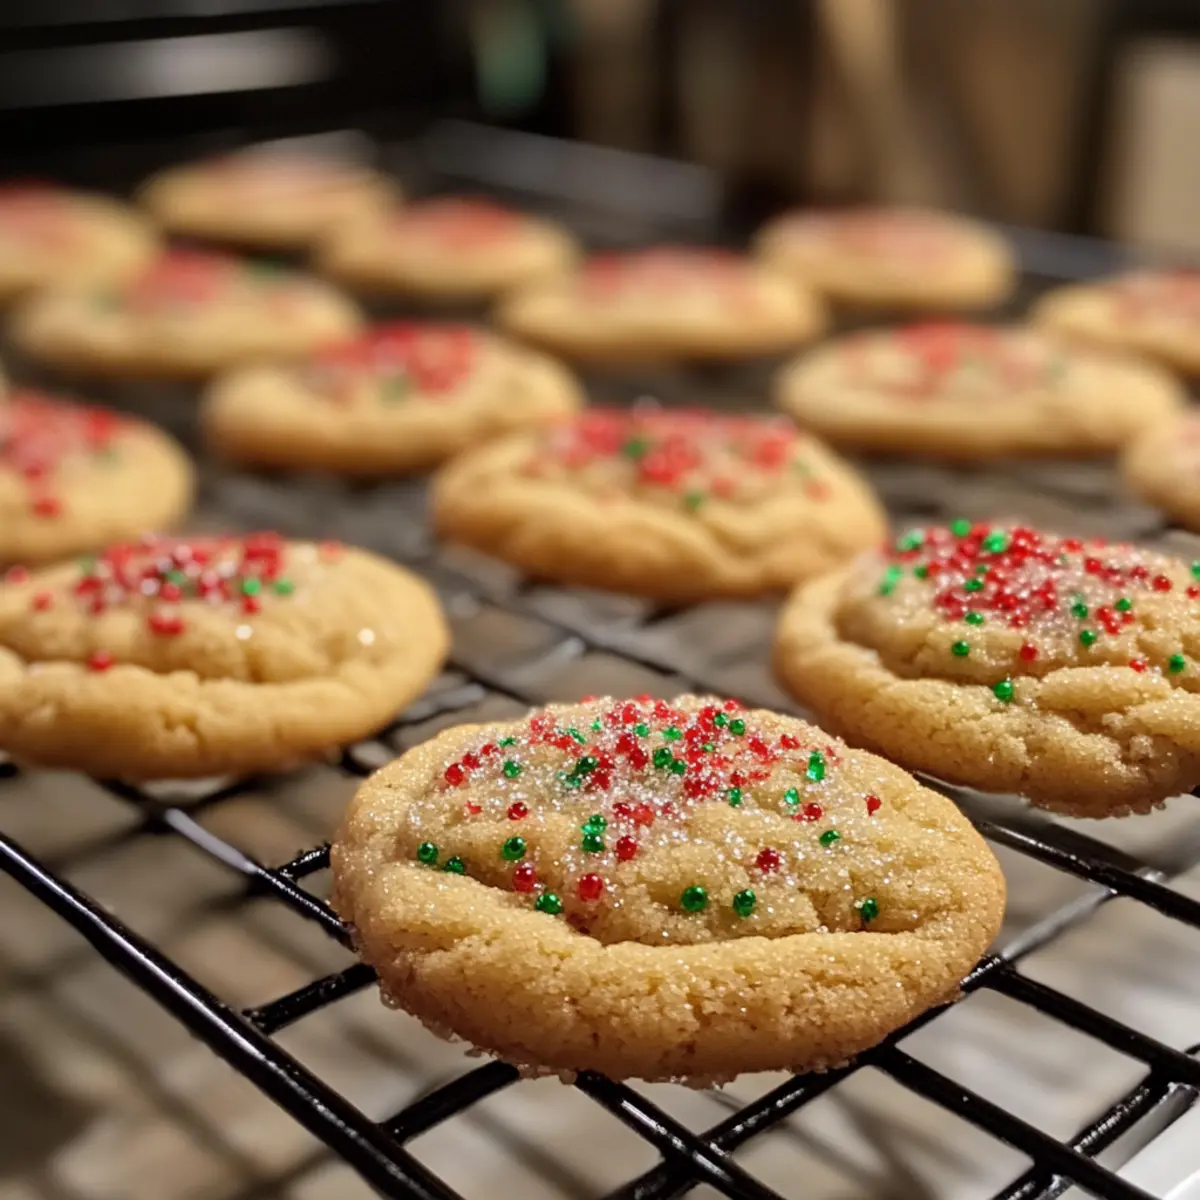
Slide the baking sheet into the preheated oven and bake for 8 to 10 minutes. Keep an eye on your cookies; they should look soft in the center and slightly puffy when done. The edges will begin to set, creating that signature chewy texture we love in these festive treats.

Step 7: Cool the Cookies
Once baked, remove the cookies from the oven and allow them to cool on the baking sheet for about 1 to 2 minutes. This resting time helps them firm up. Then, gently transfer the cookies to a wire rack to cool completely, ensuring they retain their delightful texture and taste before serving your Holiday Vanilla Pudding Cake Cookies.

What to Serve with Holiday Vanilla Pudding Cake Cookies

As you prepare to indulge in a batch of these soft, chewy delights, imagine the wonderful spread that will enhance your festive cheer.

  • Creamy Hot Chocolate: This rich and velvety drink pairs beautifully with the cookies, creating a warm, comforting holiday experience. Enjoying a cookie while sipping hot cocoa is a classic combination that evokes the spirit of the season.

  • Spiced Apple Cider: The sweet and spicy flavors of apple cider elevate the taste of the cookies, providing a cozy, aromatic beverage that captures the essence of holiday gatherings.

  • Chocolate Chip Ice Cream: Serving these cookies warm alongside a scoop of chocolate chip ice cream creates a delightful contrast of textures and temperatures, making each bite even more indulgent.

  • Festive Fruit Salad: A bright, colorful fruit salad complements the sweetness of the cookies, adding a refreshing and healthy balance to your dessert spread. Consider using seasonal fruits for a festive touch.

  • Gingerbread Milkshake: Blend rich vanilla ice cream with gingerbread cookies and a splash of milk for a quirky shake that perfectly marries the flavors of the season. It’s fun, festive, and absolutely delicious!

  • Christmas Sugar Cookies: For cookie lovers, serving these alongside classic Christmas sugar cookies creates an inviting platter filled with different tastes and textures. It sparks joy at any holiday gathering.

  • Milk with Nutmeg: A simple glass of cold milk dusted with nutmeg complements the cookies and harkens back to childhood nostalgia. It’s a timeless pairing that never goes out of style.

Enjoy mixing and matching these delightful pairings for a truly memorable holiday experience!

Make Ahead Options

These Holiday Vanilla Pudding Cake Cookies are perfect for meal prep, allowing you to enjoy fresh-baked treats with less hassle during the busy holiday season! You can prepare the cookie dough and refrigerate it for up to 3 days in advance; this will help the flavors meld together beautifully and make for a thicker, chewier dough. Alternatively, you can roll the dough into balls, coat them in decorating sugars, and freeze them in an airtight container for up to 1 month. When you’re ready to bake, simply place the frozen dough balls on a baking sheet and add an additional minute to the baking time. This way, you’ll have delicious, festive cookies that taste just as delightful, with minimal effort on the day of your gathering!

Holiday Vanilla Pudding Cake Cookies Variations

Feel free to get creative with these cookies that are sure to be a hit at any festive gathering!

  • Flavorful Swaps: Replace the white cake mix with butter golden or chocolate cake mix for a delightful variation in flavor. Chocolate lovers will rejoice!

  • Pudding Variety: Use flavored pudding like butterscotch or lemon to give your cookies a unique twist. The different flavors can completely transform the cookie experience.

  • Sweet Additions: Stir in white chocolate chips or your favorite nuts to the dough for added flavor and texture. This brings a wonderful crunch that complements the softness of the cookies beautifully.

  • Dairy-Free Delight: Swap regular butter for margarine and use almond or soy milk to create a dairy-free version of these festive treats. Everyone deserves to enjoy holiday cookies!

  • Add Extra Crispy Sugar: Roll each dough ball in a mix of red and green decorating sugars along with granulated sugar for extra crunch and a festive touch. This results in an appealing texture that’s hard to resist.

  • Spice it Up: Experiment by adding a pinch of cinnamon or nutmeg to the dough for a warm holiday vibe. It adds a subtle depth of flavor that’s cozy and inviting.

  • Gluten-Free Option: Substitute regular cake mix with a gluten-free variant to cater to those with dietary restrictions, without compromising on taste. Everyone can enjoy your delicious cookies!

  • Miniature Bites: Instead of making large cookies, try baking small, bite-sized versions for a fun twist. Serve them mixed with other sweet treats on a platter for a delightful assortment.

For more delightful flavor inspirations, why not try my Nutty Vanilla Cake or a creamy touch with Vanilla Pudding? Each offers its own unique textures and flavors that can also brighten up your holiday celebrations!

Expert Tips for Perfect Cookies

  • Chill the Dough: If the dough feels too sticky, chill it in the freezer for up to 3 hours. This makes rolling easier and helps achieve the best Holiday Vanilla Pudding Cake Cookies.
  • Correct Measurements: Stick with the specified ingredients on your cake mix; adding extra oil or eggs can lead to overly wet cookies.
  • Roll Generously: Make sure to coat the dough balls thoroughly in sugar. This step not only adds flavor but also prevents sticking during baking.
  • Bake Time Awareness: Keep an eye on your cookies as they bake; even a minute too long can change their texture from soft to cakey.
  • Storage Secrets: For freshness, store baked cookies in an airtight container, and enjoy them within a week. They can also be frozen for future treats!

Storage Tips for Holiday Vanilla Pudding Cake Cookies

Room Temperature: Store cookies in an airtight container at room temperature for up to 1 week to maintain their delightful softness and freshness.

Fridge: If you’re in a warm climate, keep them in the fridge in an airtight container for up to 2 weeks to prevent them from becoming too soft.

Freezer: For longer-term storage, freeze the cookies in a single layer on a baking sheet for 1 hour before transferring to a freezer-safe bag. They’ll keep well for up to 3 months.

Reheating: To enjoy warm, simply microwave the frozen cookies for about 15-20 seconds or bake them at 350°F for 5-7 minutes until soft. Your Holiday Vanilla Pudding Cake Cookies will taste freshly baked!

Holiday Vanilla Pudding Cake Cookies Recipe FAQs

What is the best way to select ripe ingredients for this recipe?
Absolutely! When selecting your ingredients, opt for fresh eggs, as they’ll provide the best texture. Check the milk for any sour smell; fresh milk is key to achieving moist cookies. For the cake and pudding mixes, ensure that they are within the expiration date for maximum flavor.

How should I store leftover cookies, and how long do they last?
Store your Holiday Vanilla Pudding Cake Cookies in an airtight container at room temperature for up to 1 week. If you live in a warm climate, it’s best to refrigerate them for up to 2 weeks to maintain their delightful softness. Just make sure to bring them back to room temperature before enjoying!

Can I freeze these cookies, and what’s the best method for doing so?
Yes, you can freeze your Holiday Vanilla Pudding Cake Cookies! First, set the cookies on a baking sheet in a single layer and freeze for about 1 hour until they are firm. Then, transfer them to a freezer-safe bag, layering parchment paper between any cookies to prevent sticking. They will keep well for up to 3 months. To enjoy, simply thaw them in the fridge overnight or microwave them for a quick warm-up!

What should I do if my cookie dough is too sticky?
If you find the dough too sticky to manage, no worries! Chill the entire bowl in the freezer for about 30 minutes to 3 hours. This makes rolling the dough balls much easier and will lead to perfectly shaped cookies that are soft and chewy after baking. Remember to keep rolling the dough in the sugary coating to avoid further stickiness.

Are there any dietary considerations I should keep in mind for this recipe?
Very! For those with dairy allergies, you can use margarine in place of butter and swap regular milk for almond or soy milk. If you’re looking for a gluten-free option, feel free to substitute the white cake mix with a gluten-free cake mix. Always double-check the ingredient labels for any potential allergens, especially with pudding mixes and decorating sugars!

Can I use other flavors of cake or pudding mixes?
The more the merrier! This recipe is highly versatile. You can swap out the white cake mix for a chocolate or butter golden mix for a flavor twist. Additionally, mixing in different pudding flavors like butterscotch or lemon can add an exciting flair to your Holiday Vanilla Pudding Cake Cookies. Feel free to get creative!

Holiday Vanilla Pudding Cake Cookies

Holiday Vanilla Pudding Cake Cookies for Festive Cheer

These Holiday Vanilla Pudding Cake Cookies are a delightful treat, bringing festive cheer and nostalgia to your holiday gatherings.
Prep Time 15 minutes
Cook Time 10 minutes
Cooling Time 2 minutes
Total Time 27 minutes
Servings: 24 cookies
Course: Dessert
Cuisine: American
Calories: 110

Ingredients
  

For the Cookie Dough
  • 1 box White Cake Mix Can be substituted with lemon or chocolate cake mix.
  • 1 box Vanilla Instant Pudding Mix Other pudding flavors can be used.
  • 2 large Eggs Acts as a binder.
  • 1/2 cup Butter Softened.
  • 1/4 cup Milk Substitute with almond or soy milk for dairy-free.
For Decoration
  • 1/4 cup Red & Green Decorating Sugars Colored sprinkles can be used as a substitute.

Equipment

  • mixing bowl
  • baking sheet
  • oven

Method
 

Step-by-Step Instructions
  1. Preheat your oven to 350°F (175°C) and prepare a baking sheet with cooking spray or parchment paper.
  2. In a large mixing bowl, combine the white cake mix and vanilla instant pudding mix. Add the eggs, softened butter, and milk. Mix until a thick, creamy dough forms.
  3. In a small bowl, combine red and green decorating sugars. Set aside.
  4. Scoop tablespoon-sized portions of dough and roll them into balls. Roll each ball in the decorating sugars to coat.
  5. Place coated dough balls on the prepared baking sheet, leaving about 2 inches of space between each.
  6. Bake in the preheated oven for 8 to 10 minutes until soft in the center and slightly puffy.
  7. Allow cookies to cool on the baking sheet for 1 to 2 minutes before transferring to a wire rack to cool completely.

Notes

For best results, chill the dough if it feels too sticky and store the cookies in an airtight container to maintain freshness.

Snowman Oreo Balls: The Ultimate No-Bake Holiday Delight

As I walked through the local holiday fair, the sight of cheerful snowmen transformed into sweet treats caught my eye. That delightful inspiration sparked my creativity to whip up these adorable Snowman Oreo Balls—a fun no-bake dessert that’s as simple to make as it is festive! With just a few easy ingredients, these treats combine the satisfying crunch of Oreo cookies and the luxurious creaminess of cream cheese into whimsical snowman shapes. Whether you’re hosting a holiday gathering or just want to indulge in some festive nostalgia, these delightful bites are a surefire way to spread joy. Not only are they a fun activity to make with family, but their crowd-pleasing nature makes them the perfect addition to any dessert table. Are you ready to create your own frosty friends? Let’s dive into this festive recipe together!

Why are Snowman Oreo Balls a must-try?

Festive Fun: These Snowman Oreo Balls are not just a treat; they embody the joy and spirit of the holiday season with their playful design and holiday-themed decorations.
No-Bake Simplicity: With minimal effort, you can create these scrumptious delights without ever turning on the oven! Perfect for busy bakers.
Irresistible Flavor: The mix of crunchy Oreos and creamy cream cheese creates a mouthwatering combination that keeps everyone coming back for more.
Family-Friendly Activity: Get the kids involved! Rolling and decorating these snowmen is a delightful bonding experience that makes memories while making treats.
Versatile Creations: Feel free to experiment! Try different Oreo flavors or colored chocolates to personalize your snowmen for various occasions. You might also enjoy pairing these with a platter of assorted holiday-themed treats for an eye-catching dessert table.

Snowman Oreo Balls Ingredients

For the Snowman Bodies
Oreo Cookies – These delightful treats provide the sweetness and structure; stick with regular Oreos to avoid a too-moist mixture.
Cream Cheese – Adds the perfect creamy texture and binds the Oreos together; make sure it’s softened for easy mixing.

For the Coating
Ghirardelli White Melting Wafers – Ideal for coating, providing a sweet, tasty shell; melt evenly for the best coating consistency.

For the Snowman Hats
Mini Oreos – Use these as the base for your snowman’s hat; split them apart to create two pieces.
Dark Chocolate Rolo Candy – A whimsical touch for the snowman’s hat decoration that everyone will love.

For Decoration
Holly Sprinkle Mix & Snowman Sprinkle Mix – These fun sprinkles enhance the festive look; use them to finish off your delightful Snowman Oreo Balls!

Step‑by‑Step Instructions for Snowman Oreo Balls

Step 1: Prepare Baking Tray
Start by lining a baking tray with parchment or wax paper. This will prevent the Oreo balls from sticking and make cleanup a breeze. Ensure the surface is smooth and even, providing a nice base for your festive creations.

Step 2: Make Oreo Crumbs
Using a food processor, pulse your regular Oreo cookies until they reach a fine crumb consistency. If you don’t have a processor, simply place the cookies in a sealed sandwich bag and crush them with a rolling pin. Aim for a crumb texture that resembles sand, as this will bind beautifully with the cream cheese.

Step 3: Mix Base
In a mixing bowl, beat the softened cream cheese using an electric mixer until it’s smooth and creamy. Gradually add the Oreo crumbs, mixing until well combined. You want a thick but smooth mixture that holds together well, making the foundation for your delightful Snowman Oreo Balls.

Step 4: Form Balls
Scoop out portions of the Oreo mixture using a cookie scoop, rolling them into uniform balls about an inch in diameter. Place the balls on your prepared baking sheet, making sure they have enough space between each one. Chill the tray in the refrigerator for at least 2 hours to firm up the treats.

Step 5: Prepare Hats
While the Oreo balls chill, melt the Ghirardelli white melting wafers according to package instructions, using a microwave-safe bowl. Dip half of a Mini Oreo in the melted chocolate, then stick it to an upside-down Rolo candy to create the snowman hats. Decorate with holly sprinkles before allowing them to set on another lined tray.

Step 6: Coat Balls
Once the Oreo balls have chilled, dip each ball into the melted white wafers, ensuring it’s completely coated. Allow excess chocolate to drip off before placing the balls back on the parchment-lined tray. While the coating is still wet, add facial features using the snowman sprinkles to bring your creations to life.

Step 7: Attach Hats
To secure hats onto the snowmen, add a small dollop of melted chocolate on top of each ball where the hat will rest. Gently press the decorated Mini Oreo hats into place. Hold briefly until they start to set, ensuring they don’t slide off.

Step 8: Finalize
Allow the candy coating to set completely at room temperature, or speed up the process by placing them in the fridge for a few minutes. Once set, your delightful Snowman Oreo Balls are ready to be admired and shared. Enjoy the festive fun they bring to your holiday gatherings!

Make Ahead Options

These Snowman Oreo Balls are ideal for busy home cooks looking to save time during the festive season! You can prepare the Oreo mixture up to 24 hours in advance; simply mix the cookie crumbs and cream cheese, roll into balls, and chill them. For best results, keep the coated Snowman Oreo Balls in an airtight container in the fridge for up to 3 days before serving. When ready to enjoy, dip them in the melted white wafers and attach the hats, allowing for a quick finish that yields delicious, crowd-pleasing treats. With these make-ahead tips, you’ll have festive delights ready with minimal effort!

Expert Tips for Snowman Oreo Balls

Quick Decorating: Work swiftly when adding facial features with sprinkles, as the melted coating can set quickly, making it difficult to achieve the desired look.

Chill Time: Don’t rush the chilling process! Allow the Oreo balls to set for at least 2 hours; this helps them maintain their shape and makes them easier to coat.

Even Coating: Ensure your white melting wafers are melted evenly to avoid clumps. Microwave in short intervals, stirring in between, for the best results when coating your Snowman Oreo Balls.

Substitution Savvy: Experiment with different Oreo flavors, like Mint or Red Velvet, to give your Snowman Oreo Balls a unique twist that suits your taste or occasion.

Hats in Place: Use a bit of melted chocolate to secure the hats on the snowman tops, preventing them from sliding off while adding an extra decorative touch.

Stay Organized: Having a helper can streamline the process—one can dip while the other decorates, making it more fun and ensuring you finish quicker!

Snowman Oreo Balls: Fun Variations

Embrace your creative spirit and customize your Snowman Oreo Balls into something uniquely yours!

  • Minty Twist: Swap regular Oreos for Mint Oreos to bring a refreshing flavor to your snowmen.

  • Peanut Butter Bliss: Use Peanut Butter Oreos for a rich, nutty flavor explosion that your family will love.

  • Colorful Coating: Opt for pink or green melting chocolates for delightful non-traditional holiday designs. This gives your snowmen a vibrant personality!

  • Add Some Crunch: Mix in crushed pretzels or nuts into the Oreo and cream cheese mixture for an exciting texture contrast. These little surprises will wow your guests!

  • Heated Up: Add a touch of heat by incorporating a pinch of cayenne pepper into the cream cheese mix—it’s a bold way to intrigue adventurous taste buds!

  • Fruity Flair: Incorporate a teaspoon of orange or lemon zest into the cream cheese mixture to elevate the flavor profile with a hint of citrus brightness.

  • Make It Vegan: Replace cream cheese with vegan cream cheese and use dairy-free chocolate melts for a delightful vegan treat that everyone can enjoy!

  • Pairing Suggestion: Serve these delightful treats alongside a festive platter of assorted holiday-themed treats for a truly wonderful dessert experience!

Storage Tips for Snowman Oreo Balls

Room Temperature: Keep Snowman Oreo Balls in a cool, dry place for up to 2 hours. After that, it’s best to transfer them to the fridge to maintain freshness.

Fridge: Store leftovers in an airtight container in the refrigerator for up to 5 days. This helps preserve their delightful texture and flavor.

Freezer: For longer storage, freeze the snowman balls without hats for up to 2 months. Thaw them in the fridge overnight before adding hats and serving.

Reheating: No reheating necessary! Simply enjoy these chilled treats straight from the fridge or at room temperature for the best experience.

What to Serve with Snowman Oreo Balls?

Create a festive spread that delights both the eyes and the palate, complementing these whimsical treats!

  • Hot Cocoa Bar: A warm cup of rich, creamy hot chocolate pairs perfectly, offering a cozy beverage to savor alongside the sweet snowmen.
  • Peppermint Bark: This crunchy, chocolatey treat adds a minty zing and festive flair that complements the sweetness of the Oreo balls seamlessly.
  • Fruit Skewers: Fresh berries and melon on skewers provide a refreshing contrast to the rich Oreo flavors, adding a splash of color to your dessert table.
  • Gingerbread Cookies: Classic holiday gingerbread provides a spiced companion that enhances the festive experience and brings out nostalgic flavors.
  • Caramel Popcorn: The sweet and salty crunch of caramel popcorn will add another layer of texture and flavor that pairs delightfully with these sweet bites.
  • Holiday Punch: A fruity punch, garnished with cranberries and citrus, offers a refreshing sip that balances the richness of the Snowman Oreo Balls perfectly.
  • Sugary Snowman Cupcakes: For an all-out winter wonderland theme, pair them with vanilla cupcakes topped with snowman decorations, creating charming harmony on the dessert table.
  • Spiced Apple Cider: Warm spiced apple cider brings a cozy, aromatic element that perfectly complements the flavors of this no-bake holiday delight.
  • Mini Cheesecakes: Bite-sized cheesecakes add a creamy, tangy contrast, providing a delightful balance to the rich sweetness of the Snowman Oreo Balls.

Snowman Oreo Balls Recipe FAQs

How do I choose the best Oreo cookies?
Absolutely! For the best results in your Snowman Oreo Balls, stick to classic Oreo cookies. Avoid using Double Stuf or Mega Stuf versions, as their additional cream can make the mixture too moist and affect the overall texture of your dessert.

How should I store leftover Snowman Oreo Balls?
Very simple! Store your Snowman Oreo Balls in an airtight container. They can stay fresh in the refrigerator for up to 5 days. If you want to keep them longer, consider freezing them for up to 2 months. Just remember to freeze them without the hats, and once thawed, you can decorate and serve them.

Can I freeze Snowman Oreo Balls?
Absolutely, you can! To freeze your Snowman Oreo Balls, lay them on a baking sheet in a single layer and pop them in the freezer for about an hour until firm. Then, transfer them to a freezer-safe container, separating layers with parchment paper. They can be frozen for up to 2 months. When you’re ready to enjoy, thaw them overnight in the fridge before adding the hats.

What should I do if my chocolate coating is too thick?
If your chocolate coating turns out thicker than desired, don’t worry! Simply return the bowl to the microwave and heat it in 15-second intervals, stirring in between until it reaches a smooth, pourable consistency. Adding a small splash of vegetable oil can also help thin it out, making for an easier dipping process.

Are Snowman Oreo Balls safe for everyone to eat?
It’s important to consider. Snowman Oreo Balls contain cream cheese and chocolate, so they should be enjoyed in moderation. If you have any food allergies, especially to dairy or nuts, be sure to check your ingredients carefully. These festive treats are not suitable for pets due to the chocolate content, which can be harmful to them.

How do I make the Snowman Oreo Balls look more festive?
Very easily! To enhance the festive look, you can use various colored melting chocolates for coating and create different snowman designs. Try adding edible glitter or themed sprinkles to give your Snowman Oreo Balls extra flair. You might also consider using mini candy canes for added decoration or playfulness!

Snowman Oreo Balls

Snowman Oreo Balls: The Ultimate No-Bake Holiday Delight

Snowman Oreo Balls are a delightful no-bake dessert made with Oreo cookies and cream cheese, perfect for holiday festivities.
Prep Time 30 minutes
Chill Time 2 hours
Total Time 2 hours 30 minutes
Servings: 20 balls
Course: Dessert
Cuisine: American
Calories: 150

Ingredients
  

For the Snowman Bodies
  • 30 cookies Oreo Cookies Regular Oreos for best consistency
  • 8 oz Cream Cheese Softened for easy mixing
For the Coating
  • 12 oz Ghirardelli White Melting Wafers For coating
For the Snowman Hats
  • 10 cookies Mini Oreos Split for hat base
  • 10 pieces Dark Chocolate Rolo Candy For decoration
For Decoration
  • to taste Holly Sprinkle Mix For decoration
  • to taste Snowman Sprinkle Mix For decoration

Equipment

  • Food Processor
  • mixing bowl
  • electric mixer
  • Cookie scoop
  • baking tray
  • microwave-safe bowl

Method
 

Step-by-Step Instructions
  1. Start by lining a baking tray with parchment or wax paper to prevent the Oreo balls from sticking.
  2. Pulse the Oreo cookies in a food processor until fine crumbs are formed.
  3. In a mixing bowl, beat the softened cream cheese until smooth, then mix in the Oreo crumbs.
  4. Scoop portions of the mixture and roll into balls about an inch in diameter.
  5. Melt the Ghirardelli white melting wafers, then dip each ball into the melted chocolate until covered.
  6. While the balls are covered, create snowman hats with Mini Oreos and Rolo candies, securing with melted chocolate.
  7. Lastly, add facial features with sprinkles before allowing the balls to set completely.

Notes

Enjoy these Snowman Oreo Balls with family during the holidays! Perfect for decorating together.

Decadent Little Debbie Christmas Cake Balls to Delight You

The smell of the holidays always brings back memories of festive treats, and this year, I’m embracing the joy of making Little Debbie Christmas Cake Balls. These no-bake delights transform the classic Christmas Tree Cakes into a fun and easy dessert that’s perfect for sharing. Not only do they capture the essence of holiday cheer, but they also promise a delightful bite with every taste. With minimal prep time and a sweet, creamy filling, they’re sure to be a crowd-pleaser at any gathering. Plus, the vibrant colors make them a visual treat, guaranteed to spread smiles all around. Ready to bring a touch of magic to your holiday festivities? Let’s dive into this festive recipe and start creating some delicious memories!

Why Are These Cake Balls So Irresistible?

Easy to Make: These Little Debbie Christmas Cake Balls require minimal effort, making them perfect for even novice bakers. Just mix, roll, and dip!

Decadent Flavor: The velvety cream cheese perfectly complements the sweet cake base for a rich, indulgent treat that melts in your mouth.

Visually Stunning: Their festive appearance—coated in white candy melts and sprinkled with colorful sugar—will wow your guests at holiday gatherings.

No Baking Required: Skip the oven and save time with this no-bake recipe, allowing you to whip up delicious treats without the hassle.

Adaptable: Feeling creative? Experiment with different cake bases like red velvet or chocolate, or even use dark chocolate melts for a twist. Check out our Sky Jelly Cake for more no-bake inspiration!

Crowd Favorite: Whether as a holiday dessert or a sweet gift, these cake balls are bound to be a hit and bring everyone together.

Little Debbie Christmas Cake Balls Ingredients

For the Base
Vanilla Little Debbie Christmas Tree Cakes – Crumbled for that delicious cake-like texture.
Cream Cheese – Ensure it’s at room temperature to achieve that perfect creamy consistency.

For the Coating
White Candy Melts – These provide a sweet, chocolaty crunch on the outside of each cake ball; you can use chocolate melts for a twist!
Red Candy Melts (optional) – Use to drizzle over the cake balls or for decorative accents; feel free to swap with melted chocolate.

For Decoration
Red and Green Sanding Sugar – Adds festive color and a delightful crunch; you can substitute with other edible decorations to suit your theme!

Bring the joy of Little Debbie Christmas Cake Balls into your holiday celebrations and watch them disappear!

Step‑by‑Step Instructions for Little Debbie Christmas Cake Balls

Step 1: Prepare Baking Sheet
Start by lining a baking sheet with waxed paper to provide a non-stick surface for your Little Debbie Christmas Cake Balls. This will make it easy to remove the coated cake balls once they’re ready. Set this aside as you move on to preparing the cake mixture.

Step 2: Mix Base
In a large mixing bowl, combine the crumbled Vanilla Little Debbie Christmas Tree Cakes with room temperature cream cheese. Using a spatula or your hands, blend them together until fully incorporated and smooth, creating a moist, cake-like texture. This mixture should hold together well and be easy to scoop.

Step 3: Form Balls
Take a small cookie scoop and portion out the mixture, rolling each scoop into approximately 1-inch balls with your hands. Place the formed balls onto the prepared baking sheet, gently smoothing them if needed. This step results in beautiful Little Debbie Christmas Cake Balls ready for coating.

Step 4: Chill (optional)
For easier coating, optional but recommended, place your formed cake balls in the freezer for about 30 minutes. This chilling time will firm up the balls and help prevent them from falling apart when dipping in the melted coating, ensuring a perfect finish.

Step 5: Melt Coating
In a microwave-safe bowl, add your white candy melts and heat in 1-minute intervals, stirring in between until completely melted and smooth. If the mixture is too thick for dipping, stir in a small amount of vegetable shortening to reach a desirable consistency. Your coating should be glossy and fluid for the best results.

Step 6: Coat Cake Balls
Carefully dip each chilled cake ball into the melted white candy coating, ensuring they’re fully submerged. Allow any excess coating to drip back into the bowl before placing the coated balls back onto the prepared sheet. This process will give your Little Debbie Christmas Cake Balls a perfectly smooth exterior.

Step 7: Decorate
While the coating is still wet, immediately sprinkle the cake balls with red and green sanding sugar for a festive touch. If you wish to add a drizzle of color, melt your red candy melts and use a fork to drizzle over each cake ball for additional flair before the coating sets.

Step 8: Set
Finally, transfer the baking sheet to the refrigerator and chill the coated cake balls for about 1 hour, or until firm. This step is crucial for achieving the right texture. Once set, store your delightful Little Debbie Christmas Cake Balls in an airtight container, layering them with wax paper to prevent sticking.

Expert Tips for Little Debbie Christmas Cake Balls

  • Room Temperature Cream Cheese: Ensuring your cream cheese is at room temperature will make blending easier and create a smoother filling for your Little Debbie Christmas Cake Balls.

  • Thinning Candy Melts: If your candy melts are too thick, add a little vegetable shortening while melting to achieve the perfect dipping consistency for a flawless coating.

  • Chilling for Precision: Chill your formed cake balls for at least 30 minutes before coating to help maintain their shape and make dipping easier.

  • Avoid Soggy Bottoms: To prevent your cake balls from sticking, make sure to line your baking sheet with waxed paper and allow enough space between each one after coating.

  • Mind the Drizzle: If using red candy melts for decoration, drizzle over the cake balls while the coating is still wet so it adheres properly without sliding off.

  • Storing Tips: Keep your Little Debbie Christmas Cake Balls in an airtight container in the refrigerator for up to a week, but they can also be frozen for longer enjoyment!

How to Store and Freeze Little Debbie Christmas Cake Balls

Fridge: Store your Little Debbie Christmas Cake Balls in an airtight container in the refrigerator for up to 1 week to maintain their freshness and flavor.

Freezer: To extend their shelf life, freeze the cake balls for up to 3 months. Layer them between wax paper in a freezer-safe container to prevent sticking.

Reheating: When ready to enjoy, simply thaw in the fridge for a few hours before serving. Avoid reheating in the microwave as it may compromise texture.

Room Temperature: If serving at a gathering, these treats can be left out for a few hours but should be consumed within the same day for best quality.

Make Ahead Options

These delightful Little Debbie Christmas Cake Balls are perfect for meal prep, allowing you to save time during the busy holiday season! You can prepare the cake ball mixture and shape them into balls up to 24 hours in advance. Just ensure to refrigerate them in an airtight container to maintain freshness. For an extra touch, you can also melt the white candy coating up to 3 days ahead and store it in a cool place. When you’re ready to serve, simply coat the chilled cake balls and decorate as desired. With these prep-ahead options, you’ll have stress-free holiday treats that are just as delicious as if they were made fresh!

What to Serve with Little Debbie Christmas Cake Balls

The delightful sweetness of these cake balls can be beautifully complemented by a variety of festive sides and treats, creating a memorable meal.

  • Hot Cocoa: A rich and creamy mug of hot cocoa enhances the festive spirit and balances the sweetness of the cake balls perfectly. The warmth of the drink invites cozy conversations.

  • Peppermint Bark: This crunchy candy with a cool minty flavor provides a refreshing contrast to the indulgent cake balls, making for a delightful bite-sized pairing.

  • Mini Pecan Pies: These bite-sized pecan pies offer a nutty richness that contrasts wonderfully with the sweet cake balls, while also continuing the festive theme.

  • Cheese Platter: A selection of sharp cheddar, brie, and creamy goat cheese provides an excellent savory counterpoint to the sweetness, creating a balanced flavor profile for your guests.

  • Cranberry Relish: The tartness of freshly made cranberry relish adds a bright note that cuts through the richness, enhancing every taste experience. Use it as a dip for added fun!

  • Vanilla Ice Cream: Serve a scoop of smooth vanilla ice cream alongside the cake balls for a textural contrast—a creamy cool treat that makes every bite heavenly.

  • Mulled Wine: This spiced beverage filled with warm flavors invites your guests to indulge further in the holiday experience, making it a perfect accompaniment to the cake balls.

  • Gingerbread Cookies: The festive flavors of these cookies meld seamlessly with the cake balls, making for a nostalgic and cheerful dessert plate at any gathering.

Little Debbie Christmas Cake Balls Variations

Get ready to personalize your festive treats with these delightful twists that will elevate your Little Debbie Christmas Cake Balls.

  • Chocolate Lovers: Substitute the white candy melts with dark chocolate melts for a richer, bolder flavor. This swap transforms the sweetness into a decadent indulgence everyone will adore.

  • Nutty Surprise: Add 1/4 cup of finely chopped nuts, such as walnuts or pecans, into the cake mixture. The added crunch and earthy flavor will enhance the texture and give a cozy, warm essence to each bite.

  • Flavor Boost: Mix in half a teaspoon of peppermint extract with the cream cheese for a minty twist. Perfect for the holidays, this refreshing flavor will truly brighten up your cake balls!

  • Seasonal Spice: Incorporate a dash of nutmeg or cinnamon into the crumbled cake base for a warm spice note. This subtle change will evoke the comforting aromas of the season, making your cake balls even more inviting.

  • Colorful Coating: Use colored candy melts instead of white for a vibrant, eye-catching presentation. Bright pinks, greens, or blues will amplify the festive spirit, perfect for spreading holiday cheer.

  • Vegan Version: Swap cream cheese for a plant-based alternative and use dairy-free candy melts for an inclusive dessert option. You won’t miss the dairy with this creamy and delicious adaptation!

  • Mini Cake Balls: For bite-sized treats, use a teaspoon instead of a scoop to make smaller, poppable cake balls. These mini delights will be the perfect sweet nibble for party trays or gift-giving!

  • Gourmet Toppings: After coating, drizzle with caramel or chocolate sauce, and sprinkle sea salt for a gourmet touch. This simple addition elevates your cake balls into gourmet desserts that impress.

With these variations, you can explore a world of flavors and textures—don’t forget to check out our Nutty Vanilla Cake and enhance your holiday baking experience!

Little Debbie Christmas Cake Balls Recipe FAQs

How ripe should the Little Debbie Christmas Tree Cakes be?
Absolutely! The Little Debbie Christmas Tree Cakes you use should be fresh but don’t require any specific ripeness since they are already baked and pre-packaged. However, check for any damage or signs of age, such as an unusual smell or dark spots.

How should I store the Little Debbie Christmas Cake Balls?
Very! Keep your Little Debbie Christmas Cake Balls in an airtight container in the refrigerator. They’ll stay fresh for up to 1 week. To maintain texture and flavor, layer them with wax paper to avoid sticking.

Can I freeze Little Debbie Christmas Cake Balls?
Absolutely! For longer storage, freeze your Little Debbie Christmas Cake Balls for up to 3 months. To do this, place them in a freezer-safe container with pieces of wax paper between layers to prevent sticking. When you’re ready to enjoy them, simply thaw in the fridge for a few hours before serving.

What do I do if my candy melts are too thick?
No worries! If your melted candy coating is too thick for dipping, that can happen. Just stir in a small amount of vegetable shortening while melting. This will help achieve a smooth, glossy consistency ideal for coating your cake balls.

Are these cake balls suitable for people with allergies?
Absolutely! However, always check the packaging of your ingredients. The cream cheese is dairy, and the candy melts may contain allergens like soy or gluten. Additionally, if you’re making these for a gathering, it’s good practice to inform guests of any potential allergens involved.

What if my cake balls fall apart while coating?
Don’t worry! If your Little Debbie Christmas Cake Balls are crumbling while you coat them, it may be due to not chilling them enough beforehand. Make sure to chill the formed balls for at least 30 minutes, and if they continue to be problematic, try reducing the size of the balls to ensure they hold together better.

Little Debbie Christmas Cake Balls

Decadent Little Debbie Christmas Cake Balls to Delight You

Delight in Little Debbie Christmas Cake Balls, no-bake treats that transform festive cakes into a treat everyone will love.
Prep Time 30 minutes
Chilling Time 30 minutes
Total Time 1 hour
Servings: 12 cake balls
Course: Dessert
Cuisine: American
Calories: 150

Ingredients
  

For the Base
  • 2 packages Vanilla Little Debbie Christmas Tree Cakes Crumpled
  • 8 oz Cream Cheese At room temperature
For the Coating
  • 12 oz White Candy Melts Or chocolate melts for a twist
  • 4 oz Red Candy Melts Optional for drizzling
For Decoration
  • 2 tbsp Red Sanding Sugar For festive color
  • 2 tbsp Green Sanding Sugar For festive color

Equipment

  • mixing bowl
  • baking sheet
  • spatula
  • microwave-safe bowl
  • Cookie scoop

Method
 

Step-by-Step Instructions
  1. Start by lining a baking sheet with waxed paper.
  2. Combine crumbled Little Debbie Christmas Tree Cakes with cream cheese in a large mixing bowl.
  3. Form the mixture into approximately 1-inch balls and place them on the prepared baking sheet.
  4. Place formed cake balls in the freezer for about 30 minutes for easier coating.
  5. Melt the white candy melts in a microwave-safe bowl until smooth.
  6. Dip each chilled cake ball into the melted white candy coating and place back on the baking sheet.
  7. Sprinkle with red and green sanding sugar while the coating is still wet.
  8. Chill the coated cake balls in the refrigerator for about 1 hour until firm.

Notes

Store in an airtight container in the refrigerator for up to 1 week. Can freeze for up to 3 months.

Delicious Saltine Cracker Toffee You’ll Want to Share

It’s interesting how the simplest of ingredients can transform into something truly delightful. That’s precisely what happens when you whip up this Easy 4-Ingredient Christmas Crack Recipe, a.k.a. Saltine Cracker Toffee. This delectable treat effortlessly combines crunchy saltine crackers with a heavenly mix of butter and brown sugar, topped off with rich chocolate. Not only is this recipe a breeze to prepare, but it’s also a guaranteed crowd-pleaser, leaving everyone craving just one more piece (or two). Plus, it makes for a perfect homemade gift during the festive season! So why not indulge in a little nostalgia and create a sweet experience that’s sure to brighten up your holiday gatherings? What toppings will you choose to make it your own?

Why is Saltine Cracker Toffee So Irresistible?

Simplicity at its finest: This easy recipe requires only four ingredients, making it perfect for busy days when you need a quick treat.

Perfectly balanced: The buttery richness of the caramel combines magically with crunchy saltines and smooth chocolate, creating a symphony of flavors that’s hard to resist.

Endless creativity: Want to shake things up? Optional toppings like nuts or holiday sprinkles give you the freedom to personalize your toffee to match any occasion.

A crowd-pleaser: Whether you’re hosting a holiday party or just looking for a sweet snack, this toffee always draws rave reviews from friends and family.

Gift-worthy: Packaged in festive containers, this treat makes for a thoughtful, homemade gift that shows you care. Don’t miss out on the nostalgia and joy in every bite!

Saltine Cracker Toffee Ingredients

• Create the perfect batch of Saltine Cracker Toffee with these essential ingredients!

For the Toffee

  • Dark Brown Sugar – Adds sweetness and a rich caramel flavor; substitute with light brown sugar if you prefer a milder taste.
  • Butter – Provides richness and a buttery depth; using unsalted butter gives you better control over the overall saltiness of the treat.
  • Chocolate Chips – Lends a smooth, luscious chocolate layer; feel free to swap in dark, semi-sweet, or even white chocolate based on your cravings.
  • Saltine Crackers – Forms the crunchy base for the toffee; no substitutes needed unless you require gluten-free options—opt for gluten-free crackers in that case.

Step‑by‑Step Instructions for Saltine Cracker Toffee

Step 1: Preheat Your Oven
Begin by preheating your oven to 400°F (200°C). This is a crucial step for ensuring that your Saltine Cracker Toffee bakes evenly. While the oven heats up, gather your ingredients and prepare your baking pan to make the assembly process seamless.

Step 2: Prepare the Baking Pan
Line a 9 by 13-inch baking pan with aluminum foil, allowing some overhang for easy removal later. This will prevent the toffee from sticking to the pan, ensuring a perfect release once it’s set. Take a moment to smooth out any wrinkles in the foil for a smooth surface.

Step 3: Arrange the Crackers
Lay a single layer of saltine crackers evenly across the bottom of your prepared baking pan. This will serve as the base for your delicious Saltine Cracker Toffee. Ensure the crackers are tightly packed together to create a solid foundation for the toffee mixture.

Step 4: Make the Toffee Mixture
In a medium saucepan, combine the butter and dark brown sugar. Cook over medium heat while stirring continually until the mixture reaches a rolling boil. Allow it to boil for 3 minutes—watch for a bubbly texture forming, signaling that your caramel-like toffee is ready to pour over the crackers.

Step 5: Coat the Crackers
Once your toffee mixture has boiled for 3 minutes, immediately remove it from the heat. Carefully pour the bubbling mixture over the arranged saltine crackers, ensuring an even coating. Use a spatula to spread it gently if necessary, covering all corners for that delightful sweet and salty combination.

Step 6: Bake the Toffee
Place the baking pan in your preheated oven and bake for 7 minutes. During this time, you’ll see the toffee bubble and start to caramelize, which creates that perfect gooey consistency. Keep an eye on it to ensure it doesn’t burn, as you want it nice and golden.

Step 7: Add the Chocolate
Remove the pan from the oven and immediately sprinkle the chocolate chips over the hot toffee. Allow the heat from the toffee to melt the chocolate chips for about 2-3 minutes. The melted chocolate will form a luscious layer over your amazing Saltine Cracker Toffee.

Step 8: Spread the Chocolate
Using a spatula, gently spread the melted chocolate evenly across the top of the toffee. This chocolate layer adds a rich finish to your treat. If desired, sprinkle any optional toppings, such as chopped nuts, over the chocolate for added texture and flavor.

Step 9: Chill and Set
Place the baking pan in the refrigerator for about 1 hour or until the toffee is fully set. This chilling process allows the chocolate to firm up. Once set, you’ll be able to break the toffee into delightful pieces easily.

Step 10: Serve and Indulge
After chilling, lift the toffee out of the pan using the overhang of the foil. Break it into pieces and serve! Your homemade Saltine Cracker Toffee is now ready to share, delighting family and friends with its sweet and salty goodness.

Expert Tips for Saltine Cracker Toffee

Watch Your Boil: Ensure your butter and sugar mixture reaches a rolling boil without burning it. Stir constantly to prevent sticking and achieve the perfect texture.

Smooth Chocolate Layer: For easy spreading, melt chocolate in a double boiler instead of the microwave, particularly if you’re using toffee immediately after baking.

Cracker Arrangement: Lay the saltine crackers close together in a single layer to create a solid base. This will ensure even coverage of the caramel and chocolate.

Chill Completely: Allow the Saltine Cracker Toffee to chill in the refrigerator for at least 1 hour. This step is vital for achieving a perfect, breakable texture.

Experiment with Toppings: Don’t hesitate to add your favorite toppings, like chopped nuts or colorful sprinkles, to the melted chocolate for an extra flavor boost and festive flair.

Make Ahead Options

These Easy 4-Ingredient Christmas Crack (Saltine Cracker Toffee) treats are perfect for meal prep enthusiasts! You can prepare the toffee mixture and pour it over the crackers up to 24 hours in advance; simply cover the unbaked pan with foil and refrigerate it. When you’re ready to indulge, bake it as instructed, then add the chocolate layer and chill. For best results, avoid adding any toppings until shortly before serving, as this helps maintain their freshness. This simple prep will save you time during the busy holiday season, allowing you to enjoy delightful homemade treats without the last-minute rush!

How to Store and Freeze Saltine Cracker Toffee

Room Temperature: Store your Saltine Cracker Toffee in an airtight container at room temperature for up to 2 weeks. This keeps it crunchy and delicious!

Fridge: If you prefer a firmer texture, refrigerate the toffee in an airtight container for up to 3 weeks. Just bring it back to room temperature before enjoying for the best flavor.

Freezer: For long-term storage, freeze the toffee in a freezer-safe container or plastic wrap for up to 2 months. Thaw in the fridge before serving to retain its texture.

Reheating: Generally, there’s no need to reheat the toffee, as it’s best enjoyed at room temperature. If you’ve frozen it, simply let it sit out to soften before diving in!

Saltine Cracker Toffee Variations

Feel free to get creative with your Saltine Cracker Toffee—personalize it to suit your tastes!

  • Nutty Delight: Add chopped pecans or walnuts on top of the melted chocolate for an extra crunch. This not only enhances texture but also introduces a delightful nuttiness that complements the sweet and salty flavors perfectly.

  • Toffee Bit Swap: Swap out chocolate chips with toffee bits for a chewy twist. This variation still maintains the signature sweetness while delivering a rich toffee flavor that pairs beautifully with the crunchy saltines.

  • Spicy Kick: Sprinkle a pinch of cayenne pepper or red pepper flakes into the toffee mixture for a surprising heat. This will excite your palate and add a fun twist to the traditional recipe!

  • Holiday Cheer: Use festive sprinkles or crushed candy canes as a topping for the chocolate. This variation injects vibrant colors and seasonal flair onto your toffee, making it perfect for holiday celebrations.

  • White Chocolate Elegance: Replace dark or semi-sweet chocolate with white chocolate for a sweeter, creamy take. The delightful contrast between the salty base and sweet white chocolate creates a beautifully balanced treat.

  • Peanut Butter Bliss: Swirl in some peanut butter with the melted chocolate layer for a rich, nutty flavor that takes your toffee to the next level. The combination of chocolate and peanut butter will have everyone coming back for more!

  • Coconut Crunch: For a tropical touch, sprinkle shredded coconut over the melted chocolate before it sets. This adds a chewy texture and a hint of flavor that will transport you to a sunny paradise with every bite.

  • Caramel Drizzle: Drizzle some caramel sauce over the set chocolate for an extra sweet and gooey layer. This indulgent option elevates your toffee to an even more luxurious treat that’s hard to resist.

Feel free to mix inspirations or create your unique variations! As always, your adaptability will make this easy 4-ingredient recipe even more fun and customizable. Why not check out tips for perfecting your toffee to ensure every batch turns out delightful?

What to Serve with Easy 4-Ingredient Christmas Crack?

Get ready to complete your festive spread with delightful pairings that elevate this sweet treat to new heights.

  • Creamy Hot Chocolate: A cozy cup that enhances the sweetness of the toffee, perfect for a chilly day.

  • Cozy Eggnog: The rich, creamy flavor pairs beautifully with the crunchy toffee, creating a holiday classic.

  • Savory Cheese Platter: Balance out the sweetness by serving with tangy cheeses like cheddar or creamy brie. This contrast enhances the flavors of both the cheese and the toffee.

  • Fresh Fruit Salad: Lighten up your dessert table with refreshing fruits like strawberries and apples to cleanse the palate.

  • Nutty Trail Mix: A crunchy mix of nuts offers a satisfying contrast to the toffee’s sweetness; it’s an excellent option for snacking alongside.

  • Festive Spritzer: A sparkling drink with cranberries or pomegranates adds a splash of color and a hint of tartness that complements the toffee perfectly.

  • Vanilla Ice Cream: Silky-smooth ice cream provides a deliciously creamy counterpart to the crunchy toffee, making each bite indulgently satisfying.

  • Chocolate-Covered Pretzels: This sweet-and-salty combination echoes the flavor profile of the Christmas Crack, creating a delectable snack duo.

  • Gingerbread Cookies: With their warm spice notes, these cookies create a wonderful holiday flavor experience alongside your toffee.

Saltine Cracker Toffee Recipe FAQs

How do I choose the right saltine crackers?
When selecting your saltine crackers, look for those that are fresh and crisp, with no broken pieces in the package. Aim for crackers that don’t have dark spots or excessive crumbs, as this can affect the overall texture of your toffee. If you’re gluten-sensitive, be sure to grab gluten-free saltine crackers instead, which can be found at most grocery stores!

How should I store Saltine Cracker Toffee?
Store your Saltine Cracker Toffee in an airtight container at room temperature for up to 2 weeks. This will help maintain its delightful crunchiness. If you prefer a firmer texture, placing it in the refrigerator can extend its life to about 3 weeks—just be sure to bring it back to room temperature before enjoying to experience the full flavor.

Can I freeze Saltine Cracker Toffee for later?
Absolutely! For long-term storage, freeze your Saltine Cracker Toffee by wrapping pieces in plastic wrap or placing them in a freezer-safe container. It will keep well for up to 2 months. When you’re ready to indulge, simply let it thaw in the fridge overnight or at room temperature for a couple of hours before serving.

What if my toffee mixture burns while boiling?
If your butter and sugar mixture has burned during boiling, the mixture will have a bitter taste, which is tough to salvage. It’s best to start over since the burnt flavor can overwhelm the entire toffee. When boiling, always stir continuously, and keep a close eye on it—you’re aiming for a nice caramel color and bubbling texture without straying into burnt territory.

Can I use different types of chocolate for the topping?
Very! Feel free to mix and match your chocolate toppings. Dark chocolate provides a rich contrast to the sweetness of the toffee, while semi-sweet and white chocolate can cater to different flavor preferences. You could even create a marbled effect by melting and swirling two kinds together for an eye-catching presentation!

Saltine Cracker Toffee

Delicious Saltine Cracker Toffee You’ll Want to Share

This Saltine Cracker Toffee combines simple ingredients into a delightful treat perfect for sharing during the holidays.
Prep Time 15 minutes
Cook Time 15 minutes
Chilling Time 1 hour
Total Time 1 hour 30 minutes
Servings: 12 pieces
Course: Dessert
Cuisine: American
Calories: 250

Ingredients
  

For the Toffee
  • 1 cup Dark Brown Sugar Substitute with light brown sugar if preferred.
  • 1 cup Butter Using unsalted butter for better control over saltiness.
  • 2 cups Chocolate Chips Feel free to swap for dark, semi-sweet, or white chocolate.
  • 1 package Saltine Crackers Use gluten-free crackers if required.

Equipment

  • Medium saucepan
  • baking pan
  • spatula
  • Aluminum Foil

Method
 

Step-by-Step Instructions
  1. Preheat your oven to 400°F (200°C). Gather your ingredients and prepare your baking pan.
  2. Line a 9 by 13-inch baking pan with aluminum foil, allowing some overhang.
  3. Lay a single layer of saltine crackers evenly across the bottom of the baking pan.
  4. In a medium saucepan, combine the butter and dark brown sugar, cook over medium heat while stirring until boiling. Boil for 3 minutes.
  5. Remove from heat and pour the boiling mixture over the crackers, ensuring an even coating.
  6. Bake for 7 minutes in the preheated oven until bubbly and caramelized.
  7. Add the chocolate chips on top of the toffee, allowing them to melt for 2-3 minutes.
  8. Spread the melted chocolate evenly across the toffee. Add optional toppings if desired.
  9. Chill in the refrigerator for about 1 hour until set.
  10. Lift the toffee out of the pan, break into pieces, and serve.

Notes

This Saltine Cracker Toffee is easy to make and perfect for sharing during the holiday season. It can be customized with different toppings and is ideal for gifting.

Crockpot Christmas Crack: Easy Sweet and Salty Holiday Treat

As I unwrapped the twinkling lights and festive decorations, the aroma of melted chocolate filled my kitchen—a sure sign that the holiday season was here. This year, I decided to whip up something truly special for my friends and family: Crockpot Christmas Crack. It’s an effortlessly delightful candy that blends the creamy sweetness of white and milk chocolates with the satisfying crunch of salted peanuts. The best part? It’s a “set-it-and-forget-it” treat that requires just five ingredients, making it perfect for busy holiday schedules. Whether you’re looking for a crowd-pleaser at your next gathering or a sweet gift for someone special, this treat is sure to impress. Can you resist the temptation of sweet and salty goodness? Let’s dive into the magic of this easy recipe!

Why is Crockpot Christmas Crack a must-try?

Simplicity at Its Best: This recipe is incredibly easy to follow, making it a hassle-free choice for busy bakers.

Deliciously Addictive Flavor: The harmonious blend of sweet white chocolate, rich milk chocolate, and crunchy salted peanuts creates a flavor experience that’s simply irresistible.

Perfect for Sharing: Ideal for holiday parties or as a homemade gift, this candy is sure to impress friends and family alike.

Customizable Treats: With options to substitute nuts or add ingredients like pretzels, each batch can be personalized for your cravings.

Minimal Cleanup Required: Using a crockpot means less mess and more time enjoying your sweet creation! Your kitchen will thank you! For more effortless treats, check out our easy dessert ideas.

Crockpot Christmas Crack Ingredients

• This delightful candy is made with just five simple ingredients!

For the Base

  • White Chocolate Almond Bark – Provides a creamy sweetness and forms the base of the candy. Note: Can substitute with vanilla candy coating if needed.
  • Semi-Sweet Chocolate Chips – Adds depth of chocolate flavor. Substitution: Use dark chocolate chips for a richer taste.

For the Crunch

  • Salted Dry Roasted Peanuts – Offers a satisfying crunch and balances the sweetness. Substitution: For a less salty flavor, choose unsalted peanuts.

For Added Flavor

  • Chocolate Bar or Chocolate Bark – Enhances the overall chocolatey profile. You can use any brand of milk chocolate, or simply use more chips.

For Decoration

  • Sprinkles – Optional decoration for festive appeal. Optional: Can use colored sprinkles for additional holiday cheer.

Step‑by‑Step Instructions for Crockpot Christmas Crack

Step 1: Prepare the Crockpot
Begin by spraying the inside of your crockpot with non-stick spray or using a crockpot liner to ease cleanup later. This step is crucial to prevent the delicious Crockpot Christmas Crack from sticking, ensuring it comes out effortlessly once set. Set your crockpot aside while you prep the ingredients.

Step 2: Line the Baking Sheets
Next, line two baking sheets with silicone mats or wax paper. This will create a non-stick surface for the chocolate clusters once they are ready to be dropped. This preparation is essential, as it lets your sweet, salty creation set without any mess, providing a perfect canvas for your festive treats.

Step 3: Combine the Base Ingredients
Place the white chocolate almond bark pieces at the bottom of the crockpot, creating a smooth and creamy foundation for your Crockpot Christmas Crack. This chocolate base will melt beautifully, so layer it evenly across the bottom. Doing this first ensures a lovely, even melting process for all the delicious ingredients that follow.

Step 4: Add Crunch and Flavor
Now, layer the salted dry roasted peanuts, semi-sweet chocolate chips, and the chocolate bar over the melted white chocolate. This combination creates a delightful blend of textures and flavors. Take care to distribute the peanuts and chocolates evenly, maximizing the deliciously addictive qualities of your mix as they meld together during cooking.

Step 5: Initial Cooking Phase
Cover the crockpot and set it to cook on low for 1 hour. Do not lift the lid during this time, as it contains essential heat and moisture for melting the chocolates perfectly. After this hour, expect to see a glossy sheen on the mixture, indicating that the chocolates are soft and ready for stirring.

Step 6: Stir and Continue Cooking
After the initial cooking time, carefully remove the lid and stir the mixture to combine all the melted ingredients. Once thoroughly stirred, replace the lid and continue cooking on low, stirring every 15 minutes. This will ensure that everything is well combined and melted to a smooth, indulgent texture throughout.

Step 7: Drop onto Baking Sheets
When the chocolate is fully melted and combined, use a cookie scoop or two tablespoons to drop heaping spoonfuls of the mixture onto your lined baking sheets. Position them a couple of inches apart to allow some room for spreading. Each scoop promises a generous cluster of your delightful Crockpot Christmas Crack.

Step 8: Add Festive Sprinkles
Before the chocolate sets, immediately add sprinkles on top of each cluster for a festive touch. This is an optional yet delightful step that adds color and cheer to your creation. Let the clusters cool completely at room temperature, allowing them to firm up and hold their shape beautifully.

How to Store and Freeze Crockpot Christmas Crack

Room Temperature: Store the Crockpot Christmas Crack in an airtight container at room temperature for up to 2-3 weeks to maintain freshness and flavor.

Fridge: For longer-lasting enjoyment, refrigerate the candy in an airtight container for up to 1 month. This helps firm up the clusters while keeping them deliciously sweet.

Freezer: If you want to make this treat ahead of time, wrap individual clusters tightly in plastic wrap and place them in a freezer-safe bag. They can be frozen for up to 3 months.

Reheating: There’s no need to reheat this candy; simply enjoy it chilled or at room temperature for the best texture and flavor experience.

Crockpot Christmas Crack Variations

Feel free to make this delightful treat your own with these fun and easy variations!

  • Dairy-Free: Swap out the white chocolate almond bark for a dairy-free chocolate alternative to make this treat suitable for lactose-intolerant friends.
  • Nut-Free: Use sunflower seeds instead of peanuts for a similar crunch without nuts, ensuring everyone can indulge safely at gatherings.
  • Flavor Boost: Add a pinch of sea salt or a dash of cinnamon for a warm twist. These small adjustments can elevate the sweetness, making each bite sing with flavor!
  • Caramel Delight: Mix in caramel bits for an extra layer of sweetness and a chewy texture that pairs wonderfully with the chocolate.
  • Heat it Up: For those who like it spicy, sprinkle a dash of cayenne pepper or chili flakes to introduce a subtle heat that complements the sweet and salty profile.
  • Ultimate Crunch: Incorporate crushed pretzels or potato chips for a surprising crunch element that’ll keep everyone guessing what that delightful texture is.
  • Flavored Chocolates: Use flavored chocolate bars (like mint or orange) instead of regular chocolate for a festive twist. This adds unique layers of taste that can transport your taste buds!
  • Decorative Touch: Instead of regular sprinkles, try crushed candy canes for a festive visual and a delightful peppermint twist on this holiday candy.

With these variations, your Crockpot Christmas Crack will never be boring. If you’re looking for even more ideas, check out our festive dessert options that are sure to dazzle your guests!

What to Serve with Crockpot Christmas Crack

Delight your family and friends with a full spread that complements the sweet and salty goodness of this festive treat.

  • Hot Cocoa Bar: Warm, velvety cocoa topped with whipped cream is the perfect cozy drink to balance sweet flavors. Imagine sipping this alongside your crunchy clusters!
  • Cheese Platter: A mix of sharp cheddar and creamy brie creates an excellent contrast to the sweetness of the Christmas Crack, adding savory notes to your dessert table.
  • Gingerbread Cookies: The warm spices of gingerbread pair perfectly with the chocolate; serve them for a nostalgic holiday touch that brings joy to every bite.
  • Fruit Salad: A light and zesty fruit medley with citrus fruits can refresh the palate, offering a bright counterpoint to the rich chocolate treat.
  • Spiced Nuts: Roasted nuts with cinnamon and nutmeg enhance the festive spirit, providing an addictive crunch that resonates with the flavors of the Christmas Crack.
  • Eggnog or Spiced Cider: Either of these seasonal drinks pairs harmoniously, with their creamy or spiced warmth offsetting the sweetness of your chocolate masterpiece.

Make Ahead Options

These Crockpot Christmas Crack treats are perfect for meal prep enthusiasts! You can prepare the ingredients up to 24 hours in advance by measuring out the white chocolate almond bark, chocolate chips, and peanuts, then combining them in the crockpot, keeping them separate until you’re ready to cook. Just store the prepped ingredients in airtight containers in the refrigerator to maintain their freshness. When you’re ready to serve, simply follow the cooking instructions, starting with the melting phase in the crockpot. The final result will be just as delicious and festive, saving you valuable time during the hectic holiday season!

Expert Tips for Crockpot Christmas Crack

  • Don’t Rush the Melt: Allow the chocolate to melt thoroughly during the initial hour before stirring; this ensures a creamy texture for your Crockpot Christmas Crack.

  • Stir Gently: When mixing, be gentle to keep the clusters intact and avoid breaking up the peanuts too much for that satisfying crunch.

  • Use Quality Ingredients: High-quality chocolate makes a difference in flavor; consider choosing brands that you love for a more decadent treat.

  • Adjust Sweetness: If you prefer a less sweet treat, try mixing in a little sea salt or using unsweetened chocolate to balance the flavors in your Crockpot Christmas Crack.

  • Cool Properly: If the clusters feel soft after setting, pop them in the fridge for about 30 minutes to firm them up nicely.

Crockpot Christmas Crack Recipe FAQs

What type of peanuts should I use for Crockpot Christmas Crack?
Absolutely! I recommend using salted dry roasted peanuts as they provide a delightful crunch and balance out the sweetness of the chocolates. If you prefer a milder flavor, unsalted peanuts will also work nicely.

How long can I store Crockpot Christmas Crack?
You can store your Crockpot Christmas Crack in an airtight container at room temperature for up to 2-3 weeks. If you want to keep it longer, refrigerate it for up to 1 month, which helps maintain its freshness.

Can I freeze Crockpot Christmas Crack?
Very! To freeze your delicious creations, wrap individual clusters tightly in plastic wrap and place them in a freezer-safe bag. They can be stored in the freezer for up to 3 months. Just make sure to let them thaw at room temperature before enjoying!

What should I do if my clusters feel soft after cooling?
If you find that your clusters haven’t set as firmly as you’d like, don’t worry! Simply refrigerate them for about 30 minutes to help them firm up. This step works wonders in giving them that perfect bite!

Can pets eat Crockpot Christmas Crack?
No, it’s best to keep Crockpot Christmas Crack away from pets as the chocolate can be toxic to dogs and cats. Always store treats out of reach to ensure their safety.

What can I substitute for white chocolate almond bark?
For a great alternative, you can use vanilla candy coating. If you’re looking for a more intense chocolate flavor, feel free to substitute the white chocolate with milk chocolate or even dark chocolate if you prefer that rich taste!

Crockpot Christmas Crack

Crockpot Christmas Crack: Easy Sweet and Salty Holiday Treat

Crockpot Christmas Crack is an easy, sweet and salty holiday treat perfect for parties or gifts.
Prep Time 15 minutes
Cook Time 1 hour
Total Time 1 hour 15 minutes
Servings: 12 clusters
Course: Dessert
Cuisine: American
Calories: 180

Ingredients
  

For the Base
  • 1 pack White Chocolate Almond Bark Can substitute with vanilla candy coating if needed.
  • 1 cup Semi-Sweet Chocolate Chips Use dark chocolate chips for a richer taste.
For the Crunch
  • 1 cup Salted Dry Roasted Peanuts Choose unsalted peanuts for a less salty flavor.
For Added Flavor
  • 1 bar Chocolate Bar or Chocolate Bark Any brand of milk chocolate or more chips can be used.
For Decoration
  • 1 cup Sprinkles Can use colored sprinkles for additional holiday cheer.

Equipment

  • Crockpot

Method
 

Step-by-Step Instructions
  1. Prepare the Crockpot by spraying with non-stick spray or using a liner.
  2. Line two baking sheets with silicone mats or wax paper.
  3. Combine the base ingredients by placing the white chocolate almond bark at the bottom of the crockpot.
  4. Add the salted dry roasted peanuts, semi-sweet chocolate chips, and the chocolate bar over the melted white chocolate.
  5. Cover and cook on low for 1 hour without lifting the lid.
  6. Remove lid, stir the mixture, then continue cooking on low, stirring every 15 minutes.
  7. Drop heaping spoonfuls onto the lined baking sheets.
  8. Add sprinkles on top of each cluster before the chocolate sets.

Notes

Allow the chocolate to melt thoroughly during the initial hour and cool properly to maintain cluster shape.

Delicious Buster Bars You Can Make Healthy at Home

As I rummaged through my pantry, I was pleasantly surprised to find just three simple ingredients: yogurt, peanut butter, and chocolate chips. A light bulb went off—why not recreate the nostalgic Peanut Butter Buster Bars I loved from Dairy Queen? With a healthy twist, this recipe makes it easy to whip up a treat that’s not only delicious but also packed with over 15 grams of protein and a mere 200 calories per bar. Making them is a breeze, and they can be customized for any dietary lifestyle, whether you’re vegan or keto. Trust me, you’ll want to try these healthier Buster Bars; they’re the perfect way to satisfy your sweet tooth without the guilt! Curious to see how these come together? Let’s dive into this delightful recipe!

Why Are These Buster Bars So Irresistible?

Simplicity at its finest: With just three ingredients, making these bars is a breeze, perfect for busy nights or last-minute dessert cravings.

High-protein goodness: Each bar packs over 15 grams of protein, turning your sweet treat into a guilt-free snack option.

Customizable choices: Whether you’re vegan, keto, or just looking for healthier alternatives, this recipe adapts to suit your dietary needs effortlessly.

Decadent flavor: Rich peanut butter wrapped in smooth chocolate brings indulgent taste without the unnecessary calories—only 200 calories per bar!

Crowd-pleaser: Whip these up for gatherings and watch them disappear, satisfying everyone’s sweet tooth while keeping health in mind.

Dive into these delightful Healthy Peanut Butter Buster Bars and experience the magic!

Buster Bars Ingredients

For the Base

  • Yogurt – Provides creaminess and structure; use plain yogurt, vanilla ice cream, or vegan yogurt to fit your taste.
  • Peanut Butter – Adds richness and protein; feel free to swap in almond or sunflower seed butter for allergies.
  • Sweetener – Enhances flavor if you’re using unsweetened yogurt; options include coconut sugar, maple syrup, honey, or a sugar-free substitute like stevia.

For the Coating

  • Chocolate Chips – Creates a delicious chocolate shell; consider using dairy-free or sugar-free chips for vegan or keto options.
  • Coconut Oil (optional) – Improves the chocolate coating’s smoothness; omit if you’re looking to keep it low-fat.

For Texture

  • Peanuts (optional) – Adds a delightful crunch; skip this ingredient if nut-free is your goal.

Get ready to whip up these delightful Buster Bars, and enjoy a healthier version of a classic treat!

Step‑by‑Step Instructions for Healthy Peanut Butter Buster Bars

Step 1: Mix Base
In a medium bowl, combine 1 cup of your chosen yogurt with ½ cup of creamy peanut butter and any desired sweetener. Use a hand mixer or whisk to blend until the mixture is smooth and creamy. This should take about 2-3 minutes. For an extra treat, fold in a handful of mini chocolate chips before moving on to shaping your bars.

Step 2: Shape Bars
Line a baking tray with parchment paper to prepare for your Buster Bars. Using a spoon, drop generous dollops of the peanut butter mixture onto the tray, spacing them apart. Insert popsicle sticks into the center of each dollop, then smooth the tops for an even shape. If you’d like, sprinkle chopped peanuts on top for added texture before freezing.

Step 3: Freeze
Carefully place the tray in your freezer and allow the bars to freeze for about 2-3 hours, or until they become firm. This step is key, as it helps maintain the shape of your Buster Bars. Once solid, they’ll be ready for the delightful chocolate coating that follows.

Step 4: Melt Chocolate
While your bars are freezing, prepare the chocolate coating. In a microwave-safe bowl, add 1 cup of chocolate chips and, if desired, a teaspoon of coconut oil for smoothness. Microwave on high for about 30 seconds, then stir. Repeat in 15-second intervals until completely melted and glossy, ensuring no water comes into contact with the chocolate.

Step 5: Coat Bars
Once the Buster Bars are firmly frozen, gently dip each one into the melted chocolate, ensuring it’s fully coated. Lift the bar out and let excess chocolate drip off before returning it to the parchment-lined tray. For an extra crunch, sprinkle some chopped peanuts on top before they freeze again to set the chocolate shell.

Step 6: Freeze Again
Return the coated bars to the freezer for an additional 30 minutes to 1 hour, allowing the chocolate coating to harden completely. This final freeze ensures your Healthy Peanut Butter Buster Bars have that delightful crunch when you bite into them, making for a perfect healthy dessert or snack.

Step 7: Serve and Store
Once the chocolate is set, your Buster Bars are ready to enjoy! Remove them from the parchment and store any leftovers in a sealed container in the freezer for up to a month. These bars make a healthy treat that you can quickly grab anytime you’re craving something sweet.

Buster Bars Variations & Substitutions

Feel free to let your creativity shine as you customize these Buster Bars to make them uniquely yours!

  • Nut-Free: Substitute your peanut butter with sunbutter for a delicious nut-free alternative that still offers creamy goodness.

  • Vegan Delight: Use maple syrup instead of honey and opt for dairy-free chocolate chips to make these bars completely vegan.

  • Flavor Infusion: Swap plain yogurt with flavored varieties like strawberry or chocolate for a unique twist that adds extra excitement.

  • Keto-Friendly: Replace the sweetener with a sugar-free substitute like erythritol or stevia to keep your bars low-carb while enjoying the same decadent taste.

  • Crunchy Alternatives: For a delightful change in texture, add unsweetened shredded coconut or chia seeds to the mixture before freezing.

  • Extra Chocolate: Want to fit in more chocolate? Drizzle some melted chocolate on top of the bars after coating them for an even richer finish!

  • Fruitiness: Add in small pieces of dried fruits like cranberries or cherries for a burst of flavor and a hint of natural sweetness that pairs beautifully with peanut butter.

  • Protein Boost: Stir in a scoop of your favorite protein powder before mixing the base. This adds even more protein without sacrificing taste.

Whatever variation you choose, your homemade Buster Bars will not only tantalize your taste buds but also align wonderfully with your dietary preferences. Enjoy the joy of creating your own delightful treat!

What to Serve with Healthy Peanut Butter Buster Bars

Elevate your dessert experience by pairing these indulgent yet healthy bars with delightful accompaniments that harmonize their rich flavors.

  • Fresh Berries: Their tartness beautifully contrasts the creamy sweetness of the bars, providing a refreshing burst of flavor.
  • Whipped Coconut Cream: Light and airy, this non-dairy topping adds an indulgent richness that complements the peanut butter perfectly.
  • Banana Slices: The soft sweetness of bananas enhances the peanut flavor and adds a touch of natural sweetness for a wholesome treat.
  • Nutty Granola: A sprinkle of crunchy granola not only adds texture but also a wholesome element, making your snack feel hearty.
  • Dark Chocolate Drizzle: For extra decadence, drizzle melted dark chocolate over the bars to intensify their chocolatey appeal.
  • Chilled Almond Milk: This light and nutty beverage pairs wonderfully with the bars, making for a satisfying snack that’s dairy-free.
  • Protein Shake: For a post-workout indulgence, enjoy these bars alongside a protein shake for a nutrient-packed boost that feels rewarding.
  • Coffee: The rich, robust flavors of coffee create a delightful contrast to the sweet bars, making it a perfect dessert accompaniment.

Storage Tips for Buster Bars

Room Temperature: Keep Buster Bars at room temperature for a maximum of 1-2 hours. To maintain freshness, it’s best to store them in a cool place away from direct sunlight.

Fridge: If you plan to enjoy them within 3-5 days, place the Buster Bars in an airtight container in the refrigerator. This helps preserve their texture and flavors.

Freezer: For longer storage, keep your Buster Bars in a sealed container in the freezer for up to a month. Allow them to thaw in the fridge for a few hours before serving for the best taste and texture.

Reheating: Since these bars are best enjoyed cold, there’s no need to reheat. Simply remove from the fridge or freezer and enjoy straight away for a refreshing treat!

Expert Tips for Healthy Buster Bars

Perfect Yogurt Choice: Use Greek yogurt for a creamier texture; it adds protein while keeping the bars light and fluffy.

Nut Butter Substitutes: If allergies are a concern, try using sunflower seed butter instead of peanut butter; it works wonderfully!

Coating Tips: Make sure your bars are super cold before dipping into chocolate to avoid melting; this keeps the shape intact.

Smooth Chocolate Coating: Add a touch of coconut oil while melting chocolate for an extra-smooth coating; it makes a big difference in texture!

Customize to Taste: Experiment with flavored yogurts or add-ins like chia seeds for added health benefits and variety in your Buster Bars!

Make Ahead Options

These Healthy Peanut Butter Buster Bars are perfect for meal prep enthusiasts! You can prepare the base (yogurt, peanut butter, and sweetener) and freeze it up to 24 hours in advance. Simply mix the ingredients and shape the bars as directed, then place them in the freezer; this helps maintain their firm texture. Once you’re ready to finish the recipe, melt the chocolate chips and coat the frozen bars, then freeze again for 30 minutes to 1 hour before serving. For the best taste, be sure to keep the bars stored in an airtight container in the freezer for up to one month—they’ll still be just as delicious whenever you indulge!

Healthy Peanut Butter Buster Bars Recipe FAQs

How do I choose the right yogurt for this recipe?
Absolutely! I recommend using Greek yogurt for its creaminess and higher protein content, which contributes to a satisfying texture in your Buster Bars. If you’re going vegan, look for unsweetened coconut or almond yogurt to fit seamlessly into the recipe.

What’s the best way to store leftover Buster Bars?
To keep your delicious Buster Bars fresh, store them in a sealed container in the freezer for up to a month. This method preserves their texture and flavor. If you prefer to enjoy them within a shorter timeframe, they can be placed in the refrigerator and eaten within 3-5 days.

Can I freeze the Buster Bars after making them?
Definitely! After you’ve shaped and frozen your bars, you can either enjoy them immediately or store them. For the best chocolate coating, freeze the bars until they’re firm (about 2-3 hours). Once coated in chocolate, refreeze for an additional 30 minutes to 1 hour for a perfect crunch.

What if my chocolate coating doesn’t melt smoothly?
No worries! If your chocolate seizes, it could be due to water contact or overheating. Be sure to use a microwave-safe bowl and heat in short intervals, stirring frequently. If it still isn’t melting smoothly, try adding a teaspoon of coconut oil for added fluidity and gloss.

Are there any dietary considerations for the ingredients?
Very much so! This recipe is wonderfully adaptable. If you have nut allergies, you can easily substitute peanut butter with sunflower seed butter. For a vegan twist, ensure all ingredients, especially the chocolate chips, are dairy-free. Always check labels to avoid allergens.

How long do the Buster Bars last once made?
Once prepared, you can keep your Healthy Peanut Butter Buster Bars stored in the freezer for up to a month. Just remember to keep them in an airtight container. For maximum freshness, thaw the bars in the refrigerator before enjoying; they’ll maintain their delicious texture!

Buster Bars

Delicious Buster Bars You Can Make Healthy at Home

Try these Healthy Buster Bars made with yogurt and peanut butter for a guilt-free treat packed with protein.
Prep Time 15 minutes
Freezing Time 3 hours
Total Time 3 hours 15 minutes
Servings: 12 bars
Course: Dessert
Cuisine: American
Calories: 200

Ingredients
  

Buster Bars Ingredients
  • 1 cup yogurt plain or vanilla or vegan
  • 1/2 cup peanut butter or almond/sunflower seed butter
  • 1/4 cup sweetener coconut sugar, maple syrup, honey, or stevia
  • 1 cup chocolate chips dairy-free or sugar-free for vegan/keto
  • 1 teaspoon coconut oil optional
  • 1/4 cup peanuts optional, skip if nut-free

Equipment

  • Medium bowl
  • Hand Mixer or Whisk
  • baking tray
  • parchment paper
  • microwave-safe bowl

Method
 

Step-by-Step Instructions
  1. In a medium bowl, combine 1 cup of yogurt, 1/2 cup of peanut butter, and any desired sweetener. Blend until smooth and creamy.
  2. Line a baking tray with parchment paper and drop dollops of the peanut butter mixture onto the tray, inserting popsicle sticks into each.
  3. Freeze the tray for about 2-3 hours or until the bars are firm.
  4. Melt 1 cup of chocolate chips with 1 teaspoon of coconut oil in a microwave-safe bowl, stirring until glossy.
  5. Dip each frozen bar into the melted chocolate, coating fully, and return to the tray.
  6. Freeze again for 30 minutes to 1 hour to harden the chocolate coating, then enjoy!
  7. Store any leftovers in a sealed container in the freezer for up to a month.

Notes

For best results, use Greek yogurt for creaminess and ensure bars are cold before dipping in chocolate.

Cheesy Vegetable Chowder: Comfort in a Bowl for Cozy Nights

As I stirred the pot, the rich aroma of melting cheese combined with fresh vegetables wafted through my kitchen, instantly transforming my modest space into a cozy haven. This Cheesy Vegetable Chowder is my go-to comfort food for chilly evenings—it captures all the heartwarming essence of a home-cooked meal in just one bowl. Not only is it quick to prepare, but it’s also packed with wholesome ingredients that make it a nourishing delight for any vegetarian menu. The creamy texture and vibrant veggies create a satisfying experience that makes you feel as though you’re being wrapped in a warm blanket. Have you ever craved a dish that not only fills you up but also fills your heart with joy? Let’s dive into making this delightful chowder!

Why is Cheesy Vegetable Chowder a Must-Try?

Comforting Warmth: This chowder is perfect for chilly nights, enveloping you in rich flavors that warm your soul.

Quick and Easy: With straightforward steps, you can whip up this dish in no time, making it ideal for busy evenings.

Nutritious Goodness: Packed with a variety of vegetables, it’s a hearty way to get those daily nutrients without sacrificing flavor.

Versatile Ingredient Swap: Feel free to get creative with your veggies—toss in seasonal choices like zucchini or rustic vegetable gratin for a fresh twist!

Crowd-Pleasing Delight: Its creamy, cheesy base makes it appealing to both vegetarians and cheese lovers alike, ensuring everyone will come back for seconds.

Serve it alongside artisanal bread or a refreshing apple harvest salad for a complete and satisfying meal that everyone will adore!

Cheesy Vegetable Chowder Ingredients

Let’s gather all the comforting goodness you need to create this heartwarming bowl of Cheesy Vegetable Chowder!

For the Chowder Base

  • Butter – 5 tbsp, divided; adds richness and flavor. Can use olive oil for a dairy-free version.
  • Carrots – 3 large, chopped; provide sweetness and texture. Substitute with parsnips for a different flavor.
  • Celery – 3 stalks, chopped; adds aromatic depth. Use fennel for a unique twist.
  • Yellow Onion – 1, diced; base flavor for the soup. Shallots can be used instead.
  • Garlic – 4 cloves, minced; enhances flavor. Can substitute with garlic powder in a pinch.
  • Low-Sodium Chicken Broth – 4 cups; provides a savory base. Use vegetable broth for a fully vegetarian option.
  • Russet Potatoes – 3, peeled and cubed; add heartiness. Yukon Gold potatoes can also work well.
  • Celery Root – 1, peeled and cubed; offers a unique flavor. Use additional potatoes if unavailable.
  • Broccoli – 2 heads, chopped into florets (about 3-4 cups); adds color and nutrition. Frozen broccoli can be used as a substitute.
  • Cauliflower – 1 small head, chopped into florets (about 2 cups); contributes creaminess. Can substitute with additional broccoli.

For Seasoning

  • Dried Thyme – 1/4 tsp; adds earthy flavor. Oregano can be used as a substitute.
  • Salt – 1 tsp; enhances flavors. Adjust to taste or use low-sodium options.
  • Ground Black Pepper – 1/2 tsp; provides a mild kick. White pepper is a good alternative.
  • Paprika – pinch; adds mild smokiness. Swap with cayenne for more heat.
  • Cayenne Pepper – pinch; for a hint of spice. Omit if sensitive to heat.

For Thickening & Creaminess

  • All-Purpose Flour – 6 tbsp; thickens the chowder. Gluten-free flour mix can be used as a substitute.
  • Milk – 3 cups (1%, 2%, or whole); for creaminess in the chowder. Use plant-based milk for a dairy-free version.
  • Half and Half – 1/2 cup; adds richness. Substitute with additional milk or coconut cream for dairy-free.
  • Cheddar Cheese – 2 cups (medium or sharp); provides the signature cheesy flavor. Vegan cheese can be substituted for a lactose-free option.

Step‑by‑Step Instructions for Cheesy Vegetable Chowder

Step 1: Sauté Vegetables
In a large pot over medium heat, melt 1 tablespoon of butter. Add the chopped carrots, celery, and diced onion, sautéing for about 4 minutes until softened and fragrant. Then, stir in the minced garlic and continue to sauté for an additional minute, allowing the aroma to fill your kitchen with a cozy, inviting scent.

Step 2: Add Broth and Potatoes
Pour in 4 cups of low-sodium chicken broth, followed by the cubed russet potatoes and celery root. Sprinkle in the dried thyme, salt, black pepper, paprika, and cayenne pepper. Bring this mixture to a boil, then reduce the heat to low, cover the pot, and let it simmer for 15 minutes until the potatoes are nearly tender yet still firm enough to hold their shape.

Step 3: Cook Remaining Vegetables
After 15 minutes, add the chopped broccoli and cauliflower florets to the pot. Continue cooking for an additional 5-7 minutes until all the vegetables are tender and vibrant, stirring occasionally to ensure even cooking. The Cheesy Vegetable Chowder base is coming together beautifully, creating a comforting and colorful blend of ingredients.

Step 4: Prepare the Roux
In a separate saucepan, melt the remaining 4 tablespoons of butter over medium heat. Once melted, whisk in 6 tablespoons of all-purpose flour, cooking for about 1 minute until it forms a smooth paste. Gradually whisk in 3 cups of milk until the mixture is smooth and thickened, allowing it to come to a gentle boil while stirring frequently.

Step 5: Combine Mixtures
Once your milk mixture thickens up nicely, stir in ½ cup of half and half for extra creaminess. Carefully pour this delicious creamy mixture into the pot of cooked vegetables, stirring everything together to meld the flavors beautifully. Allow the chowder to simmer for an extra minute before turning off the heat, letting the warmth fill your kitchen.

Step 6: Add the Cheese
Finally, gradually mix in 2 cups of shredded cheddar cheese, stirring continuously until the cheese is fully melted and the chowder is rich and creamy. The outcome will be a delightful Cheesy Vegetable Chowder, promising a comforting experience that looks as good as it tastes.

What to Serve with Cheesy Vegetable Chowder

Pair your comforting bowl of chowder with delightful sides that elevate the experience and create a cozy meal for all to enjoy.

  • Crusty Artisan Bread: Perfect for dipping, the chewy texture of a fresh loaf complements the creamy chowder beautifully, soaking up all the flavorful goodness. A buttery spread takes it over the top!

  • Apple Harvest Salad: This vibrant, refreshing salad adds a crunchy contrast to the rich chowder, balancing flavors with its crisp apples, nuts, and a tangy vinaigrette that will tantalize your taste buds.

  • Cucumber Dill Salad: Light and refreshing, this salad introduces cool, crisp cucumbers mixed with a creamy dill dressing, offering a soothing counterpoint to the heartiness of the chowder.

  • Garlic Breadsticks: Soft and fluffy, these breadsticks are infused with garlic butter, making them an irresistible option for sopping up that creamy goodness while adding a delightful aroma to your dining experience.

  • Roasted Brussels Sprouts: With their slight caramelization and earthy flavor, these crispy veggies provide a delightful textural contrast, making them a perfect savory side to enjoy alongside the chowder.

  • Cheese and Herb Scones: These tender scones, filled with cheese and fresh herbs, are a fantastic addition that melds seamlessly with the cheesy flavor of the chowder, offering a deliciously indulgent experience.

Make Ahead Options

These Cheesy Vegetable Chowder preparations are perfect for busy weeknights and can save you precious time! You can chop all your vegetables (carrots, celery, onion, and more) and refrigerate them up to 3 days in advance. Additionally, you can prepare the creamy roux (the flour and milk mixture) and store it in the refrigerator for 24 hours. When you’re ready to enjoy your chowder, simply sauté the prepped veggies, add your broth and potatoes, and then stir in the refrigerated roux along with the cheese. This way, you’ll have a comforting, homemade meal ready in no time—just as delicious as if you made it from scratch!

Cheesy Vegetable Chowder: Creative Twists

Feel free to give this cozy chowder your personal touch with these delightful variations!

  • Dairy-Free: Replace the milk and half and half with coconut milk or a dairy-free milk of your choice for a scrumptious vegan-friendly option. The creamy texture remains intact, while adding a subtle hint of coconut for a tropical twist.

  • Spicy Kick: For those who love some heat, toss in diced jalapeños or a dash of hot sauce. It adds a zesty punch that elevates the flavor profile, turning this chowder into a fiery delight!

  • Added Protein: Consider mixing in canned chickpeas or cooked lentils for a hearty protein boost. This not only makes the chowder more filling but also adds an earthy flavor that complements the veggies wonderfully.

  • Seasonal Veggies: Swap out the broccoli and cauliflower for fresh asparagus or zucchini to showcase seasonal produce. This creates a vibrant dish that celebrates what’s fresh from the market.

  • Cheesy Varieties: Experiment with different cheeses like Gruyère or Pepper Jack to alter the flavor profile. Each cheese brings its unique character, making the chowder a unique experience each time!

  • Thicker Texture: For a thicker chowder, incorporate pureed white beans or additional flour into the roux to amplify the creaminess. It brings a delightful richness that coats your vegetables beautifully.

  • Savory Herbs: Add a handful of fresh herbs like parsley or dill just before serving for a burst of freshness. These herbs brighten up the chowder, making it not only tasty but visually appealing as well.

  • Comforting Side Options: To accompany your chowder, how about making some warm and flaky savory vegetable cheese pancakes? They are perfect for dipping, pairing the creamy goodness of the chowder with delightful crunch!

With these variations, you can celebrate the bounty of what’s in your pantry, ensuring every bowl of Cheesy Vegetable Chowder is as unique as your kitchen’s spirit!

How to Store and Freeze Cheesy Vegetable Chowder

Fridge: Store your Cheesy Vegetable Chowder in an airtight container for up to 3-4 days. This will help retain its creamy texture and delicious flavors.

Freezer: To freeze, portion the chowder into freezer-safe containers and consume within 2 months for best quality. Leave some space at the top, as it may expand.

Thawing: When ready to enjoy, thaw in the refrigerator overnight. To reheat, warm gently on the stovetop over low heat to maintain creaminess—avoiding boiling to prevent separation.

Reheating: For best results, stir frequently while reheating and consider adding a splash of milk if the chowder thickens too much. This keeps it smooth and delightful!

Expert Tips for Cheesy Vegetable Chowder

  • Veggie Choices: Opt for fresh, vibrant vegetables for a colorful chowder. Avoid overcooking them to retain their nutrients and firm texture.

  • Smooth Texture: For a velvety finish, whisk the milk mixture thoroughly before adding it to the soup. This prevents lumps from forming in your Cheesy Vegetable Chowder.

  • Flavor Boost: Enhance the chowder’s flavor with a splash of white wine or a dash of vinegar. This helps balance the richness of the cheese and cream.

  • Reheating Tips: When reheating leftovers, do so over low heat and avoid boiling. This helps maintain the creamy texture without separating.

  • Cheese Selection: Experiment with different cheese varieties, like Monterey Jack or Gruyère, for a unique twist on the classic Cheesy Vegetable Chowder flavor profile.

Cheesy Vegetable Chowder Recipe FAQs

How do I choose the right vegetables for my Cheesy Vegetable Chowder?
Absolutely! When selecting vegetables, opt for fresh, vibrant ones that are firm to the touch and free of dark spots. For instance, bright green broccoli florets should be tightly packed, while carrots should be crisp and without blemishes. If you’re exploring substitutes, parsnips add a sweet touch in place of carrots, while fennel offers a unique twist instead of celery.

What is the best way to store leftover Cheesy Vegetable Chowder?
To preserve your delicious chowder, store it in an airtight container in the refrigerator for up to 3-4 days. This helps maintain its rich flavors and creamy texture. Make sure it’s completely cooled before sealing to avoid condensation that may dilute the taste.

Can I freeze Cheesy Vegetable Chowder?
Yes! To freeze your chowder, portion it into freezer-safe containers, leaving some space at the top as it will expand. It’s best to use it within 2 months for optimal quality. When you’re ready to enjoy it, just thaw it overnight in the refrigerator.

How should I reheat my Cheesy Vegetable Chowder?
When reheating, do so gently over low heat to prevent separation. Stir frequently as it warms up. If it thickens too much, add a splash of milk to keep it smooth and creamy. Avoid boiling, as it can alter the chowder’s delightful texture.

Is there a way to adjust this recipe for dietary restrictions?
Very! For a dairy-free version, substitute milk and half and half with plant-based alternatives like almond or oat milk, and use vegan cheese for that cheesy flavor. If gluten is a concern, you can swap all-purpose flour with a gluten-free flour blend. This ensures everyone can enjoy a comforting bowl of chowder!

Can my pets eat Cheesy Vegetable Chowder?
While it’s tempting to share, it’s best to avoid giving your pets any chowder. Ingredients like onions and garlic can be harmful to dogs and cats. Instead, offer them some plain cooked vegetables as a treat when you’re enjoying your hearty chowder!

Cheesy Vegetable Chowder

Cheesy Vegetable Chowder: Comfort in a Bowl for Cozy Nights

Cheesy Vegetable Chowder is a hearty and comforting dish that brings warmth and nourishment to chilly evenings.
Prep Time 10 minutes
Cook Time 30 minutes
Total Time 40 minutes
Servings: 6 cups
Course: Dinner
Cuisine: American
Calories: 350

Ingredients
  

For the Chowder Base
  • 5 tbsp Butter divided; adds richness and flavor
  • 3 large Carrots chopped; provides sweetness and texture
  • 3 stalks Celery chopped; adds aromatic depth
  • 1 Yellow Onion diced; base flavor for the soup
  • 4 cloves Garlic minced; enhances flavor
  • 4 cups Low-Sodium Chicken Broth provides a savory base
  • 3 Russet Potatoes peeled and cubed; add heartiness
  • 1 Celery Root peeled and cubed; offers a unique flavor
  • 2 heads Broccoli chopped into florets (about 3-4 cups); adds color and nutrition
  • 1 small head Cauliflower chopped into florets (about 2 cups); contributes creaminess
For Seasoning
  • 1/4 tsp Dried Thyme adds earthy flavor
  • 1 tsp Salt enhances flavors
  • 1/2 tsp Ground Black Pepper provides a mild kick
  • a Pinch of Paprika adds mild smokiness
  • a Pinch of Cayenne Pepper for a hint of spice
For Thickening & Creaminess
  • 6 tbsp All-Purpose Flour thickens the chowder
  • 3 cups Milk for creaminess in the chowder
  • 1/2 cup Half and Half adds richness
  • 2 cups Cheddar Cheese provides the signature cheesy flavor

Equipment

  • Large pot
  • Saucepan

Method
 

Step‑by‑Step Instructions for Cheesy Vegetable Chowder
  1. In a large pot over medium heat, melt 1 tablespoon of butter. Add the chopped carrots, celery, and diced onion, sautéing for about 4 minutes until softened and fragrant. Stir in the minced garlic and sauté for an additional minute.
  2. Pour in 4 cups of low-sodium chicken broth, followed by the cubed russet potatoes and celery root. Sprinkle in the dried thyme, salt, black pepper, paprika, and cayenne pepper. Bring to a boil, then cover and let simmer for 15 minutes.
  3. Add the chopped broccoli and cauliflower florets to the pot. Continue cooking for an additional 5-7 minutes until all the vegetables are tender, stirring occasionally.
  4. In a separate saucepan, melt the remaining 4 tablespoons of butter over medium heat. Whisk in 6 tablespoons of flour, cooking for about 1 minute until smooth. Gradually whisk in 3 cups of milk until thickened.
  5. Stir in ½ cup of half and half into the creamy mixture. Pour this into the pot of cooked vegetables, stirring to combine. Simmer for an extra minute before turning off the heat.
  6. Gradually mix in 2 cups of shredded cheddar cheese, stirring until fully melted and the chowder is rich and creamy.

Notes

Store in an airtight container for 3-4 days. Freeze in portions; consume within 2 months.

Sugar Plum Shortbread Cookies: Melt-in-Your-Mouth Delight

As I sifted through the spices and zested the vibrant oranges, a wave of nostalgia washed over me, taking me back to the warmth of my grandmother’s kitchen during the holidays. That’s exactly how these Orange-Pecan Spice Shortbread Cookies came to life—a delightful fusion of rich pecans and aromatic spices, all balanced by a subtle layer of your favorite jam. Not only are they quick to whip up, but they also add a touch of elegance to your cookie trays. Perfect for gifting or sharing at festive gatherings, these cookies embody the joy of homemade holiday treats. Curious about how to elevate your baking game this season? Let’s dive into the magic of these scrumptious cookies together!

Why Are These Cookies So Irresistible?

Flavor Explosion: The harmonious blend of orange zest and warm spices makes each bite burst with festive flavor, delighting the senses.

Quick and Easy: In just a few simple steps, you can create these elegant cookies, perfect for any baking novice.

Versatile Topping: Explore unique combinations by swapping jams or nuts; raspberry jam invites a delicious twist on this classic.

Holiday Showstopper: Their beautiful presentation makes them ideal for cookie platters or as charming gifts for friends and family.

Nostalgic Touch: These cookies evoke cherished memories of family gatherings, connecting you to the joy of holiday baking, just like the Nut Seed Cookies your grandmother might have made.

Unwrap the joy of homemade treats and treat your loved ones to these delectable delights!

Sugar Plum Shortbread Cookie Ingredients

Let’s get ready to create some mouthwatering Sugar Plum Shortbread Cookies!

For the Dough

  • Unsalted Butter – Provides a rich flavor and tender texture. You can substitute with salted butter, just reduce other added salt.
  • Granulated Sugar – Adds sweetness and contributes to the cookie’s delightful crunch.
  • Brown Sugar – Deepens the flavor with its molasses undertones and keeps the cookies moist.
  • All-purpose Flour – Creates the foundation of the dough; consider using gluten-free flour for a lighter texture.
  • Pecan Nuts – Introduces a lovely crunch and nutty notes; feel free to replace with walnuts or sunflower seeds if desired.
  • Cinnamon & Cloves – Infuse the cookies with warmth and cheer, making them perfect for the holiday season.
  • Orange Zest – Brightens and elevates the flavors, making these cookies a fresh delight.

For the Topping

  • Jam – A delightful finishing touch! Use your favorite flavor, like raspberry or orange marmalade, to complement the spices and add a pop of color.

These Sugar Plum Shortbread Cookies will add joy to your holiday celebrations!

Step‑by‑Step Instructions for Sugar Plum Shortbread Cookies

Step 1: Prepare the Dough
In a mixing bowl, cream together 1 cup of unsalted butter and ½ cup of granulated sugar, blending until light and fluffy—about 3 minutes. Gradually add ½ cup of brown sugar and continue mixing. Next, sift in 2 cups of all-purpose flour, 1 teaspoon of cinnamon, ½ teaspoon of cloves, and the zest of one orange. Mix until just combined, forming a soft dough.

Step 2: Chill the Dough
Once your Sugar Plum Shortbread cookie dough is ready, wrap it tightly in plastic wrap and refrigerate for at least 1 hour. This step helps solidify the butter, making it easier to roll out and cut into shapes. After chilling, preheat your oven to 350°F (175°C) while you prepare your work surface.

Step 3: Roll Out the Dough
After the dough has chilled, lightly flour a clean surface and unwrap the dough. Roll it out to about ½-inch thickness with a rolling pin. As you roll, use a dusting of flour to prevent sticking. You’ll want a smooth, even layer to ensure uniform baking, enhancing the texture of your Sugar Plum Shortbread cookies.

Step 4: Cut the Cookies
Using your favorite cookie cutters, cut shapes from the rolled dough and transfer them to ungreased baking sheets, leaving about 1 inch between each cookie. For extra flair, consider using a festive holiday shape! This thoughtful spacing allows for even baking and helps maintain the cookies’ integrity.

Step 5: Add the Jam
Gently spoon a thin layer of your chosen jam onto the center of each shaped cookie, taking care not to cover the edges. A small paintbrush works wonders for spreading the jam evenly without excess. This delicate touch ensures a tidy appearance while allowing the warm spices in the Sugar Plum Shortbread cookies to shine through.

Step 6: Bake the Cookies
Place the baking sheets in the preheated oven and bake for about 12-15 minutes, until the edges are lightly golden, and the cookies are set. As they bake, the delightful aroma of spices will fill your kitchen, creating that inviting holiday spirit. Keep a close eye to avoid over-baking!

Step 7: Cool and Serve
Once baked, remove the Sugar Plum Shortbread cookies from the oven and let them cool on the baking sheets for about 5 minutes. Then, gently transfer them to wire racks to cool completely. This cooling period is crucial, as it enhances the cookies’ flavor and enables them to firm up for a perfect bite.

What to Serve with Orange-Pecan Spice Shortbread Cookies

As you savor these delightful cookies, imagine the warmth of your kitchen filled with love and laughter, creating a perfect harmony for your holiday table.

  • Creamy Mashed Potatoes: The buttery richness balances the crisp texture of the cookies, elevating your entire meal experience.

  • Festive Salad: A refreshing mix of greens with citrus and pomegranate mirrors the bright flavors of the cookies while providing a delightful crunch.

  • Mulled Wine: This warming, spiced drink enhances the aromatic spices in the cookies and creates a cozy atmosphere for winter gatherings.

  • Chocolate Fondue: Rich, melted chocolate invites a fun and interactive dessert experience, allowing guests to dip cookies for an additional layer of indulgence.

  • Spiced Tea: A cup of spiced tea, with hints of cinnamon and cloves, perfectly complements the cookie’s flavor profile, offering a soothing finish.

  • Fruit Tart: A light, fruity tart provides a refreshing and sweet contrast to the cookies’ richness, rounding out the dessert options for your event.

Embrace the joy of sharing these delights with loved ones, creating heartfelt memories around your holiday table!

Sugar Plum Shortbread Cookies: Variations & Substitutions

Feel free to get creative with these delightful cookies and make them your own; every twist adds a special flavor!

  • Nut Swap: Replace pecans with walnuts for a deeper, richer nut flavor. Walnuts offer a slightly earthy taste, enhancing the overall experience.

  • Jam Variety: Experiment with different jams like apricot or blackberry to bring new flavors to each batch. These alternatives will surprise and delight your taste buds!

  • Zesty Addition: Add more orange zest directly to the dough to elevate the citrus notes even further. The vibrant brightness will make your cookies shine!

  • Dairy-Free Option: Use coconut oil instead of butter for a vegan-friendly treat. This substitution provides a unique tropical twist that you won’t want to miss.

  • Texture Twist: Incorporate crushed ginger snaps into the dough for a spicy crunch. This unexpected addition will carry a festive zing in every bite!

  • Flavor Booster: Mix in some chopped dried fruits like cranberries or raisins for sweetness and chewiness. These will complement the spices beautifully and bring joy to your mouth!

  • Chocolate Delight: Drizzle melted chocolate on top of cooled cookies for a decadent touch. This extra step takes your cookies from delightful to irresistible!

  • Heat Level: For a warming kick, add a dash of cayenne or chili powder to the dough. The hint of spice will create a surprising flavor contrast that’s perfect for holiday gatherings!

Whether you’re interested in exploring lighter options or searching for a comforting twist, remember to check out these delicious Nutty Apricot Cookies or Banana Seed Cookies for more inspiration!

Expert Tips for Sugar Plum Shortbread Cookies

  • Butter Temperature: Use room-temperature unsalted butter for optimal creaming, creating a light and fluffy texture in your cookies.

  • Proper Chill Time: Don’t rush the chilling process! Letting the dough cool for at least one hour ensures easy rolling and cutting, preventing stuck dough.

  • Jam Application: Avoid overloading jam on each cookie. A thin layer not only enhances the presentation but also maintains the structure of your Sugar Plum Shortbread Cookies during baking.

  • Flour Dusting: Lightly dust your work surface and rolling pin with flour to prevent sticking, allowing for smooth rolling and cutting of the dough.

  • Oven Monitoring: Keep an eye on your cookies while they bake. They can go from perfectly golden to overdone quickly, so set a timer!

  • Flavor Exploration: Don’t hesitate to experiment with different nuts and jams to find your favorite flavor combinations, enhancing the variety of your Sugar Plum Shortbread Cookies.

Make Ahead Options

These Orange-Pecan Spice Shortbread Cookies are a wonderful choice for meal prep, allowing busy home cooks to enjoy delicious treats without the last-minute rush. You can prepare the dough and refrigerate it up to 24 hours in advance. Just wrap the formed dough tightly in plastic wrap to maintain freshness. Alternatively, you can bake the cookies and store them at room temperature in an airtight container for up to 3 days. When you’re ready to serve, simply warm the cookies gently in the oven for a minute or two before presenting them with that delightful jam topping, ensuring they taste just as fresh as the day you made them!

How to Store and Freeze Sugar Plum Shortbread Cookies

Room Temperature: Place cooled cookies in an airtight container to keep them fresh at room temperature for up to one week.

Fridge: For longer freshness, store cookies in the fridge in an airtight container for up to two weeks, keeping them crisp and delicious.

Freezer: Freeze individual cookies by wrapping them in plastic wrap and placing them in a sealed freezer bag for up to three months—perfect for enjoying at a later date.

Reheating: To enjoy frozen Sugar Plum Shortbread Cookies, allow them to thaw at room temperature. If desired, warm them in a 300°F (150°C) oven for 5-7 minutes for a freshly baked taste.

Sugar Plum Shortbread Cookies Recipe FAQs

What is the best way to select ripe ingredients for these cookies?
Absolutely! When choosing your ingredients, particularly the oranges for zest, look for firm, smooth-skinned fruit with vibrant color, indicating ripeness. The zest of fresh oranges packs in a burst of flavor, so I recommend selecting the juiciest ones you can find!

How should I store my Sugar Plum Shortbread Cookies?
To keep your cookies fresh, store them in an airtight container at room temperature for up to one week. If you want them to last longer, consider refrigerating them in a sealed container for up to two weeks. I often use a layer of parchment paper to separate the cookies, preventing them from sticking.

Can I freeze Sugar Plum Shortbread Cookies?
Yes, indeed! To freeze individual cookies, wrap each one tightly in plastic wrap and place them in a sealed freezer bag. They can be stored this way for up to three months. When you’re ready to enjoy, simply let them thaw at room temperature. For a warm treat, pop them in a preheated oven at 300°F (150°C) for about 5-7 minutes!

What are some common troubleshooting tips for these cookies?
If your cookies spread too much during baking, check the chilling time of your dough—it should be chilled for at least one hour. Ensure your butter is at room temperature but not too soft. If they come out too dry, try checking your flour measurements, as packing it down can lead to using too much. And remember, keep an eye on them while baking; once the edges are lightly golden, they’re ready!

Can I use alternative ingredients for dietary restrictions?
Certainly! For nut allergies, feel free to substitute the pecans with sunflower seeds or simply omit them. If you’re looking for a gluten-free option, almond flour works wonderfully as a substitute for all-purpose flour; just be mindful that the texture will slightly differ. Always check labels on your jam to make sure it suits your dietary needs!

Is there a recommendation for healthier adaptations of these cookies?
Yes! You can experiment with using less sugar or substituting with natural sweeteners like honey or maple syrup. Additionally, try adding whole wheat flour instead of all-purpose for a healthier twist while still capturing that delightful shortbread texture. The more the merrier in terms of flavor and health options!

Sugar Plum Shortbread Cookies

Sugar Plum Shortbread Cookies: Melt-in-Your-Mouth Delight

Delightful Sugar Plum Shortbread Cookies with a burst of festive flavor, perfect for holiday gatherings and gifting.
Prep Time 15 minutes
Cook Time 15 minutes
Chill Time 1 hour
Total Time 1 hour 30 minutes
Servings: 24 cookies
Course: Dessert
Cuisine: American
Calories: 150

Ingredients
  

For the Dough
  • 1 cup Unsalted Butter Room temperature
  • ½ cup Granulated Sugar
  • ½ cup Brown Sugar
  • 2 cups All-purpose Flour Can use gluten-free flour
  • 1 cup Pecan Nuts Can substitute with walnuts or sunflower seeds
  • 1 teaspoon Cinnamon
  • ½ teaspoon Cloves
  • 1 tablespoon Orange Zest
For the Topping
  • 1 jar Jam Use your favorite flavor like raspberry or orange marmalade

Equipment

  • mixing bowl
  • Rolling Pin
  • Cookie Cutters
  • Baking sheets
  • plastic wrap

Method
 

Dough Preparation
  1. In a mixing bowl, cream together butter and granulated sugar until light and fluffy, about 3 minutes.
  2. Gradually add brown sugar and continue mixing.
  3. Sift in flour, cinnamon, cloves, and orange zest. Mix until just combined to form a soft dough.
Chilling
  1. Wrap the dough in plastic wrap and refrigerate for at least 1 hour.
  2. Preheat your oven to 350°F (175°C).
Rolling and Cutting
  1. Lightly flour a clean surface and roll out the dough to ½-inch thickness.
  2. Cut shapes from the dough and transfer to baking sheets, leaving about 1 inch between cookies.
Adding Jam
  1. Spoon a thin layer of jam onto the center of each cookie without covering the edges.
Baking
  1. Bake the cookies for about 12-15 minutes until the edges are lightly golden.
Cooling
  1. Remove from the oven and cool on baking sheets for about 5 minutes before transferring to wire racks.

Notes

Ensure to use room-temperature butter for optimal texture. Experiment with different jams and nuts for unique flavor combinations.

Ultimate Chicken and Dumplings for Cozy Comfort Food Bliss

The cozy aroma of homemade chicken and dumplings doesn’t just fill the kitchen—it stirs up memories of family gatherings and winter nights spent around the dinner table. This Best Old Fashioned Chicken and Dumplings recipe is your ticket to that perfect comfort food, featuring tender rotisserie chicken nestled in a rich, flavorful broth, along with fluffy dumplings that seem to melt in your mouth. Not only is this dish a crowd-pleaser, it also boasts a quick prep time, making it ideal for those busy weeknights when you crave something heartwarming without the fuss. So, are you ready to whip up a dish that feels like a warm hug in a bowl?

Why is This Chicken and Dumplings So Special?

Comforting, Hearty Meal: This dish brings the warmth of home right to your table, perfect for family gatherings or a cozy evening in.

Time-Saving Delight: Using rotisserie chicken means you can skip lengthy cooking times without sacrificing flavor.

Versatile Ingredients: Feel free to add in your favorite veggies or swap the chicken for turkey leftovers to create your own twist!

Unforgettable Texture: The fluffy dumplings that float atop the savory broth create a delightful experience that enchants every taste bud.

Crowd Favorite: Once you serve this, you’ll see smiles all around, as it’s a dish that everyone loves, perfect for any occasion! Consider pairing it with the Savory Chicken Cheesy for even more comfort.

Chicken and Dumplings Ingredients

For the Broth
Rotisserie Chicken – This main protein source ensures a quick and flavorful base; any cooked chicken can work.
Unsalted Butter – Adds richness and depth; margarine can be a good substitute if needed.
Oil – Helps sauté and brings out the flavors; olive or vegetable oil are excellent alternatives.
Onion – A must for aromatic flavor; use yellow or sweet onions for the best result.
Baby Carrots – Adds sweetness and a pop of color; regular carrots can easily be chopped to substitute.
All-Purpose Flour – Thickens the broth beautifully; gluten-free flour can be used for those with dietary restrictions.
Chicken Bouillon + Water – Forms the broth base; keep it low-sodium for a healthier option or opt for store-bought chicken broth.
Salt and Black Pepper – Essential for seasoning; adjust according to your taste preference.
Italian Seasoning – Adds a lovely herbal note; feel free to substitute with whatever dried herbs you have on hand.

For the Dumplings
Whole Milk – Provides creaminess in the broth; non-dairy milk can replace it but might change the texture slightly.
Self-Rising Flour – Crucial for that fluffy dumpling texture; all-purpose flour with baking powder is a suitable substitute if necessary.

Dive into this heartwarming recipe and enjoy the comfort of homemade chicken and dumplings—a perfect dish for those cozy evenings!

Step‑by‑Step Instructions for Best Old Fashioned Chicken and Dumplings

Step 1: Prep Veggies
Begin by dicing one onion and cutting baby carrots into thirds, then set them aside. This will enhance the flavors in your broth. Preparing these ingredients first allows for a smoother cooking process. You can also use a cutting board and sharp knife to ensure even-sized pieces.

Step 2: Cut Chicken
Next, take your rotisserie chicken and dice it into bite-sized pieces. This will facilitate even heating when combined with the broth later on. Ensure that you have enough chicken for each serving. If you prefer, you can pull it apart using your hands for a more rustic texture.

Step 3: Make Broth
In a large pot, combine the chicken bouillon with 8 cups of water and bring it to a boil over medium-high heat. This essential step creates the base of your chicken and dumplings, which should bubble vivaciously. Once boiling, reduce the heat slightly and set aside to simmer.

Step 4: Sauté Vegetables
In the same pot, heat 2 tablespoons of oil and 2 tablespoons of unsalted butter over medium heat. Add the diced onion and baby carrots, sautéing them for about 5 minutes until they soften and the onions turn translucent. This step adds aromatic flavor to your broth.

Step 5: Thicken Broth
Stir in 1/4 cup of all-purpose flour into the softened vegetables, cooking for an additional minute to create a roux. Then slowly incorporate the prepared broth, whisking constantly until it thickens. Cooking should take around 8 minutes; keep an eye on the consistency—it should become smooth and creamy.

Step 6: Combine Chicken & Season
Add the diced rotisserie chicken to the thickened broth, along with salt, black pepper, and Italian seasoning to taste. Allow the mixture to simmer on low for about 10 minutes, stirring occasionally. This step lets the flavors meld beautifully, ensuring every bite of chicken and dumplings is delicious.

Step 7: Prepare Dumplings
In a medium bowl, mix 2 cups of self-rising flour with 1/4 cup of melted butter and 1 cup of whole milk until just combined; be careful not to overmix. This mixture will create pillowy dumplings that float in your broth. The goal is a slightly lumpy batter, which helps maintain fluffiness.

Step 8: Cook Dumplings
Drop spoonfuls of the dumpling mixture into the simmering broth. Cover the pot and cook for 15-20 minutes without lifting the lid to retain steam. The dumplings should rise and become fluffy—this is your chance to take in all the cozy aromas wafting from the pot.

Step 9: Check Doneness
After 15-20 minutes, check a dumpling for doneness by inserting a toothpick or fork into the center. If it comes out clean, they’re perfectly cooked; if not, cover and cook for an additional 5 minutes. Each dumpling should be airy and light, sitting perfectly atop the comforting chicken broth.

Chicken and Dumplings Variations and Substitutions

Feel free to personalize this beloved dish with your own flair and additional ingredients that cater to your taste!

  • Spicy Zing: Add diced jalapeños or a sprinkle of cayenne pepper for an exciting kick to your creamy broth. All heat lovers will revel in this elevated flavor twist!

  • Vegetable Medley: Mix in frozen peas or corn for a vibrant burst of color and added nutrients. These veggies not only enhance the dish but also add a sweet crunch that complements the rich chicken flavors.

  • Turkey Delight: Swap the rotisserie chicken for leftover turkey for a delicious post-holiday twist. The subtly different taste pairs beautifully with the creamy broth, making it an enjoyable way to reinvent those Thanksgiving leftovers.

  • Herbaceous Boost: Experiment with fresh herbs like thyme or rosemary instead of the Italian seasoning for a fragrant depth of flavor that tantalizes the senses. A little fresh parsley added at serving also brightens each bite!

  • Dairy-Free Option: Substitute whole milk with almond or oat milk to lighten the recipe up for a dairy-free treat without losing the comforting essence of the dish. It might slightly alter the creaminess but still delivers a delightful taste.

  • Gluten-Free Goodness: Use a gluten-free flour blend in place of all-purpose flour to thicken the broth and self-rising flour for the dumplings. You’ll enjoy a delectable dish that caters to dietary needs without missing comfort!

  • Crispy Topping: Add a crunchy breadcrumb topping to your dish for a delightful contrast to the soft dumplings. Broil for a few minutes until golden and enjoy the added texture explored in each spoonful.

  • Richer Broth: For a heartier flavor, consider using homemade broth or stock in place of store-bought. Nothing beats the taste of a nourishing, slow-simmered broth infused with love (it’s reminiscent of the Pure Nourishing Chicken you might whip up)!

Remember, there’s no wrong way to make chicken and dumplings—explore these variations to reflect your taste and dietary needs while keeping the heartwarming comfort intact!

Make Ahead Options

These Best Old Fashioned Chicken and Dumplings are a fantastic meal prep choice for busy weeknights! You can prepare the broth and chop your vegetables up to 24 hours in advance, sealing them in an airtight container to keep flavors fresh. If you want even more convenience, you can also portion the diced rotisserie chicken ahead of time. When you’re ready to enjoy this comforting dish, simply reheat the broth with veggies, stir in the chicken, and follow up with making the dumplings just before serving. This ensures that every bite remains as delightful as if you just cooked it from scratch, saving you valuable time in the kitchen!

How to Store and Freeze Chicken and Dumplings

Fridge: Store leftovers in an airtight container for up to 3 days. This keeps the chicken and dumplings fresh while preventing any strong odors from mixing with your fridge.

Freezer: Freeze chicken and dumplings in a freezer-safe container for up to 3 months. Be sure to allow them to cool completely before sealing to avoid ice crystals.

Reheating: When you’re ready to enjoy your chicken and dumplings again, reheat gently on the stovetop. Add a splash of water or broth to revive the creamy texture, ensuring they stay warm and delicious.

Serving Tips: If freezing, consider portioning out your chicken and dumplings for easy single servings, making meal prep a breeze during busy weekdays!

What to Serve with Best Old Fashioned Chicken and Dumplings

Creating a memorable meal is all about balancing flavors and textures to complement the warmth of homemade comfort food.

  • Creamy Mashed Potatoes: These velvety potatoes add a rich, buttery touch that pairs perfectly with the savory broth.

  • Crispy Green Beans: A refreshing crunch balances the creamy texture of the dumplings and brings a vibrant green element to the plate.

  • Garlic Breadsticks: Soft, buttery breadsticks are ideal for soaking up every delicious drop of broth, making every bite an experience.

  • Simple Side Salad: Tossed greens with a light vinaigrette provide a bright, crisp contrast to the hearty chicken and dumplings, lightening the overall meal.

  • Cornbread: Sweet and crumbly, cornbread serves as a delightful contrast to the savory soup, making it a comforting and enjoyable pairing.

  • Apple Pie: This classic dessert offers a sweet and fruity finish to your meal, leaving everyone with warm memories of home and comfort.

  • Herbal Tea: A soothing cup of chamomile or mint tea can round off the meal beautifully, promoting relaxation after a filling dinner.

  • Sparkling Water with Lemon: This refreshing drink cleanses the palate and adds a zesty zing to the comforting flavors of the meal.

Expert Tips for Perfect Chicken and Dumplings

  • Use Rotisserie Chicken: This saves time, ensures great flavor, and almost guarantees tender meat. Feel free to use any cooked chicken if rotisserie isn’t available.

  • Check Seasoning Levels: After combining ingredients, taste and adjust salt and pepper as necessary. Remember, it’s easier to add more spice than to remedy an overly salty broth!

  • Uniform Dumplings: Scoop dumpling batter into even-sized portions for consistent cooking. This ensures that each dumpling is fluffy and cooks evenly in the broth.

  • Avoid Overmixing: When preparing the dumplings, mix just until combined. Overmixing creates dense dumplings instead of the light, airy texture you want in your chicken and dumplings.

  • Vent the Lid: Let the dumplings steam by keeping the lid closed while they cook; opening it can release precious steam and lead to undercooked dumplings.

  • Test for Doneness: Use a toothpick to check if the dumplings are cooked through. If it comes out clean, you’re ready to dig into your delicious chicken and dumplings!

Chicken and Dumplings Recipe FAQs

What type of rotisserie chicken should I use for this recipe?
Absolutely! I recommend using a plain rotisserie chicken, as the seasoning from the chicken will enhance the flavor of the dish. If you prefer, you can also use any cooked chicken from your leftovers—but keep in mind that the taste might vary slightly depending on the seasoning used.

How should I store leftover chicken and dumplings?
For optimal freshness, store your leftovers in an airtight container in the fridge for up to 3 days. This will prevent the dumplings from becoming soggy while preserving the broth. When you’re ready to enjoy them again, it’s best to reheat them gently on the stovetop with a splash of water or chicken broth.

Can I freeze chicken and dumplings, and if so, how?
Yes, you can freeze chicken and dumplings! First, allow them to cool completely. Then transfer them into a freezer-safe container or freezer bags, removing as much air as possible to prevent freezer burn. They can stay fresh for up to 3 months. When you’re ready to eat, let them thaw in the refrigerator overnight before reheating on the stovetop.

What should I do if my dumplings are dense instead of fluffy?
Very! If your dumplings come out dense, it’s usually due to overmixing the batter or not cooking them long enough. To prevent this, mix the dumpling batter just until combined—lumps are okay! Ensure you cover the pot while they cook for 15-20 minutes without lifting the lid, as steam is essential for creating that light, fluffy texture.

Are there any dietary considerations to keep in mind for this recipe?
Absolutely! This recipe contains chicken and dairy products, so it’s not suitable for vegetarians or those with certain allergies. If you’re cooking for someone with dietary restrictions, consider substituting rotisserie chicken with a plant-based protein and using non-dairy milk to make it vegan-friendly. Always check for allergens in the ingredient labels, especially for flavored chicken bouillon.

Chicken and Dumplings

Ultimate Chicken and Dumplings for Cozy Comfort Food Bliss

This Ultimate Chicken and Dumplings recipe is a comforting crowd-pleaser featuring tender rotisserie chicken and fluffy dumplings.
Prep Time 20 minutes
Cook Time 45 minutes
Total Time 1 hour 5 minutes
Servings: 6 servings
Course: Chicken
Cuisine: American
Calories: 350

Ingredients
  

For the Broth
  • 1 whole Rotisserie Chicken Any cooked chicken can work.
  • 2 tablespoons Unsalted Butter Margarine can be a substitute.
  • 2 tablespoons Oil Use olive or vegetable oil.
  • 1 whole Onion Yellow or sweet onions recommended.
  • 2 cups Baby Carrots Regular carrots can substitute.
  • 1/4 cup All-Purpose Flour Gluten-free flour can be used.
  • 8 cups Chicken Bouillon + Water Low-sodium or store-bought broth can be used.
  • 1 teaspoon Salt Adjust to taste.
  • 1/2 teaspoon Black Pepper Adjust to taste.
  • 1 tablespoon Italian Seasoning Or substitute with other dried herbs.
For the Dumplings
  • 1 cup Whole Milk Non-dairy milk can replace.
  • 2 cups Self-Rising Flour All-purpose flour with baking powder can substitute.

Equipment

  • Large pot
  • Medium bowl
  • Cutting Board
  • sharp knife

Method
 

Step‑by‑Step Instructions
  1. Prep Veggies: Dice the onion and cut baby carrots into thirds, then set aside.
  2. Cut Chicken: Dice the rotisserie chicken into bite-sized pieces.
  3. Make Broth: In a large pot, combine chicken bouillon with 8 cups of water and bring to a boil.
  4. Sauté Vegetables: In the same pot, heat oil and butter, then add onion and carrots, sauté for 5 minutes.
  5. Thicken Broth: Stir in flour and cook for an additional minute to create a roux, then incorporate broth.
  6. Combine Chicken & Season: Add chicken, salt, pepper, and Italian seasoning to the broth and simmer for 10 minutes.
  7. Prepare Dumplings: Mix self-rising flour, melted butter, and milk until just combined.
  8. Cook Dumplings: Drop spoonfuls of dumpling mixture into the broth, cover, and cook for 15-20 minutes.
  9. Check Doneness: Insert a toothpick into a dumpling to check if cooked through.

Notes

Store leftovers in an airtight container for up to 3 days in the fridge, or freeze for up to 3 months.

Decadent Chocolate Peanut Butter Banana Bread Bliss

You know that moment when you realize the last ripe bananas on your counter are begging for a purpose? Instead of standard banana bread, I decided to elevate them into something truly decadent: Chocolate Peanut Butter Banana Bread! This recipe combines the moist texture of a classic banana loaf with the indulgent flavors of chocolate and peanut butter, making it a delightful treat perfect for breakfast, snacks, or dessert. You’ll be amazed at how quickly it comes together—just a little over an hour and you’ll have a showstopper that’s sure to impress. Plus, it’s wonderfully versatile; you can enjoy it fresh out of the oven or store it for later. Curious about how this divine combination comes together? Let’s dive into the details!

Why is this Banana Bread a Must-Try?

Decadent Flavor: The rich pairing of chocolate and peanut butter creates a taste experience that will have you coming back for more.

Moist Texture: Thanks to the ripe bananas, the bread is incredibly soft and plush, making it a delightful treat for any occasion.

Quick to Make: In just over an hour, you can whip up this indulgent loaf, perfect for a last-minute dessert or sweet breakfast.

Versatile Enjoyment: Enjoy it warm, topped with your favorite spreads, or serve it with a scoop of vanilla ice cream for a dessert that’s sure to impress! If you’re interested in other banana delights, don’t miss out on our Berry Banana Bread or the delicious Banana Bread Brownies.

Crowd-Pleaser: This recipe is sure to be a hit at any gathering, leaving your friends and family raving about your baking skills!

Chocolate Peanut Butter Banana Bread Ingredients

• Here’s everything you need to create this delightful treat!

For the Batter

  • Peanut Butter – Provides creaminess and flavor; use creamy peanut butter for the best texture.
  • Sugar – Adds sweetness and helps maintain moisture; consider using brown sugar for an extra depth of flavor.
  • Mashed Bananas – The key to moisture and natural sweetness; make sure they are very ripe for optimal taste.
  • Vegetable Oil – Creates a tender crumb in the bread; melted coconut oil can add a lovely hint of flavor.
  • Eggs – Acts as a binding agent, giving the bread structure.
  • Vanilla Extract – Enhances the overall flavor profile, adding warmth to the mix.
  • All-Purpose Flour – Provides the necessary structure for this moist bread.
  • Cocoa Powder – Imparts that rich chocolate flavor that makes this recipe shine; use dark cocoa for an even deeper taste.
  • Baking Soda – Helps the bread rise beautifully.
  • Salt – Balances the sweetness and enhances the overall flavor.

For Optional Toppings

  • Banana Slices – Adds visual appeal and a hint of extra banana flavor; they can be placed on top before baking and are lovely to look at.

Make sure you gather these ingredients to whip up your delicious Chocolate Peanut Butter Banana Bread!

Step‑by‑Step Instructions for Decadent Chocolate Peanut Butter Banana Bread

Step 1: Preheat the Oven
Begin by preheating your oven to 350°F (175°C). This step is essential for ensuring that your Chocolate Peanut Butter Banana Bread bakes evenly. While the oven warms up, prepare your large loaf pan by lining it with parchment paper, which will help the bread release smoothly once baked.

Step 2: Mix Wet Ingredients
In a spacious mixing bowl, combine slightly melted creamy peanut butter, sugar, mashed bananas, vegetable oil, and eggs. Use a whisk or a sturdy spatula to mix these ingredients well until fully combined, resulting in a smooth and creamy texture. This mixture will be the flavorful foundation for your decadent bread.

Step 3: Add Dry Ingredients
Next, stir in the cocoa powder, baking soda, salt, and vanilla extract to your wet mixture. Mix gently until you don’t see any dry spots; the cocoa powder will enrich your batter with that irresistible chocolate flavor. This step brings all the beautiful components together for your Chocolate Peanut Butter Banana Bread.

Step 4: Incorporate the Flour
Gradually fold in the all-purpose flour, being careful not to overmix the batter. Stir just until the flour is evenly integrated, as this will help keep your bread tender and moist. Remember, the batter will be thick, but that’s perfect for the rich texture you want in your finished loaf.

Step 5: Prepare for Baking
Pour the thick batter into your prepared loaf pan, smoothing the top with a spatula for an even bake. If desired, top it with thinly sliced bananas, creating a beautiful presentation that also enhances the banana flavor. This is where you can infuse a touch of extra excitement into your Chocolate Peanut Butter Banana Bread!

Step 6: Bake the Bread
Place the loaf pan in the preheated oven and bake for approximately 55 minutes. You’ll know it’s done when a knife inserted into the center comes out clean or with a few moist crumbs. The aroma of chocolate and peanut butter will fill your kitchen, making it hard to wait for the next steps!

Step 7: Let It Cool
Once baked, remove the loaf from the oven and allow it to cool in the pan for about 20 minutes. This cooling phase helps the bread firm up and makes it easier to slice. After some time, carefully transfer the bread to a wire rack to cool completely.

Step 8: Drizzle and Serve
For a delicious finishing touch, melt some creamy peanut butter in the microwave until smooth. Once the bread has cooled, drizzle this melted peanut butter over the top, adding a decadent layer of flavor to your Chocolate Peanut Butter Banana Bread. Slice, serve, and enjoy this indulgent treat!

What to Serve with Decadent Chocolate Peanut Butter Banana Bread?

When it comes to this irresistible sweet creation, pairing it with complementary delights transforms your meal into a cozy experience.

  • Fresh Berries: The tartness of strawberries or raspberries adds a vibrant contrast to the rich, chocolatey flavor. They’re refreshing and make for a beautiful presentation!
  • Vanilla Ice Cream: A scoop of creamy vanilla ice cream topped on a warm slice enhances the indulgence, creating a delightful hot and cold contrast.
  • Coffee or Espresso: The rich, deep flavors of coffee marry perfectly with the decadent bread, making it an ideal morning or afternoon treat.
  • Greek Yogurt: A dollop of unsweetened Greek yogurt adds creaminess and a tangy touch that balances the sweetness beautifully.
  • Sweetened Condensed Milk Drizzle: Drizzling warm condensed milk over a slice elevates the dessert experience, amplifying its sweetness and smooth texture.
  • Nutty Granola: Sprinkle some crunchy nut granola alongside the bread for a textural contrast and a heartier breakfast option.

Pairing these delightful sides with your Chocolate Peanut Butter Banana Bread makes for an inviting meal that’s perfect for any time of day!

Expert Tips for Chocolate Peanut Butter Banana Bread

  • Use Ripe Bananas: Make sure your bananas are very ripe; they add natural sweetness and moisture, enhancing the flavor of your Chocolate Peanut Butter Banana Bread.

  • Don’t Overmix: Once you add the flour, mix just until combined. Overmixing can lead to dense, tough bread instead of the tender texture you want.

  • Check for Doneness: Use a knife or toothpick to check for doneness; it should come out clean or with a few moist crumbs to ensure a perfect bake each time.

  • Proper Storage: To prevent drying, wrap your leftover bread tightly in plastic or place it in an airtight container. This way, you’ll enjoy its moistness even days later!

  • Experiment with Mix-ins: Feel free to get creative; adding chocolate chips or nuts can take your Chocolate Peanut Butter Banana Bread to the next level of deliciousness!

Chocolate Peanut Butter Banana Bread Variations

Customize your delicious Chocolate Peanut Butter Banana Bread with these fun, flavorful twists that add excitement to every slice!

  • Nut-Free: Substitute almond butter for peanut butter to make it allergy-friendly while keeping that creamy texture.
  • Chocolate Lovers: Fold in a handful of chocolate chips for extra melty goodness; this will take your chocolate flavor over the top.
  • Whole Grain Goodness: Replace half of the all-purpose flour with whole wheat flour for a heartier and more nutritious loaf.
  • Fruity Surprise: Add a cup of diced strawberries or blueberries to brighten up your bread with fresh fruit flavors. Each bite will feel like a delightful surprise!
  • Spicy Kick: Sprinkle in a pinch of cayenne or chili powder for a subtle heat that contrasts with the sweetness of the banana and chocolate.
  • Coconut Infusion: Mix in shredded coconut for a tropical twist, or top it with toasted coconut flakes for a crunchy finish. You will love the texture!
  • Extra Moisture: Try adding a splash of milk or yogurt to the wet ingredients for a creamier batter that enhances moisture.
  • Fruity Drizzle: Top with a simple glaze of lemon juice and powdered sugar for a tart contrast to the rich chocolatey goodness.

Feel free to explore these variations and make this Chocolate Peanut Butter Banana Bread truly your own! If you’re in the mood for other banana-inspired treats, check out our enticing Banana Bread Brownies or go wild with the flavors in our Berry Banana Bread.

How to Store and Freeze Chocolate Peanut Butter Banana Bread

Room Temperature: Keep leftover Chocolate Peanut Butter Banana Bread tightly wrapped in plastic at room temperature for up to 3 days to maintain its delicious moisture.

Fridge: For longer storage, refrigerate the bread in an airtight container, where it will stay fresh for up to a week without drying out.

Freezer: You can freeze individual slices or the whole loaf for up to 3 months. Wrap them tightly in plastic wrap and then place in a freezer bag for extra protection.

Reheating: To enjoy, thaw the frozen slices at room temperature or reheat in the microwave for about 15-20 seconds for that freshly-baked taste.

Make Ahead Options

These Chocolate Peanut Butter Banana Bread slices are perfect for meal prep, saving you time during busy weeknights! You can mix the wet ingredients (peanut butter, sugar, mashed bananas, vegetable oil, and eggs) up to 24 hours in advance; just refrigerate the mixture to maintain freshness. The dry ingredients can also be pre-measured and stored in an airtight container for up to 3 days to streamline your baking process. When you’re ready to bake, simply combine the mixtures, fold in the flour, and proceed with baking as directed. To ensure the bread remains moist, wrap it tightly in plastic wrap after it cools—this way, you’ll have delicious, ready-to-enjoy Chocolate Peanut Butter Banana Bread whenever the cravings strike!

Chocolate Peanut Butter Banana Bread Recipe FAQs

What type of bananas should I use for this recipe?
Absolutely! The best bananas for Chocolate Peanut Butter Banana Bread are very ripe ones. Look for bananas that are speckled with dark spots, as these are sweeter and provide the moisture needed for a luscious loaf.

How should I store leftover banana bread?
To keep your Chocolate Peanut Butter Banana Bread fresh, wrap it tightly in plastic wrap or place it in an airtight container at room temperature, where it will stay moist for up to 3 days. For longer storage, refrigerate it for up to a week or freeze it for up to 3 months.

Can I freeze Chocolate Peanut Butter Banana Bread?
Yes, you can! To freeze, wrap individual slices or the entire loaf in plastic wrap. Then, place the wrapped bread into a freezer-safe bag. It’ll stay fresh for up to 3 months. When ready to enjoy, simply thaw at room temperature or microwave for 15-20 seconds to warm it up.

What should I do if the bread is too dense or gummy?
If your Chocolate Peanut Butter Banana Bread turns out too dense, it could be due to overmixing the batter after adding flour. Remember, mix just until incorporated! If your loaf comes out gummy, it may not have baked long enough. You should see a knife come out clean or with a few moist crumbs when it’s ready.

Are there any dietary considerations I should keep in mind?
Very! If you’re cooking for someone with nut allergies, you can substitute the peanut butter with sunflower seed butter or almond butter for a nut-free version. Always make sure to check the labels for allergens, especially if serving to pets or guests with specific dietary needs.

Can I modify the recipe?
Of course! Many variations can elevate this recipe. Consider substituting almond flour for half of the all-purpose flour for a gluten-free option, or add chocolate chips and nuts for extra texture. You can also experiment with spices like cinnamon or cardamom for a unique twist.

Chocolate Peanut Butter Banana Bread

Decadent Chocolate Peanut Butter Banana Bread Bliss

Indulge in this Chocolate Peanut Butter Banana Bread that's perfect for breakfast, snacks, or dessert!
Prep Time 15 minutes
Cook Time 55 minutes
Cooling Time 20 minutes
Total Time 1 hour 30 minutes
Servings: 10 slices
Course: Dessert
Cuisine: American
Calories: 250

Ingredients
  

For the Batter
  • 1 cup Creamy Peanut Butter Use creamy peanut butter for the best texture.
  • 1 cup Sugar Consider using brown sugar for extra depth of flavor.
  • 3 medium Mashed Bananas Make sure they are very ripe for optimal taste.
  • 1/3 cup Vegetable Oil Melted coconut oil can add flavor.
  • 2 large Eggs
  • 1 teaspoon Vanilla Extract
  • 1 1/2 cups All-Purpose Flour
  • 1/2 cup Cocoa Powder Use dark cocoa for deeper taste.
  • 1 teaspoon Baking Soda
  • 1/2 teaspoon Salt
For Optional Toppings
  • 1 medium Banana Slices Place on top before baking for visual appeal.

Equipment

  • Loaf pan
  • mixing bowl
  • whisk
  • spatula
  • parchment paper

Method
 

Step-by-Step Instructions
  1. Preheat your oven to 350°F (175°C) and line a large loaf pan with parchment paper.
  2. In a mixing bowl, combine melted peanut butter, sugar, mashed bananas, vegetable oil, and eggs until smooth.
  3. Stir in cocoa powder, baking soda, salt, and vanilla extract until incorporated.
  4. Fold in all-purpose flour gently until just combined.
  5. Pour the batter into the prepared loaf pan and smooth the top. Optionally, top with banana slices.
  6. Bake in the preheated oven for approximately 55 minutes or until a knife comes out clean.
  7. Allow cooling in the pan for 20 minutes before transferring to a wire rack.
  8. Melt some peanut butter and drizzle over the cooled bread before slicing and serving.

Notes

Ensure bananas are very ripe for optimal sweetness and moisture. Store tightly wrapped for freshness.