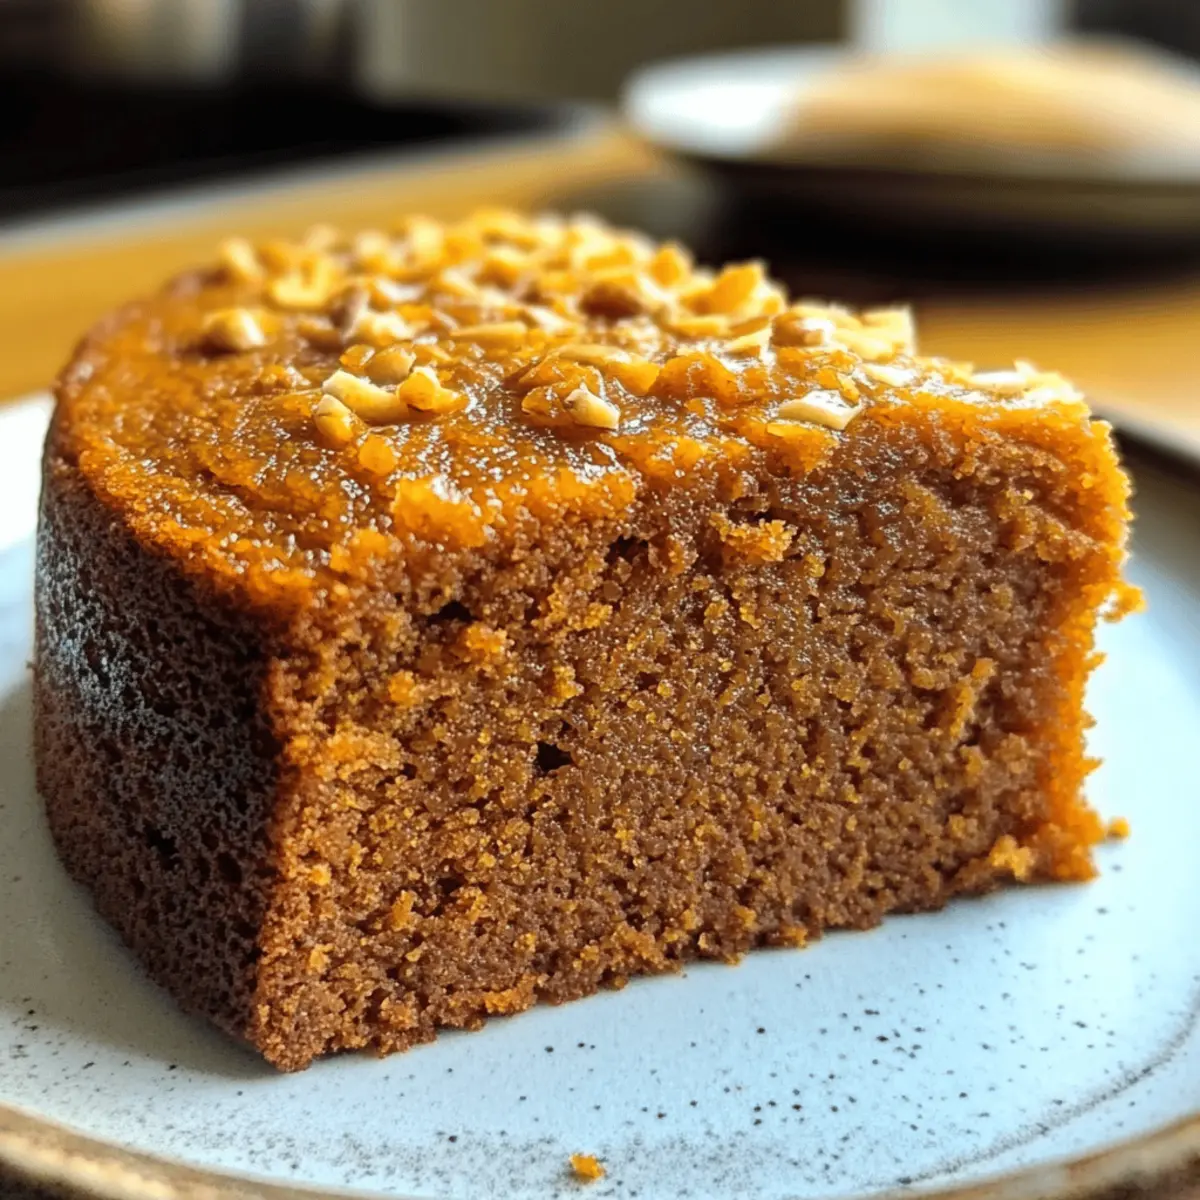
Spiced Tofu Kebabs with Vegetables: A Savory Delight!

Introduction to Spiced Tofu Kebabs with Vegetables

When I think of summer evenings, the aroma of grilled food wafts through the air, bringing back memories of family gatherings and laughter. Spiced Tofu Kebabs with Vegetables are my go-to dish for those moments. They’re not just a quick solution for a busy day; they’re a delightful way to impress friends and family alike.

With vibrant colors and bold flavors, these kebabs are perfect for any occasion. Whether you’re a seasoned grill master or just starting out, this recipe will make you feel like a culinary pro. Let’s dive into this savory delight!

Why You’ll Love This Spiced Tofu Kebabs with Vegetables

These Spiced Tofu Kebabs with Vegetables are a game-changer for busy weeknights or weekend barbecues.

They come together in no time, making meal prep a breeze.

The combination of marinated tofu and fresh veggies creates a flavor explosion that even meat lovers will appreciate.

Plus, they’re healthy, satisfying, and perfect for impressing guests without breaking a sweat.

What’s not to love?

Ingredients for Spiced Tofu Kebabs with Vegetables

Creating these Spiced Tofu Kebabs with Vegetables is all about using fresh, vibrant ingredients that pack a punch. Here’s what you’ll need:

  • Firm Tofu: The star of the show! It holds its shape well and absorbs flavors beautifully.
  • Olive Oil: Adds richness and helps the marinade cling to the tofu and veggies.
  • Soy Sauce: A savory base that brings umami to the dish. You can use low-sodium if you prefer.
  • Lemon Juice: A splash of acidity that brightens the flavors and balances the richness of the tofu.
  • Ground Cumin: This spice adds a warm, earthy flavor that complements the other spices perfectly.
  • Smoked Paprika: It gives a subtle smokiness, reminiscent of summer barbecues, even if you’re cooking indoors.
  • Garlic Powder: A must-have for that aromatic kick. Fresh garlic works too if you prefer.
  • Onion Powder: Enhances the overall flavor profile without the texture of fresh onions.
  • Salt and Black Pepper: Essential for seasoning, bringing out the natural flavors of the ingredients.
  • Bell Pepper: Adds color and sweetness. Feel free to mix colors for a vibrant presentation.
  • Zucchini: Its mild flavor and tender texture make it a perfect grilling vegetable.
  • Red Onion: Offers a slight bite and sweetness when grilled, balancing the dish beautifully.
  • Wooden or Metal Skewers: Essential for threading your kebabs. If using wooden skewers, soak them in water to prevent burning.

For exact measurements, check the bottom of the article where you can find everything listed for easy printing. Enjoy the process of gathering these ingredients; each one plays a vital role in creating a delicious meal!

How to Make Spiced Tofu Kebabs with Vegetables

Creating Spiced Tofu Kebabs with Vegetables is a straightforward process that brings together flavors and textures in a delightful way. Follow these simple steps, and you’ll be on your way to grilling perfection!

Step 1: Prepare the Tofu

Start by cutting the pressed tofu into 1-inch cubes.

This size allows the tofu to cook evenly and soak up the marinade beautifully.

Make sure to press the tofu well to remove excess moisture.

This step is crucial for achieving that perfect texture when grilling.

Step 2: Make the Marinade

In a separate bowl, whisk together olive oil, soy sauce, lemon juice, ground cumin, smoked paprika, garlic powder, onion powder, salt, and black pepper.

This marinade is the heart of the dish, infusing the tofu with rich flavors.

Feel free to adjust the spices to suit your taste.

A little extra smoked paprika can add a delightful kick!

Step 3: Marinate the Tofu

Pour the marinade over the tofu cubes and toss gently to coat.

Cover the bowl and refrigerate for at least 30 minutes, or up to 2 hours for deeper flavor.

The longer the tofu marinates, the more flavorful it becomes.

This step is where the magic happens!

Step 4: Prepare the Skewers

While the tofu is marinating, soak wooden skewers in water for about 30 minutes.

This prevents them from burning on the grill.

Next, cut your bell pepper, zucchini, and red onion into pieces that are easy to thread onto the skewers.

Aim for uniform sizes to ensure even cooking.

Step 5: Grill the Kebabs

Preheat your grill or grill pan over medium-high heat.

Once hot, thread the marinated tofu cubes and prepared vegetables onto the skewers, alternating between them.

Place the skewers on the grill and cook for about 10-12 minutes.

Turn them occasionally until the tofu is golden and the veggies are tender.

Keep an eye on them to avoid burning!

Step 6: Serve and Enjoy

Once grilled to perfection, remove the kebabs from the grill and let them cool slightly.

Serve them warm, garnished with fresh herbs if desired.

These kebabs are perfect on their own or paired with a side of rice or a fresh salad.

Enjoy the burst of flavors and the satisfaction of a job well done!

Tips for Success

  • Press the tofu well to remove excess moisture for better texture.
  • Marinate the tofu longer for a deeper flavor—overnight is ideal!
  • Use a mix of colorful vegetables for a visually appealing dish.
  • Don’t overcrowd the skewers; give the kebabs space for even cooking.
  • Experiment with different spices or add a pinch of cayenne for heat.

Equipment Needed

  • Grill or Grill Pan: Essential for cooking the kebabs. A stovetop grill pan works well if you don’t have an outdoor grill.
  • Skewers: Wooden or metal skewers are needed. If using wooden, remember to soak them first.
  • Mixing Bowls: For marinating the tofu and mixing the marinade.
  • Knife and Cutting Board: To chop the vegetables and tofu.

Variations

  • Spicy Kick: Add a pinch of cayenne pepper or red pepper flakes to the marinade for an extra heat boost.
  • Herb Infusion: Incorporate fresh herbs like cilantro or parsley into the marinade for a fresh twist.
  • Different Proteins: Swap tofu for tempeh or seitan for a different texture and flavor profile.
  • Vegetable Swaps: Use seasonal vegetables like cherry tomatoes, mushrooms, or asparagus for variety.
  • Gluten-Free Option: Ensure your soy sauce is gluten-free or substitute with tamari for a gluten-free version.

Serving Suggestions

  • Fresh Salad: Pair the kebabs with a crisp green salad for a refreshing contrast.
  • Rice or Quinoa: Serve over a bed of fluffy rice or quinoa to soak up the flavors.
  • Grilled Corn: Add grilled corn on the cob for a sweet, smoky side.
  • Chilled Beverages: Enjoy with a cold lemonade or iced tea to complement the meal.
  • Presentation: Arrange kebabs on a platter with fresh herbs for a vibrant display.

FAQs about Spiced Tofu Kebabs with Vegetables

Can I use different vegetables for the kebabs?

Absolutely! Feel free to swap in your favorite vegetables. Cherry tomatoes, mushrooms, or even bell peppers in different colors can add variety and flavor to your Spiced Tofu Kebabs with Vegetables.

How do I store leftover kebabs?

Store any leftover kebabs in an airtight container in the refrigerator for up to three days. They can be enjoyed cold or reheated in the oven or microwave.

Can I make these kebabs ahead of time?

Yes! You can marinate the tofu a day in advance. Just keep it in the fridge until you’re ready to grill. This makes meal prep a breeze!

What can I serve with Spiced Tofu Kebabs?

These kebabs pair wonderfully with a fresh salad, rice, or quinoa. You can also serve them with a side of grilled corn for a complete meal.

Are these kebabs suitable for meal prep?

Definitely! Spiced Tofu Kebabs with Vegetables are perfect for meal prep. Just grill a batch and enjoy them throughout the week for quick, healthy meals.

Final Thoughts

Cooking Spiced Tofu Kebabs with Vegetables is more than just preparing a meal; it’s about creating memories and sharing joy with loved ones.

The vibrant colors and enticing aromas fill your kitchen, setting the stage for laughter and connection.

Each bite bursts with flavor, showcasing the beauty of simple ingredients coming together.

Whether you’re grilling on a sunny afternoon or enjoying a cozy dinner at home, these kebabs are sure to impress.

So fire up that grill, gather your friends, and savor the delightful experience of these delicious kebabs.

Happy cooking!

Paul

Spiced Tofu Kebabs with Vegetables: A Savory Delight!

Spiced Tofu Kebabs with Vegetables are a savory delight, perfect for grilling and packed with flavor.
Prep Time 10 minutes
Cook Time 12 minutes
Total Time 42 minutes
Servings: 4 servings
Course: Main Dish
Cuisine: Vegetarian
Calories: 180

Ingredients
  

  • 1 block 14 ounces firm tofu, pressed and drained
  • 1 tablespoon olive oil
  • 2 tablespoons soy sauce
  • 1 tablespoon lemon juice
  • 1 teaspoon ground cumin
  • 1 teaspoon smoked paprika
  • 1 teaspoon garlic powder
  • 1 teaspoon onion powder
  • 1/2 teaspoon salt
  • 1/4 teaspoon black pepper
  • 1 bell pepper cut into 1-inch pieces
  • 1 zucchini sliced into thick rounds
  • 1 red onion cut into wedges
  • Wooden or metal skewers

Method
 

  1. Cut the pressed tofu into 1-inch cubes and place them in a large bowl.
  2. In a separate bowl, whisk together the olive oil, soy sauce, lemon juice, cumin, smoked paprika, garlic powder, onion powder, salt, and black pepper.
  3. Pour the marinade over the tofu cubes and toss gently to coat. Cover and refrigerate for at least 30 minutes, or up to 2 hours for more flavor.
  4. While the tofu marinates, soak wooden skewers in water for about 30 minutes to prevent burning on the grill.
  5. Preheat the grill or grill pan over medium-high heat.
  6. After marinating, thread the tofu cubes, bell pepper pieces, zucchini rounds, and red onion wedges onto the skewers, alternating between the tofu and vegetables.
  7. Place the skewers on the grill and cook for about 10-12 minutes, turning occasionally, until the tofu is golden and the vegetables are tender.
  8. Remove from the grill and let cool slightly before serving.
  9. Serve the kebabs warm, garnished with fresh herbs if desired.

Notes

  • For added flavor, consider marinating the tofu overnight.
  • You can substitute the vegetables with your favorites, such as cherry tomatoes or mushrooms.
  • If you prefer a spicier kick, add a pinch of cayenne pepper to the marinade.

Dill Pickle Chicken Skewers: A Flavorful Grilling Delight!

Introduction to Dill Pickle Chicken Skewers

When I think of summer evenings, the sizzle of chicken on the grill always comes to mind. Dill Pickle Chicken Skewers are my go-to for those laid-back nights with friends or family. They’re not just easy to whip up; they pack a punch of flavor that’ll have everyone asking for seconds.

Whether you’re a seasoned grill master or just starting out, this recipe is a quick solution for a busy day. With just a few ingredients and minimal prep, you can impress your loved ones with a dish that’s both fun and delicious.

Why You’ll Love This Dill Pickle Chicken Skewers

These Dill Pickle Chicken Skewers are a game-changer for any grilling enthusiast.

They’re incredibly easy to make, requiring minimal prep time, which means more time to enjoy with friends.

The tangy flavor from the dill pickle juice elevates the chicken, making each bite a burst of deliciousness.

Plus, they’re perfect for any occasion, whether it’s a backyard barbecue or a quick weeknight dinner. You’ll be hooked!

Ingredients for Dill Pickle Chicken Skewers

Creating these Dill Pickle Chicken Skewers is a breeze, especially with the right ingredients. Here’s what you’ll need:

  • Boneless, skinless chicken breasts: The star of the show! Cut into 1-inch cubes for even cooking.
  • Dill pickle juice: This tangy liquid is what gives the chicken its unique flavor. It’s a must-have for marinating!
  • Garlic powder: Adds a savory depth to the skewers without the hassle of chopping fresh garlic.
  • Onion powder: A subtle sweetness that complements the garlic and enhances the overall taste.
  • Black pepper: Just a pinch brings a bit of heat and balances the flavors beautifully.
  • Smoked paprika: This spice adds a smoky richness, making your skewers taste like they’ve been kissed by the grill.
  • Olive oil: A light brush of this oil helps the spices stick and keeps the chicken moist while grilling.
  • Wooden or metal skewers: Essential for threading the chicken. If you choose wooden skewers, remember to soak them in water to prevent burning.

Feel free to get creative! You can swap the chicken for shrimp or tofu for a different protein option.

All ingredient quantities are listed at the bottom of the article for easy printing. Happy cooking!

How to Make Dill Pickle Chicken Skewers

Making Dill Pickle Chicken Skewers is a straightforward process that anyone can master.

Follow these simple steps, and you’ll have a delicious dish ready to impress.

Step 1: Marinate the Chicken

Start by placing the chicken cubes in a large bowl.

Pour in the dill pickle juice, ensuring all pieces are submerged.

Cover the bowl and let it marinate in the refrigerator for at least one hour.

For a deeper flavor, consider marinating overnight.

This step is crucial; the pickle juice tenderizes the chicken while infusing it with that signature tang.

Step 2: Prepare the Grill

While the chicken is marinating, it’s time to get your grill ready.

Preheat your grill to medium-high heat.

If you’re using wooden skewers, soak them in water for about 30 minutes.

This prevents them from burning and ensures your skewers hold up during grilling.

A well-prepped grill is key to achieving those beautiful grill marks!

Step 3: Mix the Spices

In a small bowl, combine garlic powder, onion powder, black pepper, and smoked paprika.

This spice blend is what elevates your skewers from ordinary to extraordinary.

Mix well to ensure an even distribution of flavors.

You can adjust the spice levels to suit your taste.

Feel free to add a pinch of cayenne if you like a little heat!

Step 4: Assemble the Skewers

Once the chicken has marinated, remove it from the bowl and pat it dry with paper towels.

This helps the spices stick better.

Now, thread the chicken cubes onto the skewers, leaving a little space between each piece.

This allows for even cooking and that perfect char.

Don’t overcrowd the skewers; it’s all about balance!

Step 5: Grill the Skewers

Brush the assembled skewers with olive oil.

This not only adds flavor but also helps prevent sticking.

Sprinkle the spice mixture evenly over the chicken.

Place the skewers on the grill and cook for 10-12 minutes.

Turn them occasionally to ensure even cooking.

You’ll know they’re done when the internal temperature reaches 165°F and they have those gorgeous grill marks.

Step 6: Rest and Serve

Once grilled to perfection, remove the skewers from the grill.

Let them rest for a few minutes; this allows the juices to redistribute.

Serve your Dill Pickle Chicken Skewers warm, and watch them disappear!

Pair them with grilled veggies or a fresh salad for a complete meal.

Enjoy the compliments that come your way!

Tips for Success

  • Marinate the chicken overnight for an even bolder flavor.
  • Use a meat thermometer to ensure the chicken reaches 165°F for safety.
  • Experiment with different spices to customize the flavor to your liking.
  • Don’t overcrowd the skewers; this helps achieve that perfect char.
  • Let the skewers rest after grilling to keep them juicy and tender.

Equipment Needed

  • Grill: A gas or charcoal grill works perfectly for these skewers.
  • Skewers: Use wooden or metal skewers; if using wooden, soak them first.
  • Bowl: A large bowl for marinating the chicken.
  • Meat thermometer: To check the chicken’s doneness.
  • Brush: For applying olive oil to the skewers.

Variations

  • Spicy Dill Pickle Chicken Skewers: Add a teaspoon of cayenne pepper or your favorite hot sauce to the marinade for a kick of heat.
  • Herb-Infused Skewers: Mix in fresh herbs like dill or parsley with the spice blend for an aromatic twist.
  • Vegetarian Option: Substitute chicken with firm tofu or hearty vegetables like bell peppers, zucchini, and mushrooms for a delicious plant-based version.
  • BBQ Dill Pickle Chicken Skewers: Brush the skewers with your favorite BBQ sauce during the last few minutes of grilling for a sweet and tangy flavor.
  • Fruit and Chicken Skewers: Alternate chicken pieces with chunks of pineapple or peaches for a sweet contrast that pairs beautifully with the dill pickle flavor.

Serving Suggestions

  • Grilled Vegetables: Serve with a colorful medley of grilled zucchini, bell peppers, and asparagus for a fresh side.
  • Refreshing Salad: Pair with a crisp cucumber and tomato salad drizzled with a light vinaigrette.
  • Chilled Beverages: Enjoy with a cold beer or a zesty lemonade to complement the flavors.
  • Presentation: Arrange skewers on a platter with fresh dill sprigs for a beautiful touch.

FAQs about Dill Pickle Chicken Skewers

Can I use other meats for these skewers?

Absolutely! While chicken is the star, you can easily swap it for shrimp or even firm tofu for a vegetarian option. Just adjust the marinating time accordingly.

How long should I marinate the chicken?

For the best flavor, marinate the chicken for at least one hour. If you have the time, letting it sit overnight will really enhance the taste!

What can I serve with Dill Pickle Chicken Skewers?

These skewers pair wonderfully with grilled vegetables, a fresh salad, or even a side of rice. A cold drink, like lemonade or beer, complements the flavors perfectly.

Can I make these skewers ahead of time?

Yes! You can marinate the chicken a day in advance and assemble the skewers when you’re ready to grill. This makes for a quick and easy meal on busy days.

What’s the best way to store leftovers?

If you have any leftovers, store them in an airtight container in the fridge for up to three days. Reheat them on the grill or in the oven for the best results!

Final Thoughts

Dill Pickle Chicken Skewers are more than just a meal; they’re a celebration of flavor and simplicity.

Each bite transports me back to those carefree summer nights, filled with laughter and good company.

The tangy pickle juice and smoky spices create a delightful harmony that keeps everyone coming back for more.

Whether you’re grilling for a crowd or enjoying a quiet evening at home, these skewers bring joy to the table.

So fire up that grill, gather your loved ones, and savor the deliciousness of these skewers.

Trust me, they’ll become a staple in your summer repertoire!

Paul

Dill Pickle Chicken Skewers: A Flavorful Grilling Delight!

Dill Pickle Chicken Skewers are a flavorful and easy-to-make dish perfect for grilling enthusiasts. Marinated in dill pickle juice and seasoned with spices, these skewers are a delightful treat.
Prep Time 10 minutes
Cook Time 12 minutes
Total Time 1 hour 22 minutes
Servings: 4 servings
Course: Main Dish
Cuisine: American
Calories: 220

Ingredients
  

  • 1 pound boneless skinless chicken breasts, cut into 1-inch cubes
  • 1 cup dill pickle juice
  • 1 teaspoon garlic powder
  • 1 teaspoon onion powder
  • 1 teaspoon black pepper
  • 1 teaspoon smoked paprika
  • 1 tablespoon olive oil
  • Wooden or metal skewers

Method
 

  1. In a large bowl, combine the chicken cubes and dill pickle juice. Marinate in the refrigerator for at least 1 hour, or up to 4 hours for more flavor.
  2. Preheat your grill to medium-high heat. If using wooden skewers, soak them in water for 30 minutes to prevent burning.
  3. In a small bowl, mix together garlic powder, onion powder, black pepper, and smoked paprika.
  4. Remove the chicken from the marinade and pat dry with paper towels.
  5. Thread the marinated chicken onto the skewers, leaving a little space between each piece.
  6. Brush the skewers with olive oil and sprinkle the spice mixture evenly over the chicken.
  7. Place the skewers on the grill and cook for 10-12 minutes, turning occasionally, until the chicken is cooked through and has nice grill marks. The internal temperature should reach 165°F.
  8. Remove from the grill and let rest for a few minutes before serving.

Notes

  • For added flavor, try marinating the chicken overnight.
  • You can substitute the chicken with shrimp or tofu for a different protein option.
  • Serve with a side of grilled vegetables or a fresh salad for a complete meal.

Moussaka Maghmour: Discover the Flavorful Recipe Today!

Introduction to Moussaka Maghmour

When I think of comfort food, Moussaka Maghmour always comes to mind. This dish is a warm hug on a plate, perfect for those busy weeknights when you want something hearty yet nutritious.

With layers of roasted eggplant, chickpeas, and a creamy tahini sauce, it’s a delightful way to impress your loved ones without spending hours in the kitchen.

Whether you’re a seasoned cook or just starting out, this recipe is approachable and satisfying. Let’s dive into the flavors of the Mediterranean and create a meal that will have everyone asking for seconds!

Why You’ll Love This Moussaka Maghmour

Moussaka Maghmour is a game-changer for anyone looking to whip up a delicious meal without the fuss.

It’s quick to prepare, taking just over an hour from start to finish, and the flavors are simply out of this world.

The combination of roasted eggplant and chickpeas creates a satisfying texture, while the tahini sauce adds a creamy richness that will have your taste buds dancing.

Trust me, this dish is a crowd-pleaser!

Ingredients for Moussaka Maghmour

Creating Moussaka Maghmour is all about using fresh, vibrant ingredients that come together to create a symphony of flavors. Here’s what you’ll need:

  • Eggplants: The star of the show! They add a rich, meaty texture and absorb all the delicious flavors.
  • Salt: Essential for drawing out moisture from the eggplants, making them tender and flavorful.
  • Olive Oil: A Mediterranean staple that adds depth and richness to the dish.
  • Onion: Diced onions bring sweetness and a savory base to the chickpea mixture.
  • Garlic: Minced garlic elevates the flavor profile, adding a fragrant kick.
  • Bell Pepper: Adds a pop of color and sweetness, balancing the dish beautifully.
  • Chickpeas: These protein-packed legumes provide heartiness and a satisfying bite.
  • Diced Tomatoes: Canned tomatoes add moisture and acidity, enhancing the overall flavor.
  • Ground Cumin: This spice brings warmth and earthiness, a must for Mediterranean dishes.
  • Ground Cinnamon: A surprising yet delightful addition that adds depth and complexity.
  • Paprika: For a hint of smokiness and vibrant color.
  • Black Pepper: A simple seasoning that enhances all the other flavors.
  • Cayenne Pepper (optional): For those who like a little heat, this adds a nice kick.
  • Fresh Parsley: Chopped parsley not only garnishes the dish but also adds freshness.
  • Tahini: This creamy sesame paste is the secret to the luscious sauce that ties everything together.
  • Water: Used to thin the tahini sauce to the perfect consistency.
  • Lemon Juice: A splash of acidity that brightens the dish and balances the flavors.

For exact measurements, check the bottom of the article where you can find everything listed for easy printing. Enjoy gathering these ingredients; each one plays a vital role in making your Moussaka Maghmour unforgettable!

How to Make Moussaka Maghmour

Creating Moussaka Maghmour is a delightful journey through layers of flavor. Follow these simple steps, and you’ll have a dish that’s not only delicious but also visually stunning. Let’s get started!

Step 1: Preheat the Oven

Preheating your oven is crucial for achieving that perfect roast on the eggplant. Set it to 400°F (200°C) before you start preparing the other ingredients. This way, when the eggplant hits the hot oven, it will caramelize beautifully, enhancing its natural sweetness.

Step 2: Prepare the Eggplant

Slice the eggplants into 1/2-inch rounds and sprinkle them with salt. This salting process draws out excess moisture, making the eggplant tender and less bitter. Let them sit for about 30 minutes, then rinse and pat them dry. This step is key to achieving that melt-in-your-mouth texture.

Step 3: Sauté the Aromatics

In a large skillet, heat 2 tablespoons of olive oil over medium heat. Add the diced onion and minced garlic, sautéing until the onion turns translucent. This step is where the magic begins; the aroma of sautéing onions and garlic fills the kitchen, setting the stage for the flavors to come.

Step 4: Cook the Chickpea Mixture

Next, toss in the diced bell pepper and cook for another 3-4 minutes until softened. Then, stir in the chickpeas, diced tomatoes, and spices: cumin, cinnamon, paprika, black pepper, and cayenne (if you’re feeling adventurous). Let this simmer for about 10 minutes. This simmering allows the flavors to meld together, creating a rich and hearty filling.

Step 5: Roast the Eggplant

While the chickpea mixture simmers, brush the eggplant slices with the remaining olive oil. Arrange them on a baking sheet and roast in the oven for 20-25 minutes, flipping halfway through. You want them golden brown and slightly crispy on the edges. This roasting brings out the eggplant’s natural sweetness and adds depth to the dish.

Step 6: Make the Tahini Sauce

In a small bowl, whisk together tahini, water, and lemon juice until smooth. The consistency should be creamy but pourable. If it’s too thick, add a bit more water. This sauce is the creamy crown jewel of your Moussaka Maghmour, tying all the flavors together.

Step 7: Layer the Ingredients

In a large baking dish, start layering. Begin with half of the roasted eggplant, followed by the chickpea mixture, and then top it with the remaining eggplant. Drizzle the tahini sauce generously over the top. This layering not only looks beautiful but also ensures every bite is packed with flavor.

Step 8: Bake the Dish

Finally, bake your assembled Moussaka Maghmour in the oven for 15-20 minutes until heated through. Look for a bubbly top and a golden hue. Once it’s done, let it cool for a few minutes before serving. This dish is best enjoyed warm, garnished with fresh parsley for that extra pop of color and flavor.

Tips for Success

  • Always salt your eggplant to remove bitterness and enhance flavor.
  • Don’t rush the sautéing process; it builds a solid flavor base.
  • Feel free to customize the spices to suit your taste preferences.
  • Let the Moussaka Maghmour sit for a few minutes before serving; it helps the layers set.
  • Experiment with different vegetables for added nutrition and flavor.

Equipment Needed

  • Baking Dish: A 9×13 inch dish works well; any oven-safe dish will do.
  • Skillet: A large skillet for sautéing; a non-stick pan is a great alternative.
  • Baking Sheet: For roasting eggplant; a regular sheet pan will suffice.
  • Whisk: For mixing the tahini sauce; a fork can work in a pinch.
  • Knife and Cutting Board: Essential for chopping veggies; any sturdy knife will do.

Variations

  • Quinoa or Rice: For a heartier dish, mix in cooked quinoa or rice with the chickpea mixture.
  • Additional Vegetables: Add zucchini, mushrooms, or spinach for extra flavor and nutrition.
  • Spice it Up: Experiment with different spices like coriander or turmeric for a unique twist.
  • Cheesy Option: If you’re not strictly vegan, sprinkle some feta cheese on top before baking for added creaminess.
  • Gluten-Free: This recipe is naturally gluten-free, making it a great option for those with dietary restrictions.

Serving Suggestions

  • Fresh Salad: Pair with a crisp Greek salad for a refreshing contrast.
  • Crusty Bread: Serve with warm pita or crusty bread to soak up the tahini sauce.
  • Wine: A chilled white wine or light red complements the flavors beautifully.
  • Garnish: Top with extra parsley or a sprinkle of paprika for a pop of color.

FAQs about Moussaka Maghmour

What is Moussaka Maghmour?

Moussaka Maghmour is a Mediterranean dish featuring layers of roasted eggplant, chickpeas, and a creamy tahini sauce. It’s a hearty, vegan meal that’s both nutritious and satisfying.

Can I make Moussaka Maghmour ahead of time?

Absolutely! You can prepare the layers in advance and assemble the dish. Just cover it and refrigerate. When you’re ready to eat, pop it in the oven to heat through.

What can I serve with Moussaka Maghmour?

This dish pairs wonderfully with a fresh Greek salad or warm pita bread. A light white wine also complements the flavors beautifully.

Is Moussaka Maghmour gluten-free?

Yes! Moussaka Maghmour is naturally gluten-free, making it a great option for those with gluten sensitivities.

Can I add meat to Moussaka Maghmour?

While traditional Moussaka often includes meat, this vegan version shines on its own. However, if you prefer, you can add cooked ground meat to the chickpea mixture for a heartier dish.

Final Thoughts

Moussaka Maghmour is more than just a meal; it’s an experience that brings warmth and joy to the table.

Each layer tells a story, from the roasted eggplant to the creamy tahini sauce, creating a symphony of flavors that dance on your palate.

Whether you’re sharing it with family or enjoying a quiet dinner, this dish has a way of making any occasion feel special.

So roll up your sleeves, embrace the process, and let the aromas fill your kitchen.

I promise, every bite will remind you why cooking is such a beautiful adventure!

Paul

Moussaka Maghmour: Discover the Flavorful Recipe Today!

Moussaka Maghmour is a flavorful and hearty dish made with layers of roasted eggplant, chickpeas, and a creamy tahini sauce, perfect for a nutritious meal.
Prep Time 30 minutes
Cook Time 45 minutes
Total Time 1 hour 15 minutes
Servings: 4 servings
Course: Main Course
Cuisine: Mediterranean
Calories: 320

Ingredients
  

  • 2 medium eggplants sliced into 1/2-inch rounds
  • 1 teaspoon salt
  • 3 tablespoons olive oil
  • 1 large onion diced
  • 3 cloves garlic minced
  • 1 bell pepper diced
  • 1 can 15 ounces chickpeas, drained and rinsed
  • 1 can 14 ounces diced tomatoes
  • 1 teaspoon ground cumin
  • 1 teaspoon ground cinnamon
  • 1 teaspoon paprika
  • 1/2 teaspoon black pepper
  • 1/4 teaspoon cayenne pepper optional
  • 1/4 cup fresh parsley chopped
  • 1/4 cup tahini
  • 1/4 cup water
  • 1 tablespoon lemon juice

Method
 

  1. Preheat the oven to 400°F (200°C).
  2. Sprinkle the eggplant slices with salt and let them sit for about 30 minutes to draw out moisture. Rinse and pat dry.
  3. In a large skillet, heat 2 tablespoons of olive oil over medium heat. Add the onion and garlic, sautéing until the onion is translucent.
  4. Add the bell pepper and cook for another 3-4 minutes until softened.
  5. Stir in the chickpeas, diced tomatoes, cumin, cinnamon, paprika, black pepper, and cayenne pepper (if using). Simmer for about 10 minutes, allowing the flavors to meld.
  6. While the chickpea mixture simmers, brush the eggplant slices with the remaining olive oil and arrange them on a baking sheet. Roast in the oven for 20-25 minutes, flipping halfway through, until golden brown.
  7. In a small bowl, whisk together tahini, water, and lemon juice until smooth.
  8. In a large baking dish, layer half of the roasted eggplant, followed by the chickpea mixture, and then the remaining eggplant on top. Drizzle the tahini sauce over the top.
  9. Bake in the oven for 15-20 minutes until heated through.
  10. Garnish with fresh parsley before serving.

Notes

  • For a heartier dish, add cooked quinoa or rice to the chickpea mixture.
  • Try adding other vegetables like zucchini or mushrooms for extra flavor and nutrition.

Crispy New Orleans-Style Chicken Wings that Wow!

Introduction to Crispy New Orleans-Style Chicken Wings

There’s something magical about the aroma of chicken wings sizzling in the oven, especially when they’re Crispy New Orleans-Style Chicken Wings.

Growing up, my family would gather around the table, laughter filling the air as we devoured these spicy delights.

This recipe is perfect for those busy weeknights or game days when you want to impress your friends without spending hours in the kitchen.

With just a handful of ingredients and a simple baking method, you’ll have a plateful of crispy, flavorful wings that will wow everyone.

Let’s dive into this culinary adventure together!

Why You’ll Love This Crispy New Orleans-Style Chicken Wings

These Crispy New Orleans-Style Chicken Wings are a game changer.

They’re not just easy to make; they’re packed with flavor that’ll have your taste buds dancing.

In under an hour, you can whip up a batch that’s perfect for any occasion.

Whether it’s a casual dinner or a big game, these wings will steal the show.

Trust me, once you try them, you’ll be hooked!

Ingredients for Crispy New Orleans-Style Chicken Wings

To create these mouthwatering Crispy New Orleans-Style Chicken Wings, you’ll need a few key ingredients that pack a punch.

Here’s what you’ll gather:

  • Chicken Wings: The star of the show! Split at the joint for even cooking and crispy skin.
  • Vegetable Oil: Helps the seasoning stick and promotes that golden, crispy texture.
  • Salt: Essential for enhancing the natural flavors of the chicken.
  • Black Pepper: Adds a subtle heat and depth to the seasoning mix.
  • Garlic Powder: A must-have for that savory kick that complements the wings perfectly.
  • Onion Powder: Brings a sweet, aromatic flavor that rounds out the spice blend.
  • Smoked Paprika: This gives the wings a smoky flavor, reminiscent of a backyard barbecue.
  • Cayenne Pepper: Adjust this to your heat preference; it adds a delightful kick!
  • Dried Oregano: Offers a hint of earthiness that balances the spices.
  • Dried Thyme: Adds a subtle herbal note that enhances the overall flavor profile.
  • Hot Sauce: A key ingredient for that classic New Orleans flair; Frank’s RedHot works wonders!
  • Unsalted Butter: This enriches the sauce, making it creamy and luscious.
  • Honey: A touch of sweetness to balance the heat from the hot sauce.

Feel free to experiment with different spices or sauces to make this recipe your own!

For exact measurements, check the bottom of the article where you can find everything listed for easy printing.

How to Make Crispy New Orleans-Style Chicken Wings

Making these Crispy New Orleans-Style Chicken Wings is a straightforward process that guarantees delicious results.

Follow these steps, and you’ll be on your way to wing perfection!

Step 1: Preheat the Oven

Start by preheating your oven to 400°F (200°C).

This step is crucial for achieving that crispy texture we all crave.

While the oven heats up, line a large baking sheet with aluminum foil.

Place a wire rack on top; this allows air to circulate around the wings, ensuring they cook evenly and get that golden brown finish.

Step 2: Season the Wings

In a large bowl, toss the chicken wings with vegetable oil.

This helps the spices stick and promotes that crispy skin.

Next, sprinkle in the salt, black pepper, garlic powder, onion powder, smoked paprika, cayenne pepper, oregano, and thyme.

Mix everything well until the wings are evenly coated.

Don’t be shy—get in there and use your hands if you need to!

Step 3: Bake the Wings

Arrange the seasoned wings in a single layer on the wire rack.

This is where the magic happens!

Bake them in the preheated oven for 40-45 minutes.

Make sure to flip them halfway through for even cooking.

You’re looking for that beautiful golden brown color and a crispy texture that will make your mouth water.

Step 4: Prepare the Sauce

While the wings are baking, it’s time to whip up the sauce.

In a small bowl, whisk together the hot sauce, melted butter, and honey.

This combination strikes the perfect balance between heat and sweetness.

Taste it and adjust the heat level if you like it spicier or milder.

Your wings will be even more irresistible with this sauce!

Step 5: Toss and Bake Again

Once the wings are done baking, remove them from the oven.

Now, toss them in the hot sauce mixture until they’re well coated.

This is where the flavor really comes alive!

Return the sauced wings to the oven for an additional 5-10 minutes.

This final bake helps set the sauce, making every bite a burst of flavor.

Get ready to impress your friends and family with these crispy delights!

Tips for Success

  • For extra crunch, broil the wings for the last 2-3 minutes of cooking.
  • Make sure to flip the wings halfway through baking for even crispiness.
  • Let the wings rest for a few minutes after baking to lock in the juices.
  • Experiment with different hot sauces to find your perfect flavor combination.
  • Serve immediately for the best texture and taste!

Equipment Needed

  • Baking Sheet: A standard sheet works, but a rimmed one prevents spills.
  • Wire Rack: Essential for crispiness; if you don’t have one, use a cooling rack.
  • Mixing Bowl: Any large bowl will do for seasoning the wings.
  • Whisk: Perfect for mixing the sauce; a fork can work in a pinch.

Variations

  • Spicy Garlic Wings: Add minced garlic to the seasoning mix for an extra punch of flavor.
  • Honey BBQ Wings: Substitute the hot sauce with your favorite BBQ sauce for a sweeter twist.
  • Buffalo Ranch Wings: Mix ranch seasoning into the hot sauce for a creamy, tangy flavor.
  • Herb-Infused Wings: Use fresh herbs like rosemary or parsley for a fragrant touch.
  • Gluten-Free Option: Ensure your hot sauce and any additional sauces are certified gluten-free.

Serving Suggestions

  • Celery and Carrot Sticks: Fresh veggies add a crunchy contrast to the spicy wings.
  • Blue Cheese Dressing: A classic dip that cools down the heat beautifully.
  • Cold Beer: Pair with a crisp lager or pale ale for the ultimate game day experience.
  • Presentation: Serve on a rustic wooden board for a casual, inviting look.

FAQs about Crispy New Orleans-Style Chicken Wings

Can I make these wings in an air fryer?

Absolutely! Air frying is a fantastic way to achieve that crispy texture. Cook the wings at 375°F for about 25-30 minutes, flipping halfway through. Just keep an eye on them to avoid overcooking!

What’s the best hot sauce to use?

While Frank’s RedHot is a classic choice, feel free to experiment with your favorite hot sauce. Each one brings a unique flavor profile, so find the one that suits your taste buds best!

Can I prepare the wings ahead of time?

Yes! You can season the wings and store them in the fridge for up to 24 hours before baking. This allows the flavors to meld beautifully, making them even tastier when you finally cook them.

How do I store leftover wings?

Store any leftover wings in an airtight container in the fridge for up to 3 days. To reheat, pop them back in the oven at 350°F for about 10-15 minutes to regain that crispy texture.

Can I use frozen wings for this recipe?

Yes, you can! Just make sure to thaw them completely before seasoning and baking. This ensures even cooking and that perfect crispy finish.

Final Thoughts

Crispy New Orleans-Style Chicken Wings are more than just a dish; they’re a celebration of flavor and togetherness.

Each bite transports you to a lively gathering, where laughter and good times flow as freely as the hot sauce.

This recipe is a reminder that cooking can be simple yet rewarding, bringing friends and family together around the table.

Whether you’re hosting a game day or enjoying a cozy night in, these wings will surely impress.

So roll up your sleeves, embrace the spice, and let the joy of cooking fill your kitchen!

Paul

Crispy New Orleans-Style Chicken Wings that Wow!

Crispy New Orleans-Style Chicken Wings that Wow!
Prep Time 15 minutes
Cook Time 50 minutes
Total Time 1 hour 5 minutes
Course: Appetizer
Cuisine: American
Calories: 450

Ingredients
  

  • 2 pounds chicken wings split at the joint and tips removed
  • 1 tablespoon vegetable oil
  • 1 teaspoon salt
  • 1 teaspoon black pepper
  • 1 teaspoon garlic powder
  • 1 teaspoon onion powder
  • 1 teaspoon smoked paprika
  • 1/2 teaspoon cayenne pepper adjust to taste
  • 1/2 teaspoon dried oregano
  • 1/2 teaspoon dried thyme
  • 1/2 cup hot sauce like Frank's RedHot
  • 1/4 cup unsalted butter melted
  • 1 tablespoon honey

Method
 

  1. Preheat your oven to 400°F (200°C). Line a large baking sheet with aluminum foil and place a wire rack on top. This will help the wings get crispy.
  2. In a large bowl, combine the chicken wings with vegetable oil, salt, black pepper, garlic powder, onion powder, smoked paprika, cayenne pepper, oregano, and thyme. Toss until the wings are evenly coated with the seasoning.
  3. Arrange the seasoned wings in a single layer on the wire rack. Bake in the preheated oven for 40-45 minutes, flipping halfway through, until the wings are golden brown and crispy.
  4. While the wings are baking, prepare the sauce by whisking together the hot sauce, melted butter, and honey in a small bowl.
  5. Once the wings are done, remove them from the oven and toss them in the hot sauce mixture until well coated.
  6. Return the sauced wings to the oven and bake for an additional 5-10 minutes to set the sauce.
  7. Serve hot with your favorite dipping sauce and celery sticks.

Notes

  • For extra crunch, broil the wings for the last 2-3 minutes of cooking.
  • Try adding different spices to the seasoning mix, such as cumin or chili powder, for a unique flavor twist.

Baked Falafel with Tahini Sauce: A Delightful Recipe!

Introduction to Baked Falafel with Tahini Sauce

When I think of comfort food, baked falafel with tahini sauce always comes to mind. This dish is not just a meal; it’s a celebration of flavors and textures that can brighten any day.

Whether you’re looking for a quick solution after a long day or a dish to impress your loved ones, this recipe has you covered.

With its crispy exterior and soft, flavorful interior, paired with a creamy tahini sauce, it’s a delightful way to enjoy a healthy meal without sacrificing taste. Let’s dive into this culinary adventure together!

Why You’ll Love This Baked Falafel with Tahini Sauce

Baked falafel with tahini sauce is a game-changer in the kitchen.

It’s quick to whip up, taking just 40 minutes from start to finish.

The flavors are vibrant, making every bite a delight.

Plus, it’s a healthy option that doesn’t skimp on taste.

Whether you’re feeding a crowd or just yourself, this dish is versatile and satisfying.

You’ll find it’s a recipe you’ll want to make again and again!

Ingredients for Baked Falafel with Tahini Sauce

Creating the perfect baked falafel with tahini sauce starts with gathering the right ingredients.

Here’s what you’ll need:

  • Canned chickpeas: The star of the show! They provide the base and a hearty texture.
  • Fresh parsley: Adds a burst of color and freshness, enhancing the flavor profile.
  • Fresh cilantro: This herb brings a unique taste that complements the chickpeas beautifully.
  • Onion: Finely chopped, it adds sweetness and depth to the falafel.
  • Garlic: Minced for that aromatic kick that elevates the dish.
  • Ground cumin: A warm spice that gives the falafel its signature Middle Eastern flavor.
  • Ground coriander: This spice adds a citrusy note, balancing the earthiness of the chickpeas.
  • Baking powder: Helps the falafel rise slightly, giving it a light texture.
  • Salt: Essential for enhancing all the flavors in the mixture.
  • Black pepper: A dash of heat to round out the taste.
  • Olive oil: Adds richness and helps with browning during baking.
  • Lemon juice: Brightens the flavors and adds a refreshing zing.
  • Whole wheat flour: Acts as a binder, giving the falafel structure while keeping it healthy.

For the tahini sauce, you’ll need:

  • Tahini: This sesame paste is creamy and nutty, forming the base of the sauce.
  • Lemon juice: Just like in the falafel, it adds brightness and acidity.
  • Water: To adjust the sauce’s consistency to your liking.
  • Garlic: A touch of minced garlic for that extra flavor punch.
  • Salt: To taste, ensuring the sauce is perfectly seasoned.

Feel free to experiment with optional ingredients like cayenne pepper or paprika for a spicy kick.

You can find the exact measurements at the bottom of the article, ready for printing!

How to Make Baked Falafel with Tahini Sauce

Making baked falafel with tahini sauce is a straightforward process that yields delicious results.

Let’s break it down step by step, ensuring you have all the tips you need for success.

Step 1: Preheat the Oven

Start by preheating your oven to 400°F.

This step is crucial because it ensures even cooking and helps achieve that perfect crispy texture.

While the oven heats up, line a baking sheet with parchment paper.

This will prevent the falafel from sticking and make cleanup a breeze.

Step 2: Prepare the Falafel Mixture

In a food processor, combine the canned chickpeas, parsley, cilantro, onion, garlic, cumin, coriander, baking powder, salt, black pepper, olive oil, and lemon juice.

Pulse the mixture until it’s well combined but still slightly chunky.

You want a texture that holds together but isn’t completely smooth.

This gives the falafel its delightful bite.

Step 3: Form the Falafel Balls

Now it’s time to shape the falafel!

Using your hands, form the mixture into small balls or patties, about 1.5 inches in diameter.

Make sure to space them out on the baking sheet, leaving some room for them to expand while baking.

This will help them crisp up nicely.

Step 4: Bake the Falafel

Place the baking sheet in the preheated oven and bake for 20-25 minutes.

Flip the falafel halfway through to ensure they brown evenly on both sides.

You’re looking for a golden brown color and a crispy exterior.

Trust me, the aroma wafting through your kitchen will be irresistible!

Step 5: Make the Tahini Sauce

While the falafel bakes, let’s whip up the tahini sauce.

In a small bowl, whisk together tahini, lemon juice, water, minced garlic, and salt until smooth.

If the sauce is too thick, add more water a little at a time until you reach your desired consistency.

This creamy sauce is the perfect complement to your falafel.

Step 6: Serve and Enjoy

Once the falafel are golden and crispy, remove them from the oven.

Serve them warm, drizzled with the tahini sauce.

For an extra touch, you can add fresh veggies or serve them in pita bread.

Enjoy every bite of this delightful dish!

Tips for Success

  • Don’t skip the preheating! It’s key for that crispy texture.
  • Use a food processor for a quick and even mix.
  • Wet your hands when forming the falafel to prevent sticking.
  • Experiment with spices like cayenne for a kick.
  • Store leftover falafel in an airtight container for up to three days.
  • Reheat in the oven for best results, keeping them crispy.

Equipment Needed

  • Food Processor: Essential for mixing the falafel ingredients. A blender can work in a pinch.
  • Baking Sheet: A standard sheet will do, but a non-stick one is ideal.
  • Parchment Paper: Helps prevent sticking; aluminum foil can be a substitute.
  • Mixing Bowl: Any bowl will work for combining ingredients.
  • Measuring Cups and Spoons: Handy for precise ingredient amounts.

Variations of Baked Falafel with Tahini Sauce

  • Spicy Falafel: Add a pinch of cayenne pepper or red pepper flakes to the mixture for a fiery kick.
  • Herbed Falafel: Experiment with different herbs like mint or dill for a fresh twist on flavor.
  • Sweet Potato Falafel: Substitute half of the chickpeas with cooked sweet potato for a slightly sweet and earthy taste.
  • Gluten-Free Option: Use chickpea flour instead of whole wheat flour to make the falafel gluten-free.
  • Nutty Flavor: Mix in a tablespoon of ground flaxseed or chia seeds for added nutrition and a nutty flavor.
  • Veggie-Packed Falafel: Incorporate finely grated carrots or zucchini into the mixture for extra veggies and moisture.

Serving Suggestions for Baked Falafel with Tahini Sauce

  • Pita Bread: Serve the falafel in warm pita pockets with fresh veggies for a satisfying sandwich.
  • Salad: Pair with a crisp salad of mixed greens, cucumbers, and tomatoes for a refreshing side.
  • Drinks: Enjoy with a chilled lemonade or a light beer to complement the flavors.
  • Presentation: Garnish with extra parsley and a sprinkle of paprika for a vibrant touch.

FAQs about Baked Falafel with Tahini Sauce

Can I make baked falafel ahead of time?

Absolutely! You can prepare the falafel mixture a day in advance and store it in the fridge. Just shape and bake them when you’re ready to enjoy. This makes for a quick meal on busy days!

How do I store leftover baked falafel?

Store any leftover baked falafel in an airtight container in the fridge for up to three days. To reheat, pop them back in the oven for a few minutes to regain their crispiness.

Can I freeze baked falafel?

Yes, you can freeze baked falafel! Just let them cool completely, then place them in a freezer-safe container. They can be frozen for up to three months. Thaw in the fridge before reheating.

What can I serve with tahini sauce besides falafel?

Tahini sauce is versatile! It pairs wonderfully with grilled vegetables, drizzled over salads, or as a dip for fresh pita bread and veggies. The creamy texture and nutty flavor enhance many dishes.

Is this recipe suitable for vegans?

Yes! Baked falafel with tahini sauce is entirely plant-based, making it a fantastic option for vegans. Enjoy this healthy and delicious dish without any animal products!

Final Thoughts

Baked falafel with tahini sauce is more than just a meal; it’s an experience that brings joy to the table.

Each bite is a delightful blend of flavors and textures, making it a dish that satisfies both the palate and the soul.

Whether you’re enjoying it solo or sharing with friends, this recipe fosters connection and warmth.

It’s a reminder that healthy eating can be delicious and fun.

So, roll up your sleeves, gather your ingredients, and embark on this culinary adventure.

You’ll find that baked falafel is not just food; it’s a celebration of life’s simple pleasures!

Paul

Baked Falafel with Tahini Sauce: A Delightful Recipe!

A delightful recipe for baked falafel served with a creamy tahini sauce, perfect for a healthy meal.
Prep Time 15 minutes
Cook Time 25 minutes
Total Time 40 minutes
Servings: 4 servings
Course: Main Course
Cuisine: Middle Eastern
Calories: 220

Ingredients
  

  • 1 cup canned chickpeas drained and rinsed
  • 1/2 cup fresh parsley chopped
  • 1/4 cup fresh cilantro chopped
  • 1/4 cup onion finely chopped
  • 2 cloves garlic minced
  • 1 teaspoon ground cumin
  • 1 teaspoon ground coriander
  • 1/2 teaspoon baking powder
  • 1/2 teaspoon salt
  • 1/4 teaspoon black pepper
  • 1 tablespoon olive oil
  • 1 tablespoon lemon juice
  • 1/2 cup whole wheat flour
  • For the Tahini Sauce:1/4 cup tahini
  • 2 tablespoons lemon juice
  • 1 tablespoon water more as needed
  • 1 clove garlic minced
  • Salt to taste

Method
 

  1. Preheat the oven to 400°F. Line a baking sheet with parchment paper.
  2. In a food processor, combine the chickpeas, parsley, cilantro, onion, garlic, cumin, coriander, baking powder, salt, black pepper, olive oil, and lemon juice. Pulse until the mixture is well combined but still slightly chunky.
  3. Transfer the mixture to a bowl and stir in the whole wheat flour until fully incorporated.
  4. Using your hands, form the mixture into small balls or patties, about 1.5 inches in diameter, and place them on the prepared baking sheet.
  5. Bake for 20-25 minutes, flipping halfway through, until golden brown and crispy.
  6. While the falafel bakes, prepare the tahini sauce. In a small bowl, whisk together tahini, lemon juice, water, garlic, and salt until smooth. Adjust the consistency with more water if needed.
  7. Serve the baked falafel warm with tahini sauce drizzled on top.

Notes

  • For added flavor, try adding a pinch of cayenne pepper or paprika to the falafel mixture.
  • You can also serve the falafel in pita bread with fresh vegetables for a delicious sandwich.

Lebanese Green Bean Stew: A Flavorful and Healthy Recipe

Introduction to Lebanese Green Bean Stew

There’s something comforting about a warm bowl of stew, especially when it’s packed with flavor and nutrition. Lebanese Green Bean Stew is just that—a delightful dish that brings together fresh ingredients and aromatic spices. Whether you’re looking for a quick solution for a busy weeknight or a meal to impress your loved ones, this stew fits the bill perfectly. It’s not just a recipe; it’s a celebration of wholesome eating that nourishes both body and soul. Let’s dive into this vibrant dish that’s sure to become a staple in your kitchen!

Why You’ll Love This Lebanese Green Bean Stew

This Lebanese Green Bean Stew is a game-changer for anyone seeking a quick, healthy meal. It’s not only easy to prepare but also bursting with flavor that will tantalize your taste buds. In just 40 minutes, you can whip up a nutritious dish that’s perfect for busy weeknights or leisurely weekends. Plus, it’s vegan-friendly, making it a fantastic option for everyone at the table!

Ingredients for Lebanese Green Bean Stew

Gathering the right ingredients is the first step to creating a delicious Lebanese Green Bean Stew. Here’s what you’ll need:

  • Olive oil: A staple in Mediterranean cooking, it adds richness and depth to the stew.
  • Onion: Chopped onions provide a sweet base flavor that enhances the overall taste.
  • Garlic: Minced garlic brings a fragrant aroma and a punch of flavor that’s hard to resist.
  • Fresh green beans: Trimmed and cut into pieces, they add a satisfying crunch and vibrant color.
  • Diced tomatoes: Canned tomatoes add acidity and sweetness, creating a rich sauce for the stew.
  • Vegetable broth: This forms the stew’s base, infusing it with savory goodness. You can use homemade or store-bought.
  • Ground cumin: A warm spice that adds an earthy flavor, making the dish more aromatic.
  • Ground coriander: This spice complements cumin, adding a citrusy note that brightens the stew.
  • Paprika: A dash of paprika gives the stew a subtle smokiness and a beautiful color.
  • Salt and pepper: Essential for seasoning, they enhance all the flavors in the dish.
  • Lemon juice: A splash of lemon juice at the end brightens the flavors and adds a refreshing zing.
  • Fresh parsley: Chopped parsley is perfect for garnishing, adding a pop of color and freshness.

For those looking to boost the protein content, consider adding cooked chickpeas or lentils. If you enjoy a bit of heat, a pinch of red pepper flakes or a diced jalapeño can spice things up. You can find the exact quantities for each ingredient at the bottom of the article, ready for printing!

How to Make Lebanese Green Bean Stew

Creating a delicious Lebanese Green Bean Stew is easier than you might think. Follow these simple steps, and you’ll have a hearty meal ready in no time. Let’s get cooking!

Step 1: Sauté the Onions

Start by heating the olive oil in a large pot over medium heat. Once the oil is shimmering, toss in the chopped onions. Sauté them for about five minutes until they turn translucent. This step builds a flavorful base for your stew, so don’t rush it!

Step 2: Add Garlic

Next, it’s time to add the minced garlic. Stir it in and cook for about a minute until it becomes fragrant. Garlic is the secret weapon here; it adds depth and aroma that will make your kitchen smell amazing!

Step 3: Incorporate Green Beans

Now, add the fresh green beans to the pot. Sauté them for about three to four minutes, stirring occasionally. This quick cooking helps retain their vibrant color and crunch, making your stew visually appealing and delicious.

Step 4: Add Tomatoes and Broth

Pour in the diced tomatoes along with their juice and the vegetable broth. Give everything a good stir to combine. The tomatoes will add acidity, while the broth creates a rich, savory base for your Lebanese Green Bean Stew.

Step 5: Season the Stew

It’s time to spice things up! Add the ground cumin, ground coriander, paprika, salt, and pepper. Stir well and bring the mixture to a boil. This is where the magic happens, as the spices infuse the stew with incredible flavor.

Step 6: Simmer

Once boiling, reduce the heat to low and cover the pot. Let it simmer for about 25 to 30 minutes. Check the green beans for tenderness; they should be cooked but still have a slight bite. This simmering process allows all the flavors to meld beautifully.

Step 7: Finish with Lemon Juice

Just before serving, stir in the lemon juice. This final touch brightens the flavors and adds a refreshing zing. Now, your Lebanese Green Bean Stew is ready to be enjoyed!

Tips for Success

  • Prep your ingredients ahead of time to streamline the cooking process.
  • Don’t skip the sautéing step; it builds essential flavors.
  • Adjust the seasoning to your taste; feel free to experiment!
  • For a thicker stew, let it simmer uncovered for a few extra minutes.
  • Store leftovers in an airtight container for up to three days.

Equipment Needed

  • Large pot: A sturdy pot is essential for simmering the stew. A Dutch oven works great too.
  • Wooden spoon: Perfect for stirring and mixing ingredients without scratching your pot.
  • Cutting board and knife: For chopping vegetables efficiently.
  • Measuring cups: Handy for precise ingredient measurements, though you can eyeball it if you’re confident!

Variations

  • Protein Boost: Add cooked chickpeas or lentils for a heartier stew that packs more protein.
  • Spicy Kick: Toss in a pinch of red pepper flakes or a diced jalapeño for some heat.
  • Herb Infusion: Experiment with fresh herbs like thyme or mint for a unique flavor twist.
  • Vegetable Medley: Incorporate other vegetables like carrots or bell peppers for added color and nutrition.
  • Gluten-Free Option: This recipe is naturally gluten-free, making it suitable for those with dietary restrictions.

Serving Suggestions

  • Pair the stew with warm pita bread for a delightful dipping experience.
  • Serve over a bed of fluffy rice or quinoa for a filling meal.
  • A side of tangy cucumber salad complements the stew’s flavors beautifully.
  • Enjoy with a glass of chilled mint lemonade for a refreshing drink.
  • Garnish with extra parsley for a pop of color and freshness.

FAQs about Lebanese Green Bean Stew

Can I make Lebanese Green Bean Stew ahead of time?

Absolutely! This stew tastes even better the next day as the flavors meld together. Just store it in an airtight container in the fridge for up to three days. Reheat gently on the stovetop before serving.

Is Lebanese Green Bean Stew suitable for meal prep?

Yes! This healthy stew is perfect for meal prep. You can portion it out into containers for easy lunches or dinners throughout the week. It’s a nutritious option that keeps well and is easy to reheat.

Can I freeze Lebanese Green Bean Stew?

Definitely! This stew freezes well. Just let it cool completely, then transfer it to freezer-safe containers. It can be stored for up to three months. Thaw in the fridge overnight before reheating.

What can I serve with Lebanese Green Bean Stew?

This stew pairs wonderfully with warm pita bread, rice, or quinoa. A side salad or some roasted vegetables can also complement the meal nicely, adding freshness and crunch.

How can I adjust the spice level in the stew?

If you prefer a spicier kick, simply add red pepper flakes or diced jalapeños during the cooking process. Start with a small amount and adjust to your taste. Enjoy experimenting!

Final Thoughts

Cooking Lebanese Green Bean Stew is more than just preparing a meal; it’s about creating a moment of joy and connection. The vibrant colors and rich aromas fill your kitchen, inviting everyone to gather around the table. Each spoonful is a celebration of wholesome ingredients and bold flavors, making it a dish that warms both the heart and the belly. Whether you’re sharing it with family or enjoying it solo, this stew brings a sense of comfort and satisfaction. I hope it becomes a cherished recipe in your home, just as it has in mine!

Paul

Lebanese Green Bean Stew: A Flavorful and Healthy Recipe

A flavorful and healthy Lebanese Green Bean Stew that is perfect for a nutritious meal.
Prep Time 10 minutes
Cook Time 30 minutes
Total Time 40 minutes
Servings: 4 servings
Course: Main Dish
Cuisine: Lebanese
Calories: 150

Ingredients
  

  • 2 tablespoons olive oil
  • 1 medium onion chopped
  • 3 cloves garlic minced
  • 1 pound fresh green beans trimmed and cut into 2-inch pieces
  • 1 can 14.5 ounces diced tomatoes, undrained
  • 2 cups vegetable broth
  • 1 teaspoon ground cumin
  • 1 teaspoon ground coriander
  • 1 teaspoon paprika
  • Salt and pepper to taste
  • 1 tablespoon lemon juice
  • Fresh parsley chopped (for garnish)

Method
 

  1. In a large pot, heat the olive oil over medium heat. Add the chopped onion and sauté until translucent, about 5 minutes.
  2. Stir in the minced garlic and cook for an additional minute until fragrant.
  3. Add the green beans to the pot and sauté for about 3-4 minutes, stirring occasionally.
  4. Pour in the diced tomatoes with their juice and the vegetable broth. Stir to combine.
  5. Add the ground cumin, ground coriander, paprika, salt, and pepper. Bring the mixture to a boil, then reduce the heat to low.
  6. Cover the pot and let it simmer for about 25-30 minutes, or until the green beans are tender.
  7. Stir in the lemon juice just before serving.
  8. Garnish with fresh parsley and serve warm.

Notes

  • For added protein, consider adding cooked chickpeas or lentils to the stew.
  • If you prefer a spicier flavor, add a pinch of red pepper flakes or a diced jalapeño during the cooking process.

Strawberry Crunch Cheesecake: A Must-Try Dessert Recipe!

Introduction to Strawberry Crunch Cheesecake

There’s something magical about a dessert that combines creamy richness with a delightful crunch. That’s exactly what you get with this Strawberry Crunch Cheesecake. Whether you’re looking to impress guests at a dinner party or simply want to treat yourself after a long day, this cheesecake is a perfect choice. It’s easy to whip up, and the vibrant strawberry flavor will transport you back to carefree summer days. Plus, who can resist that satisfying crunch on top? Trust me, this dessert will quickly become a favorite in your home!

Why You’ll Love This Strawberry Crunch Cheesecake

This Strawberry Crunch Cheesecake is a game-changer for dessert lovers. It’s incredibly easy to make, even for those who claim they can’t cook. The creamy filling paired with the crunchy topping creates a delightful contrast that will have everyone coming back for seconds. Plus, it’s a crowd-pleaser, perfect for gatherings or a cozy night in. With just a few simple ingredients, you can create a dessert that feels gourmet without the fuss!

Ingredients for Strawberry Crunch Cheesecake

Gathering the right ingredients is the first step to creating your Strawberry Crunch Cheesecake masterpiece. Here’s what you’ll need:

  • Graham cracker crumbs: These form the base of your cheesecake crust, providing a sweet and crunchy foundation.
  • Unsalted butter: Melted butter binds the crumbs together, adding richness to the crust.
  • Granulated sugar: A touch of sweetness enhances the flavors of the cheesecake filling and crust.
  • Cream cheese: The star of the show! Softened cream cheese gives the cheesecake its creamy texture.
  • Vanilla extract: This adds a warm, aromatic flavor that complements the strawberries beautifully.
  • Sour cream: It adds a tangy richness, balancing the sweetness of the cheesecake.
  • Large eggs: Essential for binding the filling together and giving it structure.
  • Fresh strawberries: Diced strawberries bring a burst of fruity flavor and color to the cheesecake.
  • Strawberry-flavored cereal: This crunchy topping adds texture and a fun twist to your dessert.

For those looking to lighten things up, consider using low-fat cream cheese and sour cream. If you’re feeling adventurous, mix in some chocolate chips or even a layer of chocolate ganache before adding the cereal for a decadent twist. You can find all the exact measurements at the bottom of the article, ready for printing!

How to Make Strawberry Crunch Cheesecake

Creating your Strawberry Crunch Cheesecake is a delightful journey. Each step brings you closer to a dessert that’s not just tasty but also visually stunning. Let’s dive into the process!

Step 1: Preheat the Oven

Start by preheating your oven to 325°F. This step is crucial because it ensures even baking. If you skip this, your cheesecake might not set properly, leading to a gooey mess instead of a creamy delight. Trust me, a well-preheated oven is your best friend in baking!

Step 2: Prepare the Crust

In a medium bowl, combine your graham cracker crumbs and melted butter. Mix them until they resemble wet sand. This mixture should hold together when pressed. Now, take your springform pan and firmly press the crumb mixture into the bottom. Use the back of a measuring cup for an even layer. A solid crust is key to a great cheesecake!

Step 3: Bake the Crust

Pop the crust into the oven and bake for about 10 minutes. This step helps to set the crust, giving it a nice crunch. Once done, remove it from the oven and let it cool completely. Patience is essential here; a warm crust can ruin the filling!

Step 4: Mix the Filling

In a large mixing bowl, beat the softened cream cheese with an electric mixer until it’s smooth and creamy. Gradually add ¾ cup of granulated sugar, mixing until well combined. Then, stir in the vanilla extract and sour cream. This mixture should be silky and luscious. Don’t rush; take your time to get it just right!

Step 5: Add Strawberries

Now, gently fold in the diced strawberries. Use a spatula to incorporate them without breaking them apart. This technique keeps the strawberries intact, ensuring every bite bursts with flavor. The vibrant color will make your cheesecake even more appealing!

Step 6: Pour and Bake

Carefully pour the cream cheese mixture over your cooled crust. Spread it evenly with a spatula. Bake for 50-60 minutes, or until the center is set but still slightly jiggly. This slight jiggle means it’s perfectly baked. Remember, it will firm up as it cools!

Step 7: Cool the Cheesecake

Once baked, turn off the oven and crack the door open. Let the cheesecake cool in the oven for about an hour. This gradual cooling helps prevent cracks. After that, refrigerate it for at least 4 hours, or overnight if you can wait. The longer, the better!

Step 8: Add the Crunch

Before serving, crush the strawberry-flavored cereal into small pieces. Sprinkle it generously over the top of the cheesecake. This adds a delightful crunch that contrasts beautifully with the creamy filling. It’s the finishing touch that makes this dessert truly special!

Tips for Success

  • Make sure your cream cheese is at room temperature for easy mixing.
  • Don’t overmix the filling; it can lead to cracks in your cheesecake.
  • Use fresh strawberries for the best flavor and texture.
  • Let the cheesecake cool slowly to avoid cracks.
  • For a cleaner slice, use a hot knife to cut through the cheesecake.

Equipment Needed

  • 9-inch springform pan: Essential for easy removal of the cheesecake. A regular cake pan works too, but slicing will be trickier.
  • Electric mixer: For smooth filling. A whisk can work, but it’ll take more elbow grease!
  • Mixing bowls: Use a large one for the filling and a medium one for the crust.
  • Spatula: Perfect for folding in strawberries and spreading the filling.
  • Measuring cups and spoons: Accurate measurements are key to success!

Variations

  • Chocolate Strawberry Crunch: Add chocolate chips to the filling or drizzle chocolate ganache on top before adding the cereal for a decadent twist.
  • Low-Fat Option: Substitute low-fat cream cheese and sour cream to lighten up the dessert without sacrificing flavor.
  • Berry Medley: Mix in other berries like blueberries or raspberries for a colorful and flavorful cheesecake.
  • Nutty Crunch: Replace the strawberry-flavored cereal with crushed nuts or granola for a different texture and taste.
  • Gluten-Free Version: Use gluten-free graham cracker crumbs to make the crust suitable for gluten-sensitive guests.

Serving Suggestions

  • Pair with a dollop of whipped cream for added creaminess.
  • Serve alongside fresh strawberries or a berry compote for a fruity touch.
  • Complement with a scoop of vanilla ice cream for a delightful contrast.
  • Drizzle with chocolate sauce for an indulgent twist.
  • Garnish with mint leaves for a pop of color and freshness.

FAQs about Strawberry Crunch Cheesecake

As you embark on your journey to create the perfect Strawberry Crunch Cheesecake, you might have a few questions. Here are some common queries that can help you along the way:

Can I use frozen strawberries instead of fresh?

Absolutely! Just make sure to thaw and drain them well to avoid excess moisture in your cheesecake. Fresh strawberries do add a vibrant flavor, but frozen ones can work in a pinch.

How do I store leftover cheesecake?

Store any leftovers in an airtight container in the refrigerator. It should stay fresh for about 3-4 days. Just remember to add the cereal topping right before serving to keep it crunchy!

Can I make this cheesecake ahead of time?

Yes! This Strawberry Crunch Cheesecake is perfect for making ahead. Just prepare it a day in advance and let it chill overnight. It will taste even better the next day!

What can I substitute for cream cheese?

If you’re looking for a lighter option, you can use Greek yogurt or a vegan cream cheese alternative. Keep in mind that the texture and flavor may vary slightly.

Is this cheesecake suitable for a gluten-free diet?

To make it gluten-free, simply use gluten-free graham cracker crumbs for the crust. The rest of the ingredients are naturally gluten-free, making it a delicious option for everyone!

Final Thoughts

Creating this Strawberry Crunch Cheesecake is more than just baking; it’s about crafting a moment of joy. Each slice offers a delightful blend of creamy and crunchy textures, making it a dessert that brings smiles to faces. Whether you’re celebrating a special occasion or simply indulging on a quiet evening, this cheesecake is sure to impress. The vibrant strawberry flavor evokes memories of summer, while the crunch adds a playful twist. So, gather your ingredients, roll up your sleeves, and enjoy the sweet satisfaction of sharing this delicious treat with loved ones. You won’t regret it!

Paul

Strawberry Crunch Cheesecake: A Must-Try Dessert Recipe!

A delicious and creamy Strawberry Crunch Cheesecake topped with a crunchy strawberry-flavored cereal.
Prep Time 20 minutes
Cook Time 1 hour
Total Time 5 hours 20 minutes
Servings: 10 servings
Course: Dessert
Cuisine: American
Calories: 320

Ingredients
  

  • 1 ½ cups graham cracker crumbs
  • ½ cup unsalted butter melted
  • 1 cup granulated sugar divided
  • 2 8-ounce packages cream cheese, softened
  • 1 teaspoon vanilla extract
  • 1 cup sour cream
  • 2 large eggs
  • 1 cup fresh strawberries diced
  • 1 cup strawberry-flavored cereal like Strawberry Crunch

Method
 

  1. Preheat the oven to 325°F.
  2. In a medium bowl, combine the graham cracker crumbs and melted butter. Mix until well combined and press the mixture firmly into the bottom of a 9-inch springform pan to form the crust.
  3. Bake for 10 minutes, then remove from the oven and let cool.
  4. In a large mixing bowl, beat the softened cream cheese with an electric mixer until smooth.
  5. Gradually add ¾ cup of granulated sugar and continue to beat until well combined.
  6. Mix in the vanilla extract and sour cream until smooth.
  7. Add the eggs one at a time, mixing well after each addition.
  8. Gently fold in the diced strawberries.
  9. Pour the cream cheese mixture over the cooled crust in the springform pan.
  10. Bake for 50-60 minutes, or until the center is set but slightly jiggly.
  11. Turn off the oven and crack the door open, letting the cheesecake cool in the oven for 1 hour.
  12. Remove from the oven and refrigerate for at least 4 hours, or overnight.
  13. Before serving, crush the strawberry-flavored cereal into small pieces and sprinkle over the top of the cheesecake.

Notes

  • For a lighter version, substitute low-fat cream cheese and sour cream.
  • Try mixing in some chocolate chips or a layer of chocolate ganache on top before adding the cereal for a twist.

Cheesy Broccoli Patties: A Tasty Way to Enjoy Veggies!

Introduction to Cheesy Broccoli Patties

There’s something magical about transforming humble vegetables into a dish that makes everyone smile.

Cheesy Broccoli Patties are just that—a delightful way to enjoy veggies without feeling like you’re sacrificing flavor.

Whether you’re looking for a quick solution for a busy day or a dish to impress your loved ones, these patties fit the bill perfectly.

They’re not only easy to whip up but also packed with cheesy goodness that even the pickiest eaters will love.

Let’s dive into this tasty adventure and make your kitchen the heart of deliciousness!

Why You’ll Love This Cheesy Broccoli Patties

These Cheesy Broccoli Patties are a game-changer for busy weeknights.

They come together in just 25 minutes, making them a quick and satisfying meal option.

The combination of gooey cheese and fresh broccoli creates a flavor explosion that’s hard to resist.

Plus, they’re versatile enough to serve as a snack, appetizer, or side dish.

Trust me, once you try them, they’ll become a staple in your kitchen!

Ingredients for Cheesy Broccoli Patties

Creating Cheesy Broccoli Patties is a breeze, especially with the right ingredients.

Here’s what you’ll need to bring this delicious dish to life:

  • Fresh broccoli florets: The star of the show! Finely chopped, they provide a vibrant color and a nutritious base.
  • Shredded cheddar cheese: This melty goodness adds a rich flavor and binds everything together.
  • Breadcrumbs: They give the patties a delightful crunch. You can use regular or whole wheat for a healthier twist.
  • Grated Parmesan cheese: A sprinkle of this adds a savory depth that elevates the dish.
  • Large eggs: These act as a binding agent, helping the patties hold their shape while cooking.
  • Garlic powder: A dash of this brings a warm, aromatic flavor that complements the broccoli beautifully.
  • Onion powder: It adds a subtle sweetness and depth, enhancing the overall taste.
  • Salt and black pepper: Essential seasonings that bring out the flavors of all the ingredients.
  • Olive oil: Perfect for frying, it gives the patties a golden, crispy exterior.

For those looking to spice things up, consider adding chopped jalapeños or a pinch of cayenne pepper.

If you want to switch things up, mozzarella or feta cheese can be great substitutes for cheddar.

All ingredient quantities are listed at the bottom of the article for easy reference and printing.

Happy cooking!

How to Make Cheesy Broccoli Patties

Making Cheesy Broccoli Patties is a straightforward process that anyone can master.

With just a few simple steps, you’ll have a delicious dish ready to impress.

Let’s get started!

Step 1: Blanch the Broccoli

Begin by bringing a large pot of water to a rolling boil.

Once boiling, add your finely chopped broccoli florets.

Blanch them for about 2-3 minutes until they turn a vibrant green.

This quick cooking method helps retain their nutrients and bright color.

After that, drain the broccoli and let it cool.

You want it to be cool enough to handle but still warm for mixing.

Step 2: Mix the Ingredients

In a mixing bowl, combine the blanched broccoli with shredded cheddar cheese, breadcrumbs, and grated Parmesan.

Add in the eggs, garlic powder, onion powder, salt, and black pepper.

Mix everything together until well combined.

Don’t be afraid to get your hands in there; it’s the best way to ensure everything is evenly distributed.

The mixture should be sticky but hold together well.

Step 3: Form the Patties

Now it’s time to shape your mixture into patties.

Take a handful of the mixture and form it into a ball, then flatten it gently.

Aim for patties about 2-3 inches in diameter.

This size is perfect for cooking evenly and makes for easy flipping.

Place the formed patties on a plate or cutting board as you go.

Step 4: Fry the Patties

Heat olive oil in a large skillet over medium heat.

Once the oil is hot, carefully add the patties in batches.

Cook them for about 3-4 minutes on each side until they’re golden brown and crispy.

Keep an eye on them; you want that perfect crunch without burning.

If you have a lot of patties, it’s better to fry them in batches to avoid overcrowding the pan.

Step 5: Drain and Serve

Once cooked, remove the patties from the skillet and place them on a paper towel-lined plate.

This helps drain any excess oil, keeping them crispy.

Serve your Cheesy Broccoli Patties warm, either on their own or with your favorite dipping sauce.

They make a fantastic appetizer or side dish that everyone will love.

Enjoy the cheesy goodness!

Tips for Success

  • Make sure to chop the broccoli finely for even cooking and better texture.
  • Don’t skip the blanching step; it enhances the color and flavor of the broccoli.
  • Use a non-stick skillet to prevent the patties from sticking.
  • Let the patties rest for a few minutes before serving to help them firm up.
  • Experiment with different cheeses for unique flavor profiles.

Equipment Needed

  • Large pot: For blanching the broccoli. A deep saucepan works too.
  • Mixing bowl: To combine all the ingredients. Any large bowl will do.
  • Skillet: A non-stick skillet is ideal for frying. A cast-iron pan can also work.
  • Spatula: For flipping the patties. A slotted spatula helps drain excess oil.

Variations of Cheesy Broccoli Patties

  • Spicy Kick: Add chopped jalapeños or a pinch of cayenne pepper for a fiery twist.
  • Herb Infusion: Mix in fresh herbs like parsley or dill for an aromatic flavor boost.
  • Gluten-Free Option: Substitute breadcrumbs with gluten-free alternatives like almond flour or crushed rice crackers.
  • Cheese Swap: Experiment with different cheeses such as mozzarella for a gooey texture or feta for a tangy flavor.
  • Veggie Boost: Incorporate other finely chopped vegetables like carrots or bell peppers for added nutrition and color.

Serving Suggestions for Cheesy Broccoli Patties

  • Dip Delight: Serve with ranch, garlic aioli, or spicy sriracha for an extra flavor boost.
  • Fresh Salad: Pair with a crisp green salad for a refreshing contrast.
  • Presentation: Arrange on a colorful platter with fresh herbs for a vibrant display.
  • Drink Pairing: Enjoy with a chilled lemonade or a light beer to complement the flavors.

FAQs about Cheesy Broccoli Patties

Can I make Cheesy Broccoli Patties ahead of time?

Absolutely! You can prepare the patties in advance and store them in the fridge for up to 24 hours. Just fry them right before serving for that crispy texture.

How do I store leftovers?

Leftover Cheesy Broccoli Patties can be stored in an airtight container in the fridge for up to three days. Reheat them in a skillet for the best results.

Can I freeze Cheesy Broccoli Patties?

Yes, these patties freeze well! Place them in a single layer on a baking sheet to freeze, then transfer to a freezer bag. They can be cooked straight from frozen; just add a few extra minutes to the cooking time.

What can I serve with Cheesy Broccoli Patties?

These patties pair wonderfully with a variety of dips like ranch or sriracha. You can also serve them alongside a fresh salad or as a side to your favorite main dish.

Are Cheesy Broccoli Patties suitable for kids?

Definitely! The cheesy flavor and fun shape make them appealing to kids. Plus, they’re a sneaky way to get some veggies into their diet!

Final Thoughts

Creating Cheesy Broccoli Patties is more than just cooking; it’s about bringing joy to the table.

Each bite is a delightful blend of cheesy goodness and vibrant broccoli, making it a dish that pleases both the palate and the heart.

Whether you’re serving them at a family gathering or enjoying a quiet night in, these patties are sure to spark smiles.

They’re a fantastic way to sneak in some veggies while indulging in comfort food.

So roll up your sleeves, gather your ingredients, and let the cheesy magic unfold in your kitchen!

Paul

Cheesy Broccoli Patties: A Tasty Way to Enjoy Veggies!

Cheesy Broccoli Patties are a delicious and nutritious way to enjoy vegetables, combining fresh broccoli with cheese and spices for a tasty treat.
Prep Time 10 minutes
Cook Time 15 minutes
Total Time 25 minutes
Servings: 4 servings
Course: Appetizer
Cuisine: American
Calories: 210

Ingredients
  

  • 1 cup fresh broccoli florets finely chopped
  • 1 cup shredded cheddar cheese
  • 1/2 cup breadcrumbs
  • 1/4 cup grated Parmesan cheese
  • 2 large eggs
  • 1 teaspoon garlic powder
  • 1/2 teaspoon onion powder
  • 1/2 teaspoon salt
  • 1/4 teaspoon black pepper
  • 2 tablespoons olive oil for frying

Method
 

  1. In a large pot, bring water to a boil and blanch the chopped broccoli for 2-3 minutes until bright green. Drain and let cool.
  2. In a mixing bowl, combine the blanched broccoli, cheddar cheese, breadcrumbs, Parmesan cheese, eggs, garlic powder, onion powder, salt, and black pepper. Mix until well combined.
  3. Form the mixture into small patties, about 2-3 inches in diameter.
  4. Heat olive oil in a large skillet over medium heat. Once hot, add the patties in batches, cooking for 3-4 minutes on each side until golden brown and crispy.
  5. Remove the patties from the skillet and place them on a paper towel-lined plate to drain excess oil.
  6. Serve warm with your favorite dipping sauce or as a side dish.

Notes

  • For a spicier kick, add 1/4 teaspoon of cayenne pepper or chopped jalapeños to the mixture.
  • Substitute the cheddar cheese with mozzarella or feta for a different flavor profile.

Kimchi Reuben Sandwich: A Must-Try Flavor Fusion!

Introduction to Kimchi Reuben Sandwich

There’s something magical about a sandwich that brings together the best of two worlds. The Kimchi Reuben Sandwich does just that, merging the classic flavors of a Reuben with the spicy, tangy kick of kimchi.

Whether you’re looking for a quick solution for a busy day or a dish to impress your loved ones, this fusion sandwich is a winner.

It’s easy to whip up, packed with flavor, and sure to satisfy even the pickiest eaters. Trust me, once you take a bite, you’ll wonder why you didn’t try this delightful combination sooner!

Why You’ll Love This Kimchi Reuben Sandwich

This Kimchi Reuben Sandwich is a game-changer for your lunch routine.

It’s quick to prepare, taking just 18 minutes from start to finish.

The combination of savory corned beef, creamy Swiss cheese, and zesty kimchi creates a flavor explosion that dances on your taste buds.

Plus, it’s a fantastic way to elevate a classic dish, making it perfect for impressing friends or simply treating yourself after a long day.

Ingredients for Kimchi Reuben Sandwich

Creating the perfect Kimchi Reuben Sandwich starts with gathering the right ingredients.

Here’s what you’ll need:

  • Kimchi: This fermented cabbage adds a spicy, tangy kick. Look for a brand you love, or try making your own for a personal touch.
  • Corned Beef: The star of the show! Tender, flavorful slices bring that classic Reuben taste. You can find it pre-sliced at the deli or cook your own brisket for a homemade version.
  • Swiss Cheese: Creamy and nutty, Swiss cheese melts beautifully. If you’re feeling adventurous, try Gruyère for a richer flavor.
  • Rye Bread: The traditional choice for a Reuben, rye adds a hearty texture. If you prefer, pumpernickel or sourdough can also work well.
  • Russian or Thousand Island Dressing: This creamy dressing ties everything together. You can make your own or grab a bottle from the store for convenience.
  • Unsalted Butter: Essential for that golden, crispy exterior. Using unsalted allows you to control the saltiness of your sandwich.

Feel free to get creative!

For a vegetarian twist, swap the corned beef for grilled portobello mushrooms or tempeh.

Want an extra kick? Toss in some sliced pickles or jalapeños.

All ingredient quantities are listed at the bottom of the article for easy reference and printing.

How to Make Kimchi Reuben Sandwich

Making a Kimchi Reuben Sandwich is a straightforward process that brings together bold flavors in just a few simple steps.

Let’s dive into the deliciousness!

Step 1: Prepare Your Ingredients

Before you start cooking, take a moment to prep your ingredients.

Chop the kimchi, slice the corned beef, and have your cheese and bread ready.

This makes the cooking process smoother and ensures you won’t be scrambling for anything mid-recipe.

Trust me, a little prep goes a long way in the kitchen!

Step 2: Butter the Bread

Now, let’s get that bread ready for toasting.

Spread a generous tablespoon of softened unsalted butter on one side of each slice of rye bread.

Make sure to cover the entire surface for an even, golden crust.

This step is crucial for achieving that perfect crunch!

Step 3: Assemble the Sandwich

Time to layer up!

On the unbuttered side of two slices, spread 2 tablespoons of your chosen dressing.

Then, add half of the chopped kimchi, followed by a hearty layer of corned beef.

Top it off with two slices of Swiss cheese.

This layering technique ensures every bite is packed with flavor!

Step 4: Cook the Sandwich

Heat a skillet over medium heat.

Carefully place your assembled sandwiches in the skillet, buttered side up.

Cook for about 3-4 minutes until the bread is golden brown and the cheese starts to melt.

Then, flip the sandwiches and cook for another 3-4 minutes.

Keep an eye on them to avoid burning; you want that perfect crispy exterior!

Step 5: Serve and Enjoy

Once cooked, remove the sandwiches from the skillet and let them rest for a minute.

Slice them in half diagonally for a beautiful presentation.

Serve warm, and watch as everyone dives in!

This Kimchi Reuben Sandwich is not just a meal; it’s an experience that will leave your taste buds dancing.

Tips for Success

  • Use fresh kimchi for the best flavor; it should be tangy but not overly fermented.
  • Don’t rush the cooking process; medium heat ensures even toasting and melting.
  • Experiment with different cheeses for unique flavor profiles.
  • Let the sandwich rest for a minute after cooking to avoid burning your mouth.
  • Pair with a side of pickles for an extra crunch!

Equipment Needed

  • Skillet: A non-stick skillet works best, but any frying pan will do.
  • Spatula: A sturdy spatula helps flip the sandwiches without losing any fillings.
  • Butter Knife: For spreading butter evenly on the bread.
  • Cutting Board: Essential for slicing your sandwich perfectly.

Variations

  • Vegetarian Kimchi Reuben: Swap the corned beef for grilled portobello mushrooms or tempeh for a hearty, meatless option.
  • Spicy Kick: Add sliced jalapeños or a drizzle of sriracha to the kimchi for an extra layer of heat.
  • Cheese Swap: Experiment with different cheeses like pepper jack for a spicy twist or cheddar for a sharper flavor.
  • Gluten-Free Option: Use gluten-free bread to make this sandwich suitable for those with gluten sensitivities.
  • Asian Fusion: Incorporate a layer of pickled daikon or carrots for a refreshing crunch and added flavor.

Serving Suggestions

  • Side Salad: A crisp green salad with a tangy vinaigrette complements the richness of the sandwich.
  • Chips: Serve with kettle-cooked potato chips for a satisfying crunch.
  • Pickles: A side of dill pickles adds a refreshing contrast to the flavors.
  • Craft Beer: Pair with a light lager or pale ale to enhance the meal.
  • Presentation: Serve on a wooden board for a rustic touch that impresses!

FAQs about Kimchi Reuben Sandwich

Can I make a Kimchi Reuben Sandwich ahead of time?

Absolutely! You can prep the ingredients in advance and assemble the sandwich just before cooking. This makes it a great option for meal prep or a quick lunch.

What type of kimchi should I use?

Any kimchi you enjoy will work! Look for a fresh, crunchy variety for the best flavor. If you prefer a milder taste, opt for a less fermented kimchi.

Can I use a different type of bread?

Definitely! While rye is traditional, feel free to experiment with pumpernickel, sourdough, or even gluten-free bread to suit your taste or dietary needs.

Is this sandwich spicy?

The Kimchi Reuben Sandwich has a nice kick from the kimchi, but you can adjust the spice level. If you prefer it milder, use less kimchi or choose a milder variety.

How can I store leftovers?

If you have any leftovers, store them in an airtight container in the fridge. Reheat in a skillet for the best results, ensuring the bread stays crispy!

Final Thoughts

The Kimchi Reuben Sandwich is more than just a meal; it’s a celebration of flavors that brings joy to your kitchen.

Each bite offers a delightful crunch, a savory richness, and a spicy zing that keeps you coming back for more.

Whether you’re enjoying it solo or sharing with friends, this fusion sandwich creates memorable moments around the table.

It’s a simple yet impressive dish that showcases your culinary creativity.

So, roll up your sleeves, gather your ingredients, and dive into this delicious adventure.

Trust me, your taste buds will thank you!

Paul

Kimchi Reuben Sandwich: A Must-Try Flavor Fusion!

A delicious fusion of traditional Reuben sandwich flavors with a spicy twist from kimchi.
Prep Time 10 minutes
Cook Time 8 minutes
Total Time 18 minutes
Servings: 2 servings
Course: Sandwich
Cuisine: Korean-American
Calories: 550

Ingredients
  

  • 1 cup kimchi drained and chopped
  • 8 ounces corned beef sliced
  • 4 slices Swiss cheese
  • 4 slices rye bread
  • 4 tablespoons Russian or Thousand Island dressing
  • 2 tablespoons unsalted butter softened

Method
 

  1. Heat a skillet over medium heat.
  2. Spread 1 tablespoon of butter on one side of each slice of rye bread.
  3. On the unbuttered side of two slices, spread 2 tablespoons of dressing.
  4. Layer half of the kimchi, followed by corned beef, and top with 2 slices of Swiss cheese.
  5. Place the other two slices of bread on top, buttered side up.
  6. Carefully place the sandwiches in the skillet and cook for about 3-4 minutes until golden brown.
  7. Flip the sandwiches and cook for another 3-4 minutes until the cheese is melted and the other side is golden brown.
  8. Remove from the skillet, slice in half, and serve warm.

Notes

  • For a vegetarian version, substitute the corned beef with grilled portobello mushrooms or tempeh.
  • Add sliced pickles or jalapeños for an extra kick of flavor.

Smashed Bean and Cheese Tacos: Easy Recipe to Try Today!

Introduction to Smashed Bean and Cheese Tacos

There’s something magical about a simple meal that brings everyone together. Smashed Bean and Cheese Tacos are just that—a delightful dish that’s quick to whip up and packed with flavor. Whether you’re racing against the clock after a long day or looking to impress friends with minimal effort, these tacos are your go-to solution. They’re not just easy to make; they’re also a canvas for creativity. You can customize them to suit your taste, making them perfect for any occasion. Let’s dive into this delicious recipe that’s sure to become a family favorite!

Why You’ll Love This Smashed Bean and Cheese Tacos

These Smashed Bean and Cheese Tacos are a game-changer for busy weeknights. They come together in just 25 minutes, making them a lifesaver when time is tight. The combination of creamy beans and melty cheese creates a satisfying flavor explosion in every bite. Plus, they’re vegetarian-friendly, so everyone can enjoy them. With endless customization options, you can easily adapt them to please even the pickiest eaters in your family!

Ingredients for Smashed Bean and Cheese Tacos

Gathering the right ingredients is the first step to creating these mouthwatering Smashed Bean and Cheese Tacos. Here’s what you’ll need:

  • Black beans: The star of the show! They provide a hearty base, packed with protein and fiber.
  • Shredded cheddar cheese: This adds a creamy, melty goodness that binds the flavors together. Feel free to swap it for pepper jack for a spicy twist!
  • Olive oil: A splash of this helps to enhance the flavors and keeps the mixture moist.
  • Ground cumin: This spice brings warmth and depth, giving your tacos that authentic Mexican flair.
  • Garlic powder: A must-have for that savory punch. It’s convenient and adds a rich flavor without the fuss of fresh garlic.
  • Onion powder: This complements the garlic and adds a subtle sweetness to the mix.
  • Salt and pepper: Essential for seasoning, these will elevate all the flavors in your tacos.
  • Corn tortillas: The perfect vessel for your filling. They’re gluten-free and add a lovely texture.
  • Salsa: A fresh topping that adds a zesty kick. Choose your favorite variety, whether mild or spicy!
  • Avocado: Diced avocado adds creaminess and a touch of luxury to your tacos.
  • Fresh cilantro: Optional, but it brings a burst of freshness and color to your dish.

For those looking to mix things up, consider adding chopped jalapeños or bell peppers to the bean mixture for an extra layer of flavor. If you’re aiming for a vegan option, simply swap the cheddar cheese for a dairy-free alternative. You can find all the exact measurements at the bottom of the article, ready for printing!

How to Make Smashed Bean and Cheese Tacos

Creating Smashed Bean and Cheese Tacos is a breeze! Follow these simple steps, and you’ll have a delicious meal ready in no time. Let’s get started!

Step 1: Prepare the Bean Mixture

Begin by grabbing a medium bowl. Open your can of black beans, drain, and rinse them well. Then, using a fork, mash the beans until they’re mostly smooth, but leave some chunks for texture. This adds a delightful bite to your tacos. Next, stir in the shredded cheddar cheese, olive oil, ground cumin, garlic powder, onion powder, salt, and pepper. Mix everything until it’s well combined. The aroma will start to fill your kitchen, and trust me, it’s just the beginning!

Step 2: Toast the Tortillas

Now, let’s get those tortillas ready! Heat a skillet over medium heat. Once it’s warm, place each corn tortilla in the skillet. Toast them for about 30 seconds on each side. You want them warm and pliable, not crispy yet. This step is crucial; it prevents them from tearing when you fill them. Plus, toasting enhances their flavor, making your tacos even more delicious!

Step 3: Assemble the Tacos

With your tortillas ready, it’s time to fill them! Spoon a generous amount of the bean and cheese mixture onto one half of each tortilla. Don’t be shy—load them up! Then, fold the tortillas in half, creating a taco shape. Make sure the filling is secure inside. This is where you can get creative; feel free to add some chopped jalapeños or bell peppers for an extra kick!

Step 4: Cook the Tacos

Return the filled tacos to the skillet. Cook them for about 2-3 minutes on each side. You’re aiming for a crispy exterior and melted cheese inside. Keep an eye on them; you want that golden-brown color without burning. The sound of sizzling will be music to your ears, and the smell? Absolutely irresistible!

Step 5: Serve and Enjoy

Once your tacos are perfectly crispy, it’s time to serve! Place them on a plate and top with salsa and diced avocado. If you’re feeling fancy, sprinkle some fresh cilantro on top for a pop of color and flavor. These Smashed Bean and Cheese Tacos are not just a meal; they’re a celebration of flavors. Enjoy every bite!

Tips for Success

  • Use ripe avocados for the best flavor and creaminess.
  • Don’t skip toasting the tortillas; it enhances their taste and texture.
  • Experiment with spices! A pinch of chili powder can add a nice kick.
  • Make extra filling and store it in the fridge for quick meals later.
  • Serve with a side of your favorite chips for a complete meal.

Equipment Needed

  • Medium bowl: For mixing the bean mixture. A large mixing bowl works too.
  • Fork: To mash the beans. A potato masher can also do the trick.
  • Skillet: For toasting and cooking the tacos. A non-stick pan is ideal.
  • Spatula: To flip the tacos easily. A wooden spoon can work in a pinch.

Variations

  • Spicy Kick: Add chopped jalapeños or a dash of hot sauce to the bean mixture for a fiery twist.
  • Cheesy Delight: Swap out cheddar for pepper jack or a blend of your favorite cheeses for a richer flavor.
  • Vegan Option: Use a dairy-free cheese alternative and ensure your tortillas are vegan-friendly.
  • Veggie Boost: Mix in diced bell peppers, corn, or spinach for added nutrition and color.
  • Breakfast Tacos: Top with scrambled eggs or a fried egg for a hearty breakfast version.

Serving Suggestions

  • Chips and Salsa: Serve with a side of crispy tortilla chips and your favorite salsa for a crunchy contrast.
  • Refreshing Drinks: Pair with a cold Mexican beer or a zesty limeade to complement the flavors.
  • Colorful Presentation: Arrange tacos on a vibrant platter, garnished with lime wedges and cilantro for a festive touch.

FAQs about Smashed Bean and Cheese Tacos

Can I make Smashed Bean and Cheese Tacos ahead of time?

Absolutely! You can prepare the bean mixture in advance and store it in the fridge for up to three days. Just assemble and cook the tacos when you’re ready to eat. This makes for a quick meal solution on busy nights!

What can I use instead of black beans?

If black beans aren’t your thing, feel free to substitute them with pinto beans or refried beans. Each option brings its own unique flavor and texture, so choose what you love best!

How can I make these tacos spicier?

For a spicy kick, mix in some chopped jalapeños or add a few dashes of hot sauce to the bean mixture. You can also use pepper jack cheese instead of cheddar for an extra layer of heat!

Are Smashed Bean and Cheese Tacos gluten-free?

Yes! As long as you use corn tortillas, these tacos are naturally gluten-free. Just double-check the packaging to ensure there are no hidden gluten ingredients.

Can I freeze the bean mixture?

Definitely! The bean mixture freezes well. Just store it in an airtight container, and it will last for up to three months. Thaw it in the fridge overnight before using it to make your tacos.

Final Thoughts

Cooking Smashed Bean and Cheese Tacos is more than just preparing a meal; it’s about creating moments. The joy of gathering around the table, sharing laughter, and savoring each bite is what makes this dish special. With its simplicity and versatility, it’s a recipe that invites creativity and personal touches. Whether you’re enjoying a quiet dinner at home or hosting friends, these tacos are sure to impress. So, roll up your sleeves, embrace the flavors, and let the warmth of this dish fill your kitchen and your heart. Happy cooking!

Paul

Smashed Bean and Cheese Tacos: Easy Recipe to Try Today!

A delicious and easy recipe for Smashed Bean and Cheese Tacos, perfect for a quick meal.
Prep Time 10 minutes
Cook Time 15 minutes
Total Time 25 minutes
Servings: 4 servings
Course: Main Dish
Cuisine: Mexican
Calories: 320

Ingredients
  

  • 1 can 15 oz black beans, drained and rinsed
  • 1 cup shredded cheddar cheese
  • 1 tablespoon olive oil
  • 1 teaspoon ground cumin
  • 1 teaspoon garlic powder
  • 1/2 teaspoon onion powder
  • Salt and pepper to taste
  • 8 small corn tortillas
  • 1/2 cup salsa
  • 1 avocado diced
  • Fresh cilantro for garnish optional

Method
 

  1. In a medium bowl, mash the black beans with a fork until mostly smooth, leaving some chunks for texture.
  2. Stir in the shredded cheddar cheese, olive oil, cumin, garlic powder, onion powder, salt, and pepper until well combined.
  3. Heat a skillet over medium heat. Lightly toast each corn tortilla for about 30 seconds on each side until warm and pliable.
  4. Spoon a generous amount of the bean and cheese mixture onto each tortilla and fold them in half.
  5. Place the filled tacos back in the skillet and cook for 2-3 minutes on each side until the tacos are crispy and the cheese is melted.
  6. Serve the tacos warm with salsa and diced avocado on top. Garnish with fresh cilantro if desired.

Notes

  • For added flavor, try mixing in some chopped jalapeños or bell peppers into the bean mixture.
  • Substitute the cheddar cheese with pepper jack for a spicy kick or use a dairy-free cheese alternative for a vegan option.