Sweet Potato Ginger Cake: A Cozy Gluten-Free Treat

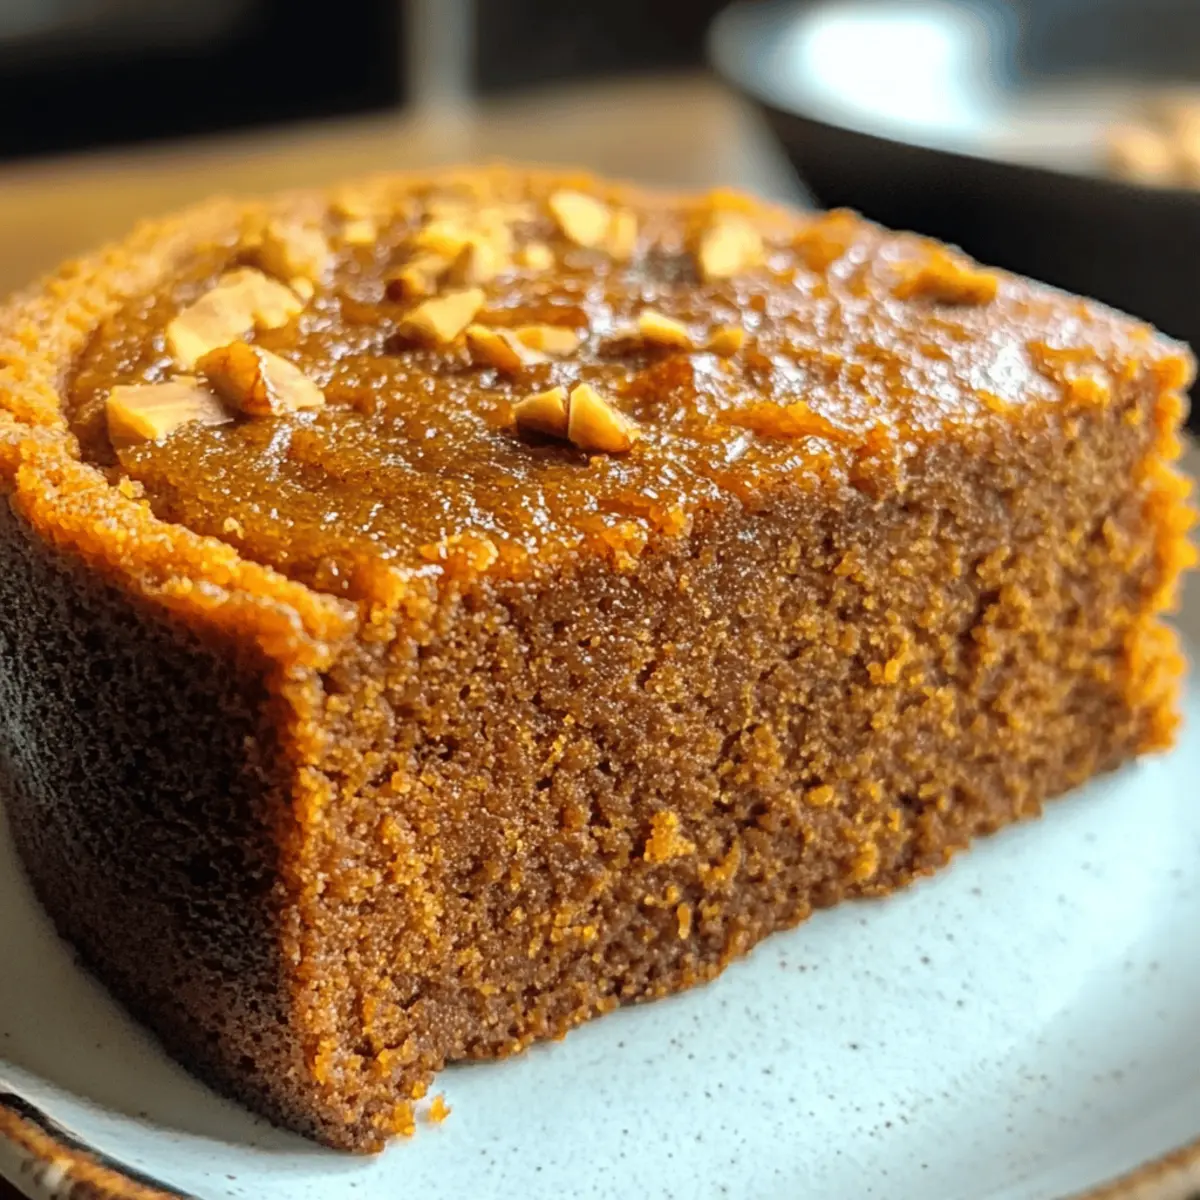
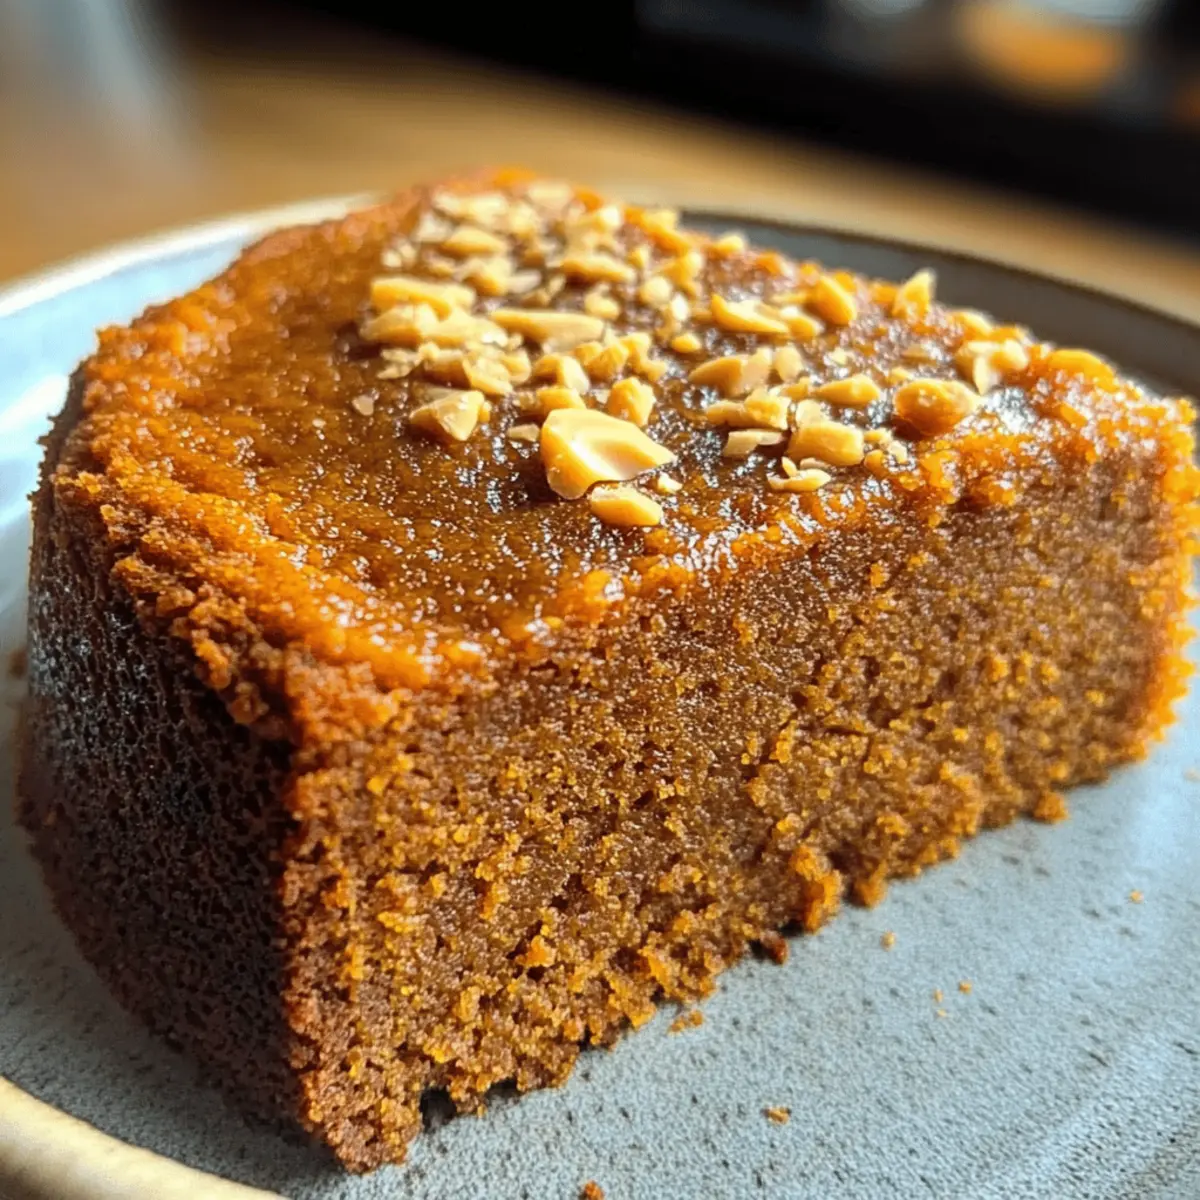
As the first chilly breeze of fall sweeps through the air, I find myself craving something warm and comforting. This Flourless Sweet Potato Ginger Cake is my go-to recipe for those cozy evenings when the smell of spices fills the kitchen. With a delightful balance of naturally sweet roasted sweet potatoes and a zesty pop from fresh ginger, this gluten-free dessert is not just a seasonal favorite; it’s perfect any time of year! It’s not only simple enough for weeknight baking but also a nutritious option that doesn’t skimp on flavor—offering a dense, cake-like texture that feels indulgent yet wholesome. Curious how such deliciousness comes together? Let’s get baking!

Why is Sweet Potato Ginger Cake irresistible?

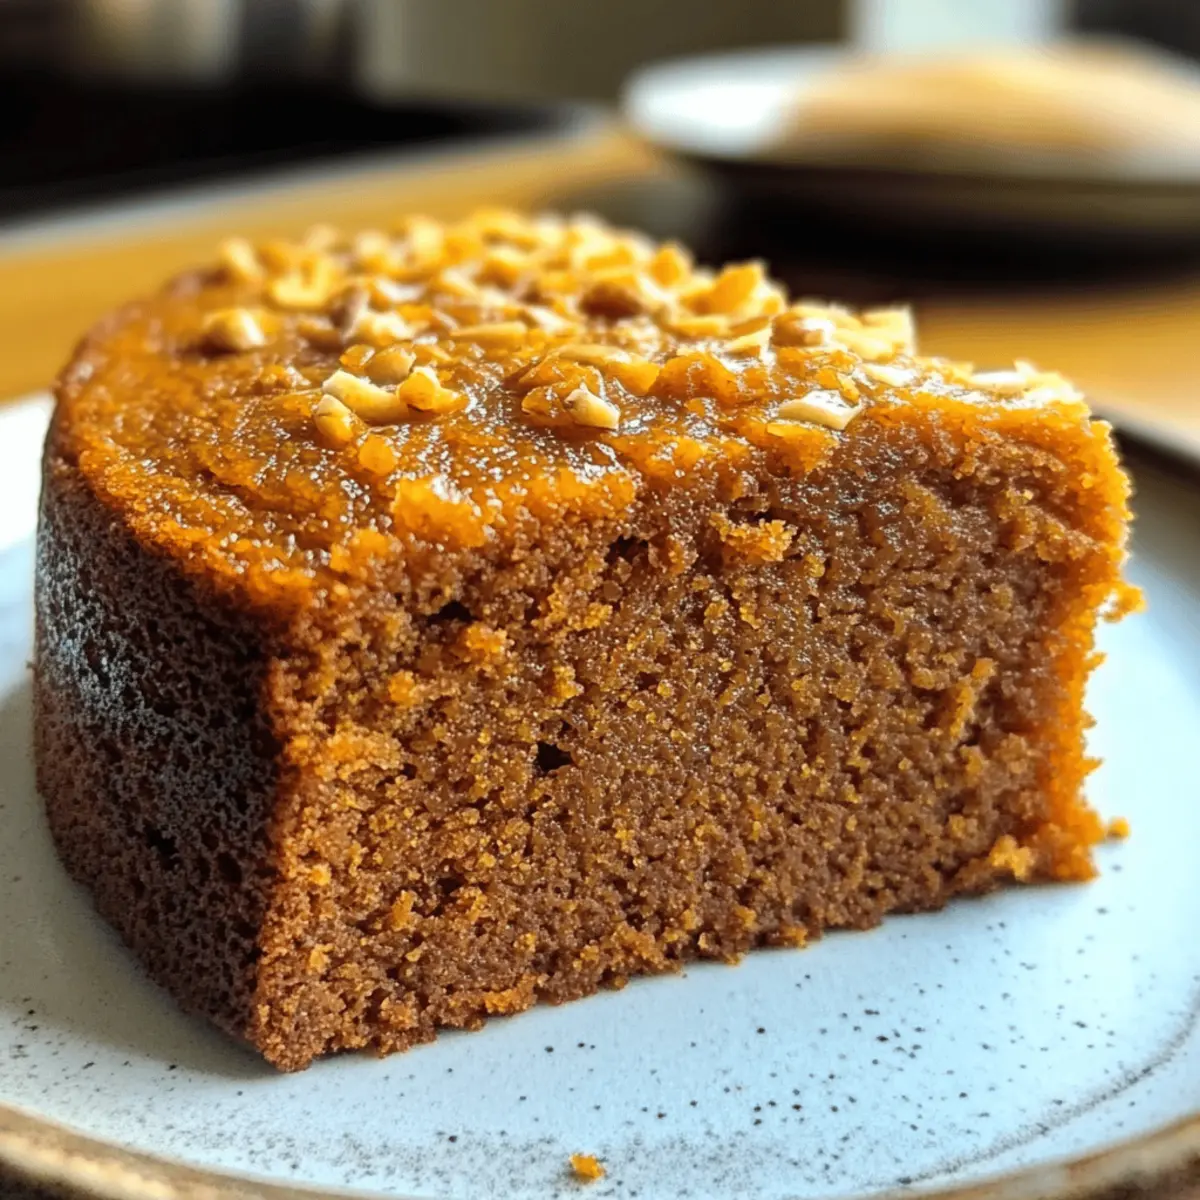
Comforting Flavors: This cake combines the natural sweetness of roasted sweet potatoes with the spicy warmth of fresh ginger, creating a delightful flavor profile.
Wholesome & Nutrient-Dense: Packed with nutrients, this dessert is a healthy alternative to traditional sweets, making it perfect for guilt-free indulgence.
Quick & Simple: With just a handful of easy-to-find ingredients, the preparation is straightforward, ideal for any home cook.
Versatile Add-Ons: You can customize the recipe by adding chopped nuts for a delightful crunch or even chocolate chips for extra richness!
Year-Round Appeal: Whether it’s for fall festivities or an everyday treat, this Sweet Potato Ginger Cake is a crowd-pleaser that’s delicious any time of year. Consider pairing it with a cup of warm chai latte for a cozy experience!

Sweet Potato Ginger Cake Ingredients

For the Cake
Sweet Potatoes – Provide natural sweetness and moisture; roast until fork-tender and mash until smooth.
Eggs – Act as a binder, contributing to the cake’s structure and moisture.
Maple Syrup – Adds sweetness while maintaining a natural flavor profile; substitute with honey if preferred.
Vanilla Extract – Enhances overall flavor; opt for pure extract for the best taste.
Grated Ginger – Introduces warmth and a spicy note; fresh ginger is preferred for maximum flavor.
Cinnamon – Provides a warm spice flavor that elevates the cake’s depth; adjust to taste.
Nutmeg – Adds a classic spice touch; use sparingly to avoid overpowering the ginger.
Salt – Enhances the flavors of the sweet ingredients; essential in baking.
Baking Soda – Acts as a leavening agent to create a light texture.
Almond Flour – Delivers a gluten-free structure and moisture; can be substituted with other nut flours for different flavors.

Optional Add-Ins
Chopped Nuts – Add texture and crunch; walnuts or pecans are great choices for extra richness.
Chocolate Chips – Incorporate for an indulgent twist; they’ll melt beautifully into the cake!

Get ready to enjoy this Sweet Potato Ginger Cake, a wholesome and comforting dessert that’s sure to impress!

Step‑by‑Step Instructions for Sweet Potato Ginger Cake

Step 1: Prepare Sweet Potatoes
Preheat your oven to 400°F (200°C). Wash and pierce the sweet potatoes with a fork, then place them on a baking sheet lined with parchment paper. Roast for 45–50 minutes, or until fork-tender. Allow them to cool slightly, then peel the skins and mash the flesh in a bowl until smooth and creamy.

Step 2: Mix Wet Ingredients
In a large mixing bowl, combine the mashed sweet potatoes with eggs, maple syrup, and vanilla extract. Add in the freshly grated ginger for an extra kick. Whisk the mixture together until it is silky and well blended, ensuring there are no lumps for a deliciously smooth Sweet Potato Ginger Cake.

Step 3: Add Dry Ingredients
In another bowl, stir together the almond flour, baking soda, cinnamon, nutmeg, and salt. Gradually fold the dry ingredients into the wet mixture until a thick, uniform batter forms. If you’re choosing to add nuts for texture, gently incorporate them into the batter now for a delightful crunch in your cake.

Step 4: Bake
Prepare an 8-inch round cake pan by greasing it lightly or lining the bottom with parchment paper. Pour the batter into the prepared pan, spreading it evenly. Place it in the preheated oven and bake for 35–40 minutes. The cake is done when it is set in the center and a toothpick inserted comes out moist but clean.

Step 5: Cool and Serve
Once baked, remove the cake from the oven and let it cool in the pan for about 10 minutes. Carefully transfer it to a wire rack to cool completely. This Sweet Potato Ginger Cake can be enjoyed plain or dressed up with your favorite toppings like whipped cream.

Make Ahead Options

These Sweet Potato Ginger Cakes are perfect for meal prep enthusiasts! You can roast and mash the sweet potatoes up to 24 hours in advance, storing them in an airtight container in the refrigerator to maintain their moisture and flavor. Additionally, you can mix the wet ingredients (mashed sweet potatoes, eggs, maple syrup, vanilla, and grated ginger) and refrigerate them overnight. When you’re ready to bake, simply combine the wet and dry ingredients and pour the batter into the pan. Bake as directed, and you’ll have a delightful dessert with minimal last-minute effort, ensuring it’s just as delicious as if you made it fresh!

Expert Tips for Sweet Potato Ginger Cake

  • Roast Sweet Potatoes: Ensure the sweet potatoes are roasted until fork-tender; this enhances their natural sweetness and moisture, crucial for your cake’s texture.
  • Mix Well: When combining your wet ingredients, whisk thoroughly to avoid lumps; even incorporation leads to a smoother Sweet Potato Ginger Cake.
  • Check for Doneness: Insert a toothpick into the center of the cake after 35 minutes; it should come out slightly moist to confirm that it’s perfectly baked.
  • Cool Completely: Allow the cake to cool completely before slicing; this prevents it from crumbling and ensures clean cuts.
  • Adjust Spices: Feel free to tweak the cinnamon and nutmeg amounts to fit your taste preference; the right balance will bring warmth to the cake.

Storage Tips for Sweet Potato Ginger Cake

Fridge: Store your Sweet Potato Ginger Cake in an airtight container for up to 5 days. This keeps it moist and flavorful, ready for a cozy dessert anytime.

Freezer: For longer storage, freeze the cake in individual slices wrapped tightly in plastic wrap, then in aluminum foil, for up to 3 months.

Thawing: When ready to enjoy, thaw in the fridge overnight or leave at room temperature for a couple of hours before serving.

Reheating: Gently warm individual slices in the microwave for 10–15 seconds to refresh the flavors and enjoy a comforting slice!

What to Serve with Sweet Potato Ginger Cake

As the aroma of this warm, spiced cake fills your kitchen, imagine the delightful dishes that would perfectly accompany it.

  • Creamy Mashed Potatoes: Their smooth texture and buttery flavor provide a comforting contrast, making for a delightful homey meal.
  • Honey-Glazed Carrots: Sweet and slightly caramelized, these vibrant veggies complement the cake’s ginger spice beautifully.
  • Warm Chai Latte: The aromatic spices in chai echo those in the cake, creating a harmonious, cozy beverage pairing.
  • Roasted Brussels Sprouts: Their crispy edges and earthy flavor add a sophisticated crunch that balances the cake’s softness.
  • Vanilla Ice Cream: A scoop adds a cool, creamy element that beautifully contrasts the warm, spiced cake.
  • Maple-Glazed Walnuts: These crunchy bites can be enjoyed on the side or sprinkled atop the cake for extra richness.
  • Cinnamon Tea: The warmth of cinnamon in this tea pairs exquisitely with the cake’s flavors for a soothing experience.
  • Apple Crisp: Another cozy dessert, its fruity sweetness and crumbly topping will enhance the cake’s warm notes.

Sweet Potato Ginger Cake Variations

Feel free to get creative with this recipe and make it uniquely yours while filling your kitchen with heavenly aromas!

  • Nutty Crunch: Stir in chopped walnuts or pecans for a delightful texture that complements the soft cake.

  • Coconut Flour: Swap almond flour for coconut flour to infuse a subtle coconut flavor and a hint of tropical sweetness.

  • Chocolate Lovers: Add dark or semi-sweet chocolate chips into the batter for a rich, decadent twist that elevates your dessert.

  • Spice It Up: Enhance the warmth by adding a pinch of cayenne pepper for a surprising kick that dances on your palate.

  • Fruit Infusion: Fold in some dried cranberries or raisins to introduce bursts of sweetness and a chewy texture in each bite.

  • Maple Pecan Topping: Top your cake with a drizzle of maple syrup and sprinkle toasted pecans for an irresistible finishing touch.

  • Citrus Zest: Add the zest of an orange or lemon into the batter that brightens the flavors with a refreshing citrus note.

  • Dairy-Free Delight: Substitute maple syrup with agave nectar for a fully dairy-free version that’s still lip-smackingly tasty.

For even more delightful recipes, consider exploring my Savory Zucchini Potato Mini Pancakes or check out my Potato Mushroom Cake for tasty twists on comfort food! Enjoy the journey of baking!

Sweet Potato Ginger Cake Recipe FAQs

What is the best way to select sweet potatoes for this cake?
Absolutely! Look for sweet potatoes that are firm and have smooth skin. Avoid those with soft spots or dark blemishes, as they may affect the flavor of your cake. The ideal sweet potatoes should feel heavy for their size, indicating great moisture content.

How should I store leftover Sweet Potato Ginger Cake?
You can store your Sweet Potato Ginger Cake in an airtight container in the fridge for up to 5 days. This keeps it moist and delicious, perfect for a cozy snack whenever the craving strikes! Make sure it cools completely before storing to avoid excess moisture buildup.

Can I freeze Sweet Potato Ginger Cake?
Yes, you can absolutely freeze this cake! Wrap it tightly in plastic wrap, followed by aluminum foil to prevent freezer burn. You can freeze it for up to 3 months. When you’re ready to enjoy a slice, simply thaw it in the fridge overnight or at room temperature for a couple of hours.

What should I do if my cake is too dense?
If your Sweet Potato Ginger Cake turns out too dense, it might be due to over-mixing the batter or using too much almond flour. To fix this, ensure that you gently fold the dry ingredients into the wet ones until just combined. If you find your cake is consistently dense, consider checking the freshness of your baking soda, as older agents may not provide the lift needed.

Are there any dietary considerations I should be aware of?
Yes! This cake is gluten-free, making it suitable for those with gluten sensitivities. However, always double-check ingredient labels if you’re concerned about cross-contamination. Additionally, if you’re serving guests with nut allergies, consider omitting the almond flour and any optional nuts. There are great substitutes, like gluten-free oat flour, you can use in place of almond flour.

Can I substitute ingredients in this recipe?
Of course! You can swap out maple syrup for honey if you prefer a different sweetener. If you don’t have almond flour, you could use coconut flour or hazelnut flour, but keep in mind that you may need to adjust the amounts, as these flours absorb moisture differently. Always check the ratio to maintain the cake’s texture!

Sweet Potato Ginger Cake

Sweet Potato Ginger Cake: A Cozy Gluten-Free Treat

Sweet Potato Ginger Cake is a warm and comforting gluten-free dessert filled with natural sweetness and spicy warmth from ginger.
Prep Time 10 minutes
Cook Time 40 minutes
Cooling Time 10 minutes
Total Time 1 hour
Servings: 8 slices
Course: Dessert
Cuisine: Gluten-Free
Calories: 210

Ingredients
  

For the Cake
  • 2 cups mashed sweet potatoes roast until fork-tender
  • 3 large eggs act as a binder
  • 1/2 cup maple syrup substitute with honey if preferred
  • 1 teaspoon vanilla extract opt for pure extract
  • 1 tablespoon grated ginger fresh ginger preferred
  • 1 teaspoon cinnamon adjust to taste
  • 1/4 teaspoon nutmeg use sparingly
  • 1/4 teaspoon salt essential in baking
  • 1 teaspoon baking soda acts as a leavening agent
  • 2 cups almond flour can be substituted with other nut flours
Optional Add-Ins
  • 1/2 cup chopped nuts walnuts or pecans are great choices
  • 1 cup chocolate chips for an indulgent twist

Equipment

  • oven
  • mixing bowl
  • baking sheet
  • cake pan
  • whisk

Method
 

Step-by-Step Instructions for Sweet Potato Ginger Cake
  1. Preheat your oven to 400°F (200°C). Wash and pierce the sweet potatoes with a fork, then place them on a baking sheet lined with parchment paper. Roast for 45–50 minutes, or until fork-tender. Allow them to cool slightly, then peel the skins and mash the flesh in a bowl until smooth and creamy.
  2. In a large mixing bowl, combine the mashed sweet potatoes with eggs, maple syrup, and vanilla extract. Add in the freshly grated ginger and whisk until smooth.
  3. In another bowl, mix the almond flour, baking soda, cinnamon, nutmeg, and salt. Gradually fold the dry ingredients into the wet mixture until a thick batter forms. Incorporate optional nuts if desired.
  4. Prepare an 8-inch round cake pan by greasing it. Pour the batter into the prepared pan and spread it evenly. Bake for 35–40 minutes until set in the center.
  5. Once baked, allow the cake to cool in the pan for about 10 minutes, then transfer it to a wire rack to cool completely.

Notes

This cake can be enjoyed plain or dressed up with your favorite toppings like whipped cream.

Delicious Moroccan Cauliflower with Tahini-Honey Bliss

While daydreaming in my kitchen, I stumbled upon a flavor combination that took me on a culinary journey straight to North Africa. This Moroccan Cauliflower with Tahini-Honey is a vibrant dish that allows simple ingredients to shine. The warm spices hug the delicately roasted cauliflower, while the creamy tahini-honey sauce adds a sweet and tangy twist that dances on your palate. Not only is this recipe quick to prepare, needing just 40 minutes, but it’s also a crowd-pleaser, making it perfect for both casual weeknight meals and festive gatherings. Imagine serving this colorful side that’s not only delicious but also healthy, fitting perfectly into any plant-based diet. Will you join me on this flavorful adventure and discover how easy it is to impress with such simple notes?

Why is this Cauliflower Recipe a Must-Try?

Flavorful: The marriage of Moroccan spices and creamy tahini creates a burst of flavor that you won’t forget!

Quick & Easy: In just 40 minutes, you can have this delightful dish ready—perfect for busy weeknights or last-minute gatherings.

Nutritious Delight: Packed with fiber and plant-based goodness, this recipe fits beautifully into a healthy lifestyle.

Versatile Serving: Whether as a standalone dish or paired with grilled meats, it adapts to any meal, much like our Savory Zucchini Pancakes with Fresh Herbs.

Vegan-Friendly: Simply swap honey with maple syrup for a delicious vegan option that everyone can enjoy!

Visually Stunning: The vibrant colors and textures make this dish a showstopper that will impress your guests.

Moroccan Cauliflower with Tahini-Honey Ingredients

To embark on this flavorful journey, gather the following ingredients!

For the Cauliflower

  • Cauliflower – The star of the dish, providing texture and volume that’s both satisfying and nutritious.
  • Olive Oil – Helps to roast the cauliflower to perfection, giving it a deliciously caramelized finish.
  • Ground Cumin – Adds an earthy aroma that brings out the vibrant Moroccan flavors.
  • Ground Coriander – Offers a light, citrusy note balancing out the spices beautifully.
  • Smoked Paprika – Infuses a subtle smokiness that elevates the aroma and flavor.
  • Salt and Black Pepper – Essential seasonings; feel free to adjust to match your taste preferences.

For the Tahini-Honey Sauce

  • Tahini – This creamy base contributes a rich, nutty flavor that’s perfect for drizzling.
  • Honey – Adds a sweet touch to the sauce; replace with maple syrup for the vegan twist.
  • Lemon Juice – Brightens all the flavors with a touch of acidity that makes every bite pop!

For Garnishing

  • Fresh Parsley – A sprinkle of this herb provides a fresh flavor and a pop of color for presentation.
  • Sesame Seeds – Optional, but they add delightful texture and enhance the visual appeal of your dish.

This Moroccan Cauliflower with Tahini-Honey recipe will absolutely dazzle your dining experience with its rich flavors and vibrant aesthetics!

Step‑by‑Step Instructions for Moroccan Cauliflower with Tahini-Honey

Step 1: Preheat the Oven
Begin by preheating your oven to 425°F (220°C). This high temperature is essential for achieving beautifully roasted cauliflower with a crispy exterior and tender interior. Preparing your oven while you prep the other ingredients ensures everything comes together seamlessly.

Step 2: Prepare the Cauliflower
Wash and cut the cauliflower into bite-sized florets, aiming for uniform pieces to ensure even cooking. Place the prepared florets in a large mixing bowl, allowing them plenty of room to be coated with spices later. The cauliflower will be the star of your Moroccan Cauliflower with Tahini-Honey dish!

Step 3: Season the Cauliflower
Drizzle a generous amount of olive oil over the cauliflower florets, aiming for even coverage. Next, sprinkle the cumin, coriander, smoked paprika, salt, and pepper. Toss the florets thoroughly, ensuring they’re well-coated in the seasonings. The colors and aromas should begin to awaken your senses, hinting at the delicious flavors to come.

Step 4: Roast the Cauliflower
Spread the seasoned cauliflower florets in a single layer on a parchment-lined baking sheet, ensuring they are not overcrowded. Roast them in the preheated oven for 20-25 minutes, or until they are golden brown and tender when pierced with a fork. Halfway through, give them a quick stir to promote even browning.

Step 5: Make the Tahini-Honey Sauce
While the cauliflower is roasting, prepare the tahini-honey sauce. In a medium bowl, whisk together tahini, honey (or maple syrup for a vegan option), lemon juice, and a pinch of salt. Adjust the consistency by adding water, one teaspoon at a time, until you achieve a smooth, pourable sauce that will beautifully glaze your roasted cauliflower.

Step 6: Combine and Serve
Once the cauliflower is perfectly roasted, remove it from the oven and transfer it to a serving bowl. Drizzle the prepared tahini-honey sauce generously over the warm florets, ensuring each bite is coated in that luscious flavor. This Moroccan Cauliflower with Tahini-Honey is now ready to shine at your dinner table.

Step 7: Garnish for Appeal
To add a fresh touch, sprinkle chopped fresh parsley and sesame seeds over the top of the drizzled cauliflower. The vibrant green herbs and tiny white seeds not only enhance the dish’s visual appeal but also contribute delightful textures. Your stunning Moroccan Cauliflower with Tahini-Honey is now ready to impress!

Moroccan Cauliflower with Tahini-Honey Variations

Feel free to take this Moroccan Cauliflower dish on a playful journey with your own personal twists and substitutions!

  • Vegan Delight: Substitute honey with maple syrup for a sweet, plant-based version of the sauce. It’s wonderfully delicious with a hint of caramel flavor.
  • Add Protein: Toss in a can of chickpeas before roasting for an extra protein boost. This not only enhances the meal but provides a delightful contrast in textures.
  • Quinoa Base: Serve the roasted cauliflower over a warm bed of fluffy quinoa. This hearty addition makes it a main course rather than just a side dish.
  • Spice It Up: Add some red pepper flakes or chopped fresh chili for a kick of heat. This will awaken your taste buds and elevate the flavor profile beautifully.
  • Creamy Twist: Mix in a little Greek yogurt or plant-based yogurt in the tahini sauce for a richer, creamier consistency. This adds a silky texture that pairs well with the roasted florets.
  • Herbal Infusion: Experiment with herbs such as cilantro or mint to garnish your dish. These fresh flavors will complement the warm spices and add vibrancy to your plate.
  • Nutty Finish: Toss in some toasted almonds or pine nuts as a crunchy topping. This will introduce an extra nutty flavor and lovely texture for every bite.

This Moroccan Cauliflower with Tahini-Honey is a canvas, and each variation is a brushstroke on your culinary masterpiece. Enjoy exploring these delightful options!

Storage Tips for Moroccan Cauliflower with Tahini-Honey

Fridge: Store leftover Moroccan Cauliflower in an airtight container in the refrigerator for up to 3 days. This helps maintain freshness and flavor without compromising the dish’s texture.

Freezer: If you need to freeze, place the cooled cauliflower in a sealed freezer bag or container. It can be frozen for up to 1 month; just ensure all air is removed to prevent freezer burn.

Reheating: To reheat, place the cauliflower on a baking sheet and warm it in a preheated oven at 350°F (175°C) for about 10-15 minutes. This method retains its crispy exterior, making every bite delicious.

Sauce Storage: Keep any leftover tahini-honey sauce in a separate airtight container in the fridge for up to 5 days. Stir well before serving again to restore its creamy texture.

What to Serve with Moroccan Cauliflower with Tahini-Honey

Elevate your dining experience by pairing this flavorful dish with delightful sides that complement its exotic charm.

  • Couscous with Vegetables: The fluffy grains absorb the savory spices, providing a perfect base for your cauliflower to shine.
  • Harissa Chickpeas: Adding a spicy kick, these chickpeas bring protein, offering a hearty balance to the lightness of the roasted cauliflower.
  • Sauteed Spinach with Garlic: The earthy flavor of spinach lightly sautéed enhances the dish, while its vibrant greens brighten up your plate.
  • Quinoa Salad: A refreshing addition, featuring crunchy cucumbers and tangy feta, introduces a delicious contrast in texture and flavor.
  • Pita Bread: Soft and warm, these can be used to scoop up the roasted cauliflower, making for a delightful, hands-on eating experience.
  • Mint Yogurt Sauce: Creamy and tangy, this sauce balances the spices in the cauliflower, adding a refreshing twist that enhances every bite.
  • Lemon Garlic Hummus: A creamy dip perfect for spreading or scooping, its garlicky richness beautifully complements the sweet tahini-honey sauce.
  • Rosemary Sweet Potato Wedges: Crispy and slightly sweet, the natural sugars in the potatoes resonate with the honey in both dishes, creating a lovely harmony.
  • Chilled White Wine: A crisp varietal like Sauvignon Blanc makes for a refreshing sip that complements the warm spices of your Moroccan Cauliflower.

Make Ahead Options

These Moroccan Cauliflower with Tahini-Honey are perfect for meal prep enthusiasts! You can prepare the cauliflower florets by cutting and seasoning them up to 24 hours in advance. Simply drizzle the olive oil and spices over the florets, toss to coat, and store them in an airtight container in the refrigerator. The tahini-honey sauce can be made ahead and kept in the fridge for up to 3 days; just whisk it again with a little water if it thickens. When you’re ready to serve, roast the cauliflower directly from the fridge for 20-25 minutes, drizzle with the sauce, and enjoy a delicious meal with minimal effort!

Expert Tips for Moroccan Cauliflower

Even Coating: Ensure all cauliflower florets are evenly coated with olive oil and spices. This promotes uniform roasting and enhances the overall flavor of your Moroccan Cauliflower.

Watch the Roasting Time: Keep an eye on your cauliflower during roasting, as ovens can vary. Check for a golden brown color and tenderness, typically around 20-25 minutes.

Adjusting the Sauce: If your tahini-honey sauce is too thick, add water a little at a time until you achieve your desired consistency. A smoother sauce clings beautifully to the roasted cauliflower.

Chill for Extra Flavor: Let the roasted cauliflower sit for a moment after drizzling with the tahini-honey sauce. This allows the flavors to meld together, enhancing the taste experience.

Garnish Generously: Don’t skip the parsley and sesame seeds! They not only add a fresh touch but also elevate the visual appeal and texture of your Moroccan Cauliflower with Tahini-Honey.

Moroccan Cauliflower with Tahini-Honey Recipe FAQs

How do I choose the best cauliflower for roasting?
Look for cauliflower heads that are firm and compact, with no dark spots or blemishes. The florets should be tightly packed together, and the leaves should be green and crisp. A fresh cauliflower will yield the best texture when roasted, giving you those delectable golden-brown florets.

How should I store leftover Moroccan Cauliflower?
To keep your leftover Moroccan Cauliflower fresh, store it in an airtight container in the refrigerator for up to 3 days. For best results, reheat it in the oven at 350°F (175°C) for about 10-15 minutes, which helps maintain its crispy texture. If reheating in the microwave, the cauliflower may lose some of its delightful crunch, but it will still taste great!

Can I freeze Moroccan Cauliflower with Tahini-Honey?
Absolutely! After the dish has cooled, transfer the Moroccan Cauliflower to a sealed freezer bag or container, removing as much air as possible to avoid freezer burn. It can be frozen for up to 1 month. When you’re ready to enjoy it again, simply reheat in the oven, which helps restore some of its original crispiness.

What if my tahini-honey sauce is too thick?
If your tahini-honey sauce turns out thicker than desired, don’t worry! Simply add water, one teaspoon at a time, while whisking until you reach your preferred consistency. It should be smooth and pourable—perfect for drizzling over the cauliflower! If you want a creamier texture, using a food processor can also help blend the ingredients seamlessly.

Is this recipe suitable for a vegan diet?
Yes indeed! By substituting honey with maple syrup, you can easily make this Moroccan Cauliflower with Tahini-Honey a completely vegan dish. This way, everyone can enjoy it, making it a versatile choice for your gathering, whether they’re omnivores or plant-based eaters.

Can pets eat roasted cauliflower?
While cauliflower is safe for dogs in small amounts, make sure to avoid giving them any of the seasonings or tahini-honey sauce. Plain roasted cauliflower florets can be a treat, but it’s always wise to check with your veterinarian before introducing new foods into your pet’s diet.

Moroccan Cauliflower with Tahini-Honey

Delicious Moroccan Cauliflower with Tahini-Honey Bliss

This Moroccan Cauliflower with Tahini-Honey is a vibrant dish that combines warm spices with a creamy sauce for a healthy, flavorful experience.
Prep Time 15 minutes
Cook Time 25 minutes
Total Time 40 minutes
Servings: 4 servings
Course: Dinner
Cuisine: Moroccan
Calories: 180

Ingredients
  

Cauliflower Ingredients
  • 1 head Cauliflower Cut into florets
  • 2 tablespoons Olive Oil For roasting
  • 1 teaspoon Ground Cumin For seasoning
  • 1 teaspoon Ground Coriander For seasoning
  • 1 teaspoon Smoked Paprika For seasoning
  • 1/2 teaspoon Salt To taste
  • 1/2 teaspoon Black Pepper To taste
Tahini-Honey Sauce
  • 1/4 cup Tahini For the sauce
  • 2 tablespoons Honey Can replace with maple syrup for vegan
  • 1 tablespoon Lemon Juice For acidity
Garnishing
  • 2 tablespoons Fresh Parsley Chopped, for garnishing
  • 1 tablespoon Sesame Seeds Optional, for garnishing

Equipment

  • oven
  • baking sheet
  • mixing bowl
  • whisk

Method
 

Preparation Steps
  1. Preheat your oven to 425°F (220°C).
  2. Wash and cut the cauliflower into bite-sized florets.
  3. Drizzle olive oil over the cauliflower florets and toss with cumin, coriander, smoked paprika, salt, and pepper.
  4. Spread the seasoned cauliflower on a parchment-lined baking sheet and roast for 20-25 minutes.
  5. While roasting, whisk together tahini, honey, lemon juice, and a pinch of salt in a medium bowl. Add water to achieve desired consistency.
  6. Once roasted, transfer cauliflower to a serving bowl and drizzle with tahini-honey sauce.
  7. Garnish with chopped parsley and sesame seeds before serving.

Notes

Ensure even coating of spices for the best flavor and watch roasting time closely.

Maple Ginger Pear Pie – Your Fall Slice of Heaven

As the leaves don their golden coats and the air turns crisp, there’s something truly magical about the aroma of a freshly baked pie wafting through the kitchen. That’s where my Maple Ginger Pear Pie steps in—combining juicy, ripe pears with the warm embrace of maple syrup and a dash of spicy ginger. This fall dessert not only delivers a unique twist on the classic pie, but it also comes together in no time, making it perfect for cozy gatherings with loved ones. It’s an easy way to elevate your autumn feasts while filling your home with the inviting scent of seasonal comfort. Are you ready to create a sweet masterpiece that will leave your guests asking for seconds?

Why is Maple Ginger Pear Pie Irresistible?

Unique Flavor Fusion: The blend of ripe pears, maple syrup, and ginger creates a delightful balance of sweetness and warmth, perfect for fall.

Crowd-Pleasing Treat: Easy to make and utterly delicious, this pie is sure to impress guests at any gathering, even rivaling Apple Pie.

Simple Preparation: With just a few steps, it comes together quickly, giving you more time to enjoy the company of friends and family.

Versatile Variations: Feel free to experiment with different spices or sweeteners to make this recipe your own.

Perfect Texture: Expect a beautifully golden crust with a satisfyingly firm yet juicy filling, offering a delightful contrast in every bite.

Maple Ginger Pear Pie Ingredients

• Elevate your baking game with these delightful ingredients!

For the Crust

  • Double Pie Crust – A homemade or store-bought option that cradles the filling for that perfect bite.

For the Filling

  • Fresh Pears – 8 cups (about 8-9 pears), peeled and sliced (1/4″ thick); they provide the delicious natural sweetness essential for this Maple Ginger Pear Pie.
  • All-Purpose Flour – 1/3 cup (40g); this helps thicken the filling, keeping it from being runny.
  • Ground Ginger – 1 tsp; adds a warm, spicy kick that pairs wonderfully with the sweetness of the pears.
  • Ground Cinnamon – 1/4 tsp; enhances the cozy flavor profile, creating an aromatic embrace.
  • Maple Syrup – 3/4 cup (190ml); acts as a natural sweetener, deepening the flavors of the pie. Swap with honey for a different sweetness profile if desired.

Step‑by‑Step Instructions for Maple Ginger Pear Pie

Step 1: Preheat the Oven
Begin by preheating your oven to 375°F (190°C). This temperature is perfect for baking the Maple Ginger Pear Pie, ensuring a golden, flaky crust. Position the oven rack in the lower third of the oven to promote even baking. While the oven is heating, you can prepare the filling and crust.

Step 2: Prepare the Filling
In a large mixing bowl, combine the sliced fresh pears, flour, ground ginger, and ground cinnamon. Toss the ingredients gently yet thoroughly until the pears are evenly coated with the flour and spices. This step helps to bind the filling together and intensifies the flavors, giving the pie a deliciously aromatic base.

Step 3: Add Sweetener
Pour the maple syrup over the pear mixture and gently fold it in using a spatula. Make sure every slice of pear is well-coated with the syrup. The maple syrup not only sweetens the filling but also adds a rich depth of flavor that beautifully complements the ginger. Allow the mixture to sit for a few minutes to absorb the flavors.

Step 4: Assemble the Pie
Take your first pie crust and lay it in a 9-inch pie plate, ensuring it fits snugly. Spoon the prepared pear filling into the crust, spreading it evenly to create a beautiful mound in the center. This way, the filling will bubble and create that delightful fruitiness we love in a Maple Ginger Pear Pie.

Step 5: Top Crust
Roll out your second pie crust and cut it into 1-inch strips to create a lattice pattern over the filling. Alternatively, you can place the crust whole over the filling and slice slits for ventilation. Make sure to crimp the edges together to seal the pie securely, which helps keep all those lovely juices inside while baking.

Step 6: Bake the Pie
Carefully place the pie in the preheated oven and bake for about 1 hour. Keep an eye on the crust; it should turn a beautiful golden brown while the filling begins to bubble up through the slits. If necessary, use a pie shield or aluminum foil to cover the edges, preventing them from over-browning.

Step 7: Cool Before Serving
Once baked, remove the Maple Ginger Pear Pie from the oven and allow it to cool for at least 1 hour. This cooling period helps the filling set, making it easier to slice when you’re ready to serve. The wonderful aromas will fill your kitchen, promising a delicious treat ahead!

Maple Ginger Pear Pie Variations

Feel free to let your creativity shine by customizing this delightful pie to suit your palate!

  • Honey Swap: Substitute maple syrup with honey for a floral sweetness that brings a new dimension to the flavor.
  • Citrus Zest: Add a tablespoon of fresh lemon or orange zest to the filling for a zesty brightness that dances on your taste buds.
  • Nutty Crunch: Fold in a handful of chopped walnuts or pecans for an exciting texture contrast and a nutty flavor.
  • Spice It Up: Incorporate a pinch of nutmeg or allspice for extra warmth. This twist could elevate the cozy feel of your pie.
  • Dairy-Free: Use a dairy-free pie crust and serve with coconut whipped cream for a delightful dairy-free dessert option.
  • Caramel Swirl: Drizzle in salted caramel sauce when assembling the pie for a decadent touch that complements the maple flavors beautifully.
  • Mini Pies: For a fun twist, consider making individual-sized mini pies using muffin tins. These are perfect for parties and make for delightful portions.
  • Savory Option: Blend in a hint of sage with the filling for a savory approach, creating a unique take that’s great for holiday gatherings.

Explore these variations and find the perfect combination that you and your loved ones will adore. Looking for more pie inspiration? Check out my delicious recipes for Chicken Pot Pie and Mini Beef Pies.

How to Store and Freeze Maple Ginger Pear Pie

Fridge: Store leftovers covered in the refrigerator for up to 3 days. This helps maintain the crust’s integrity while keeping the filling fresh.

Freezer: For longer storage, freeze the pie before baking. Wrap it tightly in plastic wrap and foil, and it can last up to 3 months. Bake directly from frozen.

Reheating: When ready to serve, preheat your oven to 350°F (175°C). Reheat the pie for about 20–30 minutes until warmed through, restoring its lovely flaky crust.

What to Serve with Maple Ginger Pear Pie?

As you bring this warm and fragrant dessert to the table, it’s the perfect time to think about delightful accompaniments to elevate your dining experience.

  • Vanilla Ice Cream: A scoop of creamy vanilla ice cream melts beautifully atop the warm pie, providing a glorious temperature contrast.

  • Whipped Cream: Light and airy, a dollop of freshly whipped cream enhances the flavors and adds a touch of indulgence.

  • Cinnamon Sugar Dust: Just a sprinkle of cinnamon sugar over the pie crust adds a subtle sweetness and extra texture, making every bite even more delightful.

  • Caramel Sauce: Drizzle rich caramel sauce over each slice for an added layer of sweetness that pairs perfectly with the maple and ginger flavors.

  • Rich Coffee: A warm cup of coffee complements the sweetness of the pie, the boldness balancing the flavors while adding a cozy feeling to your gathering.

  • Herbal Tea: Try serving with a soothing herbal tea like chamomile or peppermint for a refreshing contrast, creating a delightful end to your meal.

  • Chilled Sparkling Cider: The effervescence of sparkling cider cleanses the palate, making it a refreshing choice alongside this flavorful fall dessert.

  • Nuts and Cheese Platter: A rustic cheese platter with sharp cheddar and toasted nuts can provide a nice savory contrast to the sweetness of the pie—a delightful touch for savory lovers!

Make Ahead Options

Preparing your Maple Ginger Pear Pie ahead of time is a fantastic way to ease the stress of busy weeknights! You can slice and toss the fresh pears with flour, ginger, cinnamon, and maple syrup up to 24 hours in advance—just refrigerate the filling in an airtight container to keep the pears from browning. Additionally, you can prepare your pie crust ahead of time; wrap it tightly in plastic and store it in the fridge for up to 3 days. When you’re ready to serve, all you have to do is assemble the pie and bake it until golden brown. This method allows you to enjoy the deliciousness of the Maple Ginger Pear Pie with minimal effort, ensuring your dessert is just as delightful as if it were freshly made!

Expert Tips for Maple Ginger Pear Pie

  • Pear Selection: Choose ripe but firm pears to prevent a mushy filling. Bartlett or Anjou varieties are excellent options for this Maple Ginger Pear Pie.
  • Crust Consistency: Ensure your pie crust is well-chilled before baking. This helps achieve a flaky, tender texture that contrasts perfectly with the juicy filling.
  • Sweetness Adjustment: If you prefer a sweeter pie, feel free to add more maple syrup or a dash of brown sugar to the filling, but remember to taste as you go!
  • Cooling Time: Allowing the pie to cool for at least an hour before slicing is crucial. It helps the filling set for cleaner, more beautiful slices.
  • Flavor Boosting: Experiment with additional spices like nutmeg or allspice. Just a pinch can add depth to your Maple Ginger Pear Pie.
  • Serving Suggestions: For a delightful experience, serve warm with a scoop of vanilla ice cream or fresh whipped cream to enhance the flavors.

Maple Ginger Pear Pie Recipe FAQs

How do I choose the best pears for my Maple Ginger Pear Pie?
Absolutely! Opt for ripe yet firm pears to avoid a mushy filling. I recommend using Bartlett or Anjou varieties for their flavor and texture. They should yield slightly when pressed but shouldn’t feel overly soft or have dark spots all over.

What’s the best way to store leftovers of Maple Ginger Pear Pie?
For sure! Store any leftovers in the refrigerator, covered, for up to 3 days. This keeps the crust from getting too soggy while preserving the filling’s freshness. Just remember to reheat it in the oven to restore that delightful crispiness before serving.

Can I freeze my Maple Ginger Pear Pie?
Yes, you can! To freeze it, wrap the unbaked pie tightly in plastic wrap and then in aluminum foil. It’s safe in the freezer for up to 3 months. When you’re ready to bake it, don’t thaw—just pop it into a preheated oven and bake about 20-30 minutes longer than the original recipe suggests.

What if my pie crust is getting too brown while baking?
No worries! If you notice the crust browning too quickly, simply cover the edges with a pie shield or a strip of aluminum foil to prevent burning. This way, the filling can continue to bubble while your crust maintains a beautiful golden hue.

Can I use a different sweetener instead of maple syrup?
Very! You can substitute maple syrup with honey or agave nectar if you prefer. Just keep in mind that each sweetener has a unique flavor profile—honey will add a floral note, while agave is milder. Remember to adjust the quantity based on your taste preferences.

Is this pie safe for pets or people with allergies?
It’s best to be cautious! While the Maple Ginger Pear Pie has no direct allergens like nuts or dairy, it does contain ingredients like flour and maple syrup which some folks may be sensitive to. Always check with your guests regarding any dietary restrictions, especially if you plan to serve this delightful pie.

Maple Ginger Pear Pie

Maple Ginger Pear Pie - Your Fall Slice of Heaven

Experience the delightful blend of ripe pears, warm maple syrup, and spicy ginger in this Maple Ginger Pear Pie.
Prep Time 20 minutes
Cook Time 1 hour
Cooling Time 1 hour
Total Time 2 hours 20 minutes
Servings: 8 slices
Course: Dessert
Cuisine: American
Calories: 250

Ingredients
  

For the Crust
  • Double Pie Crust homemade or store-bought
For the Filling
  • 8 cups Fresh Pears peeled and sliced (1/4" thick)
  • 1/3 cup All-Purpose Flour helps thicken the filling
  • 1 tsp Ground Ginger adds spiciness
  • 1/4 tsp Ground Cinnamon enhances flavor profile
  • 3/4 cup Maple Syrup acts as a natural sweetener

Equipment

  • 9-inch pie plate
  • mixing bowl
  • spatula

Method
 

Step-by-Step Instructions
  1. Preheat your oven to 375°F (190°C) and position the rack in the lower third.
  2. In a large mixing bowl, combine the sliced pears, flour, ginger, and cinnamon.
  3. Pour the maple syrup over the pear mixture and fold gently.
  4. Lay the first pie crust in a 9-inch pie plate and fill it with the pear mixture.
  5. Create a lattice pattern with the second pie crust or place it whole with slits for ventilation.
  6. Bake for about 1 hour until the crust is golden and the filling bubbles.
  7. Allow the pie to cool for at least 1 hour before serving.

Notes

Choose ripe but firm pears for best results. Cooling the pie before slicing is important for cleaner slices.

Decadent Raspberry Brownies You Can Make in Minutes

As I stood in my kitchen, the sweet aroma of chocolate wafting through the air, I couldn’t help but feel a little giddy about making Raspberry Brownies. This delightful recipe combines a simple box mix with fresh raspberries, creating a perfectly fudgy treat that’s sure to impress, even the busiest of bakers. The beauty of these brownies lies not only in their luscious texture but also in their ability to transport you to a world where rich chocolate meets the tart brightness of raspberry jam. Plus, they come together in no time, making them an excellent option for last-minute gatherings or cozy nights in. Ready to dive into this easy yet impressive dessert? Let’s get baking!

Why Are Raspberry Brownies So Irresistible?

Decadent flavors collide in these fudgy brownies that infuse rich chocolate with the tartness of fresh raspberries. Speedy preparations make these a breeze to whip up, perfect for any home cook or busy chef. Versatile delights mean you can easily tailor them with your favorite jams or nuts, giving you options for every occasion. Crowd-pleaser guaranteed! These brownies are sure to impress family and friends at any gathering. For more sweet inspiration, check out our delicious Banana Bread Brownies that also bring together comfort and flavor in a snap!

Raspberry Brownie Ingredients

• Get ready to bake these delightful treats with the following must-have ingredients!

For the Brownies

  • Brownie Mix – This is the essential base for your Raspberry Brownies; choose your favorite box mix and follow the package instructions for delicious results.
  • Fresh Raspberries – Vibrant and juicy, they add a burst of flavor; if fresh aren’t available, frozen can suffice without thawing.
  • Raspberry Jam – This sweet addition enhances flavors and creates beautiful swirls throughout the brownies; opt for a natural variety without added preservatives for the best taste.

Additional Toppings

  • Extra Raspberries – Pressing these on top of the batter elevates the fruity appeal and adds a charming look to your brownies.
  • Chopped Nuts (Optional) – Think about adding walnuts or pecans for a delightful crunch; they complement the fudgy brownie texture perfectly!

These can be made effortlessly, ensuring your Raspberry Brownies turn out as deliciously as you envision! Happy baking!

Step‑by‑Step Instructions for Raspberry Brownies

Step 1: Preheat and Prepare
Start by preheating your oven to the temperature indicated for an 8 x 8 inch pan, typically around 350°F (175°C). While the oven warms up, spray your baking pan with non-stick spray to ensure easy removal of the brownies later. This step is crucial for achieving perfectly fudgy Raspberry Brownies without sticking to the sides.

Step 2: Mix the Batter
In a large mixing bowl, prepare the boxed brownie mix according to the package directions. This usually involves combining the mix with water, oil, and eggs. Stir the mixture until just combined, being careful not to overmix, as this could affect the texture of your brownies. You want your batter smooth but still thick and rich.

Step 3: Add Raspberries
Gently fold in the fresh raspberries into the brownie batter. Take your time with this step to ensure that the raspberries are evenly distributed throughout the mixture without breaking them down too much. This will provide bursts of flavor in each bite of your delicious Raspberry Brownies while retaining a lovely fruitiness.

Step 4: Swirl in Raspberry Jam
Spoon dollops of raspberry jam onto the top of the brownie batter. Using a knife, swirl the jam gently into the batter for a marbled effect. Be creative! The jam not only enhances the taste of your Raspberry Brownies but also gives them an attractive appearance that will tempt anyone who sees them.

Step 5: Add Extra Raspberries
To elevate the deliciousness, press a few extra raspberries firmly on top of the brownie batter. This added element not only intensifies the fruity flavor but also makes for a beautiful presentation once baked. The bright berries create a tempting sight that will make your Raspberry Brownies a standout dessert.

Step 6: Bake to Perfection
Carefully place the prepared pan in the preheated oven. Bake your Raspberry Brownies according to the box instructions, generally around 25 to 30 minutes, or until a toothpick inserted into the center comes out with a few moist crumbs. Check a few minutes before the suggested time to prevent overbaking; you want that fudgy texture to shine!

Step 7: Cool Before Cutting
Once baked, remove the brownies from the oven and let them cool in the pan for at least 10-15 minutes. This cooling period allows the brownies to set properly. Once completely cooled, carefully cut them into squares for serving. This step ensures cleaner edges, allowing you to showcase the beautiful raspberry swirls inside your delightful treats.

How to Store and Freeze Raspberry Brownies

Room Temperature: Store your Raspberry Brownies in an airtight container at room temperature for up to 3 days. This keeps them moist and fudgy, perfect for a quick treat!

Fridge: If you want to keep them fresh longer, place the brownies in the refrigerator where they can last for up to a week. Just make sure they’re in an airtight container to prevent drying out.

Freezer: For longer storage, you can freeze your Raspberry Brownies. Wrap them tightly in plastic wrap and then place in a freezer-safe bag. They’ll stay fresh for up to 3 months. Thaw before serving for best results.

Reheating: If enjoying them warm, reheat individual squares in the microwave for about 10-15 seconds. This revives the fudginess and enhances that delicious brownie experience!

Tips for the Best Raspberry Brownies

  • Mix Wisely: Be careful not to overmix the brownie batter after adding raspberries; it can break them down and release too much juice, affecting the texture.

  • Watch the Bake Time: Start checking your Raspberry Brownies a few minutes before the box’s minimum baking time. This helps ensure they remain fudgy and aren’t overbaked.

  • Cool for Clean Cuts: Allow the brownies to cool completely in the pan before cutting. This provides cleaner edges and a better presentation when serving.

  • Use Fresh Berries: Fresh raspberries are ideal for flavor and texture. If using frozen, do not thaw them, or they may add excess moisture to your brownies.

  • Elevate with Toppings: Experiment with additional toppings like chopped nuts or a cream cheese frosting after cooling to add more layers of flavor and texture to your Raspberry Brownies.

Raspberry Brownies Variations & Substitutions

Feel free to get creative and make this recipe your own by exploring these delightful variations!

  • Nutty Boost: Add chopped walnuts or pecans to the batter for extra crunch and flavor; they pair beautifully with the chocolate and raspberry.

  • Jam Swaps: Substitute raspberry jam with strawberry or cherry jam for a new taste experience. Each brings its unique flavor twist, making these brownies versatile enough for any occasion.

  • Vegan-Friendly: To make these brownies vegan, use a plant-based egg substitute and ensure your brownie mix is dairy-free. You’ll enjoy a deliciously moist treat without sacrificing taste!

  • Fruity Layers: Mix in diced peaches or strawberries with the raspberries for an added fruit medley that enhances sweetness and texture. This twist unlocks a whole new realm of flavor, and who doesn’t love fruit?

  • Choco-Lover’s Dream: Fold in chocolate chips along with the raspberries for a double chocolate dessert that will have any chocolate lover swooning. They add melty bursts of chocolate with every bite!

  • Flavor Infusion: Drizzle a bit of orange zest over the top before baking for a citrusy zing that perfectly complements the raspberry’s tartness. It’s a simple change that elevates your brownies to another level!

  • Creamy Frosting: For an indulgent finish, consider layering cream cheese frosting on top after the brownies cool. This can transform your dessert into an even richer experience! If you’re looking for more creative dessert ideas, don’t forget to check out our version of Banana Bread Brownies for inspiration!

  • Spicy Kick: Add a pinch of cayenne pepper or cinnamon into the batter for a surprising warmth that adds depth to the sweet flavors. This unique twist is perfect for those who like a little heat!

Make Ahead Options

These decadent Raspberry Brownies are perfect for meal prep enthusiasts! You can prepare the brownie batter up to 24 hours in advance, storing it in an airtight container in the refrigerator to maintain freshness. Gently fold the raspberries into the mixture, then refrigerate, allowing the flavors to meld overnight. You can also swirl in the raspberry jam ahead of time before covering it for chilling. When you’re ready to bake, simply pour the cold batter into your prepared pan and bake as directed. This makes your busy weeknights a breeze, ensuring you enjoy these rich, fudgy treats with minimal effort and just as delightful flavor!

What to Serve with Decadent Raspberry Brownies

Transform your dessert experience with delightful pairings that elevate your Raspberry Brownies into a feast for the senses.

  • Vanilla Ice Cream: The creamy, cool texture of ice cream provides a perfect contrast to warm brownies, making for indulgent bites.

  • Fresh Whipped Cream: Light and airy, whipped cream adds a lovely touch of sweetness that complements the tartness of the raspberries beautifully.

  • Chocolate Ganache Drizzle: A rich, velvety chocolate ganache enhances the decadent chocolatey goodness of the brownies, taking each mouthful over the top.

  • Berry Compote: A warm berry compote made from mixed berries amplifies the fruity elements, offering a juicy, sweet addition that plays well with the raspberry flavors.

  • Chocolate Covered Strawberries: These not only look fantastic on a dessert platter but also mirror the central theme of rich chocolate paired with fresh fruit.

  • Almond Milk Latte: A warm latte brings a comforting beverage pairing that softens the rich brownie experience, while almond milk elevates the nuttiness.

  • Mint Tea: Providing a light, refreshing contrast, mint tea can cleanse the palate and balance the sweetness of your brownies.

Each of these pairings creates a symphony of flavors that will have your family and friends coming back for more!

Raspberry Brownies Recipe FAQs

What type of brownie mix should I use?
Absolutely! You can use any brownie mix that you enjoy. Read the package instructions carefully, as different brands may call for varying additional ingredients like eggs, oil, or water. Just ensure it fits your taste preference!

How should I store Raspberry Brownies?
To keep your brownies fresh, store them in an airtight container at room temperature for up to 3 days. If you’d like them to last longer, refrigerate them for up to a week. Just remember that storing them in the fridge may affect their fudginess slightly.

Can I freeze Raspberry Brownies?
Yes, indeed! To freeze your brownies, first, let them cool completely. Then, wrap individual squares tightly in plastic wrap and place them in a freezer-safe bag. They’ll keep well for up to 3 months. To enjoy, simply thaw them in the refrigerator and warm them in the microwave for about 10-15 seconds to restore their delicious fudgy texture.

What if my brownies are too dry?
If your Raspberry Brownies turn out dry, it likely means they were overbaked. Always check them a few minutes before the minimum baking time indicated on the package. Ensure you use a toothpick to check; it should come out with some moist crumbs. Also, be mindful of your oven temperature—sometimes they can run hotter or cooler than expected!

Can I use frozen raspberries instead of fresh ones?
Certainly! Frozen raspberries can be used in this recipe without thawing them first. Just fold them gently into the batter as you would with fresh raspberries. However, keep in mind that they may release more moisture during baking, so adjust your baking time a little if needed.

Are these Raspberry Brownies suitable for a vegan diet?
Yes, you can easily make these brownies vegan-friendly! Many brownie mixes on the market are accidentally vegan, and you can substitute eggs with flax eggs (1 tablespoon of ground flaxseed mixed with 2.5 tablespoons of water per egg) or applesauce for added moisture. Always check the ingredients on your brownie mix to ensure it meets your dietary needs.

Raspberry Brownies

Decadent Raspberry Brownies You Can Make in Minutes

Indulge in these Raspberry Brownies, combining rich chocolate and tart raspberries for a delightful dessert.
Prep Time 10 minutes
Cook Time 30 minutes
Cooling Time 15 minutes
Total Time 55 minutes
Servings: 9 slices
Course: Dessert
Cuisine: American
Calories: 180

Ingredients
  

For the Brownies
  • 1 box Brownie Mix Choose your favorite box mix.
  • 1 cup Fresh Raspberries Frozen can be used without thawing.
  • 1/2 cup Raspberry Jam Opt for a natural variety.
Additional Toppings
  • 1/2 cup Extra Raspberries For decoration.
  • 1/2 cup Chopped Nuts Optional, consider walnuts or pecans.

Equipment

  • 8 x 8 inch baking pan
  • mixing bowl
  • Knife

Method
 

Step‑by‑Step Instructions for Raspberry Brownies
  1. Preheat oven to 350°F (175°C) and prepare the baking pan with non-stick spray.
  2. Mix the brownie mix according to package directions in a large mixing bowl.
  3. Gently fold in the fresh raspberries into the brownie batter.
  4. Spoon dollops of raspberry jam onto the top and swirl gently for a marbled effect.
  5. Press a few extra raspberries firmly on top of the brownie batter.
  6. Bake according to box instructions, generally around 25 to 30 minutes.
  7. Cool in the pan for 10-15 minutes before cutting into squares.

Notes

Be careful not to overmix the batter after adding raspberries to maintain texture. Store leftovers in an airtight container.

Sweet Chili Tofu Balls: Crunchy Vegan Bliss in 30 Minutes

As I peeled myself away from yet another uninspiring takeout menu, the scent of something sweet and tangy danced through my mind—it was time for a change. Enter my Sweet Chili Tofu Balls, a vibrant vegan delight that takes just 20 minutes to whip up! Not only are these air-fried nuggets crispy and satisfying, but they also bring a delightful blend of sweet and spicy to your table, easily pairing with steamed rice or noodles for a wholesome meal. Whether you’re a seasoned home chef looking for a simple dish or someone craving a healthier alternative to fast food, these tofu balls will not disappoint. Are you ready to elevate your dinner game? Let’s dive into this easy recipe together!

Why Are Sweet Chili Tofu Balls Amazing?

Quick and Easy: These Sweet Chili Tofu Balls are a breeze to prepare, taking only 20 minutes from start to finish—perfect for busy weeknights!

Flavor Explosion: The sweet and spicy glaze offers a delightful contrast that will excite your palate and keep you coming back for more.

Versatile Delight: Pair them with steamed rice or noodles, and don’t hesitate to experiment with different sauces like teriyaki for various flavor profiles.

Health-Conscious Choice: With each serving clocking in at just 352 calories, these air-fried nuggets provide a satisfying and guilt-free alternative to fast food.

Crowd-Pleaser: Impress friends and family at your next gathering with this vegan dish. Ideal for both seasoned chefs and novice cooks, it’s bound to be a hit!

Sweet Chili Tofu Balls Ingredients

For the Sauce
Sweet Chili Sauce – Adds sweetness and spice to the dish; use any preferred store-bought sweet chili sauce.
Water – Adjusts sauce consistency; add as needed for desired thickness.
Gochujang (Korean chili paste) – Provides heat and depth; can be replaced with another chili paste if unavailable.
Tomato Ketchup – Contributes sweetness and tanginess; any ketchup variety works well.
Sesame Oil – Imparts a nutty flavor; olive or vegetable oil can be used as a substitute, albeit with a different taste.
Sugar – Enhances sweetness; feel free to reduce or switch for agave or maple syrup if desired.
Rice Vinegar – Adds acidity; regular white vinegar can serve as an alternative.

For the Tofu Balls
Air Fried Tofu Balls – The key protein component; can be substituted with store-bought vegan meatballs or homemade variations.
Garlic (minced) – Provides aromatic flavor and depth to the sauce; fresh garlic is highly recommended.
Oil – Used for sautéing garlic; choose any cooking oil you have on hand.

For Garnish
Chopped Green Onions/Scallions – Adds freshness and color; perfect for topping off the dish.
Sesame Seeds – Used as a garnish for added texture; optional but adds appealing visual contrast.

For Serving
Steamed Rice or Noodles – Ideal accompaniment to serve the Sweet Chili Tofu Balls; they’ll soak up the delicious sauce beautifully.

Step‑by‑Step Instructions for Sweet Chili Tofu Balls

Step 1: Prepare the Sauce
In a mixing bowl, combine sweet chili sauce, water, gochujang, tomato ketchup, sesame oil, sugar, and rice vinegar. Whisk the ingredients together until smooth, ensuring the gochujang is fully dissolved. This vibrant sauce will be the star of your Sweet Chili Tofu Balls, so keep it set aside while you work on the other components. It should have a glossy finish.

Step 2: Sauté the Garlic
In a large pan, heat 1 tablespoon of cooking oil over medium heat. Once the oil is shimmering, add the minced garlic and sauté for about 1 minute, stirring constantly until it turns golden and aromatic. Be careful not to burn the garlic, as that can lend a bitter taste to your Sweet Chili Tofu Balls.

Step 3: Simmer the Sauce
Pour the prepared sauce mixture into the pan with the sautéed garlic. Increase the heat to medium-high and bring the mixture to a gentle boil. Allow it to simmer for about 3-5 minutes, stirring occasionally, until the sauce begins to thicken slightly. You’ll know it’s ready when it coats the back of a spoon.

Step 4: Coat the Tofu Balls
Add the air-fried tofu balls to the simmering sauce and stir gently to coat each piece thoroughly. Ensure that the tofu balls are enveloped in the sweet and spicy glaze, allowing them to absorb the flavors. If the sauce is too thick, feel free to add a splash of water to achieve your desired consistency.

Step 5: Heat the Tofu Balls
Continue cooking the coated tofu balls in the sauce for an additional 1-2 minutes, stirring occasionally to ensure even heating. The tofu balls should be hot throughout and glistening with the sauce. Keep an eye on them; they should be well-coated and beautifully shiny when done.

Step 6: Garnish and Serve
Remove the pan from heat and elevate your Sweet Chili Tofu Balls by garnishing with chopped green onions and sesame seeds. Serve them immediately over steamed rice or toss with noodles for a delightful meal. Let the vibrant colors and aromas entice your loved ones as you dish up this homemade delight.

Make Ahead Options

These Sweet Chili Tofu Balls are a fantastic choice for meal prep enthusiasts! You can prepare the sauce (excluding the sautéed garlic) up to 24 hours in advance. Simply mix the sweet chili sauce, gochujang, ketchup, sesame oil, sugar, rice vinegar, and water, and refrigerate it in an airtight container. Additionally, you can air-fry the tofu balls and store them separately in the fridge for up to 3 days. When you’re ready to serve, reheat the sauce on the stovetop, add the sautéed garlic, and then toss in the tofu balls to coat them in the luscious glaze. This not only saves time but ensures your Sweet Chili Tofu Balls are just as delicious!

Sweet Chili Tofu Balls Variations

Feel free to get creative with these Sweet Chili Tofu Balls and customize them to suit your taste!

  • Chickpea Balls: Replace tofu with chickpeas for a hearty, protein-packed alternative that’s equally satisfying.

    These chickpea balls bring a delightful texture while soaking up the delicious sauce just as well.

  • Teriyaki Twist: Swap out the sweet chili sauce for teriyaki sauce to create a different flavor profile.

    This version adds a sweet, tangy bite that pairs beautifully with traditional Asian sides like rice or noodles.

  • Vegetable Boost: Toss in colorful veggies like bell peppers or snap peas for extra nutrition and crunch.

    Adding vegetables not only enhances taste but also contributes vibrant colors that make your dish even more visually appealing.

  • Spice it Up: Increase the heat by adding extra gochujang or incorporating fresh chili peppers into the sauce.

    If you enjoy a fiery kick, don’t hold back—it’ll elevate your Sweet Chili Tofu Balls to a whole new level of excitement!

  • BBQ Variation: Use homemade BBQ sauce instead of sweet chili for a smoky, tangy option.

    This swap turns your tofu balls into a bold dish that’s excellent for summer gatherings or casual dinners.

  • Maple Sweetness: Substitute sugar with maple syrup for a natural sweetener that adds complexity to the flavor.

    The maple syrup creates a warm hint of sweetness that will surprise your taste buds in the best way!

  • Mushroom Magic: Incorporate finely chopped mushrooms into the tofu mix for added umami and flavor depth.

    Mushrooms not only boost the taste but also provide a satisfying texture that complements the crispy exterior of the tofu balls.

  • Serve with Noodles: Try serving your Sweet Chili Tofu Balls over a bed of noodles instead of rice for a delightful twist.

    This pairing gives your meal an entirely new character, perfect for slurping up those delicious flavors!

Explore these variations and make this dish your own, creating a truly memorable meal for you and your loved ones. And if you’re in the mood for more flavors, consider trying the Honey Chili Chicken or a comforting bowl of Homemade Sweet Orange Jam to accompany your culinary journey!

Storage Tips for Sweet Chili Tofu Balls

Fridge: Store leftovers in an airtight container and refrigerate for up to 3 days. This helps maintain the flavor and texture of your Sweet Chili Tofu Balls.

Freezer: For longer storage, freeze the tofu balls in a single layer on a baking sheet, then transfer to a freezer-safe container for up to 2 months.

Reheating: When ready to enjoy, thaw overnight in the fridge, then reheat in a pan over medium heat until warmed through. Alternatively, use the microwave in short intervals until hot.

Avoid Sogginess: To keep the tofu balls crispy during reheating, consider reheating them uncovered or in an air fryer for a few minutes.

What to Serve with Sweet Chili Tofu Balls

Elevate your dining experience with vibrant flavors and hearty textures, all while keeping it wholesome and delicious.

  • Coconut Rice: The subtle sweetness of coconut rice complements the spicy glaze beautifully, enhancing the overall flavor of the meal.

  • Steamed Broccoli: Add a fresh, crunchy vegetable to your plate. The bright green color and earthiness provide a lovely contrast to the tofu balls.

  • Crispy Spring Rolls: These add a delightful crunch and can be filled with fresh veggies, offering a satisfying bite alongside your tofu dish.

  • Zucchini Noodles: For a low-carb option, zucchini noodles are light and can soak up the sweet chili sauce, making each bite flavorful.

  • Miso Soup: A warm bowl of miso soup pairs perfectly, enriching the meal with umami flavors while keeping it light.

  • Asian Slaw: The tangy crunch of cabbage and carrots in an Asian-inspired slaw brings freshness and balances the sweetness of the tofu balls.

  • Chili Garlic Edamame: These provide a punch of flavor and satisfyingly chewy texture, making them an irresistible side.

  • Jasmine Tea: This fragrant tea cleanses the palate between bites and adds an elegant touch to your dining experience.

  • Mango Sorbet: To finish off on a sweet note, a refreshing mango sorbet provides a delightful contrast to the savory aspects of the meal.

Expert Tips for Sweet Chili Tofu Balls

  • Cook Tofu Properly: Ensure your air-fried tofu balls are crispy before adding them to the sauce, which prevents sogginess and enhances the texture.

  • Garlic Magic: Sauté the garlic just until golden; burning it produces a bitter flavor that can overpower your Sweet Chili Tofu Balls.

  • Sauce Adjustments: Feel free to modify sweetness or spice levels based on personal preference by adjusting sugar or gochujang amounts for desired taste.

  • Consistency Control: For a thicker sauce, reduce water. If it’s too thick, gradually add more until you reach your preferred sweetness and stickiness.

  • Garnish Generously: Don’t skimp on garnishes like green onions and sesame seeds. They add freshness and a nice crunch to every delicious bite!

Sweet Chili Tofu Balls Recipe FAQs

How do I select the best tofu for Sweet Chili Tofu Balls?
Absolutely! For the best texture, choose extra-firm tofu. Look for tofu that is well-pressed and has minimal moisture. It should have a firm density and not have dark spots all over, which indicates possible spoilage. Pressing it before cooking can help remove excess moisture and create crispier tofu balls.

How should I store leftover Sweet Chili Tofu Balls?
Very good question! Store any leftovers in an airtight container in the refrigerator for up to 3 days. To maintain their texture, gently reheat them in a pan over medium heat or in the microwave, ensuring they are heated just enough to warm through without becoming soggy.

Can I freeze Sweet Chili Tofu Balls?
Yes, you can! To freeze, place the cooked tofu balls in a single layer on a baking sheet and freeze until solid. Then transfer them to a freezer-safe container or bag. They will stay fresh for up to 3 months. To reheat, thaw overnight in the refrigerator, then warm them in a pan or air fryer for that freshly-made crispiness.

What should I do if the sauce is too thin or thick?
If your sauce is too thin, simply return it to the heat and let it simmer a little longer to thicken up, stirring occasionally. For a thicker sauce, reduce the amount of added water in the initial mixing step. Conversely, if it’s too thick, gradually add more water while cooking until you achieve your desired consistency; always whisk well between additions for a smooth blend!

Are there any dietary considerations for making Sweet Chili Tofu Balls?
Definitely! This recipe is vegan-friendly, making it a fantastic option for those avoiding animal products. However, be cautious with store-bought sweet chili sauce, as some brands may contain fish sauce or modify their ingredients. Always check labels if you have allergies, and consider using homemade versions to control the ingredients completely.

Sweet Chili Tofu Balls

Sweet Chili Tofu Balls: Crunchy Vegan Bliss in 30 Minutes

Delight in these Sweet Chili Tofu Balls, a crunchy vegan treat bursting with sweet and spicy flavors, ready in just 20 minutes!
Prep Time 10 minutes
Cook Time 20 minutes
Total Time 30 minutes
Servings: 4 balls
Course: Other
Cuisine: Vegan
Calories: 352

Ingredients
  

For the Sauce
  • 1 cup Sweet Chili Sauce Any preferred store-bought variety
  • 2 tablespoons Water Add as needed for desired thickness
  • 2 tablespoons Gochujang (Korean chili paste) Can be replaced with another chili paste
  • 2 tablespoons Tomato Ketchup Any variety works well
  • 1 tablespoon Sesame Oil Can substitute with olive or vegetable oil
  • 1 tablespoon Sugar Can be reduced or replaced with agave or maple syrup
  • 1 tablespoon Rice Vinegar White vinegar can be used as an alternative
For the Tofu Balls
  • 14 ounces Air Fried Tofu Balls Can be substituted with store-bought vegan meatballs
  • 2 cloves Garlic (minced) Fresh garlic is highly recommended
  • 1 tablespoon Oil Any cooking oil on hand for sautéing
For Garnish
  • 2 tablespoons Chopped Green Onions/Scallions For topping
  • 1 tablespoon Sesame Seeds Optional for garnish
For Serving
  • 4 servings Steamed Rice or Noodles Ideal accompaniment

Equipment

  • Large mixing bowl
  • large pan
  • whisk

Method
 

Step-by-Step Instructions
  1. In a mixing bowl, combine sweet chili sauce, water, gochujang, tomato ketchup, sesame oil, sugar, and rice vinegar. Whisk until smooth and set aside.
  2. In a large pan, heat oil over medium heat. Add minced garlic and sauté for about 1 minute until golden and aromatic.
  3. Pour the prepared sauce into the pan with the sautéed garlic, increase heat, and simmer for 3-5 minutes until slightly thickened.
  4. Add the air-fried tofu balls to the sauce and stir gently to coat. Add a splash of water if the sauce is too thick.
  5. Cook the coated tofu balls in the sauce for an additional 1-2 minutes until hot and glistening.
  6. Remove from heat and garnish with chopped green onions and sesame seeds. Serve immediately over rice or toss with noodles.

Notes

Ensure tofu is crispy before adding to sauce to maintain texture. Adjust sweetness and spice levels based on preference.

Decadent Brownie Petit Fours for Elegant Celebrations

As I stood in my kitchen, the rich aroma of melting chocolate enveloped me, whisking me away to a more elegant era of dessert-making. Today, I’m excited to share my recipe for Brownie Petit Fours, which transform classic brownies into bite-sized masterpieces. These delightful treats are not just a feast for the eyes; they boast a luscious ganache and a sprinkle of fleur de sel, elevating them into the realm of refined desserts. Ideal for any sophisticated gathering—be it a wedding, birthday, or holiday fête—these petit fours will impress your guests while providing an indulgent experience. Not only are they visually striking, but they’re also surprisingly easy to make! So, are you ready to dazzle your loved ones with this delectable creation? Let’s dive into the world of homemade elegance!

Why are Brownie Petit Fours a Must-Try?

Unforgettable Presentation: These brownie petit fours are a feast for the eyes. Their elegant, small size makes them perfect for impressing guests at any special event.

Luscious Ganache: The smooth, rich ganache coating enhances the chocolate flavor while adding a silky texture that melts in your mouth.

Easy to Master: With simple ingredients and straightforward steps, you don’t need to be a pastry chef to create gourmet desserts at home.

Versatile Enjoyment: Whether for weddings, birthdays, or casual gatherings, these treats fit perfectly into any occasion. They even pair beautifully with coffee or dessert wine!

If you love even more creative dessert ideas, don’t miss out on my Banana Bread Brownies, another delicious way to elevate your home baking game!

Brownie Petit Fours Ingredients

For the Brownies
Semisweet Chocolate (4 ounces) – Provides rich chocolate flavor and structure; consider milk chocolate for a sweeter taste.
Unsalted Butter (¾ cup or 165g) – Adds richness and moisture; use coconut oil for a dairy-free option.
Granulated Sugar (¾ cup or 150g) – Sweetens the brownies; no substitute necessary for optimal sweetness.
Light Brown Sugar (½ cup or 100g) – Enhances sweetness and moisture; can be swapped with regular brown sugar in equal amounts.
Eggs (3 large) – Binds and adds moisture; unfortunately, no egg substitutes are recommended for this recipe.
Vanilla Extract (1½ teaspoons) – Adds depth of flavor; almond extract can be used for a different flavor profile.
All-Purpose Flour (1 cup or 140g) – Provides structure; for gluten-free brownies, use a gluten-free flour blend.
Cocoa Powder (¾ cup or 65g) – Intensifies chocolate flavor; try Dutch-processed cocoa for an alternative taste.
Salt (¾ teaspoon) – Balances sweetness and enhances flavor; kosher salt makes a fine alternative.

For the Ganache
Heavy Whipping Cream (¾ cup or 6 ounces) – Essential for ganache texture; coconut cream is a great dairy-free substitute.

For Garnish
Fleur de Sel – Imparts a lovely contrast in flavor; feel free to use a pinch of sea salt instead if needed.

These delectable Brownie Petit Fours are sure to delight at your next gathering, bringing elegance to any occasion!

Step‑by‑Step Instructions for Brownie Petit Fours

Step 1: Preheat the Oven
Begin by preheating your oven to 350°F (175°C) to ensure the optimal baking environment for your Brownie Petit Fours. While the oven heats, prepare an 8×8-inch baking pan by lining it with parchment paper. This will allow for easy removal of the brownies later, keeping their refined shape intact.

Step 2: Melt Chocolate and Butter
In a double boiler or microwave-safe bowl, combine 4 ounces of semisweet chocolate and ¾ cup of unsalted butter. Heat gently until both ingredients are smooth and fully melted, stirring occasionally to prevent burning. This mixture will become the rich foundation for your brownies, setting the stage for that delectable flavor.

Step 3: Mix in Sugars and Eggs
Once the chocolate and butter are melted, remove from heat and whisk in ¾ cup granulated sugar and ½ cup light brown sugar until thoroughly combined. Add 3 large eggs one at a time, mixing well after each addition, along with 1½ teaspoons of vanilla extract, until the batter is glossy and well-blended. This step infuses the batter with sweetness and a touch of warmth.

Step 4: Incorporate Dry Ingredients
Sift 1 cup of all-purpose flour, ¾ cup of cocoa powder, and ¾ teaspoon of salt into the chocolate mixture. Gently fold the dry ingredients into the wet mixture using a spatula until just combined. Be careful not to overmix, as this can lead to tougher brownies. The batter should be smooth with a richness that promises chocolatey bliss for your Brownie Petit Fours.

Step 5: Bake the Brownies
Pour the brownie batter into your prepared pan and spread it evenly. Bake in the preheated oven for 20–25 minutes, or until a toothpick inserted into the center comes out with a few moist crumbs. This indicates the brownies are fudgy and perfect, ideal for cutting into petite squares later for your elegant dessert.

Step 6: Cool the Brownies
Once baked, remove the brownies from the oven and allow them to cool completely in the pan. This may take about 30 minutes. Cooling is vital to firm up the texture, making it easier to cut them into beautiful petit fours without crumbling. Patience is key here!

Step 7: Prepare the Ganache
While the brownies cool, prepare the decadent ganache. In a saucepan, heat ¾ cup of heavy whipping cream over medium heat until it begins to simmer. Pour the hot cream over 4 ounces of chopped semisweet chocolate in a bowl and let it sit for a few minutes. Then stir until the mixture is velvety smooth; this will coat your brownie squares in luscious elegance.

Step 8: Cut and Dip
Once the brownies are completely cool, remove them from the pan and cut them into small squares or rectangles, creating bite-sized pieces perfect for serving as petit fours. Dip each piece into the prepared ganache, ensuring they are fully coated, and place them on a wire rack to allow the excess ganache to drip off.

Step 9: Add the Finishing Touch
Before the ganache sets, sprinkle a touch of fleur de sel or sea salt over each brownie petit four. This final step enhances the chocolate flavor and adds a delightful contrast. Allow the ganache to fully harden at room temperature before serving, creating an exquisite bite with a crunchy shell surrounding the fudgy center. Enjoy this elegant dessert!

How to Store and Freeze Brownie Petit Fours

Room Temperature: Store leftover brownie petit fours in an airtight container at room temperature for up to 3 days to keep them fresh while maintaining their fudgy texture.

Fridge: For extended freshness, refrigerate the petit fours in an airtight container for up to a week. The cool temperature can enhance the ganache’s firmness.

Freezer: For longer storage, freeze the brownie petit fours in a single layer before transferring to a freezer-safe container. They will last for up to 3 months without losing their delightful flavor.

Reheating: To enjoy, simply thaw in the refrigerator overnight or leave at room temperature for a couple of hours. The brownies can be gently warmed in the microwave for a few seconds for that fresh-baked experience!

Expert Tips for Brownie Petit Fours

  • Avoid Overmixing: Gently fold dry ingredients into the wet mixture to prevent tough brownies. Overmixing will affect the delicate texture of the Brownie Petit Fours.

  • Choose Quality Chocolate: Opt for high-quality semisweet chocolate for both the brownies and ganache. It significantly enhances the flavor of your dessert.

  • Cool Completely: Ensure the brownies cool completely in the pan before cutting. This helps maintain their shape and prevents the ganache from melting when dipped.

  • Flavor Variation: Consider adding chopped nuts or flavored extracts to the batter for a unique twist on the classic Brownie Petit Fours.

  • Perfect Ganache: Allow the heavy whipping cream to just simmer—not boil—before pouring it over the chocolate for a smoother ganache consistency.

Make Ahead Options

These Brownie Petit Fours are an excellent choice for meal prep, saving you time for entertaining or special occasions! You can bake the brownies up to 24 hours in advance; once cooled, simply wrap them tightly in plastic wrap to lock in moisture and freshness. The ganache can also be made up to 3 days ahead; keep it refrigerated in an airtight container and gently reheat it in the microwave before dipping. When you’re ready to serve, just cut the brownies into squares, dip them in the ganache, and allow them to set at room temperature. By preparing components in advance, you’ll ensure these indulgent treats remain just as delicious while making your festivities effortlessly elegant!

What to Serve with Brownie Petit Fours

Pairing these elegant bite-sized desserts with the right accompaniments can elevate your gathering.

  • Velvety Ice Cream: A scoop of vanilla bean ice cream adds a creamy contrast, enhancing the rich chocolate experience of your petit fours.

  • Rich Coffee: A hot cup of espresso or brewed coffee complements the sweetness and provides a delightful balance to the fudgy texture.

  • Fresh Berries: Raspberries or strawberries on the side add a pop of freshness and tartness, beautifully contrasting the rich chocolate ganache.

  • Dessert Wine: A glass of Port or dessert wine pairs exquisitely, enhancing the flavor profiles of both the chocolate and the overall experience.

  • Whipped Cream: Light and airy whipped cream dolloped on the plate provides a soft texture that enhances each bite along with the brownie.

  • Mint Leaves: A sprinkle of fresh mint leaves not only adds a touch of color but also introduces a refreshing flavor that cuts through the richness.

Indulging in these pairings while savoring your Brownie Petit Fours gives any celebration a more sophisticated touch!

Brownie Petit Fours Variations & Substitutions

Feel free to embrace your creativity with these variations that will elevate your Brownie Petit Fours into a uniquely personal treat!

  • Dairy-Free: Substitute unsalted butter and heavy cream with coconut oil and coconut cream for a delicious dairy-free option.
  • Gluten-Free: Use a gluten-free flour blend in place of all-purpose flour to cater to gluten-sensitive guests.
  • Nuts Added: Fold in chopped walnuts or pecans into the brownie batter for added texture and a nutty flavor twist.
  • Flavored Ganache: Infuse your ganache with espresso powder or orange zest for an exceptional flavor enhancement.
  • Fruit Topping: Garnish with fresh raspberries or strawberries for a vibrant, fruity contrast to the rich chocolate.
  • Mini Molds: Pour the batter into mini muffin tins for adorable, bite-sized brownie bites instead of the classic squares.
  • Fancier Decor: Try decorating with edible gold leaf or intricate chocolate designs for a stunning presentation at upscale events.
  • Spicy Kick: Add a pinch of cayenne pepper to the brownie batter for a surprising and delightful heat, a unique take on chocolate desserts!

For more delightful ideas, check out my Banana Bread Brownies for another scrumptious twist on classic recipes.

Brownie Petit Fours Recipe FAQs

How do I choose the right chocolate for my Brownie Petit Fours?
Absolutely! I recommend using high-quality semisweet chocolate for both the brownies and ganache, as this impacts the overall flavor significantly. Look for chocolate with a cacao content of 60% to 70% for rich and balanced sweetness. If you prefer a sweeter treat, milk chocolate can be substituted; just adjust the sugar in the recipe accordingly.

How should I store leftover brownie petit fours?
For best results, store your brownie petit fours in an airtight container at room temperature for up to 3 days. This will keep them fresh while preserving their fudgy texture. If you plan to keep them longer, refrigerate them for up to a week. Just remember to let them come to room temperature before serving for the best flavor!

Can I freeze brownie petit fours?
Very! To freeze your brownie petit fours, first, place them in a single layer on a baking sheet and freeze until hardened (about 1 to 2 hours). Then, transfer them to a freezer-safe container or zip-top bag, where they can last for up to 3 months. When you’re ready to enjoy, thaw them in the refrigerator overnight or leave them at room temperature for a couple of hours—so simple and convenient!

What if my brownie batter is too thick or appears dry?
If your brownie batter seems thick or dry, it may be due to over-measuring the flour or not enough liquid. Be sure to spoon the flour into your measuring cup rather than scooping directly from the bag, as this can compact the flour. If the batter looks too thick, add a tablespoon of milk or melted butter to loosen it up—this will help achieve that gooey, fudgy texture!

Are these brownie petit fours suitable for a gluten-free diet?
Absolutely! To make your Brownie Petit Fours gluten-free, simply replace the all-purpose flour with a gluten-free flour blend, ensuring it’s one that’s suitable for baking. Just be sure to check that all other ingredients, such as baking powder if you choose to use it, are also gluten-free. Enjoying these treats while accommodating dietary needs is entirely possible!

Can I use substitutes for the eggs in this recipe?
No substitutes for eggs are recommended in this particular recipe, as they play a crucial role in binding the brownie ingredients together. However, if you’re looking for egg alternatives for a different recipe, you might consider using a flax egg (1 tablespoon flaxseed meal mixed with 2.5 tablespoons water) per egg, but be aware this will change the texture and flavor. For this decadent indulgence, sticking to the original ingredients is highly recommended for the best results.

Brownie Petit Fours

Decadent Brownie Petit Fours for Elegant Celebrations

Indulge in Brownie Petit Fours, bite-sized chocolate masterpieces perfect for elegant celebrations.
Prep Time 30 minutes
Cook Time 25 minutes
Cooling Time 30 minutes
Total Time 1 hour 25 minutes
Servings: 16 pieces
Course: Dessert
Cuisine: American
Calories: 120

Ingredients
  

For the Brownies
  • 4 ounces Semisweet Chocolate Provides rich chocolate flavor and structure; consider milk chocolate for a sweeter taste.
  • ¾ cup Unsalted Butter Adds richness and moisture; use coconut oil for a dairy-free option.
  • ¾ cup Granulated Sugar Sweetens the brownies; no substitute necessary for optimal sweetness.
  • ½ cup Light Brown Sugar Enhances sweetness and moisture; can be swapped with regular brown sugar in equal amounts.
  • 3 large Eggs Binds and adds moisture; unfortunately, no egg substitutes are recommended for this recipe.
  • teaspoons Vanilla Extract Adds depth of flavor; almond extract can be used for a different flavor profile.
  • 1 cup All-Purpose Flour Provides structure; for gluten-free brownies, use a gluten-free flour blend.
  • ¾ cup Cocoa Powder Intensifies chocolate flavor; try Dutch-processed cocoa for an alternative taste.
  • ¾ teaspoon Salt Balances sweetness and enhances flavor; kosher salt makes a fine alternative.
For the Ganache
  • ¾ cup Heavy Whipping Cream Essential for ganache texture; coconut cream is a great dairy-free substitute.
For Garnish
  • Fleur de Sel Imparts a lovely contrast in flavor; feel free to use a pinch of sea salt instead if needed.

Equipment

  • 8x8 inch baking pan
  • Double boiler or microwave-safe bowl
  • spatula
  • Sifter
  • Wire rack

Method
 

Step-by-Step Instructions for Brownie Petit Fours
  1. Preheat your oven to 350°F (175°C) and prepare an 8x8-inch baking pan with parchment paper.
  2. Melt 4 ounces of semisweet chocolate and ¾ cup of unsalted butter in a double boiler or microwave, stirring until smooth.
  3. Whisk in ¾ cup granulated sugar and ½ cup light brown sugar until combined. Add 3 large eggs one at a time, mixing well, along with 1½ teaspoons of vanilla extract.
  4. Sift in 1 cup of all-purpose flour, ¾ cup cocoa powder, and ¾ teaspoon salt. Gently fold until just combined.
  5. Pour the batter into the pan and bake for 20–25 minutes or until a toothpick comes out with a few moist crumbs.
  6. Let the brownies cool completely in the pan for about 30 minutes.
  7. Prepare the ganache by heating ¾ cup of heavy whipping cream until it simmers, then pour it over 4 ounces of chopped chocolate and stir until smooth.
  8. Cut the cooled brownies into small squares or rectangles and dip each into the ganache, allowing excess to drip off.
  9. Before the ganache sets, sprinkle fleur de sel over each brownie, then let the ganache harden before serving.

Notes

These Brownie Petit Fours are perfect for elegant gatherings and can be stored at room temperature or in the fridge for extended freshness.

Crispy Buffalo Chicken Dip Egg Roll: A Game Day Delight

As I scoured the fridge for a game day snack, a lightbulb moment struck—what if I could merge two beloved favorites into one irresistible bite? Enter the Buffalo Chicken Dip Egg Roll, a delightful creation that wraps the creamy, spicy goodness of buffalo chicken dip in a perfectly crispy shell. Not only is this crowd-pleaser a breeze to whip up, but it’s also customizable to fit your taste preferences—whether you’re seeking a healthier air-fried version or the classic fried indulgence. These egg rolls are bound to impress your friends and family at any gathering, and they’re perfect for cozy nights in as well. Ready to take your appetizer game to the next level? Let’s dive into this delicious recipe!

Why are Buffalo Chicken Dip Egg Rolls a must-try?

Flavor Explosion: Each bite delivers a perfectly balanced blend of creamy, spicy, and cheesy goodness that everyone will love.

Crowd-Pleaser: Ideal for any gathering, these egg rolls will have your friends and family coming back for more, making them the star of game day or parties.

Customizable: Tailor the filling to satisfy every palate—swap out chicken for beans for a vegetarian twist or adjust the spice level to suit your taste!

Easy Prep: With just a few simple steps, you can have these ready in no time. They’re as fuss-free as my other favorite appetizers like Homemade Chicken Rolls or Savory Chicken Veggie Strips.

Versatile Cooking Options: Whether you prefer frying, baking, or air frying, there’s a method for everyone. Perfect for a quick snack or an impressive appetizer!

Buffalo Chicken Dip Egg Roll Ingredients

  • For the Filling
    Cooked and Shredded Chicken – Provides the main protein and flavor of the dip; substitute with rotisserie chicken for speedy prep.
    Cream Cheese – Adds creaminess and helps bind the filling; ensure it’s softened for easy mixing.
    Buffalo Wing Sauce – Gives the dish its signature spicy kick; Frank’s RedHot is recommended for the best flavor.
    Ranch Dressing – Adds a creamy, tangy touch; can be swapped with blue cheese dressing for a bolder flavor.
    Shredded Cheddar Cheese – Contributes to the cheesy goodness; alternatives include Monterey Jack or a cheese blend.
    Chopped Green Onions – Provides a fresh crunch and enhances flavor; feel free to omit if you prefer less texture.
    Garlic Powder & Onion Powder – Adds depth and flavor; using fresh garlic and onion will offer a more intense taste.

  • For the Wrapping and Cooking
    Egg Roll Wrappers – Encases the filling and is crucial for structure; ensure wrappers are fresh for the best results.
    Vegetable Oil (for frying) – Essential for achieving a crispy exterior; opt for a high smoke point oil like canola or peanut oil.
    Water – Used to seal the egg roll wrappers securely, ensuring they hold their shape during cooking.

  • Optional Garnishes
    Ranch Dressing – Perfect for dipping and adds an extra layer of flavor.
    Blue Cheese Dressing – A classic pairing that complements the spiciness of the egg rolls beautifully.
    Chopped Green Onions & Shredded Cheddar – Great for toppings that enhance presentation and taste when serving.

With these Buffalo Chicken Dip Egg Roll ingredients, you’re all set to create a delicious snack that will surely impress!

Step‑by‑Step Instructions for Buffalo Chicken Dip Egg Roll

Step 1: Prepare the Dip
In a large mixing bowl, combine shredded chicken, softened cream cheese, buffalo wing sauce, ranch dressing, shredded cheddar, chopped green onions, garlic powder, and onion powder. Use a spatula to blend all the ingredients thoroughly until the mixture is creamy and well combined. Cover the bowl and refrigerate for at least 30 minutes to allow the flavors to meld beautifully.

Step 2: Assemble the Egg Rolls
On a clean, flat surface, lay out an egg roll wrapper with one corner pointing toward you. Spoon 2-3 tablespoons of the chilled buffalo chicken dip mixture onto the center of the wrapper, carefully fold the corner over the filling, and roll it tightly. Seal the edges by dampening them with a little water, ensuring no filling escapes during cooking. Repeat this process until all the filling is used.

Step 3: Heat the Oil
In a deep frying pan, pour about 2-3 inches of vegetable oil and heat it over medium-high heat until it reaches 350°F (175°C). To check if the oil is ready, drop a small piece of egg roll wrapper into the oil; it should sizzle and begin to bubble immediately. Be sure to adjust the heat as needed to maintain the temperature.

Step 4: Fry the Egg Rolls
Carefully place a few assembled buffalo chicken dip egg rolls into the hot oil, ensuring not to overcrowd the pan. Fry them for 2-3 minutes on each side or until they turn golden brown and crispy. Use a slotted spoon to gently flip the egg rolls halfway through to ensure even cooking and a nice, crispy exterior.

Step 5: Drain and Cool
Once fried to a perfect golden brown, remove the egg rolls from the oil and place them on a plate lined with paper towels. This helps absorb any excess oil, keeping the exterior crispy. Let them cool for a couple of minutes before serving, allowing the fillings to set slightly for the best texture when bitten into.

Step 6: Serve and Enjoy
Arrange the buffalo chicken dip egg rolls on a serving platter, optionally garnishing with chopped green onions and shredded cheddar for a pleasing presentation. Serve them warm alongside your favorite dipping sauces, such as ranch or blue cheese dressing, to complement the dish’s bold flavors. Enjoy this delightful game day snack with friends and family!

Make Ahead Options

These Buffalo Chicken Dip Egg Rolls are perfect for meal prep, making it easy to enjoy delicious snacks even on your busiest days! You can assemble the egg rolls up to 24 hours in advance; simply wrap the filling in the egg roll wrappers and place them on a baking sheet lined with parchment paper. Cover and refrigerate them until you’re ready to fry or bake. For longer storage, freeze the assembled egg rolls for up to 3 months—just make sure to place them in an airtight container or freezer bag to maintain quality. When you’re ready to serve, cook them from frozen for an additional couple of minutes, allowing you to enjoy restaurant-quality results with minimal effort and time!

Storage Tips for Buffalo Chicken Dip Egg Rolls

  • Room Temperature: Allow the cooked egg rolls to cool for about 30 minutes before placing them in an airtight container. They can be stored at room temperature for up to 2 hours.

  • Fridge: Store leftover Buffalo Chicken Dip Egg Rolls in an airtight container in the refrigerator for up to 3 days. Reheat in the oven at 350°F (175°C) for 10-15 minutes to regain crispiness.

  • Freezer: For longer storage, freeze assembled but uncooked egg rolls in a single layer on a baking sheet. Once frozen, transfer them to a freezer-safe bag for up to 3 months.

  • Reheating: To reheat frozen egg rolls, fry them directly from the freezer for about 4-5 minutes at 350°F (175°C) or bake at 400°F (200°C) for 15-20 minutes until golden brown.

What to Serve with Buffalo Chicken Dip Egg Rolls

Elevate your game day gathering with delicious sides that complement the savory and spicy flavors of these crowd-pleasing indulgences.

  • Creamy Coleslaw: The cool, crunchy texture of coleslaw balances the rich, spicy flavors of the egg rolls, offering a refreshing contrast with every bite.

  • Buffalo Cauliflower Bites: For a delightful twist on buffalo flavor, these crispy cauliflower bites add an extra layer of heat and are perfect for dipping.

  • Cheesy Potato Skins: Loaded with cheese and bacon, these crunchy potato skins provide a satisfying texture and pair well with the creamy filling of the egg rolls.

  • Classic Ranch Dip: Serve with a side of ranch dip for a cooling contrast. The creamy ranch perfectly complements the spicy buffalo flavor and boosts your dipping experience.

  • Vegetable Platter: Fresh veggies like carrots, celery, and bell peppers add a vibrant crunch and refreshing bite, making your spread healthier and colorful.

  • Crisp Lettuce Wraps: For a lighter option, offer crispy lettuce leaves that pair well with the buffalo chicken flavor, allowing guests to make their own wraps.

  • Sweet Tea or Lemonade: Quench everyone’s thirst with a pitcher of homemade sweet tea or tangy lemonade, providing a refreshing contrast to the spicy egg rolls.

  • Chocolate Chip Cookies: End your meal on a sweet note with warm, gooey chocolate chip cookies that offer a comforting finish after all those savory snacks.

Buffalo Chicken Dip Egg Roll Variations

Feel free to customize these egg rolls to suit your cravings and dietary needs!

  • Air Fryer Option: Brush with oil and cook at 400°F for a healthier alternative that still delivers crunch. Perfect for guilt-free snacking!

  • Baked Version: For a lighter takeaway, brush egg rolls with oil and bake at 400°F for 15-20 minutes until golden brown. You’ll be surprised how delicious baked can be!

  • Spice Adjustment: You can modify the buffalo sauce amount to match your heat preference. Or, give it an extra kick with some cayenne pepper—every bite can be an adventure!

  • Cheese Variations: Why not experiment? Using different cheeses like pepper jack or gouda can create exciting flavor twists. Each choice will bring a unique flair to your egg rolls!

  • Vegetarian Version: Swap out the chicken for black beans or a vegetarian meat alternative. This variation can easily cater to a plant-based diet while keeping the delicious flavors intact.

  • Flavor Infusion: Add in chopped jalapeños or a touch of smoked paprika for extra flavor depth. You know what they say—variety is the spice of life!

  • Veggie Boost: Toss in some finely chopped bell peppers, corn, or spinach for added texture and nutritional value. It’s an easy way to sneak in those extra veggies!

  • Serve with Style: Serve with a zesty homemade ranch or spicy blue cheese dressing, just like you’d enjoy with your favorite finger foods. Nothing like a great dip to elevate the experience!

Enjoying these Buffalo Chicken Dip Egg Rolls can be as customizable as your imagination! For even more crowd-pleasing recipes, check out my other favorites like Homemade Chicken Rolls or Savory Chicken Veggie Strips.

Expert Tips for Buffalo Chicken Dip Egg Rolls

  • Avoid Sogginess: Ensure your oil is hot enough (350°F) before frying. This prevents soggy egg rolls and creates a perfectly crispy texture.

  • Don’t Overcrowd: Fry in small batches to maintain the oil’s temperature. Overcrowding can lead to uneven cooking and less crispy results.

  • Seal Well: Use a bit of water to seal the egg roll wrappers tightly. This keeps them from opening while frying or baking, ensuring that your buffalo chicken dip stays inside.

  • Healthy Cooking: For a lighter version, brush the assembled egg rolls with oil and bake at 400°F for about 15-20 minutes, flipping them halfway for even crispiness.

  • Creative Customization: Feel free to experiment with different fillings. Change the chicken to beans for a vegetarian option, or mix in your favorite veggies to create your own unique buffalo chicken dip egg roll!

Buffalo Chicken Dip Egg Rolls Recipe FAQs

What type of chicken should I use for Buffalo Chicken Dip Egg Rolls?
Absolutely! For the best flavor, use cooked and shredded chicken; rotisserie chicken is a fantastic choice for speedy prep. You can also use leftover chicken or even turkey if you have it on hand.

How can I store left over Buffalo Chicken Dip Egg Rolls?
For optimal freshness, place leftover egg rolls in an airtight container and refrigerate for up to 3 days. When you’re ready to enjoy them again, reheat in the oven at 350°F (175°C) for about 10-15 minutes to restore that delightful crispiness!

Can I freeze Buffalo Chicken Dip Egg Rolls?
Yes! To freeze, assemble your egg rolls but don’t fry them first. Instead, arrange them in a single layer on a baking sheet and freeze until solid. After about an hour, transfer them to a freezer-safe bag where they can stay good for up to 3 months. When you’re ready to cook, you can fry them directly from the freezer or bake them!

How can I make healthier Buffalo Chicken Dip Egg Rolls?
Very! If you’d like a lighter version, brush assembled egg rolls with a small amount of oil and bake them at 400°F (200°C) for 15-20 minutes, flipping halfway through. You can also opt for whole wheat egg roll wrappers and reduce the amount of cream cheese for a healthier twist.

What should I do if my egg rolls start to open while frying?
If this happens, it’s often due to not sealing them well enough. To avoid this, ensure the edges are moistened with water before folding. Additionally, don’t overcrowd the frying pan, as this can cause the temperature to drop, leading to sogginess. If they do open, don’t fret; they’ll still taste great!

Are these egg rolls suitable for people with dietary restrictions?
Certainly! You can customize the filling to accommodate dietary needs. For a vegetarian version, swap out the chicken for black beans or a meat alternative. Just remember to check that the egg roll wrappers are suitable for your specific dietary requirements. Enjoy customizing your Buffalo Chicken Dip Egg Rolls to fit everyone’s preferences!

Buffalo Chicken Dip Egg Roll

Crispy Buffalo Chicken Dip Egg Roll: A Game Day Delight

A delicious Buffalo Chicken Dip Egg Roll that combines creamy, spicy flavors in a crispy shell—perfect for game day gatherings!
Prep Time 30 minutes
Cook Time 15 minutes
Chilling Time 30 minutes
Total Time 1 hour 15 minutes
Servings: 12 egg rolls
Course: Appetizer
Cuisine: American
Calories: 200

Ingredients
  

For the Filling
  • 2 cups Cooked and Shredded Chicken Substitute with rotisserie chicken for speed.
  • 8 oz Cream Cheese Ensure it's softened.
  • 1/2 cup Buffalo Wing Sauce Frank’s RedHot recommended.
  • 1/2 cup Ranch Dressing Can swap with blue cheese.
  • 1 cup Shredded Cheddar Cheese Or Monterey Jack or cheese blend.
  • 1/4 cup Chopped Green Onions Optional.
  • 1 teaspoon Garlic Powder
  • 1 teaspoon Onion Powder
For the Wrapping and Cooking
  • 12 pieces Egg Roll Wrappers Ensure fresh.
  • 2-3 cups Vegetable Oil For frying.
  • 1 cup Water For sealing.
Optional Garnishes
  • 1/2 cup Ranch Dressing For dipping.
  • 1/2 cup Blue Cheese Dressing Pairs well with spiciness.
  • 1/4 cup Chopped Green Onions For topping.
  • 1/2 cup Shredded Cheddar For topping.

Equipment

  • Large mixing bowl
  • Deep frying pan
  • slotted spoon
  • spatula
  • airtight container

Method
 

Step-by-Step Instructions
  1. In a large mixing bowl, combine shredded chicken, softened cream cheese, buffalo wing sauce, ranch dressing, shredded cheddar, chopped green onions, garlic powder, and onion powder. Blend thoroughly until creamy and well combined. Cover and refrigerate for at least 30 minutes.
  2. On a clean, flat surface, lay out an egg roll wrapper with one corner pointing toward you. Spoon 2-3 tablespoons of the chilled buffalo chicken dip mixture onto the center of the wrapper, fold the corner over, and roll tightly. Seal with water.
  3. In a deep frying pan, heat the vegetable oil over medium-high heat until it reaches 350°F (175°C). Check readiness by dropping a wrapper into the oil; it should sizzle.
  4. Carefully place a few assembled egg rolls into the hot oil. Fry for 2-3 minutes per side or until golden brown. Use a slotted spoon to flip halfway through.
  5. Remove egg rolls from oil and place on a plate lined with paper towels. Allow cooling for a few minutes.
  6. Arrange the egg rolls on a serving platter and optionally garnish with chopped green onions and shredded cheddar. Serve warm with ranch or blue cheese dressing.

Notes

These egg rolls can be customized with different fillings and cooking methods, from frying to baking, making them versatile for any occasion.

Thanksgiving Peas with Pancetta: A Sweet & Savory Delight

The aroma of crispy pancetta sizzling in the skillet makes my heart skip a beat. As Thanksgiving approaches, I’m always on the hunt for that perfect side dish that warms the soul and elevates the festive table. This year, I’m thrilled to share my recipe for Thanksgiving Peas with Pancetta and Pear—a dish that’s as easy to whip up as it is delightful to eat. The combination of sweet pears, tender peas, and savory pancetta creates a harmonious blend of flavors and textures that is sure to captivate your guests. Plus, it comes together in a flash, making it a hassle-free addition to your holiday spread. Ready to impress your family and friends with a mere handful of simple ingredients? Let’s dive into this deliciously unique side that’s destined to become a new Thanksgiving favorite!

Why Are Thanksgiving Peas So Irresistible?

Uniquely Delicious: This recipe blends sweet pears with savory pancetta, creating an unforgettable flavor profile that stands out on any Thanksgiving table.
Quick and Easy: You can prepare this dish in just a flash, allowing you more time to focus on the turkey or enjoy festivities with family and friends.
Versatile Substitutions: Don’t have all the ingredients? Feel free to swap in apples for pears or turkey bacon for pancetta—it’s adaptable to your pantry!
Crowd Pleaser: With its vibrant colors and a delightful contrast of textures, it’s not just a side—it’s a dish that will impress everyone, whether they’re foodies or picky eaters.
Serve it alongside mashed potatoes or turkey for a complete Thanksgiving feast that’s both festive and comforting!

Thanksgiving Peas Ingredients

For the Peas
Frozen Peas – The star ingredient, providing a sweet and vibrant taste.
Pear – Adds a delightful sweetness that contrasts beautifully with the pancetta; apples can serve as an alternative.

For the Pancetta
Pancetta – Brings a rich, savory flavor; thick-cut bacon can be a suitable substitute.
Shallots – Infuse aromatic sweetness, with yellow onions being a handy replacement if needed.

For the Dressing
Dijon Mustard – Enhances the dish with a zesty flavor; whole grain mustard offers a unique texture twist.
Lemon – Brightens the dish and balances the flavors; citron juice works if lemon isn’t on hand.

For the Finish
Parsley – Adds a fresh touch and color; chives or green onions can also freshen things up.
Black Pepper – Elevates the overall taste profile; freshly ground is best for optimal flavor.

This Thanksgiving Peas recipe will not only complement your holiday meal but will also become a cherished dish for family gatherings!

Step‑by‑Step Instructions for Thanksgiving Peas

Step 1: Prep the Pear
Start by peeling, slicing, and dicing one pear into small chunks. To prevent browning, toss the pieces in a little lemon juice and set them aside. The vibrant color of the pear will add a delightful sweetness when mixed with the savory pancetta in your Thanksgiving Peas dish.

Step 2: Cook the Pancetta
In a large skillet, heat the pan over medium heat and add the diced pancetta. Sauté for about 5–7 minutes, stirring occasionally until it becomes crispy and golden. Once done, remove the pancetta with a slotted spoon, allowing the excess fat to drain, but leave about 3 tablespoons of grease in the pan for flavor.

Step 3: Sauté the Shallots
Next, add the sliced shallots to the same skillet and sauté them in the pancetta fat over medium heat for about 1 minute, until they become softened and translucent. This step enhances the aromatic sweetness in your Thanksgiving Peas and sets the stage for the additional ingredients.

Step 4: Mix in the Dijon Mustard
Stir in 1 tablespoon of Dijon mustard with the sautéed shallots, coating them well and cooking for another minute. This addition brings a zesty tang that perfectly complements the rich flavors of the pancetta and the sweetness of the pear.

Step 5: Combine All Ingredients
Now, add the frozen peas and prepared pear chunks into the skillet, stirring gently. Cook everything together for about 5 minutes, allowing the peas to warm through and become vibrant green. The combination of textures from the peas and pears will make your Thanksgiving Peas a standout side dish.

Step 6: Finish the Dish
Finally, mix in half of the crispy pancetta along with chopped parsley and a sprinkle of freshly cracked black pepper. Give everything a good stir before transferring the mixture to a serving bowl. Top it with the remaining pancetta and a zest of lemon for a fresh pop of color and flavor.

How to Store and Freeze Thanksgiving Peas

Fridge: Store leftovers in an airtight container for up to 4–5 days. This allows you to enjoy the flavors of the Thanksgiving Peas another day.

Freezer: For longer storage, freeze the dish in a freezer-safe container for up to 3 months. Just be sure to cool it completely before placing it in the freezer.

Reheating: When ready to enjoy, reheat gently on the stovetop or in the microwave, stirring occasionally to maintain the texture of the peas and pancetta.

Make-Ahead: You can prepare this dish ahead of time and store it in the fridge. Just remember to reheat it slowly to avoid overcooking the peas!

What to Serve with Thanksgiving Peas with Pancetta and Pear?

This festive side dish pairs beautifully with comforting and classic flavors that elevate your holiday meal.

  • Roasted Turkey: The juicy, savory flavor of roasted turkey creates a perfect harmony with the sweetness of the peas and pears.

  • Creamy Mashed Potatoes: Silky and buttery, mashed potatoes provide a wonderful texture contrast to the crunchy pancetta and tender peas.

  • Honey-Glazed Carrots: Their natural sweetness complements the savory elements of the Thanksgiving Peas while adding a pop of vibrant color to your plate.

  • Green Bean Almondine: The crisp texture of green beans and the nutty crunch of almonds offer a delightful balance, reminiscent of cozy holiday gatherings.

  • Cranberry Sauce: A tart and sweet burst of flavor, cranberry sauce brightens up the plate, cutting through the richness of the pancetta.

  • Apple Cider Cocktail: This refreshing drink enhances the meal with hints of spice and sweetness, creating a festive atmosphere all around.

Your Thanksgiving Peas will shine even more brightly on a table filled with these complementary delights!

Thanksgiving Peas Variations & Substitutions

Feel free to tweak this recipe and make it your own, adding flavors and ingredients that excite your taste buds!

  • Turkey Bacon: Swap pancetta for turkey bacon to create a leaner version without sacrificing flavor. The smoky notes will still shine through, making it a delightful alternative.

  • Nutty Crunch: Add toasted almonds or walnuts for an extra crunch. Not only does this enhance texture, but it also provides a nutty contrast to the sweet pears.

  • Seasonal Veggies: Incorporate seasonal vegetables like green beans or roasted carrots for added color and nutrition. This versatility ensures you can rotate ingredients based on what’s fresh and available.

  • Fruit Twist: Replace pears with apples for a different kind of sweetness. Their tartness can brighten the overall dish, offering yet another lovely flavor dimension.

  • Spicy Kick: Add a pinch of red pepper flakes to bring some heat into the mix. This tiny tweak will take your Thanksgiving Peas to an exciting new level of flavor.

  • Fresh Herbs: Experiment with different herbs like thyme or sage instead of parsley to give a seasonal twist. Each herb brings a unique fragrance and taste, inviting a fresh take on a classic dish.

  • Gluten-Free Dressing: For a gluten-free option, ensure your mustard and other ingredients are certified gluten-free. This keeps everyone at the table happy while enjoying a guilt-free meal!

  • Creamy Addition: Fold in a splash of cream or a dollop of sour cream for extra richness. This would transform your peas into a luscious side dish that feels indulgent and comforting.

Diving into these variations will not only make this dish more uniquely yours and will create unforgettable memories at your holiday celebrations. Serve alongside mashed potatoes or roasted turkey to round out a perfect Thanksgiving meal!

Make Ahead Options

These Thanksgiving Peas with Pancetta and Pear are a fantastic dish to prep ahead, saving you precious time during the busy holiday season! You can chop the pear and toss it in lemon juice to prevent browning up to 24 hours in advance, and store it in the refrigerator until you’re ready to cook. Additionally, you can cook the pancetta and shallots a day ahead; simply refrigerate them in an airtight container. When you’re ready, just combine the prepped ingredients in a skillet, add the peas and pear, and cook briefly until warmed through. This way, you’ll enjoy a delightful dish that’s just as delicious and packed with flavor but requires minimal effort when it’s time to serve!

Expert Tips for Thanksgiving Peas

Freshness Counts: Using frozen peas is perfect for this dish, but if you have fresh peas, feel free to substitute for an even brighter flavor!

Right Pancetta: Make sure to choose high-quality pancetta for the best savory flavor; thick-cut bacon works too, but it may alter the taste slightly.

Lemon Juice: Don’t skip the lemon juice! It balances sweetness and acidity beautifully. If you forget, the dish may taste flat.

Avoid Greasiness: Drain excess fat after cooking the pancetta but leave some for flavor. Too much grease can make your Thanksgiving Peas soggy.

Mix and Match: Don’t hesitate to experiment with substitutes, like using apples instead of pears or even adding nuts for a crunchy twist! This recipe is versatile.

These tips will help ensure your Thanksgiving Peas are a hit at your holiday gathering!

Thanksgiving Peas with Pancetta and Pear Recipe FAQs

How do I choose the right pears for this recipe?
Absolutely! Look for pears that are slightly firm to the touch but give a little when gently pressed. Avoid any with soft spots or bruising. Varieties like Bartlett or Anjou are great choices due to their sweet flavor and smooth texture.

What’s the best way to store leftover Thanksgiving Peas?
Very! Allow the dish to cool completely, then transfer it into an airtight container. You can store it in the fridge for 4–5 days. Just remember to reheat it gently to maintain that delicious texture.

Can I freeze Thanksgiving Peas?
Yes, you can! To freeze, let the peas cool completely before placing them in a freezer-safe container. They can be frozen for up to 3 months. When you’re ready to enjoy them, thaw in the refrigerator overnight and reheat gently on the stove or microwave.

What should I do if my pancetta isn’t crispy?
No worries! If your pancetta isn’t getting crispy, try increasing the heat slightly but keep an eye on it to avoid burning. Ensure you’re using enough fat in the pan for frying. Cooking in batches can also help achieve that desirable crispiness.

Are there any dietary considerations for this recipe?
Absolutely! This dish is gluten-free as written, but always check your mustard’s label to ensure there are no added gluten ingredients if that’s a concern. For those with meat allergies, you can substitute pancetta with turkey bacon or omit it altogether, using a little olive oil for flavor instead.

Can I make substitutions for the ingredients?
Certainly! If you’re out of pears, apples are a great alternative. You can swap pancetta for turkey bacon or even eliminate it entirely for a vegetarian option. Fresh peas can replace frozen ones, and feel free to mix in some nuts for extra crunch—experiment to find what you love best!

Thanksgiving Peas

Thanksgiving Peas with Pancetta: A Sweet & Savory Delight

Delight your guests with Thanksgiving Peas, a sweet and savory side dish of peas, pancetta, and pears.
Prep Time 10 minutes
Cook Time 15 minutes
Total Time 25 minutes
Servings: 4 servings
Course: Dinner
Cuisine: American
Calories: 180

Ingredients
  

For the Peas
  • 2 cups Frozen Peas
  • 1 medium Pear peeled, sliced, and diced
For the Pancetta
  • 4 oz Pancetta diced
  • 2 medium Shallots sliced
For the Dressing
  • 1 tbsp Dijon Mustard
  • 1 tbsp Lemon juice
For the Finish
  • 2 tbsp Parsley chopped
  • 1 pinch Black Pepper freshly cracked

Equipment

  • large skillet

Method
 

Preparation and Cooking Steps
  1. Start by peeling, slicing, and dicing one pear into small chunks. Toss the pieces in a little lemon juice and set aside.
  2. In a large skillet, heat the pan over medium heat and add the diced pancetta. Sauté for about 5–7 minutes until crispy and golden. Remove with a slotted spoon but leave about 3 tablespoons of fat in the pan.
  3. Add the sliced shallots to the skillet and sauté them in the pancetta fat for about 1 minute until they are softened and translucent.
  4. Stir in 1 tablespoon of Dijon mustard with the sautéed shallots and cook for another minute.
  5. Add the frozen peas and prepared pear chunks into the skillet, stirring gently. Cook for about 5 minutes until the peas are warmed through.
  6. Mix in half of the crispy pancetta along with chopped parsley and a sprinkle of black pepper. Transfer to a serving bowl, topping with the remaining pancetta and a zest of lemon.

Notes

This recipe can be easily adapted with substitutions for pears or pancetta based on availability and preference.

Amazing Steak and Blue Cheese Pizza That’ll Wow Your Tastebuds

The unmistakable sizzle of a steak on the grill instantly transports me to summer evenings spent savoring the great outdoors. Now, imagine that robust flavor elegantly nestled atop a delicate artisan pizza—this is what I want to share with you today: my Amazing Steak and Blue Cheese Pizza. Not only is this recipe quick and easy to whip up, but it also elevates your classic pizza night into a culinary adventure that rivals the best pizzerias. With caramelized onions and earthy mushrooms rounding out the toppings, each bite is a perfect balance of rich, tangy goodness and hearty textures. Trust me; your family and friends are going to ask for seconds! So, are you ready to transform your pizza game and impress your guests? Let’s get cooking!

Why is this pizza a crowd-pleaser?

Decadent flavors: The bold combination of tender steak and blue cheese creates a rich, savory dish that excites taste buds.
Easy preparation: With quick-cooking methods and ingredients, this pizza fits perfectly into a busy weeknight routine.
Versatile toppings: Feel free to mix in seasonal vegetables or your favorite cheese—perhaps trying out variations like goat cheese as in our Vegetable Bake Cheese!
Kid-friendly appeal: Pizza is universally loved, and this gourmet twist will have the whole family asking for more.
Perfect for gatherings: Whether it’s game day or a casual dinner party, this impressive dish will make you the host of the year!

Amazing Steak and Blue Cheese Pizza Ingredients

For the Pizza Base
Whole Wheat Pizza Dough (14 ounces) – Use this hearty dough for a nutty flavor and healthier option; store-bought or homemade works beautifully!

For the Toppings
Shredded Mozzarella (1 cup) – This classic melty cheese creates that gooey texture we love; feel free to experiment with provolone for a twist.
Cooked Steak Strips (1 cup) – Adds protein and a savory punch; utilize leftover steak or pre-cooked strips for a quick preparation.
Blue Cheese Crumbles (4 ounces) – The superstar ingredient that delivers bold, tangy notes; swap in feta for a softer taste if desired.
Sliced Mushrooms (8 ounces, optional) – Infuse earthiness into your pizza; sautéed bell peppers can be used as an alternative for a different flavor profile.
Onion (½, optional) – Caramelizes to provide a sweet, savory touch; shallots can substitute for a milder flavor.
Baby Arugula (handful, optional) – Add for a peppery freshness that balances the richness of the cheese and steak.

For Seasoning
Salt and Pepper (to taste) – Enhances all the flavors; adjust according to your preference to make this amazing steak and blue cheese pizza your own!

Step‑by‑Step Instructions for Amazing Steak and Blue Cheese Pizza

Step 1: Preheat the Oven
Begin by preheating your oven to 400°F (200°C). This temperature will ensure that your crust becomes perfectly golden and crispy while the toppings melt beautifully. Prepare a pizza baking sheet or stone to place your pizza on once it’s assembled, and keep an eye out for any signs of heat, like the oven’s indicator light.

Step 2: Prepare the Toppings
If using, slice half an onion and cook it in a skillet with olive oil over medium heat for about 5-7 minutes, stirring occasionally until it becomes translucent. Next, add 8 ounces of sliced mushrooms and sautée for an additional 5 minutes, or until they’re softened and fragrant, bringing out a wonderful earthiness that complements your Amazing Steak and Blue Cheese Pizza.

Step 3: Roll Out the Dough
Dust a clean surface with flour and take your 14 ounces of whole wheat pizza dough, rolling it out into a round circle approximately 16 inches in diameter. Aim for a thin, even thickness for the crust to become crispy. Use a rolling pin for an effortless and smooth finish, then transfer the dough onto your prepared baking sheet or stone.

Step 4: Add the Cheese Base
Sprinkle 1 cup of shredded mozzarella cheese evenly over the surface of the rolled-out pizza dough. This cheesy layer not only enhances flavor but also acts as a delicious glue for the toppings. Be sure to cover all areas for an unforgettable melted base in your Amazing Steak and Blue Cheese Pizza, leaving a small border for the crust.

Step 5: Layer on the Steak and Vegetables
Distribute 1 cup of cooked steak strips over the melted mozzarella, followed by the caramelized onion and mushroom mixture if you prepared them in Step 2. Each piece of steak should be spread out evenly to ensure every bite is packed with flavor. The savory aroma should start to fill your kitchen, teasing your taste buds.

Step 6: Crumble the Blue Cheese
Generously sprinkle 4 ounces of blue cheese crumbles across the steak and toppings. This is the star of your Amazing Steak and Blue Cheese Pizza, with its bold flavors ready to contrast beautifully against the rich steak. The blue cheese should be distributed evenly so that each slice delivers that signature tang.

Step 7: Bake the Pizza
Carefully place your assembled pizza in the preheated oven and bake for 20-25 minutes. Watch for the crust to turn a delightful golden brown and the cheese to bubble and become slightly crispy on the edges. The combination of aromas will indicate that your pizza is nearing perfection!

Step 8: Finish with Fresh Arugula
If desired, once the pizza is out of the oven, top it with a handful of baby arugula for a fresh, peppery finish. This optional step adds a delightful crunch and a burst of color to your Amazing Steak and Blue Cheese Pizza. Slice it up and get ready to share this crowd-pleaser with friends and family!

Expert Tips for Amazing Steak and Blue Cheese Pizza

  • Keep it Crispy: Baking on a preheated pizza stone gives your crust a fantastic crunch, enhancing the overall experience of your amazing steak and blue cheese pizza.
  • Sautéing Secrets: Ensure onions and mushrooms are properly caramelized; undercooked veggies can lead to watery pizza, affecting texture.
  • Cheese Choice: Mixing mozzarella with a sharper cheese can elevate flavors; blending cheddar can provide a delightful twist to your amazing steak and blue cheese pizza.
  • Precooked Steak: Using leftover or frozen pre-cooked steak makes preparation quicker, but remember to properly heat it through before topping.
  • Don’t Skip Seasoning: Season every layer with salt and pepper to bring out the flavors; omission can result in a bland pizza.
  • Freshness Matters: If using arugula or other greens, add them post-bake for a fresh, vibrant crunch that balances the richness of your pizza.

Amazing Steak and Blue Cheese Pizza Variations

Let your creativity flow and customize this delicious pizza to suit your taste and dietary needs!

  • Gluten-Free: Use a gluten-free pizza crust to make this recipe accessible to those with gluten sensitivities. There are many great store-bought options that hold up well!

  • Different Cheese Options: Experiment with cheese by swapping the blue cheese for goat cheese or aged cheddar for a unique flavor twist. Each cheese brings its own character to your pizza, enhancing the overall taste.

  • Vegetarian Delight: Replace the steak with hearty roasted veggies such as zucchini or eggplant for a delightful vegetarian option. Roasting brings out their natural sweetness, creating a satisfying texture.

  • Extra Kick: Add sliced jalapeños or crushed red pepper flakes to introduce some heat. This gives your Amazing Steak and Blue Cheese Pizza that extra zing to tantalize your taste buds!

  • Herbal Infusion: Sprinkle fresh herbs like thyme or rosemary over your toppings before baking. These herbs add an aromatic touch that complements the richness of the cheese and steak beautifully.

  • Savory Sauces: Drizzle barbecue or balsamic glaze over the cooked pizza for a sweet-and-savory finish. It adds depth and a completely new dimension to your flavor experience!

  • Mixed Greens: Swap baby arugula for baby spinach or mixed greens for a different peppery profile. These greens can be added fresh post-bake for an added crunch and burst of freshness.

  • Crispy Onions: Finish your pizza with crispy fried onions on top after it comes out of the oven for an additional layer of texture. They create a wonderful crunch that contrasts nicely with all the gooey cheese.

With these variations, you have endless options for personalizing your Amazing Steak and Blue Cheese Pizza! Don’t forget to check out our delicious Bread Pizza or the flavorful Beef Bacon Cheese for more inspiration!

Storage Tips for Amazing Steak and Blue Cheese Pizza

Fridge: Store leftover pizza in an airtight container for up to 4-5 days. This ensures it maintains its flavorful integrity without drying out.

Freezer: For long-term storage, freeze slices in a single layer, then wrap tightly in plastic wrap. This method preserves freshness for up to 2-3 months.

Reheating: To enjoy your amazing steak and blue cheese pizza at its best, reheat in the oven at 375°F (190°C) for 10-15 minutes, ensuring the crust stays crispy.

Make Ahead Options

These Amazing Steak and Blue Cheese Pizzas are perfect for meal prep enthusiasts! You can slice and caramelize the onion, and sauté the mushrooms up to 3 days in advance. Make sure to refrigerate them in an airtight container to keep their flavors fresh. Additionally, you can roll out the pizza dough and keep it wrapped in plastic or a resealable bag in the fridge for up to 24 hours. When ready to enjoy your delicious pizza, simply spread the mozzarella, layer your prepped toppings, crumble on the blue cheese, and bake as instructed. By prepping ahead, you’ll have an impressive meal ready to go with minimal effort—just as delicious as if made fresh!

What to Serve with Amazing Steak and Blue Cheese Pizza

Elevate your dining experience with these delightful sides that perfectly complement the rich flavors of your artisan pizza.

  • Garlic Bread: A crunchy, buttery delight that pairs perfectly with the pizza’s creamy blue cheese and savory steak, perfect for dipping.
  • Crunchy Side Salad: A refreshing mix of greens with tangy vinaigrette; it balances the richness of the pizza beautifully and brings a vibrant touch to your meal.
  • Roasted Vegetables: Seasonal veggies, roasted to caramelized perfection enrich your meal with colorful textures and earthy flavors that harmonize with the pizza.
  • Sweet Potato Fries: Their natural sweetness and crispiness offer a delightful contrast to the savory pie, making them a satisfyingly indulgent side!
  • Red Wine: A glass of full-bodied red wine enhances the robust flavors of the steak and blue cheese, setting the stage for a splendid dining experience.
  • Chocolate Mousse: For dessert, this rich, airy treat provides a luscious finish to your meal, making it a truly memorable occasion for family and friends.

Amazing Steak and Blue Cheese Pizza Recipe FAQs

What kind of steak is best for this pizza?
I recommend using tender cuts like sirloin or ribeye, as they have great flavor when cooked. Leftover steak from a previous meal works perfectly too—just ensure it’s sliced into thin strips to fit the pizza nicely.

How should I store leftover pizza?
Leftover Amazing Steak and Blue Cheese Pizza can be stored in an airtight container in the fridge for up to 4-5 days. For longer storage, wrap slices individually in plastic wrap and freeze them for up to 2-3 months. This method keeps them fresh and ready to enjoy later.

Can I freeze this pizza?
Absolutely! To freeze your Amazing Steak and Blue Cheese Pizza, let it cool completely. Slice it into portions, then wrap each piece tightly in plastic wrap and place them in a freezer-safe bag. Be sure to remove as much air as possible to prevent freezer burn. When you’re ready to eat, simply reheat from frozen in a preheated oven at 375°F (190°C) for 15-20 minutes until heated through.

What should I do if my pizza crust is soggy?
If your Amazing Steak and Blue Cheese Pizza ends up with a soggy crust, it’s likely due to excess moisture from the toppings. To avoid this, make sure to caramelize the onions and cook the mushrooms thoroughly beforehand. Additionally, baking on a preheated pizza stone can help achieve that crispy base. If you still find it soggy, placing the pizza back in the oven on low heat for a few minutes can help crisp it up!

Are there any dietary considerations I should be aware of?
Since this recipe includes blue cheese, be cautious with those who might have a dairy allergy. The pizza can easily be adapted; simply swap out the blue cheese with a non-dairy alternative for a gentler option. Moreover, using gluten-free pizza dough is another great alternative for anyone avoiding gluten, so everyone can join in on enjoying this Amazing Steak and Blue Cheese Pizza recipe!

How can I customize my toppings?
The joy of this pizza is its versatility! You can mix and match toppings according to your preference. Consider using grilled chicken instead of steak for a lighter option, or load up with seasonal veggies like spinach or bell peppers for added color and nutrition. The more, the merrier!

Amazing Steak and Blue Cheese Pizza

Amazing Steak and Blue Cheese Pizza That’ll Wow Your Tastebuds

Enjoy the bold flavors of Amazing Steak and Blue Cheese Pizza, a perfect balance of rich, tangy goodness.
Prep Time 30 minutes
Cook Time 25 minutes
Total Time 55 minutes
Servings: 4 slices
Course: Dinner
Cuisine: Italian
Calories: 320

Ingredients
  

For the Pizza Base
  • 14 ounces Whole Wheat Pizza Dough Use store-bought or homemade for a nutty flavor.
For the Toppings
  • 1 cup Shredded Mozzarella Feel free to experiment with provolone.
  • 1 cup Cooked Steak Strips Utilize leftover steak for quick preparation.
  • 4 ounces Blue Cheese Crumbles Swap in feta for a softer taste if desired.
  • 8 ounces Sliced Mushrooms Optional; sautéed bell peppers can be used alternatively.
  • ½ unit Onion Use shallots for a milder flavor.
  • Baby Arugula Optional; add for a peppery freshness.
For Seasoning
  • Salt and Pepper To taste; enhances all flavors.

Equipment

  • oven
  • Skillet
  • Pizza Baking Sheet or Stone
  • Rolling Pin

Method
 

Step-by-Step Instructions
  1. Preheat your oven to 400°F (200°C). Prepare a pizza baking sheet or stone.
  2. Slice half an onion and cook it in a skillet with olive oil over medium heat for 5-7 minutes until translucent.
  3. Roll out the 14 ounces of whole wheat pizza dough into a 16-inch round circle for a crispy crust.
  4. Sprinkle 1 cup of shredded mozzarella cheese evenly over the dough, covering all areas.
  5. Distribute 1 cup of cooked steak strips over the mozzarella, followed by the onion and mushroom mixture.
  6. Generously sprinkle 4 ounces of blue cheese crumbles across the toppings.
  7. Bake the pizza in the preheated oven for 20-25 minutes, until the crust is golden brown.
  8. Top with baby arugula for a fresh finish after baking.

Notes

Store leftover pizza in an airtight container for up to 4-5 days in the fridge. For long-term storage, freeze slices wrapped in plastic wrap for up to 2-3 months.

Roasted Air Fryer Garlic Bulbs: Easy Flavor Boost in Minutes

“Garlic lovers, gather round—this one’s for you! If you’ve ever savored the rich, nutty flavor of roasted garlic, you’ll be thrilled to learn just how simple it is to achieve that magic at home with my Quick and Easy Roasted Air Fryer Garlic Bulbs. In just 15 minutes, the air fryer transforms whole garlic bulbs into tender, caramelized wonders that will elevate your dishes from ordinary to extraordinary. Not only is this recipe quick, but it’s also gluten-free, making it a perfect addition to a variety of meals. Whether you’re looking to add depth to pasta, enhance your favorite mashed potatoes, or whip up a gourmet garlic spread, roasted garlic is a versatile kitchen must-have. Curious about how to unlock this culinary treasure? Let’s dive in!”

Why You Need Roasted Garlic Bulbs

Flavor Explosion: The rich, nutty taste of roasted garlic will elevate any dish, transforming simple recipes into culinary masterpieces.
Quick and Easy: You’ll love how effortlessly you can create complex flavors in just 15 minutes with your air fryer.
Versatile Use: Add roasted garlic to pasta, mashed potatoes, or spread on crusty bread for an instant gourmet touch.
Healthy Benefits: Packed with antioxidants, roasted garlic not only enhances your meals but also supports your wellness journey.
Zero Fuss: Enjoy the simplicity of minimal prep and cleanup, allowing you to focus on enjoying your delicious creations.
For more delicious ideas, explore how to elevate your dinners with Honey Garlic Slow ribs or infuse flavor into your meals with Heirloom Herb Garlic bread!

Roasted Air Fryer Garlic Bulbs Ingredients

• Elevate your cooking with these essential ingredients for making delicious roasted air fryer garlic bulbs.

For the Garlic

  • Garlic Bulbs – The main ingredient, providing that rich, nutty flavor; opt for large bulbs for the best results.

For the Oil and Seasoning

  • Olive Oil – Enhances flavor and helps with cooking; extra virgin is preferred, but any cooking oil works.
  • Salt and Pepper – Essential seasonings for taste; adjust to your liking, and feel free to use them sparingly.

For Optional Garnish

  • Minced Fresh Parsley – A lovely garnish to both enhance flavor and presentation; substitute with herbs like thyme or basil if you desire a different profile.

Each ingredient plays a pivotal role in unlocking the full potential of your roasted air fryer garlic bulbs, ensuring a delightful cooking experience that makes your meals sing!

Step‑by‑Step Instructions for Roasted Air Fryer Garlic Bulbs

Step 1: Prep the Garlic
Start by slicing the top off each garlic bulb—this exposes the cloves for optimal roasting. Drizzle the exposed garlic generously with olive oil, ensuring even coverage. Sprinkle with salt and pepper to enhance the natural flavor. Once seasoned, wrap each bulb tightly in aluminum foil, creating a secure package to trap the steam during cooking.

Step 2: Air Fry
Preheat your air fryer to 400°F (200°C) for a few minutes to ensure a hot cooking environment. Place the wrapped garlic bulbs in the air fryer basket in a single layer, giving them enough space to cook evenly. Set the timer for 15 minutes, allowing the air fryer to transform the bulbs into tender, caramelized delights. Keep an eye on the cooking process; you’ll know they’re done when they feel soft to the touch.

Step 3: Cool and Store
After the cooking time is up, carefully remove the garlic bulbs from the air fryer using tongs, as they will be hot. Let them cool for a few minutes before unwrapping to avoid burning your fingers. Once cooled, squeeze the soft, roasted cloves into a container for easy storage. If you like, garnish with fresh parsley for an added burst of flavor and color, making your Roasted Air Fryer Garlic Bulbs even more appealing.

Roasted Air Fryer Garlic Bulbs Variations

Customize your roasted garlic experience with these delightful twists that will tantalize your taste buds!

  • Herb Infusion: Mix fresh herbs like rosemary or thyme with olive oil before drizzling over garlic for a fragrant flavor boost. The aroma will fill your kitchen as they roast, creating an enticing invitation to your meal.

  • Spicy Kick: Add a sprinkle of red pepper flakes or cayenne pepper to the olive oil for a zesty touch. This lively addition can turn your roasted garlic into a fiery ingredient for dips or sauces.

  • Creamy Twist: Incorporate a spoonful of cream cheese or feta cheese into the container when you squeeze out the garlic. This creates a luscious, creamy spread that pairs beautifully with crackers or bread.

  • Smoky Flavor: Enhance the depth by adding smoked paprika to the oil for a rich, smoky undertone. This will complement savory dishes or give your garlic bread an appealing twist.

  • Sweet Touch: Drizzle a little honey over the garlic bulbs before roasting for a unique sweet and savory combination. This unexpected sweetness works wonders in dressings or atop roasted vegetables.

  • Lemon Zest: Throw in some lemon zest to the olive oil for a citrusy brightness that cuts through the richness. The fresh flavor can enliven pasta dishes or enhance chicken recipes.

  • Cheesy Garlic: Before air frying, place a small dollop of grated parmesan on top of the garlic bulbs. As it melts, it will create a delightful cheesy crust that’s irresistible on a fresh baguette.

  • Asian Infusion: Add a dash of soy sauce or sesame oil to the olive oil, for an Asian-inspired take. This pairs wonderfully with fried rice or noodle dishes, elevating your weeknight dinners.

Each of these variations offers a unique touch to the already fabulous roasted garlic, enhancing your culinary adventures! For more delicious garlic-inspired recipes, be sure to check out Garlic Butter French fries or the appetizing Chili Chicken Roasted vegetables for more flavor-packed inspiration!

Make Ahead Options

These Roasted Air Fryer Garlic Bulbs are perfect for meal prep enthusiasts! You can prepare the garlic bulbs by slicing the tops and drizzling them with olive oil, salt, and pepper up to 24 hours in advance. Simply wrap the seasoned bulbs tightly in aluminum foil and refrigerate them. When you’re ready to enjoy this flavorful addition, just preheat your air fryer and cook as directed—this ensures they’re just as delicious as if you made them fresh! If you’d like to store any leftovers, you can keep roasted garlic in an airtight container in the fridge for up to one week or freeze them for up to three months for easy access later on!

What to Serve with Quick and Easy Roasted Air Fryer Garlic Bulbs

Bring your meals to life by pairing these tender, caramelized garlic bulbs with delightful sides, enhancing every bite.

  • Creamy Mashed Potatoes: The rich, buttery texture of mashed potatoes creates a beautiful pairing, allowing the roasted garlic to shine.

  • Grilled Chicken: Juicy, herbed chicken complements the sweetness of roasted garlic, making your dinner both savory and satisfying.

  • Pasta Primavera: Toss your favorite pasta with seasonal veggies and a generous scoop of roasted garlic for a fresh, flavorful dish.

  • Crusty Bread: Spread the buttery, soft roasted garlic on warm, toasted bread for a comforting appetizer that’ll have everyone asking for more!

  • Roasted Vegetables: Pair your garlic bulbs with a medley of roasted veggies to create an earthy and colorful side full of flavor and nutrition.

  • Homemade Hummus: Blend roasted garlic into your hummus for an extra layer of flavor; it makes for a mouthwatering dip perfect for gatherings.

  • Fennel and Citrus Salad: The brightness of citrus combined with the sweet notes of fennel provides a refreshing contrast to the rich garlic.

  • Wine Pairing: A crisp white wine, like Sauvignon Blanc, harmonizes beautifully with the garlicky flavors, enhancing your overall dining experience.

  • Chocolate Mousse: For an unexpected sweet ending, serve a light chocolate mousse after the garlic-infused meal to cleanse the palate delightfully.

Expert Tips for Roasted Air Fryer Garlic Bulbs

  • Choose Quality Garlic: Selecting large, fresh garlic bulbs ensures a rich flavor and good texture. Avoid bulbs with sprouts or soft spots.

  • Wrap Securely: Tightly wrapping the bulbs in aluminum foil is key for even cooking and allows the garlic to steam, enhancing sweetness.

  • Watch Your Timing: If your bulbs feel soft before the 15 minutes are up, check them to prevent burning. Adjust cooking time as needed for perfect roasted garlic.

  • Experiment with Oils: While olive oil is recommended, feel free to try flavored oils or infuse herbs into the oil for additional depth in your roasted air fryer garlic bulbs.

  • Store with Care: Keep roasted garlic cloves in an airtight container in the fridge for up to a week, or freeze them in small portions for longer shelf life.

  • Avoid Over-Oiling: Too much oil can overflow from the foil while cooking, creating a mess. Stick to a light drizzle for the best results.

How to Store and Freeze Roasted Air Fryer Garlic Bulbs

Fridge: Store roasted garlic in an airtight container in the refrigerator for up to 1 week. This keeps the cloves fresh and ready for use in your favorite dishes.

Freezer: For longer storage, freeze the roasted garlic cloves in small portions. They will keep well for up to 3 months. Portioning helps you use only what you need without thawing the whole batch.

Reheating: When ready to use, simply thaw the roasted garlic at room temperature or microwave it in short bursts. You can add the softened cloves directly to your dishes or use them as a spread.

Wrapping: Be sure to tightly wrap the garlic bulbs in foil while cooking to maintain their moisture and delicious flavor, making your roasted air fryer garlic bulbs a delightful treat!

Roasted Air Fryer Garlic Bulbs Recipe FAQs

What kind of garlic bulbs should I use?
When selecting garlic bulbs, opt for large, fresh ones without any sprouts or soft spots. The size contributes to a richer flavor and a better end product. I always choose bulbs that feel firm to the touch and have a smooth outer skin for the best results.

How should I store roasted garlic?
Roasted garlic should be stored in an airtight container in the refrigerator for up to 1 week. This keeps the cloves fresh and flavorful, ready for use in dips, spreads, or cooked dishes. For longer storage, consider freezing the cloves in small portions, which will keep well for up to 3 months!

Can I freeze roasted garlic, and how?
Absolutely! To freeze roasted garlic cloves, first allow them to cool. Afterward, squeeze the softened cloves into an ice cube tray or a small container, covering them with olive oil if desired to prevent freezer burn. Freeze until solid, then transfer to a freezer bag, removing excess air. This way, you have convenient portions ready whenever you need a flavor boost!

What should I do if my garlic bulbs are not soft after cooking?
If you find that your garlic bulbs are not soft after the specified 15 minutes, it’s okay! Just return them to the air fryer and cook for an additional 5 minutes. Make sure they are tightly wrapped in foil to trap the steam, and check on their softness before removing them. Sometimes, smaller bulbs may cook quicker, while larger ones might need that extra time—they can be a bit temperamental!

Is roasted garlic safe for pets?
While roasted garlic is delicious for humans, it’s important to note that garlic is not safe for pets, especially dogs and cats. It can cause gastrointestinal upset and other health issues. Always keep roasted garlic and any garlic-infused oils out of reach of your furry friends.

Can I substitute any ingredients in this recipe?
Yes, you can customize your roasted air fryer garlic bulbs to your liking! If you don’t have olive oil, any neutral or flavored oil will work fine. Plus, if you’re not keen on parsley for garnish, consider using other herbs like thyme or basil to add a different twist to your final dish!

Roasted Air Fryer Garlic Bulbs

Roasted Air Fryer Garlic Bulbs: Easy Flavor Boost in Minutes

Enjoy garlic lovers! This easy recipe for Roasted Air Fryer Garlic Bulbs brings delightful flavor in just 15 minutes.
Prep Time 5 minutes
Cook Time 15 minutes
Cooling Time 5 minutes
Total Time 25 minutes
Servings: 4 bulbs
Course: Other
Cuisine: American
Calories: 30

Ingredients
  

For the Garlic
  • 2 bulbs Garlic Bulbs Opt for large bulbs for best results.
For the Oil and Seasoning
  • 2 tablespoons Olive Oil Extra virgin is preferred.
  • to taste Salt Essential seasoning for taste.
  • to taste Pepper Essential seasoning for taste.
For Optional Garnish
  • 1 tablespoon Minced Fresh Parsley Substitute with thyme or basil for different flavors.

Equipment

  • Air Fryer

Method
 

Preparation Steps
  1. Start by slicing the top off each garlic bulb to expose the cloves. Drizzle with olive oil, sprinkle with salt and pepper, then wrap in aluminum foil.
  2. Preheat your air fryer to 400°F (200°C). Place the wrapped garlic bulbs in a single layer in the air fryer basket and cook for 15 minutes.
  3. After cooking, carefully remove the garlic bulbs from the air fryer and let cool for a few minutes. Unwrap and squeeze the roasted cloves into a container.

Notes

Choose quality garlic bulbs for the best flavor, tightly wrap in foil for even cooking, and store in an airtight container.