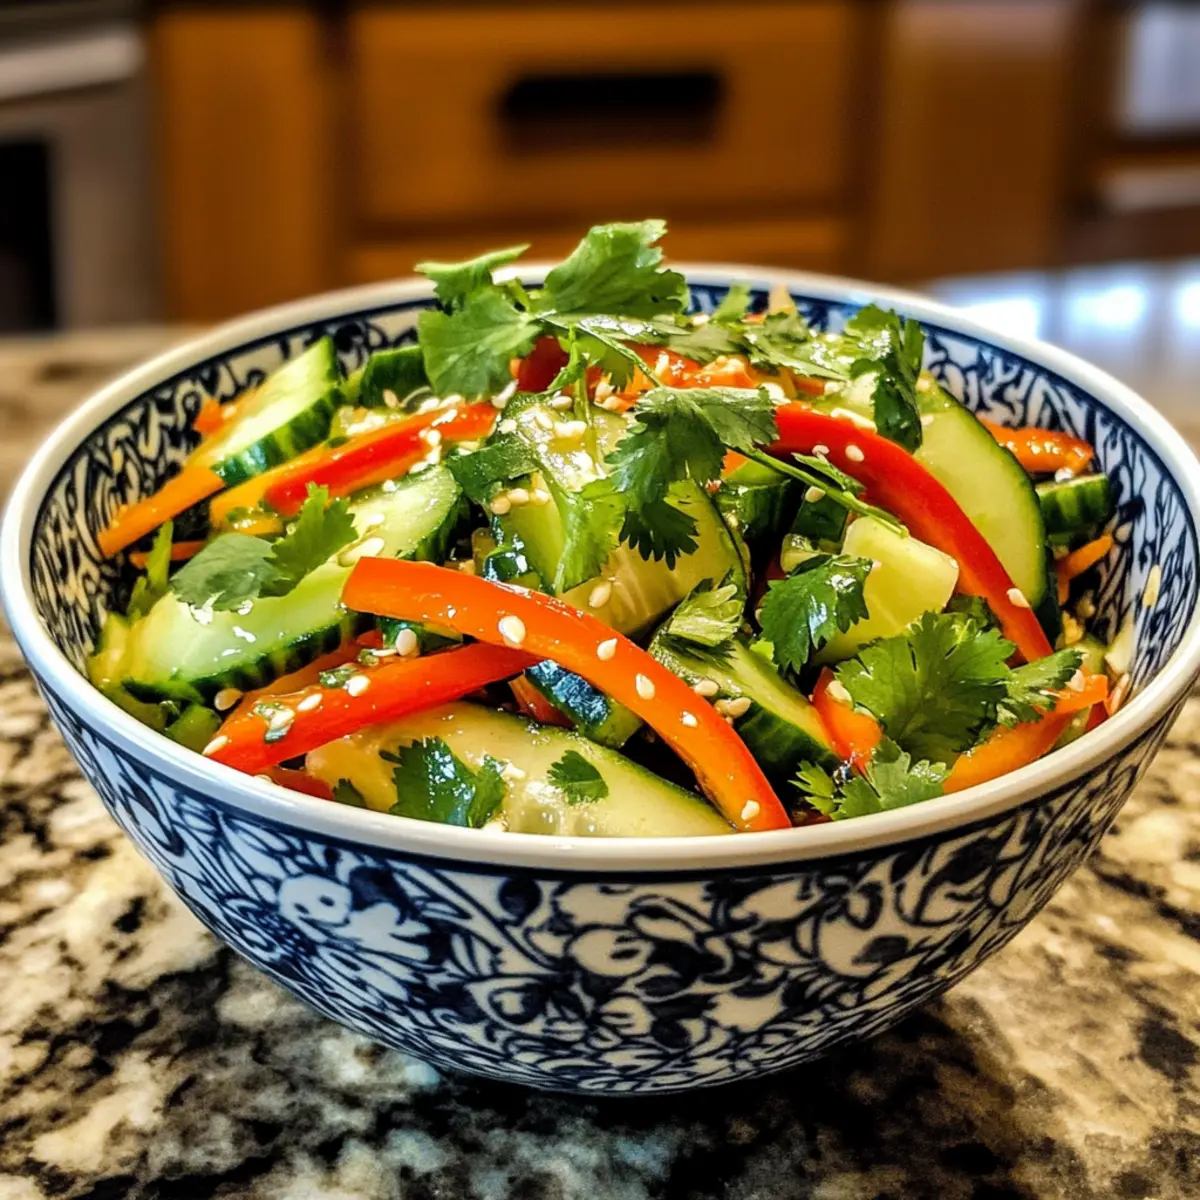
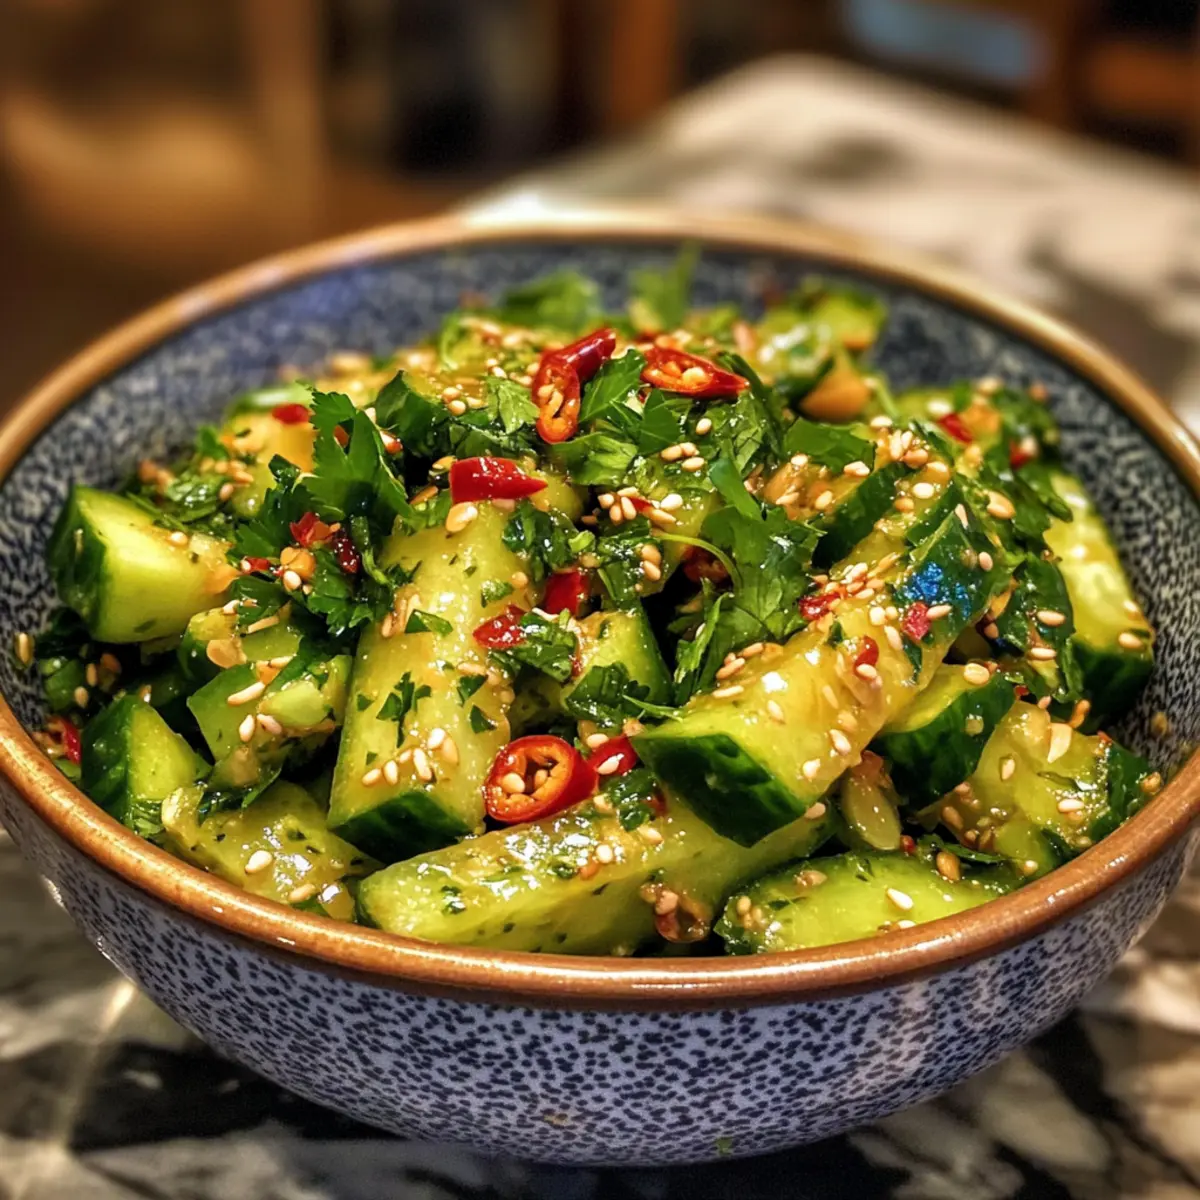
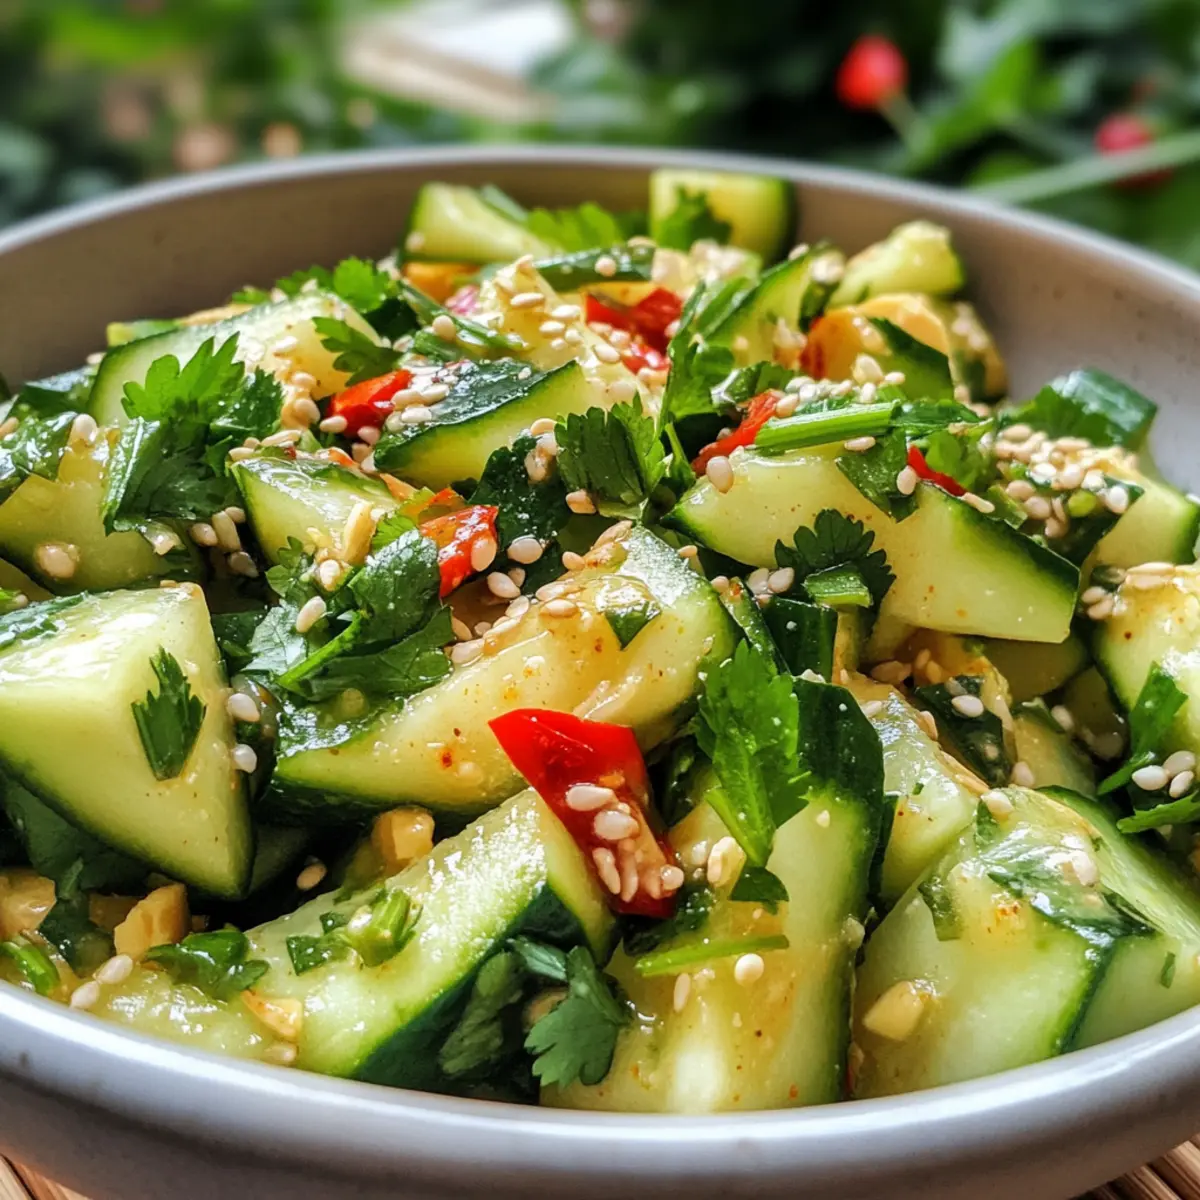
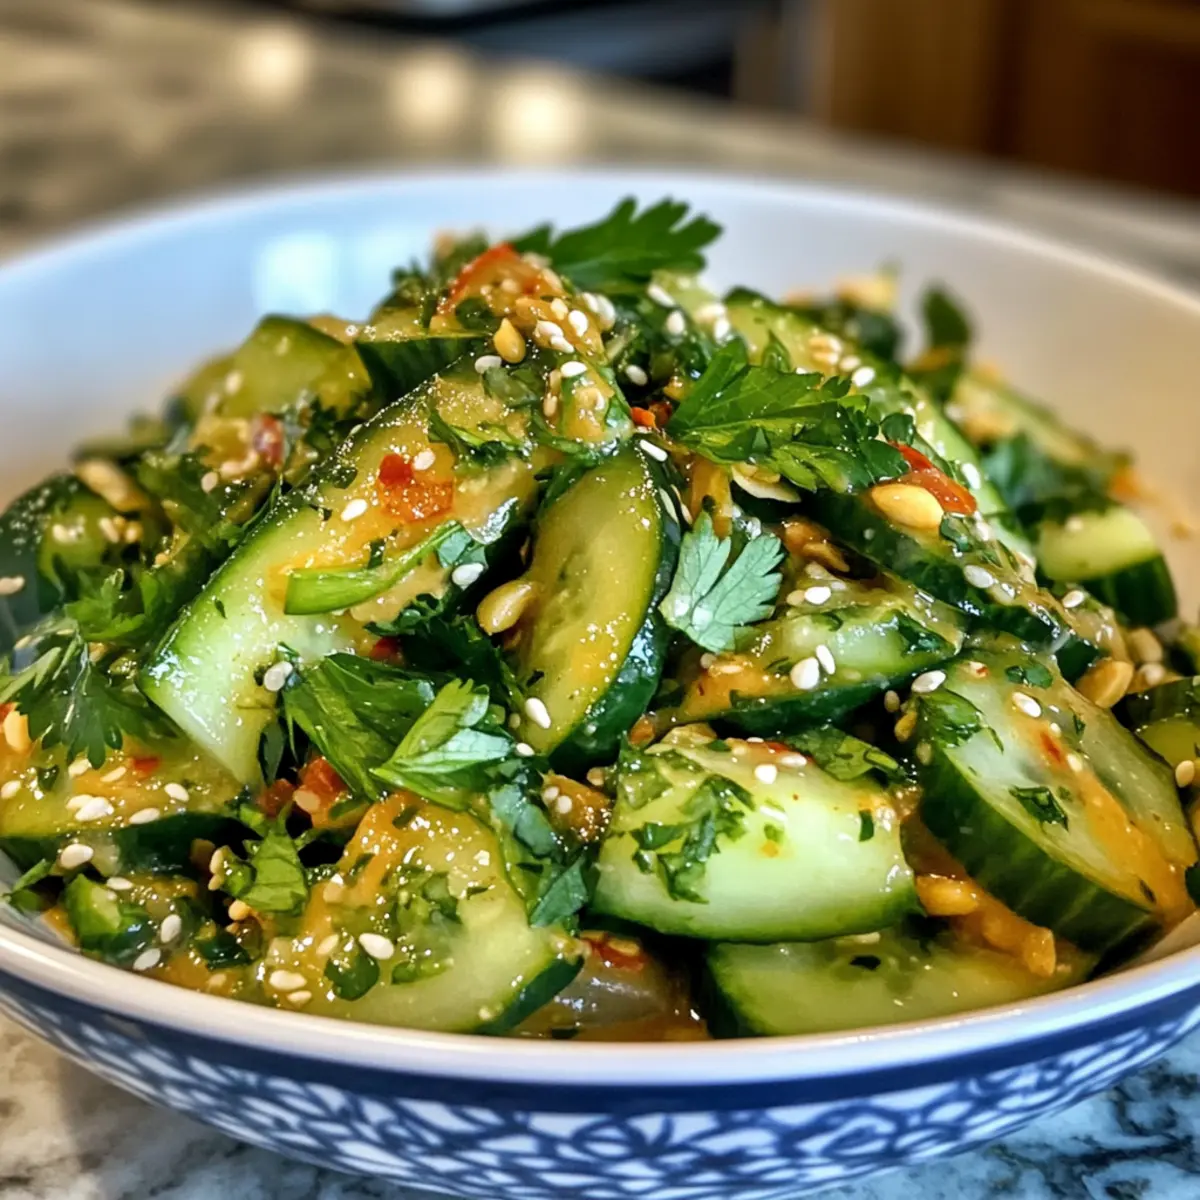
The moment I tasted this unique Cucumber Peanut Butter Salad for the first time, a lightbulb went off in my mind: why hadn’t I thought of this before? This refreshing salad offers the perfect crunch from crisp cucumbers, paired with a creamy peanut butter dressing that adds a delightful twist to the classic summer fare. Not only is it a breeze to whip up, making it ideal for quick weeknight dinners, but it’s also entirely vegan and gluten-free, so everyone can enjoy it. Plus, its vibrant colors and bold flavors are sure to impress at any gathering. So, are you ready to elevate your salad game and wow your dinner guests with something extraordinary?
Why Choose Cucumber Peanut Butter Salad?
Unique Flavors: This salad combines refreshing cucumber with a creamy peanut butter dressing, creating a harmonious blend that tantalizes the taste buds.
Vegan & Gluten-Free: Enjoy peace of mind knowing this dish is accessible to all, making it a great option for gatherings with diverse dietary preferences.
Quick & Easy: Perfect for busy weeknights, this salad comes together in mere minutes, letting you focus on what really matters—savoring each bite.
Colorful Presentation: With its vibrant colors, it’s a feast for the eyes as well as the palate; a great way to brighten up your dinner table.
Versatile Pairing: Serve alongside grilled veggies or noodles for a complete meal, or enjoy it solo as a light lunch option! Dive into this deliciousness today, and for more fantastic ideas, check out our refreshing Cucumber Carrot Salad and Crunch Cucumber Salad!
Cucumber Peanut Butter Salad Ingredients
• Here’s what you need to create this refreshing delight:
For the Salad
- Cucumber – Adds a refreshing crunch; can substitute with zucchini, carrots, or bell peppers for variety.
- Fresh Parsley – Provides a fresh herbaceous flavor; ensure it’s finely chopped for even distribution.
- Fresh Chilies – Adds a kick of heat to the dish; substitute with red bell pepper for a milder flavor.
- Sesame Seeds – Offers crunch and nutty flavor; toast before use for added depth.
For the Dressing
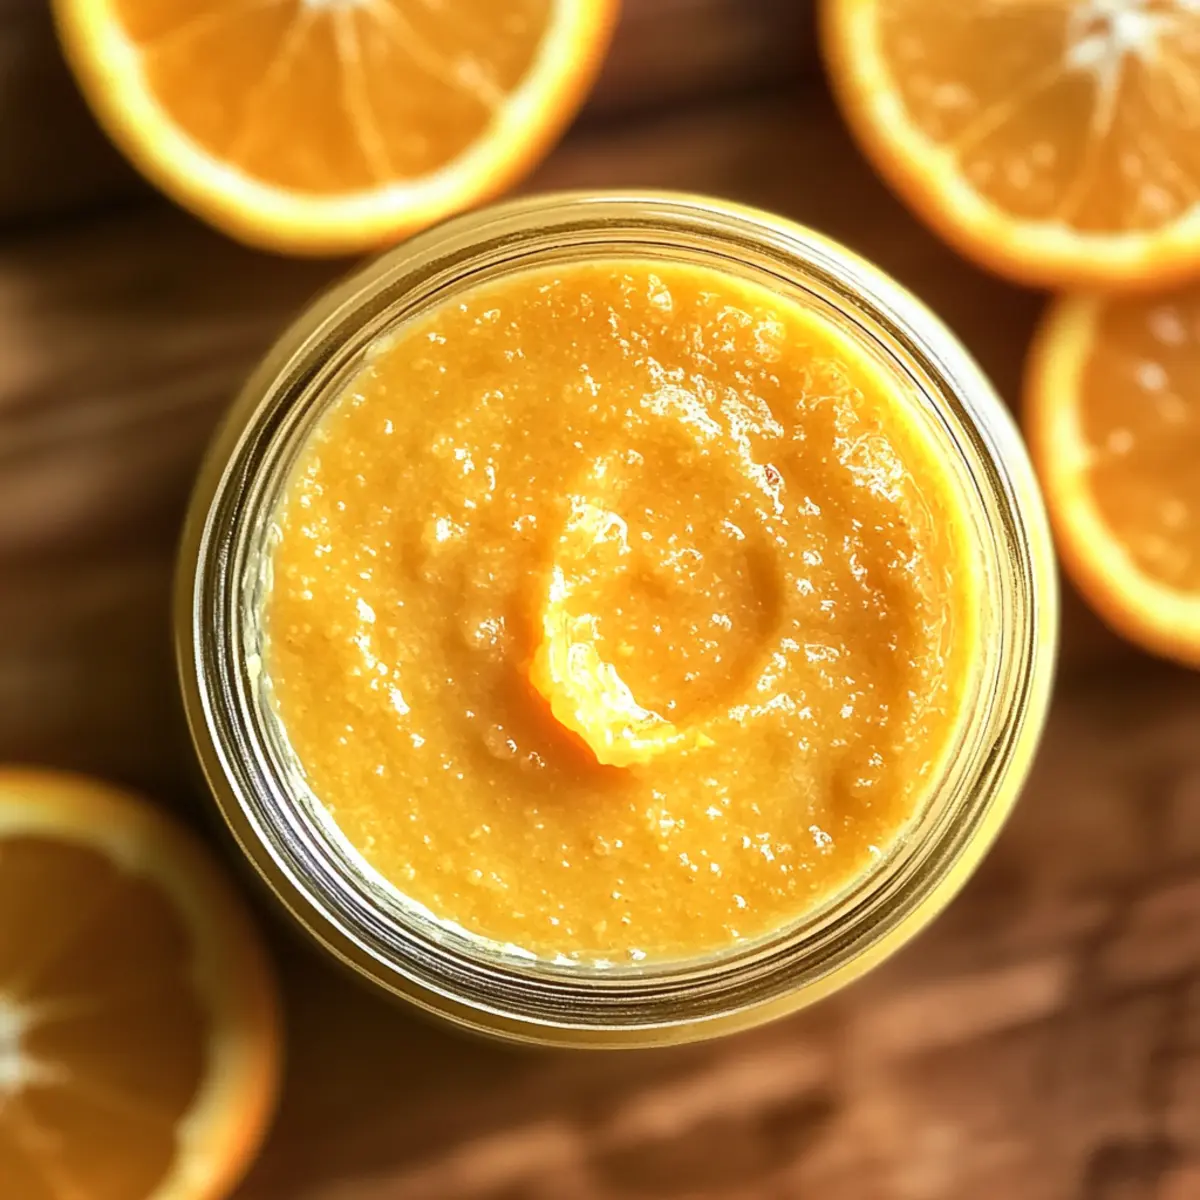
- Peanut Butter – Creates a creamy dressing; smooth, unsweetened peanut butter is ideal; crunchy can add texture.
- Soy Sauce – Provides umami and saltiness; use gluten-free soy sauce or tamari for gluten-free needs.
- Sesame Oil – Adds depth and a slight toasty flavor; for a lighter option, replace with water or extra rice vinegar.
- Maple Syrup – Balances the savory elements with sweetness; honey can be a substitute for non-vegan versions.
- Rice Vinegar – Offers tanginess to the dressing; lemon or lime juice can be used as alternatives.
- Garlic – Infuses the dressing with flavor; use minced fresh garlic for best results.
Step‑by‑Step Instructions for Cucumber Peanut Butter Salad
Step 1: Prepare the Cucumbers
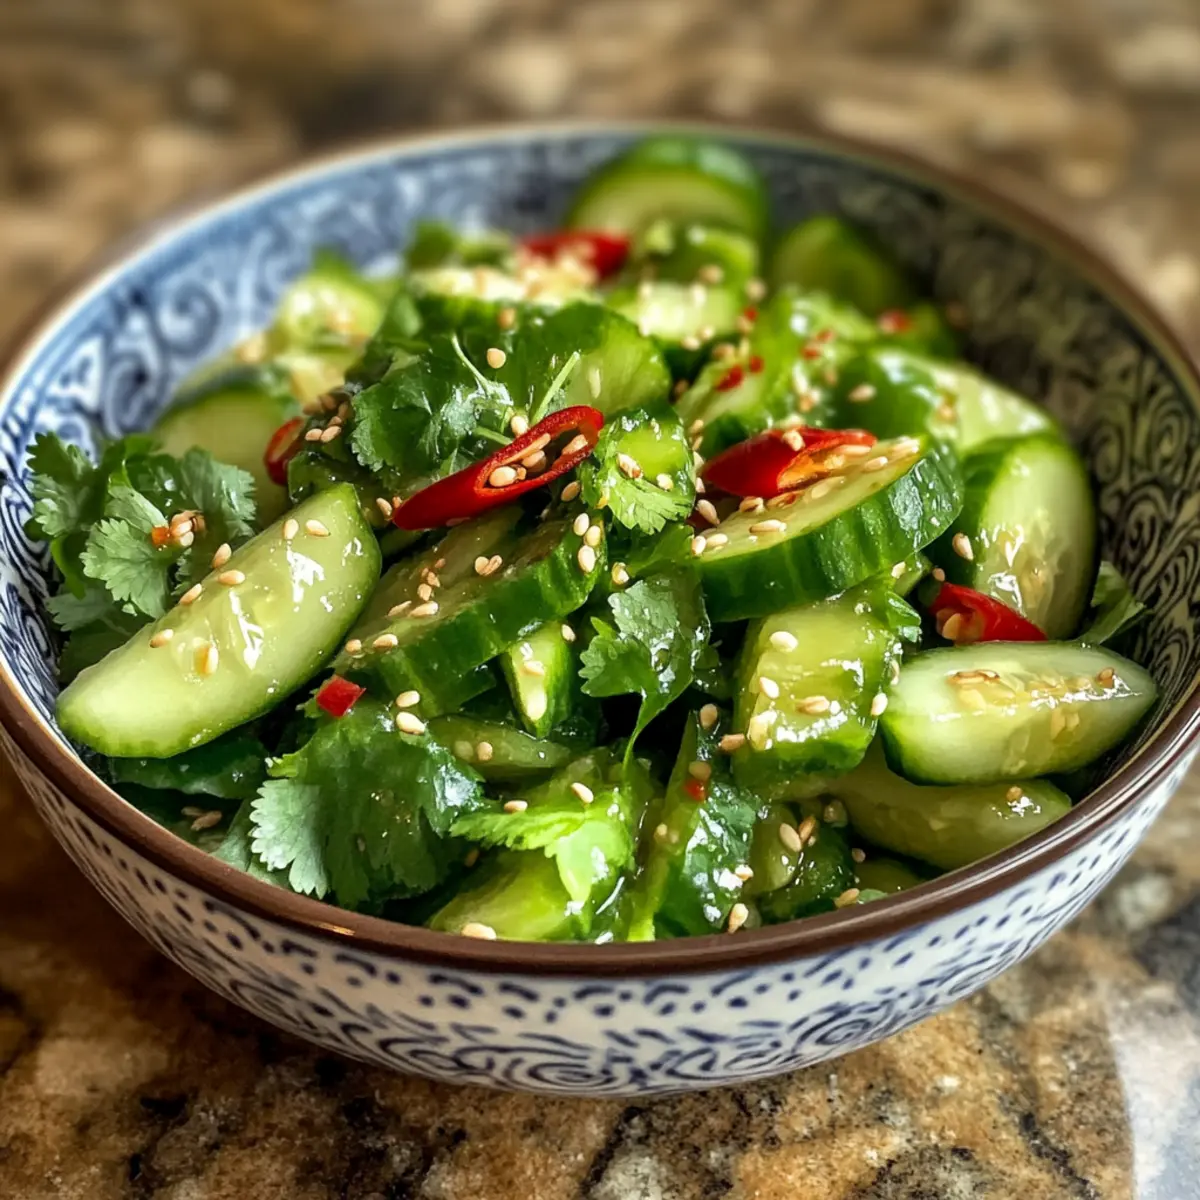
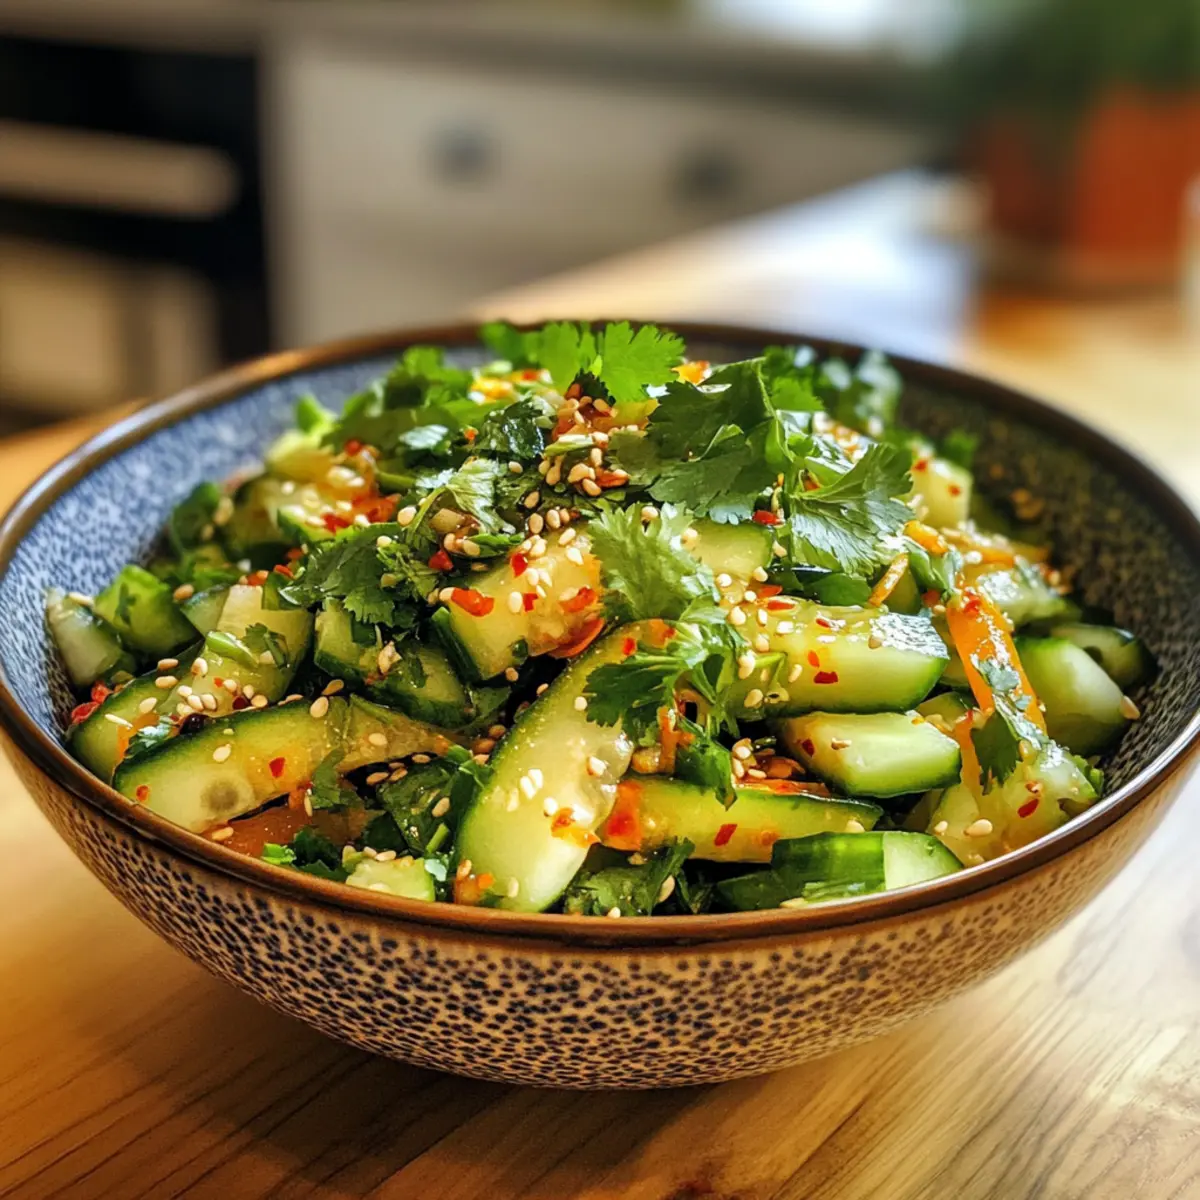
Start by washing 2 large cucumbers thoroughly under cold water, then peel them if desired for a softer texture. Cut the cucumbers into thin strips or rounds using a sharp knife. Once sliced, place the cucumber pieces into a large mixing bowl, allowing their refreshing essence to fill the air.
Step 2: Add Fresh Ingredients
Chop a handful of fresh parsley and finely slice 1-2 fresh chilies according to your heat preference. Add these vibrant ingredients to the bowl of cucumbers along with a sprinkle of toasted sesame seeds for that extra crunch. Gently stir the salad components together until well combined, showcasing a colorful medley.
Step 3: Whisk Together the Dressing
In a separate medium-sized bowl, combine 4 tablespoons of smooth peanut butter with 3 tablespoons of gluten-free soy sauce, 1 tablespoon of sesame oil, 2 tablespoons of rice vinegar, and 1 tablespoon of maple syrup. Mince 1 garlic clove and add it to the mixture. Whisk the ingredients together for about 1-2 minutes, until you achieve a smooth, creamy dressing.
Step 4: Combine Salad and Dressing
Pour the luscious peanut butter dressing over the cucumber mixture in the large bowl. Use a pair of tongs or a spatula to gently toss the salad, ensuring each cucumber piece is coated in the creamy dressing. This fusion of flavors creates the signature essence of the Cucumber Peanut Butter Salad.
Step 5: Serve and Garnish
Once combined, transfer the salad to a serving bowl or individual plates. For an elegant touch, sprinkle additional toasted sesame seeds on top. This Cucumber Peanut Butter Salad is best served immediately to preserve the crispness of the cucumbers and the vibrant flavors. Enjoy the delightful combination of textures and tastes!
What to Serve with Cucumber Peanut Butter Salad?
Transform your meal into a delightful feast with these complementary dishes and drinks that perfectly enhance your refreshing salad.
- Grilled Veggies: Charred zucchini, bell peppers, and eggplant add a smokiness that beautifully contrasts the salad’s creamy dressing.
- Cold Rice Noodles: Light and silky, they soak up the peanut butter dressing while providing a nutritious base for your meal. Toss with some sesame oil for extra flavor!
- Quinoa Salad: A hearty quinoa salad with cherry tomatoes and cucumbers echoes the salad’s freshness while adding protein and substance.
- Tofu Skewers: Serve marinated and grilled tofu skewers as a crowd-pleasing source of plant-based protein that pairs well with the nutty flavors.
- Asian-Inspired Spring Rolls: Light and crisp, these colorful rolls filled with fresh veggies offer an enjoyable crunch and satisfyingly complement the peanut butter dressing.
- Sweet Mango Chutney: A spoonful of this tangy-sweet chutney can heighten the flavor profile on your plate, adding an exotic twist to your meal.
- Green Tea: A refreshing cup of chilled green tea cleanses your palate and enhances the salad’s vibrant flavors.
- Coconut Milk Ice Cream: For dessert, indulge in a creamy coconut milk ice cream; its richness beautifully balances the salad’s crunchiness and adds a sweet note.
- Fruit Salad: Finish with a light fruit salad of mixed berries and melons for a refreshing, bright dessert that ties the meal together perfectly.
Expert Tips for Cucumber Peanut Butter Salad
-
Freshness Matters: Always use freshly cut cucumbers to keep them crisp. If making ahead, store cucumbers and dressing separately until serving time.
-
Flavor Balance: Adjust the amount of maple syrup or soy sauce in the dressing to get a perfect balance of creamy and tangy in your Cucumber Peanut Butter Salad.
-
Chop Wisely: Finely chop herbs and spices to ensure even distribution throughout the salad, enhancing the overall flavor profile.
-
Customize Your Heat: If you prefer a milder taste, replace fresh chilies with sweet red bell pepper or omit them altogether for a family-friendly option.
-
Store Leftover Dressing: If you have dressing left over, store it in an airtight container in the fridge for up to 5 days. Shake well before use!
Make Ahead Options
These Cucumber Peanut Butter Salad components are perfect for meal prep enthusiasts! You can cut the cucumbers and chop the parsley up to 24 hours in advance, storing them separately in the refrigerator to maintain their crunch. The peanut butter dressing can also be prepared ahead of time and kept in an airtight container for up to 5 days—just give it a good shake before using. When you’re ready to serve, combine the cucumbers, herbs, and dressing together for a quick toss. This way, you’ll enjoy a refreshing Cucumber Peanut Butter Salad that’s just as delicious and vibrant on your busy weeknights!
How to Store and Freeze Cucumber Peanut Butter Salad
Room Temperature: Best enjoyed fresh, do not leave this salad out for more than 2 hours to maintain its crispness and safety.
Fridge: Leftover Cucumber Peanut Butter Salad can be stored in an airtight container in the fridge for up to 3 days, but for the best texture, store cucumbers and dressing separately until serving.
Freezer: Freezing is not recommended due to the high water content of cucumbers which may become mushy upon thawing.
Reheating: This salad is best served cold, so no reheating is necessary. Simply remove from the fridge and enjoy the refreshing flavors!
Cucumber Peanut Butter Salad Variations
Feel free to get creative and customize this salad to suit your taste preferences!
- Zucchini Swap: Replace cucumbers with zucchini for a slightly different texture while keeping the refreshing crunch.
- Nut Butter Twist: Try almond or cashew butter instead of peanut butter for a unique flavor profile. Each nut brings its own delightful characteristics to the salad.
- Extra Crunch: Toss in some shredded carrots or sliced radishes for an added crunch and vibrant color. These veggies will add a beautiful contrast to the creamy dressing!
- Spicy Kick: Incorporate sliced jalapeños for a fiery heat, or even a dash of sriracha in the dressing to spice things up. Balance it with extra maple syrup for sweetness if needed.
- Herb Infusion: Experiment with fresh mint or cilantro instead of parsley for an entirely new aromatic experience. Both herbs will give your salad a fresh, lively flair.
- Bowl Addition: For a heartier meal, mix in some cooked quinoa or brown rice. This not only enhances the nutritional value but also makes it a filling dish.
- Citrusy Zest: Add a splash of fresh lime or lemon juice to brighten the flavors even more. The acid will enhance the dressing and meld beautifully with the nut butter.
- Savoury Seeds: Instead of sesame seeds, sprinkle in pumpkin seeds or sunflower seeds for a delightful crunch and additional nutrition. They also bring a different nutty flavor to the dish.
Feel inspired to create your own version of this delicious salad! If you’re in the mood for more salad ideas, don’t forget to check out our refreshing Garden Harvest Salad for another awesome choice!

Cucumber Peanut Butter Salad Recipe FAQs
How do I choose the best cucumbers for this salad?
Absolutely! Look for firm, glossy cucumbers with a vibrant green color. Avoid any that have dark spots or are overly soft, as these may be past their prime. If you can, opt for organic varieties to ensure they haven’t been treated with pesticides. Fresh cucumbers will keep the salad crunchy and refreshing!
How should I store leftover Cucumber Peanut Butter Salad?
To maintain its freshness, store the leftover salad in an airtight container in the fridge for up to 3 days. However, for optimal texture, I recommend keeping the cucumbers and dressing separate until you’re ready to serve. If combined, the cucumbers may release water and become limp.
Can I freeze Cucumber Peanut Butter Salad?
Freezing is not recommended for this recipe. The high water content in cucumbers will lead to a mushy texture when thawed. If you want to prepare ingredients ahead of time, chop up the cucumbers and herbs, and store them in the fridge separately from the dressing for fresh-tasting salad whenever you crave it!
What should I do if my dressing is too thick?
Very! If you find your peanut butter dressing is too thick, simply add a tablespoon of warm water or extra rice vinegar and whisk until it reaches your desired consistency. This will help to loosen it without losing any flavor. You can also adjust the flavors by adding a dash more soy sauce or maple syrup to taste!
Are there any dietary considerations for this recipe?
Yes! This Cucumber Peanut Butter Salad is entirely vegan and gluten-free, making it suitable for a wide array of dietary preferences. However, if preparing for guests with nut allergies, consider substituting the peanut butter with sunbutter or tahini as an alternative. Always double-check labels on sauces to ensure they meet your guests’ dietary needs!
Refresh Your Day with Cucumber Peanut Butter Salad Delight
Ingredients
Equipment
Method
- Wash the cucumbers thoroughly under cold water and peel if desired. Cut into thin strips or rounds and place into a large bowl.
- Chop parsley and finely slice fresh chilies. Add to the cucumber bowl along with toasted sesame seeds. Stir gently to combine.
- In a separate bowl, whisk together the peanut butter, soy sauce, sesame oil, rice vinegar, maple syrup, and minced garlic until smooth.
- Pour the dressing over the cucumber mixture and gently toss to coat.
- Transfer the salad to serving bowls and sprinkle with additional toasted sesame seeds. Serve immediately.