Champagne Cake with Champagne Italian Meringue Buttercream Bliss

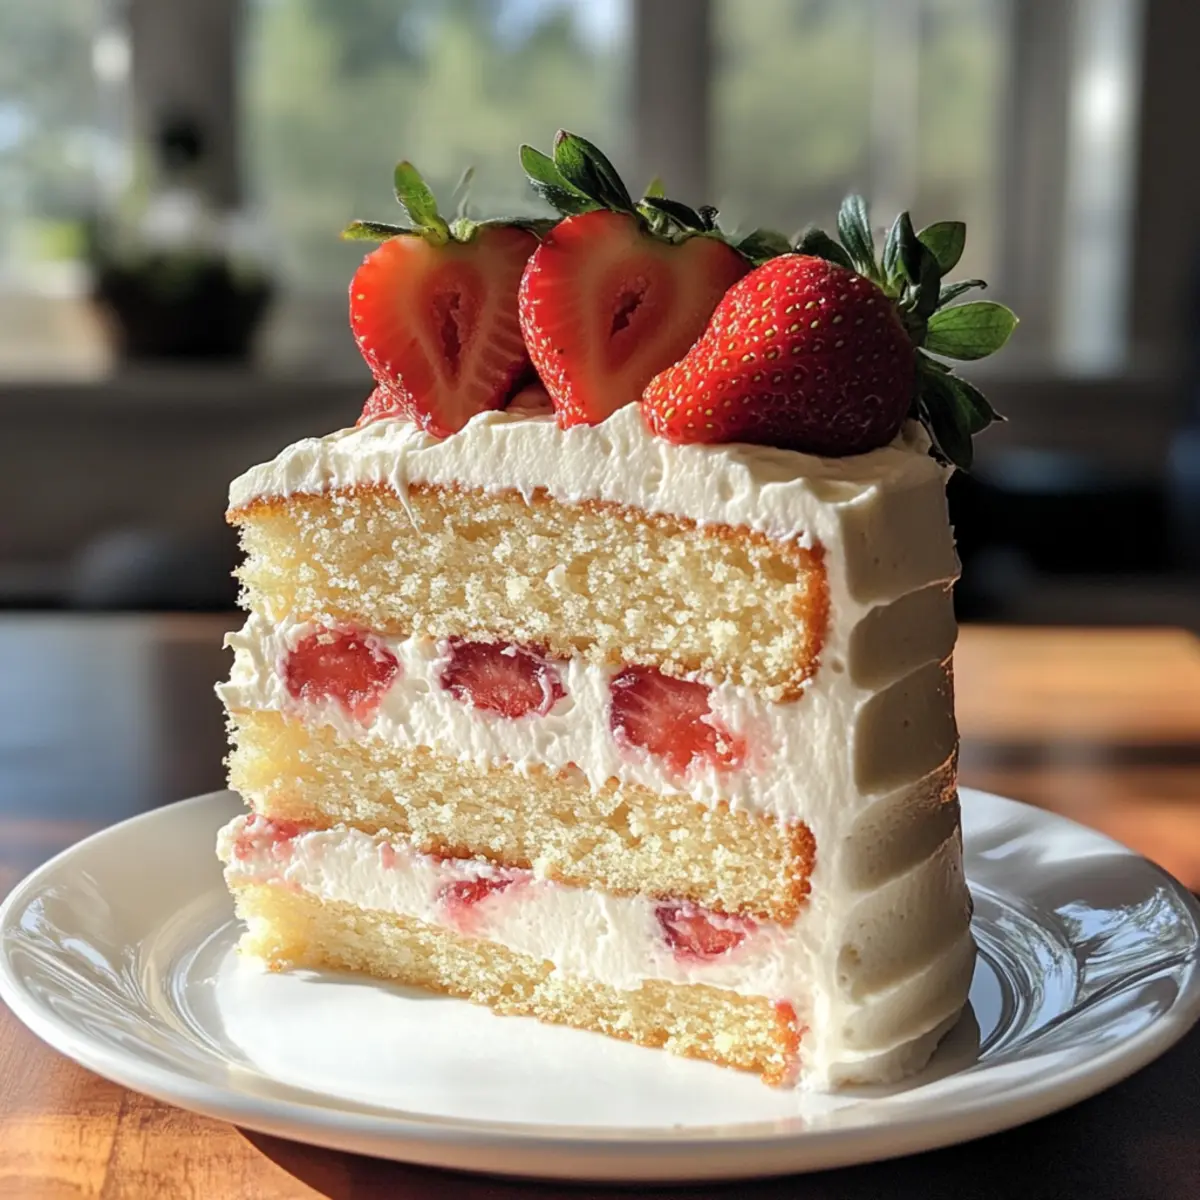
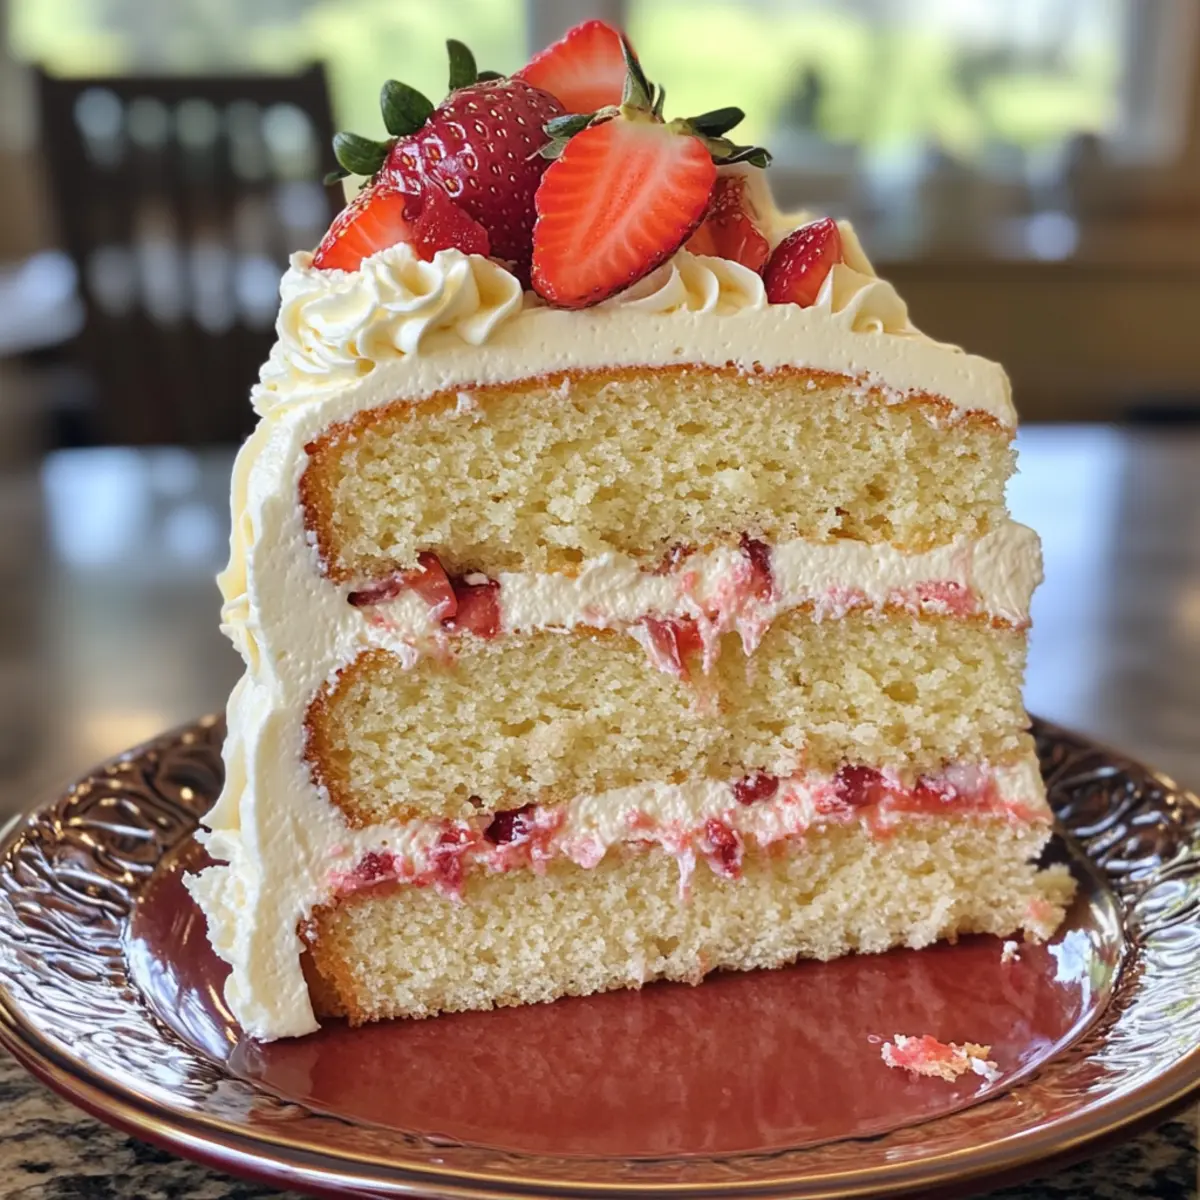
A celebratory darling, the Champagne Cake with Champagne Italian Meringue Buttercream is like a sweet confession whispered during a toast. Imagine slicing into a moist, tender crumb cake, the subtle notes of champagne dancing on your palate and harmoniously blending with luscious buttercream. This elegant dessert is perfect for birthdays, weddings, or any occasion that deserves a touch of sophistication. One of the best perks? It’s surprisingly simple to whip up, making you the star of your next gathering without the fuss! Plus, it pairs beautifully with fresh strawberries, adding a burst of color and flavor. Are you ready to elevate your dessert game? Let’s dive into creating this enchanting cake together!

Why is Champagne Cake a Celebration Favorite?

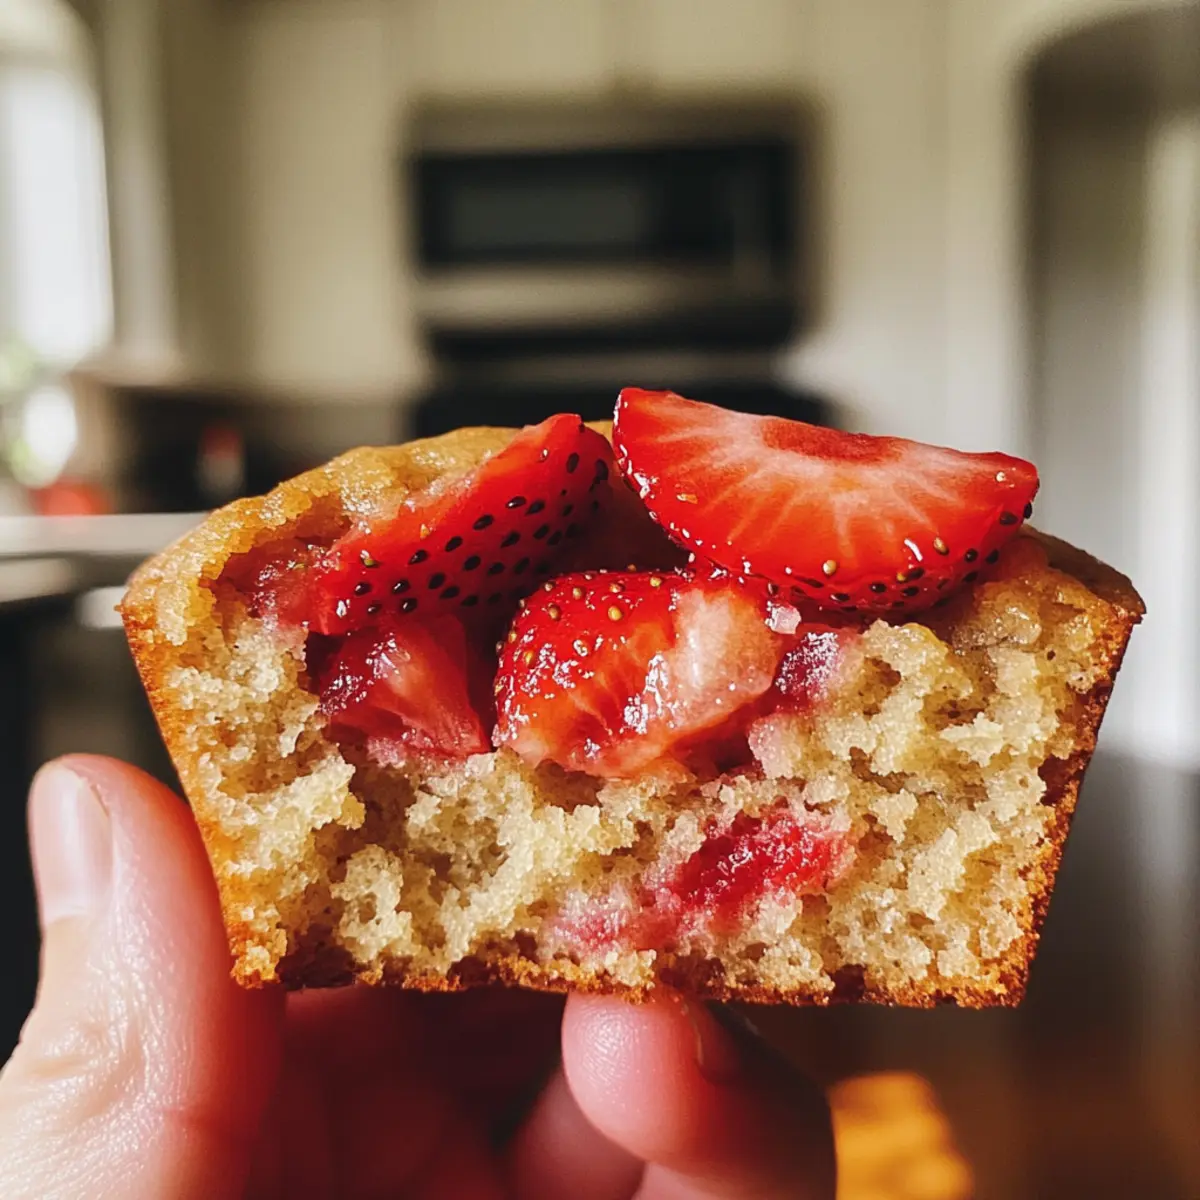
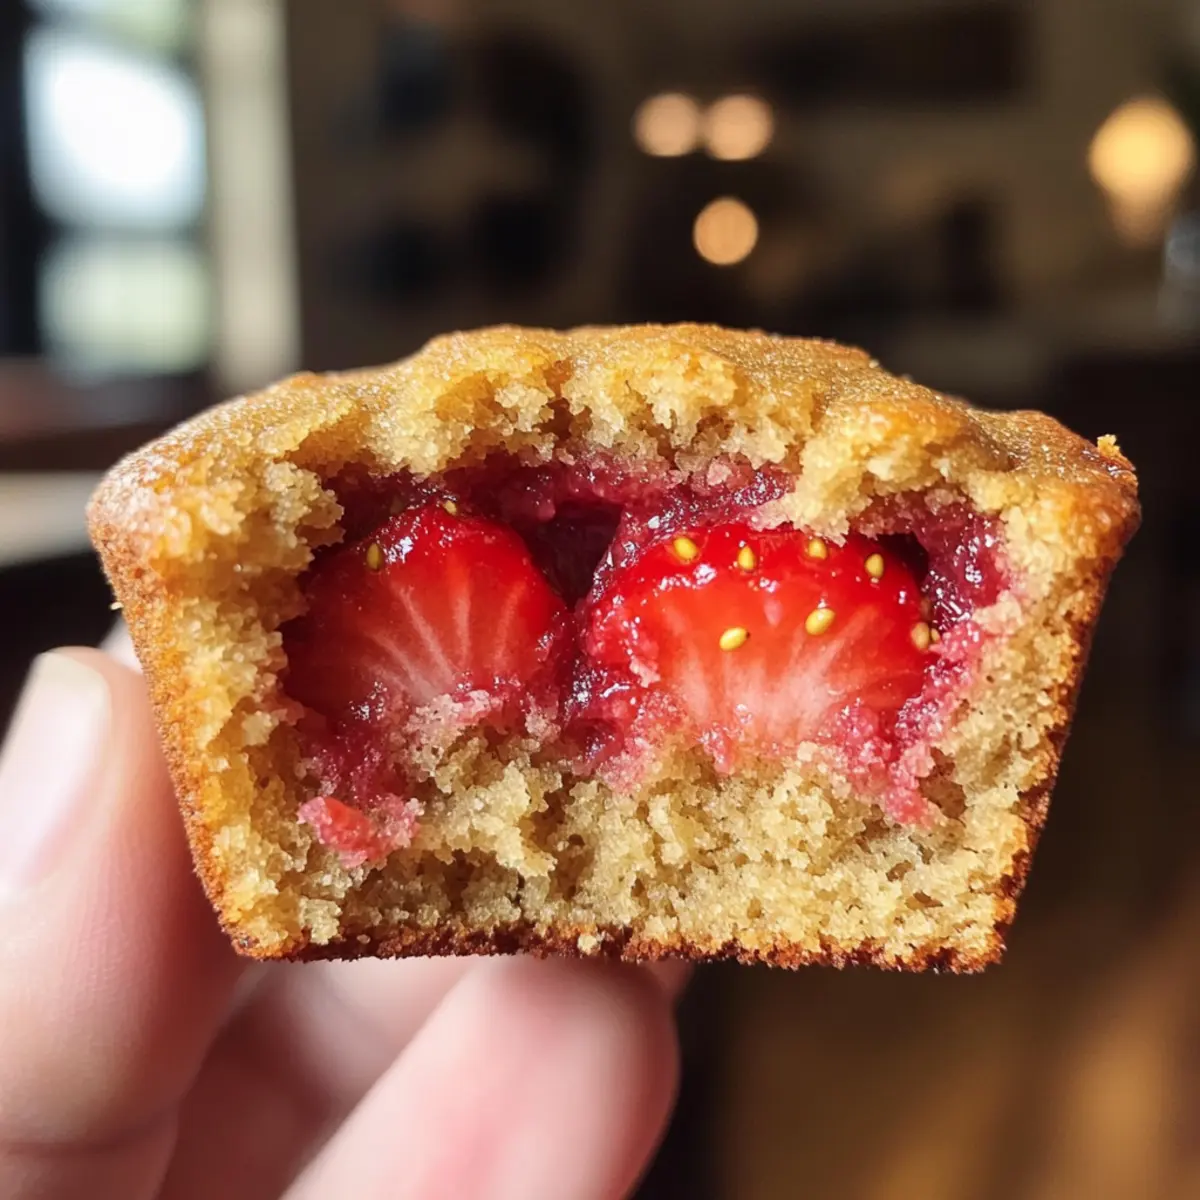
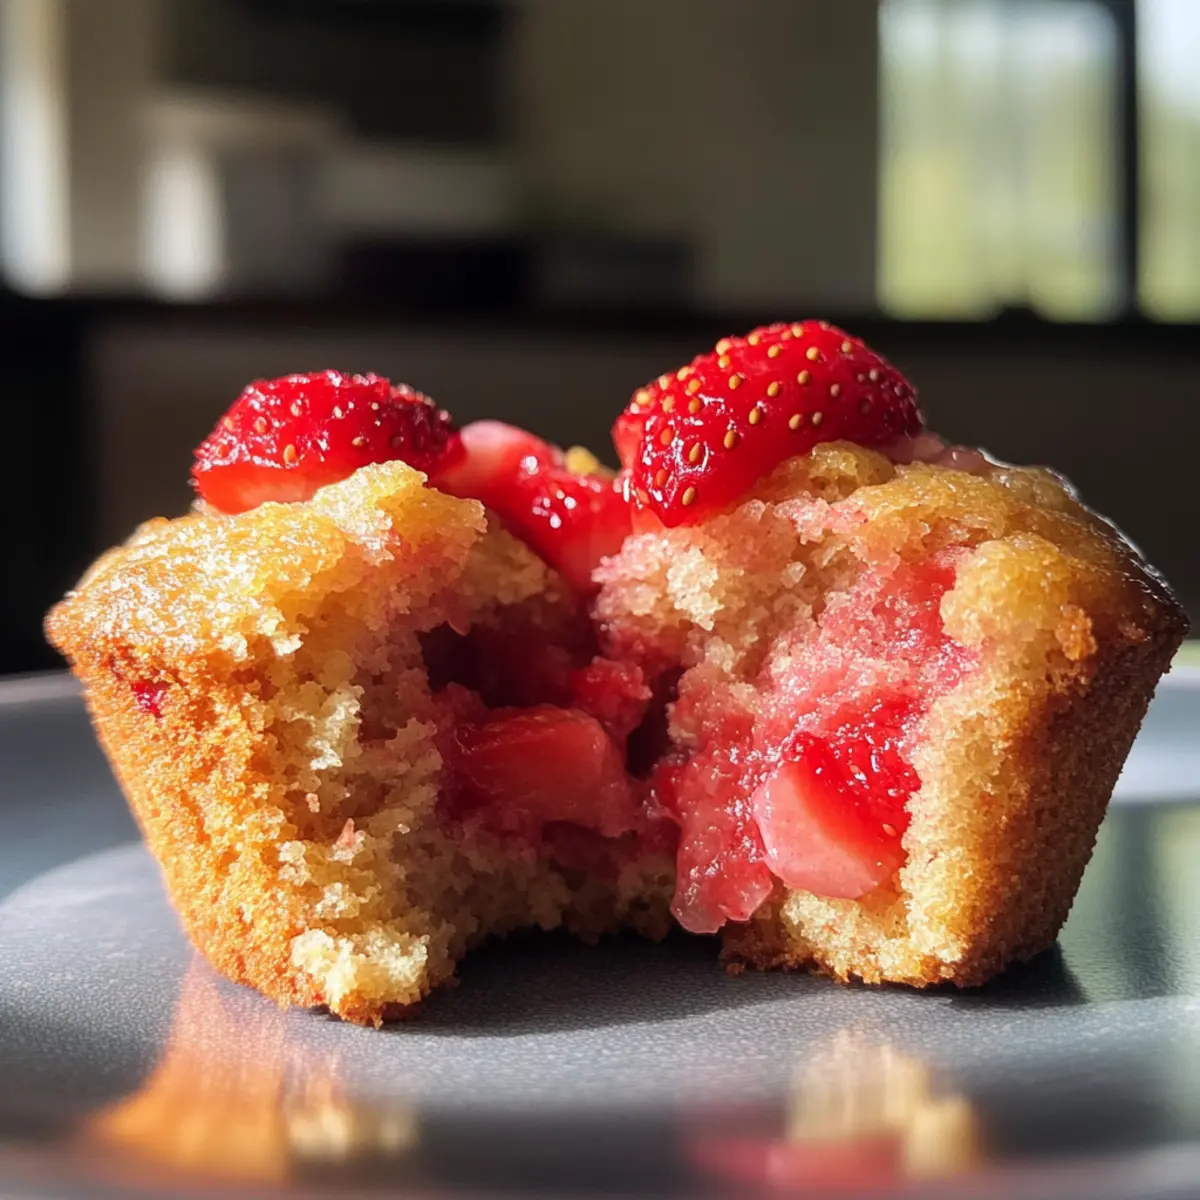
Moist Texture: The Champagne Cake boasts a deliciously tender crumb that melts in your mouth. Luscious Buttercream: Topped with Champagne Italian Meringue Buttercream, it adds a rich, creamy layer to each bite. Elegant Presentation: Ideal for weddings or festive gatherings, this cake shines as a stunning centerpiece. Easy to Make: With straightforward ingredients and instructions, it’s a breeze to whip up at home. Pair it beautifully with fresh strawberries for a delightful contrast, or enjoy it alongside a gorgeous slice of Nutty Vanilla Cake and create a dessert spread everyone will adore!

Champagne Cake Ingredients

For the Cake

  • Cake Flour – Provides a light, tender crumb; a mix of all-purpose flour and cornstarch works in a pinch.
  • Buttermilk – Adds moisture and flavor; substitute with yogurt or a quick DIY (milk + vinegar).
  • Champagne – This star ingredient enhances the flavor; a sweeter champagne works wonders.
  • Unsalted Butter – Key for a rich flavor in the buttercream; avoid substitutes for best results.
  • Granulated Sugar – Sweetens the cake and helps with texture; try brown sugar for a unique twist.
  • Eggs – Gives structure and moisture; use medium or large eggs as needed.

For the Filling and Topping

  • Strawberries – Serve as a filling and for a fresh pairing; raspberries also make a delightful alternative.
  • Cream of Tartar – Stabilizes the Italian meringue buttercream; leave it out only if necessary.

Add these ingredients to your shopping list, and let’s bring this delicious Champagne Cake with Champagne Italian Meringue Buttercream to life!

Step‑by‑Step Instructions for Champagne Cake with Champagne Italian Meringue Buttercream

Step 1: Preheat and Prepare Pans
Begin by preheating your oven to 350°F (non-fan assisted). While the oven heats, prepare your cake pans by greasing them with baking spray or lining them with parchment paper. This will ensure your Champagne Cake releases easily after baking, leaving you with beautifully intact layers ready for frosting.

Step 2: Mix Dry Ingredients
In a mixing bowl, whisk together the cake flour, baking powder, and salt until well combined. This step ensures an even distribution of the leavening agent, which is crucial for achieving that light, tender crumb in your Champagne Cake. Set this mixture aside while you move on to the next steps.

Step 3: Cream Butter and Sugar
In a large mixing bowl, cream together the unsalted butter and granulated sugar using an electric mixer on medium speed. Beat until the mixture is light and fluffy, around 3-5 minutes. This process incorporates air, giving your cake volume. Once fluffy, add in the eggs one at a time, blending well after each addition to fully incorporate.

Step 4: Combine Wet and Dry Ingredients
Next, alternate adding the flour mixture and buttermilk to the butter mixture. Begin with one-third of the flour, then add half of the buttermilk, and repeat until both are fully combined. Mix until just incorporated; be careful not to overmix, as it can affect the texture of your Champagne Cake, which should be moist and fluffy.

Step 5: Add Champagne
Gently fold in the champagne into the batter until it’s fully incorporated. This step is where the delightful champagne flavor develops, elevating your cake to festive heights. Once mixed, pour the batter evenly into the prepared pans and smooth the tops with a spatula to ensure even baking.

Step 6: Bake the Cake
Place the pans in the preheated oven and bake for approximately 30 minutes. Keep an eye on the cakes; they are done when a toothpick inserted in the center comes out clean. The tops should be lightly golden and spring back when touched. Once baked, remove them from the oven.

Step 7: Cool and Enhance Flavors
Allow the cake layers to cool in the pans for about 10 minutes before transferring them to a wire rack. While the cakes cool, prepare a champagne reduction if desired, brushing the tops of the layers with it to enhance the flavor and moisture. This added step ensures an even richer champagne taste.

Step 8: Prepare the Italian Meringue Buttercream
For the Champagne Italian Meringue Buttercream, start by whipping egg whites in a mixing bowl until soft peaks form. Gradually add granulated sugar while continuing to whip until stiff peaks form. This will give your buttercream a luxurious texture. Next, incorporate the softened butter and reduced champagne, mixing until the buttercream is smooth and creamy.

Step 9: Assemble the Cake
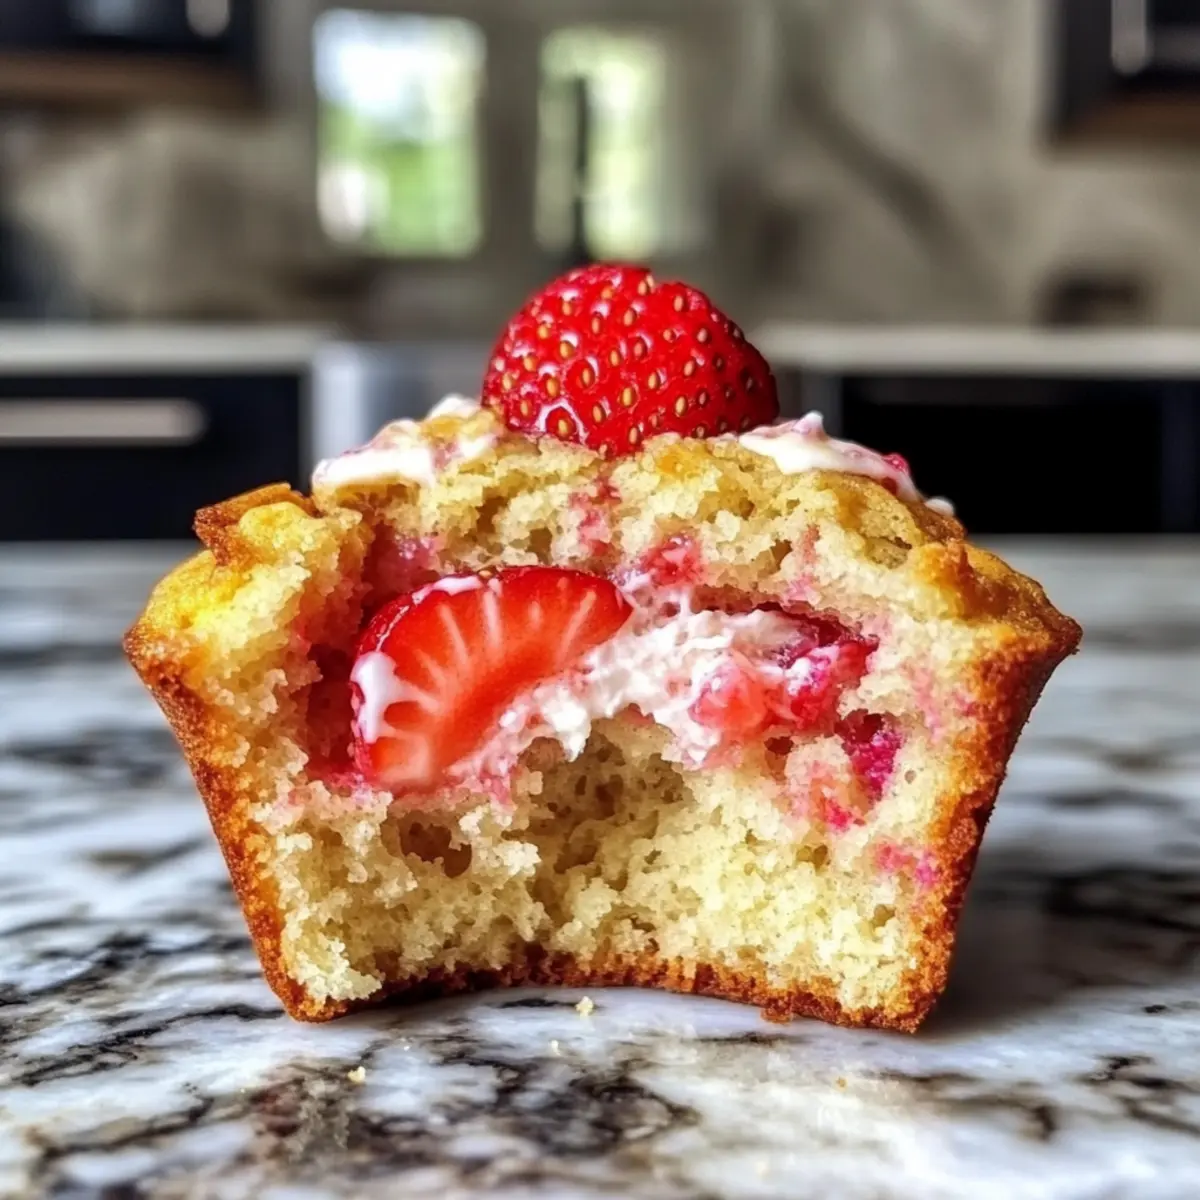
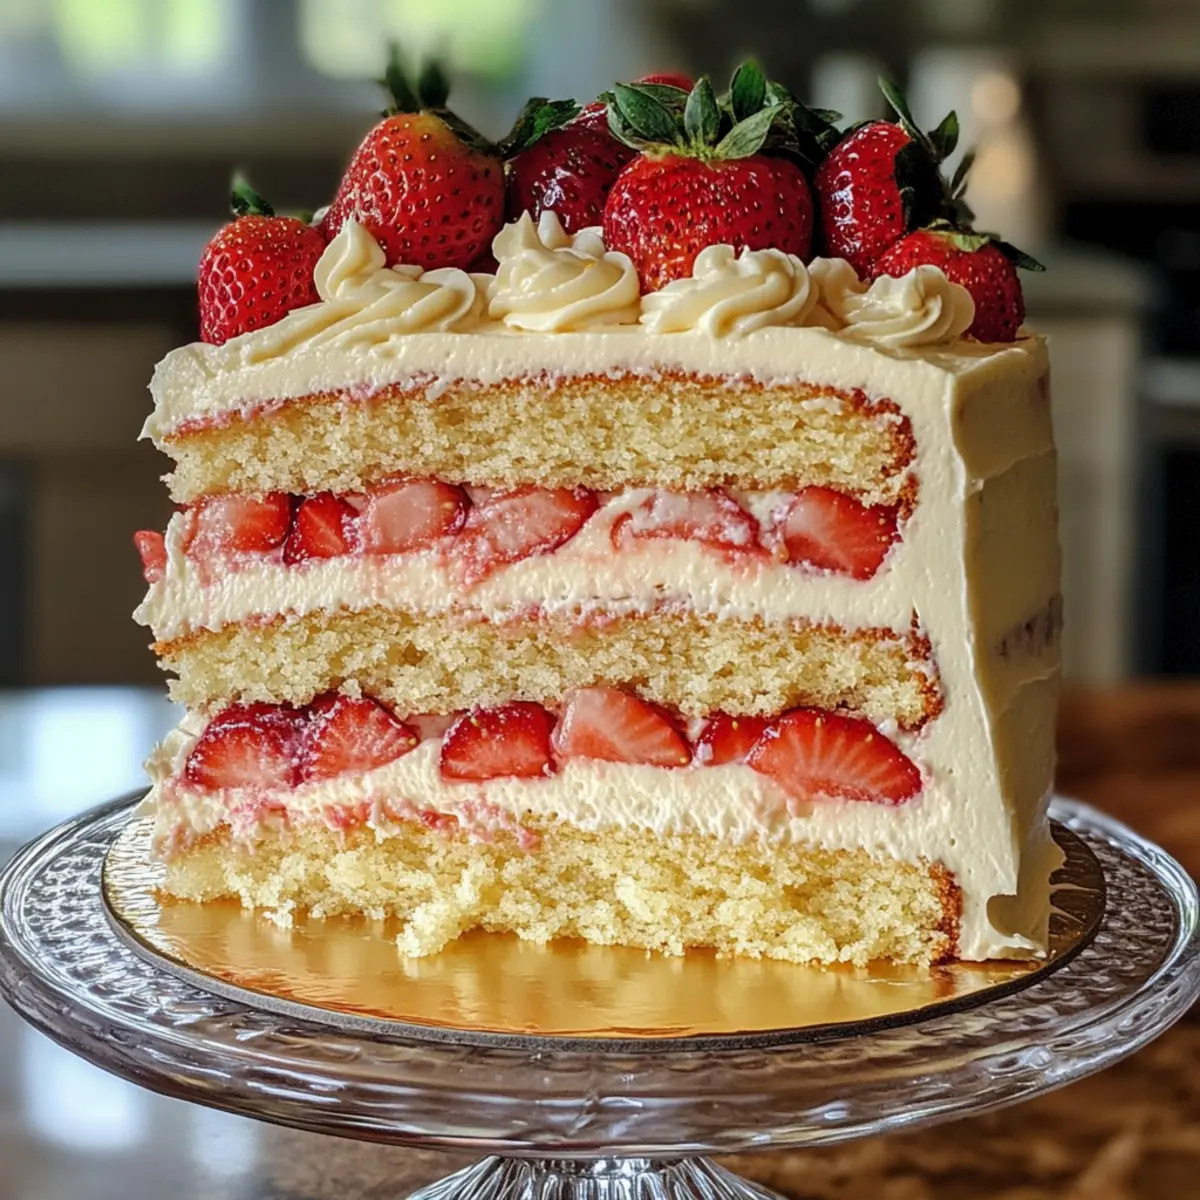
Now it’s time to assemble your Champagne Cake! Place one layer on a serving plate and spread a layer of fresh strawberries as the filling. Top with a generous portion of Champagne Italian Meringue Buttercream. Carefully place the second layer over it, gently pressing down to secure everything in place.

Step 10: Frost the Cake
Finally, frost the entire cake with the Champagne Italian Meringue Buttercream, smoothing it out with a spatula to create an elegant finish. You can decorate the top with fresh strawberries for a beautiful and vibrant presentation. Your Champagne Cake with Champagne Italian Meringue Buttercream is now ready to shine at your next celebration!

Storage Tips for Champagne Cake with Champagne Italian Meringue Buttercream

  • Room Temperature: Store unfrosted cake layers wrapped in plastic wrap at room temperature for up to 3 days. This keeps the cake moist without compromising its texture.

  • Fridge: If you have leftover frosted Champagne Cake, keep it covered in an airtight container in the refrigerator for up to 5 days. This helps maintain moisture and flavor while preventing drying.

  • Freezer: For longer storage, freeze unfrosted cake layers wrapped tightly in plastic wrap and then foil. They can be stored in the freezer for up to 3 months. Thaw the layers in the fridge overnight before frosting to ensure even texture.

  • Reheating: If you’ve refrigerated the cake, allow it to come to room temperature before serving. For added moisture, consider brushing with champagne reduction before slicing into the cake.

Expert Tips for Champagne Cake Success

  • Use Fresh Ingredients: Always use fresh champagne and unsalted butter for a rich flavor. This enhances the overall taste of your Champagne Cake.

  • Avoid Overmixing: Overmixing the batter can lead to a dense cake. Mix until just combined to ensure a moist and tender crumb.

  • Cool Properly: Let the cake layers cool completely before frosting. Frosting a warm cake can cause the buttercream to melt and slide off.

  • Dress It Up: For added flair, garnish with more strawberries or edible flowers. This creates a stunning presentation for your celebration.

  • Test for Doneness: Always check for doneness with a toothpick—if it comes out clean, your Champagne Cake is ready. Otherwise, it may need a few more minutes.

  • Storage Tips: Store any leftovers in an airtight container in the fridge to maintain the moistness of the Champagne Cake with Champagne Italian Meringue Buttercream.

Champagne Cake with Fun Variations

Feel free to let your creativity soar by customizing your Champagne Cake with delightful twists and substitutes!

  • Dairy-Free: Swap buttermilk with almond milk mixed with vinegar for a dairy-free twist without losing moisture.

  • Flavor Boost: Replace champagne with a flavored liqueur, like Grand Marnier, for a citrusy kick that enhances your celebration.

  • Fruit Alternatives: Instead of strawberries, use fresh blueberries or a bright raspberry puree for a tasty surprise in each slice.

  • Frosting Options: Try cream cheese frosting for a tangy flavor, or go for an American Buttercream for a sweeter, denser finish.

  • Gluten-Free: Substitute cake flour with a gluten-free blend to accommodate dietary needs while still achieving a tender crumb.

  • Lower Sugar: Reduce granulated sugar by a quarter and incorporate natural sweeteners like honey or maple syrup for a lighter option.

  • Layered Delight: For an extra layer of flavor, add a thin layer of your favorite jam between the cake layers along with the fruit filling!

  • Spice it Up: Add a teaspoon of vanilla extract and a pinch of nutmeg or cinnamon to the batter for a warm, spicy note.

Whether you’re enjoying a slice alongside a glass of bubbly or serving it up with delightful Savory Zucchini Pancakes at a brunch gathering, the possibilities are as exciting as the celebration itself!

Make Ahead Options

These Champagne Cake with Champagne Italian Meringue Buttercream is perfect for meal prep enthusiasts! You can prepare the cake layers up to 24 hours in advance by baking them and letting them cool completely. After cooling, wrap them securely in plastic wrap and refrigerate to maintain moisture. The Champagne Italian Meringue Buttercream can be made up to 3 days ahead; store it in an airtight container in the fridge. To finish the cake, simply re-whip the buttercream for smoothness, then layer with fresh strawberries before frosting and serving. This approach allows for a stress-free assembly on your special day while ensuring your cake remains just as delicious!

What to Serve with Champagne Cake with Champagne Italian Meringue Buttercream

Looking to create a delightful spread that complements your elegant cake? Here are some wonderful pairings that will elevate your dessert experience.

  • Fresh Strawberries: The burst of juicy sweetness contrasts beautifully with the creamy buttercream and sophisticated champagne flavor, adding a refreshing touch.

  • Sparkling Wine: Enhance the celebratory mood by serving a chilled glass of sparkling wine. Its effervescence mirrors the champagne in the cake, creating a delightful tasting experience.

  • Vanilla Ice Cream: The creamy texture and vanilla notes offer a comforting balance against the lightness of the Champagne Cake, making each bite indulgent.

  • Lemon Curd: The tartness of lemon curd creates a lovely balance with the sweetness of the cake, awakening your palate with zesty flair. Its vibrant color adds visual appeal as well!

  • Chocolate Ganache: Rich and indulgent, a drizzle of chocolate ganache introduces a luxurious depth to the cake. This unexpected pairing makes for an unforgettable contrast.

  • Whipped Cream: Light and airy, a dollop of freshly whipped cream complements the Champagne Cake perfectly, adding a layer of creaminess that enhances the entire dessert experience.

  • Pistachio Financiers: These almond-flour cakes bring a nutty flavor and moist texture, creating harmony with the champagne undertones. Their unique texture adds variety to your dessert table.

  • Espresso: A short, strong shot of espresso provides an energizing contrast to the sweetness of the cake, awakening your senses and highlighting its flavors.

Incorporate these delightful accompaniments to turn your Champagne Cake with Champagne Italian Meringue Buttercream into a multi-sensory experience that everyone will cherish!

Champagne Cake with Champagne Italian Meringue Buttercream Recipe FAQs

How do I choose the right champagne for the cake?
Absolutely! When selecting champagne, look for a sweeter variety to enhance the flavors in your cake. If champagne isn’t available, sparkling wine or a champagne reduction can be excellent alternatives. Remember, the quality of the champagne will directly impact the cake’s taste.

What’s the best way to store leftover Champagne Cake?
For all those delicious leftovers, store your frosted Champagne Cake in an airtight container in the refrigerator for up to 5 days. Make sure to keep it covered to maintain moisture. If you have unfrosted cake layers, wrap them tightly in plastic wrap at room temperature for up to 3 days without compromising the texture.

Can I freeze Champagne Cake?
Very! To freeze your Champagne Cake properly, wrap unfrosted layers tightly in plastic wrap followed by aluminum foil. They’ll stay fresh for up to 3 months in the freezer. When you’re ready to enjoy, thaw the layers in the fridge overnight before frosting to keep them perfectly moist.

What common issues should I watch for while baking?
Be vigilant about not overmixing your batter, as this can lead to a dense cake. Always check your cake for doneness by inserting a toothpick; if it comes out clean, the cake is ready! Also, if the meringue buttercream isn’t holding its shape, consider whipping the egg whites longer for that perfect fluffiness.

Can I make this cake dairy-free?
Certainly! To make a dairy-free version, substitute the buttermilk with a dairy-free yogurt or a DIY alternative (plant-based milk mixed with a splash of vinegar). Use vegan butter in place of unsalted butter in the buttercream. Make sure the champagne is also vegan-friendly, ensuring all components align with your dietary preferences.

How do I ensure my cake has a perfect crumb?
For a light, tender crumb, be sure to use cake flour instead of all-purpose flour, or mix all-purpose flour with cornstarch for a similar effect. When creaming your butter and sugar, be patient—beat until light and fluffy, usually around 3-5 minutes, to introduce air that helps the cake rise beautifully. Happy baking!

Champagne Cake with Champagne Italian Meringue Buttercream

Champagne Cake with Champagne Italian Meringue Buttercream Bliss

Celebratory Champagne Cake with Champagne Italian Meringue Buttercream is perfect for any sophisticated occasion.
Prep Time 30 minutes
Cook Time 30 minutes
Cooling Time 10 minutes
Total Time 1 hour 10 minutes
Servings: 12 slices
Course: Dessert
Cuisine: American
Calories: 320

Ingredients
  

For the Cake
  • 2 cups Cake Flour A mix of all-purpose flour and cornstarch works in a pinch.
  • 1 cup Buttermilk Can substitute with yogurt or a milk + vinegar mix.
  • 1 cup Champagne A sweeter champagne works wonders.
  • 1 cup Unsalted Butter Avoid substitutes for best results.
  • 1.5 cups Granulated Sugar Try brown sugar for a unique twist.
  • 4 large Eggs Use medium or large eggs as needed.
For the Filling and Topping
  • 1 cup Strawberries Fresh; raspberries also work as an alternative.
  • 1 teaspoon Cream of Tartar Leave out only if necessary.

Equipment

  • mixing bowl
  • electric mixer
  • spatula
  • oven
  • cake pans
  • Wire rack

Method
 

Step-by-Step Instructions
  1. Preheat your oven to 350°F and prepare your cake pans.
  2. In a bowl, whisk together the cake flour, baking powder, and salt.
  3. Cream together the unsalted butter and granulated sugar until fluffy.
  4. Alternate adding the flour mixture and buttermilk to the butter mixture.
  5. Gently fold in the champagne into the batter.
  6. Pour the batter evenly into prepared pans and smooth the tops.
  7. Bake for approximately 30 minutes until done.
  8. Allow the cake layers to cool for 10 minutes before transferring them.
  9. Prepare the Italian Meringue Buttercream by whipping egg whites and gradually adding sugar.
  10. Assemble the cake with fresh strawberries and buttercream.
  11. Frost the entire cake and decorate with strawberries.

Notes

Store unfrosted cake layers wrapped in plastic at room temperature. Frosted cake can be stored in an airtight container in the fridge for up to 5 days.

Creamy Roasted Garlic White Chicken Lasagna Soup Bliss

As I stood in my kitchen, the rich aroma of roasted garlic mingled with bubbling chicken broth, instantly melting away the chaos of the day. This Creamy Roasted Garlic White Chicken Lasagna Soup isn’t just a recipe; it’s a warm embrace in a bowl, combining tender chicken, earthy mushrooms, and comforting lasagna noodles. Perfect for those chilly nights, this soup offers a delectable twist on classic comfort food, making it a surefire hit with the whole family. Plus, it’s high in protein, ensuring everyone stays satisfied and nourished. Whether you’re too busy for a full meal prep or craving something creamy yet hearty, this dish will sweep you off your feet. Ready to see how this delightful soup comes together?

Why is this soup a must-try?

Creamy Comfort: This Roasted Garlic White Chicken Lasagna Soup takes comfort food to a whole new level, enveloping you in its luscious creaminess with every spoonful.

Flavor Explosion: With roasted garlic, tender chicken, and earthy mushrooms, it’s a symphony of flavors that will leave your taste buds singing.

Crowd-Pleasing Dish: Perfect for families and dinner guests, it’s a recipe that garners smiles and satisfied stomachs, turning any meal into a special occasion.

Quick and Easy: Whether you use rotisserie chicken or store-bought roasted garlic, you’ll have a hearty, soul-warming meal on the table in no time.

Versatile Options: Feel free to customize this soup by swapping in your favorite vegetables or even experimenting with different types of pasta like quinoa for a gluten-free option.

Experience the deliciousness for yourself, and pair it with some Homemade Chicken Soup or a fresh Garlic Bread for an unforgettable meal.

Roasted Garlic White Chicken Lasagna Soup Ingredients

For the Soup Base
Roasted Garlic Cloves – Provides intense flavor and aroma; store-bought roasted garlic can save time.
Prepared Alfredo Sauce – Adds creaminess and rich flavor; substitute with homemade Alfredo for a fresher taste.
Boneless Skinless Chicken Breasts (chopped into 1-inch pieces) – Main protein source, enhancing heartiness; use rotisserie chicken for quicker prep.
Olive Oil – For sautéing, adds healthy fats; substitute with vegetable oil if desired.
All-Purpose Flour – Used as a thickener; can be substituted with cornstarch for a gluten-free option.
Butter – Adds richness and flavor; can be replaced with margarine for a dairy-free option.
Mushrooms (sliced) – Provide earthy flavor and texture; you can use any variety, such as shiitake or button mushrooms.
Onions (minced) – Adds sweetness and depth of flavor; yellow or sweet onions work best.
Chicken Stock or Broth – Provides the soup base; use low-sodium stock for better control over salt levels.
Half and Half or Whole Milk – For creaminess; replace with skim milk for a lighter version.
Garlic Powder – Enhances garlic flavor; fresh minced garlic can be used instead.
Dried Basil – Adds herbal notes; substitute with Italian seasoning if needed.
Italian Seasoning – A blend of herbs for added flavor; use fresh herbs for a more vibrant taste.
Ground Nutmeg – Adds warmth to the flavor profile; omit if preferred.
Red Pepper Flakes – Provides a hint of heat; adjust to taste or leave out for milder soup.
Grated Parmesan Cheese – For richness and flavor; use a dairy-free alternative for lactose intolerance.

For the Noodles
Lasagna Noodles (broken into 4 pieces each, cooked) – Provides the Italian noodle base; substitute with other pasta like bowtie or fusilli if needed.

For the Garnish
Chopped Parsley – For fresh garnish; omit if not available.

Step‑by‑Step Instructions for Roasted Garlic White Chicken Lasagna Soup

Step 1: Blend the Sauce
Start by blending your roasted garlic cloves with the prepared Alfredo sauce in a blender until smooth and creamy. This rich mixture will bring a luscious texture to your roasted garlic white chicken lasagna soup. Set the blended sauce aside and prepare for the next step.

Step 2: Sauté Chicken
In a large Dutch oven, heat 2 tablespoons of olive oil over medium-high heat. Add your chopped boneless skinless chicken breasts, seasoning them with salt and pepper. Sauté until the chicken is browned and cooked through, about 4 to 6 minutes. Once done, remove the chicken from the pot and set it aside for later.

Step 3: Sauté Mushrooms
Using the same Dutch oven, melt 1 tablespoon of butter and add the sliced mushrooms. Sauté for about 5 to 6 minutes until the mushrooms are golden brown and tender. The earthy aroma will fill your kitchen! Once cooked, remove the mushrooms and set them aside with the chicken.

Step 4: Make the Soup Base
Add the remaining tablespoon of butter and the minced onions to the pot. Sauté for 5 to 6 minutes, stirring until the onions are translucent and fragrant. Sprinkle in the all-purpose flour, stirring continuously for 1 minute to eliminate the raw flour taste. This step will help thicken your roasted garlic white chicken lasagna soup.

Step 5: Add Liquids
Gradually whisk in the chicken stock and half and half, ensuring there are no lumps from the flour. Stir in the blended roasted garlic mixture along with garlic powder, dried basil, Italian seasoning, ground nutmeg, and red pepper flakes. Bring the mixture to a boil, then reduce the heat and let it simmer for 10 minutes, allowing all those flavors to meld beautifully.

Step 6: Combine Ingredients
Stir in the grated Parmesan cheese until melted and well combined. Next, return the cooked chicken and sautéed mushrooms to the pot. Toss in the chopped parsley, adjusting the seasoning with salt and pepper as needed. This adds a fresh touch to your roasted garlic white chicken lasagna soup.

Step 7: Serve
Decide whether to add the cooked and broken lasagna noodles directly to the soup or serve them on the side for leftovers. Ladle the warm soup into bowls and enjoy the comforting aroma that fills the room. Your delicious roasted garlic white chicken lasagna soup is ready to be savored!

Expert Tips for Roasted Garlic White Chicken Lasagna Soup

Flavorful Roasting: Ensure garlic is sufficiently roasted until caramelized to unlock its sweet, nutty flavor. This enhances the overall richness of your lasagna soup.

Chicken Choices: For ultimate convenience, use rotisserie chicken; it speeds up prep time and adds layers of flavor to the soup.

Creaminess Control: Adjust the thickness of your soup by varying flour or broth amounts. More flour thickens while reducing liquid keeps it lighter.

Ingredient Freshness: Use fresh herbs like basil instead of dried for an aromatic boost in your roasted garlic white chicken lasagna soup.

Perfect Pairing: Serve with garlic bread or a crunchy salad to balance the creaminess of the soup and elevate your meal experience.

What to Serve with Creamy Roasted Garlic White Chicken Lasagna Soup

Cozy up to a delightful meal that perfectly complements this rich and creamy masterpiece, enhancing the overall dining experience.

  • Garlic Bread: This crispy, warm delight is perfect for soaking up the creamy soup, adding a delicious crunch to every bite. Imagine the buttery aroma filling your kitchen—it’s the classic pairing everyone loves!

  • Mixed Green Salad: A fresh, vibrant salad balances the richness of the soup with crunchy greens and a tangy vinaigrette. Toss in some cherry tomatoes and cucumbers for a pop of color and flavor.

  • Steamed Broccoli: Bright green, tender-crisp broccoli provides a nutritious touch alongside the creamy soup. It adds a subtle crunch while enhancing your daily vegetable intake.

  • Caesar Salad: The creamy dressing and crisp romaine of a Caesar salad beautifully echo the flavors of the soup, creating a harmonious meal that feels both indulgent and fresh.

  • Wine Pairing: A glass of chilled Sauvignon Blanc complements the savory garlic notes and rich creaminess. It adds a refreshing contrast to enrich your dining experience.

  • Savory Herb Biscuits: Flaky, buttery biscuits infused with herbs make for a lovely side, perfect for dipping into the soup. Each bite will feel like a hug on your taste buds!

  • Roasted Brussels Sprouts: Crispy, caramelized Brussels sprouts offer an earthy flavor that pairs beautifully with the rich chicken soup. The slight bitterness balances the creaminess wonderfully.

  • Quinoa Salad: Light and fluffy quinoa tossed with lemon, herbs, and veggies brings an unexpected twist to the table. It adds texture and bright flavors to round out the meal perfectly.

Make Ahead Options

This Creamy Roasted Garlic White Chicken Lasagna Soup is a fantastic choice for meal prep, allowing you to enjoy its comforting flavors even on your busiest nights! You can prepare the soup base (steps 1-5) up to 3 days in advance; simply refrigerate it in an airtight container to lock in freshness. For optimal quality, store the cooked lasagna noodles separately to prevent them from becoming mushy. When you’re ready to serve, reheat the soup gently on the stove, adding in the noodles and any additional toppings like parmesan and parsley just before serving. You’ll be rewarded with a delicious, home-cooked meal with minimal effort!

How to Store and Freeze Roasted Garlic White Chicken Lasagna Soup

Fridge: Store leftover soup in an airtight container for up to 3 days. This creamy delight stays delicious in the fridge, ready for your next meal.

Freezer: For longer storage, freeze the soup in individual portions using freezer-safe containers for up to 3 months. This way, you always have a comforting meal at hand.

Reheating: When you’re ready to enjoy, simply thaw in the fridge overnight and reheat gently on the stove, stirring to reincorporate the creamy texture of your roasted garlic white chicken lasagna soup.

Extra Tips: If you know you’ll have leftovers, consider cooking the lasagna noodles separately and adding them just before serving to maintain their texture.

Variations & Substitutions for Roasted Garlic White Chicken Lasagna Soup

Feel free to let your creativity shine by customizing this comforting soup with these delightful variations!

  • Italian Sausage: Swap chicken for Italian sausage for a heartier, spicier flavor. The robust taste of sausage pairs beautifully with roasted garlic.
  • Vegetarian Delight: Eliminate the chicken and amp up the veggies! Add spinach, zucchini, or bell peppers for a fresh, vibrant twist that even meat-eaters will adore.
  • Pasta Swap: Replace lasagna noodles with farfalle or penne for a different texture. Quinoa is also a fantastic gluten-free alternative that adds a nutty flavor.
  • Low-Fat Version: Use skim milk instead of half-and-half for a lighter option that’s still deeply satisfying. You can also use less butter for a healthier approach.
  • Extra Creamy: For a dreamier consistency, add more Alfredo sauce or a splash of cream. Your family will love the indulgent, silky texture!
  • Spice it Up: Add more red pepper flakes for an exciting kick. If you want an even bolder flavor, sprinkle in some zesty cayenne pepper.
  • Herbal Infusion: Replace dried basil with fresh herbs like oregano or thyme for a fragrant boost that enhances the depth of your soup. Fresh herbs are a game-changer!
  • Cheese Variation: Try different cheeses such as mozzarella or ricotta for fun variations in flavor and texture. Each twist will take your soup to new delicious heights!

Embrace the opportunity to make this recipe your own! Consider pairing it with a comforting Homemade Chicken Soup or a delightful Chili Chicken Roasted for a filling meal that keeps everyone smiling at the dinner table.

Roasted Garlic White Chicken Lasagna Soup Recipe FAQs

What type of garlic is best for this soup?
Absolutely! For optimal flavor, use roasted garlic cloves. Roasting caramelizes the garlic, giving it a sweet, nutty flavor that enhances the soup’s richness. If you’re short on time, store-bought roasted garlic can be quite convenient and works well in this recipe!

How should I store leftovers?
Leftover Roasted Garlic White Chicken Lasagna Soup can be stored in an airtight container in the refrigerator for up to 3 days. Just make sure to let it cool to room temperature before sealing to maintain the creamy texture when reheating.

Can I freeze this soup?
Yes, you can freeze this creamy soup! Pour it into individual freezer-safe containers or bags, being sure to leave some space for expansion. It can be stored for up to 3 months. Thaw it in the fridge the night before you’re ready to eat, and then gently reheat on the stove while stirring to restore its creamy consistency.

What if my soup is too thick?
No worries! If you find your soup is too thick, simply add a bit of chicken stock or water while it simmers. Start with small amounts, about ¼ cup at a time, until you reach your desired consistency. Also, remember that the lasagna noodles will absorb some liquid, so adjusting just before serving works best!

Are there any dietary considerations I should be aware of?
Indeed! For those with lactose intolerance, replace the half and half and Parmesan cheese with dairy-free alternatives. Additionally, if you’re following a gluten-free diet, use gluten-free pasta and cornstarch instead of all-purpose flour. Always check ingredient labels for potential allergens.

What type of pasta can I use instead of lasagna noodles?
The more the merrier! While this recipe suggests lasagna noodles, you can substitute them with other pasta shapes like bowtie, fusilli, or even quinoa for a gluten-free option. Just be sure to adjust cooking times based on the pasta type you choose.

Roasted Garlic White Chicken Lasagna Soup

Creamy Roasted Garlic White Chicken Lasagna Soup Bliss

This Creamy Roasted Garlic White Chicken Lasagna Soup is a comforting meal filled with tender chicken, earthy mushrooms, and creamy flavors.
Prep Time 15 minutes
Cook Time 30 minutes
Total Time 45 minutes
Servings: 6 bowls
Course: Dinner
Cuisine: Italian
Calories: 450

Ingredients
  

For the Soup Base
  • 10 cloves Roasted Garlic Store-bought can save time.
  • 1 cup Prepared Alfredo Sauce Use homemade for a fresher taste.
  • 1 pound Boneless Skinless Chicken Breasts Chopped into 1-inch pieces.
  • 2 tablespoons Olive Oil Substitute with vegetable oil if desired.
  • 2 tablespoons All-Purpose Flour Can be substituted with cornstarch for gluten-free.
  • 1 tablespoon Butter Can be replaced with margarine for a dairy-free option.
  • 8 ounces Mushrooms Sliced, use any variety.
  • 1 medium Onion Minced, yellow or sweet onions work best.
  • 4 cups Chicken Stock Use low-sodium stock.
  • 1 cup Half and Half Replace with skim milk for a lighter version.
  • 1 teaspoon Garlic Powder Fresh minced garlic can be used instead.
  • 1 teaspoon Dried Basil Substitute with Italian seasoning if needed.
  • 1 teaspoon Italian Seasoning Use fresh herbs for a more vibrant taste.
  • 1/4 teaspoon Ground Nutmeg Omit if preferred.
  • 1 teaspoon Red Pepper Flakes Adjust to taste.
  • 1/2 cup Grated Parmesan Cheese Use a dairy-free alternative if needed.
For the Noodles
  • 9 sheets Lasagna Noodles Broken into 4 pieces each, cooked.
For the Garnish
  • 1/4 cup Chopped Parsley Omit if not available.

Equipment

  • Dutch oven

Method
 

Step-by-Step Instructions
  1. Blend the roasted garlic cloves with the prepared Alfredo sauce until smooth and creamy. Set aside.
  2. In a large Dutch oven, heat olive oil over medium-high heat. Add the chopped chicken, season with salt and pepper, and sauté until browned, about 4-6 minutes. Remove and set aside.
  3. In the same pot, melt butter and add sliced mushrooms. Sauté for 5-6 minutes until golden brown. Set aside with the chicken.
  4. Add remaining butter and minced onions to the pot. Sauté for 5-6 minutes until translucent. Stir in flour for 1 minute.
  5. Gradually whisk in chicken stock and half and half, then stir in the blended roasted garlic mixture along with spices. Bring to a boil, then simmer for 10 minutes.
  6. Stir in Parmesan cheese until melted and combined. Return cooked chicken and mushrooms, add parsley, and adjust seasoning.
  7. Decide whether to add cooked lasagna noodles to the soup or serve separately. Ladle into bowls and enjoy.

Notes

For best flavor, use rotisserie chicken and fresh herbs. Serve with garlic bread for a complete meal.

Strawberry Protein Muffins: Healthy, Guilt-Free Delight

As the warm aroma of berry goodness filled my kitchen, I couldn’t help but smile at the delightful mess I was creating. If you’ve ever wanted a guilt-free treat that tastes indulgent, let me introduce you to my Strawberry Protein Muffins. These fluffy gems are not only low-carb and high-protein, making them perfect for any health-conscious foodie, but they’re also incredibly quick to whip up—a real lifesaver on busy mornings! Each muffin is packed with fresh strawberries, delivering that burst of fruity goodness while keeping your energy up throughout the day. Are you ready to embrace a delicious twist on your breakfast routine? Let’s get baking!

Why Are Strawberry Protein Muffins Amazing?

Guilt-Free Indulgence: You can enjoy these muffins without compromising your health goals. Packed with protein yet low in carbs, they are a satisfying snack that fuels your day.

Quick and Easy: Just a few simple steps and you’ll have a delightful batch ready to enjoy. Perfect for busy chefs and home cooks alike!

Versatile Flavor: While bursting with strawberry goodness, you can adapt the recipe with other berries or spices to keep things exciting. Check out our Strawberry Cheesecake Dump for more fruity inspiration!

Crowd-Pleasing Appeal: These muffins are not only delicious but impressive. Serve them at brunch or as a grab-and-go snack that everyone will rave about.

Wholesome Ingredients: Each bite is made with nourishing components like cottage cheese and almond flour, providing a boost of energy without the guilt. Enjoy the balance of indulgence and health all in one!

Strawberry Protein Muffin Ingredients

Here’s what you’ll need to create these delicious, guilt-free Strawberry Protein Muffins!

For the Muffins

  • Eggs – Provides structure and moisture; use large eggs for best results.
  • Cottage Cheese – Acts as a base, offering protein and moisture; opt for 2% or 4% milkfat for best texture.
  • Almond Flour – Adds richness while keeping the recipe low-carb; can substitute with coconut flour (just adjust the amount).
  • Vanilla Extract – Enhances sweetness and flavor complexity.
  • Baking Powder – Serves as the leavening agent to ensure a fluffy muffin.
  • Ground Cinnamon – Adds warmth and a subtle kick; totally optional for extra spice!
  • Strawberries – Fresh strawberries provide natural sweetness and moisture; if using frozen, thaw and pat them dry first.
  • Sweetener (optional) – Tailor the sweetness to your needs; use a sugar substitute if preferred.

Enjoy baking these Strawberry Protein Muffins that blend delightful taste with guilt-free nutrition!

Step‑by‑Step Instructions for Strawberry Protein Muffins

Step 1: Preheat the Oven
Begin by preheating your oven to 375°F (190°C). While the oven warms up, lightly grease a muffin tin with cooking spray or use silicone muffin liners to prevent sticking. This simple step sets the stage for perfectly baked Strawberry Protein Muffins that will rise beautifully and have a golden color.

Step 2: Whisk the Eggs
In a mixing bowl, crack and whisk together three large eggs until they are fully combined and frothy. Incorporate the cottage cheese into the eggs, stirring until the mixture is smooth and well-blended. This creamy base provides moisture and protein to your Strawberry Protein Muffins, ensuring they are both fluffy and satisfying.

Step 3: Combine Dry Ingredients
Next, add the almond flour, baking powder, vanilla extract, and ground cinnamon to the egg and cottage cheese mixture. Stir until well mixed, ensuring there are no lumps. If desired, incorporate your preferred sweetener to enhance the muffin’s flavor. Achieving a consistent batter is key to your Strawberry Protein Muffins rising evenly while baking.

Step 4: Fold in Strawberries
Carefully fold in the diced strawberries with a spatula, ensuring that they are evenly distributed throughout the batter without breaking down too much. The fresh strawberries will provide bursts of juicy sweetness in each bite of your Strawberry Protein Muffins, creating a delightful contrast to the fluffy texture.

Step 5: Fill the Muffin Tin
Spoon the batter evenly into each muffin cup, filling each one about three-quarters full. This ensures that the muffins have enough room to rise while baking. Gently smooth the tops with a spatula for a uniform look. Your muffin tin is now ready to create a batch of scrumptious Strawberry Protein Muffins.

Step 6: Bake to Perfection
Place the muffin tin in the preheated oven and bake for 18 to 20 minutes, or until the muffins are golden brown on top and a toothpick inserted into the center comes out clean. Keep an eye on them towards the end to avoid overbaking. Your kitchen will be filled with the heavenly aroma of Strawberry Protein Muffins!

Step 7: Cool Before Serving
Once baked, remove the muffins from the oven and allow them to cool in the tin for about 5 minutes. Then, transfer them to a wire rack to cool completely. Enjoy warm or at room temperature, experiencing the wholesome goodness of your delicious Strawberry Protein Muffins!

Make Ahead Options

These Strawberry Protein Muffins are perfect for busy home cooks looking to streamline their meal prep! You can prepare the muffin batter up to 24 hours in advance by mixing the eggs, cottage cheese, almond flour, and other dry ingredients. Simply refrigerate the batter to keep it fresh. When you’re ready to enjoy your muffins, carefully fold in the diced strawberries, spoon the batter into the muffin tin, and bake. This method allows you to enjoy delicious, fresh muffins with minimal morning effort while maintaining their delightful fluffy texture. Just remember, for the best quality, avoid overmixing and refrigerate your batter until you’re ready to bake!

Storage Tips for Strawberry Protein Muffins

  • Room Temperature: Store muffins in an airtight container at room temperature for up to 3 days. This keeps them fresh and soft, ready for a quick snack or breakfast.

  • Fridge: For longer storage, place the muffins in the fridge, where they can last for about 5-7 days. Ensure they are in a sealed container to prevent them from drying out.

  • Freezer: For optimal long-term storage, freeze the muffins in a freezer-safe bag or airtight container for up to 3 months. Make sure they are completely cool before freezing to avoid ice crystals.

  • Reheating: To enjoy your Strawberry Protein Muffins after freezing, simply reheat them in the microwave for about 30 seconds. This will bring back their delightful fluffiness, just like they were freshly baked!

Strawberry Protein Muffins Variations & Substitutions

Feel free to let your creativity shine as you customize these muffins to suit your taste and dietary needs!

  • Nut-Free: Replace almond flour with sunflower seed flour for a nut-free option while keeping it low-carb. It’s perfect for those with nut allergies.

  • Dairy-Free: Use silken tofu or almond-based yogurt instead of cottage cheese for a creamy, dairy-free alternative. They’ll still be fluffy and delicious!

  • Sweetener Swap: Substitute your favorite sweetener with honey or agave if you prefer a natural option. It brings a lovely sweetness to the muffins.

  • Berry Medley: Try mixing blueberries and raspberries with the strawberries for a colorful berry mix that excites the taste buds. Each bite will be a burst of flavor!

  • Spice it Up: Enhance your muffins with a dash of cayenne pepper for a surprising kick. The heat balances beautifully with the sweet strawberries.

  • Chocolate Love: Fold in some dark chocolate chips for an indulgent twist. The rich chocolate pairs wonderfully with the fresh strawberries, satisfying your sweet tooth.

  • Protein Boost: Add a scoop of your favorite protein powder to the dry ingredients for an extra protein punch. It’s great for post-workout snacks!

  • Flavor Explosion: Incorporate a teaspoon of almond extract for a nutty, aromatic enhancement that complements the strawberry flavor beautifully.

With these variations, you can enjoy a delightful serving of Strawberry Protein Muffins that cater to your cravings and dietary requirements. Don’t forget to check out our Strawberry Cheesecake Dump for more fruity inspiration if you’re looking to explore even more berry delights!

Expert Tips for Strawberry Protein Muffins

  • Dry Strawberries Thoroughly: Ensure your strawberries are completely dry before chopping. Excess moisture can lead to soggy muffins, ruining your perfect Strawberry Protein Muffins.

  • Use Non-Stick Bakeware: Opt for a non-stick muffin tin or silicone liners. This prevents sticking and helps your muffins release effortlessly.

  • Adjust Bake Time: If your muffins feel wet after the minimum bake time, give them an extra 5 minutes in the oven. This guarantees the desired fluffiness without the risk of undercooking.

  • Experiment with Sweeteners: If using a sweetener, taste your batter before baking. Adjust according to your preference to ensure your Strawberry Protein Muffins shine with the perfect sweetness.

  • Store Properly: For optimal freshness, allow muffins to cool completely before storing in a freezer-safe bag. This keeps them moist and ready for your next snack!

What to Serve with Strawberry Protein Muffins

These delightful muffins are just the start of a wholesome breakfast or snack spread, ready to be accompanied by tasty sides and drinks.

  • Creamy Greek Yogurt: The tangy richness contrasts the sweetness of the muffins, creating a balanced bite that is both nourishing and satisfying. Add a drizzle of honey for a touch of sweetness!

  • Fresh Fruit Salad: A vibrant mix of seasonal fruits brightens up the plate and complements the strawberries in the muffins. The juiciness of watermelon or the zing of citrus can liven the meal!

  • Cinnamon Maple Oatmeal: Warm, spiced oatmeal provides a comforting texture alongside the fluffy muffins. The flavors harmonize beautifully, making for a hearty breakfast that will keep you energized.

  • Nut Butter Spread: A generous smear of almond or peanut butter enhances the muffins’ protein content and adds a nutty richness. This decadent option feels indulgent while staying nutritious.

  • Green Smoothie: A refreshing blend of spinach, bananas, and almond milk adds a refreshing touch. This nutritious drink complements the muffins perfectly while providing an extra boost of energy.

  • Herbal Tea: A warm cup of herbal tea, like chamomile or mint, accompanies the muffins with soothing flavors. It’s a wonderful way to relax and enjoy the comforting experience of homemade goodness.

  • Ricotta Cheese with Honey: This creamy delight pairs beautifully with the muffins, providing a luxurious counterpoint to their texture. Just spread a little ricotta and drizzle with honey for an irresistible combination!

  • Coconut Chia Pudding: This is a delightful, healthy side that adds a chewy texture and tropical flavor. The seeds bring in an extra hit of nutrition, creating a satisfying balance.

Strawberry Protein Muffins Recipe FAQs

What type of strawberries should I use for the muffins?
Absolutely! Fresh strawberries are ideal as they bring natural sweetness and moisture. If using frozen strawberries, ensure they are completely thawed and patted dry to avoid excess moisture in the batter. Look for strawberries that are vibrant and firm, without any dark spots or blemishes.

How should I store Strawberry Protein Muffins?
To keep your muffins fresh, store them in an airtight container at room temperature for up to 3 days. For longer storage, you can place them in the fridge for 5-7 days. If you want them to last even longer, freeze the muffins in a freezer-safe bag for up to 3 months—just remember to cool them completely first!

Can I freeze Strawberry Protein Muffins?
Absolutely! To freeze, ensure the muffins are completely cooled. Place them in a single layer on a baking sheet and freeze until solid. Then, transfer them to a freezer-safe bag or container. This way, you can enjoy delicious muffins anytime! Just reheat in the microwave for about 30 seconds when you’re ready to enjoy.

What if my muffins turn out soggy?
If you find your muffins are soggy, it could be due to excess moisture from the strawberries. Make sure to dry them well before chopping. If that’s not the issue and they still feel wet, they might need a little more time in the oven. Check for doneness by inserting a toothpick; if it comes out clean, they’re ready!

Are these muffins safe for dietary restrictions?
These Strawberry Protein Muffins are quite versatile! They are low-carb and can be adjusted for gluten-free diets by using a suitable almond flour. However, check that no one has allergies to eggs or dairy in your household since this recipe contains both. Always prioritize personal dietary needs when baking to ensure everyone can enjoy these delicious treats!

Strawberry Protein Muffins

Strawberry Protein Muffins: Healthy, Guilt-Free Delight

Enjoy these guilt-free Strawberry Protein Muffins, a low-carb, high-protein treat perfect for breakfast or a snack.
Prep Time 10 minutes
Cook Time 20 minutes
Cooling Time 5 minutes
Total Time 35 minutes
Servings: 12 muffins
Course: Breakfast
Cuisine: American
Calories: 150

Ingredients
  

For the Muffins
  • 3 large Eggs Provides structure and moisture.
  • 1 cup Cottage Cheese Opt for 2% or 4% milkfat.
  • 2 cups Almond Flour Can substitute with coconut flour.
  • 1 teaspoon Vanilla Extract Enhances sweetness and flavor.
  • 2 teaspoons Baking Powder Leavening agent.
  • 1 teaspoon Ground Cinnamon Optional spice.
  • 1 cup Strawberries Fresh, diced; or thawed if frozen.
  • to taste Sweetener (optional) Use sugar substitute if preferred.

Equipment

  • muffin tin
  • mixing bowl
  • spatula

Method
 

Step-by-Step Instructions for Strawberry Protein Muffins
  1. Preheat your oven to 375°F (190°C) and lightly grease a muffin tin.
  2. In a mixing bowl, whisk together three large eggs until frothy. Incorporate the cottage cheese until smooth.
  3. Add almond flour, baking powder, vanilla extract, and ground cinnamon to the mixture and stir until well mixed.
  4. Fold in the diced strawberries carefully to distribute evenly throughout the batter.
  5. Spoon the batter evenly into each muffin cup, filling each one about three-quarters full.
  6. Bake for 18 to 20 minutes or until golden brown and a toothpick comes out clean.
  7. Remove from oven and allow to cool in the tin for about 5 minutes, then transfer to a wire rack.

Notes

Ensure strawberries are dry before chopping to avoid soggy muffins. Store in an airtight container for freshness.

Loaded Wedge Salad with zesty Buttermilk Ranch Delight

While flipping through an old cookbook, I stumbled upon a classic that instantly brought me back to summer gatherings and family barbecues—the wedge salad. This Loaded Wedge Salad takes that nostalgic recipe and jazzes it up with a modern twist, featuring a creamy buttermilk ranch dressing that’s simply irresistible. It’s a true crowd-pleaser, perfect for those who crave a fresh, satisfying dish without sacrificing flavor. With its vibrant mix of crunchy iceberg lettuce, crispy bacon, and delightful toppings, this salad not only looks beautiful on the table but also makes for a quick prep option that’s ideal for busy weeknights or entertaining guests. Ready to elevate your salad game? Let’s dive into the details of creating this delicious Loaded Wedge Salad!

Why is Loaded Wedge Salad a Must-Try?

Crowd-Pleasing: This Loaded Wedge Salad is not just a meal; it’s an experience! Perfect for gatherings, it impresses guests with its vibrant colors and flavors.

Effortless Preparation: With a quick assembly process, you can whip this beauty up in no time, making it a go-to for busy weeknights or last-minute invites.

Rich, Creamy Dressing: The homemade buttermilk ranch dressing is a game-changer that elevates the classic flavor profile while staying true to its roots.

Versatile Toppings: Feel free to mix and match with your favorite toppings, like crispy bacon and cherry tomatoes, or add a twist with blue cheese or avocado, ensuring there’s a delightful surprise in every bite.

Texture Excellence: Each crunchy wedge of iceberg is contrasted by crispy breadcrumbs, tender bacon, creamy eggs, and a dollop of ranch dressing — a delightful mix that keeps every bite interesting.

If you’re looking for even more salad inspiration, be sure to check out our delicious Garden Harvest Salad or the refreshing Cabbage Apple Salad.

Loaded Wedge Salad Ingredients

For the Dressing
Mayonnaise – Forms the creamy base; you can substitute part of this with Greek yogurt for a lighter version.
Buttermilk – Adds tanginess; essential for the flavor depth of the dressing.
Champagne Vinegar – Enhances the dressing’s taste; white wine vinegar works well, too.
Sugar – Balances the dressing’s acidity; adjust based on taste preferences.
Chives – Provides a mild onion flavor; fresh is ideal for optimal flavor.
Fresh Parsley – Brightens the dressing; can be replaced with dill for a different profile.
Dill – Adds a fresh, herby note; feel free to use dried if fresh isn’t available.
Garlic Powder – Packs in flavor without the pungency of fresh garlic; complements well.
Onion Powder – Enhances the dressy complex flavors; it’s a must in ranch dressing.
Hot Sauce – Adds a little heat; adjust to your spice preference.

For the Salad
Iceberg Lettuce – The star of the dish, offering crunch; ensure it’s fresh and crisp.
Bacon – For that savory, crispy punch; cook until golden and crumble over the top.
Hard Boiled Eggs – Deliver creaminess and protein; use two, diced for even distribution.
Cherry Tomatoes – Bright and juicy; if unavailable, substitute with diced regular tomatoes.
Red Onion – Provides a punch of flavor; soaking it in vinegar mellows its intensity.
Crispy Lemon Breadcrumbs – Adds an unexpected crunch; panko can be subbed if needed.
Chives – For garnish and flavor; fresh ones elevate your dish beautifully.
Butter – Essential for the crispy breadcrumbs; use salted for flavor enhancement.

With these ingredients in hand, you’re on your way to crafting a Loaded Wedge Salad that will impress everyone at the table!

Step‑by‑Step Instructions for Loaded Wedge Salad

Step 1: Make the Dressing
In a medium bowl, whisk together the mayonnaise, buttermilk, champagne vinegar, sugar, chives, parsley, dill, garlic powder, onion powder, and hot sauce until smooth and creamy. Once well-combined, cover and refrigerate the dressing for at least 2 hours to allow the flavors to meld beautifully, ensuring your Loaded Wedge Salad has a deliciously rich dressing.

Step 2: Soak the Onions
While the dressing chills, prepare your red onions. In a small bowl, combine diced onions with cold water and a splash of vinegar, then let them soak for at least 30 minutes. This process will mellow the onion’s sharpness, enhancing the overall flavor profile of your Loaded Wedge Salad. After soaking, drain and set aside.

Step 3: Prepare the Lettuce
Take a fresh head of iceberg lettuce and carefully remove the outer leaves. Cut the lettuce into 4 to 6 equal wedges, making sure each piece retains its shape for a beautiful presentation. Rinse the wedges under cold water to remove any dirt and gently pat them dry with a paper towel, ensuring they are crisp and ready for assembly.

Step 4: Make the Breadcrumbs
In a skillet over medium heat, melt a tablespoon of butter. Once melted, add the breadcrumbs and toast them, stirring frequently until golden brown and crispy, about 3 to 5 minutes. Once toasted, remove from heat, mix in the lemon zest, and allow them to cool slightly. These crunchy breadcrumbs will add an exciting texture to your Loaded Wedge Salad.

Step 5: Assemble the Salad
On a large serving platter, artfully arrange the lettuce wedges, creating an attractive display. Drizzle generous amounts of the creamy buttermilk ranch dressing over each wedge. Top with crispy bacon, diced hard-boiled eggs, cherry tomatoes, soaked red onions, and the crispy lemon breadcrumbs. Finally, sprinkle fresh chives on top for a finishing touch and serve immediately to enjoy the delightful flavors of your Loaded Wedge Salad.

How to Store and Freeze Loaded Wedge Salad

Fridge: Keep any leftover Loaded Wedge Salad components separate in airtight containers; they can last up to 4 days. This helps maintain the crunch of the lettuce and freshness of the toppings.

Dressing: Store the buttermilk ranch dressing in a sealed container in the fridge for up to 1 week. Give it a good shake before reusing to restore its creamy texture.

Freezer: It’s not recommended to freeze the Loaded Wedge Salad due to textures of the lettuce and toppings, which may become mushy upon thawing.

Reheating: If you’ve made crispy breadcrumbs in advance, reheat them briefly in a skillet for added crunch before topping your salad again.

Expert Tips for Loaded Wedge Salad

Chill Longer: For a richer flavor in your dressing, allow it to chill longer than 2 hours—overnight is ideal!

Onion Soaking: Soak your red onions adequately to tame their sharpness; too little soaking can leave an overwhelming flavor.

Fresh Ingredients: Use fresh iceberg lettuce, ensuring it’s crispy and intact; wilted leaves can spoil the salad’s crunch.

Breadcrumb Timing: Make the crispy lemon breadcrumbs just before serving for maximum crunchiness—no one likes soggy toppings!

Topping Variety: Don’t hesitate to experiment with toppings—additions like avocado or roasted nuts can elevate your Loaded Wedge Salad.

Presentation Matters: Arrange your salad wedges artfully on the platter; a beautiful presentation enhances the dining experience!

What to Serve with Loaded Wedge Salad

Elevate your dining experience with delightful pairs that complement this hearty, refreshing salad beautifully.

  • Grilled Chicken: Juicy, smoky chicken adds protein and heartiness, balancing the crispness of the salad.

  • Roasted Vegetables: A medley of roasted seasonal vegetables brings warmth and depth, creating a lovely contrast in texture.

  • Garlic Bread: Crunchy, buttery garlic bread provides a satisfying crunch that will have everyone reaching for more.

  • Creamy Coleslaw: A tangy coleslaw provides an additional crunch and refreshing creaminess that pairs seamlessly with the dressing.

  • Chilled White Wine: A crisp Sauvignon Blanc enhances the vibrancy of the salad while complementing the creamy dressing perfectly.

  • Fresh Fruit Medley: Lightens the meal with sweet and juicy fruits, offering a refreshing contrast to the savory salad.

  • Potato Wedges: Crispy, salty wedges add a heartiness that makes for a satisfying meal, perfect for family gatherings.

  • Mini Quiches: A platter of mini quiches adds a savory touch, ensuring there’s an element of warmth for every bite.

Feel free to mix and match these options to create a perfectly balanced feast alongside your Loaded Wedge Salad!

Make Ahead Options

Preparing your Loaded Wedge Salad ahead of time is a fantastic way to save valuable minutes during busy weeknights or for entertaining guests. You can make the buttermilk ranch dressing up to 3 days in advance and store it in an airtight container in the refrigerator — just make sure to give it a good stir before serving to refresh the flavors. Additionally, you can wash and cut the iceberg lettuce into wedges and refrigerate them, wrapped in paper towels, for up to 24 hours to maintain crispness. The bacon can be cooked and crumbled a day ahead as well. When it’s time to serve, simply assemble the salad by layering the lettuce and toppings, drizzling with dressing, and enjoy the same delectable taste with less fuss!

Loaded Wedge Salad Variations

Feel free to experiment and make this Loaded Wedge Salad your own, adding flavors and textures that tantalize your taste buds!

  • Dairy-Free: Swap the buttermilk ranch dressing for a plant-based version by using almond milk and vegan mayo. It keeps all the creaminess while catering to dairy-free diets.

  • Avocado Bliss: Top your wedge salad with diced avocado for a rich, buttery flavor that pairs beautifully with the crunch of iceberg lettuce. The creaminess adds a delightful contrast to the classic ingredients.

  • Spicy Kick: Add diced jalapeños or a sprinkle of crushed red pepper flakes for a kick. This provides a nice contrast to the fresh toppings and transforms your salad into a spicy sensation.

  • Nutty Boost: Sprinkle roasted nuts like almonds or pecans for an added crunch and nuttiness. This not only provides an extra layer of texture but also enhances the overall flavor profile of your salad.

  • Smoky Flavor: Incorporate smoked bacon or even smoked paprika in the dressing for a deeper, more complex flavor. The smokiness elevates the salad from classic to gourmet.

  • Gourmet Touch: Crumble some blue cheese or feta cheese on top for a tangy twist. The bold flavors of the cheese complement the creamy dressing perfectly, making every bite an indulgent experience.

  • Herb-Infused Dressing: Incorporate fresh herbs like basil or cilantro into your ranch dressing for a fragrant upgrade. The fresh herbs give the salad a vibrant, garden-fresh taste.

  • Crunch Cucumber Addition: For a refreshing bite, add thinly sliced cucumbers to your salad. Their crispness works wonderfully with the other textures and keeps the salad light.

If you’re in the mood for more salad ideas, consider trying our delicious Crunch Cucumber Salad for a refreshing twist or the zesty Cucumber Carrot Salad bursting with flavors!

Loaded Wedge Salad Recipe FAQs

What type of iceberg lettuce should I use?
Absolutely! Use fresh, intact heads of iceberg lettuce for the best crunch. Look for heads that are firm, vibrant green, and free from any signs of brown or wilted leaves. This not only ensures a crisp texture but also enhances the visual appeal of your Loaded Wedge Salad.

How long can I store the components of the Loaded Wedge Salad?
To keep things fresh, store the salad components separately in airtight containers. The lettuce can last up to 4 days in the fridge, while the buttermilk ranch dressing can be kept in a sealed container for up to a week. This method helps maintain the individual textures and flavors of each ingredient.

Can I freeze the Loaded Wedge Salad?
It’s best not to freeze your Loaded Wedge Salad. Freezing can alter the crispness of the lettuce and toppings, making them mushy when thawed. If you want to make ahead, consider storing the dressing and toppings separately and assemble the salad fresh when you’re ready to enjoy.

How do I prevent my red onions from being too strong?
To mellow the sharp flavor of the red onions, soak them in cold water with a splash of vinegar for at least 30 minutes. This simple step softens their bite and enhances the overall flavor of your Loaded Wedge Salad, making each bite more enjoyable.

What are some great toppings for my Loaded Wedge Salad?
Feel free to get creative with your toppings! Beyond the classic bacon and hard-boiled eggs, you can add diced avocado, crumbled blue cheese, or even roasted nuts for a delightful twist. The more the merrier! Each addition brings a different flavor and texture, making your salad special every time.

Loaded Wedge Salad

Loaded Wedge Salad with zesty Buttermilk Ranch Delight

Experience the flavors of a Loaded Wedge Salad, featuring a creamy buttermilk ranch dressing, perfect for gatherings and quick weeknight meals.
Prep Time 20 minutes
Cook Time 15 minutes
Resting Time 2 hours
Total Time 2 hours 35 minutes
Servings: 4 servings
Course: Lunch
Cuisine: American
Calories: 320

Ingredients
  

For the Dressing
  • 1 cup Mayonnaise can substitute part with Greek yogurt
  • 1/2 cup Buttermilk essential for flavor
  • 2 tablespoons Champagne Vinegar can use white wine vinegar
  • 1 teaspoon Sugar adjust based on taste
  • 2 tablespoons Chives fresh is ideal
  • 2 tablespoons Fresh Parsley can be replaced with dill
  • 1 teaspoon Dill fresh or dried
  • 1 teaspoon Garlic Powder
  • 1 teaspoon Onion Powder
  • to taste Hot Sauce adjust to spice preference
For the Salad
  • 1 head Iceberg Lettuce fresh and crisp
  • 1 cup Bacon cooked and crumbled
  • 2 Hard Boiled Eggs diced
  • 1 cup Cherry Tomatoes or diced regular tomatoes
  • 1/4 cup Red Onion soaked in vinegar
  • 1 cup Crispy Lemon Breadcrumbs can substitute panko
  • 2 tablespoons Chives for garnish
  • 1 tablespoon Butter for breadcrumbs

Equipment

  • Medium bowl
  • Skillet
  • Serving platter
  • Small bowl

Method
 

Make the Dressing
  1. Whisk together the mayonnaise, buttermilk, champagne vinegar, sugar, chives, parsley, dill, garlic powder, onion powder, and hot sauce in a medium bowl until smooth. Cover and refrigerate for at least 2 hours.
Soak the Onions
  1. Combine diced onions with cold water and a splash of vinegar in a small bowl, let soak for at least 30 minutes. Drain and set aside.
Prepare the Lettuce
  1. Remove outer leaves from a head of iceberg lettuce. Cut into 4 to 6 wedges, rinse, and pat dry.
Make the Breadcrumbs
  1. Melt butter in a skillet over medium heat, add breadcrumbs and toast until golden brown, about 3 to 5 minutes. Mix in lemon zest and cool slightly.
Assemble the Salad
  1. Arrange lettuce wedges on a large platter, drizzle with dressing, and top with bacon, eggs, tomatoes, onions, and breadcrumbs. Garnish with chives and serve.

Notes

For a richer flavor, let the dressing chill longer. Use fresh ingredients for the best results. Make breadcrumbs just before serving for optimal crunchiness.

Salted Dark Chocolate Orange Cookies for Sweet Zesty Bliss

As I stood in the kitchen, the rich aroma of melting dark chocolate began to swirl through the air, mingling with the bright, zesty scent of fresh oranges. This moment marked the beginning of my latest baking adventure: Salted Dark Chocolate Orange Cookies. Not only do these cookies come together swiftly, making them perfect for a weeknight treat, but their delightful blend of sweet and savory adds a tantalizing twist that’s hard to resist. Just imagine sinking your teeth into a cookie that is crispy on the outside and chewy within, crowned with a sprinkle of flaky sea salt to enhance that decadent flavor. Trust me, once you experience the harmony of dark chocolate and citrus, your taste buds will thank you! Ready to unleash your inner baker and indulge in these unforgettable cookies?

Why are these cookies so irresistible?

Decadent Delight: The combination of rich dark chocolate and zesty orange creates a flavor profile that’s both indulgent and refreshing, making every bite a delicious experience.

Quick and Easy: With a straightforward baking process, these cookies come together in a flash, making them perfect for last-minute cravings or spontaneous gatherings.

Perfectly Balanced: Topped with flaky sea salt, each cookie delivers a delightful contrast of flavors that elevates the traditional cookie to something spectacular.

Versatile Variations: Feel free to explore your creativity—try swapping orange zest for lemon or adding nuts for a delightful twist. They’re so adaptable!

Crowd Pleaser: Whether you’re serving them at a party or enjoying them with a cup of coffee, these cookies are sure to impress your family and friends. You might also want to check out the delightful Coconut Chocolate Rolls to add variety to your dessert table.

Salted Dark Chocolate Orange Cookies Ingredients

Get ready to bake some unforgettable treats!

For the Cookie Dough
All-Purpose Flour – Provides structure to the cookies; swap with gluten-free flour for a gluten-free option.
Baking Powder – Acts as a leavening agent, helping the cookies rise beautifully.
Salt – Enhances flavors and creates balance against the sweetness of the chocolate.
Butter (room temperature) – Adds richness, moisture, and a soft, tender texture; unsalted is ideal for better salt control.
Large Egg – Binds ingredients together while adding needed moisture.
Sugar – Sweetens the dough, with brown sugar bringing deeper, caramel notes; feel free to mix it up!
Orange Zest – Infuses bright citrus notes; adjust to your taste for that perfect zesty punch.
Orange Liqueur or Juice – Enhances the orange flavor and adds moisture; feel free to swap with vanilla extract if desired.
Dark Chocolate Bars – Melt for cookie dough or use chocolate chips for an easier option.

For the Glaze
Powdered Sugar – Sweetens the glaze and offers a smooth finish for the cookie toppings.
Butter (melted) – Contributes sheen and richness to the glaze, making it irresistibly delicious.
Flake Sea Salt – For topping, it adds texture while beautifully contrasting the sweetness of the cookies.

These Salted Dark Chocolate Orange Cookies are not just a tasty treat; they’re a delicious journey waiting to be explored. Happy baking!

Step‑by‑Step Instructions for Salted Dark Chocolate Orange Cookies

Step 1: Prepare Oven
Start by preheating your oven to 350°F (175°C). This ensures that when you put your Salted Dark Chocolate Orange Cookies in, they will bake evenly and rise beautifully. As the oven warms up, gather your baking sheets and line them with parchment paper for easy cleanup and to prevent sticking.

Step 2: Make Dough
In your stand mixer, beat the room temperature butter until it’s light and fluffy, about 2-3 minutes. Gradually add the sugar, mixing until smooth and well combined. Next, incorporate the large egg, fresh orange zest, and orange liqueur until everything is fully blended, creating a luscious base for your cookies.

Step 3: Combine Dry Ingredients
In a separate bowl, whisk together the all-purpose flour, baking powder, and salt. This ensures that the dry ingredients are evenly distributed. Gradually add the flour mixture to your wet ingredients, mixing gently until just combined. You want to avoid over-mixing to maintain a tender texture in your Salted Dark Chocolate Orange Cookies.

Step 4: Add Chocolate
Now it’s time to fold in the chopped dark chocolate. Using a spatula, gently combine the chocolate into the dough until it is evenly distributed. The rich pieces of chocolate will melt just slightly in the oven, creating delightful pockets of gooey goodness in every bite of cookie.

Step 5: Scoop and Bake
Use a cookie scoop or tablespoon to drop rounded balls of dough onto the prepared baking sheets, leaving space between each for spreading. Bake in the preheated oven for 12-14 minutes, or until the edges are firm and the tops are slightly cracked. You’ll know they’re ready when they have a golden exterior but still look soft in the center.

Step 6: Cool Cookies
Once baked, let the cookies cool on the baking sheet for about 5 minutes. This resting time allows them to set slightly. Then, carefully transfer the cookies to a wire rack to cool completely, giving them a chance to finish firming up and enhancing their chewy texture.

Step 7: Prepare Glaze
While the cookies cool, prepare the glaze. In a mixing bowl, combine powdered sugar, melted butter, and a splash of orange juice. Stir until you achieve a smooth, pourable consistency. This sweet glaze will add a delicious finish to your Salted Dark Chocolate Orange Cookies.

Step 8: Glaze & Garnish
Once the cookies are cool, dip the tops into the prepared glaze, allowing any excess to drip off. While the glaze is still wet, sprinkle with flaky sea salt and a touch more orange zest for an extra citrusy kick. Place the glazed cookies back on a wire rack and let the glaze set before serving or storing.

Storage Tips for Salted Dark Chocolate Orange Cookies

Airtight Container: Store your cookies in an airtight container at room temperature for up to one week to maintain their chewy texture and delightful flavor.

Freezer: For longer storage, freeze the cookies in a single layer on a baking sheet, then transfer them to a freezer-safe bag or container. They can stay frozen for up to three months.

Reheating: When you’re ready to enjoy a cookie, thaw at room temperature or reheat in the oven at 350°F (175°C) for 5-7 minutes to restore that fresh-baked feel.

Dough Storage: If you want to prepare ahead, chill the dough wrapped in plastic wrap for up to three days before baking. Just scoop and bake when ready!

Salted Dark Chocolate Orange Cookies Variations

Feel free to personalize these cookies for your taste buds—the possibilities are deliciously endless!

  • Milk Chocolate: Swap dark chocolate for milk chocolate for a sweeter cookie experience. This variation enhances the cookie’s sweetness for a comforting flavor.

  • Citrus Swap: Replace orange zest with lemon or lime zest to create a brighter, tangy cookie. The citrus notes will still provide a zesty kick with a unique twist!

  • Nutty Addition: Fold in chopped walnuts or pecans for a delightful crunch. Nuts offer a heartiness that pairs beautifully with the soft cookie texture.

  • Spicy Touch: Add a pinch of cayenne pepper or ground ginger for a warm kick. The heat will play perfectly against the cookie’s sweetness and citrusy notes.

  • Gluten-Free: Substitute all-purpose flour with a gluten-free flour blend for a gluten-free treat. You’ll still enjoy the same soft and chewy texture!

  • Double Chocolate: Incorporate cocoa powder into the flour mixture to make these cookies even richer. The double chocolate effect will satisfy any chocolate lover’s cravings.

  • Dairy-Free: Use coconut oil instead of butter and dairy-free chocolate for a vegan-friendly version. The coconut flavor will complement the orange beautifully.

  • Flavored Glaze: Experiment with flavored glazes by adding a splash of orange extract or even a bit of coffee to the icing. It will create an unexpected yet delightful taste sensation.

Don’t forget, if you love these cookies, you might also enjoy the sweet indulgence of Nutty Apricot Cookies or the vibrant tastes of Homemade Sweet Orange Jam, adding more delightful options to your baking repertoire!

Make Ahead Options

These Salted Dark Chocolate Orange Cookies are perfect for busy home cooks looking to save time without sacrificing flavor! You can prepare the cookie dough up to 24 hours in advance by mixing all the ingredients and chilling the dough in the refrigerator, which helps to deepen the flavors while preventing them from spreading too much during baking. Alternatively, you can scoop the dough into individual balls and freeze them, ensuring they stay fresh for up to 3 months. When you’re ready to bake, simply place the frozen dough on a baking sheet and add a couple of extra minutes to the baking time. This strategy allows you to enjoy freshly baked cookies with minimal effort whenever a craving strikes!

What to Serve with Salted Dark Chocolate Orange Cookies

Indulging in the delicate sweetness and citrusy notes of these cookies opens the door to a delightful meal experience, perfect for any occasion.

  • Fresh Fruits: Pairing with tart berries like raspberries or strawberries adds a fresh, vibrant contrast to the rich flavors.

  • Vanilla Ice Cream: The creamy, vanilla undertone complements the chocolate and orange perfectly, creating a classic dessert duo.

  • Coffee or Espresso: A cup of robust coffee enhances the chocolate’s depth while rounding out the zesty notes impeccably.

  • Dark Chocolate Ganache: Drizzling a rich ganache on top intensifies the chocolate experience and adds a luxurious touch.

  • Nutty Biscotti: Crunchy almond or hazelnut biscotti brings a satisfying texture and nutty flavor that pairs wonderfully with the cookies.

  • Citrus Salad: A refreshing citrus salad with a honey dressing brings out the orange zest and adds brightness to your dessert table.

  • Hot Chocolate: Cozy up with a mug of hot chocolate for an irresistible sweet pairing that enhances the indulgence of the cookies.

  • Sparkling Wine: A glass of bubbly complements the sweetness while accentuating the citrus elements, making for a festive treat.

Expert Tips for Salted Dark Chocolate Orange Cookies

Room Temperature Butter: Ensure your butter is at room temperature for effortless mixing and a fluffy cookie dough texture.

Avoid Overbaking: Keep an eye on your cookies while baking; they should look slightly soft in the center when done. They firm up as they cool.

Zest Fresh Oranges: For maximum flavor, always use fresh orange zest instead of bottled juice; it really enhances the zesty goodness in your Salted Dark Chocolate Orange Cookies.

Mix Dry Ingredients Gently: When combining wet and dry ingredients, mix just until incorporated to maintain the cookies’ tender texture.

Use Quality Chocolate: Opt for high-quality dark chocolate bars for a richer taste that elevates the overall experience of the cookies.

Experiment with Glaze: Feel free to adjust the amount of orange juice in the glaze for a thicker or thinner consistency, based on your preference.

Salted Dark Chocolate Orange Cookies Recipe FAQs

What kind of flour should I use for these cookies?
To achieve the perfect texture for your Salted Dark Chocolate Orange Cookies, all-purpose flour is recommended as it provides structure. However, if you’re looking for a gluten-free option, you can substitute it with a gluten-free flour blend without compromising on taste!

How should I store my cookies and for how long?
Keep your cookies in an airtight container at room temperature for up to one week. This will preserve their delightful chewy texture and rich flavor. If you want to keep them longer, consider freezing them. Just stack the cookies in a single layer on a baking sheet until frozen, then transfer them to a freezer-safe bag or container for up to three months.

Can I freeze the cookie dough?
Absolutely! You can chill the prepared cookie dough wrapped tightly in plastic wrap or in an airtight container for up to three days. For long-term storage, scoop the dough into balls, freeze them on a baking sheet until firm, then place them in a freezer-safe bag. When you’re ready to bake, just pop them into the oven straight from the freezer, adding a couple of extra minutes to the baking time.

What should I do if my cookies spread too much while baking?
If your cookies are spreading excessively, check a couple of factors. First, make sure your butter is properly softened and not melted. If it’s too warm, the dough can lose its shape. Secondly, try chilling the dough for at least 30 minutes before baking. This will help the cookies maintain their structure, so you’ll get that perfect texture—crispy edges and chewy centers!

Are these cookies suitable for people with allergies?
These Salted Dark Chocolate Orange Cookies contain common allergens, including gluten (from the flour) and dairy (from the butter). If you’re baking for someone with allergies, consider substituting the flour with a gluten-free alternative and using dairy-free butter. Always read ingredient labels carefully to ensure safety!

Salted Dark Chocolate Orange Cookies

Salted Dark Chocolate Orange Cookies for Sweet Zesty Bliss

Delight in the irresistible flavors of salted dark chocolate and orange in these quick and easy cookies.
Prep Time 15 minutes
Cook Time 14 minutes
Cooling Time 5 minutes
Total Time 34 minutes
Servings: 24 cookies
Course: Dessert
Cuisine: American
Calories: 150

Ingredients
  

For the Cookie Dough
  • 2 cups All-Purpose Flour Swap with gluten-free flour for a gluten-free option.
  • 1 teaspoon Baking Powder Acts as a leavening agent.
  • 1/2 teaspoon Salt Enhances flavors.
  • 1 cup Butter (room temperature) Unsalted is ideal for better salt control.
  • 1 large Egg Binds ingredients together.
  • 1/2 cup Sugar Brown sugar adds deeper notes.
  • 2 tablespoons Orange Zest Adjust to taste for zest.
  • 2 tablespoons Orange Liqueur or Juice Can swap with vanilla extract.
  • 8 ounces Dark Chocolate Bars Melt for dough or use chips.
For the Glaze
  • 1 cup Powdered Sugar Sweetens the glaze.
  • 2 tablespoons Butter (melted) Adds sheen to the glaze.
  • 1/2 teaspoon Flake Sea Salt For topping.

Equipment

  • Stand mixer
  • Baking sheets
  • parchment paper
  • mixing bowls
  • Cookie scoop

Method
 

Step-by-Step Instructions
  1. Preheat your oven to 350°F (175°C) and line baking sheets with parchment paper.
  2. Beat the room temperature butter until light and fluffy, then gradually add sugar.
  3. Incorporate egg, orange zest, and orange liqueur until blended.
  4. Whisk together flour, baking powder, and salt in a separate bowl.
  5. Gradually add the flour mixture to wet ingredients until just combined.
  6. Fold in the chopped dark chocolate until evenly distributed.
  7. Drop rounded balls of dough onto prepared baking sheets and bake for 12-14 minutes.
  8. Let baked cookies cool on the sheet for 5 minutes, then transfer to a wire rack.
  9. For the glaze, combine powdered sugar, melted butter, and a splash of orange juice until smooth.
  10. Dip the tops of cooled cookies in the glaze, sprinkle with flake sea salt, and let set.

Notes

Store cookies in an airtight container at room temperature for up to one week. For longer storage, freeze cookies for up to three months.

Irresistible Cookie Butter Muddy Buddies for Sweet Cravings

The scent of warm cookie butter wafts through the air, wrapping around me like a cozy blanket. I can’t help but smile as I prepare to whip up a batch of Cookie Butter Muddy Buddies, taking a delightful spin on the classic puppy chow. This joy-packed treat is remarkably simple to make, perfect for those busy holiday gatherings where you want an indulgent sweet that won’t keep you in the kitchen for hours. With a creamy texture that melts in your mouth and a sugary coating that adds just the right crunch, these babies are true crowd-pleasers! Plus, they’re incredibly versatile—swap in Biscoff spread or cinnamon chips for a fun twist. Ready to impress your family and friends with a fun dessert? Let’s dive into this sweet adventure!

Why are Cookie Butter Muddy Buddies a must-try?

Simplicity at its Best: You’ll whip these up in no time with just a few ingredients and minimal prep work.

Decadent Flavor: The rich cookie butter pairs beautifully with the sweetness of white chocolate, delivering a taste that’s deeply satisfying and unforgettable.

Crowd-Pleasing Delight: Perfect for parties, these treats are an instant hit among family and friends, making them ideal for holiday gatherings.

Versatile Variations: Feel free to switch things up with Biscoff spread or cinnamon chips, tailoring the flavor to your family’s preference, just like with our Nutty Apricot Cookies.

Quick Snack: A delightful and quick snack for movie nights or after-school treats, these Muddy Buddies can easily satisfy your sweet cravings!

Easy Storage: Make a big batch ahead of time, and store them in an airtight container—just like our Chocolate Date Cookies, they keep well for days.

Cookie Butter Muddy Buddies Ingredients

• Indulge in these sweet treats!

For the Chocolate Mixture

  • Cookie Butter – Adds rich, sweet flavor with notes of spices; substitute Biscoff spread for a similar taste.
  • White Chocolate Chips or Cinnamon Chips – Provide sweetness and creamy texture; semi-sweet chocolate can be used for a richer flavor.
  • Shortening or Butter – Ensures smooth melting and blending of the chocolate mixture; coconut oil serves as a dairy-free alternative.

For the Cereal Base

  • Chex Cereal – The base that provides crunch; Rice Chex is recommended for a lighter texture; corn or wheat Chex are great alternatives.

For the Coating

  • Powdered Sugar – Coats the mixture for sweetness and a snow-like finish; adjust the amount based on your preference for sweetness.

Embrace the joy of making Cookie Butter Muddy Buddies that your loved ones will devour!

Step‑by‑Step Instructions for Cookie Butter Muddy Buddies

Step 1: Prepare Baking Dish
Begin by greasing a 9×13-inch baking dish lightly with cooking spray or butter, then line it with parchment paper for easy removal later. This ensures your Cookie Butter Muddy Buddies will set properly and come out easily, leaving you with a clean, tidy presentation after they’ve cooled.

Step 2: Melt Mixture
In a large microwave-safe bowl, combine 1 cup of cookie butter, 1 cup of white chocolate chips (or your choice of cinnamon chips), and 2 tablespoons of shortening. Microwave this mixture in 20-second intervals, stirring after each time until it’s fully melted and smoothly combined. Aim for a glossy mixture without any lumps, as this will coat the cereal beautifully.

Step 3: Combine with Cereal
Once your melting mixture is smooth, add 8 cups of Chex cereal into the bowl. Using a spatula, gently fold the cereal into the chocolate mixture until each piece is thoroughly coated. This step requires care to avoid crushing the cereal, resulting in perfectly crunchy Cookie Butter Muddy Buddies that maintain their delightful texture.

Step 4: Add Sugar
Transfer the coated cereal into a large resealable plastic bag, then add about 1 cup of powdered sugar. Seal the bag tightly, ensuring there’s no excess air inside, and shake vigorously until all pieces are evenly coated in the powdered sugar. This step gives your Cookie Butter Muddy Buddies that sweet, snowy finish that makes them irresistibly tempting.

Step 5: Set to Dry
Spread the sugary, coated mix onto your prepared baking dish in an even layer. Allow it to cool and set at room temperature for about one hour. This crucial step lets the chocolate firm up, resulting in delightful clusters that hold together perfectly while still being soft and creamy on the inside.

Step 6: Store
Once fully cooled and set, break apart any large clusters, if necessary, and transfer your Cookie Butter Muddy Buddies into a sealable bag or airtight container. Store them at room temperature for up to a week, ensuring you have a delicious, convenient snack ready whenever those sweet cravings hit!

What to Serve with Cookie Butter Muddy Buddies?

The delightful crunch of these tasty treats opens the door for a wonderful array of pairings that will elevate your dessert game!

  • Creamy Vanilla Ice Cream: A scoop of creamy vanilla ice cream brings a delightful contrast to the crunchy Muddy Buddies, enhancing the overall flavor experience. Drizzle with caramel for a sweet touch!

  • Fresh Fruit Platter: Bright and juicy fruits like strawberries, apples, and blueberries balance the sweetness, providing a refreshing burst of flavor. Their natural acidity cuts through the richness beautifully.

  • Homemade Whipped Cream: Fluffy whipped cream adds a light, airy compliment, making your Cookie Butter Muddy Buddies feel indulgent yet balanced. It’s like a hug in a cup next to your snacks!

  • Hot Cocoa or Coffee: A warm cup of hot cocoa or coffee pairs wonderfully, adding a cozy element to your dessert experience. The chocolate undertones will harmonize beautifully with the cookie flavors.

  • Chocolate Drizzled Popcorn: Add a fun and playful element with chocolate drizzled popcorn. The salty crunch pairs nicely with the sweet and rich Muddy Buddies, creating a delightful mix of flavors.

  • Nut Medley: A selection of spiced mixed nuts offers a crunchy, savory contrast that enhances the sweetness of the Muddy Buddies. They provide a satisfying crunch that keeps you reaching for more!

  • Mini Cheesecake Bites: Indulge in rich mini cheesecakes that will elevate your gathering to a gourmet level. The creamy texture complements the crunchy Muddy Buddies for a delectable duo.

  • Festive Holiday Punch: Serve with a sparkling fruit punch for a festive touch! The refreshing bubbles bring a fun, celebratory vibe, making each bite of Cookie Butter Muddy Buddies even more enjoyable.

Make Ahead Options

These Cookie Butter Muddy Buddies are absolutely perfect for meal prep enthusiasts! You can prepare the coated cereal mixture up to 24 hours in advance. Simply follow the initial steps up to adding the powdered sugar, spreading it in your baking dish, and allowing it to cool. Once set, store the mixture in an airtight container to maintain its freshness and crunchiness. When you’re ready to serve, simply break it apart and, if desired, give it a light dusting of extra powdered sugar for that snowy finish. This way, you’ll have a delectable treat ready to impress your family and friends with minimal effort—it’s a time-saver for those busy holiday gatherings!

Cookie Butter Muddy Buddies Variations

Feel free to make these Cookie Butter Muddy Buddies your own with some creative twists that everyone will love!

  • Biscoff Spread: Swap cookie butter with Biscoff spread for a deliciously spiced flavor. This simple change elevates the taste and takes you on a nostalgic flavor trip.

  • Cinnamon Chips: Use cinnamon chips instead of white chocolate for an inviting warmth. These will make your treats feel cozy, perfect for chilly evenings!

  • Nutty Crunch: Blend in crushed nuts like almonds or pecans for added crunch. The nuts introduce a satisfying texture and rich flavor that pairs perfectly with the sweet elements.

  • Chewy Add-ins: Stir in some mini marshmallows or dried fruits like cranberries or raisins for an interesting chew. You’ll surprise everyone with a delightful mix of textures and flavors!

  • Chocolate Variations: Experiment by using dark chocolate chips instead of white chocolate. This will give a more robust flavor profile that balances the sweetness beautifully.

  • Spicy Kick: Add a dash of cayenne pepper to your coating for a surprising twist. The heat is subtle but adds a fun, unexpected zing that pairs well with the sweet!

  • Cookie Crunch: Toss in some crushed cookie pieces (like Oreos or graham crackers) to the mix before coating. This not only enhances the flavor but adds a bit of crunch and whimsy, just like our Nut Seed Cookies.

  • Flavor Infusion: Try adding a teaspoon of vanilla extract or almond extract to the melted mixture. This extra layer of flavor makes the cookies even more aromatic and delicious, reminiscent of our German Style Cookies.

Feel free to get creative and mix and match these variations to discover the perfect blend that excites your taste buds!

How to Store and Freeze Cookie Butter Muddy Buddies

Room Temperature: Store your Cookie Butter Muddy Buddies in an airtight container at room temperature for up to one week. Ensure they’re fully cooled before sealing them to maintain their delightful crunch.

Fridge: If you prefer them chilled, place the container in the fridge. They can stay fresh for about two weeks this way, but may lose some texture.

Freezer: For longer storage, freeze the Muddy Buddies in a freezer-safe bag or container for up to three months. Allow them to thaw at room temperature before serving to regain their lovely texture.

Reheating: These treats are best enjoyed as is, but if you’d like to give them a warm twist, pop them in the microwave for just a few seconds to soften while keeping an eye on them!

Expert Tips for Cookie Butter Muddy Buddies

Use a Double Boiler: Melt your cookie butter and white chocolate mixture using a double boiler for greater control, preventing overheating and ensuring a smooth finish.

Stir Frequently: Stir the chocolate mixture often during melting. This helps avoid burning and guarantees a beautiful, creamy consistency for your Cookie Butter Muddy Buddies.

Prepare Your Cereal Carefully: Gently fold the Chex cereal into the chocolate mixture to maintain its crunch. Crushing the cereal will result in less crunchy treats.

Adjust Sugar to Taste: Feel free to modify the amount of powdered sugar in the coating to suit your sweetness preference. Taste your Brownies before sealing for perfect balance!

Store Wisely: Keep your Cookie Butter Muddy Buddies in an airtight container at room temperature to retain their delightful texture and flavor for up to one week.

Cookie Butter Muddy Buddies Recipe FAQs

What kind of cookie butter should I use?
I recommend using classic cookie butter for its rich, sweet flavor with warm spice notes. If you want to switch things up, Biscoff spread is a fantastic alternative that still captures that beloved taste.

How should I store Cookie Butter Muddy Buddies?
Absolutely! To keep them fresh, store your Cookie Butter Muddy Buddies in an airtight container at room temperature for up to one week. Make sure they are completely cooled before sealing, as this helps maintain their delightful crunch.

Can I freeze Cookie Butter Muddy Buddies?
Yes, you can! For long-term storage, place your Cookie Butter Muddy Buddies in a freezer-safe bag or container. They can be frozen for up to three months. When you’re ready to enjoy them, simply allow them to thaw at room temperature for the best texture.

What if my chocolate mixture seizes up while melting?
Very! If your chocolate mixture seizes, it’s usually because of moisture or overheating. To fix it, try adding a small amount of vegetable oil or shortening—about a teaspoon at a time—stirring well. Using a double boiler method for melting can also prevent this issue, ensuring a smooth, creamy mixture.

Are there any allergy concerns with this recipe?
Definitely! Though this recipe is a delightful treat, it’s important to consider potential allergens. It contains dairy from the chocolate and may contain gluten depending on the type of Chex cereal used. Always read labels carefully and opt for gluten-free Chex if you have dietary restrictions.

Cookie Butter Muddy Buddies

Irresistible Cookie Butter Muddy Buddies for Sweet Cravings

Delight in these Cookie Butter Muddy Buddies, a twist on classic puppy chow that's perfect for sweet cravings.
Prep Time 10 minutes
Cook Time 5 minutes
Cooling Time 1 hour
Total Time 1 hour 15 minutes
Servings: 12 servings
Course: Dessert
Cuisine: American
Calories: 250

Ingredients
  

For the Chocolate Mixture
  • 1 cup Cookie Butter Adds rich, sweet flavor; substitute Biscoff spread for similar taste.
  • 1 cup White Chocolate Chips or Cinnamon Chips Provide sweetness and creamy texture; semi-sweet chocolate is a rich alternative.
  • 2 tablespoons Shortening or Butter Ensures smooth melting; coconut oil is a dairy-free option.
For the Cereal Base
  • 8 cups Chex Cereal Provides crunch; Rice Chex is recommended for a lighter texture.
For the Coating
  • 1 cup Powdered Sugar Coats for sweetness; adjust based on preference.

Equipment

  • microwave-safe bowl
  • Large mixing bowl
  • spatula
  • Resealable plastic bag
  • Baking Dish

Method
 

Step-by-Step Instructions
  1. Grease a 9x13-inch baking dish with cooking spray or butter and line with parchment paper.
  2. In a microwave-safe bowl, combine cookie butter, white chocolate chips, and shortening. Microwave in 20-second intervals, stirring until melted.
  3. Add Chex cereal to the mixture, gently folding until coated.
  4. Transfer to a resealable bag, add powdered sugar, seal tightly, and shake until evenly coated.
  5. Spread the mixture onto the prepared baking dish and allow to cool for about one hour.
  6. Once cooled, break apart clusters if needed and store in an airtight container.

Notes

For greater control while melting, consider using a double boiler to avoid overheating. Adjust sugar to taste before sealing.

Oatmeal Cream Pie Cheesecake: A Nostalgic No-Bake Delight

There’s something magical about the first bite of a creamy dessert that whisks you back to childhood. This No-Bake Oatmeal Cream Pie Cheesecake delivers just that, effortlessly merging the nostalgia of those beloved Little Debbie treats with a sophisticated twist. Best of all, it’s remarkably easy to prepare, ensuring that even the busiest home chefs can whip it up without breaking a sweat. The delightful contrast of a crunchy cookie crust and a rich, creamy filling makes it a crowd-pleaser at any gathering—perfect for kids and grown-ups alike. So, why not treat your loved ones to a slice of this sweet memory? You won’t want to miss out on the joy of sharing this irresistible treat! Are you ready to dive into this delightful recipe?

Why is This Cheesecake So Irresistible?

Nostalgic Flavors: Each bite transports you back to childhood with the familiar taste of oatmeal cream pies, creating instant joy.
Effortless Preparation: As a no-bake dessert, it requires minimal time and effort, making it perfect for novice chefs and busy lives.
Kid-Friendly Fun: The creamy filling and crunchy crust will delight kids and adults alike, making it a hit at family gatherings.
Versatile Options: Feel free to switch up the cookie crust with gingersnaps or add your favorite toppings like chocolate ganache—endless possibilities await!
Crowd-Pleaser: Its charming presentation and delicious flavor guarantee it will be the star of any dessert table, ensuring you’ll receive plenty of compliments!
Whether you’re indulging yourself or preparing a sweet surprise, this Oatmeal Cream Pie Cheesecake is sure to impress everyone at your next gathering!

Oatmeal Cream Pie Cheesecake Ingredients

For the Cheesecake Filling

  • Cream Cheese – Provides creaminess and a smooth texture; ensure it’s softened for easy mixing.
  • Powdered Sugar – Adds a perfect sweetness without gritty bits, making it ideal for the filling.
  • Cool Whip – Lightens the filling, creating an airy consistency; for a homemade touch, whip heavy cream instead.
  • Vanilla Extract – Enhances the flavor beautifully; opt for pure vanilla extract for the best results.

For the Cookie Crust

  • Oatmeal Cookies – Forms the base, with a chewiness that complements the rich cheesecake; substitute with gingersnap or chocolate cookies for a different flavor twist.
  • Melted Butter – Binds the cookie crumbs together, ensuring a crispy and delicious foundation for the cheesecake.

Remember, this Oatmeal Cream Pie Cheesecake isn’t just a treat; it’s a heartfelt reminder of dessert time during childhood, promising a nostalgic experience in every bite!

Step‑by‑Step Instructions for Oatmeal Cream Pie Cheesecake

Step 1: Prepare the Cookie Crust
Start by crushing the oatmeal cookies into fine crumbs using a food processor or by placing them in a zip-top bag and rolling with a rolling pin. Once crushed, melt the butter and mix it with the cookie crumbs until it resembles wet sand. Firmly press this mixture into the bottom of a springform pan to form an even layer.

Step 2: Make the Cheesecake Filling
In a mixing bowl, ensure the cream cheese is softened for easy blending. Beat the softened cream cheese and powdered sugar together until smooth and creamy, which should take about 2-3 minutes on medium speed. Add in the vanilla extract and mix again until fully incorporated, making sure there are no lumps remaining in the cheesecake filling.

Step 3: Fold in Whipped Topping
Gently fold in the Cool Whip into the cream cheese mixture using a spatula. Be careful during this step—you’re aiming to maintain the airy texture of the whipped topping, so mix until fully blended but avoid over-mixing. The cheesecake filling should become fluffy and smooth, ready to be layered onto the crust.

Step 4: Assemble the Cheesecake
Pour the creamy filling over the prepared cookie crust in the springform pan. Use a spatula to spread and smooth the top evenly, ensuring it reaches the edges of the crust for a polished look. This will be the final layer, so make sure it is nice and smooth for the best presentation in your Oatmeal Cream Pie Cheesecake.

Step 5: Chill
Cover the assembled cheesecake with plastic wrap and refrigerate for at least 5-6 hours or overnight for the best results. As it sets, the filling will firm up, making it easier to slice and serve. This chilling time is essential for achieving the perfect texture in your Oatmeal Cream Pie Cheesecake.

Step 6: Serve
Once chilled, carefully remove the cheesecake from the springform pan. Slice into wedges, and serve cold. You might want to garnish each slice with a dollop of whipped cream or some fresh fruit for added color and flavor. Delight in the creamy, nostalgic flavors of your homemade Oatmeal Cream Pie Cheesecake!

Storage Tips for Oatmeal Cream Pie Cheesecake

Fridge: Store any leftovers in an airtight container or cover with plastic wrap in the refrigerator for up to 5 days; this keeps the cheesecake fresh and creamy.

Freezer: For longer storage, wrap slices individually in plastic wrap, then place them in a freezer-safe bag. The Oatmeal Cream Pie Cheesecake can be frozen for up to 2 months.

Thawing: To enjoy your frozen cheesecake, simply move it to the fridge and allow it to thaw overnight; this preserves its creamy texture without compromising flavor.

Serving Suggestions: Should you choose to serve chilled, garnish with a dollop of whipped cream or fresh fruit for an attractive presentation and added flavor!

Expert Tips for Oatmeal Cream Pie Cheesecake

  • Softened Cream Cheese: Ensure the cream cheese is softened at room temperature; this prevents lumps and guarantees a smooth filling.
  • Gentle Folding: Use a spatula to fold in the Cool Whip carefully to retain its airiness, which is key for a light and fluffy Oatmeal Cream Pie Cheesecake.
  • Even Crust Layer: Press the cookie mixture firmly into an even layer at the bottom of the springform pan; a well-packed crust provides a sturdy base for your cheesecake.
  • Chilling Time Matters: Don’t rush the chilling process—connect with the delight of anticipation! A proper chill (at least 5-6 hours) allows for perfect slicing and sets the texture beautifully.
  • Flavor Variations: Feel free to experiment with different cookies for the crust; gingersnaps or chocolate cookies can add a delightful twist to the classic Oatmeal Cream Pie Cheesecake.

Oatmeal Cream Pie Cheesecake Variations

Feel free to get creative and personalize your cheesecake—there’s a world of delicious possibilities!

  • Dairy-Free: Use a non-dairy cream cheese alternative and coconut whipped cream for a luscious, plant-based treat.

  • Ginger Snap Crust: Swap oatmeal cookies for ginger snaps in the crust for a spicy kick and an exciting flavor change.

  • Chocolate Drizzle: Add a rich chocolate ganache topping that elevates each slice with a sweet, indulgent touch.

  • Nutty Crunch: Stir in crushed nuts to the cookie crust for added texture and a delightful crunch that contrasts beautifully with the creamy filling.

  • Coconut Twist: Incorporate shredded coconut into the cheesecake mixture for an enticing tropical flavor that adds a unique flair.

  • Fruit-Filled Solution: Top the cheesecake with fresh berries or a fruit compote for a burst of freshness that pairs perfectly with the rich filling.

  • Spiced Variation: Mix in a dash of cinnamon or nutmeg to the filling for a warm, inviting flavor that’s especially cozy during the cooler months.

  • Mini Cheesecakes: Create individual mini versions using muffin tins; perfect for parties and ensures everyone gets their own slice of nostalgia!

For an even sweeter ride down memory lane, you might want to check out other delightful desserts like Blueberry Cream Cheese or Strawberry Cheesecake Dump that also evoke wonderful flavors!

What to Serve with Oatmeal Cream Pie Cheesecake

Elevate your dessert experience by pairing this nostalgic cheesecake with delicious accompaniments that delight the senses.

  • Whipped Cream: A dollop on top adds a creamy, light texture contrasting beautifully with the cheesecake’s richness.

  • Fresh Berries: Ripe strawberries or blueberries introduce a fresh, tart flavor, enhancing each sweet bite and adding vibrant color.

  • Chocolate Sauce: Drizzling warm chocolate ganache over each slice deepens the taste and adds a luxurious finish to the dish.

  • Ice Cream: A scoop of vanilla or caramel ice cream brings a delicious creaminess that balances the cheesecake’s firmness for a delightful contrast.

  • Coffee: A hot cup of rich coffee complements the dessert’s sweetness and creates a cozy atmosphere—perfect for dessert time!

  • Fruit Salad: A refreshing mix of seasonal fruits cuts through richness while brightening the overall meal experience. Opt for mint leaves for an aromatic touch.

Including these delightful seasonings and sides with your Oatmeal Cream Pie Cheesecake not only enhances the flavors but also adds a personal touch, making your dessert gatherings truly memorable!

Make Ahead Options

These Oatmeal Cream Pie Cheesecakes are perfect for meal prep enthusiasts! You can prepare the cookie crust and cheesecake filling up to 24 hours in advance, allowing you to save time on busy days. Simply crush the oatmeal cookies, mix with melted butter, and press into the pan, then whip up the filling and layer it over the crust. Cover the assembled cheesecake tightly with plastic wrap to keep it fresh and refrigerate overnight. When you’re ready to serve, just slice it cold and enjoy—it’s just as delicious, with that creamy texture intact! This makes for a delightful dessert that’s ready to impress at a moment’s notice.

Oatmeal Cream Pie Cheesecake Recipe FAQs

What kind of oatmeal cookies should I use for the crust?
Absolutely! For the crust, I recommend using chewy oatmeal cookies, as they provide the perfect texture and flavor. You can also opt for gingersnap or chocolate cookies if you’re looking to mix it up or add a different flavor profile to your Oatmeal Cream Pie Cheesecake.

How should I store the cheesecake leftovers?
Very simple! Store any leftover cheesecake in an airtight container or cover it well with plastic wrap in the refrigerator for up to 5 days. This will help maintain its creamy texture and delicious flavor for your next sweet craving.

Can I freeze the cheesecake, and if so, how?
Yes, you can! To freeze your Oatmeal Cream Pie Cheesecake, wrap individual slices tightly in plastic wrap, ensuring no air is trapped, and then place them in a freezer-safe bag. This cheesecake can be frozen for up to 2 months. When you’re ready to enjoy it, simply transfer it to the fridge and let it thaw overnight for the best results.

What if my cream cheese filling has lumps?
No worries! If you notice lumps in your cream cheese filling, it means the cream cheese wasn’t softened enough before mixing. To fix this, let it sit at room temperature for about 30 minutes before you start. If lumps persist after mixing, consider blending the mixture with a hand mixer, as this can help achieve a smoother consistency.

Is this cheesecake suitable for people with allergies?
It depends! This Oatmeal Cream Pie Cheesecake contains dairy; if you or your guests have lactose intolerance, consider using lactose-free cream cheese and whipped topping. Additionally, check the cookie ingredients to ensure they are safe for anyone with gluten or nut allergies. Remember, you can always customize recipes to fit dietary needs!

How long should I chill the cheesecake to ensure it sets properly?
To achieve the best texture, it’s important to chill the cheesecake for a minimum of 5-6 hours, or ideally overnight. This time allows the filling to firm up, making slicing easier and ensuring each bite is as delightful as the last! Enjoy the anticipation; it’s well worth the wait!

Oatmeal Cream Pie Cheesecake

Oatmeal Cream Pie Cheesecake

This Oatmeal Cream Pie Cheesecake is a nostalgic no-bake delight that perfectly merges childhood flavors with a creamy, dreamy texture.
Prep Time 30 minutes
Chilling Time 6 hours
Total Time 6 hours 30 minutes
Servings: 8 slices
Course: Dessert
Cuisine: American
Calories: 320

Ingredients
  

For the Cheesecake Filling
  • 8 oz cream cheese softened
  • 1 cup powdered sugar
  • 8 oz Cool Whip or homemade whipped cream
  • 1 tsp vanilla extract preferably pure
For the Cookie Crust
  • 2 cups oatmeal cookies crushed
  • 1/2 cup melted butter

Equipment

  • springform pan
  • mixing bowl
  • Food Processor
  • spatula

Method
 

Step-by-Step Instructions
  1. Crush the oatmeal cookies into fine crumbs, then mix with melted butter until it resembles wet sand. Press into the bottom of a springform pan.
  2. In a mixing bowl, beat softened cream cheese and powdered sugar until smooth and creamy. Add vanilla extract and mix until incorporated.
  3. Fold in Cool Whip carefully using a spatula until fully blended and fluffy.
  4. Pour the cheesecake filling over the prepared crust. Spread and smooth the top evenly.
  5. Cover with plastic wrap and refrigerate for at least 5-6 hours or overnight.
  6. Carefully remove from springform pan, slice, and serve cold, optionally garnished with whipped cream or fresh fruit.

Notes

Ensure the cream cheese is softened for a smooth filling. Experiment with different cookies for the crust for unique flavors.

Perfectly Pillowy Sourdough English Muffins You’ll Love

The first time I savored a fresh Sourdough English Muffin, I was hit with a wave of nostalgia, recalling lazy Sunday mornings filled with butter melting into those delightful nooks and crannies. This homemade version elevates the simple breakfast staple, giving you the chance to use that bubbly sourdough starter sitting in your kitchen. Not only are these muffins an impressive crowd-pleaser, but they also come together surprisingly quickly, turning your brunch table into a feast. With a golden, chewy crust and airy texture, they’re perfect with a slather of jam or as the base for your breakfast sandwich. Ready to bring this tasty twist to your mornings? Let’s dive in!

Why Sourdough English Muffins Are Special?

Nostalgic Flavors: There’s something about the warm aroma and slightly tangy taste of homemade sourdough English muffins that evokes fond memories of cozy breakfasts.

Easy to Make: With just a few basic ingredients, you can whip up a delicious batch. Even if you’re a beginner, this recipe allows for simple steps and minimal fuss!

Versatile Treats: Whether topped with creamy butter or transformed into hearty breakfast sandwiches, they adapt to your preferences perfectly.

Unique Texture: The delightful nooks and crannies created by this method are ideal for holding flavorful spreads, making each bite a treat.

Crowd-Pleaser: Bake these for family gatherings or brunch with friends, and watch them disappear! Once you serve these muffins, everyone will be asking for the recipe.

Time-Saving: With most of the rising time happening while you relax, you’ll find these muffins fit effortlessly into your busy schedule. Don’t forget to check out our classic Sourdough Bread Recipe for more delicious inspiration!

Sourdough English Muffin Ingredients

• Embrace the deliciousness of homemade muffins with this crisp but tender recipe!

For the Dough

  • Fed Sourdough Starter – This is your key leavening agent; ensure your starter is bubbly and well-fed for the best flavor and rise.
  • Warm Water – Activates the yeast; use water around 100°F (38°C) for optimal results.
  • All-Purpose Flour – The backbone of your muffins; measure carefully to avoid dense results.
  • Granulated Sugar – Adds a touch of sweetness; feel free to reduce or substitute with honey or maple syrup if desired.
  • Unsalted Butter – Infuses flavor and moisture; you can swap it with oil or dairy-free butter if preferred.
  • Large Egg – Binds ingredients together; replace with a flax egg for a vegan-friendly option.
  • Salt – Essential for balancing flavors; it enhances sweetness and controls yeast activity.
  • Cornmeal – Dust the baking sheet to prevent sticking; can be omitted if you’re in a pinch.

Dive into the world of baking with these ingredients for your delightful Sourdough English Muffins!

Step‑by‑Step Instructions for Sourdough English Muffins

Step 1: Mix the Starter and Water
In a large mixing bowl, whisk together 1 cup of fed sourdough starter and 1/2 cup of warm water, ensuring the water is around 100°F (38°C) to activate the yeast. Continue mixing until well combined to create a smooth base. This initial step sets the stage for those delectable Sourdough English Muffins, so make sure everything is thoroughly blended.

Step 2: Add Remaining Ingredients
To your starter and water mixture, add 3 cups of all-purpose flour, 2 tablespoons of granulated sugar, 2 tablespoons of softened unsalted butter, 1 large egg, and 1 teaspoon of salt. Stir until the ingredients form a shaggy dough, which may look messy but will come together as you continue with your process. This mixture is the foundation of your airy muffins, full of flavor.

Step 3: Knead the Dough
Transfer your shaggy dough onto a floured surface and knead it for about 5-8 minutes until it’s smooth and elastic. You’ll know it’s ready when it springs back after a gentle poke and feels slightly tacky under your hands. Kneading activates the gluten, crucial for achieving the right texture in your Sourdough English Muffins.

Step 4: First Rise
Lightly oil a clean bowl and place your kneaded dough inside, turning it to coat. Cover with a cloth or plastic wrap and let it rise in a warm place for 3-4 hours, or until doubled in size. During this time, the dough will start developing those lovely flavors, creating the perfect base for your muffins.

Step 5: Shape the Muffins
Once your dough has risen, gently roll it out on a floured surface to about ½ inch thick. Use a round cookie cutter to cut out muffin shapes, ensuring to avoid twisting the cutter to keep the edges sealed. Arrange the cut muffins on a baking sheet dusted with cornmeal, enhancing their delightful texture and making sure they don’t stick.

Step 6: Second Rise
Cover the cut muffins with a clean cloth and let them rise for about 1 hour until puffed. Keep an eye on them; they should appear noticeably larger and softer. This rise allows the air pockets to form, which helps create those iconic nooks and crannies in your Sourdough English Muffins.

Step 7: Cook the Muffins
Preheat a skillet or griddle over medium heat. Carefully transfer the risen muffins to the skillet, cooking each side for 3-4 minutes until golden brown. To ensure they are fully cooked, check that they reach an internal temperature of 190°F (88°C). The aroma wafting through your kitchen will be irresistible!

Step 8: Cool and Serve
Once cooked, remove the muffins from the skillet and let them cool on a wire rack. When you’re ready to enjoy these Sourdough English Muffins, fork split them or use a serrated knife to carefully open. They’re perfect for butter, jam, or your favorite breakfast sandwich!

Make Ahead Options

These Sourdough English Muffins are perfect for meal prep enthusiasts! You can prepare the dough up to 24 hours in advance by mixing it and allowing it to rise in the refrigerator instead of at room temperature. This slower rise enhances the flavor and makes your muffins even tastier! Just ensure that you cover the bowl tightly to prevent drying out. When you’re ready to cook, take the dough out, shape the muffins, and allow them a final rise for about 1 hour at room temperature before cooking. This way, you’ll have fresh, homemade muffins ready to enjoy with minimal effort during your busy mornings!

Sourdough English Muffin Variations

Looking to twist up your Sourdough English Muffins? Let your creativity run wild with these flavorful ideas!

  • Herb-Infused: Add fresh herbs like rosemary or thyme to the dough for a fragrant touch.

  • Cheesy Delight: Mix in shredded cheese, such as cheddar or mozzarella, for a savory indulgence. The melty goodness will add a delightful flavor boost that’s hard to resist.

  • Whole Wheat Swap: Substitute half of the all-purpose flour with whole wheat flour for added nutrition and a nuttier flavor. This is a great way to make your muffins a bit heartier while still keeping them light!

  • Cinnamon Sugar: For a sweet treat, sprinkle cinnamon and sugar on top before cooking. The warm spices awaken your taste buds, making breakfast feel even cozier!

  • Kick of Spice: Incorporate a pinch of cayenne pepper or red pepper flakes to add a subtle heat that complements breakfast sandwiches beautifully. Just a small addition can transform your muffins into a spicy indulgence.

  • Extra Crunch: Dust the muffin tops with seeds like sesame or poppy before cooking for added texture and visual appeal. It’s a simple change that elevates the overall experience!

  • Sweetened Variants: Replace sugar with honey or maple syrup for a delightful twist in sweetness. These natural sweeteners can impart a lovely depth of flavor to the muffins.

  • Nutty Addition: Throw in some chopped nuts, like walnuts or pecans, to enrich the texture and add healthy fats. They provide a satisfying crunch that contrasts beautifully with the soft muffin interior.

Don’t forget, you can serve them with your favorite toppings or accompaniments like homemade jam or whipped butter! For a classic bread experience, be sure to check out our Sourdough Bread Recipe for delicious ideas. Enjoy your baking adventure!

What to Serve with Homemade Sourdough English Muffins

Nothing enhances the joy of homemade baking quite like a thoughtfully curated meal around your delicious creation.

  • Creamy Scrambled Eggs: The rich, velvety texture of scrambled eggs pairs beautifully with the airy muffins, making it an indulgent breakfast treat.

  • Savory Bacon: Crisp, salty bacon adds a delightful crunch and a savory contrast to the tender muffins, elevating your breakfast sandwich possibilities.

  • Fresh Avocado Toast: Spread ripe avocado on your muffins for a fresh, creamy bite that balances with the tangy flavor of sourdough.

  • Mixed Berry Jam: Sweet and tart, homemade or quality store-bought berry jam perfectly fills those nooks and crannies for a burst of fruity goodness.

  • Herbed Cream Cheese: A spread of herbed cream cheese provides a flavorful, creamy layer that complements the muffins’ texture beautifully.

  • Breakfast Sandwich: Layer your muffins with a fried egg, cheese, and your choice of protein for a satisfying meal that’s always a hit.

For drinks, consider pairing your muffins with freshly brewed coffee or a zesty orange juice, perfectly rounding out your breakfast table.

How to Store and Freeze Sourdough English Muffins

Room Temperature: Store your Sourdough English Muffins covered at room temperature for up to 5 days. This helps retain their soft, fresh texture and delightful flavor.

Freezer: For longer storage, freeze muffins in an airtight container or freezer bag for up to three months. This ensures they stay fresh and flavorful.

Thawing: To enjoy frozen muffins, simply thaw them at room temperature for a couple of hours, or pop them in the toaster for a quick reheat.

Reheating: Reheat muffins in a toaster or skillet for a few minutes until warmed through. This revitalizes their crust and makes them taste freshly baked!

Expert Tips for Sourdough English Muffins

Use Active Starter: Ensure your sourdough starter is bubbly and well-fed; a non-active starter may lead to flat muffins lacking flavor.

Temperature Check: Keep your water at around 100°F (38°C) to activate the yeast effectively, ensuring a good rise in your Sourdough English Muffins.

No Overmixing: When adding flour, stir just until combined to avoid developing too much gluten, which can make muffins dense instead of light.

Don’t Rush Rises: Allow adequate time for both rises; this is crucial for airy texture and those wonderful nooks and crannies in the muffins.

Monitor Skillet Heat: Use a medium heat to cook the muffins; too high and they’ll burn on the outside while staying raw inside.

Cool Properly: Let the muffins cool on a wire rack to maintain their texture; cooling on a flat surface can make them soggy.

Sourdough English Muffins Recipe FAQs

What type of sourdough starter should I use?
Absolutely, using a bubbly and well-fed sourdough starter is crucial for your muffins. Look for a starter that has been recently fed and is showing active bubbles on the surface; this ensures the best rise and flavor in your Sourdough English Muffins.

How do I store Sourdough English Muffins?
Store your freshly baked Sourdough English Muffins covered at room temperature for up to 5 days. This helps them maintain their soft texture. If you want to keep them longer, place them in an airtight container or freezer bag and freeze for up to three months.

Can I freeze Sourdough English Muffins?
Yes! To freeze, ensure the muffins have completely cooled, then wrap them individually in plastic wrap or place them in an airtight freezer bag. This prevents freezer burn. When you’re ready to enjoy them, simply thaw at room temperature or pop them in the toaster for a quick heat-up.

What should I do if my muffins don’t rise?
If your muffins don’t rise adequately, it may be because your starter isn’t active enough. To troubleshoot, check the temperature in which you’re letting the dough rise; it should be warm (around 70°F-80°F or 21°C-27°C). If needed, give it more time, as they may need longer than the suggested 3-4 hours for the first rise.

Are Sourdough English Muffins suitable for special diets?
While this recipe contains eggs and dairy, it can be easily modified for vegan diets. Replace the egg with a flax egg (1 tablespoon ground flaxseed mixed with 2.5 tablespoons of water, left to sit until it thickens) and swap unsalted butter for a dairy-free alternative. Always check ingredient labels to avoid allergens!

Sourdough English Muffin

Perfectly Pillowy Sourdough English Muffins You’ll Love

These Sourdough English Muffins bring nostalgic flavors and a unique texture to your breakfast, perfect for any meal.
Prep Time 15 minutes
Cook Time 30 minutes
First Rise 3 hours
Total Time 3 hours 45 minutes
Servings: 12 muffins
Course: Breakfast
Cuisine: American
Calories: 150

Ingredients
  

For the Dough
  • 1 cup fed sourdough starter Ensure bubbly and well-fed
  • 1/2 cup warm water Around 100°F (38°C)
  • 3 cups all-purpose flour Measure carefully
  • 2 tablespoons granulated sugar Can substitute with honey or maple syrup
  • 2 tablespoons unsalted butter Can swap with oil or dairy-free butter
  • 1 large egg Can replace with flax egg for vegan option
  • 1 teaspoon salt Essential for balancing flavors
  • cornmeal for dusting Can be omitted if necessary

Equipment

  • mixing bowl
  • skillet or griddle
  • Cookie cutter
  • Wire rack

Method
 

Step-by-Step Instructions
  1. Mix the starter and warm water in a large bowl until well combined.
  2. Add remaining ingredients and stir until a shaggy dough forms.
  3. Knead the dough on a floured surface for 5-8 minutes until smooth and elastic.
  4. Place the kneaded dough in a lightly oiled bowl, cover, and let it rise in a warm place for 3-4 hours.
  5. Roll out the risen dough to ½ inch thick and cut out muffin shapes.
  6. Let the cut muffins rise for about 1 hour until puffed.
  7. Cook the muffins in a preheated skillet over medium heat for 3-4 minutes per side until golden brown.
  8. Cool on a wire rack and serve as desired.

Notes

Best served fresh but can be stored at room temperature for up to 5 days or frozen for up to 3 months.

Keto Whipped Peanut Butter Cottage Cheese: Creamy Guilt-Free Bliss

Whipping up a quick snack can often feel like a daunting task—especially when you’re striving for both taste and nutrition. Enter my Keto Whipped Peanut Butter Cottage Cheese, a delightfully creamy blend that truly reimagines snacking! With just four simple ingredients, this low-carb, sugar-free treat packs a protein punch, making it perfect for those of us who need to kick those fast-food cravings to the curb. Whether you enjoy it chilled with a swirl of berry sauce or as a stand-alone mousse, it’s a versatile snack that can easily adapt to your taste preferences. Plus, it’s a breeze to prepare, allowing you to spend more time savoring it and less time in the kitchen. Are you ready to discover a guilt-free snack that satisfies your sweet tooth while keeping you on track? Let’s dive in!

Why Is This Snack So Irresistible?

Simplicity at Its Best: With just four ingredients, making this Keto Whipped Peanut Butter Cottage Cheese is a cinch, even for busy bees!

Protein-Packed Pleasure: Each serving boasts around 20g of protein, making it an energizing snack to help power through your day.

Decadent Flavor Explosion: The rich, nutty essence of peanut butter combined with the creamy cottage cheese creates a taste profile that feels indulgent without the guilt.

Versatile & Customizable: Enjoy it as is or get creative! Top with homemade berry sauce, cocoa powder, or even a sprinkle of coconut for extra flair.

Time-Saving Solution: Whip it up in minutes and have a delicious snack ready to crush those fast-food cravings! Why not pair it with a side of Savory Vegetable Cheese Pancakes for a satisfying meal?

With this delightful treat, healthy eating never tasted so good!

Keto Whipped Peanut Butter Cottage Cheese Ingredients

For the Base
Cottage Cheese – Provides the creamy texture and protein power; choose Good Culture or Daisy for lower carbs.
Peanut Butter – Adds a rich taste and creaminess; opt for low-carb varieties or natural peanut butter for a healthier option.
Sweetener – Balances the flavors; use liquid stevia or your favorite low-carb sweetener to keep it keto-friendly.

For Serving Suggestions
Frozen Berries – Perfect for a berry sauce or mixing in for a delightful PB&J flavor; any low-sugar frozen berries work great!
Cocoa Powder – Blend in for a chocolatey twist; it enhances the flavor and keeps your snack exciting!
Mini Chocolate Chips – Top for an extra crunchy texture; look for sugar-free options to stay aligned with your keto goals.

Step‑by‑Step Instructions for Keto Whipped Peanut Butter Cottage Cheese

Step 1: Blend the Cottage Cheese
Start by placing 1 cup of cottage cheese in a food processor or high-speed blender. Blend for about 30 seconds until the mixture is completely smooth and creamy, resembling a thick cheesecake texture. Stop to scrape down the sides if necessary, ensuring no lumps are left in the Keto Whipped Peanut Butter Cottage Cheese base.

Step 2: Add Peanut Butter and Sweetener
Next, incorporate 1/2 cup of low-carb peanut butter and your preferred sweetener into the blended cottage cheese. Blend everything together for another 20 to 30 seconds until well combined. The mixture should turn creamy and fluffy, with a delightful peanut butter aroma filling your kitchen.

Step 3: Spoon Into Bowls
Once your mixture is perfectly blended, spoon it into serving bowls or jars. This portioning makes it easy to serve single servings later on. At this point, you can enjoy the rich Keto Whipped Peanut Butter Cottage Cheese as-is, or prepare to add a delicious berry sauce for an extra flavor kick.

Step 4: Prepare the Berry Sauce (Optional)
For a fruity twist, blend 1 cup of frozen berries with an additional 1-2 teaspoons of your chosen sweetener in the same processor. Blend until you achieve a smooth, thick sauce, which should take about 1 minute. This berry sauce not only adds color but also a refreshing contrast to the creamy peanut butter mixture.

Step 5: Cook Down Berries on the Stove (Optional)
If you prefer a thicker berry sauce, pour the blended mixture into a small saucepan over medium heat. Cook for about 4-5 minutes, stirring frequently, until it thickens. Allow it to cool slightly before drizzling it over your Keto Whipped Peanut Butter Cottage Cheese, adding a sweet and tangy flavor that elevates the dish.

Step 6: Serve and Enjoy
Serve your delicious Keto Whipped Peanut Butter Cottage Cheese immediately, either chilled or at room temperature. Feel free to top with mini chocolate chips or coconut flakes for added texture and sweetness. This creamy, protein-packed snack is perfect for any time of day, giving you that whipped dessert indulgence without the guilt!

How to Store and Freeze Keto Whipped Peanut Butter Cottage Cheese

Fridge: Store any leftover Keto Whipped Peanut Butter Cottage Cheese in an airtight container for up to 3 days. This ensures it stays fresh and creamy for your next craving!

Freezer: For longer storage, you can freeze the mixture. Transfer it into a freezer-safe container, leaving some space for expansion, and enjoy it within 1 month for the best flavor.

Thawing: To enjoy, simply transfer the frozen cottage cheese to the fridge to thaw overnight. Blend again briefly to restore its creamy texture before serving.

Reheating: If you prefer it warm, gently heat in the microwave for about 15-20 seconds, stirring well to ensure even warming. Just be mindful not to overheat!

Keto Whipped Peanut Butter Cottage Cheese Variations

Feel free to get creative and personalize your Keto Whipped Peanut Butter Cottage Cheese with these delightful twists!

  • Nut-Free Option: Substitute peanut butter with almond or sunflower seed butter to cater to nut allergies without losing creaminess.

  • Berry Bliss: Use homemade sugar-free berry jam or preserves for a fruity explosion that brightens this creamy snack.

  • Chocolate Delight: Mix in cocoa powder for a rich chocolate version that satisfies your sweet cravings while staying keto-friendly.

  • Spiced Up: Try adding a sprinkle of cinnamon or a dash of cayenne for an unexpected flavor boost that adds warmth and depth. It’s a surprising twist!

  • Crunchy Toppings: Top with sugar-free granola or crushed nuts for a delightful crunch that adds texture and makes it extra satisfying.

  • Coconut Dream: Sprinkle unsweetened coconut flakes for a tropical twist that complements the nutty flavors beautifully.

  • Savory Option: Blend in some garlic powder and chives for a savory dip that pairs perfectly with crunchy veggies.

  • Smoothie Companion: Add a scoop to your morning smoothie for a protein punch and a creamy texture—we’re talking about a breakfast game-changer! Want more smoothie ideas? Check out the delicious Milky Coconut Cheese Dessert.

No matter which variation you choose, this creamy delight can adapt beautifully to suit your taste and keep things exciting!

Expert Tips for Keto Whipped Peanut Butter Cottage Cheese

  • Blend for Smoothness: Make sure to blend the cottage cheese thoroughly until it’s completely creamy. This ensures your Keto Whipped Peanut Butter Cottage Cheese has a luscious texture without lumps.

  • Sweetness to Taste: Start with a small amount of sweetener and adjust according to your preference. Some brands of peanut butter are sweeter than others, so taste as you go!

  • Thickness Matters: If you prefer a thicker consistency, add unsweetened almond milk gradually. This balances the creaminess while keeping the recipe keto-friendly.

  • Flavor Enhancements: Consider adding cocoa powder or a dash of vanilla extract to elevate the flavor profile of your whipped cottage cheese, giving it a dessert-like quality.

  • Ingredient Quality: Opt for high-quality peanut butter without added sugars to maintain the health benefits. A natural peanut butter enhances both the flavor and nutritional value of your snack.

  • Storage Tips: Store any leftovers in an airtight container in the fridge for up to 3 days to keep the Keto Whipped Peanut Butter Cottage Cheese fresh and delicious!

Make Ahead Options

These Keto Whipped Peanut Butter Cottage Cheese delights are perfect for meal prep! You can blend the cottage cheese, peanut butter, and sweetener up to 24 hours in advance to save time during your busy week. Simply spoon the mixture into serving bowls and refrigerate it until you’re ready to enjoy. If you want to prepare the berry sauce, it can also be made ahead of time and stored in an airtight container in the fridge for up to 3 days. Just remember to give the mixture a quick stir before serving for that creamy texture, and drizzle the berry sauce on top right before enjoying to keep everything fresh and vibrant. With these make-ahead options, you’ll have a delicious, high-protein snack ready to go!

What to Serve with Keto Whipped Peanut Butter Cottage Cheese

Elevate your snacking experience with delightful pairings that add flavor and excitement to your creamy creation.

  • Fresh Berries: The natural sweetness and tartness of berries provide a refreshing contrast, making every bite burst with flavor.

  • Almond Flour Cookies: These low-carb treats are perfect for dipping, adding a delightful crunch to your creamy dessert. Bake a batch for a satisfying snack combo!

  • Celery Sticks: The crispness of celery offers a refreshing and healthy contrast to the rich peanut butter flavor, perfect for a light snack.

  • Chocolate Chia Pudding: Pair your cottage cheese with a rich and chocolatey chia pudding for a dessert that’s equally indulgent and healthy.

  • Sliced Apples: Crisp apple slices add a refreshing sweetness and a juicy burst, balancing the creamy texture beautifully.

  • Iced Coffee: Enjoy a chilled glass of iced coffee alongside your keto snack for an energizing pick-me-up that complements the flavors perfectly.

  • Coconut Flakes: Sprinkling coconut flakes adds a tropical touch and chewiness, enhancing the overall texture and flavor profile of your dish.

  • Sugar-Free Dark Chocolate: A few pieces of sugar-free dark chocolate bring an indulgent touch, creating a luxurious end to your healthy snack experience.

Keto Whipped Peanut Butter Cottage Cheese Recipe FAQs

What should I look for when selecting cottage cheese?
Absolutely! When choosing cottage cheese for your Keto Whipped Peanut Butter Cottage Cheese, go for brands like Good Culture or Daisy, which typically offer lower carbs (around 3-4g net carbs per ½ cup). Ensure the cottage cheese is fresh with no dark spots or off smells; this ensures the best flavor and texture for your delicious snack.

How long can I store leftover Keto Whipped Peanut Butter Cottage Cheese?
Very simply! You can store any leftovers in an airtight container in the refrigerator for up to 3 days. This helps maintain its creamy texture and delicious taste, making it easy to grab a quick snack later on!

Can I freeze Keto Whipped Peanut Butter Cottage Cheese?
Certainly! To freeze your mixture, transfer it to a freezer-safe container, leaving some space for expansion. It’s best enjoyed within a month for optimal flavor. When you’re ready to indulge, thaw it in the fridge overnight, then give it a quick blend to restore its luscious creaminess.

What if my mixture is too thick?
No worries! If your Keto Whipped Peanut Butter Cottage Cheese is thicker than you’d like, you can gradually mix in unsweetened almond milk until you reach your desired consistency. This will help maintain its creamy texture while keeping it keto-friendly!

Can I make this recipe nut-free?
The more the merrier! If you have nut allergies, you can easily substitute peanut butter with sunflower seed butter or almond butter. Just ensure that the alternatives align with your dietary restrictions, and enjoy a deliciously creamy treat without worry!

Is this recipe safe for pets?
Absolutely not! While cottage cheese is safe for dogs in moderation, the sweeteners and peanut butter should be avoided. It’s best to keep this delightful snack just for you and stick to pet-friendly treats for our furry companions!

Keto Whipped Peanut Butter Cottage Cheese

Keto Whipped Peanut Butter Cottage Cheese: Creamy Guilt-Free Bliss

Keto Whipped Peanut Butter Cottage Cheese is a creamy, low-carb snack that satisfies sweet cravings without guilt.
Prep Time 5 minutes
Cook Time 5 minutes
Total Time 10 minutes
Servings: 4 servings
Course: Other
Cuisine: American
Calories: 250

Ingredients
  

Base Ingredients
  • 1 cup cottage cheese Choose Good Culture or Daisy for lower carbs.
  • 1/2 cup peanut butter Opt for low-carb varieties or natural peanut butter.
  • 2 tablespoons sweetener Use liquid stevia or your favorite low-carb sweetener.
Serving Suggestions
  • 1 cup frozen berries Any low-sugar frozen berries work great.
  • 2 teaspoons cocoa powder Blend in for a chocolatey twist.
  • 1/4 cup mini chocolate chips Look for sugar-free options.

Equipment

  • Food Processor
  • mixing bowls
  • Measuring cups
  • spoons

Method
 

Preparation Steps
  1. Blend the cottage cheese in a food processor for about 30 seconds until smooth and creamy.
  2. Add peanut butter and sweetener, blend for another 20 to 30 seconds until well combined.
  3. Spoon the mixture into serving bowls or jars.
  4. Optional: For berry sauce, blend frozen berries with sweetener until smooth.
  5. Optional: Cook blended berries in saucepan over medium heat for 4-5 minutes until thickened.
  6. Serve immediately or chill, topping with chocolate chips or coconut flakes as desired.

Notes

Store leftovers in an airtight container in the fridge for up to 3 days or freeze for up to 1 month. Thaw in the fridge and blend again if needed.

Muffins with Perfect Crannies for Irresistible Toasting Delights

As I poured warm milk into the bowl, the faint aroma of yeast began to dance in the air, transporting me to cozy mornings filled with homemade delights. These Easy Homemade English Muffins with Perfect Crannies have become my go-to recipe for lazy weekends—quick to prepare and even easier to enjoy. With minimal active time required, you can mix, let them rise, and soon be savoring soft, buttery muffins crisped to perfection in your skillet. Plus, they’re incredibly versatile; whether you prefer them with a slather of jam or a simple pat of butter, they’re guaranteed to be a hit at your breakfast table. Interested in how you can customize this recipe for your dietary needs, even going dairy-free? Let’s dive in!

Why Are These Muffins So Special?

Perfect Crannies mean these muffins are made for toasting! Each bite delivers a delightful crunch, soaking up your favorite spreads seamlessly. Easy and Quick to make, this recipe fits into your schedule, requiring minimal active time for maximum satisfaction. Versatile Options allow you to swap ingredients easily, like using almond milk for a dairy-free treat. Homemade Goodness brings warmth and texture that packaged muffins simply can’t match. Whether enjoyed solo or piled high with toppings, these muffins will surely impress your family and friends, making them the star of your breakfast table!

Muffins with Perfect Crannies Ingredients

• Get ready to create your own delightful batch of muffins with perfect crannies that are perfect for toasting!

For the Dough

  • Whole Milk – Activates yeast for dough rise; substitute with warm almond or oat milk for a dairy-free version.
  • Active Dry Yeast – Essential for leavening; instantly switch with the same quantity of instant yeast without needing to proof.
  • All-Purpose Flour – Provides structure; mix with whole wheat flour for a nuttier, healthier alternative.
  • Unsalted Butter – Adds richness; use vegetable oil as a dairy-free option by replacing it in equal measure.

For the Cooking Surface

  • Cornmeal or Semolina – Prevents sticking during cooking; if unavailable, use flour or parchment paper to achieve similar results.

Feel excited to whip up these muffins with perfect crannies that will elevate your breakfast experience!

Step‑by‑Step Instructions for Muffins with Perfect Crannies

Step 1: Activate the Yeast
In a small bowl, combine 1 cup of warm whole milk, 2 teaspoons of active dry yeast, and 1 tablespoon of sugar. Stir gently and let it sit for 5-10 minutes until it becomes foamy and bubbly. This indicates the yeast is active and ready to work its magic, ensuring your muffins with perfect crannies rise brilliantly.

Step 2: Mix the Dry Ingredients
In a large mixing bowl, whisk together 2 ½ cups of all-purpose flour and 1 teaspoon of salt. Create a well in the center and pour in the melted unsalted butter along with your activated yeast mixture. Stir everything together until a shaggy dough forms, indicating that the ingredients are starting to come together beautifully.

Step 3: Knead the Dough
Transfer the shaggy dough onto a lightly floured surface. Knead the dough for about 6-8 minutes until it becomes smooth and elastic. Feel the texture change as you work it—this step is crucial for developing the perfect structure for your English muffins and creating those delightful crannies later on.

Step 4: First Rise
Place your kneaded dough into a lightly oiled bowl, turning it to coat the surface. Cover the bowl with a clean kitchen towel and let it rise in a warm spot for 1-1.5 hours, or until it has doubled in size. Keep an eye on it; the dough should be fluffy and puffy, ready for the next delicious phase in your muffin-making journey.

Step 5: Shape the Muffins
Once the dough has risen, gently punch it down to remove excess air. Roll it out on a floured surface to about ½ inch thick, then using a round cutter, cut out individual muffins. This step is crucial for creating the perfect shape, ensuring each muffin has room to develop those signature crannies.

Step 6: Second Rise
Transfer the cut muffins onto a tray dusted with cornmeal or semolina to prevent sticking. Cover them again with a towel and let them rise for an additional 30 minutes. During this time, they will puff up, preparing them for the skillet while enhancing their texture and taste for those perfect toasting moments.

Step 7: Cook the Muffins
Heat a skillet over low to medium-low heat, ensuring it’s warm but not too hot to burn the muffins. Place the muffins in the skillet and cook for 7-8 minutes on each side or until they develop a lovely golden brown crust. Watch them closely for that tempting color, which indicates they are perfectly cooked on the inside.

Step 8: Cool and Serve
Once cooked, transfer the muffins to a wire rack to cool slightly. Allowing them to cool on a rack helps maintain their wonderful texture. When you’re ready, slice the muffins with a fork to preserve those beautiful crannies, perfect for catching butter or jam, and toast them before serving for a deliciously irresistible treat!

How to Store and Freeze Muffins with Perfect Crannies

Room Temperature: Store muffins in an airtight container for up to 2 days to maintain their softness and delightful texture.

Fridge: If you need to keep them longer, refrigerate for up to a week. Just remember to warm them up slightly before serving for that fresh-baked taste.

Freezer: For extended storage, freeze muffins in a sealed bag for up to 3 months. Toast from the frozen state for best results—the perfect way to enjoy your muffins with perfect crannies!

Reheating: When ready to enjoy, pop them in a toaster or skillet until warmed through and crispy on the outside for a delicious breakfast treat.

Expert Tips for Muffins with Perfect Crannies

  • Check Yeast Freshness: Always verify the expiration date on your yeast. Inactive yeast will result in dense muffins without those lovely crannies.
  • Knead with Care: Ensure you knead the dough for the full 6-8 minutes. Insufficient kneading can lead to gummy texture instead of a light, airy muffin.
  • Temperature Matters: Let the dough rise in a warm, draft-free space. Too cold, and it may not rise properly, affecting the final texture of your muffins.
  • Use a Fork to Slice: To maintain those perfect crannies, use a fork to slice the muffins instead of a knife. This preserves the delicate structure without squashing them.
  • Store Wisely: Keep leftover muffins in an airtight container at room temperature for optimal freshness. To enjoy later, freeze and toast directly from frozen for delicious results.

What to Serve with Easy Homemade English Muffins

As you delight in your warm, buttery muffins with perfect crannies, consider these scrumptious pairings to elevate your breakfast experience.

  • Creamy Scrambled Eggs: Fluffy eggs add protein and a rich texture, perfect for topping your muffin for a hearty breakfast.

  • Fresh Fruit Salad: A vibrant mix of seasonal fruits adds a refreshing contrast, enhancing the meal with a burst of flavor and color.

  • Homemade Jam: Smooth, fruity spreads bring a sweet charm that melds beautifully with the muffins’ texture, enhancing every bite.

Imagine slathering ripe strawberry or tangy apricot jam over a fresh muffin—it’s a heavenly combination!

  • Savory Avocado Toast: Creamy avocado seasoned to perfection creates a tasty twist, making each muffin a delightful vehicle for flavor.

  • Crispy Bacon or Sausage: The savory richness of crispy bacon or sausage adds a comforting element, ensuring your meal is truly indulgent.

  • Herbed Cottage Cheese: A light, protein-packed topping with fresh herbs brings a creamy balance to the muffins, adding a wellness touch to your meal.

Pair your muffins with a warm cup of coffee or a refreshing iced tea to complete your cozy breakfast experience!

Make Ahead Options

These Easy Homemade English Muffins with Perfect Crannies are perfect for meal prep, saving you time during busy mornings! You can prepare and shape the dough up to 24 hours in advance. After the first rise, simply punch down the dough, cut out the muffins, and refrigerate them covered until you’re ready to cook. This not only enhances flavor but helps maintain their light texture. When you’re ready to eat, let the muffins come to room temperature before cooking them in a skillet over low heat for 7-8 minutes on each side. You’ll enjoy freshly made muffins with minimal effort, just as delicious as if you made them from scratch that day!

Muffins with Perfect Crannies Variations

Feel free to get creative with these muffins, enhancing their flavor and texture for a breakfast experience you’ll love even more!

  • Dairy-Free: Substitute whole milk with warm almond or oat milk for a creamy alternative.

  • Whole Wheat Twist: Use half whole wheat flour for a slightly nuttier flavor and added nutrition.

  • Vegan Option: Replace unsalted butter with equal parts vegetable oil and a dairy-free milk of your choice for a fully vegan muffin.

  • Flavor Boost: Add dried fruit like cranberries or currents to the dough for a sweet surprise in every bite. The added chewiness compliments the fluffy texture beautifully.

  • Herbal Infusion: Mix in fresh herbs such as rosemary or thyme for a fragrant, savory twist. Try pairing with your favorite cheese spread for an elevated snack!

  • Spice it Up: Incorporate a teaspoon of cinnamon or nutmeg into the dry ingredients for a warm, aromatic flavor that will fill your kitchen with mouthwatering scents.

  • Chili Heat: Add a dash of cayenne pepper or finely chopped jalapeños to spice things up; these savory muffins are perfect for an adventurous brunch!

  • Nutty Delight: Stir in chopped nuts like walnuts or pecans for additional crunch and nutrition. Perfectly paired with a spread of soft cheese or jam, this variation might become your new favorite.

Embrace the joy of customization, and if you’re in the mood for fresh, simple salads, you could also whip up a side of Refreshing Cucumber and Carrot Salad to complement your muffins beautifully!

Muffins with Perfect Crannies Recipe FAQs

How do I choose the best milk for this recipe?
The type of milk you use can significantly impact the texture and flavor of your muffins. For the best results, I recommend using whole milk as it activates the yeast beautifully, leading to a soft rise. If you’re opting for a dairy-free alternative, warm almond or oat milk works perfectly. Just make sure it’s not cold, as it might hinder the yeast’s activation!

What’s the best way to store leftover muffins?
To keep your muffins with perfect crannies fresh, store them in an airtight container at room temperature for 1-2 days. If you want to enjoy them later, they can be refrigerated for up to a week. Just remember to warm them up slightly before serving to bring back that fresh-baked taste.

Can I freeze these muffins? How do I do it?
Absolutely! Freezing is a great way to preserve your homemade muffins. Once they’ve cooled completely, wrap each muffin tightly in plastic wrap or place them in a sealed freezer bag. They can be frozen for up to 3 months. When you’re ready to enjoy, simply toast them directly from frozen—it’s the best way to achieve that delightful texture!

What should I do if my dough doesn’t rise?
If your dough doesn’t rise, it’s likely because the yeast was inactive. Make sure you check the expiration date on your yeast before starting. If the yeast fails to froth during activation, it’s a sign it won’t be effective. For future attempts, ensure you’re using warm milk (about 110°F) rather than hot, which can kill the yeast.

Any tips for accommodating allergies?
Great question! If you’re looking to make these muffins allergy-friendly, you can easily swap out the unsalted butter for an equal amount of vegetable oil or a dairy-free butter substitute. For gluten sensitivities, using a gluten-free flour blend is ideal, but be sure to follow the manufacturer’s instructions as these flours behave differently.

How can I achieve the perfect crannies when slicing?
To maintain those perfect crannies while slicing, always use a fork instead of a knife. This method gently separates the muffin without compressing it, allowing the airy texture to remain intact, ideal for soaking up your favorite toppings like butter or jam.

Muffins with Perfect Crannies

Muffins with Perfect Crannies for Irresistible Toasting Delights

These Easy Homemade English Muffins with Perfect Crannies are perfect for toasting, delivering delightful crunch and versatility.
Prep Time 20 minutes
Cook Time 16 minutes
Rising Time 1 hour 30 minutes
Total Time 2 hours 6 minutes
Servings: 12 muffins
Course: Breakfast
Cuisine: English
Calories: 150

Ingredients
  

For the Dough
  • 1 cup Whole Milk Can substitute with warm almond or oat milk for a dairy-free version.
  • 2 teaspoons Active Dry Yeast Instant yeast can be used in the same quantity without proofing.
  • 2.5 cups All-Purpose Flour Mix with whole wheat flour for a nuttier alternative.
  • 1 tablespoon Sugar
  • 1 teaspoon Salt
  • 2 tablespoons Unsalted Butter Can replace with vegetable oil as a dairy-free option.
For the Cooking Surface
  • 1 cup Cornmeal or Semolina Use flour or parchment paper if unavailable.

Equipment

  • mixing bowl
  • Skillet
  • Rolling Pin
  • round cutter
  • Wire rack
  • kitchen towel

Method
 

Step-by-Step Instructions
  1. In a small bowl, combine 1 cup of warm whole milk, 2 teaspoons of active dry yeast, and 1 tablespoon of sugar. Stir gently and let it sit for 5-10 minutes until foamy.
  2. In a large mixing bowl, whisk together 2.5 cups of all-purpose flour and 1 teaspoon of salt. Create a well and add melted unsalted butter and the activated yeast mixture, stirring until a shaggy dough forms.
  3. Transfer the shaggy dough to a lightly floured surface and knead for about 6-8 minutes until smooth and elastic.
  4. Place kneaded dough in a lightly oiled bowl, cover with a towel, and let rise in a warm spot for 1-1.5 hours until doubled in size.
  5. Once risen, punch down the dough, roll it out to ½ inch thick, and cut out muffins using a round cutter.
  6. Transfer cut muffins onto a tray dusted with cornmeal or semolina, cover with a towel, and let rise for an additional 30 minutes.
  7. Heat a skillet over low to medium-low heat. Cook muffins for 7-8 minutes on each side until golden brown.
  8. Transfer muffins to a wire rack to cool slightly. Slice with a fork to maintain crannies and toast before serving.

Notes

Check yeast freshness for best results. Knead for the full time and allow dough to rise in a warm area.

Stay Connected

Get recipes via email: