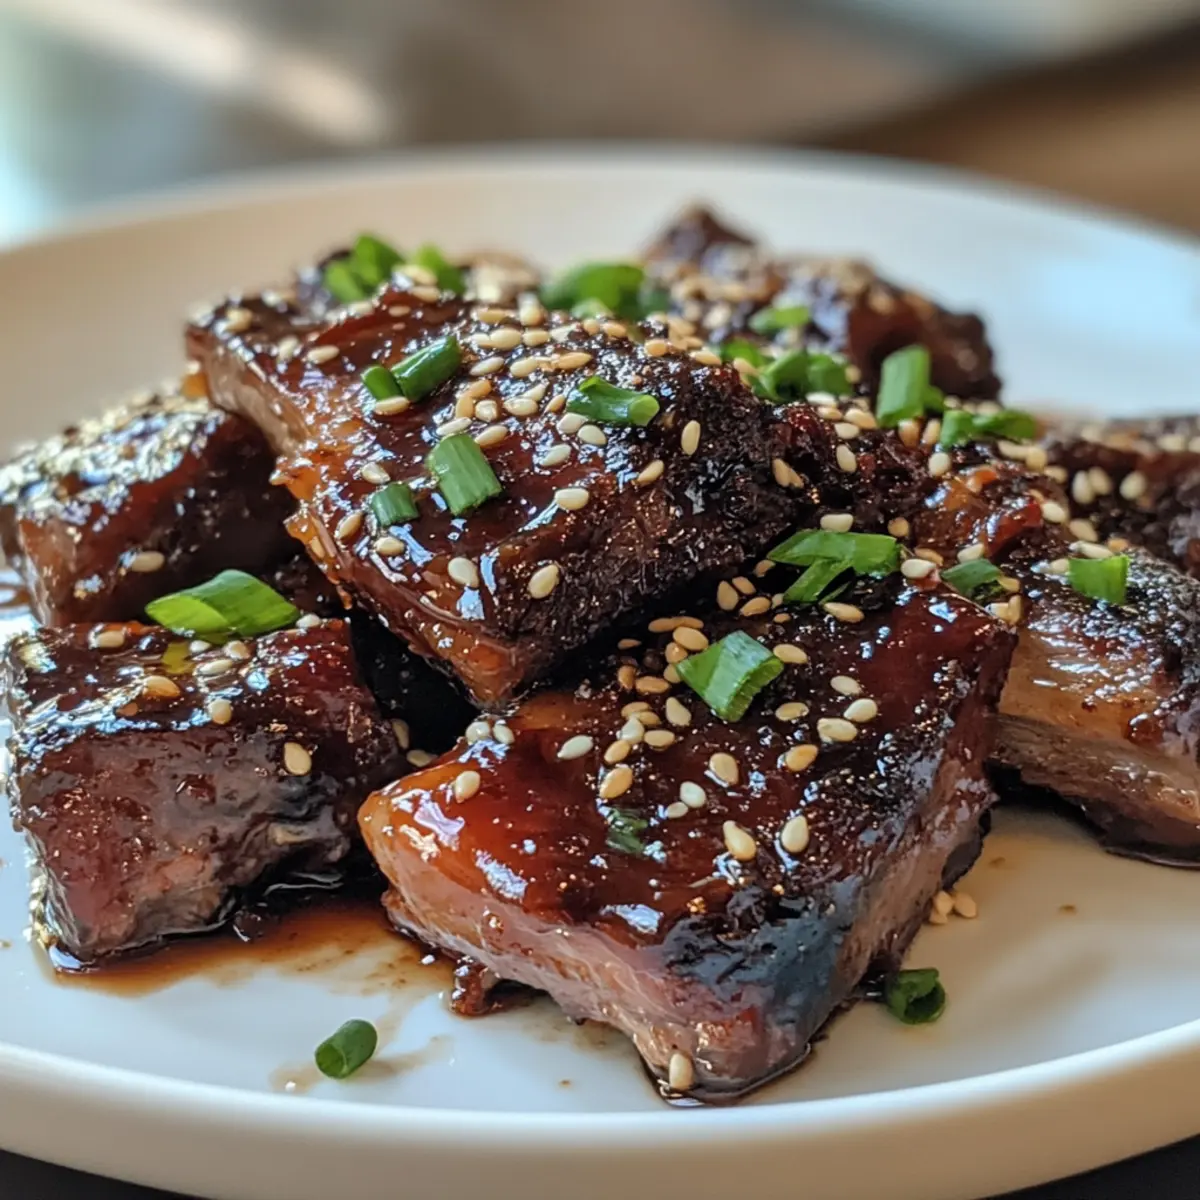
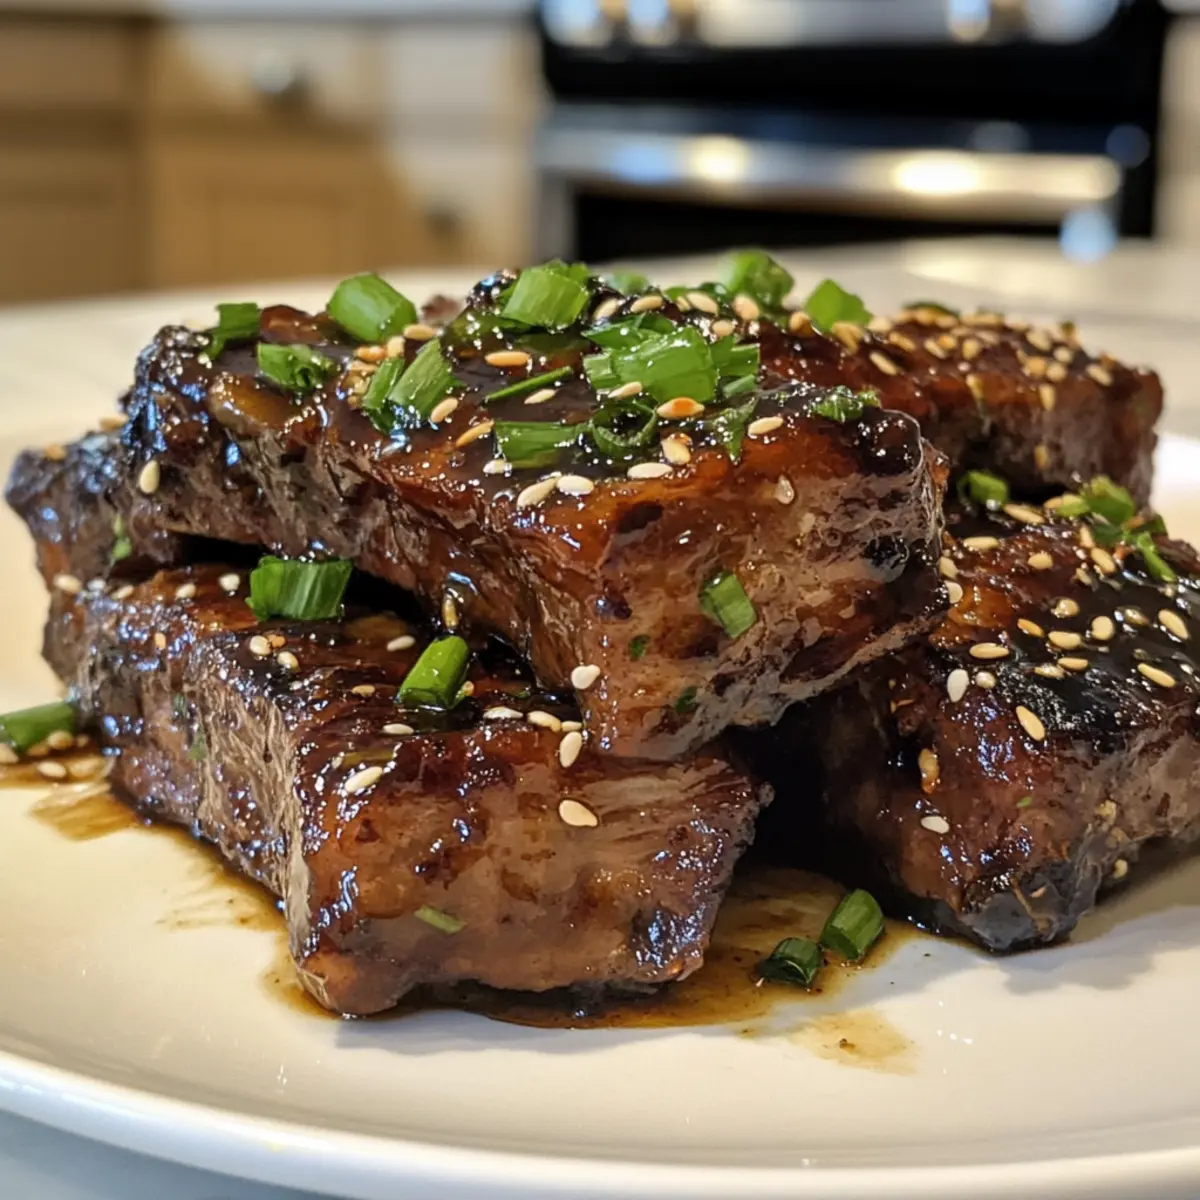
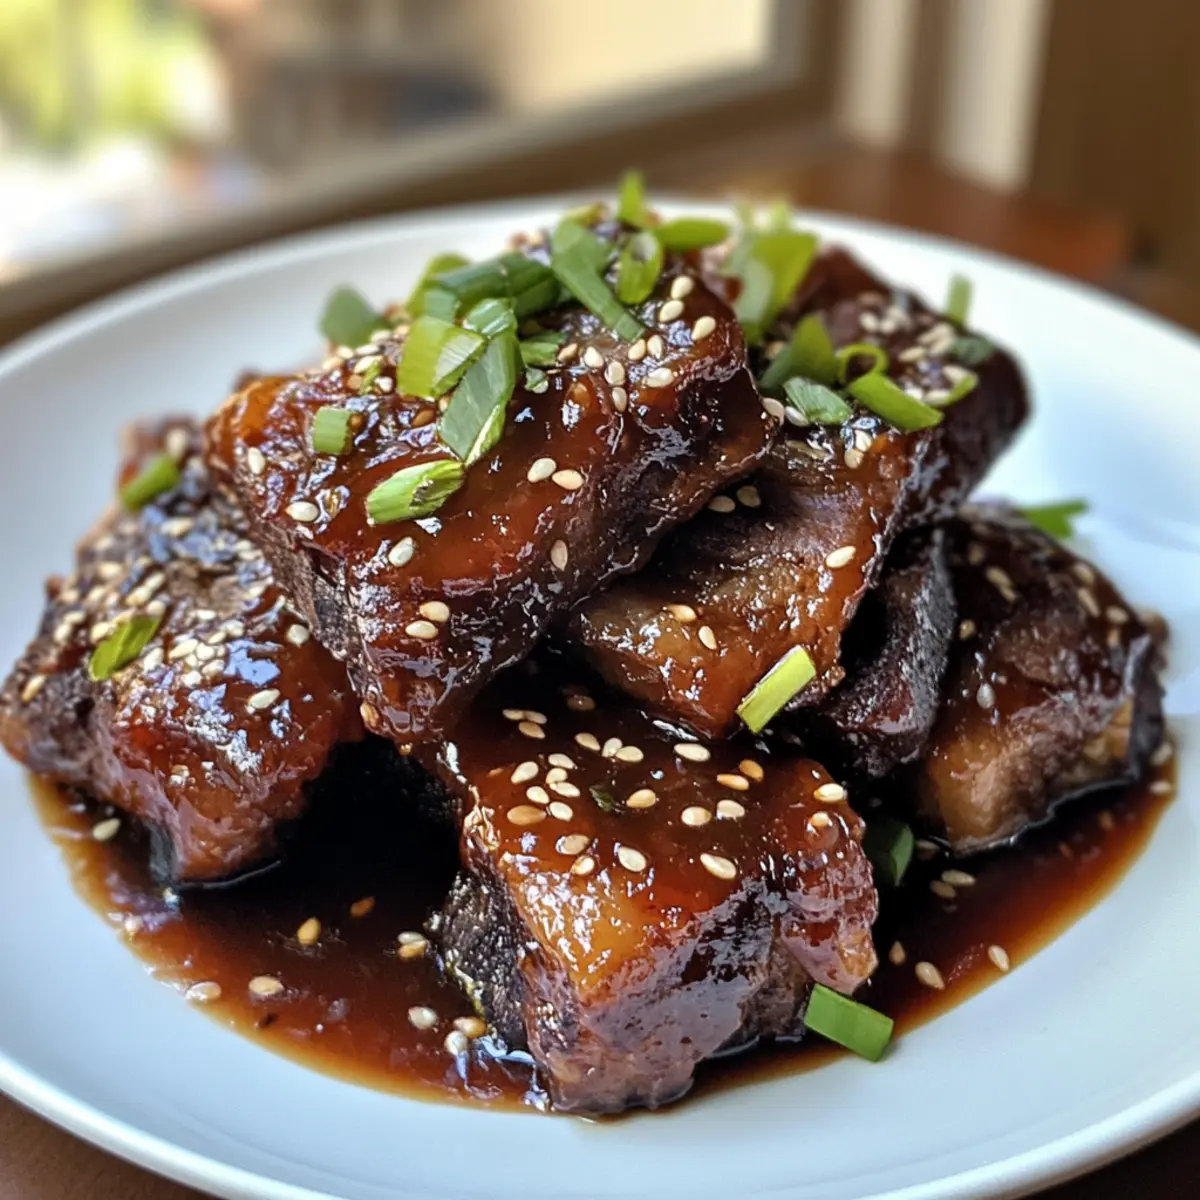
The delicate aroma of simmering ginger and garlic fills the air as I prepare to unveil one of my all-time favorite dinner delights: Sticky Caramelized Asian Beef Short Ribs. These beauties offer a melt-in-your-mouth experience wrapped in a glossy, deeply caramelized sauce that dances with flavors of soy and sesame—a true crowd-pleaser for any occasion. The best part? This recipe is not only a showstopper for family meals but also easy enough to become a weeknight staple for when you’re craving something special without spending hours in the kitchen. Pair them with fluffy rice or creamy mashed potatoes for a meal that will satisfy your taste buds and leave you longing for seconds! Are you ready to indulge in some homemade goodness?
Why are these ribs a must-try?
Melt-in-your-mouth tenderness: The slow-cooking process transforms the tough beef short ribs into succulent bites that practically dissolve on your tongue.
Sticky, rich glaze: The harmonious blend of soy sauce, ginger, and brown sugar creates a thick, delectable sauce that elevates the ribs to new culinary heights.
Quick preparation: With a straightforward process, these beef short ribs can go from oven to table in a few hours, making them perfect for both special occasions and casual weeknight dinners.
Versatile pairings: Serve them alongside steamed rice, creamy mashed potatoes, or even a refreshing Asian inspired cabbage salad for a delightful balance of flavors and textures.
Join the ranks of home cooks raving about this dish—your taste buds will thank you! Enjoy the same satisfaction as with dishes like Savory Beef Bacon or Honey Garlic Ribs.
Sticky Caramelized Asian Beef Short Ribs Ingredients
• Create your magical dish with the following essentials:
For the Ribs
- Bone-in Beef Short Ribs – 3 lbs (1.4 kg); use English-cut for optimal flavor and texture.
- Kosher Salt – 1 tsp; essential for seasoning, adjust according to taste.
- Black Pepper – 0.5 tsp; adds warmth, use freshly ground for best results.
- Neutral Oil (Canola or Avocado) – 2 tbsp; needed for searing to achieve a golden crust.
For the Sauce
- Fresh Ginger – 1 tbsp (minced); provides a delightful aromatic flavor—substitute with ground ginger as needed, but use less.
- Garlic – 4 cloves (minced); offers rich, savory depth to the dish.
- Low-Sodium Soy Sauce – 0.5 cup; crucial for the sticky caramel glaze and imparts umami.
- Rice Vinegar – 2 tbsp; balances the richness with acidity—apple cider vinegar can be an alternative.
- Dark Brown Sugar – 0.5 cup (packed); key to achieving that sticky caramel glaze—substitute with regular brown sugar if necessary.
- Beef Broth – 1 cup; essential for braising and infusing moisture; homemade or low-sodium versions work well.
- Toasted Sesame Oil – 1 tbsp; adds nutty undertones to enhance the dish.
- Cornstarch mixed with Cold Water – 1 tbsp each; thickens the glaze for a luscious finish—optional, but highly recommended.
Garnish
- Toasted White Sesame Seeds – 1 tbsp; for garnish, adding a delightful crunch.
- Green Scallions – 2 stalks (thinly sliced); fresh addition that brightens the dish.
These Sticky Caramelized Asian Beef Short Ribs are sure to impress and become a favorite in your home. Enjoy cooking!
Step‑by‑Step Instructions for Sticky Caramelized Asian Beef Short Ribs
Step 1: Preheat the Oven
Begin by preheating your oven to 325°F (165°C). This initial step is crucial for the slow cooking process that gives the Sticky Caramelized Asian Beef Short Ribs their melt-in-your-mouth tenderness. Make sure your oven is fully preheated before moving on to the next step, ensuring even cooking throughout.
Step 2: Prepare the Ribs
While the oven is heating up, pat the beef short ribs dry with paper towels. Generously season them on all sides with kosher salt and freshly ground black pepper. This step enhances the flavor of the ribs and prepares them for a beautiful sear, which will deepen their savory qualities in the final dish.
Step 3: Sear the Ribs
In a large Dutch oven, heat 2 tablespoons of neutral oil over medium-high heat. Once the oil is shimmering, carefully add the beef short ribs, searing each side for about 2-3 minutes until they develop a golden-brown crust. This process locks in the juices and adds a rich flavor profile. Once browned, remove the ribs and set them aside.
Step 4: Build the Sauce
In the same Dutch oven, reduce the heat to medium and add minced garlic and ginger. Sauté these aromatic ingredients for about 60 seconds, until fragrant and slightly softened. Then, pour in the beef broth, scraping the bottom of the pot to incorporate any flavorful bits stuck to the bottom, followed by soy sauce, dark brown sugar, rice vinegar, and toasted sesame oil. Stir well to combine.
Step 5: Braise the Ribs
Return the seared beef short ribs to the pot, placing them bone-side down in the sauce. Bring the mixture to a gentle simmer, then cover the Dutch oven with a lid and transfer it to the preheated oven. Braise for 2.5 to 3 hours, or until the ribs are fork-tender and the meat pulls away easily from the bone, creating that perfect texture.
Step 6: Finish the Sauce
Once the ribs are tender, carefully remove them from the pot and set them aside, covering them to keep warm. Skim off any excess fat from the surface of the liquid. Bring the remaining sauce to a boil over medium-high heat and stir in a cornstarch slurry (1 tablespoon each of cornstarch and cold water) to thicken the sauce. Let it reduce for 5-7 minutes until it reaches a glossy, syrupy consistency.
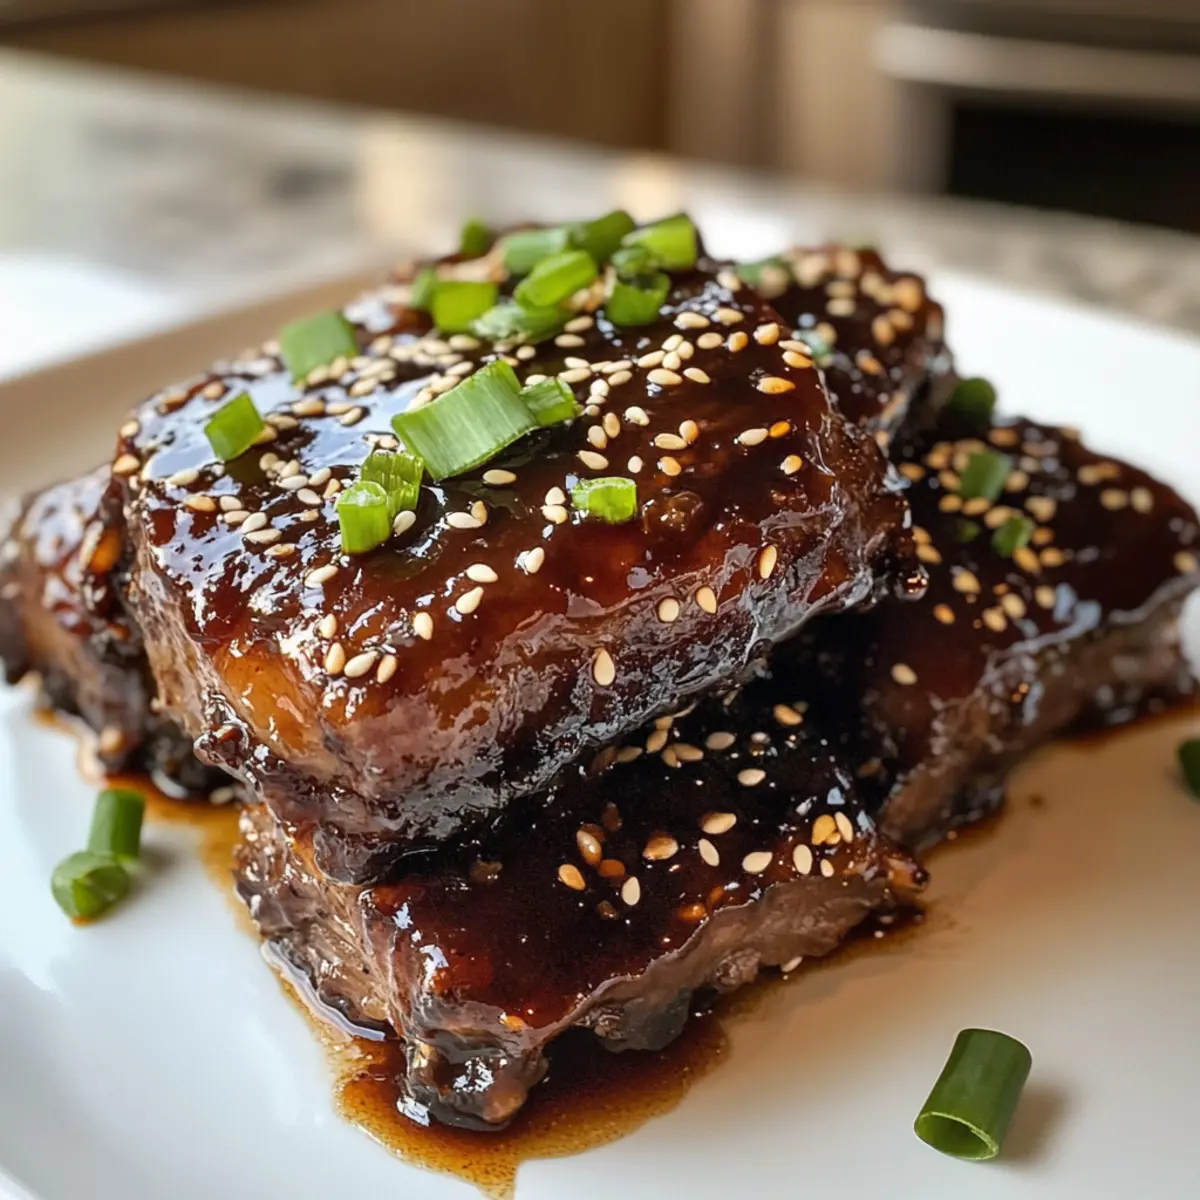
Step 7: Garnish & Serve
Finally, return the beef short ribs to the pot, allowing them to be coated in the thick sauce. Transfer the ribs to a serving platter, pouring the remaining glaze over the top. Garnish generously with toasted sesame seeds and thinly sliced green scallions for an added crunch and bright flavor. Serve your Sticky Caramelized Asian Beef Short Ribs warm over steamed rice or mashed potatoes.
What to Serve with Sticky Caramelized Asian Beef Short Ribs
The delightful aroma of these ribs invites a variety of tasty accompaniments that elevate your meal experience—let’s explore some superb pairings!
-
Fluffy Jasmine Rice: A classic choice that soaks up the rich sauce, creating a perfect balance of flavors and textures with every bite.
-
Creamy Mashed Potatoes: These buttery potatoes offer a velvety contrast to the sticky sweetness of the ribs, making for a comforting, hearty meal.
-
Asian Cabbage Salad: Fresh and crunchy, this salad adds a refreshing contrast to the deep flavors of the ribs. The crispness of the vegetables brightens the plate beautifully.
-
Steamed Broccoli or Bok Choy: The slight bitterness of these greens pairs wonderfully with the sweetness of the sauce, adding a vibrant color and nutritious element to your dinner.
-
Roasted Sweet Potatoes: Their natural sweetness complements the sticky glaze, while the caramelization offers an enjoyable, textural contrast to the tender beef.
-
Chilled Sake or Asian Beer: A light and crisp drink balances the rib’s richness and enhances the overall culinary journey. The freshness of sake elevates the dining experience.
-
Sesame Noodles: Tossed in a savory sauce, these noodles will join the sticky goodness on your plate, creating a uniquely satisfying harmony.
-
Chocolate Mochi Ice Cream: To finish off your meal, enjoy a sweet treat like mochi ice cream. Its chewy texture and flavors create a delightful ending to your savory feast.
Make Ahead Options
These Sticky Caramelized Asian Beef Short Ribs are perfect for busy home cooks looking to save time during the week! You can season the ribs and prepare the sauce up to 24 hours in advance. Simply pat the ribs dry, apply kosher salt and black pepper, and store them covered in the refrigerator. Prepare the sauce by following the initial steps and refrigerate it separately. When you’re ready to enjoy your meal, just reheat the sauce while bringing the ribs back to temperature, then proceed to braise them as directed. This method maintains the ribs’ quality, ensuring they remain just as delicious and satisfying when you finally serve them.
Expert Tips for Sticky Caramelized Asian Beef Short Ribs
-
Perfect Searing: A well-cooked golden crust not only enhances flavor but also seals in juices. Don’t rush this important step!
-
Avoid Grease: Skim the excess fat off the sauce before thickening it; this creates a luscious, glossy glaze instead of greasy ribs.
-
Be Patient with Cooking: Slow cooking is essential for breaking down collagen in the ribs. This ensures your ribs are fall-off-the-bone tender and deliciously sticky.
-
Quality Ingredients Matter: Use low-sodium soy sauce to avoid overwhelming saltiness in your Sticky Caramelized Asian Beef Short Ribs for a balanced flavor.
-
Customize Your Sauce: Feel free to add a touch of spice with chili paste. It’s a great way to adjust the flavor profile based on your taste preferences!
Sticky Caramelized Asian Beef Short Ribs Variations
Feel free to make this dish your own by swapping ingredients and tweaking flavors!
-
Pork Ribs: Substitute the beef with pork ribs for a delightful twist that’s equally tender and flavorful.
-
Spicy Touch: Add a teaspoon of chili paste to the sauce for an exhilarating kick, making your taste buds dance with delight.
-
Wine Infusion: Consider adding a splash of red wine to the braising liquid for a deeper flavor profile that beautifully complements the sauce.
-
Herb Boost: Toss in fresh herbs like cilantro or basil during the last few minutes of cooking for an aromatic lift to the dish.
-
Vegetable Pair: Add sliced carrots or bell peppers to the braise for a colorful veggie addition that melds beautifully with the flavors.
-
Sweet Kick: Adjust the brown sugar to add more sweetness based on your preference, or add a touch of honey for a unique flavor twist.
-
Coconut Curry: For an Asian-inspired twist, incorporate a spoonful of coconut curry paste into the sauce to create a delightful harmony of sweet and savory notes.
-
Quick Prep: If time is short, using a pressure cooker can significantly reduce cooking time while still producing those flavorful, melty ribs.
These Sticky Caramelized Asian Beef Short Ribs are a versatile dish that can transform into many delicious variations. Enhance your meals with a side of steamed jasmine rice or enjoy them alongside comforting Heirloom Beef Pancakes for a complete experience!
Storage Tips for Sticky Caramelized Asian Beef Short Ribs
Fridge: Store the ribs in an airtight container for up to 4 days. The flavors will intensify as they sit, making leftovers even tastier.
Freezer: If you want to enjoy your Sticky Caramelized Asian Beef Short Ribs later, freeze them in an airtight container for up to 3 months.
Reheating: Thaw in the fridge overnight before reheating. For best results, warm them in a saucepan over low heat, adding a splash of broth if needed to maintain moisture.
Serving Suggestions: Enhance your next meal by serving the reheated ribs over fluffy rice or with a side of steamy vegetables for a satisfying dish.
Sticky Caramelized Asian Beef Short Ribs Recipe FAQs
What type of beef short ribs should I use?
I recommend using bone-in beef short ribs, specifically English-cut for optimal flavor and texture. This cut has a rich marbling that breaks down beautifully during the slow cooking process, resulting in tender, succulent meat. Look for ribs that have a good amount of meat on them, avoiding any with excessive fat or bone.
How should I store the Sticky Caramelized Asian Beef Short Ribs?
Store the ribs in an airtight container in the refrigerator for up to 4 days. The flavors actually improve as they sit, melding together beautifully—perfect for enjoying leftovers! If you want to keep them longer, you can freeze them in an airtight container for up to 3 months. Just remember to label and date the container!
Can I freeze the Sticky Caramelized Asian Beef Short Ribs?
Absolutely! To freeze, allow the ribs to cool completely, then place them in an airtight container or heavy-duty freezer bag. Make sure to remove as much air as possible before sealing. When you’re ready to enjoy them, thaw overnight in the fridge and reheat gently on the stovetop, adding a splash of broth to maintain moisture and tenderness.
What should I do if my sauce isn’t thick enough?
If your sauce isn’t thickening to your liking, don’t worry! You can create a cornstarch slurry by mixing 1 tablespoon of cornstarch with 1 tablespoon of cold water. Stir this mixture into the simmering sauce. Let it boil for a few minutes while stirring constantly until it reaches your desired thickness. This will give you that glossy, sticky consistency that makes these ribs so delightful.
Are there any dietary considerations to be aware of with this recipe?
Yes, if you are cooking for someone with soy allergies, you can substitute the low-sodium soy sauce with a tamari sauce or coconut aminos, which are both soy-free alternatives. Additionally, always check that the ingredients, especially broths and sauces, are certified gluten-free if you have gluten sensitivities. This way, everyone can enjoy these delicious Sticky Caramelized Asian Beef Short Ribs!
What if I can’t find fresh ginger for the recipe?
If you can’t find fresh ginger, ground ginger can be used as a substitute! Just remember to reduce the quantity; for every tablespoon of fresh ginger, you can use about 1/4 to 1/2 teaspoon of ground ginger. While fresh ginger offers a more vibrant flavor, the ground spice will still bring a warm spiciness to your dish, making it a suitable alternative.
Sticky Caramelized Asian Beef Short Ribs for Cozy Nights
Ingredients
Equipment
Method
- Preheat your oven to 325°F (165°C).
- Pat the beef short ribs dry and season them with kosher salt and black pepper.
- In a large Dutch oven, heat the oil over medium-high heat and sear the ribs until golden-brown on all sides.
- Reduce the heat, add garlic and ginger, then pour in the beef broth, soy sauce, sugar, vinegar, and sesame oil.
- Return seared ribs to the pot, cover, and braise in the oven for 2.5 to 3 hours until fork-tender.
- Remove the ribs, skim excess fat, then boil the sauce and stir in the cornstarch slurry to thicken.
- Return ribs to the pot, coat with sauce, serve with garnish and enjoy!