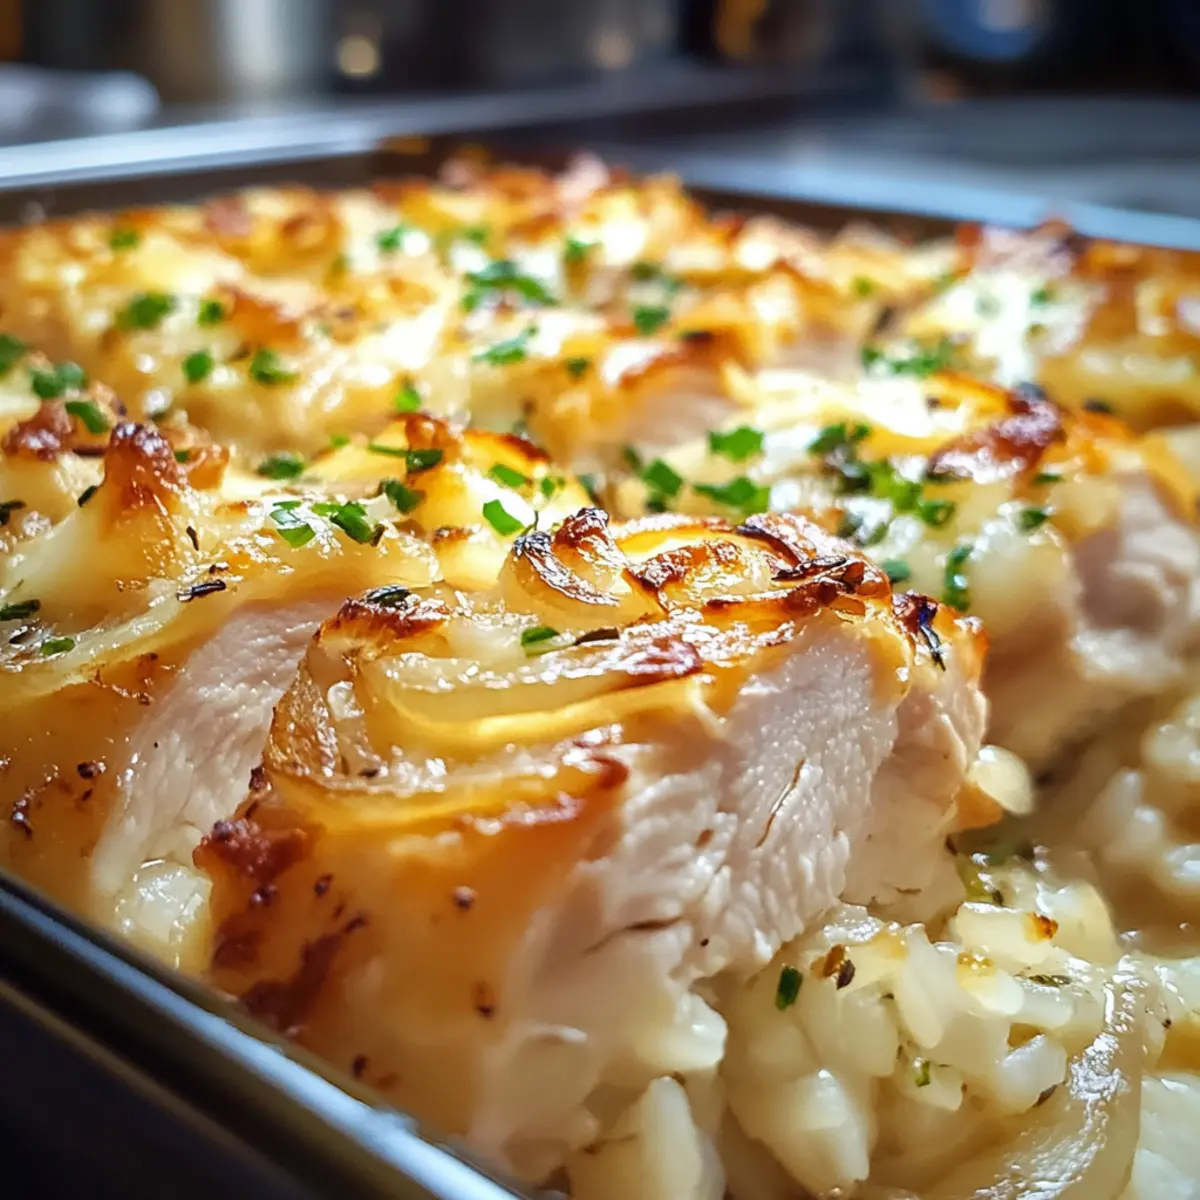
As I savored every spoonful, the delightful aroma wafting through my kitchen transported me to a cozy French bistro. This French Onion Chicken Rice Bake masterfully combines the rich, caramelized goodness of French onion soup with the ease of a comforting casserole. Perfect for those weeknight dinners when I crave something hearty yet simple, this dish features succulent chicken resting on a bed of creamy, flavor-infused rice. With minimal prep time and just one pan to clean, it’s an absolute crowd-pleaser that transforms ordinary ingredients into a satisfying meal. Whether you’re cooking for family or entertaining friends, this bake caters to every palate while offering that warm, homemade feel. Curious to discover how to whip up this irresistible dish in your own kitchen? Let’s dive in!
Why You’ll Love This Recipe
Simplicity reigns supreme: With just one pan and minimal prep, achieving gourmet flavors has never been easier.
Rich, comforting flavors: The savory mix of caramelized onions, tender chicken, and creamy rice transports your taste buds straight to culinary bliss.
Crowd-pleaser appeal: Perfect for family dinners or impressing guests, this Homemade Chicken Pot recipe is sure to be a hit.
Versatile options: Eager to mix things up? Try swapping in brown rice or different cheeses like Swiss or mozzarella for a fresh twist.
Made for sharing: Each delightful serving is not only satisfying but brings warmth and joy, turning meal times into cherished moments.
French Onion Chicken Rice Bake Ingredients
For the Chicken
- Chicken Breasts – Essential for a hearty protein base; season well for maximum flavor.
- Olive Oil – Perfect for searing the chicken, adding a rich depth of flavor.
For the Rice Mixture
- Unsalted Butter – Ideal for caramelizing onions, giving a buttery, rich taste.
- Yellow Onions – The star of the dish; caramelization brings out their natural sweetness.
- Garlic – Imparts aromatic savories when cooked along with the onions.
- Long Grain White Rice – Forms the heart of the bake; it absorbs all the delightful flavors.
- Chicken Broth – Adds moisture and flavor; vegetable broth works as a substitute for a vegetarian option.
- Sour Cream – Provides creaminess and tang; use Greek yogurt as a lighter alternative.
For the Topping
- Gruyère Cheese – Melts beautifully into a golden topping; swap with Swiss or mozzarella if desired.
- Dried Thyme – Offers a lovely herbal flavor; fresh thyme can brighten up the dish.
- Salt and Black Pepper – Essential for proper seasoning; adjust to suit your taste.
- Fresh Parsley – A sprinkle of freshness on top for garnish, enhancing presentation.
This French Onion Chicken Rice Bake promises a rich, comforting dish that everyone will love. Gather these ingredients and prepare to indulge in a delightful homemade experience!
Step‑by‑Step Instructions for French Onion Chicken Rice Bake
Step 1: Preheat the Oven
Begin by preheating your oven to 375°F (190°C). This step ensures that your French Onion Chicken Rice Bake will cook evenly throughout, creating that beautifully golden and bubbly layer of cheese on top. While the oven warms up, you can focus on preparing the chicken and the flavorful base of the bake.
Step 2: Prepare the Chicken
Season the chicken breasts generously with salt and black pepper on both sides, ensuring a balanced flavor throughout the dish. Heat a large skillet over medium-high heat and drizzle in some olive oil, allowing it to shimmer before adding the seasoned chicken. Sear each breast for about 2 minutes on each side until they turn a lovely golden brown. Once done, set the chicken aside.
Step 3: Caramelize the Onions
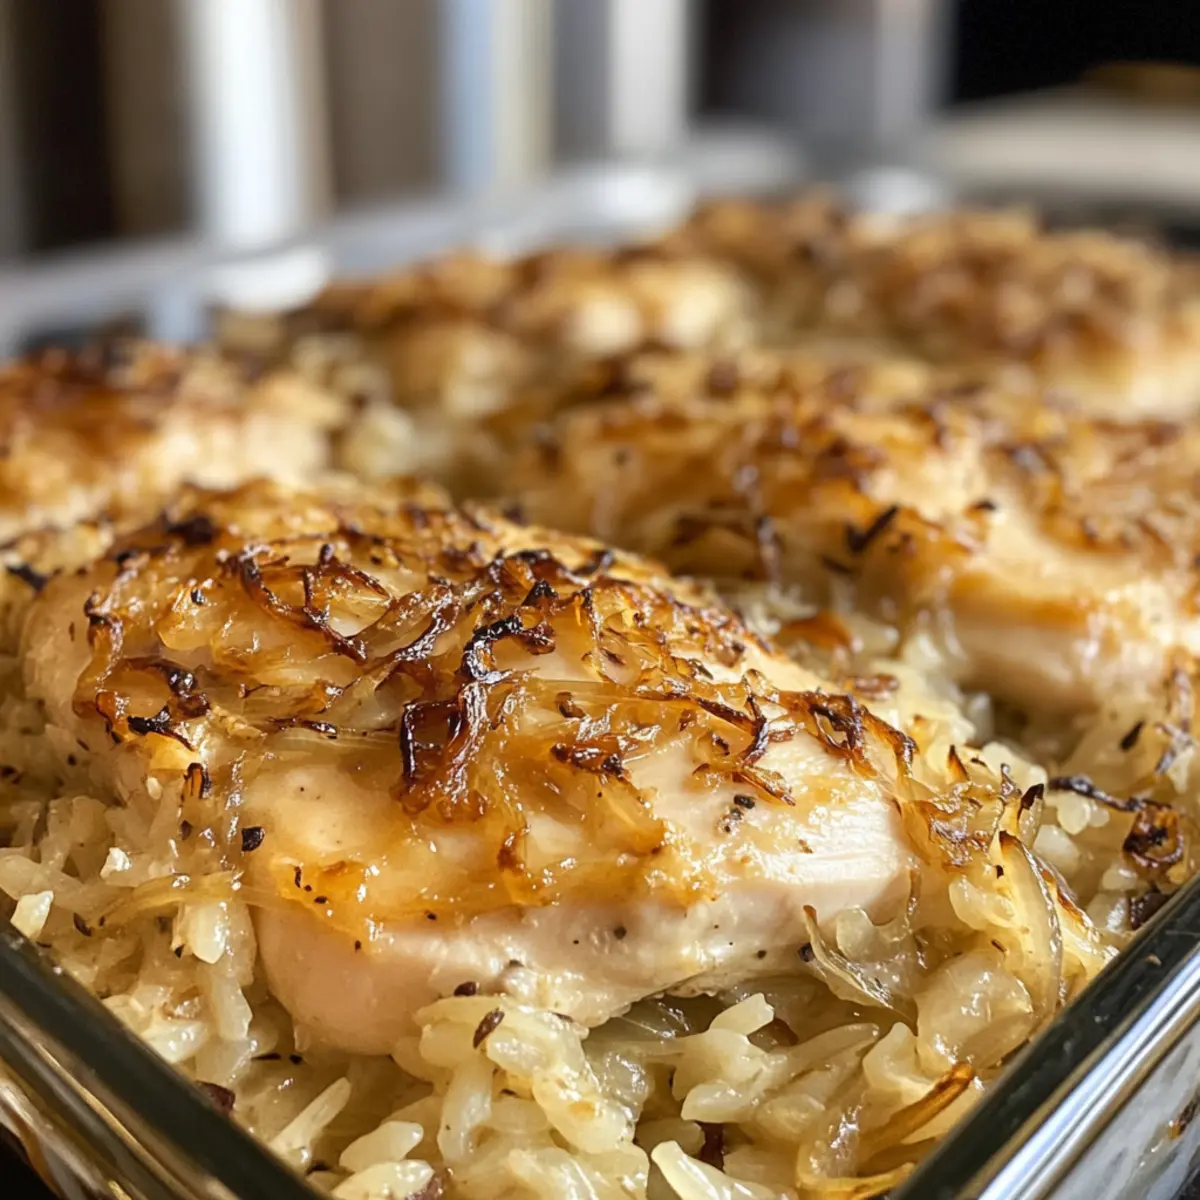
In the same skillet, reduce the heat to medium and add unsalted butter, letting it melt completely. Next, toss in thinly sliced yellow onions, stirring frequently for approximately 15 minutes until they are deeply caramelized and translucent. This step is crucial as the sweetness of the onions will enhance the overall richness of the French Onion Chicken Rice Bake.
Step 4: Add Garlic
Next, introduce minced garlic to the caramelized onions, cooking for an additional 30 seconds until fragrant. This will elevate the aroma and flavor of your dish. Stir well to combine, ensuring the garlic doesn’t burn, as it can turn bitter quickly. The combination of caramelized onions and garlic will create an irresistible base for your casserole.
Step 5: Incorporate the Rice
Add long-grain white rice to the skillet, stirring to combine it with the onion and garlic mixture. Allow the rice to absorb those delicious flavors for about a minute. This step is key for making sure the rice fully integrates with the savory base of the French Onion Chicken Rice Bake, setting the stage for a deeply satisfying dish.
Step 6: Mix in the Broth
Pour in chicken broth along with sour cream, dried thyme, and additional salt and pepper to taste. Bring the mixture to a gentle simmer while stirring continuously. You want to ensure all ingredients meld together, producing a creamy and flavorful foundation. This will be the comforting layer upon which your chicken will rest and bake.
Step 7: Assemble the Bake
Transfer the flavorful rice mixture to a greased baking dish, spreading it evenly across the bottom. Place the seared chicken breasts on top, arranging them artfully to ensure everyone gets a hearty piece. This layering technique allows the chicken to lock in moisture and flavor from the rice, making every bite delicious.
Step 8: Add the Cheese Topping
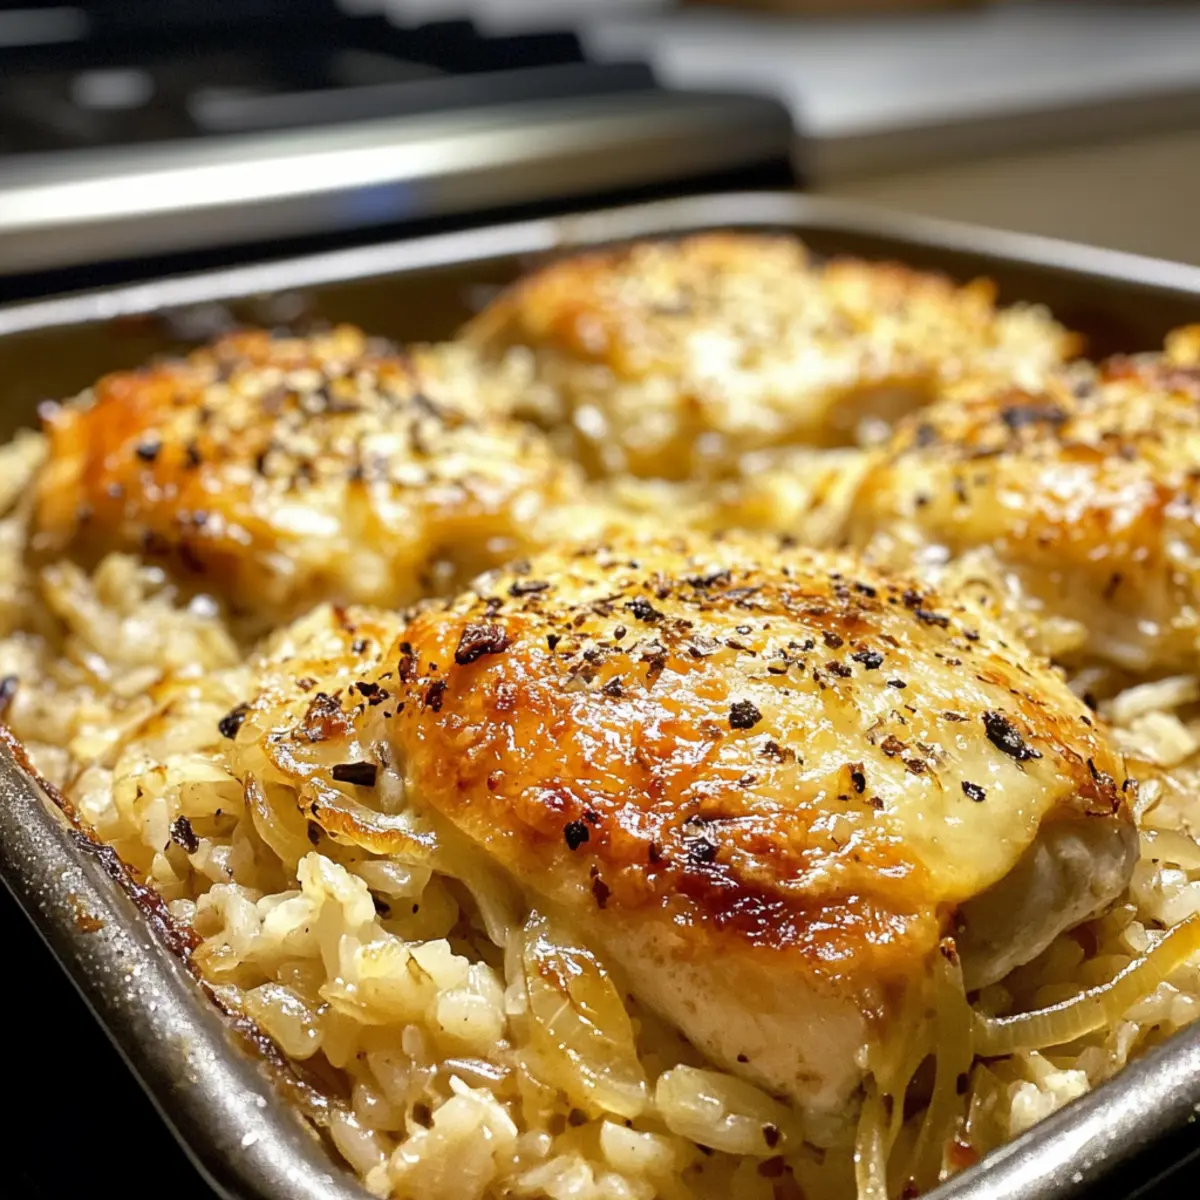
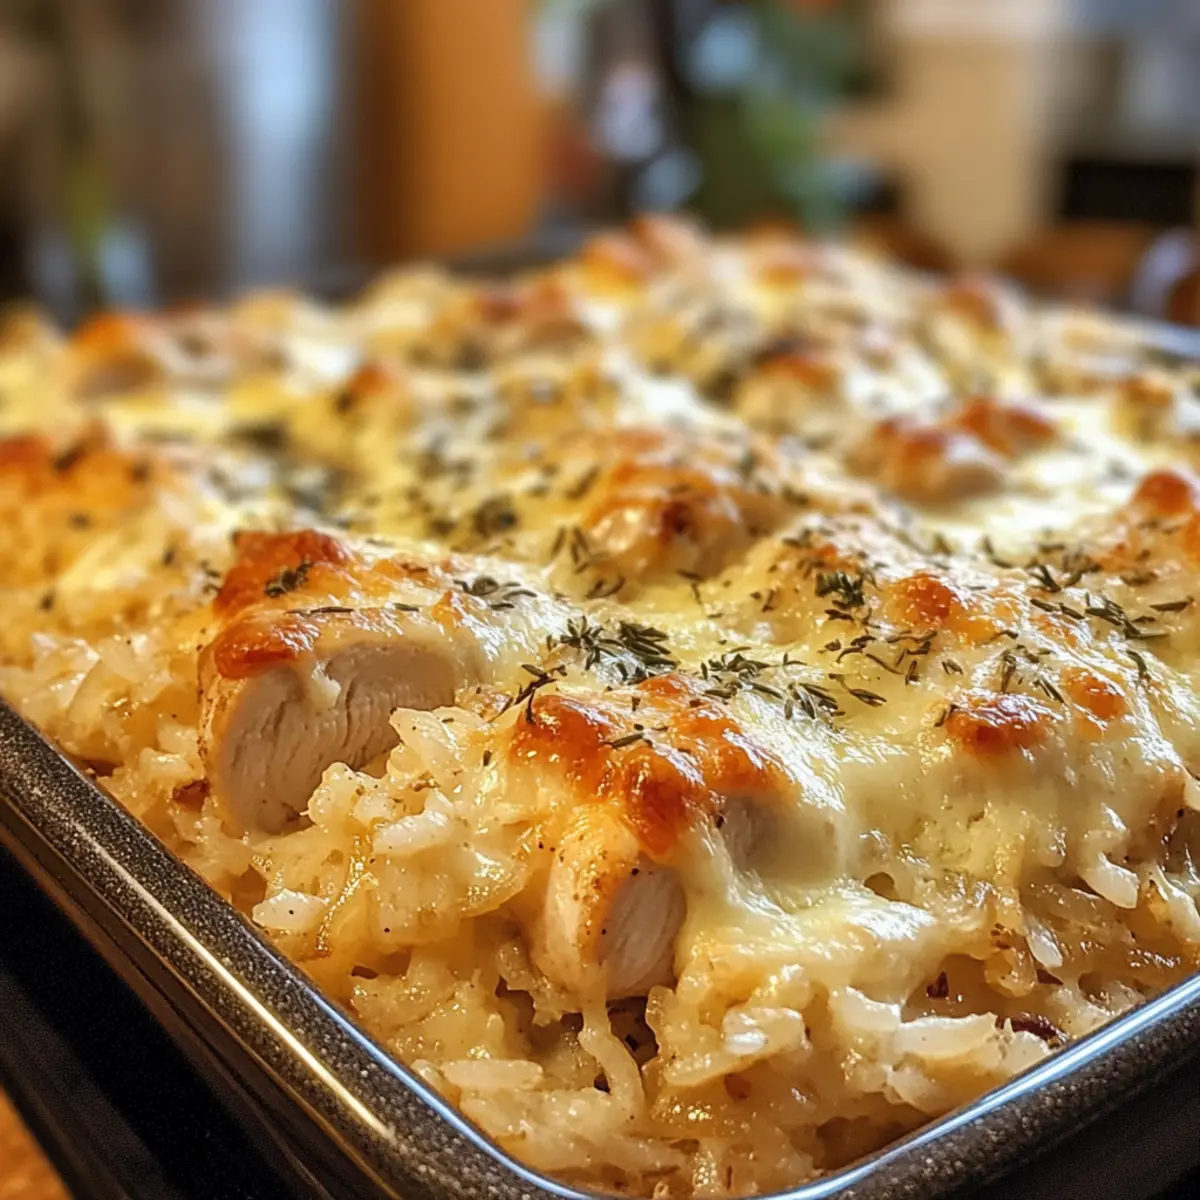
Generously sprinkle the grated Gruyère cheese over the chicken and rice mixture, creating a sumptuous layer. The cheese will melt beautifully during baking, forming that golden, gooey layer that complements the dish. Make sure to cover the entire surface for that irresistible cheesy goodness that defines a well-made French Onion Chicken Rice Bake.
Step 9: Bake the Dish
Cover the baking dish tightly with aluminum foil to trap steam, and place it in the preheated oven. Bake for 35 minutes to allow the rice to cook perfectly and absorb all the flavors. This steaming method ensures your casserole is hearty and comforting, with tender chicken courtesy of those sealed-in juices.
Step 10: Finish Baking without Foil
After 35 minutes, carefully remove the foil and continue baking for an additional 5 minutes. This step allows the cheese to bubble up and develop a lovely golden brown crust, creating that inviting visual that will make everyone eager for the first bite of your French Onion Chicken Rice Bake.
Step 11: Rest and Garnish
Once out of the oven, let the bake rest for about 5 minutes. This resting time allows all the flavors to settle and makes serving easier. Finish by garnishing with freshly chopped parsley to add a touch of color and freshness, elevating the presentation of your comforting dish.
What to Serve with French Onion Chicken Rice Bake
As you nestle into a cozy dinner at home, consider these delightful pairing options that will perfectly complement your bake and elevate your dining experience.
-
Crisp Side Salad: A refreshing mix of greens and vinaigrette balances the richness of the casserole. The crunch and acidity bring a bright contrast to the creamy dish.
-
Garlic Bread: Golden, buttery slices complement the comforting flavors, allowing for delightful scooping of any leftover cheesy goodness. Each bite becomes an indulgent moment.
-
Steamed Broccoli: Tender, vibrant florets add a touch of freshness and a boost of nutrients, enhancing the overall meal experience without overpowering the main flavors.
-
Roasted Asparagus: Drizzled with olive oil and sprinkled with sea salt, asparagus provides a lovely texture and nutty flavor that harmonizes beautifully with the savory casserole.
-
Savory Herb Rice: For those craving extra carbs, pair with herb-infused rice for a hearty, comforting addition that amplifies the flavor profile while remaining easy to prepare.
-
Chardonnay or Sauvignon Blanc: These wines offer a crisp acidity that cuts through the creaminess, enhancing the dish’s flavors while making your meal feel special.
-
Chocolate Mousse: For dessert, a light and airy mousse adds an elegant touch to your meal’s conclusion, providing a sweet contrast that leaves everyone satisfied.
French Onion Chicken Rice Bake Variations
Feel free to get creative with this recipe and make it your own. Here are some delightful twists to consider!
-
Brown Rice: Substitute brown rice for a nutty flavor and added fiber. Just increase the broth to 3 cups and adjust the cooking time.
-
Cheese Options: Swap Gruyère with other cheeses like Swiss, Monterey Jack, or a sharp cheddar blend. Each brings its unique flavor profile, adding a delightful twist to your bake.
-
Vegetarian Delight: For a meatless version, replace chicken with hearty vegetables like mushrooms and bell peppers. Sauté them in olive oil to build wonderful flavor.
-
Spicy Kick: Add a pinch of red pepper flakes to the onion mixture for a subtle heat. For more intensity, stir in some chopped jalapeños before baking.
-
Herb Infusion: Experiment with fresh herbs like rosemary or parsley instead of dried thyme. Fresh herbs will brighten the flavors beautifully and provide a lovely aroma.
-
Savory Add-Ins: Consider mixing in cooked bacon or pancetta for a smoky, savory element that enhances the comforting essence of the dish.
-
Creaminess Boost: For an extra creamy texture, fold in a bit of cream cheese alongside the sour cream. This adds a rich, velvety consistency that’s to die for!
Looking for more delicious ideas? You might enjoy making a lovely Homemade Chicken Pot using similar ingredients or pairing it with some crispy Homemade French Fries for a complete comfort meal.
Make Ahead Options
Preparing your French Onion Chicken Rice Bake in advance is a game-changer for busy weeknights! You can caramelize the onions and cook the rice mixture up to 24 hours in advance, allowing those rich flavors to blend beautifully. Simply store the cooked components in an airtight container in the refrigerator. When you’re ready to bake, layer the rice mixture in a greased baking dish, place the seared chicken on top, and sprinkle with Gruyère cheese before baking as directed. This method not only saves time but ensures that you enjoy a deliciously comforting meal that’s just as delightful, even when made ahead.
Expert Tips for French Onion Chicken Rice Bake
-
Caramelize Onions Perfectly: Ensure onions cook until deep golden brown for maximum sweetness and flavor. This will elevate your French Onion Chicken Rice Bake.
-
Seal It Tight: Cover your baking dish securely with foil to lock in steam, which helps the rice cook evenly without drying out.
-
Adjust for Brown Rice: If using brown rice, increase broth to 3 cups and extend the baking time. This ensures proper cooking and flavor infusion.
-
Cheese Swap Options: Feel free to use Swiss or mozzarella in place of Gruyère. Each will offer a slightly different but still delicious flavor and texture.
-
Rest Before Serving: Allow the bake to rest for at least 5 minutes post-baking. This helps the dish set and makes serving easier, while flavors meld beautifully.
Storage Tips for French Onion Chicken Rice Bake
Fridge: Store leftovers in an airtight container for up to 3 days. Make sure to let the dish cool completely before sealing to prevent condensation.
Freezer: For long-term storage, freeze portions in individual containers for up to 2 months. Thaw in the fridge overnight before reheating for best results.
Reheating: Gently reheat in the oven at 350°F (175°C) for about 20 minutes, or until heated through. For microwave reheating, cover with a damp paper towel and heat in short intervals, stirring in between.
Serving Suggestion: Always stir before serving to mix the layers together, ensuring that the flavors of the French Onion Chicken Rice Bake are revived in every bite.
French Onion Chicken Rice Bake Recipe FAQs
How do I select the best onions for caramelization?
Absolutely! When choosing onions for caramelization, go for yellow onions as they have the perfect balance of sweetness and flavor. Look for firm onions without any dark spots or soft patches. Fresh onions should have a smooth skin and be heavy for their size.
What’s the best way to store leftovers?
Very! Once your French Onion Chicken Rice Bake has cooled completely, transfer any leftovers to an airtight container. It can be stored in the refrigerator for up to 3 days. For the best taste, let it sit in the fridge uncovered for about 30 minutes before sealing it to avoid moisture buildup.
Can I freeze the French Onion Chicken Rice Bake?
Absolutely! To freeze your French Onion Chicken Rice Bake, cut it into individual servings and place them in freezer-safe containers or wrap them tightly in plastic wrap and aluminum foil. It can be frozen for up to 2 months. When you’re ready to eat, thaw the portions in the refrigerator overnight for the best results before reheating.
What should I do if my rice isn’t fully cooked after baking?
If you find the rice undercooked after the baking time, don’t worry! Simply add a splash of chicken broth or water, cover it with foil, and return it to the oven. Bake for an additional 10-15 minutes at 375°F (190°C), checking periodically. This will help the rice absorb the remaining liquid and cook through completely.
Does this recipe cater to dietary restrictions?
Very! To make it vegetarian-friendly, swap the chicken broth for vegetable broth and omit the chicken, adding in your favorite vegetables instead. For those with dairy allergies, using a non-dairy sour cream substitute and vegan cheese can work splendidly. Always check ingredient labels to ensure they align with your dietary needs!
Savory French Onion Chicken Rice Bake: Comfort in Every Bite
Ingredients
Equipment
Method
- Preheat your oven to 375°F (190°C).
- Season the chicken breasts generously with salt and black pepper on both sides. Heat a skillet over medium-high heat with olive oil and sear each chicken breast for about 2 minutes on each side until golden brown. Set the chicken aside.
- In the same skillet, reduce heat to medium, add butter, and melt completely. Add thinly sliced onions and stir frequently for approximately 15 minutes until caramelized and translucent.
- Introduce minced garlic to the caramelized onions, cooking for an additional 30 seconds until fragrant.
- Add long-grain white rice, stirring to combine with the onion and garlic mixture. Allow it to absorb the flavors for about a minute.
- Pour in chicken broth and sour cream, along with dried thyme, salt, and pepper to taste. Bring to a gentle simmer while stirring continuously.
- Transfer the rice mixture to a greased baking dish, then place the seared chicken breasts on top.
- Generously sprinkle the grated Gruyère cheese over the chicken and rice mixture.
- Cover the baking dish with aluminum foil and bake for 35 minutes.
- After 35 minutes, remove the foil and continue baking for an additional 5 minutes for a golden crust.
- Let the bake rest for about 5 minutes before garnishing with freshly chopped parsley.