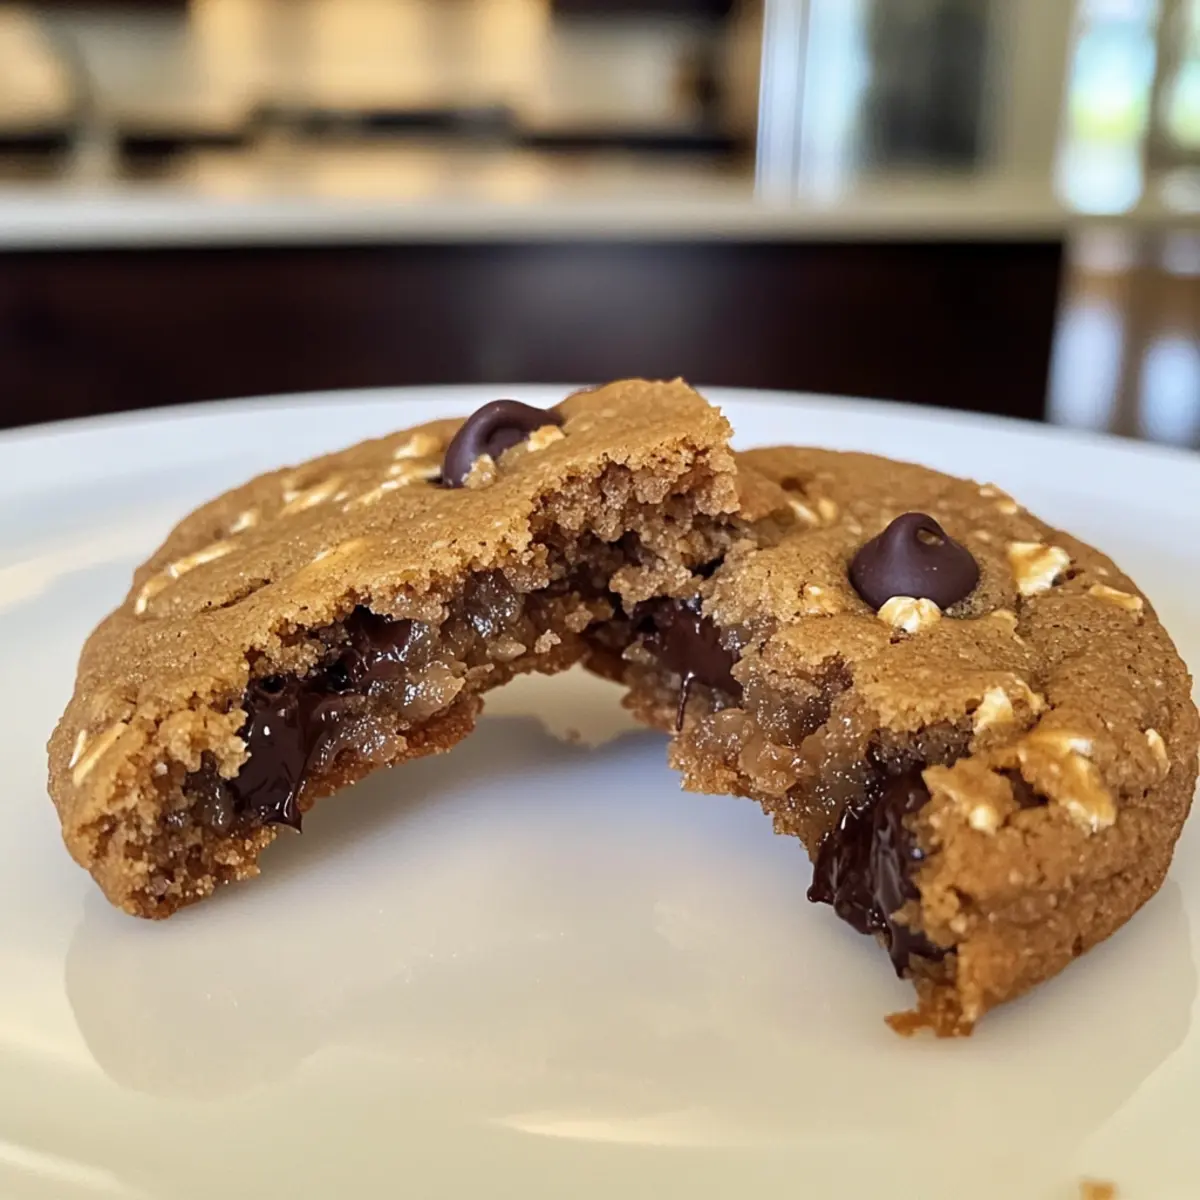
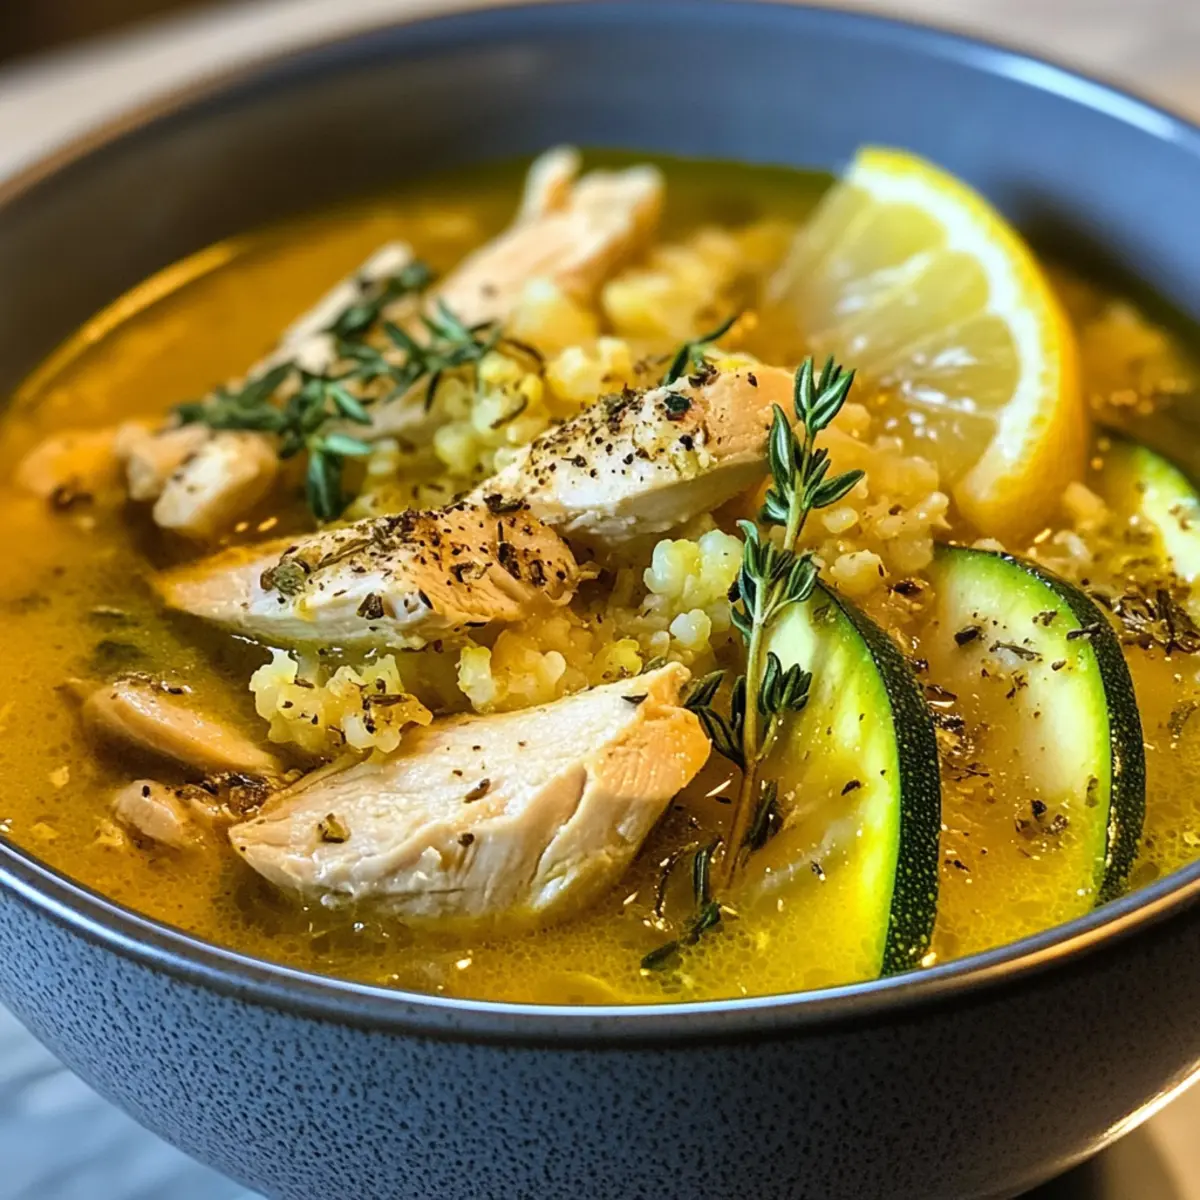
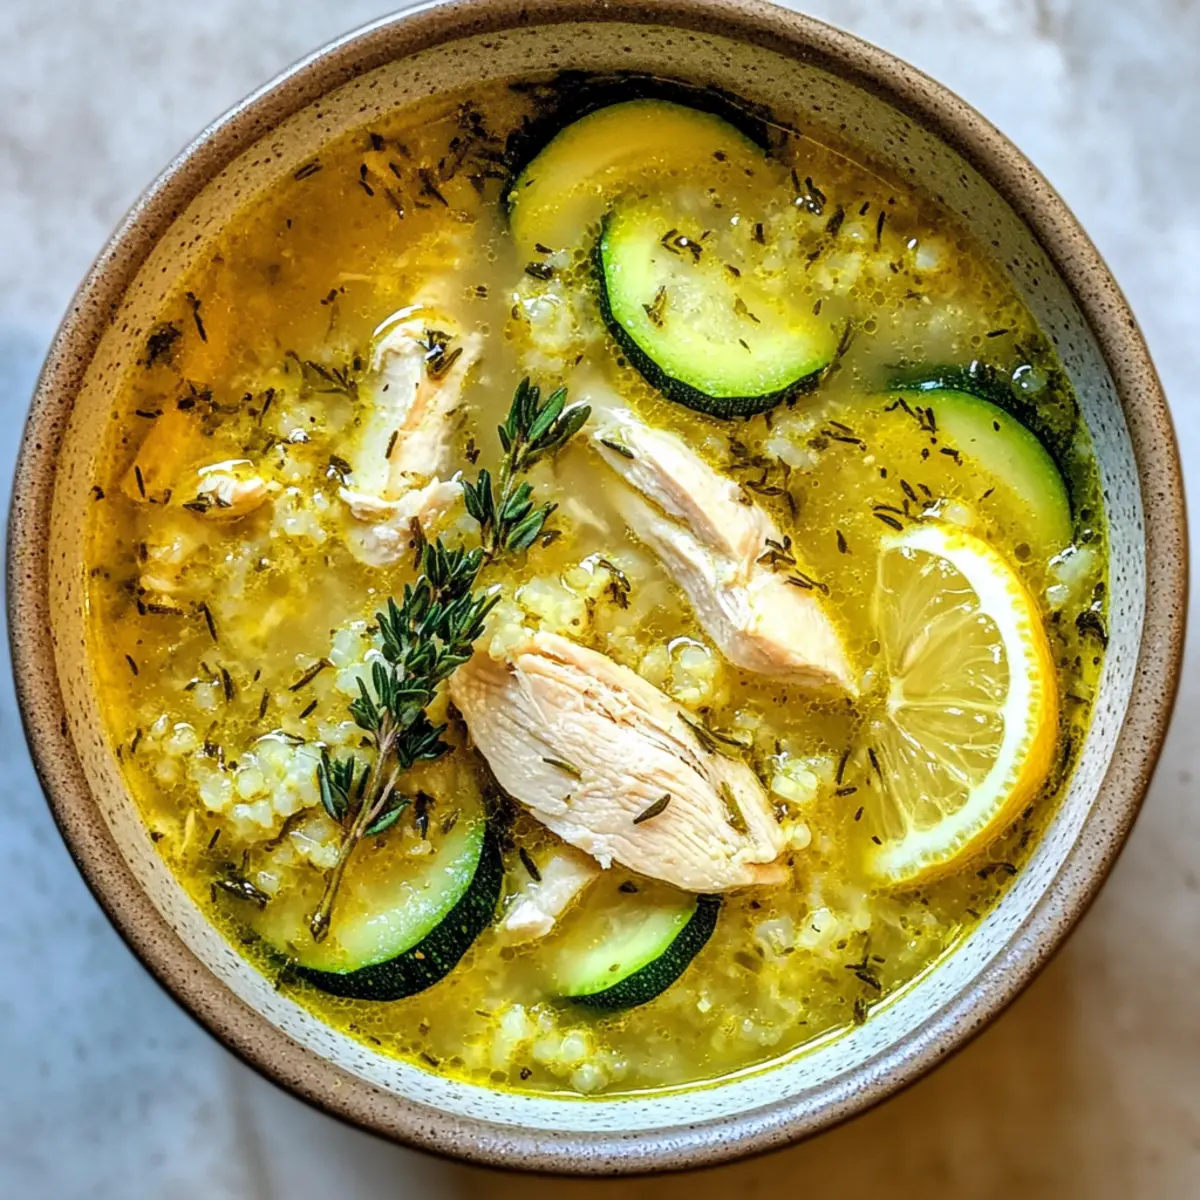
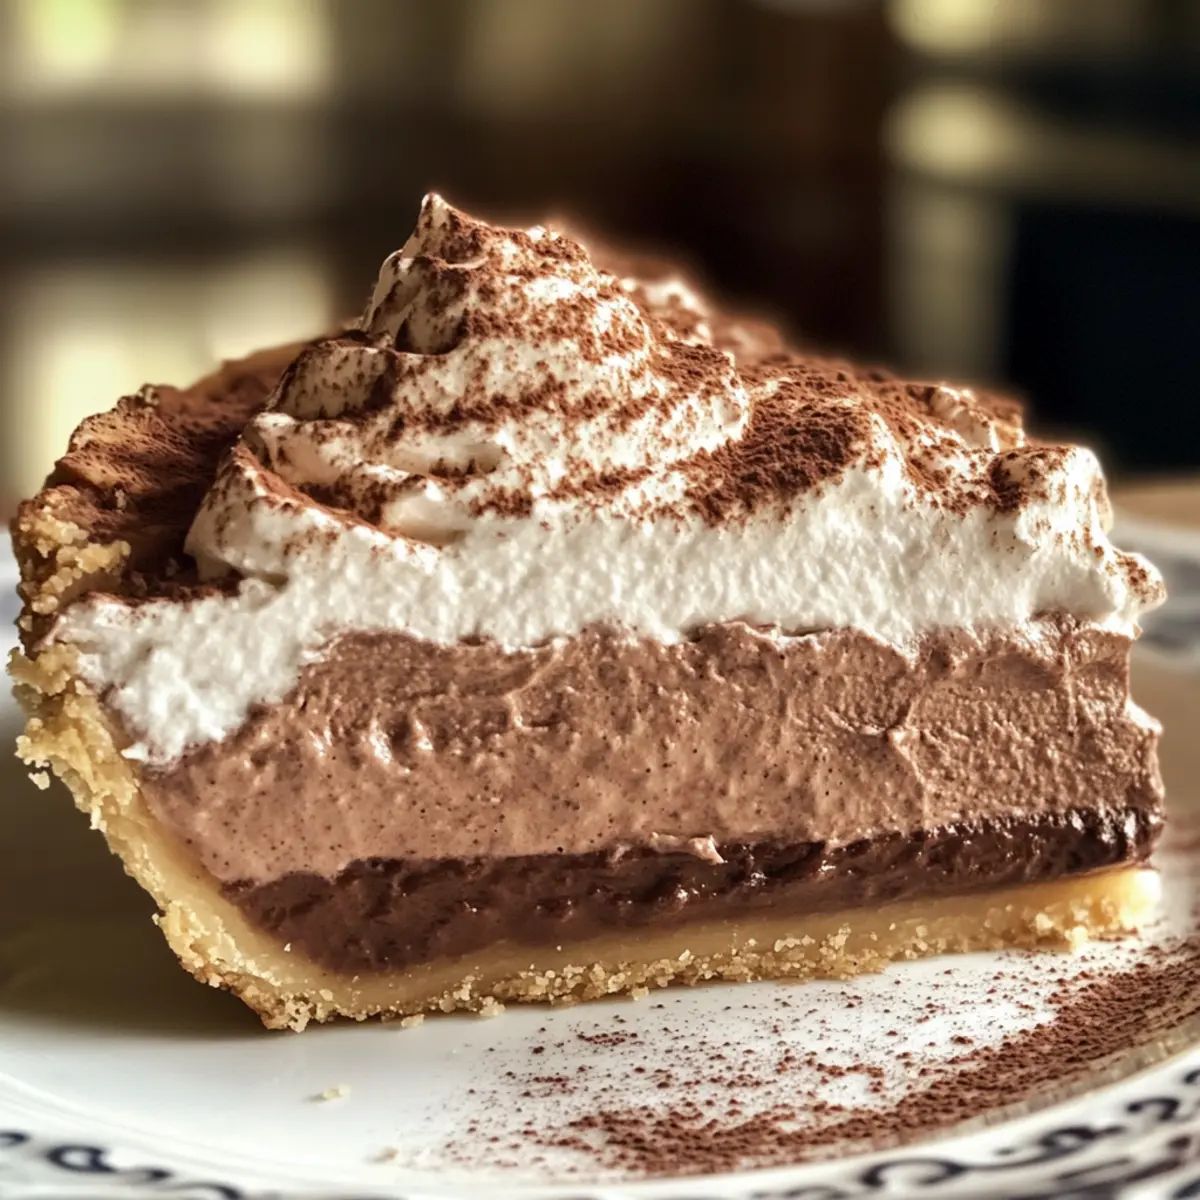
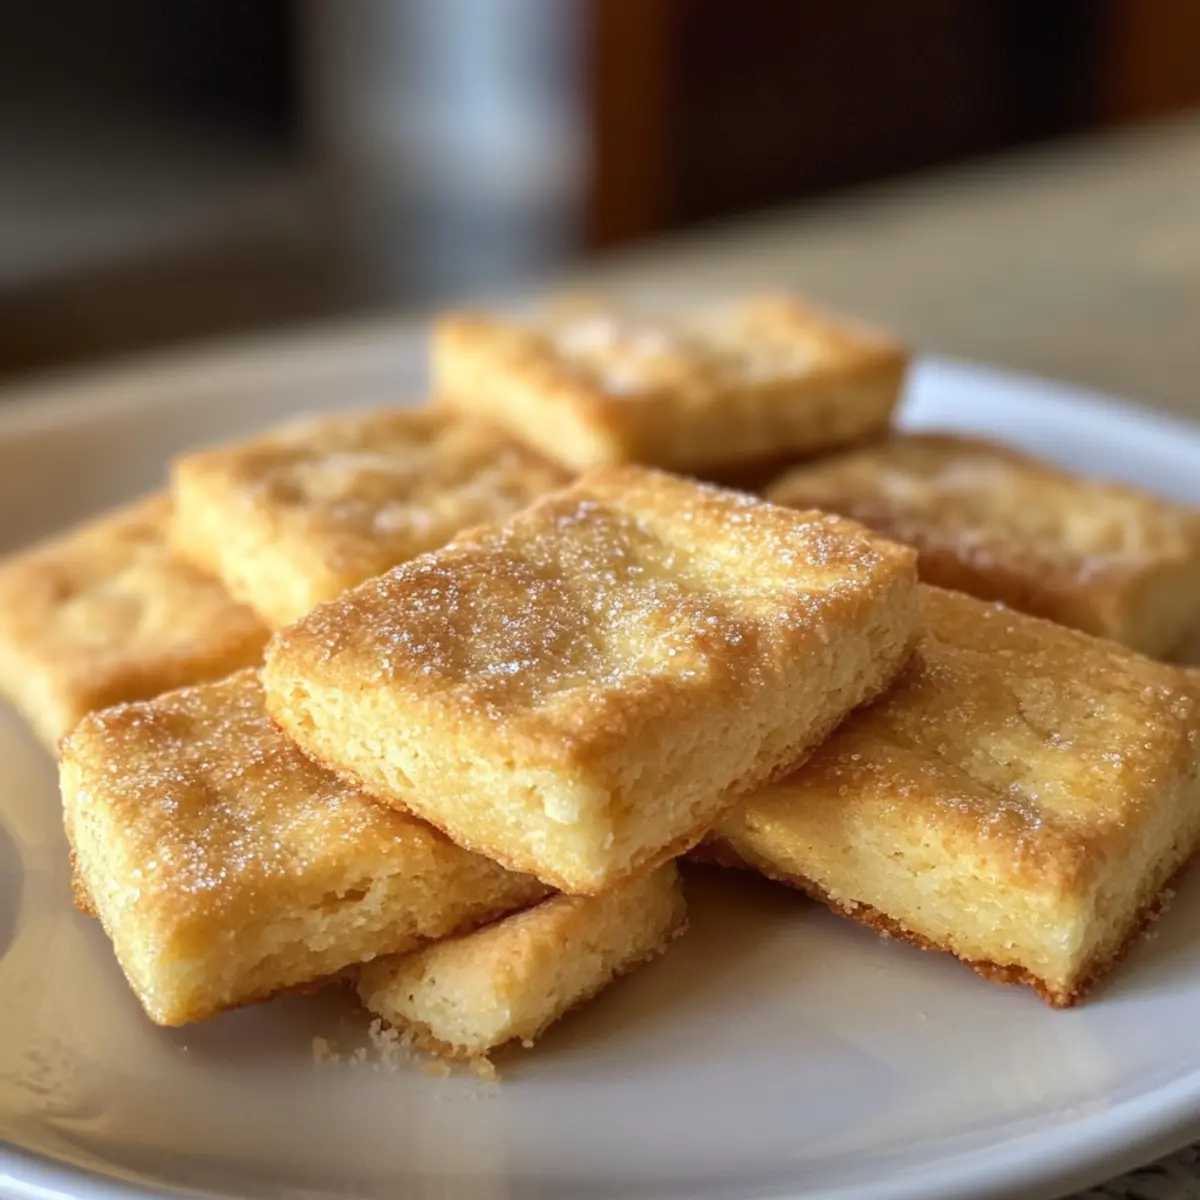
Pancake Breakfast Tacos That Will Transform Your Mornings

“Who says tacos are only for lunch or dinner?” When I first tried pancake breakfast tacos, it felt like a culinary revelation, combining fluffy pancakes with spicy, savory fillings. This Pancake Breakfast Tacos recipe turns a traditional breakfast upside down, making it a fun twist that’s perfect for any day of the week. Not only are these tacos quick and easy to whip up, but they’re also a fantastic way to cater to gluten-free diets—allowing everyone to join the breakfast party. Whether you’re indulging in a lazy Sunday brunch or need a fast meal on a busy morning, these breakfast tacos are here to impress. Ready to transform your mornings? Let’s dive into this delicious recipe!

Why Choose Pancake Breakfast Tacos?

Irresistible Taste: These breakfast tacos delight your taste buds with the fluffy pancakes enveloping savory fillings and creamy cheese.
Quick to Make: Whip them up in under 30 minutes, perfect for busy mornings!
Diet-Friendly: Easily adaptable with gluten-free pancake options or dairy-free alternatives like almond milk.
Versatile Fillings: Customize with your favorite ingredients—try adding fresh veggies or protein for a hearty meal.
Crowd-Pleasing Fun: Bring excitement to breakfast; whether for the family or brunch with friends, these tacos are sure to impress! If you want more breakfast ideas, check out our Nutritious Oatmeal Pancake or Savory Zucchini Pancakes.

Ingredients

Pancake Breakfast Taco Ingredients

For the Pancakes
Pancake Mix – The base for your fluffy pancakes; opt for a gluten-free mix if needed.
Eggs – Adds fluffiness and binds the ingredients together; use a flax egg for a vegan option.
Milk – Provides moisture; substitute with almond or coconut milk for a dairy-free version.
Coconut Flour – Adds a unique texture and flavor; can be swapped for almond flour, although the texture will vary.

For the Filling
Soft Cheese (e.g., Kite Hill or Treeline) – Offers a creamy richness; optional for a lighter taco.
Fillings (e.g., eggs, veggies) – Customize your tacos; fresh vegetables or proteins enhance the overall taste.

For the Toppings
Salsa – A flavorful addition; choose your preferred style or spice level to elevate your taco experience.
Fresh Herbs – Adds freshness and color; cilantro or chives pair wonderfully with the pancakes.

Step‑by‑Step Instructions for Pancake Breakfast Tacos

Step 1: Prepare the Pancake Batter
In a large mixing bowl, combine your chosen pancake mix, eggs, milk, and coconut flour. Stir gently until the mixture is smooth and well combined, avoiding overmixing to ensure your pancakes remain fluffy. Let the batter rest for about 5 minutes while you heat up your skillet, allowing the flavors to meld perfectly for your Pancake Breakfast Tacos.

Step 2: Heat the Skillet
Place a non-stick skillet on the stove over medium heat. After a few minutes, lightly grease the skillet with cooking spray or a small pat of butter. This will prevent the pancakes from sticking and help create that lovely golden-brown color. When the skillet is hot enough, it should sizzle slightly when the batter is poured on.

Step 3: Cook the Pancakes
Pour a small ladleful of batter into the skillet, forming a pancake about 4-5 inches in diameter. Let it cook undisturbed for about 2-3 minutes, or until bubbles form on the surface. Gently flip the pancake over with a spatula and cook for an additional 1-2 minutes, until both sides are golden brown and the pancake is cooked through. Continue this process until all the batter is used.

Step 4: Assemble the Tacos
Once your pancakes are ready, place one fluffy pancake on a plate. Spread a layer of soft cheese in the center, followed by your choice of fillings like scrambled eggs, sautéed veggies, or cooked sausage. Be generous but not overloaded, as you want to be able to fold the pancake easily into a taco shape without spilling.

Step 5: Add Toppings and Serve
Top your assembled pancake tacos with a spoonful of salsa and a sprinkle of fresh herbs for added flavor and freshness. Consider optional toppings like sliced avocados or diced jalapeños for an extra kick. Serve warm and enjoy your delightful Pancake Breakfast Tacos right away, savoring the blend of fluffy pancakes and savory fillings.

Pancake Breakfast Tacos Variations

Feel free to get creative with your Pancake Breakfast Tacos; the possibilities are endless with these delicious breakfast delights!

  • Dairy-Free: Switch out the soft cheese for mashed avocado or a spreadable plant-based cheese. It adds creaminess without the dairy!
  • Protein-Packed: Incorporate cooked bacon, sausage, or scrambled tofu into the filling for an energy boost; it’s a hearty way to fuel your day.
  • Sweet Twist: Top with sliced bananas, strawberries, or a drizzle of maple syrup for a breakfast that leans into the sweeter side; perfect for those with a sweet tooth.
  • Spicy Kick: Add diced jalapeños or a sprinkle of chili flakes to the filling; this brings a vibrant heat to the mix.
  • Veggie Boost: Mix in sautéed spinach, bell peppers, or mushrooms within your filling; they’ll add nutrition and flavor without overpowering the dish.
  • Herb Infusion: Consider using fresh herbs like basil or cilantro instead of just traditional toppings; this will elevate the flavor profile and freshness.
  • Nutty Crunch: Top your tacos with crushed nuts like almonds or walnuts for a delightful texture contrast; it’s both flavorful and satisfying.

If you’re looking for more inspiration, our recipes for Savory Vegetable Cheese Pancakes and Crispy Vegetable Pancakes might just spark new ideas for your next breakfast adventure!

What to Serve with Pancake Breakfast Tacos

Elevate your breakfast experience with delightful sides that perfectly complement these tasty pancake tacos.

  • Fresh Fruit Salad: A vibrant mix of seasonal fruits adds brightness and sweetness, balancing the savory flavors of the tacos. The juiciness of berries, melons, and citrus will provide a refreshing contrast.

  • Crispy Potato Hash: Golden-brown, crunchy potatoes tossed with onions and peppers offer a hearty texture that pairs beautifully. These crispy bites add a satisfying crunch to your meal.

  • Creamy Avocado Slices: Sliced avocado brings a creamy richness that complements the fluffy pancakes. A sprinkle of salt and lime juice elevates the flavor, enhancing the entire breakfast.

  • Zesty Green Smoothie: Blend spinach, banana, and yogurt for a nutrient-packed drink that adds refreshing brightness. This smoothie is a perfect light contrast to the warm, savory pancakes.

  • Scrambled Eggs with Herbs: Lightly seasoned, fluffy scrambled eggs are a classic pairing that enhances the meal’s protein content. Fresh herbs like chives or cilantro will bring an aromatic freshness.

  • Spicy Salsa: A tangy, spicy salsa adds a delightful kick that brings each bite of pancake tacos to life. Choose your preferred heat level to tailor the spice to your taste.

  • Fluffy Buttermilk Biscuits: Serve alongside warm, flaky biscuits for a comforting addition. Slather with butter or jam for a touch of sweetness that complements the savory flavors.

Make Ahead Options

These Pancake Breakfast Tacos are a fantastic option for meal prep enthusiasts! You can prepare the pancake batter up to 24 hours in advance—simply mix the pancake mix, eggs, milk, and coconut flour, then store the batter in an airtight container in the fridge. This not only saves time in the morning but also lets the flavors meld beautifully. When you’re ready to enjoy, just give the batter a gentle stir and cook the pancakes as directed. Additionally, you can pre-cook any desired fillings (like scrambled eggs or sautéed vegetables) and refrigerate them for up to 3 days. This way, assembling and serving your flavorful Pancake Breakfast Tacos becomes a breeze, ensuring delicious results with minimal morning fuss!

How to Store and Freeze Pancake Breakfast Tacos

Fridge: Store leftover pancakes in an airtight container for up to 3 days; reheat gently in a skillet or microwave before serving to retain their fluffiness.

Freezer: For longer storage, freeze unassembled pancakes in a single layer, then transfer to a freezer bag for up to 2 months; reheat from frozen in a skillet or the microwave.

Wrap: If making ahead, wrap prepared pancakes individually in plastic wrap or parchment paper before freezing for easy grabbing on busy mornings.

Reheating: When ready to enjoy, reheat pancakes in the microwave, skillet, or toaster oven; add desired fillings after reheating for a fresh taste.

Expert Tips for Pancake Breakfast Tacos

  • Perfect Temperature: Use medium heat for your skillet to prevent burning and ensure a beautifully cooked pancake every time.
  • Don’t Overmix: Mix the pancake batter just until combined; overmixing can result in dense pancakes rather than light and fluffy ones.
  • Flavor Variations: Experiment with different fillings according to the season, such as fresh tomatoes in summer or roasted sweet potatoes in fall for your pancake breakfast tacos.
  • Storage Savvy: Keep leftover pancakes in an airtight container in the fridge for up to 3 days, and reheat gently to maintain their fluffy texture.
  • Creative Fillings: Try swapping soft cheese for avocado or adding shredded chicken for heartier options, tailoring your pancake breakfast tacos to your taste.

Pancake Breakfast Tacos Recipe FAQs

What type of pancake mix should I use?
Absolutely! You can use any pancake mix, but for those needing gluten-free options, look for a certified gluten-free pancake mix. This ensures a delicious base for your Pancake Breakfast Tacos without compromising flavor or fluffiness.

How should I store leftover pancakes?
Very simple! Place any leftover pancakes in an airtight container in the refrigerator. They’ll stay fresh for up to 3 days. When you’re ready to enjoy them again, gently reheat in a skillet or microwave to restore their fluffy texture.

Can pancake breakfast tacos be frozen?
Absolutely, they can! To freeze, first let the pancakes cool completely. Then, place them in a single layer on a baking sheet. Once frozen, transfer them to a freezer bag or container and store for up to 2 months. When you’re ready to eat, reheat them in a skillet or microwave without any fillings for the best texture.

What if my pancake batter is too thick?
If your batter feels thick, that’s an easy fix! Gradually add a little more milk, 1 tablespoon at a time, mixing until you achieve your desired consistency. Remember, the key is to mix just until combined to keep the pancakes light and fluffy.

Are there any dietary concerns regarding the ingredients?
Great question! To cater to various dietary needs, consider substituting eggs with a flax egg (1 tablespoon ground flaxseed mixed with 2.5 tablespoons water) for a vegan option. Always check the labels for any allergies, especially regarding the soft cheese—there are terrific dairy-free alternatives available too!

Can I prepare the pancake batter in advance?
Certainly! You can make the pancake batter the night before. Just store it in the refrigerator in a covered container. Be sure to give it a gentle stir before cooking it in the morning, as the ingredients may settle. It’s a great time-saver for busy mornings!

Pancake Breakfast Tacos

Pancake Breakfast Tacos That Will Transform Your Mornings

Pancake Breakfast Tacos: a fun and gluten-free twist on breakfast that combines fluffy pancakes with savory fillings.
Prep Time 10 minutes
Cook Time 20 minutes
Resting Time 5 minutes
Total Time 35 minutes
Servings: 4 tacos
Course: Breakfast
Cuisine: American
Calories: 250

Ingredients
  

For the Pancakes
  • 1 cup Pancake Mix opt for a gluten-free mix if needed
  • 2 Eggs use a flax egg for a vegan option
  • 1 cup Milk substitute with almond or coconut milk for dairy-free
  • 1/4 cup Coconut Flour can be swapped for almond flour
For the Filling
  • 1/2 cup Soft Cheese (e.g., Kite Hill or Treeline) optional for a lighter taco
  • 1 cup Fillings (e.g., eggs, veggies) customize with fresh vegetables or proteins
For the Toppings
  • 1/2 cup Salsa choose preferred style or spice level
  • 1/4 cup Fresh Herbs cilantro or chives pair well

Equipment

  • Non-Stick Skillet
  • mixing bowl
  • spatula

Method
 

Step-by-Step Instructions
  1. Prepare the Pancake Batter: In a large mixing bowl, combine pancake mix, eggs, milk, and coconut flour. Stir gently until smooth. Let rest for 5 minutes.
  2. Heat the Skillet: Place a non-stick skillet over medium heat, grease with cooking spray or butter.
  3. Cook the Pancakes: Pour a ladle of batter for each pancake. Cook for 2-3 minutes, flip and cook for an additional 1-2 minutes until golden brown.
  4. Assemble the Tacos: Place a pancake, add cheese and chosen fillings, folding gently into a taco shape.
  5. Add Toppings and Serve: Top with salsa and fresh herbs, serve warm.

Notes

Feel free to customize fillings and toppings to your preference. Storage tips: Keep leftovers in an airtight container for up to 3 days, or freeze unassembled pancakes for up to 2 months.

Spicy Taco Polenta Bake: A Flavorful Gluten-Free Delight

As I stood in my kitchen, the vibrant colors of the ingredients sprawled across the countertop caught my eye—each one waiting to transform into the ultimate comfort dish: Spicy Taco Polenta Bake. This recipe brings a delightful fusion of flavors, combining hearty ground beef, black beans, and melty cheese nestled on a creamy polenta base. Not only is it gluten-free, but it’s also remarkably versatile, allowing you to switch up proteins and beans for a personalized twist. Imagine the joy of serving a dish that pleases every palate while also fitting seamlessly into your meal prep routine. From busy weeknights to laid-back weekends, this savory bake has your back. Are you ready to spice up your dinner table? Let’s dive into this delicious adventure!

Why is Spicy Taco Polenta Bake so special?

Bold flavors come alive in every bite, with layers of ground beef, black beans, and gooey cheese over a creamy polenta base. Customizable options let you swap proteins or beans to suit your preferences; think ground turkey or pinto beans for a tasty twist. Easy meal prep means you can whip this up ahead of time and have meals ready for the week. Comforting textures blend together, making it a hit with family and friends, while its gluten-free nature ensures everyone can enjoy. Perfect for any occasion, this dish is an invitation to share love through food!

Spicy Taco Polenta Bake Ingredients

For the Polenta Base

  • Polenta – A creamy, versatile foundation that sets the stage for the bold flavors ahead.
  • Shredded Cheese (Mozzarella) – Melts beautifully to bind everything together; feel free to substitute with cheddar or dairy-free cheese for variations.

For the Filling

  • Ground Beef – Provides a hearty protein punch; swap for ground turkey or shredded chicken if preferred.
  • Taco Seasoning – Adds a burst of spice and flavor; use your favorite store-bought blend or whip up a homemade mix.
  • Black Beans – A source of protein and fiber, adding texture; consider using pinto beans for a different taste.
  • Diced Green Chilis – For a touch of heat and depth; omit if a milder flavor is desired.

Add-Ons

  • Corn – Optional, for a sweet crunch that elevates the dish; fresh or frozen works well!
  • Sour Cream – A creamy topping to balance the spices and add richness; perfect for serving alongside.
  • Fresh Cilantro – Brightens up the dish with a burst of freshness; an optional garnish for added flavor.

Dive into creating this Spicy Taco Polenta Bake that brings excitement to your dinner table while being gluten-free and wonderfully customizable!

Step‑by‑Step Instructions for Spicy Taco Polenta Bake

Step 1: Preheat and Prepare
Begin by preheating your oven to 375°F (190°C). While the oven warms up, grab a 9×9-inch casserole dish and lightly grease it with cooking spray or a drizzle of olive oil. This prepares a cozy home for your Spicy Taco Polenta Bake, ensuring that the polenta doesn’t stick as it cooks to perfection.

Step 2: Prepare the Polenta Base
Take your tube of polenta or cooked polenta from a bag and crumble it into pieces. Press the crumbled polenta evenly into the bottom of your prepared casserole dish, creating a solid base. Smooth it out using your hands or a spatula, making sure it’s packed tightly. This step is crucial for a sturdy foundation!

Step 3: Bake the Polenta
Place the casserole dish in the preheated oven and bake the polenta base for about 15 minutes. You want to see the edges slightly firm up and the surface become just a tad golden, letting you know it’s ready for the next delicious layer. While the polenta is baking, move on to preparing your filling.

Step 4: Prepare the Filling
In a large skillet over medium heat, brown 1 pound of ground beef until it’s well-cooked and no longer pink, which should take about 5-7 minutes. Drain any excess fat, then stir in your taco seasoning, black beans, and diced green chilies. Cook everything together for an additional 3-5 minutes, allowing the flavors to meld beautifully.

Step 5: Layer the Filling
Once your filling is ready and aromatic, remove the polenta base from the oven. Carefully spoon the meat mixture over the baked polenta, spreading it evenly to ensure every bite of the Spicy Taco Polenta Bake is packed with flavor. The warm filling will start to awaken those comforting aromas in your kitchen!

Step 6: Add Cheese
Generously sprinkle the shredded mozzarella cheese over the beef and bean mixture. This layer of cheese will melt and bind all the ingredients together, bringing creaminess to your bake. Don’t be shy—make it as cheesy as you desire for a rich finish!

Step 7: Final Bake
Return your casserole dish to the oven and bake for an additional 15-20 minutes. Keep an eye on your dish, looking for bubbling cheese and a lightly golden top—that’s the sign of a perfectly baked Spicy Taco Polenta Bake ready to shine at your dinner table.

Step 8: Cool and Serve
Once the baking time has elapsed, carefully remove the dish from the oven and let it cool for about 5 minutes. This brief resting period allows the layers to set slightly, making it easier to serve. Spoon portions onto plates and consider adding garnishes like avocado, sour cream, or fresh cilantro to elevate your meal even further!

What to Serve with Spicy Taco Polenta Bake

Treat your taste buds to a vibrant meal that perfectly balances flavors and textures, enriching every bite of this delightful dish.

  • Creamy Guacamole: A silky addition that complements the spicy bake; its rich avocado flavor cools the heat just right.

  • Zesty Mexican Street Corn: The sweet, charred kernels add a lovely crunch and contrast the polenta’s creaminess; it’s truly magical.

  • Crispy Tortilla Chips: Serve with a side of salsa or queso dip to give a crispy texture alongside the soft polenta; a perfect party starter!

  • Fresh Cilantro Lime Rice: This light and aromatic side adds a zesty freshness, enhancing the bold flavors of the bake while offering a fluffy contrast.

  • Black Bean Salad: A refreshing mix of black beans, corn, and tomatoes adds a vibrant, slightly tangy element, making each bite feel even more lively.

  • Lemonade or Iced Tea: These refreshing drinks provide a cooling effect to balance the dish’s spices; it’s an ideal accompaniment for warm evenings.

Spicy Taco Polenta Bake Variations

Feel free to get creative with this recipe and customize it to your heart’s content!

  • Lean Protein: Swap ground beef for ground turkey or shredded chicken for a lighter option. You’ll maintain that hearty satisfaction while cutting down on calories.

  • Bean Swap: Replace black beans with pinto beans or even kidney beans for a different flavor profile. Each type brings a unique twist, making it feel like a brand-new dish!

  • Cheesy Alternatives: If you’re looking for a dairy-free option, use dairy-free cheese instead of mozzarella. This way, everyone can enjoy a delicious meal without compromising on taste.

  • Add Some Crunch: Toss in fresh corn for a delightful, sweet crunch or mix in diced tomatoes for an added burst of freshness. Both will elevate the bake even more!

  • Spicier Heat: If you enjoy some kick, replace the diced green chilis with jalapeños or add a dash of cayenne pepper to the filling. It’ll definitely spice things up!

  • Herbal Touch: Infuse your polenta bake with fresh herbs like cilantro or parsley. They add a layer of brightness and elevate the overall flavor.

  • Vegetarian Delight: For a vegetarian version, skip the meat completely and load up on more beans, veggies, and spice—making this bake satisfying without the meat.

Now that you have various options, why not serve this dish with a refreshing side like a simple avocado salad? Or, if you’re looking to keep it cozy, pair it with a comforting Savor Comforting Bake! Enjoy the cooking adventure!

How to Store and Freeze Spicy Taco Polenta Bake

  • Room Temperature: Let the Spicy Taco Polenta Bake cool completely before storing. It can sit at room temperature for up to 2 hours before refrigerating.
  • Fridge: Store leftovers in an airtight container in the fridge for up to 3 days. Reheat individual portions in the microwave or cover and place in a 350°F (175°C) oven until warmed through.
  • Freezer: For longer storage, freeze the cooled bake in a freezer-safe container for up to 3 months. Thaw in the fridge overnight before reheating.
  • Reheating: To reheat from frozen, bake at 350°F (175°C) for about 30-40 minutes, covered with foil until heated through, then remove the foil for the last 10 minutes to crisp the cheese.

Make Ahead Options

These Spicy Taco Polenta Bake is perfect for meal prep enthusiasts looking to save time during busy weeknights! You can prepare the polenta base and filling up to 24 hours in advance. Simply follow the first four steps in the instructions, then let the polenta cool before covering it with the filling. Store everything tightly wrapped in the refrigerator to maintain the dish’s freshness and prevent drying out. When you’re ready to enjoy, just pop it in the oven and bake as directed until bubbly and golden, ensuring that each bite is just as delicious as when freshly made. This way, you can delight in a comforting meal with minimal effort!

Helpful Tricks for Spicy Taco Polenta Bake

  • Polenta Tips: Ensure the polenta is evenly crumbled and packed tightly to create a firm base that won’t fall apart during baking.
  • Meat Options: If using ground turkey or chicken, remember to cook them thoroughly as they tend to dry out faster; consider adding a splash of broth for moisture.
  • Spice Control: Adjust the amount of taco seasoning and green chilis to suit your family’s taste; it’s easy to make it milder or spicier based on preference.
  • Layering Gesture: Spread the filling evenly over the polenta base to ensure each slice of the Spicy Taco Polenta Bake has all the flavors balanced with every bite.
  • Don’t Rush Cooling: Allow the bake to cool slightly before serving to help it hold its shape, making for easier plating and a more enjoyable dining experience.

Spicy Taco Polenta Bake Recipe FAQs

What type of polenta should I use for the Spicy Taco Polenta Bake?
Absolutely! You can use store-bought tube polenta for convenience, or cook polenta from a bag for a more homemade touch. If you opt for the cooked version, make sure to follow the instructions on the package for the best results.

How should I store leftover Spicy Taco Polenta Bake?
To store leftovers, let the dish cool completely before placing it in an airtight container in the fridge, where it will last for up to 3 days. You can reheat portions in the microwave or cover and warm in the oven at 350°F (175°C) until heated through.

Can I freeze Spicy Taco Polenta Bake, and if so, how?
Absolutely! To freeze, first allow the finished bake to cool completely. Then, wrap it tightly in plastic wrap or foil and place it in a freezer-safe container. It lasts for up to 3 months. When you’re ready to enjoy it again, thaw it in the fridge overnight and reheat.

What if my polenta base crumbles during baking?
No worries, it happens sometimes! Ensure when you’re pressing the polenta into the dish, it’s packed tightly and even. If it does crumble, I recommend adding a bit more sauce or cheese on top to help bind it together. A small step like this can salvage the dish nicely!

Are there any dietary considerations for the Spicy Taco Polenta Bake?
Yes! This dish is gluten-free, making it a great option for individuals with gluten sensitivities. If you’re also accommodating different diets, you can easily use ground turkey for a leaner protein and dairy-free cheese to make it suitable for vegans. Just ensure to check beans and cheeses for any possible allergens.

What variations can I try for the protein in this recipe?
The more, the merrier! You can swap out the ground beef for ground turkey or shredded chicken for a lighter option, or even incorporate additional beans like kidney beans for added texture. The flexibility of this recipe means you can easily customize it to suit everyone’s tastes!

Spicy Taco Polenta Bake

Spicy Taco Polenta Bake: A Flavorful Gluten-Free Delight

Spicy Taco Polenta Bake is a flavorful, gluten-free dish combining beef, black beans, and cheese on creamy polenta.
Prep Time 20 minutes
Cook Time 30 minutes
Cooling Time 5 minutes
Total Time 55 minutes
Servings: 6 slices
Course: Dinner
Cuisine: American, Mexican
Calories: 350

Ingredients
  

For the Polenta Base
  • 1 tube Polenta Crumble for base
  • 1 cup Shredded Cheese (Mozzarella) Substitute with cheddar or dairy-free cheese if desired
For the Filling
  • 1 pound Ground Beef Can substitute with ground turkey or shredded chicken
  • 1 packet Taco Seasoning Use store-bought or homemade
  • 1 can Black Beans Can substitute with pinto beans
  • 1 can Diced Green Chilis Omit for milder flavor
Add-Ons
  • 1 cup Corn Optional, use fresh or frozen
  • 1 cup Sour Cream For serving
  • 1/4 cup Fresh Cilantro For garnish

Equipment

  • 9x9-inch casserole dish
  • large skillet
  • spatula

Method
 

Step-by-Step Instructions
  1. Preheat your oven to 375°F (190°C) and grease a 9x9-inch casserole dish.
  2. Crumble the polenta and press it evenly into the bottom of the prepared casserole dish.
  3. Bake the polenta base for about 15 minutes until edges are firm and slightly golden.
  4. In a large skillet, brown ground beef for 5-7 minutes, then stir in taco seasoning, black beans, and diced green chilis.
  5. Spread the filling evenly over the baked polenta.
  6. Sprinkle mozzarella cheese over the filling generously.
  7. Bake for an additional 15-20 minutes until cheese is bubbling and golden.
  8. Let the dish cool for 5 minutes before serving, garnishing with sour cream and cilantro.

Notes

Customize with different proteins and beans as desired. Allow to cool slightly for easier serving.

Loaded Wedge Salad: A Flavor-Packed Crunchy Delight

As I stood in my kitchen, the scent of crispy bacon mingling with creamy buttermilk ranch dressing filled the air, instantly lifting my spirits. This Loaded Wedge Salad is my go-to for gatherings or simply when I want to indulge without the guilt. Packed with crisp iceberg lettuce, savory toppings, and a tangy dressing, it transforms a simple salad into a showstopper. With an easy prep time and a vibrant presentation, it’s as perfect for dinner parties as it is for weeknight meals. Plus, you can customize it to suit your taste buds! Whether you’re adding avocado for creaminess or swapping bacon for roasted chickpeas, the possibilities are endless. Are you ready to discover how to create this delightful dish that will have everyone asking for seconds?

Why is This Salad So Special?

Flavor Explosion: Every bite is a burst of freshness, from the crunchy lettuce to the creamy ranch dressing.
Easy to Make: With simple ingredients and straightforward steps, you can whip this up in no time.
Versatile Toppings: Customize it with your choice of toppings like bacon, blue cheese, or even grilled chicken for a personal touch.
Impressive Presentation: The striking wedges arranged on a platter make this salad a showstopper at any gathering.
Perfect for Any Occasion: Whether it’s a summer barbecue or a cozy weeknight dinner, this Loaded Wedge Salad fits right in! Plus, you can serve it alongside a Garden Harvest Salad or a Crunch Cucumber Salad for an even more delightful spread.

Loaded Wedge Salad Ingredients

• Everything you need to create this delicious dish!

For the Dressing

  • Mayonnaise – Creaminess and base for the ranch dressing. Can substitute with Greek yogurt for a lighter option.
  • Buttermilk – Provides tanginess and thin consistency for ranch dressing. Regular milk with vinegar can imitate buttermilk.
  • Champagne Vinegar – Adds acidity to the dressing and salad. White wine vinegar may be used as a replacement.
  • Granulated Sugar – Balances the acidity in the dressing. Honey or maple syrup can be adjusted according to taste.
  • Fresh Chives – Offers mild onion flavor and freshness in dressing and salad. Can substitute with green onions or scallions.
  • Dried Herbs (Parsley, Dill) – Enhance the flavor profile of the dressing. Fresh herbs can replace dried for a fresher taste.
  • Garlic Powder & Onion Powder – Provide savory depth to the ranch dressing. Fresh garlic and onions may be substituted but require adjustment in quantity.
  • Hot Sauce – Adds a kick, enhancing flavor. Adjust according to spice preference or omit if needed.

For the Salad

  • Iceberg Lettuce – Base of the salad, providing crunch and freshness. Can replace with romaine for a different texture.
  • Bacon – Adds savory, salty flavor as a topping. Use turkey bacon or a vegetarian alternative for a lighter version.
  • Hard Boiled Eggs – Add protein and creaminess. Tofu can be used for a vegetarian protein option.
  • Cherry Tomatoes – Bright flavor and vibrant color. Substitute with diced tomatoes or another seasonal vegetable.
  • Red Onion – Provides sharpness and crunch to the salad. Can replace with shallots for a milder taste.
  • Breadcrumbs – Crunchy topping for texture. Panko breadcrumbs or gluten-free options can be used.
  • Salted Butter – Used to toast breadcrumbs for a rich flavor. Olive oil may be a lighter alternative.
  • Lemon Zest – Adds brightness and acidity to the breadcrumbs. Can substitute with lime zest for a different flavor profile.

Step‑by‑Step Instructions for Loaded Wedge Salad

Step 1: Make the Dressing
In a medium bowl, whisk together ½ cup mayonnaise, ½ cup buttermilk, 2 tablespoons champagne vinegar, 1 teaspoon sugar, and 2 tablespoons finely chopped fresh chives. Add a sprinkle of dried parsley, dill, garlic powder, onion powder, and a dash of hot sauce for an extra kick. Mix well until creamy and combine all the flavors. Refrigerate for at least 2 hours, allowing the dressing for the Loaded Wedge Salad to thicken and the flavors to meld beautifully.

Step 2: Soak the Onions
Prepare the red onions by soaking ½ cup of diced onions in a bowl filled with cold water and 1 tablespoon of champagne vinegar for 30 minutes. This process will mellow the sharpness of the onions, enhancing the overall flavor of your Loaded Wedge Salad. After soaking, drain and pat the onions dry to remove excess moisture, ensuring they don’t overpower the salad’s delicate balance.

Step 3: Prepare Lettuce
Take one large head of iceberg lettuce and cut it into four equal wedges. Rinse each wedge under cold water to remove any dirt, then gently pat them dry with a paper towel. Chill the wedges in the refrigerator for at least 15 minutes prior to serving; this will maintain their crunch and freshness, making your Loaded Wedge Salad even more appealing.

Step 4: Toast Breadcrumbs
In a skillet over medium heat, melt 2 tablespoons of salted butter until bubbly. Add ½ cup of breadcrumbs and stir continuously for about 4-5 minutes or until they turn golden brown and crispy. Mix in the zest of one lemon to enhance the flavor before transferring the toasted breadcrumbs to a plate to cool. This crunchy topping will give your Loaded Wedge Salad an irresistible texture.

Step 5: Assemble the Salad
On a large platter, arrange the chilled lettuce wedges with the cut sides facing upward. Generously drizzle the chilled ranch dressing over each wedge, ensuring every bite is flavorful. Top with crumbled bacon, quartered hard-boiled eggs, halved cherry tomatoes, and the soaked red onions, layering the ingredients attractively. Finally, sprinkle the toasted breadcrumbs over the top, and garnish with extra chives for a pop of freshness before serving.

Make Ahead Options

This Loaded Wedge Salad is perfect for meal prep, allowing you to enjoy its delightful crunch and creamy dressing on busy weeknights! You can prepare the dressing and soak the onions up to 3 days in advance. Simply whisk together the dressing ingredients and store in an airtight container in the refrigerator; this will keep the flavors fresh and vibrant. To maintain the lettuce’s crispness, cut the iceberg into wedges and store them in a sealed bag with a paper towel to absorb moisture—this can be done up to 24 hours before serving. When you’re ready to enjoy the salad, follow the assembly instructions, drizzling the dressing and adding toppings just before serving to ensure everything remains perfectly fresh and delicious!

Loaded Wedge Salad Variations & Substitutions

Feeling adventurous? Let your creativity shine as you explore the delightful twists and turns you can add to this scrumptious Loaded Wedge Salad!

  • Dairy-Free: Swap mayonnaise and buttermilk for cashew cream to create a rich, dairy-free ranch dressing.
  • Protein-Packed: Add grilled chicken or shrimp for an extra boost of protein that’s both satisfying and delicious. Feel free to marinate the protein for added flavor!
  • Spicy Kick: Toss in sliced jalapeños to the mix for a fiery twist that wakes up the taste buds and adds an exciting heat.
  • Vegan Delight: Replace bacon with crispy roasted chickpeas and use a plant-based ranch dressing for a hearty vegan option. The chickpeas add a wonderful texture that you’ll love!
  • Savory & Sweet: Try adding diced apples or pears alongside the usual toppings for a refreshing sweetness that perfectly complements the savory elements.
  • Herb Lover: Instead of dried herbs, whip up the dressing with fresh herbs like dill or basil for a more vibrant flavor profile that’s bursting with freshness.
  • Crunchy Alternatives: Swap breadcrumbs for toasted nuts or seeds, giving your salad a delightful crunch and added nutritional benefits. Consider sunflower seeds or slivered almonds for interest!
  • Seasonal Swaps: Customize your salad with seasonal vegetables like radishes or roasted beets for a colorful and nutritious spin. This adds visual appeal and a surprising taste!

With all these scrumptious options and delicious variations, you can easily create a salad that mirrors your unique tastes and dietary preferences. And if you’re looking for more fresh ideas, check out our Cabbage Apple Salad or the refreshing Cucumber Carrot Salad to inspire your next meal!

What to Serve with Loaded Wedge Salad

The perfect pairing elevates any meal, and this salad is a delightful backdrop for many dishes.

  • Grilled Chicken: Juicy grilled chicken adds a savory protein that complements the cool, crunchy salad beautifully and makes for a heartier meal.
  • Classic BBQ Ribs: The smoky flavor of BBQ ribs contrasts superbly with the freshness of the wedge salad, creating a balance that delights the palate.
  • Roasted Vegetables: Seasoned roasted vegetables provide a warm, earthy flavor and texture, enhancing the vibrant crunch of the salad.
  • Cornbread Muffins: Sweet cornbread muffins make for a comforting addition, perfectly soaking up the dressing and flavors of the salad.
  • Spicy Shrimp Tacos: These tacos pack a flavorful punch; the heat pairs wonderfully with the creamy elements of the wedge salad.
  • Iced Tea: Refreshing iced tea with a twist of lemon complements the salad’s freshness while balancing the richness of the dressing.
  • Lemon Sorbet: For dessert, light lemon sorbet cleanses the palate and finishes the meal on a refreshing high note.
  • Red Wine: A chilled light-bodied red wine enhances the flavors of the bacon and dressing, making it a delightful pairing for leisurely dinners.

Storage Tips for Loaded Wedge Salad

Fridge: Store any leftover Loaded Wedge Salad components separately in airtight containers for up to 3 days to maintain freshness and texture.

Dressing: Keep the ranch dressing in the fridge in a sealed jar for up to one week; give it a good shake before using, as ingredients may settle.

Prepared Salad: Assemble the salad just before serving. If made ahead, store lettuce wedges unassembled with dressing and toppings separately for optimal crunch.

Freezer: Freezing is not recommended for this salad, as the texture of the ingredients, especially lettuce and dressing, will not hold up.

Expert Tips for Loaded Wedge Salad

  • Bacon Best Practices: Use crispy bacon for a crunchier texture; consider baking it for even results and less mess compared to frying.
  • Onion Soaking Success: Soaking red onions not only reduces bitterness but adds sweetness; don’t skip this step for the fullest flavor.
  • Chill Time Matters: Allow dressing to chill: it thickens and flavors meld beautifully. Aim for at least 2 hours before serving your Loaded Wedge Salad.
  • Freshness Rules: Dress the salad just before serving. This keeps the iceberg lettuce crisp and appealing—no one loves a soggy salad!
  • Customizable Crunch: Experiment with toppings like roasted chickpeas or avocado for different textures and flavors. Your topped Loaded Wedge Salad can be a delicious masterpiece!

Loaded Wedge Salad Recipe FAQs

How do I choose the best iceberg lettuce for my salad?
Absolutely! When selecting iceberg lettuce, look for heads that are heavy for their size with crisp, firmly closed leaves. The outer leaves should be bright green without dark spots or wilting, indicating freshness. A good wedge starts with quality lettuce!

What’s the best way to store leftover Loaded Wedge Salad?
To maintain freshness, store leftover salad components separately. Keep the lettuce wedges in an airtight container and the dressing in a sealed jar in the refrigerator for up to 3 days. If you have toppings like bacon or hard-boiled eggs, store them in separate containers to avoid sogginess.

Can I freeze the Loaded Wedge Salad components?
It’s not recommended to freeze this salad, as the texture of the lettuce and dressing will suffer. However, you can freeze leftover bacon for up to 3 months. Just ensure it’s properly sealed in an airtight container, and when you’re ready to use it, defrost in the refrigerator before adding to your salad.

What if my dressing is too thick or too thin?
No worries! If your ranch dressing is too thick, simply whisk in a little more buttermilk or regular milk, one tablespoon at a time, until you reach your desired consistency. If it’s too thin, mix a bit more mayonnaise or an extra pinch of dried herbs to thicken it up. Tasting as you go allows you to find the perfect balance!

Are there any allergy considerations for this Loaded Wedge Salad?
Very! For those with egg allergies, you could substitute hard-boiled eggs with diced tofu or cooked chickpeas. If you’re gluten-sensitive, use gluten-free breadcrumbs for the topping. Additionally, ensure that your mayonnaise is egg-free if needed. Always check labels when shopping for allergens!

How can I customize my Loaded Wedge Salad?
The more the merrier! Feel free to swap out traditional toppings for favorites like crumbled blue cheese, grilled chicken, or even avocado for creaminess. If you want to keep it vegan, replace bacon with roasted chickpeas and use a plant-based ranch dressing. The possibilities are endless!

Loaded Wedge Salad

Loaded Wedge Salad: A Flavor-Packed Crunchy Delight

Enjoy a Loaded Wedge Salad packed with flavor from crispy bacon, creamy ranch dressing, and fresh toppings. Perfect for any occasion!
Prep Time 30 minutes
Cook Time 10 minutes
Chill Time 2 hours
Total Time 2 hours 40 minutes
Servings: 4 servings
Course: Lunch
Cuisine: American
Calories: 320

Ingredients
  

For the Dressing
  • ½ cup Mayonnaise Can substitute with Greek yogurt for a lighter option.
  • ½ cup Buttermilk Regular milk with vinegar can imitate buttermilk.
  • 2 tablespoons Champagne Vinegar White wine vinegar may be used as a replacement.
  • 1 teaspoon Granulated Sugar Honey or maple syrup can be adjusted according to taste.
  • 2 tablespoons Fresh Chives Can substitute with green onions or scallions.
  • 1 teaspoon Dried Herbs Fresh herbs can replace dried for a fresher taste.
  • 1 teaspoon Garlic Powder Fresh garlic may be substituted but requires adjustment in quantity.
  • 1 teaspoon Onion Powder Fresh onions may be substituted but requires adjustment in quantity.
  • to taste Hot Sauce Adjust according to spice preference or omit if needed.
For the Salad
  • 1 large head Iceberg Lettuce Can replace with romaine for a different texture.
  • 4 slices Bacon Use turkey bacon or a vegetarian alternative for a lighter version.
  • 2 Hard Boiled Eggs Tofu can be used for a vegetarian protein option.
  • 1 cup Cherry Tomatoes Substitute with diced tomatoes or another seasonal vegetable.
  • ½ cup Red Onion Can replace with shallots for a milder taste.
  • ½ cup Breadcrumbs Panko breadcrumbs or gluten-free options can be used.
  • 2 tablespoons Salted Butter Olive oil may be a lighter alternative.
  • 1 tablespoon Lemon Zest Can substitute with lime zest for a different flavor profile.

Equipment

  • Medium bowl
  • Skillet
  • Cutting Board
  • Knife
  • whisk

Method
 

Step-by-Step Instructions
  1. In a medium bowl, whisk together mayonnaise, buttermilk, champagne vinegar, sugar, and fresh chives. Add dried herbs, garlic powder, onion powder, and hot sauce. Mix well and refrigerate for at least 2 hours.
  2. Soak diced red onions in cold water with champagne vinegar for 30 minutes. Drain and pat dry.
  3. Cut iceberg lettuce into wedges and rinse. Pat dry and chill in the refrigerator for at least 15 minutes.
  4. Melt butter in a skillet, add breadcrumbs and toast until golden brown, about 4-5 minutes. Stir in lemon zest and cool.
  5. On a platter, arrange chilled lettuce wedges, drizzle with dressing, and top with bacon, eggs, tomatoes, onions, and breadcrumbs. Garnish with extra chives.

Notes

Dress the salad just before serving to keep the lettuce crisp. Customize with your favorite toppings.

Savory Meatball Subs That Bring Family Together

As I stood in my kitchen, the rich aroma of sautéing onions and peppers whisked me back to childhood meals shared with family, where every bite felt like a warm hug. These Hearty Homemade Meatball Subs with Fresh Sauce encapsulate all that comfort, featuring succulent homemade meatballs that nestle perfectly in a crusty French roll. The best part? Not only is this recipe a family-friendly crowd-pleaser, but it also offers the delightful possibility of making it ahead of time and stashing it in your freezer for future busy nights. Whether it’s a cozy Sunday dinner or a quick, satisfying weeknight meal, these subs promise to deliver a tasty experience that’ll have everyone reaching for seconds. Curious to learn how to create this mouthwatering masterpiece? Let’s dive into the delicious details!

Why Are These Meatball Subs Perfect?

Simplicity in preparation: This recipe requires minimal effort, perfect for those busy weeknights.
Hearty Flavor: Juicy homemade meatballs are enveloped in a rich, flavorful sauce that tantalizes your taste buds.
Family-friendly appeal: Designed to please even the pickiest eaters, making it a go-to for dinner gatherings.
Make-ahead magic: Prepare the meatballs and sauce in advance, freeze them, and enjoy a hassle-free meal when you need it. Try pairing these subs with a refreshing Caesar salad for a complete dining experience.
Customized toppings allow you to get creative—add your favorite extras for a personalized touch!

Meatball Subs Ingredients

For the Meatballs
Ground Beef (2 lbs) – The foundation of your subs, opt for a mix of 80/20 for juicy meatballs.
Saltine Crackers (1 sleeve, crushed) – Acts as a binder; breadcrumbs work as a great substitute.
Eggs (2, room temperature) – Essential to hold the meat mixture together and add moisture; don’t skip!
Salt (1 tbsp) – Enhances the overall flavor; feel free to adjust to taste.
Pepper (1 tbsp) – Adds a delightful kick; use freshly ground for more potency.
Garlic Powder (1 tbsp) – Infuses lovely aroma; fresh garlic can be used for an extra punch.
Onion Powder (1 tbsp) – Deepens the savory essence; swap with fresh minced onions if you prefer.
Dried Oregano (1 tbsp) – An aromatic herb that pairs beautifully with meat; Italian seasoning works too.

For the Sauce
Yellow Onion (1 medium, minced) – Introduces moisture and flavor; key to a balanced sauce.
Green Peppers (2, rough chopped) – Infuses sweetness and crunch; red peppers can also be used for a different twist.
Red Pepper (1, rough chopped) – Adds vibrant color and sweetness; use it if you like!
Cherry or Grape Tomatoes (1 pint) – Brings freshness and brightness; substitute with canned diced tomatoes if necessary.
Spaghetti Sauce (1 jar) – The luscious base for your meatball sauce; homemade matters, but your favorite store-bought works wonderfully too.
Sugar (2 tbsp) – Balances acidic notes in the sauce; brown sugar is a richer option.
Fresh Oregano – For optional herb garnish; skip if you prefer a simpler flavor profile.

For Assembly
French Bread Rolls – The perfect vessel for your hearty meatballs; choose rolls from your favorite bakery for the best results.
Toppings – Consider mini fresh mozzarella balls and hot pepper rings for a delightful finishing touch.

These Meatball Subs ingredients will create a comforting dish that brings warmth and joy to your family table. Get ready to savor every delightful bite!

Step‑by‑Step Instructions for Hearty Homemade Meatball Subs

Step 1: Combine Ingredients
In a large mixing bowl, combine 2 pounds of ground beef, 1 medium minced onion, 1 sleeve of crushed saltine crackers, and your salt, pepper, garlic powder, onion powder, and dried oregano. Use your hands to mix until everything is evenly incorporated, but be careful not to overwork the meat. This mixture will form the flavorful meatballs for your hearty meatball subs.

Step 2: Mix in Eggs
Whisk together 2 room-temperature eggs in a small bowl and pour them into the meat mixture. Gently combine until the eggs are completely integrated, ensuring the mixture remains moist and cohesive. Next, form small 2-inch meatballs, placing them on a parchment-lined baking sheet as you go. This step is crucial for the perfect texture of your meatball subs.

Step 3: Rest Meatballs
Once shaped, let the meatballs rest at room temperature for 20 minutes. This resting period allows the flavors to meld and helps the meatballs maintain their shape during cooking. While they rest, preheat a large skillet over medium heat and prepare for sautéing the vegetables, ensuring a seamless cooking process for your hearty meatball subs.

Step 4: Sauté Vegetables
In the preheated skillet, drizzle a splash of oil and add 2 rough-chopped green peppers and 1 rough-chopped red pepper along with 1 pint of cherry or grape tomatoes and 1 medium minced onion. Sauté the vegetables for about 5-7 minutes until they become tender and fragrant. Remove from heat and set aside; these veggies will add a refreshing touch to your subs.

Step 5: Brown Meatballs
Using the same skillet, arrange the meatballs in a single layer. Cook them for about 3-4 minutes on each side, turning them gently to achieve a rich, browned exterior. Keep an eye out for visual cues like a nice crust forming; this browning adds depth to the flavor of your hearty meatball subs. Once browned, move the meatballs to a large soup pot.

Step 6: Transfer to Pot
Carefully transfer the browned meatballs to a large pot and set the skillet aside. Pour in the sautéed vegetable mixture and add your favorite marinara sauce along with a touch of water and 2 tablespoons of sugar to balance the acidity. Stir everything together, ensuring the meatballs are well coated—this will create a rich sauce for your meatball subs.

Step 7: Simmer with Sauce
Cover the pot and let the meatballs simmer on low heat for 90 minutes, stirring occasionally. This slow cooking allows the flavors to meld beautifully, ensuring that each meatball soaks up the delicious sauce. Make sure to check the sauce to keep it from sticking, creating the perfect base for your hearty meatball subs.

Step 8: Check Doneness
After simmering, check the meatballs to ensure they are fully cooked through and tender. The internal temperature should reach 160°F, and they should feel firm yet juicy. If they’re not quite done, continue simmering and checking every 5–10 minutes until they’re perfect for your hearty meatball subs.

Step 9: Prepare Rolls
While the meatballs are finishing, slice your French bread rolls and toast them lightly in the oven at 375°F for about 5 minutes. This step will give a delightful crunch to your subs, making a crisp vessel for the juicy meatballs and sauce. Keep an eye on them so they don’t burn—golden brown is the goal!

Step 10: Assemble Subs
Now it’s time to assemble your hearty meatball subs! Start by spooning meatballs and sauce onto the toasted rolls, adding the sautéed vegetables on top. For an extra touch of deliciousness, sprinkle with mini fresh mozzarella balls and your favorite toppings. Each bite of your meatball sub will be a comforting reminder of home.

What to Serve with Hearty Homemade Meatball Subs?

Discover delightful pairings that elevate your Meatball Subs experience to new heights!

  • Caesar Salad: Crisp romaine and creamy dressing provide a refreshing contrast to the savory meatballs.

  • Garlic Bread: Perfectly toasted with buttery goodness, it complements the hearty flavors without overshadowing them.

  • Pasta Salad: A tangy, chilled pasta salad brightens your meal, giving a refreshing bite between savory sips.

  • Roasted Vegetables: Seasonal veggies roasted to perfection add a delightful crunch and bring out natural sweetness.

  • Coleslaw: Creamy, tangy coleslaw delivers crunch and a burst of flavor that balances the richness of the subs.

  • Herb-Infused Olive Oil: A dip for your crusty rolls, this oil brings rich herbal undertones and depth to your meal.

  • Soda or Iced Tea: A fizzy soda or chilled iced tea quenches thirst and keeps the meal light and enjoyable.

  • Brownies or Gelato: Finish off with fudgy brownies or velvety gelato for a sweet end to your comforting feast.

Expert Tips for the Best Meatball Subs

  • Meatball Resting Time: Allow meatballs to rest for 20 minutes after shaping; this helps them maintain their structure while cooking, preventing them from falling apart.

  • Browning Technique: Only turn meatballs when they’ve formed a nice crust. This prevents sticking and maximizes flavor.

  • Consistent Cooking: Keep an eye on cooking times as they can vary based on stove and skillet. Always check for doneness to ensure your meatball subs are perfectly cooked.

  • Trusted Sauce Choices: Use a combination of homemade and store-bought sauces to create depth of flavor in your sauce.

  • Roll Selection: Choose bakery-fresh French rolls for the best texture; they should hold up to the meatballs and sauce without becoming soggy.

  • Variety for Toppings: Experiment with toppings! Mini mozzarella balls and hot pepper rings can elevate your meatball subs to new flavor heights, ensuring everyone finds their favorite.

How to Store and Freeze Meatball Subs

Fridge: Store leftover Meatball Subs in an airtight container for up to 3 days, ensuring the bread remains soft and the flavors meld beautifully.

Freezer: Freeze individually wrapped meatballs and sauce for future quick dinners. It’s best to use airtight containers or heavy-duty freezer bags for optimal freshness.

Reheating: To reheat, thaw overnight in the fridge before warming in a skillet over low heat or in the oven at 350°F until heated through, about 20 minutes.

Make-Ahead Tip: Prepare the meatballs and sauce ahead of time, freeze them, and enjoy a delicious meal on busy nights with minimal effort.

Meatball Subs Variations & Substitutions

Get ready to unleash your inner chef and make these classic meatball subs perfectly yours with a few exciting twists!

  • Turkey Meatballs: Swap ground beef for turkey or chicken for a leaner, lighter flavor without sacrificing taste. These meatballs still deliver the same hearty satisfaction.

  • Pasta Roll Substitution: Try using soft hoagie rolls or ciabatta instead of standard French rolls. Each option adds its unique texture to the overall experience, making every bite irresistibly delicious.

  • Spicy Kick: Add crushed red pepper flakes or diced jalapeños to the meat mixture for a zesty, fiery flavor that elevates each sub to new heat levels. A little spice goes a long way to excite the palate!

  • Veggie-Packed: Fold in finely chopped spinach, mushrooms, or zucchini into the meat mixture for a nutritious boost. These veggies add moisture and a pop of color while enhancing the overall profile of your meatball subs.

  • Herbed Bliss: Experiment by mixing fresh herbs like parsley or basil into your meatballs for extra flavor. The aromatic hints transform the classic recipe into a fragrant masterpiece that will make your kitchen smell heavenly!

  • Cheddar Twist: Instead of mini mozzarella, sprinkle shredded cheddar or provolone cheese on top before broiling. This creates a beautifully melted topping that adds richness and depth.

  • Sweet & Savory Sauce: Replace sugar with honey or balsamic glaze in your sauce for a unique sweetness that balances the flavors beautifully. This subtle change can create a delightful new taste dimension.

  • Cheesy Saucy Variation: For a creamy twist, consider a layer of ricotta or cream cheese in the sauce. This change adds richness and brings a luxurious texture to your meatball subs.

For even more inspiration, why not check out my Spaghetti Homemade Meatballs for ideas on varying your meatball flavor profiles or pairing these subs with a vibrant salad? Endless possibilities await your kitchen!

Make Ahead Options

These savory Meatball Subs are perfect for meal prep, making your busy weeknights stress-free! You can prepare the meatballs and sauce up to 3 days in advance. Simply make the meatballs, allow them to cool, and store them in an airtight container in the refrigerator. The sauce can also be made ahead and refrigerated, or even frozen for up to 3 months. When you’re ready to serve, just reheat the meatballs and sauce on the stove until warmed through (about 10-15 minutes). For best quality, avoid reheating in the microwave, as this can dry out the meatballs. Assemble the subs with toasted bread and your favorite toppings for a comforting meal that tastes just as delicious as the day you made them!

Meatball Subs Recipe FAQs

What kind of ground beef should I use for meatballs?
I recommend using ground beef with a fat content of 80/20 for juicy meatballs. This mix guarantees that your meatballs remain moist and flavorful, creating the perfect base for your scrumptious Meatball Subs.

How should I store leftover Meatball Subs?
Leftover Meatball Subs can be stored in an airtight container in the refrigerator for up to 3 days. Make sure to keep the bread soft by placing a paper towel inside the container, which helps absorb excess moisture and preserves the quality of your hearty subs.

Can I freeze the meatballs and sauce? If so, how?
Absolutely! To freeze, let the cooked meatballs and sauce cool completely, then transfer them into airtight containers or heavy-duty freezer bags. They can be stored in the freezer for up to 3 months. When you’re ready to enjoy, thaw overnight in the fridge and reheat gently in a skillet or oven at 350°F until warmed through.

What should I do if my meatballs are falling apart while cooking?
If your meatballs tend to crumble, it might be due to overmixing or insufficient binding. To fix this, ensure you mix the ingredients gently and allow the meatballs to rest for 20 minutes after shaping. This resting time helps them hold together better during cooking. Additionally, consider using a binding agent like bread crumbs or crushed crackers.

Are there any dietary considerations for these Meatball Subs?
Yes! If you or someone you’re cooking for has specific dietary needs, you can easily customize these Meatball Subs. For gluten-free options, substitute saltine crackers with gluten-free breadcrumbs, and opt for gluten-free rolls. If there are concerns about allergies, always check ingredient labels for potential allergens like eggs or specific spices. You can also swap out ground beef for ground turkey or chicken for a healthier alternative.

How can I tell if my meatballs are cooked through?
To ensure your meatballs are fully cooked, the internal temperature should reach 160°F. You can use a meat thermometer for accuracy. Additionally, they should feel firm to the touch and not be overly soft or gummy. If needed, let them simmer a little longer to ensure they are perfectly cooked for your delightful Meatball Subs.

Meatball Subs

Savory Meatball Subs That Bring Family Together

These meatball subs bring family together with homemade meatballs nestled in crusty rolls, perfect for any occasion.
Prep Time 30 minutes
Cook Time 1 hour 30 minutes
Resting Time 20 minutes
Total Time 2 hours 20 minutes
Servings: 6 subs
Course: Lunch
Cuisine: American
Calories: 450

Ingredients
  

For the Meatballs
  • 2 lbs Ground Beef 80/20 mix
  • 1 sleeve Saltine Crackers crushed
  • 2 whole Eggs room temperature
  • 1 tbsp Salt to taste
  • 1 tbsp Pepper freshly ground
  • 1 tbsp Garlic Powder
  • 1 tbsp Onion Powder
  • 1 tbsp Dried Oregano
For the Sauce
  • 1 medium Yellow Onion minced
  • 2 whole Green Peppers rough chopped
  • 1 whole Red Pepper rough chopped
  • 1 pint Cherry or Grape Tomatoes
  • 1 jar Spaghetti Sauce store-bought or homemade
  • 2 tbsp Sugar adjust to taste
  • Fresh Oregano for garnish, optional
For Assembly
  • 6 rolls French Bread Rolls
  • Toppings mini fresh mozzarella balls and hot pepper rings optional

Equipment

  • Large mixing bowl
  • Skillet
  • Parchment-lined baking sheet
  • Large pot

Method
 

Step-by-Step Instructions
  1. In a large mixing bowl, combine ground beef, minced onion, crushed saltine crackers, salt, pepper, garlic powder, onion powder, and dried oregano.
  2. Whisk together eggs in a small bowl and pour into the meat mixture. Gently combine until integrated, then form small meatballs.
  3. Let the meatballs rest at room temperature for 20 minutes.
  4. In the skillet, add oil and sauté green peppers, red pepper, cherry tomatoes, and minced onion for about 5-7 minutes.
  5. Brown the meatballs in the same skillet for about 3-4 minutes on each side, then transfer to a large pot.
  6. Add the sautéed vegetables, marinara sauce, and sugar to the pot, stirring to coat the meatballs.
  7. Cover and let simmer on low heat for 90 minutes, stirring occasionally.
  8. Check that meatballs are fully cooked and internal temperature reaches 160°F.
  9. While the meatballs finish, slice and toast the French rolls in the oven at 375°F for about 5 minutes.
  10. Assemble by spooning meatballs and sauce onto the toasted rolls and adding sautéed vegetables and toppings.

Notes

These meatball subs are perfect for family gatherings and can be made ahead of time and frozen for convenience.

Indulgent Almond & Medjool Date Tart: A Guilt-Free Delight

As I sifted through my pantry, a vision of vibrant flavors sparked my imagination: an Elegant Almond & Medjool Date Tart was destined to grace my table. This delightful dessert isn’t just visually stunning—it’s also a guilt-free indulgence that’s entirely vegan, gluten-free, and refined sugar-free. The buttery almond crust cradles a velvety filling crafted from luscious Medjool dates, bringing richness without the usual heaviness. Plus, this tart is a breeze to prepare, making it perfect for any occasion—from cozy family dinners to elegant holiday gatherings. Impress your guests while nurturing your culinary passions with this wholesome creation. Curious about how to conjure up a dessert that’s as delightful as it is nourishing? Let’s dive in!

Why is this tart a must-try?

Guilt-Free Indulgence: This Almond & Medjool Date Tart strikes the perfect balance between health and decadence, making it a fantastic choice for anyone looking to enjoy dessert without the guilt.
Simple Preparation: With easy-to-follow steps, this recipe is approachable for all skill levels, making it an ideal pick for both novice and experienced bakers.
Naturally Sweet: Thanks to the Medjool dates, you can relish a deliciously sweet filling without any refined sugars. You might also enjoy the Nutty Chocolate Date recipe for another delightful treat!
Versatile Flavors: Feel free to customize this tart—swap out nut flours or add spices to suit your taste, and make it uniquely yours!
Texture Delight: The crunchy almond crust paired with a creamy filling and a whimsical streusel topping ensures every bite is an exploration of textures and flavors that your guests will adore.

Almond & Medjool Date Tart Ingredients

• Get ready to create something delicious!

For the Crust

  • Almond Flour – Provides structure and a nutty flavor; you can substitute with ground almonds or a gluten-free blend, if needed.
  • Maple Syrup – Acts as a natural sweetener and binding agent; for a refined sugar-free option, you can use coconut oil and a flax egg.
  • Water – Helps to form the dough for the crust; adjust the quantity if changing the flour type.

For the Filling

  • Medjool Dates – Sweetens the filling and adds a rich caramel-like flavor; while other soft varieties may work, Medjool dates are preferred for their texture.
  • Coconut Milk – Provides creaminess without dairy; feel free to use regular milk or heavy cream if you’re not vegan, adding an extra thickener if needed.
  • Vanilla Extract – Enhances the flavor profile of the filling.
  • Cornstarch – Thickens the filling; arrowroot starch is a suitable alternative if desired.
  • Sea Salt – Balances sweetness and enhances overall flavors.

Optional Topping

  • Extra Crumbled Crust – Add for a delightful streusel effect on top to elevate texture and presentation!

Step‑by‑Step Instructions for Almond & Medjool Date Tart

Step 1: Preheat the Oven
Begin by preheating your oven to 350°F (175°C). This ensures that when you’re ready to bake your Almond & Medjool Date Tart, the oven is at the perfect temperature to create that golden crust. While the oven heats, gather your ingredients to keep the process streamlined.

Step 2: Make the Crust Dough
In a mixing bowl, combine almond flour, maple syrup, and water. Stir until the mixture forms a cohesive dough that is slightly sticky but manageable. This may take about 2-3 minutes. Once combined, visually check that no dry flour is left, ensuring a consistent texture for your crust.

Step 3: Shape the Crust
Take the dough and press it firmly into the bottom and up the sides of a tart pan, using your fingers or a flat object for even coverage. Aim for a thickness of about ¼ inch. This step takes a little finesse, and you should see the dough hugging the tart pan’s edges.

Step 4: Bake the Crust
Place your tart pan in the preheated oven and bake for 10-12 minutes, or until the crust is lightly golden. Keep an eye on it, as you want to achieve a beautiful color without burning. The edges should start browning slightly, hinting at the nutty aroma ready to fill your kitchen.

Step 5: Prepare the Filling
While the crust cools, prepare the filling. In a blender, add the Medjool dates, coconut milk, vanilla extract, sea salt, and cornstarch. Blend on high for about 1-2 minutes until the mixture is perfectly smooth, resembling a creamy caramel. It’s important to ensure the dates are fully blended for a velvety filling.

Step 6: Combine Filling and Crust
Once blended, carefully pour the luscious filling into the pre-baked almond crust. Use a spatula to smooth the top evenly, ensuring every corner is filled. This step allows your Almond & Medjool Date Tart to have a gorgeous presentation when baked.

Step 7: Bake the Tart
Return the tart to the oven and bake for an additional 30-35 minutes. Watch for the filling to be set and lightly browned on top. It should jiggle slightly when done, similar to a custard, which means it’s perfectly baked and ready to cool.

Step 8: Cool and Chill
Remove the tart from the oven and let it cool to room temperature. This step is crucial, as it allows the filling to firm up. After cooling, transfer the tart to the refrigerator and chill for at least 1 hour to enhance the flavors and make slicing easier.

Step 9: Optional Topping
For an added touch, crumble any extra baked crust on top for a delightful streusel effect before serving. This optional step adds a beautiful visual appeal and a satisfying crunch to each bite of your Almond & Medjool Date Tart.

Expert Tips for Almond & Medjool Date Tart

  • Crust Perfection: Ensure the crust is golden before adding the filling; underbaking may result in a soggy texture.
  • Cool Completely: Allow the tart to cool fully to help the filling firm up, similar to how a custard pie sets.
  • Pan Size Matters: Adjust your baking times based on the pan size you use; a bigger pan may need extra time for the filling to cook through.
  • Blend Well: Make sure the Medjool dates are blended thoroughly for a smooth filling; any chunks can disrupt the desired creamy texture.
  • Chill Time: Don’t skip the refrigeration step; chilling for at least an hour enhances flavor and makes for cleaner slices.

What to Serve with Almond & Medjool Date Tart

Elevate your dessert experience by pairing this elegant tart with complementary dishes that delight the senses.

  • Fresh Berries: A medley of strawberries, blueberries, and raspberries will add a burst of color and refreshing acidity that perfectly balances the tart’s sweetness. Their natural juiciness provides a delightful contrast to the creamy filling.

  • Coconut Whipped Cream: A dollop of light and fluffy coconut whipped cream enhances the tropical notes of the coconut milk in the tart, creating a rich and indulgent finish to every slice.

  • Chilled Mint Tea: The light, herbal notes of chilled mint tea will cleanse the palate and offer a soothing experience alongside the sweet flavors of the tart. It’s a refreshing choice that adds an aromatic layer to your dessert table.

  • Dark Chocolate Shavings: For an upscale touch, sprinkle dark chocolate shavings atop the tart. The bittersweet chocolate adds depth and a touch of luxury, harmonizing beautifully with the Medjool dates.

  • Roasted Nuts: A sprinkle of roasted almonds or pecans adds a crunchy texture that contrasts wonderfully with the smooth filling. Their nuttiness echoes the tart’s crust and elevates the overall flavor profile.

  • Vanilla Ice Cream: A scoop of vegan vanilla ice cream provides a creamy, cold contrast to the warm tart, melting slightly and creating a dreamy blend of flavors that will leave everyone coming back for more.

  • Caramel Sauce: A drizzle of homemade or store-bought caramel sauce, especially one made with coconut milk, can add a delightful richness and create a sumptuous experience when served with your Almond & Medjool Date Tart.

Storage Tips for Almond & Medjool Date Tart

  • Room Temperature: Keep the tart at room temperature for up to 2 hours before serving. If not served immediately, transfer to the fridge.
  • Fridge: Store in an airtight container in the refrigerator for up to 5 days to maintain freshness. Make sure to cover it well to avoid drying out.
  • Freezer: The tart can be frozen for up to 3 months. Wrap it tightly in plastic wrap and then in aluminum foil to prevent freezer burn.
  • Reheating: For best results, serve the tart chilled. If you prefer it warm, gently reheat in the oven at a low temperature until just warm, being careful not to overcook.

Make Ahead Options

These Almond & Medjool Date Tarts are perfect for busy home cooks looking to save time without sacrificing flavor! You can prepare the almond crust up to 24 hours in advance; simply press it into the tart pan and refrigerate. The filling can also be blended and stored in an airtight container in the fridge for up to 3 days. To maintain the tart’s quality, assemble the filling with the crust just before baking to ensure a fresh and delicious dessert. Finally, when you’re ready to serve, pour the filling into the pre-baked crust, bake as instructed, and delight in a stunning, make-ahead dessert that’s just as scrumptious!

Almond & Medjool Date Tart Variations

Feel free to get creative and make this dessert your own; the possibilities are as delightful as they are delicious!

  • Nut Flour Swap: Replace almond flour with pecan flour to add a rich, buttery flavor that pairs beautifully with the dates. The nuttiness just sings!

  • Warm Spices: A touch of ground cinnamon or nutmeg can elevate the filling, bringing warmth that’s perfect for cozy gatherings. These spices whisper comfort in every bite.

  • Fruit Twist: Experiment with baked apples or pears instead of dates for a fruity twist. Just remember to adjust moisture levels to keep that perfect tart texture.

  • Maple-Free: Swap maple syrup for agave nectar or date syrup if you prefer a different sweetness, keeping it refined sugar-free and absolutely scrumptious!

  • Coconut Cream Boost: Add a dollop of coconut cream to the filling for an ultra-creamy finish that will have everyone asking for seconds. It’s decadence at its finest!

  • Zesty Kick: Incorporate a splash of fresh orange juice or zest for a tangy brightness that dances on your palate, enhancing the natural sweetness of the dates.

  • Chocolate Lovers: Mix in a few tablespoons of unsweetened cocoa powder for a chocolatey filling that offers a rich, indulgent experience. Pair this chocoholic delight with the Nutty Chocolate Date for a sweet duo!

  • Raw & Vegan Option: No baking required! For a raw version, combine nuts and dates for the crust and blend remaining filling ingredients until smooth, leaving out the baking entirely for a quick dessert.

Let these variations inspire your culinary creativity, and enjoy every moment of delight when you serve this beautiful Almond & Medjool Date Tart!

Almond & Medjool Date Tart Recipe FAQs

How do I select ripe Medjool dates?
Absolutely! When selecting Medjool dates, look for ones that are plump, shiny, and have a smooth skin. Avoid dates with dark spots all over, as they may be overripe or dried out. A slight stickiness is a good sign of freshness, as it indicates natural sugars are present. If they feel too hard, they could be past their prime!

What’s the best way to store leftovers?
Very good question! To keep your Almond & Medjool Date Tart fresh, store it in an airtight container in the refrigerator for up to 5 days. I recommend placing parchment paper between the tart and the lid to avoid any moisture buildup, which could compromise the texture. When stored correctly, you can ensure that every slice remains as delightful as the first!

Can I freeze the Almond & Medjool Date Tart?
Absolutely! To freeze, first, let the tart cool completely to room temperature. Then, wrap the tart tightly in plastic wrap, followed by aluminum foil, to protect it from freezer burn. It can be stored in the freezer for up to 3 months. When you’re ready to enjoy it, simply thaw it in the refrigerator overnight and serve it chilled!

What should I do if my tart filling is too runny?
If your filling turns out runny, don’t panic! You may not have blended the Medjool dates thoroughly enough, leading to an uneven consistency. To fix this, you can return the tart to the oven and bake it for an additional 5-10 minutes, checking the filling periodically for firmness. If you plan to make it again, ensure you blend until completely smooth and consider adding a bit more cornstarch to help it set.

Is the Almond & Medjool Date Tart suitable for people with nut allergies?
That’s a vital consideration! Since this tart features almond flour, it’s not safe for individuals with nut allergies. You can try substituting the almond flour with a seed-based flour like sunflower seed flour, which can create a similar texture. However, be aware that this substitution may alter the flavor slightly. Always check with those you’re serving to make sure they can enjoy the treat safely!

How long does the tart keep at room temperature?
Great question! The tart can be kept at room temperature for about 2 hours before it begins to lose its optimal texture and freshness. If you’re serving it at a gathering, it’s best to chill it afterwards in the refrigerator, where it will stay fresh for up to 5 days. Enjoying it chilled tends to enhance the flavors, too!

Almond & Medjool Date Tart

Indulgent Almond & Medjool Date Tart: A Guilt-Free Delight

A delicious Almond & Medjool Date Tart that's vegan, gluten-free, and refined sugar-free, providing a guilt-free dessert option.
Prep Time 30 minutes
Cook Time 50 minutes
Chilling Time 1 hour
Total Time 2 hours 20 minutes
Servings: 8 slices
Course: Dessert
Cuisine: Vegan
Calories: 170

Ingredients
  

For the Crust
  • 2 cups Almond Flour Provides structure and nutty flavor
  • 1/4 cup Maple Syrup Acts as natural sweetener and binding agent
  • 2-3 tablespoons Water Helps to form the dough
For the Filling
  • 1 cup Medjool Dates Sweetens the filling
  • 1 cup Coconut Milk Provides creaminess without dairy
  • 1 teaspoon Vanilla Extract Enhances flavor profile
  • 2 tablespoons Cornstarch Thickens the filling
  • 1/4 teaspoon Sea Salt Balances sweetness
Optional Topping
  • 1/4 cup Extra Crumbled Crust For a delightful streusel effect

Equipment

  • mixing bowl
  • tart pan
  • Blender

Method
 

Step-by-Step Instructions
  1. Preheat your oven to 350°F (175°C).
  2. In a mixing bowl, combine almond flour, maple syrup, and water to form a cohesive dough.
  3. Press the dough firmly into the bottom and up the sides of a tart pan.
  4. Bake the crust for 10-12 minutes, or until lightly golden.
  5. In a blender, combine Medjool dates, coconut milk, vanilla extract, sea salt, and cornstarch. Blend until smooth.
  6. Pour the filling into the pre-baked almond crust and smooth the top.
  7. Bake for an additional 30-35 minutes until the filling is set and lightly browned.
  8. Let the tart cool to room temperature, then chill in the refrigerator for at least 1 hour.
  9. Optional: Crumble any extra baked crust on top before serving.

Notes

Ensure the crust is golden before adding the filling to avoid sogginess. Chill the tart to enhance flavor and facilitate easy slicing.

Healthy Chocolate Chickpea Truffles for Guilt-Free Indulgence

As I scoured my pantry for a sweet fix, a brilliant idea struck: why not whip up some Healthy Chocolate Chickpea Truffles? The beauty of these delightful bites lies not just in their heavenly taste, but in their nourishing ingredients. With just a 30-minute prep time, this recipe transforms humble chickpeas into a luscious treat that’s both vegan and gluten-free. Imagine balancing indulgence with health—these truffles provide a protein-packed snack or dessert option that satisfies every craving. Plus, they’re incredibly versatile! You can roll them in crushed peanuts, cocoa powder, or coconut for added flair. Ready to take your chocolate game to the next level? Grab your aprons and let’s create these guilt-free delights together!

Why are these truffles a must-try?

Nourishing Ingredients: These Healthy Chocolate Chickpea Truffles are crafted with wholesome components, giving you the satisfaction of dessert without the guilt. Quick Prep Time: In just 30 minutes, you’ll transform basic pantry staples into a decadent treat! Versatile Coatings: With options to roll in crushed peanuts, cocoa powder, or coconut, you can customize each batch to perfection. Vegan & Gluten-Free: Ideal for various dietary needs, everyone can enjoy these delightful bites! Protein-Packed: Chickpeas offer a unique boost of protein, making them a truly satisfying snack that won’t derail your healthy eating goals. Grab a plate and indulge guilt-free! If you’re looking for more delicious no-bake sweets, try our Coconut Chocolate Rolls or Coffee Chocolate Truffles.

Healthy Chocolate Chickpea Truffles Ingredients

For the Base

  • Chickpeas – Provides the base and adds protein and fiber; use canned chickpeas for convenience.
  • Dates – Natural sweetness and binding; soak in hot water to soften for easier blending.
  • Cocoa Powder – Adds chocolaty flavor; unsweetened cocoa is preferred for health benefits.
  • Peanut Butter – Contributes creaminess and richness; can substitute with sunflower seed butter for nut-free options.
  • Salt – Enhances flavor balance; a pinch is sufficient to complement sweetness.

For Sweetness

  • Agave Syrup – Provides additional sweetness and moisture; maple syrup can be used as an alternative.

For Coating

  • Dry-Roasted Unsalted Peanuts – Adds texture and a crunchy coating; swap with desiccated coconut or crushed dark chocolate for variety.

Step‑by‑Step Instructions for Healthy Chocolate Chickpea Truffles

Step 1: Soak the Dates
Start by soaking the pitted dates in a bowl of hot water for about 5 minutes. This softening process is essential for achieving a smooth texture in your Healthy Chocolate Chickpea Truffles. Once softened, drain the dates and set them aside for later blending.

Step 2: Blend the Mixture
In a food processor, combine the drained chickpeas, softened dates, cocoa powder, peanut butter, salt, and agave syrup. Blend this mixture on high for 2-3 minutes, or until it reaches a creamy and smooth consistency. You may need to stop and scrape down the sides of the bowl to ensure everything is well incorporated.

Step 3: Chill the Mixture
Transfer the blended mixture into a bowl and cover it with plastic wrap. Place it in the refrigerator for 20 minutes, allowing the mixture to firm up slightly. This chilling step helps make rolling the truffles easier and promotes a better texture in your Healthy Chocolate Chickpea Truffles.

Step 4: Roll the Truffles
Once chilled, use a small scoop or your hands to portion the mixture into 16–18 equal-sized balls. Roll each portion gently between your palms until they are smooth and round. The mixture should be slightly tacky but should hold its shape nicely, providing the perfect base for your truffles.

Step 5: Prepare the Coating
In the food processor, pulse the dry-roasted unsalted peanuts until finely chopped. This should take about 15-20 seconds. Once ready, transfer the crushed peanuts to a small bowl or plate where you can easily roll the truffles. This crunchy coating will add a delightful texture to your Healthy Chocolate Chickpea Truffles.

Step 6: Coat the Truffles
Take each rolled truffle and gently roll it in the crushed peanuts, ensuring an even coating on all sides. Press lightly to help the peanuts adhere, creating a delicious crunch that complements the creamy chocolate inside. Repeat this until all truffles are coated to perfection.

Step 7: Store and Serve
Place your completed Healthy Chocolate Chickpea Truffles in an airtight container and refrigerate them until ready to serve. They can be stored in the fridge for up to one week. For longer storage, consider freezing them for up to three months. Allow them to thaw at room temperature before enjoying!

Make Ahead Options

These Healthy Chocolate Chickpea Truffles are perfect for meal prep, saving you precious time on busy weeknights! You can prepare the mixture and chill it up to 24 hours in advance. Simply follow the recipe up to the chilling step, then store the blended mixture in an airtight container in the fridge. When you’re ready to enjoy, roll the mixture into balls, coat them as desired, and serve. This method ensures the truffles stay just as delicious while allowing the flavors to meld overnight for an even richer taste. Get ready to treat yourself with minimal effort!

Healthy Chocolate Chickpea Truffles Variations

Feel free to let your creativity shine as you customize these truffles to suit your taste!

  • Nut-Free: Swap peanut butter for sunflower seed butter and coat with seeds or oats for a delightful crunch.
  • Sweetener Swap: Use maple syrup instead of agave for a different flavor profile and natural sweetness.
  • Coating Choices: Roll your truffles in cocoa powder, desiccated coconut, or crushed dark chocolate for an added layer of decadence.
  • Flavor Boost: Add a splash of vanilla extract or a pinch of cinnamon to enhance the richness of your truffles.
  • Texture Twists: For an extra crunch, mix crushed pretzels or graham crackers into the coating. The contrast will surprise your taste buds!
  • Chocolate Lover’s Dream: Dip the truffles in melted dark chocolate for a decadent finish—just let them set before serving.

  • Protein Packed: Mix in a scoop of your favorite protein powder to boost the nutritional content without sacrificing flavor.
  • Energy Bites: For a supercharged snack, toss in some chia seeds or flaxseeds for added nutrition and texture.

Maybe you’re interested in more delightful no-bake options? You might enjoy our Nutty Chocolate Date or the irresistible Homemade Bake Chocolate. Always feel free to explore different ingredient combinations to find your own perfect truffle!

What to Serve with Healthy Chocolate Chickpea Truffles

These delightful truffles are not just a standalone treat; they pair beautifully with various dishes and beverages to create a satisfying meal or snack experience.

  • Creamy Nut Butter Toast: Toast topped with your favorite nut butter adds a rich, creamy element that complements the chocolatey bites perfectly.

  • Fresh Berries: A side of mixed berries provides a refreshing contrast with their bright flavors—sweet, tart, and juicy. Together, they create a vibrant atmosphere.

  • Coconut Chia Pudding: This pudding offers a light, silky texture and pairs well with chocolate for a deliciously sweet finish. Serve chilled for a double treat!

  • Herbal Tea: A warm cup of chamomile or mint tea adds a soothing element, making it an ideal accompaniment that enhances flavors without overpowering them.

  • Almond Milk Smoothie: A light smoothie made with almond milk and banana can be a great addition, providing a creamy, nutritious option that complements the truffles.

  • Dark Chocolate Covered Pretzels: For an unexpected twist, pair these truffles with salty, chocolatey pretzels that offer a crunch and contrasting flavors.

  • Frozen Yogurt: Serve your truffles alongside a bowl of creamy frozen yogurt for a delightful mix of textures and tastes, ideal for warm afternoons.

  • Coffee: A robust cup of coffee serves as an energizing partner, heightening the chocolate flavor while providing a comforting experience.

  • Chocolate Avocado Mousse: This rich and velvety dessert can beautifully complement your truffles, enhancing the overall chocolate indulgence.

With these pairings, your Healthy Chocolate Chickpea Truffles become part of a charming culinary adventure that celebrates health without sacrificing taste.

How to Store and Freeze Healthy Chocolate Chickpea Truffles

Fridge: Store your Healthy Chocolate Chickpea Truffles in an airtight container in the refrigerator for up to one week. This keeps them fresh and delicious for daily snacking.

Freezer: If you’d like to enjoy them later, freeze the truffles for up to three months. Wrap each one individually or place them in a sealed container to prevent freezer burn.

Thawing: When ready to indulge, simply let the truffles thaw at room temperature for about 15-20 minutes before serving. They’ll be perfectly soft and ready to enjoy!
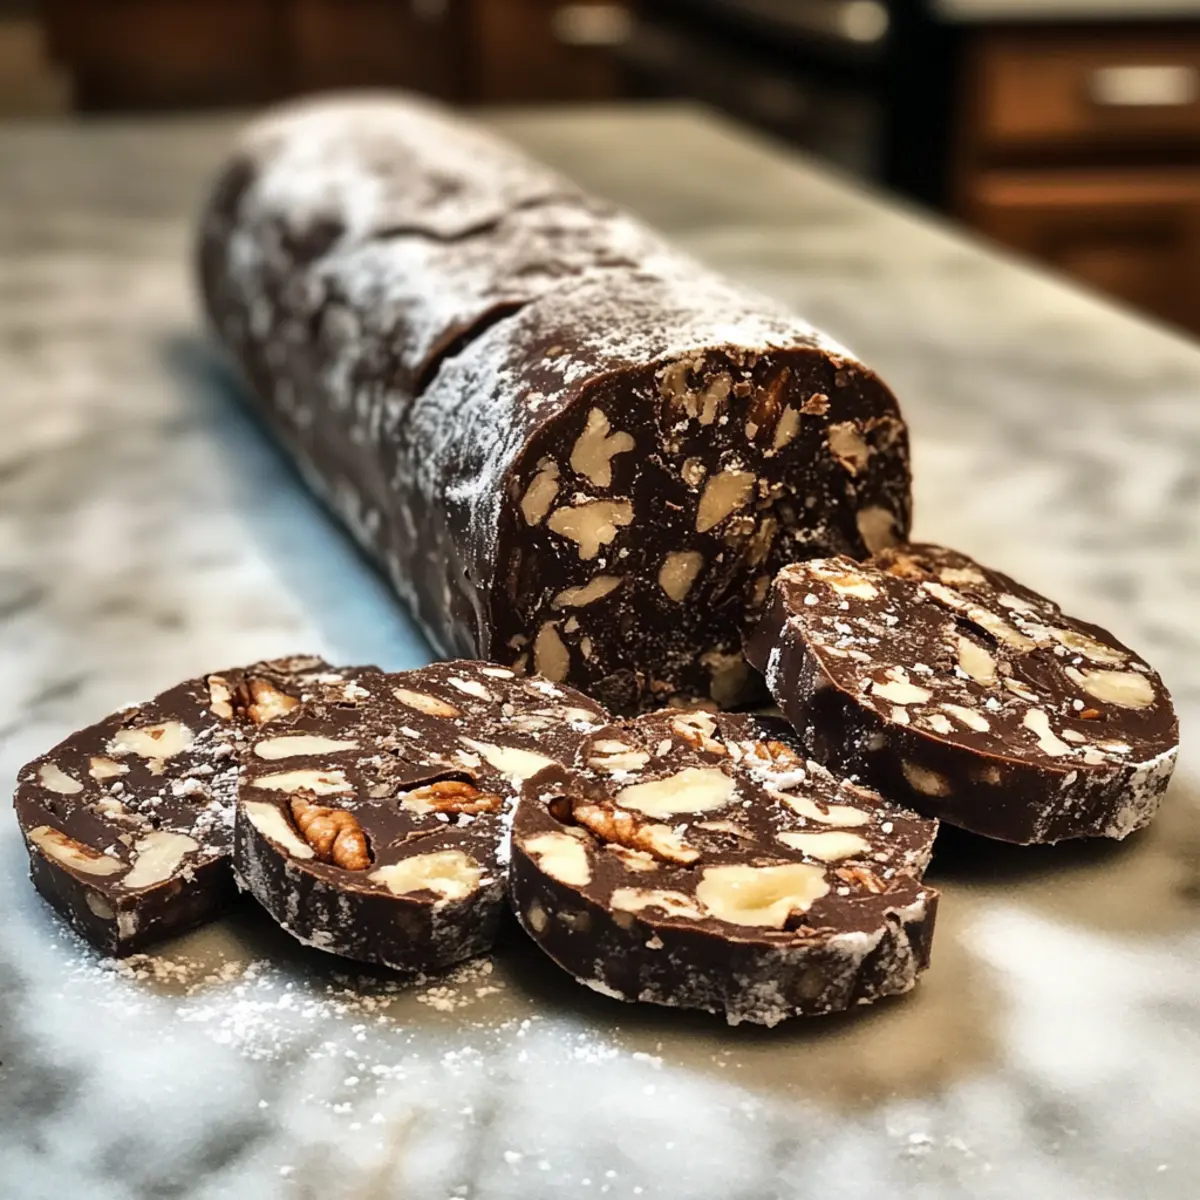
Reheating: While these truffles are best served chilled, you can microwave them for about 10 seconds if you prefer them slightly warmed. Just be careful not to overheat!

Expert Tips for Healthy Chocolate Chickpea Truffles

  • Perfectly Soft Dates: Soak your dates in hot water for about 5 minutes to ensure they blend smoothly into the truffles. This step is crucial for achieving the right texture.

  • Use a Food Processor: A food processor is ideal for blending the ingredients thoroughly. If you use a blender, consider working in smaller batches to prevent any chunks in your Healthy Chocolate Chickpea Truffles.

  • Taste Before Coating: Always sample the mixture before rolling it into balls. You can adjust the sweetness if necessary, preventing overly sweet truffles.

  • Include Variations: Don’t hesitate to experiment with different coatings. Crushed dark chocolate or desiccated coconut can add unique flavors and textures to your Healthy Chocolate Chickpea Truffles.

  • Storing Tips: Keep your truffles in an airtight container in the fridge for up to one week. For longer shelf life, freeze them and thaw before serving.
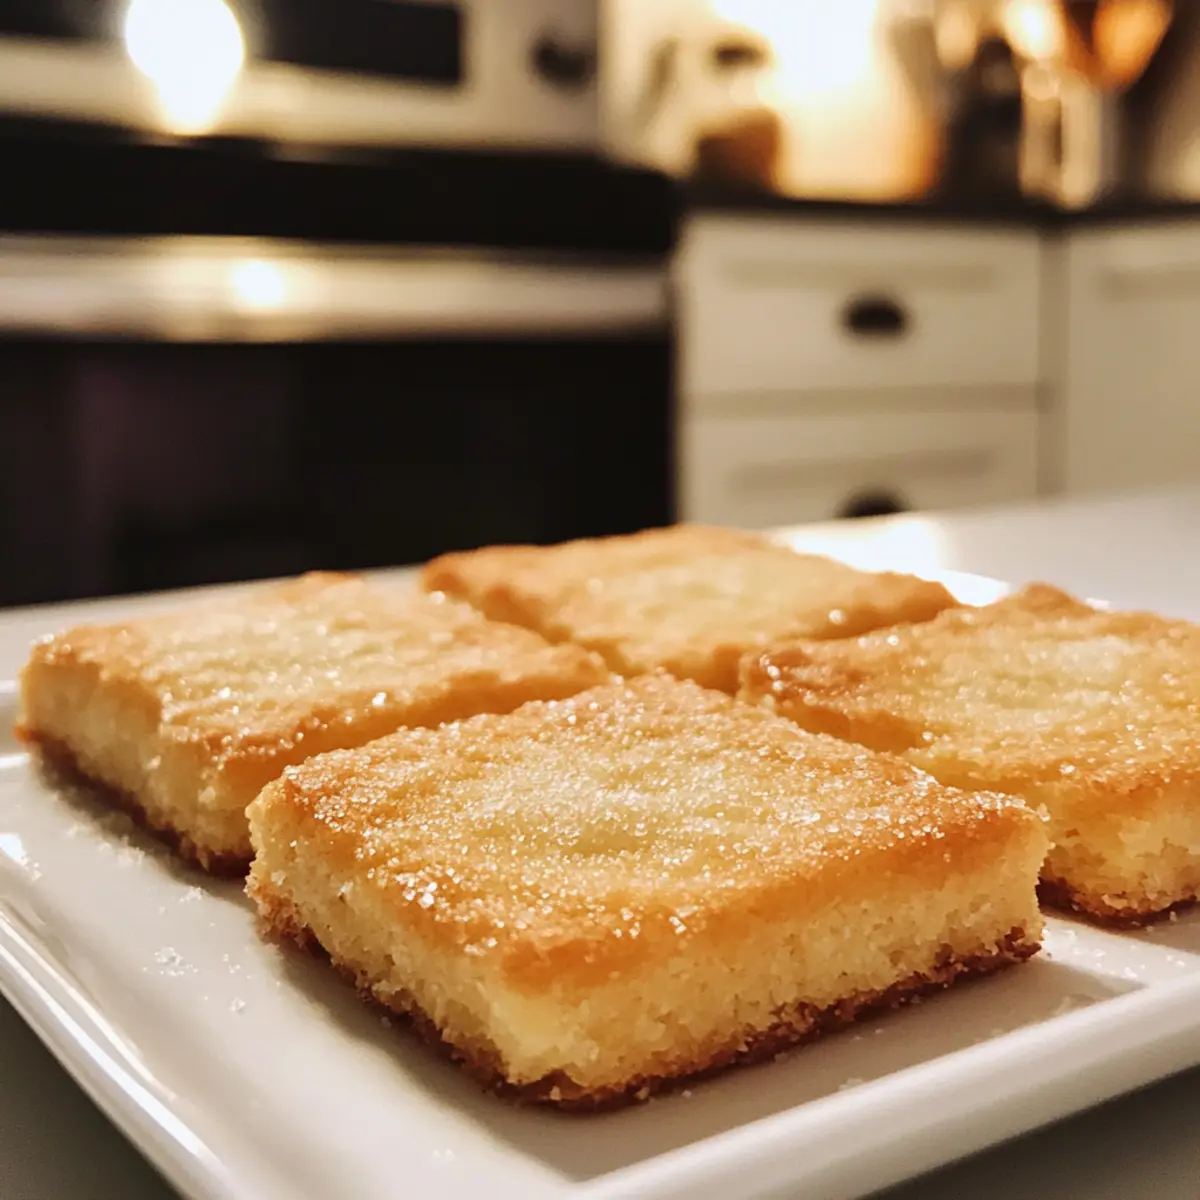
Healthy Chocolate Chickpea Truffles Recipe FAQs

What type of chickpeas should I use?
I recommend using canned chickpeas for convenience and consistent texture, but if you prefer, you can also use cooked dried chickpeas. Just ensure they are well-drained.

How should I store my truffles?
Store your Healthy Chocolate Chickpea Truffles in an airtight container in the refrigerator for up to one week. This keeps them fresh and ready for snacking. If you’d like to enjoy them later, you can freeze them as well.

Can I freeze these truffles?
Absolutely! These truffles can be frozen for up to three months. I suggest wrapping each one individually or placing them in a sealed container to prevent freezer burn. When you’re ready to enjoy, simply let them thaw at room temperature for about 15-20 minutes.

What can I do if my truffle mixture is too sticky?
If your mixture is too sticky to roll, you can chill it in the refrigerator for an additional 10-15 minutes. This will help firm it up, making it easier to handle. Alternatively, you can lightly oil your hands or sprinkle a bit of cocoa powder on your hands to help with rolling.

Are there any allergen considerations for this recipe?
Yes, if you’re preparing these Healthy Chocolate Chickpea Truffles for someone with nut allergies, simply replace peanut butter with sunflower seed butter and skip the crushed peanuts for coating. You could roll them in seeds or oats instead to keep them safe and delicious.

What can I use instead of agave syrup?
You can easily substitute agave syrup with maple syrup for a different flavor profile. Both options add sweetness and moisture, but be sure to taste the mixture for desired sweetness before rolling into balls!

Healthy Chocolate Chickpea Truffles

Healthy Chocolate Chickpea Truffles for Guilt-Free Indulgence

A delicious recipe for Healthy Chocolate Chickpea Truffles, offering a guilt-free indulgence with nourishing ingredients.
Prep Time 30 minutes
Chilling Time 20 minutes
Total Time 50 minutes
Servings: 16 truffles
Course: Dessert
Cuisine: Vegan
Calories: 100

Ingredients
  

For the Base
  • 1 can Chickpeas Canned chickpeas for convenience
  • 1 cup Dates Soak in hot water to soften
  • 1/2 cup Cocoa Powder Unsweetened cocoa is preferred
  • 1/2 cup Peanut Butter Can substitute with sunflower seed butter
  • 1/4 teaspoon Salt A pinch is sufficient
For Sweetness
  • 1/4 cup Agave Syrup Maple syrup can be used as an alternative
For Coating
  • 1 cup Dry-Roasted Unsalted Peanuts Can be swapped with desiccated coconut or crushed chocolate

Equipment

  • Food Processor
  • Bowl
  • airtight container

Method
 

Step-by-Step Instructions
  1. Soak the pitted dates in hot water for about 5 minutes to soften them.
  2. Blend the soaked dates with chickpeas, cocoa powder, peanut butter, salt, and agave syrup until creamy.
  3. Transfer mixture to a bowl, cover with plastic wrap, and chill in the refrigerator for 20 minutes.
  4. Once chilled, scoop the mixture into 16–18 balls and roll between your palms to form truffles.
  5. Pulse dry-roasted peanuts in a food processor until finely chopped, then prepare for coating.
  6. Roll each truffle in the crushed peanuts until evenly coated.
  7. Store in an airtight container in the refrigerator until ready to serve, for up to one week.

Notes

These truffles can be customized with various coatings and can be frozen for longer storage.

Trio of Asian Dipping Sauces to Elevate Your Appetizers

The moment you dip into a jar of homemade sauce, a world of flavors opens up that take your taste buds on an unforgettable journey. Today, I’m excited to share my recipe for a Trio of Asian Dipping Sauces that brings together sweet, spicy, and savory elements in a matter of minutes. Each sauce is quick to whip up, perfect for those who love to entertain without the stress. Imagine serving your friends and family delectable appetizers without spending hours in the kitchen! Whether you’re pairing them with crisp spring rolls or flavorful dumplings, these sauces elevate any dish, making your gatherings delightful and fun. Ready to dive into bold flavors that will leave everyone asking for more? Let’s get started!

Why are These Sauces Perfect for You?

Quick Preparation: These trio of Asian dipping sauces can be ready in under 30 minutes, making them a breeze for busy evenings or spontaneous gatherings.

Bold Flavors: Each sauce bursts with unique flavor profiles—from the sweetness of honey sesame to the zesty kick of spicy soy—that will excite your palate.

Versatility: Ideal as a companion for spring rolls, dumplings, or even salads, these sauces can enhance any appetizer, turning simple bites into a full culinary experience.

Customizable: Feel free to tweak ingredients based on your preferences—try using maple syrup for sweetness or almond butter for the peanut sauce to suit dietary needs.

Crowd-Pleasing Appeal: Your guests will rave about these homemade delights, effortlessly impressing them with your kitchen skills and flavorful creations.

Trio of Asian Dipping Sauces Ingredients

For Honey Sesame Sauce

  • Honey – Adds the right sweetness; substitute with maple syrup for a vegan option.
  • Sesame Oil – Provides a nutty flavor; use olive oil if sesame oil isn’t available.
  • Rice Wine Vinegar – Offers a tangy acidity; white wine vinegar can work as a substitute.
  • Low-Sodium Soy Sauce – Adds umami; gluten-free soy sauce is great for gluten-sensitive diets.
  • Fresh Ginger (grated) – Imparts a zesty kick; ground ginger can be a quick alternative.

For Spicy Soy Sauce

  • Low-Sodium Soy Sauce – Serves as the base for umami; feel free to experiment with flavored soy sauces for unique tastes.
  • Chili Sauce – Delivers the heat; adjust the amount for your preferred spice level.
  • Honey – Sweetens the heat; you can swap it out for agave syrup if desired.

For Savory Peanut Sauce

  • Peanut Butter (smooth or chunky) – Creates a creamy texture; almond butter makes a good substitution.
  • Hoisin Sauce – Adds complexity and sweetness; omit if unavailable, but note the flavor will be milder.
  • Low-Sodium Soy Sauce – Enhances the savory flavor; replace with tamari for a gluten-free option.
  • Warm Water – Adjusts the consistency; add gradually to avoid thinning the sauce too much.

These delightful sauces are a surefire way to enhance your appetizers and impress your guests with your culinary artistry!

Step‑by‑Step Instructions for Trio of Asian Dipping Sauces

Step 1: Prepare the Honey Sesame Sauce
In a medium bowl, whisk together 1/4 cup of honey, 1 tablespoon of sesame oil, 2 tablespoons of rice wine vinegar, and 2 tablespoons of low-sodium soy sauce. Continue whisking until the mixture is smooth and well combined, about 1-2 minutes. For an added burst of flavor, stir in 1 teaspoon of grated ginger. Once ready, set aside to allow the flavors to meld.

Step 2: Create the Spicy Soy Sauce
In a separate small bowl, blend 1/3 cup of low-sodium soy sauce, 1-2 tablespoons of chili sauce (adjusting to your desired spice level), and 1 tablespoon of honey. Stir the ingredients vigorously until well combined, about 1-2 minutes. Top the mixture with 1 tablespoon of chopped scallions and a sprinkle of sesame seeds for flavor and garnish. Set this sauce aside.

Step 3: Mix the Savory Peanut Sauce
For the peanut sauce, use a clean bowl to combine 1/4 cup of hoisin sauce, 1/4 cup of peanut butter (smooth or chunky), and 2 tablespoons of low-sodium soy sauce. Gradually add warm water, mixing well until you achieve your desired consistency, approximately 2-3 tablespoons should suffice. If desired, garnish the sauce with chopped peanuts for an extra crunch.

Step 4: Set Up for Serving
Arrange your three sauces—Honey Sesame, Spicy Soy, and Savory Peanut—into small serving dishes or ramekins. Each sauce should be easily accessible, creating an inviting and colorful display. Consider serving these trio of Asian dipping sauces with an assortment of spring rolls, dumplings, or even crisp vegetables, making for a delightful appetizer spread.

Expert Tips for Trio of Asian Dipping Sauces

Adjust Sweetness: Taste as you go! Some prefer a sweeter honey sesame sauce—feel free to add a bit more honey if desired.

Control Heat: For the spicy soy sauce, start with less chili sauce and increase gradually. It’s easier to add heat than to tone it down!

Consistent Texture: When making the savory peanut sauce, add warm water slowly until you achieve your perfect creamy consistency; don’t rush it!

Fresh Ingredients: Use fresh ginger and scallions for the best flavor. Fresh ingredients elevate these trio of Asian dipping sauces to the next level.

Storage Savvy: Store sauces in airtight containers in the fridge and give them a good stir before serving again to re-emulsify any separation.

What to Serve with Trio of Asian Dipping Sauces

The perfect accompaniment can turn your appetizer table into an unforgettable feast.

  • Crispy Spring Rolls: These delicate rolls offer a satisfying crunch, balancing the creamy textures of the dipping sauces perfectly.
  • Savory Dumplings: With their rich filling, dumplings create a delightful contrast to the lightness of the sauces, enhancing every bite.
  • Fresh Vegetable Platter: A mix of crunchy carrots, cucumbers, and bell peppers provides a refreshing contrast that pairs wonderfully with all three sauces.
  • Grilled Chicken Skewers: Juicy and tender, these skewers soak in the flavors from the sauces, making for a satisfying and flavorful pairing.
  • Sticky Rice Balls: Their chewy texture complements the sauces beautifully, allowing you to scoop up bold flavors in every bite.
  • Homemade Sushi Rolls: The combination of fresh ingredients and the trio of Asian dipping sauces elevate these simple rolls into an extraordinary treat.
  • Light Beer or Sake: Refreshing and slightly effervescent, they pair effortlessly with the spicy heat and sweetness of your sauces, ensuring a well-rounded experience.

Elevate your next gathering with these delicious pairings, and watch as your guests savor every moment!

Make Ahead Options

These trio of Asian dipping sauces are a fantastic option for meal prep, allowing you to streamline your cooking process on busy days. You can prepare all three sauces up to 3 days in advance. Simply follow the recipe instructions, then store each sauce in tightly sealed containers in the refrigerator to maintain their vibrant flavors. This ensures they stay just as delicious and fresh when you’re ready to serve. When you’re set to enjoy these sauces, give them a quick stir to recombine any separated ingredients, and they’re ready to elevate your appetizers in no time. Enjoy the convenience and taste of homemade sauces without the last-minute rush!

Trio of Asian Dipping Sauce Variations

Feel free to explore different flavor profiles and dietary options with these fun and creative variations!

  • Vegan Sweetener: Substitute honey with agave syrup for a delicious vegan-friendly option. You’ll still achieve that perfect sweetness!

  • Nut Butter Swap: Use almond or cashew butter in the peanut sauce instead of peanut butter. This twist introduces new flavors that complement the savory notes beautifully.

  • Flavored Soy Sauce: Experiment with mushroom or tamari soy sauces for unique tastes in your dipping sauces. These variations can transform the umami depth you achieve.

  • Extra Spice: Add a sprinkle of crushed red pepper flakes to your spicy soy sauce for added heat if you’re feeling adventurous!

  • Citrus Zing: Incorporate a squeeze of fresh lime or lemon juice into the honey sesame sauce for a citrusy brightness. The acidity makes it even more refreshing!

  • Sweet and Spicy: Mix in a bit of chili paste with your honey sesame sauce for a delightful kick that balances the sweetness beautifully.

  • Herbaceous Twist: Try adding fresh herbs like cilantro or mint to any of the sauces for a fresh, garden-inspired flavor. Pair it with Asian Inspired Cabbage for added freshness!

  • Ginger Boost: Enhance the ginger flavor in the honey sesame sauce with a bit of minced candied ginger. It’ll add a wonderful sweet heat that dances on your palate.

These variations let you customize the flavors to suit your mood and dietary needs, ensuring every gathering is a hit!

How to Store and Freeze Trio of Asian Dipping Sauces

Fridge: Keep your trio of Asian dipping sauces in airtight containers for up to 5 days. This ensures maximum freshness and flavor retention.

Freezer: For longer storage, pour the sauces into ice cube trays, freeze until solid, and then transfer to freezer bags or containers for up to 3 months.

Reheating: Thaw in the fridge overnight or use a microwave for quick defrosting. Give the sauces a good stir after thawing, as separation may occur.

Room Temperature: These sauces are best served chilled, so avoid leaving them out at room temperature for more than 2 hours to ensure food safety.

Trio of Asian Dipping Sauces Recipe FAQs

What type of honey is best for making the Honey Sesame Sauce?
Absolutely! I recommend using a high-quality, light or clover honey for the best flavor in your Honey Sesame Sauce. The lighter honey will enhance the sauce’s sweetness without overpowering the other ingredients. If you’re looking for a vegan option, maple syrup works wonderfully as a substitute while still providing that sweet touch.

How long can I store these sauces in the refrigerator?
Very! The trio of Asian dipping sauces can be stored in airtight containers in the refrigerator for up to 5 days. This keeps them fresh and flavorful. Just remember to give them a good stir before serving, as separation can occur.

Can I freeze these sauces for later use?
Yes, definitely! To freeze the sauces, pour them into ice cube trays and freeze until solid. After that, transfer them to freezer bags or containers. They can be kept in the freezer for up to 3 months. When ready to use, thaw them overnight in the fridge.

What if my spicy soy sauce ends up too spicy?
If your spicy soy sauce turns out too hot, don’t worry! Simply add more soy sauce and a touch of honey to help balance the heat. You can also incorporate a bit of water to dilute it, along with additional chopped scallions to enhance the flavor without adding more spice.

Are these dipping sauces suitable for people with dietary restrictions?
Absolutely! For those with gluten sensitivities, simply opt for gluten-free soy sauce in the recipes. Also, if you’re catering to vegans, replace honey with agave syrup in both the Honey Sesame and Spicy Soy sauces. It’s essential to check ingredient labels for allergens, but these sauces are quite versatile!

How can I customize the flavors of these sauces?
The more the merrier! Feel free to experiment with your sauces. For different flavor dimensions, try using flavored soy sauces like mushroom or tamari. You can swap out peanut butter for almond butter in the Peanut Sauce, or add a dash of rice vinegar for a tangy twist. These substitutions can open up a whole new world of taste!

Trio of Asian Dipping Sauces

Trio of Asian Dipping Sauces to Elevate Your Appetizers

A delicious Trio of Asian Dipping Sauces to elevate your appetizers with bold flavors and quick preparation.
Prep Time 30 minutes
Total Time 30 minutes
Servings: 6 dips
Course: Other
Cuisine: Asian
Calories: 80

Ingredients
  

Honey Sesame Sauce
  • 1/4 cup Honey Substitute with maple syrup for a vegan option.
  • 1 tablespoon Sesame Oil Use olive oil if sesame oil isn't available.
  • 2 tablespoons Rice Wine Vinegar White wine vinegar can work as a substitute.
  • 2 tablespoons Low-Sodium Soy Sauce Gluten-free soy sauce is great for gluten-sensitive diets.
  • 1 teaspoon Fresh Ginger (grated) Ground ginger can be a quick alternative.
Spicy Soy Sauce
  • 1/3 cup Low-Sodium Soy Sauce Experiment with flavored soy sauces for unique tastes.
  • 1-2 tablespoons Chili Sauce Adjust the amount for your preferred spice level.
  • 1 tablespoon Honey You can swap it out for agave syrup if desired.
Savory Peanut Sauce
  • 1/4 cup Peanut Butter (smooth or chunky) Almond butter makes a good substitution.
  • 1/4 cup Hoisin Sauce Omit if unavailable for a milder flavor.
  • 2 tablespoons Low-Sodium Soy Sauce Replace with tamari for a gluten-free option.
  • 2-3 tablespoons Warm Water Adjusts the consistency; add gradually.

Equipment

  • Medium bowl
  • Small bowl
  • whisk

Method
 

Honey Sesame Sauce
  1. In a medium bowl, whisk together honey, sesame oil, rice wine vinegar, and low-sodium soy sauce until smooth.
  2. Stir in grated ginger and set aside.
Spicy Soy Sauce
  1. In a small bowl, blend low-sodium soy sauce, chili sauce, and honey until well combined.
  2. Top the mixture with chopped scallions and sesame seeds, set aside.
Savory Peanut Sauce
  1. In a clean bowl, combine hoisin sauce, peanut butter, and low-sodium soy sauce.
  2. Gradually add warm water, mixing until desired consistency.
  3. Garnish with chopped peanuts if desired.
Serving
  1. Arrange your three sauces into small serving dishes.
  2. Serve with an assortment of spring rolls, dumplings, or crisp vegetables.

Notes

Store in airtight containers in the fridge for up to 5 days. For longer storage, freeze in ice cube trays for up to 3 months.

Pistachio Cranberry Wreath Cookies to Brighten Your Holidays

As I unwrapped the last of the festive decorations, a flurry of inspiration hit me. The delightful sight of colorful garlands reminded me that it was time for some holiday baking! Enter the Pistachio Cranberry Wreath Cookies—a mesmerizing treat that combines the nutty crunch of pistachios with the zing of tangy cranberries. Not only are these festive cookies a visual showstopper, shaped whimsically like wreaths and dusted lightly with powdered sugar, but they’re also incredibly easy to whip up. Perfect for cookie exchanges or sharing with loved ones, these treats bring a wholesome warmth to any holiday gathering. Are you curious about how to make these delightful cookies that will fill your home with the spirit of the season? Let’s dive into this scrumptious recipe!

Why Are Pistachio Cranberry Wreath Cookies a Must-Try?

Unique Presentation: The whimsical wreath shape makes these cookies a stunning centerpiece for any festive gathering.
Bursting with Flavor: The combination of earthy pistachios and tangy cranberries provides a delightful contrast that will keep taste buds dancing.
Quick and Easy: With simple ingredients and straightforward steps, you can have these festive treats in no time!
Versatile Treat: Great for cookie exchanges, holiday gifting, or simply enjoying during cozy evenings at home. Try pairing them with a warm cup of tea alongside our German Style Cookies for a delightful treat!
Beautifully Snow-Dusted: A light dusting of powdered sugar not only enhances the visual appeal but evokes the winter wonderland spirit.

Pistachio Cranberry Wreath Cookies Ingredients

• Get ready to create magic with these festive flavors!

For the Cookies

  • Butter – Provides richness and a tender crumb; ensure it’s at room temperature for easy creaming.
  • Granulated Sugar – Sweetens the cookies and aids in browning; can substitute with brown sugar for a deeper flavor.
  • Egg – Binds ingredients together and contributes moisture; substitute with a flaxseed egg for vegans.
  • All-Purpose Flour – The structural base for the cookies; can be swapped with gluten-free flour for a gluten-free option.
  • Pistachios – Adds nutty flavor and crunch; substitute with almonds or walnuts if preferred.
  • Dried Cranberries – Provides sweetness and tartness; can use dried cherries or raisins as alternatives.
  • Vanilla Extract – Enhances the flavor profile; no substitute—use pure vanilla for best results.

For the Topping

  • Powdered Sugar – Used for dusting to create a snowy appearance; can omit if desired but highly recommended for that festive look!

Get your ingredients ready and let’s make some memories with these delicious Pistachio Cranberry Wreath Cookies!

Step‑by‑Step Instructions for Pistachio Cranberry Wreath Cookies

Step 1: Preheat the Oven
Begin by preheating your oven to 350°F (175°C). This crucial step ensures that your Pistachio Cranberry Wreath Cookies bake evenly. While the oven heats, line a baking sheet with parchment paper to prevent sticking and prepare for the cookie dough.

Step 2: Cream the Butter and Sugar
In a large mixing bowl, cream together 1 cup of softened butter and 1 cup of granulated sugar. Use an electric mixer on medium speed for about 3-4 minutes, until the mixture becomes light and fluffy. This step is important as it incorporates air into the dough, leading to a tender texture in your cookies.

Step 3: Incorporate Egg and Vanilla
Next, add 1 large egg and 1 teaspoon of vanilla extract to the creamed butter and sugar. Beat the mixture on low speed until fully combined, about 1 minute. You’ll know it’s ready when the batter is smooth and homogeneous, infusing your Pistachio Cranberry Wreath Cookies with a delightful flavor.

Step 4: Add the Dry Ingredients
Gradually mix in 2 cups of all-purpose flour with a spatula or wooden spoon until a dough begins to form. Aim for a smooth texture; the dough should come together without any dry flour remaining, which usually takes about 2-3 minutes of gentle mixing. This foundation is what gives your cookies that delightful crumb.

Step 5: Fold in the Nuts and Cranberries
Gently fold in 1 cup of chopped pistachios and 1 cup of dried cranberries into the cookie dough using a spatula. Make sure they are evenly distributed throughout the dough for a burst of flavor in every bite. You’ll know it’s well mixed when the pistachios and cranberries are visible throughout the batter.

Step 6: Shape the Cookies
Using your hands, take small portions of dough and form them into wreath shapes on the prepared baking sheet. Aim for about 2 inches in diameter, ensuring they are spaced at least 1 inch apart for even baking. This whimsical shape will create the playful appearance of your Pistachio Cranberry Wreath Cookies.

Step 7: Bake the Cookies
Place the baking sheet in the preheated oven and bake for 10-12 minutes, or until the edges are slightly golden and the centers are set but still soft. Keep an eye on them to avoid overbaking; they should look slightly underdone for the best texture.

Step 8: Cool and Dust with Sugar
Once baked, remove the cookies from the oven and allow them to cool on the baking sheet for about 5 minutes. Then transfer them to a wire rack to cool completely. Once cooled, lightly dust the tops with powdered sugar to create a snowy effect, enhancing their festive appearance before serving.
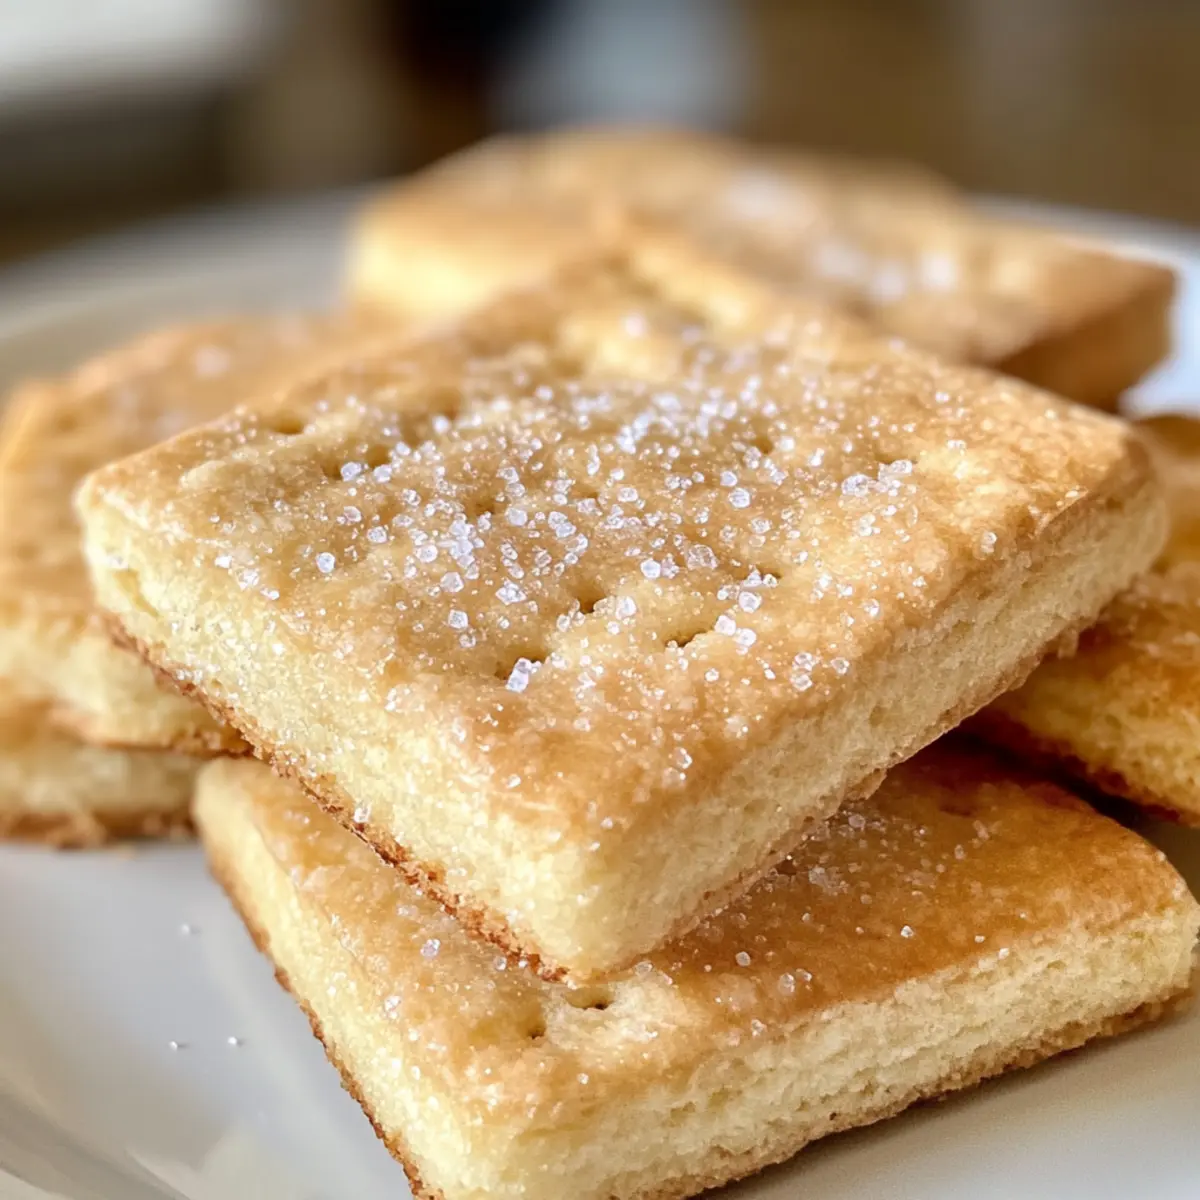
How to Store and Freeze Pistachio Cranberry Wreath Cookies

Room Temperature: Keep cookies in an airtight container at room temperature for up to one week to maintain their delicious softness and flavor.

Fridge: If you want to extend freshness slightly, store the cookies in the fridge; however, they will lose some tenderness. Consume within 10 days for best quality.

Freezer: For longer storage, freeze the cookies in an airtight container or freezer bag for up to three months. Thaw overnight in the fridge when ready to enjoy again.

Reheating: To warm up frozen cookies, bake them at 350°F (175°C) for about 5-7 minutes. This revives their softness and brings back those delightful flavors!

What to Serve with Pistachio Cranberry Wreath Cookies

Pair these enchanting cookies with delightful sides that enhance their festive spirit and taste.

  • Hot Cocoa: A warm mug of rich hot cocoa creates the perfect cozy pairing, making each bite of cookie feel like a hug.

  • Red Wine: The subtle sweetness of a light red wine, like a Pinot Noir, complements the tartness of cranberries beautifully, adding depth to your dessert experience.

  • Cheese Platter: A mix of soft cheeses, like brie or goat cheese, provides a creamy contrast to the crunchy cookies, enhancing flavors and textures.

  • Fruit Salad: A refreshing fruit salad with pomegranates, oranges, and mint brightens the palate, lifting the richness of the cookies while adding a splash of color to your table.

  • Coffee: Pairing these cookies with a strong cup of freshly brewed coffee or espresso turns them into a delightful afternoon snack, intensifying their flavors expertly.

  • Nutty Ice Cream: A scoop of pistachio or vanilla ice cream with a sprinkling of chopped nuts adds creamy goodness that echoes the cookies’ delectable flavors.

  • Chai Tea: The warm spices in chai, like cardamom and cinnamon, create a comforting atmosphere, beautifully complementing the festive notes of the cookies.

  • Shortbread: For a classic touch, serve alongside buttery shortbread cookies for a double dose of holiday indulgence, perfect for sharing with friends and family.

Expert Tips for Pistachio Cranberry Wreath Cookies

  • Room Temperature Butter: Ensure your butter is at room temperature for easy creaming, which helps create the perfect texture in your Pistachio Cranberry Wreath Cookies.

  • Avoid Overbaking: Keep a close watch on your cookies as they bake. They should be set in the center but still soft to ensure a delightful texture.

  • Store Properly: To maintain freshness, keep your cookies in an airtight container at room temperature. They’ll stay delicious for up to a week!

  • Chop with Care: For varied texture, finely chop pistachios for a more delicate bite or leave them coarser for a satisfying crunch.

  • Experiment with Flavors: Don’t hesitate to get creative! Add orange zest or substitute dark chocolate chips to switch up the traditional flavor of your Pistachio Cranberry Wreath Cookies.

Pistachio Cranberry Wreath Cookies Variations

Feel free to get creative and tailor these delightful cookies to your taste and preferences!

  • Dark Chocolate Delight: Swap out dried cranberries for dark chocolate chips for a sweeter, decadent version that adds rich flavor.

  • Citrus Zest Boost: Add a teaspoon of orange or lemon zest to the dough for a bright, refreshing twist that enhances the festive spirit.

  • Vegan Version: Replace regular butter with coconut oil and the egg with a flaxseed egg for a delicious vegan alternative, perfect for everyone to enjoy.

  • Nutty Substitutions: For a different nutty flavor, use chopped almonds or walnuts in place of pistachios to switch things up while keeping the crunch.

  • Spiced Cookies: Incorporate 1/2 teaspoon of ground cardamom or cinnamon into the dough for a warming spice that beautifully complements the sweetness of the cranberries.

  • Chewy Cranberries: Soak dried cranberries in warm water or orange juice for a few minutes before folding them into the dough; this will give them a plumper, juicier texture.

  • Texture Twist: Add a cup of rolled oats to the dough for extra chewiness and a wholesome feel, making these treats even heartier.

  • Sweeten the Presentation: For a festive visual flair, dip the finished cookies half into melted white chocolate and sprinkle with crushed pistachios for a delightful contrast.

Whichever variation you decide to try, you can’t go wrong with these lovely cookies! And if you’re looking for more delectable cookie recipes, check out our Chocolate Date Cookies or Nutty Apricot Cookies for delicious inspirations.

Make Ahead Options

These Pistachio Cranberry Wreath Cookies are a fantastic choice for busy home cooks who want to save time during the holiday rush! You can prepare the dough up to 24 hours in advance—just wrap it tightly in plastic wrap and refrigerate it. This will help the flavors meld beautifully. Alternatively, you can shape the cookies and freeze them for up to 3 months. When you’re ready to bake, simply place the frozen wreaths on a baking sheet (no need to thaw!) and add an extra minute or two to the baking time. This way, you’ll have these delightful cookies fresh and ready to enjoy with minimal effort.

Pistachio Cranberry Wreath Cookies Recipe FAQs

How do I choose ripe ingredients for my Pistachio Cranberry Wreath Cookies?
Absolutely! For the best flavor, ensure your dried cranberries are plump and shiny, as these indicate freshness. Opt for raw or lightly salted pistachios with no dark spots or a rancid odor. Both ingredients contribute significantly to the cookie’s flavor profile, so quality matters!

How should I store my cookies, and how long will they last?
To keep your Pistachio Cranberry Wreath Cookies fresh, store them in an airtight container at room temperature for up to one week. This will maintain their delightful softness and flavor. If you decide to keep them in the fridge, consume within 10 days for optimal quality.

Can I freeze leftover cookies, and if so, how?
Absolutely! To freeze your Pistachio Cranberry Wreath Cookies, place them in an airtight container or a heavy-duty freezer bag, layering parchment paper between cookies if necessary to prevent sticking. They can be frozen for up to three months. When you’re ready to enjoy them, simply thaw overnight in the fridge, then warm in the oven at 350°F (175°C) for about 5–7 minutes for that fresh-baked feel!

What should I do if my cookies turn out too dry?
Very commonly, overmixing the cookie dough or baking them a minute too long can lead to dryness. Make sure to cream the butter and sugar just until fluffy and watch the cookies closely while baking—remove them when they look slightly underbaked! If you find them dry, consider serving with a scoop of ice cream or a drizzle of warm chocolate sauce for extra moisture.

Are these cookies suitable for those with allergies or dietary restrictions?
Yes, you have options! To make your Pistachio Cranberry Wreath Cookies vegan, substitute the egg with a flaxseed egg (1 tablespoon of ground flaxseed mixed with 2.5 tablespoons of water, let sit for 5 minutes before using) and replace butter with coconut oil or a vegan butter alternative. Always check for allergies related to nuts, as they may pose a risk for some individuals.

Can pets eat any of the ingredients?
Although the cookies contain ingredients primarily safe for humans, keep them away from pets! Ingredients like sugar, especially in large quantities, can be harmful. Additionally, nuts can sometimes cause digestive issues for dogs. It’s always best to enjoy these delicious Pistachio Cranberry Wreath Cookies yourself and share your treats with friends and family instead.

Pistachio Cranberry Wreath Cookies

Pistachio Cranberry Wreath Cookies to Brighten Your Holidays

Pistachio Cranberry Wreath Cookies are a delightful treat that combines nutty pistachios and tangy cranberries, perfect for holiday gatherings.
Prep Time 20 minutes
Cook Time 12 minutes
Cooling Time 5 minutes
Total Time 37 minutes
Servings: 24 cookies
Course: Dessert
Cuisine: American
Calories: 150

Ingredients
  

For the Cookies
  • 1 cup Butter softened, at room temperature
  • 1 cup Granulated Sugar can substitute with brown sugar
  • 1 large Egg can substitute with a flaxseed egg for vegans
  • 2 cups All-Purpose Flour can be swapped with gluten-free flour
  • 1 cup Pistachios chopped, can substitute with almonds or walnuts
  • 1 cup Dried Cranberries can use dried cherries or raisins
  • 1 teaspoon Vanilla Extract use pure vanilla for best results
For the Topping
  • 1 cup Powdered Sugar for dusting, can omit if desired

Equipment

  • mixing bowl
  • electric mixer
  • baking sheet
  • parchment paper
  • Wire rack

Method
 

Step-by-Step Instructions
  1. Preheat your oven to 350°F (175°C) and line a baking sheet with parchment paper.
  2. Cream together 1 cup of softened butter and 1 cup of granulated sugar in a large mixing bowl for about 3-4 minutes.
  3. Add 1 large egg and 1 teaspoon of vanilla extract, then beat on low speed until fully combined.
  4. Gradually mix in 2 cups of all-purpose flour until a dough forms without any dry flour remaining.
  5. Fold in 1 cup of chopped pistachios and 1 cup of dried cranberries into the dough.
  6. Shape the dough into wreath shapes on the prepared baking sheet, about 2 inches in diameter, spaced 1 inch apart.
  7. Bake for 10-12 minutes or until the edges are golden and centers are soft; avoid overbaking.
  8. Cool on the baking sheet for about 5 minutes, then transfer to a wire rack and dust with powdered sugar.

Notes

Ensure butter is at room temperature for easy creaming. Store cookies in an airtight container to maintain freshness.

Decadent Chocolate Orange Cookies to Brighten Your Day

I once stumbled upon a delightful bakery hidden in a bustling city street, where the air was thick with the enticing scent of freshly baked treats. Among the many confections, the Chocolate Orange Cookies instantly caught my eye, a simple but luxurious treat that married the richness of chocolate with a burst of vibrant citrus. Today, I’m excited to share my version of these Rich Chocolate Orange Cookies, which are easy to whip up and perfect for impressing friends or indulging in a cozy night in. Not only do they offer a delightful fudgy texture, but their zesty orange undertones make them a unique crowd-pleaser that’s sure to elevate your cookie game. Are you ready to fill your kitchen with irresistible aromas? Let’s get baking!

Why Are Chocolate Orange Cookies Amazing?

Irresistible Combination: The fusion of rich chocolate and bright orange zest delivers a taste sensation that will have your taste buds dancing.

Easy to Make: With a simple preparation process, even novice bakers can create these gourmet treats from the comfort of their kitchen.

Versatile Options: Want to switch things up? Try adding Nutty Apricot Cookies or using white chocolate for a sweeter alternative!

Perfect for Sharing: These cookies are not just a treat for you; they make wonderful gifts for friends and family, ensuring you spread the joy of homemade goodness.

Crowd-Pleasing Delight: Their unique flavor profile makes them a hit at gatherings, coffee dates, or cozy nights in with a Coconut Chocolate Roll.

Chocolate Orange Cookie Ingredients

For the Cookie Dough
All-purpose flour – Provides structure; can substitute with gluten-free flour for a gluten-free version.
Natural unsweetened cocoa powder – Adds rich chocolate flavor; avoid Dutch-processed cocoa to ensure proper rising.
Baking soda – Acts as a leavening agent, essential for a delightful texture.
Ground cardamom (optional) – Adds a unique flavor note; skip if unavailable.
Salt – Enhances all flavors; a key ingredient for balance.
Granulated sugar – Contributes sweetness; adjust according to your taste.
Light brown sugar – Adds moisture and chewiness; can swap for more granulated sugar if needed.
Orange zest – Provides fresh citrus flavor; finely grated for best results.
Unsalted butter – Adds richness; ensure it’s at room temperature for optimal mixing.
Pure vanilla extract – Enhances flavor complexity; opt for pure for the best taste.
Large egg – Binds ingredients together; best if at room temperature.
Semi-sweet chocolate chips – Contributes pockets of chocolatey goodness; can substitute with dark or milk chocolate depending on preference.

For the Topping
Sugared orange zest (optional) – Adds a lovely decorative finish; mix zest with sugar for best results.

These Chocolate Orange Cookies are a delightful treat that will surely brighten your day!

Step‑by‑Step Instructions for Chocolate Orange Cookies

Step 1: Prepare the Dry Ingredients
In a medium bowl, whisk together 1 ½ cups of all-purpose flour, ½ cup of natural unsweetened cocoa powder, 1 tsp of baking soda, and a pinch of salt until well combined. If using ground cardamom, add it in at this stage. Set this dry mixture aside to ensure even distribution when combined with the wet ingredients later.

Step 2: Combine Sugars and Orange Zest
In a large mixing bowl, place ¾ cup of granulated sugar and the zest of one orange. Use your fingers to rub the sugar and zest together for about 1-2 minutes, allowing the bright oils from the zest to infuse into the sugar, creating a fragrant blend that enhances your Chocolate Orange Cookies.

Step 3: Cream Butter and Add Eggs
Add ½ cup of room-temperature unsalted butter and 1 tsp of pure vanilla extract to the sugar-orange mixture. Beat this combination with an electric mixer on medium speed for 2-3 minutes, or until light and creamy. Next, crack in one large egg and continue mixing until well incorporated, creating a smooth batter that envelops the delightful citrus fragrance.

Step 4: Incorporate Dry Ingredients
Gradually fold in the reserved dry ingredient mixture from Step 1, mixing gently until just combined. Be careful not to overmix, as you want the dough to remain tender and ready for the rich chocolate chips. This step helps to maintain the fudgy texture of your Chocolate Orange Cookies.

Step 5: Add Chocolate Chips
Carefully fold in 1 cup of semi-sweet chocolate chips using a spatula, ensuring they are evenly distributed throughout the cookie dough. This allows for delightful pockets of melty chocolate in every bite. Cover the bowl with plastic wrap or a lid and refrigerate the dough for at least 1 hour, or up to 2 days, to enhance the flavors and texture.

Step 6: Preheat the Oven
About 10 minutes before you’re ready to bake, preheat your oven to 350°F (180°C). Prepare a baking sheet by lining it with parchment paper, creating a non-stick surface that helps your Chocolate Orange Cookies bake evenly without sticking.

Step 7: Shape the Cookies
Scoop out approximately 1.5 tablespoons of chilled cookie dough and roll it into a ball. Place these dough balls about 2 inches apart on the prepared baking sheet. This spacing is crucial to allow the cookies to spread as they bake, maintaining their ideal shape and texture.

Step 8: Bake the Cookies
Slide the baking sheet into the preheated oven and bake for about 10 minutes. Keep an eye on them— the edges should be set while the centers remain soft. Remember, the cookies will continue to firm up once removed from the oven, ensuring that delightful fudginess.

Step 9: Add Finishing Touches
Once baked, allow the Chocolate Orange Cookies to cool on the baking sheet for a few minutes before transferring them to a wire rack. As they cool, top them with optional sugared orange zest for an extra burst of flavor and visual appeal, bringing the heavenly aroma of chocolate and citrus right to your kitchen!

Expert Tips for Chocolate Orange Cookies

  • Butter Temperature: Ensure your unsalted butter is at room temperature to create a light and creamy batter, which is essential for perfect texture.

  • Cocoa Powder Choice: Always use natural unsweetened cocoa powder for the best results; Dutch-processed cocoa can hinder cookie rise and texture.

  • Chill the Dough: Don’t skip chilling the dough for at least an hour; this step enhances flavor and helps maintain the chewy texture of your Chocolate Orange Cookies.

  • Baking Timing: Keep an eye on the baking time; remove cookies from the oven when edges are set but centers are still soft for that ideal fudgy finish.

  • Storage Tips: Store finished cookies in an airtight container at room temperature for up to a week. For longer storage, freeze cookie dough or baked cookies to retain freshness.

What to Serve with Rich Chocolate Orange Cookies?

Transform your cookie experience into a delightful meal by pairing them with these mouthwatering options that balance flavors and textures.

  • Creamy Vanilla Ice Cream: The cool, smooth texture of ice cream contrasts beautifully with warm cookies, enhancing their rich chocolate flavor.
  • Fresh Fruit Salad: A vibrant mix of berries and citrus fruits adds a refreshing touch, cutting the sweetness and introducing a lightness that’s simply irresistible.
  • Rich Hot Chocolate: Embrace the chocolate theme by serving these cookies with a mug of rich hot cocoa, perfect for dipping and savoring!
  • Nutty Granola: A crunchy and wholesome granola sprinkled on top of yogurt makes for an enjoyable crunch that pairs excellently with the fudgy cookies.
  • Spicy Chai Latte: The warm spices of chai create a comforting pairing with the cookies, enhancing the orange notes with cinnamon, clove, and ginger.
  • Chocolate-Dipped Strawberries: Indulge in double chocolate heaven by coupling these cookies with luscious, chocolate-dipped strawberries that beautifully elevate your dessert experience.
  • Zesty Lemonade: The tangy sweetness of lemonade can refresh your palate and harmonizes wonderfully with the orange notes in the cookies—perfect for sunny days!
  • Caramel Sauce: Drizzle warm caramel over your cookie or serve it on the side for luscious dunking; the sweet buttery flavor complements the richness brilliantly.
  • Coffee or Espresso: Sip on a fresh cup of coffee or a shot of espresso; their bold flavors balance the sweetness of the cookies and create a delightful afternoon pick-me-up.
  • Orange Sorbet: For a light, refreshing dessert, orange sorbet mirrors the cookie’s citrus notes and cleanses the palate, making every bite feel new and exciting.

How to Store and Freeze Chocolate Orange Cookies

Room Temperature: Keep your chocolate orange cookies in an airtight container at room temperature for up to one week to maintain their freshness and chewy texture.

Fridge: For extended freshness, you can store them in the fridge for up to two weeks; just remember to let them come to room temperature before enjoying for the best flavor.

Freezer: Freeze the cookie dough formed into balls for up to three months. Bake directly from frozen, adding a couple of extra minutes to the baking time.

Reheating: To revive leftovers, warm the cookies in the microwave for about 10-15 seconds or in the oven at 350°F (180°C) for a few minutes until just heated through.

Make Ahead Options

These decadent Chocolate Orange Cookies are perfect for busy home cooks looking to save time! You can prepare the cookie dough and refrigerate it for up to 2 days. Simply follow the first five steps of the recipe, then cover the dough tightly and chill in the fridge. If you need to make them even further in advance, scoop the dough into balls and freeze (up to 3 months). When ready to bake, there’s no need to thaw; simply place them on a baking sheet and bake straight from the freezer, adding an extra minute or two to the baking time. This way, your cookies will be just as delicious as when freshly made, while saving you precious time during your busy week!

Chocolate Orange Cookies Variations

Now’s your chance to put your own spin on these delightful cookies and create a batch that’s uniquely yours!

  • Gluten-Free: Substitute all-purpose flour with a 1:1 gluten-free blend for a deliciously inclusive treat. You’ll still enjoy the delightful chocolate and citrus burst in every bite.

  • White Chocolate: Swap semi-sweet chocolate chips for white chocolate chips for a sweeter, creamier experience. The brightness of the orange zest pairs beautifully with the sweetness of the white chocolate!

  • Candied Citrus Twist: Incorporate finely chopped candied orange peel into the dough for extra bursts of citrusy sweetness. It adds a wonderful chewy texture that complements the cookies perfectly.

  • Nutty Delight: Add ½ cup of chopped walnuts or pecans for added crunch and richness. They provide a delightful contrast to the gooey chocolate goodness.

  • Almond Extract: Use almond extract instead of vanilla for a nutty flavor twist. This subtle change enriches the overall cookie experience while enhancing the chocolate and orange flavors.

  • Spicy Kick: Add a pinch of cayenne pepper or cinnamon to the dry ingredients for a warm, spicy surprise. The heat will lift the flavor profile, making these cookies even more exciting.

  • Decadent Filling: For a gooey center, place a small piece of chocolate between two dough balls before baking. This hidden chocolate surprise will take these cookies to another level of indulgence!

For even more delicious inspirations, consider making Nutty Apricot Cookies or exploring delightful treats like Coconut Chocolate Rolls. Your cookie adventure awaits!

Chocolate Orange Cookies Recipe FAQs

How do I choose the best oranges for zesting?
Absolutely! Look for oranges that are slightly firm to the touch and have vibrant, smooth skin. Avoid any with dark spots or blemishes, as they may indicate overripeness. For the best flavor, choose organic oranges if possible, as they are less likely to have wax or pesticides on the skin.

How should I store leftover Chocolate Orange Cookies?
To maintain their deliciousness, store your Chocolate Orange Cookies in an airtight container at room temperature for up to one week. If you’re looking to prolong their freshness, you can place them in the fridge for up to two weeks, just make sure to let them come back to room temperature before enjoying.

Can I freeze Chocolate Orange Cookies?
Absolutely! You can freeze the cookie dough formed into balls for up to three months. To do this, arrange the dough balls on a baking sheet and freeze them until solid. Once frozen, transfer the dough balls to a zip-top bag. When you’re ready to bake, simply preheat your oven and bake directly from frozen, adding a couple of extra minutes to the baking time.

What should I do if my cookies are too dry?
If your Chocolate Orange Cookies turn out dry, it might be due to overmixing the dough or too much flour. To prevent this, always spoon flour into your measuring cup, leveling it off without packing it down. If you’re in a pinch, you can also add a tablespoon of milk to the dry dough to help moisten it!

Are these cookies safe for someone with nut allergies?
Yes! The base recipe for Chocolate Orange Cookies does not include any nuts, making them a great option for those with nut allergies. However, always double-check the labels on your chocolate chips and other ingredients to ensure they haven’t been processed in facilities that handle nuts.

Can I substitute ingredients for dietary restrictions?
Very! To make these cookies gluten-free, simply substitute all-purpose flour with a 1:1 gluten-free flour blend. If you have dairy restrictions, you can replace unsalted butter with a non-dairy alternative like coconut oil or a vegan butter substitute. For a sugar-free version, experiment with sugar substitutes that measure 1:1 for granulated sugar.

Chocolate Orange Cookies

Decadent Chocolate Orange Cookies to Brighten Your Day

Delight in these rich Chocolate Orange Cookies, blending chocolate and citrus for a gourmet treat.
Prep Time 30 minutes
Cook Time 10 minutes
Chilling Time 1 hour
Total Time 1 hour 40 minutes
Servings: 24 cookies
Course: Dessert
Cuisine: American
Calories: 150

Ingredients
  

For the Cookie Dough
  • 1.5 cups all-purpose flour Can substitute with gluten-free flour.
  • 0.5 cups natural unsweetened cocoa powder Avoid Dutch-processed for proper rising.
  • 1 tsp baking soda Acts as a leavening agent.
  • 1 tsp ground cardamom Optional, skip if unavailable.
  • 1 pinch salt Enhances all flavors.
  • 0.75 cups granulated sugar Adjust according to your taste.
  • 0.5 cups light brown sugar Can swap for more granulated if needed.
  • 1 zest orange Finely grated for best results.
  • 0.5 cups unsalted butter At room temperature.
  • 1 tsp pure vanilla extract Opt for pure for best taste.
  • 1 large egg Best if at room temperature.
  • 1 cups semi-sweet chocolate chips Can substitute with dark or milk chocolate.
For the Topping
  • 1 zest sugared orange zest Optional, mix zest with sugar.

Equipment

  • mixing bowls
  • electric mixer
  • baking sheet
  • parchment paper

Method
 

Step-by-Step Instructions
  1. Prepare the Dry Ingredients: In a medium bowl, whisk together the flour, cocoa powder, baking soda, and a pinch of salt until well combined.
  2. Combine Sugars and Orange Zest: In a large mixing bowl, rub the granulated sugar with the zest of orange.
  3. Cream Butter and Add Eggs: Beat butter and vanilla with the sugar mixture, then add the egg.
  4. Incorporate Dry Ingredients: Gradually fold in the dry ingredient mixture until just combined.
  5. Add Chocolate Chips: Fold in chocolate chips and refrigerate dough for at least 1 hour.
  6. Preheat the Oven: Preheat your oven to 350°F (180°C) about 10 minutes before baking.
  7. Shape the Cookies: Roll chilled dough into balls and place them on a prepared baking sheet.
  8. Bake the Cookies: Bake for about 10 minutes until edges are set and centers are soft.
  9. Add Finishing Touches: Cool on the baking sheet before adding optional sugared orange zest.

Notes

Store cookies in an airtight container at room temperature for up to one week. For longer storage, freeze dough or baked cookies.

Jam Donut Focaccia: A Sweet Twist for Your Brunch Table

As I pulled the warm, golden-brown Homemade Jam Donut Focaccia from the oven, the aroma instantly whisked me back to my childhood—a cozy kitchen filled with laughter and the promise of sweet delights. This delightful twist on traditional focaccia marries fluffy bread with the nostalgic sweetness of jam-filled donuts, making it the perfect centerpiece for your next brunch gathering. You’ll love how simple it is to prepare with just a handful of pantry staples, allowing you to unleash your creativity with any jam filling you desire. Not only does it deliver nostalgic flavors, but it’s also a crowd-pleaser that will impress everyone around the table. Curious about how to create this indulgent treat for yourself? Let’s dive in!

Why is Jam Donut Focaccia a Must-Try?

Irresistibly Nostalgic: The blend of warm bread and sweet jam will transport you to your fondest brunch memories.

Customizable Delight: Use your favorite jams, from raspberry to apricot, making it versatile for every taste.

Easy to Create: With just a few straightforward steps, this recipe fits into any home cook’s repertoire.

Crowd-Pleasing Treat: Perfect for family gatherings, it promises to delight both kids and adults alike.

Perfect for Sharing: Serve it warm with whipped cream or a scoop of coconut yogurt for an extra indulgent experience.

Make Ahead: Prepare it the night before and enjoy the fresh, warm aroma in the morning, just like in a cozy bakery while you sip coffee or mimosas.

Jam Donut Focaccia Ingredients

For the Dough
Warm Water – Activates the yeast; aim for a temperature between 105-115°F for optimal results.
Sugar – Optional, but enhances yeast activity for a fluffier focaccia.
Active Dry Yeast – Essential for leavening; always check for freshness for best results.
Bread Flour – Gives the focaccia its chewy structure, making each bite satisfying.
All-Purpose Flour – Helps create a light, fluffy texture that complements the sweetness.
Salt – Enhances the overall flavor profile, making each bite deliciously balanced.
Olive Oil – Adds richness and moisture, keeping the bread tender and fresh.

For the Filling
Raspberry Preserves – The primary filling that brings the nostalgic sweetness; feel free to swap with your favorite jam.

For the Glaze
Confectioners’ Sugar – Provides sweetness and a beautiful glossy finish to the focaccia.
Whole Milk – Adjust the glaze consistency; use as needed for a perfect drizzle.

With these simple ingredients in hand, you’re well on your way to crafting an unforgettable Jam Donut Focaccia that’s sure to become a family favorite!

Step‑by‑Step Instructions for Jam Donut Focaccia

Step 1: Prepare Yeast Mixture
In a small bowl, combine 1 cup of warm water (between 105-115°F) with 1 tablespoon of sugar. Sprinkle 2 teaspoons of active dry yeast over the water and let it sit for about 5 minutes until bubbly and frothy, indicating the yeast is activated and ready to work its magic in your delicious Jam Donut Focaccia.

Step 2: Mix Dough
In a stand mixer fitted with a dough hook, combine the yeast mixture with 2 cups of bread flour, 1 cup of all-purpose flour, and 1 teaspoon of salt. Mix on medium speed until a sticky dough forms, about 3-5 minutes. The dough should pull away from the sides of the bowl but remain slightly tacky to the touch, perfect for the next steps of your Jam Donut Focaccia.

Step 3: First Rise
Transfer the dough to a greased bowl, ensuring all sides are coated to prevent sticking. Cover the bowl with a clean kitchen towel and let it rise in a warm, draft-free area for about 1 hour or until it has doubled in size. You’ll know it’s ready when the dough has puffed up beautifully to create a soft and airy texture for your focaccia.

Step 4: Prepare Baking Pan
While the dough is rising, grease a 9×13-inch baking pan with olive oil to prevent sticking. Once the dough has risen, gently punch it down to release any air and transfer it into the prepared pan. Spread the dough evenly with your fingers, allowing it to fill the corners. This ensures a beautiful, fluffy Jam Donut Focaccia.

Step 5: Second Rise
Cover the dough in the baking pan with a slightly damp kitchen towel and allow it to rise again for another hour. This second rise is crucial for achieving the fluffy texture that will make your Jam Donut Focaccia irresistible. You want it to puff up nicely, creating an airy base for your jam.

Step 6: Preheat Oven
About 15 minutes before the second rise is complete, preheat your oven to 425°F (220°C). This ensures your oven is hot and ready, allowing your Jam Donut Focaccia to bake evenly and develop a lovely golden crust once it’s time to bake.

Step 7: Shape and Fill Dough
Once the dough has risen, use your fingers to poke deep holes evenly across the surface. Be generous with the spacing to create pockets for the raspberry preserves. Then, spread the jam of your choice, making sure to fill each hole without overflowing. This step adds a delightful burst of flavor to each bite of your Jam Donut Focaccia.

Step 8: Bake
Carefully place the pan in the preheated oven and bake for 18-22 minutes, or until your Jam Donut Focaccia is golden brown on top and sounds hollow when tapped gently. The delicious aroma will fill your kitchen, tempting everyone to gather around as you wait for that perfect bake.

Step 9: Prepare Glaze
While the focaccia is baking, whisk together 1 cup of confectioners’ sugar with enough whole milk to create a smooth glaze. Aim for a drizzle-able consistency for that perfect finishing touch on your Jam Donut Focaccia that enhances both the flavor and presentation.

Step 10: Serve
Once baked, remove your Jam Donut Focaccia from the oven and let it cool for a few minutes. Drizzle the glaze generously over the top, cut into squares, and serve warm. The contrast of the sweet glaze with the fluffy focaccia and jam filling will make this dish a hit at your brunch table!

Jam Donut Focaccia Variations & Substitutions

Feel free to take this delectable recipe in new directions, enhancing flavors and accommodating dietary preferences!

  • Flavor Twist: Substitute Raspberry Preserves with your choice of jam, such as strawberry or apricot, for a unique taste that sparks joy with every bite.
  • Gluten-Free Option: Use Gluten-Free Flour to create a version everyone can enjoy, ensuring a fluffy texture without the gluten.
  • Vegan Friendly: Replace Whole Milk with Almond Milk or another dairy-free alternative to make your focaccia plant-based without sacrificing flavor.
  • Extra Indulgence: Drizzle with Melted Chocolate instead of the glaze for a rich, dessert-like touch that will surely impress your guests.
  • Spiced Up: Add a sprinkle of Cinnamon or Nutmeg to the dough for an aromatic twist that’ll enhance the overall flavor profile.
  • Fruit Filling: Try adding thinly sliced fresh fruits like Bananas or Peaches along with the jam for a delightful fruity surprise in each mouthful.
  • Nutty Crunch: Fold in some Chopped Nuts such as walnuts or almonds for added texture and a satisfying crunch to your focaccia.
  • Zesty Kick: Mix in a teaspoon of Lemon Zest to your jam filling to add a refreshing zing that balances the sweetness perfectly.

With all these delightful options, you have the power to create a unique version of your Homemade Jam Donut Focaccia that caters to your taste buds. If you need further inspiration, feel free to explore recipes like Sweet Orange Jam that could elevate your jam game! The possibilities are endless!

Expert Tips for Jam Donut Focaccia

Yeast Care: Always check the freshness of your active dry yeast. If it doesn’t bubble after mixing with warm water, it’s best to start over.

Optimal Rising: For a successful rise, place your dough in a warm, draft-free area. If needed, use a slightly warmed oven to encourage rising.

Jam Choice: Choose smooth, high-quality jams for easy filling. Avoid chunky varieties as they can make it harder to achieve that perfect pocket in your Jam Donut Focaccia.

Control the Filling: Be mindful not to overfill the holes with jam. This helps maintain the focaccia’s shape and ensures even baking.

Bake Wisely: Keep an eye on the baking time! Ovens can vary, so check your focaccia around 18 minutes to avoid over-browning.

Enjoy Fresh: While delicious warm, this focaccia is best the day it’s made. Store leftovers in an airtight container at room temperature for up to 2 days.

What to Serve with Jam Donut Focaccia?

Indulging in the warm, sweet layers of this delightful treat paves the way for a beautifully curated brunch experience.

  • Fresh Berries: A burst of juicy sweetness from strawberries or blueberries balances the richness of the focaccia. Their tartness cuts through the sweetness, adding a refreshing twist.

  • Whipped Cream: Light, fluffy whipped cream is the perfect companion to your focaccia, adding a creamy texture. A dollop on the side elevates each bite into a decadent treat.

  • Coconut Yogurt: For a dairy-free option, coconut yogurt adds a tropical twist and a creamy texture that complements the sweet jam focal point beautifully.

  • Iced Coffee: The rich and bold flavors of iced coffee offer a robust contrast to the soft sweetness of the focaccia, making each bite and sip a delightful pairing.

  • Mimosas: Bubbly and refreshing, mimosas add a celebratory touch to your brunch spread. Their citrusy brightness pairs excellently with the warm, sweet notes of the focaccia.

  • Chocolate Drizzle: A quick drizzle of chocolate can add a luxurious layer to the focaccia, enhancing the sweetness and turning it into an indulgent dessert.

  • Powdered Sugar Dusting: A light dusting of powdered sugar over the focaccia enhances its sweetness and visual appeal, making it a feast for both the eyes and taste buds.

Make Ahead Options

These Homemade Jam Donut Focaccia are perfect for meal prep, allowing you to delight in warm, fresh-baked goodness on busy mornings. You can prepare the dough up to 24 hours in advance; just complete steps 1 through 5 and refrigerate the covered dough. When you’re ready to bake, simply let it sit at room temperature for 30 minutes before proceeding with steps 6 through 10. To maintain that delightful fluffy texture and prevent it from drying out, ensure it’s tightly covered during refrigeration. With these make-ahead options, you can savor the deliciousness of Jam Donut Focaccia with minimal morning effort, making brunch a breeze!

How to Store and Freeze Jam Donut Focaccia

Room Temperature: Enjoy your Jam Donut Focaccia fresh for up to 2 days stored in an airtight container at room temperature to maintain its delightful texture.

Freezer: For longer storage, wrap the focaccia tightly in plastic wrap and aluminum foil before placing it in the freezer, where it can last up to 1 month.

Thawing: When ready to enjoy, thaw the frozen focaccia overnight in the fridge, then reheat in a warm oven for a few minutes to restore its fluffy glory.

Reheating: To serve warm, simply pop individual squares in the microwave for about 15-20 seconds, or in the oven at 350°F (175°C) for 5-7 minutes until heated through.

Jam Donut Focaccia Recipe FAQs

How do I know if my yeast is fresh?
To ensure your active dry yeast is fresh, combine it with warm water (between 105-115°F) and a bit of sugar. If it bubbles and froths within 5 minutes, it’s alive and ready to help your dough rise. If there’s no reaction, it’s best to get a new packet.

Can I use any type of jam for the filling?
Absolutely! While raspberry preserves are delightful, feel free to explore other flavors like strawberry, apricot, or even citrus jams. Just make sure they’re smooth to create a perfect filling, avoiding chunky varieties that could disrupt the dough’s texture.

How should I store leftover Jam Donut Focaccia?
Leftovers can be kept at room temperature in an airtight container for up to 2 days. To store for a longer period, wrap the focaccia tightly in plastic wrap and aluminum foil, and freeze it for up to 1 month. This way, you can enjoy this sweet treat even later!

What’s the best way to reheat frozen Jam Donut Focaccia?
To reheat, first, thaw the frozen focaccia overnight in the fridge. When ready to enjoy, preheat your oven to 350°F (175°C) and place the focaccia in for about 5-7 minutes until warmed through. Alternatively, microwave individual squares for 15-20 seconds for a quick treat.

Can I make this recipe gluten-free?
Yes! To adapt this recipe for gluten-free diets, substitute the bread flour and all-purpose flour with a gluten-free flour blend. Just be sure to check the labels for cross-contamination if allergies are a concern, and consider using dairy-free milk for the glaze for a fully dairy-free option.

Jam Donut Focaccia

Jam Donut Focaccia: A Sweet Twist for Your Brunch Table

Enjoy a nostalgic twist on focaccia with a fluffy bread and sweet jam filling in this Jam Donut Focaccia recipe.
Prep Time 30 minutes
Cook Time 22 minutes
Rising Time 2 hours
Total Time 2 hours 52 minutes
Servings: 8 slices
Course: Dessert
Cuisine: Italian
Calories: 220

Ingredients
  

Dough Ingredients
  • 1 cup Warm Water Between 105-115°F
  • 1 tablespoon Sugar Optional
  • 2 teaspoons Active Dry Yeast Check for freshness
  • 2 cups Bread Flour For chewy structure
  • 1 cup All-Purpose Flour For light texture
  • 1 teaspoon Salt Enhances flavor
  • 2 tablespoons Olive Oil Adds richness
Filling Ingredients
  • 1 cup Raspberry Preserves Primary filling
Glaze Ingredients
  • 1 cup Confectioners’ Sugar For sweetness
  • as needed Whole Milk For glaze consistency

Equipment

  • Stand mixer
  • 9x13 inch baking pan
  • Small bowl

Method
 

Preparation Steps
  1. In a small bowl, combine warm water with sugar. Sprinkle active dry yeast over the water and let sit for about 5 minutes.
  2. In a stand mixer, combine the yeast mixture with bread flour, all-purpose flour, and salt. Mix until a sticky dough forms.
  3. Transfer the dough to a greased bowl, cover with a towel, and let rise for about 1 hour until doubled in size.
  4. Grease a 9x13-inch baking pan with olive oil. Punch down the dough and transfer into the prepared pan, spreading it evenly.
  5. Cover the dough with a damp towel and allow it to rise for another hour.
  6. Preheat your oven to 425°F (220°C) about 15 minutes before the second rise is complete.
  7. Poke deep holes in the dough and fill each pocket with raspberry preserves.
  8. Bake for 18-22 minutes until golden brown and hollow-sounding when tapped.
  9. Whisk together confectioners’ sugar with whole milk to create a smooth glaze.
  10. Remove from oven, let cool, drizzle glaze over, cut into squares, and serve warm.

Notes

Store leftovers in an airtight container at room temperature for up to 2 days. For longer storage, freeze wrapped tightly in plastic wrap and aluminum foil for up to 1 month.