Vegan Cheesy Broccoli and Rice for Cozy Nights In

As I stood in my kitchen, the sweet scent of sautéed onions wafted through the air, instantly making me feel at home. It reminded me of simpler times, and now I couldn’t wait to share my favorite recipe: Vegan Cheesy Broccoli and Rice Casserole. This dish is the epitome of healthy comfort food, brimming with vibrant broccoli and a creamy, plant-based cheese sauce that delights everyone at the table. The best part? It’s a one-pot meal that comes together in just 15 minutes, making it perfect for those busy weeknights when you crave something hearty yet wholesome. Whether you’re a seasoned chef or just looking to shake off the fast food fatigue, this casserole is a delicious way to nourish your body and soul. Curious about how this simple recipe will revolutionize your dinner routine? Let’s dive in!

Why Choose Vegan Cheesy Broccoli and Rice?

Simplicity: With just a few ingredients and a quick 15-minute prep time, this dish proves that healthy cooking doesn’t have to be complicated.

Indulgently Creamy: The plant-based cheese sauce delivers a level of creaminess that rivals traditional casseroles, making every bite a comforting delight.

Nutrient-Rich: Packed with broccoli and other veggies, this casserole offers a bounty of vitamins and fiber, making it a guilt-free indulgence.

One-Pot Wonder: No one enjoys a sink full of dishes! This recipe is all made in one pot, saving you time and effort while maximizing flavors.

Crowd-Pleasing Flavor: Even non-vegans will love the savory, cheesy goodness, making it the perfect dish for gatherings or family dinners.

Looking for more comforting, plant-based recipes? Try out our Savory Chicken Cheesy Drumsticks or our delightful Comforting Broccoli and Potato Bake for a delicious twist!

Vegan Cheesy Broccoli and Rice Ingredients

For the Casserole
Broccoli – Adds vibrant color and essential nutrients; cut into even pieces for uniform cooking.
Brown Rice – A hearty base rich in fiber; substitute with white rice if needed, but adjust cooking time.
Yellow Onion – Provides sweetness and depth; shallots can be used for a more delicate flavor.
Potatoes – Creates creaminess in the cheese sauce; use Russet or Yukon Gold for best results.
Carrots – Adds natural sweetness and nutrients; optional, but they enhance the dish’s flavor profile.

For the Cheese Sauce
Cashews – Essential for creaminess; soak for a few hours if using a standard blender to achieve a smooth consistency.
Nutritional Yeast – Delivers a cheesy flavor without dairy; indispensable for that authentic taste.
Dijon Mustard – Introduces a tangy depth to the sauce; yellow mustard works as a milder alternative.
Garlic – Infuses aromatic flavor; fresh or powdered can both be used as a quick option.
Salt & Black Pepper – Enhance the dish’s flavor; adjust to taste for your palate.

Each of these ingredients plays a crucial role in creating the comforting and delicious Vegan Cheesy Broccoli and Rice, just the kind of nutritious meal you’re craving!

Step‑by‑Step Instructions for Vegan Cheesy Broccoli and Rice

Step 1: Cook the Rice
Start by rinsing 1 cup of brown rice under cold water, then cook it according to package instructions, typically about 30-40 minutes. Bring 2 cups of water to a boil, add the rice, reduce to a simmer, cover, and let it cook until tender. Once done, fluff the rice with a fork and set it aside while you prepare the cheese sauce and vegetables for your Vegan Cheesy Broccoli and Rice.

Step 2: Boil the Vegetables
In a large pot, bring 4 cups of water to a rolling boil. Carefully add 1 diced yellow onion, 1 peeled and cubed potato, and 1 chopped carrot. Cook these vegetables for 15-20 minutes until they are completely tender. You’ll know they’re ready when you can easily pierce them with a fork. Drain the water, but keep a little for blending, and move on to creating the creamy cheese sauce.

Step 3: Blend the Cheese Sauce
In a high-powered blender, combine the boiled vegetables with 1 cup of soaked cashews, 1/4 cup of nutritional yeast, 1 tablespoon of Dijon mustard, 2 cloves of garlic, and a pinch of salt and black pepper. Add in 1 cup of the reserved cooking water. Blend until smooth and creamy, ensuring there are no lumps left behind. This rich cheese sauce will bring your Vegan Cheesy Broccoli and Rice to life.

Step 4: Mix in Broccoli and Rice
In the same large pot, add the drained rice and 2 cups of chopped broccoli florets to the blended cheese sauce. Stir everything together until the broccoli is evenly coated and bright green. Cook on low heat for about 5 minutes, allowing the dish to heat through and the flavors to meld. This is the key moment for your Vegan Cheesy Broccoli and Rice to become truly comforting.

Step 5: Serve and Enjoy
Once heated, taste your creamy Vegan Cheesy Broccoli and Rice, then adjust seasonings if necessary, adding additional salt or pepper if desired. Serve this comforting dish warm, garnished as you like, and watch as everyone digs in happily! This makeup of the casserole is not only delicious but also visually captivating with vibrant colors, making it a perfect centerpiece for your mealtime.

Vegan Cheesy Broccoli and Rice Variations

Feel free to explore these delightful twists that can elevate your Vegan Cheesy Broccoli and Rice experience!

  • Creamy and Zesty: Add a splash of lemon juice to the cheese sauce for an extra zing of flavor. It brightens every bite!

  • Dairy-Free Cheese: For a different cheese vibe, try store-bought vegan cheese shreds or cream cheese. It melts beautifully and enhances creaminess.

  • Nut-Free: Swap cashews for silken tofu in the cheese sauce for a creamy texture minus the nuts. Adjust the seasoning to fit your palate.

  • Protein Boost: Incorporate cooked chickpeas or lentils for an added protein punch, supplementing the nutritional value without changing the flavors.

  • Spicy Kick: Mix in diced jalapeños or a sprinkle of cayenne pepper for a fiery touch! The heat contrasts well with the creamy sauce.

  • Herb Garden: Fresh herbs like basil or cilantro can be stirred in right before serving, introducing a fresh herbal note that brightens the dish.

  • Seasonal Veggies: Swap broccoli for seasonal veggies such as asparagus or zucchini, adapting to what you have on hand and keeping the dish vibrant.

For even more comforting options, don’t miss our delicious Zucchini and Potato Fritters with Cheesy Mozzarella or the tasty Everyday Broccoli Patties. Enjoy customizing your meal!

Tips for the Best Vegan Cheesy Broccoli and Rice

  • Veggie Softness: Ensure vegetables are fully tender before blending; undercooked ones can lead to a grainy cheese sauce.

  • Blender Power: Use a high-powered blender for the creamiest results. If you don’t have one, soak cashews longer for smooth blending.

  • Flavor Depth: Adjust seasonings like salt and pepper after mixing; taste as you go to create the perfect Vegan Cheesy Broccoli and Rice experience.

  • Storing Tips: If making ahead, store the cheese sauce separately and refrigerate for up to three days, or freeze for up to three months.

  • Mix & Match: Don’t hesitate to play with veggies—add bell peppers or spinach for additional nutrition and color!

  • Serving Style: This dish can be served alone or paired perfectly with a fresh green salad for a complete meal.

What to Serve with Vegan Cheesy Broccoli and Rice?

Looking to build a delightful, comforting meal around this creamy casserole? Let’s explore some delectable pairings!

  • Crispy Garlic Bread: A classic addition, its crunchy texture and buttery flavor enhance the creamy richness of the casserole beautifully.

  • Simple Green Salad: A refreshing blend of mixed greens adds a light, crisp contrast that balances the warmth of the cheesy dish.

  • Roasted Brussels Sprouts: Their slight bitterness paired with a touch of olive oil creates a mouthwatering depth that complements the flavors of the casserole.

  • Savory Quinoa Pilaf: The nutty flavor of quinoa adds an interesting dimension, providing a wholesome and protein-packed side to amplify the meal.

  • Vegan Coleslaw: Bright and tangy, this crunchy side adds freshness and a delightful crunch that makes every bite of broccoli and rice sing.

  • Herbed Lemon Water: Keep it refreshing with this zesty drink; it’ll cleanse your palate and elevate all the flavors of your comforting meal.

Bring together these elements, and you’ll create a table filled with warmth, comfort, and joy that everyone will cherish!

How to Store and Freeze Vegan Cheesy Broccoli and Rice

Fridge: Store leftovers in an airtight container in the refrigerator for up to 3–4 days to maintain freshness and flavor.

Freezer: For longer storage, freeze portions in glass containers or freezer-safe bags for up to 3 months. Thaw overnight in the fridge before reheating.

Reheating: Gently reheat in a saucepan over low heat, adding a splash of water or vegetable broth to restore creaminess. Stir well until heated through.

Prep Ahead: If you plan to make it ahead, consider storing the cheese sauce separately, allowing you to enjoy this comforting Vegan Cheesy Broccoli and Rice at your convenience.

Make Ahead Options

These Vegan Cheesy Broccoli and Rice Casseroles are a meal prep enthusiast’s dream! You can prepare the cheese sauce and cook the rice up to 3 days in advance. Simply store the cheese sauce in an airtight container in the refrigerator, ensuring it is completely cooled to maintain its creamy texture. When you’re ready to serve, simply reheat the sauce gently on the stove and stir in the cooked broccoli and rice, heating through until bubbling and warm. This thoughtful preparation not only saves you time on busy weeknights but ensures your casserole is just as delicious and satisfying as when fresh!

Vegan Cheesy Broccoli and Rice Recipe FAQs

How do I choose the right broccoli?
Absolutely! When selecting broccoli, look for firm, bright green florets without any dark spots or yellowing, which indicate age. It should feel heavy for its size and have tight buds. For best results, choose heads that are fresh and stored in a cool place.

What’s the best way to store leftovers?
Leftovers can be stored in an airtight container in the refrigerator for up to 3-4 days. Make sure to let it cool completely before sealing it, which helps prevent condensation and keeps your Vegan Cheesy Broccoli and Rice fresh and flavorful.

Can I freeze Vegan Cheesy Broccoli and Rice?
Yes, for longer storage, freeze portions in glass containers or freezer-safe bags for up to 3 months. I recommend labeling the containers with the date. To reheat, thaw overnight in the refrigerator, and gently warm it in a saucepan over low heat, adding a splash of water or vegetable broth for creaminess.

What if my cheese sauce turns grainy?
Not to worry! A grainy texture can happen if the vegetables aren’t cooked thoroughly. Make sure to boil them until they’re completely soft, which usually takes about 15-20 minutes. A high-powered blender also helps achieve that smooth consistency. If you’re using a regular blender, soaking the cashews for at least 4 hours before blending can improve texture.

Is this recipe safe for people with nut allergies?
If you or someone you’re cooking for has a nut allergy, you can substitute the cashews with silken tofu or cooked white beans to achieve creaminess. While this may change the flavor slightly, it still keeps the dish creamy and delicious without the risk.

How do I adjust this recipe for a gluten-free diet?
The good news! This Vegan Cheesy Broccoli and Rice recipe is naturally gluten-free, especially if you use gluten-free rice. Ensure all additional ingredients, particularly Dijon mustard and vegetable broth (if used), also carry a gluten-free label to keep it safe and delicious for everyone.

Vegan Cheesy Broccoli and Rice

Vegan Cheesy Broccoli and Rice for Cozy Nights In

Enjoy a comforting Vegan Cheesy Broccoli and Rice that's quick, healthy, and perfect for busy weeknights.
Prep Time 15 minutes
Cook Time 30 minutes
Total Time 45 minutes
Servings: 4 servings
Course: Dinner
Cuisine: Vegan
Calories: 350

Ingredients
  

For the Casserole
  • 4 cups Water for boiling vegetables
  • 1 cup Brown Rice can substitute with white rice
  • 1 medium Yellow Onion diced
  • 1 medium Potato peeled and cubed
  • 1 medium Carrot optional, chopped
  • 2 cups Broccoli Florets chopped
For the Cheese Sauce
  • 1 cup Cashews soaked for a few hours
  • 1/4 cup Nutritional Yeast
  • 1 tablespoon Dijon Mustard
  • 2 cloves Garlic fresh or powdered
  • to taste Salt
  • to taste Black Pepper

Equipment

  • Large pot
  • High-powered blender

Method
 

Cooking Instructions
  1. Rinse 1 cup of brown rice under cold water and cook it according to package instructions, typically about 30-40 minutes.
  2. In a large pot, bring 4 cups of water to a rolling boil. Add diced yellow onion, peeled and cubed potato, and chopped carrot. Cook for 15-20 minutes until tender.
  3. In a high-powered blender, combine boiled vegetables, soaked cashews, nutritional yeast, Dijon mustard, garlic, and a pinch of salt and black pepper. Add in 1 cup of the reserved cooking water. Blend until smooth.
  4. In the same large pot, add drained rice and chopped broccoli florets to the blended cheese sauce. Stir until evenly coated and cook on low heat for about 5 minutes.
  5. Serve warm, adjusting seasonings if necessary, and enjoy your Vegan Cheesy Broccoli and Rice.

Notes

For best results, ensure vegetables are fully tender before blending and use a high-powered blender for a creamy sauce. If making ahead, store the cheese sauce separately.

5-Minute Mediterranean Bowl for Quick, Fresh Flavor

Every busy week seems to greet us with the same dilemma: how to whip up a nutritious meal in a flash. Enter the 5-Minute Mediterranean Bowl—a delightful creation that transforms ordinary meal times into Mediterranean-inspired feasts in mere moments. This vibrant dish combines fresh, crunchy veggies, protein-packed chickpeas, and the creaminess of hummus, all while being vegan and gluten-free. It’s packed with flavors and textures that are not just satisfying but also a breeze to prepare, making it perfect for those hectic lunch breaks or quick dinners after a long day. Plus, it’s a fantastic option for meal prep, so you can enjoy this healthy delight all week long! Curious to see how you can customize this bowl to suit your taste? Let’s dive into this quick culinary adventure.

Why is This Bowl a Game-Changer?

Quick and Easy: This 5-Minute Mediterranean Bowl is a lifesaver for busy days, meaning you’ll spend less time cooking and more time enjoying!

Fresh Ingredients: With crunchy vegetables and zesty flavors, each bite bursts with freshness that will leave your taste buds dancing.

Endless Variations: Customize with your favorite hummus or even add proteins like chicken for a non-vegan twist. The options are truly limitless!

Healthy and Nutritious: Packed with plant-based protein and fiber, this bowl is not only a satisfying meal but also supports a wellness-focused lifestyle.

Meal Prep Hero: Perfect for pre-prepped lunches or dinners, it stays delicious all week long—just store components separately for optimal freshness.

For more quick meals, check out this Simple Vegan Recipe that you can whip up in no time!

5-Minute Mediterranean Bowl Ingredients

Get ready to create a vibrant feast in just minutes!

For the Salad

  • Cucumber – Adds crunch and hydration; can substitute with zucchini for a different texture.
  • Tomatoes – Provide juiciness and are rich in antioxidants; cherry tomatoes are a tasty alternative.
  • Spring onions – Enhance flavor with a mild taste; red onions can be used for a stronger kick.
  • Parsley – Freshness and vitamin C boost; replace with cilantro for a unique twist.

For the Protein

  • Chickpeas – A hearty source of plant protein and fiber; canned are convenient, while dried require soaking.
  • Quinoa – Adds protein and texture to your bowl; brown rice or couscous are great substitutes.

For the Creaminess

  • Hummus – Provides delightful creaminess and flavor; homemade is fresh, while store-bought saves time.
  • Tzatziki – Offers a cooling touch; use a vegan alternative if desired.

For Assembly

  • Olive oil – Adds richness and depth; about 1 teaspoon is perfect, or try avocado oil.
  • Black pepper – Enhances flavor and aroma; freshly ground ensures the best taste.

Packed with flavor and quick to prepare, this 5-Minute Mediterranean Bowl is a delightful experience waiting to happen!

Step‑by‑Step Instructions for 5-Minute Mediterranean Bowl

Step 1: Prep Salad
Begin by washing and chopping ½ cucumber, 1 medium tomato, 2 spring onions, and a small handful of parsley into bite-sized pieces. Combine these vibrant ingredients in a mixing bowl, then sprinkle with a pinch of salt and drizzle about 1 teaspoon of olive oil. Toss everything gently until well-coated, allowing the colors and flavors to mingle beautifully.

Step 2: Assemble Bowl
In a serving bowl, start layering your 5-Minute Mediterranean Bowl. Begin with the prepared salad base at the bottom, followed by ⅓ cup of drained chickpeas for protein. Then, add 2-3 tablespoons of cooked quinoa for texture. Finally, dollop in 2 generous tablespoons of hummus and 1 teaspoon of tzatziki for that delicious creaminess.

Step 3: Season
To elevate the flavors of your Mediterranean Bowl, finish with a generous sprinkle of freshly ground black pepper. This adds a lovely kick to the dish, enhancing all the fresh ingredient flavors. Serve immediately for a delightful, quick meal that’s packed with nutrients and color, or store the components separately for easy meal prep throughout the week.

What to Serve with 5-Minute Mediterranean Bowl

Elevate your dining experience with harmonious additions that perfectly complement this vibrant and satisfying dish.

  • Whole-Grain Pita:
    A warm, fluffy pita adds a delightful texture, perfect for scooping up the bowl’s creamy elements while enhancing the Mediterranean vibe.

  • Garlic Bread:
    Crispy garlic bread’s buttery flavor offers a savory contrast, creating a wonderful balance with the zesty and fresh components of your bowl.

  • Greek Salad:
    Fresh vegetables with feta cheese provide an aromatic bite, making your meal more colorful and adding a delightful Mediterranean touch.

  • Roasted Vegetable Medley:
    Warm, roasted veggies offer comfort and depth, enriching the overall flavor profile while introducing different textures to each bite.

  • Lemon-Infused Quinoa Salad:
    This tangy side enhances the bowl’s freshness, providing an additional layer of flavor that complements the plant-based ingredients beautifully.

  • Chilled White Wine:
    A crisp, chilled Sauvignon Blanc pairs wonderfully, cutting through the creaminess of the hummus and tzatziki while refreshing your palate.

  • Minted Yogurt Dip:
    A cool, minty yogurt dip brings a luscious creaminess, perfect for drizzling over your bowl and intensifying the Mediterranean essence.

With these delightful pairings, each meal can transform into a fuller experience, bringing warmth and joy to your table!

Expert Tips for the Best 5-Minute Mediterranean Bowl

  • Ingredient Freshness: Use the freshest veggies you can find. This ensures vibrant flavors in your 5-Minute Mediterranean Bowl that truly shine.

  • Chickpea Options: Avoid mushy chickpeas by using drained canned varieties for quick meals or roasting dried ones for added crunch—both work wonders here!

  • Hydration Hint: Keep cucumber on hand to add a refreshing crunch; just remember to slice it right before serving to maintain its crispness.

  • Custom Creaminess: Experiment with various hummus flavors to elevate your bowl—think roasted red pepper or garlic—giving your 5-Minute Mediterranean Bowl a personal touch.

  • Meal Prep Magic: For quick assembly later, prepare components in advance and store them separately. This prevents sogginess, keeping your meal fresh and delicious throughout the week.

Make Ahead Options

This 5-Minute Mediterranean Bowl is a fantastic choice for meal prep, saving you time during your busy week. You can chop the cucumber, tomatoes, spring onions, and parsley up to 24 hours in advance; just store them in an airtight container in the refrigerator to maintain their freshness. The chickpeas, quinoa, hummus, and tzatziki can be prepared up to 3 days ahead of time without compromising on flavor. To assemble, simply layer your prepped salad, chickpeas, quinoa, hummus, and tzatziki in a bowl just before serving. This method ensures you have a nutritious, delicious meal ready in minutes, making healthy eating effortless!

How to Store and Freeze 5-Minute Mediterranean Bowl

  • Fridge: Store individual components like salad, chickpeas, and grains separately in airtight containers; they will last up to 3-4 days for optimal freshness.
  • Freezer: You can freeze cooked quinoa and hummus for up to 3 months. Just be sure to thaw in the fridge before assembling your bowl.
  • Room Temperature: Avoid leaving the assembled bowl out for more than 2 hours to prevent spoilage, especially with fresh ingredients.
  • Reheating: If using frozen components, reheat quinoa in the microwave or on the stove, and enjoy the creamy hummus and tzatziki cold for the best flavor in your 5-Minute Mediterranean Bowl.

5-Minute Mediterranean Bowl Variations

Feel free to add your own twist to this vibrant meal with some delightful variations!

  • Quinoa Alternative: Swap quinoa for brown rice, farro, or even bulgur for a unique texture and flavor.

  • Added Heat: Spice things up by adding a sprinkle of crushed red pepper flakes or a drizzle of sriracha for a fiery kick.

  • Roasted Veggies: Incorporate roasted bell peppers and zucchini for a warm, comforting version of this Mediterranean delight that’s bursting with flavor.

  • Nutty Addition: Toss in some toasted pine nuts or walnuts for added crunch and healthy fats. They elevate the dish’s richness beautifully.

  • Creamy Avocado: For a richer taste, dice up half an avocado and mix it in, making the bowl even creamier and more satisfying.

  • Fish Option: For pescatarians, top with flaked smoked salmon or grilled shrimp for a delicious seafood twist that infuses the bowl with lovely flavors.

  • Dairy-Free Tzatziki: Create a creamy vegan tzatziki using coconut yogurt instead of traditional yogurt, making it a perfect dairy-free surprise.

For more delightful ideas tailored to your taste, check out these Versatile Grain Bowls that will inspire your cooking adventures!

5-Minute Mediterranean Bowl Recipe FAQs

What type of cucumber should I use for the salad?
Absolutely, any cucumber will work! For a refreshing crunch, I recommend using English cucumbers as they have fewer seeds and a thinner skin. If you can’t find those, smaller Persian cucumbers are also delicious. However, if you prefer a softer texture, zucchini can make a wonderful substitute as well!

How long can I store the components of my Mediterranean Bowl?
The components of your 5-Minute Mediterranean Bowl can be stored separately in airtight containers in the refrigerator for up to 3-4 days. Keep your salad ingredients—cucumbers, tomatoes, and spring onions—stored separately to maintain their crispness. Just be mindful to consume the salad mix within the first 24 hours for the best flavor and texture!

Can I freeze the chickpeas or quinoa?
Yes! You can certainly freeze both the chickpeas and quinoa for meal prep. First, make sure to allow your cooked quinoa to cool completely, then place it in an airtight container or a freezer-safe bag. It can be frozen for up to 3 months. When you’re ready to enjoy it, just thaw in the fridge overnight before use. For chickpeas, if they’re canned, you can freeze drained ones in similar fashion and add them straight to your bowl after thawing.

What should I do if my chickpeas become mushy?
If your chickpeas turn mushy, don’t worry! To avoid this in the future, it’s best to use canned chickpeas and drain them well. However, if you happen to have dried chickpeas, soak them overnight, then boil until tender but not overcooked. Alternatively, roasting canned chickpeas for about 20 minutes in the oven at 400°F can add a delightful crunch and prevent any mushiness.

Are there any dietary considerations I should keep in mind?
While this 5-Minute Mediterranean Bowl is naturally vegan and gluten-free, always check the labels of your hummus and tzatziki for any hidden allergens. If you’re serving this bowl to others, it’s a good idea to ask about specific dietary restrictions to keep everyone safe and happy. For pets, like dogs, small amounts of chickpeas are generally safe, but avoid sharing human-made tzatziki as garlic can be harmful to them.

Can I prepare this bowl in advance for meal prep?
Very much so! To ensure freshness, I recommend prepping each component separately and storing them in airtight containers. Prepare your salad, grains, and protein (like quinoa and chickpeas) ahead of time, and enjoy a quick assembly throughout the week. Just remember to add the dressing or hummus closer to serving time to keep everything crisp and vibrant!

5-Minute Mediterranean Bowl

5-Minute Mediterranean Bowl for Quick, Fresh Flavor

Enjoy a nutritious, quick meal with our 5-Minute Mediterranean Bowl, bursting with fresh flavors and textures.
Prep Time 5 minutes
Total Time 5 minutes
Servings: 2 bowls
Course: Lunch
Cuisine: Mediterranean
Calories: 350

Ingredients
  

For the Salad
  • ½ cucumber Cucumber Adds crunch and hydration; can substitute with zucchini
  • 1 medium Tomato Provide juiciness and are rich in antioxidants; cherry tomatoes are an alternative
  • 2 spring onions Spring onions Enhance flavor with a mild taste; red onions can be used
  • small handful Parsley Freshness and vitamin C boost; replace with cilantro for a twist
For the Protein
  • 1 can Chickpeas A hearty source of plant protein; canned are convenient
  • cup Quinoa Adds protein and texture; brown rice is a substitute
For the Creaminess
  • 2 tablespoons Hummus Provides creaminess; homemade is fresh, store-bought saves time
  • 1 teaspoon Tzatziki Offers a cooling touch; use a vegan alternative if desired
For Assembly
  • 1 teaspoon Olive oil Adds richness; avocado oil is an option
  • to taste Black pepper Freshly ground ensures the best taste

Equipment

  • mixing bowl
  • serving bowl

Method
 

Step-by-Step Instructions
  1. Wash and chop the vegetables, combine in a mixing bowl, sprinkle with salt and olive oil, and toss gently.
  2. Layer the salad base in a serving bowl, followed by chickpeas, quinoa, hummus, and tzatziki.
  3. Finish with a sprinkle of black pepper and serve immediately or store components separately.

Notes

Experiment with various hummus flavors and ensure to prep components separately for meal prep.

Delicious Homemade Vegan Chorizo: Spice Up Your Meals!

As I stood in my kitchen, the aroma of dried chiles and spices wafted through the air, instantly transporting me to the vibrant streets of Mexico. This brings us to the star of today’s recipe: Spicy Homemade Vegan Chorizo. Packed with bold flavors and a delightful crumbly texture, this plant-based protein dish is perfect for anything from hearty breakfast burritos to lively taco nights. Not only does it offer a delicious alternative to traditional chorizo, but it’s also vegan and gluten-free, ensuring that everyone can enjoy its spicy goodness. So, whether you’re looking to elevate your taco Tuesday or simply want a wholesome addition to your dishes, this homemade chorizo will soon become a staple in your kitchen. Ready to spice things up? Let’s get cooking!

Why Choose Homemade Vegan Chorizo?

Flavor Explosion: The medley of dried chiles and fresh spices creates a mouthwatering taste that’s both spicy and comforting.

Quick & Easy: Prepare this dish in less than 30 minutes, making it ideal for busy weeknights or quick brunches.

Flexibility: Use it in your favorite recipes—from breakfast burritos to veggie tacos, the possibilities are endless!

Crowd-Pleaser: Perfect for gatherings, this vegan chorizo guarantees to win over both plant-based eaters and meat lovers alike. Don’t forget to pair it with some warm tortillas or a side of Homemade Chicken Pot to create the ultimate spread!

Health-Conscious: Packed with plant-based protein, it provides a nutritious boost without the guilt. Plus, it’s gluten-free, friendly for various diets!

Homemade Vegan Chorizo Ingredients

For the Base
Tofu – Use extra-firm tofu for the best texture, or substitute with garbanzo beans for a soy-free option.
Mushrooms (Finely Chopped) – Adds umami flavor and creates a crumbly texture; sauté until golden for optimal results.

For the Spice Mix
Dried Guajillo Chiles – Adds mild heat and deep flavor; remember to soak before blending.
Dried Ancho Chiles – Provides sweetness and rich, smoky undertones; soak similarly to guajillo chiles.
Dried Arbol Chiles – Contributes spiciness; adjust quantity based on your heat preference.
Garlic – Enhances the flavor profile; use fresh garlic for the best taste.
Dried Mexican Oregano – Offers earthy notes; can substitute with regular oregano in a pinch.
Ground Cumin – Adds warmth and depth; coriander can be used as a flavorful alternative.
Whole Cloves – Provides a warm, aromatic flavor; blend well to ensure even distribution.
Ground Paprika – Gives color and enhances richness; smoked paprika can add a nice touch.
Ground Coriander – Offers bright citrus notes; although optional, it’s recommended for balance.
Black Pepper – Introduces spiciness; freshly ground is ideal for enhanced flavor.

For the Finishing Touches
Apple Cider Vinegar – Enhances acidity and brightness; feel free to swap with other vinegars if needed.
Salt – Balances all flavors; adjust to personal taste.
Avocado Oil (optional) – Adds richness; can be omitted for an oil-free version.

Step‑by‑Step Instructions for Homemade Vegan Chorizo

Step 1: Press Tofu
Begin by pressing your extra-firm tofu to remove excess moisture, which will enhance the texture of your Homemade Vegan Chorizo. Wrap the tofu in a clean kitchen towel and set a heavy object on top, like a cast-iron skillet, for about 30 minutes. You’ll know it’s ready when the towel is damp, and the tofu feels firmer to the touch.

Step 2: Soak Chiles
While the tofu is pressing, prepare your dried guajillo and ancho chiles by placing them in a heatproof bowl. Pour boiling water over the chiles, ensuring they are fully submerged, and let them soak for about 15 minutes. They should become soft and pliable, perfect for blending. Don’t forget to reserve some of the soaking liquid for later.

Step 3: Blend Ingredients
In a blender, combine the softened chiles, fresh garlic, Mexican oregano, ground cumin, whole cloves, ground paprika, ground coriander, apple cider vinegar, salt, and freshly ground black pepper. Add a splash of the reserved soaking liquid to help with blending. Blend the mixture until it achieves a smooth, vibrant puree, showcasing the bold flavors of your Homemade Vegan Chorizo.

Step 4: Prepare Tofu
Once the tofu is pressed, drain any excess water, and crumble the tofu into a large mixing bowl. Pour half of the flavorful chile puree over the crumbled tofu, ensuring it is evenly coated. Stir gently to mix well and let it marinate for about 10 minutes, allowing the tofu to absorb all those zesty flavors.

Step 5: Cook Mushrooms
In a large skillet, heat optional avocado oil over medium-high heat. Add your finely chopped mushrooms, sautéing them for about 6-7 minutes until they’re golden brown and fragrant. This step enhances the umami flavor of your Homemade Vegan Chorizo, creating the perfect crumbly texture. Stir occasionally to prevent sticking.

Step 6: Combine Mixtures
Lower the heat to medium and add the remaining chile puree to the skillet with the sautéed mushrooms, stirring to combine. Allow the mixture to cook for a minute or two, then gently fold in the marinated tofu. Cook everything together for another 7-8 minutes, stirring occasionally until the tofu is heated through and slightly browned, evaporating any excess moisture.

Step 7: Taste and Adjust
Finally, taste your Homemade Vegan Chorizo mixture and adjust the seasoning if needed. You can add more salt or pepper depending on your preference. Once satisfied, remove it from the heat. This spicy, crumbly chorizo is now ready to be used in your favorite dishes or stored for later enjoyment.

Homemade Vegan Chorizo Variations

Feel free to play around with this spicy and crumbly vegan chorizo recipe to discover new flavor combinations and textures that excite your taste buds!

  • Mushroom Variety: Experiment with different types of mushrooms like shiitake or portobello for unique flavors. Each variety adds its own character, elevating the chorizo experience.

  • TVP Swap: Substitute tofu with textured vegetable protein (TVP) for a heartier texture. This variation offers a delightful chewiness while still keeping it plant-based.

  • Heat Level Adjustment: Add more arbol chiles for extra heat or scale back for a milder flavor profile. Adjusting spiciness can cater to personal preferences, making this dish versatile for everyone.

  • Smoky Flavor Boost: Use smoked paprika instead of regular for a deeper, smoky flavor. This twist enhances the overall taste, taking your imitation chorizo to the next level!

  • Herb Infusion: Incorporate fresh herbs such as cilantro or parsley for added freshness. Adding herbs not only introduces brightness but also brings a new layer of taste to the mix.

  • Spice it Up: Mix in chili powder or cayenne pepper for a punchier kick. This adjustment will make your chorizo even more dynamic and exciting!

  • Nutty Twist: Blend in ground walnuts for a creamy texture and a delightful nutty flavor. This ingredient can add richness, taking your dish from good to unforgettable!

  • Condiment Pairing: Serve with a dollop of homemade avocado crema or salsa verde for an added zing. Pairing these sauces will amplify the flavors and offer a refreshing contrast.

Take this opportunity to personalize your homemade vegan chorizo! And don’t forget to check out these delicious sides like Homemade Chicken Pot or Hearty Spaghetti with Homemade Meatballs to create a feast everyone will love!

Expert Tips for Homemade Vegan Chorizo

  • Use Firm Tofu: Choosing extra-firm tofu is vital for achieving the best crumbly texture in your homemade vegan chorizo. Avoid silken tofu as it will become too mushy.

  • Soak Chiles Properly: Don’t rush the soaking process for your dried guajillo and ancho chiles. Proper soaking enhances flavor, so let them soak until soft for the best puree.

  • Adjust Heat Level: Control the spice by varying the amount of arbol chiles used. Start with less if you’re unsure, and taste as you go.

  • Sauté Mushrooms Well: Ensure mushrooms are sautéed until golden brown to deepen the umami flavors in your chorizo. This step adds both texture and richness.

  • Blend Smoothly: Use enough soaking liquid when blending the chiles and spices to achieve a smooth consistency. This guarantees an even distribution of flavors in your homemade vegan chorizo.

  • Taste Before Serving: Always taste and adjust the seasoning at the end of cooking. A pinch of salt or a dash of extra paprika can elevate your dish to perfection!

Make Ahead Options

Preparing Homemade Vegan Chorizo in advance is a brilliant way to save time during busy weeks! You can blend the spice mixture (steps 2 and 3) and crumble the tofu (step 4) up to 24 hours ahead. Simply store the blended puree and marinated tofu separately in airtight containers in the refrigerator. To maintain the vibrant flavors and prevent browning, keep the chile puree tightly sealed. When you’re ready to cook, sauté the mushrooms and combine everything as directed in steps 5 and 6. In just a few easy steps, you’ll have a delicious, quick meal that tastes just as fresh as if you made it that day!

What to Serve with Spicy Homemade Vegan Chorizo

Elevate your meal experience by pairing this vibrant dish with delightful sides and beverages that complement its bold flavors.

  • Warm Tortillas: Soft, warm tortillas are perfect for enveloping the spicy chorizo, creating a satisfying bite that highlights both flavor and texture.

  • Avocado Salsa: The creamy coolness of avocado salsa balances the spicy notes beautifully, adding a fresh twist to your meal.

  • Cilantro Lime Rice: The zesty flavors of cilantro and lime perfectly offset the richness of the chorizo, providing a refreshing taste sensation.

  • Roasted Veggies: Colorful roasted vegetables bring a crunchy contrast and a sweet element that beautifully harmonizes with the spicy chorizo.

  • Black Beans: Protein-packed and earthy, black beans serve as a hearty side that complements the flavors of the chorizo while adding nutritional benefits.

  • Margaritas: A classic margarita enhances the Mexican theme, with its tartness beautifully counterbalancing the spice of the chorizo for a delicious dining experience.

  • Chilled Watermelon Salad: Refreshing and light, this salad’s juicy sweetness serves as a delightful counterpoint to the heat, making your taste buds dance.

  • Cornbread Muffins: These sweet and savory muffins add a comforting texture, contrasting nicely against the crumbly homemade vegan chorizo.

  • Coconut Milk Rice Pudding: For dessert, a creamy rice pudding adds an indulgent note to end your meal on a sweet and soothing note.

How to Store and Freeze Homemade Vegan Chorizo

Fridge: Store your leftover homemade vegan chorizo in an airtight container for up to 5 days. This keeps it fresh and ready to enjoy in your favorite dishes.

Freezer: For longer storage, freeze the chorizo in an airtight container or freezer bag for up to 6 months. Make sure to label it with the date for easy tracking!

Reheating: To reheat, simply thaw in the fridge overnight and sauté in a skillet over medium heat until warmed through, adding a splash of water if it seems dry.

Boring Meals Be Gone: Use this homemade vegan chorizo in burritos, tacos, or breakfast hashes to elevate your meals effortlessly!

Homemade Vegan Chorizo Recipe FAQs

What type of tofu is best for homemade vegan chorizo?
Absolutely! For the best texture, use extra-firm tofu. It provides a sturdy base and mimics the crumbly texture of traditional chorizo. If you’re looking for a soy-free alternative, garbanzo beans or finely chopped cauliflower can work wonders too!

How should I store leftover homemade vegan chorizo?
Very! Store any leftover chorizo in an airtight container in the fridge for up to 5 days. If you’re planning to keep it longer, freezing is a great option. Just make sure it’s in an airtight container or freezer bag, and it will last for up to 6 months.

Can I freeze homemade vegan chorizo?
Absolutely! To freeze your homemade vegan chorizo, allow it to cool completely, then portion it into airtight containers or freezer bags. Lay the bags flat in the freezer for easy storage. When you’re ready to use it, thaw it overnight in the fridge and sauté over medium heat to warm it up, adding a splash of water if it seems dry.

What if my homemade vegan chorizo turns out too dry?
No worries! If you find that your chorizo is dry, it can happen if you cook it too long, allowing moisture to evaporate. To fix this, simply add a splash of vegetable broth or water during reheating, which will help rehydrate it and enhance the flavor as it warms through.

Are there any dietary considerations for homemade vegan chorizo?
Yes! This recipe is vegan and gluten-free, making it a suitable option for many dietary needs. However, if you’re cooking for someone with allergies, always double-check the ingredients, especially the spices and other add-ins, to ensure they’re free from allergens.

Homemade Vegan Chorizo

Delicious Homemade Vegan Chorizo: Spice Up Your Meals!

Homemade Vegan Chorizo is a delicious plant-based protein dish that offers bold flavors and a delightful crumbly texture, perfect for various meals.
Prep Time 30 minutes
Cook Time 15 minutes
Total Time 45 minutes
Servings: 4 servings
Course: Other
Cuisine: Mexican
Calories: 180

Ingredients
  

For the Base
  • 14 oz Extra-Firm Tofu Use for best texture
  • 1 cup Mushrooms, Finely Chopped Adds umami flavor
For the Spice Mix
  • 3 pieces Dried Guajillo Chiles Soak before blending
  • 3 pieces Dried Ancho Chiles Soak similarly to guajillo
  • 2 pieces Dried Arbol Chiles Adjust for spice level
  • 3 cloves Garlic Use fresh for best taste
  • 1 tsp Dried Mexican Oregano Substitute with regular oregano if needed
  • 1 tsp Ground Cumin Can use coriander as an alternative
  • 1 tsp Whole Cloves Blend well for even distribution
  • 1 tsp Ground Paprika Smoked paprika can be added
  • 1 tsp Ground Coriander Optional but recommended
  • 1/2 tsp Black Pepper Freshly ground is ideal
For the Finishing Touches
  • 1 tbsp Apple Cider Vinegar Can swap with other vinegars
  • 1 tsp Salt Adjust to taste
  • 2 tbsp Avocado Oil Optional, can omit for oil-free version

Equipment

  • Blender
  • Skillet
  • Heavy Object for Pressing Tofu

Method
 

Step‑by‑Step Instructions
  1. Press the tofu to remove excess moisture by wrapping it in a kitchen towel and placing a heavy object on top for about 30 minutes.
  2. Soak dried guajillo and ancho chiles in boiling water for about 15 minutes until soft.
  3. Blend softened chiles, fresh garlic, Mexican oregano, ground cumin, whole cloves, ground paprika, ground coriander, apple cider vinegar, salt, and black pepper until smooth.
  4. Crumble pressed tofu into a bowl, mix in half the chile puree, and let it marinate for 10 minutes.
  5. Heat avocado oil in a skillet, sauté chopped mushrooms for 6-7 minutes until golden brown.
  6. Add remaining chile puree to skillet, mix, then fold in the marinated tofu and cook for another 7-8 minutes.
  7. Taste and adjust seasoning as needed before serving.

Notes

Store leftovers in an airtight container for up to 5 days; freeze for 6 months. Perfect for tacos, burritos, or hashes.

Irresistible Pistachio Ferrero Rocher Brownies You’ll Love

As I was blending textures and flavors in my kitchen the other day, I found myself on a delightful culinary journey with my Pistachio Ferrero Rocher Brownies. These treats are not just brownies; they’re an indulgence that whisks you away to a world where fudgy chocolate meets the rich, nutty essence of pistachio cream. What’s even better is that this recipe is not only easy to whip up on a busy day but also a guaranteed crowd-pleaser for family gatherings or cozy get-togethers. With their unique twist on the beloved Ferrero Rocher, these brownies offer a wonderful blend of crunchy and creamy textures that make every bite a joyful surprise. Ready to elevate your dessert game? Let’s dive into this chocolatey goodness together!

Why Are These Brownies So Special?

Indulgent, these Pistachio Ferrero Rocher Brownies combine rich chocolate with a creamy pistachio center, creating a delightful treat that melts in your mouth. Effortless to make, this recipe is perfect for both seasoned chefs and novice bakers looking for a showstopper dessert. Versatile, you can easily substitute nuts or try different flavor additions like Nutella or coconut for a unique twist. Crowd-pleaser, these brownies are sure to impress at any gathering, making them the ideal choice for parties or family celebrations. And if you love merging flavors, consider making delightful Banana Bread Brownies next!

Pistachio Ferrero Rocher Brownies Ingredients

• Dive into the world of indulgence with these Pistachio Ferrero Rocher Brownies!

For the Brownies

  • Dark Chocolate – This is the key to achieving rich flavor and moisture; opt for high-quality chocolate for the best results.
  • Unsalted Butter – It lends richness and helps create a fudgy texture; swap with dairy-free butter if needed.
  • Brown Sugar – Provides the sweetness and moisture that enhances every bite; consider coconut sugar for a natural alternative.
  • Eggs – Essential for structure, they also add richness; always use room temperature eggs for smoother blending.
  • All-Purpose Flour – It gives the brownies their structure; substitute with a gluten-free blend for dietary needs.

For the Pistachio Element

  • Pistachio Cream – Adds a luscious creamy layer and nutty flavor; homemade is best for maximum taste.
  • Crushed Pistachios – Used to coat the brownies and add a delightful crunch; feel free to use almonds or walnuts for a twist.

Indulging in these delicious treats combines your love for baked goods with a newfound passion for nutty flavors! Enjoy every decadent bite!

Step‑by‑Step Instructions for Pistachio Ferrero Rocher Brownies

Step 1: Preheat the Oven
Begin by preheating your oven to 350°F (175°C). This step is crucial to ensure even baking and a perfectly fudgy center in your Pistachio Ferrero Rocher Brownies. While the oven warms up, gather your ingredients and prepare your baking equipment for a smooth cooking experience.

Step 2: Prepare the Baking Pan
Grease an 8×8 inch baking pan with unsalted butter or cooking spray to prevent sticking. Next, line the bottom and sides with parchment paper, leaving a bit of overhang for easy removal later. This will help you achieve that perfect square of delicious chocolate goodness when you cut your brownies.

Step 3: Make Brownie Batter
In a medium saucepan, melt high-quality dark chocolate and unsalted butter together over low heat, stirring until smooth and combined. Once melted, remove from heat and stir in brown sugar, blending well. Then, beat in eggs one at a time, ensuring each egg is fully incorporated before adding the next, followed by the all-purpose flour until just combined for a fudgy consistency.

Step 4: Add Pistachio Cream
Gently swirl in homemade pistachio cream into the brownie batter using a spatula, creating a marbled effect. This step adds a delightful richness and nutty flavor throughout, making your Pistachio Ferrero Rocher Brownies even more indulgent. Be careful not to overmix, as you want those beautiful swirls to stay visible.

Step 5: Bake the Brownies
Pour the brownie batter into the prepared baking pan, spreading it evenly with a spatula. Bake in the preheated oven for 25-30 minutes, keeping an eye out for the perfect doneness. A toothpick inserted into the center should come out with moist crumbs, indicating your brownies are fudgy and ready to cool.

Step 6: Cool Completely
Once baked, remove the brownies from the oven and allow them to cool completely in the pan on a wire rack. This process takes about 1-2 hours, but it’s essential for achieving the right texture and ease of cutting. Patience here will reward you with the perfect brownies.

Step 7: Coat with Crushed Pistachios
Once your Pistachio Ferrero Rocher Brownies are fully cooled, carefully lift them out of the pan using the overhanging parchment paper. Place them on a cutting board and cut into squares. Finally, roll each brownie in crushed pistachios to add a delightful crunch and enhance that nutty flavor before serving.

Make Ahead Options

These Pistachio Ferrero Rocher Brownies are a dream for meal prep enthusiasts! You can prepare the brownie batter up to 24 hours in advance; simply mix it according to the recipe and store it in an airtight container in the refrigerator to maintain freshness. The crushed pistachios can also be measured and set aside before serving. When you’re ready to bake, just remove the batter from the fridge, pour it into the prepared pan, and bake as directed. This makes a delicious dessert with minimal effort, ensuring that your brownies stay just as fudgy and delightful as if made fresh that day!

Pistachio Ferrero Rocher Brownies Variations

Feel free to unleash your creativity and customize these brownies to suit your taste!

  • Nut Swap: Replace pistachios with hazelnuts or walnuts for different flavor experiences. Each nut brings its unique profile, enhancing that delightful crunch!

  • Nutella Layer: Add a luscious layer of Nutella in the middle for an extra chocolatey richness that pairs beautifully with the pistachio cream. This twist is like a treasure hidden within!

  • Chocolate Variety: Experiment with milk or white chocolate instead of dark chocolate for a sweeter result. This change can create a delightful contrast with the nutty flavor.

  • Spice It Up: Incorporate a sprinkle of cinnamon or espresso powder to deepen the flavor profile. A little spice elevates the brownies to a new level of indulgence!

  • Textures and Flavors: Stir in shredded coconut or dried fruits like cherries or cranberries for added texture and sweetness. This can transform the brownies into a multifaceted dessert experience.

  • Gluten-Free Option: Swap all-purpose flour with a gluten-free blend to accommodate dietary needs without sacrificing that fudgy goodness. Everyone can enjoy these treats!

  • Oven-Free Version: For a no-bake option, mix brownie ingredients with crushed graham crackers and refrigerate until set. Roll them in crushed pistachios for that classic flavor!

  • Serving Suggestions: Enhance your brownie experience by pairing these delightful treats with a scoop of vanilla ice cream or a drizzle of chocolate sauce. This adds an exciting layer to every mouthful!

Whichever variation you choose, remember to enjoy the delightful process. And if you’re feeling inspired by the textures, you may also want to check out my delectable Banana Bread Brownies for a delightful twist!

Expert Tips for Making Pistachio Ferrero Rocher Brownies

  • Quality Ingredients: Use high-quality dark chocolate for a richer flavor in your Pistachio Ferrero Rocher Brownies; it makes all the difference in taste.

  • Temperature Matters: Make sure your eggs are at room temperature. This helps create a smooth batter, enhancing the brownies’ overall texture.

  • Swirl Gently: When adding pistachio cream, mix just until marbled; overmixing can lead to a less visually appealing result.

  • Perfect Doneness: Keep an eye on baking time—check for moist crumbs with a toothpick, but avoid overbaking to maintain that fudgy texture.

  • Cool Completely: Let the brownies cool fully in the pan before cutting; this helps them firm up for easy slicing and serving.

  • Storage Tips: To keep your Pistachio Ferrero Rocher Brownies fresh, store them in an airtight container at room temperature; they will stay delicious for up to three days.

How to Store and Freeze Pistachio Ferrero Rocher Brownies

  • Room Temperature: Store cut brownies in an airtight container at room temperature for up to 3 days to maintain their fudgy texture and rich flavors.
  • Fridge: For longer freshness, refrigerate the brownies for up to 1 week; allow them to come to room temperature before serving for the best taste.
  • Freezer: Wrap brownies tightly in plastic wrap and place them in a freezer-safe bag for up to 3 months. Thaw at room temperature before enjoying.
  • Reheating: If desired, warm individual brownies in the microwave for about 10-15 seconds for a cozy and indulgent treat!

What to Serve with Pistachio Ferrero Rocher Brownies

Elevate your dessert experience by pairing these exquisite brownies with delightful companions that enhance their rich, nutty flavor.

  • Vanilla Ice Cream: A classic choice, the creaminess of vanilla ice cream perfectly balances the fudgy bites, providing a refreshing contrast.

  • Fresh Berries: Bursting with sweetness and acidity, fresh raspberries or strawberries brighten the rich chocolate and pistachio, adding a refreshing pop.

  • Chocolate Drizzle: A simple drizzle of warm melted chocolate over the brownies amplifies the indulgence, giving every bite an extra dose of richness.

  • Espresso or Coffee: The robust flavor of espresso or coffee enhances the chocolatey goodness, making for a comforting, satisfying pairing after a meal.

  • Coconut Flakes: For a tropical twist, sprinkle toasted coconut flakes on top of your brownies. The chewy texture complements the fudgy interior beautifully!

  • Mint Tea: Pair your brownies with a soothing cup of mint tea. The refreshing notes help cleanse the palate between indulgent bites, making it a delightful experience.

  • Nutty Liqueur: A drizzle of Frangelico or Amaretto can lend a luxurious finish, harmonizing with the pistachio elements for a sophisticated pairing.

Pistachio Ferrero Rocher Brownies Recipe FAQs

What type of dark chocolate should I use for the brownies?
Absolutely, using high-quality dark chocolate is essential for achieving rich flavor and moisture in your Pistachio Ferrero Rocher Brownies. Look for chocolate that contains at least 70% cocoa solids for the best results, as this will provide that luxurious, deep chocolate taste that complements the pistachio cream beautifully.

How should I store the brownies to keep them fresh?
For optimal freshness, store cut brownies in an airtight container at room temperature for up to 3 days. If you want to keep them longer, refrigerate them for up to a week; just be sure to let them come to room temperature before serving for the best taste and texture.

Can I freeze the brownies, and if so, how?
Definitely! To freeze your Pistachio Ferrero Rocher Brownies, first, ensure they are completely cooled. Wrap them tightly in plastic wrap, then place them in a freezer-safe bag for up to 3 months. When you’re ready to enjoy, simply thaw them at room temperature. If you prefer them warm, microwave individual brownies for about 10-15 seconds.

What should I do if my brownies turn out too dry?
If your brownies end up dry, it might be due to overbaking. Always check for doneness by inserting a toothpick into the center; it should come out with moist crumbs. To salvage overly dry brownies, consider warming them slightly in the microwave and serving with a scoop of vanilla ice cream or drizzling them with chocolate sauce for added moisture.

Are these brownies safe for people with nut allergies?
Since these Pistachio Ferrero Rocher Brownies contain both pistachio cream and crushed pistachios, they are not suitable for individuals with nut allergies. However, you can still enjoy a similar recipe by substituting the pistachios with a seed-based butter and seeds like sunflower seeds, allowing everyone to indulge in a delicious treat without the concern of nut allergies.

Pistachio Ferrero Rocher Brownies

Irresistible Pistachio Ferrero Rocher Brownies You’ll Love

These Pistachio Ferrero Rocher Brownies are a delightful blend of fudgy chocolate and pistachio cream, perfect for any gathering.
Prep Time 15 minutes
Cook Time 30 minutes
Cooling Time 2 hours
Total Time 2 hours 45 minutes
Servings: 12 slices
Course: Dessert
Cuisine: American
Calories: 250

Ingredients
  

For the Brownies
  • 8 oz Dark Chocolate Use high-quality chocolate for best results.
  • 1/2 cup Unsalted Butter Can be swapped with dairy-free butter.
  • 1 cup Brown Sugar Coconut sugar can be used for a natural alternative.
  • 2 Eggs Use room temperature eggs.
  • 1/2 cup All-Purpose Flour Substitute with gluten-free blend if needed.
For the Pistachio Element
  • 1/2 cup Pistachio Cream Homemade is best.
  • 1/2 cup Crushed Pistachios Almonds or walnuts can be used as alternatives.

Equipment

  • Medium saucepan
  • 8x8 inch baking pan
  • spatula
  • whisk
  • mixing bowl

Method
 

Step-by-Step Instructions for Pistachio Ferrero Rocher Brownies
  1. Preheat your oven to 350°F (175°C).
  2. Grease an 8x8 inch baking pan, then line it with parchment paper.
  3. Melt dark chocolate and butter together in a saucepan, then stir in brown sugar.
  4. Beat in eggs, then mix in all-purpose flour until just combined.
  5. Swirl in pistachio cream gently to create a marbled effect.
  6. Bake the batter for 25-30 minutes or until a toothpick comes out with moist crumbs.
  7. Cool the brownies completely in the pan on a wire rack for 1-2 hours.
  8. Cut into squares and coat each brownie with crushed pistachios before serving.

Notes

Store brownies in an airtight container at room temperature for up to 3 days. Refrigerate for up to 1 week or freeze for up to 3 months. Warm in the microwave if desired.

Irresistible Teriyaki Tofu Sandwich Bursting with Flavor

As I stood in my kitchen yesterday, the aroma of sweet and salty teriyaki sauce filled the air, instantly transporting me to my favorite izakaya. That’s when I realized it was the perfect moment to whip up a Teriyaki Tofu Sandwich! This delicious combination of glazed tofu cutlets paired with a zesty citrus ginger slaw not only delights the taste buds but comes together in just 30 minutes—perfect for anyone craving a quick, nourishing meal. Packed with plant-based goodness and customizable to your liking, this sandwich is a delightful twist on a classic favorite. Whether you’re vegan, looking for a high-protein option, or simply tired of fast food, this teriyaki tofu sandwich is sure to impress. Ready to dig into a vibrant, flavor-packed bite? Let’s get cooking!

Why Is This Sandwich So Irresistible?

Quick and Easy: In just 30 minutes, you can whip up this delicious sandwich, ideal for busy weekdays.

Flavor Explosion: The combination of sweet teriyaki sauce with citrusy ginger slaw offers a delightful contrast that’ll leave your taste buds dancing.

Customizable Delight: Feel free to mix and match veggies or replace tofu with tempeh to keep things exciting.

Nutritious and Filling: With its high-protein, plant-based components, this sandwich is perfect for those looking for a wholesome meal.

Perfect for Everyone: Vegan or not, the crowd-pleasing flavors make it a favorite at the table, no matter your dietary preferences. Pair this with a side of Refreshing Avocado Sandwiches for a complete meal!

Teriyaki Tofu Sandwich Ingredients

• This delightful sandwich is not only quick to make but also packed with flavor and nutrients!

For the Tofu

  • Tofu – Use extra firm tofu for the best texture; tempeh is a great swap for a nuttier flavor.
  • Soy Sauce – Essential for umami and saltiness; opt for tamari or coconut aminos if gluten-free.
  • Mirin – Adds a sweet depth to your teriyaki sauce; substitute with sweet rice vinegar if needed.
  • Sake – Brings authenticity to the sauce; feel free to swap with vegetable broth or water.
  • Sugar – Balances the flavors and thickens the sauce; coconut sugar is a great refined-sugar-free option.

For the Slaw

  • Carrots – Offers crunch and sweetness to the slaw; pre-shredded mixes can save you time.
  • Cabbage – Provides volume and nutrition; try red cabbage for a vibrant twist.
  • Lime – Fresh juice and zest brighten the slaw; bottled juice works in a pinch but lacks the zing.
  • Garlic Powder – Adds flavor to the cornstarch coating; consider fresh garlic for a stronger taste.
  • Thyme – Seasoning for the tofu coating; fresh herbs can elevate the dish even more.

For Assembly

  • Bread – Choose hearty bread or a soft bun that can hold all the delicious fillings.
  • Sriracha Mayo – A blend of mayo and sriracha gives a creamy kick; switch to vegan mayo for a plant-based option.
  • Avocado – Adds creaminess and healthy fats; ripe avocados are key for the best texture.

With these essential ingredients lined up for your Teriyaki Tofu Sandwich, you’re just moments away from creating a meal that’s not only quick to prepare but will also leave everyone asking for seconds! Happy cooking!

Step‑by‑Step Instructions for Teriyaki Tofu Sandwich

Step 1: Prepare the Slaw
Begin by combining the shredded cabbage, grated carrots, jalapeño, chopped cilantro, minced ginger, lime zest, salt, and sugar in a large mixing bowl. Toss these ingredients together until well combined. Next, drizzle fresh lime juice over the mixture, stirring gently to incorporate everything. Cover the bowl and refrigerate for at least 10 minutes to allow the flavors to meld and the slaw to stay crisp.

Step 2: Make the Teriyaki Sauce
In a small bowl, whisk together soy sauce, mirin, sake, and sugar until the sugar is fully dissolved. This will create a glossy teriyaki sauce that adds depth to your Teriyaki Tofu Sandwich. Set this sauce aside while you prepare the tofu, as it will be used to marinate and glaze the tofu later.

Step 3: Prepare the Tofu
Slice the extra firm tofu into thick slabs, about half an inch each. For added flavor, score the top of each slab in a crosshatch pattern. Briefly marinate the tofu in soy sauce for 5 minutes, allowing it to soak in the salty goodness. Next, mix cornstarch with garlic powder and thyme in a shallow dish, and dredge each slab of tofu in this mixture, ensuring an even coating.

Step 4: Sear the Tofu
Heat a tablespoon of oil in a non-stick skillet over medium heat. Once hot, add the coated tofu slabs, searing them for about 5 minutes on each side until they turn a beautiful golden brown and develop a crispy texture. Keep an eye on them to prevent burning while they cook evenly.

Step 5: Glaze the Tofu
After searing, pour the prepared teriyaki sauce over the golden tofu slabs in the skillet. Cook for an additional 2–3 minutes, allowing the sauce to thicken and coat the tofu as it bubbles and reduces. Toss the slabs gently in the sauce to ensure every piece is evenly glazed and lusciously coated.

Step 6: Assemble the Sandwich
To create your Teriyaki Tofu Sandwich, take a slice of hearty bread or a soft bun. Spread a generous layer of sriracha mayo on one side, then layer on slices of ripe avocado, the glazed tofu, and a handful of the refreshing citrus ginger slaw. Top with another slice of bread or bun, press down gently, and prepare to savor this mouthwatering creation.

Make Ahead Options

These Teriyaki Tofu Sandwiches are perfect for meal prep enthusiasts looking to save time during busy weekdays! You can prepare the slaw up to 3 days in advance; simply store it in an airtight container in the refrigerator to keep it fresh and crunchy. Additionally, the teriyaki sauce can be made ahead and stored in the fridge for up to 1 week. Just be sure to whisk it well before using to restore its glossy texture. When it’s time to enjoy your sandwiches, quickly sear the marinated tofu and assemble with the slaw and sriracha mayo right before serving. This way, you can indulge in delicious, restaurant-quality flavors with minimal effort!

Expert Tips for the Best Teriyaki Tofu Sandwich

  • Choose Quality Tofu: Use extra firm tofu for the best texture. If you prefer, freeze it beforehand to enhance firmness and flavor absorption.
  • Balance Your Sauce: Adjust sweetness and saltiness to your liking; remember that the ratio of soy sauce, mirin, sake, and sugar should remain 1:1:1:1 for the perfect teriyaki sauce.
  • Crispy Tofu Finish: Make sure to sear the tofu until golden brown to achieve a delightful crispiness, avoiding sogginess.
  • Fresh vs. Bottled Lime: Always opt for fresh lime juice and zest in your slaw for a brighter flavor; bottled alternatives often lack the same freshness.
  • Experiment with Slaw Veggies: Don’t hesitate to try different veggies in your slaw, like bell peppers or radishes, for added color and crunch in your Teriyaki Tofu Sandwich.

How to Store and Freeze Teriyaki Tofu Sandwich

  • Room Temperature: It’s best to avoid leaving assembled sandwiches out at room temperature for more than 2 hours to maintain freshness and safety.

  • Fridge: Store assembled sandwiches in an airtight container in the fridge for up to 24 hours. Keep the slaw separate to keep everything crisp and fresh until ready to enjoy.

  • Freezer: To freeze, wrap individual tofu slabs tightly in plastic wrap and place them in a freezer-safe bag. They can last in the freezer for up to 3 months. Reheat thoroughly before serving.

  • Reheating: When ready to enjoy chilled leftovers, reheat the tofu in a skillet until warm, and freshen the slaw with a squeeze of lime juice before assembling your sandwich again.

What to Serve with Teriyaki Tofu Sandwich

Looking to create a complete meal to accompany your flavorful sandwich? Here are some delightful pairings that will elevate your dining experience.

  • Sweet Potato Fries: Crispy and slightly sweet, they offer a perfect contrast to the savory tofu.
  • Crisp Side Salad: A simple mix of greens with a light vinaigrette complements the richness of the sandwich beautifully.
  • Edamame Beans: A high-protein snack, they add a satisfying crunch and a light touch of salt, enhancing the meal’s overall balance.
  • Miso Soup: Warm and nourishing, this classic Japanese soup contrasts nicely with the sandwich’s vibrant flavors, creating a cozy vibe.

Fresh ingredients play a key role here. Why not toss in some fresh herbs or a splash of lime juice to keep the flavors lively?

  • Fruit Salad: A refreshing mix of seasonal fruits adds a sweet and juicy contrast, balancing out the savory elements perfectly.
  • Ginger Lemonade: A chilled beverage with a zesty kick enhances the meal experience, refreshing your palate with every sip.
  • Chocolate Avocado Mousse: Indulge in a rich, creamy dessert that echoes the avocado in the sandwich with a delightful cocoa twist.

Teriyaki Tofu Sandwich Variations

Feel free to explore delicious twists and substitutions that will personalize your teriyaki tofu sandwich experience!

  • Dairy-Free: Replace sriracha mayo with a creamy vegan garlic aioli for a rich flavor without dairy. It’s a wonderful option to elevate the sandwich while keeping it plant-based.

  • Gluten-Free: Swap soy sauce for tamari or coconut aminos, and make sure your bread is gluten-free. This ensures everyone can enjoy this delightful dish without worry!

  • Smoky-Style: Add a touch of smoked paprika or some liquid smoke to the teriyaki marinade for a smoky flavor boost that will take your sandwich to the next level.

  • Extra Crunch: Mix in chopped nuts or seeds like sesame or sunflower seeds into the slaw for an added textural contrast that brings a delightful crunch.

  • Heat Lovers: Spice things up by adding sliced jalapeños or a drizzle of chili oil to the slaw or the sriracha mayo for those who enjoy a kick.

  • Asian Fusion: Incorporate Asian pickles like kimchi into the sandwich for a tangy twist, adding complexity and texture that’s absolutely addictive.

  • Nourish Bowl Option: Serve the teriyaki tofu on a bed of brown rice or quinoa with all the fixings. Top with the citrus ginger slaw for a satisfying nourish bowl.

  • Veggie Variation: Swap out the slaw ingredients for shredded zucchini and diced bell peppers for a refreshing take that’s bursting with color and flavor.

Feel free to get creative and discover what delicious combos work for you. If you’re in the mood for something different, check out some ideas like the vibrant Refreshing Avocado Sandwiches that can also complement your meal beautifully! Enjoy your culinary adventure!

Teriyaki Tofu Sandwich Recipe FAQs

How do I choose the right tofu for my Teriyaki Tofu Sandwich?
Absolutely! For the best texture, go for extra firm tofu, which holds its shape well and absorbs flavors beautifully. If you’re feeling adventurous, try freezing the tofu a day before cooking; this creates a firmer texture and gives the tofu a spongy quality that soaks up the teriyaki sauce deliciously once thawed and pressed out for moisture.

How should I store leftover Teriyaki Tofu Sandwiches?
You can store your assembled sandwiches in an airtight container in the fridge for up to 24 hours. To keep the slaw fresh and crisp, I recommend storing it separately and then combining it with the sandwich just before you’re ready to enjoy it. This way, you can savor that delightful crunch!

Can I freeze the components of my Teriyaki Tofu Sandwich?
Certainly! To freeze, wrap individual tofu slabs tightly in plastic wrap and place them in freezer-safe bags. They will keep well in the freezer for up to 3 months. When ready to enjoy, simply thaw the tofu in the fridge overnight, reheat it in a skillet, and freshen up the slaw with a squeeze of lime juice for that zesty kick.

What if my teriyaki sauce turns out too salty or sweet?
Very easy to manage! If your sauce is too salty, you can balance it by adding a touch more of mirin or a spoonful of brown sugar, stirring well. To tone down sweetness, dilute with a little water or add a dash of soy sauce. Remembering the standard 1:1:1:1 ratio of soy, mirin, sake, and sugar can help guide your adjustments for your perfect flavor profile.

Are there any dietary considerations for this sandwich?
Yes! This Teriyaki Tofu Sandwich is inherently vegan and can be made gluten-free by using tamari or coconut aminos instead of regular soy sauce. Always check the labels on your store-bought mayo or sriracha if you have allergies, and opt for gluten-free bread to accommodate gluten sensitivities. Enjoy with confidence knowing it’s flexible and accommodating!

Teriyaki Tofu Sandwich

Irresistible Teriyaki Tofu Sandwich Bursting with Flavor

This irresistible Teriyaki Tofu Sandwich is bursting with flavor and perfect for a quick, nourishing meal.
Prep Time 10 minutes
Cook Time 20 minutes
Chill Time 10 minutes
Total Time 30 minutes
Servings: 2 sandwiches
Course: Lunch
Cuisine: Japanese
Calories: 450

Ingredients
  

For the Tofu
  • 1 block extra firm tofu Use tempeh for a nuttier flavor
  • 3 tablespoons soy sauce Tamari or coconut aminos if gluten-free
  • 2 tablespoons mirin Substitute with sweet rice vinegar if needed
  • 2 tablespoons sake Can swap with vegetable broth or water
  • 2 tablespoons sugar Coconut sugar is a great refined-sugar-free option
For the Slaw
  • 1 cup shredded carrots Pre-shredded saves time
  • 2 cups shredded cabbage Red cabbage for a vibrant twist
  • 1 each lime Fresh juice and zest recommended
  • 1 teaspoon garlic powder Consider fresh garlic for stronger taste
  • 1 teaspoon thyme Fresh herbs can elevate flavor
For Assembly
  • 2 slices hearty bread Or soft buns
  • 4 tablespoons sriracha mayo Use vegan mayo for plant-based option
  • 1 each ripe avocado Key for best texture

Equipment

  • Skillet
  • mixing bowl
  • whisk

Method
 

Preparation Steps
  1. Combine the shredded cabbage, grated carrots, jalapeño, chopped cilantro, minced ginger, lime zest, salt, and sugar in a large mixing bowl. Toss these ingredients together until well combined. Drizzle fresh lime juice over the mixture, stirring gently to incorporate. Cover the bowl and refrigerate for at least 10 minutes.
  2. In a small bowl, whisk together soy sauce, mirin, sake, and sugar until dissolved. Set this sauce aside for later use.
  3. Slice the tofu into thick slabs and score the top in a crosshatch pattern. Marinate the tofu in soy sauce for 5 minutes. Mix cornstarch with garlic powder and thyme in a shallow dish, and dredge tofu slabs in this mixture.
  4. Heat oil in a skillet over medium heat. Add the coated tofu and sear for about 5 minutes on each side until golden brown.
  5. Pour the teriyaki sauce over the seared tofu and cook for an additional 2–3 minutes, allowing the sauce to thicken and coat the tofu.
  6. Assemble the sandwich by spreading sriracha mayo on bread, layering on avocado slices, glazed tofu, and slaw. Top with another slice of bread or bun.

Notes

Use fresh lime juice for the slaw for a brighter flavor and explore different slaw veggies for added color.

30 Minute Coconut Salmon Curry for Effortless Weeknight Delight

It’s been a long day, and the last thing I want to do is spend hours in the kitchen. That’s where my Easy 30-Minute Coconut Salmon Curry comes to the rescue! Imagine succulent salmon fillets, coated in a fragrant spice rub and then baked to a delightful crisp, all draped in a luscious Thai-style coconut curry sauce. This recipe is not just quick to whip up; it’s also incredibly versatile for those of us who love to experiment. Whether you’re cooking for yourself or hosting a small gathering, this dish is sure to impress, all while keeping the fuss to a minimum. Plus, it’s perfect for beginners—no secret culinary skills needed. What will you add to make this dish your own?

Why is this dish a must-try?

Simplicity: This 30 Minute Coconut Salmon Curry comes together quickly, making it ideal for busy weeknights without sacrificing flavor.

Versatile: Feel free to swap ingredients! Use chicken or tofu instead of salmon or add extra veggies to boost nutrition.

Rich Flavor: The blend of coconut milk, Thai curry paste, and fresh herbs creates a mouthwatering sauce that’s simply irresistible.

Crowd-Pleaser: Impress your family or guests with this delightful dish that works beautifully for casual dinners or special occasions.

Beginner-Friendly: No advanced cooking techniques are required—just mix, bake, and enjoy! If you’re looking to broaden your culinary skills, check out our Milky Coconut Cheese or Coconut Chocolate Rolls for more coconut-inspired delights.

30 Minute Coconut Salmon Curry Ingredients

For the Salmon
Salmon Fillets – The star of the dish; packed with healthy fats and flavor. Frozen salmon is a great substitute if properly thawed.
Demerara Sugar – Adds a touch of sweetness to the spice rub; can be swapped for brown sugar if needed.

For the Spice Rub
Curry Powder – Provides aromatic warmth; feel free to exchange for garam masala for an interesting twist.
Ground Ginger – Enhances the flavor profile; fresh ginger can elevate the dish even more.
Garlic Powder – A must for flavor; fresh garlic works perfectly too if you prefer it.

For the Curry Sauce
Garlic Cloves – Essential for that delightful aroma; add more for an extra kick!
Fresh Ginger – Another layer of spice; use additionally for intensified flavor.
Thai Red Curry Paste – This is the backbone of the curry—adjust to your spice liking.
Coconut Milk – A creamy, rich base; both full-fat and light versions are delicious.
Soy Sauce – Adds umami depth; replace with tamari or coconut aminos to keep it gluten-free.
Lime Juice – A splash of acidity to brighten everything up and perfect the flavor balance.

For the Greens
Fresh Spinach – Adds color and nutrition; feel free to swap with kale or parsley if desired.
Fresh Basil & Coriander (Cilantro) – These herbs enhance the dish’s aroma and presentation; optional to use if unavailable.

This 30 Minute Coconut Salmon Curry is a delightful blend of flavors that will bring excitement to your weeknight meals!

Step‑by‑Step Instructions for 30 Minute Coconut Salmon Curry

Step 1: Prepare the Spice Rub
In a small bowl, mix together demerara sugar, curry powder, garlic powder, and ground ginger, adding a pinch of sea salt. Gradually add water to create a thick paste. This spice rub will give your salmon a flavorful kick, so set it aside once it reaches the desired consistency, ready to enhance the delightful 30 Minute Coconut Salmon Curry.

Step 2: Bake Salmon
Preheat your oven to 190°C (375°F). Spread the prepared spice paste generously over the surface of your salmon fillets, ensuring they are well coated. Place the salmon on a baking sheet lined with parchment paper and bake for about 6 minutes. Watch for a crispy crust to form as it cooks, giving your curry a beautiful flavor base.

Step 3: Sauté Aromatics
While the salmon bakes, heat a tablespoon of olive oil in a large skillet over medium heat. Once hot, add minced garlic cloves and freshly grated ginger, sautéing for 3-5 minutes until fragrant. This step lays the aromatic foundation for your curry sauce, filling your kitchen with mouthwatering scents, which is the essence of a good 30 Minute Coconut Salmon Curry.

Step 4: Make Curry Base
To the skillet, add a dash of demerara sugar and 2 tablespoons of Thai red curry paste. Stir everything together until it thickens slightly, creating a rich base. Next, pour in one can of coconut milk and bring the mixture to a simmer—allow it to bubble for about 2 minutes. This creamy sauce is what makes the 30 Minute Coconut Salmon Curry irresistibly delicious.

Step 5: Add Spinach & Salmon
Introduce a handful of fresh spinach into the skillet, stirring until it wilts down, which should take just a minute. Gently add the partially baked salmon fillets to the skillet, cooking for an additional 5-8 minutes. Monitor the salmon, ensuring it’s fully cooked through and flakes easily at an internal temperature of 145°F (63°C), wrapping it in that luscious curry sauce.

Step 6: Serve
Finally, serve your vibrant 30 Minute Coconut Salmon Curry hot, over a bed of fluffy rice. Use a spoon to drizzle more of that aromatic sauce over the top, enhancing each bite with its rich, complex flavors. Garnish with fresh basil and coriander for an added touch of color and aroma, and delight in the comforting taste of a home-cooked meal!

Expert Tips for 30 Minute Coconut Salmon Curry

  • Salmon Freshness: Always use fresh salmon if possible; it enhances flavor. If using frozen salmon, ensure it’s completely thawed before cooking.

  • Spice Balance: For a milder curry, start with less Thai red curry paste. You can always add more as it simmers to achieve your desired heat.

  • Creamy Consistency: To keep the curry sauce creamy, avoid overcooking the coconut milk. Stir gently and simmer just until combined.

  • Veggie Additions: Boost your dish with colorful vegetables like bell peppers or zucchini. Ensure they are cooked to tenderness before adding the salmon.

  • Leftover Magic: Don’t let any sauce go to waste! Use extra curry sauce to marinate chicken or drizzle over steamed veggies for a quick lunch option.

  • Rice Recommendations: Serve the curry over fluffy basmati or jasmine rice to absorb the delicious sauce, enhancing the overall experience of your 30 Minute Coconut Salmon Curry.

30 Minute Coconut Salmon Curry Variations

Feel free to get creative and put your own spin on this delightful dish, making it uniquely yours.

  • Protein Swap: Replace salmon with firm tofu or chicken for a different twist on flavor and texture.

  • Veggie Boost: Mix in colorful vegetables like bell peppers or zucchini to enhance nutrition and add a vibrant touch. A little crunch never hurts!

  • Low-Carb Option: Use cauliflower rice instead of traditional rice for a lightened-up base that still absorbs the delicious curry sauce.

  • Spice Level: Adjust the amount of Thai red curry paste to control the heat. A little goes a long way, but don’t be afraid to experiment!

  • Coconut Creamy: For an even richer sauce, blend in a splash of coconut cream in place of some coconut milk.

  • Fresh Herb Variations: If you lack basil or cilantro, parsley or mint can bring a fresh note to the dish. Fresh herbs truly brighten any meal.

  • Citrus Zest: Add a zing with a sprinkle of lime or lemon zest over the curry just before serving. It lifts the flavors beautifully!

Don’t forget, if you’re craving more coconut-inspired goodness, check out our Milky Coconut Cheese or indulge in some decadent Coconut Chocolate Rolls to complete your meal!

What to Serve with Easy 30-Minute Coconut Salmon Curry

Add the finishing touches to create a well-rounded meal that your loved ones will adore.

  • Fluffy Jasmine Rice: Soft and fragrant, jasmine rice perfectly soaks up the rich curry sauce, enhancing every bite.
  • Steamed Broccoli: Crisp-tender broccoli adds a fresh crunch and balances the creamy curry, making your plate visually appealing.
  • Roti or Naan: Warm, pillowy bread serves as a delightful vessel for scooping up the curry, bringing an authentic touch to your meal.
  • Garden Salad: A bright salad with mixed greens, cucumber, and a light vinaigrette adds freshness and a zing to counter the richness of the curry.
  • Pickled Vegetables: Tangy pickles contrast the sweetness of the curry, offering a delightful pop of flavor in each mouthful.
  • Coconut Water: This refreshing drink keeps the tropical theme going, pairing beautifully with the flavors in your 30-Minute Coconut Salmon Curry.

How to Store and Freeze 30 Minute Coconut Salmon Curry

Fridge: Store leftovers in an airtight container for up to 2 days. Make sure the curry has cooled down to room temperature before sealing to maintain freshness.

Reheating: Gently reheat in a skillet over low heat, stirring occasionally to ensure even warming. Add a splash of coconut milk or water if the sauce thickens too much during storage.

Freezer: While it’s not recommended to freeze the entire dish due to the spinach’s texture, you can freeze the curry base (without salmon) for up to 2 months. Just reheat and add freshly cooked salmon when ready to serve.

Serving Freshness: For the best taste, enjoy your 30 Minute Coconut Salmon Curry fresh. If you have leftovers, use them quickly to savor that delightful balance of flavors!

Make Ahead Options

These Easy 30-Minute Coconut Salmon Curry ingredients are perfect for meal prep! You can prepare the spice rub a day in advance (up to 24 hours) and store it in the refrigerator to maximize flavor. The salmon can also be seasoned with the rub and left to marinate for up to 3 hours for a more intense taste. To maintain quality, keep the salmon and spice mixture stored separately until ready to cook. When it’s time to serve, simply bake the marinated salmon, sauté the aromatics, and follow the rest of the curry steps for a delicious, homemade meal that saves you time on busy weekdays.

30 Minute Coconut Salmon Curry Recipe FAQs

What type of salmon is best for this recipe?
Absolutely! Fresh salmon is ideal for the best flavor, but you can absolutely use frozen salmon if it is properly thawed beforehand. Look for firm, vibrant fillets without dark spots or any signs of freezer burn for optimal results.

How should I store leftovers?
Store any leftover 30 Minute Coconut Salmon Curry in an airtight container in the fridge for up to 2 days. Make sure to let it cool to room temperature before sealing. When reheating, do so gently on the stove over low heat, stirring occasionally and adding a bit of coconut milk or water if the sauce thickens too much.

Can I freeze this dish?
Not recommended. While you can freeze the curry base (without the salmon) for up to 2 months, freezing the final dish can alter the texture of the spinach. When ready to eat, just reheat the curry base and add freshly cooked salmon for that delightful taste!

What if the curry turns out too spicy for my liking?
Very easy! If your 30 Minute Coconut Salmon Curry is spicier than expected, you can mellow it out by stirring in more coconut milk or adding a dollop of yogurt. This will not only tone down the heat but also enrich the creamy texture of your sauce.

Are there any dietary considerations for this recipe?
Yes! This dish is generally well-received, but be mindful of allergies. If you’re serving those with gluten sensitivities, replace soy sauce with tamari or coconut aminos. Additionally, you may substitute the salmon with firm tofu or chicken for those with dietary restrictions.

How can I customize this recipe further?
The more the merrier! Feel free to toss in colorful vegetables like bell peppers, zucchini, or snap peas to enhance nutrition and add a vibrant look to your dish. You can also adjust the herbs according to personal preference; kale or parsley can be excellent alternatives to spinach and cilantro.

30 Minute Coconut Salmon Curry

30 Minute Coconut Salmon Curry for Effortless Weeknight Delight

This 30 Minute Coconut Salmon Curry is a quick and flavorful dish perfect for a busy weeknight.
Prep Time 10 minutes
Cook Time 20 minutes
Total Time 30 minutes
Servings: 4 servings
Course: Dinner
Cuisine: Thai
Calories: 450

Ingredients
  

For the Salmon
  • 4 fillets Salmon Fillets Frozen salmon is a great substitute if properly thawed.
  • 1 tbsp Demerara Sugar Can be swapped for brown sugar if needed.
For the Spice Rub
  • 1 tbsp Curry Powder Feel free to exchange for garam masala.
  • 1 tsp Ground Ginger Fresh ginger can elevate the dish.
  • 1 tsp Garlic Powder Fresh garlic works perfectly too.
For the Curry Sauce
  • 3 cloves Garlic Cloves Essential for aroma; add more for an extra kick!
  • 1 inch Fresh Ginger Use additionally for intensified flavor.
  • 2 tbsp Thai Red Curry Paste Adjust to your spice liking.
  • 1 can Coconut Milk Both full-fat and light versions are delicious.
  • 2 tbsp Soy Sauce Replace with tamari or coconut aminos for gluten-free.
  • 1 tbsp Lime Juice A splash of acidity to brighten flavors.
For the Greens
  • 2 cups Fresh Spinach Feel free to swap with kale or parsley.
  • 1/4 cup Fresh Basil Optional if unavailable.
  • 1/4 cup Coriander (Cilantro) Optional if unavailable.

Equipment

  • oven
  • large skillet
  • baking sheet
  • mixing bowl

Method
 

Step-by-Step Instructions
  1. In a small bowl, mix together demerara sugar, curry powder, garlic powder, and ground ginger, adding a pinch of sea salt. Gradually add water to create a thick paste. Set it aside once it reaches the desired consistency.
  2. Preheat your oven to 190°C (375°F). Spread the spice paste over the salmon fillets and bake for about 6 minutes.
  3. Heat a tablespoon of olive oil in a large skillet over medium heat. Add minced garlic cloves and grated ginger, sautéing for 3-5 minutes until fragrant.
  4. Add demerara sugar and 2 tablespoons of Thai red curry paste. Stir until it thickens slightly, then pour in one can of coconut milk and bring to a simmer for about 2 minutes.
  5. Add fresh spinach to the skillet, stirring until it wilts down. Gently add the partially baked salmon to the skillet, cooking for an additional 5-8 minutes.
  6. Serve your 30 Minute Coconut Salmon Curry hot, over rice. Drizzle more sauce over the top and garnish with fresh basil and coriander.

Notes

Always use fresh salmon if possible; ensure frozen salmon is thawed. Adjust spices according to taste.

S’mores Rolled Rice Krispie Treat: Your New Favorite No-Bake Dessert

As I stood in my kitchen, a childhood memory came rushing back—gathering around a crackling campfire with friends, savoring the gooey sweetness of s’mores. Now, I can relive that nostalgic flavor with a twist in the form of S’mores Rolled Rice Krispie Treats! This no-bake delight wraps the classic s’mores goodness in a chewy Rice Krispie treat, complete with a luscious marshmallow swirl and an inviting drizzle of chocolate. These treats are not only a visual feast, but they also promise to be a huge hit at any gathering or casual snack time. Plus, they’re super easy to whip up, making them perfect for busy days when you crave sweet comfort without a lot of fuss. Why not treat yourself to a taste of summer any time of year? Let’s dive into this delicious recipe that will bring a smile to your face and a sweet memory to your heart!

Why are S’mores Rolled Rice Krispie Treats irresistible?

Nostalgic Flavor: Relive childhood memories with each bite, as these treats bring the classic s’mores experience to life in a new, fun shape.

No-Bake Simplicity: Perfect for busy days, this recipe is quick and requires minimal effort—just melt, mix, roll, and chill!

Crowd-Pleasing Appeal: Great for parties, these treats are sure to impress friends and family with their visually stunning presentation and delicious taste.

Customizable Delight: Feel free to experiment with different flavors, like adding cocoa cereal or mini chocolate chips to the mix for a unique twist.

Whether you’re looking for a simple dessert to satisfy your sweet tooth or a fun dish for gatherings, these Sizzling Rice Wrapped treats are the answer. Enjoy the best of both worlds with a delicious blend of crunchy and gooey textures!

S’mores Rolled Rice Krispie Treat Ingredients

For the Base
Unsalted Butter – Helps melt marshmallows smoothly and keeps the mixture flexible; light brown butter adds a richer flavor.
Mini Marshmallows – Provides the gooey center and swirl; you can substitute large marshmallows, cut into smaller pieces.
Crispy Rice Cereal – Adds structure and crunch; ensure not to crush it for the perfect roll.
Crushed Graham Crackers – Delivers the essential s’mores flavor; gluten-free graham crackers can be used for a gluten-free version.

For the Chocolate Swirl
Chocolate Spread or Melted Chocolate – Forms a delightful ribbon inside; pick based on your texture preference (creaminess vs. firmness).
Semi-Sweet Chocolate Chips – Used for the final drizzle, enhancing the treat’s pleasing flavor combination.

For the Drizzle
Coconut Oil or Butter – Enhances the glossiness of the chocolate drizzle, helping it set perfectly.

These S’mores Rolled Rice Krispie Treats are more than just a tasty dessert; they’re a reminder of delightful summers and good times shared. Enjoy making them!

Step‑by‑Step Instructions for S’mores Rolled Rice Krispie Treat

Step 1: Melt the Butter
In a medium saucepan, melt 4 tablespoons of unsalted butter over medium-low heat. Stir continuously until the butter is fully melted and starts to bubble gently, which should take about 2-3 minutes. Once melted, add in 6 cups of mini marshmallows, stirring constantly until they are completely melted and the mixture is smooth and creamy, approximately 4-5 minutes.

Step 2: Mix in the Cereal and Crackers
Remove the saucepan from heat and gently fold in 6 cups of crispy rice cereal and 1½ cups of crushed graham crackers. Use a silicone spatula to carefully mix everything together until each piece of cereal is evenly coated with the marshmallow mixture. This should take about 2-3 minutes to ensure there’s no dry cereal left.

Step 3: Form the Base
Line a baking sheet with parchment paper and lightly grease it with cooking spray. Transfer the marshmallow and cereal mixture onto the parchment, using your hands or the spatula to press it into an even rectangle, about ½ inch thick. The mixture should feel warm and sticky but manageable, giving you a base ready for rolling.

Step 4: Add the Chocolate Spread
Using a spatula, spread a layer of your favorite chocolate spread or melted chocolate evenly across the pressed Rice Krispie mixture. Sprinkle a handful of mini marshmallows on top of the chocolate layer, making sure they are distributed evenly. This step will create that iconic gooey swirl in your S’mores Rolled Rice Krispie Treats.

Step 5: Roll the Treat
With the help of the parchment paper, start rolling the mixture tightly from one of the long edges. As you roll, apply gentle pressure to create a snug log shape while ensuring the ingredients stay together without spilling out. Aim for a tight roll to keep the defined swirl, which should take about 1-2 minutes.

Step 6: Chill the Roll
Once rolled, wrap the log tightly in parchment paper or plastic wrap to hold its shape. Place the wrapped log in the refrigerator for 30-45 minutes, allowing it to firm up sufficiently. When chilled, the treats should feel solid and retain their shape, making it easier to slice.

Step 7: Drizzle the Chocolate
In a small microwave-safe bowl, melt 1 cup of semi-sweet chocolate chips with 1 tablespoon of coconut oil in the microwave, stirring every 30 seconds until smooth. Once melted, drizzle the chocolate generously over the chilled roll using a spoon or a piping bag for more control.

Step 8: Slice and Serve
Using a serrated knife, slice the chocolate-drizzled roll into 1-inch rounds. Make sure to clean the knife between cuts to ensure clean edges, revealing the beautiful marshmallow swirl within. Your S’mores Rolled Rice Krispie Treats are now ready to delight friends and family!

What to Serve with S’mores Rolled Rice Krispie Treats

Looking to create a delicious spread that perfectly complements your delightful no-bake treats?

  • Creamy Ice Cream: The cool, rich texture of vanilla or chocolate ice cream pairs beautifully with the chewy rolls, balancing the flavors. Imagine spooning a scoop alongside your treat for an indulgent dessert experience.

  • Fresh Berries: Strawberries and raspberries add a burst of freshness and tartness, enhancing the sweetness of the treats. A colorful berry medley not only looks great on the plate but also elevates the overall flavor profile.

  • Chocolate Milkshake: A thick, creamy milkshake echoes the chocolatey richness of the S’mores Rolled Rice Krispie Treats, creating a memorable combination that appeals to both kids and adults.

  • Graham Cracker Crust Cheesecake: This decadent dessert mirrors the graham cracker flavor in your treats, offering a contrasting texture that will delight the senses. Slice the cheesecake thin for a delightful pairing.

  • Salted Caramel Sauce: A drizzle of warm salted caramel brings a new layer of sophistication and flavor, enhancing the sweetness while adding a touch of salty balance.

  • S’mores Board: Create a themed board with mini marshmallows, chocolate squares, graham crackers, and a few extra treats for guests to enjoy alongside your S’mores Rolled Rice Krispie Treats. This inviting presentation is perfect for gatherings.

  • Herbal Iced Tea: A light, refreshing iced tea infused with mint or lemon offers a cool contrast to your sweet treats. The herbaceous undertones bring a refreshing break between bites.

  • Peanut Butter Dip: A creamy peanut butter dip provides a rich, nutty flavor that complements the softness of your treats. Serve with apple slices for a delightful crunchy element to the mix.

These pairings will create a delightful spread that enhances your S’mores Rolled Rice Krispie Treats, inviting smiles and sweet enjoyment at every gathering!

Expert Tips for S’mores Rolled Rice Krispie Treats

  • Warm Mixture: Work quickly while the marshmallow mixture is warm for easier rolling; it becomes stickier as it cools.
  • Low Heat: Keep the heat low when melting butter and marshmallows to ensure a chewy texture, avoiding a hard or crumbly treat.
  • Chill Thoroughly: Fully chill the rolled log before slicing to achieve clean, defined rounds that showcase the beautiful marshmallow swirl.
  • Knife Care: Wipe the knife blade between cuts for neat slices and to avoid squishing the marshmallow center.
  • Layering Options: Experiment with added flavors by mixing in cocoa cereal or mini chocolate chips for fun variations of the S’mores Rolled Rice Krispie Treat!

Storage Tips for S’mores Rolled Rice Krispie Treats

Room Temperature: Keep your S’mores Rolled Rice Krispie Treats in an airtight container at room temperature for up to 3 days to maintain their softness and flavor.

Fridge: Store in the refrigerator for up to 5 days; use layers of parchment paper between pieces to prevent sticking and keep them fresh.

Freezer: If you want to enjoy your treats later, freeze them tightly wrapped in plastic wrap and placed in a freezer-safe container for up to 2 months.

Reheating: For best results, let frozen treats thaw in the fridge overnight before serving, allowing their delicious gooeyness to return without affecting their texture.

S’mores Rolled Rice Krispie Treat Variations

Feel free to unleash your creativity and customize these delightful treats to satisfy your taste buds!

  • Gluten-Free: Substitute traditional graham crackers with gluten-free varieties for a safe-for-all s’mores experience.
  • Nutty Addition: Mix in some chopped nuts, like pecans or almonds, for a delightful crunch in every bite; they add a rich, earthy flavor too.
  • Fruit Twist: Swap in freeze-dried strawberries or raspberries instead of graham crackers for a fruity twist; the sweetness pairs beautifully with the chocolate.
  • Decadent Drizzle: Elevate the chocolate drizzle with a swirl of caramel for an indulgent touch; it’s a delicious surprise that will wow everyone.
  • Spice It Up: Add a pinch of cinnamon or a splash of vanilla extract to the marshmallow mixture for extra warmth and flavor.
  • Coconut Lover: Incorporate shredded coconut into the rice cereal mixture for a tropical flair; the chewiness is a match made in heaven.
  • Cocoa Crunch: For a chocolatey spin, replace half of the crispy rice cereal with cocoa cereal; it’s a sweet and chocolatey delight!
  • Heat It Up: Sprinkle in a dash of cayenne pepper or use spicy chocolate for those who love a little kick in their sweets; it creates a tantalizing contrast with the sweetness.

These variations make these treats even more enjoyable, so don’t hesitate to explore options like these Sizzling Rice Wrapped delights. Enjoy adapting your recipe to suit every occasion!

Make Ahead Options

These S’mores Rolled Rice Krispie Treats are perfect for meal prep enthusiasts! You can prepare the entire roll up to 24 hours in advance and store it wrapped tightly in parchment or plastic wrap in the refrigerator to maintain that gooey texture. For an even quicker option, you can make the base and chocolate swirl and refrigerate them separately for 3 days. When you’re ready to serve, simply drizzle the melted chocolate over the chilled roll and slice. This makes your dessert prep so much easier, ensuring you can enjoy these delicious treats with minimal fuss, anytime cravings strike!

S’mores Rolled Rice Krispie Treat Recipe FAQs

What kind of marshmallows should I use?
Absolutely! Mini marshmallows work best because they melt quickly and evenly, creating a smooth mixture. However, if all you have are large marshmallows, just cut them into smaller pieces before adding them to the saucepan. This ensures they melt down properly.

How should I store my S’mores Rolled Rice Krispie Treats?
You can keep your treats at room temperature in an airtight container for up to 3 days to maintain their freshness and softness. If you prefer a longer shelf life, place them in the refrigerator, where they can last for up to 5 days—just remember to use parchment paper between layers to prevent sticking.

Can I freeze these treats?
Very! To freeze your S’mores Rolled Rice Krispie Treats, wrap them tightly in plastic wrap to prevent freezer burn, and place them in a freezer-safe container. They should keep well for up to 2 months. When you’re ready to enjoy them, simply let them thaw in the fridge overnight for the best texture.

What if my rolled treats don’t hold their shape after chilling?
If your treats are falling apart, it could be due to not rolling them tightly enough or not letting them chill long enough. Make sure you roll them snugly and allow them to chill in the refrigerator for at least 30-45 minutes. If they still don’t hold, you can try adding a bit more melted marshmallow or mixture next time for extra stickiness.

Are these treats safe for dogs?
Not really! While some ingredients like rice or graham crackers are okay in small amounts, the marshmallows and chocolate are not safe for dogs. They can cause digestive issues or be toxic. Always keep treats like this out of reach of your furry friends!

What if I want to modify the recipe for dietary restrictions?
You’ve got options! For gluten-free treats, simply use gluten-free graham crackers and ensure all your cereal brands are labeled gluten-free. If you’re looking for a different flavor, try incorporating cocoa-based cereal or mini chocolate chips into the mix or use dairy-free options for chocolate and butter to accommodate vegan diets. Enjoy experimenting!

S’mores Rolled Rice Krispie Treat

S’mores Rolled Rice Krispie Treat: Your New Favorite No-Bake Dessert

Relive childhood memories with S’mores Rolled Rice Krispie Treats, a delightful no-bake dessert that combines gooey marshmallows, crunchy cereal, and a chocolate swirl.
Prep Time 15 minutes
Cook Time 10 minutes
Chilling Time 45 minutes
Total Time 1 hour 10 minutes
Servings: 12 pieces
Course: Dessert
Cuisine: American
Calories: 180

Ingredients
  

For the Base
  • 4 tablespoons unsalted butter Light brown butter adds a richer flavor
  • 6 cups mini marshmallows Can substitute with cut large marshmallows
  • 6 cups crispy rice cereal Ensure not to crush it for the perfect roll
  • 1.5 cups crushed graham crackers Gluten-free option available
For the Chocolate Swirl
  • 1 cup chocolate spread or melted chocolate Choose based on texture preference
  • 1 cup semi-sweet chocolate chips Used for final drizzle
For the Drizzle
  • 1 tablespoon coconut oil or butter Enhances glossiness of chocolate drizzle

Equipment

  • Medium saucepan
  • spatula
  • baking sheet
  • parchment paper
  • microwave-safe bowl
  • Serrated knife

Method
 

Step-by-Step Instructions
  1. Melt the butter in a medium saucepan over medium-low heat until fully melted, then stir in mini marshmallows until completely melted.
  2. Remove from heat and fold in crispy rice cereal and crushed graham crackers until evenly blended.
  3. Line a baking sheet with parchment paper, transfer the mixture, and press into an even rectangle about ½ inch thick.
  4. Spread a layer of chocolate spread or melted chocolate over the pressed rice mixture, then sprinkle mini marshmallows on top.
  5. Roll the mixture tightly from one edge using parchment paper; apply gentle pressure to create a snug log shape.
  6. Wrap the rolled log in parchment or plastic wrap and chill in the refrigerator for 30-45 minutes.
  7. Melt semi-sweet chocolate chips with coconut oil in a microwave and drizzle over the chilled roll.
  8. Slice the chocolate-drizzled roll into 1-inch rounds and serve.

Notes

Work quickly with the warm marshmallow mixture and keep low heat to ensure a chewy texture. Fully chill before slicing for neat rounds.

Sweet Chili Roasted Chicken and Vegetables for Busy Nights

As the aroma of sweet chili sauce begins to waft through my kitchen, I can’t help but feel a wave of comfort wash over me. There’s something magical about Quick Sheet Pan Recipes, and my Easy Sweet Chili Roasted Chicken and Vegetables is no exception. This dish transforms busy weeknight dinners into a delightful experience, offering a balance of tender chicken and crisp, colorful veggies, all lovingly intertwined with that irresistible sauce. Not only is this meal a breeze to whip up, but it’s also a health-conscious choice that won’t leave you reaching for takeout. So, why not trade fast food for this healthy, satisfying option? Let’s dive into flavors that will not only fill your belly but also warm your heart! Ready to bring some magic to your dinner table?

Why is this dish a weeknight hero?

Simplicity at Its Best: Just toss everything on a sheet pan, and you’re set! No complicated steps, perfect for busy lives.
Rich, Flavorful Sauce: The sweet chili sauce adds a delightful mix of sweetness and heat, ensuring every bite is exciting.
Nutrient-Packed Goodness: Featuring vibrant vegetables like broccoli and carrots, this dish is not only delicious but also packed with essential nutrients.
Versatile Options: Swap in your favorite proteins or veggies, making it adaptable to various dietary needs—even a quick shrimp or tofu option!
Quick Cook Time: Ready in 15-20 minutes, it’s the ultimate solution for last-minute dinner dilemmas. Plus, if you’re looking for more quick meals, try Chili Chicken Roasted for another delicious spin!

Sweet Chili Roasted Chicken and Vegetables Ingredients

For the Chicken

  • Boneless Skinless Chicken Breasts – The main protein that remains juicy and tender; feel free to substitute with thighs for added flavor or tofu for a vegetarian twist.

For the Vegetables

  • Broccoli Florets – Adds a nice crunch and is nutrient-dense; both fresh or frozen work well here.
  • Cauliflower Florets – Absorbs the sweet chili sauce beautifully; you can swap these for bell peppers for a different flavor.
  • Large Carrots – Offers natural sweetness and vibrant color; zucchini can be a lower-carb alternative.

For Flavor

  • Olive Oil – Helps in roasting and enhances flavors; consider using avocado oil for a higher smoke point.
  • Freshly Ground Black Pepper – Perfect for seasoning; adjust based on your taste preferences or replace it with garlic powder for an extra kick.
  • Sweet Chili Sauce – The star of this dish, adding a sweet and mildly spicy flavor; you could try a homemade version or teriyaki sauce for a new twist.

This collection of ingredients enhances the magic of the Sweet Chili Roasted Chicken and Vegetables, promising an easy and satisfying meal to delight your taste buds!

Step‑by‑Step Instructions for Sweet Chili Roasted Chicken and Vegetables

Step 1: Preheat the Oven
Begin by preheating your oven to 425°F (or 400°F if using a conventional oven). This high temperature is essential for achieving that wonderful roasted flavor and crispiness. While the oven warms up, gather your ingredients and prepare your sheet pan to make the process smooth and enjoyable.

Step 2: Prepare the Baking Sheet
Line a large sheet pan with aluminum foil, allowing for easy cleanup later. This step not only saves time but also ensures your chicken and vegetables won’t stick as they roast together. It’s a lovely way to create a hassle-free cooking experience while keeping your kitchen tidy.

Step 3: Arrange Chicken and Vegetables
Next, place the diced boneless skinless chicken breasts and your choice of broccoli, cauliflower, and large carrots directly on the lined sheet pan. Make sure to spread everything out evenly, ensuring the chicken is not overcrowded, allowing for even roasting and beautiful caramelization.

Step 4: Drizzle with Oil and Season
Drizzle a generous amount of olive oil over the chicken and vegetables, followed by a sprinkle of freshly ground black pepper. Using tongs or your hands, toss everything together gently to coat evenly. This simple action enhances flavors and helps achieve that delightful golden finish in your Sweet Chili Roasted Chicken and Vegetables.

Step 5: Add the Sweet Chili Sauce
Now it’s time to drizzle about three-quarters of the sweet chili sauce over the chicken and veggie mixture. Mix thoroughly to ensure every piece is infused with that deliciously sweet, slightly spicy sauce. This step creates a savory glaze that will cling beautifully as it roasts.

Step 6: Roast in the Oven
Place the sheet pan in your preheated oven, and roast for 14-15 minutes. If using a conventional oven, aim for 17-20 minutes. Keep an eye on the chicken—it should reach an internal temperature of 165°F, and the vegetables will become vibrant and crisp-tender.

Step 7: Final Sauce Drizzle
Once cooked, remove the sheet pan from the oven, and let it rest for a couple of minutes. Before serving, drizzle the remaining sweet chili sauce over the warm chicken and vegetables. This finishing touch amps up the flavor, making your Sweet Chili Roasted Chicken and Vegetables irresistible and ready to enjoy.

Make Ahead Options

These Sweet Chili Roasted Chicken and Vegetables are perfect for meal prep enthusiasts! You can prep the chicken and vegetables up to 24 hours in advance by cutting them and storing them separately in airtight containers in the refrigerator. Drizzle the chicken and veggies with olive oil, season with black pepper, and toss them together before refrigerating to maintain freshness and prevent browning. When you’re ready to serve, simply add the sweet chili sauce and roast them straight from the fridge for 14-15 minutes (or 17-20 minutes in a conventional oven). This easy prep not only saves you time but also ensures a deliciously warm meal with minimal effort!

What to Serve with Sweet Chili Roasted Chicken and Vegetables

Transform your dinner into a wholesome feast with these delightful pairings that enhance every bite of your main dish!

  • Fluffy Jasmine Rice: This fragrant rice makes the perfect bed for your chicken, soaking up the delicious sweet chili sauce for a satisfying experience.

  • Quinoa Salad: A nutty quinoa salad with fresh herbs and citrus dressing adds a refreshing touch, balancing the richness of the roasted veggies and chicken.

  • Crispy Garlic Bread: Serve slices of crispy garlic bread for dipping in any leftover sauce, creating a fun and satisfying accompaniment bringing warmth to your meal.

  • Steamed Green Beans: Vibrant green beans add a bright crunch to your plate and provide a lovely color contrast against the sweet chili sauce.

  • Roasted Sweet Potatoes: The natural sweetness of roasted sweet potatoes complements the dish beautifully while their creamy texture invites slow and satisfying bites.

  • Chilled Cucumber Salad: Cool and refreshing, a cucumber salad drizzled with rice vinegar brings a lightness that balances the savory flavors.

  • Mango Smoothie: A sweet mango smoothie serves as a delightful dessert, echoing the tropical notes found in sweet chili sauce and offering a refreshing end to your meal.

  • Coconut Ice Cream: For dessert, a scoop of coconut ice cream adds a creamy, sweet, and slightly tropical finish to complete your dining experience beautifully.

Expert Tips for Sweet Chili Roasted Chicken and Vegetables

  • Cut Consistency: Ensure all vegetables are cut to a similar size for even roasting. This helps avoid any soggy or undercooked pieces.

  • Vegetable Options: Don’t hesitate to swap out vegetables! Using seasonal favorites like bell peppers or snap peas can add a fresh twist to your Sweet Chili Roasted Chicken and Vegetables.

  • Keep an Eye on Time: Cooking times can vary based on your oven and the size of the chicken pieces. Always check that the internal temperature reaches 165°F.

  • Prevent Drying: If you prefer your chicken extra juicy, marinate it in the sweet chili sauce for 30 minutes before roasting. This can help keep it moist during cooking.

  • One-Pan Wonder: Embrace the simplicity of this sheet pan dish by preparing everything ahead. It saves time and brings more flavor to your busy weeknight meals!

Sweet Chili Roasted Chicken and Vegetables Variations

Feel free to explore different flavor profiles and textures to make this dish even more enjoyable!

  • Shrimp or Tofu: Swap out chicken for shrimp or tofu for a lightened-up version packed with protein and flavor.

  • Seasonal Veggies: Use a mix of seasonal vegetables like bell peppers, asparagus, or snap peas to add variety and freshness. This transformation keeps things interesting and colorful!

  • Spicy Alternative: Substitute the sweet chili sauce with a spicy blend or sriracha for those who love a bit more heat in their meals.

  • Honey-Mustard Twist: Drizzle your chicken and veggies with a mix of honey and mustard for a deliciously tangy alternative that complements the dish beautifully.

  • Zucchini for Carrots: Replace large carrots with zucchini for a lower-carb option that still offers crunch and vibrant color.

Don’t forget, if you’re looking for more quick and delicious dinners, check out Homemade Chicken Rolls that are as delightful as they are easy to make!

  • Garlic Infusion: Add minced garlic or garlic powder for an aromatic enhancement that pairs perfectly with the sweet chili sauce.

  • Cauliflower Rice: Serve your Sweet Chili Roasted Chicken and Vegetables over cauliflower rice instead of regular rice for a healthier, low-carb base. It absorbs the flavors wonderfully!

Enjoy creating your own twist on this delightful weeknight dish—the possibilities are endless!

How to Store and Freeze Sweet Chili Roasted Chicken and Vegetables

Fridge: Store any leftovers in an airtight container for up to 5 days. This way, you can enjoy your tasty Sweet Chili Roasted Chicken and Vegetables over the next few days without losing flavor.

Freezer: If you want to keep it longer, freeze the dish for up to 4 months. Make sure it’s well-wrapped or stored in a freezer-safe container to prevent freezer burn.

Reheating: For best results, thaw in the refrigerator overnight, then reheat in the oven at 350°F until warmed through, about 15-20 minutes, to maintain that delicious roasted quality.

Meal Prep: Consider prepping the chicken and vegetables ahead of time, storing them separately in the fridge, and simply roasting when you’re ready to enjoy this delightful meal!

Sweet Chili Roasted Chicken and Vegetables Recipe FAQs

What is the best way to select ripe vegetables for this dish?
Absolutely! When choosing vegetables like broccoli and cauliflower, look for vibrant colors and firm textures. Fresh broccoli should have tightly closed florets, while cauliflower should be dense without dark spots. Avoid any wilted or yellowing leaves, as these are indications of age.

How should I store leftovers of Sweet Chili Roasted Chicken and Vegetables?
Leftovers can be stored in an airtight container in the refrigerator for up to 5 days. Ensure they cool down before sealing to prevent excess moisture, which can make them soggy. If you’re planning to eat them later in the week, lining the container with a paper towel can help absorb any moisture!

Can Sweet Chili Roasted Chicken and Vegetables be frozen?
Yes! To freeze, allow the dish to cool completely, then transfer to a freezer-safe container or resealable bag. Be sure to remove as much air as possible to avoid freezer burn. It can be stored for up to 4 months. When you’re ready to enjoy, thaw in the refrigerator overnight before reheating.

What if my vegetables are overcooked or undercooked?
For even cooking, cut all vegetables into uniform sizes, about 1-2 inches. If you notice they’re undercooked after the suggested roasting time, return them to the oven for a few additional minutes. If they seem overcooked, take care to start checking them earlier next time—once they’re crisp-tender, they’re perfect!

Are there any dietary considerations to keep in mind?
This dish is gluten-free, making it suitable for those with gluten sensitivities. However, if you have allergies, like to soy or specific oils, double-check the ingredients in the sweet chili sauce or make your own from scratch! You can use alternative vegetables to fit your dietary needs, ensuring everyone can enjoy this meal!

Sweet Chili Roasted Chicken and Vegetables

Sweet Chili Roasted Chicken and Vegetables for Busy Nights

Enjoy a delightful Sweet Chili Roasted Chicken and Vegetables dish, perfect for busy nights with tender chicken and colorful veggies.
Prep Time 10 minutes
Cook Time 15 minutes
Total Time 25 minutes
Servings: 4 servings
Course: Chicken
Cuisine: American
Calories: 400

Ingredients
  

For the Chicken
  • 2 pounds Boneless Skinless Chicken Breasts Substitute with thighs for added flavor or tofu for a vegetarian twist.
For the Vegetables
  • 2 cups Broccoli Florets Both fresh or frozen work well.
  • 2 cups Cauliflower Florets Can be swapped for bell peppers.
  • 2 large Carrots Zucchini can be a lower-carb alternative.
For Flavor
  • 2 tablespoons Olive Oil Consider using avocado oil for a higher smoke point.
  • 1 teaspoon Freshly Ground Black Pepper Adjust based on taste or replace with garlic powder.
  • 1 cup Sweet Chili Sauce Can try a homemade version or teriyaki sauce.

Equipment

  • Sheet Pan
  • Aluminum Foil
  • oven

Method
 

Step-by-Step Instructions
  1. Preheat your oven to 425°F (or 400°F if using a conventional oven).
  2. Line a large sheet pan with aluminum foil.
  3. Arrange diced chicken and vegetables on the sheet pan evenly.
  4. Drizzle with olive oil and sprinkle with black pepper, then toss to coat.
  5. Drizzle three-quarters of the sweet chili sauce over the mixture and mix thoroughly.
  6. Roast in the preheated oven for 14-15 minutes (or 17-20 minutes for conventional ovens).
  7. After cooking, drizzle the remaining sweet chili sauce over the dish before serving.
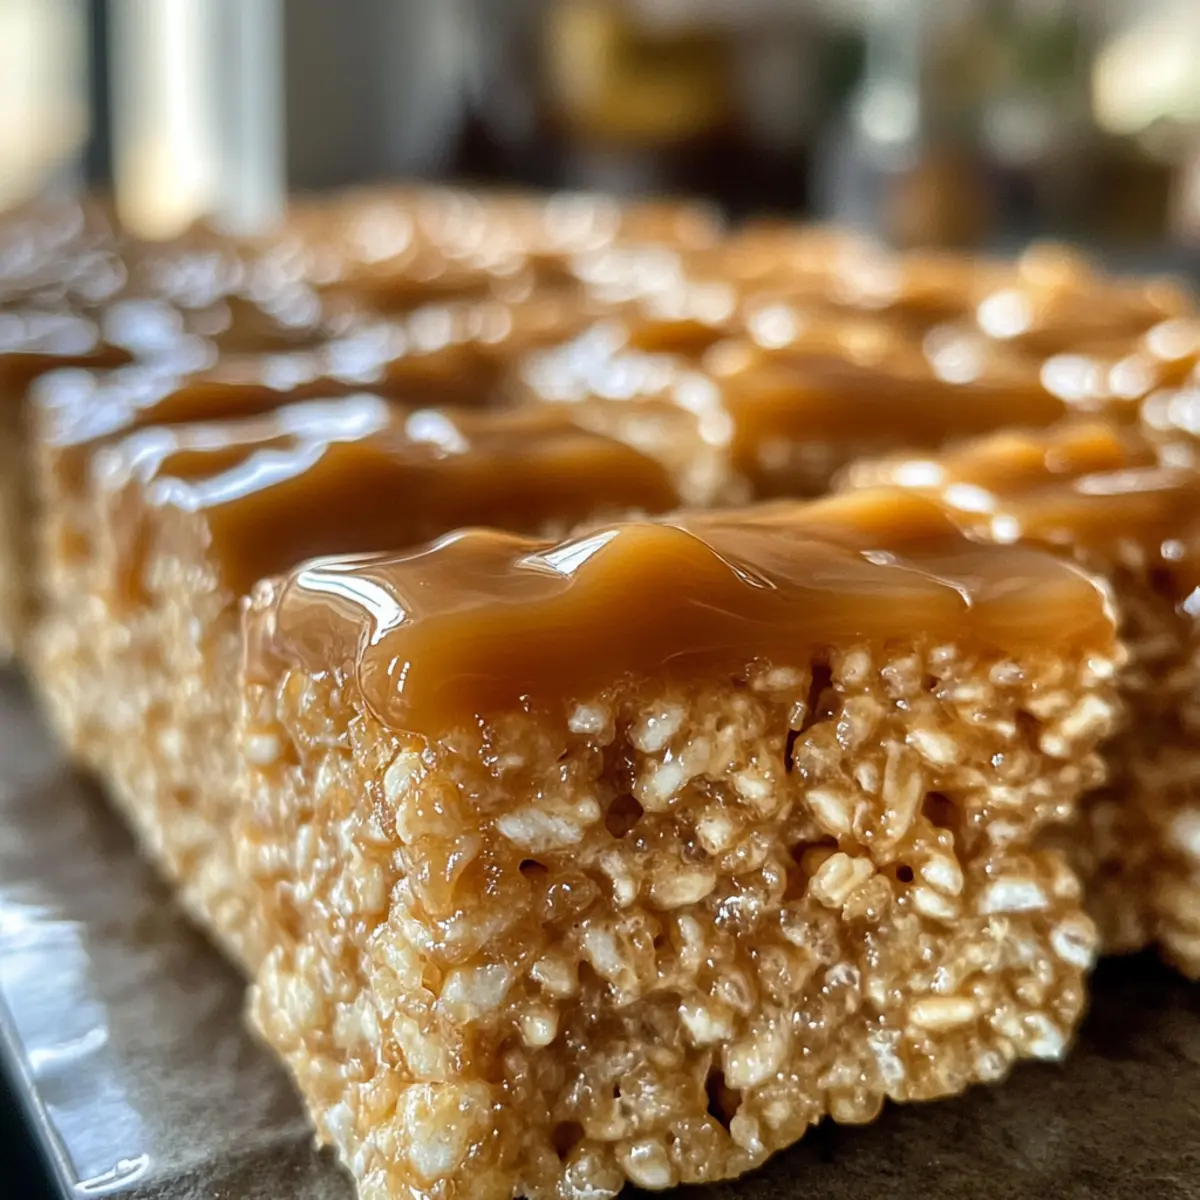
Notes

Ensure all vegetables are cut to a similar size for even roasting. Feel free to swap out vegetables based on seasonal availability.

Bobby Flay Caramelized Onion Dip: Elevate Your Snack Game

As I prepped for my last gathering, I stumbled upon Bobby Flay’s Caramelized Onion Dip and instantly knew this creamy delight would steal the spotlight. Eager to impress my friends, I discovered that this classic dip is not just rich and velvety, but also a charming way to elevate any occasion. With just a handful of pantry staples and minimal prep, I crafted a dish that outshines store-bought options. Whether it’s game day, a cozy movie night, or an impromptu get-together, this irresistible dip is a crowd-pleaser that’s uniquely customizable to fit anyone’s taste. Curious about all the magic this dip can bring to your next gathering? Let’s dive in!

Why is This Dip So Irresistible?

Creamy Indulgence: The smooth blend of sour cream and mayonnaise creates a luxurious texture that’s hard to resist.

Homemade Goodness: Unlike store-bought dips, Bobby Flay’s version offers a fresh, flavorful taste made from simple ingredients you likely have on hand.

Versatile Delight: Whether paired with crunchy potato chips, crisp veggies, or spread on sandwiches, this dip adapts beautifully to any occasion. For other delightful dips, check out my recipes for Savory Onion Potato or Cheese Green Onion.

Crowd-Pleasing Flavor: This classic dip is guaranteed to be a hit at parties, making it a must-try for your next gathering.

Easily Customizable: Add your favorite spices or herbs for a personal touch, and you can even switch out the dairy for plant-based options to suit dietary preferences.

Bobby Flay Caramelized Onion Dip Ingredients

• Get ready to create a dip that everyone will love!

For the Dip

  • Extra Virgin Olive Oil – Provides richness and aids in sautéing; swap with canola oil if needed.
  • Diced Onions (2 onions) – The heart of the dip, offering sweetness when caramelized; choose yellow or sweet onions for the best flavor.
  • Fresh Thyme Leaves (1 tablespoon) – Adds earthy notes that complement the onions; for convenience, dried thyme can be used instead (1 teaspoon).
  • Sour Cream (1 ¼ cups) – Ensures that luscious creaminess and tang; Greek yogurt works if you’re looking for a lighter version.
  • Mayonnaise (½ cup) – Contributes to the rich texture; consider avocado mayo as a healthier alternative.
  • Worcestershire Sauce (1 tablespoon) – Infuses umami flavor into the dip; soy sauce can serve as a satisfying substitute.
  • Kosher Salt and Black Pepper – Essential for seasoning; adjust to your taste for the right balance.

For Serving

  • Potato Chips – The perfect crunchy companion for this onion dip; feel free to use veggies or crackers instead for a fresher option.

Bobby Flay’s Caramelized Onion Dip is your ticket to a creamy, flavorful experience that outshines any store-bought version!

Step‑by‑Step Instructions for Bobby Flay Caramelized Onion Dip

Step 1: Heat the Oil
In a non-stick skillet, pour in 2 tablespoons of extra virgin olive oil and set your burner to medium heat. Allow the oil to warm for about a minute, watching for a shimmering surface, which indicates it’s ready. This oil will infuse richness into the dip while providing a perfect base for the onions.

Step 2: Sauté the Onions
Add 2 diced onions to the skillet and stir them gently to coat with the oil. Sauté the onions for approximately 10 to 15 minutes, stirring regularly, until they turn beautifully translucent and slightly golden; this is where the sweet caramelization begins. The fragrance will fill your kitchen, hinting at the deliciousness to come in your Bobby Flay Caramelized Onion Dip.

Step 3: Add Thyme
Once the onions are caramelized to a lovely golden hue, stir in 1 tablespoon of fresh thyme leaves. Mix them thoroughly into the onions, allowing this herb’s earthy aroma to blend harmoniously with the sweet onions. Sauté everything together for another minute to maximize flavor before removing the skillet from the heat.

Step 4: Prepare the Base
In a mixing bowl, combine 1 ¼ cups of sour cream, ½ cup of mayonnaise, and 1 tablespoon of Worcestershire sauce. Whisk these ingredients together until they achieve a smooth consistency. The combination of these items will create the creamy base for your dip, elevating its flavor and texture, setting the stage for the flavorful onions.

Step 5: Incorporate the Onions
Gradually add the sautéed onions and thyme mixture to the creamy base, continuing to whisk until everything is fully incorporated. Take a moment to admire the luxurious texture and how the golden onions enrich the dip. Ensure no onion clumps remain, yielding a cohesive mixture reminiscent of Bobby Flay’s Caramelized Onion Dip perfection.

Step 6: Season the Dip
Now, season your dip to taste with kosher salt and freshly ground black pepper. Start with a pinch of each and taste the mixture to find the perfect balance. This seasoning step is crucial as it enhances all flavors, ensuring your dip is not only rich but also savory and satisfying for everyone to enjoy.

Step 7: Chill and Meld Flavors
For optimal flavor, refrigerate the dip for at least 3 hours, allowing the ingredients to meld beautifully. Cover the bowl tightly with plastic wrap to keep it fresh in the fridge. This step is essential, as the waiting period not only enhances the flavors but also thickens your dip to a delightful consistency perfect for dipping.

Step 8: Serve with Style
When you’re ready to serve, give the dip a gentle stir and transfer it to your favorite serving bowl. If desired, garnish with a sprinkle of chopped chives for an added touch of color and freshness. Pair your Bobby Flay Caramelized Onion Dip with crunchy potato chips, fresh veggies, or crackers — it’s sure to be a hit at your next gathering!

Expert Tips for Bobby Flay Caramelized Onion Dip

  • Perfect Caramelization: Stir the onions frequently while sautéing to avoid burning. A medium flame is key to achieving that sweet and mellow flavor.

  • Avoid Chunkiness: Ensure the onions are finely mixed into the creamy base to create a cohesive dip. This enhances the texture and taste of your Bobby Flay Caramelized Onion Dip.

  • Make-Ahead Magic: Prepare the dip the day before your gathering for maximum flavor. Allowing it to chill overnight melds the ingredients beautifully.

  • Thickening Tip: If you prefer a denser dip, consider adding a couple of ounces of cream cheese into the mix. This creates a velvety, indulgent consistency.

  • Herb Enhancement: Spice it up! Feel free to experiment with additional herbs or spices like smoked paprika or cayenne for a unique twist that suits your taste.

  • Serving Ideas: Pair with not just potato chips, but also fresh veggies or even as a spread on sandwiches to truly bring versatility to this crowd-pleaser.

What to Serve with Bobby Flay’s Caramelized Onion Dip

Elevate your entertaining experience with delicious accompaniments that beautifully enhance this creamy, savory dip.

  • Crunchy Potato Chips: The classic choice, their satisfying texture provides a perfect contrast to the creamy dip, making every bite irresistible.
  • Fresh Veggie Platter: Crisp cucumber slices, bell pepper strips, and carrot sticks add a refreshing crunch, offering a lighter option while balancing the richness of the dip.
  • Toasty Baguette Slices: Warm, crusty bread serves as an excellent vehicle for the dip, adding a gourmet touch that feels special at any gathering. Don’t forget a drizzle of olive oil for added flavor!
  • Savory Crackers: A variety of whole-grain or herbed crackers can add another layer of flavor, perfectly pairing with the dip’s creamy consistency.
  • Classic Caesar Salad: A light Caesar salad provides a refreshing and zesty contrast to the richness of the dip, rounding out the meal and adding a bit of elegance.
  • Chilled White Wine: A crisp Sauvignon Blanc or a refreshing Prosecco pairs well, complementing the dip’s flavors and enhancing the overall experience of your gathering.

Remember, Bobby Flay’s Caramelized Onion Dip shines brightest when enjoyed with delightful, complementary bites!

Bobby Flay Caramelized Onion Dip Variations

Feel free to bring your own twist to this scrumptious dip and make it uniquely yours!

  • Spicy Kick: Add 1 teaspoon of smoked paprika or cayenne pepper for some heat. This will elevate the flavor and make it pop!

  • Herb Infusion: Mix in fresh herbs like basil, oregano, or parsley to brighten the taste. These herbs provide an aromatic depth that complements the richness beautifully.

  • Dairy-Free Delight: For a vegan version, swap the dairy ingredients for plant-based alternatives like cashew cream or dairy-free mayo. Your guests won’t even notice the difference!

  • Extra Creamy: Incorporate an 8-ounce package of softened cream cheese to give your dip a thicker, richer texture. This twist is perfect for those who love a velvety base.

  • Zesty Lemon: Add a splash of lemon juice to brighten the flavors and add a refreshing contrast to the creamy dip. Just a little bit goes a long way in elevating taste!

  • Nutty Crunch: Consider sprinkling in some toasted nuts like walnuts or almonds for an unexpected crunch. This adds a delightful texture and flavor variation that’s sure to surprise.

  • Caramelized Vegetables: Mix in some finely chopped caramelized bell peppers or mushrooms to enhance the flavor profile and bring in additional layers of deliciousness.

  • For More Dips: If you’re interested in trying out another dynamic dip, check out my recipe for Savory Onion Potato or Cheese Green Onion. Each offers a unique twist for your next gathering.

Storage Tips for Bobby Flay Caramelized Onion Dip

  • Fridge: Store the dip in an airtight container in the refrigerator for up to 1 week, keeping it fresh and ready to enjoy.

  • Make-Ahead: This dip tastes even better when made a day in advance, allowing the flavors to meld beautifully. Just refrigerate it overnight!

  • Freezer: While not recommended for long-term freezing, you can freeze the dip for up to 2 months. Thaw in the fridge and stir well before serving.
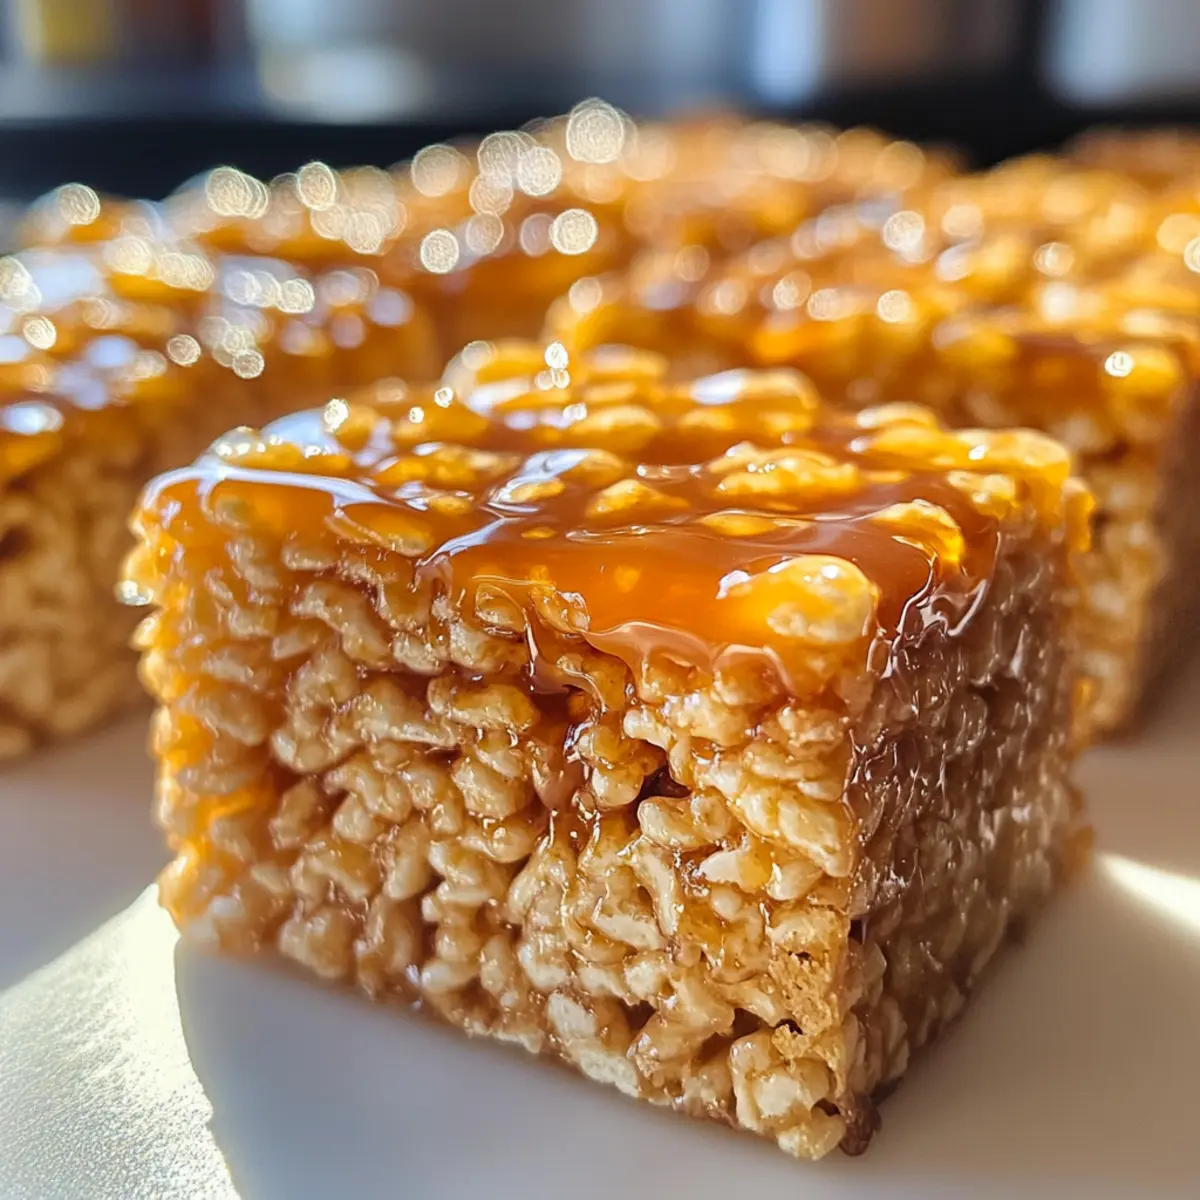
  • Reheating: If chilled, give it a gentle stir after refrigerating to restore its creamy texture. There’s no need to heat; it’s delicious cold or at room temperature!

Make Ahead Options

Bobby Flay’s Caramelized Onion Dip is a fantastic choice for meal prep, saving you time on busy days! You can prepare the dip up to 24 hours in advance, allowing the flavors to deepen. Start by sautéing the onions and mixing them with the cream base, then let the mixture cool before refrigerating it in an airtight container. To preserve its delicious quality, make sure to store it well to prevent drying out. When you’re ready to serve, simply give it a quick stir, garnish with chives if desired, and enjoy the rich, creamy dip that’s just as delectable as the day you made it!

Bobby Flay Caramelized Onion Dip Recipe FAQs

How do I know if my onions are ripe enough for caramelization?
Absolutely! Choose yellow or sweet onions for the best results. Look for firm onions with smooth, dry skins and no dark spots or soft areas. These are good indicators that you’re starting with quality produce that will caramelize beautifully.

What’s the best way to store leftover Bobby Flay Caramelized Onion Dip?
You can store the dip in an airtight container in the refrigerator for up to 1 week. Just ensure it’s tightly sealed to maintain its freshness. If preparing ahead of time, making it a day earlier enhances the flavor, so it’s a great make-ahead option!

Can I freeze Bobby Flay Caramelized Onion Dip?
While freezing is possible, it’s not always recommended for the best texture. However, if you’d like to go this route, you can freeze the dip for up to 2 months. Just pour the dip into a freezer-safe container, leaving some space for expansion, and thaw it in the fridge before serving. Give it a good stir to restore its creamy consistency.
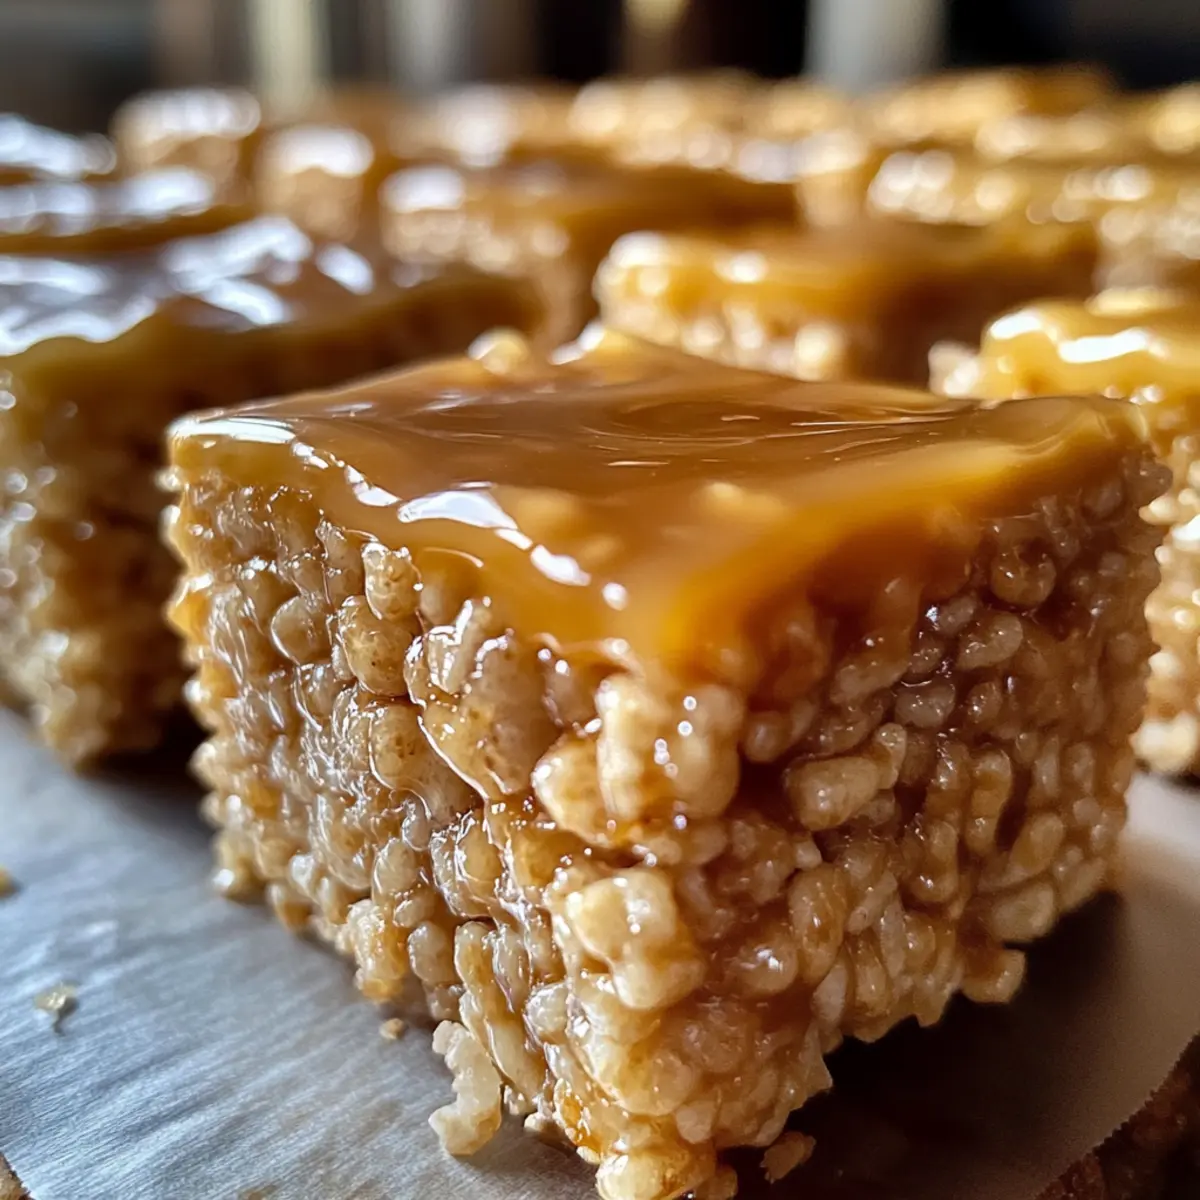
What should I do if my dip is too salty?
If you find your dip is too salty for your taste, start by adding a little extra sour cream or mayonnaise to balance the flavors. Gradually mix it in while tasting until you reach the desired saltiness. You can also add some finely chopped fresh herbs, which help counteract saltiness too!

Can I make a vegan version of Bobby Flay’s Caramelized Onion Dip?
Very! To create a vegan version, substitute sour cream with cashew cream or dairy-free yogurt, and replace mayonnaise with avocado mayo or any plant-based alternative. This way, you can enjoy the rich flavors of the dip while keeping it completely dairy-free!

How long can I keep the dip at room temperature during a gathering?
I recommend not keeping the dip out for more than 2 hours at room temperature to ensure freshness and safety. If your gathering lasts longer, consider placing it on ice to keep it cool and delicious!

Bobby Flay Caramelized Onion Dip

Bobby Flay Caramelized Onion Dip: Elevate Your Snack Game

Bobby Flay Caramelized Onion Dip is a creamy delight that elevates any occasion with its rich flavor and simple ingredients.
Prep Time 15 minutes
Cook Time 15 minutes
Chilling Time 3 hours
Total Time 3 hours 30 minutes
Servings: 8 servings
Course: Other
Cuisine: American
Calories: 250

Ingredients
  

For the Dip
  • 2 tablespoons Extra Virgin Olive Oil Provides richness and aids in sautéing; swap with canola oil if needed.
  • 2 onions Diced Onions The heart of the dip, offering sweetness when caramelized; choose yellow or sweet onions.
  • 1 tablespoon Fresh Thyme Leaves Adds earthy notes that complement the onions; dried thyme can be used instead.
  • 1.25 cups Sour Cream Ensures creaminess and tang; Greek yogurt works for a lighter version.
  • 0.5 cups Mayonnaise Contributes to the rich texture; avocado mayo can be a healthier alternative.
  • 1 tablespoon Worcestershire Sauce Infuses umami flavor; soy sauce can serve as a substitute.
  • to taste Kosher Salt Essential for seasoning.
  • to taste Black Pepper Essential for seasoning.
For Serving
  • to taste Potato Chips The perfect crunchy companion; feel free to use veggies or crackers instead.

Equipment

  • Non-Stick Skillet
  • mixing bowl
  • whisk
  • spatula

Method
 

Step-by-Step Instructions
  1. Heat the Oil: In a non-stick skillet, pour in 2 tablespoons of extra virgin olive oil and set your burner to medium heat. Allow the oil to warm for about a minute, watching for a shimmering surface.
  2. Sauté the Onions: Add 2 diced onions to the skillet and stir them gently to coat with the oil. Sauté for approximately 10 to 15 minutes, stirring regularly until they turn translucent and slightly golden.
  3. Add Thyme: Once the onions are caramelized, stir in 1 tablespoon of fresh thyme leaves and sauté together for another minute.
  4. Prepare the Base: In a mixing bowl, combine 1 ¼ cups of sour cream, ½ cup of mayonnaise, and 1 tablespoon of Worcestershire sauce. Whisk until smooth.
  5. Incorporate the Onions: Gradually add the sautéed onions and thyme mixture to the creamy base, whisking until fully incorporated.
  6. Season the Dip: Season to taste with kosher salt and freshly ground black pepper.
  7. Chill and Meld Flavors: Refrigerate the dip for at least 3 hours to allow flavors to meld.
  8. Serve with Style: Transfer to a serving bowl and garnish with chopped chives if desired. Enjoy with potato chips, veggies, or crackers.

Notes

This dip tastes even better when made a day in advance, allowing the flavors to meld beautifully.

Zesty Homemade Remoulade Sauce to Elevate Your Dishes

As I stirred the creamy ingredients together, a zesty aroma began to fill my kitchen, transporting me to the bustling streets of New Orleans. The magic of this Homemade Remoulade Sauce lies in its bold flavor—perfectly tangy, subtly spicy, and creamy enough to elevate everything from crispy fried seafood to your favorite sandwiches. This easy recipe not only saves you from bottled sauces that often disappoint, but it also allows you to customize the heat level to fit your taste buds. Whether you’re hosting a gathering or looking for a quick dip, this versatile sauce can be ready in a matter of minutes using pantry staples. Wondering how you can make this condiment your own? Let’s dive in!

Why Choose Homemade Remoulade Sauce?

Elevated Flavor: This zesty sauce transforms ordinary meals into culinary masterpieces. Versatile Uses: Whether as a dip for fried seafood, a spread on sandwiches, or drizzled over grilled veggies, it adapts effortlessly to your preferences. Quick & Easy: With just a handful of ingredients, you can whip up a batch in minutes, saving time without sacrificing flavor. Customizable Heat: Adjust the spice level to suit your taste, ensuring everyone at your table is satisfied. Plus, you might love exploring other delectable condiments like Grandma’s Homemade Chocolate Oat Bites for your next gathering!

Homemade Remoulade Sauce Ingredients

• Get ready to whip up this flavorful condiment with just a few simple ingredients!

For the Base

  • Mayonnaise – Creates the rich and creamy foundation; swap for vegan mayo for a plant-based option.
  • Dijon Mustard – Infuses tanginess and depth; regular mustard can be used if needed.
  • Prepared Horseradish – Delivers a sharp kick; extra hot sauce can work in a pinch for spice.
  • Hot Sauce (e.g., Tabasco) – Adds spiciness; adjust the amount to match your heat preferences.
  • Worcestershire Sauce – Contributes a savory umami flavor; a vegan alternative is available for plant-based recipes.

For the Flavor Boost

  • Smoked Paprika – Gives a subtle smokiness; you can use regular paprika for a milder taste.
  • Garlic Powder – Offers a lovely savory depth; fresh minced garlic enhances the flavor even more.
  • Lemon Juice – Brightens the sauce beautifully; vinegar can be a quick substitute if lemon isn’t handy.

For the Texture and Freshness

  • Chopped Capers – Adds briny notes that elevate the sauce; chopped pickles work as a similar alternative.
  • Fresh Parsley – Brings freshness and vibrant color; any fresh herb like tarragon can switch up the flavor.

With these ingredients in hand, you’re all set to create your own Homemade Remoulade Sauce that’ll impress your family and friends!

Step‑by‑Step Instructions for Homemade Remoulade Sauce

Step 1: Prepare the Base
In a medium-sized mixing bowl, add one cup of mayonnaise to serve as the creamy base for your Homemade Remoulade Sauce. Using a whisk, blend the mayonnaise until it reaches a smooth and uniform texture, about 30 seconds. This ensures a velvety foundation for the sauce, perfect for adding your exciting flavors.

Step 2: Add Flavorful Ingredients
To the smooth mayonnaise, incorporate two tablespoons of Dijon mustard, one tablespoon of prepared horseradish, one tablespoon of Worcestershire sauce, and a few dashes of hot sauce to taste. Whisk these ingredients together thoroughly for another 30 seconds, until fully integrated. You should notice the sauce taking on a more complex and tangy flavor profile.

Step 3: Mix in Spices
Next, stir in one teaspoon of smoked paprika, one teaspoon of garlic powder, and two tablespoons of fresh lemon juice into the mixture. Continue whisking until all spices are evenly combined, about 20 seconds. This step introduces a warm smokiness and a zesty brightness, deepening the flavor of your Homemade Remoulade Sauce.

Step 4: Fold in the Texture
Gently fold in three tablespoons of chopped capers and two tablespoons of finely chopped fresh parsley using a spatula. Work carefully to ensure the ingredients are evenly distributed without overmixing, which should take about 30 seconds. This will give your sauce a delightful texture and burst of freshness with every bite.

Step 5: Refrigerate for Maximum Flavor
Cover your bowl tightly with plastic wrap and refrigerate the remoulade sauce for at least 30 minutes. This resting period allows the flavors to meld and develop, creating a richer taste. When ready to serve, you’ll be rewarded with a creamy and tangy condiment that enhances any dish splendidly.

Expert Tips for Homemade Remoulade Sauce

Balance Flavors: Start with the base recipe and adjust ingredients gradually. Taste and tweak to ensure the flavor profile meets your preference for Homemade Remoulade Sauce.

Chill Time Matters: Allow the sauce to sit in the fridge for at least 30 minutes before serving; this step is crucial for letting flavors meld beautifully.

Spice Control: Adjust the cayenne and hot sauce to your taste; remember, it’s always easier to add more spice than to tone it down once mixed in.

Fresh Ingredients: Use fresh herbs and ingredients wherever possible. This will enhance the brightness and overall flavor of your Homemade Remoulade Sauce.

Storage Tips: Store in an airtight container to keep the sauce fresh for up to a week. Stir well before using, as some separation may occur.

Experiment with Variations: Don’t hesitate to try adding different herbs or spices to put your unique spin on the recipe, enhancing both flavor and depth.

Make Ahead Options

These Homemade Remoulade Sauce options are perfect for busy home cooks who want to save time in the kitchen! You can prepare the sauce up to 3 days in advance by combining all the ingredients, as described in the recipe, and storing it in an airtight container in the refrigerator. To maintain the sauce’s creamy texture and vibrant flavor, be sure to cover it tightly to prevent it from absorbing any odors in the fridge. When you’re ready to serve, simply give it a good stir to remix the ingredients and adjust the seasoning if needed. With just a little prep, you’ll have a zesty condiment ready to elevate any meal!

Homemade Remoulade Sauce Variations

Feel free to make this creamy sauce truly yours by exploring these exciting twists!

  • Vegan Version: Substitute mayonnaise with vegan mayo for a plant-based delight without sacrificing flavor.
  • Herb-Infused: Try adding freshly chopped tarragon or chives for an aromatic lift—perfect for seafood salads!
  • Heat Boost: Increase the hot sauce or toss in a pinch of cayenne for those who like it spicy. Your taste buds will dance!
  • Chunky Texture: For a heartier bite, mix in more chopped capers or some diced pickles to amplify the briny goodness.
  • Smoky Twist: If you adore a deeper flavor, add a teaspoon of liquid smoke for a unique, southern twist.
  • Citrus Zing: A splash of orange juice can replace some lemon juice for a sweet and tangy surprise.
  • Sweet & Spicy: Blend in a teaspoon of honey or agave syrup alongside the hot sauce for a sweet heat that’s equally delightful.
  • Garlic Lovers: Swap garlic powder with fresh minced garlic for an extra punch of flavor that fills the kitchen with a warm aroma.

Pair your homemade creation with crispy fried oysters or drizzled over a refreshing shrimp salad! Looking for other delicious ideas? Consider exploring Homemade Chicken Pot Pie Soup for a cozy dinner option or try this Homemade Sweet Orange Jam to add a burst of flavor to breakfast!

What to Serve with Creamy and Tangy Homemade Remoulade Sauce

Explore delightful pairings that will enhance the already bold flavors of your homemade remoulade sauce.

  • Crispy Fried Shrimp: The crunchy texture of fried shrimp perfectly complements the creamy remoulade, creating a satisfying harmony of flavors.
  • Grilled Salmon: Drizzling remoulade over flaky grilled salmon adds a tangy contrast that elevates the entire dish.
  • Potato Wedges: Crispy potato wedges dunked in that zesty sauce create a playful and delicious snack or side.
  • Roasted Vegetables: Serve remoulade as a dipping sauce alongside colorful roasted veggies for a splash of brightness.
  • Sandwiches & Wraps: Use remoulade as a spread to spice up your sandwiches or wraps, adding vibrancy to each bite.
  • Crab Cakes: A classic pairing, the flavors of crab cakes shine when paired with the creamy tang of remoulade, enhancing the dish wonderfully.
  • Fresh Slaw: Serve remoulade as a dressing for a crunchy slaw; the creaminess complements the fresh vegetables beautifully.
  • Oysters on the Half Shell: A touch of this sauce on freshly shucked oysters adds a zesty kick that seafood lovers crave.
  • Sweet Potato Fries: The sweetness of fries balances the tanginess of remoulade, creating a delightful contrast that’s hard to resist.
  • Chilled Sparkling Wine: Pair your meal with a glass of chilled sparkling wine to elevate the dining experience and cleanse the palate.

How to Store and Freeze Homemade Remoulade Sauce

Fridge: Store the Homemade Remoulade Sauce in an airtight container for up to one week. Make sure to stir well before using, as some separation may occur.

Freezer: While it’s best enjoyed fresh, you can freeze the sauce for up to three months. Place it in a freezer-safe container, leaving some room for expansion.

Thawing: To use frozen remoulade sauce, transfer it to the fridge a day before needed to thaw slowly. Stir well before serving to recombine the ingredients.

Avoid Room Temperature: For food safety, avoid leaving the sauce at room temperature for more than two hours. Always return leftovers to the fridge promptly.

Homemade Remoulade Sauce Recipe FAQs

What is the best way to select ripe ingredients for my Homemade Remoulade Sauce?
Absolutely! For the best flavors, choose fresh ingredients. Look for mayonnaise that has a creamy consistency and isn’t nearing the expiration date. For herbs like parsley, select vibrant green leaves without wilting. Fresh horseradish should be firm to the touch, and your lemon should feel slightly heavy for its size, indicating juiciness.

How should I store my Homemade Remoulade Sauce after making it?
The Homemade Remoulade Sauce can be kept in an airtight container in the refrigerator for up to one week. Make sure it’s sealed tightly to maintain freshness. It’s a good idea to give it a gentle stir before using, as some separation may occur during storage.

Can I freeze Homemade Remoulade Sauce, and if so, how?
Yes, you can freeze your Homemade Remoulade Sauce for up to three months! To do this, place the sauce in a freezer-safe container, leaving some space at the top for expansion. When you’re ready to use it, thaw the sauce overnight in the fridge. Once thawed, stir well to recombine the ingredients before serving.
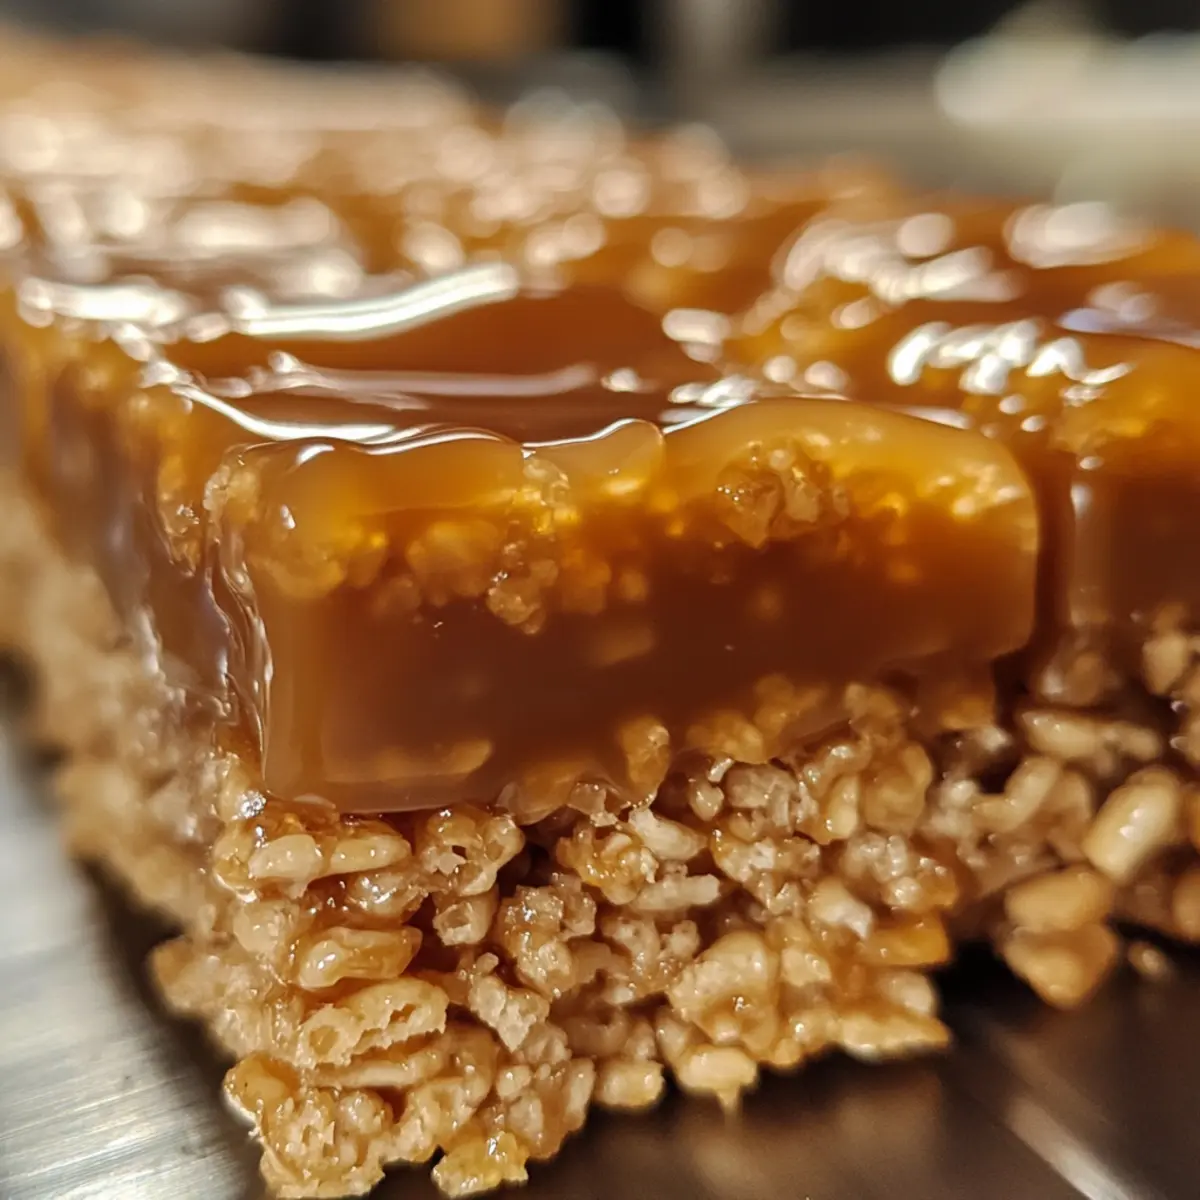
What should I do if my remoulade sauce tastes off?
If your sauce isn’t tasting quite right, don’t worry! Start by checking the freshness of your ingredients; expired or old components may impact flavor. If it’s too salty or tangy, consider adding a touch of sweetness, like honey or sugar. You can also balance it out by adding more mayonnaise or sour cream. And remember, adjusting seasoning little by little can help reach the perfect taste!

Can I make Homemade Remoulade Sauce for guests with food allergies?
Certainly! If you’re preparing for guests with allergies, consider using allergen-free alternatives. For example, choose a vegan mayo for dairy-free guests and double-check that all sauces, especially Worcestershire, are free from allergens like fish, which is common in traditional versions. Reading labels attentively ensures a safe and tasty experience for all!

How can I adjust the spiciness of my Homemade Remoulade Sauce?
Very easily! To control the heat in your Homemade Remoulade Sauce, start by adding just a dash of hot sauce and horseradish, then taste as you go. If you prefer a milder sauce, reduce the amounts of these spicy ingredients or use a milder hot sauce. On the flip side, if you want to kick it up a notch, don’t hesitate to add more until it suits your taste!

Homemade Remoulade Sauce

Zesty Homemade Remoulade Sauce to Elevate Your Dishes

Homemade Remoulade Sauce is a zesty, creamy condiment perfect for enhancing various dishes.
Prep Time 10 minutes
Refrigeration Time 30 minutes
Total Time 40 minutes
Servings: 8 tablespoons
Course: Other
Cuisine: Creole, Southern
Calories: 120

Ingredients
  

For the Base
  • 1 cup Mayonnaise Can swap for vegan mayo for plant-based option.
  • 2 tablespoons Dijon Mustard Regular mustard can be used if needed.
  • 1 tablespoon Prepared Horseradish Extra hot sauce can work for spice.
  • a few dashes Hot Sauce (e.g., Tabasco) Adjust amount to match heat preferences.
  • 1 tablespoon Worcestershire Sauce A vegan alternative is available.
For the Flavor Boost
  • 1 teaspoon Smoked Paprika Regular paprika can be used for milder taste.
  • 1 teaspoon Garlic Powder Fresh minced garlic enhances flavor.
  • 2 tablespoons Lemon Juice Vinegar can be a substitute if lemon isn’t handy.
For the Texture and Freshness
  • 3 tablespoons Chopped Capers Chopped pickles can be a similar alternative.
  • 2 tablespoons Fresh Parsley Any fresh herb like tarragon can switch up the flavor.

Equipment

  • mixing bowl
  • whisk
  • spatula
  • plastic wrap

Method
 

Step-by-Step Instructions
  1. In a medium-sized mixing bowl, add one cup of mayonnaise and blend until smooth, about 30 seconds.
  2. Incorporate two tablespoons of Dijon mustard, one tablespoon of prepared horseradish, one tablespoon of Worcestershire sauce, and hot sauce to taste. Whisk until fully integrated, about 30 seconds.
  3. Stir in one teaspoon of smoked paprika, one teaspoon of garlic powder, and two tablespoons of lemon juice until all are evenly combined, about 20 seconds.
  4. Gently fold in three tablespoons of chopped capers and two tablespoons of finely chopped parsley using a spatula for about 30 seconds.
  5. Cover tightly with plastic wrap and refrigerate for at least 30 minutes to let flavors meld.

Notes

Start with the base recipe and adjust ingredients gradually for taste. Allow to sit in the fridge for at least 30 minutes before serving.