Irresistible Glossy Pomegranate Mousse for Every Celebration

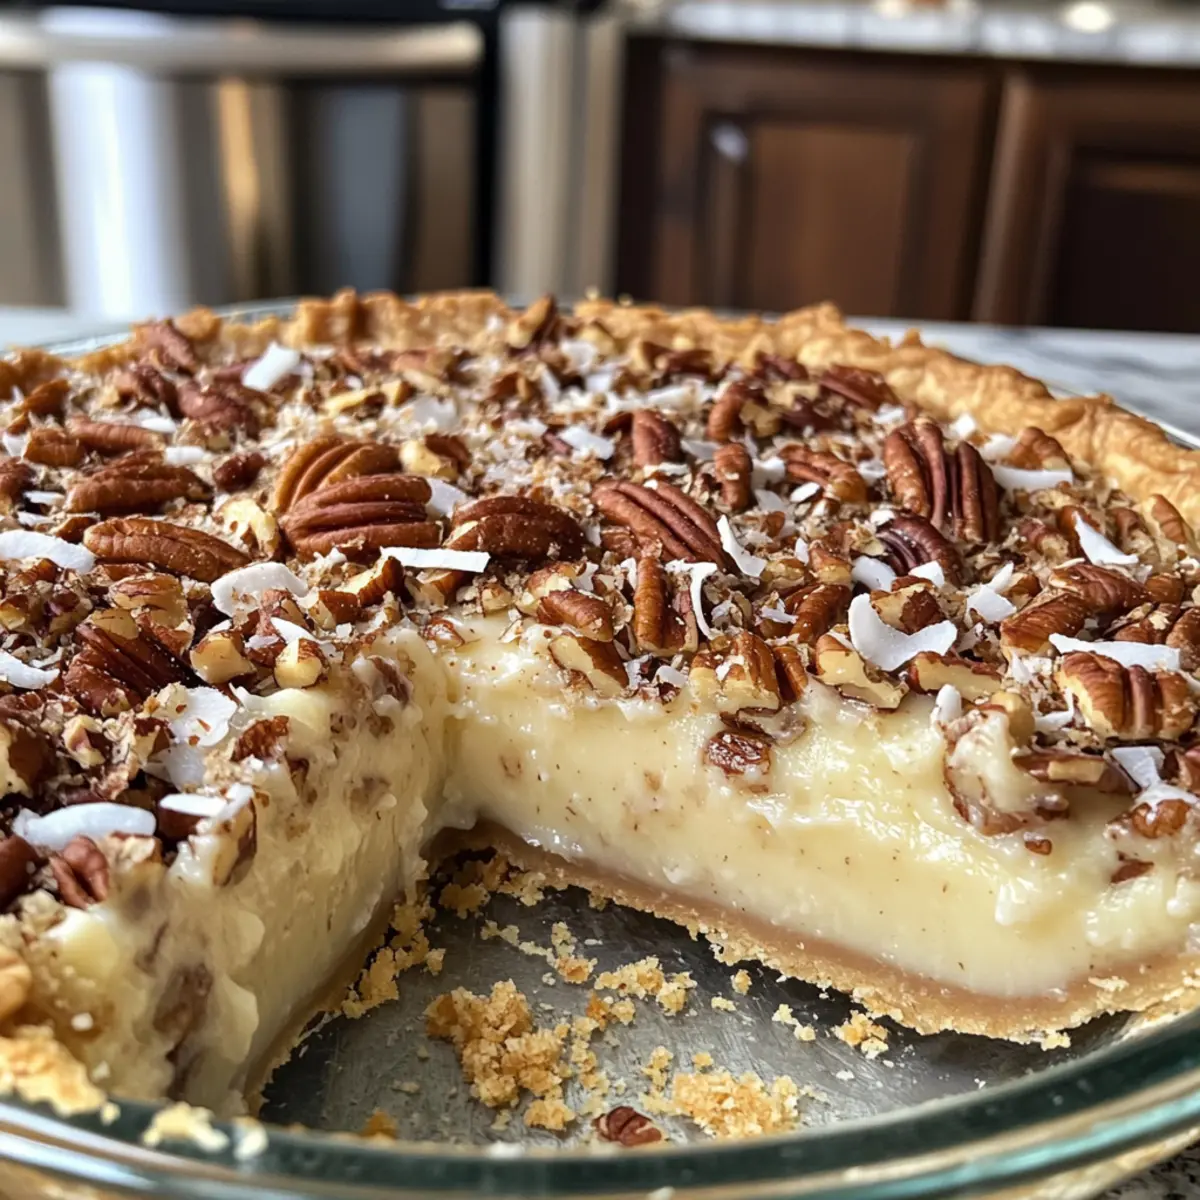
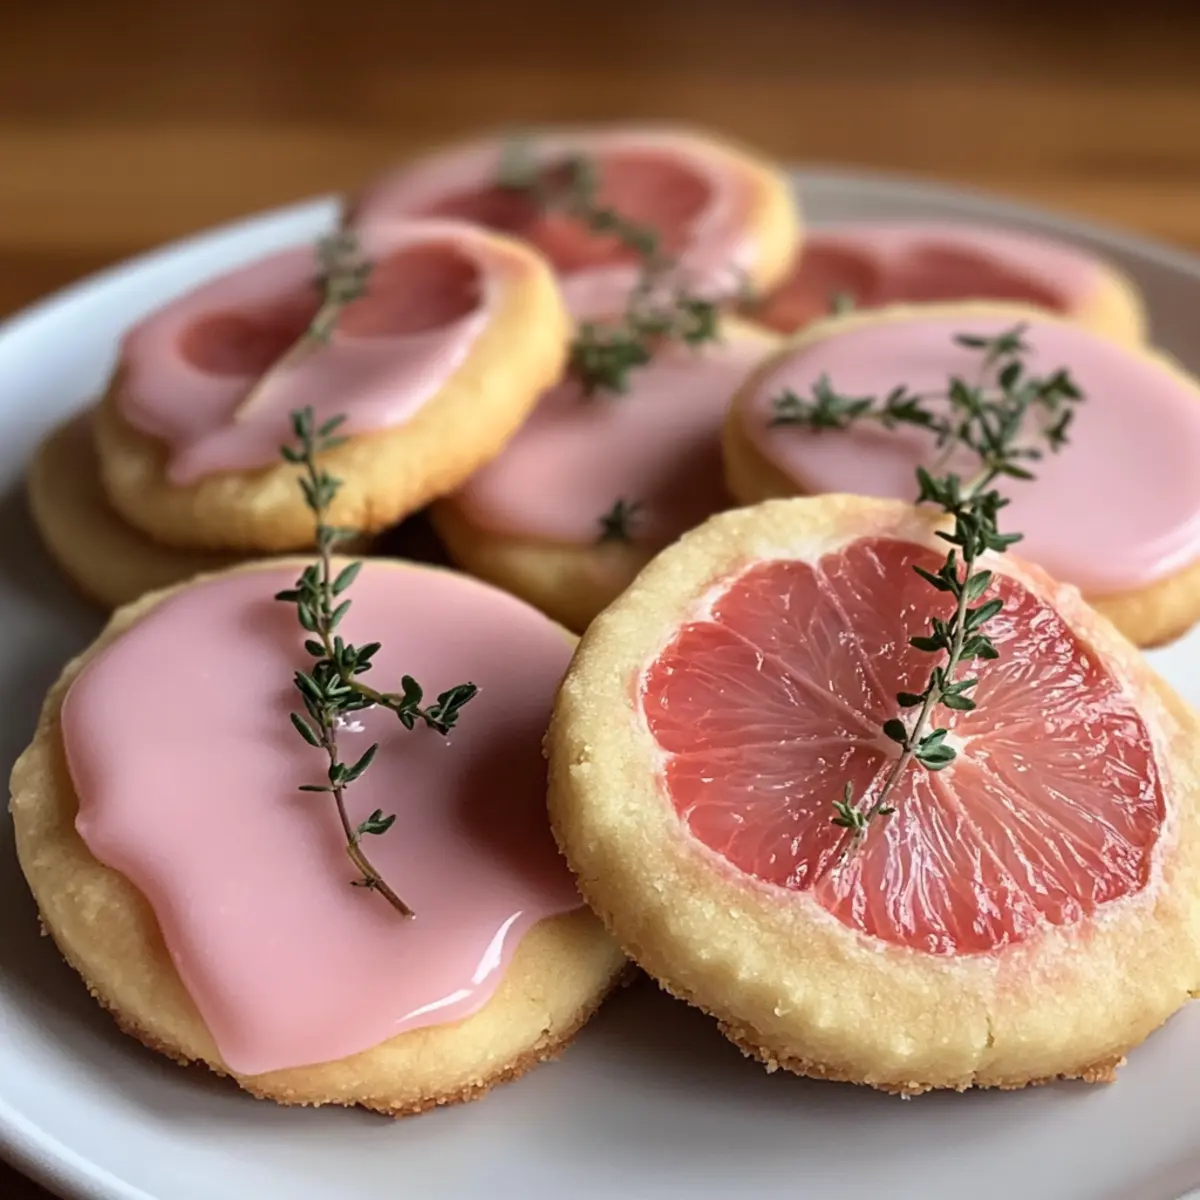
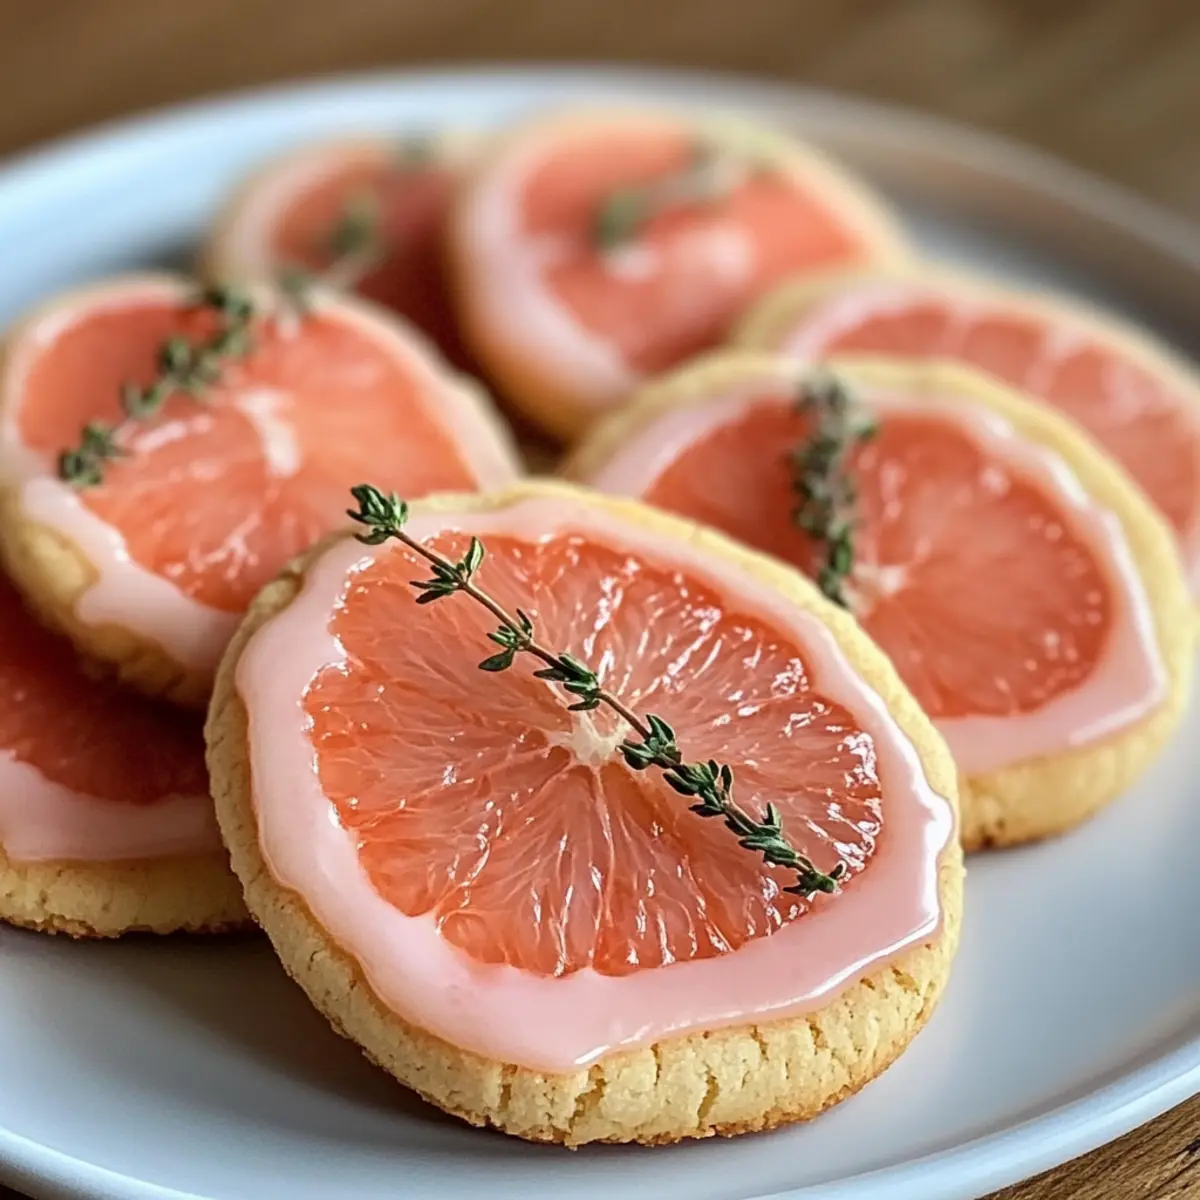
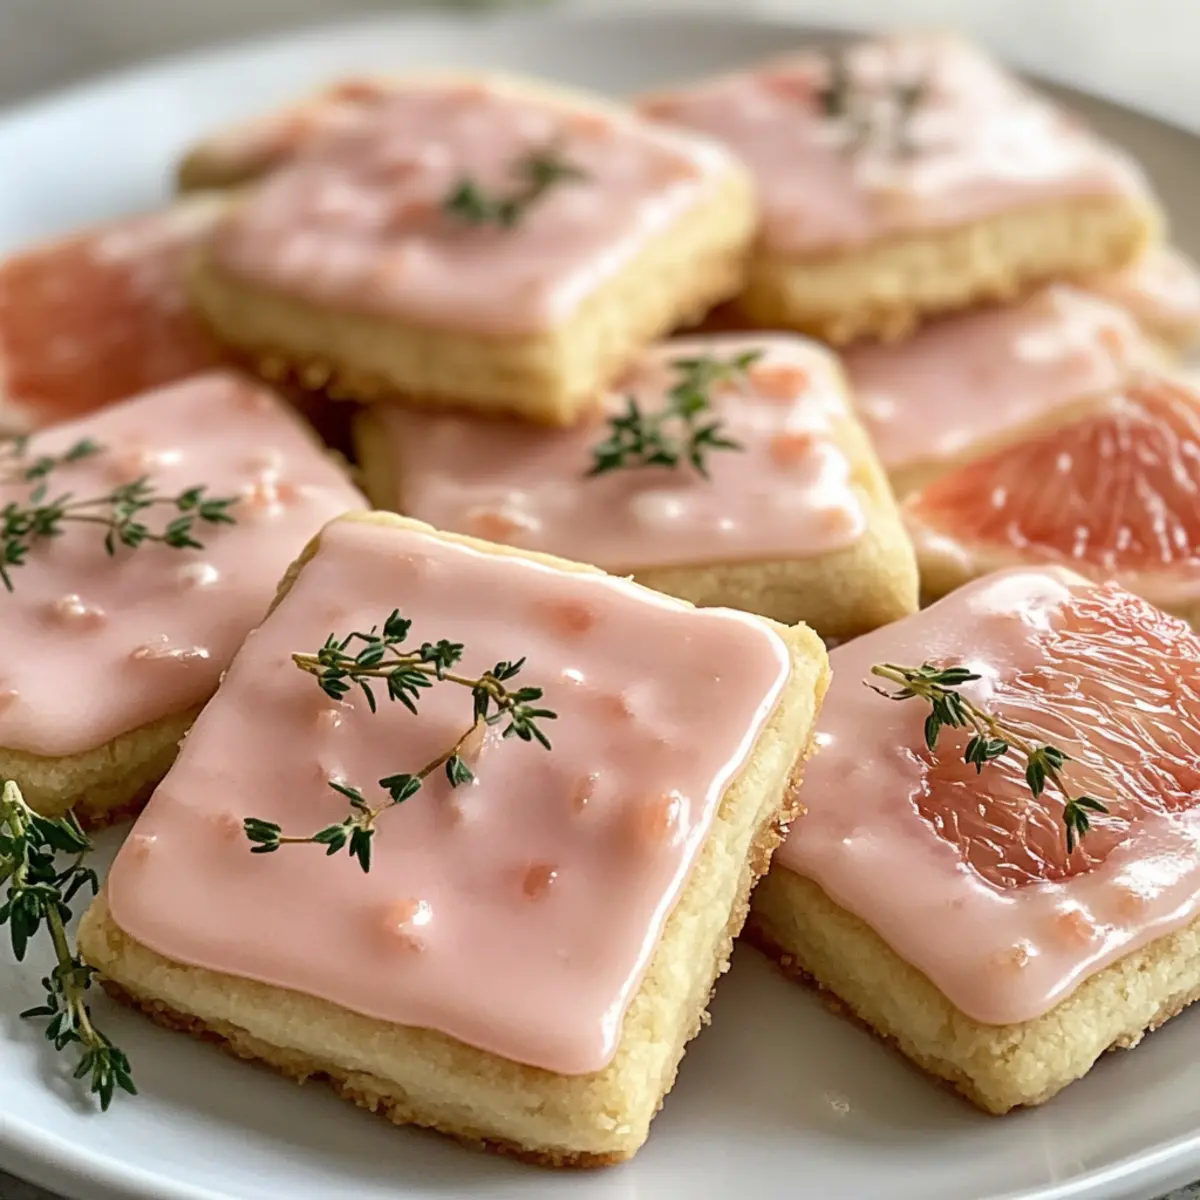
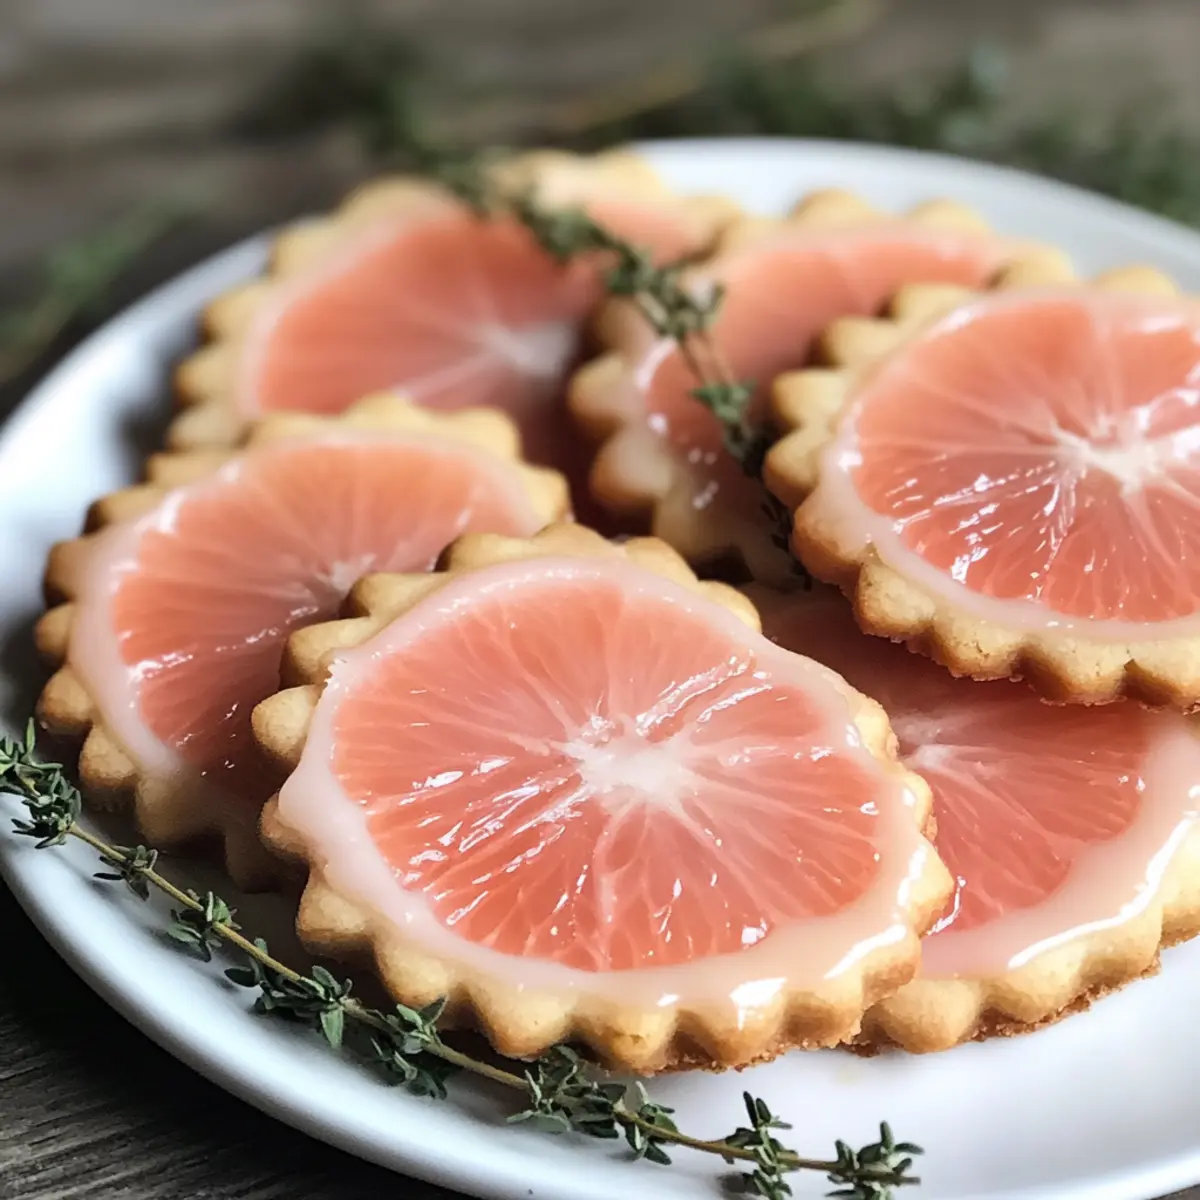
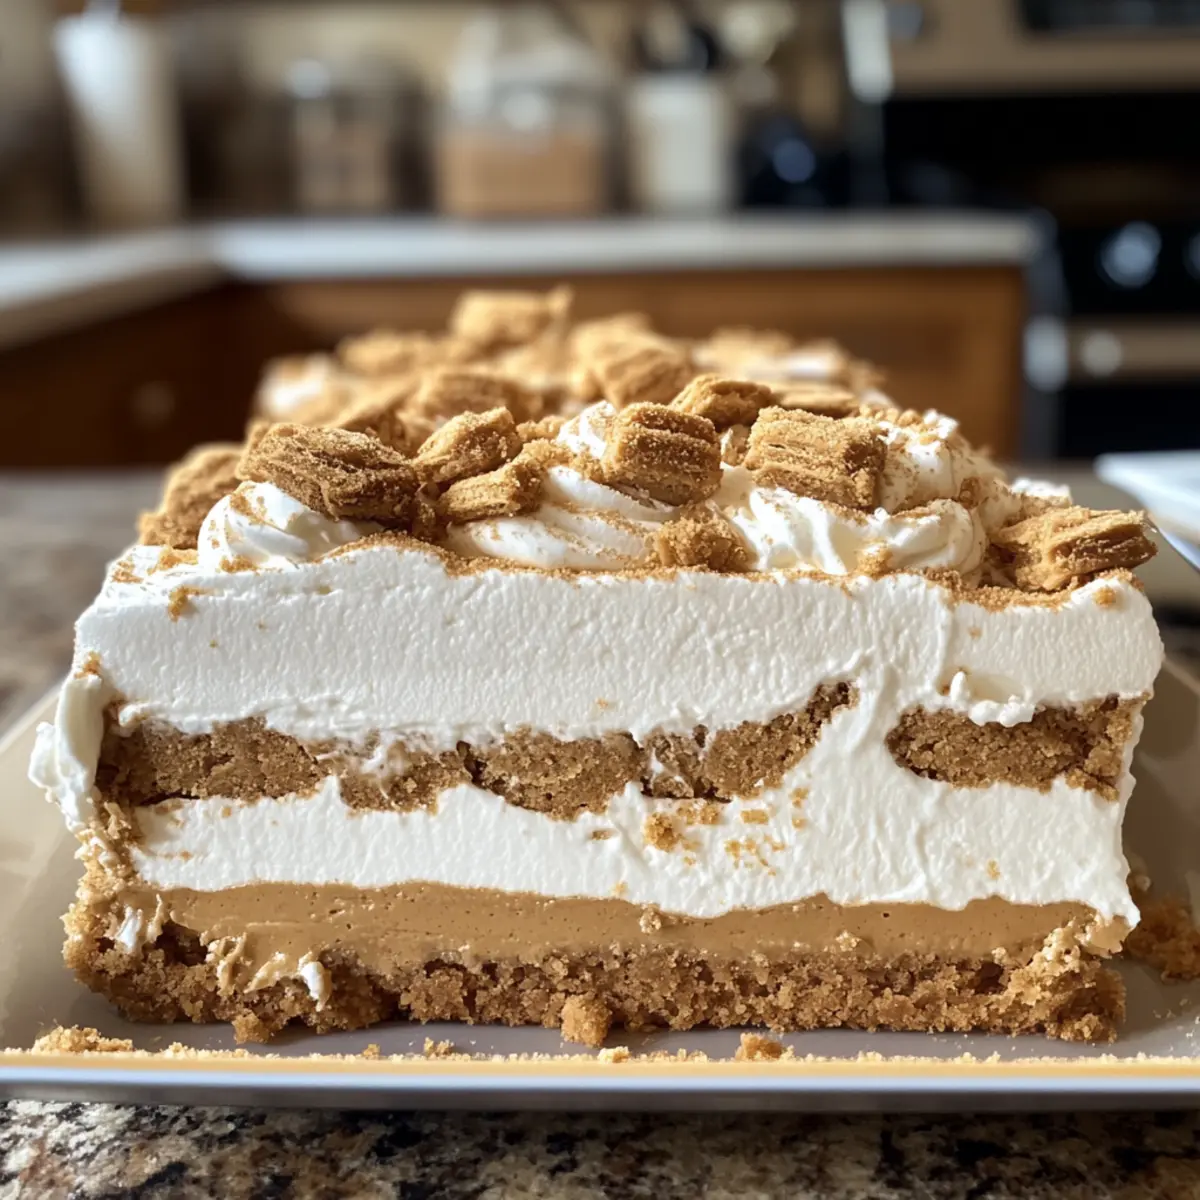
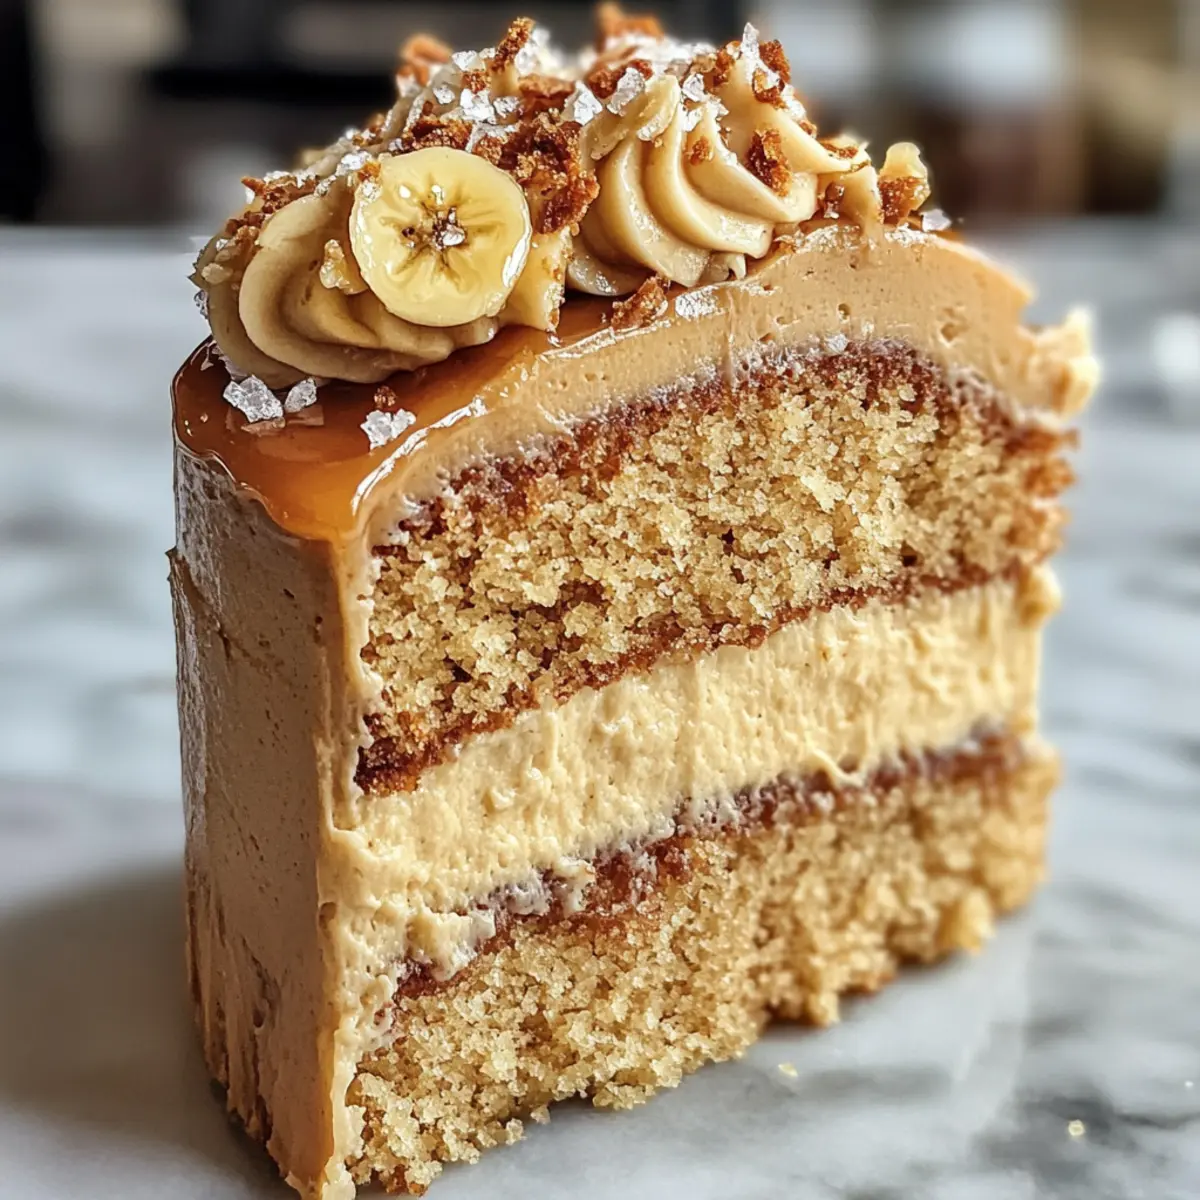
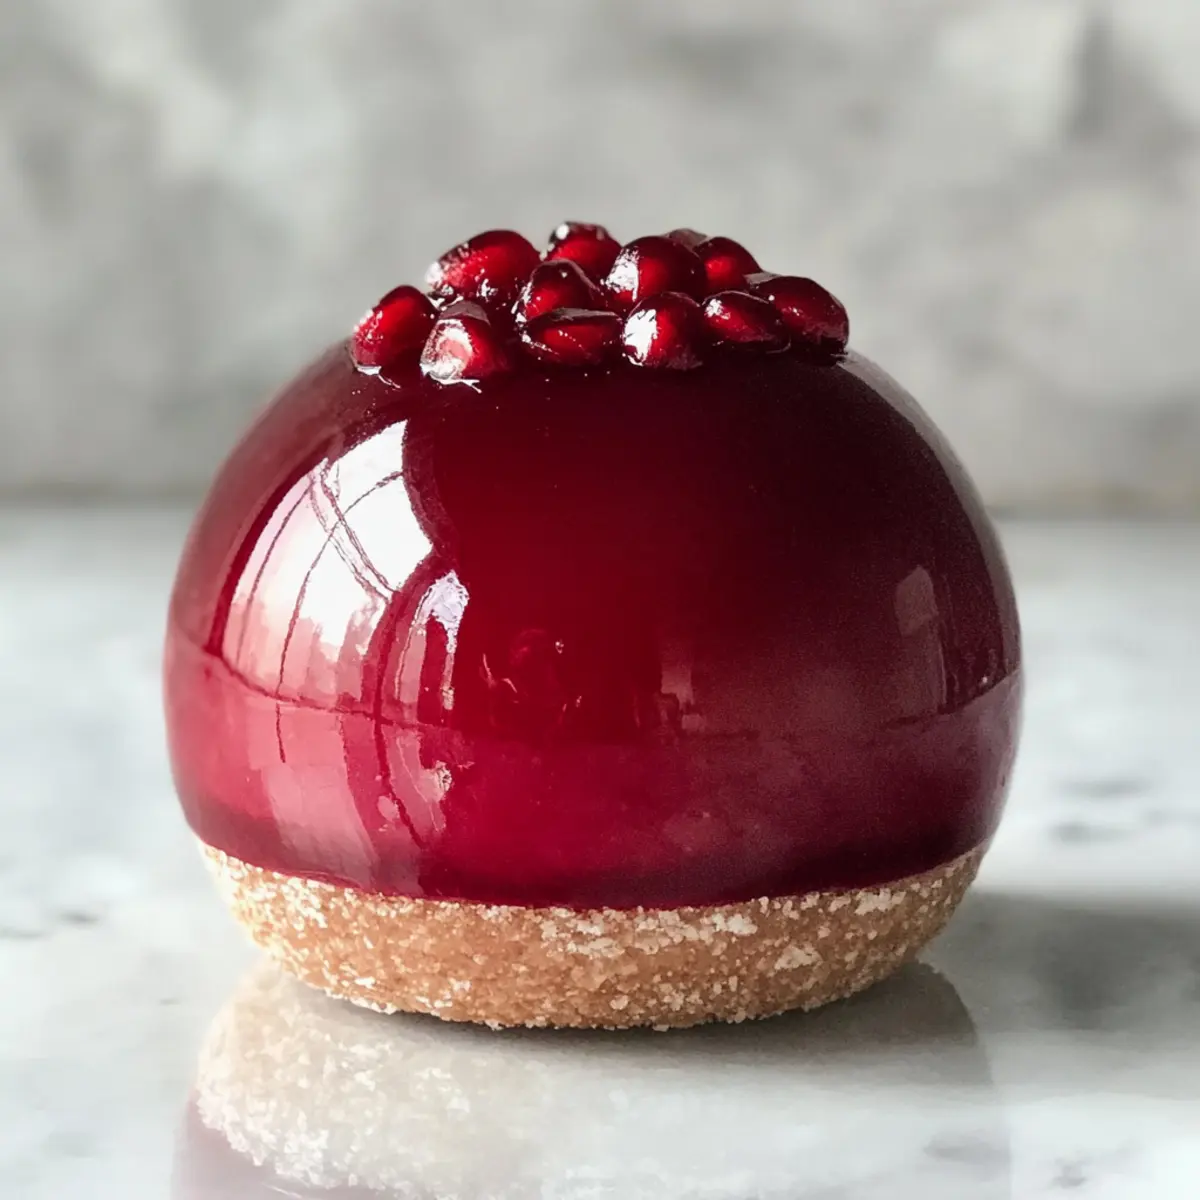
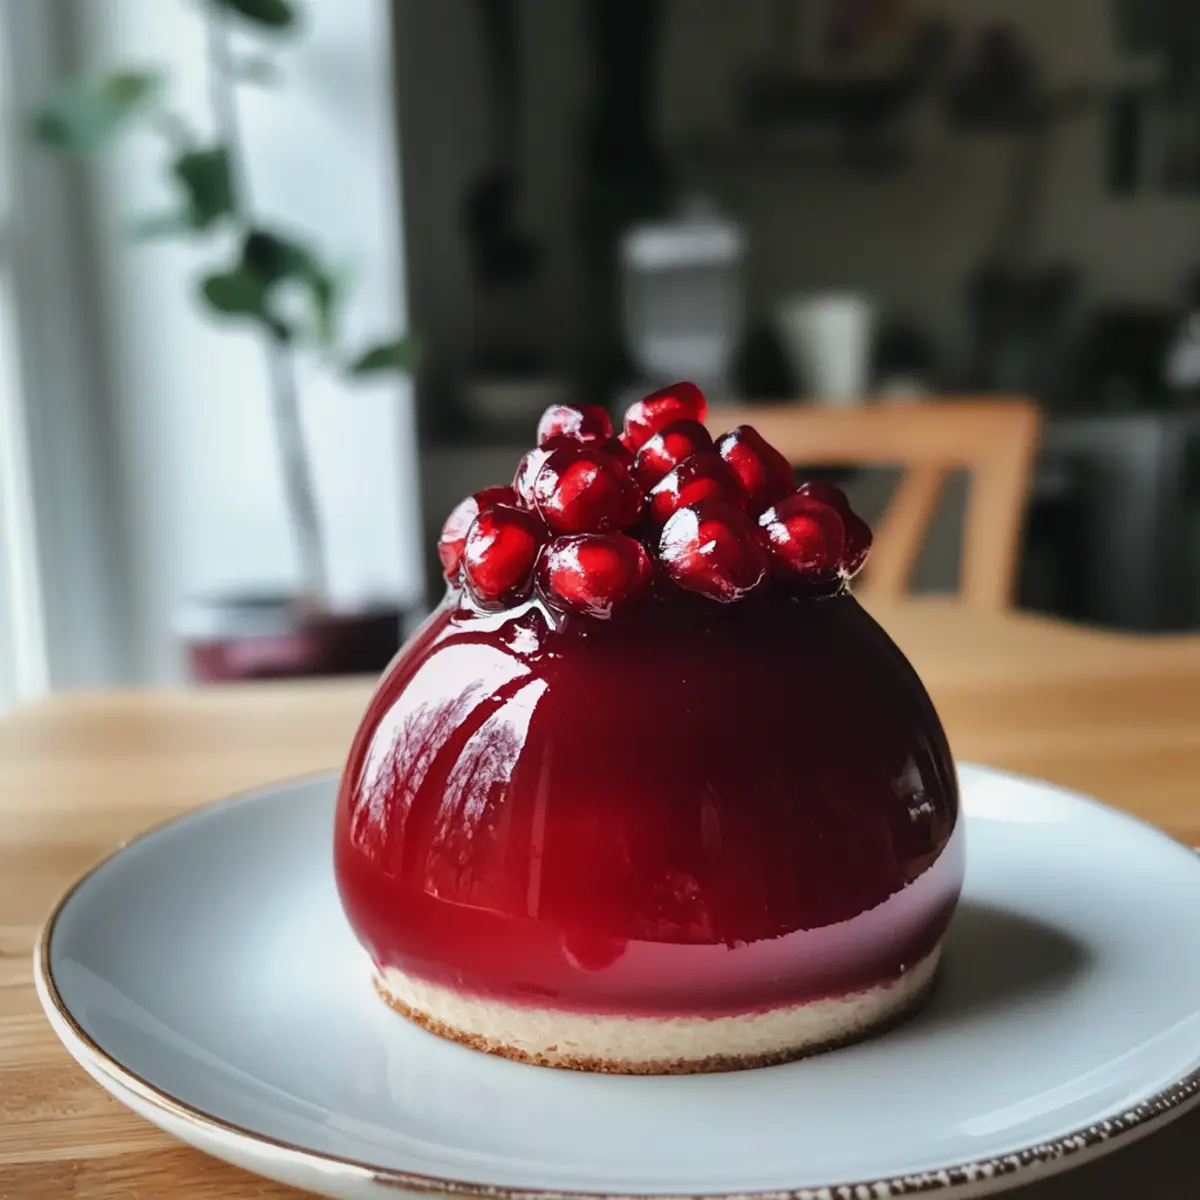
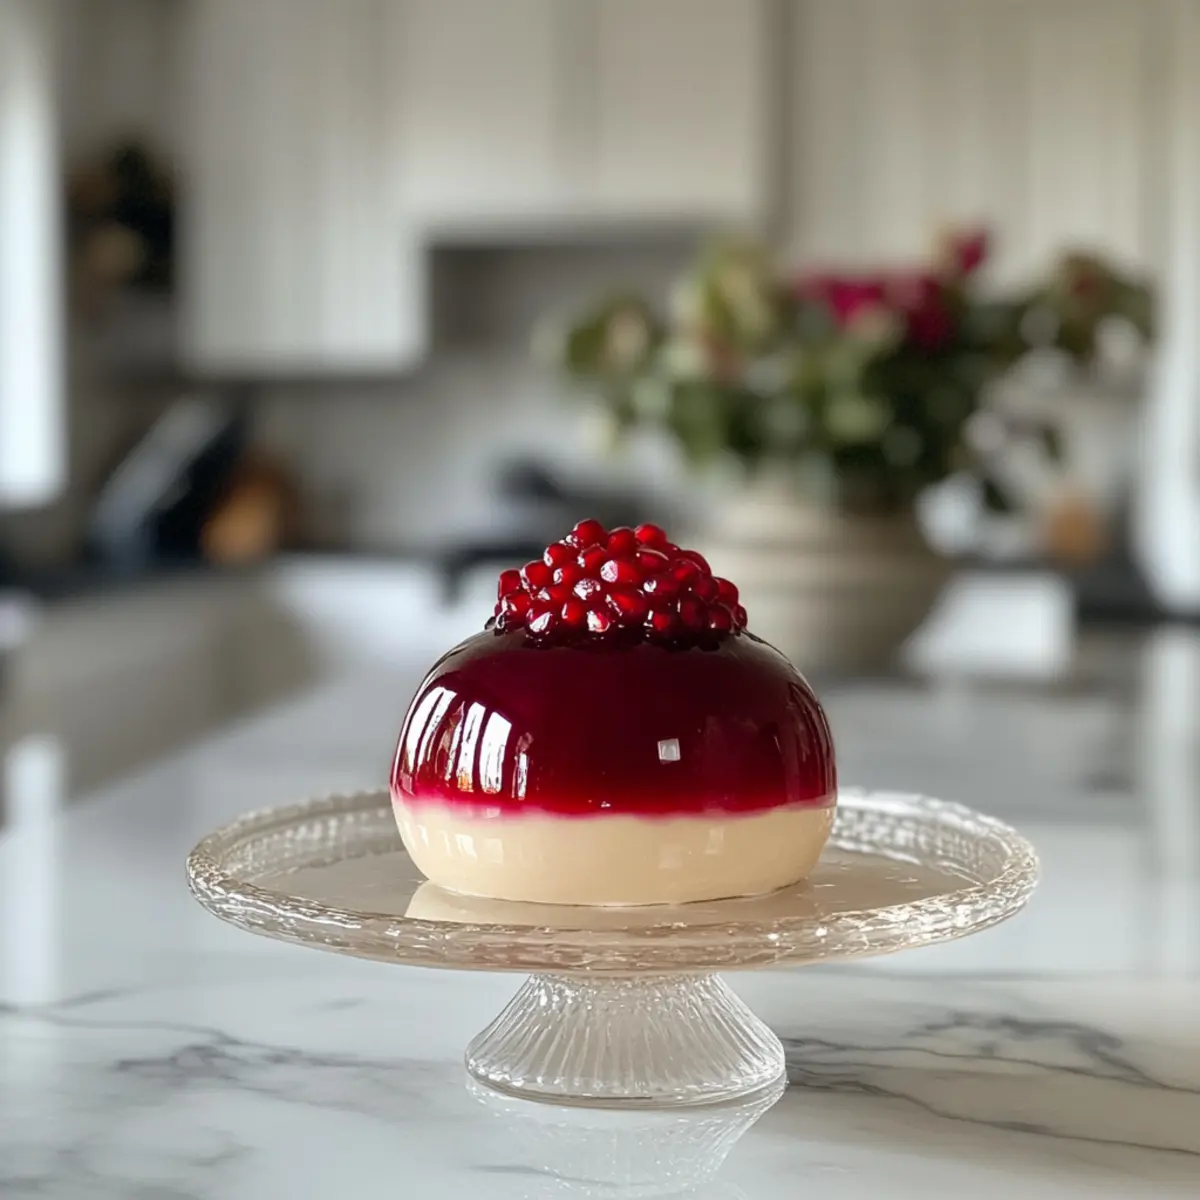
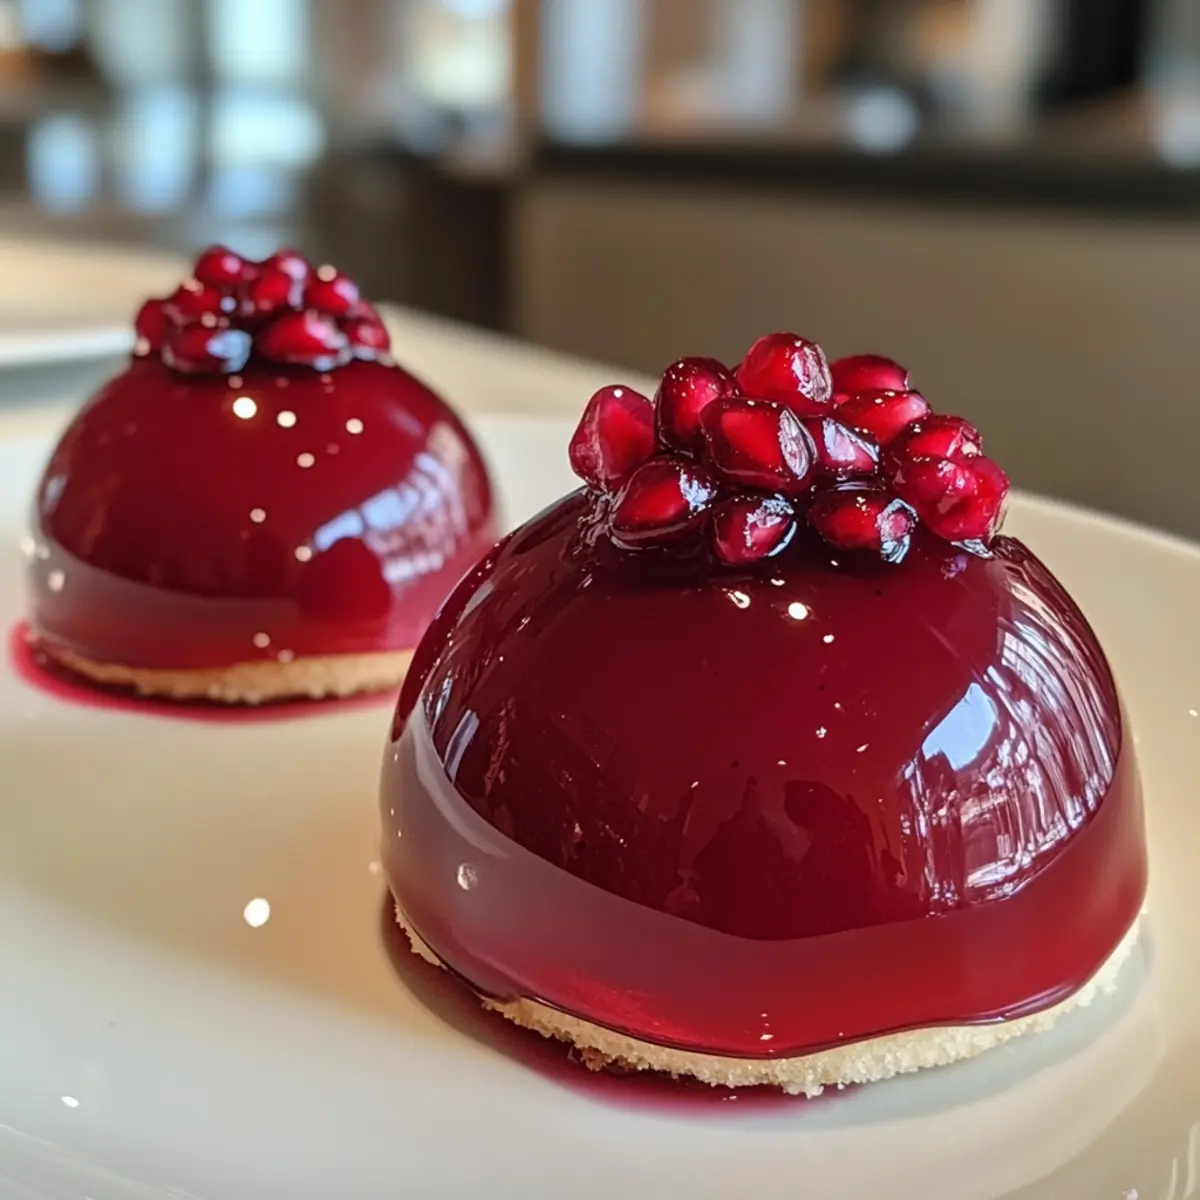
As I stood in my kitchen, the vibrant hue of pomegranate juice glimmered under the warm light, instantly drawing me in. It reminded me why I fell in love with cooking: the ability to create something visually stunning yet exquisitely tasty from just a few simple ingredients. This is exactly what you’ll experience with my Glossy Pomegranate Mousse Domes. Perfect for impressing guests at holiday gatherings or treating yourself to a touch of sophistication, these elegant desserts combine a silky, fruity mousse with a fluffy sponge base, all encased in a shiny, decadent glaze. Despite their sophisticated appearance, they are surprisingly simple to make, proving you don’t need to be a pastry chef to create a show-stopping dessert. Are you ready to dive into this delightful culinary adventure?

Why Is Glossy Pomegranate Mousse a Must-Try?

Elegance On Your Plate: The stunning visual appeal of these domes can elevate any gathering, making them the envy of your dinner table.

Bursting With Flavor: The combination of luscious pomegranate and creamy textures creates a refreshing, fruity delight that dances on your palate.

Simple Yet Impressive: You don’t need to be a pro chef; just a few straightforward steps and some patience lead to these exquisite treats.

Versatile Base: Feel free to experiment! Swap in different fruit juices or chocolate types for a personalized twist that suits your taste.

Perfect for Celebrations: Whether it’s a holiday feast or a romantic dinner, these mousse domes make every occasion feel special and that much sweeter.

Elevate your dessert game and impress your friends with this delightful treat—after all, who can resist a glossy finish and a burst of pomegranate deliciousness?

Glossy Pomegranate Mousse Ingredients

For the Mousse

  • Pomegranate Juice – Provides a vibrant flavor and beautiful color, use fresh or store-bought for convenience.
  • Sugar – Adds just the right amount of sweetness; adjust based on the tartness of your pomegranate juice.
  • Gelatin Powder – Essential for achieving the perfect texture; do not substitute with fresh gelatin, as it won’t provide the same results.
  • Heavy Cream – Whipped to incorporate air for a rich mousse texture; substitute with coconut cream for a dairy-free option.

For the Sponge Base

  • Flour – Gives structure and lightness to the sponge; use gluten-free flour if desired for a gluten-free dessert.
  • Eggs – Large eggs keep the batter moist and help it rise; make sure they’re at room temperature for best results.
  • Butter – Adds richness; can be replaced with a light oil for a dairy-free alternative.
  • Vanilla Extract – Enhances the flavor profile of the sponge; feel free to use almond extract for a different twist.

For the Mirror Glaze

  • White Chocolate – Creates a magical contrast with the pomegranate; replace with dark chocolate for a deeper flavor.
  • Corn Syrup or Glucose – Provides shine and prevents sugar crystallization; honey can be used but may slightly alter taste.

Creating these exquisite Glossy Pomegranate Mousse Domes is not just about flavor; it’s an experience that brings a touch of magic to your celebrations!

Step‑by‑Step Instructions for Glossy Pomegranate Mousse Domes

Step 1: Prepare Pomegranate Mousse
In a saucepan, combine 1 cup of pomegranate juice and 1/2 cup of sugar over medium heat. Stir until the sugar dissolves completely, then remove from heat and sprinkle 2 teaspoons of gelatin powder over the mixture, stirring until fully dissolved. Next, whip 1 cup of heavy cream to soft peaks and gently fold it into the pomegranate mixture until well incorporated. Pour the mixture into dome molds and freeze for at least 4 hours until completely solid.

Step 2: Make Sponge Base
Preheat your oven to 350°F (175°C) and line a baking dish with parchment paper. In a mixing bowl, whisk together 3 large eggs and 1/2 cup of sugar until the mixture is pale and fluffy, about 5 minutes. Gradually fold in 1 cup of flour, 1/4 cup of melted butter, and 1 teaspoon of vanilla extract until just combined. Pour the batter into the prepared dish and bake for 15-20 minutes until golden and springy to the touch. Allow it to cool completely before cutting into rounds.

Step 3: Create Mirror Glaze
In a saucepan, heat 1/2 cup of pomegranate juice, 1/2 cup of sugar, and 1/4 cup of corn syrup over medium heat. Stir until the sugar and syrup dissolve and the mixture is smooth. Add 4 ounces of chopped white chocolate to the hot mixture, stirring until melted. Once melted, in a separate bowl, dissolve 2 teaspoons of gelatin powder in 2 tablespoons of water and add it to the glaze mixture, stirring to combine. Allow the glaze to cool to 90-95°F (32-35°C).

Step 4: Assemble
Carefully remove the frozen Glossy Pomegranate Mousse domes from their molds and place each dome on a round of sponge cake. Ensure they are centered well for a beautiful presentation. Slowly pour the cooled mirror glaze over the domes, allowing it to coat them completely and evenly, creating that stunning glossy finish. Place the assembled mousse domes in the refrigerator for about 30 minutes to set the glaze before serving.

What to Serve with Glossy Pomegranate Mousse Domes

Imagine treating your guests to a stunningly elegant dessert that brings not just flavor but a complete dining experience.

  • Fresh Berries: A vibrant medley of fresh strawberries, blueberries, and raspberries provides a refreshing contrast, enhancing the fruity notes of the mousse.

  • Chantilly Cream: Lightly sweetened whipped cream adds an airy contrast, balancing the richness of the pomegranate mousse and creating a luxurious pairing.

  • Edible Flowers: Beautifully delicate, edible flowers like pansies or violets add elegance to your presentation, making the dessert even more visually stunning.

  • Chocolate Shavings: Dark or white chocolate shavings add a bit of crunch and an extra layer of richness, harmonizing beautifully with the mousse’s creaminess.

  • Pistachio Crumble: A sprinkle of crushed pistachios introduces a delightful crunch and subtle nuttiness, beautifully complementing the smooth texture of the mousse.

  • Sparkling Wine: A glass of sparkling wine, such as Prosecco or Champagne, elevates the meal, enhancing the celebration and refreshing your palate.

  • Vanilla Ice Cream: A scoop of creamy vanilla ice cream by the side serves to balance the tartness of the pomegranate, creating a delicious contrast.

  • Citrus Salad: A light salad with segments of orange and grapefruit adds brightness and a touch of acidity that can enhance the flavors of the mousse.

  • Mint Leaves: A garnish of fresh mint leaves adds a pop of color and a hint of freshness, making each bite feel light and refreshing.

How to Store and Freeze Glossy Pomegranate Mousse

Fridge: Store the assembled mousse domes in an airtight container for up to 3 days. Keep them chilled to maintain their creamy texture and glossy finish until serving.

Freezer: You can freeze the mousse domes for up to 2 weeks without the glaze. Wrap each dome tightly in plastic wrap and then in aluminum foil to prevent freezer burn.

Preparing for Serving: When ready to serve, remove the domes from the freezer and allow them to thaw in the fridge for several hours. Glaze just before serving to ensure they look their best.

Reheating: If the sponge base is slightly hard after freezing, you can gently warm it in the oven at a low temperature for a few minutes prior to assembling with mousse.

Expert Tips for Glossy Pomegranate Mousse

Frozen Precision: Ensure your mousse domes are completely frozen before applying the glaze. This guarantees a clean, sharp coating that glistens beautifully.

Temperature Matters: Cool your mirror glaze to 90-95°F before glazing. A temperature that’s too high can cause the glaze to melt the mousse, ruining the stunning glossy finish.

Measuring Gelatin: Use a kitchen scale to measure gelatin powder accurately. Too little can lead to a runny mousse, while too much might create a rubbery texture.

Substitutions Savvy: If making substitutions, like using coconut cream instead of heavy cream, adjust the ratios. Aim for similar consistency to get the right whip on your mousse.

Serve Fresh: For maximum visual impact and flavor, try to glaze the mousse domes just before serving. This ensures the shine is at its most attractive!

These tips will help you master the art of creating stunning Glossy Pomegranate Mousse Domes that are as delightful to present as they are to taste.

Glossy Pomegranate Mousse Customization Ideas

Feel free to unleash your inner chef and make this dessert truly your own with these delicious variations!

  • Dairy-Free: Replace heavy cream with coconut cream for a light, tropical twist that’s also dairy-free.

    Coconut cream will give your mousse a subtly exotic flavor, enhancing the fruity pomegranate beautifully.

  • Gluten-Free: Use gluten-free flour instead of regular flour in the sponge base for a delightful gluten-free version.

    This simple swap ensures everyone can indulge in these elegant treats without compromising on taste or texture.

  • Fruit Variations: Swap pomegranate juice for raspberry, cranberry, or passion fruit juice for a unique flavor profile.

    Each fruit brings its own character—experiment with different juices to discover your favorite combination!

  • Chocolate Twist: Substitute white chocolate in the mirror glaze for dark chocolate to create a richer contrast.

    Dark chocolate’s bitterness complements the sweetness of pomegranate, adding depth to your dessert.

  • Honey Glaze: Use honey instead of corn syrup in the glaze for a more natural sweetness.

    Just keep in mind that honey can slightly change the flavor profile, adding a lovely floral note.

  • Nutty Flavors: Add ground almonds or hazelnuts to the sponge base for added texture and a nutty aroma.

    This offers a wonderful crunch that complements the creaminess of the mousse and glaze.

  • Spiced Sensation: Enhance the sponge with a pinch of cinnamon or cardamom for a warm, aromatic touch.

    Spices like these can elevate your dessert, making it perfect for fall gatherings and winter celebrations.

  • Heat It Up: Introduce a hint of chili or cayenne pepper to the mousse for a spicy kick that surprises the palate.

    This daring twist balances sweetness with heat, turning an elegant dessert into a memorable culinary experience!

With these simple variations, you can create an enjoyable experience for everyone—from family gatherings to elegant dinner parties. For additional inspiration, check out my recipe for Raspberry Chocolate Mousse, which highlights delightful flavor pairings for similar occasions. Enjoy the creativity!

Make Ahead Options

These Glossy Pomegranate Mousse Domes are perfect for meal prep, allowing you to dazzle your guests with minimal day-of effort! You can prepare the mousse and sponge base up to 24 hours in advance. Simply make the mousse and freeze it in the dome molds, and bake the sponge base. Once cooled, store the sponge in an airtight container in the refrigerator. For optimal freshness and texture, assemble the domes and apply the mirror glaze just before serving. This ensures that the glaze maintains its beautiful shine and the mousse remains perfectly creamy. With this prep strategy, you’ll enjoy delicious, show-stopping desserts without the last-minute rush!

Glossy Pomegranate Mousse Recipe FAQs

Which pomegranate juice should I use?
Absolutely! For the best flavor and color, opt for fresh pomegranate juice if possible. However, high-quality bottled juice works well too. Just be mindful of the sweetness; adjust your sugar accordingly!

How long can I store the mousse domes in the fridge?
You can store your assembled Glossy Pomegranate Mousse Domes in an airtight container in the fridge for up to 3 days. To keep them looking fresh and beautiful, make sure to chill them right until serving.

Can I freeze the mousse domes?
Yes, you can freeze the mousse domes for up to 2 weeks before glazing. Just wrap each dome tightly in plastic wrap, followed by aluminum foil to prevent freezer burn. When you’re ready to serve, thaw them in the fridge for several hours and glaze just before serving for the best presentation.

What if my mousse doesn’t set properly?
If your mousse is too runny, it might be due to not enough gelatin. I recommend checking the measurement; ensure you’re using powder gelatin, which is crucial for proper thickening. Always whisk it thoroughly into the warm mixture to activate its setting properties.

Are these mousse domes suitable for dietary restrictions?
Very! You can make these mousse domes gluten-free by using gluten-free flour. For a dairy-free version, substitute heavy cream with coconut cream and butter with light oil. Just be sure to adjust proportions accordingly to maintain the right texture!

Can I use a different fruit juice?
Of course! Feel free to experiment with other juices like raspberry, cranberry, or even mango for different flavor profiles. Each fruit will give a unique spin to your glossy mousse, so have fun creating your own versions!

Glossy Pomegranate Mousse

Irresistible Glossy Pomegranate Mousse for Every Celebration

Experience the elegance of Glossy Pomegranate Mousse, a stunning dessert perfect for any celebration.
Prep Time 30 minutes
Cook Time 35 minutes
Freezing Time 4 hours
Total Time 5 hours 5 minutes
Servings: 8 domes
Course: Dessert
Cuisine: International
Calories: 250

Ingredients
  

For the Mousse
  • 1 cup Pomegranate Juice Fresh or store-bought
  • 1/2 cup Sugar Adjust based on tartness
  • 2 teaspoons Gelatin Powder Do not substitute with fresh gelatin
  • 1 cup Heavy Cream Can use coconut cream for dairy-free
For the Sponge Base
  • 1 cup Flour Use gluten-free flour if desired
  • 3 large Eggs Must be at room temperature
  • 1/4 cup Butter Can be replaced with light oil
  • 1 teaspoon Vanilla Extract Almond extract can be used as a twist
For the Mirror Glaze
  • 1/2 cup Pomegranate Juice
  • 1/2 cup Sugar
  • 1/4 cup Corn Syrup Can substitute with honey
  • 4 ounces White Chocolate Dark chocolate can be an alternative
  • 2 teaspoons Gelatin Powder
  • 2 tablespoons Water

Equipment

  • Saucepan
  • mixing bowl
  • whisk
  • Dome molds
  • oven
  • Baking Dish

Method
 

Preparing the Mousse
  1. In a saucepan, combine 1 cup of pomegranate juice and 1/2 cup of sugar over medium heat. Stir until the sugar dissolves completely, then remove from heat and sprinkle 2 teaspoons of gelatin powder over the mixture, stirring until fully dissolved. Next, whip 1 cup of heavy cream to soft peaks and gently fold it into the pomegranate mixture until well incorporated. Pour the mixture into dome molds and freeze for at least 4 hours until completely solid.
Making the Sponge Base
  1. Preheat your oven to 350°F (175°C) and line a baking dish with parchment paper. In a mixing bowl, whisk together 3 large eggs and 1/2 cup of sugar until the mixture is pale and fluffy, about 5 minutes. Gradually fold in 1 cup of flour, 1/4 cup of melted butter, and 1 teaspoon of vanilla extract until just combined. Pour the batter into the prepared dish and bake for 15-20 minutes until golden and springy to the touch. Allow it to cool completely before cutting into rounds.
Creating the Mirror Glaze
  1. In a saucepan, heat 1/2 cup of pomegranate juice, 1/2 cup of sugar, and 1/4 cup of corn syrup over medium heat. Stir until the sugar and syrup dissolve and the mixture is smooth. Add 4 ounces of chopped white chocolate to the hot mixture, stirring until melted. Once melted, in a separate bowl, dissolve 2 teaspoons of gelatin powder in 2 tablespoons of water and add it to the glaze mixture, stirring to combine. Allow the glaze to cool to 90-95°F (32-35°C).
Assembling the Domes
  1. Carefully remove the frozen Glossy Pomegranate Mousse domes from their molds and place each dome on a round of sponge cake. Ensure they are centered well for a beautiful presentation. Slowly pour the cooled mirror glaze over the domes, allowing it to coat them completely and evenly, creating that stunning glossy finish. Place the assembled mousse domes in the refrigerator for about 30 minutes to set the glaze before serving.

Notes

For best results, glaze the mousse domes just before serving to maximize shine and flavor.

Sweet and Savory Rosemary and Spiced Fig Thumbprint Cookies

As I was sifting through my pantry, the aroma of rosemary greeted me, sparking an idea that transformed a simple day into a culinary adventure. I decided to whip up a batch of Sweet and Savory Rosemary and Spiced Fig Thumbprints, a delightful twist on the traditional cookie. These savory cookies unite the earthy notes of fresh rosemary with a gentle kick from chili flakes, creating a unique snack. The best part? They not only elevate your appetizer spread but also offer a quick, tasty alternative to bland snacks. Paired perfectly with cheese or salami, these cookies are sure to impress at your next gathering. Curious about how to make them sing with flavor and flair? Let’s dive into the recipe and transform your kitchen experience!

Why are these cookies a game-changer?

Unique Flavor Fusion: Combining earthy rosemary and spicy chili flakes, these cookies deliver a flavor profile that’s anything but ordinary.

Versatile Snack: Great as finger foods, or pair them with your favorite cheeses and meats, making them a perfect addition to any gathering.

Quick to Prepare: Simple ingredients and straightforward steps mean you’ll have delicious snacks in no time, ideal for busy days or last-minute get-togethers.

Crispy Yet Chewy: Each bite offers a pleasing texture, balancing a crisp exterior with a slightly chewy center that keeps you coming back for more.

Looking for more savory options? These cookies would pair wonderfully with a Savory Chicken Cheesy dish! Plus, if you’re interested in different flavor combos, check out my Savory Beef Bacon recipe.

Sweet and Savory Rosemary and Spiced Fig Thumbprint Ingredients

For the Cookies
Sugar – Sweetness is key; reduce for less sweetness in your cookie.
Salt – Enhances overall flavor; it’s essential for balancing sweetness and other ingredients.
Almond Meal – Offers a nutty flavor and texture; swap with your choice of nut flour for a twist.
Unsalted Butter – Adds richness and moisture; if using salted butter, skip the added salt in the recipe.
Egg – Acts as a binder; for a vegan alternative, try a flax egg.
Almond Extract – Infuses aromatic depth; you can omit this for a simpler taste.
Fresh Rosemary – Brings earthy herbal notes; dried rosemary or herbs like thyme are good substitutes.
Chili Flakes – Packs a spicy punch; feel free to adjust the amount to suit your heat preference.
All-Purpose Flour – Provides structure; gluten-free flour works as a great alternative.
Spiced Fig Jam – Adds sweetness and a unique savory flavor contrast; other jams can work but will alter the taste.
Coarse Sea Salt – For sprinkling on top; it’s optional, but it elevates the overall flavor profile.

These Sweet and Savory Rosemary and Spiced Fig Thumbprint cookies are bound to become a beloved staple in your home!

Step‑by‑Step Instructions for Sweet and Savory Rosemary and Spiced Fig Thumbprint

Step 1: Cream the Base
In a mixing bowl, cream together ½ cup sugar and ½ cup softened unsalted butter until the mixture is light and fluffy, about 3-4 minutes. The texture should be airy, and you’ll notice a slight change in color. This step is essential for your Sweet and Savory Rosemary and Spiced Fig Thumbprints, as it helps create a tender cookie.

Step 2: Add Flavorings
Next, mix in ¼ teaspoon salt, 1 teaspoon almond extract, 1 tablespoon minced fresh rosemary, and ½ teaspoon chili flakes. Stir until everything is evenly combined, releasing the fragrant aromas of rosemary and spice. The mixture should also be smooth and cohesive, setting the foundation for the burst of flavors in your cookies.

Step 3: Incorporate Dry Ingredients
Gradually incorporate 1 cup almond meal and 1 cup all-purpose flour into the mixture. Use a spatula or wooden spoon to gently fold in the dry ingredients until fully combined, being careful not to overmix. The dough will start to form, becoming slightly sticky and well-blended, ready for chilling.

Step 4: Chill the Dough
Wrap the dough in plastic wrap and chill it in the refrigerator for at least 1 hour. This chilling period is crucial as it helps the dough firm up, ensuring your Sweet and Savory Rosemary and Spiced Fig Thumbprints retain their shape while baking.

Step 5: Preheat and Prepare
Preheat your oven to 325°F (160°C) while you line two baking sheets with parchment paper. This step will give your cookies a perfect baking surface, and the oven needs to be hot to achieve that ideal golden color.

Step 6: Shape the Cookies
Once the dough has chilled, scoop out about 2 tablespoons of the dough and roll it into a ball. Place the balls onto the prepared baking sheets, spacing them about 2 inches apart. Press your thumb gently into the center of each ball to create a well, forming the iconic thumbprint shape.

Step 7: First Bake
Bake the cookies in the preheated oven for 10 minutes, until they are just starting to turn golden around the edges. Since these Sweet and Savory Rosemary and Spiced Fig Thumbprints require a defined shape, remove them from the oven and redefine the depressions with your thumb carefully.

Step 8: Add Fig Jam
Fill each thumbprint depression with about ½ teaspoon of spiced fig jam, allowing it to settle into the well. The jam adds a delightful sweetness that pairs perfectly with the savory flavors of the cookie, enhancing the overall taste experience.

Step 9: Final Bake
Return the cookies to the oven and bake for an additional 10-12 minutes, until they are golden brown and have a slightly crisp exterior. Watch closely as they finish baking; you want them to be golden but not overly dark.

Step 10: Cool and Serve
Once out of the oven, let the cookies cool on the baking sheets for a few minutes before transferring them to a wire rack. Allow them to cool completely; this will ensure they achieve the perfect texture before you serve your Sweet and Savory Rosemary and Spiced Fig Thumbprints.

Make Ahead Options

These Sweet and Savory Rosemary and Spiced Fig Thumbprint cookies are perfect for meal prep! You can prepare the dough up to 24 hours in advance by wrapping it tightly in plastic wrap and refrigerating it. This chilling period not only saves you time but also helps the cookies maintain their delightful shape during baking. Additionally, you can bake the cookies and store them in an airtight container for up to 3 days at room temperature. When ready to serve, just fill the thumbprints with spiced fig jam and enjoy them just as delicious as freshly baked. With these make-ahead options, you’ll have a gourmet snack ready for busy weeknights or spontaneous gatherings!

Sweet and Savory Rosemary Cookie Variations

Dive into exciting options to make these cookies uniquely yours, adding flavors and textures that will surprise your taste buds!

  • Nutty Hazelnut: Swap almond meal for hazelnut flour for a richer, more robust nut flavor that pairs beautifully with the rosemary. Hazelnuts bring an earthy essence that complements the herbs wonderfully.

  • Vegan Friendly: Replace the egg with a flax egg (1 tablespoon ground flaxseed mixed with 2.5 tablespoons water) to create a delicious vegan version that doesn’t skimp on taste. Your cookie texture will still be soft and delightful!

  • Herbal Delight: Change fresh rosemary to fresh basil or thyme for a refreshing twist. Each herb brings a different dimension, allowing you to create a herbal forest of flavors that dances on your palate.

  • Cheesy Infusion: Add ½ cup grated Parmesan or feta cheese to the dough for a cheesy kick that pairs spectacularly with the fig jam. This savory addition transforms the cookie into a more substantial snack!

  • Spicy Jam Swap: Use a spicy tomato or pepper jam instead of fig for a bold flavor contrast. This brings a zesty kick that will wow anyone looking for a savory alternative to sweet snacks.

  • Citrus Zest: Incorporate the zest of a lemon or orange into the dough for a vibrant citrusy note that elevates the overall flavor, balancing the savory notes perfectly with a bright twist.

  • Gluten-Free Option: Substitute all-purpose flour with gluten-free flour mix to cater to gluten sensitivity without losing any of those delicious textures and flavors. It’s a delightful way to make these cookies accessible to all!

For more savory inspiration, consider pairing with dishes like Savory Chicken Cheesy or exploring the flavors of Savory Beef Bacon, and keep the culinary adventures rolling!

How to Store and Freeze Sweet and Savory Rosemary and Spiced Fig Thumbprint Cookies

Airtight Container: Store the cookies in an airtight container at room temperature for up to one week to maintain their delightful texture and flavor.

Refrigeration Option: If you want to extend their freshness, place them in the fridge for up to two weeks; just remember they may become slightly softer.

Freezing: For longer storage, freeze the baked cookies in an airtight container or freezer bag for up to three months. Thaw them at room temperature before serving.

Reheating: To enjoy the cookies warm, reheat them in the oven at 300°F (150°C) for about 5-10 minutes, ensuring they are crisp and delicious once again.

Expert Tips for Sweet and Savory Cookies

  • Chill the Dough: Refrigerating the dough is crucial; it helps maintain the shape of your Sweet and Savory Rosemary and Spiced Fig Thumbprints during baking.

  • Watch the Bake Time: For perfectly textured cookies, bake until just golden and slightly soft in the center. Overbaking leads to dry cookies.

  • Select Fresh Ingredients: Using fresh rosemary enhances the flavor significantly. Dried herbs work, but fresh will give the best results.

  • Adjust Spice Levels: Feel free to modify chili flake amounts according to your heat preference—less for mild, more for a kick!

  • Experiment with Flours: Swap almond meal for a different nut flour if desired. Just keep in mind that each nut flour varies in flavor and texture.

What to Serve with Rosemary and Chili Flake Savory Cookies?

These flavorful cookies create an impressive centerpiece for your next gathering, inviting guests to indulge in delightful taste combinations.

  • Cheese Platter: The rich creaminess of cheeses like goat cheese or brie pairs beautifully with the herby notes and chili heat, enhancing each bite.

  • Cured Meats: A selection of salami or prosciutto complements the spices in the cookies, adding a savory depth that tantalizes the palate.

  • Olives and Tapenade: The briny, tart flavors from olives help to balance the sweetness of the fig jam, creating a harmonious appetizer experience.

  • Fresh Fruit: Slices of pear or figs provide a sweet contrast to the savory cookie, making for a refreshing element on your appetizer table.

  • Red Wine: A nice Merlot or Chianti enriches the overall dining experience, with tannins that beautifully match the cookie’s herbal notes.

  • Warm Dip: Try serving with a creamy spinach or artichoke dip for a delightful texture contrast that’s sure to please everyone at the table.

  • Sweet Dessert Wine: End your meal on a light note with a dessert wine like Sauternes, perfect for complementing the sweetness of the fig jam.

  • Chocolate Treats: Dark chocolate dipped strawberries can bring a unique and decadent twist to the overall flavor profile of the cookies.

Sweet and Savory Rosemary and Spiced Fig Thumbprint Recipe FAQs

How do I choose the best fresh rosemary?
Absolutely! When selecting fresh rosemary, look for vibrant green leaves that are soft and fragrant. Avoid any sprigs with dark spots or dryness, as those may be old or losing their flavor. Fresh rosemary is not only more aromatic but also provides a delightful burst of flavor when baked into your thumbprint cookies.

What’s the best way to store these cookies?
Store your Sweet and Savory Rosemary and Spiced Fig Thumbprint cookies in an airtight container at room temperature for up to one week. You can also place them in the refrigerator to extend their freshness for up to two weeks, but be mindful that chilling may make them slightly softer. Keeping them in a cool, dry place is essential to maintain their delightful texture and flavor.

Can I freeze the thumbprint cookies?
Absolutely! To freeze your Sweet and Savory Rosemary and Spiced Fig Thumbprint cookies, first let them cool completely. Then, place them in an airtight container or a freezer bag, separating layers with parchment paper to prevent sticking. These cookies can be frozen for up to three months. When you’re ready to enjoy them, simply thaw them at room temperature—no need for reheating if you prefer them soft!

What if my cookies spread too much while baking?
Very often! If your cookies spread too much, it may be due to the dough not being cold enough before baking or over-mixing the ingredients. Ensure that you chill the dough for at least 1 hour before baking, and when mixing, fold the ingredients gently until just combined. If you find the dough is too soft after chilling, you can add a little more flour to help maintain their shape while baking.

Are these cookies suitable for those with nut allergies?
When it comes to allergies, it’s essential to be cautious. Since this recipe includes almond meal, it’s not suitable for individuals with nut allergies. However, you can substitute the almond meal with sunflower seed flour to keep the nut-free nature of the cookies intact. Also, ensure that the spiced fig jam does not contain allergens depending on the brand you choose.

Can I adjust the spice level of the chili flakes?
The more the merrier! Feel free to adjust the amount of chili flakes to suit your spice preference. If you prefer a mild flavor, simply reduce the amount. Conversely, if you love a bit more heat, you can up the quantity. Remember, spices can vary, so I recommend tasting the dough before baking (minus any raw egg) to ensure it’s just right for your palate.

Sweet and Savory Rosemary and Spiced Fig Thumbprint

Sweet and Savory Rosemary and Spiced Fig Thumbprint Cookies

Sweet and Savory Rosemary and Spiced Fig Thumbprint offer a delightful twist on traditional cookies with unique flavor.
Prep Time 30 minutes
Cook Time 20 minutes
Chilling Time 1 hour
Total Time 1 hour 50 minutes
Servings: 24 cookies
Course: Dessert
Cuisine: American
Calories: 120

Ingredients
  

For the Cookies
  • 1/2 cup sugar sweetness is key; reduce for less sweetness
  • 1/2 teaspoon salt enhances overall flavor
  • 1 cup almond meal offers nutty flavor and texture
  • 1/2 cup unsalted butter adds richness and moisture
  • 1 large egg acts as a binder
  • 1 teaspoon almond extract infuses aromatic depth
  • 1 tablespoon fresh rosemary brings earthy herbal notes
  • 1/2 teaspoon chili flakes packs spicy punch
  • 1 cup all-purpose flour provides structure
  • 1/2 cup spiced fig jam adds sweetness and unique flavor contrast
  • coarse to taste sea salt for sprinkling on top

Equipment

  • mixing bowl
  • spatula
  • Baking sheets
  • parchment paper
  • Wire rack

Method
 

Step-by-Step Instructions
  1. Cream together ½ cup sugar and ½ cup softened unsalted butter until light and fluffy, about 3-4 minutes.
  2. Mix in ¼ teaspoon salt, 1 teaspoon almond extract, 1 tablespoon minced fresh rosemary, and ½ teaspoon chili flakes.
  3. Gradually incorporate 1 cup almond meal and 1 cup all-purpose flour.
  4. Wrap the dough in plastic wrap and chill for at least 1 hour.
  5. Preheat your oven to 325°F (160°C) and line two baking sheets with parchment paper.
  6. Scoop about 2 tablespoons of the dough and roll it into a ball; place them on baking sheets and press a thumb into the center.
  7. Bake for 10 minutes until starting to turn golden; then redefine the thumbprints.
  8. Fill each thumbprint with about ½ teaspoon of spiced fig jam.
  9. Return to oven and bake for an additional 10-12 minutes, until golden brown.
  10. Cool on baking sheets for a few minutes before transferring to a wire rack.

Notes

These cookies can be stored in an airtight container for up to one week or frozen for up to three months.

Savory Chicken Romano Meatballs in Zesty Lemon Sauce

There’s nothing quite like the aroma of meatballs sizzling in a skillet, is there? As I tossed my Chicken Romano Meatballs into the pan, I knew I was crafting something special. These delightful little bites are bursting with the savory richness of Romano cheese and a perfect blend of fresh herbs and garlic, all brought together in a zingy lemon white wine sauce that’ll elevate your dinner from ordinary to extraordinary. Whether you’re tossing them over pasta, piling them into a hearty sandwich, or enjoying them on their own, these high-protein meatballs are bound to impress. Plus, the gluten-free breadcrumbs ensure everyone can enjoy them without worry. Are you ready to indulge in this comforting Italian favorite? Let’s dive into the recipe!

Why Will You Love Chicken Romano Meatballs?

Flavor Explosion: These meatballs are truly a flavor sensation, with Romano cheese and fragrant herbs that create a mouthwatering experience.
Quick & Easy: With simple ingredients and straightforward steps, you can have a delicious dinner on the table in no time.
Versatile Serving Options: Enjoy them over pasta, in a sandwich, or alongside a fresh salad for an equally delightful meal.
Crowd-Pleasing Treat: Perfect for family dinners or entertaining, these meatballs are sure to be a hit with everyone at the table! For an extra comfort food twist, try pairing them with Homemade Chicken Pot or a side of Savory Chicken Cheesy.
Gluten-Free Friendly: With options for gluten-free breadcrumbs, everyone can enjoy this hearty dish without worry!

Chicken Romano Meatballs Ingredients

• Enjoy making these high-protein Chicken Romano Meatballs with ease!

For the Meatballs

  • Ground Chicken – Main protein source providing a light and moist texture; substitute with turkey for a leaner option.
  • Garlic (2 cloves, minced) – Adds aromatic flavor; fresh garlic is recommended for best taste.
  • Egg (1 large, lightly beaten) – Binds the meat mixture, ensuring the meatballs hold together.
  • Seasoned Bread Crumbs (½ cup) – Provides structure and a slight crunch; use gluten-free breadcrumbs for a gluten-free version.
  • Romano Cheese (⅓ cup) – Adds a rich, salty flavor; Parmesan cheese can be used as a substitute.
  • Chopped Fresh Parsley (¼ cup) – Introduces freshness; alternatively, use basil or cilantro.
  • Dried Basil (½ teaspoon) – Offers an herby backdrop; can be substituted with Italian seasoning.
  • Dried Oregano (½ teaspoon) – Enhances the Italian flavor profile; thyme is a good alternative.
  • Crushed Red Pepper Flakes (½ teaspoon) – Adds mild heat; adjust according to taste preference.
  • Salt (½ teaspoon) – Essential for overall flavor.
  • Pepper (½ teaspoon) – Enhances seasoning.

For the Sauce

  • Shallot (1, diced) – Provides sweetness and depth of flavor in the sauce.
  • Chicken Broth (1 cup) – Forms the base of the sauce, infusing the dish with flavor.
  • Dry White Wine (⅓ cup, such as Chardonnay) – Adds acidity and balances the sauce; apple cider vinegar can be used for a non-alcoholic option.
  • Lemon (1, sliced) – Freshness and acidity to brighten the dish.

Step‑by‑Step Instructions for Chicken Romano Meatballs

Step 1: Preheat the Oven
Begin by preheating your oven to 350°F (175°C). This ensures that your Chicken Romano Meatballs will bake evenly and thoroughly, achieving that perfect, juicy texture. While the oven heats, you can gather your ingredients to make the mixing process smoother and quicker.

Step 2: Mix the Meatball Ingredients
In a large mixing bowl, combine ground chicken, minced garlic, beaten egg, seasoned breadcrumbs, Romano cheese, chopped parsley, dried basil, dried oregano, crushed red pepper flakes, salt, and pepper. Use your hands to gently mix until just combined, being careful not to overmix, as this helps keep the meatballs tender and flavorful.

Step 3: Shape the Meatballs
With your mixture ready, use your hands to form the meat mixture into 1-inch meatballs. Aim for about 24 meatballs in total. Place the shaped meatballs on a plate or baking tray, ensuring they are evenly spaced. This allows for proper browning when cooked, enhancing their flavor.

Step 4: Brown the Meatballs
Heat a splash of olive oil in an oven-safe skillet over medium heat. Once hot, add the meatballs to the skillet, making sure they are not overcrowded. Sear them for about 5-6 minutes, turning occasionally until they are golden brown on the outside but not fully cooked through, as they will continue baking in the oven.

Step 5: Sauté the Aromatics
Carefully remove the browned meatballs from the skillet and set them aside on a plate. In the same skillet, add the diced shallot and sauté for a minute or two, followed by minced garlic and a pinch of salt, until they are softened and fragrant—about 3 minutes—creating a beautifully aromatic base for your sauce.

Step 6: Create the Sauce
Pour in the dry white wine and let it simmer for about 2 minutes, allowing the alcohol to cook off and the flavors to concentrate. Next, add the lemon slices and chicken broth, stirring well to combine, creating a zesty sauce that will elevate the Chicken Romano Meatballs to the next level.

Step 7: Finish Baking the Meatballs
Return the meatballs to the skillet, carefully nestling them into the sauce. Cover the skillet and transfer it to the preheated oven. Bake for about 15 minutes, or until the meatballs are cooked through and reach an internal temperature of 165°F (74°C), ensuring they’re both safe and delicious.

Step 8: Serve and Enjoy
Once baked, remove the skillet from the oven and let it cool slightly before serving. You can enjoy the Chicken Romano Meatballs over pasta, in a sandwich, or alongside a fresh salad. The tender meatballs, combined with the zesty lemon white wine sauce, create a mouthwatering dish that is sure to impress!

Expert Tips for Chicken Romano Meatballs

  • Don’t Overmix: Gently combine the ingredients to maintain a tender texture; overmixing can lead to tough meatballs.
  • Preheat Properly: Ensure your oven is fully heated before baking to achieve optimal cooking results for your Chicken Romano Meatballs.
  • Searing is Key: Brown the meatballs before baking to enhance flavor; avoid crowding them in the skillet for perfect browning.
  • Check Temp: Always check the internal temperature; meatballs should reach 165°F (74°C) for safe eating.
  • Experiment with Herbs: Feel free to substitute herbs based on what you have on hand; fresh herbs can really elevate the dish!
  • Sauce Texture: Aim for a balanced sauce; if it’s too thick, add a splash more chicken broth for a silky finish.

What to Serve with Chicken Romano Meatballs?

There’s something magical about pairing your dinner with the perfect sides to enhance every bite and create an unforgettable meal experience.

  • Creamy Mashed Potatoes: Their buttery richness provides a luscious contrast to the zesty meatballs, creating a mouthwatering combination that warms the soul.

  • Garlic Bread: Crunchy, warm slices of garlic bread offer a delightful crunch and make perfect vessels for sopping up that delicious lemon white wine sauce.

  • Zucchini Noodles: For a lighter, low-carb option, spiralized zucchini adds a fresh touch while effortlessly absorbing the flavors of the sauce.

  • Fresh Garden Salad: Crisp greens topped with cherry tomatoes and a tangy vinaigrette bring a refreshing balance, brightening up every savory bite.

  • Roasted Vegetables: Colorful medleys of roasted bell peppers, carrots, and asparagus add vibrant flavor and textures, creating a more wholesome meal.

  • Risotto: Creamy risotto, infused with herbs or lemon zest, transforms the plate into a cozy Italian delight that pairs brilliantly with the savory meatballs.

  • Chardonnay: A chilled glass of chilled Chardonnay echoes the wine in your sauce, enhancing the meal’s flavors for a harmonious dining experience.

How to Store and Freeze Chicken Romano Meatballs

Fridge: Keep leftover Chicken Romano Meatballs in an airtight container in the refrigerator for up to 3 days to retain their juicy flavor.

Freezer: For longer storage, freeze the meatballs in a single layer on a baking sheet, then transfer to a freezer-safe bag, where they’ll last up to 3 months.

Reheating: When ready to eat, reheat frozen meatballs straight from the freezer in the oven at 350°F (175°C) for about 20 minutes or until heated through.

Thawing: To thaw, place the meatballs in the refrigerator overnight before reheating or use the microwave for a quicker option; just ensure they reach 165°F (74°C) before serving.

Chicken Romano Meatballs Variations

Customize your Chicken Romano Meatballs to suit your tastes and dietary needs with these delicious twists!

  • Ground Turkey: Swap out ground chicken for turkey for a leaner option without losing any flavor.
  • Pork Alternative: Use ground pork instead of chicken to bring a rich, savory flavor to your meatballs.
  • Gluten-Free Delight: Opt for gluten-free breadcrumbs easily to make this dish friendly for gluten sensitivities.
  • Herb Change-Up: Replace fresh parsley with basil or cilantro for a different herbal signature that can bring a fresh vibe.
  • Zucchini Noodles: For a low-carb option, serve your meatballs over spiralized zucchini noodles instead of traditional pasta.
  • Extra Spice: If you like a bit more kick, increase the crushed red pepper flakes or add diced jalapeños to the mix!
  • Pesto Infusion: Stir in some store-bought or homemade pesto into the meat mixture for a burst of herbaceous flavor.
  • Creamy Sauce Twist: Add a splash of cream or a dollop of sour cream to the sauce for a richer, velvety texture that pairs beautifully with the meatballs.

Feel free to explore these options, and let your taste buds guide you! And if you’re looking for other chicken recipes, be sure to check out Honey Chili Chicken or the comforting Homemade Chicken Rolls. Enjoy your culinary adventure!

Make Ahead Options

These Chicken Romano Meatballs are perfect for meal prep enthusiasts! You can prepare the meatball mixture up to 24 hours in advance, simply combining all the ingredients and shaping the meatballs, then refrigerate them in an airtight container. The sauce can also be made ahead of time; sauté the shallots and garlic, then add the broth, wine, and lemon, and store it in the fridge for up to 3 days. When you’re ready to serve, just reheat the sauce in the skillet, add the chilled meatballs, and bake as directed for a dinner that’s just as delicious with minimal effort!

Chicken Romano Meatballs Recipe FAQs

What are the best tips for selecting ripe ingredients?
Absolutely! For the freshest flavor, choose firm, bright lemons with smooth skin to brighten your dish. When selecting garlic, opt for firm bulbs without dark spots for maximum aroma. Fresh herbs should be vibrant and fragrant; wilted ones won’t provide the same punch!

How do I properly store Chicken Romano Meatballs?
You can keep leftover Chicken Romano Meatballs in an airtight container in the refrigerator for up to 3 days. To maintain their flavor and moisture, ensure that they’re completely cooled before sealing them up. Reheat in the oven or microwave until hot throughout.

Can I freeze Chicken Romano Meatballs, and what’s the process?
Absolutely! For freezing, first, arrange the meatballs in a single layer on a baking sheet and freeze them for about 1-2 hours until solid. Once they’re frozen, transfer them to a freezer-safe plastic bag, where they can be stored for up to 3 months. Just remember to label the bag with the date!

What should I do if my meatballs are too dry?
If your Chicken Romano Meatballs turn out too dry, it could be from overmixing the ingredients or cooking them too long. For the next batch, gently mix the ingredients just until combined. If reheating leftovers, try adding a splash of chicken broth or the lemon white wine sauce while warming to keep them juicy.

Are there any dietary considerations for these meatballs?
For those concerned about allergies, this recipe can be made gluten-free by using gluten-free breadcrumbs instead of regular ones. The ingredients are otherwise fairly inclusive, but always check labels for hidden allergens, particularly when using pre-made items like breadcrumbs or sauces.

How long should I cook Chicken Romano Meatballs to ensure they’re safe to eat?
Make sure to cook your Chicken Romano Meatballs until they reach an internal temperature of 165°F (74°C). Using a meat thermometer is the best way to confirm this. Bake them for about 15 minutes after browning, and they should come out juicy and safe to enjoy!

Chicken Romano Meatballs

Savory Chicken Romano Meatballs in Zesty Lemon Sauce

Delicious Chicken Romano Meatballs with rich flavors and zesty lemon sauce.
Prep Time 15 minutes
Cook Time 30 minutes
Cooling Time 5 minutes
Total Time 50 minutes
Servings: 6 meatballs
Course: Chicken
Cuisine: Italian
Calories: 300

Ingredients
  

For the Meatballs
  • 1 pound Ground Chicken Can substitute with turkey
  • 2 cloves Garlic, minced Fresh garlic recommended
  • 1 large Egg, beaten Lightly beaten to bind
  • ½ cup Seasoned Bread Crumbs Use gluten-free for a gluten-free version
  • cup Romano Cheese, grated Can substitute with Parmesan
  • ¼ cup Chopped Fresh Parsley Alternatively use basil or cilantro
  • ½ teaspoon Dried Basil Can substitute with Italian seasoning
  • ½ teaspoon Dried Oregano Thyme is a good alternative
  • ½ teaspoon Crushed Red Pepper Flakes Adjust according to taste preference
  • ½ teaspoon Salt
  • ½ teaspoon Pepper
For the Sauce
  • 1 medium Shallot, diced Provides sweetness
  • 1 cup Chicken Broth
  • cup Dry White Wine Such as Chardonnay, or use apple cider vinegar
  • 1 Lemon, sliced Adds freshness and acidity

Equipment

  • Skillet
  • mixing bowl
  • baking tray

Method
 

Cooking Instructions
  1. Preheat your oven to 350°F (175°C).
  2. In a large mixing bowl, combine ground chicken, minced garlic, beaten egg, seasoned breadcrumbs, Romano cheese, chopped parsley, dried basil, dried oregano, crushed red pepper flakes, salt, and pepper. Use your hands to mix until just combined.
  3. Form the meat mixture into 1-inch meatballs and place them on a plate or baking tray.
  4. Heat olive oil in an oven-safe skillet over medium heat. Add the meatballs, sear them for about 5-6 minutes until golden brown.
  5. Remove the browned meatballs and set aside. In the same skillet, sauté diced shallot for a minute, then add minced garlic and a pinch of salt until softened.
  6. Pour in dry white wine, simmer for 2 minutes, then add lemon slices and chicken broth, stirring to combine.
  7. Return the meatballs to the skillet, cover, and bake for about 15 minutes until fully cooked and reach an internal temperature of 165°F (74°C).
  8. Let skillet cool slightly before serving. Enjoy over pasta, in a sandwich, or alongside a salad.

Notes

Don’t overmix the meatball mixture to maintain tenderness. Ensure proper searing for enhanced flavor.

Irresistible Cream of Coconut Pecan Pie for Tropical Bliss

As I was piecing together my holiday dessert spread, a sudden craving for a sweet twist on tradition hit me—what if I could bring a slice of the tropics to my Thanksgiving table? Enter the Cream of Coconut Pecan Pie, where nutty, buttery goodness meets the lush flavor of coconut. This delightful fusion makes for an easy-to-prepare dessert that not only pleases the crowd but also adds a unique flair to your festive gatherings. Imagine serving a slice that’s rich and creamy, with just the right amount of crunch from pecans and a hint of sweetness without overwhelming the palate. Trust me; this pie will quickly become a go-to favorite in your holiday repertoire! Are you ready to discover how this tropical treat can transform your dessert game?

Why is this pie a holiday must-have?

Irresistible flavor: With a rich filling made from cream of coconut, this pie brings tropical bliss to your Thanksgiving table.
Easy to prepare: Even novice bakers can whip it up with just a few simple steps.
Crowd-pleaser: The combination of nutty pecans and creamy coconut is sure to impress family and friends.
Versatile variations: Consider swapping pecans for walnuts or adding mini chocolate chips for a decadent twist!
Make-ahead friendly: Bake it a day in advance and chill for a hassle-free dessert on the big day—just like with my Coconut Chocolate Rolls or Blueberry Cream Cheese!

Cream of Coconut Pecan Pie Ingredients

• Get ready to create your tropical delight!

For the Pie Crust

  • Frozen Deep Dish Pie Crust – Use a 9″ pie crust for the perfect base.

For the Filling

  • Unsalted Butter (6 Tbsp) – Adds richness and flavor; can substitute with margarine for a dairy-free option.
  • Cream of Coconut (1¼ cups) – The primary flavoring and sweetness source; ensure it’s the cream of coconut, not coconut milk, as they are not interchangeable.
  • Light Brown Sugar (½ cup) – Provides sweetness and a hint of molasses flavor; regular granulated sugar can be substituted.
  • All-Purpose Flour (1 Tbsp) – Acts as a thickening agent; gluten-free all-purpose flour works well as a substitute.
  • Salt (½ tsp) – Enhances overall flavor balance.
  • Large Eggs (3, lightly beaten) – Offers structure and richness to the filling.
  • Coconut Extract (½ tsp) – Intensifies the coconut flavor; vanilla extract makes a fine substitute.
  • Sweetened Shredded Coconut (1 cup, divided) – Offers texture and coconut flavor.
  • Chopped Pecans (1½ cups) – Gives nutty flavor and crunch; walnuts can be used as an alternative.

Get your ingredients ready and prepare for a delightful experience as you whip up this Cream of Coconut Pecan Pie!

Step‑by‑Step Instructions for Cream of Coconut Pecan Pie

Step 1: Preheat the Oven
Begin by preheating your oven to 350°F (175°C). This ensures that by the time the Cream of Coconut Pecan Pie filling is ready, your oven is set to create the perfect environment for baking. While the oven warms up, place your frozen deep dish pie crust on a baking sheet for easier handling.

Step 2: Melt the Butter
In a medium saucepan over medium heat, melt 6 tablespoons of unsalted butter. Keep a close eye on the butter as it melts; you’ll want it to turn a light brown color, signaling that it’s ready. This browning process adds a nutty flavor to your pie, enhancing the richness of your Cream of Coconut Pecan Pie.

Step 3: Combine Ingredients
Once the butter is browned, remove the saucepan from the heat. Immediately whisk in 1¼ cups of cream of coconut, ½ cup of light brown sugar, 1 tablespoon of all-purpose flour, and ½ teaspoon of salt until smooth. Allow this mixture to cool for about 5-10 minutes, so it doesn’t cook the eggs you will add next.

Step 4: Mix in Eggs and Coconut Extract
After the mixture has cooled slightly, add 3 lightly beaten large eggs and ½ teaspoon of coconut extract. Stir everything together until well combined, ensuring a smooth and creamy filling for your pie. The blend of ingredients will create the foundation of your delightful Cream of Coconut Pecan Pie.

Step 5: Add Shredded Coconut and Pecans
Now it’s time to fold in 1½ cups of chopped pecans and ½ cup of sweetened shredded coconut into the filling. This step not only adds texture but also enhances the tropical flavor of your pie. Gently mix until all the ingredients are well-distributed, creating a delightful combination for your filling.

Step 6: Pour into Pie Crust
Carefully pour the prepared filling into the waiting pie crust on the baking sheet. Make sure to spread it evenly for consistent baking. This rich and fragrant filling is the heart of your Cream of Coconut Pecan Pie, ready to bake and develop that beautiful golden color.

Step 7: Bake the Pie
Place the pie in the preheated oven and bake for 35-40 minutes. Keep an eye on the pie; it’s ready when the center is set and appears dull. If the edges start to brown too quickly, loosely cover them with foil midway through baking to prevent burning.

Step 8: Cool and Refrigerate
Once baked, remove the pie from the oven and allow it to cool completely at room temperature. After cooling, refrigerate the pie for about 2 hours until it firms up, making it easier to slice. This chilling step enhances the texture of your Cream of Coconut Pecan Pie, ensuring a smooth and satisfying experience.

Step 9: Prepare for Serving
As you prepare to serve, toast the remaining shredded coconut in a dry skillet over medium heat until golden brown. This will add a delightful crunch and depth of flavor. When ready, serve slices of the Cream of Coconut Pecan Pie with a generous dollop of whipped cream and sprinkle the toasted coconut on top for an impressive touch!

Cream of Coconut Pecan Pie Variations

Feel free to explore new flavors and textures that make this dessert truly yours!

  • Nutty Twist: Substitute chopped pecans with walnuts for a bolder nutty flavor. Walnuts provide a slightly different crunch while still complementing the creamy coconut filling beautifully.

  • Chocolate Delight: Add mini chocolate chips to the filling for an indulgent twist. The chocolate pairs perfectly with the creamy coconut, creating an irresistible flavor combination.

  • Texture Surprise: Try using a graham cracker crust instead of the traditional pie crust. This change introduces a delightful crunch and a hint of sweetness that elevates the tropical experience.

  • Dairy-Free Option: Swap unsalted butter with margarine or coconut oil for a dairy-free alternative. This simple switch gives the pie a vegan-friendly twist without sacrificing flavor.

  • Extra Flavor Boost: Incorporate a splash of dark rum or coconut rum into the filling. The liquor enhances the tropical essence, giving your pie a sophisticated flair that’s perfect for holiday gatherings.

  • Coconut-Heavy: Increase the shredded coconut to 1½ cups for a more pronounced coconut flavor and delightful texture throughout the pie. The extra coconut amplifies those tropical vibes!

  • Spice It Up: Add a pinch of cinnamon or nutmeg to the filling to deepen the flavor profile. The warm spices create a cozy atmosphere, perfect for festive occasions.

  • Fruity Addition: Fold in some chopped tropical fruits like pineapple or mango pieces. This adds a refreshing burst of sweetness, making every bite feel like a mini-vacation!

Feel inspired? You can play around with these variations to suit your mood or the occasion! For more delightful dessert ideas, check out my Cream Puffs Vanilla or the sumptuous Lemon Caramel Cream.

How to Store and Freeze Cream of Coconut Pecan Pie

Fridge: Store your pie in the refrigerator, covered tightly, for up to 3 days. This keeps it fresh and ready to serve at a moment’s notice.

Freezer: If you want to keep it longer, freeze the pie after it has cooled completely. Wrap tightly in plastic wrap and then aluminum foil for up to 2 months.

Thawing: To serve a frozen pie, transfer it to the fridge for 8–12 hours before enjoying. This gradual thaw helps preserve its creamy texture.

Reheating: If preferred warm, slice and microwave each piece for about 15-20 seconds, just enough to slightly warm the creamy filling without losing its delightful chill.

Make Ahead Options

Planning ahead with this Cream of Coconut Pecan Pie is a fantastic way to save time during the busy holiday season! You can prepare the pie filling up to 24 hours in advance by mixing all the ingredients and storing it in an airtight container in the refrigerator. The pie crust can also be pre-baked and kept at room temperature for up to 3 days. Just ensure the crust is completely cooled before wrapping it tightly. When you’re ready to serve, simply pour the prepared filling into the crust, bake as directed, and cool before chilling in the fridge for a couple of hours. The end result will be just as delicious, giving you a stress-free dessert option that your family will love!

What to Serve with Cream of Coconut Pecan Pie

Imagine the laughter of friends and family mingling with the sweet scent of coconut as you create a feast around this tropical-inspired dessert.

  • Whipped Cream: A dollop of freshly whipped cream adds a light, airy contrast, enhancing the pie’s rich flavors.
  • Tropical Fruit Salad: Bright and juicy pineapple, mango, and kiwi can balance the sweetness, offering a refreshing crunch.
  • Coffee or Espresso: The boldness of a well-brewed coffee or espresso makes a perfect companion, cutting through the creamy richness.
  • Vanilla Ice Cream: A scoop of smooth vanilla ice cream melts beautifully over the warm pie, creating a luscious dessert experience.
  • Toasted Coconut Flakes: Serve alongside the pie for an extra layer of flavor and texture; these crunchy shavings enhance the coconut theme.
  • Mint Tea: Cooling mint tea can refresh the palate, making it a delightful contrast to the rich, buttery pie.
  • Chocolate Sauce: Drizzle some warm chocolate sauce on each slice for an indulgent twist that complements the nuttiness of the pecans.
  • Candied Ginger: Adding pieces of candied ginger brings a spicy-sweet kick and an exotic flair that harmonizes with the coconut.
  • Ice-Cold Lemonade: Zesty lemonade refreshes the senses and balances the sweetness, making it a surprisingly delightful pairing!
  • Caramel Sauce: A drizzle of rich caramel over slices adds a sweet depth that plays beautifully with the pie’s tropical notes.

Expert Tips for Cream of Coconut Pecan Pie

  • Choose The Right Coconut: Ensure you buy cream of coconut rather than coconut milk for the right sweetness and texture in your Cream of Coconut Pecan Pie.

  • Butter Care: Pay close attention while browning the butter; it should be a light brown color without burning for an optimal flavor enhancement.

  • Egg Temperature: Let your filling cool for at least 5-10 minutes before adding the eggs to prevent them from scrambling in the warm mixture.

  • Pecan Alternatives: If you’re out of pecans, walnuts can provide a delicious alternative; adjust the quantity for personal preference.

  • Prevent Over-Browning: Use foil to cover the edges loosely if they begin to brown too quickly while baking, ensuring your pie cooks evenly.

  • Chill Before Serving: Refrigerate the pie for a couple of hours after baking; this helps achieve a firmer texture for easy slicing and a more satisfying experience.

Cream of Coconut Pecan Pie Recipe FAQs

How do I select the best cream of coconut?
Absolutely! When choosing cream of coconut, look for brands that specifically state “cream of coconut” on the label, as it is sweeter and thicker than coconut milk. You can usually find it in the alcohol mixer aisle or the Asian food section of your grocery store. Also, give it a good shake before using, as it can separate.

What’s the best way to store leftover cream of coconut pecan pie?
Very! Store your Cream of Coconut Pecan Pie in the refrigerator, covered tightly with plastic wrap or aluminum foil. It will stay fresh for up to 3 days. If you want to prep ahead, feel free to bake it a couple of days in advance!

Can I freeze the cream of coconut pecan pie?
Absolutely! To freeze your pie, let it cool completely after baking. Wrap it tightly in plastic wrap and then aluminum foil to prevent freezer burn. It can be stored in the freezer for up to 2 months. When you’re ready to enjoy it, transfer it to the fridge for 8–12 hours to thaw gradually, and it will be as good as new!

What should I do if the pie center doesn’t set while baking?
If your Cream of Coconut Pecan Pie doesn’t set, it might need a little extra time in the oven—sometimes a few more minutes can make all the difference! Keep an eye on the edges to ensure they don’t brown too quickly; if they do, cover them loosely with foil. Remember, an undercooked pie can usually be salvaged by returning it to the oven.

Are there any allergy considerations I should be aware of with this recipe?
Definitely! This pie contains eggs and nuts, which are common allergens. If you’re serving this dessert to guests, be sure to check for nut allergies or offer a nut-free alternative by substituting walnuts with seeds like sunflower seeds for a similar crunch. And as always, double-check all ingredient labels for potential allergens.

Cream of Coconut Pecan Pie

Irresistible Cream of Coconut Pecan Pie for Tropical Bliss

Indulge in the rich flavors of Cream of Coconut Pecan Pie, a delightful dessert that brings tropical bliss to your holiday table.
Prep Time 10 minutes
Cook Time 40 minutes
Cooling Time 2 hours
Total Time 2 hours 50 minutes
Servings: 8 slices
Course: Dessert
Cuisine: Tropical
Calories: 320

Ingredients
  

For the Pie Crust
  • 1 9 inch Frozen Deep Dish Pie Crust For the perfect base.
For the Filling
  • 6 Tbsp Unsalted Butter Adds richness and flavor; can substitute with margarine.
  • 1.25 cups Cream of Coconut Ensure it's the cream of coconut, not coconut milk.
  • 0.5 cups Light Brown Sugar Regular granulated sugar can be substituted.
  • 1 Tbsp All-Purpose Flour Gluten-free all-purpose flour works well as a substitute.
  • 0.5 tsp Salt Enhances overall flavor balance.
  • 3 Large Eggs Lightly beaten to offer structure.
  • 0.5 tsp Coconut Extract Vanilla extract makes a fine substitute.
  • 1 cup Sweetened Shredded Coconut Offers texture and coconut flavor, divided.
  • 1.5 cups Chopped Pecans Gives nutty flavor and crunch; walnuts can be used as an alternative.

Equipment

  • Medium saucepan
  • baking sheet
  • whisk

Method
 

Step‑by‑Step Instructions for Cream of Coconut Pecan Pie
  1. Preheat your oven to 350°F (175°C) and place the frozen deep dish pie crust on a baking sheet.
  2. Melt 6 tablespoons of unsalted butter in a medium saucepan over medium heat until it turns light brown.
  3. Combine melted butter, 1¼ cups of cream of coconut, ½ cup of light brown sugar, 1 tablespoon of all-purpose flour, and ½ teaspoon of salt until smooth. Cool for 5-10 minutes.
  4. Mix in 3 lightly beaten large eggs and ½ teaspoon of coconut extract. Stir until well combined.
  5. Fold in 1½ cups of chopped pecans and ½ cup of sweetened shredded coconut until evenly distributed.
  6. Carefully pour the filling into the pie crust, spreading it evenly.
  7. Bake for 35-40 minutes until set, covering edges with foil if browning too quickly.
  8. Cool the pie at room temperature then refrigerate for about 2 hours before serving.
  9. Toast the remaining shredded coconut in a dry skillet until golden brown and use to top whipped cream on the pie before serving.

Notes

Ensure you use cream of coconut for the right sweetness and texture. Brown the butter carefully to enhance flavor. Chill the pie before serving for a firmer texture.

Pink Grapefruit and Thyme Vegan Shortbread Cookie Bliss

The aroma of freshly baked cookies has a magical way of bringing smiles and warmth into any kitchen. Today, I’m excited to share my recipe for Pink Grapefruit and Thyme Vegan Shortbread Cookies—delivering a unique twist on a classic. These delightful treats harmoniously combine the bright zest of grapefruit with the earthy tones of thyme, creating an unforgettable flavor experience. One of the best perks? They come together in no time without the hassle of rolling out dough—just blend, press, and bake! Plus, they’re not only vegan but make for stunning gifts that are sure to impress anyone lucky enough to receive them. Who wouldn’t love a little burst of citrus goodness paired with the comfort of homemade cookies? Ready to elevate your baking game? Let’s dive in!

Why make Pink Grapefruit and Thyme Cookies?

Simplicity at Its Finest: With just a few ingredients and no need for rolling dough, these cookies are as easy as they are delicious.

Unique Flavor Combination: The vibrant combination of zesty grapefruit and aromatic thyme introduces a delightful twist to traditional shortbread.

Versatile Treat: Perfect for gifting or elevating your afternoon tea, these cookies are versatile and crowd-pleasing.

Crispy Yet Buttery: Enjoy the perfect texture—a crispy exterior that gives way to a tender center, making each bite irresistible!

Dietary Friendly: Vegan and easily adaptable for gluten-free diets, these cookies cater to various dietary preferences without compromising flavor.

Elevate your baking repertoire with these Pink Grapefruit and Thyme Vegan Shortbread Cookies and discover the joyful experience they bring!

Pink Grapefruit and Thyme Vegan Shortbread Cookie Ingredients

For the Dough

  • Unbleached All-Purpose Flour – Provides structure; substitute with gluten-free flour for a gluten-free option.
  • Icing Sugar – Adds sweetness; confectioners sugar helps achieve a melt-in-your-mouth texture.
  • Salt – Enhances flavor; just a pinch balances out the sweetness.
  • Grapefruit Zest – Infuses the cookies with bright citrus notes; freshly grated zest elevates the flavor.
  • Fresh Thyme – Adds an herbaceous character; fresh thyme enhances the cookies’ taste complexity.
  • Vegan Butter (cubed) – Contributes to the buttery flavor and texture; use a plant-based butter like Becel.

For the Icing

  • Powdered Sugar (for icing) – Delivers sweetness; necessary for a beautiful icing coat.
  • Fresh Grapefruit Juice – Moistens the icing; fresh-squeezed juice gives the best flavor and consistency.
  • Gel Food Coloring (optional) – Provides visual appeal; a splash of color can make the icing pop.

For the Garnish

  • Fresh Thyme/Pearl Sugar – Adds an elegant finish; elevates your iced cookies with a refined touch.

With these ingredients, you’ll create delightful Pink Grapefruit and Thyme Vegan Shortbread Cookies that are sure to leave an impression!

Step-by-Step Instructions for Pink Grapefruit and Thyme Vegan Shortbread Cookie

Step 1: Preheat the Oven
Start by preheating your oven to 300°F (150°C). This allows your Pink Grapefruit and Thyme Vegan Shortbread Cookies to bake evenly and develop that lovely golden color. While the oven heats up, you can gather your ingredients and get ready for the fun of mixing!

Step 2: Make the Dough
In a food processor, combine the unbleached all-purpose flour, icing sugar, salt, grapefruit zest, and fresh thyme. Blend these ingredients until well combined, which should take about 30 seconds. Gradually add the cubed vegan butter while pulsing until the mixture forms a rough dough that clumps together, roughly 1-2 minutes.

Step 3: Press & Bake
Transfer the dough into a 9-inch fluted tart pan, pressing it evenly across the bottom. Ensure the surface is smooth, as this will help achieve even baking. Place the pan in your preheated oven and bake for 35-40 minutes, or until the edges are set and slightly golden—your kitchen will smell amazing!

Step 4: Cut
Once baked, carefully remove the tart pan from the oven and, while it’s still warm, cut the shortbread into 16 uniform pieces. Use a sharp knife for clean cuts without crumbling the edges. Leave the cookies to cool completely in the pan—this helps them firm up nicely.

Step 5: Prepare Icing
To make your icing, sift the powdered sugar into a mixing bowl and gradually stir in fresh grapefruit juice until you reach your desired consistency. The icing should be thick enough to coat the cookies but not too runny. If you want a bit of color, add a drop of gel food coloring and mix well.

Step 6: Dip Cookies
Once the cookies are cooled, dip the top of each cookie into the icing, allowing any excess to drip off. Place the iced cookies on a wire rack to dry. For a more decadent finish, repeat this step for a second coat of icing, and then garnish with a sprinkle of fresh thyme or pearl sugar for an elegant look.

Step 7: Dry & Serve
Leave the iced cookies on the rack until the icing is firm, which should take about 30 minutes. Once dried, they are ready to be enjoyed! Store any leftovers in an airtight container at room temperature, or pack them up as delightful gifts, sharing the joy of your Pink Grapefruit and Thyme Vegan Shortbread Cookies with friends and family.

What to Serve with Pink Grapefruit and Thyme Vegan Shortbread Cookies?

Elevate your dessert experience by pairing these delightful cookies with the perfect accompaniments that enhance their unique flavors.

  • Earl Grey Tea: The bergamot notes in Earl Grey beautifully complement the citrus in the cookies, creating a fragrant pairing.
  • Fresh Fruit Salad: A vibrant mix of berries and citrus offers a refreshing contrast to the rich sweetness of the cookies.
  • Dark Chocolate Drizzle: A touch of bittersweet chocolate on top adds a delightful richness, balancing the cookies’ zesty profile perfectly.
  • Chilled Sparkling Water: The effervescence cleanses the palate while the citrus notes are highlighted, making each bite feel indulgent.
  • Lemon Sorbet: A light and tangy sorbet pairs wonderfully, enhancing the grapefruit flavors and adding a refreshing touch to your dessert spread.
  • Coconut Cream: Serve a dollop of whipped coconut cream alongside for a creamy, tropical twist that complements the herbal thyme.
  • Herbal Tea Infusion: A calming cup of chamomile or mint tea pairs well, ensuring a cozy atmosphere while enjoying the cookies.
  • Almond Biscotti: Enhance your cookie platter with these crunchy treats; their nutty flavor resonates with the thyme in the shortbread.
  • Orange Blossom Water Cake: A delicate, fragrant cake perfectly aligns with the aromatic elements of your cookies, providing a sophisticated finish.
  • Ice Cream Float: Pair with a grapefruit soda and a scoop of vanilla ice cream for a playful, sweet treat that’s sure to impress!

Make Ahead Options

These Pink Grapefruit and Thyme Vegan Shortbread Cookies are perfect for meal prep enthusiasts looking to save time! You can make the dough up to 24 hours in advance—simply prepare it and wrap it tightly in plastic wrap before refrigerating. This not only helps the flavors meld but also saves you time on a busy day. When you’re ready to bake, just press the chilled dough into your tart pan and follow the baking instructions as usual. For the icing, you can prepare it a day ahead as well; simply store it in an airtight container in the fridge, and give it a quick stir before dipping your cookies. By prepping in advance, you’ll enjoy fresh, homemade cookies that are just as delicious as if they were baked that day!

Storage Tips for Pink Grapefruit and Thyme Vegan Shortbread Cookies

Room Temperature: Store cookies in an airtight container at room temperature for up to 2 weeks to maintain their delicious flavor and texture.

Freezer: For longer storage, freeze the cookies in a single layer on a baking sheet, then transfer to an airtight container for up to 6 months.

Icing Note: If you choose to freeze, ice the Pink Grapefruit and Thyme Vegan Shortbread Cookies only after thawing them to prevent the icing from becoming sticky.

Reheating: For a fresh taste, gently refresh in the oven at 300°F (150°C) for a few minutes before serving, bringing back their delightful crispiness.

Pink Grapefruit and Thyme Vegan Shortbread Cookie Variations

Feel free to let your creativity shine as you explore these exciting twists on our Pink Grapefruit and Thyme Vegan Shortbread Cookies!

  • Zesty Swaps: Substitute lime or lemon zest to introduce a different citrus note. The bright variations will keep your taste buds tingling.

  • Herb Alternatives: Try using rosemary instead of thyme for a fragrant finish. This earthy herb offers a lovely depth, creating a unique flavor profile.

  • Sweeten with Maple: Replace icing sugar with maple sugar for a natural twist. Not only does it add sweetness, but also a hint of warm flavor that enhances the cookies beautifully.

  • Nutty Bliss: Add finely chopped nuts, such as almonds or pistachios, for a delightful crunch. Incorporating nuts adds texture and flavor complexity that everyone will adore.

  • Chocolate Drizzle: Drizzle melted dark chocolate over the iced cookies for an indulgent touch. The rich chocolate can create a beautiful flavor balance with the citrus.

  • Continue the Theme: Pair these cookies with fresh grapefruit or a light herbal tea for a refreshing snack. The combination amplifies all the delightful flavors in every bite!

  • Icing Flavor Twist: Experiment by mixing in a few drops of vanilla extract into the icing for an aromatic element, enhancing the overall flavor harmony. The warmth of vanilla beautifully layers with the grapefruit zing.

  • Dairy-Free Ganache: For a fudgy twist, make a vegan chocolate ganache with dairy-free chocolate and coconut cream that can be used instead of icing. It brings a rich chocolatey flavor that makes these cookies irresistibly decadent!

Have fun with these variations and let your tastes guide you! And if you’re looking for similar delightful recipes, check out my Nut Seed Cookies or try these Nutty Chocolate Date Cookies for another tasty treat.

Expert Tips for Pink Grapefruit and Thyme Vegan Shortbread Cookies

  • Cold Butter is Key: Keep your vegan butter chilled to prevent the dough from becoming greasy, ensuring a perfectly crisp texture.

  • Flavor Development: For the best flavor, let the coated cookies sit for a few hours after icing before serving, allowing the flavors to meld beautifully.

  • Cutting Warm: Always cut the cookies while they are still warm from the oven. This prevents crumbling and ensures clean edges for your Pink Grapefruit and Thyme Vegan Shortbread Cookies.

  • Stacking Smart: When storing, use parchment paper between layers to avoid sticking. This keeps your cookies looking beautiful and intact!

  • Don’t Rush the Icing: Take your time when dipping the cookies in icing. A gentle dip allows a better coat and prevents excess icing from dripping off.

Pink Grapefruit and Thyme Vegan Shortbread Cookies Recipe FAQs

What is the best way to choose ripe grapefruits for this recipe?
Absolutely! When selecting grapefruits, look for ones that are heavy for their size and have smooth, fine skin. Avoid any that have dark spots or feel soft, as these may indicate overripeness. Freshly zested grapefruit will bring out that delightful citrus flavor in your cookies, making all the difference in your baking!

How should I store Pink Grapefruit and Thyme Vegan Shortbread Cookies?
To keep your cookies fresh, store them in an airtight container at room temperature for up to 2 weeks. If you’re looking to preserve them longer, they can be frozen for up to 6 months. Just make sure to layer parchment paper between stacked cookies to prevent them from sticking together.

Can I freeze the Pink Grapefruit and Thyme Vegan Shortbread Cookies?
Definitely! To freeze, first, place the cookies in a single layer on a baking sheet and freeze until solid. Then, transfer them to an airtight container, separating layers with parchment paper to prevent sticking. When you’re ready to enjoy them, thaw in the fridge or at room temperature and ice only after they’ve thawed.

What should I do if my cookie dough is too crumbly?
If your dough is crumbly and not holding together, don’t worry! You can add a teaspoon of cold water or more vegan butter, one tablespoon at a time, mixing until the dough comes together. Be careful not to add too much liquid as it could affect the cookie’s texture. Remember, it should form a rough mass but not be overly sticky.

Are there any dietary considerations for allergies related to this recipe?
Very! Since this recipe is vegan, it’s naturally free from dairy and eggs, making it suitable for many diets. For those with gluten sensitivities, you can substitute the unbleached all-purpose flour with gluten-free flour. Always check product labels to ensure there are no allergens, especially in your plant-based butter and icing sugar!

How can I enhance the flavor if I can’t find fresh thyme?
If fresh thyme isn’t available, you can substitute with dried thyme in smaller quantities—about one-third of the amount as dried herbs are more concentrated. Alternatively, consider using other herbs like rosemary for a different twist. Experimenting with different herbs can lead to exciting flavor profiles!

Pink Grapefruit and Thyme Vegan Shortbread Cookie

Pink Grapefruit and Thyme Vegan Shortbread Cookie Bliss

Delight in these Pink Grapefruit and Thyme Vegan Shortbread Cookies that combine zest with herbaceous tones for a uniquely scrumptious treat.
Prep Time 10 minutes
Cook Time 40 minutes
Cooling Time 30 minutes
Total Time 1 hour 20 minutes
Servings: 16 cookies
Course: Dessert
Cuisine: Vegan
Calories: 90

Ingredients
  

For the Dough
  • 2 cups Unbleached All-Purpose Flour Substitute with gluten-free flour for a gluten-free option.
  • 1/2 cup Icing Sugar Helps achieve a melt-in-your-mouth texture.
  • 1 pinch Salt Balances out the sweetness.
  • 1 tablespoon Grapefruit Zest Freshly grated zest elevates the flavor.
  • 1 tablespoon Fresh Thyme Enhances the cookies' taste complexity.
  • 1/2 cup Vegan Butter (cubed) Use a plant-based butter like Becel.
For the Icing
  • 1 cup Powdered Sugar Necessary for a beautiful icing coat.
  • 1/4 cup Fresh Grapefruit Juice Fresh-squeezed juice gives the best flavor.
  • 1 drop Gel Food Coloring Optional for visual appeal.
For the Garnish
  • 1 tablespoon Fresh Thyme/Pearl Sugar Elevates your iced cookies.

Equipment

  • Food Processor
  • 9-inch Fluted Tart Pan
  • mixing bowl
  • Wire rack
  • sharp knife

Method
 

Instructions
  1. Preheat your oven to 300°F (150°C). Gather your ingredients.
  2. In a food processor, combine flour, icing sugar, salt, grapefruit zest, and thyme. Blend until combined, about 30 seconds. Gradually add vegan butter while pulsing until a rough dough forms, 1-2 minutes.
  3. Press the dough into a 9-inch fluted tart pan evenly across the bottom. Bake for 35-40 minutes until edges are set and slightly golden.
  4. Once baked, cut the shortbread into 16 uniform pieces while still warm. Allow to cool completely in the pan.
  5. For icing, sift powdered sugar into a mixing bowl and gradually stir in grapefruit juice until desired consistency. Optional: add food coloring.
  6. Dip the top of each cookie into the icing, allowing excess to drip off. Place on a wire rack to dry. For a second coat, repeat and garnish.
  7. Allow iced cookies to dry for about 30 minutes. Store leftovers in an airtight container or box as gifts.

Notes

Best served after letting iced cookies sit for a few hours. Store with parchment paper between layers to prevent sticking.

Creamy Spinach and Artichoke Goat Cheese Dip You’ll Love

Standing in my kitchen, I caught a whiff of something incredible bubbling away in the oven—my Spinach and Artichoke Goat Cheese Dip was on its way to perfection. This recipe is a delightful twist on a classic favorite, where the tangy notes of creamy goat cheese take the traditional depth to a whole new realm. The beauty of this dip lies not only in its rich, comforting flavors but also in its effortless preparation, making it a stellar choice for your next gathering. It’s a guaranteed crowd-pleaser that can be whipped up in no time, and trust me, it’ll vanish before you know it! So, are you ready to dip into a cheesy adventure that’s as delightful as it is easy to make?

Why is This Dip a Must-Try?

Irresistible Flavor: The harmonious blend of fresh spinach, artichokes, and three types of cheese creates a flavor explosion that will leave your guests craving more.

Quick and Easy: Simply mix the ingredients, bake, and voila! In no time, you’ll have a delicious appetizer that feels gourmet.

Perfect for Any Occasion: Whether it’s a game day, a cozy family dinner, or a festive gathering, this Spinach and Artichoke Goat Cheese Dip fits right in, earning rave reviews.

Versatile Pairings: Dive into deliciousness with crispy crackers or warm pita bread; or enjoy it with crispy veggies for a refreshing contrast.

Make-Ahead Friendly: Prepping in advance? This dip can be assembled a day ahead. Just bake it fresh before serving!

For more cheesy goodness, don’t forget to check out my recipes for Savory Zucchini Cheese and Stovetop Cheese Green.

Spinach and Artichoke Goat Cheese Dip Ingredients

For the Dip
Fresh Spinach – Fresh spinach is preferred for its vibrant flavor and nutritional benefits.
Artichoke Hearts – Canned artichoke hearts work perfectly for convenience and a distinct flavor.
Cream Cheese – This creamy base provides richness and structure for the dip.
Goat Cheese – Use a log for a smooth consistency, adding a tangy depth to your dip.
Parmesan Cheese – Adds a nutty richness that enhances the overall flavor profile.
Mozzarella Cheese – Provides that gooey texture we all crave in a cheesy dip.
Garlic – Fresh minced garlic boosts the flavors; avoid pre-minced varieties for the best taste.
Salt and Pepper – Essential for enhancing the flavors of your Spinach and Artichoke Goat Cheese Dip.

Step‑by‑Step Instructions for Spinach and Artichoke Goat Cheese Dip

Step 1: Blanch the Spinach
Start by bringing a large pot of water to a rolling boil, adding a generous pinch of salt for flavor. Once boiling, immerse the fresh spinach and let it cook for about 30 seconds until it wilts. Immediately transfer the spinach to a bowl filled with ice water to halt the cooking process and preserve its vibrant color. After a few minutes, drain and squeeze out any excess moisture.

Step 2: Prepare the Dip Mixture
In a large mixing bowl, combine the blanched spinach with the chopped artichoke hearts, softened cream cheese, crumbled goat cheese, grated Parmesan, and shredded mozzarella. Add minced garlic, along with salt and pepper to taste. Use a fork or spatula to mash the mixture together until it’s well-blended, creamy, and free of large lumps, creating a luscious filling for your Spinach and Artichoke Goat Cheese Dip.

Step 3: Transfer to Baking Dish
Preheat your oven to 375°F (190°C). Once the dip mixture is ready, scoop it into a greased baking dish, spreading it evenly. For an extra cheesy topping, sprinkle more shredded mozzarella on top. This will create a delightful, golden crust as it bakes. The dish should be full but not overflowing, ensuring even cooking and bubbling.

Step 4: Bake the Dip
Place the baking dish in the preheated oven and bake for 25 minutes. You’ll know it’s ready when the edges are bubbly, and the top is starting to turn golden brown. This beautiful transformation will give your Spinach and Artichoke Goat Cheese Dip that irresistible appeal everyone will love.

Step 5: Serve Warm
Once baked, remove the dip from the oven and let it cool for just a minute or two. Then, serve warm with your favorite accompaniments, such as crispy crackers, fresh vegetable sticks, or toasted French bread. This creamy, flavorful dip will surely be the star of your gathering!

Expert Tips for Spinach and Artichoke Goat Cheese Dip

Fresh is Best: Using fresh spinach instead of frozen significantly enhances the flavor and texture of your dip.

Squeeze Out Water: Make sure to squeeze excess moisture from the blanched spinach; too much water can make your dip runny.

Pre-Bake Preparation: Assemble your Spinach and Artichoke Goat Cheese Dip a day in advance, refrigerate it, then bake right before serving for optimal taste.

Crumbly Goat Cheese: Opt for a log of goat cheese rather than crumbles for smoother mixing and a creamier finish.

Decorative Touch: Consider topping your dip with a sprinkle of red pepper flakes or fresh herbs for a beautiful presentation and added flavor.

What to Serve with Spinach and Artichoke Goat Cheese Dip

Indulge your guests for a complete experience with delightful pairings that enhance the creamy, cheesy goodness of this irresistible dip.

  • Crispy Water Table Crackers: Their light crunch offers a perfect contrast to the creamy dip, making every bite a savory delight.

  • Warm Pita Bread: Soft and chewy, pita bread soaks up the dip beautifully, creating an enjoyable texture experience as you savor each mouthful.

  • Crunchy Veggie Sticks: Carrot, celery, and bell pepper sticks provide a refreshing crunch, balancing the richness while adding vibrant colors to your platter.

  • Toasted French Bread: The warm, crusty surface allows for a satisfying scoop that captures the gooey dip with every slice you serve.

  • Savory Olive Tapenade: A flavorful complement, it delivers briny notes that play beautifully against the creamy base of your Spinach and Artichoke Goat Cheese Dip.

  • Chilled White Wine: A crisp Sauvignon Blanc accentuates the flavors of the dip, creating an elegant pairing for a sophisticated gathering.

  • Mini Quiches: These delightful bites introduce a textural change, offering both creaminess and a savory egg balance alongside your dip.

  • Fresh Berries for Dessert: Conclude your meal on a sweet note! The sweetness of strawberries or raspberries provides a refreshing finish after the rich dip.

How to Store and Freeze Spinach and Artichoke Goat Cheese Dip

Fridge: Store leftovers in an airtight container in the fridge for up to 3 days. Allow the dip to cool completely before sealing to prevent moisture buildup.

Freezer: For longer storage, freeze the dip in a freezer-safe container for up to 2 months. To prevent freezer burn, ensure it’s tightly sealed.

Reheating: Thaw the dip overnight in the fridge before reheating. Warm it in the microwave in 30-second intervals, stirring in between until heated through.

Make-Ahead Tip: If you plan to serve this Spinach and Artichoke Goat Cheese Dip later, prepare it a day in advance, refrigerate, and bake just before serving for fresh flavors!

Spinach and Artichoke Goat Cheese Dip Variations

Feel free to get creative and customize this dip to suit your taste buds or dietary needs!

  • Roasted Red Peppers: Swap artichokes with diced roasted red peppers for a slightly sweet, smoky twist. This adds a vibrant color and flavor that can brighten up your dip.

  • Herbed Goat Cheese: Use flavored goat cheese, such as herbed or garlic varieties. This simple switch can add an exciting layer of taste that elevates the overall experience.

  • Low-Fat Option: For a lighter version, replace cream cheese with Greek yogurt. This keeps the creaminess while providing a healthier alternative without sacrificing flavor.

  • Spicy Kick: Add a teaspoon of red pepper flakes or a dash of hot sauce for a mild heat. You’ll create a delicious contrast to the rich, creamy dip that’s sure to excite your palate.

For more heat options, consider diving into Cheese Chili French for some spicy inspiration.

  • Nutty Crunch: Fold in some chopped walnuts or pecans. This adds a delightful texture and nutty flavor, making every dip more interesting and satisfying.

  • Artisan Cheeses: Experiment with different cheese combinations! Try a mix of goat cheese and smoked Gouda for a unique smoky flavor that brings a whole new depth to your dip.

  • Vegetable Infusion: For more veggies, include finely chopped bell peppers or even some sautéed mushrooms. Not only does this enhance the nutrition, but it also adds layers of flavor.

For more delicious ideas, check out my recipe for Savory Zucchini Cheese for some tasty twists on cheesy dishes!

Make Ahead Options

These Spinach and Artichoke Goat Cheese Dip are perfect for meal prep enthusiasts! You can prepare the dip mixture up to 24 hours in advance, combining the blanched spinach, artichoke hearts, cheeses, and seasonings, then store it tightly covered in the refrigerator. This not only saves you time on busy days but also allows the flavors to meld beautifully overnight. When you’re ready to serve, simply transfer the dip to a baking dish, sprinkle with extra mozzarella, and bake at 375°F for 25 minutes. Trust me, it’ll be just as delicious as if made fresh! Enjoy the convenience of this make-ahead delight at your next gathering!

Spinach and Artichoke Goat Cheese Dip Recipe FAQs

How do I select fresh spinach?
Absolutely! When choosing fresh spinach, look for vibrant green leaves without any dark spots or wilting. The leaves should be firm and crisp. If the spinach appears slimy or wilted, it’s best to skip it!

What’s the best way to store leftovers?
Very! Store your Spinach and Artichoke Goat Cheese Dip in an airtight container in the fridge for up to 3 days. Allow it to cool completely before sealing to avoid any moisture buildup, which can affect the texture.

Can I freeze this dip?
Of course! To freeze, place the dip in a freezer-safe container, ensuring it’s tightly sealed to prevent freezer burn. It will last for up to 2 months. Remember to label it with the date so you know when to enjoy it!

How do I reheat frozen dip?
Great question! To reheat, let the dip thaw overnight in the fridge. When you’re ready to eat, warm it in the microwave in 30-second intervals, stirring in between until heated through. This will help maintain its creamy texture.

What if my dip turns out runny?
No worries! If your dip is too runny, it could be due to excess moisture in the spinach. Make sure you squeeze out as much water as possible after blanching. If it’s already baked, try mixing in a little extra cream cheese or Parmesan to help thicken it up.

Is this dip safe for people with dairy allergies?
Very! Unfortunately, since this Spinach and Artichoke Goat Cheese Dip contains several types of cheese, it wouldn’t be suitable for those with dairy allergies. You could try using dairy-free alternatives, like cashew cream or vegan cheese, for a similar creamy texture.

Spinach and Artichoke Goat Cheese Dip

Creamy Spinach and Artichoke Goat Cheese Dip You'll Love

This Spinach and Artichoke Goat Cheese Dip is a creamy, delicious appetizer that's perfect for any gathering.
Prep Time 15 minutes
Cook Time 25 minutes
Total Time 40 minutes
Servings: 8 servings
Course: Other
Cuisine: American
Calories: 220

Ingredients
  

For the Dip
  • 10 oz Fresh Spinach Use fresh for best flavor
  • 14 oz Artichoke Hearts Canned, drained and chopped
  • 8 oz Cream Cheese Softened
  • 4 oz Goat Cheese Log form
  • 1/2 cup Parmesan Cheese Grated
  • 1 cup Mozzarella Cheese Shredded
  • 2 cloves Garlic Minced
  • 1 tsp Salt
  • 1 tsp Pepper

Equipment

  • Large pot
  • mixing bowl
  • Baking Dish
  • fork or spatula

Method
 

Step-by-Step Instructions
  1. Start by bringing a large pot of water to a rolling boil, adding a generous pinch of salt. Once boiling, immerse the fresh spinach and cook for about 30 seconds until wilted. Transfer to ice water to halt cooking, then drain and squeeze out excess moisture.
  2. In a large mixing bowl, combine the blanched spinach, chopped artichoke hearts, softened cream cheese, crumbled goat cheese, grated Parmesan, and shredded mozzarella. Add minced garlic, along with salt and pepper. Use a fork or spatula to blend until creamy.
  3. Preheat your oven to 375°F (190°C). Transfer the dip mixture to a greased baking dish, spreading evenly. Sprinkle additional mozzarella on top.
  4. Place the baking dish in the oven and bake for 25 minutes, until edges are bubbly and top is golden brown.
  5. Let the dip cool for a minute or two before serving warm with crackers, veggies, or toasted bread.

Notes

Assemble the dip a day in advance and refrigerate. Bake before serving for optimal taste.

Heavenly Vanilla Whipped Sweet Potatoes for Festive Feasts

As the aroma of roasted sweet potatoes fills the kitchen, I can’t help but feel a wave of nostalgia wash over me. This year, my heart is set on making the perfect Vanilla Whipped Sweet Potatoes—a side dish that’s as elegant as it is comforting. The blend of creamy texture and natural sweetness, elevated by the warmth of vanilla, makes this recipe a standout for any holiday gathering. One of the best parts? It’s not only incredibly easy to whip up, but it also leaves an impressive touch that promises to have your guests returning for seconds. Plus, you can customize it with dairy-free alternatives if needed! Are you ready to dive into a world of festive flavors that’ll make your holiday table shine?

Why are Vanilla Whipped Sweet Potatoes irresistible?

Creamy Delight: These Vanilla Whipped Sweet Potatoes boast a silky texture that melts in your mouth, making them a true indulgence at any gathering.

Nostalgic Comfort: Combining the essence of tradition with modern elegance, this dish evokes warm memories while elevating your holiday feast.

Flexible Preparation: Easy to prepare ahead of time, you can simply reheat before serving, aligning with your busy schedule.

Versatile Options: Whether you opt for classic dairy or try a dairy-free version, the flavor remains consistently delightful, ensuring everyone can enjoy this dish.

Crowd-Pleasing Flavor: The warm notes of vanilla paired with sweet potatoes create a rich harmony that keeps guests coming back for more—perfect for those festive dinners.

For a perfect companion, consider pairing it with some homemade sweet orange jelly or just a simple drizzle of butter as a finishing touch!

Vanilla Whipped Sweet Potatoes Ingredients

For the Sweet Potatoes
Sweet Potatoes – Use 4 pounds for the perfect base of natural sweetness and creamy texture.
Salt – Just a pinch helps to balance the flavors and enhance the sweetness of the dish.

For the Creamy Mixture
Heavy Cream – Adds richness and creaminess; substitute with full-fat coconut milk for a delightful dairy-free alternative.
Light Brown Sugar – Provides subtle sweetness and moisture; can also be swapped with maple syrup for a unique flavor twist.
Unsalted Butter – Enhances the dish’s creaminess; opt for plant-based butter or olive oil for a vegan version.
Vanilla Bean – Infuses fragrant natural vanilla flavor; if you’re in a pinch, use 2-3 teaspoons of vanilla bean paste instead.

For the Finishing Touches
Ground Cinnamon – A lovely optional garnish that adds warmth and aesthetic appeal to your dish.

There you have it—the essential ingredients for making your heavenly Vanilla Whipped Sweet Potatoes! Get ready to impress your family and friends with this comforting holiday side dish!

Step‑by‑Step Instructions for Vanilla Whipped Sweet Potatoes

Step 1: Preheat and Prepare
Begin by preheating your oven to 400°F (200°C) while you prepare a large rimmed baking sheet. Wash and scrub the sweet potatoes thoroughly under running water. Once clean, poke several holes in each sweet potato with a fork to allow steam to escape. This helps prevent them from bursting in the oven.

Step 2: Roast the Sweet Potatoes
Place the prepared sweet potatoes on the baking sheet, spread apart for even roasting. Roast them in the preheated oven for 35-45 minutes, or until they are fork-tender. The outside should be caramelized and slightly wrinkled, and a fork should easily slide into the thickest part of the sweet potatoes.

Step 3: Cool and Peel
Once roasted, remove the sweet potatoes from the oven and allow them to cool for about 10 minutes until they are manageable to handle. Carefully peel off the skin using your hands or a fork, discarding any charred bits. Place the peeled sweet potatoes in a food processor for blending.

Step 4: Blend for Smoothness
In the food processor, purée the sweet potatoes until they become completely smooth and creamy, scraping down the sides as needed. This should take about 2-3 minutes. The texture should resemble that of whipped cream, ensuring a delightful consistency for your Vanilla Whipped Sweet Potatoes.

Step 5: Prepare the Cream Mixture
While the sweet potatoes are blending, grab a medium saucepan and combine the heavy cream, light brown sugar, unsalted butter, and a pinch of salt over medium heat. Stir occasionally and bring the mixture to a gentle simmer. Once the sugar is fully dissolved, add the seeds from a vanilla bean or vanilla bean paste, stirring to incorporate.

Step 6: Combine and Adjust Flavor
With the cream mixture ready, slowly pour it into the food processor while blending the sweet potatoes. This helps combine the creamy goodness thoroughly. Taste the mixture and adjust the salt as desired, ensuring that the flavors of the Vanilla Whipped Sweet Potatoes are perfectly balanced.

Step 7: Serve or Store
Transfer the sumptuous Vanilla Whipped Sweet Potatoes to a serving dish for immediate enjoyment, optionally dusting with ground cinnamon for a hint of warmth and flavor. If preparing in advance, cover and refrigerate for up to a day. When ready to serve, gently reheat in a 350°F (180°C) oven to enjoy the creamy texture again.

What to Serve with Vanilla Whipped Sweet Potatoes

Whether you’re creating a festive holiday spread or comforting family dinner, it’s all about harmony and balance on the plate.

  • Roasted Herb Chicken: The savory flavors of juicy roasted chicken perfectly complement the sweetness of the vanilla whipped sweet potatoes, creating a delightful taste experience.

  • Garlic Green Beans: Crisp-tender green beans add a fresh, bright contrast, enhancing the rich, creamy texture of the sweet potatoes.

  • Maple-Glazed Carrots: The natural sweetness of glazed carrots harmonizes with the vanilla notes, tying the dishes together for a festive feast.

A warm loaf of rustic bread can also serve as a wonderful vessel to scoop up those luscious sweet potatoes, bringing everyone together at the table.

  • Cranberry Sauce: A tart and vibrant cranberry sauce cuts through the creaminess, providing a welcome zing that elevates the entire meal.

  • Herbed Stuffing: A flavorful stuffing infused with herbs brings savory depth, making each bite a magical combination of textures and flavors.

  • Sparkling Cider: For a refreshing drink, sparkling cider’s sweetness and bubbles contrast beautifully with creamy textures, making it a festive choice perfect for holiday gatherings.

  • Pumpkin Pie: Finish off with a slice of pumpkin pie; the spices in the pie will dance delightfully alongside the vanilla undertones of the sweet potatoes.

How to Store and Freeze Vanilla Whipped Sweet Potatoes

Fridge: Store your Vanilla Whipped Sweet Potatoes in an airtight container for up to 3 days. Gently reheat in a 350°F (180°C) oven for best texture.

Freezer: For longer storage, freeze in a freezer-safe container for up to 2 months. Ensure it’s well-sealed to avoid freezer burn.

Thawing: To serve, thaw overnight in the fridge and reheat gently in the oven, stirring occasionally for even warmth.

Serving Tip: Add a touch of cream or butter while reheating to revive the creamy texture of your Vanilla Whipped Sweet Potatoes.

Expert Tips for Vanilla Whipped Sweet Potatoes

Tender Texture: Ensure your sweet potatoes are fork-tender before pureeing; this guarantees a smooth, creamy consistency for your Vanilla Whipped Sweet Potatoes.

Cooling Time: Allow the roasted sweet potatoes to cool for about 10 minutes before peeling to prevent burns and make handling safer.

Precise Measuring: Use a kitchen scale to measure your sweet potatoes accurately; consistency in quantity helps achieve the perfect balance of flavors in your dish.

Avoid Overmixing: Blend just until smooth—overmixing can lead to a gluey texture. The ideal consistency should resemble that of airy whipped cream.

Customize Sweetness: Taste and adjust the sweetness as you go; feel free to use less brown sugar or add more based on your preference.

Easy Reheating: If making ahead, store in an airtight container and reheat gently in the oven to maintain the beautiful texture of your Vanilla Whipped Sweet Potatoes.

Make Ahead Options

These Vanilla Whipped Sweet Potatoes are perfect for meal prep and can save you precious time on busy holiday mornings! You can prepare the sweet potatoes by roasting and blending them up to 24 hours in advance. Simply follow the steps in the recipe, then store the creamy mixture in an airtight container in the refrigerator. To maintain their delightful creamy texture, reheat them gently in a 350°F (180°C) oven before serving, stirring occasionally until heated through. This way, you can enjoy the same delicious flavors with minimal effort on the day of your gathering, impressing your guests without the last-minute fuss!

Vanilla Whipped Sweet Potatoes Variations

Feel free to play with this recipe and make it your own, adding delightful twists that will impress everyone at the table!

  • Dairy-Free: Substitute heavy cream with full-fat coconut milk and use plant-based butter for a delicious dairy-free version.
    Whipped to perfection, the coconut milk adds a subtle tropical flair, creating an equally creamy delight.

  • Maple Sweetness: Swap out light brown sugar for pure maple syrup to infuse a unique flavor profile.
    The sweetness of maple lifts the dish to new heights, enhancing the natural flavors of the sweet potatoes beautifully.

  • Vanilla Bean Paste: If you can’t find vanilla beans, use 2-3 teaspoons of vanilla bean paste for an easy and fragrant substitute.
    It’s a convenient option that still provides that luxurious vanilla essence, ensuring your dish remains aromatic and delightful.

  • Additional Spices: Add a pinch of nutmeg or ground ginger for an extra layer of warmth and complexity.
    These spices dance harmoniously with the sweet potatoes, offering a cozy depth that is perfect for holiday gatherings.

  • Crunchy Topping: Top your whipped sweet potatoes with toasted pecans or walnuts for a delightful texture contrast.
    The crunchy nuts create a wonderful textural balance with the creamy fluffiness, making every bite a delicious adventure.

  • Citrus Twist: Mix in a teaspoon of orange zest for a fresh and vibrant twist on the traditional flavor.
    The citrus brightness cuts through the richness, adding a refreshing element that complements the dish beautifully.

  • Heat Up: Stir in a dash of cayenne pepper or chili powder for a hint of warmth that surprises and tantalizes the taste buds.
    This unexpected burst of heat offers a delightful counterpoint to the sweetness, creating a truly captivating experience.

For additional inspiration, consider serving your Vanilla Whipped Sweet Potatoes alongside Cream Puffs Vanilla or drizzled with some homemade Sweet Orange Jam. Enjoy your culinary journey!

Vanilla Whipped Sweet Potatoes Recipe FAQs

What should I look for when selecting sweet potatoes?
Absolutely! Choose sweet potatoes that are firm without dark spots or blemishes. The best ones are smooth and free from any soft areas. Look for those that feel heavy for their size; this indicates they are fresh and packed with flavor.

How do I store leftover Vanilla Whipped Sweet Potatoes?
You can store your Vanilla Whipped Sweet Potatoes in an airtight container in the refrigerator for up to 3 days. Just make sure to let them cool completely before sealing. When reheating, I recommend doing so in a 350°F (180°C) oven to help retain their creamy texture.

Can I freeze Vanilla Whipped Sweet Potatoes?
Yes! To freeze, transfer the whipped sweet potatoes into a freezer-safe container, making sure it’s well-sealed to prevent freezer burn. They can be stored for up to 2 months. When you’re ready to enjoy, simply thaw overnight in the refrigerator and reheat gently.

What should I do if my Vanilla Whipped Sweet Potatoes are too thick?
If you find your sweet potatoes are thicker than you’d like, don’t worry! Simply add a splash of heavy cream or coconut milk while mixing to reach your desired consistency. Blend it back together until smooth and enjoy!

Can I make Vanilla Whipped Sweet Potatoes dairy-free?
Very much so! Substitute the heavy cream with full-fat coconut milk and the unsalted butter with plant-based butter or olive oil. This way, you’ll still achieve that luscious flavor and creamy texture, perfect for your dairy-free guests!

Is it safe for pets to consume sweet potatoes?
In moderation, sweet potatoes can be safe for pets like dogs, but make sure they are plain and unseasoned. Always consult with your veterinarian before introducing new food to your pet’s diet, especially if they have existing health concerns or dietary restrictions.

Vanilla Whipped Sweet Potatoes

Heavenly Vanilla Whipped Sweet Potatoes for Festive Feasts

A comforting and elegant side dish, Vanilla Whipped Sweet Potatoes are perfect for any holiday gathering.
Prep Time 15 minutes
Cook Time 45 minutes
Cooling Time 10 minutes
Total Time 1 hour 10 minutes
Servings: 8 servings
Course: Dinner
Cuisine: American
Calories: 250

Ingredients
  

For the Sweet Potatoes
  • 4 pounds Sweet Potatoes Use for the perfect base of natural sweetness and creamy texture.
  • 1 pinch Salt Helps to balance flavors and enhance sweetness.
For the Creamy Mixture
  • 1 cup Heavy Cream Adds richness; substitute with full-fat coconut milk for dairy-free.
  • 1/2 cup Light Brown Sugar Provides subtle sweetness; can swap with maple syrup.
  • 1/2 cup Unsalted Butter Enhances creaminess; opt for plant-based butter for vegan.
  • 1 each Vanilla Bean Infuses flavor; can use 2-3 teaspoons of vanilla bean paste.
For the Finishing Touches
  • 1 teaspoon Ground Cinnamon Optional garnish that adds warmth.

Equipment

  • oven
  • baking sheet
  • Food Processor
  • Medium saucepan

Method
 

Preparation Steps
  1. Preheat your oven to 400°F (200°C) and prepare a large rimmed baking sheet.
  2. Wash and scrub the sweet potatoes thoroughly under running water and poke several holes in each with a fork.
  3. Roast the sweet potatoes on the baking sheet for 35-45 minutes until fork-tender.
  4. Allow the roasted sweet potatoes to cool for about 10 minutes before peeling off the skin.
  5. In a food processor, purée the sweet potatoes until completely smooth and creamy.
  6. Combine heavy cream, brown sugar, unsalted butter, and a pinch of salt in a saucepan and bring to a simmer.
  7. Slowly pour the cream mixture into the food processor while blending sweet potatoes for thorough incorporation.
  8. Transfer to a serving dish, optionally dusting with ground cinnamon before serving.

Notes

Customize with dairy-free alternatives if needed and pair with sweet orange jelly or butter for added flavor.

Delicious Biscoff Icebox Cake: The Ultimate No-Bake Treat

As the summer heat creeps in, a delightful discovery awaits in my kitchen: the Biscoff Icebox Cake. This no-bake wonder requires just four ingredients, making it an effortless dessert for those sweltering days when turning on the oven feels like a mini crisis. With creamy layers of sweet cookie butter mingling with crunchy Biscoff biscuits, this cake is not only simple to whip up but also a guaranteed crowd-pleaser for any gathering. Plus, it’s the perfect make-ahead treat that can sit in your freezer until it’s time to impress. What flavor twist will you be tempted to try in your own Biscoff Icebox Cake?

Why is the Biscoff Icebox Cake a must-try?

Simplicity: With only four ingredients, this cake requires minimal effort for maximum enjoyment!

No Baking Required: Perfect for hot summer days, avoid heating up the kitchen while still indulging in a delightful dessert.

Crowd-Pleasing: Friends and family will rave about its creamy texture and crunchy layers; it’s an instant showstopper at any gathering.

Versatile Customizations: Feel free to swap in your favorite flavored cookie butters or add crushed nuts for a personalized touch.

Make-Ahead Delight: Prepare in advance and keep it in the freezer for those spontaneous gatherings—always have a treat at the ready!

Discover more indulgent dessert ideas like the Nutty Vanilla Cake or try a refreshing Strawberry Cheesecake Dump Cake to mix things up!

Biscoff Icebox Cake Ingredients

• To create this delightful Biscoff Icebox Cake, gather these essential ingredients to ensure a truly tasty treat!

For the Cream Filling

  • Heavy Cream – Cold heavy cream is key for achieving that perfect, airy texture.
  • Sweetened Condensed Milk – This ingredient adds luscious sweetness and creaminess to your filling.
  • Lotus Biscoff Spread – The star of this recipe, it gives that delectable spiced cookie flavor that makes the cake irresistible.

For the Layering

  • Lotus Biscoff Biscuits – These crunchy biscuits provide delightful texture and structure for your icebox cake.

Step‑by‑Step Instructions for Biscoff Icebox Cake

Step 1: Whip the Cream
In a large, chilled mixing bowl, combine cold heavy cream and sweetened condensed milk. Using an electric mixer, whip the mixture on medium-high speed for about 3-5 minutes until stiff peaks form and the cream is fluffy and thick. This base will create the light texture that is key to the delightful Biscoff Icebox Cake.

Step 2: Incorporate Biscoff Spread
Gently fold in the Lotus Biscoff spread into the whipped cream mixture using a rubber spatula. Make sure the spread is fully incorporated without deflating the cream. You should achieve a smooth, well-blended mixture that showcases the rich, spiced flavor of Biscoff, setting the stage for the next layers of your cake.

Step 3: Prepare Biscoff Spread
To enhance the layering, microwave an additional 1/4 cup of Lotus Biscoff spread for about 10-15 seconds until it becomes runny and pourable. This step will make it easier to drizzle into the layers, adding a burst of flavor. Just be careful not to overheat it; you want it warm but not hot.

Step 4: Line the Pan
Line a 9×5 loaf pan with overlapping plastic wrap, ensuring there’s enough excess on each side to cover the cake later. This will help with easy removal once the Biscoff Icebox Cake sets. Make sure the wrap covers the corners and edges securely to prevent any spills.

Step 5: Layer the Cream and Biscuits
Spread a thin layer of the fluffy Biscoff cream on the bottom of your lined loaf pan. Then, place a layer of Biscoff biscuits evenly over the cream, ensuring they are snugly arranged. This creates a delightful crunch that complements the creamy texture, setting the foundation for your dessert.

Step 6: Add the First Layer of Cream
Top the layer of biscuits with one-third of the remaining Biscoff cream mixture. Drizzle some of the warmed Biscoff spread over the cream for added sweetness and flavor. Smooth out the top with a spatula, creating a visually appealing layer, and prepare for the next round of layering.

Step 7: Repeat the Layering
Repeat the layering process two more times with the remaining Biscoff cream and biscuits. Make sure to finish the final layer with a decorative top of biscuits and any remaining cream. This method builds a contrasting structure of creamy and crunchy, essential for mastering the Biscoff Icebox Cake.

Step 8: Freeze
Garnish the top with additional biscuit crumbs and whole Biscoff biscuits for a beautiful presentation. Cover the cake with the plastic wrap and freeze for a minimum of 2 hours, or ideally overnight. This freezing step helps the cake set beautifully, allowing all the flavors to meld together.

Step 9: Slice and Serve
Once frozen, carefully slice the Biscoff Icebox Cake while it’s still cold. Let the slices sit at room temperature for about 15 minutes before serving, allowing them to soften just a bit. Serve chilled, and watch friends and family delight in every bite of this decadent treat!

How to Store and Freeze Biscoff Icebox Cake

Fridge: Store the Biscoff Icebox Cake in the refrigerator for up to 3 days covered in an airtight container. However, freezing is recommended for longer freshness.

Freezer: Wrap the cake tightly in plastic wrap or foil before placing it in the freezer. It can be stored for up to 2 weeks, maintaining its delicious flavor and texture.

Thawing: To serve, remove individual slices from the freezer and let them sit at room temperature for about 15 minutes to soften. This ensures a more enjoyable eating experience.

Leftovers: If you have leftover cream mixture, store it in the fridge for up to 2 days, but it’s best enjoyed fresh alongside your Biscoff Icebox Cake.

Expert Tips for Biscoff Icebox Cake

Chill Your Tools: Ensure your mixing bowls and utensils are cold; this helps achieve fluffy peaks for the cream mixture.

Taste and Adjust: Before layering, taste the Biscoff cream and feel free to add more condensed milk or sugar if you prefer a sweeter flavor.

Layer with Care: Avoid overfilling each layer, as the Biscoff Icebox Cake will be more stable if layers are thin, preventing any spills.

Cover Well: Wrap the cake tightly in plastic wrap before freezing to prevent freezer burn and retain its creamy texture.

Thawing Time: Don’t rush the slicing process! Let the cake soften at room temperature for about 15 minutes before serving; it enhances every bite.

What to Serve with Biscoff Icebox Cake

Imagine a sumptuous dessert experience, perfectly designed to entice your taste buds and create wonderful memories.

  • Whipped Cream: A cloud of airy whipped cream adds an extra touch of sweetness that beautifully contrasts the rich Biscoff flavors.
  • Vanilla Ice Cream: The creamy, cold ice cream pairs wonderfully with the cake, enhancing its overall indulgence while providing a refreshing chill.
  • Fresh Berries: Juicy strawberries or raspberries offer a bright, tangy burst that balances the sweetness of the cake, making each bite vibrant and refreshing.
  • Chocolate Sauce: Drizzling some warm chocolate sauce adds a decadent twist, creating a combination that’s utterly irresistible as it complements the Biscoff spread.
  • Coffee: A cup of freshly brewed coffee can heighten the flavors of the cake, adding a comforting warmth that transforms dessert into an elegant affair.
  • Mint Leaves: A sprinkle of fresh mint leaves elevates the dessert visually and provides a fresh, herbal note that lightens the rich layers of flavor.
  • Nutty Biscotti: As a crunchy side treat, nutty biscotti offers a delightful contrast in texture when enjoyed alongside each creamy slice of the cake.

Keep these delightful pairings in mind to make your Biscoff Icebox Cake experience a true celebration of flavors and textures!

Make Ahead Options

These Biscoff Icebox Cakes are a fantastic dessert to prepare ahead of time, saving you precious minutes on busy days! You can whip together the creamy filling and layer the biscuits up to 24 hours in advance. To maintain their quality, store the uncut, wrapped cake in the freezer until you’re ready to serve. The flavors meld beautifully during this time, making each bite just as delightful as fresh! When it’s time to indulge, simply slice the frozen cake and let it sit at room temperature for about 15 minutes before serving, ensuring it softens to perfection for your loved ones to enjoy.

Biscoff Icebox Cake Variations

Feel free to unleash your creativity and customize your Biscoff Icebox Cake with these delightful twists!

  • Nutty Crunch: Add a layer of crushed almonds or hazelnuts for extra texture and a nutty flavor that complements the Biscoff spread beautifully. The added crunch takes this dessert to a whole new level!

  • Dairy-Free Delight: Substitute the heavy cream with coconut cream for a dairy-free option, while still achieving a rich and creamy texture. You won’t even miss the traditional dairy—just pure bliss!

  • Chocolate Indulgence: Incorporate a layer of whipped chocolate ganache between the cookie layers. This decadent addition will elevate your icebox cake and satisfy any chocolate lover’s cravings.

  • Fruity Freshness: Add a layer of fresh or frozen berries, like raspberries or sliced strawberries, between the cream and biscuits. The tartness from the fruit balances the sweetness perfectly, creating a refreshing spin on this dessert.

  • Spicy Surprise: Mix in a touch of cinnamon or ginger to the cream filling for a hint of warmth and spice. This subtle twist enhances the flavor profile and adds a delightful depth to every bite.

  • Flavorful Cookie Swap: For a fun twist, use other flavored cookie spreads like speculoos or peanut butter, creating a whole new take on your icebox cake. It’s a great way to experiment with different tastes!

  • Heat It Up: For those who love a little spice, sprinkle chopped jalapeños into the cream mixture. This unexpected combination will give you a sweet-heat sensation that’s sure to wow guests!

Each of these variations will uplift your Biscoff Icebox Cake experience, ensuring that every occasion feels special. Don’t forget to check out the Sky Jelly Cake or a luscious Matcha Sponge Cake for even more delectable dessert ideas!

Biscoff Icebox Cake Recipe FAQs

What should I look for when selecting ingredients for my Biscoff Icebox Cake?
Absolutely! For the heavy cream, ensure that it is cold; this is key to whipping it into stiff peaks. When picking the Lotus Biscoff spread, look for a smooth texture without any dark spots, which can indicate spoilage. As for the Biscoff biscuits, choose a package that’s intact and not broken; this will make layering much easier.

How should I store my Biscoff Icebox Cake after making it?
You can store the Biscoff Icebox Cake in the refrigerator for up to 3 days in an airtight container. However, for optimum freshness and flavor, I recommend keeping it in the freezer, tightly wrapped in plastic wrap or foil for up to 2 weeks. This way, you can enjoy those luscious layers even longer!

Can I freeze individual slices of Biscoff Icebox Cake?
Yes, indeed! To freeze individual slices, wrap them well in plastic wrap and then place them in a freezer-safe container. This will ensure they stay fresh for up to 2 weeks. When you’re ready to enjoy a slice, simply take it out and let it sit at room temperature for about 15 minutes before serving. This extra time allows it to soften, making each bite even more delightful!

What if my Biscoff cream mixture doesn’t whip up properly?
Ah, that can happen! If your cream mixture isn’t whipping, it might be because either the heavy cream wasn’t cold enough or the bowl wasn’t chilled. Always start with cold mixing tools. If your mixture feels too runny, try whipping it a little longer. Just be cautious not to over-whip, or you might end up making butter instead of a fluffy cream. If it remains a challenge, adding a touch more heavy cream can sometimes help stabilize the mixture as you whip.

Can I substitute ingredients if I have dietary restrictions?
Very much so! The Biscoff Icebox Cake is quite flexible. If you need a dairy-free option, you can use coconut cream instead of heavy cream. For the Biscoff spread, any nut-free cookie butter can be a great alternative. Just be sure to double-check the labels if you’re accommodating allergies or dietary needs!

Is Biscoff Icebox Cake suitable for pets?
Unfortunately, it’s best to keep this treat away from pets. The sugar and chocolate found in the Biscoff biscuits could be harmful to dogs and cats. Always opt for pet-friendly treats and enjoy your cake without worrying about fur babies sneaking a bite!

Biscoff Icebox Cake

Delicious Biscoff Icebox Cake: The Ultimate No-Bake Treat

Enjoy the creamy and crunchy layers of Biscoff Icebox Cake, a delightful no-bake treat perfect for hot summer days.
Prep Time 15 minutes
Freezing Time 2 hours
Total Time 2 hours 15 minutes
Servings: 8 slices
Course: Dessert
Cuisine: American
Calories: 350

Ingredients
  

For the Cream Filling
  • 1 cup Heavy Cream Cold heavy cream is key for achieving that perfect, airy texture.
  • 14 oz Sweetened Condensed Milk Adds sweetness and creaminess.
  • 1 cup Lotus Biscoff Spread The star ingredient for flavor.
For the Layering
  • 24 pieces Lotus Biscoff Biscuits Provides texture and structure.

Equipment

  • mixing bowl
  • electric mixer
  • Loaf pan
  • rubber spatula
  • Microwave

Method
 

Instructions
  1. In a large, chilled mixing bowl, combine cold heavy cream and sweetened condensed milk. Whip on medium-high speed for 3-5 minutes until stiff peaks form.
  2. Gently fold in Lotus Biscoff spread into the whipped cream mixture using a rubber spatula until well-blended.
  3. Microwave 1/4 cup of Lotus Biscoff spread for 10-15 seconds until it becomes runny.
  4. Line a 9x5 loaf pan with overlapping plastic wrap, making sure to cover corners and edges securely.
  5. Spread a layer of the Biscoff cream at the bottom of the lined loaf pan, then add a layer of Biscoff biscuits.
  6. Top the biscuits with one-third of the remaining Biscoff cream mixture and drizzle warmed Biscoff spread over the cream.
  7. Repeat the layering process two more times, finishing with a decorative top of biscuits.
  8. Garnish the top with biscuit crumbs, cover with plastic wrap and freeze for a minimum of 2 hours or overnight.
  9. Once frozen, slice the cake while still cold and let sit at room temperature for 15 minutes before serving.

Notes

To ensure a successful cake, chill your mixing tools, adjust sweetness if desired, and store properly to maintain freshness.

Irresistible Gluten Free Banana Cake with Salted Caramel Bliss

As I flipped through a stack of old recipe cards, a faded note caught my eye: “Banana Snack Cake.” Immediately, my mind transported me to warm, inviting kitchens filled with laughter and the sweet aroma of joy. This Gluten Free Banana Snack Cake with Salted Caramel Buttercream is a loving nod to those cherished memories, combining the delightful taste of ripe bananas with a rich and creamy frosting that dances on your taste buds. Not only is this cake incredibly easy to whip up, but it’s also a fantastic way to use those overripe bananas lingering on your counter, giving them a new life in a moist, fluffy masterpiece. Perfect for both special occasions and cozy family gatherings, this delicious treat is sure to satisfy dessert cravings without the fuss. Curious about how to create this delectable dessert that promises smiles all around? Let’s dive into the fun!

Why is this gluten-free cake a must-try?

Irresistible flavor combination: The marriage of ripe bananas with salted caramel buttercream creates an unforgettable taste sensation that will leave your guests in awe.

Effortless preparation: With simple ingredients and straightforward steps, you can have this delicious cake baking in no time.

Versatile options: Whether you prefer cream cheese frosting or a chocolate twist, this recipe adapts beautifully to your palate.

Perfect for sharing: This cake is an instant crowd-pleaser, perfect for gatherings, family dinners, or just an indulgent treat to brighten your day.

Don’t forget to check out my Guilt Free Energy Bites for a healthier snack option alongside this sweet delight!

Gluten Free Banana Cake Ingredients

Discover the key ingredients for an irresistible gluten free banana cake that guarantees delightful flavor and texture!

For the Cake

  • Butter (113g, melted and browned) – Adds richness and flavor; can substitute with dairy-free butter for a dairy-free version.
  • Light Brown Sugar (100g) – Provides sweetness and moisture; no direct substitute suggested.
  • Granulated White Sugar (100g) – Additional sweetness; consider using coconut sugar for a lower glycemic option.
  • Eggs (2, at room temperature) – Essential for structure and moisture; for a vegan version, refer to alternative recipes.
  • Vanilla Extract (1 tsp) – Enhances overall flavor; optional, but highly recommended!
  • Overripe Bananas (400g, peeled) – The star ingredient for flavor; use ripe bananas with brown spots, or applesauce in a pinch.
  • Multipurpose Gluten Free Flour (300g) – Provides necessary structure; can be replaced with various gluten-free flour blends as tested.
  • Baking Soda (1 tsp) – Acts as a leavening agent; crucial for that perfect rise.
  • Kosher Salt (½ tsp) – Balances the sweetness beautifully; no substitutions recommended.
  • Ground Cinnamon (½ tsp) – Adds warmth and depth; nutmeg can be used for a different flavor twist.

For the Salted Caramel Buttercream

  • Heavy Cream (150g) – Key for a luscious buttercream; can substitute with full-fat coconut milk for a dairy-free option.
  • Unsalted Butter (226g, very soft) – Essential for creating a rich buttercream; dairy-free butter can replace this.
  • Caramel Sauce (125g to 165g) – Sweet component for frosting; homemade is preferred for superior flavor.
  • Egg Whites (90g) – Vital for Swiss meringue buttercream; no direct vegan substitute exists.

Now you’re ready to create a delightful cake that your family will love!

Step‑by‑Step Instructions for Gluten Free Banana Snack Cake with Salted Caramel Buttercream

Step 1: Brown the Butter
Begin by melting 113g of unsalted butter in a heavy-bottomed saucepan over low heat. Swirl the pan occasionally until the butter becomes golden and fragrant, with a nutty aroma, taking about 5-7 minutes. Once browned, remove it from the heat and let the butter cool slightly while you prepare the other ingredients.

Step 2: Preheat Oven
Preheat your oven to 350°F (180°C). Prepare an 8×8-inch baking pan by lining it with parchment paper, allowing some overhang for easy removal later. This setup will ensure an even bake for your delightful Gluten Free Banana Snack Cake, resulting in a moist and fluffy texture.

Step 3: Combine Dry Ingredients
In a mixing bowl, whisk together 300g of multipurpose gluten-free flour, 1 tsp of baking soda, ½ tsp of kosher salt, and ½ tsp of ground cinnamon. Mix until thoroughly combined to eliminate any lumps. This blending ensures that your cake rises beautifully while creating a wonderful flavor profile to complement the bananas.

Step 4: Mix Wet Ingredients
In a large mixing bowl, cream the cooled, browned butter with 100g each of light brown and granulated white sugars, alongside 1 tsp of vanilla extract. Using an electric mixer on medium speed, beat until light and fluffy. Add 2 room-temperature eggs one at a time, mixing well after each. Finally, fold in 400g of mashed overripe bananas until just combined.

Step 5: Combine Mixtures
Gradually add the dry mixture to the wet mixture, using a spatula or wooden spoon to combine gently. Mix until just incorporated, avoiding overmixing to maintain a fluffy texture in your gluten-free banana snack cake. You should see a few specks of flour remaining in the batter, which will even out during baking.

Step 6: Bake
Pour the batter into the prepared baking pan, smoothing the top with a spatula. Place it in the preheated oven and bake for 40-45 minutes, or until a toothpick inserted into the center comes out clean. As it bakes, your kitchen will fill with the warm scent of bananas, making it hard to resist!

Step 7: Cool Completely
Once baked, remove the cake from the oven and allow it to cool in the pan for about 10 minutes. Then, lift the cake out using the parchment overhang and transfer it to a wire rack. Let it cool completely before frosting, ensuring the salted caramel buttercream will spread smoothly without melting.

Step 8: Make Caramel Sauce
In a saucepan, combine sugar with a splash of warm water, carefully stirring until dissolved. Heat over medium-low until it turns a deep amber color, around 8-10 minutes. Once caramelized, remove it from heat and stir in 150g of heavy cream and 113g of softened butter until fully combined. Let it cool completely before using.

Step 9: Prepare Buttercream
For the salted caramel buttercream, place 90g of egg whites and 200g of sugar in a heatproof bowl over simmering water. Whisk continuously until the mixture reaches 160°F (70°C), then remove from heat and cool slightly. Gradually add 226g of very soft unsalted butter and cooled caramel sauce while whipping until light and creamy.

Step 10: Frost
Once the gluten free banana snack cake is completely cooled, generously spread the salted caramel buttercream on top, using a spatula to create smooth or swirled patterns. Drizzle additional caramel sauce over the frosting and sprinkle with flaky sea salt for an indulgent finish that will make this cake truly irresistible!

Customized Gluten Free Banana Cake

Feel free to put your own twist on this delightful treat and make it even more special!

  • Almond Flour: Substitute part of the gluten-free flour with almond flour for a nutty, rich flavor. This addition can create a deliciously moist texture that pairs beautifully with bananas.

  • Cream Cheese Frosting: Swap the salted caramel buttercream for a tangy cream cheese frosting. The creaminess and slight tartness will balance out the sweetness of the cake perfectly.

  • Dark Chocolate Frosting: For a decadent twist, use dark chocolate frosting instead! This rich topping enhances the flavors of the banana and adds an indulgent touch to every bite.

  • Dairy-Free Cake: Use dairy-free butter and full-fat coconut milk instead of cream for a creamy, dreamy dairy-free version. It retains brightness without sacrificing flavor!

  • Add Ins: Toss in some chopped nuts or chocolate chips for a delightful crunch and extra dimension to your cake. It creates a fun texture contrast that marries well with the moist cake.

  • Spiced Variation: Experiment with different spices like nutmeg or cardamom instead of cinnamon for a warm and comforting flavor profile that complements the banana beautifully.

  • Chili Flakes: If you like a little heat, add a pinch of chili flakes to the frosting. This surprising twist creates a sweet and spicy sensation that delights the palate.

  • Fruit Swaps: If bananas aren’t your thing, consider using ripe apples or pears as a substitute. They lend sweetness and moisture, creating an unexpected variation that’s equally satisfying.

These variations will surely elevate your cake and ensure each bake becomes a new, cherished memory in your kitchen! Don’t forget to check out my Berry Banana Cottage for another delicious fruity twist!

How to Store and Freeze Gluten Free Banana Cake

Room Temperature: Store leftover gluten free banana cake in an airtight container at room temperature for up to 3 days, perfect for snacking or dessert.

Fridge: If you live in a warm climate, refrigerate leftovers to preserve freshness, allowing them to come to room temperature before serving for the best flavor.

Freezer: For longer storage, wrap the cooled cake tightly in plastic wrap and then in aluminum foil; it can be frozen for up to 3 months. Thaw in the fridge overnight before enjoying.

Reheating: To enjoy a slice warm, gently reheat in the microwave for 15-20 seconds. This will enhance the flavors and bring back the moist texture of the gluten free banana cake!

Make Ahead Options

These Gluten Free Banana Snack Cakes are perfect for busy home cooks looking to save time! You can prepare the cake batter up to 24 hours in advance by mixing all the dry and wet ingredients and storing the batter in the refrigerator. To ensure quality, cover the bowl tightly to prevent any drying out or browning of the bananas. The baked cake can be kept at room temperature for up to 3 days before frosting. To finish, allow the cake to come to room temperature before spreading the salted caramel buttercream on top, and you’ll have a delightful dessert ready with minimal effort for your busy weeknights!

What to Serve with Gluten Free Banana Snack Cake with Salted Caramel Buttercream

This delightful treat is perfect for creating a cozy, satisfying meal that your loved ones will adore.

  • Fresh Fruit Salad: A vibrant mix of berries and citrus adds a refreshing contrast to the rich cake, balancing sweetness with a zesty touch. The freshness complements the banana notes beautifully.

  • Vanilla Ice Cream: Its creamy, cool texture provides a delightful temperature contrast to the warm cake, creating a nostalgic dessert experience that feels indulgent and comforting.

  • Coffee or Espresso: Pairing this dessert with a rich cup of coffee enhances the caramel flavors and adds a cozy feel, perfect for leisurely afternoons or after-dinner conversations.

  • Chai Tea: The warming spices of chai harmonize beautifully with the cinnamon in the cake, creating a comforting drink that enhances the overall experience of your dessert.

  • Chocolate Chips: Sprinkling those on top adds an extra layer of indulgence, allowing for a chocolatey twist to each slice that makes every bite an adventure.

  • Nuts or Seeds: Crunchy walnuts or toasted pumpkin seeds provide a textural contrast and a nutritious boost, making it a well-rounded snack or dessert.

Indulge in these pairings, and enjoy the comfort of home-cooked goodness!

Expert Tips for the Best Gluten Free Banana Cake

  • Perfectly Ripe Bananas: Use overripe bananas with brown spots; they provide the best flavor and moisture for your gluten free banana cake.
  • Room Temperature Eggs: Ensure your eggs are at room temperature for optimal incorporation into the batter, leading to a fluffier texture.
  • Brown the Butter Well: Take care when browning butter; a heavy-bottom saucepan prevents burning and promotes even cooking, enhancing flavor.
  • Avoid Overmixing: When combining wet and dry ingredients, mix until just incorporated to keep your cake light and fluffy.
  • Cool the Cake Completely: Allow the cake to cool completely before frosting to ensure the salted caramel buttercream doesn’t melt into a gooey mess.

Gluten Free Banana Snack Cake with Salted Caramel Buttercream Recipe FAQs

How do I know if my bananas are ripe enough for this cake?
Absolutely! For the best flavor and moisture, look for bananas with brown spots all over their peel. Those overripe bananas will be naturally sweet and add that perfect moist texture. If you’re in a pinch, you can also use applesauce as a substitute!

How should I store leftover gluten-free banana cake?
I recommend storing the leftover cake in an airtight container at room temperature for up to 3 days. If you’re in a warmer climate, refrigerate it to maintain freshness. Just be sure to let it come back to room temperature before serving to bring back those delightful flavors!

Can I freeze this gluten-free banana cake? How?
Very! To freeze your gluten-free banana cake, wrap it tightly in plastic wrap, then cover it with aluminum foil to prevent freezer burn. It can last up to 3 months. When you’re ready to enjoy a slice, simply thaw it in the fridge overnight before indulging!

What should I do if my cake is too dense or doesn’t rise?
If your cake turns out dense, it could be due to overmixing the batter. When combining wet and dry ingredients, mix just until incorporated to maintain a light texture. Also, ensure your baking soda is fresh, as an expired leavening agent can prevent the cake from rising properly.

Are there any common allergens in this recipe?
Absolutely! This recipe contains eggs, butter, and may contain gluten if not using certified gluten-free flour. For a dairy-free version, opt for dairy-free butter and full-fat coconut milk. If you have specific allergies, make sure to use substitutes accordingly!

Can pets eat this banana cake?
No, it’s best to keep this cake away from pets. The ingredients like sugar, butter, and caramel can upset their tummy. While bananas are safe for most pets in small amounts, avoid sharing baked goods, as they often contain things that aren’t safe for our furry friends!

Gluten Free Banana Cake

Irresistible Gluten Free Banana Cake with Salted Caramel Bliss

This Gluten Free Banana Cake is a delightful treat combining ripe bananas and rich salted caramel, perfect for any occasion.
Prep Time 15 minutes
Cook Time 45 minutes
Cooling Time 10 minutes
Total Time 1 hour 10 minutes
Servings: 8 slices
Course: Dessert
Cuisine: American
Calories: 380

Ingredients
  

For the Cake
  • 113 g Butter, melted and browned can substitute with dairy-free butter for a dairy-free version
  • 100 g Light Brown Sugar no direct substitute suggested
  • 100 g Granulated White Sugar consider using coconut sugar for a lower glycemic option
  • 2 Eggs, at room temperature for a vegan version, refer to alternative recipes
  • 1 tsp Vanilla Extract optional but highly recommended
  • 400 g Overripe Bananas, peeled use ripe bananas with brown spots, or applesauce in a pinch
  • 300 g Multipurpose Gluten Free Flour can be replaced with various gluten-free flour blends as tested
  • 1 tsp Baking Soda crucial for that perfect rise
  • ½ tsp Kosher Salt no substitutions recommended
  • ½ tsp Ground Cinnamon nutmeg can be used for a different flavor twist
For the Salted Caramel Buttercream
  • 150 g Heavy Cream can substitute with full-fat coconut milk for a dairy-free option
  • 226 g Unsalted Butter, very soft dairy-free butter can replace this
  • 125-165 g Caramel Sauce homemade is preferred for superior flavor
  • 90 g Egg Whites no direct vegan substitute exists

Equipment

  • Heavy-Bottomed Saucepan
  • mixing bowls
  • electric mixer
  • baking pan
  • spatula
  • Wire rack

Method
 

Baking Instructions
  1. Brown the Butter: Melt 113g of unsalted butter in a heavy-bottomed saucepan over low heat until golden and fragrant, about 5-7 minutes.
  2. Preheat Oven: Preheat your oven to 350°F (180°C) and prepare an 8x8-inch baking pan lined with parchment paper.
  3. Combine Dry Ingredients: In a bowl, whisk together 300g gluten-free flour, 1 tsp baking soda, ½ tsp kosher salt, and ½ tsp cinnamon.
  4. Mix Wet Ingredients: Cream the cooled butter with sugars and vanilla, then add eggs one at a time, and fold in mashed bananas.
  5. Combine Mixtures: Gradually add the dry mixture to the wet mixture until just incorporated.
  6. Bake: Pour the batter into the pan, smooth the top, and bake for 40-45 minutes until a toothpick comes out clean.
  7. Cool Completely: Allow the cake to cool for 10 minutes in the pan, then transfer to a wire rack to cool completely.
  8. Make Caramel Sauce: Combine sugar with warm water, stir until dissolved, heat until amber, then mix with heavy cream and butter.
  9. Prepare Buttercream: Whisk egg whites and sugar over simmering water until 160°F, then add butter and caramel until creamy.
  10. Frost: Spread the buttercream on the cooled cake and drizzle with additional caramel and sprinkle with flaky sea salt.

Notes

Allow the cake to cool completely before frosting to prevent the salted caramel buttercream from melting.

Delicious Caramel Crunch Brownies for Sweet Indulgence

“Can you believe how easy it is to make brownies that taste like they’re from a gourmet bakery?” This thought raced through my mind as I took the first bite of my latest creation: Caramel Crunch Brownies. These irresistible treats combine rich, fudgy chocolate with a delightfully chewy layer of caramel-coated cornflakes, creating a symphony of textures that dance on your palate. Not only are they a fantastic indulgence to serve at your next gathering, but they also come together in a snap, making them the perfect solution for any dessert dilemma. Whether you’re a passionate home chef or just looking to impress your loved ones, this recipe is certain to become a staple in your kitchen. Curious how to achieve that perfect balance of chewy and crunchy? Let’s dive into the delicious details!

Why Are These Brownies So Irresistible?

Simplicity at Its Best: Making these Caramel Crunch Brownies requires just a few straightforward steps, making them perfect for busy bakers.

Indulgent Flavor Explosion: The combination of rich chocolate and sweet caramel brings decadent delight that will wow your taste buds.

Textural Harmony: With a fudgy center topped by crispy, caramel-coated cornflakes, every bite is a delightful experience of contrasts.

Versatile Treat: Ideal for parties, bake sales, or cozy nights in, these brownies are bound to appeal to friends and family alike.

Quick to Prepare: You can whip these up in no time, making them a hassle-free dessert option for any occasion.

Serve Warm: For an added touch, serve them with a scoop of vanilla ice cream or alongside a fresh Veggie Crunch Cucumber salad for a balanced meal.

Caramel Crunch Brownies Ingredients

• Here’s everything you need to whip up these delightful Caramel Crunch Brownies:

For the Brownie Base

  • Brown Sugar – Adds moisture and a deep caramel flavor; light brown sugar works too for a milder taste.
  • Caster Sugar – Provides sweetness and improved texture; granulated sugar can easily replace it.
  • Salted Butter – Enhances flavor and moisture; feel free to use unsalted butter with a pinch of salt added.
  • Dark Cooking Chocolate – Offers a rich chocolate experience; semi-sweet chocolate is a fine substitute.
  • Large Eggs (2) + Egg Yolk – Contributes to that fudgy texture; using room temperature eggs aids in emulsification.
  • All-Purpose Flour – Provides structure to your brownies; a gluten-free flour blend can be used if needed.
  • Cocoa Powder (unsweetened) – Elevates the chocolate richness; avoid Dutch-processed for baking.
  • Vanilla Extract – Adds warmth to the flavors; go for pure extract for the best taste.

For the Topping

  • Granulated Sugar (for topping) – Sweetens the caramel layer; this specific role doesn’t have a substitute.
  • Heavy Cream (hot) – Essential for caramelization; in a pinch, evaporated milk can work as a substitute.
  • Cornflakes – Provides that delightful crunch on top; you can swap in puffed rice or crushed pretzels for a twist.

Now that you have your ingredients ready, get excited to create some truly unforgettable Caramel Crunch Brownies!

Step‑by‑Step Instructions for Caramel Crunch Brownies

Step 1: Prep the Oven and Pan
Begin by preheating your oven to 170°C (350°F). While it warms, grab a 9 x 13-inch baking tin, spraying it lightly with non-stick spray. Line the bottom and sides with parchment paper, letting it hang over the edges; this ensures easy removal later on and will help you achieve the perfect slice of your Caramel Crunch Brownies.

Step 2: Make the Brownie Base
In a heatproof bowl, combine brown sugar, caster sugar, salted butter, and chopped dark cooking chocolate. Microwave the mixture in 30-second intervals, stirring in between, until everything melts smoothly together—this should take around 2-3 minutes. Once melted, whisk in the large eggs and egg yolk, followed by flour, cocoa powder, and vanilla extract until just combined, creating a rich and fudgy batter.

Step 3: Bake the Brownies
Pour the brownie mixture into your prepared baking tin, smoothing it out evenly with a spatula. Place the tin in the preheated oven, baking the brownies for about 25-30 minutes. Keep an eye on them—they should look set around the edges and slightly soft in the center. Once done, remove from the oven and let them cool in the tin until reaching room temperature.

Step 4: Prepare the Caramel Topping
In a medium saucepan over medium heat, add the granulated sugar and let it melt, stirring gently to prevent burning. Once the sugar turns a beautiful golden color (about 118°C or 245°F), carefully add the hot heavy cream. Be cautious as it may bubble vigorously! Stir until the mixture is smooth, then add in the butter and mix until fully dissolved, achieving a rich caramel.

Step 5: Combine with Cornflakes
After removing the saucepan from heat, fold the cornflakes into the caramel mixture, ensuring that each flake is well coated. This sticky caramel-cornflake blend will become the lovely topping for your brownies, giving them that signature crunch. Once mixed, pour the cornflake topping evenly over the cooled brownies in the tin.

Step 6: Set and Chill
Allow the Caramel Crunch Brownies to sit at room temperature for about 30 minutes. This will help the caramel topping set slightly, making it easier to slice. For the best results, transfer the brownies to the refrigerator and chill them for at least 2 hours until firm. This gives you the perfect chewy and crunchy texture for slicing!

Step 7: Slice and Serve
Once the brownies are chilled and firm, use a sharp knife heated in hot water for clean cuts. Slice them into squares, revealing the delicious layers of fudgy brownie and caramel crunch on top. Serve your Caramel Crunch Brownies chilled or at room temperature, and share them with family and friends for a delightful treat!

Storage Tips for Caramel Crunch Brownies

Room Temperature: Keep your Caramel Crunch Brownies in an airtight container at room temperature for up to 5 days to maintain their delicious texture and flavor.

Fridge: If you prefer a chilled treat, store the brownies in the fridge for up to a week. This allows the caramel to set nicely but may alter the texture slightly.

Freezer: For longer storage, freeze the brownies in an airtight container or wrap them tightly in plastic wrap. They can be frozen for up to 3 months and will remain chewy once thawed.

Reheating: To enjoy them warm, lightly microwave individual brownies for about 10-15 seconds to bring back that fresh-baked experience.

Helpful Tricks for Caramel Crunch Brownies

Watch the Toffee: Keep a close eye on the caramel as it cooks; it can go from perfect to burnt quickly. Stir gently and consistently for the best results.

Proper Cooling: Allow the brownies to cool completely in the pan before adding the topping; this helps maintain their fudgy texture while setting the caramel.

Ideal Knife for Slicing: Use a large, sharp knife dipped in hot water to slice the brownies; this ensures clean cuts and prevents the topping from sticking.

Temperature of Ingredients: Using room temperature eggs and melted butter ensures better emulsification in the batter, creating the perfect fudgy texture.

Storing Tips: Keep the brownies in an airtight container for up to 5 days, or freeze them for future indulgence. They remain chewy even after thawing!

Experiment with Flavors: Don’t hesitate to swap in different toppings like nuts or dried fruits—just remember, the key ratio of caramel crunch brownies is what makes them so delightful!

Caramel Crunch Brownies Variations & Substitutions

Feel free to get creative with these Caramel Crunch Brownies and make them your own!

  • Nutty Delight: Add chopped walnuts or pecans into the brownie batter for a delicious crunch and earthy flavor.
  • Gluten-Free: Use a gluten-free flour blend instead of all-purpose flour to make these brownies suitable for gluten-sensitive friends.
  • Dairy-Free: Swap heavy cream with coconut cream and use dairy-free chocolate to cater to dairy-free diets.
  • Extra Chewy: Mix in marshmallows with the cornflakes for a gooey, extra chewy delight that takes your brownies to the next level. Just imagine that sweet, stretchy goodness!
  • Spiced Up: Add a sprinkle of cinnamon or espresso powder to the brownie batter for an unexpected flavor boost that enhances the chocolate.
  • Crispy Alternative: Try using rice krispies instead of cornflakes for an equally crunchy topping with a slightly different texture.
  • Salted Caramel Twist: Sprinkle flaky sea salt over the caramel topping before it sets to create a wonderful sweet-savory contrast.
  • Tropical Flavor: Add shredded coconut into the topping mix for an exotic twist, bringing a delightful chewiness that pairs beautifully with chocolate.

With these fun variations, you can customize your Caramel Crunch Brownies to fit your preferences and impress your loved ones. If you’re in the mood for something fresh alongside, consider pairing these decadent treats with a refreshing Crunchy Cabbage Carrot salad for a lovely balance. Enjoy your baking adventure!

Make Ahead Options

These Caramel Crunch Brownies are a fantastic choice for meal prep, allowing you to enjoy decadent treats without last-minute stress! To prep in advance, you can make the brownie base up to 24 hours before serving—simply store it tightly wrapped in plastic wrap in the refrigerator to maintain that fudgy texture. The caramel-cornflake topping can also be prepared a day ahead; just refrigerate the mixture after combining it. When you’re ready to indulge, spread the topping over the brownie base and refrigerate for at least 2 hours to set. With these make-ahead options, you can enjoy your homemade brownies anytime, easily impressing family and friends!

What to Serve with Caramel Crunch Brownies

Indulging in a sweet treat like these brownies opens up a world of delicious pairing possibilities.

  • Vanilla Ice Cream: The creamy texture and rich flavor of vanilla ice cream melt beautifully with warm brownies, creating a nostalgic classic.
  • Fresh Berries: Juicy strawberries or raspberries offer a tart contrast, brightening up the sweetness and adding freshness to each bite.
  • Whipped Cream: Light and airy, whipped cream enhances the richness of the brownies, making every mouthful feel more indulgent.
  • Espresso or Coffee: A warm cup of coffee balances the dessert’s sweetness, enriching the chocolate experience and enhancing flavors.
    Pairing these brownies with a bold espresso will surprise your taste buds and elevate your dessert game.
  • Chocolate Sauce: A drizzle of warm chocolate sauce on top adds an extra layer of decadence that chocolate lovers crave.
  • Caramel Sauce Drizzle: For caramel lovers, an extra caramel sauce drizzle will intensify the flavor and creamy texture, making your treat even more delightful.
  • Nutty Granola: A sprinkle of crunchy granola adds textural contrast and nutty notes, making for a well-rounded treat.
  • Signature Mocktail: Create a sparkling mocktail with lemon-lime soda and fresh mint for a refreshing drink that perfectly complements the rich brownies.
  • Chocolate Milk: For a nostalgic pairing, serve chilled chocolate milk that adds creaminess and enhances the chocolate flavor of the brownies.

Caramel Crunch Brownies Recipe FAQs

How do I choose the right cornflakes for the topping?
Absolutely! When selecting cornflakes, look for brands that don’t have added sugars or artificial flavors for the best results. Opt for classic, plain cornflakes, as they will provide the perfect crunch without overwhelming the caramel flavor. If you want to shake things up a bit, consider using puffed rice or even crushed pretzels for a unique twist!

What’s the best way to store leftover Caramel Crunch Brownies?
Very important! You can place your Caramel Crunch Brownies in an airtight container to keep them fresh at room temperature for up to 5 days! If you prefer a chilled treat, go ahead and refrigerate them; they can last about a week in the fridge.

Can I freeze Caramel Crunch Brownies?
Absolutely! To freeze, wrap individual brownie squares in plastic wrap and place them in a sealed plastic freezer bag or an airtight container. They can be stored in the freezer for up to 3 months. When you’re ready to enjoy them again, just let them thaw at room temperature or pop them in the microwave for about 10-15 seconds for a warm, soft treat!

What should I do if my caramel burns while cooking?
Oh no! If your caramel starts to burn, it’s best to discard it and start over. Make sure to stir gently and continuously while heating the sugar to prevent sticking and burning. Consistent monitoring is key here. To make a perfect caramel, heat the granulated sugar over medium heat until it melts and turns a nice golden color—this should take about 5-7 minutes. Remember, patience pays off with beautiful caramel!

Can I make these brownies gluten-free?
Absolutely! To make your Caramel Crunch Brownies gluten-free, simply substitute the all-purpose flour with a gluten-free flour blend, ensuring it has a good balance of starches and proteins. I often recommend trying a blend that includes almond flour for added flavor and texture, but be cautious of cross-contamination if allergies are a concern.

Are there any allergy considerations I should be aware of?
Great question! Keep in mind that these brownies contain common allergens like eggs, dairy (from butter and cream), and gluten (from flour). If you’re making them for someone with specific allergies, you can use egg substitutes like flaxseed meal or applesauce for binding, and opt for dairy-free butter and cream alternatives. Always read labels to ensure ingredient safety, particularly for store-bought components like chocolate and cornflakes.

Caramel Crunch Brownies

Delicious Caramel Crunch Brownies for Sweet Indulgence

These Caramel Crunch Brownies combine rich chocolate and chewy caramel-coated cornflakes, creating a delicious dessert experience.
Prep Time 15 minutes
Cook Time 30 minutes
Chilling Time 2 hours
Total Time 2 hours 45 minutes
Servings: 12 slices
Course: Dessert
Cuisine: American
Calories: 250

Ingredients
  

Brownie Base
  • 1 cup Brown Sugar Adds moisture and a deep caramel flavor
  • 1 cup Caster Sugar Provides sweetness and improved texture
  • 0.5 cup Salted Butter Enhances flavor and moisture; use unsalted with a pinch of salt
  • 200 grams Dark Cooking Chocolate Offers a rich chocolate experience
  • 2 large Eggs Contributes to fudgy texture
  • 1 large Egg Yolk Aids in emulsification
  • 1 cup All-Purpose Flour Provides structure; gluten-free blend can be used
  • 0.5 cup Cocoa Powder Elevates chocolate richness; avoid Dutch-processed
  • 1 teaspoon Vanilla Extract Adds warmth to flavors; better with pure extract
Topping
  • 0.5 cup Granulated Sugar Sweetens the caramel layer
  • 1 cup Heavy Cream Essential for caramelization
  • 3 cups Cornflakes Provides delightful crunch on top

Equipment

  • 9 x 13-inch baking tin
  • Heatproof Bowl
  • Medium saucepan
  • spatula
  • sharp knife

Method
 

Preparation
  1. Preheat your oven to 170°C (350°F) and prepare the baking tin with non-stick spray and parchment paper.
  2. In a heatproof bowl, combine brown sugar, caster sugar, salted butter, and chopped dark chocolate; microwave in 30-second intervals until melted.
  3. Whisk in the large eggs, egg yolk, flour, cocoa powder, and vanilla extract until just combined.
  4. Pour the batter into the prepared baking tin and smooth it out. Bake for 25-30 minutes until set around the edges and slightly soft in the center.
  5. Cool in the tin until room temperature.
  6. In a saucepan, melt granulated sugar over medium heat until golden; add hot heavy cream carefully and stir until smooth.
  7. Fold in cornflakes to the caramel mixture until well coated, then pour over cooled brownies.
  8. Allow to sit at room temperature for 30 minutes, then chill in the refrigerator for at least 2 hours before slicing.
  9. Slice into squares using a sharp knife dipped in hot water and serve.

Notes

For the best texture and flavor, use room temperature ingredients. Store brownies in an airtight container for up to 5 days.