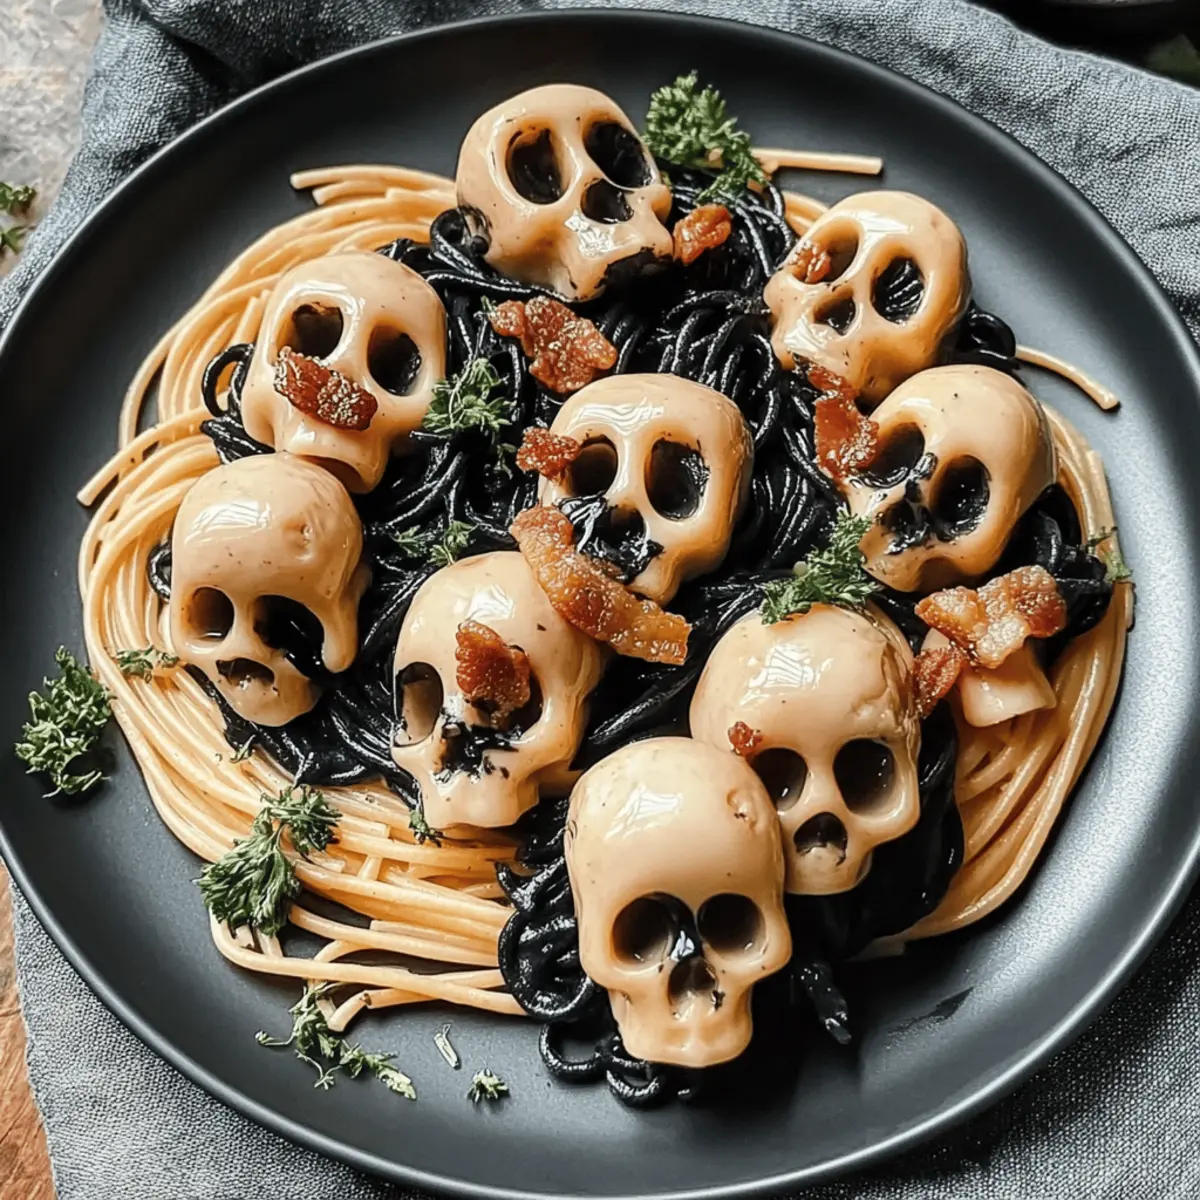
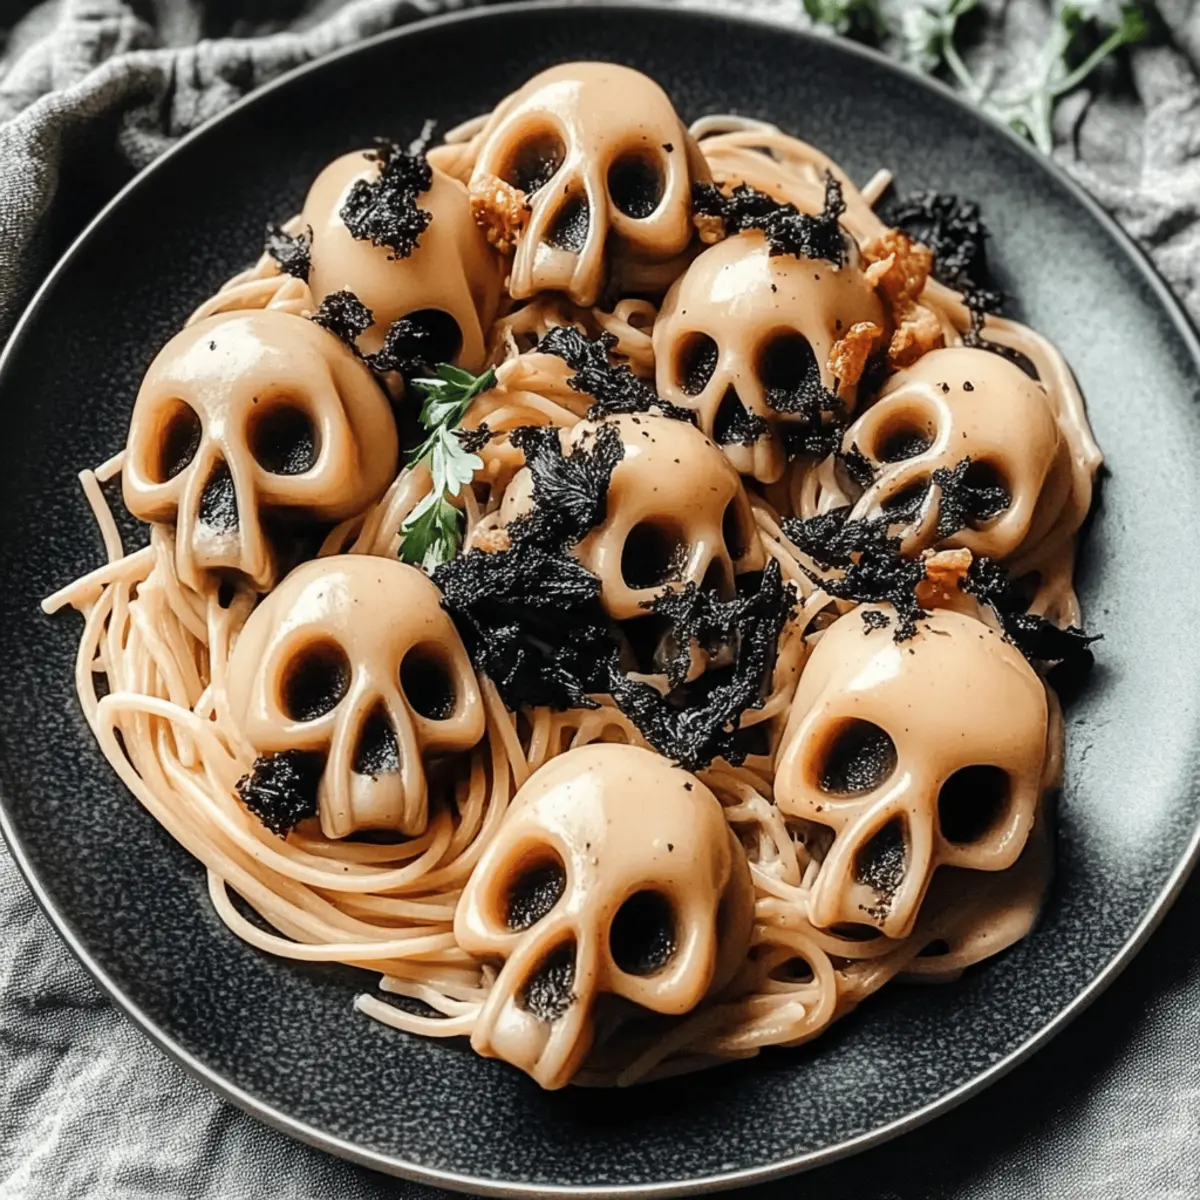
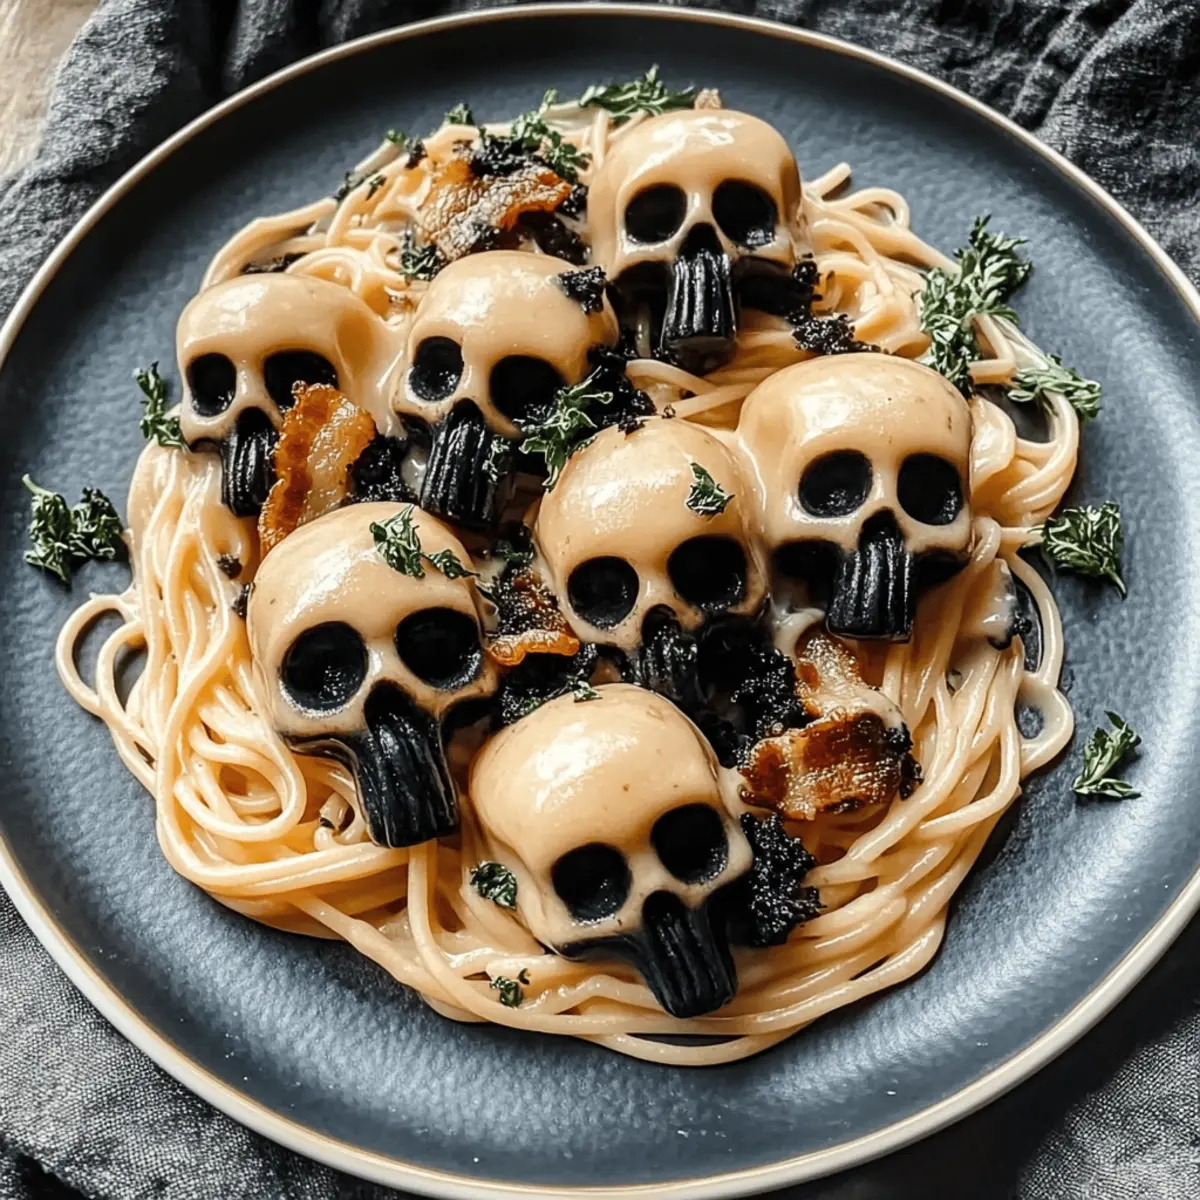
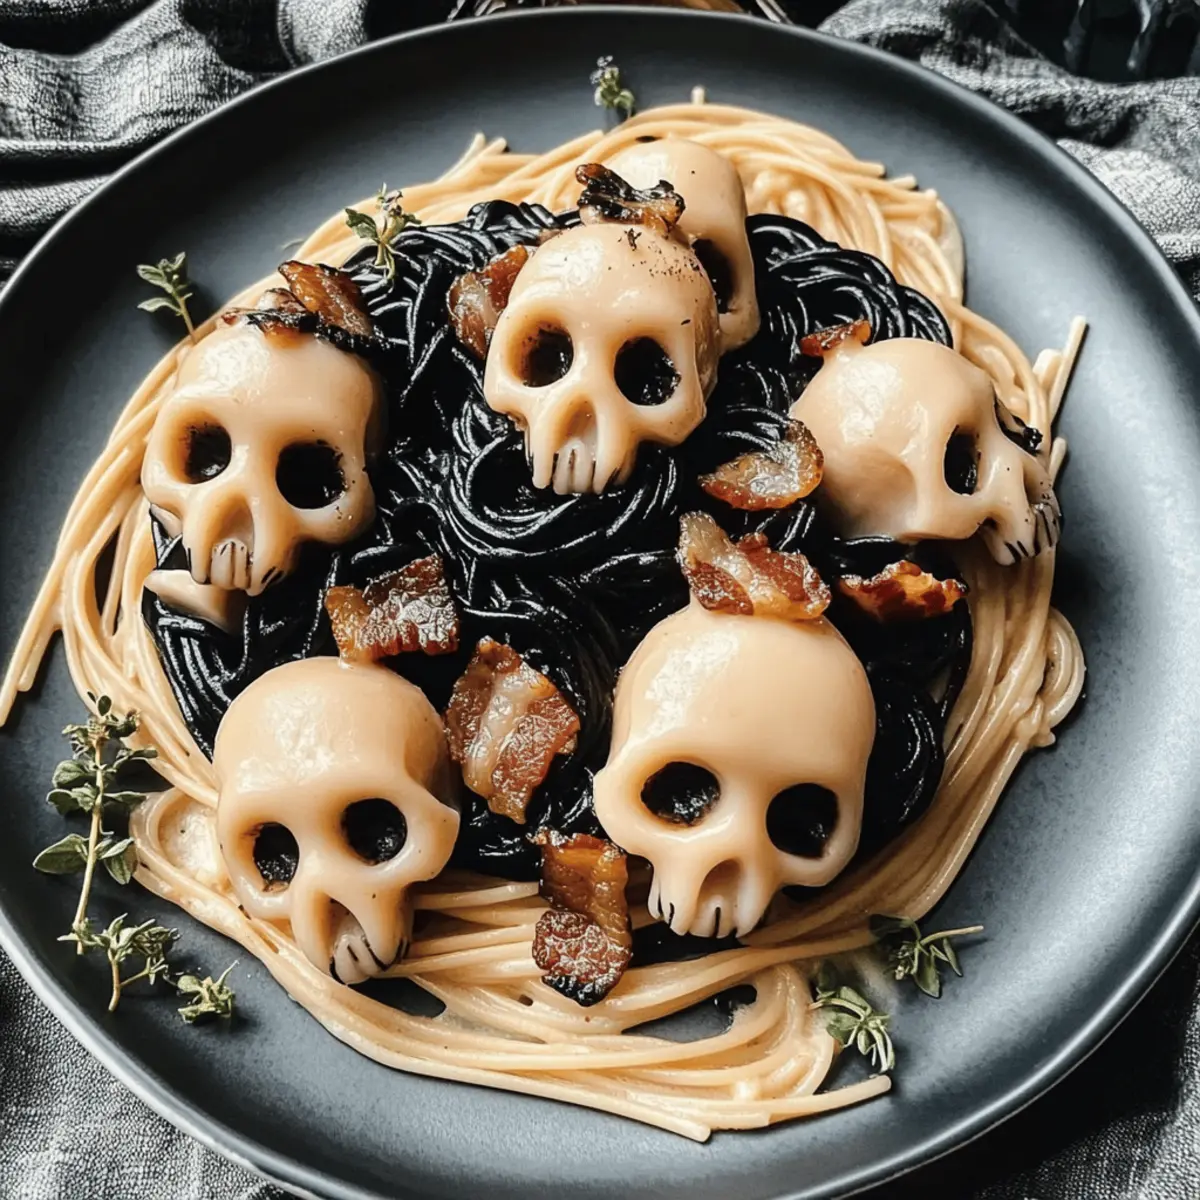
Savor the Best Buffalo Chicken Pizza Recipe for Game Day Fun

“What’s on the menu for game day?” I overheard a friend ask while planning a gathering. Instantly, my mind raced to the ultimate crowd-pleaser: Buffalo Chicken Pizza. This twist on classic American cuisine delivers a mouthwatering blend of spicy buffalo sauce and tender grilled chicken, all cradled in a perfectly baked crust. Whether you’re hosting a football watch party or simply craving a hearty slice, this recipe serves up two irresistible perks: it’s a fun, interactive dish for all ages and brings a delightful balance of heat from the buffalo sauce and sweetness from a drizzle of honey. Trust me; it’s a winner! Curious about how to make this showstopper? Let’s dive into the details!

Why is Buffalo Chicken Pizza a Must-Try?

Bold flavors come alive with this Buffalo Chicken Pizza recipe, perfectly blending spicy and sweet. Easy preparation means you can whip this up for any game day or family gathering without breaking a sweat. Customizable toppings let you tailor the heat to your liking—swap chicken for shrimp or go vegetarian with jackfruit! Crowd-pleaser status is ensured, as everyone loves a good pizza. And if you’re looking for more delicious options, consider pairing it with a side of Savory Chicken Cheesy or trying a refreshing Homemade Chicken Rolls. Make this pizza and watch it disappear in no time!

Buffalo Chicken Pizza Ingredients

For the Dough
Pizza Dough – Use pre-made or homemade dough for a perfect foundation.

For the Toppings
Chicken Breast (8 ounces, cut into strips) – Main protein for heartiness; grilled or crispy chicken can enhance texture.
Buffalo Sauce (1/2 cup, divided) – This spicy sauce adds the signature flavor to your buffalo chicken pizza; choose mild or spicy based on your heat preference.
Fresh Mozzarella (6 ounces) – Melts beautifully and adds creaminess; mozzarella pearls are great for even distribution.
Red Onion (1/2, thinly sliced) – Adds crunch and a hint of sweetness when cooked; substitute with sweet onions if desired.
Jalapeno (sliced, fresh) – Brings color and heat; remove the seeds for a milder kick.

For Finishing Touches
Honey (for drizzling) – This sweetness balances the heat of the buffalo sauce; maple syrup can be a tasty alternative.
Ranch/Blue Cheese Dressing (on the side) – A classic dip that enhances flavor; omit if you prefer a lighter option.
Flour (1/3 cup, for dusting) – Essential for preventing the dough from sticking while shaping.

Get ready to enjoy your homemade buffalo chicken pizza that perfectly blends spicy and sweet flavors!

Step‑by‑Step Instructions for Buffalo Chicken Pizza

Step 1: Dough Preparation
Remove your pizza dough from the fridge and place it in a greased bowl. Cover it with a damp cloth and let it proof for 3-4 hours at room temperature, or until it feels warm to the touch. This step is essential to achieve a light and airy crust for your buffalo chicken pizza.

Step 2: Oven Preheat
While the dough is proofing, preheat your oven to a scorching 500-550°F. If you have a pizza stone or steel, place it in the oven to heat for at least 1 hour. This high temperature will help create a crisp, golden crust when you bake your Buffalo Chicken Pizza.

Step 3: Chicken Cooking
In a skillet, heat a drizzle of oil over medium heat. Add the chicken breast strips and sauté for approximately 5-7 minutes or until they are golden brown and fully cooked. Once done, remove them from the heat and coat evenly with half of your buffalo sauce for that signature spicy flavor.

Step 4: Shape Dough
On a floured surface, gently stretch and shape your dough into a round 12-inch crust. Aim for a thin center with a thicker edge to hold the toppings. Be mindful not to tug too hard, as you want a nice, fluffy texture for your buffalo chicken pizza.

Step 5: Assemble Pizza
Carefully transfer your shaped dough onto a floured pizza peel. Begin by spreading a layer of buffalo sauce evenly over the surface. Next, place the sautéed chicken, fresh mozzarella, thinly sliced red onion, and jalapenos on top to create a deliciously vibrant and flavorful pizza.

Step 6: Baking
Slide your assembled buffalo chicken pizza onto the preheated stone or steel inside the oven. Bake for 5-6 minutes until the crust is crispy and the cheese is melted. For an extra touch, turn on the broiler for an additional 2-3 minutes to achieve a delightful char on the toppings.

Step 7: Finishing Touch
Once done baking, remove the buffalo chicken pizza from the oven and let it cool for a couple of minutes. Drizzle honey over the top for a touch of sweetness, slice into portions, and serve hot. Your homemade buffalo chicken pizza is now ready to wow your guests!

Tips for the Best Buffalo Chicken Pizza

  • Proof the Dough: Allow the pizza dough to proof fully to ensure a light, airy crust. Rushing this step can yield a dense pizza.

  • Temperature Matters: Preheat your oven to 500-550°F; high heat is essential for achieving that perfect crispy texture on your buffalo chicken pizza.

  • Sauté Chicken Properly: Cook the chicken until it’s golden brown before coating it with buffalo sauce. This enhances flavor and texture, making every bite delightful.

  • Broil for Finish: Don’t skip the broiling step! It creates a delicious char that elevates your pizza and adds an appealing look.

  • Ingredient Freshness: Use fresh ingredients for the best flavor and presentation. Keep vegetables crisp and cheeses high-quality for a gourmet touch!

Buffalo Chicken Pizza Variations & Substitutions

Feel free to unleash your creativity and tailor this buffalo chicken pizza just the way you like it!

  • Spicy Shrimp: Swap the chicken for sautéed shrimp marinated in buffalo sauce for a seafood twist. This variation will add an exciting, zesty flavor that seafood lovers will appreciate.

  • Vegetarian Jackfruit: Use shredded jackfruit instead of chicken for a delicious vegetarian twist. The texture is surprisingly similar to pulled chicken, making it a satisfying option for those refraining from meat.

  • Gluten-Free Crust: Make this dish gluten-free by using a cauliflower crust instead of traditional dough. The subtle flavor of the cauliflower complements the zesty buffalo sauce and cheese beautifully.

  • Extra Cheese: For dairy lovers, add a blend of cheeses like sharp cheddar or pepper jack for an even richer taste. The added creaminess will enhance each cheesy, spicy, and succulent bite.

  • Sweet Heat: Drizzle extra honey or a sweet chili sauce over your pizza before it goes into the oven for an extra layer of flavor. This contrast of sweet and heat will have everyone coming back for more!

  • Smoky BBQ Flavor: Mix in a little BBQ sauce with the buffalo sauce for a smoky alternative that still packs a punch. The combination adds complexity and depth that is sure to please.

  • Heat Level: Adjust the spice level by using milder jalapeños or opting for roasted red peppers instead. This twist gives you the flavor without overwhelming heat.

If you enjoy a wonderful blend of flavors, why not pair your buffalo chicken pizza with a side of Savory Chicken Cheesy or a refreshing Homemade Chicken Rolls? Enjoy experimenting and make it your own!

What to Serve with Buffalo Chicken Pizza

The perfect accompaniment will elevate your buffalo chicken pizza experience, creating a complete and comforting meal.

  • Crunchy Veggie Sticks: Fresh carrots, celery, and bell peppers add a refreshing crunch that balances the pizza’s heat. Their natural sweetness pairs beautifully with buffalo sauce.
  • Classic Caesar Salad: Crisp romaine topped with tangy Caesar dressing and crunchy croutons offers a creamy contrast, making it an unbeatable side dish. It’s a salad that everyone will love!
  • Sweet Potato Fries: These sweet and salty fries bring a delightful crunch and a balancing sweetness, creating a delicious contrast alongside your spicy pizza. Perfect for dipping!
  • Garlic Parmesan Breadsticks: Soft and chewy, drizzled with garlic butter and sprinkled with parmesan, these breadsticks are made for sharing while waiting for that pizza to cool down.
  • Ranch Dressing Dip: Have a side of cool ranch dressing for dipping pizza crust! This smooth, creamy dip enhances the pizza’s spices while providing a soothing finish.
  • Crisp Beer: A cold lager or IPA complements the flavors of buffalo chicken pizza; the carbonation cuts through the richness, making every bite even more enjoyable.
  • Chocolate Brownies: For dessert, indulge in fudgy chocolate brownies to satisfy your sweet tooth, balancing out the meal with something comforting and oh-so-tempting.
  • Lemonade Sparkler: A refreshing drink with a bubbly twist, this zesty lemonade provides a refreshing contrast to the heat of the buffalo sauce, ensuring a bright finish to your meal.

How to Store and Freeze Buffalo Chicken Pizza

Fridge: Store leftover buffalo chicken pizza in an airtight container for up to 3 days. Reheat slices in the oven at 350°F for about 10 minutes for best results.

Freezer: Wrap individual slices or the whole pizza tightly in plastic wrap and aluminum foil. It can be frozen for up to 2 months. Thaw in the fridge overnight before reheating.

Reheating: For crispy crust, reheat slices in a preheated oven or on a skillet over medium heat for about 5 minutes. This method preserves the lovely texture of your buffalo chicken pizza.

Make Ahead Options

These Buffalo Chicken Pizza preparations are perfect for busy weeknights or game day gatherings! You can assemble your pizza (without baking) up to 24 hours in advance. Simply prepare the dough and let it proof as outlined, then layer the pizza with buffalo sauce, chicken, cheese, and toppings. Cover it tightly with plastic wrap and refrigerate to maintain freshness. When you’re ready to serve, take it out of the fridge, allow it to sit at room temperature for about 15 minutes to take the chill off, and then bake as directed for that perfect crispy crust. This way, you enjoy delicious, homemade Buffalo Chicken Pizza with minimal effort!

Buffalo Chicken Pizza Recipe FAQs

What type of chicken works best for buffalo chicken pizza?
Absolutely! I recommend using grilled or crispy chicken breast strips for the best texture. If you’re short on time, pre-cooked rotisserie chicken can work wonders. Just shred it and toss it with buffalo sauce for an instant flavor boost!

How should I store leftover buffalo chicken pizza?
For optimal freshness, store any leftover buffalo chicken pizza in an airtight container in the fridge for up to 3 days. When you’re ready to enjoy another slice, simply reheat it in the oven at 350°F for about 10 minutes, and it will taste almost as good as the first time!

Can I freeze buffalo chicken pizza, and how do I do it?
Very! To freeze buffalo chicken pizza, wrap each slice or the whole pizza tightly in plastic wrap and then in aluminum foil. This will keep it safe from freezer burn. It can be frozen for up to 2 months. When you’re ready to eat, thaw it in the fridge overnight and reheat in the oven for a delicious comeback!

What if my pizza dough is too sticky?
The more the merrier! If your dough feels sticky, you can add a little more flour while shaping it to prevent it from sticking to your hands or the surface. Make sure to use flour sparingly; too much can make the crust tough. Alternatively, let the dough rest for a few minutes, as this can help it firm up.

Is buffalo chicken pizza suitable for someone with dairy allergies?
Very! For a dairy-free option, you can use non-dairy cheese alternatives or simply omit the cheese. Just ensure that your buffalo sauce is also dairy-free, as some brands may contain creamy elements. Customize it with fresh veggies and an extra drizzle of honey for that wonderful sweet and spicy mix!

Can I keep the pizza assembled in the fridge before baking?
Absolutely! You can assemble your buffalo chicken pizza (without baking) and keep it in the fridge for up to 24 hours. Cover it with plastic wrap to prevent drying out. When you’re ready, just pop it in the preheated oven, and you’ll have a delicious home-cooked meal in no time!

Buffalo Chicken Pizza

Savor the Best Buffalo Chicken Pizza Recipe for Game Day Fun

Discover this irresistible Buffalo Chicken Pizza recipe, perfect for game day with its spicy and sweet flavors.
Prep Time 15 minutes
Cook Time 15 minutes
Proofing Time 4 hours
Total Time 4 hours 30 minutes
Servings: 4 slices
Course: Chicken
Cuisine: American
Calories: 320

Ingredients
  

For the Dough
  • 1 Pizza Dough Use pre-made or homemade dough.
For the Toppings
  • 8 ounces Chicken Breast Cut into strips.
  • 1/2 cup Buffalo Sauce Divided.
  • 6 ounces Fresh Mozzarella Mozzarella pearls are great.
  • 1/2 Red Onion Thinly sliced.
  • 1 Jalapeno Sliced, fresh.
For Finishing Touches
  • Honey For drizzling.
  • Ranch/Blue Cheese Dressing On the side.
  • 1/3 cup Flour For dusting.

Equipment

  • oven
  • Skillet
  • Pizza Peel
  • Bowl

Method
 

Step-by-Step Instructions
  1. Remove your pizza dough from the fridge and place it in a greased bowl. Cover it with a damp cloth and let it proof for 3-4 hours at room temperature, or until it feels warm to the touch.
  2. While the dough is proofing, preheat your oven to a scorching 500-550°F. If you have a pizza stone or steel, place it in the oven to heat for at least 1 hour.
  3. In a skillet, heat a drizzle of oil over medium heat. Add the chicken breast strips and sauté for approximately 5-7 minutes or until they are golden brown and fully cooked. Coat evenly with half of your buffalo sauce.
  4. On a floured surface, gently stretch and shape your dough into a round 12-inch crust.
  5. Carefully transfer your shaped dough onto a floured pizza peel. Spread buffalo sauce evenly, then add the sautéed chicken, fresh mozzarella, thinly sliced red onion, and jalapenos.
  6. Slide your assembled pizza onto the preheated stone or steel inside the oven. Bake for 5-6 minutes until the crust is crispy and the cheese is melted.
  7. Once done baking, let it cool for a couple of minutes. Drizzle honey over the top, slice into portions, and serve hot.

Notes

Use fresh ingredients for the best flavor. Don't skip broiling for an extra crust char.

Comforting Persian Potato Curry for Easy Home Cookin’

As the warm, fragrant aroma of spices fills my kitchen, I’m transported back to a charming Persian market, where the vibrant colors of fresh produce are just as captivating as the enticing scents. Today, I’m excited to share my recipe for Dopiazeh Aloo, a comforting Persian Potato Curry that transforms everyday ingredients like tender potatoes and caramelized onions into a heartwarming meal. This vegan dish is not only incredibly simple to make, but it also offers a customizable experience perfect for any palate. Whether you’re a seasoned home chef or just looking for a delicious plant-based option, this Persian Potato Curry is sure to delight. Are you ready to explore the rich flavors of Persian cuisine with me?

Why is Dopiazeh Aloo a Must-Try?

Comforting and cozy, this Persian Potato Curry wraps you in its warmth with every bite. Rich flavors come from slow-cooked onions and a blend of spices, creating an exquisite depth that makes it truly special. Customizable to your taste, you can easily add chickpeas for protein or extra veggies to amp up the nutrition. Quickly prepared, it’s perfect for busy weeknights, taking only about 30 minutes from start to finish. Plus, serve it with warm lavash or fluffy rice, and you’re in for a meal that’s sure to impress! If you’re looking for more delightful potato dishes, check out my Savory Onion Potato Pancakes or Zucchini Potato Fritters.

Persian Potato Curry Ingredients

• Discover the key components of this comforting dish!

For the Base

  • Potatoes – The heart of the dish, Yukon Gold provides the best texture.
  • Onions – Essential for depth, caramelizing them brings out their natural sweetness.
  • Garlic – Fresh minced garlic adds a savory aroma that enhances the curry’s flavor.

For the Spices

  • Turmeric – Brings a warm, earthy flavor and vibrant color to your Persian Potato Curry; substitute with curry powder if needed.
  • Cumin – Adds a nutty depth; coriander can be a fragrant alternative.
  • Chili flakes (optional) – Spice it up according to your preference for a little heat.

For the Optional Add-ins

  • Tomatoes (optional) – Fresh or canned tomatoes add acidity and balance; they’re a wonderful choice if you enjoy a tangy flavor.
  • Chickpeas (optional) – Boosts protein and texture; canned makes it a quick addition.
  • Herbs (optional) – Fresh cilantro or parsley for garnish offers a pop of freshness and color.

With these ingredients, you’re all set to create a delicious Persian Potato Curry that’s sure to tantalize your taste buds!

Step‑by‑Step Instructions for Persian Potato Curry

Step 1: Prepare the Potatoes
Begin by peeling and chopping your Yukon Gold potatoes into bite-sized pieces, ensuring uniformity for even cooking. Set them aside in a bowl of cold water to prevent browning while you prepare the other ingredients. This simple step is crucial for the delicious texture of your Dopiazeh Aloo.

Step 2: Caramelize the Onions
In a large skillet, heat 2 tablespoons of oil over medium heat, then add the thinly sliced onions. Cook them slowly, stirring occasionally for about 10–15 minutes, until they turn golden brown and caramelized. This slow process enhances the flavor of your Persian Potato Curry, creating a sweet and savory base that’s hard to resist.

Step 3: Add Garlic and Spices
Once your onions are beautifully caramelized, stir in the minced garlic, turmeric, and cumin. Let the mixture cook for 1–2 minutes, or until fragrant, stirring continuously to prevent burning. The warm spices will further deepen the flavors of the Dopiazeh Aloo, making your kitchen smell divine!

Step 4: Incorporate the Potatoes
Next, toss the chopped potatoes into the onion and spice mixture, stirring well to coat the potatoes evenly. This step helps the flavors meld together into the base of your Persian Potato Curry. Allow the potatoes to absorb the aromatic spices for a minute before moving to the next step.

Step 5: Simmer with Liquid
Pour in enough water or vegetable broth to fully cover the potatoes, stirring gently to combine. Increase the heat to bring the mixture to a gentle simmer, then reduce to low, covering the skillet. Let the Dopiazeh Aloo simmer for about 15–20 minutes, until the potatoes are tender and can be easily pierced with a fork.

Step 6: Add Optional Ingredients
If you’re including tomatoes and/or chickpeas, this is the perfect time to add them to the curry. Stir gently and let the dish cook for an additional 5–10 minutes, allowing the flavors to blend and the ingredients to warm through. This step adds extra texture and dimensions to your Persian Potato Curry.

Step 7: Season to Taste
Taste your Dopiazeh Aloo and adjust the seasoning as needed, adding salt, pepper, and optional chili flakes according to your preference. This finishing touch will enhance the dish’s overall flavor profile, ensuring it’s just right for you and your loved ones.

Step 8: Serve and Garnish
Finally, remove your Persian Potato Curry from heat and swap the lid for a little time to rest, allowing the spices to meld. Serve it hot, garnished with a sprinkle of fresh cilantro or parsley. Pair with fluffy rice or warm lavash for a delightful meal that captures the essence of Persian cuisine.

Make Ahead Options

These comforting Persian Potato Curry dishes are perfect for busy home cooks looking to save time! You can prepare the entire Dopiazeh Aloo up to 24 hours in advance and refrigerate it, allowing the flavors to deepen overnight. Simply caramelize the onions and cook the potatoes as instructed, then let the curry cool before transferring it to an airtight container. When you’re ready to serve, reheat gently on the stove or in the microwave, adding a splash of water if needed to maintain moisture. This way, you’ll have a deliciously rich and flavorful meal ready to enjoy with minimal effort, just as delightful as when freshly made!

How to Store and Freeze Dopiazeh Aloo

Fridge: Keep your Persian Potato Curry in an airtight container for up to 3 days. Simply reheat it gently on the stove or in the microwave, adding a splash of water if needed for moisture.

Freezer: For longer storage, freeze Dopiazeh Aloo in a freezer-safe container for up to 2 months. Thaw overnight in the fridge before reheating.

Reheating: When it’s time to enjoy your leftovers, reheat on low heat, stirring occasionally to prevent sticking. A little water or broth can help restore its creamy texture.

Airtight Storage: Always use airtight containers to maintain freshness and prevent freezer burn. Enjoy this comforting dish knowing you have delicious leftovers ready to savor!

What to Serve with Dopiazeh Aloo?

Elevate your Persian Potato Curry experience by pairing it with delightful and complementary sides that enhance every bite.

  • Fluffy Basmati Rice: Perfectly cooked rice absorbs the rich, savory curry sauce, making each mouthful wonderfully satisfying.
  • Warm Lavash: This soft and pliable bread is ideal for scooping up the curry, delivering a delightful texture contrast.
  • Cucumber Yogurt Salad: A refreshing combination of yogurt, diced cucumber, and herbs balances the spices of the curry and adds creaminess.
  • Pickled Vegetables: The tangy notes of pickles provide a sharp contrast that brightens the dish’s overall flavor profile, adding zing.
  • Roasted Vegetables: Seasonal roasted veggies like carrots and bell peppers enhance nutrition and provide a lovely sweetness that complements the curry.
  • Minted Lemonade: A cool, refreshing drink like mint lemonade cleanses the palate while echoing the aromatic notes of the dish.
  • Spicy Chickpea Stew: For an extra protein punch, serve alongside a zesty chickpea stew that melds beautifully with the warm spices of the Dopiazeh Aloo.

Expert Tips for Persian Potato Curry

Caramelization Secret: Start with low heat to ensure onions caramelize beautifully without burning. This adds depth to your Persian Potato Curry.

Potato Choice: Opt for waxy potatoes like Yukon Gold for the best texture; they hold up well during cooking. Avoid starchy varieties which can become mushy.

Layering Flavors: Stir in the garlic and spices after the onions are caramelized to enhance the aroma and flavor of the dish. Don’t rush this step!

Taste Test: Always taste and adjust the seasoning towards the end; small changes can elevate your Persian Potato Curry to extraordinary!

Resting Time: Let your curry sit for a few minutes after cooking. This allows the flavors to meld and creates a richer taste.

Variations & Substitutions for Persian Potato Curry

Elevate your culinary journey by customizing this delightful dish to suit your tastes and pantry!

  • Herb Swap: Replace cilantro with parsley for a fresh twist on the flavor profiles. Each herb brings a unique aroma that can change the entire dish. Enjoy the refreshing notes of parsley while still capturing the essence of Persian flavors.

  • Extra Veggies: Add fresh spinach or green peas towards the end of cooking for a nutritional boost and vibrant color. These add-ins are a fantastic way to enjoy more veggies in your meal without compromising the deliciousness.

  • Protein-Packed: Toss in chickpeas for added protein and a heartier texture. They soak up the flavors beautifully, making each bite even more satisfying. Canned chickpeas make it simple and quick, while dried ones will require a bit more time if you prefer.

  • Tomato Variation: Include fresh or canned tomatoes to enhance acidity and balance the curry’s flavors. This twist can make your Dopiazeh Aloo richer and more complex, perfect for those who love a tangy element.

  • Spice Up Your Life: Feel free to customize the spice levels by adding chili flakes or a pinch of cinnamon for warmth. A bay leaf while simmering can also infuse a deeper aroma, giving your curry an extra layer of flavor.

  • Creamy Option: For a creamier texture, stir in a splash of coconut milk or a dollop of yogurt after cooking. It adds a lovely richness and a hint of sweetness, making your Dopiazeh Aloo exceptionally comforting.

  • Serving Suggestions: Pair your curry with fluffy basmati rice or warm lavash for a complete meal that feels like a warm hug. You could also serve it alongside my Savory Zucchini Potato Mini Pancakes for a delightful combination!

Explore these variations to craft a Persian Potato Curry that’s not only comforting but also uniquely yours!

Dopiazeh Aloo (Persian Potato Curry) Recipe FAQs

Which type of potatoes should I use for Dopiazeh Aloo?
I recommend using waxy potatoes like Yukon Gold for the best texture. They hold up beautifully when cooked, providing a creamy interior and a satisfying bite. Avoid starchy varieties, as they tend to become mushy and lose their shape in the curry.

How should I store leftover Dopiazeh Aloo?
Store your Persian Potato Curry in an airtight container in the refrigerator for up to 3 days. When you’re ready to enjoy your leftovers, simply reheat on the stove or in the microwave, adding a splash of water if needed to maintain moisture and creaminess.

Can I freeze Dopiazeh Aloo?
Absolutely! To freeze your Persian Potato Curry, allow it to cool completely before transferring it to a freezer-safe container. It can be stored for up to 2 months. When you’re ready to eat it, thaw overnight in the fridge and reheat gently on the stove, stirring occasionally.

What if my onions don’t caramelize properly?
If your onions aren’t caramelizing well, make sure you’re cooking them over medium heat and giving them plenty of time, about 10-15 minutes. Stir them occasionally to ensure even cooking, and avoid rushing the process. If they’re still pale and not browning, a pinch of salt can help draw out moisture and speed up caramelization.

Are there any dietary considerations when making Dopiazeh Aloo?
This dish is naturally vegan and should be suitable for most dietary restrictions. However, if you’re cooking for guests, make sure to check for any allergies, particularly to garlic or spices. You can easily customize the recipe by adjusting ingredients, like omitting chili flakes for those who prefer a milder flavor or using different herbs to accommodate personal tastes.

Can I add more vegetables to the curry?
Very! Dopiazeh Aloo is quite customizable. You can add vegetables like spinach or green peas in the last few minutes of cooking to boost nutrition and color. Just ensure they’re added early enough to cook through but late enough to retain their vibrant color and texture.

Persian Potato Curry

Comforting Persian Potato Curry for Easy Home Cookin'

This Persian Potato Curry is a comforting vegan dish featuring fragrant spices and tender potatoes, perfect for a satisfying meal.
Prep Time 10 minutes
Cook Time 30 minutes
Resting Time 5 minutes
Total Time 45 minutes
Servings: 4 servings
Course: Dinner
Cuisine: Persian
Calories: 250

Ingredients
  

For the Base
  • 4 medium Yukon Gold potatoes peeled and chopped
  • 2 medium onions thinly sliced
  • 3 cloves garlic minced
For the Spices
  • 1 teaspoon turmeric or curry powder as a substitute
  • 1 teaspoon cumin or coriander as an alternative
  • 1/2 teaspoon chili flakes optional
For the Optional Add-ins
  • 1 cup tomatoes fresh or canned, optional
  • 1 can chickpeas drained and rinsed, optional
  • 1/4 cup fresh cilantro or parsley for garnish, optional

Equipment

  • large skillet

Method
 

Step-by-Step Instructions for Persian Potato Curry
  1. Begin by peeling and chopping your Yukon Gold potatoes into bite-sized pieces, ensuring uniformity for even cooking. Set them aside in a bowl of cold water to prevent browning.
  2. In a large skillet, heat 2 tablespoons of oil over medium heat, then add the thinly sliced onions. Cook them slowly for about 10–15 minutes, until they turn golden brown and caramelized.
  3. Once your onions are beautifully caramelized, stir in the minced garlic, turmeric, and cumin. Let the mixture cook for 1–2 minutes, or until fragrant.
  4. Toss the chopped potatoes into the onion and spice mixture, stirring well to coat the potatoes evenly.
  5. Pour in enough water or vegetable broth to fully cover the potatoes, then bring to a gentle simmer. Reduce to low, cover, and let simmer for about 15–20 minutes until tender.
  6. If you’re including tomatoes and/or chickpeas, add them now and cook for an additional 5–10 minutes.
  7. Taste and adjust the seasoning, adding salt, pepper, and optional chili flakes as desired.
  8. Remove from heat and let the curry sit for a few minutes. Serve hot, garnished with fresh cilantro or parsley alongside fluffy rice or warm lavash.

Notes

Start with low heat for caramelizing onions and always taste before serving to adjust seasoning.

Savory Sausage Egg & Cheese Kolaches for Breakfast Bliss

The rich aroma of baked goods wafted through my kitchen, instantly transporting me to a cozy café where breakfast dreams come true. Today, I’m excited to share my Easy Sausage Egg & Cheese Kolaches, a delightful twist on a beloved classic. These fluffy little pockets burst with a savory filling that’s perfect for breakfast or brunch. Not only are they a breeze to whip up, but they also make for a satisfying meal prep option, keeping your mornings stress-free and deliciously hearty. Whether you’re savoring them solo or sharing with family, these kolaches are sure to elevate your breakfast game. Are you ready to learn how to create these irresistible bites of happiness? Let’s dive in!

Why Are Kolaches Perfect for Breakfast?

Fluffy Texture: The dough forms a soft, pillowy shell, perfectly complementing the savory filling inside.

Flavor Explosion: With the combination of sausage, scrambled eggs, and melting cheese, each bite delivers a delightful burst of flavor!

Easy to Make: Utilize frozen dinner rolls for a quick, hassle-free preparation, making these kolaches a great option for busy mornings.

Meal Prep Friendly: Bake a batch ahead of time and enjoy these scrumptious treats throughout the week, saving you time while still enjoying a homemade breakfast.

Customizable Delights: Feel free to swap in your favorite ingredients—try bacon instead of sausage or add vegetables for a nutritious twist. They are as versatile as they are delicious! Explore more ideas with Savory Vegetable Cheese Pancakes or Easy Milky Coconut Cheese Dessert for extra inspiration.

Sausage Egg & Cheese Kolaches Ingredients

  • For the Dough
    Frozen Dinner Rolls – A convenient and soft base for your kolaches; Rhodes brand works best for ideal texture.

  • For the Filling
    Fully Cooked Breakfast Sausage – Adds savory deliciousness; turkey sausage is a lighter option if desired.
    Eggs – Ensure a rich, protein-packed filling; consider using egg whites for a healthier version.
    Heavy Cream or Milk – Enhances creaminess in the egg mixture; opt for a dairy-free milk alternative if needed.
    Onion Powder – An optional flavor boost; skip it if you prefer a simpler taste.
    Salt & Pepper – Essential seasonings to elevate the flavor; adjust to suit your preference.
    Cheddar Cheese – Melts beautifully, adding a gooey texture; feel free to swap with mozzarella or American cheese for variety.

  • For the Topping
    Everything Bagel Seasoning – Adds delightful texture and flavor; can experiment with toppings like sesame or poppy seeds for extra flair.

These Sausage Egg & Cheese Kolaches are not just scrumptious; they are the perfect handmade breakfast treat!

Step‑by‑Step Instructions for Sausage Egg & Cheese Kolaches

Step 1: Prepare Dough
Start by placing 12 frozen dinner rolls on a parchment-lined baking sheet. Cover them loosely with plastic wrap and allow the rolls to rise at room temperature for about 20 minutes, until they begin to soften and expand. This will create the perfect base for your Sausage Egg & Cheese Kolaches.

Step 2: Cook Eggs
In a mixing bowl, whisk together eggs, cream, onion powder (if using), salt, and pepper until well combined. Heat a non-stick skillet over medium heat and pour in the egg mixture. Stir gently as it cooks, removing it from the heat just as it begins to set. Fold in the defrosted breakfast sausage for added flavor without overcooking the eggs.

Step 3: Assemble Kolaches
Once the dough has risen, flatten each roll into a roughly 3-inch circle using your hands or a rolling pin. Place half a slice of cheddar cheese in the center, followed by about 2 tablespoons of the egg and sausage mixture. Carefully pinch the edges to seal each kolache, wetting them with a drop of water if necessary to ensure they stay closed.

Step 4: Season and Rise
Preheat your oven to 350°F (175°C). While the oven heats up, dip the tops of each assembled kolache into everything bagel seasoning for added texture and flavor. Arrange them back on the baking sheet, cover, and let them rise for an additional 30 minutes until puffy, allowing the dough to become airy and light.

Step 5: Bake
Once they have risen, space the kolaches about 2 inches apart on the baking sheet. Bake in the preheated oven for 15 to 17 minutes or until they turn a beautiful golden brown. Keep an eye on them; they should be firm to the touch yet soft inside. Allow them to cool for 10 minutes before serving them warm, and savor the delightful flavors of your homemade Sausage Egg & Cheese Kolaches.

Expert Tips for Sausage Egg & Cheese Kolaches

  • Dough Temperature: Ensure the frozen dinner rolls are completely thawed before shaping; otherwise, they won’t rise properly, resulting in dense kolaches.

  • Filling Balance: Avoid overfilling your kolaches with the egg mixture. About 2 tablespoons are perfect; too much can lead to messy seams that may burst while baking.

  • Pinching Edges: Seal the kolaches tightly by pinching the edges well. If they open during baking, the filling may leak out, disrupting that delicious Sausage Egg & Cheese experience.

  • Seasoning Preview: Taste the egg mixture before cooking. This allows you to adjust the salt and pepper for a perfectly seasoned filling that suits your family’s tastes.

  • Let Them Rest: Allow the baked kolaches to cool for about 10 minutes before serving. This ensures they finish cooking inside and the cheese stays melty but not runny.

Make Ahead Options

These Sausage Egg & Cheese Kolaches are fantastic for meal prep! You can prepare the filling (cooked eggs, sausage, and cheese mixture) up to 3 days in advance; simply store it in an airtight container in the refrigerator. Additionally, you can assemble the kolaches, pinching and sealing them, and refrigerate them for up to 24 hours before baking. To maintain their freshness, cover the assembled kolaches tightly with plastic wrap to prevent drying out. When you’re ready to enjoy them, simply let them come to room temperature while preheating your oven to 350°F (175°C), then bake as directed, and you’ll have a cozy breakfast ready with minimal effort!

What to Serve with Easy Sausage Egg & Cheese Kolaches

Enjoy these soft, fluffy breakfast bites with a variety of delicious sides for a complete morning feast.

  • Crispy Bacon: The salty crunch of bacon provides a perfect contrast to the soft kolaches, enhancing each savory bite.

  • Fresh Fruit Salad: A refreshing mix of seasonal fruits adds a burst of sweetness and bright colors to your breakfast table.

  • Savory Hash Browns: Crispy, golden hash browns add texture and comfort—a beloved breakfast staple alongside your kolaches.

A side of hash browns not only balances flavors but also makes your meal heartier. The crispy potatoes pair beautifully with the cheesy filling, creating a satisfying breakfast experience.

  • Zesty Green Salad: A light salad with arugula, cherry tomatoes, and a lemon vinaigrette introduces freshness and acidity, cutting through the richness.

  • Creamy Grits: Velvety grits topped with cheese or butter complement the savory kolaches while providing a Southern touch.

  • Herbal Tea or Coffee: A warm cup of herbal tea or freshly brewed coffee completes your breakfast with soothing warmth and rich flavors.

Pairing these elements with your Easy Sausage Egg & Cheese Kolaches will ensure a delightful experience everyone can enjoy!

Sausage Egg & Cheese Kolaches Variations

Feel free to sprinkle your creativity into these kolaches for a fun twist on a family favorite!

  • Bacon Swap: Replace breakfast sausage with crispy bacon for a smoky and savory touch. Each bite will be an unforgettable flavor adventure!

  • Vegetarian Delight: Use diced bell peppers, spinach, or mushrooms as a filling for a colorful and nutritious veggie option. The freshness will make your morning feel vibrant!

  • Spicy Kick: Opt for pepper jack cheese instead of cheddar for a spicy surprise that will warm your heart and kickstart your day. Everyone loves a little heat, right?

  • Herbed Variation: Incorporate fresh herbs like chives or parsley into the egg mixture for an aromatic upgrade that adds a delightful freshness. It’s a simple way to elevate your breakfast!

  • Creamy Alternative: Swap heavy cream for Greek yogurt in the egg mixture to enhance creaminess while adding a touch of tangy goodness to your kolaches.

  • Gluten-Free Option: Use gluten-free dinner rolls as a base for those with dietary restrictions, ensuring everyone can enjoy a delicious breakfast treat!

  • Cheese Medley: Mix different cheeses such as mozzarella and gouda for an indulgent, gooey filling that’s bursting with flavor. Cheese lovers will definitely rejoice!

  • Sweet Surprise: For a fun dessert twist, use a sweet filling of cream cheese and jam instead. It’s a delightful reminder that breakfast can be a little sweet too!

Explore more delectable ideas inspired by these savory kolaches with Savory Cheese Egg or the delightful contrast of Blueberry Cream Cheese for a perfect brunch!

How to Store and Freeze Sausage Egg & Cheese Kolaches

  • Room Temperature: Keep the kolaches covered at room temperature for up to 2 hours if serving immediately. After that, store them in the fridge to maintain freshness.
  • Fridge: Store in an airtight container in the refrigerator for up to 1 week. Reheat in the microwave for a quick breakfast, or bake them at 350°F for a few minutes to regain their fluffy texture.
  • Freezer: Freeze individually wrapped kolaches in plastic wrap and then place them in a freezer bag for up to 3 months. Thaw overnight in the fridge before reheating.
  • Reheating: For best results, reheat in the oven for about 10-15 minutes at 350°F to keep the dough soft and the filling warm. These Sausage Egg & Cheese Kolaches are sure to delight!

Sausage Egg & Cheese Kolaches Recipe FAQs

How do I know when my sausage is fully cooked?
Always check that your sausage is heated to an internal temperature of 165°F (74°C). If you’re using fully cooked breakfast sausage, it should easily brown and have no pink visible. Look for a nice golden color with a slight crisp on the outside that indicates it’s ready to mingle with your eggs!

What is the best way to store leftover kolaches?
Store your Sausage Egg & Cheese Kolaches in an airtight container in the refrigerator for up to one week. They stay fresh and delicious. If you plan to eat them later, just reheat them in the microwave for about 30 seconds, or pop them back in the oven at 350°F for 10-15 minutes to regain that lovely fluffy texture.

Can I freeze these kolaches?
Absolutely! To freeze your Sausage Egg & Cheese Kolaches, wrap them individually in plastic wrap, then place them in a freezer-safe bag or container. They can last for up to 3 months. To reheat, simply thaw overnight in the fridge and warm them up in the oven for about 10-15 minutes at 350°F. This method keeps the dough soft while ensuring the filling is piping hot!

What should I do if the kolaches burst while baking?
If your kolaches burst, it usually means they were overfilled or not sealed tightly enough. To prevent this, keep the filling to about 2 tablespoons, and pinch the edges well to secure. If they do burst, don’t worry! You can still enjoy the flavors; just treat them like a breakfast casserole!

Can I make these kolaches without dairy?
Absolutely! You can easily adapt the recipe to be dairy-free. Substitute the heavy cream or milk with a dairy-free alternative like almond or oat milk. Use dairy-free cheese too! Just ensure that whatever substitutes you choose melt well to replicate that creamy goodness.

Are these kolaches suitable for kids and pets?
Oh, yes! These Sausage Egg & Cheese Kolaches make a fantastic breakfast for kids. Just be careful with the spices. And for pets, while the ingredients are generally safe, avoid feeding them cheese or sausage in larger quantities. It’s always best to consult with your vet before sharing any human food with your furry friends!

Sausage Egg & Cheese Kolaches

Savory Sausage Egg & Cheese Kolaches for Breakfast Bliss

Delight in these Sausage Egg & Cheese Kolaches, perfect for breakfast or brunch.
Prep Time 20 minutes
Cook Time 17 minutes
Rising Time 30 minutes
Total Time 1 hour 7 minutes
Servings: 12 kolaches
Course: Breakfast
Cuisine: American
Calories: 220

Ingredients
  

For the Dough
  • 12 rolls Frozen Dinner Rolls Rhodes brand works best for ideal texture.
For the Filling
  • 1 package Fully Cooked Breakfast Sausage Turkey sausage is a lighter option.
  • 4 large Eggs Consider using egg whites for a healthier version.
  • 1 cup Heavy Cream or Milk Opt for a dairy-free milk alternative if needed.
  • 1 teaspoon Onion Powder Optional flavor boost.
  • to taste Salt Adjust to suit your preference.
  • to taste Pepper Adjust to suit your preference.
  • 6 slices Cheddar Cheese Feel free to swap with mozzarella or American cheese.
For the Topping
  • 1 tablespoon Everything Bagel Seasoning Experiment with toppings like sesame or poppy seeds.

Equipment

  • mixing bowl
  • Non-Stick Skillet
  • baking sheet
  • plastic wrap
  • parchment paper

Method
 

Preparation Steps
  1. Place 12 frozen dinner rolls on a parchment-lined baking sheet. Cover loosely with plastic wrap and let rise at room temperature for about 20 minutes until they soften and expand.
  2. Whisk together eggs, cream, onion powder (if using), salt, and pepper in a mixing bowl. Cook in a non-stick skillet over medium heat, stirring gently until set. Fold in the defrosted breakfast sausage.
  3. Flatten each risen roll into a 3-inch circle, place half a slice of cheddar cheese, and about 2 tablespoons of the egg and sausage mixture in the center. Pinch the edges to seal.
  4. Preheat your oven to 350°F (175°C). Dip tops of kolaches in everything bagel seasoning, arrange back on the baking sheet, cover, and let rise for another 30 minutes.
  5. Bake for 15 to 17 minutes until golden brown. Allow to cool for 10 minutes before serving.

Notes

These kolaches are versatile; feel free to customize the filling with your favorite ingredients.

Hawaiian Scrambled Eggs with Cheese: A Tropical Breakfast Treat

“Did you say pineapple for breakfast?” I overheard the surprise in my friend’s voice as I introduced my latest creation: Hawaiian Scrambled Eggs with Cheese. This delightful dish brings together the comforting fluffiness of scrambled eggs, savory diced ham, and sweet bursts of pineapple, topped off with gooey melted cheese. With its quick prep time and vibrant flavors, it’s perfect for sleepy mornings or lazy brunches when you want to impress without the fuss. Plus, it’s gluten-free, making it suitable for everyone at your table. Are you ready to discover how easy it is to elevate your breakfast game with these tropical flavors? Let’s dive into this delicious recipe!

Why Are Hawaiian Flavors So Irresistible?

Easy to Prepare: This recipe is perfect for busy mornings, taking just minutes to whip up while bringing a taste of the tropics to your kitchen.

Unique Flavor Profile: The harmonious blend of sweet pineapple and savory ham paired with cheddar cheese creates an explosion of flavors that will surprise and delight.

Versatile Options: Feel free to swap ingredients and get creative—try adding bell peppers or fresh herbs for a personal twist!

Crowd-Pleaser: Whether for breakfast, brunch, or even dinner, these Hawaiian Scrambled Eggs with Cheese are sure to satisfy everyone at your table.

Guilt-Free Indulgence: As a gluten-free dish, it’s an excellent choice for those looking to enjoy delicious food without compromise. Plus, check out our Savory Vegetable Cheese Pancakes for another yummy breakfast option!

Hawaiian Scrambled Eggs with Cheese Ingredients

For the Base

  • 6 large eggs – The star of the dish, providing fluffy texture and protein.
  • Salt and black pepper – Essential seasonings to enhance the delightful flavors.

For the Filling

  • 3/4 cup diced ham (about 4 oz.) – Adds savory depth and protein to the scramble.
  • 1/2 cup diced pineapple – Introduces a hint of sweetness; fresh or canned works well, just drain any canned fruit.
  • 1/2 cup diced tomatoes – Contributes freshness and hydration; feel free to swap with bell peppers for added crunch.

For Cooking

  • 2 teaspoons unsalted butter – Provides richness while cooking; olive oil can be a dairy-free substitute.

For the Cheese

  • 1/2 cup shredded cheddar cheese – Melts beautifully for creamy flavor; consider using mozzarella or Monterey Jack for a different taste.

Embrace the vibrant flavors of these Hawaiian Scrambled Eggs with Cheese as they bring a tropical twist to your breakfast table!

Step‑by‑Step Instructions for Hawaiian Scrambled Eggs with Cheese

Step 1: Prepare the Egg Mixture
Crack 6 large eggs into a mixing bowl, adding a pinch of salt and pepper. Whisk vigorously until the mixture is well-blended and slightly frothy, about 1-2 minutes. Gently fold in 3/4 cup of diced ham, 1/2 cup of diced pineapple, and 1/2 cup of diced tomatoes. This colorful concoction will bring exciting flavors to your Hawaiian Scrambled Eggs with Cheese.

Step 2: Heat the Skillet
Place a medium nonstick skillet over medium heat and add 2 teaspoons of unsalted butter. Allow the butter to melt completely, swirling it around to coat the bottom of the skillet. You’ll know it’s ready when the butter stops foaming and just begins to bubble. This step ensures a rich, buttery flavor while preventing the eggs from sticking.

Step 3: Cook the Eggs
Pour the prepared egg mixture into the skillet, allowing it to spread evenly. Cook undisturbed for about 1 minute until the edges start to set. Use a spatula to gently stir and fold the eggs every 30 seconds, incorporating the cooked parts and letting the runny eggs flow to the bottom. This technique keeps your scrambled eggs fluffy and light.

Step 4: Finish Cooking
As the eggs continue to cook, keep scraping the bottom and sides of the skillet with your spatula. Stop cooking when the eggs are slightly undercooked, about 2-3 minutes total, still creamy and glossy. At this stage, they will have a soft texture, which ensures that they remain flavorful and moist in your Hawaiian Scrambled Eggs with Cheese.

Step 5: Add the Cheese
Evenly sprinkle 1/2 cup of shredded cheddar cheese over the top of the scrambled eggs. Immediately cover the skillet with a lid and let the residual heat melt the cheese, which should take about 1-2 minutes. This step creates a deliciously gooey topping that enhances the overall creaminess and flavor of your Hawaiian Scrambled Eggs with Cheese.

Step 6: Serve and Enjoy
Once the cheese has melted to your liking, remove the skillet from heat. Serve the Hawaiian Scrambled Eggs with Cheese hot, garnishing with additional salt and pepper if desired. Enjoy this delightful dish with toasted bread or fresh fruit for a balanced breakfast experience!

Make Ahead Options

These Hawaiian Scrambled Eggs with Cheese are perfect for busy mornings, allowing you to prep ahead and save time. You can whisk the eggs and mix in the diced ham, pineapple, and tomatoes up to 24 hours in advance. Simply store the mixture in an airtight container in the refrigerator to keep it fresh. When you’re ready to serve, just melt the butter in the skillet, pour in the egg mixture, and cook as instructed. Adding the cheese should be the final step—sprinkling it on when the eggs are nearly set—ensuring it melts beautifully for creamy, delicious results. Enjoy the same delightful flavors without the morning rush!

How to Store and Freeze Hawaiian Scrambled Eggs with Cheese

Fridge: Store leftovers in an airtight container for up to 3 days. Make sure they cool down completely before sealing to prevent condensation.

Freezer: While it’s best to enjoy Hawaiian Scrambled Eggs with Cheese fresh, you can freeze them for up to 2 months. Portion them into airtight bags and squeeze out excess air before sealing.

Reheating: Reheat gently in a nonstick skillet over low heat, stirring occasionally until warmed through. Avoid high heat to keep the eggs from becoming rubbery.

Serving Tip: For an added touch, freshen up the dish with a sprinkle of herbs or a dash of hot sauce when reheating and serving.

Variations & Substitutions for Hawaiian Scrambled Eggs with Cheese

Feel free to make this dish your own with these delightful twists! Each option adds a unique flair to your Hawaiian Scrambled Eggs with Cheese.

  • Bacon Swap: Substitute diced ham with crispy bacon for a smoky, rich flavor that’s hard to resist. The added crunch pairs beautifully with creamy eggs.

  • Veggie Boost: Replace the pineapple with diced bell peppers or zucchini for a fresh, crunchy texture. This swap adds color and nutrition, creating a more wholesome breakfast.

  • Spice It Up: Add a pinch of red pepper flakes or diced jalapeños for a spicy kick. The heat provides an exciting contrast to the sweet pineapple.

  • Herb Infusion: Incorporate fresh herbs like cilantro or green onions just before serving. Their vibrant flavors brighten the dish and give it a garden-fresh taste.

  • Cheese Variety: Try different cheeses such as feta or pepper jack for a new taste experience. Each cheese brings its distinct flavor profile that contributes to the overall dish.

  • Dairy-Free Delight: Swap the butter for olive oil and use a plant-based cheese alternative to create a dairy-free version. Enjoy the same comforting flavors without the dairy!

  • Breakfast Burrito: Transform your scrambled eggs into a filling for a breakfast burrito. Wrap them in a gluten-free tortilla with additional toppings like avocado for a satisfying meal on the go.

For more creative twists, check out our Savory Vegetable Cheese Pancakes or explore options with a delicious Sizzling Rice Wrapped Hotdogs with Cheese to keep your breakfast routine exciting!

Expert Tips for Hawaiian Scrambled Eggs with Cheese

  • Egg Whisking: Whisk the eggs thoroughly for fluffiness: Make sure to whisk until the mixture is well-blended for a light, airy texture.

  • Avoid Overcooking: Undercook slightly: Remove the eggs from heat when they’re still creamy; they’ll continue cooking and set as they rest.

  • Nonstick Skillet: Use the right cookware: A nonstick skillet ensures that your Hawaiian Scrambled Eggs with Cheese slide out easily and don’t stick.

  • Ingredient Variations: Swap with ease: Experiment with different proteins like bacon or alternative cheeses to personalize your dish and keep it exciting.

  • Storing Leftovers: Store properly: Keep leftovers in an airtight container in the fridge for up to 3 days—reheat gently to preserve texture and flavor.

What to Serve with Hawaiian Scrambled Eggs with Cheese?

A delightful spread enhances the tropical flavors of this breakfast creation, making every meal an experience to savor.

  • Buttery Toast: Toasted bread provides a crunchy contrast to the creamy eggs, making every bite delightful. Add a smear of avocado or a dollop of jam for an extra touch!

  • Fresh Fruit Salad: A side of vibrant fruit salad, featuring melons and berries, balances the savory notes of the eggs with refreshing sweetness, keeping your meal bright and invigorating.

  • Crispy Hash Browns: Golden-brown hash browns add a satisfying crunch and richness to the plate—perfect for soaking up any runny egg goodness.

  • Coconut Smoothie: For a tropical twist, blend coconut milk with banana and pineapple. This creamy drink complements the Hawaiian flavors remarkably.

  • Herbed English Muffins: Serve warm, toasted English muffins topped with a sprinkle of fresh herbs. Their hearty texture adds a lovely bite alongside the fluffy eggs.

  • Spinach Salad: A light spinach salad with a zesty dressing adds greens to your meal and provides a refreshing counterpoint to the richness of the cheese eggs.

  • Coffee or Tea: Pair your meal with a warm cup of coffee or herbal tea to enhance the breakfast experience—perfect for leisurely brunches!

Hawaiian Scrambled Eggs with Cheese Recipe FAQs

How do I select ripe pineapples for this recipe?
Absolutely! When choosing a fresh pineapple, look for ones that are slightly firm, with a sweet aroma at the base. The skin should be vibrant yellow to golden, avoiding any dark spots or blemishes, which can indicate overripeness. A ripe pineapple will also give a little when you press it gently.

What’s the best way to store leftovers of Hawaiian Scrambled Eggs with Cheese?
Very good question! Store leftovers in an airtight container in the refrigerator for up to 3 days. Ensure they’ve cooled completely before sealing to prevent moisture buildup, which can make the eggs soggy. When ready to eat, simply reheat in a nonstick skillet over low heat for best results.

Can I freeze Hawaiian Scrambled Eggs with Cheese?
Yes! While fresh is best, you can freeze Hawaiian Scrambled Eggs with Cheese for up to 2 months. I recommend portioning them into airtight freezer bags and pressing out the excess air before sealing. Label the bags with the date, and when you’re ready to indulge, thaw them in the fridge overnight before gently reheating.

What should I do if my scrambled eggs turn out rubbery?
Don’t worry; it happens to the best of us! Rubberiness typically indicates that the eggs were overcooked. To achieve fluffy scrambled eggs, ensure you remove them from heat while they are still slightly creamy, as they’ll continue cooking off the heat. Also, keep the heat low and stir gently, allowing the eggs to cook evenly without drying out.

Are there any dietary considerations I should be aware of?
Absolutely! This dish is gluten-free due to its simple ingredients. If you’re serving it to someone with allergies, be sure to check that the ham and cheese are gluten-free as well. For dairy-free versions, simply substitute the butter with olive oil and cheese with a dairy-free alternative. It’s always best to cater to any dietary restrictions to ensure everyone can enjoy your delicious Hawaiian Scrambled Eggs with Cheese!

Hawaiian Scrambled Eggs with Cheese

Hawaiian Scrambled Eggs with Cheese: A Tropical Breakfast Treat

Hawaiian Scrambled Eggs with Cheese combines fluffy scrambled eggs, savory ham, and sweet pineapple for a vibrant breakfast treat.
Prep Time 5 minutes
Cook Time 10 minutes
Total Time 15 minutes
Servings: 2 plates
Course: Breakfast
Cuisine: Hawaiian
Calories: 350

Ingredients
  

For the Base
  • 6 large eggs The star of the dish, providing fluffy texture and protein.
  • Salt Essential seasoning to enhance the flavors.
  • Black pepper Essential seasoning to enhance the flavors.
For the Filling
  • 3/4 cup diced ham Adds savory depth and protein to the scramble.
  • 1/2 cup diced pineapple Introduces a hint of sweetness; fresh or canned works well.
  • 1/2 cup diced tomatoes Contributes freshness; feel free to swap with bell peppers.
For Cooking
  • 2 teaspoons unsalted butter Provides richness while cooking.
For the Cheese
  • 1/2 cup shredded cheddar cheese Melts beautifully for creamy flavor.

Equipment

  • nonstick skillet
  • mixing bowl

Method
 

Step-by-Step Instructions
  1. Crack 6 large eggs into a mixing bowl, adding a pinch of salt and pepper. Whisk vigorously until well-blended and slightly frothy.
  2. Fold in 3/4 cup diced ham, 1/2 cup diced pineapple, and 1/2 cup diced tomatoes.
  3. Place a medium nonstick skillet over medium heat and add 2 teaspoons of unsalted butter. Allow the butter to melt completely.
  4. Pour the egg mixture into the skillet and cook undisturbed for about 1 minute until the edges start to set.
  5. Gently stir and fold the eggs every 30 seconds, incorporating the cooked parts.
  6. Stop cooking when the eggs are slightly undercooked, about 2-3 minutes total, still creamy and glossy.
  7. Sprinkle 1/2 cup shredded cheddar cheese over the top and cover the skillet with a lid. Let the cheese melt for 1-2 minutes.
  8. Remove from heat, serve hot, and garnish with additional salt and pepper if desired.

Notes

This dish is perfect for breakfast, brunch, or even a light dinner. Experiment with ingredients for personal twists!

Irresistible BBQ Chicken Sandwich with a Spicy Twist

Stepping into my kitchen, I’m greeted by the irresistible smokiness of chipotle and the vibrant colors of fresh ingredients. As I load up my grill, the thought of a Spicy Chipotle BBQ Chicken Sandwich with Mango Guacamole makes my mouth water. This isn’t just a meal; it’s an adventure in bold flavors and exciting textures. With juicy chicken drizzled in sweet BBQ sauce, topped with caramelized pineapple, and enveloped in creamy mango guacamole, this recipe promises to transform your ordinary weeknight dinner into a flavorful festivity. Plus, it comes together quickly, making it perfect for busy nights, and it’s a guaranteed crowd-pleaser that everyone will adore. Are you ready to elevate your sandwich game?

Why is this BBQ Chicken Sandwich special?

Bold flavors collide in this Spicy Chipotle BBQ Chicken Sandwich, offering a unique twist on a classic favorite. Quick and easy to whip up, it’s perfect for busy weeknights. Layered goodness combines juicy chicken, sweet BBQ sauce, and creamy mango guacamole, ensuring every bite is a delight. A crowd-pleaser, this dish pairs wonderfully with sides like coleslaw or sweet potato fries. For more exciting chicken recipes, check out our Savory Chicken Cheesy or Honey Chili Chicken.

BBQ Chicken Sandwich Ingredients

• Discover the must-have ingredients for the ultimate BBQ Chicken Sandwich.

For the Chicken
Chicken Breasts – The star of this sandwich; pound thin for even cooking.
Chipotle Chili Powder – Adds that signature smoky heat; substitute regular chili powder for a milder flavor.
Sweet Barbecue Sauce – Elevates the taste with sweetness and tang; choose your favorite or a homemade version.

For the Toppings
Pineapple Slices – Grilled to add a touch of sweetness; fresh or canned works well.
Monterey Jack Cheese – Provides creaminess; feel free to substitute with Swiss or cheddar.
Avocado – The base for creamy mango guacamole; ripe avocados are the best choice.

For the Guacamole
Mango – Sweetens the guacamole wonderfully; any ripe mango will do.
Lime Juice – Brings freshness and acidity; fresh lime juice is preferred for the best flavor.
Sour Cream & Mayonnaise – Combine to create a smooth guacamole texture; Greek yogurt can work as a substitute.

Seasonings
Garlic Powder & Ground Cumin – Optional but highly recommended for flavor depth.
Salt and Pepper – Essential for seasoning to taste.

Now you have all the essential ingredients to create your very own BBQ Chicken Sandwich—an easy, delicious option for your next meal!

Step‑by‑Step Instructions for Spicy Chipotle BBQ Chicken Sandwich

Step 1: Pound the Chicken
Begin by placing the chicken breasts between two sheets of plastic wrap. Using a meat mallet, pound them down to an even thickness of about ¾ inch. This step ensures uniform cooking and juiciness. It’s important to tenderize the chicken so it absorbs the flavors of the rub you’ll create next.

Step 2: Prepare the Chipotle Wet Rub
In a medium bowl, combine chipotle chili powder, regular chili powder, ground cumin, smoked paprika, garlic powder, olive oil, and fresh lime juice. Mix until a smooth paste forms. This wet rub packs a punch and will coat the chicken beautifully. Set aside the prepared rub for the next step as you look forward to those bold flavors unfolding.

Step 3: Marinate the Chicken
Coat each chicken breast evenly with your chipotle wet rub, ensuring every inch is covered. For the best flavor, let the chicken marinate in the refrigerator for at least 30 minutes; however, if you have time, up to 8 hours will elevate the flavor even further. The longer it marinates, the bolder the taste of your BBQ chicken sandwich.

Step 4: Preheat the Grill
As the chicken marinates, preheat your grill on medium-high heat for about 10-15 minutes. Brush the grates lightly with olive oil to prevent the chicken from sticking. A hot grill is essential for achieving those perfect grill marks and mouthwatering char on your chicken breasts, which will enhance their flavor significantly.

Step 5: Grill the Chicken
Place the marinated chicken on the preheated grill and cook for approximately 6-7 minutes on each side. The chicken is done when it reaches an internal temperature of 160°F and has nice grill marks. Once cooked, let it rest for 5-10 minutes off the heat, allowing the juices to redistribute and keep your sandwich juicy and tender.

Step 6: Grill the Pineapple
While the chicken is resting, add pineapple slices to the grill. Grill each side for about 2-3 minutes or until they become caramelized and golden. The sweetness of the grilled pineapple adds a deliciously tropical flavor to your Spicy Chipotle BBQ Chicken Sandwich, balancing the spice beautifully.

Step 7: Make the Mango Guacamole
In a bowl, mash ripe avocado until creamy. Mix in diced mango, fresh lime juice, sour cream, mayonnaise, garlic powder, ground cumin, and season with salt and pepper to taste. Stir well until combined. This creamy mango guacamole not only amplifies the flavors but also adds a rich texture to your BBQ chicken sandwich.

Step 8: Toast the Burger Buns
Preheat your grill or a skillet on medium heat. Lightly butter the insides of the burger buns and toast them for about 2-3 minutes until golden brown. Toasting the buns adds a delightful crunch and prevents them from getting soggy when layered with the juicy grilled chicken and toppings.

Step 9: Assemble the Sandwiches
Start by placing a grilled chicken breast on the bottom half of each toasted bun. Top with a slice of Monterey Jack cheese, a piece of caramelized pineapple, and a generous scoop of mango guacamole. Cap it with the top half of the bun and get ready to savor an unforgettable Spicy Chipotle BBQ Chicken Sandwich packed with flavor in every bite.

What to Serve with Spicy Chipotle BBQ Chicken Sandwich

Elevate your BBQ experience with sides that beautifully complement the bold flavors of this sandwich.

  • Creamy Coleslaw: This crunchy, tangy salad balances the spice of the sandwich, adding refreshing coolness with each bite. A perfect match!

  • Sweet Potato Fries: Crispy, slightly sweet, and irresistibly delicious, these fries provide a delightful contrast to the savory chicken and sauce.

  • Grilled Corn on the Cob: Charred edges and buttery goodness create a smoky sweetness that ties all components together, making for an ideal summer pairing.

  • Garden Salad: A light salad with fresh greens and vibrant veggies offers a crisp, refreshing counterpoint to the richness of the chicken sandwich.

  • Mango Salsa: Velvety pieces of fresh mango mixed with zesty lime and cilantro introduces a tropical twist that mirrors the flavors of your guacamole.

  • Crisp Pickles: Sour and crunchy, pickles add a satisfying bite of acidity, cutting through the richness of the sandwich’s creamy components.

  • Lemonade or Iced Tea: A chilled glass of lemonade or refreshing iced tea provides the perfect sweetness to wash it all down, making every meal a celebration!

BBQ Chicken Sandwich Variations

Feel free to get creative with this delicious recipe and tailor it to your taste buds.

  • Cheese Swap: Use Swiss or cheddar instead of Monterey Jack for a different creamy profile. Each cheese adds its own unique richness.

  • Vegetable Twist: Add grilled bell peppers or zucchini for an extra crunch and a burst of color. These veggies enhance both flavor and nutrition.

  • Low-Carb Alternative: Wrap your chicken and toppings in large lettuce leaves for a refreshing, low-carb option. It’s crisp, light, and oh-so-satisfying!

  • Mild Heat: If you prefer less spice, replace the chipotle chili powder with a mild paprika for a smokey but gentle flavor. It keeps the essence without overwhelming heat.

  • Tropical Kick: Substitute the grilled pineapple with slices of grilled peach or mango for a different touch of sweetness. Each fruit brings a unique flavor profile that elevates the sandwich.

  • Zesty Guacamole: Add diced jalapeño to the mango guacamole for a spicy twist that packs an extra punch. It’s perfect for those who love a bit of heat!

  • Herbed Delight: Mix fresh cilantro or basil into the guacamole for a vibrant herbal note that brightens each bite. The fresh herbs make everything feel bright and lively.

  • Savory Additions: Consider adding crispy bacon strips for a smoky crunch that complements the flavors beautifully. Who can resist the allure of bacon?

Don’t forget to pair your sandwiches with a side of coleslaw or sweet potato fries to round out your meal. And for more chicken-inspired dishes, check out our Homemade Chicken Pot and Pure Nourishing Chicken recipes. Enjoy these exciting variations!

How to Store and Freeze BBQ Chicken Sandwich

Fridge: Store leftover chicken and toppings separately in airtight containers for up to 3 days. This prevents sogginess and maintains the flavors of your BBQ chicken sandwich.

Freezer: For longer storage, freeze grilled chicken wrapped tightly in plastic wrap and then in foil for up to 3 months. Thaw in the refrigerator before reheating.

Reheating: Reheat the chicken and pineapple in a skillet over medium heat or in the microwave until heated through. Ensure the chicken reaches an internal temperature of 165°F before consuming.

Guacamole Tip: To prevent oxidation, store mango guacamole in an airtight container with plastic wrap pressed against the surface for up to 1 day. The flavor will still be fresh and ready to enjoy!

Make Ahead Options

These Spicy Chipotle BBQ Chicken Sandwiches are a fantastic choice for meal prep! You can marinate the chicken breasts with the chipotle wet rub up to 24 hours in advance, keeping them in the refrigerator to enhance their flavor. The mango guacamole can also be prepared a few hours ahead; just be sure to store it in an airtight container to prevent browning. Additionally, slice the pineapple and toast the burger buns beforehand, ensuring they’re ready to go. When it’s time to serve, quickly grill the marinated chicken and pineapple, assemble the sandwiches, and enjoy freshly made deliciousness with minimal effort on busy weeknights!

Expert Tips for BBQ Chicken Sandwiches

  • Pound Evenly: Always pound the chicken to an even thickness to ensure it cooks uniformly and stays juicy. Uneven pieces can lead to dry spots while grilling.

  • Use a Thermometer: For perfectly cooked chicken, use an instant-read thermometer. Remove it from the grill at 160°F since it continues to cook while resting, achieving the safe 165°F.

  • Let It Rest: After grilling, allow the chicken to rest for 5-10 minutes. This step locks in juices and enhances the flavor of your BBQ chicken sandwich.

  • Avoid Soggy Buns: Toast the burger buns before assembling to create a barrier against the juices. This keeps your sandwich from getting soggy and adds a delightful crunch.

  • Customize Flavors: Experiment with toppings! Add grilled veggies or switch up the cheese to personalize your BBQ chicken sandwich and make it your own.

Spicy Chipotle BBQ Chicken Sandwich Recipe FAQs

How do I select ripe avocados for the guacamole?
Absolutely! When choosing avocados for your mango guacamole, look for ones that yield slightly to gentle pressure. They should be dark green or almost black in color and free of dark spots. If you find avocados that are too firm, simply place them in a brown paper bag at room temperature for a day or two until they soften.

How can I store leftovers safely?
Very! Store leftover chicken and toppings in separate airtight containers in the fridge for up to 3 days. This helps keep the sandwich fresh and avoids sogginess. To keep your mango guacamole vibrant, press plastic wrap against the surface to minimize oxidation before sealing.

Can I freeze the grilled chicken?
The more the merrier! Yes, you can freeze grilled chicken. Wrap the cooled chicken tightly in plastic wrap, then in foil or store in a freezer bag to prevent freezer burn. It can last in the freezer for up to 3 months. When you’re ready to eat it, simply thaw in the fridge overnight and reheat in a skillet or microwave.

What should I do if my sandwich gets too soggy?
No worries! To prevent your BBQ chicken sandwich from becoming soggy, make sure to toast the burger buns lightly before assembling. You can also layer lettuce or other crispy vegetables between the bun and the juicy toppings. If needed, use a slotted spoon for the guacamole to control moisture.

Can this recipe be adjusted for dietary restrictions?
Absolutely! If you’re considering allergies, you can use dairy-free cheese alternatives in place of Monterey Jack and substitute the mayonnaise with a dairy-free option. For a low-carb version, skip the buns and use large leaves of lettuce to wrap the fillings. Feel free to customize the ingredients based on your family’s preferences and dietary needs.

How long will the guacamole stay fresh?
Very! The mango guacamole can be stored in the refrigerator for up to 1 day. To keep it fresh and prevent browning, press plastic wrap directly onto the surface of the guacamole before sealing in an airtight container. You can also add a bit of extra lime juice to help preserve its vibrant color and flavor.

BBQ Chicken Sandwich

Irresistible BBQ Chicken Sandwich with a Spicy Twist

This BBQ Chicken Sandwich features bold flavors with a spicy twist, perfect for a quick weeknight meal.
Prep Time 20 minutes
Cook Time 30 minutes
Marinating Time 30 minutes
Total Time 1 hour 20 minutes
Servings: 4 sandwiches
Course: Lunch
Cuisine: American
Calories: 500

Ingredients
  

For the Chicken
  • 4 pieces Chicken Breasts Pound thin for even cooking
  • 1 tablespoon Chipotle Chili Powder For smoky heat
  • 1 cup Sweet Barbecue Sauce Use your favorite or homemade
For the Toppings
  • 4 slices Pineapple Slices Grill until caramelized
  • 4 slices Monterey Jack Cheese Can substitute with Swiss or cheddar
  • 2 pieces Avocado Ripe avocados for the guacamole
For the Guacamole
  • 1 piece Mango Ripe
  • 1 tablespoon Lime Juice Fresh preferred
  • 1 cup Sour Cream
  • 1/2 cup Mayonnaise Can substitute with Greek yogurt
Seasonings
  • 1 teaspoon Garlic Powder Optional but highly recommended
  • 1 teaspoon Ground Cumin Optional but highly recommended
  • to taste Salt
  • to taste Pepper

Equipment

  • grill
  • Meat mallet
  • Medium bowl
  • plastic wrap
  • Skillet

Method
 

Preparation
  1. Pound the chicken breasts between plastic wrap to an even thickness of about ¾ inch.
  2. In a medium bowl, combine chipotle chili powder, ground cumin, smoked paprika, garlic powder, olive oil, and lime juice to form a wet rub.
  3. Coat the chicken with the chipotle wet rub and marinate in the refrigerator for at least 30 minutes.
  4. Preheat the grill on medium-high for about 10-15 minutes.
  5. Grill the marinated chicken for 6-7 minutes on each side until internal temperature reaches 160°F.
  6. Grill pineapple slices until caramelized, about 2-3 minutes each side.
  7. Mash avocado in a bowl, mix in diced mango, lime juice, sour cream, mayonnaise, garlic powder, and cumin.
  8. Toast burger buns lightly buttered on the insides for 2-3 minutes on the grill.
  9. Assemble by layering grilled chicken, Monterey Jack cheese, caramelized pineapple, and mango guacamole on the toasted bun.

Notes

For best results, marinate chicken up to 8 hours and toast buns to prevent sogginess.

Decadent Midnight Fudge Cake That’ll Satisfy Your Sweet Cravings

As the clock strikes midnight, a delightful scent wafts through the kitchen, beckoning chocolate enthusiasts from their dreams. This isn’t just any dessert; it’s my Midnight Fudge Cake, an exquisitely rich chocolate cake that promises to satisfy even the most intense late-night cravings. Easy to make, this decadent treat pairs moist layers with a velvety fudge frosting that’s truly irresistible for any chocolate lover. Whether you’re celebrating a special occasion or simply indulging on a cozy evening at home, this cake is sure to impress your family and friends. Plus, it’s perfect for making ahead—store it and enjoy slices throughout the week. Are you ready to dive into the ultimate chocolate experience?

Why is Midnight Fudge Cake So Irresistible?

Decadent Delight: One bite of this cake and you’ll understand why it’s a chocolate lover’s dream. Simplicity: With straightforward instructions, even beginner bakers can create this masterpiece. Versatile Serving Options: Pair it with a scoop of ice cream or fresh berries for a delightful contrast. Rich Textures: Enjoy the moist, fudgy cake topped with creamy frosting. Make-Ahead Magic: Perfect for prepping in advance, it stores well in the fridge—allowing for sweet indulgence all week long. This is not just dessert; it’s a celebration!

Midnight Fudge Cake Ingredients

For the Cake

  • All-purpose flour – Provides structure to the cake; substitute with gluten-free flour blend if needed.
  • Granulated sugar – Adds the perfect level of sweetness and moisture.
  • Unsweetened cocoa powder – Gives the cake its rich chocolate flavor; Dutch-processed is best for depth.
  • Baking powder – Acts as a leavening agent to keep the cake light and fluffy.
  • Baking soda – Works hand in hand with acidic ingredients to ensure the cake rises beautifully.
  • Salt – Enhances flavor by balancing the sweetness.
  • Buttermilk – Adds moisture and tenderness; you can substitute it with milk mixed with vinegar or lemon juice.
  • Vegetable oil – Keeps the cake wonderfully moist; use melted butter for an even richer experience.
  • Eggs – Essential for binding and adding moisture to the cake.
  • Vanilla extract – Infuses the cake with aromatic complexity.
  • Boiling water – Activates the cocoa powder, amplifying the cake’s richness.

For the Frosting

  • Unsalted butter – Forms the creamy base of the frosting; make sure it’s softened for easy blending.
  • Powdered sugar – Sweetens and gives a smooth texture to the frosting.
  • Milk – Adjusts the frosting’s consistency; whole or low-fat milk works well.
  • Pinch of salt – Mainly to balance the sweetness in frosting.

For Topping

  • Chocolate shavings – Elevate the presentation and add extra chocolatey goodness.
  • Fresh berries – A refreshing contrast that enhances flavor and visual appeal.
  • Chopped nuts – Provide a delightful crunch and textural contrast.

Indulge in the magic of the Midnight Fudge Cake, and enjoy the deliciousness that awaits!

Step‑by‑Step Instructions for Midnight Fudge Cake

Step 1: Preheat and Prepare
Begin by preheating your oven to 350°F (175°C). Grease and flour two 9-inch round cake pans to prevent sticking. This preparation ensures that your Midnight Fudge Cake layers will release easily, helping to maintain their perfect shape after baking.

Step 2: Mix the Dry Ingredients
In a large mixing bowl, whisk together the all-purpose flour, granulated sugar, unsweetened cocoa powder, baking powder, baking soda, and salt. This dry blend should be well combined to evenly distribute the leavening agents and flavorings, setting a rich base for your cake.

Step 3: Combine the Wet Ingredients
In a separate bowl, whisk together the buttermilk, vegetable oil, eggs, and vanilla extract until smooth. This combination of wet ingredients enhances the moisture and richness of your Midnight Fudge Cake, creating a harmonious balance of flavors to complement the dry mix.

Step 4: Mix Wet and Dry Ingredients
Carefully combine the wet and dry ingredients in the large mixing bowl. Using a stand mixer on low speed, mix until just combined—be cautious not to overmix. The goal is to create a lump-free batter while keeping it tender, which ensures your cake stays soft and moist.

Step 5: Add Boiling Water
Pour in the boiling water, mixing it into the batter until smooth. The batter will be quite thin, but this is perfect for a fudgy texture. The heat of the water activates the cocoa powder, intensifying the chocolate flavor of your Midnight Fudge Cake, creating a decadent base.

Step 6: Bake the Cake
Divide the thin batter evenly between the prepared cake pans. Bake in your preheated oven for about 30 to 35 minutes, or until a toothpick inserted in the center comes out clean. Watch for a slight spring back when gently pressed on top—this indicates the cake is perfectly done.

Step 7: Cool the Cakes
Once baked, remove the cake pans from the oven and let them cool for about 10 minutes. After cooling slightly, carefully transfer the cakes to wire racks to cool completely. This step is crucial to ensure that your Midnight Fudge Cake layers remain moist and easy to frost.

Step 8: Prepare the Fudge Frosting
While the cakes cool, beat the softened unsalted butter in a mixing bowl until fluffy. Gradually mix in the powdered sugar and cocoa powder until well blended, creating a rich frosting base. This is where your cake will gain its luscious, velvety finish.

Step 9: Adjust the Frosting
Add milk and vanilla extract to the frosting mixture, beating until smooth. If the frosting is too thick, add a little more milk to reach your desired consistency. This creamy frosting will perfectly complement the moist layers of your Midnight Fudge Cake, enhancing its chocolatey allure.

Step 10: Frost the Cake
Once the cakes have completely cooled, use a serrated knife to level the tops if necessary. Spread a generous layer of frosting between the cake layers and cover the top and sides of the cake. This ensures that each bite is enveloped in that delightful fudge flavor.

Step 11: Garnish and Chill
Finish your Midnight Fudge Cake with decorative toppings, such as chocolate shavings, fresh berries, or chopped nuts for added texture. Refrigerate the cake for at least 30 minutes before serving to allow the frosting to set, making it easier to slice while maintaining its deliciously luxurious look.

Midnight Fudge Cake Variations & Substitutions

Feel free to get creative with your Midnight Fudge Cake! There’s always room for personal twists that brighten up your dessert experience.

  • Gluten-Free: Substitute all-purpose flour with a gluten-free flour blend to cater to dietary needs. Enjoy the same deliciousness, minus the gluten!

  • Dairy-Free: Use a non-dairy milk like almond or oat milk mixed with lemon juice instead of buttermilk. This works perfectly, giving you a creamy texture without dairy.

  • Nutty Delight: Fold in chopped walnuts or pecans into the batter for an extra crunch. These will add texture and a delightful nutty flavor, elevating your cake.

  • Espresso Infusion: Stir in 1-2 tablespoons of instant coffee or espresso powder to the dry ingredients. This will deepen the chocolate flavor, creating a coffee-chocolate harmony that delights the senses.

  • Peanut Butter Swirl: Add dollops of peanut butter into the batter before baking and swirl it with a knife. This creates a beautiful marbled effect while introducing a rich, nutty flavor.

  • Fruity Accents: Top the cake with fresh strawberries or raspberries for a refreshing touch. The tartness of the berries truly complements the richness of the fudge.

  • Salted Caramel Drizzle: Drizzle warmed salted caramel sauce over the frosted cake for an indulgent finish. This sweet-salty combination is simply irresistible!

For more delightful dessert inspiration, check out Nutty Vanilla Cake and Strawberry Cheesecake Dump that are perfect for any occasion!

Make Ahead Options

The Midnight Fudge Cake is a fantastic dessert for meal prep enthusiasts! You can bake the cake layers up to 3 days in advance. Simply let them cool completely, then wrap each layer tightly in plastic wrap and refrigerate. The fudge frosting can also be made ahead; store it in an airtight container in the fridge for up to 5 days. When you’re ready to serve, frost the cake and let it sit at room temperature for about 30 minutes before slicing. This ensures that the cake maintains its moist texture and the frosting remains creamy, offering that same indulgent experience you crave! Just like fresh out of the oven!

Expert Tips for Midnight Fudge Cake

  • Ingredient Temperature: Ensure all ingredients are at room temperature; this helps create a smooth batter for your Midnight Fudge Cake and a tender crumb.

  • Mixing Care: Don’t overmix the batter once wet and dry ingredients are combined; this will prevent your cake from becoming tough, keeping it delightfully moist.

  • Baking Check: Start checking for doneness a few minutes early; cakes should spring back when lightly pressed and a skewer should come out clean to avoid overbaking.

  • Frosting Consistency: Adjust frosting thickness with milk; aim for a smooth but thick consistency that spreads easily over the cake.

  • Cool Completely: Allow cake layers to cool completely before frosting; this prevents melting and helps achieve a perfect, even layer of fudge frosting.

How to Store and Freeze Midnight Fudge Cake

Room Temperature: You can leave your Midnight Fudge Cake at room temperature for up to 1 day if well-covered in a cake dome or cloche to maintain its moisture.

Fridge: Store the cake in an airtight container for up to 3 days. Allow the cake to come to room temperature before serving for the best flavor and texture.

Freezer: Freeze individual slices of the Midnight Fudge Cake wrapped in plastic wrap and then in foil for up to 3 months. Thaw overnight in the refrigerator before enjoying.

Reheating: For a warm treat, microwave a slice for about 15-20 seconds. This will enhance the fudgy experience, especially when paired with a scoop of ice cream!

What to Serve with Midnight Fudge Cake?

Imagine the sweet aroma of chocolate wafting through your space as you create an unforgettable dining experience alongside your Midnight Fudge Cake.

  • Vanilla Ice Cream: A classic pairing, the creamy vanilla perfectly balances the rich chocolate, creating a delightful contrast with each bite.
  • Fresh Berries: Strawberries or raspberries brighten up the plate while adding a burst of freshness that complements the chocolate’s intensity.
  • Espresso: A rich cup of espresso enhances the cake’s chocolate notes, elevating the dessert experience to sophisticated heights.
  • Chocolate Ganache: Intensify the chocolate flavor by drizzling warm ganache over the slices for an extra indulgent touch.
  • Whipped Cream: Light and airy, whipped cream adds a luscious texture that softens the richness of the cake, enhancing its appeal.
  • Nuts: A sprinkle of toasted nuts like pecans or walnuts adds a crunchy element, deepening the overall flavor.
  • Salted Caramel Sauce: Drizzling this sweet-and-salty sauce brings a delightful dimension to the Midnight Fudge Cake, creating layers of flavor.
  • Mint Tea: The refreshing qualities of mint tea cleanse the palate between bites, making sure each taste is as enjoyable as the last.
  • Chocolate Mousse: Serve alongside rich chocolate mousse to satisfy the most ardent chocolate enthusiasts and create a decadent dessert table.

Midnight Fudge Cake Recipe FAQs

How do I choose the best cocoa powder for Midnight Fudge Cake?
I always recommend using high-quality unsweetened cocoa powder for the richest flavor. Dutch-processed cocoa adds depth to your cake, enhancing its chocolatey taste. Look for cocoa that’s vibrant and aromatic—this will significantly elevate your baking!

How should I store my Midnight Fudge Cake for freshness?
To keep your cake fresh, store it in an airtight container in the refrigerator for up to 3 days. Make sure to allow it to come to room temperature before serving for the best texture and flavor. Alternatively, you can cover it with plastic wrap and leave it at room temperature for up to 1 day.

Can I freeze my Midnight Fudge Cake?
Absolutely! To freeze your cake, first, ensure it is fully cooled. Wrap individual slices in plastic wrap, followed by a layer of foil, and store them in the freezer for up to 3 months. To enjoy, simply thaw a slice overnight in the refrigerator and warm it in the microwave for about 15-20 seconds for that fresh-out-of-the-oven taste!

What should I do if my cake sticks to the pan?
To prevent sticking, ensure you grease and flour your cake pans thoroughly. If your cake does stick, gently run a knife around the edges and carefully invert the pan while giving it a gentle tap to release it. If some cake remains stuck, you can patch it back with frosting—it’s a great way to add a rustic touch to your presentation!

Is there a gluten-free option for the Midnight Fudge Cake?
Yes! You can substitute the all-purpose flour with a gluten-free flour blend. Make sure to check that it includes a binding agent like xanthan gum, which will help maintain the cake’s structure and moisture without gluten.

Are there any dietary considerations for pets or allergies?
Yes, this cake contains ingredients that are harmful to pets, including chocolate, which is toxic to dogs and cats. Please keep it safely stored away from pets. Additionally, it contains common allergens like eggs and dairy—consider alternatives such as egg replacer or plant-based milk for those with allergies.

Midnight Fudge Cake

Decadent Midnight Fudge Cake That'll Satisfy Your Sweet Cravings

Indulge in the Midnight Fudge Cake, a rich chocolate dessert perfect for satisfying your cravings.
Prep Time 20 minutes
Cook Time 35 minutes
Cooling Time 10 minutes
Total Time 1 hour 5 minutes
Servings: 12 slices
Course: Dessert
Cuisine: American
Calories: 350

Ingredients
  

For the Cake
  • 2 cups all-purpose flour substitute with gluten-free flour blend if needed
  • 2 cups granulated sugar adds sweetness
  • 3/4 cup unsweetened cocoa powder Dutch-processed is best for depth
  • 1 tbsp baking powder leavening agent
  • 1 tsp baking soda helps cake rise
  • 1 tsp salt enhances flavor
  • 1 cup buttermilk can substitute with milk mixed with vinegar or lemon juice
  • 1/2 cup vegetable oil can use melted butter for richer taste
  • 2 large eggs for binding
  • 2 tbsp vanilla extract for flavor
  • 1 cup boiling water activates cocoa powder
For the Frosting
  • 1 cup unsalted butter softened
  • 3 cups powdered sugar for sweetness
  • 1/4 cup milk whole or low-fat
  • 1 pinch salt to balance sweetness
For Topping
  • 1/2 cup chocolate shavings for decoration
  • 1 cup fresh berries optional
  • 1/2 cup chopped nuts optional

Equipment

  • oven
  • mixing bowls
  • whisk
  • Stand mixer
  • cake pans
  • Wire racks

Method
 

Preparation
  1. Preheat your oven to 350°F (175°C) and grease and flour two 9-inch round cake pans.
  2. In a large mixing bowl, whisk together the dry ingredients, including flour, sugar, cocoa powder, baking powder, baking soda, and salt.
  3. In a separate bowl, whisk together the buttermilk, vegetable oil, eggs, and vanilla extract until smooth.
  4. Combine the wet and dry ingredients, mixing until just combined—be cautious not to overmix.
  5. Pour in the boiling water and mix until smooth; the batter will be thin.
  6. Divide the batter evenly between the cake pans and bake for 30 to 35 minutes, or until a toothpick comes out clean.
  7. Let the cakes cool in the pans for 10 minutes, then transfer them to wire racks to cool completely.
  8. Beat the softened butter in a mixing bowl until fluffy, then gradually add powdered sugar and cocoa powder until well blended.
  9. Add milk and vanilla extract to the frosting mixture, beating until smooth and adjusting consistency as needed.
  10. Level the cakes if necessary, then frost between the layers and cover the top and sides.
  11. Garnish with chocolate shavings, berries, or nuts, and refrigerate for at least 30 minutes before serving.

Notes

Ensure ingredients are at room temperature for best results. Don’t overmix the batter to keep the cake moist. Adjust frosting thickness with milk as needed.

Savory Asian Noodle Bowls: Quick, Comforting Delight

The aroma of a sizzling stir-fry fills my kitchen as I prepare my go-to weeknight dinner—Savory Asian Noodle Bowls. Imagine the tender rice noodles mingling with savory ground pork and a vibrant medley of crisp vegetables, all drizzled in a rich ginger-soy sauce. This dish combines the comforting essence of potstickers without the fuss of dumpling preparation, delivering everything you love about them in under 30 minutes. Perfect for busy weeknights, these noodle bowls are not only incredibly satisfying but also incredibly versatile, allowing you to tailor them to your dietary preferences with ground chicken, turkey, or even tofu. Ready to savor a delightful bowl of joy that practically makes itself? Let’s dive into this delicious recipe that’s sure to become a staple in your home!

Why are these Noodle Bowls Perfect?

Convenience at Its Core: This recipe transforms traditional potstickers into a hassle-free bowl of goodness, ready in under 30 minutes!

Savory and Satisfying: The robust flavors from ground meat and sautéed veggies make every bite a pleasure.

Adaptable Options: Whether you prefer pork, chicken, turkey, or a vegetarian delight with tofu, you can easily customize to suit your taste.

Healthy and Wholesome: Packed with colorful vegetables and gluten-free options, it’s a nutritious choice the whole family will love.

Meal Prep Friendly: Make a big batch to enjoy throughout the week—just store leftovers in the fridge for easy reheating!

Diving into a bowl of these Savory Beef Bacon Cheese Rolls will also give you that comforting feeling of home-cooked goodness!

Savory Asian Noodle Bowls Ingredients

• Dive into a delicious world of flavor with these Savory Asian Noodle Bowls!

For the Noodle Bowl

  • Ground Pork – The main protein packed with rich flavor; swap for ground chicken, turkey, or tofu for lighter options.
  • White or Black Pepper – Adds a touch of mild heat and depth to elevate your dish.
  • Gluten-Free Tamari (1/2 cup + 1 tablespoon) – Provides umami and saltiness; a perfect soy sauce substitute if you’re gluten-free.
  • Chicken Broth or Water (1/4 cup) – Enhances the sauce’s flavor; choose broth for a more intense taste.
  • Rice Vinegar (1 tablespoon) – Brings acidity and brightness that balances the flavors beautifully.
  • Ginger Paste (1 tablespoon) – Infuses aromatic warmth and complexity, making prep a breeze.
  • Sesame Oil (2 teaspoons) – Imparts a delightful nutty flavor that rounds out the dish.
  • Red Chili Pepper Flakes (optional) – Adjust this for extra heat based on your preference!
  • Stir Fry Rice Noodles (8 oz) – They serve as the dish’s base; thin spaghetti or ramen can be used with adjusted cooking times.
  • Coleslaw Mix (14 oz) – A quick, versatile veggie blend; feel free to customize with fresh bell peppers or bok choy to reach about 4 cups.
  • Green Onions (1 bunch) – Adds a pop of freshness; utilize the green parts for garnish and cook with the white parts.
  • Garlic (4 cloves) – Provides aromatic depth; press or mince to suit your taste.

Enjoy the ease of making these delightful Savory Asian Noodle Bowls, perfect for comforting weeknight dinners!

Step‑by‑Step Instructions for Savory Asian Noodle Bowls

Step 1: Prep the Ground Pork
In a medium bowl, combine the ground pork with a pinch of white or black pepper and 1 tablespoon of tamari. Use your hands to mix it well, ensuring the seasoning blends evenly into the meat. Set the seasoned pork aside, allowing the flavors to meld while you prepare the remaining ingredients.

Step 2: Make the Flavorful Sauce
In a small bowl, whisk together 1/2 cup of tamari, 1/4 cup of chicken broth or water, 1 tablespoon of rice vinegar, 1 tablespoon of ginger paste, and 2 teaspoons of sesame oil. If you enjoy a little heat, sprinkle in some red chili pepper flakes. Set this savory sauce aside to let the flavors combine.

Step 3: Cook the Rice Noodles
Bring a pot of water to a boil and add 8 oz of stir fry rice noodles. Cook according to the package instructions, usually around 4-6 minutes, until just tender. Once done, drain the noodles and rinse them under cold water to stop the cooking process; this will help prevent them from becoming mushy.

Step 4: Stir-Fry the Pork and Vegetables
Heat a wok or large skillet over medium-high heat. Add the prepared ground pork and cook it, breaking it apart with a spatula until it’s browned, about 5-7 minutes. Next, toss in the coleslaw mix and the white parts of the green onions, continuing to stir-fry until the vegetables are tender and vibrant, roughly 3-4 minutes.

Step 5: Combine Ingredients for the Noodle Bowl
Add the minced garlic to the pork and vegetable mixture, stirring for about 1 minute until fragrant. Then, mix in the cooked rice noodles along with the flavorful sauce you prepared earlier. Stir-fry everything together for 4-5 minutes until all components are heated through and coated in the sauce.

Step 6: Let Rest Before Serving
Once everything is combined and heated, remove the skillet from the heat and let the Savory Asian Noodle Bowls rest for about 10 minutes. This allows the flavors to meld further. When ready, portion the noodle bowl into serving bowls and top with the green parts of the green onions for a fresh finish.

What to Serve with Quick & Easy Potsticker Noodle Bowls

Enhancing your dining experience is as simple as finding the perfect pairings for your meal!

  • Crispy Spring Rolls: Light and crunchy, these delicious rolls bring a delightful textural contrast to your noodle bowls.

  • Sesame Broccoli Salad: This salad adds a refreshing crunch with a nutty flavor that complements the savory elements of the dish.

  • Edamame: Steamed edamame beans serve as a protein-packed snack and are perfect for nibbling alongside your noodles.

  • Chili Garlic Green Beans: Spicy and slightly sweet, these green beans provide a zesty kick that elevates the meal.

  • Miso Soup: A warm bowl of miso soup offers a soothing companion with its umami depth, perfect for a cozy dinner experience.

  • Refreshing Cucumber Salad: This cool and tangy salad brightens up the palate and balances the rich flavors of the noodle bowl.

  • Ginger Lemonade: A zesty, refreshing drink that pairs wonderfully with the ginger-soy sauce, awakening your taste buds.

  • Dark Chocolate Mousse: Conclude your meal with a luscious dessert that brings a smooth, rich finish, ensuring a delightful end to the evening.

Make Ahead Options

These Savory Asian Noodle Bowls are perfect for meal prep enthusiasts! You can prep the ground pork mixture and sauce up to 24 hours in advance, storing them separately in airtight containers in the refrigerator to maintain flavor and quality. Additionally, chop your vegetables ahead of time, keeping them in a sealed bag to preserve freshness. When ready to serve, simply stir-fry the pork and veggies as instructed, then add the pre-cooked noodles and sauce, heating everything through for a delicious meal that feels fresh. This way, you’ll save valuable time on busy weeknights while enjoying a comforting bowl that’s just as delightful as if you’d made it all at once!

How to Store and Freeze Savory Asian Noodle Bowls

  • Fridge: Store your Savory Asian Noodle Bowls in an airtight container for up to 3 days. The flavors will deepen as they sit, making leftovers taste even better!

  • Freezer: For longer storage, separate the noodles from the broth and veggies, storing them in individual airtight containers. They can be frozen for up to 3 months. When ready to enjoy, reheat your noodles with fresh broth.

  • Reheating: To reheat, add a splash of chicken broth or water while warming on the stove, ensuring everything is heated through without drying out.

  • Meal Prep Tip: Consider prepping a big batch on the weekend. Portion out servings into containers for quick, grab-and-go meals during busy weekdays!

Expert Tips for Savory Asian Noodle Bowls

  • Prep Ahead: Make your sauce and chop vegetables in advance to streamline cooking time during busy weeknights.

  • Protein Choices: If using ground chicken or turkey, ensure to cook until fully browned to avoid any mushy texture.

  • Keep It Crisp: Stir-fry veggies only until tender while retaining a slight crunch; overcooking will lead to a soggy bowl.

  • Gluten-Free Best Practices: Double-check that your tamari, broth, and noodles are certified gluten-free for a safe, delicious meal.

  • Flavor Play: Don’t hesitate to experiment with veggies like bell peppers or bok choy to create your own twist on these savory Asian noodle bowls!

Savory Asian Noodle Bowls Variations

Feel free to get creative and customize these delightful noodle bowls to fit your unique taste buds!

  • Ground Chicken:
    Swap out ground pork with ground chicken for a lighter protein option. It still delivers fantastic flavor while being a bit leaner.

  • Turkey Twist:
    Consider using ground turkey as an alternative for a slightly different taste. This option works beautifully with all the rich flavors of the sauce.

  • Vegetarian Delight:
    Replace the meat with crumbled firm tofu or tempeh, ensuring to season well with extra ginger and sesame oil to amp up the flavor.

  • Veggie Power:
    Add vibrant bell peppers, snap peas, or even bok choy to your mix for bursts of color and crunch. Each bite becomes an expression of freshness!

  • Spicy Kick:
    For those who love heat, amp up the flavor profile with fresh diced chili peppers or an extra sprinkle of red chili pepper flakes.

  • Gluten-Free Genius:
    Use gluten-free noodles of your choice, whether rice noodles or a quinoa-based option. Just check the cooking times for perfect texture!

  • Noodle Variety:
    Think beyond stir fry noodles—try using thin spaghetti or ramen for a fun twist on the classic. You might just discover a new favorite!

  • Fresh Herbs:
    Top your dish with a fresh herb medley like cilantro, Thai basil, or mint for an aromatic finish—it’s a delightful way to elevate each bowl!

For a heartwarming experience, you might also enjoy serving this alongside some Zucchini Carrot Savory Pancakes for the perfect complement to your homemade meal.

Savory Asian Noodle Bowls Recipe FAQs

What should I look for when selecting ground pork?
When selecting ground pork, look for meat that has a bright pink color and a relatively firm texture. Avoid any packages with dark spots or an off odor. Fresh ground pork should be used within 1-2 days of purchase, or can be frozen immediately for later use.

How should I store leftover Savory Asian Noodle Bowls?
Store your Savory Asian Noodle Bowls in an airtight container in the fridge for up to 3 days. To reheat, add a splash of chicken broth or water to keep the noodles moist. The flavors often improve after a day in the fridge, making leftovers delicious!

Can I freeze Savory Asian Noodle Bowls?
Yes! To freeze, separate the noodle mixture from the broth and vegetables before placing them in airtight containers. You can freeze each component for up to 3 months. When ready to eat, reheat the noodles with fresh broth and enjoy!

What can I do if my noodles become mushy?
If your noodles turn mushy, it’s usually due to overcooking. Ensure you boil the noodles for just 4-6 minutes, then rinse them under cold water to stop the cooking process. If they still become mushy, consider adding more vegetables to balance out the texture when you cook them next.

Are there any dietary considerations I should keep in mind?
Absolutely! For gluten-free options, ensure that your tamari, broth, and noodles are certified gluten-free. If you have allergies, be cautious with ingredients like sesame oil and garlic, and consider using alternatives that fit your dietary needs, such as coconut aminos for soy sauce.

Savory Asian Noodle Bowls

Savory Asian Noodle Bowls: Quick, Comforting Delight

Savory Asian Noodle Bowls offer a quick, comforting dinner with tender rice noodles, savory ground pork, and vibrant vegetables.
Prep Time 10 minutes
Cook Time 20 minutes
Resting Time 10 minutes
Total Time 40 minutes
Servings: 4 bowls
Course: Dinner
Cuisine: Asian
Calories: 400

Ingredients
  

For the Noodle Bowl
  • 1 lb Ground Pork can substitute with ground chicken, turkey, or tofu
  • 1 teaspoon White or Black Pepper
  • 1 cup Gluten-Free Tamari 1/2 cup plus 1 tablespoon
  • 1/4 cup Chicken Broth or Water
  • 1 tablespoon Rice Vinegar
  • 1 tablespoon Ginger Paste
  • 2 teaspoons Sesame Oil
  • 1 teaspoon Red Chili Pepper Flakes optional
  • 8 oz Stir Fry Rice Noodles
  • 14 oz Coleslaw Mix can customize to reach about 4 cups
  • 1 bunch Green Onions use green parts for garnish and white parts for cooking
  • 4 cloves Garlic pressed or minced

Equipment

  • Wok or Large Skillet
  • Medium bowl
  • Small bowl

Method
 

Step-by-Step Instructions
  1. In a medium bowl, combine the ground pork with a pinch of white or black pepper and 1 tablespoon of tamari. Mix well and set aside.
  2. In a small bowl, whisk together 1/2 cup of tamari, 1/4 cup of chicken broth or water, 1 tablespoon of rice vinegar, 1 tablespoon of ginger paste, and 2 teaspoons of sesame oil. Add red chili pepper flakes if desired.
  3. Bring a pot of water to a boil and add the stir fry rice noodles. Cook for 4-6 minutes until tender, then drain and rinse with cold water.
  4. Heat a wok or large skillet over medium-high heat. Add the ground pork and cook until browned, about 5-7 minutes. Add the coleslaw mix and white parts of the green onions, stir-frying for 3-4 minutes until tender.
  5. Add minced garlic to the pork and vegetable mixture, stirring for about 1 minute until fragrant. Mix in the cooked rice noodles and flavorful sauce, stir-frying for 4-5 minutes.
  6. Remove from heat and let the noodle bowls rest for about 10 minutes. Serve into bowls and garnish with green parts of green onions.

Notes

These noodle bowls can be customized with different proteins and vegetables, making them a versatile weeknight dinner option. Perfect for meal prep and packed with flavor!

Chocolate Chip Crumble Muffins for Cozy Mornings at Home

As the aroma of freshly baked muffins wafts through my kitchen, I can’t help but smile. These Bakery-Style Chocolate Chip Crumble Muffins are my go-to solution for busy mornings and lazy weekend brunches alike. With their moist, fluffy interiors and a crunchy crumble topping, they’re a delightful twist on the traditional muffin that will have your loved ones coming back for seconds. Not only are they surprisingly easy to whip up, but they also elevate your breakfast game from mundane to mouthwatering in no time. Plus, they make for a perfect make-ahead treat! Are you ready to fill your home with the irresistible scent of chocolate and butter? Let’s dive into this recipe and create a batch that’ll brighten your day.

Why Are These Muffins So Irresistible?

Decadent Chocolate: Each bite is loaded with mini chocolate chips that melt in your mouth, adding a delightful sweetness.

Crunchy Topping: The buttery crumble topping creates a perfect contrast to the soft muffin base, making every bite satisfying.

Quick & Easy: You don’t need to be a baking pro! Beginner-friendly instructions make these muffins a breeze to prepare—ideal for any home cook.

Versatile Fun: Mix up the flavors by using fresh berries or nuts in place of chocolate chips, allowing you to customize to your palate.

Perfect for Any Occasion: Whether it’s a busy weekday or a lazy Sunday brunch, these muffins will impress family and friends alike, making them a go-to treat in your recipe collection. Enjoy them warm with a dab of butter, or savor alongside a yogurt for a wholesome breakfast.

Chocolate Chip Crumble Muffin Ingredients

For the Muffins
Salted Butter – Provides moisture and richness in both muffins and crumble. Use unsalted butter for more control over salt content.
Granulated Sugar – Adds sweetness and helps create a tender crumb. Can substitute with brown sugar for a deeper flavor.
Vanilla Extract – Enhances the overall flavor profile. No substitutions needed; use pure vanilla for best results.
Vegetable Oil – Adds moistness and a softer texture. Can substitute with melted coconut oil or melted butter.
Eggs – Acts as a binding agent and adds moisture. Use flax eggs for a vegan alternative.
Sour Cream – Contributes to moisture and a tender texture. Plain Greek yogurt or regular yogurt can be used as a substitute.
All-Purpose Flour – Provides structure. Use a gluten-free flour blend for gluten-free muffins.
Baking Powder – A leavening agent that helps the muffins rise. Ensure it’s fresh for best results.
Baking Soda – Works in tandem with baking powder for a light muffin texture. No substitutions needed.
Salt – Enhances flavor. Can be omitted if using salted butter.
Whole Milk – Adds moisture and helps create a tender crumb. Can substitute with almond milk or oat milk.
Mini Chocolate Chips – Provide bursts of chocolate flavor. Regular chocolate chips can be used, but mini chips distribute better.

For the Crumble Topping
More Salted Butter – Creates the perfect buttery crumble. Chill for better texture when baking.
Brown Sugar – Adds a rich flavor and depth to the topping. For a lighter option, use granulated sugar.
All-Purpose Flour – Forms the base of the crumble. Ensure it’s well-mixed for an even texture.
Cinnamon (optional) – Adds warmth and coziness. Feel free to adjust the amount according to your spice preference.

These Chocolate Chip Crumble Muffins are not just a treat; they’re an experience to be savored! Enjoy the rush of flavors and the joy of baking.

Step‑by‑Step Instructions for Chocolate Chip Crumble Muffins

Step 1: Prepare the Crumble
In a medium mixing bowl, combine cold, diced salted butter, brown sugar, and all-purpose flour. Using a fork or pastry cutter, mix until the mixture resembles coarse crumbs or sand. Once combined, transfer the crumble to the refrigerator to chill for about 20 minutes, allowing it to firm up before topping the muffins.

Step 2: Mix Wet Ingredients
In a large bowl, whisk together the melted butter, granulated sugar, vanilla extract, and vegetable oil until smooth and well combined, about 1 minute. Add the eggs and sour cream, stirring gently until just combined. It’s important not to overmix at this stage, as we want to keep our Chocolate Chip Crumble Muffins moist and fluffy.

Step 3: Combine Dry Ingredients
Next, gradually add the all-purpose flour, baking powder, baking soda, and salt to the wet mixture, mixing gently until no dry flour remains. Then, slowly incorporate the whole milk, continuing to stir until just combined. Finally, fold in the mini chocolate chips, ensuring even distribution throughout the batter.

Step 4: Fill Muffin Tins
Prepare a muffin tin by lining it with paper liners or greasing it lightly with cooking spray. Using a scoop or measuring cup, fill each muffin cup with the batter, filling them almost to the top for a bakery-style look. Sprinkle a generous amount of the chilled crumble topping over each muffin to create that perfect crunchy layer.

Step 5: Bake
Preheat your oven to 425°F (220°C). Place the muffin tray in the oven, baking for 5 minutes at this higher temperature to help them rise. After 5 minutes, reduce the temperature to 350°F (175°C) and continue to bake for an additional 30-35 minutes, or until the tops are golden brown and a toothpick inserted in the center comes out clean.

Step 6: Cool and Serve
Once baked, remove the muffin tin from the oven and let cool for about 15 minutes. Gently remove the muffins from the tin and place them on a wire rack to cool completely. These warm Chocolate Chip Crumble Muffins are perfect to enjoy with a pat of butter or alongside your favorite morning beverage.

Chocolate Chip Crumble Muffins Variations

Feel free to explore these delightful variations that inspire your kitchen creativity and tantalize your taste buds!

  • Berry Burst: Swap chocolate chips for fresh blueberries or raspberries for a fruity, tangy twist that brightens each bite.
  • Nutty Crunch: Add chopped walnuts or pecans for an extra layer of texture and a wonderful nutty flavor that complements the sweetness.
  • Cinnamon Spice: Sprinkle in some cinnamon or nutmeg to warm up the flavor profile, perfect for cozy mornings or a festive gathering.
  • Vegan Version: Substitute eggs with flax eggs and use almond milk instead of whole milk for a plant-based treat that’s still rich and satisfying.
  • Gluten-Free: Replace all-purpose flour with a gluten-free flour blend for a muffin everyone can enjoy without compromising flavor.
  • Dairy-Free Delight: Use coconut oil and a dairy-free yogurt alternative to make these muffins accessible for lactose-sensitive friends.
  • Chocolate Lovers: Double the amount of mini chocolate chips or mix in some dark chocolate chunks for an indulgent experience that’s hard to resist.

If you’re in the mood for more delicious options, consider making Nutty Chocolate Date cookies or treating your family to Coconut Chocolate Rolls for a delightful dessert. You’ll also love the rich flavors of Coffee Chocolate Truffles as a sweet pairing with these muffins!

What to Serve with Chocolate Chip Crumble Muffins

Enjoy these warm, fluffy delights with perfect pairings that elevate your breakfast experience.

  • Creamy Yogurt: A dollop of Greek yogurt adds tanginess and creaminess, balancing the sweetness of the muffins beautifully. It’s a delightful fusion that feels wholesome and satisfying.

  • Fresh Berries: Juicy strawberries or blueberries offer a burst of freshness. Their vibrant colors and natural sweetness complement the chocolate, making each bite even more refreshing.

  • Buttered Toast: Spread a little butter or jam on a slice of toast to enhance your breakfast table. The crunchy bread provides a lovely contrast to the soft muffins.

  • Nutty Granola: A sprinkle of granola over yogurt or served on the side adds a satisfying crunch, bringing extra protein and fiber to your meal.

  • Warm Coffee: A steaming cup of coffee pairs perfectly with the rich chocolate flavors. The warmth and slight bitterness of the coffee enhance the sweetness of the muffins beautifully.

  • Milk or Almond Milk: This classic pairing is always a hit! The creamy, cool milk helps wash down the decadent flavors and makes for a comforting combination.

  • Maple Syrup Drizzle: For a sweet finishing touch, drizzle a little maple syrup over the muffins. It elevates the experience, adding warmth and a cozy, indulgent flavor.

  • Chai Tea: Aromatic chai tea, with its warming spices, creates a delightful balance with the sweetness of the muffins, making them perfect for a cozy morning gathering.

Make Ahead Options

These Chocolate Chip Crumble Muffins are a fantastic choice for meal prep enthusiasts! You can prepare the crumble topping up to 3 days in advance; simply mix the ingredients and store the mixture in an airtight container in the refrigerator. To maintain that perfect crumble texture, chill it until you’re ready to bake. The muffin batter can also be prepared up to 24 hours in advance; just store it in the fridge and cover it tightly. When you’re ready to bake, simply fill your muffin tins with the chilled batter, sprinkle the crumble on top, and bake as directed. This way, you’ll have warm, fresh muffins with minimal effort—ideal for busy mornings!

Expert Tips for Chocolate Chip Crumble Muffins

Chill the Crumble: Ensure the crumble topping is chilled before baking. This will create a flaky, buttery texture that contrasts beautifully with the muffins.

Avoid Overmixing: Gently fold the ingredients to keep the muffins light and fluffy. Overmixing can lead to dense, tough muffins.

Use Room Temperature Ingredients: Make sure your eggs and sour cream are at room temperature. This helps the batter come together seamlessly for moist Chocolate Chip Crumble Muffins.

Test Freshness: Check the expiration dates on your baking powder and baking soda. Fresh leavening agents ensure your muffins rise beautifully.

Customize Flavors: Feel free to add spices like cinnamon or nutmeg to the batter for a cozy twist. Your personal touch will elevate the flavor profile even more!

Storage Tips for Chocolate Chip Crumble Muffins

Room Temperature: Store muffins in an airtight container at room temperature for up to 3 days. This keeps them moist and delicious for your busy mornings.

Fridge: If you’re in a warmer climate and want to extend freshness, you can keep them in the fridge for up to 5 days. Just be sure to wrap them well to prevent drying out.

Freezer: For longer storage, freeze the muffins in an airtight container or freezer bag for up to 2 months. Reheat them in the oven or microwave when ready to enjoy!

Reheating: To bring back their just-baked warmth, pop frozen muffins into a preheated oven at 350°F (175°C) for 10-15 minutes, or microwave for about 30 seconds. Enjoy your Chocolate Chip Crumble Muffins fresh!

Chocolate Chip Crumble Muffins Recipe FAQs

What type of butter should I use for the muffins?
You can use either salted or unsalted butter in this recipe. I personally recommend unsalted butter, as it gives you more control over the salt content in your muffins. If you’re looking for a richer crumb, salted butter works beautifully, too!

How should I store my Chocolate Chip Crumble Muffins?
Store your freshly baked muffins in an airtight container at room temperature for up to 3 days. If you want them to last longer, you can keep them in the fridge for about 5 days. Just make sure they’re wrapped well to prevent them from drying out!

Can I freeze Chocolate Chip Crumble Muffins?
Absolutely! To freeze, individually wrap each muffin in plastic wrap and place them inside an airtight freezer bag. They can be stored for up to 2 months. When you’re ready to enjoy one, simply reheat in a preheated oven at 350°F (175°C) for about 10-15 minutes or microwave for around 30 seconds.

My muffins turned out dense; what did I do wrong?
Dense muffins can often be the result of overmixing the batter. When combining your wet and dry ingredients, mix gently until just combined; it’s okay if there are a few lumps. Additionally, make sure your baking powder and baking soda are fresh, as expired leavening agents will not help your muffins rise properly.

Can I use other ingredients for dietary restrictions?
Heck yes! For a vegan version, you can replace the eggs with flax eggs (1 tablespoon ground flaxseed mixed with 2.5 tablespoons water for each egg). You can also substitute sour cream with plain Greek yogurt or even dairy-free yogurt. Just keep in mind that ingredient swaps may slightly alter the texture and flavor of the muffins.

How can I enhance the flavor of my muffins?
Feel free to add your favorite spices, like cinnamon or nutmeg, to the batter for an extra cozy twist. You can also swap out mini chocolate chips for fresh berries or nuts for a different flavor profile. The more, the merrier when it comes to personalizing your Chocolate Chip Crumble Muffins!

Chocolate Chip Crumble Muffins

Chocolate Chip Crumble Muffins for Cozy Mornings at Home

Delicious Chocolate Chip Crumble Muffins that are easy to make, perfect for busy mornings.
Prep Time 30 minutes
Cook Time 35 minutes
Chill Time 20 minutes
Total Time 1 hour 25 minutes
Servings: 12 muffins
Course: Breakfast
Cuisine: American
Calories: 250

Ingredients
  

For the Muffins
  • 1 cup Salted Butter Use unsalted butter for more control over salt content.
  • 1 cup Granulated Sugar Can substitute with brown sugar for a deeper flavor.
  • 2 teaspoons Vanilla Extract Use pure vanilla for best results.
  • 1/2 cup Vegetable Oil Can substitute with melted coconut oil or melted butter.
  • 2 large Eggs Use flax eggs for a vegan alternative.
  • 1 cup Sour Cream Plain Greek yogurt or regular yogurt can be used as a substitute.
  • 2 cups All-Purpose Flour Use a gluten-free flour blend for gluten-free muffins.
  • 1 tablespoon Baking Powder Ensure it’s fresh for best results.
  • 1/2 teaspoon Baking Soda No substitutions needed.
  • 1/2 teaspoon Salt Can be omitted if using salted butter.
  • 1 cup Whole Milk Can substitute with almond milk or oat milk.
  • 1 cup Mini Chocolate Chips Regular chocolate chips can be used, but mini chips distribute better.
For the Crumble Topping
  • 1/2 cup Salted Butter Chill for better texture when baking.
  • 1/2 cup Brown Sugar For a lighter option, use granulated sugar.
  • 1 cup All-Purpose Flour Ensure it's well-mixed for an even texture.
  • 1 teaspoon Cinnamon Feel free to adjust the amount according to your spice preference.

Equipment

  • muffin tin
  • mixing bowls
  • whisk
  • Fork

Method
 

Step‑by‑Step Instructions
  1. Prepare the crumble by mixing cold, diced salted butter, brown sugar, and all-purpose flour in a medium bowl until resembling coarse crumbs. Chill for about 20 minutes.
  2. Mix wet ingredients by whisking together melted butter, granulated sugar, vanilla extract, and vegetable oil in a large bowl. Add eggs and sour cream, stirring gently until just combined.
  3. Combine dry ingredients by gradually adding all-purpose flour, baking powder, baking soda, and salt to the wet mixture and mix gently. Slowly incorporate whole milk and fold in mini chocolate chips.
  4. Fill muffin tins by lining them with paper liners or greasing lightly. Fill each muffin cup almost to the top and sprinkle generously with the chilled crumble topping.
  5. Bake the muffins in a preheated oven at 425°F (220°C) for 5 minutes, then reduce the temperature to 350°F (175°C) and bake for an additional 30-35 minutes until golden brown.
  6. Cool and serve by letting muffins cool for about 15 minutes before removing from the tin and placing on a wire rack. Enjoy with a pat of butter or your favorite beverage.

Notes

These muffins are an experience to be savored! Customize flavors with spices like cinnamon or nutmeg.

Healthy Tahini Chocolate Balls for Guilt-Free Snacking

You know those moments when hunger strikes and all you want is something wholesome yet indulgent? Enter my No-Bake Tahini Chocolate Energy Balls. With just five simple ingredients, these delectable bites pack the rich, nutty flavor of tahini into a satisfyingly chewy treat that’s perfect for any time of day. Not only are they gluten-free and vegan, making them suitable for various dietary preferences, but they also require no baking—so you can whip them up in a flash! Whether you’re zipping out the door in the morning or in need of a post-workout pick-me-up, these energy balls are your new best friend. Curious about that irresistible combination of chocolate and tahini? Let’s dive into the delicious details!

Why are Tahini Chocolate Balls a Must-Try?

Guilty-Free Indulgence: These no-bake bites let you enjoy the decadence of chocolate without the guilt.
Minimal Ingredients: With just five simple components, preparation is a breeze, making them perfect for busy lifestyles.
Nutrient-Packed: Loaded with healthy fats from tahini and fiber from oat flour, these balls offer energy that keeps you fueled throughout the day.
Versatile Snacks: Whether you need a mid-afternoon boost or a quick on-the-go breakfast, these can easily fit into any routine.
Crowd-Pleasing Flavor: The delightful marriage of chocolate and tahini creates a unique taste that appeals to everyone, even those who are picky! Enjoy similar deliciousness with my Own Homemade Chocolate or try out the Nutty Chocolate Date recipe for another satisfying treat!

Tahini Chocolate Balls Ingredients

• Here’s everything you need to whip up delectable Tahini Chocolate Balls!

For the Energy Balls

  • Tahini – Adds healthy fats and a nutty flavor; opt for runny Lebanese tahini for the best taste and texture.
  • Maple Syrup – Acts as a natural sweetener that balances out the bitterness of tahini and cocoa; agave syrup or honey can be good substitutes.
  • Oat Flour – Provides structure and complex carbohydrates; ground oats can work in a pinch, but adjust liquids as needed.
  • Cocoa Powder – Contributes rich chocolate flavor and antioxidants; essential for that luscious chocolate taste.
  • Pinch of Salt – Enhances the overall flavor; though commonly used, it can be omitted if desired.

For Coating

  • Sesame Seeds – Used for coating, adding both crunch and nuttiness; toasting them enhances their flavor and texture.

Step‑by‑Step Instructions for Tahini Chocolate Balls

Step 1: Toast Sesame Seeds (optional)
Begin by heating a dry skillet over medium heat. Add sesame seeds and toast them for about 2 minutes, stirring continuously until they turn a golden brown and become fragrant. Remove them from heat and let them cool completely while you prepare the rest of your ingredients for the Tahini Chocolate Balls.

Step 2: Mix Ingredients
In a medium bowl, combine the creamy tahini and maple syrup. Using a spatula or spoon, mix them together until you have a smooth and consistent mixture. This step ensures that the nutty flavor of tahini beautifully complements the sweetness of the maple syrup, creating a rich base for your energy balls.

Step 3: Incorporate Dry Ingredients
Now, add the oat flour, cocoa powder, and a pinch of salt to your tahini-maple mixture. Stir until everything is well combined and a dough forms. The dough should be thick and slightly sticky; if it’s too wet, you can add a touch more oat flour to achieve the right consistency for shaping your Tahini Chocolate Balls.

Step 4: Shape Balls
Using your hands, take portions of the dough and roll them into balls about the size of a tablespoon. Aim for 10-12 balls total. As you shape them, ensure they have a smooth surface for the best texture. This step not only shapes your treats but also activates their chewy texture, making each bite delightful.

Step 5: Coat
Take the toasted sesame seeds and spread them on a plate. Roll each formed ball in the sesame seeds until evenly coated, adding a wonderful crunch and nuttiness to your Tahini Chocolate Balls. Make sure to press gently so the seeds adhere well to the surface of the balls for the best flavor experience.

Step 6: Enjoy or Store
Your delicious Tahini Chocolate Balls are ready! You can enjoy them immediately for a quick snack, or store them in an airtight container. For a softer texture, keep them at room temperature; alternatively, refrigerate for up to 4 days for a firmer treat. These energy bites are perfect for on-the-go munching!

Make Ahead Options

These Tahini Chocolate Balls are perfect for meal prep enthusiasts! You can mix the base ingredients (tahini, maple syrup, oat flour, cocoa powder, and salt) up to 24 hours in advance and store the mixture in the fridge to let the flavors meld. When you’re ready to finish, simply roll the chilled dough into balls, coat them in sesame seeds, and enjoy! For even more convenience, you can shape and coat the balls ahead of time, refrigerating them for up to 4 days. Just remember to keep them in an airtight container to maintain their freshness and prevent drying out. With these make-ahead tips, you’ll have delectable, guilt-free snacks ready to go anytime!

Variations & Substitutions for Tahini Chocolate Balls

Get ready to explore delightful twists on your Tahini Chocolate Balls that’ll tickle your taste buds and suit your cravings!

  • Nut-Free: Use sunbutter instead of tahini for a nut-free version that maintains a creamy texture and rich flavor.
  • Sweetener Swap: Substitute maple syrup with agave nectar for a lighter sweetness; honey works if you’re not strictly vegan.
  • Crunchy Coating: Instead of sesame seeds, roll the balls in crushed nuts or coconut flakes for a different crunch and flavor profile.
  • Flavor Infusion: Add a teaspoon of vanilla extract for extra warmth and sweetness; it beautifully complements the chocolate and tahini.
  • Chocolate Chips: Mix in mini dark chocolate chips to boost the chocolatey goodness; they’ll melt slightly, adding a luscious texture.
  • Fruitiness: Toss in finely chopped dried figs or apricots; their natural sweetness and chewiness uplift each ball.
  • Spicy Kick: If you like a little heat, sprinkle a dash of cayenne pepper in the mixture; it creates an unexpected yet delightful contrast.
  • Protein Packed: Stir in a scoop of your favorite protein powder—any flavor pairs well, especially chocolate or vanilla!

Curious for more sweet inspirations? You may also enjoy my Coconut Chocolate Rolls or whip up some Coffee Chocolate Truffles for another layer of flavor!

Expert Tips for Tahini Chocolate Balls

  • Choose Quality Tahini: Use runny Lebanese tahini for the best flavor and consistency; thicker varieties may lead to dry, hard balls.
  • Adjust Sweetness: If you prefer sweeter energy balls, gradually add more maple syrup until tailored to your taste—avoid overdoing it!
  • Texture Control: For firmer balls, carefully increase the oat flour; too much liquid can result in a sticky mixture that won’t hold shape.
  • Experiment Freely: Feel free to incorporate extras like nuts, seeds, or dried fruits for unique textures and flavors in your Tahini Chocolate Balls.
  • Right Coating Techique: When rolling in sesame seeds, ensure each ball is evenly coated to enhance flavor and crunch with every bite.

What to Serve with No-Bake Tahini Chocolate Energy Balls

Imagine a delightful spread that perfectly complements the nutty sweetness of your tantalizing energy balls—a feast for all senses awaits!

  • Fresh Fruit Salad: A vibrant mix of seasonal fruits adds a refreshing contrast, enhancing the depth of flavors in your energy balls.

  • Almond Butter Toast: Savor warm, crusty bread topped with creamy almond butter for a rich, nutty companion that pairs beautifully.

  • Chilled Coconut Yogurt: This silky, dairy-free yogurt offers a cool, creamy texture that balances the rich chocolate, creating a satisfying contrast.

  • Matcha Green Tea: Enjoy a cozy cup of this earthy tea; its subtle bitterness complements the sweetness of the tahini and chocolate perfectly.

  • Homemade Granola: Crunchy, oat-based granola provides delightful texture and brings out the creaminess of tahini, making each bite irresistible.

  • Nutty Trail Mix: A handful of mixed nuts and seeds gives a satisfying crunch, enhancing the overall experience while adding extra nutrients to your snack.

  • Dark Chocolate Dipped Strawberries: Indulge in more chocolate with these luscious berries; their sweetness and acidity are a great contrast to your energy balls.

  • Date Smoothie: Blend ripe bananas, dates, and almond milk for a naturally sweet and creamy treat that mirrors the richness of your energy balls.

How to Store and Freeze Tahini Chocolate Balls

Room Temperature: Keep your Tahini Chocolate Balls in an airtight container for up to 3 days to enjoy a softer texture while snacking.

Fridge: Store the energy balls in the refrigerator for up to 4 days. This will help maintain their firmness and keep them fresh for on-the-go snacking.

Freezer: For longer storage, freeze the balls in a single layer, then transfer to a freezer-safe bag for up to 2 months. Thaw in the fridge before enjoying.

Reheating: If you prefer them warm, briefly microwave each ball for about 10-15 seconds to enhance their chocolatey flavor before eating.

Tahini Chocolate Balls Recipe FAQs

How do I pick ripe tahini?
Absolutely! Look for tahini that’s smooth and runny. The best option is to choose Lebanese tahini as it has a richer flavor. Avoid jars with dark spots or separation, which can indicate age or spoilage.

What’s the best way to store Tahini Chocolate Balls?
For optimal freshness, store your Tahini Chocolate Balls in an airtight container. At room temperature, they will last for about 3 days, providing a softer texture. If you prefer a firmer bite, refrigerate them for up to 4 days.

Can I freeze Tahini Chocolate Balls?
Yes! To freeze, lay the energy balls out in a single layer on a baking sheet and freeze for about an hour. Once frozen, transfer them to a freezer-safe bag. They can be stored for up to 3 months. When you’re ready to enjoy them, simply thaw them in the fridge before eating!

What should I do if my balls are too sticky?
No worries! If your Tahini Chocolate Balls turn out sticky, gradually incorporate more oat flour until you reach a manageable dough consistency. You can also chill the mixture for 30 minutes to help it firm up before shaping.

Are Tahini Chocolate Balls safe for pets or allergies?
These energy balls are not suitable for pets, particularly due to the high sugar content from maple syrup. If you’re allergic to sesame or nuts, you may want to skip this recipe or replace tahini with sunflower seed butter, especially for a nut-free alternative.

How can I enhance the flavor of my Tahini Chocolate Balls?
The more the merrier! You can experiment by adding a pinch of cinnamon or cardamom to the mix for warmth. Additionally, consider mixing in chopped dried fruits like dates or cranberries for a delightful sweetness and texture contrast.

Tahini Chocolate Balls

Healthy Tahini Chocolate Balls for Guilt-Free Snacking

Indulge in these no-bake Tahini Chocolate Balls, perfect for guilt-free snacking. They are vegan and gluten-free, packing a rich tahini flavor into a nutritious treat.
Prep Time 15 minutes
Total Time 15 minutes
Servings: 10 balls
Course: Dessert
Cuisine: Vegan
Calories: 120

Ingredients
  

For the Energy Balls
  • 1 cup Tahini Opt for runny Lebanese tahini for best taste
  • 1/4 cup Maple Syrup Agave syrup or honey can be substitutes
  • 1 cup Oat Flour Ground oats can work in a pinch
  • 1/2 cup Cocoa Powder Essential for that rich chocolate flavor
  • 1 pinch Salt Enhances overall flavor, can be omitted
For Coating
  • 1/4 cup Sesame Seeds Toast for enhanced flavor and texture

Equipment

  • Skillet
  • Medium bowl
  • spatula

Method
 

Step-by-Step Instructions
  1. Toast Sesame Seeds (optional): Heat a dry skillet over medium heat. Add sesame seeds and toast for about 2 minutes until golden brown and fragrant.
  2. Mix Ingredients: Combine tahini and maple syrup in a medium bowl until smooth.
  3. Incorporate Dry Ingredients: Add oat flour, cocoa powder, and pinch of salt. Stir until well combined and a thick dough forms.
  4. Shape Balls: Roll portions of dough into 10-12 balls, aiming for a smooth surface.
  5. Coat: Roll balls in toasted sesame seeds until evenly coated.
  6. Enjoy or Store: Enjoy immediately or store in an airtight container at room temperature or in the fridge.

Notes

For firmer balls, increase oat flour. Experiment with additional ingredients such as nuts or dried fruits.

Irresistibly Crispy Fried Meatballs: A Flavorful Twist

“Can you hear that sizzle? As soon as I drop these Fried Meatballs—Romanian chiftele—into the hot oil, the kitchen comes alive with an irresistible aroma, pulling everyone closer. These golden bites are not just food; they’re a celebration of flavors passed down through generations, marrying ground meat with fragrant herbs. Perfect as appetizers for family feasts or casual snacks, their crispy exterior hides a juicy, tender interior that’s sure to impress even the fussiest eaters. Plus, they’re easy to whip up and can be customized with different meats or gluten-free options, making them a versatile addition to any meal plan. Ready to dive into this cozy culinary tradition that’s bound to bring smiles and satisfaction around your table?”

Why Are These Meatballs So Special?

Savoriness: The blend of rich meats and fresh herbs makes these meatballs explode with flavor in every bite.

Crispy Texture: Achieve that perfect crunch on the outside, while keeping the inside juicy and tender.

Versatile Creation: Easily swap ground pork for chicken or turkey, allowing you to cater to various tastes and dietary needs.

Easy to Prepare: With simple ingredients and straightforward steps, you’ll have these delicious treats ready in no time—perfect for busy weeknights or gatherings.

Family Favorite: These meatballs are a hit with both kids and adults, making them an ideal choice for family dinners or get-togethers. Looking for a companion dish? Check out my Spaghetti Homemade Meatballs for a complete culinary experience!

Fried Meatballs Ingredients

  • For the Meatball Mixture
    Ground Pork – The main protein source that offers richness; feel free to substitute with beef, chicken, or turkey for a custom twist.
    Chopped Green Onions – Adds flavor and a lovely crunch; if unavailable, you can use regular onions instead.
    Chopped Green Garlic – Provides aromatic depth; garlic cloves work as a suitable alternative—use around 8 for the same punch.
    Fresh Parsley – Brings a fresh burst of flavor and vibrant color; cilantro makes a delightful substitute if desired.
    Fresh Dill – Adds a unique, aromatic flavor; if you don’t have fresh dill, dried dill can be used—just be careful to use less.
    Eggs – Binds the mixture together; consider using flaxseed meal mixed with water as an egg replacement if needed.
    Hardened Bread – Acts as a moisture source and binding agent; for a gluten-free option, substitute with gluten-free breadcrumbs or bread.
    Salt and Pepper – Essential for seasoning; taste and adjust according to your preference.

  • For Coating and Cooking
    Flour – Creates a crispy crust on the outside; chickpea or rice flour can be used for a gluten-free option.
    Vegetable Oil – Needed for frying, adding richness; use any high-heat oil like canola or sunflower to achieve the best results.

Dive into creating these Fried Meatballs that will undoubtedly delight everyone at your table!

Step‑by‑Step Instructions for Delicious Fried Meatballs (Romanian Chiftele)

Step 1: Prep the Bread
Begin by soaking the hardened bread in water or milk for about 5 minutes until it’s thoroughly soft. Squeeze out any excess moisture before proceeding. This crucial step ensures the fried meatballs have a moist and tender texture, creating the perfect foundation for your chiftele.

Step 2: Mix the Ingredients
In a large bowl, combine the ground pork, chopped green onions, green garlic, fresh parsley, dill, salt, pepper, and eggs. Crumble the prepped bread into the mixture. Using your hands, mix everything together thoroughly until it’s well combined, with no dry spots left, creating a flavorful meatball mixture that is ready to be shaped.

Step 3: Form Meatballs
Scoop spoonfuls of the meat mixture and roll them into balls, roughly the size of a golf ball. Dredge each meatball lightly in flour to coat them evenly, which will help achieve a crispy crust when frying. Shape the edges smoothly to ensure uniform cooking, making these fried meatballs look appealing and professional.

Step 4: Heat the Oil
In several large frying pans, heat enough vegetable oil over medium-high heat to cover the bottom generously. Allow the oil to heat for about 5 minutes, or until shimmering, indicating it’s hot enough to fry the meatballs. It’s essential for the oil to be properly heated to achieve that delightful crispy exterior when you drop in your chiftele.

Step 5: Fry the Meatballs
Carefully place the meatballs into the hot oil, ensuring to leave space between them to avoid overcrowding. Fry for about 3-4 minutes per side, turning them gently with a spatula until they’re golden brown and crispy. Keep an eye on them, as the enticing aroma and color will let you know they’re nearing perfection.

Step 6: Drain the Excess Oil
Once the meatballs are beautifully golden and cooked through, transfer them to a platter lined with paper towels. This will help absorb any excess oil, ensuring your fried meatballs remain crispy and not greasy. Allow them to drain for a minute while you prepare to serve them warm or allow them to cool completely for later.

Step 7: Serve
Enjoy your fried meatballs (Romanian chiftele) immediately while hot, paired with fresh bread and vegetables, or serve them as delightful appetizers at your next gathering. If you prefer, you can also refrigerate any leftovers in an airtight container to savor their deliciousness later.

Fried Meatballs Variations & Substitutions

Explore endless possibilities to make these fried meatballs your own and tantalize your taste buds!

  • Gluten-Free: Substitute hardened bread with gluten-free breadcrumbs or gluten-free bread to cater to dietary needs without sacrificing flavor.
  • Different Meats: Swap ground pork for beef, chicken, or turkey for a custom twist that suits your family’s preferences perfectly. Each option brings its unique flavor to the table!
  • Herb Enhancements: Experiment with different herbs, such as thyme or oregano, to add a new dimension of flavor that complements the meat beautifully.
  • Cheesy Delight: Add in grated cheese like parmesan or feta to the meatball mixture for a delightful burst of flavor and extra moisture.
  • Spicy Kick: Mix in some cayenne pepper or crushed red pepper flakes for those who enjoy an extra kick in their bites—perfect for spice lovers!
  • Vegetable Boost: Chop and incorporate finely grated zucchini or carrots into the mixture for added nutrition and moisture, truly elevating the traditional recipe!
  • Savory Additions: Toss in some cooked bacon bits for a smoky flavor that will take your meatballs to new heights, delighting all those who dive in.
  • Saucy Pairing: Consider serving them in a rich tomato sauce for a comforting meal reminiscent of hearty Italian dishes. For a complete culinary experience, why not try them alongside Spaghetti Homemade Meatballs?

These nifty twists not only add variety but also keep your meals exciting and tailored to your family’s tastes!

Storage Tips for Fried Meatballs

Fridge: store leftover fried meatballs in an airtight container for up to 3 days. This keeps them fresh while maintaining their deliciousness.

Freezer: for longer storage, freeze the chiftele in a single layer on a baking sheet until firm, then transfer them to a freezer-safe bag for up to 3 months.

Reheating: when ready to enjoy, gently reheat in a preheated oven at 350°F (175°C) for about 15-20 minutes or until heated through, preserving their crispy texture.

Wrapping: wrap any unserved meatballs well before refrigerating or freezing to prevent moisture loss and freezer burn, ensuring they taste just as delightful when you’re ready to eat them again.

What to Serve with Delicious Fried Meatballs (Romanian Chiftele)

Looking to create a complete meal that pairs beautifully with these crispy, savory bites?

  • Crispy Green Salad: Fresh greens drizzled with a tangy vinaigrette provide a refreshing contrast, balancing the richness of the meatballs.

  • Creamy Mashed Potatoes: These buttery, smooth potatoes soak up any flavorful juices, offering a delightful comfort food twist that enhances every bite.

  • Roasted Vegetables: A medley of seasonal vegetables brings sweetness and texture, complementing the savory profile of the fried meatballs beautifully.

  • Homemade Tomato Sauce: Simmered with herbs and spices, a vibrant sauce brings a zesty touch, perfect for dipping your meatballs in or served over pasta.

  • Crusty Bread: Freshly baked or toasted, this rustic side is wonderful for mopping up juices, making each bite a savory experience to savor.

  • Savory Yogurt Dip: A cool, herbed yogurt dip introduces a creamy contrast that enhances the flavors of the meatballs while refreshing the palate.

  • Polenta: Smooth, creamy polenta adds a delightful corn flavor; it’s a comforting base that pairs well with the meatballs.

  • Wine Pairing: A light red wine like Pinot Noir or a refreshing white like Sauvignon Blanc complements the savory meat with their acidity and fruitiness.

Expert Tips for Fried Meatballs

  • Hot Oil Is Key: Ensure the oil is properly heated before frying; it should shimmer. This creates a crispy crust while keeping the meatballs juicy inside.

  • Avoid Overcrowding: Fry meatballs in batches to prevent them from steaming, which can result in uneven cooking and soggy textures.

  • Perfectly Formed: Shape the meatballs evenly for consistent cooking. Use wet hands to prevent the mixture from sticking, ensuring they hold together well.

  • Flavor Boost: For extra zest, add grated cheese or spices like paprika to the mixture. Don’t be afraid to experiment! This helps customize your Fried Meatballs.

  • Storage Solutions: Refrigerate leftover meatballs in an airtight container for up to 3 days. They can also be frozen for longer preservation; just reheat gently!

  • Adaptable Ingredients: Feel free to swap out ground pork with beef, chicken, or turkey to suit your family’s preferences or dietary needs without losing flavor!

Make Ahead Options

Making these Fried Meatballs ahead of time is a brilliant way to save yourself time during busy weeknights! You can prepare the meatball mixture up to 24 hours in advance; simply mix all the ingredients, shape into balls, and cover tightly before refrigerating. This allows the flavors to meld beautifully. Another option is to fry the meatballs and then refrigerate them in an airtight container for up to 3 days. To maintain their crispy texture, reheat them in a hot oven for about 10-15 minutes before serving. With these make-ahead tips, you’ll enjoy restaurant-quality Fried Meatballs with minimal effort on the day of your gathering!

Fried Meatballs (Romanian Chiftele) Recipe FAQs

How do I choose the right ground meat for the meatballs?
Absolutely! While traditional chiftele are made with ground pork for its richness, you can use ground beef, chicken, or turkey as well. Choose grass-fed meats for enhanced flavor and texture, and make sure it’s finely ground to achieve that juicy tenderness.

What is the best way to store leftover fried meatballs?
Very! For optimal freshness, store your fried meatballs in an airtight container in the refrigerator for up to 3 days. Just be sure to let them cool completely before sealing to avoid moisture buildup. If you notice any dark spots or off smells, it’s best to discard them.

Can I freeze these meatballs, and if so, how?
Certainly! To freeze your chiftele, first arrange the cooked meatballs in a single layer on a baking sheet and place them in the freezer until firm (about 1-2 hours). Then, transfer them to a freezer-safe bag, removing as much air as possible. They can be frozen for up to 3 months. When you’re ready to enjoy, simply reheat them in the oven to maintain their delicious crispiness.

What if my meatball mixture is too wet or crumbly?
That’s a great question! If your mixture feels too wet, try adding a bit more crumbled bread or breadcrumbs to absorb the excess moisture. For a crumblier mix, lightly wet your hands while shaping the meatballs to help them hold together better. If they’re still falling apart, an extra egg or a flaxseed meal-water mix can act as a binding agent.

Are there any dietary considerations I should be aware of?
Definitely! If you’re catering to gluten-free diets, you can easily swap out the hardened bread for gluten-free breadcrumbs or gluten-free bread. Additionally, if anyone has egg allergies, the flaxseed meal option mentioned before is a wonderful alternative. Always double-check labels for any hidden allergens that might be present in packaged products!

How long can I wait to eat the meatballs after cooking?
You’ll want to enjoy your fried meatballs while they’re still warm and crispy! However, if you have leftovers, they can stay fresh in the fridge for about 3 days. If served immediately, they are perfect as appetizers or casual snacks at gatherings, and you can also cool them completely and refrigerate for later enjoyment.

Fried Meatballs

Irresistibly Crispy Fried Meatballs: A Flavorful Twist

Enjoy the irresistible flavor and crispy texture of these Fried Meatballs, perfect for any meal.
Prep Time 15 minutes
Cook Time 20 minutes
Total Time 35 minutes
Servings: 4 meatballs
Course: Dinner
Cuisine: Romanian
Calories: 200

Ingredients
  

For the Meatball Mixture
  • 1 pound Ground Pork Can substitute with beef, chicken, or turkey
  • 1 cup Chopped Green Onions Use regular onions if unavailable
  • 1 cup Chopped Green Garlic Around 8 garlic cloves can be used
  • 1 cup Fresh Parsley Cilantro works as a substitute
  • 1 cup Fresh Dill Dried dill can be used in lesser amounts
  • 2 large Eggs Flaxseed meal mixed with water can replace
  • 2 cups Hardened Bread Use gluten-free breadcrumbs for a gluten-free option
  • to taste tsp Salt Essential for seasoning
  • to taste tsp Pepper Essential for seasoning
For Coating and Cooking
  • 1 cup Flour Chickpea or rice flour for a gluten-free option
  • as needed cup Vegetable Oil Use high-heat oil like canola or sunflower

Equipment

  • Frying pan
  • mixing bowl

Method
 

Step‑by‑Step Instructions for Delicious Fried Meatballs
  1. Begin by soaking the hardened bread in water or milk for about 5 minutes until it's thoroughly soft. Squeeze out any excess moisture before proceeding.
  2. In a large bowl, combine the ground pork, chopped green onions, green garlic, fresh parsley, dill, salt, pepper, and eggs. Crumble the prepped bread into the mixture.
  3. Scoop spoonfuls of the meat mixture and roll them into balls, roughly the size of a golf ball. Dredge each meatball lightly in flour to coat them evenly.
  4. In several large frying pans, heat enough vegetable oil over medium-high heat to cover the bottom generously.
  5. Carefully place the meatballs into the hot oil and fry for about 3-4 minutes per side until golden brown and crispy.
  6. Once the meatballs are cooked through and golden, transfer them to a platter lined with paper towels to absorb excess oil.
  7. Enjoy your fried meatballs immediately while hot, paired with fresh bread and vegetables.

Notes

These meatballs can be customized with different meats or gluten-free options. Refrigerate leftovers in an airtight container for up to 3 days or freeze for up to 3 months.