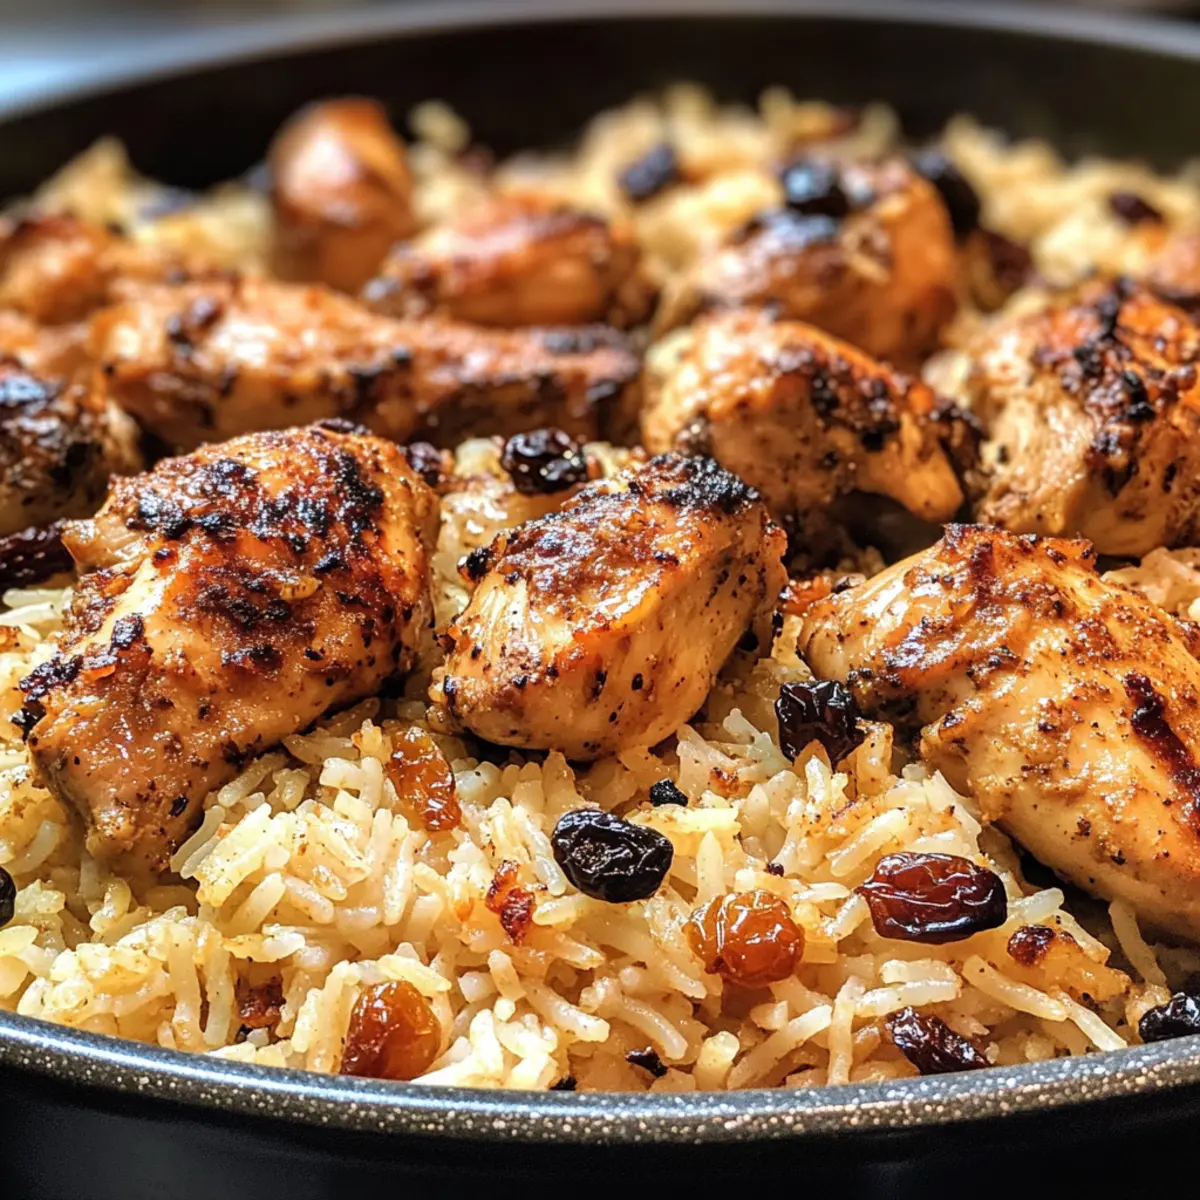
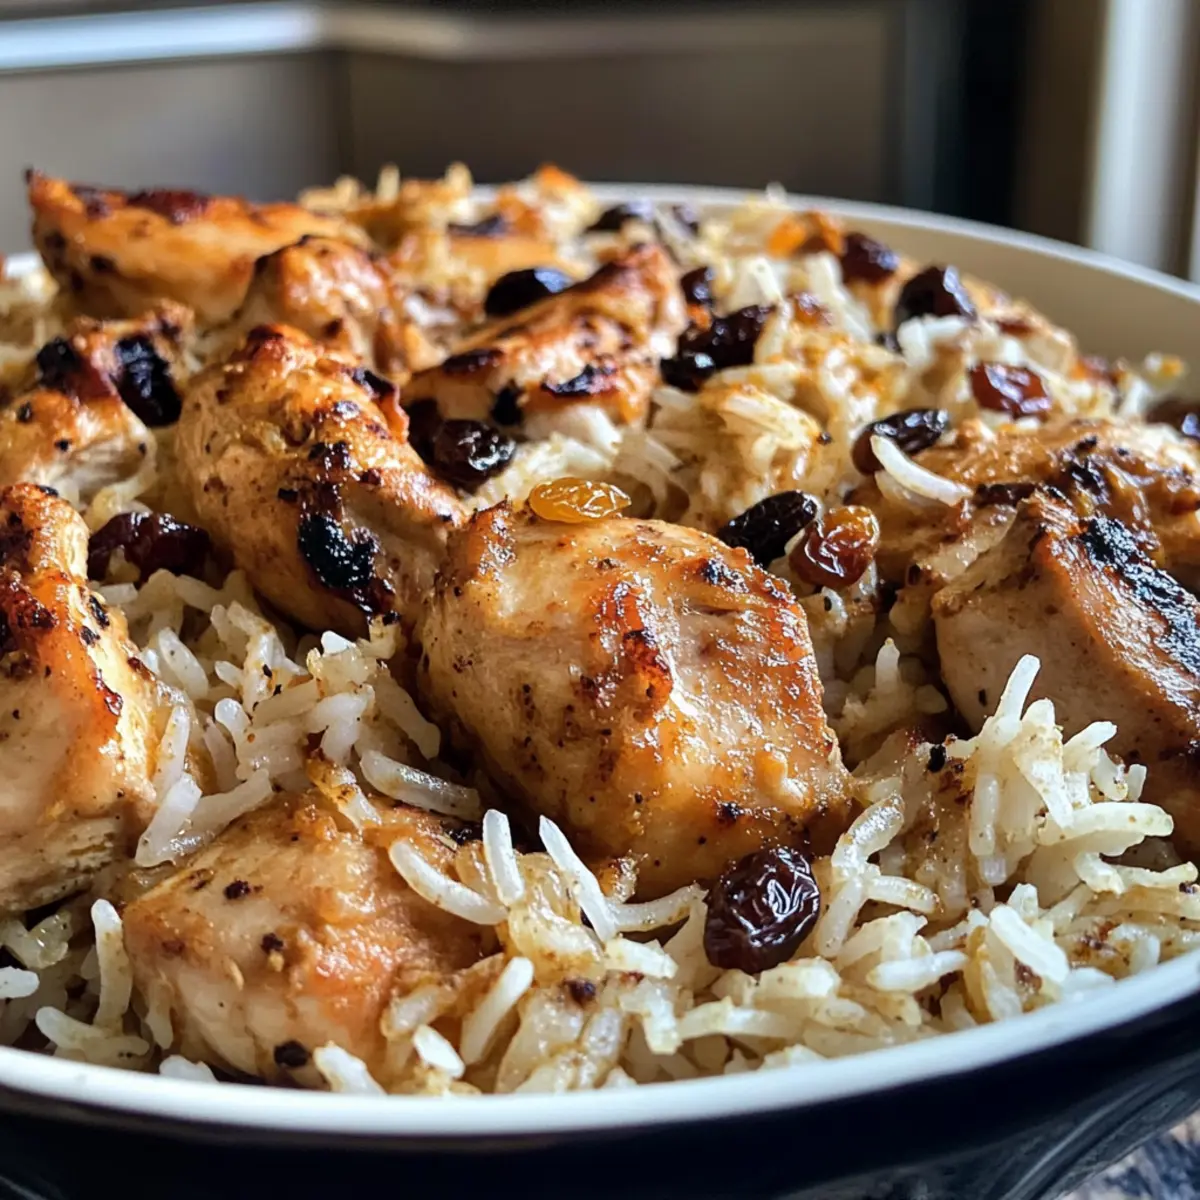
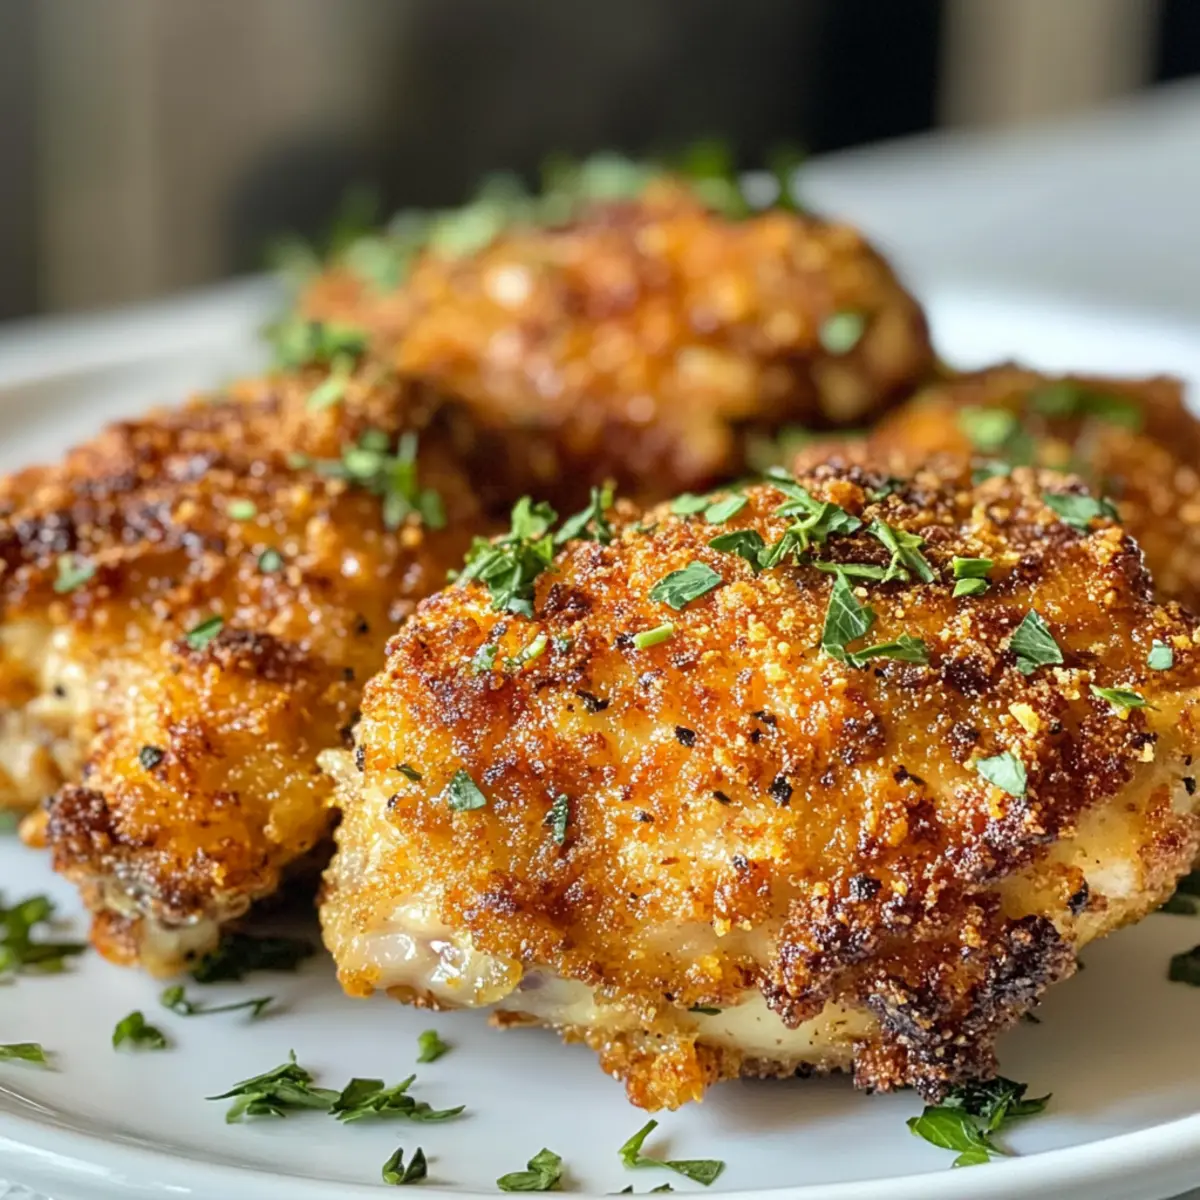
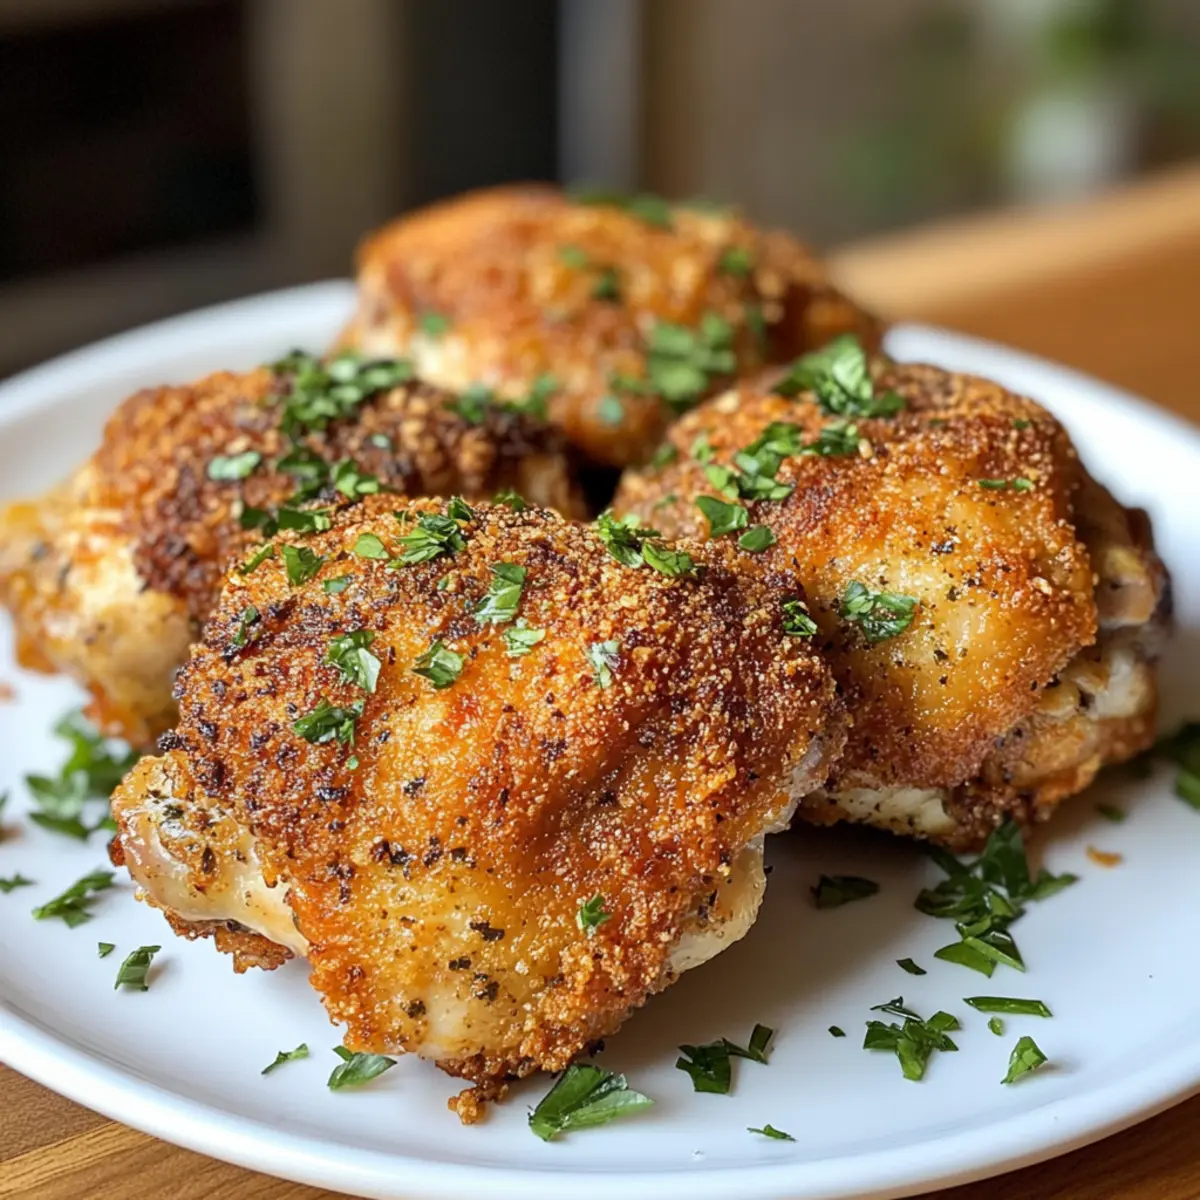
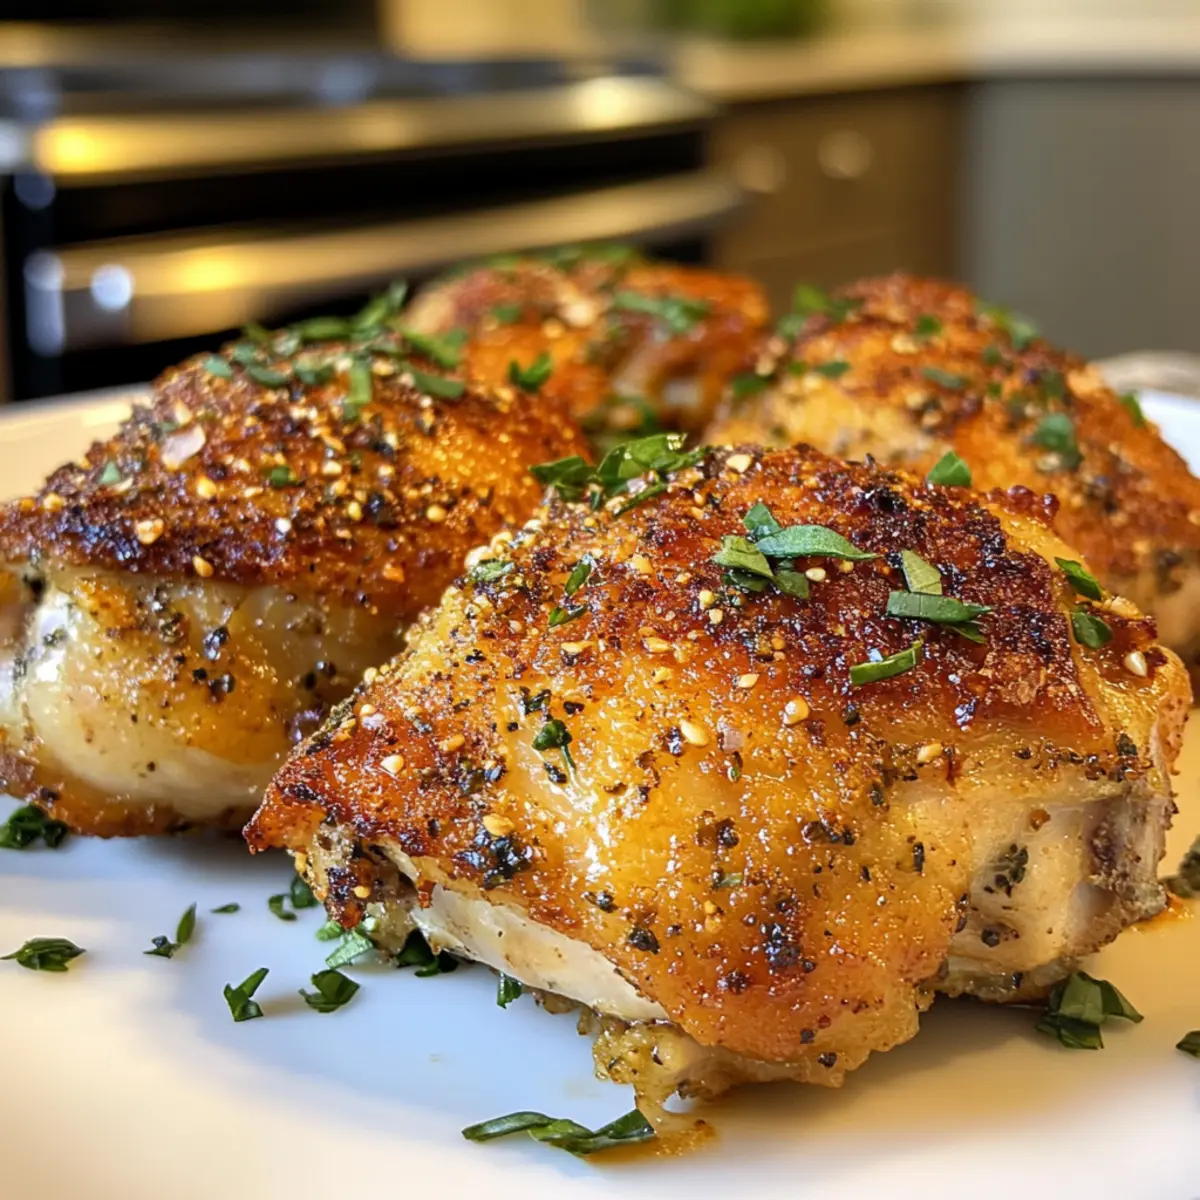
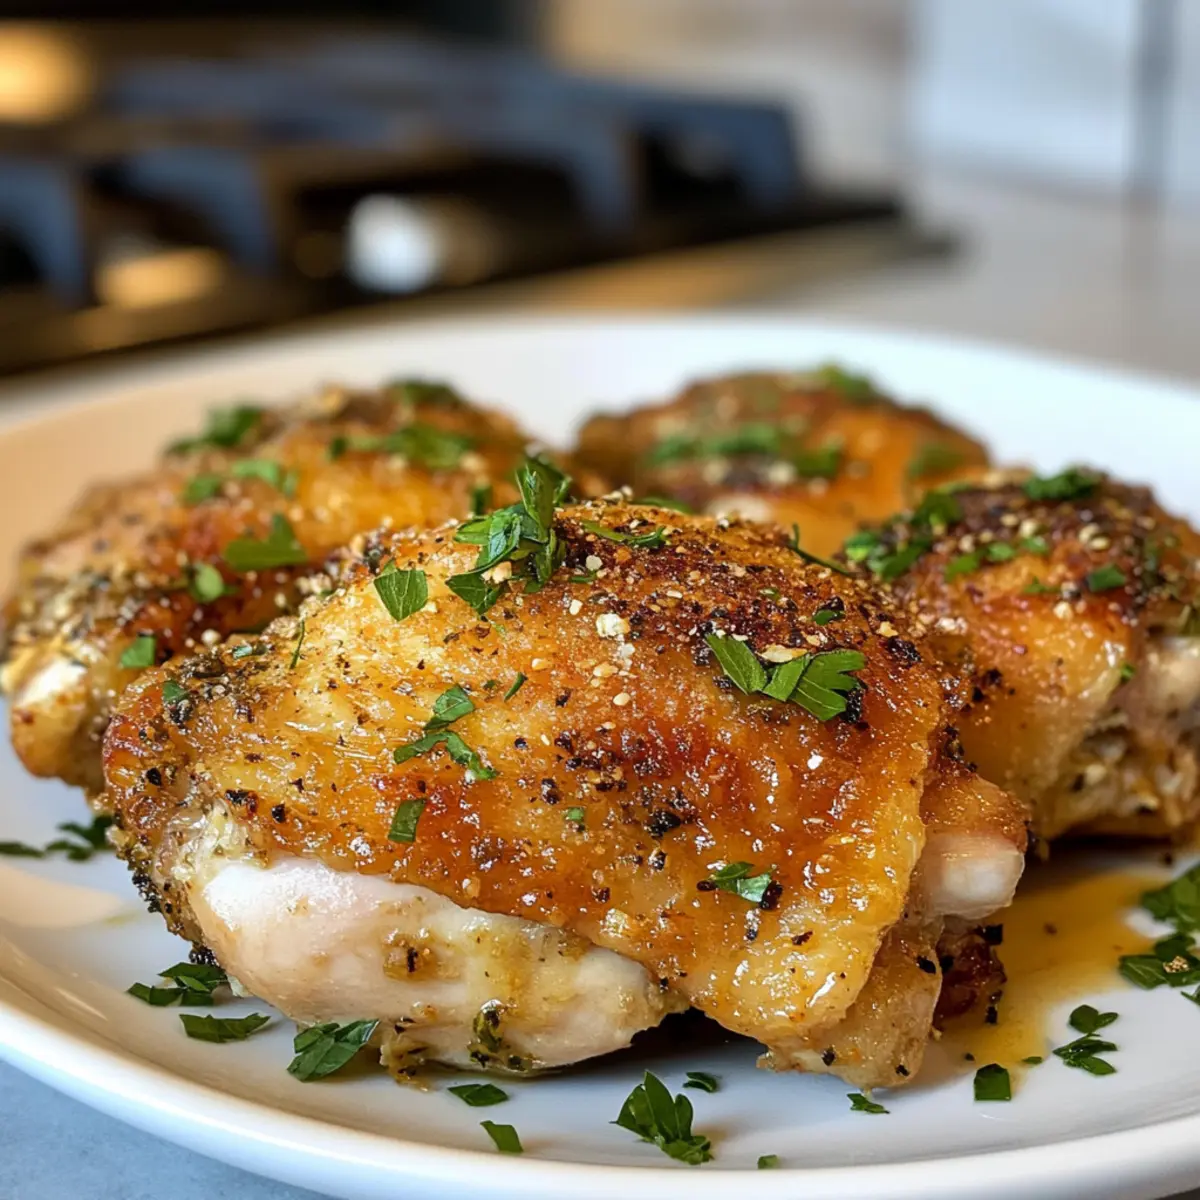
Crispy Hawaiian Fried Garlic Chicken You’ll Crave in 30 Minutes

The tantalizing aroma of sizzling garlic is something I can never resist, especially when preparing a dish as delightful as Crispy Hawaiian Fried Garlic Chicken. This easy recipe, ready in just 30 minutes, showcases the rich flavors of Hawaiian cuisine that elevate a simple family dinner into a festive feast! With a perfect crunch and a sweet, sticky garlic sauce, it’s a true crowd-pleaser for gatherings or a casual lunch. What’s even better? It brings the taste of the islands straight to your kitchen, allowing you to indulge in that tropical vibe without the travel hassle. Are you ready to create a dish that will leave everyone asking for seconds?

Why is Hawaiian Fried Garlic Chicken a Must-try?

Irresistible Flavor: This dish effortlessly combines sweet and savory, making every bite unforgettable.
Quick Prep Time: Ready in just 30 minutes, it’s perfect for busy weeknights or spontaneous gatherings.
Crowd-Pleasing Appeal: With its crunchy texture and sticky garlic sauce, it’s sure to impress family and friends at your next dinner.
Versatile Options: Feel free to swap chicken for shrimp or tofu, tailoring it to your family’s preferences.
Cultural Delight: Enjoy a taste of Hawaii in your home that brings everyone together, just like our Homemade Chicken Pot or Tropical Chicken Pineapple recipes.

Hawaiian Fried Garlic Chicken Ingredients

For the Chicken

  • Chicken – 2 pounds/1 kg, sliced into cubes; this is the main protein source that keeps the dish juicy.
  • Cornstarch – 1 tablespoon (for marinating) & 1/2 cup (for batter); it helps tenderize the chicken and create that crispy coating.
  • Vegetable Oil – 1 tablespoon (for marinating) & additional for frying; choose canola or peanut oil for best results.

For the Sauce

  • Soy Sauce – 3/4 cup; delivers umami flavor—opt for low-sodium for a healthier choice.
  • Sugar – 3/4 cup; balances the salty and savory notes; brown sugar adds a richer taste.
  • Garlic – 1/2 cup, crushed or finely chopped; this is the star ingredient for the ultimate garlic explosion.
  • Green Onion – 1/4 cup, chopped; brings in freshness—chives work well as a substitute.
  • Sesame Oil – 1 tablespoon; deepens the flavor profile; olive oil can be a lighter swap.
  • Red Chili Flakes – 1 teaspoon; adds a touch of heat, perfect for those who like a spicy kick.
  • White Pepper – 1/2 teaspoon; provides subtle spice; black pepper also works well here.

For the Coating

  • Flour – 1 1/2 cups; essential for that golden, crispy coating; substitute with gluten-free flour for dietary needs.
  • Salt – 1/2 teaspoon; helps enhance all flavors—do adjust according to taste.

Elevate your family dinners or casual lunches with this delightful Hawaiian Fried Garlic Chicken that packs flavor and crunch in every bite!

Step‑by‑Step Instructions for Hawaiian Fried Garlic Chicken

Step 1: Prepare Garlic Sauce
In a saucepan, combine 3/4 cup soy sauce and 3/4 cup sugar over medium heat. Stir until the mixture comes to a boil, then reduce to a simmer for 2-3 minutes until slightly thickened. Add 1/2 cup crushed garlic, 1/4 cup chopped green onion, 1 tablespoon sesame oil, 1 teaspoon red chili flakes, and 1/2 teaspoon white pepper; simmer for another minute before setting aside.

Step 2: Marinate Chicken
In a large mixing bowl, combine 2 pounds of cubed chicken with 4-5 tablespoons of the prepared garlic sauce, 1 tablespoon of cornstarch, and 1 tablespoon of vegetable oil. Toss everything together until the chicken is well coated, then cover the bowl and let it marinate for 30 minutes at room temperature or refrigerate it for up to overnight for deeper flavor absorption.

Step 3: Prepare Coating
While the chicken marinates, take a separate bowl and whisk together 1 1/2 cups of flour, 1/2 cup of cornstarch, and 1/2 teaspoon of salt. To create small clumps, mix in 3 tablespoons of the garlic sauce. This dry mix will help achieve a crispy coating when frying the chicken later, so ensure it’s well combined and set aside.

Step 4: Fry Chicken
Heat about 2 inches of vegetable oil in a large frying pan over medium-high heat until shimmering; this should take about 5-7 minutes. Dredge the marinated chicken cubes in the flour-cornstarch mixture, ensuring they are well coated. Fry the chicken in batches for 4-5 minutes, turning occasionally until golden brown and crispy. Drain the fried chicken on paper towels to remove excess oil.

Step 5: Serve
To finish, gently heat the remaining garlic sauce in a small saucepan until warm. Toss the crispy fried chicken in the heated sauce to coat thoroughly. Serve the Hawaiian Fried Garlic Chicken warm over a bed of jasmine rice or alongside the sauce for dipping, bringing a touch of the islands to your dining table.

What to Serve with Crispy Hawaiian Fried Garlic Chicken

Indulge in a sensory journey by pairing your dish with delightful sides and drinks that enhance its flavors.

  • Jasmine Rice: A perfect canvas for the garlic sauce, fluffy jasmine rice balances the sweetness and adds a delightful texture.
  • Fried Rice: This vibrant option, tossed with veggies and garnished with furikake, brings a savory flavor complementing the chicken’s sweetness.
  • Coleslaw: A crunchy, fresh slaw provides a refreshing contrast to the rich garlic chicken—add a touch of pineapple for a tropical flair!
  • Pineapple Chunks: Juicy and sweet, fresh pineapple chunks echo the Hawaiian theme while cutting through the richness of the fried chicken.
  • Soggy-Free Beer or Light Ale: A crisp, cold beer offers a refreshing contrast to the savory flavor of the dish, making each bite a joy!
  • Coconut Water: This refreshing drink not only hydrates but also complements the tropical notes of the dish, cooling down the garlic intensity.
  • Chocolate Lava Cake: End your meal on a sweet note with a decadent dessert that offers a rich contrast to the garlic-forward chicken, making it a delightful finish!

Hawaiian Fried Garlic Chicken Variations

Feel free to explore these delicious twists on this classic recipe that capture the spirit of Hawaiian cuisine!

  • Seafood Swap: Use shrimp instead of chicken for a delightful twist; adjust cooking time as shrimp cooks quickly.

  • Tofu Delight: Substitute cubed firm tofu for a vegetarian option; make sure to press the tofu first to remove excess moisture.

  • Pineapple Splash: Adding a splash of pineapple juice to your marinade brings a sweet, tropical kick that complements the garlic beautifully.

  • Gluten-Free Version: Swap regular flour with almond flour or a gluten-free flour blend to accommodate dietary needs without sacrificing flavor.

  • Spicy Kick: Increase the red chili flakes to 2 teaspoons for a spicier dish; this adds an exciting heat that chili lovers will enjoy.

  • Savory Herbs: Incorporate fresh herbs like cilantro or basil for a fresh flavor boost; toss them into your garlic sauce before coating the chicken.

  • Nutty Crunch: Add crushed macadamia nuts to your flour coating for extra crunch and a nutty flavor that pairs perfectly with Hawaiian dishes.

  • Crispy Air Frying: For a lighter cooking method, prepare your chicken in an air fryer; this achieves that coveted crunch with less oil—perfect for a healthier option!

Each of these variations can make your Hawaiian Fried Garlic Chicken experience uniquely yours. Pair it with a side of jasmine rice or even a refreshing salad and enjoy the taste of the islands right at home. If you’re craving more chicken recipes, check out Homemade Chicken Pot and Honey Chili Chicken for more inspiration!

Expert Tips for Hawaiian Fried Garlic Chicken

  • Use Fresh Garlic: Freshly crushed garlic will elevate your dish with powerful flavor. Avoid pre-minced garlic to maintain that authentic taste.

  • Hot Oil is Key: Make sure the oil is hot enough before adding chicken. If it’s not, the chicken may become soggy rather than crispy, ruining your Hawaiian Fried Garlic Chicken.

  • Don’t Overcrowd: Fry in small batches to prevent crowding. Overloading the frying pan lowers the oil temperature, leading to greasy, unappetizing chicken rather than a crunchy texture.

  • Perfecting the Coating: Ensure your flour mixture clings well by pressing it onto the marinated chicken firmly. This step is crucial for achieving that irresistible crispy exterior.

  • Serve Immediately: For the best taste and texture, serve the chicken right after frying. The longer it sits, the less crispy it will become!

Make Ahead Options

These Crispy Hawaiian Fried Garlic Chicken bites are perfect for meal prep enthusiasts! You can marinate the chicken up to 24 hours in advance, allowing the flavors to deepen. Simply combine the cubed chicken with garlic sauce, cornstarch, and vegetable oil, then refrigerate it. Additionally, prepare the garlic sauce and coating mixture on the same day, storing them separately in the fridge for up to 3 days. When you’re ready to serve, just heat the oil and fry the marinated chicken until golden and crispy. This approach not only saves time but also guarantees that your dish is just as delicious, ensuring that family dinners can be quick and enjoyable!

Storage Tips for Hawaiian Fried Garlic Chicken

  • Fridge: Store leftover Hawaiian Fried Garlic Chicken in an airtight container for up to 3 days. Make sure it’s completely cooled before sealing to maintain quality.

  • Freezer: For longer storage, freeze the chicken in a freezer-safe container for up to 2 months. It’s best to separate pieces with parchment paper to prevent sticking.

  • Reheating: When ready to eat, reheat the chicken in the oven at 350°F (175°C) for about 15-20 minutes to restore crispiness. Microwaving is quicker but may leave it soggy, so take care.

  • Serving Tips: To revive the sticky garlic sauce, gently heat it on the stove and toss the reheated chicken before serving. It’ll taste just as delicious as freshly made!

Hawaiian Fried Garlic Chicken Recipe FAQs

How do I select the right chicken for this recipe?
Absolutely! Choose skinless, boneless chicken thighs or breasts for juicy results. Thighs tend to be more forgiving and moist, but breast meat can also work well if cooked properly. Look for pieces that are pink and firm, avoiding any that have dark spots or an off smell.

How should I store leftover Hawaiian Fried Garlic Chicken?
It’s easy! Once cooled, store your leftover chicken in an airtight container in the fridge for up to 3 days to maintain its best quality. Cool it completely before sealing to prevent condensation and sogginess. If you want to keep it longer, you can freeze the chicken in a freezer-safe container for up to 2 months.

Can I freeze Hawaiian Fried Garlic Chicken? How?
Yes, you can! To freeze your chicken, first, ensure it’s completely cooled. Then, place the pieces in a single layer on a parchment-lined baking sheet to freeze individually for about 1-2 hours. Afterward, transfer the frozen chicken to a freezer-safe bag or container, separating pieces with parchment paper to prevent sticking. Label with the date for best practices and enjoy within 2 months.

What should I do if my chicken isn’t getting crispy?
Very! If your chicken isn’t crispy, check a few things. First, ensure your oil is hot enough—about 350°F (175°C) before adding the chicken. This usually takes about 5-7 minutes when heating. Also, avoid overcrowding the pan, as that lowers the oil temperature. Remember, frying in batches is key to keeping that delightful crunch!

Is Hawaiian Fried Garlic Chicken suitable for anyone with common allergies?
I recommend caution! This recipe contains soy sauce, which often has gluten, and can be an allergen for some. To make it gluten-free, simply use a gluten-free soy sauce substitute. Additionally, be mindful of the garlic, which can cause digestive issues for some individuals. Always double-check ingredients based on dietary restrictions when serving guests.

Hawaiian Fried Garlic Chicken

Crispy Hawaiian Fried Garlic Chicken You'll Crave in 30 Minutes

Discover the irresistible flavors of Hawaiian Fried Garlic Chicken, perfectly crispy and ready in just 30 minutes.
Prep Time 30 minutes
Cook Time 10 minutes
Total Time 40 minutes
Servings: 4 pieces
Course: Chicken
Cuisine: Hawaiian
Calories: 350

Ingredients
  

For the Chicken
  • 2 pounds Chicken, sliced into cubes main protein source
  • 1 tablespoon Cornstarch for marinating
  • 1/2 cup Cornstarch for batter
  • 1 tablespoon Vegetable Oil for marinating
  • additional Vegetable Oil for frying
For the Sauce
  • 3/4 cup Soy Sauce opt for low-sodium
  • 3/4 cup Sugar brown sugar adds richness
  • 1/2 cup Garlic, crushed or finely chopped star ingredient
  • 1/4 cup Green Onion, chopped brings freshness
  • 1 tablespoon Sesame Oil deepens flavor
  • 1 teaspoon Red Chili Flakes for heat
  • 1/2 teaspoon White Pepper subtle spice
For the Coating
  • 1 1/2 cups Flour for crispy coating
  • 1/2 teaspoon Salt enhances flavors

Equipment

  • Large frying pan
  • Saucepan
  • mixing bowl
  • whisk
  • Measuring cups
  • Measuring spoons
  • Paper Towels

Method
 

Step-by-Step Instructions
  1. Prepare Garlic Sauce: In a saucepan, combine soy sauce and sugar over medium heat. Stir until boiling, then simmer for 2-3 minutes. Add crushed garlic, chopped green onion, sesame oil, red chili flakes, and white pepper; simmer for another minute.
  2. Marinate Chicken: In a bowl, combine cubed chicken, 4-5 tablespoons of garlic sauce, cornstarch, and vegetable oil. Toss until well coated, cover, and let marinate for 30 minutes.
  3. Prepare Coating: In a separate bowl, whisk together flour, cornstarch, and salt. Mix in 3 tablespoons of garlic sauce to create clumps. Set aside.
  4. Fry Chicken: Heat vegetable oil in a frying pan over medium-high heat until shimmering. Dredge marinated chicken in the flour mixture and fry in batches for 4-5 minutes until golden and crispy.
  5. Serve: Gently heat remaining garlic sauce, then toss the fried chicken to coat. Serve warm over jasmine rice or with sauce for dipping.

Notes

Use fresh garlic for the best flavor. Make sure oil is hot before frying to avoid sogginess. Do not overcrowd the frying pan for the crispiest results.

Crunchy Teriyaki Cauliflower Wings That Steal the Show

As I stood in my kitchen, I couldn’t help but think how the world doesn’t always appreciate the beauty of a simple cauliflower. Enter these Crunchy Teriyaki Cauliflower Wings! Coated in crunchy tortilla chips, they combine a delightful blend of sweet and savory teriyaki flavor that turns an often-overlooked vegetable into a show-stopping appetizer. The best part? They’re not just gluten-free and vegan but also incredibly quick to whip up, making them an irresistible choice for any gathering or a late-night snack. So, are you ready to elevate your snack game and dive into a deliciously crispy experience that won’t weigh you down? Let’s get started!

Why Choose Cauliflower Wings?

Unique Flavor Fusion: These Crunchy Teriyaki Cauliflower Wings offer a sensational mix of sweet and savory notes that will please any palate.

Quick to Prepare: In just under 30 minutes, you can have a delicious appetizer ready to impress your guests.

Crispy Satisfaction: The crushed tortilla chips create an incredible crunch that keeps you coming back for more!

Versatile Enjoyment: Pair them with ranch dressing or enjoy them on their own for a versatile snack solution.

Healthier Alternative: Being gluten-free and vegan, these wings are a guilt-free option for satisfying your cravings without sacrificing flavor. Try them alongside a refreshing Crunchy Cabbage Carrot salad for a complete meal!

Crunchy Teriyaki Cauliflower Wings Ingredients

For the Cauliflower Wings
Cauliflower – The star of the dish that provides bulk and a tender bite.
Crushed Tortilla Chips – Adds an irresistible crunch; Siete Foods is a great gluten-free option.
Gluten-Free All-Purpose Flour – Ensures a great batter consistency; you can substitute with regular flour for a non-gluten-free version.
Tapioca Flour – Enhances the crispiness of your wings; arrowroot flour or corn starch can also be used if needed.
Non-Dairy Milk – Binds the ingredients; any non-dairy milk like almond or soy works well.

For Seasoning
Ground Black Pepper – Adds a bit of heat; adjust according to your spice preference.
Sea Salt – Brings out the flavors; season to taste.
Garlic Powder – Infuses a savory depth; feel free to substitute with fresh garlic for a more vibrant taste.

For the Teriyaki Coating
Teriyaki Sauce – Delivers that sweet and savory umami flavor; store-bought is perfectly fine, just thicken with water if necessary.

For Garnishing
Scallions – Adds a fresh, mild onion flavor and a pop of color.
Sesame Seeds – Optional for an extra touch of texture and nutty flavor.

For Dipping
Ranch Dressing – A creamy dip that pairs beautifully with the wings, optional but highly recommended!

These Crunchy Teriyaki Cauliflower Wings are set to bring joy and flavor to your table, turning every bite into a delightful experience!

Step‑by‑Step Instructions for Crunchy Teriyaki Cauliflower Wings

Step 1: Preheat and Prepare
Preheat your oven to 450°F (232°C) and line a baking sheet with parchment paper for easy cleanup. This crucial first step ensures that your Crunchy Teriyaki Cauliflower Wings will bake evenly and come out beautifully golden. Make sure your oven is fully heated before you add the cauliflower for the best results.

Step 2: Chop Cauliflower
Next, chop the cauliflower into evenly-sized florets, aiming for pieces similar in size to make sure they cook uniformly. This step is essential to achieving that perfect texture—crunchy on the outside while tender on the inside. Set the florets aside in a large mixing bowl as you prep the coating.

Step 3: Crush the Chips
Using a blender or food processor, crush the tortilla chips until they resemble coarse crumbs. Pour the crushed chips into a shallow bowl—this will create your crunchy coating for the wings. The texture from the chips will contribute significantly to the delightful crunch of your Crunchy Teriyaki Cauliflower Wings, so take care to get the right consistency.

Step 4: Prepare the Batter
In a separate bowl, whisk together the gluten-free flour, tapioca flour, non-dairy milk, pepper, salt, and garlic powder until the mixture is smooth and well combined. The batter should be thick yet pourable. This will create a sticky coating that evenly adheres to the cauliflower florets, ensuring delicious flavor in every bite.

Step 5: Coat the Cauliflower
Toss the cauliflower florets in the batter until they are thoroughly coated. Use your hands to ensure each piece is well-covered, allowing the batter to stick. This coating is pivotal in achieving a crispy outer layer once baked, so don’t rush this step; make sure each floret is bathed in the sweet, garlicky goodness of the batter.

Step 6: Coat with Tortilla Chips
After coating, transfer the veggie florets to the bowl with the crushed tortilla chips, tossing gently to coat them thoroughly. Arrange the coated cauliflower pieces on the prepared baking sheet, ensuring they are spaced out to allow for even baking. This prevents the cauliflower wings from steaming, which helps to maintain their crunch throughout the cooking process.

Step 7: Bake the Wings
Place the baking sheet in the preheated oven and bake for 20-22 minutes, or until the cauliflower wings are golden and crispy. Keep an eye on them in the last few minutes to avoid over-baking. You’ll know they’re done when they’re puffed up and have a tantalizing crunch—your kitchen will smell heavenly!

Step 8: Prepare the Teriyaki Sauce
While the wings are baking, in a separate bowl, prepare the teriyaki sauce by thinning it with a bit of water if necessary. Give it a good mix to reach your desired consistency; this will help it cling better to the wings later. This sweet and savory sauce will elevate your Crunchy Teriyaki Cauliflower Wings to a whole new level.

Step 9: Coat with Sauce
Once the cauliflower wings are baked to perfection, remove them from the oven and either dip each wing in the teriyaki sauce or brush it on generously. Return them to the oven for an additional 5 minutes to allow the flavors to meld and the coating to set. Watch as the wings gleam with that luscious teriyaki sauce!

Step 10: Serve and Garnish
Finally, serve your Crunchy Teriyaki Cauliflower Wings hot, garnished with freshly chopped scallions and optional sesame seeds for a burst of color and flavor. For an extra treat, place some ranch dressing alongside them for dipping. These wings are perfect for sharing—or keeping all to yourself!

Crunchy Teriyaki Cauliflower Wings Variations

Feel free to customize your Crunchy Teriyaki Cauliflower Wings for a unique twist on this delightful dish!

  • BBQ Blast: Swap the teriyaki sauce for your favorite BBQ sauce for a smoky, sweet flavor profile.

  • Spicy Heat: Add cayenne pepper or chili powder to the batter for a fiery kick that balances the teriyaki sweetness. You’ll feel the heat as you savor each bite!

  • Nutty Flavor: Incorporate a spoonful of peanut butter into the teriyaki sauce for a creamy, nutty twist that adds richness and depth.

  • Herb Infusion: Mix fresh herbs like cilantro or basil into the batter or garnish. This will elevate your wings with a refreshing herbal note, making them feel vibrant.

  • Chip Variety: Experiment with different types of chips, such as Crunchy Banana Seed or breadcrumbs as your coating base for diverse textures.

  • Extra Crispy: For an even crunchier texture, double-dip the cauliflower florets in the batter and chips, ensuring everyone gets double the fun in each bite.

  • Veggie Medley: Add some sliced carrots or zucchini into the batter alongside the cauliflower for added nutrition and color. They’ll roast beautifully, adding delightful surprises.

  • Creamy Dipping Sauce: Whip up a quick spicy mayonnaise or ranch dressing for a zesty dip that complements the wings, much like pairing them with a fresh Crunchy Cucumber Egg salad for a refreshing crunch.

Let your creativity shine as you adapt these Crunchy Teriyaki Cauliflower Wings into your own family-favorite dish!

Make Ahead Options

These Crunchy Teriyaki Cauliflower Wings are a fantastic choice for meal prep, allowing busy home cooks to streamline their kitchen efforts! You can prepare the cauliflower florets and coat them in the batter up to 24 hours in advance, just make sure to cover them tightly in the fridge to prevent browning. Additionally, crush the tortilla chips and store them in an airtight container until you’re ready to bake. When it’s time to enjoy, simply toss the cauliflower in the crushed chips, bake for 20-22 minutes, then coat with teriyaki sauce and bake for an extra 5 minutes. This way, you can savor a delicious, homemade snack with minimal effort!

Storage Tips for Crunchy Teriyaki Cauliflower Wings

Fridge: Store your Crunchy Teriyaki Cauliflower Wings in an airtight container in the fridge for up to 2 days. This will help preserve their flavor and texture as best as possible.

Freezer: For longer storage, freeze the wings before coating them in teriyaki sauce. Place them in a single layer on a baking sheet, freeze until solid, then transfer to a freezer-safe bag for up to 1 month.

Reheating: To restore the crunchiness, reheat in the oven at 375°F (190°C) for about 10-15 minutes. Avoid microwaving, as this can make them soggy.

Serving Tip: These cauliflower wings are best enjoyed fresh, so aim to finish them within a couple of days for the ultimate crispy experience!

Expert Tips for Crunchy Teriyaki Cauliflower Wings

  • Uniform Florets: Ensure your cauliflower pieces are the same size to guarantee even cooking and optimal crunchiness throughout every bite.

  • Tortilla Chips Choice: Opt for thicker tortilla chips to ensure a robust crunch. Brands like Siete Foods are fantastic for a gluten-free option with great flavor.

  • Batter Consistency: Achieve the right batter thickness by gradually adding non-dairy milk. A stickier batter helps the cauliflower wings maintain a crispy exterior while baking.

  • Serve Hot: For the best experience, serve your Crunchy Teriyaki Cauliflower Wings immediately after baking. This keeps them crispy and prevents them from getting soggy.

  • Air Fryer Option: For a quicker alternative, use an air fryer. Cook at 400°F for 5 minutes before coating in teriyaki sauce, then air fry for an additional 3 minutes for perfectly crispy results.

What to Serve with Crunchy Teriyaki Cauliflower Wings

Elevate your snacking experience by pairing these crispy delights with complementary sides and flavors that enhance every bite.

  • Creamy Vegan Coleslaw: A crunchy and refreshing slaw balances the savory wings and adds a cooling touch, perfect for contrast.

  • Sweet Potato Fries: Their natural sweetness and crispy texture pair beautifully, creating an irresistible flavor harmony that’s sure to satisfy.

  • Spicy Sriracha Hummus: A zesty dip that provides a creamy element and a kick of spice, enhancing the umami flavor of the wings.

  • Grilled Vegetable Skewers: Adding smoky grilled veggies brings a medley of flavors, rounding out a colorful and healthy plate.

  • Quinoa Salad: Light and fluffy quinoa mixed with fresh herbs and veggies combines protein with flavor, making it a delightful companion.

  • Apple Slices with Almond Butter: A sweet and crunchy snack contrasts the savory wings while bringing a refreshing, light touch to the meal.

  • Ginger-Lemon Sparkling Water: This refreshing drink cleanses the palate and balances the rich flavors, making it an ideal beverage choice.

  • Chocolate Avocado Mousse: For dessert, this creamy, rich chocolate treat offers a decadent yet healthy finish that leaves everyone satisfied.

Crunchy Teriyaki Cauliflower Wings Recipe FAQs

What type of cauliflower is best for these wings?
Absolutely! When selecting cauliflower, look for heads that are firm with tight, bright green leaves. They should be free from dark spots or blemishes. A fresh cauliflower will yield the best texture and flavor for your Crunchy Teriyaki Cauliflower Wings.

How do I store leftover cauliflower wings?
Once cooled, store your Crunchy Teriyaki Cauliflower Wings in an airtight container in the fridge for up to 2 days. To keep them crispy, reheat them in the oven rather than the microwave. Preheat your oven to 375°F (190°C) and bake for about 10-15 minutes to restore that crunchy goodness.

Can I freeze the wings, and if so, how?
Absolutely! For freezing, coat the cauliflower florets in the batter but do not add the teriyaki sauce yet. Arrange them in a single layer on a baking sheet and freeze until solid. Once frozen, transfer the wings to a freezer-safe bag for up to 1 month. When you’re ready to enjoy them, bake from frozen until golden, then dip or brush with the teriyaki sauce and bake again for those last few minutes.

What if my wings aren’t crispy enough?
Very! Ensuring an even layer of batter and properly spaced florets on the baking sheet is key for maximum crunch. If your Crunchy Teriyaki Cauliflower Wings come out less crispy than you’d like, try increasing the baking time by a couple of minutes while keeping an eye on them to prevent burning. Also, make sure your oven is fully preheated before baking for best results.

Are these wings suitable for allergen concerns?
Yes! These wings are gluten-free and vegan, making them a great option for many dietary restrictions. However, if you’re serving to guests, always double-check labels on your ingredients, especially your teriyaki sauce and tortilla chips, to ensure they meet specific allergy needs. If serving children or pets, remember that teriyaki sauce usually contains soy and can be high in sodium, so please adjust accordingly!

Crunchy Teriyaki Cauliflower Wings

Crunchy Teriyaki Cauliflower Wings That Steal the Show

These Crunchy Teriyaki Cauliflower Wings combine sweet and savory flavors, making them a delicious, gluten-free, and vegan snack.
Prep Time 10 minutes
Cook Time 22 minutes
Total Time 32 minutes
Servings: 4 wings
Course: Other
Cuisine: Gluten-Free, Vegan
Calories: 150

Ingredients
  

For the Cauliflower Wings
  • 1 head Cauliflower Chopped into florets
  • 1 cup Crushed Tortilla Chips Siete Foods is a great gluten-free option
  • 1/2 cup Gluten-Free All-Purpose Flour Can substitute with regular flour
  • 1/4 cup Tapioca Flour Can also use arrowroot flour or corn starch
  • 1 cup Non-Dairy Milk Any non-dairy milk like almond or soy
For Seasoning
  • 1/2 teaspoon Ground Black Pepper Adjust according to spice preference
  • 1 teaspoon Sea Salt Season to taste
  • 1 teaspoon Garlic Powder Can substitute with fresh garlic
For the Teriyaki Coating
  • 1/2 cup Teriyaki Sauce Store-bought is fine, thicken with water if necessary
For Garnishing
  • 2 tablespoons Scallions Chopped
  • Sesame Seeds Optional
For Dipping
  • 1 cup Ranch Dressing Optional but highly recommended

Equipment

  • oven
  • Blender or Food Processor
  • baking sheet
  • parchment paper
  • mixing bowls

Method
 

Step-by-Step Instructions for Crunchy Teriyaki Cauliflower Wings
  1. Preheat your oven to 450°F (232°C) and line a baking sheet with parchment paper.
  2. Chop the cauliflower into evenly-sized florets and set aside in a large mixing bowl.
  3. Crush the tortilla chips until they resemble coarse crumbs and pour into a shallow bowl.
  4. In a separate bowl, whisk together the gluten-free flour, tapioca flour, non-dairy milk, pepper, salt, and garlic powder until smooth.
  5. Toss the cauliflower florets in the batter until thoroughly coated.
  6. Transfer the batter-coated florets to the bowl of crushed tortilla chips and toss to coat.
  7. Arrange the coated cauliflower pieces on the prepared baking sheet.
  8. Bake for 20-22 minutes, until golden and crispy.
  9. Prepare the teriyaki sauce by thinning it with water if needed.
  10. Once baked, dip each wing in the teriyaki sauce or brush it on generously, then return to the oven for 5 minutes.
  11. Serve hot, garnished with scallions and sesame seeds, with ranch dressing on the side.

Notes

Best served immediately for optimal crispiness.

Hawaiian Style Korean Fried Chicken: Crispy Bliss Awaits

Every time I take a bite of this Hawaiian Style Korean Fried Chicken, I can almost feel the ocean breeze and the sizzle of a backyard barbecue. This incredible fusion dish marries the traditional crunch of double-fried chicken with a vibrant sweet chili garlic sauce, resulting in a snack that’s both satisfying and unforgettable. What makes this recipe a standout is not just its easy preparation but also its ability to impress friends and family—whether it’s game day or a cozy dinner at home. With each crunchy piece, you experience a delightful contrast of textures and flavors, bringing a taste of paradise right to your plate. Are you ready to dive into this culinary adventure with me?

Why is Hawaiian Style Korean Fried Chicken special?

Bold Fusion: The blend of Hawaiian and Korean flavors creates a unique dining experience that tantalizes the taste buds.
Crispy Heaven: Double-frying locks in the juiciness while providing an irresistible crunchy texture.
Quick Prep: With straightforward instructions, this recipe is perfect for any home cook, making deliciousness accessible to everyone.
Crowd-Pleaser: Ideal for game days or family gatherings—people will rave about this dish!
Versatile Options: Customize with tofu or cauliflower for a vegetarian delight, or spice things up with extra chili garlic sauce. This Hawaiian Style Korean Fried Chicken is your ticket to bringing excitement back to meal times!

Hawaiian Style Korean Fried Chicken Ingredients

Get ready to whip up a delightful dish with these key ingredients!

  • For the Chicken

  • Chicken – 2 lbs boneless, skinless breasts or thighs; thighs provide juicier results.

  • Salt – 1 tsp; enhances the overall flavor of the chicken.

  • Potato Starch – 3/4 cup; creates a light, crispy coating when fried.

  • For the Sauce

  • Shoyu (Soy Sauce) – 1/2 cup; adds umami and moisture to the sauce.

    • Substitution: Use Tamari for a gluten-free option.
  • Brown Sugar – 1/3 cup; balances the sauce with sweetness.

    • Substitution: Honey or maple syrup can offer a unique flavor twist.
  • Chili Garlic Sauce – 2 Tbsp; introduces heat and garlic flavor to the sauce.

    • Note: Adjust spice level with Sriracha for more heat.
  • Sesame Oil – 2 tsp; imparts a deliciously toasted, nutty flavor.

  • Garlic – 2 cloves, minced; enhances the sauce with robust garlic goodness.

  • Green Onions – 1/2 cup, diced; adds freshness to the sauce.

  • For the Frying

  • Vegetable Oil – Enough for frying (about 3/4″ in depth); ensure it’s hot for perfect frying.

  • Finishing Touches

  • Sesame Seeds – 1 Tbsp; adds a nutty touch and decorative flair.

  • Garlic Powder – 1 tsp; for an extra layer of flavor in the coating.

Now that you have everything ready, it’s time to create that unforgettable Hawaiian Style Korean Fried Chicken!

Step‑by‑Step Instructions for Hawaiian Style Korean Fried Chicken

Step 1: Prepare Chicken
Start by cutting the boneless, skinless chicken into bite-sized pieces, ensuring uniformity for even cooking. In a mixing bowl, toss the chicken with potato starch, garlic powder, and salt, making sure every piece is well-coated. Cover and refrigerate for at least 1 hour—this helps develop the flavor and achieve that perfect texture.

Step 2: Heat Oil
In a heavy-bottomed pan, pour in enough vegetable oil to create a depth of about 3/4 inch for frying. Heat the oil over medium heat until it reaches a temperature of 175°C (350°F). To test if it’s ready, drop a small piece of chicken in; it should sizzle immediately. This crucial step ensures your Hawaiian Style Korean Fried Chicken comes out crispy and golden.

Step 3: First Frying
Carefully place a batch of the chicken pieces into the hot oil, making sure not to overcrowd the pan. Fry them for about 8–10 minutes, turning occasionally until they develop a light golden color. Use a slotted spoon to transfer the chicken to a plate lined with paper towels to drain excess oil. This step creates that initial crunchy layer you’ll love.

Step 4: Second Frying
After the first fry, let the chicken rest for 1–2 minutes. Then, return the chicken to the hot oil for a second fry. This time, fry for an additional 2–3 minutes until the pieces are a deep golden brown and irresistibly crispy. This double-frying method is what elevates the texture of your Hawaiian Style Korean Fried Chicken, ensuring it’s perfectly crunchy.

Step 5: Make Sauce
While the chicken is frying, prepare the sauce. In a large bowl, whisk together the shoyu, diced green onions, brown sugar, chili garlic sauce, sesame seeds, minced garlic, and sesame oil. Mix until well combined, creating a delectable sauce that harmonizes the sweet and savory flavors, which will coat your crispy chicken beautifully.

Step 6: Coat Chicken
Once the chicken is perfectly fried, immediately toss it in the sauce while it’s still hot. Use a large spatula or tongs to gently but thoroughly coat each piece, ensuring they’re all saturated with the vibrant sauce. This final step brings all those flavors together, transforming your fried chicken into a spectacular dish of Hawaiian Style Korean Fried Chicken.

Make Ahead Options

These Hawaiian Style Korean Fried Chicken are perfect for busy meal preppers! You can prepare the chicken by cutting it into bite-sized pieces and tossing it with potato starch, garlic powder, and salt up to 24 hours in advance, refrigerating it until you’re ready to cook. Additionally, you can whisk together the sauce ingredients and store it in an airtight container in the fridge for up to 3 days. When it’s time to serve, simply fry the chicken as directed for that crispy crunch and toss it in the pre-made sauce for a delightful burst of flavor. This approach allows you to enjoy delicious homemade snacks with minimal last-minute effort!

Expert Tips for Hawaiian Style Korean Fried Chicken

  • Optimal Oil Temperature: Keep the oil at 175°C (350°F) for perfect frying; too hot burns the coating while too cool makes it greasy.

  • Double Frying Benefit: Don’t skip the second frying; this is key to achieving that unmatched crunch and enhancing the overall texture of your Hawaiian Style Korean Fried Chicken.

  • Resting Time: Allow the chicken to rest for 1-2 minutes between fries; it helps create a more even and crisp coating.

  • Coating Technique: Toss the hot fried chicken in the sauce immediately after frying to ensure every piece is beautifully coated and flavorful.

  • Substitution Insights: Feel free to swap potato starch with cornstarch if needed, but remember the texture will differ slightly—stick to potato starch for maximum crunch!

What to Serve with Hawaiian Style Korean Fried Chicken?

Bring your meal to life with delightful pairings that enhance every bite of this crispy and savory chicken.

  • Hawaiian Mac Salad: Creamy and tangy, this classic dish complements the savory notes of the chicken while adding a cooling element.

  • Fresh Pineapple Salsa: The sweet and vibrant flavors add a tropical twist that beautifully balances the spicy and savory aspects of the chicken.

  • Garlic Fried Rice: This aromatic side pairs perfectly, as it provides a satisfying base while soaking up the delicious sauce drippings.

  • Crisp Asian Slaw: Crunchy and refreshing, this slaw made with cabbage and carrots adds a lovely texture contrast, brightening the meal.

  • Sweet Potato Fries: Their subtle sweetness offers a delightful contrast to the spicy chicken, creating a harmonious balance of flavors on your plate.

  • Fruit Salad: A vibrant mix of seasonal fruits brings extra freshness and complements the dish with its natural sweetness and juiciness.

  • Sparkling Water with Lime: Effervescent and zesty, this beverage cuts through the richness of the fried chicken and enhances the tropical theme.

  • Chocolate Lava Cake: Cap off the meal with a rich, warm dessert that melts beautifully, delivering a luscious finish to your delightful dining experience.

How to Store and Freeze Hawaiian Style Korean Fried Chicken

Fridge: Store your leftover Hawaiian Style Korean Fried Chicken in an airtight container for up to 3 days. This helps retain its flavors and prevents drying out.

Freezer: For longer storage, freeze the chicken in an airtight container or freezer bag for up to 2 months. This way, you can enjoy a delicious snack anytime!

Reheating: To reclaim that crispy goodness, simply reheat in an oven at 180°C (350°F) for about 10-15 minutes or in an air fryer for 5-7 minutes until heated through.

Thawing: Always thaw frozen chicken in the refrigerator overnight before reheating to maintain its delicious flavor and texture.

Variations & Substitutions

Customization is the heart of cooking, so let your creativity shine with these delightful twists!

  • Vegetarian Delight: Substitute chicken with tofu or cauliflower for a fabulous vegetarian option that still packs great flavor.
  • Extra Crunch: Swap out potato starch for panko breadcrumbs for an even crispier coating that amplifies the texture.
  • Gluten-Free Option:Replace shoyu with tamari and enjoy this dish without the gluten; it keeps that delicious umami flavor intact.
  • Spicy Kick: Stir in extra chili garlic sauce or add fresh chopped chilies to the sauce for a fiery boost that daring taste buds will love.
  • Fruity Touch: Toss in some diced pineapple or mango into the sauce to infuse sweetness and a tropical vibe that pairs well with the dish.
  • Heat Adjustment: If you’re not a fan of spice, use garlic paste instead of chili garlic sauce for a milder taste without sacrificing the richness.
  • Nuts for Crunch: Top your finished chicken with chopped macadamia nuts or peanuts for a delightful crunch and an extra layer of flavor.
  • Herb Infusion: Add chopped fresh cilantro or basil to the sauce for a refreshing herbaceous note that brightens every bite.

Explore these variations or mix and match to find your favorite! They’ll elevate your Hawaiian Style Korean Fried Chicken experience even further. For more delicious chicken ideas, be sure to check out our Homemade Chicken Pot and Tropical Chicken Pineapple recipes!

Hawaiian Style Korean Fried Chicken Recipe FAQs

What type of chicken should I use for Hawaiian Style Korean Fried Chicken?
For this recipe, I recommend using boneless, skinless chicken thighs. They provide a juicier texture compared to breasts, making your fried chicken even more delicious and tender. However, if you prefer leaner meat, chicken breasts can also work well!

How can I properly store Hawaiian Style Korean Fried Chicken?
You can store leftovers in an airtight container in the refrigerator for up to 3 days. This will keep the chicken flavorful and moist. If you want to enjoy it longer, consider freezing the chicken. Just make sure to place it in a freezer bag or airtight container; it can stay fresh for up to 2 months.

What’s the best way to reheat the chicken while keeping it crispy?
To reheat your Hawaiian Style Korean Fried Chicken and retain that marvelous crunch, preheat your oven to 180°C (350°F). Place the chicken on a baking sheet and heat for about 10-15 minutes. Alternatively, an air fryer works wonders too—just heat the chicken for about 5-7 minutes at 175°C (350°F), and it’ll regain that delightful crispy exterior!

Can I make Hawaiian Style Korean Fried Chicken ahead of time?
Absolutely! If you plan to serve this dish at a gathering, you can fry the chicken in advance and store it. Just follow the storing instructions, and when you’re ready to serve, reheat it as mentioned above. For the best flavor, try making the sauce fresh to coat the chicken just before serving.

Are there any dietary considerations I should keep in mind?
Yes, if you’re accommodating guests with dietary restrictions, consider switching to tamari instead of shoyu for gluten-free options. Also, if you have vegetarians at your table, you can substitute the chicken with tofu or cauliflower. Each will absorb the vibrant sauce beautifully and make for a delightful dish.

What can I do if my chicken turns out greasy after frying?
If your chicken turns out greasy, it likely means the oil was not hot enough during frying. Ensure the oil temperature stays around 175°C (350°F) for crispy results. Also, using a wire rack post-frying instead of paper towels allows excess oil to drain off and helps maintain that coveted crispiness.

Hawaiian Style Korean Fried Chicken

Hawaiian Style Korean Fried Chicken: Crispy Bliss Awaits

Try this Hawaiian Style Korean Fried Chicken for a satisfying and unforgettable fusion dish that combines crispy fried chicken with a sweet chili garlic sauce.
Prep Time 30 minutes
Cook Time 20 minutes
Resting Time 1 hour
Total Time 1 hour 50 minutes
Servings: 4 pieces
Course: Chicken
Cuisine: Hawaiian, Korean
Calories: 450

Ingredients
  

For the Chicken
  • 2 lbs boneless, skinless chicken breasts or thighs Thighs provide juicier results.
  • 1 tsp salt Enhances the overall flavor of the chicken.
  • 3/4 cup potato starch Creates a light, crispy coating when fried.
For the Sauce
  • 1/2 cup shoyu (soy sauce) Adds umami and moisture to the sauce. Substitution: Use Tamari for a gluten-free option.
  • 1/3 cup brown sugar Balances the sauce with sweetness. Substitution: Honey or maple syrup can offer a unique flavor twist.
  • 2 Tbsp chili garlic sauce Introduces heat and garlic flavor to the sauce. Note: Adjust spice level with Sriracha for more heat.
  • 2 tsp sesame oil Imparts a deliciously toasted, nutty flavor.
  • 2 cloves garlic, minced Enhances the sauce with robust garlic goodness.
  • 1/2 cup green onions, diced Adds freshness to the sauce.
For the Frying
  • vegetable oil Enough for frying (about 3/4" in depth); ensure it's hot for perfect frying.
Finishing Touches
  • 1 Tbsp sesame seeds Adds a nutty touch and decorative flair.
  • 1 tsp garlic powder For an extra layer of flavor in the coating.

Equipment

  • heavy-bottomed pan
  • mixing bowl
  • slotted spoon
  • spatula or tongs

Method
 

Step-by-Step Instructions
  1. Start by cutting the boneless, skinless chicken into bite-sized pieces, ensuring uniformity for even cooking. In a mixing bowl, toss the chicken with potato starch, garlic powder, and salt, making sure every piece is well-coated. Cover and refrigerate for at least 1 hour—this helps develop the flavor and achieve that perfect texture.
  2. In a heavy-bottomed pan, pour in enough vegetable oil to create a depth of about 3/4 inch for frying. Heat the oil over medium heat until it reaches a temperature of 175°C (350°F). To test if it’s ready, drop a small piece of chicken in; it should sizzle immediately.
  3. Carefully place a batch of the chicken pieces into the hot oil, making sure not to overcrowd the pan. Fry them for about 8–10 minutes, turning occasionally until they develop a light golden color. Use a slotted spoon to transfer the chicken to a plate lined with paper towels.
  4. After the first fry, let the chicken rest for 1–2 minutes. Then, return the chicken to the hot oil for a second fry. Fry for an additional 2–3 minutes until the pieces are a deep golden brown and irresistibly crispy.
  5. While the chicken is frying, prepare the sauce. In a large bowl, whisk together shoyu, diced green onions, brown sugar, chili garlic sauce, sesame seeds, minced garlic, and sesame oil. Mix until well combined.
  6. Once the chicken is perfectly fried, immediately toss it in the sauce while it’s still hot. Use a large spatula or tongs to gently but thoroughly coat each piece.

Notes

Store leftovers in an airtight container for up to 3 days. For longer storage, freeze in an airtight container or freezer bag for up to 2 months. Reheat in an oven at 180°C (350°F) for about 10-15 minutes or in an air fryer for 5-7 minutes.

Crispy Chinese Salt and Pepper Chicken Wings to Savor

As I stood at the bustling street corner, the air filled with the intoxicating aroma of sizzling spices, I knew it was time to recreate that magic in my own kitchen. Enter the Spicy Chinese Salt and Pepper Chicken Wings—a dish that not only delivers a satisfying crunch but also packs a spicy punch that will awaken your taste buds. Marinated in a zesty blend of ginger and garlic, these wings are perfect for gatherings or a cozy night in, and you can whip them up in no time. Whether you choose to deep-fry for that classic crispy texture or opt for an air fryer for a lighter twist, this recipe promises to impress. Who needs takeout when you can whip up these mouthwatering wings right at home? Are you ready to bring a taste of authentic Chinese cuisine to your table?

Why Try These Chicken Wings?

Crispy Texture: Achieve that perfect crunch with a simple frying technique or easily adapt to an air fryer for a lighter option.

Bold Flavors: Each bite is bursting with ginger and garlic, enhanced by heat from stir-fried chiles, ensuring a flavorful experience that’s truly unforgettable.

Easy to Adapt: Need to cater to different tastes? Substitute chicken wings for boneless thighs or adjust spice levels by using milder peppers for family-friendly options.

Quick Preparation: Marinate while prepping other dishes—this recipe is perfect for those looking to get dinner on the table without hassle, just like with Tropical Chicken Pineapple.

Crowd Favorite: Whether for game day or a casual get-together, these wings are always a hit, leaving your guests craving more!

Authentic Experience: With roots in Chinese dining, enjoy a classic dish that brings restaurant-quality flavor right into your kitchen!

Chinese Salt and Pepper Chicken Wings Ingredients

For the Marinade
Shaoxing Wine – Adds depth and flavor to the marinade; substitute with sake, dry sherry, or dry white wine if needed.
Minced Ginger – Provides aromatic warmth; no direct substitutes suggested for the best flavor.
Minced Garlic – Enhances flavor; use fresh for superior results as powdered garlic is not recommended.
Kosher Salt – Essential for seasoning; you can use table salt but adjust the quantity accordingly.

For the Chicken
Chicken Wings – The star of the dish; can substitute with boneless skinless thighs, just adjust cooking time to 3-5 minutes.
Potato Starch – Creates that sought-after crispiness; can replace with cornstarch if necessary.
Oil for Frying – Required for frying; opt for high smoke-point oils like canola or peanut oil.

For the Topping
Chiles (4-6) – Provides desired heat; select based on your spice preference (serrano or jalapeño work well).
Butter – Adds rich flavor to the chile topping, making every bite indulgent.
Ground White Pepper – Delivers a subtle spiciness; black pepper can be used as an alternative if needed.
Szechuan Pepper-Salt (¼ to ½ teaspoon) – Unique flavor enhancer; if unavailable, substitute with kosher salt and ground black pepper.

Each of these components plays its part in crafting the perfect Chinese Salt and Pepper Chicken Wings, ensuring that you’re not just serving a dish but a delightful experience that’ll leave your family and friends clamoring for more!

Step‑by‑Step Instructions for Chinese Salt and Pepper Chicken Wings

Step 1: Marinate the Chicken Wings
In a large bowl, combine chicken wings with Shaoxing wine, minced ginger, minced garlic, and kosher salt. Stir well to ensure all wings are evenly coated. Cover the bowl with plastic wrap and let it marinate in the refrigerator for at least 20 minutes to enhance the flavors and tenderness—or for an extra boost, let it sit overnight.

Step 2: Prepare for Frying
Heat oil in a deep frying pan over medium-high heat until it shimmers, reaching about 350°F. This is the ideal temperature for achieving that crispy outer layer. While the oil is heating, place potato starch in a plate or shallow dish. Coat each marinated wing generously in potato starch, ensuring an even layer for extra crunch during frying.

Step 3: Fry the Chicken Wings
Once the oil is hot, carefully add the coated chicken wings in batches of 5 to 7 pieces. Fry them for about 5 minutes on each side, or until they turn a beautiful golden brown and are crispy. Use a slotted spoon to gently turn the wings, ensuring they cook evenly. Once done, transfer them to a paper towel-lined plate to drain excess oil.

Step 4: Sauté Chiles and Garlic
In a separate skillet, melt butter over medium-high heat. Once melted, add sliced chiles and minced garlic, stirring frequently for about 1-2 minutes, or until the garlic becomes slightly golden and fragrant. This step will infuse the buttery base with delightful heat and aromatic flavors that complement the crispy wings perfectly.

Step 5: Combine and Season
In a large serving platter, combine the fried chicken wings with the sautéed chiles and garlic. Toss gently to ensure each wing is coated with the flavorful mixture. Finish the dish by sprinkling ground white pepper and Szechuan pepper-salt over the top for an extra kick. Your Chinese Salt and Pepper Chicken Wings are now ready to serve!

Expert Tips for Chinese Salt and Pepper Chicken Wings

  • Marination Time: Longer is better: Allow the wings to marinate overnight for maximum flavor absorption and tenderness—the more, the merrier!

  • Oil Temperature: Perfectly hot: Ensure your oil reaches 350°F before frying; too low and the wings will absorb oil; too high and they’ll burn.

  • Coating Technique: Even coverage: Really coat each wing in potato starch to guarantee a crisp and crunchy exterior that everyone loves in these Chinese Salt and Pepper Chicken Wings.

  • Batch Frying: Don’t crowd the pan: Fry wings in small batches to maintain oil temperature and prevent steaming, which can lead to sogginess.

  • Air Fryer Option: Maintain crunch: If using an air fryer, set it to a higher temperature and fry in a single layer, adjusting cooking time for that signature crispiness without deep frying.

  • Keep It Fresh: Serve immediately: These wings are best enjoyed fresh out of the fryer to fully experience their wonderful texture and flavor.

What to Serve with Chinese Salt and Pepper Chicken Wings

As you prepare your Spicy Chinese Salt and Pepper Chicken Wings, consider these delightful pairings that will elevate your meal experience.

  • Creamy Mashed Potatoes: The buttery richness of smashed potatoes curbs the spice, creating a comforting balance that complements the wings beautifully.

  • Stir-Fried Vegetables: A colorful medley of bell peppers and broccoli adds a crisp, fresh crunch that contrasts perfectly with the savory wings.

  • Steamed Jasmine Rice: Light and fragrant, steamed jasmine rice absorbs the delicious flavors, providing a satisfying base to enjoy with spicy bites.

  • Cold Asian Noodle Salad: With its tangy dressing and refreshing crunch, this salad brings a cooling effect to the heat of the wings, making for a well-rounded meal.

  • Beer or Sparkling Water: A cold craft beer enhances the flavor of the spicy wings, while sparkling water offers a refreshing cleanse between bites.

  • Sweet and Sour Sauce: For those who enjoy a little extra sweetness, a side of sweet and sour sauce makes for an exciting dip that complements the spicy notes.

  • Garlic Breadsticks: These fluffy delights offer a soft, buttery bite, perfect for saucing up any leftover spicy goodness.

  • Mango Sticky Rice: For dessert, this delightful treat cools the palate while adding a sweet finish, creating a satisfying end to your meal.

With these pairing ideas, your homemade platter of Chinese Salt and Pepper Chicken Wings will surely dazzle your family and friends!

Make Ahead Options

These Chinese Salt and Pepper Chicken Wings are perfect for meal prep enthusiasts! You can marinate the chicken wings in the ginger and garlic mixture up to 24 hours in advance, allowing those flavors to deepen and ensure a tender bite. Additionally, the wings can be fully coated in potato starch and stored in the refrigerator for up to 3 days—just remember to keep them in an airtight container to maintain their crunch. When you’re ready to serve, simply fry them straight from the fridge for gloriously crispy results! Finish by sautéing the chiles and garlic just before serving, and enjoy restaurant-quality wings with minimal effort.

Chinese Salt and Pepper Chicken Wings Variations

Feel free to explore these exciting twists and transformations to make this recipe your own!

  • Substitute Protein: Use chicken thighs or drumsticks instead for a juicier bite; adjust frying time to 3-5 minutes for these cuts.

  • Air Fryer Method: For a healthier take, cook in an air fryer at 400°F for about 25 minutes for that same delightful crispness.

  • Spice Level Adjustments: Prefer milder wings? Swap chiles for sweet bell peppers, or omit them for a family-friendly option.

  • Flavor Boost: Add a splash of sesame oil to the marinade for an aromatic twist that elevates the traditional flavor profile.

  • Gluten-Free Version: Use cornstarch in place of potato starch and ensure your soy sauce and other ingredients are gluten-free.

  • Crispy No Frying: Try baking the wings at a high temperature (425°F) for 30-40 minutes; just keep an eye on them for golden perfection!

  • Add Fresh Herbs: Toss in chopped scallions or cilantro just before serving for an added freshness that brightens each bite.

  • Szechuan Level Up: For an extra punch, increase the amount of Szechuan pepper-salt; it offers a numbing heat that excites the taste buds.

Feel free to explore these exciting twists and variations to make this dish something special for you and your loved ones, and if you’re looking for something different, why not try a delicious rendition of Savory Chicken Cheesy or a unique take with Honey Chili Chicken? The possibilities are endless!

How to Store and Freeze Chinese Salt and Pepper Chicken Wings

Fridge: Store leftover wings in an airtight container for up to 3 days. Reheat in the oven for optimal crispiness or in the microwave, but be mindful of potential sogginess.

Freezer: For longer storage, freeze wings in a single layer on a baking sheet, then transfer to a freezer bag after 1-2 hours. They can be frozen for up to 3 months.

Reheating: Reheat frozen wings in the oven at 375°F until warmed through and crispy, about 20-25 minutes. Alternatively, the air fryer works well to re-establish that delightful crunch.

Meal Prep: Marinate wings in advance and store them in the fridge for up to 24 hours before frying for quick meal options throughout the week.

Chinese Salt and Pepper Chicken Wings Recipe FAQs

How do I select the best chicken wings?
Look for chicken wings that are plump and firm, with a fresh smell and no discoloration. Avoid wings with dark spots or a slimy texture, as these may indicate spoilage. I often opt for organic or free-range wings for the best flavor and quality.

How should I store leftover wings?
Store leftover Chinese Salt and Pepper Chicken Wings in an airtight container in the fridge for up to 3 days. To keep them crispy, consider reheating them in the oven at 375°F for about 10-15 minutes, allowing them to regain their crunch.

Can I freeze my chicken wings?
Absolutely! To freeze, first lay the cooked wings in a single layer on a baking sheet and freeze for 1-2 hours until solid. Then, transfer them to a freezer bag or airtight container, and they will last for up to 3 months. When you’re ready to enjoy them, reheat in the oven to bring back that wonderful crunch.

What should I do if my wings aren’t crispy?
If your Chinese Salt and Pepper Chicken Wings aren’t crispy, check a few things: ensure the oil was hot enough (350°F), the wings are well-coated in potato starch, and avoid overcrowding the pan while frying. Each of these elements plays a crucial role in achieving that perfect crunchy texture.

Are there any dietary considerations for servings?
Yes! Be cautious with allergies: this recipe contains wheat (from the soy sauce) and can be made gluten-free by using tamari. If serving to pets, keep the spices out as they may not be safe for them. Always check with guests for specific dietary restrictions to accommodate everyone’s needs.

Chinese Salt and Pepper Chicken Wings

Crispy Chinese Salt and Pepper Chicken Wings to Savor

Enjoy the bold flavors of Chinese Salt and Pepper Chicken Wings with a satisfying crunch and zesty marinade.
Prep Time 20 minutes
Cook Time 10 minutes
Marination Time 20 minutes
Total Time 50 minutes
Servings: 4 wings
Course: Chicken
Cuisine: Chinese
Calories: 350

Ingredients
  

For the Marinade
  • 1/4 cup Shaoxing Wine Substitute with sake, dry sherry, or dry white wine if needed.
  • 1 tablespoon Minced Ginger No direct substitutes suggested for the best flavor.
  • 2 cloves Minced Garlic Use fresh for superior results.
  • 1 teaspoon Kosher Salt Use table salt but adjust the quantity accordingly.
For the Chicken
  • 2 pounds Chicken Wings Can substitute with boneless skinless thighs.
  • 1/2 cup Potato Starch Can replace with cornstarch if necessary.
  • Oil for frying Oil Opt for high smoke-point oils like canola or peanut oil.
For the Topping
  • 4-6 Chiles Select based on your spice preference.
  • 2 tablespoons Butter Adds rich flavor to the topping.
  • 1 teaspoon Ground White Pepper Black pepper can be used as an alternative.
  • 1/4 teaspoon Szechuan Pepper-Salt If unavailable, substitute with kosher salt and ground black pepper.

Equipment

  • Deep frying pan
  • Skillet

Method
 

Preparation Steps
  1. Marinate the chicken wings by combining them with Shaoxing wine, minced ginger, minced garlic, and kosher salt in a large bowl. Cover and let it marinate in the refrigerator for at least 20 minutes.
  2. Prepare oil for frying in a deep frying pan over medium-high heat until it shimmers at about 350°F. Coat each marinated wing with potato starch.
  3. Fry the coated chicken wings in batches for about 5 minutes on each side until golden brown and crispy. Drain on paper towel.
  4. Sauté sliced chiles and minced garlic in melted butter for 1-2 minutes until garlic is golden and fragrant.
  5. Combine the fried wings with the sautéed chiles and garlic in a serving platter. Toss gently, then sprinkle with ground white pepper and Szechuan pepper-salt before serving.

Notes

Store leftovers in an airtight container for up to 3 days. Best enjoyed fresh out of the fryer.

Indulge in Creamy Vanilla Bean Pots de Crème Bliss

The aroma of fresh vanilla wafts through the kitchen, immediately transporting me to a quaint Parisian café. As I prepare my Vanilla Bean Pots de Crème, I can’t help but feel excited about treating myself and my loved ones to this luxurious French custard dessert. Not only do these silky pots offer a stunning finish to any meal, but they’re also incredibly easy to make ahead—perfect for those busy weeknights when indulgence is non-negotiable. Imagine diving into a creamy, smooth custard, elegantly flavored with real vanilla beans, that feels just a bit special, no matter the occasion. Ready to elevate your dessert game? Let’s dive into the world of pots de crème together!

Why are Vanilla Bean Pots de Crème special?

Indulgent, these creamy delights transform any meal into a celebration. Make-ahead convenience means you can prep them in advance, freeing up your time for other fun activities. Elegant presentation in personal ramekins makes serving easy and impressive. Rich flavor from real vanilla beans sets these apart from store-bought options. If you’re also a fan of wonderful desserts like Nutty Vanilla Cake or Cream Puffs Vanilla, you’ll love adding this recipe to your repertoire!

Vanilla Bean Pots de Crème Ingredients

For the Custard

  • Heavy Cream – Provides richness and a creamy texture; a must for luxurious vanilla bean pots de crème.
  • Whole Milk – Balances the richness; low-fat options may alter the desired texture.
  • Granulated Sugar – Sweetens the custard while ensuring a smooth consistency; alternatives can work, but may change flavor.
  • Vanilla Bean – Infuses the custard with an intense flavor; you can substitute with two teaspoons of vanilla bean paste if needed.
  • Egg Yolks – Essential for structure and creaminess; using fresh yolks elevates the flavor.
  • Salt – Enhances sweetness and balances flavors; just a pinch is essential.

For Baking

  • Hot Water – Creates the necessary water bath for even baking; use water heated to 160°F-180°F for best results.

Step‑by‑Step Instructions for Vanilla Bean Pots de Crème

Step 1: Preheat the Oven
Begin by preheating your oven to 300°F (150°C). This step is crucial for ensuring that your Vanilla Bean Pots de Crème bake evenly, resulting in a perfectly silky custard. Make sure to give your oven ample time to reach the correct temperature before you start preparing the ramekins and the custard mixture.

Step 2: Prepare Ramekins
While the oven heats up, arrange four 4-ounce ramekins in a snug baking dish. This will help create a gentle water bath during baking. Having everything ready makes the pouring of the custard smooth and efficient. Ensure the ramekins are clean and dry for the best results.

Step 3: Infuse the Cream
In a medium saucepan, combine the heavy cream, whole milk, and half of the granulated sugar. Slit the vanilla bean lengthwise, scraping the seeds into the saucepan along with the pod. Heat the mixture over medium heat until it is steaming, but not boiling, about 5–7 minutes (targeting 160°F-170°F). Once heated, remove from heat and allow the vanilla to steep for 15-20 minutes, enhancing the custard’s flavor.

Step 4: Combine Yolk Mixture
In a mixing bowl, whisk together the egg yolks, remaining sugar, and a pinch of salt until smooth and slightly pale. This mixture will provide the rich texture that defines your Vanilla Bean Pots de Crème. Take your time whisking to incorporate air, as it aids in achieving a light, creamy custard.

Step 5: Temper the Yolks
To prevent curdling, gradually ladle the warm cream mixture into the egg yolks while continuously whisking. This process is known as tempering and ensures a smooth custard. Once fully combined, strain the mixture through a fine-mesh sieve into a measuring cup to catch any vanilla pod remnants or coagulated bits.

Step 6: Bake
Evenly divide the custard mixture among the prepared ramekins. Carefully pour hot water into the baking dish, filling it halfway up the sides of the ramekins, which helps regulate the baking temperature. Cover the dish tightly with aluminum foil and bake in the preheated oven for 35–55 minutes. The custard is done when the edges are set but the centers slightly wobble, creating a luscious texture.

Step 7: Cool and Chill
Once baking is complete, carefully remove the ramekins from the water bath and let them cool to room temperature on a wire rack. After cooling, transfer your Vanilla Bean Pots de Crème to the refrigerator and chill for at least 4 hours. This allows the flavors to develop and the custard to set perfectly.

Expert Tips for Vanilla Bean Pots de Crème

  • Cream Infusion: Ensure the cream mixture is steaming, not boiling; boiling can change the texture and ruin your custard.
  • Proper Tempering: Always temper the yolks slowly with warm cream to prevent curdling; this step is crucial for silky Vanilla Bean Pots de Crème.
  • Water Bath Essentials: Use hot water at 160°F-180°F for the water bath to guarantee even cooking; cold water can lead to uneven results.
  • Check for Doneness: The custard should jiggle softly in the center when done; overbaking will lead to a dense texture.
  • Chill Thoroughly: Allowing ample refrigeration time (at least 4 hours) enhances flavor and sets the custard; don’t skip this step!

Vanilla Bean Pots de Crème Variations

Explore the delightful possibilities to uniquely customize your Vanilla Bean Pots de Crème!

  • Dairy-Free: Substitute heavy cream with coconut cream for a rich, creamy texture without dairy; it adds a lovely tropical twist.
  • Alternative Sweeteners: Use honey, agave syrup, or a sugar substitute like stevia to cater to your dietary preferences, adjusting sweetness to taste.
  • Extract Exploration: Replace vanilla with almond or hazelnut extract for an exciting flavor shift, adding a nutty depth to the custard.
  • Citrus Zing: Incorporate a tablespoon of orange or lemon zest into the cream for a bright, refreshing twist that pairs beautifully with vanilla.

For an even bolder dessert, consider garnishing with fresh berries or a dusting of cocoa powder. This enhances both the look and flavor, making it more inviting. It’s a small touch that can wow your guests!

  • Chocolate Lovers: Blend in melted dark chocolate (about 3 ounces) with the cream for a decadent chocolate pots de crème variation; it’s an irresistible treat.
  • Hazelnut Praline: Top your custard with chopped hazelnut praline for a delightful crunch; this adds an interesting texture contrast to the silky custard.

If you’re captivated by the creamy world of custards, don’t miss the chance to explore recipes like Vanilla Pudding or indulge in a slice of Nutty Vanilla Cake. Your dessert adventures await!

Make Ahead Options

These Vanilla Bean Pots de Crème are an absolute gem for meal prep! You can prepare the custard mixture and pour it into ramekins up to 24 hours in advance, then cover and refrigerate them. This allows the flavors to meld beautifully, resulting in an even richer taste. To maintain quality, ensure the ramekins are tightly covered to prevent any absorption of odors from the fridge. When you’re ready to serve, bake the pots for about 35–55 minutes until the edges are set and the centers still wobble slightly. Chill them for at least 4 hours before serving, and you will enjoy a perfectly indulgent dessert that feels like a treat with minimal last-minute effort!

How to Store and Freeze Vanilla Bean Pots de Crème

Fridge: Store your Vanilla Bean Pots de Crème tightly covered in the refrigerator for up to 3 days. This keeps them fresh and delicious, ready to be enjoyed whenever you desire.

Freezer: It’s best not to freeze these pots, as freezing can alter the delicate texture of the custard, making it grainy upon thawing.

Reheating: If you’ve stored them in the fridge, there’s no need to reheat; serve them chilled for the best experience. Simply take them out of the fridge, garnish, and serve!

What to Serve with Vanilla Bean Pots de Crème?

Delight in these complementary dishes that will elevate your meal into an unforgettable dining experience.

  • Decadent Chocolate Cake: The rich chocolate flavor balances the vanilla’s sweetness, creating a luxurious dessert duo.
  • Fresh Berries: Juicy strawberries or raspberries add a burst of tartness, cutting through the custard’s creaminess. They add color and freshness to the presentation.
  • Espresso Coffee: A bold cup of espresso enhances the flavor profile of the custard while offering a delightful contrast in temperature.
  • Shortbread Cookies: Buttery, crumbly cookies provide a textural contrast to the smoothness of the pots de crème, making for a lovely pairing.
  • Whipped Cream: A dollop of lightly sweetened whipped cream adds an airy touch that complements the velvety custard beautifully.
  • Caramel Sauce: Drizzling warm homemade caramel on top adds a layer of sweetness that pairs perfectly with the vanilla infusion.
  • Mint Infusion: A sprig of fresh mint not only brightens the presentation but offers a refreshing bite that complements the luscious custard.
  • Sparkling Water: Serve with chilled sparkling water for a refreshing palate cleanser that cuts through the richness of the dessert.
  • Lemon Tart: The tartness of a lemon dessert introduces a lively contrast to the creamy pots de crème, making your plate more dynamic and flavorful.
  • Sauvignon Blanc: A chilled glass of this crisp, aromatic wine beautifully complements the richness of the custard while enhancing your dining experience.

Vanilla Bean Pots de Crème Recipe FAQs

What kind of vanilla bean should I use?
I recommend using high-quality Madagascar or Tahitian vanilla beans for the best flavor infusion. Look for beans that are plump and moist, with a strong aroma. If fresh beans aren’t available, you can substitute with 2 teaspoons of vanilla bean paste for a similar effect.

How should I store my Vanilla Bean Pots de Crème?
These delectable pots should be tightly covered and stored in the refrigerator for up to 3 days. To keep them fresh, use plastic wrap, ensuring it doesn’t touch the surface of the custard to prevent skin formation. Enjoy them cold directly from the fridge for the best taste!

Can I freeze Vanilla Bean Pots de Crème?
I advise against freezing these custards, as the delicate texture can become grainy or watery when thawed. Instead, enjoy them fresh from the fridge. If you have to save them, consider storing the custard mixture before baking; it can be kept for up to 3 months in the freezer. Thaw it in the refrigerator before proceeding with baking.

What if my custards don’t set properly?
If your Vanilla Bean Pots de Crème are undercooked, they will remain too liquid. Make sure to bake until the edges are set and the centers wobble slightly. If you have overbaked them, they may turn out too firm. To prevent this, always creamy-check for doneness by gently shaking the ramekins towards the end of the baking time.

Can I use alternative milk for a dairy-free version?
Absolutely! You can substitute heavy cream with coconut cream for a luscious, dairy-free treat. Just keep in mind that using different milk may alter the final flavor slightly; I often find unsweetened almond or oat milk pairs well while keeping the custard rich.

Can pets enjoy Vanilla Bean Pots de Crème?
It’s best not to share these custards with your furry friends. The ingredients, especially eggs and sugar, can upset your pet’s stomach. Instead, consider making a pet-friendly treat specifically designed for them!

Vanilla Bean Pots de Creme

Indulge in Creamy Vanilla Bean Pots de Crème Bliss

Experience the luxurious treat of Vanilla Bean Pots de Crème, a silky French custard dessert perfect for any occasion.
Prep Time 20 minutes
Cook Time 55 minutes
Chilling Time 4 hours
Total Time 5 hours 15 minutes
Servings: 4 ramekins
Course: Dessert
Cuisine: French
Calories: 350

Ingredients
  

For the Custard
  • 2 cups Heavy Cream Provides richness and a creamy texture
  • 1 cup Whole Milk Balances the richness
  • 3/4 cup Granulated Sugar Sweetens the custard
  • 1 whole Vanilla Bean Infuses the custard with intense flavor
  • 6 large Egg Yolks Essential for structure and creaminess
  • a pinch Salt Enhances sweetness
For Baking
  • 4 cups Hot Water Creates the water bath for even baking

Equipment

  • oven
  • Medium saucepan
  • mixing bowl
  • Fine Mesh Sieve
  • Baking Dish
  • ramekins

Method
 

Step‑by‑Step Instructions
  1. Preheat your oven to 300°F (150°C) to ensure even baking.
  2. Arrange four 4-ounce ramekins in a snug baking dish.
  3. Combine heavy cream, whole milk, and half of the sugar in a saucepan. Slit the vanilla bean lengthwise and scrape the seeds into the saucepan. Heat until steaming, then steep for 15-20 minutes.
  4. In a bowl, whisk together egg yolks, remaining sugar, and a pinch of salt until smooth and pale.
  5. Gradually ladle warm cream mixture into egg yolks while whisking to temper. Strain the mixture through a sieve into a measuring cup.
  6. Evenly divide the custard among the ramekins. Pour hot water into the baking dish halfway up the sides of the ramekins. Cover with foil and bake for 35-55 minutes.
  7. Remove the ramekins from the water bath and let cool to room temperature. Chill in the fridge for at least 4 hours before serving.

Notes

Serve chilled and garnish as desired. These pots de crème can be stored in the refrigerator for up to 3 days.

Crispy Tofu Fried Chicken That Will Wow Everyone

As the sizzle of hot oil fills the kitchen, memories flood back—summer barbecues, and crispy bites of joy that left us all craving more. Enter my Crispy Vegan Tofu Fried Chicken, a dish that brings back that nostalgic goodness without a hint of meat! This plant-based wonder not only tantalizes taste buds but also offers an irresistible comfort food experience that’s ready in under 40 minutes. The beauty of this recipe lies in its simplicity and its ability to convert even the most devoted carnivores into tofu fans. It’s healthy, crowd-pleasing, and perfect for those evenings when you want something hearty yet light. Ready to indulge in a guilt-free, vegan fried chicken that’ll have you dreaming of the Colonel, but without the guilt? Let’s dive into the crispy magic of Tofu Fried Chicken!

Why Will You Love Tofu Fried Chicken?

Incredibly Flavorful: Each bite bursts with a delightful mix of spices and marinade, making it a tasty alternative that’s packed with personality.

Quick & Easy: Ready in under 40 minutes, it’s perfect for busy weeknights when you need a satisfying meal without the fuss.

Healthier Option: Enjoy the crispy comfort of fried chicken while embracing plant-based goodness—it’s a win-win!

Versatile Dish: Serve it with your favorite dipping sauces, like BBQ or ranch, to cater to various taste preferences.

Crowd-Pleasing: This dish is sure to impress friends and family alike, even those who typically prefer traditional fried chicken.

Elevate your dinner game and explore more delicious offerings like Savory Chicken Cheesy or indulge in a bowl of Homemade Chicken Pot to round out your culinary adventures!

Tofu Fried Chicken Ingredients

• Perfectly crafted for a crispy delight!

For the Tofu

  • Tofu – Use extra firm for the best texture; frozen and thawed yields a denser result.
  • Vegan Chicken Broth – Essential for marinating tofu, adding a deep flavor; vegetable broth works as a great substitute if needed.

For the Buttermilk Mixture

  • Soy Milk – Acts as a buttermilk substitute; feel free to replace it with any other plant-based milk, though flavors may vary.
  • Apple Cider Vinegar – Adds tanginess; lemon juice is a perfect alternative for a similar kick.
  • Hot Sauce – Elevates the flavor of the tofu; adjust to your liking for extra heat.

For the Bread Coating

  • Flour – The base for the coating; gluten-free flour mix is an excellent alternative for a gluten-free version.
  • Cornstarch – Crucial for that crispy texture; potato starch can also do the job.
  • Cornmeal – Gives extra crunch; can be skipped for a finer coating if preferred.

For Flavor Enhancement

  • Oregano & Creole Seasoning – Infuses depth and aroma; Italian seasoning can substitute oregano; cayenne pepper can replace Creole seasoning for a spicy twist.
  • Garlic Powder – Intensifies the savory flavor profile.
  • Onion Powder – Adds sweetness and depth.
  • Paprika – Contributes warmth and color.
  • Black Pepper – Offers a subtle kick.
  • White Pepper – Complements the spices without overpowering the dish.

With these carefully selected ingredients, your Tofu Fried Chicken will be a delightful blend of texture and flavor that impresses everyone!

Step‑by‑Step Instructions for Tofu Fried Chicken

Step 1: Prepare Tofu
Start by freezing the extra firm tofu overnight, then thaw it for at least 30 minutes. Once thawed, wrap the tofu in a clean kitchen towel and press it gently to eliminate excess moisture for about 10 minutes. This pressing step ensures that your Tofu Fried Chicken absorbs the flavors beautifully and achieves the right texture.

Step 2: Marinate
Cut the pressed tofu into bite-sized cubes and place them in a bowl. Pour the vegan chicken broth over the cubes, ensuring they are submerged. Let the tofu marinate for at least 15 minutes to soak in the rich flavors. This step is essential for infusing your Tofu Fried Chicken with delicious taste.

Step 3: Make Buttermilk
In a separate bowl, combine the soy milk, apple cider vinegar, and hot sauce. Stir the mixture and let it sit for 10 minutes—this will thicken, creating a perfect plant-based buttermilk. This step adds a delightful tanginess to the tofu and helps the breading stick beautifully when making your Tofu Fried Chicken.

Step 4: Prepare Breading
In another bowl, whisk together the flour, cornstarch, cornmeal, oregano, Creole seasoning, garlic powder, onion powder, paprika, black pepper, and white pepper. Mix until well combined, creating a flavorful coating for your Tofu Fried Chicken. Having this mixture ready ensures a smooth dipping process during frying.

Step 5: Heat Oil
In a deep skillet or frying pan, pour enough oil for shallow frying—about 1-2 inches deep. Heat the oil to 370°F (187°C) over medium-high heat. Use a thermometer for accuracy, and look for shimmering oil. This temperature is crucial to achieving a crispy, golden-brown finish on your Tofu Fried Chicken.

Step 6: Bread Tofu
Take the marinated tofu cubes and dip each piece into the buttermilk mixture, ensuring it’s fully coated. Afterward, roll the tofu in the prepared dry mixture until thoroughly coated. For a crisper texture, repeat the process if desired, doubling the layer of crunch on your Tofu Fried Chicken.

Step 7: Fry
Carefully place the breaded tofu cubes in the hot oil, frying them in batches to avoid overcrowding. Fry for about 3-4 minutes, turning occasionally, until the tofu is golden brown and crispy on all sides. Keep a close eye on them to ensure they don’t burn, as this is the key to perfect Tofu Fried Chicken.

Step 8: Cool & Serve
Once golden brown, remove the tofu using a slotted spoon and place them on paper towels to drain excess oil. Allow them to cool slightly, then serve your Tofu Fried Chicken hot with your favorite dipping sauces. The delightful crunch and tender inside will certainly impress your family and friends!

What to Serve with Tofu Fried Chicken

Create a delightful dining experience that complements the crispy flavors of your vegan delight.

  • Creamy Mashed Potatoes: A classic side that pairs beautifully, adding a smooth contrast to the crunch of Tofu Fried Chicken. It’s comforting and rich, perfect for soaking up any sauces.

  • Garlicky Green Beans: These lightly sautéed green beans bring a fresh crunch and a burst of flavor to your meal, balancing the richness of the fried tofu. The garlic adds an aromatic touch that elevates the dish.

  • Coleslaw: A tangy, crunchy coleslaw provides a refreshing bite that complements the savory elements of Tofu Fried Chicken. Its crisp texture adds an exciting layer, enhancing your plate.

  • Corn on the Cob: Juicy and sweet, corn on the cob makes a perfect finger food companion. The natural sweetness contrasts delightfully with the savory tofu, making each bite a joy.

  • Spicy Vegan Ranch Dip: Serve this creamy dip alongside, as it’s perfect for drizzling or dipping. The coolness balances the heat of any spices used in the chicken, making it a hit with everyone.

  • Sweet Potato Fries: Crispy on the outside and tender within, these fries add a seasonal touch packed with flavor. Their mild sweetness balances the spices of the fried chicken well.

Pair any combination of these sides to achieve a full meal that enchants your diners, wrapping them in warmth and flavor!

Expert Tips for Tofu Fried Chicken

Crispier Coating: Use cornstarch: For an extra crispy finish, ensure you coat the tofu with cornstarch after the buttermilk, as this helps it crunch beautifully.

Proper Temperature: Check oil heat: Always make sure the oil reaches 370°F (187°C) before adding the tofu to prevent sogginess—use a thermometer for accuracy.

Flavor Boost: Marinating time: Allow the tofu to marinate in vegan chicken broth for at least 15 minutes to fully absorb the flavors, enhancing your Tofu Fried Chicken.

Double Coating Trick: Extra crunch: For a dustier, crunchier coating, dip the tofu in buttermilk and breading twice before frying.

Avoid Overcrowding: Fry in batches: Frying too many pieces at once can lower the oil temperature, leading to greasier tofu. Fry in small batches to keep everything crispy.

Storing Leftovers: Best reheating method: Store leftovers in an airtight container and reheat in the oven at 400°F (204°C) to regain that delightful crispness.

How to Store and Freeze Tofu Fried Chicken

Fridge: Store leftovers in an airtight container for up to 3 days. This keeps your Tofu Fried Chicken fresh and ready to enjoy.

Freezer: For longer storage, freeze unbattered tofu cubes for up to 2 months. Thaw before marinating and frying when you crave those crispy bites again.

Reheating: To restore crispiness, reheat in the oven at 400°F (204°C) for about 10-15 minutes. This method ensures your Tofu Fried Chicken tastes just as amazing as when it was first made!

Tofu Fried Chicken Variations & Substitutions

Feel free to get creative with your cooking and customize this delightful Tofu Fried Chicken recipe to fit your taste preferences!

  • Baked Option: For a healthier take, bake the breaded tofu in the oven at 400°F (204°C) for 20-25 minutes until crispy.
  • Air-Fried Goodness: Using an air fryer can achieve crispy results with less oil. Cook at 375°F (190°C) for about 10-15 minutes.
  • Extra Spicy: Double the amount of hot sauce in the marinade for a fiery flavor boost that heat lovers will appreciate!
  • Tempeh Twist: Substitute tofu with tempeh for a heartier texture; just be sure to adjust the marinating time for maximum flavor absorption.
  • Seasoned Flour: Experiment with different seasonings in the breading mix, like smoked paprika or nutritional yeast, for extra flavor layers.
  • Gluten-Free: Swap traditional flour with a gluten-free blend or almond flour, ensuring everyone can enjoy this crispy dish.
  • Herb Infusion: Add chopped fresh herbs like parsley or cilantro to the breadcrumb mixture for a fresh and vibrant twist.
  • Sweet & Spicy: Incorporate a bit of maple syrup or honey (if not fully vegan) into the buttermilk mixture for a hint of sweetness and depth.

After you’ve enjoyed your crispy chicken, why not try pairing it with a refreshing salad like Homemade Chicken Rolls or indulge in comforting Savory Chicken Cheesy? The possibilities are endless!

Make Ahead Options

These Tofu Fried Chicken bites are perfect for meal prep enthusiasts! You can marinate the tofu cubes in vegan chicken broth up to 24 hours in advance; simply keep them covered in the refrigerator to soak up all the delicious flavors. Additionally, you can prepare the buttermilk mixture and store it in the fridge for up to 3 days. When you’re ready to enjoy your Tofu Fried Chicken, just bread the marinated tofu and fry it as instructed for that crispy, golden finish. This make-ahead approach allows for a quick, weeknight dinner solution without sacrificing taste or texture—just as delicious as if you made them fresh!

Tofu Fried Chicken Recipe FAQs

How do I select the best tofu for this recipe?
Absolutely! For the best texture and flavor, always choose extra firm tofu. If you have time, freeze the tofu overnight and then thaw it for a denser, meatier texture.

What’s the best way to store leftovers of Tofu Fried Chicken?
Very! Store any leftovers in an airtight container in the refrigerator for up to 3 days. To keep them crispy, I recommend reheating them in the oven at 400°F (204°C) for about 10-15 minutes.

Can I freeze Tofu Fried Chicken?
Absolutely! For freezing, I suggest first freezing the unbattered tofu cubes for up to 2 months. When you’re ready, simply thaw the tofu, marinate, and fry as instructed. Just note that once cooked, freezing may affect the crispy texture of the final product.

What if my breading doesn’t stick to the tofu?
No worries! If you’re having trouble with your breading adhering, try pressing the tofu longer to remove excess moisture and ensure your buttermilk is thick enough. I often dip the tofu in buttermilk and breading twice for an extra crunchy layer, which may help!

Are there any dietary considerations for this recipe?
Very! This Tofu Fried Chicken is plant-based and suitable for vegans. However, if you have allergies, keep in mind that it includes soy and gluten (if using regular flour). For gluten-free options, simply use a gluten-free flour mix and ensure your broths are also gluten-free.

How can I enhance the flavor of Tofu Fried Chicken?
I recommend marinating the tofu in vegan chicken broth for at least 15 minutes to let it soak up the flavors. Additionally, you can amp up the spices in the breading or adjust the amounts of hot sauce in the buttermilk to tailor it to your taste preferences!

Tofu Fried Chicken

Crispy Tofu Fried Chicken That Will Wow Everyone

A delightful crispy vegan tofu fried chicken that offers a nostalgic, healthy comfort food experience. Perfect for impressing friends and family.
Prep Time 40 minutes
Cook Time 15 minutes
Marinating Time 15 minutes
Total Time 55 minutes
Servings: 4 pieces
Course: Dinner
Cuisine: Comfort Food, Vegan
Calories: 150

Ingredients
  

For the Tofu
  • 1 block Extra firm tofu Frozen and thawed for denser texture
  • 1 cup Vegan chicken broth Vegetable broth works as a great substitute
For the Buttermilk Mixture
  • 1 cup Soy milk Can substitute with any plant-based milk
  • 1 tbsp Apple cider vinegar Lemon juice can be used as an alternative
  • 1 tbsp Hot sauce Adjust to taste for desired heat
For the Bread Coating
  • 1 cup Flour Gluten-free flour mix can be used
  • 1/4 cup Cornstarch Potato starch can also be used
  • 1/4 cup Cornmeal Can skip for a finer coating
For Flavor Enhancement
  • 1 tbsp Oregano Italian seasoning can substitute
  • 1 tbsp Creole seasoning Cayenne pepper can replace for spice
  • 1 tsp Garlic powder
  • 1 tsp Onion powder
  • 1 tsp Paprika
  • 1/2 tsp Black pepper
  • 1/2 tsp White pepper

Equipment

  • Deep Skillet
  • whisk
  • Thermometer
  • Bowl
  • slotted spoon

Method
 

Step-by-Step Instructions for Tofu Fried Chicken
  1. Freeze the tofu overnight, then thaw for at least 30 minutes. Press gently to remove excess moisture.
  2. Cut the tofu into cubes and marinate in vegan chicken broth for at least 15 minutes.
  3. Mix soy milk, apple cider vinegar, and hot sauce in a bowl and let sit for 10 minutes to thicken.
  4. Whisk together flour, cornstarch, cornmeal, oregano, Creole seasoning, garlic powder, onion powder, paprika, black and white pepper.
  5. Heat oil in a skillet to 370°F (187°C) for frying.
  6. Dip marinated tofu in buttermilk and then coat with the dry breading mixture. Repeat for extra crunch if desired.
  7. Fry the breaded tofu cubes in batches for about 3-4 minutes until golden brown and crispy.
  8. Remove from oil and let drain on paper towels. Serve hot with your favorite dipping sauces.

Notes

Store leftovers in an airtight container for up to 3 days. For longer storage, freeze unbattered tofu cubes for up to 2 months.

Five Spice Cranberry Dutch Baby: Your Cozy Winter Breakfast Delight

There’s something magical about the first whiff of spices wafting through the kitchen on a winter morning, isn’t there? As I whisk up this Five Spice Cranberry Dutch Baby, the aromatic blend of cinnamon, spices, and tart cranberries transports me to cozy gatherings that warm the heart as much as the belly. This delightful breakfast treat comes together in just 25 minutes and is a breeze to prepare—perfect for those of us who love homemade food but might be short on time. The fluffy oven pancake boasts a unique twist with the fragrant five spice, making it a fun addition to your winter menu that will impress your family and friends. So, are you ready to elevate your breakfast game with this enchanting Dutch baby? Let’s dive into the simple, scrumptious details!

Why is This Dutch Baby Worth Trying?

Fluffy Texture: The airy pancake base delivers a delightful lift, making every bite feel like a cloud.

Unique Flavor Blend: Infused with five spice, this recipe goes beyond traditional pancakes, bringing warmth and depth to your winter breakfast.

Quick Preparation: On busy mornings, whip this up in just 25 minutes, ensuring you can enjoy a homemade meal without the hassle.

Versatile Options: Feel free to substitute cranberries with seasonal fruits like apples or berries for a fresh twist that pleases everyone at the table.

Perfect for Sharing: This Dutch baby is visually stunning and is perfect for brunch gatherings, inviting friends and family to dive into its warm, delicious layers.

Ready to elevate your breakfast routine? This Five Spice Cranberry Dutch Baby is a fantastic way to usher in cozy winter mornings. If you’re looking for more comforting ideas, check out our collection of comfort food recipes that you and your loved ones will adore!

Five Spice Cranberry Dutch Baby Ingredients

For the Batter

  • Unsalted Butter – Provides richness and aids in browning while baking.
  • Eggs – The essential ingredient for structure and a fluffy texture; make sure they are at room temperature.
  • Milk – Whole milk is preferred for creaminess, but feel free to use low-fat if you’re looking for a lighter option.
  • All-Purpose Flour – Gives structure to the Dutch baby; no substitutes recommended.
  • Sugar – Balances the tartness of cranberries; adjust based on your taste preference.
  • Vanilla Extract – Adds a delightful depth of flavor to the batter.
  • Salt – Enhances the overall flavor profile of the dish.

For the Topping

  • Cranberries – Tart and colorful; you can use fresh or frozen for a pop of flavor.
  • Chinese Five Spice – A unique blend that infuses warm, aromatic flavors; if unavailable, substitute with cinnamon for a different twist.

Enjoy making this Five Spice Cranberry Dutch Baby, a delightful winter breakfast that brings warmth and comfort to your table!

Step‑by‑Step Instructions for Five Spice Cranberry Dutch Baby

Step 1: Preheat and Sauté
Begin by preheating your oven to 425°F (220°C). While the oven warms, melt 2 tablespoons of unsalted butter in a large oven-safe skillet over medium heat. Once melted, add 1 cup of cranberries and 1 teaspoon of Chinese five spice. Sauté for 2-3 minutes until the cranberries soften and the spices become fragrant, creating an inviting aroma in your kitchen.

Step 2: Blend the Batter
In a mixing bowl, combine 3 large eggs, 1 cup of whole milk, 1 cup of all-purpose flour, 2 tablespoons of sugar, 1 teaspoon of vanilla extract, and a pinch of salt. Whisk the ingredients vigorously until the mixture is smooth and frothy, about 1 minute. This helps to incorporate air, which is key for the fluffy texture of your Five Spice Cranberry Dutch Baby.

Step 3: Combine and Pour
Carefully pour the blended batter over the sautéed cranberries in the hot skillet. Ensure the batter evenly covers the fruit; this will create a beautiful layering effect while baking. Avoid stirring, as you want the cranberries to remain dispersed within the batter, adding to the delightful flavor profile of your Dutch baby.

Step 4: Bake to Perfection
Place the skillet in the preheated oven and bake for about 20 minutes, or until the Dutch baby has puffed up and turned a lovely golden brown. Keep an eye on it through the oven window; it should rise dramatically and look airy, signaling that it’s time to take it out.

Step 5: Serve and Enjoy
Once the baking time is complete, remove the skillet from the oven. The Dutch baby will start to deflate almost immediately, creating a rustic look. Slice it into wedges while warm and serve topped with maple syrup or a light dusting of powdered sugar for an extra touch of sweetness that complements the tart cranberries beautifully.

Five Spice Cranberry Dutch Baby Variations

Feel free to explore these delightful twists to make your Five Spice Cranberry Dutch Baby even more special!

  • Fruit Swap: Replace cranberries with seasonal fruits like blueberries or sliced apples for a refreshing change. Each fruit brings its unique flavor; experiment with what’s fresh at your local market!

  • Dairy-Free: Use almond or oat milk instead of regular milk for a creamy, dairy-free version. This keeps the comforting texture while catering to lactose-intolerant friends or family.

  • Sweetness Adjustment: Feel free to modify the sweetness level according to preference by reducing the sugar or adding a drizzle of honey as a topping. A little sweetness goes a long way in creating a comforting dish!

  • Spice Variations: Can’t find five spice? Try a mix of ground nutmeg and cloves for a fragrant, cozy flavor. These spices create their own warmth and depth, offering a delightful twist to the classic.

  • Add Nuts: Fold chopped toasted walnuts or pecans into the batter for added crunch and protein. The nutty flavor pairs beautifully with the tart cranberries for a balanced breakfast treat.

  • Savory Spin: For a savory version, omit sugar, and add shredded cheese and herbs. This variation transitions your Dutch baby into a delicious brunch option that’s perfect with a side salad.

  • Heat it Up: For those who love a bit of spice, sprinkle red pepper flakes or cayenne in the batter for a warm kick. The heat beautifully contrasts with the sweetness of the cranberries.

  • Maple Surprise: Swap regular sugar for maple sugar to add a uniquely rich flavor. The sweet and earthy notes from the maple will elevate the dish to new culinary heights.

Do any of these variations inspire you? If you’re looking for more breakfast adventures, don’t forget to check out our delicious selection of breakfast recipes that the whole family will love!

What to Serve with Five Spice Cranberry Dutch Baby

Enhance your breakfast experience with delightful pairings that complement the warm, spicy flavors of this unique Dutch baby.

  • Creamy Mashed Potatoes: The buttery richness balances the tart cranberries beautifully, adding comfort to your breakfast spread. A dollop of gravy could elevate your meal even further.

  • Warm Spiced Apple Cider: Infused with cinnamon and nutmeg, this cozy beverage echoes the fragrant spices, creating a perfectly harmonious winter morning vibe.

  • Crispy Bacon or Sausage: The salty, savory elements provide a wonderful contrast to the sweet-tart Dutch baby, making every mouthful a delightful experience.

  • Fresh Fruit Salad: A mix of seasonal fruits brightens the plate while their natural sweetness pairs well with the warm spices, adding freshness to the meal.

  • Maple Syrup Drizzle: Pouring a touch of this rich syrup over your Dutch baby enhances its sweetness while complementing the tartness of the cranberries.

  • Greek Yogurt with Honey: This creamy addition brings a tangy kick that pairs wonderfully, further balancing the flavors and adding a healthy twist.

  • Chai Tea: The warming spices mirror those in the Dutch baby, deepening the flavor experience and adding a soothing touch to your breakfast.

  • Chocolate Chip Cookies: A little indulgence never hurt anyone! Pairing these sweet treats with your Dutch baby brings a playful element to your brunch that family and friends will love.

Make Ahead Options

These Five Spice Cranberry Dutch Babies are perfect for meal prep enthusiasts! You can prepare the batter up to 24 hours in advance by whisking together the eggs, milk, flour, sugar, vanilla extract, and salt, then store it in an airtight container in the refrigerator. Additionally, you can sauté the cranberries with the five spice ahead of time, and keep them in the fridge for up to 3 days. When you’re ready to bake, simply combine the warm cranberries with the chilled batter and pour it into a preheated skillet. This way, you’ll still enjoy a delightful, fluffy Dutch baby full of flavor without the morning rush, making your breakfast routine hassle-free!

Expert Tips for the Best Dutch Baby

  • Egg Whipping: Whip the eggs well: This is essential for incorporating air, which gives your Five Spice Cranberry Dutch Baby its signature fluffy texture.

  • Don’t Over-Mix: Mix gently: Once you add the flour, mix until just combined to prevent a dense batter. This keeps the Dutch baby light and airy.

  • Serve Promptly: Serve immediately: The Dutch baby collapses quickly after baking, so slice and serve right away for the best presentation and enjoyment.

  • Fruit Flexibility: Feel free to diversify: Use fresh seasonal fruits instead of cranberries, such as apples or berries, to experiment with flavors while keeping it simple.

  • Skillet Heating: Preheat your skillet: Ensure it’s hot before pouring in the batter; this helps achieve that beautiful rise and crispy edge around the Dutch baby.

How to Store and Freeze Five Spice Cranberry Dutch Baby

Fridge: Keep any leftover Dutch baby in an airtight container in the fridge for up to 2 days. Reheat in the oven at 350°F for about 10 minutes for best results.

Freezer: You can freeze slices for up to 1 month. Wrap each piece tightly in plastic wrap and place in a freezer-safe bag. To enjoy, thaw overnight in the fridge and reheat in the oven.

Room Temperature: Serve fresh for the best flavor, but if left out, it’s safe for about 2 hours before it should be refrigerated to prevent spoilage.

Reheating: For optimal texture, reheat slices in the oven instead of the microwave; this restores the fluffy quality of the Five Spice Cranberry Dutch Baby.

Five Spice Cranberry Dutch Baby Recipe FAQs

What kind of cranberries should I use?
Absolutely! You can use both fresh or frozen cranberries for this recipe. Fresh cranberries should be firm and shiny, while frozen ones are perfect if you can’t find fresh. Just remember to thaw and drain them before use to prevent excess moisture in your Dutch baby.

How should I store leftovers?
After enjoying your Dutch baby, store any leftovers in an airtight container in the refrigerator for up to 2 days. When you’re ready to enjoy again, reheat it in the oven at 350°F for about 10 minutes to regain its fluffy texture.

Can I freeze slices of the Dutch baby?
Very! You can freeze slices of the Five Spice Cranberry Dutch Baby for up to 1 month. Wrap each slice tightly in plastic wrap and place them in a freezer-safe bag. To reheat, simply thaw in the fridge overnight and warm them up in the oven for a delightful breakfast treat.

What are some common troubleshooting tips?
If your Dutch baby doesn’t puff up as expected, check a few things: First, ensure your oven is properly preheated; a hot skillet is crucial for that rise. Also, make sure you whipped your eggs enough for air incorporation and avoided over-mixing once adding flour. Any dense batter will result in a less fluffy texture.

Is this recipe safe for my pets or allergies?
Keep in mind that while the Five Spice Cranberry Dutch Baby is delicious for you, cranberries aren’t suitable for pets like dogs and cats. If you have allergies, avoid any specific spices or ingredients that might cause a reaction, and feel free to substitute with safe options. Always consult your vet for pet dietary concerns.

How can I adapt this recipe for dietary preferences?
The Five Spice Cranberry Dutch Baby is quite versatile! You can swap cranberries for other fruits such as apples or berries, which allows for seasonal variety. For a lactose-free option, substitute whole milk with almond or oat milk, and if you want to lower the sugar, simply adjust the sugar content according to your taste preference. Enjoy experimenting!

Five Spice Cranberry Dutch Baby

Five Spice Cranberry Dutch Baby: Your Cozy Winter Breakfast Delight

This Five Spice Cranberry Dutch Baby is a delightful winter breakfast that combines fluffy texture with unique flavors.
Prep Time 10 minutes
Cook Time 20 minutes
Total Time 30 minutes
Servings: 4 slices
Course: Breakfast
Cuisine: American
Calories: 250

Ingredients
  

For the Batter
  • 2 tablespoons Unsalted Butter Provides richness and aids in browning while baking.
  • 3 large Eggs Ensure they are at room temperature.
  • 1 cup Whole Milk You can use low-fat if desired.
  • 1 cup All-Purpose Flour No substitutes recommended.
  • 2 tablespoons Sugar Adjust based on your taste preference.
  • 1 teaspoon Vanilla Extract Adds depth of flavor.
  • 1 pinch Salt Enhances the overall flavor profile.
For the Topping
  • 1 cup Cranberries Use fresh or frozen.
  • 1 teaspoon Chinese Five Spice If unavailable, substitute with cinnamon.

Equipment

  • oven-safe skillet

Method
 

Step-by-Step Instructions
  1. Preheat your oven to 425°F (220°C). Melt 2 tablespoons of unsalted butter in a large oven-safe skillet over medium heat. Add 1 cup of cranberries and 1 teaspoon of Chinese five spice. Sauté for 2-3 minutes until softened.
  2. In a mixing bowl, combine 3 large eggs, 1 cup of whole milk, 1 cup of all-purpose flour, 2 tablespoons of sugar, 1 teaspoon of vanilla extract, and a pinch of salt. Whisk until smooth and frothy, about 1 minute.
  3. Pour the blended batter over the sautéed cranberries in the hot skillet, ensuring it evenly covers the fruit.
  4. Place the skillet in the preheated oven and bake for about 20 minutes, or until puffed up and golden brown.
  5. Remove the skillet from the oven and slice the Dutch baby into wedges. Serve topped with maple syrup or powdered sugar.

Notes

Serve immediately for the best presentation and enjoyment. Adjust sugar based on taste preference. Feel free to experiment with seasonal fruits.

Sugared Cranberries & Sugared Rosemary: Your Festive Touch

In a flurry of holiday preparations, I found myself searching for that one magical touch to elevate my festive table. That’s when I stumbled upon the enchanting combo of Sugared Cranberries and Rosemary! This no-bake recipe is a delightful way to bring a sparkle to your desserts and drinks, merging the tartness of cranberries with the aromatic essence of rosemary. Not only does this festive garnish look stunning on plates and charcuterie boards, but it’s also incredibly easy to whip up, requiring minimal effort yet offering maximum impact. Just imagine how those glistening berries will catch the light, impressing your guests and making your celebrations even more special. Curious to learn how to create this charming seasonal treat? Keep reading!

Why Choose Sugared Cranberries?

Irresistible Visual Appeal: These glistening berries and fragrant rosemary not only stand out on any holiday table but also elevate your dishes to the next level of elegance.

Effortless Preparation: With just a few simple steps, you can whip up this stunning garnish without the need for an oven, making it perfect for busy holiday schedules.

Versatile Use: Whether adorning desserts, enhancing charcuterie boards, or garnishing holiday drinks, these tangy-sweet treats blend beautifully with various dishes, adding a festive flair.

Delicious Flavor Contrast: The tartness of cranberries layered with the herbal notes of rosemary creates a remarkable taste experience that harmoniously balances sweetness and freshness.

Customizable Twist: Feel free to play around with syrups and flavors to create your unique versions, making your creation even more one-of-a-kind! Get creative with options similar to this Flavored Simple Syrup to expand your garnish game.

Sugared Cranberries Ingredients

For the Garnish
Cranberries – Fresh cranberries provide the perfect tartness and vibrant color for a festive touch.
Rosemary – Using fresh rosemary enhances the aromatic flavor, elevating the entire garnish.

For the Syrup Coating
Granulated Sugar – This coating agent gives your sugared cranberries and rosemary that dazzling, crystalline finish.
Water – Essential for making a simple syrup; it helps the sugar adhere to your fruits and herbs.

These easy-to-make Sugared Cranberries and Sugared Rosemary are a delightful way to add a festive touch to your holiday gatherings!

Step‑by‑Step Instructions for Sugared Cranberries & Sugared Rosemary

Step 1: Prep Cranberries and Rosemary
Begin by washing the cranberries and fresh rosemary sprigs under cool running water. Gently drain and thoroughly pat them dry using a clean kitchen towel. This step is crucial as it ensures that the simple syrup adheres well, giving your Sugared Cranberries & Sugared Rosemary a beautiful sparkling finish.

Step 2: Make Simple Syrup
In a small saucepan, combine equal parts water and granulated sugar. Heat over medium heat, stirring consistently until the mixture comes to a gentle boil. Allow it to boil for exactly 1 minute—this will create your simple syrup. Once done, remove the pan from the heat and let it cool until just warm, making sure the sugar is fully dissolved.

Step 3: Coat in Syrup
Carefully dip the cranberries and rosemary sprigs into the warm simple syrup, ensuring they’re well-coated but not soaked. To avoid bruising the delicate stems of the rosemary, dip them gently. This step will allow the flavors to infuse while ensuring a solid sugar coating once they dry.

Step 4: Dry Coated Items
After coating, place the cranberries and rosemary on a wire rack or a sheet of parchment paper. Allow them to dry for 1-2 hours at room temperature. Look for a tacky surface on the fruits and herbs, as this will help the granulated sugar cling beautifully in the next step.

Step 5: Sugar Coating
Once dry, pour some granulated sugar into a bowl and roll small batches of the dried cranberries and rosemary in it. Ensure an even coating by gently shaking and stirring them in sugar. The result will be enchanting Sugared Cranberries & Sugared Rosemary that sparkle with holiday cheer, ready to adorn your festive table!

Expert Tips for Sugared Cranberries

  • Dry Thoroughly: Ensure cranberries and rosemary are completely dry post-wash to help the syrup adhere effectively for a beautiful finish.

  • Dip Gently: Avoid soaking the cranberries and rosemary in syrup for too long to prevent bursting or wilting; quick dips are best.

  • Adjust Drying Time: Factor in humidity levels in your home when drying coated items; humid conditions may require a longer drying period for optimal sugar coating.

  • Use Fresh Ingredients: Opt for fresh cranberries and rosemary to maximize both the flavor and visual appeal of your sugared cranberries and rosemary garnish.

  • Store Properly: Keep sugared items in a single layer at room temperature to maintain their crispy texture; store them uncovered for best results.

Sugared Cranberries & Sugared Rosemary Variations

Feel free to get creative with your garnishes—there’s so much you can do with Sugared Cranberries & Sugared Rosemary to make them uniquely yours!

  • Flavored Simple Syrup: Infuse your syrup with herbs like mint for a refreshing twist. Just add a few sprigs while heating the syrup.
  • Citrus Zest: Mix in lemon or orange zest into your syrup for a bright, zesty flavor that pairs beautifully with the tartness of cranberries.
  • Spicy Kick: Add a pinch of cayenne or crushed red pepper flakes to your syrup for a delightful heat that elevates the sweetness.
  • Sugar Alternatives: Swap granulated sugar with coconut sugar or maple sugar for a lower glycemic index option that still shines.
  • Lemon Juice: A splash of lemon juice in the syrup can enhance the flavor balance and provide a refreshing zing.
  • Dried Herb Garnish: For added texture and aesthetics, sprinkle dried herbs—like thyme or basil—over the sugar-coated cranberries and rosemary.
  • Nut Topping: After rolling in sugar, toss your garnishes in finely chopped nuts for a delightful crunch and flavor contrast.
  • Colorful Sprinkles: Give a fun twist to your sugared cranberries by tossing them in festive sprinkles for an extra pop of color—perfect for kids’ parties!

The possibilities are endless! These variations allow you to transform your garnishes into more than just a decoration, enhancing your holiday table with delightful flavors that intrigue your guests. Consider pairing these sugared treats with other whimsical options like a Holiday Spiced Wine or using them to jazz up a classic Cheese Board. Enjoy making these charming customizations!

Make Ahead Options

These Sugared Cranberries and Rosemary are perfect for meal prep enthusiasts during the bustling holiday season! You can prepare the cranberries and rosemary up to 24 hours in advance by washing and drying them thoroughly and storing them in an airtight container in the refrigerator. Next, make the simple syrup and keep it refrigerated for up to 3 days before you’re ready to coat the cranberries and rosemary. To maintain quality, ensure they are dried properly to avoid excess moisture before coating. When you’re ready to serve, simply reheat the syrup slightly to make it easier to coat the cranberries and rosemary, then follow the final sugar coating steps for that dazzling final touch. This way, you can save time and still impress your guests with a stunning garnish!

Storage Tips for Sugared Cranberries

  • Room Temperature: Store separately in a single layer in an airtight container for up to 3-4 days. This helps maintain their delightful texture and prevents moisture accumulation.

  • Humidity Consideration: Keep them in a cool, dry area, as high humidity can cause the sugar coating to dissolve, diminishing the sparkle of your sugared cranberries.

  • Freezer: For longer storage, freeze sugared cranberries on a baking sheet until firm, then transfer to a zip-top bag for up to 2 months. Thaw in the fridge before use for optimal texture.

  • Reheating Not Required: There’s no need to reheat these garnishes; simply use them directly from storage for that festive pop of color and flavor on your holiday dishes!

What to Serve with Sugared Cranberries and Rosemary

Make your holiday meals shine by complementing your festive garnishes with delightful pairings!

  • Creamy Cheesecake: The velvety texture and rich flavor create a luscious contrast to the tartness of the cranberries.
  • Sparkling Wine: Bubbly beverages enhance the festive spirit while balancing the sweetness, making every sip feel special.
  • Savory Charcuterie Board: A mix of meats, cheeses, and fruits not only adds variety but also highlights the herbal notes of the rosemary.
  • Roasted Brussels Sprouts: These earthy greens offer a crisp bite that pairs wonderfully with the sweet-and-tangy profile of the sugared cranberries.
  • Pecan Pie: The nutty richness of this classic dessert beautifully complements the bright flavors, creating a harmonious taste experience.
  • Herb-Infused Gravy: A drizzle over turkey or mashed potatoes can elevate your main courses, rounding out the festive meal perfectly!

These enchanting Sugared Cranberries and Rosemary should effortlessly elevate any holiday spread.

Sugared Cranberries and Rosemary Recipe FAQs

What type of cranberries should I use for this recipe?
Absolutely! Fresh cranberries are essential for achieving the best results in this recipe. Look for bright, plump berries without any dark spots or soft patches, as these indicate overripeness. Freshness not only enhances the flavor but also contributes to the stunning visual appeal of your sugared cranberries.

How should I store sugared cranberries after making them?
To maintain their delightful texture, store the sugared cranberries in a single layer at room temperature, preferably in an airtight container. They will stay fresh for about 3-4 days. It’s best to keep them uncovered to promote air circulation, preventing the sugar from melting and keeping that beautiful sparkle intact.

Can I freeze sugared cranberries? If so, how?
Very! You can freeze sugared cranberries for up to 2 months. First, lay them out in a single layer on a baking sheet and freeze until firm. Once frozen, transfer them to a zip-top bag, making sure to remove as much air as possible before sealing. When you’re ready to use them, simply thaw in the fridge. You’ll enjoy the same burst of flavor and festive touch!

What if my cranberries burst while coating them in syrup?
If cranberries burst, it often means they were soaked too long in the syrup. To avoid this, make sure you dip them quickly—just enough to coat them without letting them soak. If some do burst, don’t worry! Just use the unblemished ones for garnishing; the burst ones are still delicious and can be used in sauces or other dishes.

Are sugared cranberries safe for pets or anyone with allergies?
Always check! Sugared cranberries are generally safe for human consumption but can be a choking hazard for pets, especially dogs. Additionally, monitor any allergies, as the primary ingredients are cranberries and sugar. If you’re concerned about sugar intake, you might want to consider adjusting the amount of sugar used, or experimenting with natural sweeteners in future culinary creations.

Sugared Cranberries & Sugared Rosemary

Sugared Cranberries & Sugared Rosemary: Your Festive Touch

Elevate your festive table with these enchanting Sugared Cranberries and Sugared Rosemary, a delightful garnish that brings sparkle to your desserts and drinks.
Prep Time 15 minutes
Cook Time 5 minutes
Drying Time 2 hours
Total Time 2 hours 20 minutes
Servings: 8 servings
Course: Dessert
Cuisine: Holiday
Calories: 50

Ingredients
  

For the Garnish
  • 2 cups Fresh cranberries Provides tartness and vibrant color
  • 6 sprigs Fresh rosemary Enhances aromatic flavor
For the Syrup Coating
  • 1 cup Granulated sugar Gives the crystalline finish
  • 1 cup Water Essential for simple syrup

Equipment

  • Small saucepan
  • Wire rack
  • parchment paper

Method
 

Step-by-Step Instructions
  1. Wash the cranberries and rosemary under cool running water, then pat them dry.
  2. Combine equal parts water and sugar in a saucepan, heat until boiling for 1 minute to create simple syrup.
  3. Dip cranberries and rosemary sprigs into warm syrup until coated but not soaked.
  4. Place coated items on a wire rack or parchment paper to dry for 1-2 hours.
  5. Roll dried items in granulated sugar for an even coating and enjoy your decorated garnish.

Notes

Ensure cranberries and rosemary are fresh for maximum flavor and appeal. Store in a single layer for best results.

Savory Bahn Mi Sandwich: A Flavor Explosion at Home

As I sat in a bustling street cafe in Vietnam, the aroma of fresh baguettes mingled with sizzling meat and vibrant herbs drew me in. The legendary Banh Mi Sandwich captures the essence of this culinary paradise, harmonizing crispy bread with savory layers that dance across your palate. This recipe for the Classic Vietnamese Banh Mi Sandwich with Pork Tenderloin is not only a feast for the senses but also an effortless way to elevate your sandwich game. With quick prep and room for creativity—whether you choose chicken or tofu—you can customize this iconic dish to suit your taste. You’ll be amazed at how easily you can bring authentic flavors to your kitchen, all while impressing family and friends. Ready to make your very own Banh Mi and embark on a mouthwatering adventure? Let’s dive in!

Why is Banh Mi a Crowd Favorite?

Unforgettable Flavor: This Banh Mi Sandwich bursts with the authentic taste of Vietnam, where each layer contributes to an intricate tapestry of flavors.

Quick and Easy: With just a few simple steps, you can have this gourmet sandwich ready in no time, making it perfect for a weeknight dinner or a casual lunch.

Customizable Options: Whether you prefer juicy pork, grilled chicken, or marinated tofu, this recipe allows you to tailor your Banh Mi to your liking.

Vibrant Textures: Enjoy the delightful crunch of pickled veggies and fresh cucumbers against the chewy baguette, elevating your sandwich experience to new heights.

Ideal for Sharing: Perfect for gatherings, this sandwich not only impresses with its unique flavors but also inspires conversations about the rich culinary history of Vietnam. For a refreshing side, consider pairing it with my Refreshing Avocado Sandwiches.

Banh Mi Sandwich Ingredients

For the Pork Marinade
Pork Tenderloin – The star ingredient that offers a tender and juicy texture; you can substitute with chicken or tofu for variations.
Lemongrass – Essential for an aromatic citrus flavor; if unavailable, replace with 1 tsp of lemongrass paste.
Fish Sauce – Adds critical umami depth to the marinade; makes for a flavor-packed sandwich.
Oyster Sauce – Enhances the sweetness and complexity; use a quality brand for the best results, but can be omitted if necessary.
Lime Juice – Brightens up the flavors; freshly squeezed is always best.
Maple Syrup & Brown Sugar – These sweeteners balance out the salty and tangy elements; opt for pure maple whenever possible.
Ginger & Garlic – Aromatics that deepen the flavor profile of the marinade; ground alternatives can be used in a pinch.
Toasted Sesame Oil – Infuses a nutty aroma that is key to achieving authentic taste.

For the Pickled Vegetables
Rice Vinegar & Sugar – Used for pickling to create a sweet-tangy balance; important for a refreshing kick.
Carrots & Daikon Radish – These crunchy veggies are integral for adding texture and zing; ensure they’re properly pickled.

For Assembling the Sandwich
Cucumber – Sliced thin for a refreshing crunch within the sandwich; essential for balance.
Jalapeños – Optional, but these add a lovely heat—adjust to your preference.
Cilantro – This fresh herb adds brightness; it’s a must-have for authenticity.
Mayonnaise & Chili Garlic Sauce – Provides creaminess with a spicy kick; feel free to substitute your favorite type of mayo.

Each ingredient plays a significant role in crafting the ultimate Banh Mi Sandwich, ensuring it’s bursting with flavor and delight in every bite. Enjoy the culinary journey!

Step‑by‑Step Instructions for Banh Mi Sandwich

Step 1: Marinate the Pork
Start by slicing the pork tenderloin lengthwise and then pound it thin for even cooking. In a bowl, blend together lemongrass, garlic, ginger, fish sauce, oyster sauce, lime juice, maple syrup, and spices. Coat the pork thoroughly in this marinade and let it sit in the refrigerator for 6-8 hours, allowing the flavors to penetrate deeply into the meat.

Step 2: Pickle the Vegetables
Prepare the pickled vegetables by bringing water to a boil and mixing it with rice vinegar, sugar, and salt. Pour this hot mixture over prepared matchstick carrots and daikon radish in a bowl, ensuring they’re fully submerged. Allow them to pickle for at least 30 minutes to develop that tangy flavor, creating a perfect contrast for your Banh Mi Sandwich.

Step 3: Cook the Pork
Heat a grill or a pan over medium-high heat. Once hot, place the marinated pork onto the grill or pan, cooking for about 1-2 minutes per side, or until the exterior is caramelized and the pork is cooked through. Use a meat thermometer, ensuring the internal temperature reaches at least 145°F for juicy, tender slices.

Step 4: Toast the Baguettes
While the pork rests, slice the Vietnamese baguettes in half and place them cut-side down on the grill for a couple of minutes. Toast until they are lightly browned and crisp, which not only enhances the flavor but also prevents sogginess once the sandwich is assembled. This toasty base is essential for enjoying your Banh Mi Sandwich.

Step 5: Assemble the Sandwiches
Spread mayonnaise and chili garlic sauce generously inside each toasted baguette. Layer the cooked pork slices on one side, followed by the pickled vegetables for a burst of flavor. Add thin cucumber slices, jalapeños (if using), and finish with a handful of fresh cilantro for that authentic taste, bringing your delicious Banh Mi Sandwich to life.

What to Serve with Classic Vietnamese Banh Mi Sandwich

Pairing your Banh Mi with complementary sides and drinks will create a harmonious dining experience filled with flavor and freshness.

  • Crispy Spring Rolls: A classic Vietnamese starter, these crispy delights are filled with veggies and protein, adding a delightful crunch to your meal.

  • Refreshing Salad: A simple side salad with mixed greens, herbs, and a light vinaigrette will enhance the freshness of the Banh Mi, balancing flavors beautifully.

  • Sweet Potato Fries: Their natural sweetness and crispy texture pair perfectly with the savory sandwich, adding an interesting twist to your meal.

  • Coconut Rice: This subtly sweet, aromatic rice will complement the rich pork while bringing a hint of tropical flavor to your plate.

  • Iced Vietnamese Coffee: For a truly authentic pairing, sip on a rich and creamy iced coffee. The caffeine kick and sweet flavor will uplift your dining experience.

  • Pickled Vegetable Medley: Keep the crunch and tang going with additional pickled veggies, enhancing the freshness and texture of the meal.

These pairings will take your classic Vietnamese Banh Mi Sandwich from a delicious solo dish to a complete, satisfying meal bursting with color and flavor.

Banh Mi Sandwich Variations & Substitutions

Feel free to get creative with this Banh Mi Sandwich, customizing it to match your taste buds and dietary preferences!

  • Chicken Alternative: Replace the pork with grilled chicken for a lighter option. The marinade works beautifully with chicken, enhancing its flavor and juiciness.

  • Tofu Delight: For a vegetarian twist, marinate tofu slices in the same mixture as the pork, then grill or fry until golden brown. You’ll still enjoy that flavorful punch!

  • Bold Pickling: Swap out carrots and daikon for other pickled vegetables like cucumbers or red onions, creating a unique crunch with each bite. You could even add sliced mango for a sweet touch.

  • Spicy Upgrade: If you love heat, throw in extra jalapeños or sliced Thai bird chilies for a fiery kick. Adjust according to your spice tolerance!

  • Flavorful Herbs: Switch up the cilantro with fresh basil or mint for a refreshing take. Each herb brings its own aroma and zest to the sandwich.

  • Saucy Variations: Experiment with sauces by using Sriracha mayo or spicy aioli instead of traditional mayo for an added flavor layer. The creamy base is your canvas!

  • Gluten-Free Option: Use gluten-free baguettes or wraps to enjoy this sandwich without compromising your dietary needs. It’s a delightful, inclusive twist!

  • Scrumptious Sides: Pair your Banh Mi with my Refreshing Avocado Sandwiches for a complimentary freshness that balances out the flavors in your meal.

How to Store and Freeze Banh Mi Sandwich

Fridge: Store assembled Banh Mi Sandwich in an airtight container for up to 2 days. For best results, keep the components separate, especially the pickled veggies, to maintain freshness.

Freezer: Wrap each assembled sandwich tightly in plastic wrap and foil, then place in a freezer bag. They can be frozen for up to 3 months; however, the baguette may lose its crispness.

Reheating: To reheat, remove plastic wrap and foil, then warm in the oven at 350°F for about 10 minutes or until heated through. Consider adding fresh cilantro and quick-pickled veggies after reheating for a burst of flavor.

Make-Ahead Tips: You can marinate the pork and pickle the vegetables a day in advance, ensuring that your Banh Mi Sandwich comes together effortlessly when you’re ready to enjoy a delightful meal.

Make Ahead Options

These Banh Mi Sandwiches are perfect for meal prep enthusiasts! You can marinate the pork tenderloin up to 8 hours in advance, allowing the flavors to deeply infuse for optimal taste. Additionally, the pickled vegetables can be prepared a day ahead and stored in the refrigerator for up to one week, maintaining their crunchy texture and vibrant tang. When you’re ready to serve, simply cook the marinated pork as directed, toast the baguettes, and assemble your sandwiches fresh. This way, you’ll have a flavorful, aromatic Banh Mi ready in no time—ideal for busy weeknights or unexpected guests!

Expert Tips for the Best Banh Mi Sandwich

  • Perfect Pork Prep: Ensure the pork is partially frozen before slicing; this makes it easier to cut thin, uniform pieces that cook evenly.

  • Marination Matters: Always marinate the pork for 6-8 hours for maximum depth of flavor. If in a hurry, even 2 hours can help but won’t be as rich.

  • Vegetable Pickling: For the best taste, pickle your carrots and daikon a day in advance. Freshly pickled veggies elevate the Banh Mi Sandwich!

  • Quality Ingredients: Use a high-quality fish sauce for authentic flavor. Budget brands can be too salty and lack depth; splurge a little for the best result.

  • Avoid Overcooking: Cook the pork just until caramelized—1-2 minutes on each side—so it remains juicy and tender. A meat thermometer can help ensure perfection.

Banh Mi Sandwich Recipe FAQs

How do I choose ripe ingredients for the pickled vegetables?
When selecting carrots and daikon for pickling, choose firm, vibrant ones without dark spots or blemishes. Fresh veggies will add more crunch and flavor to your Banh Mi Sandwich.

What is the best way to store leftover Banh Mi Sandwich?
To store leftovers, keep the assembled Banh Mi Sandwich in an airtight container in the fridge for up to 2 days. It’s best to separate the pickled vegetables to maintain their crunch and freshness.

Can I freeze Banh Mi Sandwiches? How?
Absolutely! To freeze, tightly wrap each assembled sandwich in plastic wrap and foil, then place it in a freezer bag. They can be stored for up to 3 months. When ready to enjoy, remove the wrapping and heat in the oven at 350°F for about 10 minutes, adding fresh herbs or veggies afterward for that just-made taste.

What should I do if my pork is overcooked?
If your pork ends up overcooked and dry, you can consider slicing it thinly and mixing it with a bit of broth or a savory sauce to add moisture. Alternatively, you can create a simple gravy or sauce and drizzle it over your sandwich to improve texture and flavor.

Are there any allergenic ingredients in the Banh Mi Sandwich?
Yes, this recipe includes fish sauce, which contains seafood, and soy-based sauces that may contain gluten. If you’re cooking for someone with allergies, I recommend substituting those components with gluten-free or allergen-free alternatives, like coconut aminos instead of soy sauce.

Bahn Mi Sandwich

Savory Bahn Mi Sandwich: A Flavor Explosion at Home

This Bahn Mi Sandwich is a delightful blend of flavors and textures, elevating your sandwich game with its authentic taste.
Prep Time 30 minutes
Cook Time 15 minutes
Marination Time 8 hours
Total Time 8 hours 45 minutes
Servings: 4 sandwiches
Course: Lunch
Cuisine: Vietnamese
Calories: 450

Ingredients
  

For the Pork Marinade
  • 1 pound Pork Tenderloin can substitute with chicken or tofu
  • 2 stalks Lemongrass or 1 tsp lemongrass paste if unavailable
  • 3 tablespoons Fish Sauce
  • 1 tablespoon Oyster Sauce optional
  • 2 tablespoons Lime Juice freshly squeezed
  • 1 tablespoon Maple Syrup or brown sugar
  • 1 teaspoon Ginger grated
  • 2 cloves Garlic minced
  • 2 tablespoons Toasted Sesame Oil
For the Pickled Vegetables
  • 1 cup Rice Vinegar
  • 1 tablespoon Sugar
  • 1 cup Carrots matchstick cut
  • 1 cup Daikon Radish matchstick cut
For Assembling the Sandwich
  • 1 large Cucumber sliced thin
  • 1 each Jalapeños optional
  • 1 cup Cilantro fresh
  • 4 tablespoons Mayonnaise
  • 2 tablespoons Chili Garlic Sauce or preferred mayo

Equipment

  • grill
  • Bowl
  • Knife
  • Pan

Method
 

Marination & Pickling
  1. Slice the pork tenderloin lengthwise and pound thin. In a bowl, mix lemongrass, garlic, ginger, fish sauce, oyster sauce, lime juice, maple syrup, and spices. Marinate pork for 6-8 hours.
  2. Pickle vegetables by boiling water and mixing with rice vinegar, sugar, and salt. Pour over carrots and daikon radish, let sit for at least 30 minutes.
Cooking & Assembling
  1. Heat a grill/pan. Grill marinated pork for 1-2 minutes per side until caramelized. Use a meat thermometer to check for 145°F.
  2. Toast Vietnamese baguettes cut-side down on the grill until browned.
  3. Spread mayonnaise and chili garlic sauce inside each baguette. Layer with pork, pickled veggies, cucumber, jalapeños (if using), and cilantro.

Notes

For best results, marinate pork and pickle vegetables a day in advance. Keep components separate during storage.

Savory Chicken Salmoriglio: Crispy Delight with Zesty Sauce

The rich aroma of lemon and garlic wafts through my kitchen, pulling me back to sun-soaked Italian summers. That’s the magic of Chicken Salmoriglio—a dish where crispy breaded chicken cutlets meet a zesty sauce that sings with fresh herbs. This simple yet comforting recipe brings joy not just to the cook but to anyone lucky enough to share at the table. It’s a quick meal that lends itself to both relaxed weeknight dinners and special gatherings, proving that homemade flavors can easily outshine takeout. Whether you’re a seasoned home chef or just starting on your culinary journey, this Chicken Salmoriglio will dazzle your palate and delight your family. Ready to elevate your dinner game with this Italian classic? Let’s dive in!

Why is Chicken Salmoriglio So Special?

Crispy, Flavorful Delight: The breaded chicken cutlets offer a satisfying crunch that pairs perfectly with the zesty Salmoriglio sauce, elevating each bite to new heights.

Quick and Easy: With a straightforward preparation process, this dish is designed for those busy weeknights when you crave homemade goodness without the fuss.

Family-Friendly Appeal: Everyone will love the vibrant flavors, making it a hit at dinner tables—ideal for both discerning palates and picky eaters alike.

Versatile Dish: Don’t hesitate to adapt it; try grilled chicken or even seafood as a twist. You might also enjoy trying it with a side of Homemade Chicken Rolls for a complete meal!

Impress Without Stress: Serve it on special occasions or casual gatherings—this crowd-pleaser is bound to impress your guests without requiring extensive cooking skills.

Bring the taste of Italy to your kitchen with Chicken Salmoriglio, and experience the joy of deliciously simple homemade meals!

Chicken Salmoriglio Ingredients

Get ready to create an irresistible dish with these essential Chicken Salmoriglio ingredients!

For the Chicken Cutlets
Chicken Breasts – Boneless, skinless varieties ensure quick cooking and tender texture.
Kosher Salt – Enhances the flavor of the chicken; sea salt can be an effective substitute.
Black Pepper (freshly ground) – Adds a touch of mild heat; use pre-ground if necessary.
Flour – Acts as the coating base for breading; whole wheat flour can make it a bit healthier.
Eggs and Water – Binds the coating; a flaxseed mixture works well for a vegan option.

For the Breading
Panko Breadcrumbs – Provides an extra crunch; regular breadcrumbs are a substitute but won’t be as crispy.
Parmesan Cheese (grated) – Infuses umami flavors into the dish; nutritional yeast can replace it for a dairy-free take.

For the Salmoriglio Sauce
Lemon Zest – Brings brightness and flavor; fresh zest is highly recommended over dried.
Garlic (minced) – Delivers aromatic goodness; can be swapped with garlic powder if needed.
Extra Virgin Olive Oil – Used for marinating and frying; vegetable oil can be a neutral substitute.
Dry Oregano – Adds an herbaceous note; fresh oregano can elevate the flavor if available.
Butter – For frying; can be replaced with olive oil for a healthier version.

Remember, these components blend beautifully, turning your Chicken Salmoriglio into a sensational family favorite!

Step‑by‑Step Instructions for Chicken Salmoriglio

Step 1: Prepare the Chicken
Start by butterflying the chicken breasts to create even cutlets, then cut them into four equal portions. This ensures that they will cook quickly and evenly. Once cut, let the chicken sit at room temperature while you prepare the marinade, enhancing the flavor of your Chicken Salmoriglio.

Step 2: Marinate the Chicken
In a mixing bowl, combine lemon zest, minced garlic, extra virgin olive oil, dried oregano, kosher salt, and freshly ground black pepper. Coat each chicken cutlet in this zesty mixture, making sure they are fully covered. Allow the chicken to marinate for about 1 hour, which infuses it with bright flavors.

Step 3: Set Up the Breading Station
Prepare three shallow bowls for breading: one with seasoned flour (mixed with a bit of salt and pepper), one with beaten eggs and a splash of water, and the last filled with panko breadcrumbs mixed with grated Parmesan cheese. This setup will help you easily coat the chicken cutlets, ensuring a crispy finish on your Chicken Salmoriglio.

Step 4: Coat the Chicken
Take each marinated chicken piece and dredge it in the flour, shaking off any excess. Next, dip it into the egg mixture to ensure it adheres properly, and then finally coat it in the panko-Parmesan blend, pressing gently to help the breadcrumbs stick. Set aside each coated piece on a plate, ready for frying.

Step 5: Fry the Chicken
Heat a large skillet over medium-high heat and add a mix of butter and olive oil, enough to cover the bottom of the pan. Once hot, carefully place the coated chicken cutlets in the skillet, ensuring not to overcrowd the pan. Fry the chicken for about 3-4 minutes on each side, or until golden brown and crispy.

Step 6: Bake for Perfect Texture
Once the chicken is browned, transfer the cutlets to a baking sheet. Brush the tops with melted butter and bake in a preheated oven at 400°F for an additional 5-10 minutes, until they reach an internal temperature of 165°F. This step ensures that the chicken is fully cooked while retaining its crispiness.

Step 7: Serve with Salmoriglio Sauce
After baking, plate the crispy Chicken Salmoriglio and generously pour the reserved Salmoriglio sauce over each cutlet. Enhance the dish with fresh lemon wedges for an extra zing. This vibrant, flavor-packed dish is sure to impress your family and friends, making every bite a delight!

What to Serve with Chicken Salmoriglio

Elevate your dining experience by pairing vibrant sides with this zesty, crispy chicken delight.

  • Creamy Mashed Potatoes: The rich, buttery texture of mashed potatoes creates a comforting contrast to the crunchy chicken and bright sauce.

  • Garlic Roasted Asparagus: Tender asparagus, with a hint of garlic, adds a fresh and nutty flavor, balancing out the dish.

  • Simple Arugula Salad: A light salad with peppery arugula and a lemon vinaigrette complements the zesty Salmoriglio sauce beautifully.

  • Pasta Aglio e Olio: This classic, garlicky pasta is a perfect hearty companion, soaking up flavors and adding to the Italian theme on your table.

  • Grilled Vegetable Medley: Colorful grilled vegetables introduce a smoky flavor and delightful texture, enhancing the fresh taste of the chicken.

  • Lemon Herb Quinoa: Light and fluffy quinoa infused with herbs echoes the lemony tones of the Salmoriglio sauce while adding wholesome nutrients.

  • Chilled Pinot Grigio: A refreshing white wine serves as a delightful sip to clear your palate with each bite of chicken.

  • Lemon Sorbet: Finish with a light, tangy dessert to cleanse your palate and keep the flavors bright until the very end.

How to Store and Freeze Chicken Salmoriglio

Refrigerator: Store leftover Chicken Salmoriglio in an airtight container for up to 3 days. To maintain crispness, keep the sauce separate until ready to serve.

Freezer: Freeze the breaded and cooked chicken cutlets for up to 1 month. Place them in a single layer on a baking sheet before transferring to a freezer bag to prevent sticking.

Reheating: Reheat the chicken in a preheated oven at 375°F for about 10-15 minutes. This will help restore the crispiness. Warm the sauce gently on the stovetop or microwave before serving over the chicken.

Make-Ahead Tip: Prepare the chicken cutlets but refrain from frying them. Store the breaded cutlets in the refrigerator for up to a day or freeze before frying for a quick meal later featuring Chicken Salmoriglio!

Chicken Salmoriglio Variations & Substitutions

Feel free to let your creativity shine and personalize this recipe!

  • Grilled Chicken: Swap the pan-frying method for a grilled finish. Marinate the chicken and grill for a smoky flavor infusion.
  • Seafood Twist: Use shrimp or fish instead of chicken for a lighter, ocean-inspired take. These options pair beautifully with the zesty Salmoriglio sauce.
  • Oven-Baked: Skip the frying altogether and bake the breaded chicken cutlets for a healthier alternative. Coat with spray oil for that crispy texture.
  • Herb Variations: Experiment with fresh herbs like thyme or rosemary instead of oregano, creating unique flavor profiles. Each herb lends a different aromatic quality, so be adventurous!
  • Spicy Version: Add red pepper flakes to the Salmoriglio sauce for a kick of heat. This elevates the dish for those who enjoy a little fire on their plate.

For a delightful side, consider pairing the chicken with a light salad or even some roasted vegetables. The vibrant flavors complement the breaded cutlets beautifully! You might also love it served with Savory Chicken Cheesy Potato Drumsticks for a comforting meal.

  • Vegetarian Delight: Use eggplant or zucchini slices instead of chicken, breading and preparing them the same way. The results are just as crispy and satisfying!
  • Whole Wheat Flour: For a healthier breading, replace all-purpose flour with whole wheat flour. It adds a nuttier flavor while maintaining the crunch.

Make Ahead Options

These Chicken Salmoriglio cutlets are perfect for meal prep enthusiasts! You can marinate the chicken breasts up to 24 hours in advance, allowing the flavors to deeply infuse. Just mix your lemon zest, garlic, olive oil, oregano, salt, and pepper, then coat the cutlets and refrigerate in an airtight container. If you’re short on time, you can also bread the chicken cutlets ahead of time and store them in the fridge for up to three days. When you’re ready to serve, simply fry and bake as directed for restaurant-quality results with minimal effort. Just remember to keep the sauce separate until serving to maintain the chicken’s crispy texture!

Expert Tips for Chicken Salmoriglio

Marinate Wisely: Ensure the chicken sits at room temperature for at least 30 minutes after marinating. This helps deepen flavors and ensures even cooking for your Chicken Salmoriglio.

Don’t Rush the Frying: Fry the cutlets in batches to avoid overcrowding the pan, which can lead to uneven browning and soggy chicken.

Check Temperature: Use a meat thermometer to verify that your chicken reaches 165°F; this guarantees juiciness and safe consumption.

Crispiness Reboot: For leftovers, reheat the chicken in the oven at 375°F for about 10 minutes to restore that satisfying crunch.

Reserve Sauce Prior: Always set aside part of the marinade for the Salmoriglio sauce before coating the chicken to avoid cross-contamination.

With these tips, your Chicken Salmoriglio will be a family favorite you’ll want to make again and again!

Chicken Salmoriglio Recipe FAQs

How do I choose the best chicken breasts for this recipe?
Absolutely! When selecting chicken breasts, look for boneless, skinless options that are firm to the touch and have a pink hue, avoiding any with dark spots or a grayish color. Fresh poultry ensures the best texture and flavor in your Chicken Salmoriglio.

What’s the best way to store leftover Chicken Salmoriglio?
To maintain its deliciousness, store any leftovers in an airtight container in the refrigerator for up to 3 days. I recommend keeping the Salmoriglio sauce separate until you’re ready to serve to preserve the chicken’s crispiness.

Can I freeze Chicken Salmoriglio?
Absolutely! You can freeze the cooked, breaded cutlets for up to 1 month. To do this, lay them in a single layer on a baking sheet first, then transfer them to a freezer bag. This prevents sticking, making it easy to grab just what you need later!

What should I do if the chicken isn’t browning properly while frying?
If you find that your chicken isn’t browning, it may be because the pan is overcrowded or the oil isn’t hot enough. Make sure to cook in small batches and properly heat your oil before adding the chicken. Aim for an oil temperature around 350°F for golden-brown results.

Are there any dietary considerations for Chicken Salmoriglio?
Yes! If you’re cooking for someone with dairy allergies, you can swap Parmesan cheese with nutritional yeast for a fantastic dairy-free alternative. Furthermore, for a vegan version, consider using a flaxseed mixture in place of eggs and skip the butter altogether, replacing it with olive oil for frying.

Can I make the chicken cutlets ahead of time?
Certainly! You can prepare the breaded chicken cutlets a day in advance. Simply keep them in the refrigerator before frying. For longer-term storage, freeze them before cooking; this way, you’ll have a quick meal ready whenever you need it, featuring your homemade Chicken Salmoriglio!

Chicken Salmoriglio

Savory Chicken Salmoriglio: Crispy Delight with Zesty Sauce

Experience the magic of Chicken Salmoriglio with crispy chicken cutlets and zesty sauce, a delightful Italian dish.
Prep Time 10 minutes
Cook Time 20 minutes
Marinating Time 1 hour
Total Time 1 hour 30 minutes
Servings: 4 cutlets
Course: Chicken
Cuisine: Italian
Calories: 450

Ingredients
  

For the Chicken Cutlets
  • 4 pieces Chicken Breasts Boneless, skinless
  • 1 teaspoon Kosher Salt
  • 1 teaspoon Black Pepper (freshly ground) or pre-ground
  • 1 cup Flour whole wheat flour can be healthier
  • 2 large Eggs and a splash of water
For the Breading
  • 1 cup Panko Breadcrumbs provides extra crunch
  • 1/2 cup Parmesan Cheese (grated) nutritional yeast for dairy-free
For the Salmoriglio Sauce
  • 1 tablespoon Lemon Zest fresh zest recommended
  • 3 cloves Garlic (minced) can use garlic powder if needed
  • 1/4 cup Extra Virgin Olive Oil vegetable oil as substitute
  • 1 teaspoon Dry Oregano fresh oregano can elevate flavor
  • 2 tablespoons Butter can replace with olive oil

Equipment

  • large skillet
  • mixing bowl
  • baking sheet
  • Meat thermometer

Method
 

Preparation Steps
  1. Step 1: Prepare the Chicken - Butterfly the chicken breasts and cut into four equal portions. Let sit at room temperature while preparing marinade.
  2. Step 2: Marinate the Chicken - Combine lemon zest, minced garlic, olive oil, oregano, salt, and pepper in a bowl. Coat the chicken and marinate for 1 hour.
  3. Step 3: Set Up the Breading Station - Prepare three shallow bowls for flour, egg mixture, and panko-Parmesan blend.
  4. Step 4: Coat the Chicken - Dredge marinated chicken in flour, then dip in the egg mixture, and coat with the panko-Parmesan blend.
  5. Step 5: Fry the Chicken - Heat skillet with butter and olive oil. Fry coated chicken about 3-4 minutes on each side.
  6. Step 6: Bake for Perfect Texture - Transfer to a baking sheet, brush with melted butter, and bake at 400°F for 5-10 minutes.
  7. Step 7: Serve with Salmoriglio Sauce - Plate chicken and pour Salmoriglio sauce over. Serve with fresh lemon wedges.

Notes

Store leftovers in an airtight container for up to 3 days. For best texture, use caution when reheating.