Delight in Vegan Black Forest Dessert Cups – No-Bake Bliss!

The sweet scent of cherries and chocolate wafts through the air as I dream up my latest creation: Black Forest Dessert Cups. Picture a sunny afternoon where the traditional labor of baking is traded for a no-bake delight that’s not only a breeze to whip up, but also aligns with vegan, dairy-free, and refined sugar-free lifestyles. These creamy, indulgent cups, layered with avocado chocolate mousse and fluffy whipped cream, are bound to steal the show at any gathering, proving that guilt-free desserts can hold their own against the classics. It’s the perfect way to indulge without compromising on health or taste! So, how about we take a step away from fast food and dive into a refreshing world of homemade goodness together?

Why are Black Forest Dessert Cups irresistible?

Indulgent Layers: Each spoonful reveals a decadent blend of rich avocado chocolate mousse, luscious whipped cream, and juicy cherries, creating a delightful experience unmatched by regular desserts.
No-Bake Easy Prep: Whip up these cups in no time, making them a time-saving solution for busy days or last-minute gatherings.
Guilt-Free Treat: With their vegan, dairy-free, and refined sugar-free profile, you can enjoy these delicious desserts without compromising your health goals.
Versatile Delight: Feel free to mix and match with other fruits or flavored chocolates, ensuring everyone’s taste buds are satisfied and surprised.
Crowd-Pleasing Appeal: Whether at a summer barbecue or cozy dinner, these dessert cups are sure to impress your guests, much like my Harvest Salad Cups or Coconut Cheese Dessert.
Flavorful Experience: Each component harmonizes beautifully, giving you a rich dessert that feels indulgent but is actually health-conscious!

Black Forest Dessert Cups Ingredients

For the Mousse

  • Large Ripe Avocado – Acts as a creamy base; make sure it’s fully ripe for the best texture.
  • Melted Dairy-Free Chocolate – Provides depth and richness; feel free to substitute with cocoa powder for a lighter flavor.
  • Dairy-Free Milk – Adds creaminess, helping to blend the mousse smoothly; use room temperature for optimal results.
  • Maple Syrup – Sweetens both the mousse and cherries; agave syrup is a perfect alternative if needed.
  • Dutch-Process Cocoa Powder – Enhances the chocolate flavor and color; it’s optional but highly recommended for avid chocolate lovers.
  • Vanilla Extract – A touch of sweetness that amplifies flavor; consider adding espresso powder for a mocha twist.
  • Pinch of Salt – Balances and enhances the overall flavor of the mousse.

For the Assembly

  • Fresh Sweet Cherries – Essential for that classic black forest taste; canned or frozen cherries work well in a pinch.
  • Dairy-Free Whipped Cream – Light and airy topping; you can substitute with thick dairy-free yogurt or coconut cream if preferred.

These delicious ingredients come together to create your dreamy Black Forest Dessert Cups, a dessert that’s not only delightful but also guilt-free! Dive into the layers of flavor and texture that make this dish a crowd favorite!

Step‑by‑Step Instructions for Black Forest Dessert Cups

Step 1: Prepare Cherries
In a medium bowl, gently stir halved fresh sweet cherries with maple syrup until well-coated. Allow the cherries to chill in the refrigerator for at least 15 minutes, letting the syrup create a sweet glaze. This step enhances the flavor and ensures they’re juicy and ready to layer into your delightful Black Forest Dessert Cups.

Step 2: Whip Cream
In a large mixing bowl, whip the dairy-free whipped cream according to the package instructions until soft peaks form, which should take about 3–5 minutes using an electric mixer. Once whipped to a fluffy consistency, cover the bowl and refrigerate it until ready to use. This airy texture will beautifully contrast the rich mousse layers.

Step 3: Make Mousse
In a blender, combine the ripe avocado, melted dairy-free chocolate, dairy-free milk, maple syrup, Dutch-process cocoa powder, vanilla extract, and a pinch of salt. Blend the ingredients on high for about 1-2 minutes, or until the mixture is completely smooth and creamy. Taste and adjust the sweetness if needed, achieving a luscious base for your Black Forest Dessert Cups.

Step 4: Assemble Cups
In serving glasses, start layering by adding a generous spoonful of dairy-free whipped cream at the bottom. Next, carefully spoon in a layer of the creamy avocado mousse and top with the macerated cherries, adding a drizzle of the cherry syrup for extra sweetness. Repeat the layering process until the glasses are filled, creating a visually appealing dessert.

Step 5: Serve or Store
Once assembled, the Black Forest Dessert Cups can be served immediately for a delightful treat or covered with plastic wrap and stored in the refrigerator for up to 6 hours. If you’re prepping in advance, it’s best to assemble them just a couple of hours before serving to maintain the freshness and layered look.

Black Forest Dessert Cups Variations

Customize your Black Forest Dessert Cups to match your taste and dietary preferences with these fun and delicious ideas!

  • Cherry Liqueur:
    For an adult twist, add a splash of cherry liqueur to your macerated cherries for a delightful burst of flavor. This adds complexity and a touch of sophistication to your cups.

  • Different Fruits:
    Swap out sweet cherries for raspberries or strawberries for a refreshing change. The tartness of these berries complements the richness of the mousse beautifully, creating a lovely contrast.

  • Cocoa Powder Option:
    Prefer a lighter chocolate flavor? Use cocoa powder instead of melted dairy-free chocolate in the mousse. This will still yield a delicious treat sans the richness.

  • Nutty Delight:
    Incorporate crushed nuts like almonds or hazelnuts between layers for added texture and crunch. The nutty flavor is a perfect companion to the creaminess of the mousse.

  • Flavor Infusions:
    Infuse your whipped cream with vanilla or almond extract for an extra layer of flavor. Just a few drops can elevate the creamy topping.

  • Coconut Cream Swap:
    For a tropical twist, use coconut cream instead of dairy-free whipped cream. This swap adds a subtle coconut flavor that pairs wonderfully with the chocolate and cherries.

  • Chocolate Variations:
    Experiment with different types of chocolate, like dark or white chocolate, for your mousse base. Each will give a unique taste and color, making your dessert special.

  • Extra Sweetness:
    If you have a sweet tooth, drizzle some agave or maple syrup over each layer of fruit to enhance the flavors and add some sweetness to your cups.

Your Black Forest Dessert Cups can be a canvas for creativity, much like my delightful Coconut Cheese Dessert or my vibrant Harvest Salad Cups. Enjoy the process and make it your own!

Make Ahead Options

These Black Forest Dessert Cups are perfect for meal prep, allowing you to savor the deliciousness without the last-minute rush. You can prepare the avocado chocolate mousse and the macerated cherries up to 3 days in advance, storing them in airtight containers in the refrigerator to maintain their flavors and textures. For the best quality, keep the whipped cream separate and whip it fresh just a few hours before serving. When ready to serve, simply layer the mousse, cherries, and whipped cream in your serving glasses, making sure to enjoy every rich and creamy bite just as delightful as when first made!
Expert Tips for Black Forest Dessert Cups

  • Room Temperature Ingredients: Ensure all ingredients, especially avocado and dairy-free milk, are at room temperature to prevent chocolate from seizing during blending.

  • Cherry Consideration: If using canned or jarred cherries, thoroughly drain them and reserve the juice; it can be used to enhance the mousse’s flavor.

  • Mousse Consistency: For a firmer mousse, chill it in the refrigerator for at least 30 minutes before serving; this aids in setting and gives it a delightful texture.

  • Layering Technique: When assembling the Black Forest Dessert Cups, layer with care. Start with whipped cream, then mousse, and cherries for a visually appealing presentation.

  • Adjusting Sweetness: Taste the mousse after blending and adjust the sweetness as needed. Depending on your cherry sweetness or personal preference, feel free to add more maple syrup!

How to Store and Freeze Black Forest Dessert Cups

Fridge: Store any leftover Black Forest Dessert Cups in an airtight container in the fridge for up to 6 hours to maintain the ideal texture and flavor.

Make-Ahead: Prepare the mousse and macerated cherries 1-2 days in advance. Keep them stored separately in the fridge, then layer before serving for the best presentation.

Freezer: While not recommended for the assembled cups, you can freeze the mousse in an airtight container for up to 2 months. Thaw in the fridge overnight before use.

Reheating: Since this is a no-bake dessert, there’s no need to reheat. Serve chilled for the best taste and texture.

What to Serve with Black Forest Dessert Cups?

Envision a delightful spread where your Black Forest Dessert Cups shine as the star, accompanied by dishes that elevate every bite.

  • Creamy Vegan Coffee: The warm, nutty notes of coffee create a perfect contrast to the cool indulgence of your dessert cups. This pairing can invigorate your taste experience after the sweetness.

  • Fluffy Vegan Pancakes: Light and airy pancakes topped with a dab of maple syrup echo the sweetness of the mousse while adding a comforting breakfast element to your brunch table.

  • Fresh Berry Salad: A vibrant mix of seasonal berries enhances the fresh cherry layers in the dessert. This fruity side offers a refreshing balance to the rich flavors.

  • Chocolate Nut Bark: With a simple combination of melted dairy-free chocolate and nuts, this crunchy treat pairs excellently, amplifying the chocolatey goodness of your dessert.

  • Coconut Cream Pie: For those who love tropical notes, a dairy-free pie brings a creaminess and additional sweetness that complements the avocado mousse’s texture while diversifying your dessert experience.

  • Sparkling Water with Lime: A zesty, bubbly drink cleanses your palate, highlighting the rich layers of chocolate and cherry while ensuring a refreshing dining experience.

  • Minted Watermelon Slices: Juicy watermelon with a hint of mint creates a light, hydrating option that contrasts beautifully with the richness of the dessert, giving a delightful seasonal twist to your meal.

Black Forest Dessert Cups Recipe FAQs

How do I select ripe avocados for the mousse?
Absolutely! Look for avocados that yield slightly to gentle pressure; this indicates they are ripe and creamy. Avoid those with dark spots all over, as they may be overripe. It’s best to use them within a couple of days after purchase for optimal flavor and texture.

How should I store leftover Black Forest Dessert Cups?
To maintain their deliciousness, simply place the leftover cups in an airtight container and store them in the fridge for up to 6 hours. Unfortunately, they won’t last much longer than that, as the whipped cream may lose its fluffiness beyond this period. Enjoy them fresh for the best experience!

Can I freeze the mousse or the assembled dessert?
You can certainly freeze the mousse! Store it in an airtight container and it will last for up to 2 months. Just be sure to thaw it in the fridge overnight before using. However, I recommend avoiding freezing the assembled cups, as the texture of the whipped cream and cherries may become mushy once thawed.

What should I do if the mousse is too thick?
If your mousse turns out too thick, don’t fret! Simply add a splash of room temperature dairy-free milk, blend again for a few seconds, and it should reach your desired consistency. This way, you can ensure the mousse is perfectly creamy, just the way you want it!

Are there any dietary considerations for pets or allergies?
Yes, keep in mind that while this recipe is vegan and free from common allergens like eggs and dairy, the avocados should be kept away from pets, particularly dogs, as they can be harmful to them. Additionally, check for allergies related to chocolate, as some individuals may have sensitivities.

Can I make these Black Forest Dessert Cups ahead of time?
Very! I often prepare the mousse and macerated cherries 1-2 days in advance. Simply store them separately in the fridge. Assemble the cups a couple of hours before serving for the best presentation and to keep the whipped cream fluffy and fresh.

Black Forest Dessert Cups

Delight in Vegan Black Forest Dessert Cups – No-Bake Bliss!

Indulge in these Black Forest Dessert Cups, a no-bake vegan delight that combines chocolate mousse, whipped cream, and cherries for a guilt-free treat.
Prep Time 20 minutes
Total Time 20 minutes
Servings: 4 cups
Course: Dessert
Cuisine: Vegan
Calories: 250

Ingredients
  

For the Mousse
  • 1 large ripe avocado ensure it’s fully ripe for the best texture
  • 1/2 cup melted dairy-free chocolate substitute with cocoa powder for a lighter flavor
  • 1/2 cup dairy-free milk use room temperature for optimal results
  • 1/4 cup maple syrup agave syrup is a perfect alternative if needed
  • 2 tablespoons Dutch-process cocoa powder optional but highly recommended
  • 1 teaspoon vanilla extract consider adding espresso powder for a mocha twist
  • 1 pinch salt balances and enhances flavor
For the Assembly
  • 2 cups fresh sweet cherries or canned/frozen cherries in a pinch
  • 1 cup dairy-free whipped cream substitute with thick dairy-free yogurt or coconut cream if preferred

Equipment

  • Blender
  • mixing bowl
  • electric mixer
  • serving glasses

Method
 

Step-by-Step Instructions
  1. Prepare Cherries: Stir halved fresh sweet cherries with maple syrup in a bowl. Chill for at least 15 minutes.
  2. Whip Cream: Whip dairy-free whipped cream until soft peaks form. Refrigerate until ready to use.
  3. Make Mousse: Blend avocado, melted chocolate, dairy-free milk, maple syrup, cocoa powder, vanilla extract, and salt until smooth.
  4. Assemble Cups: Layer whipped cream, avocado mousse, and cherries in serving glasses.
  5. Serve or Store: Serve immediately or store in the refrigerator for up to 6 hours.

Notes

Ensure all ingredients are at room temperature to prevent chocolate from seizing. Adjust sweetness of mousse as desired.

Refreshing Thai Lod Chong Dessert You’ll Love This Summer

As summer sizzles, nothing brings a smile quite like a cool, refreshing dessert. Enter the Thai Lod Chong Dessert (Cendol)—a delightful combination of chewy pandan noodles, creamy coconut milk, and sweet syrup that perfectly captures the essence of Thai street food. This gluten-free treat doubles as a playful drink, making it perfect for hot days when you need something delicious yet light. Plus, it’s incredibly easy to prepare, inviting the whole family into the kitchen for some quality bonding. With just a few simple ingredients, your kids will love crafting these vibrant green noodles while learning about an exciting part of Thai culture. Ready to take a culinary adventure right at home? Let’s dive into this delightful summer recipe!

Why is Thai Lod Chong Dessert So Special?

Unique Flavor Fusion: Experience the delicious blend of creamy coconut milk, chewy pandan noodles, and a sweet caramel-like syrup that tantalizes your taste buds. This dessert encapsulates the flavors of Thailand in every spoonful!

Family Fun Activity: Get the whole family involved! Making the vibrant green noodles is a fun, hands-on activity that kids love, creating lasting memories in the kitchen.

Versatile Delight: Transform it effortlessly! This dessert doubles as a refreshing drink, ideal for summer gatherings or a light snack, ensuring there’s something for everyone at the table.

Easy and Quick: Enjoy a delightful treat in no time. With minimal ingredients and simple steps, this gluten-free recipe is perfect for weeknight cooking or weekend entertaining.

Cultural Experience: Learn about Thai culture through food! This beloved dessert highlights the region’s culinary richness and can spark conversations around family traditions and recipes. For more delightful recipes, don’t miss out on our sweet Coconut Cheese Dessert or our light and refreshing Bake Cake Dessert.

Thai Lod Chong Dessert Ingredients

For the Noodles

  • Rice flour – Provides structure for the noodles and is a gluten-free alternative to wheat flour.
  • Tapioca starch – Enhances the chewy texture of the noodles; can be swapped with more rice flour in a pinch.
  • Pandan leaves (chopped) – Adds a fragrant aroma and vibrant green color to the noodles; if unavailable, use a few drops of pandan extract.
  • Water – Hydrates the dough and aids in cooking.
  • Calcium hydroxide – Essential for creating limewater to enhance noodle texture; follow limewater prep notes carefully as it’s not commonly substituted.

For the Coconut Milk Mixture

  • Coconut milk – Provides a creamy, rich base for the dessert; adjust the salt for desired sweetness.
  • Salt – Enhances the flavor in the coconut milk, so use to taste.

For the Syrup

  • Coconut sugar – Sweetens the syrup with a delightful caramel-like flavor; can be replaced with granulated sugar for a lighter sweetness.
  • Water (for syrup) – Helps dissolve and create a smooth syrup.

Embrace the vibrant flavors of this Thai Lod Chong Dessert, and get ready for a fun-filled cooking experience!

Step‑by‑Step Instructions for Thai Lod Chong Dessert

Step 1: Prepare Limewater
To start your Thai Lod Chong Dessert, dissolve 1 tablespoon of calcium hydroxide in 1 cup of water. Let the mixture sit undisturbed for about 3 hours so the limewater can separate. Once the time is up, carefully pour off the clear liquid, leaving any sediment behind. This limewater will enhance the texture of your pandan noodles, ensuring they come out perfectly chewy.

Step 2: Extract Pandan Juice
Next, chop a handful of pandan leaves and blend them with ½ cup of the limewater you prepared. Once blended into a smooth mixture, strain the blend using a cheesecloth to extract the fragrant green pandan juice. This juice will not only give color to the noodles but also infuse a wonderful aroma, elevating your Thai Lod Chong Dessert experience.

Step 3: Make Noodle Dough
In a mixing bowl, combine 1 cup of rice flour and ½ cup of tapioca starch. Slowly add the pandan juice, stirring continuously until a thick, homogeneous dough forms. Keep mixing until the dough is smooth and pliable. This is a crucial step, as the quality of the dough will determine the texture of your noodles in the final Thai Lod Chong Dessert.

Step 4: Cook Dough
Transfer the noodle dough to a non-stick saucepan and heat over low heat, stirring constantly. You’ll want to do this for about 10 minutes until the mixture thickens and turns gooey. It’s essential to keep stirring to prevent clumping and ensure even cooking. Once it reaches a glossy, sticky consistency, you’re ready for the next step.

Step 5: Shape Noodles
To shape the noodles, use a lod chong press or cut a small hole in one corner of a plastic bag filled with the dough. Squeeze the dough through the opening into a pot of cold water to create long, thin noodles. These should be added to the water in small batches, allowing them to cool and firm up while you repeat the shaping process until all the dough is extruded.

Step 6: Prepare Sugar Syrup
In a saucepan, combine ½ cup of coconut sugar with ½ cup of water. Cook over medium heat until the mixture comes to a gentle simmer. Stir occasionally until the sugar fully dissolves and the syrup thickens slightly, which should take about 5–7 minutes. This syrup will add sweetness to your Thai Lod Chong Dessert, complementing the creamy coconut milk beautifully.

Step 7: Make Coconut Milk Mixture
In another pot, pour in 1 cup of coconut milk and add a pinch of salt along with a few torn pandan leaves for flavor. Heat this mixture on low for about 3 minutes, just until warmed through and fragrant. Be careful not to boil it; you want the coconut milk to stay creamy and silky for your final assembly.

Step 8: Assemble and Serve
To serve your delightful Thai Lod Chong Dessert, prepare bowls or tall glasses. Start by layering crushed ice at the bottom, followed by a generous serving of the shaped pandan noodles. Pour in the warm coconut milk mixture and drizzle with the prepared sugar syrup. For an optional touch, top with jackfruit or sweet corn for added texture and flavor. Enjoy this refreshing treat for a fun family dessert!

Thai Lod Chong Dessert Variations & Substitutions

Feel free to let your creativity shine as you customize this delightful dessert to suit your taste buds!

  • Dairy-Free: Substitute coconut milk with almond or oat milk for a lighter dairy-free option. Both add a unique twist while retaining creaminess.
  • Alternative Sweeteners: Use maple syrup or agave nectar instead of coconut sugar for a different flavor profile that’s still sweet and delicious.
  • Fruit Toppings: Add a burst of freshness with lychee, mango, or berries instead of jackfruit or corn. These fruits complement the coconut beautifully!
  • Nutty Flavor: Incorporate toasted coconut flakes or chopped peanuts on top for an added crunch and rich nutty flavor in each spoonful.
  • Spice it Up: Add a pinch of cinnamon or cardamom powder in the coconut milk for a warm spice note that enhances the dessert’s aroma.
  • Make it a Drink: Blend ice with the dessert components and serve it as a refreshing cold drink, perfect for summer sips. The texture will remain intriguing!
  • Herbal Twist: Infuse the coconut milk with fresh mint or Thai basil before serving; this will add a refreshing herbal note that awakens the senses.
  • Colorful Noodles: Use butterfly pea flower powder along with pandan juice for a vibrant blue-green noodle that visually dazzles.

These variations are great for mixing things up, just like in other delightful recipes like our sweet Coconut Cheese Dessert or the refreshing Bake Cake Dessert. Enjoy exploring!

What to Serve with Thai Lod Chong Dessert (Cendol)

Indulge in a delightful culinary experience by pairing your Thai Lod Chong Dessert with tantalizing complements.

  • Coconut Sticky Rice: This sweet and slightly chewy dish mirrors the creamy coconut flavor, enhancing your dessert’s richness.
  • Fresh Fruit Salad: A mix of tropical fruits like mango and papaya adds a refreshing contrast, balancing the sweetness with vibrant juiciness.
  • Thai Tea: The spiced notes of Thai tea provide a warm, aromatic counterpart to the coolness of the Lod Chong, creating a comforting duo.
  • Pandan Waffles: A delightful textural contrast, these waffles echo the flavors of the dessert while offering a fun breakfast or snack option.
  • Mango Sticky Rice: The sweet and creamy combination plays beautifully with the Lod Chong, ensuring a deliciously soft, intriguing finish.

For a festive gathering, consider adding a chilled coconut smoothie. This can be blended creamy and frothy, amplifying the tropical experience while providing an invigorating and refreshing touch to your meal.

Expert Tips for Thai Lod Chong Dessert

  • Stir Constantly: Keep stirring your dough while cooking to prevent clumping and achieve that delicious gooey texture perfect for the Thai Lod Chong Dessert.

  • Use Ice Water: When shaping the noodles, ensure the water is cold to help the noodles set properly and maintain their delightful texture.

  • Taste Test Syrup: Adjust the sweetness of your sugar syrup according to your preference; some prefer it sweeter while others enjoy a lighter touch.

  • Preserve Freshness: To maintain the texture of your noodles and coconut milk, store leftovers in separate airtight containers for up to 3 days.

  • Get Creative: Explore different toppings like fruits or tapioca pearls to add a personal touch to your Thai Lod Chong Dessert and enhance its visual appeal.

Storage Tips for Thai Lod Chong Dessert

Room Temperature: Store any leftover Thai Lod Chong Dessert at room temperature for up to 2 hours if serving at a gathering. After this time, it’s best to refrigerate or freeze.

Fridge: Keep refrigerated in an airtight container for up to 3 days. For optimal freshness, store the noodles and coconut milk separately.

Freezer: If you want to keep the Thai Lod Chong Dessert for longer, freeze the noodles and the coconut milk separately for up to a month. Thaw in the fridge before serving.
Reheating: When ready to enjoy, reheat the coconut milk gently on the stove over low heat and mix with the chilled noodles. Enjoy the delightful flavors that are sure to make your taste buds dance!

Make Ahead Options

These Thai Lod Chong Dessert (Cendol) preparations are perfect for busy home cooks looking to save time! You can prepare the pandan noodles and store them in an airtight container for up to 3 days in the refrigerator, keeping them separate from the coconut milk to maintain their chewy texture. The coconut milk mixture can also be made ahead and refrigerated for up to 2 days. When you’re ready to serve, simply rewarm the coconut milk gently on the stove and layer it over the noodles with crushed ice and syrup. This way, you’ll have a refreshing dessert ready to enjoy with minimal effort, just as delicious as when freshly made!

Thai Lod Chong Dessert (Cendol) Recipe FAQs

Why is the texture of my pandan noodles not chewy enough?
Absolutely! The key to achieving that delightful chewy texture lies in the cooking process. Make sure to continuously stir the dough over low heat until it thickens and becomes gooey—this usually takes about 10 minutes. If the mixture isn’t cooked long enough, the noodles may turn out too soft.

How can I tell if my pandan leaves are fresh?
Very important! Look for pandan leaves that are vibrant green, firm, and free of dark spots or yellowing. Fresh leaves will have a sweet aroma when crushed. If they’re limp and lose their fragrance, it’s best to find fresher ones to enhance your Thai Lod Chong Dessert.

What’s the best way to store leftovers?
I often recommend storing the components separately. Keep the cooked pandan noodles and the coconut milk in airtight containers in the refrigerator for up to 3 days. If you foresee leftovers, consider freezing them! Just make sure to freeze them separately; the noodles can maintain their texture for up to 1 month. Thaw overnight in the fridge before serving.
Can I make the pandan noodles ahead of time?
Absolutely! You can prepare the pandan noodles and store them in the refrigerator for up to 3 days. When you’re ready to serve, just combine with the coconut milk and syrup. However, if you want to make them even further in advance, you can freeze them! Just follow these steps:

  1. Make the noodles and allow them to cool completely.
  2. Place them in a single layer on a baking sheet and freeze until solid.
  3. Transfer to a zip-top freezer bag with all the air removed, and they’ll be good for up to 3 months!
    When you’re ready to enjoy, simply thaw and heat gently before serving.
Is Thai Lod Chong Dessert suitable for my lactose-intolerant friend?
Very much so! This dessert is naturally gluten-free and, since it uses coconut milk instead of dairy, it’s a great choice for those who are lactose intolerant. Always check the labels of any sweeteners or additional toppings to ensure they align with dietary needs.

What if I can’t find calcium hydroxide?
No worries at all! If you’re unable to find calcium hydroxide, your noodles can still turn out delicious. Just follow the recipe without it and aim for a slightly longer cooking time to give the dough the desired texture. The result may differ slightly, but the flavors will still be wonderfully inviting in your Thai Lod Chong Dessert!

Thai Lod Chong Dessert

Refreshing Thai Lod Chong Dessert You'll Love This Summer

Enjoy the cool, refreshing Thai Lod Chong Dessert, a delightful combination of chewy pandan noodles and creamy coconut milk, perfect for summer!
Prep Time 30 minutes
Cook Time 20 minutes
Limewater Preparation 3 hours
Total Time 3 hours 50 minutes
Servings: 4 servings
Course: Dessert
Cuisine: Thai
Calories: 300

Ingredients
  

For the Noodles
  • 1 cups rice flour Provides structure for the noodles
  • ½ cups tapioca starch Enhances the chewy texture
  • 5 leaves pandan leaves (chopped) Adds fragrance and color
  • 1 cups water Hydrates the dough
  • 1 tablespoon calcium hydroxide Essential for limewater
For the Coconut Milk Mixture
  • 1 cups coconut milk Provides a creamy base
  • to taste pinch salt Enhances flavor
For the Syrup
  • ½ cups coconut sugar Sweetens the syrup
  • ½ cups water Helps dissolve the sugar

Equipment

  • mixing bowl
  • lod chong press or plastic bag
  • Saucepan
  • Cheesecloth
  • Blender

Method
 

Preparation Steps
  1. Prepare Limewater: Dissolve 1 tablespoon of calcium hydroxide in 1 cup of water. Let sit for 3 hours, then carefully pour off the clear liquid.
  2. Extract Pandan Juice: Blend chopped pandan leaves with ½ cup of limewater. Strain through cheesecloth to extract pandan juice.
  3. Make Noodle Dough: Combine rice flour and tapioca starch in a mixing bowl. Slowly add pandan juice until a thick dough forms.
  4. Cook Dough: Heat the noodle dough in a non-stick saucepan over low heat, stirring for about 10 minutes until it becomes gooey.
  5. Shape Noodles: Use a lod chong press or plastic bag to squeeze dough into cold water, forming long noodles.
  6. Prepare Sugar Syrup: Combine coconut sugar and water in a saucepan, simmer until sugar dissolves and syrup thickens (5-7 minutes).
  7. Make Coconut Milk Mixture: Heat coconut milk with a pinch of salt and torn pandan leaves on low for 3 minutes.
  8. Assemble and Serve: Layer crushed ice, pandan noodles, warm coconut milk, and drizzle with syrup in bowls or glasses.

Notes

Store leftovers in separate airtight containers: noodles and coconut milk for up to 3 days in the fridge. Reheat coconut milk gently before serving.
Zesty Pickled Mustard Seeds That Elevate Every Meal

As I stood by the stove, the tangy aroma of simmering mustard seeds danced through the air, instantly sparking my culinary curiosity. Today, I’m thrilled to introduce you to my easy-to-make Pickled Mustard Seeds, which transform from humble pantry staples into a vibrant condiment bursting with personality. Perfectly suited for grilling season, these flavorful little gems enhance everything from charcuterie boards to fresh salads. In just 25 minutes, you’ll have a versatile accompaniment that’s not only gluten-free but also customizable to fit your flavor preferences! Feeling adventurous? You can play with spices or vinegars for a unique twist that will keep your tastebuds excited. Are you ready to elevate your dishes with this delightful addition? Let’s dive in!

Why Are Pickled Mustard Seeds So Irresistible?

Bold, Vibrant Flavor: These pickled mustard seeds are a zesty explosion that transforms any dish!
Quick Prep Time: In just 25 minutes, you can whip up this delightful condiment that elevates your meals with almost no effort.
Customizable: Experiment with different vinegars and spices to create your signature taste!
Versatile Use: Whether on grilled meats, fresh salads, or as part of a charcuterie board, they adapt perfectly to various dishes.
Healthy Twist: Low in calories and gluten-free, they make for a light yet flavorful alternative to traditional condiments. For more tips on enhancing your meals, check out our guide on easy homemade condiments.

Pickled Mustard Seeds Ingredients

For the Base

  • Yellow Mustard Seeds – The star of the show, providing a crunchy texture and robust flavor; you can substitute brown mustard seeds for a spicier kick.
  • White Wine Vinegar – Offers a delightful tang that balances the seeds; feel free to switch to apple cider vinegar for a sweeter touch.
  • Sea Salt – Enhances and brings out the flavors; regular table salt works too, but use less since it’s finer.

For Sweetness

  • Honey – Adds a natural sweetness to balance acidity; agave syrup or brown sugar can be excellent alternatives if needed.

For Depth of Flavor

  • Mustard Powder – Intensifies the mustard flavor, adding a punch; though you can leave it out, it’s recommended for depth.

For a Kick

  • Red Pepper Flakes – Introduces a lovely hint of heat; adjust to your taste or omit if you prefer milder seeds.

For Aroma

  • Finely Minced Shallots – Adds an aromatic touch that elevates the condiment; replace with green onions or red onions if necessary.

Feel inspired to make your own Pickled Mustard Seeds? Let’s get started on this culinary adventure!

Step‑by‑Step Instructions for Pickled Mustard Seeds

Step 1: Soak the Mustard Seeds
Begin by soaking ½ cup of yellow mustard seeds in enough water to cover them completely. Allow them to soak for 12 to 24 hours at room temperature. This softens the seeds and prepares them for pickling. You should notice the seeds swell and plump up, ready to absorb all the flavors coming their way.

Step 2: Mix Ingredients Together
In a medium saucepan, combine the soaked mustard seeds with ½ cup of white wine vinegar, 1 tablespoon of sea salt, 2 tablespoons of honey, 1 teaspoon of mustard powder, and a pinch of red pepper flakes. Stir well to ensure all the ingredients are evenly distributed before moving on to the cooking process. This mixture will form the flavorful base of your Pickled Mustard Seeds.

Step 3: Cook the Mixture
Place the saucepan over medium heat and gently bring the mixture to a simmer. Allow it to cook for approximately 20 minutes, stirring occasionally to prevent sticking. The seeds will become tender, and you’ll see small bubbles forming. Once the mixture thickens slightly and the seeds are tender yet still maintain a bit of crunch, it’s time for the next step.

Step 4: Add Shallots and Additional Vinegar
Once the seeds have cooked, remove the saucepan from heat and stir in ¼ cup of finely minced shallots for a fragrant aroma. For an extra tang, you can mix in an additional tablespoon of white wine vinegar here. Allow the mixture to cool slightly, giving the shallots time to infuse their flavor into the seeds.

Step 5: Jar and Refrigerate
After letting the mixture cool to room temperature, transfer the pickled mustard seeds into a clean glass jar, ensuring they are submerged in the liquid. Seal the jar tightly and place it in the refrigerator. Your Pickled Mustard Seeds will be ready to enjoy after 24 hours and can be stored for up to 2 weeks, with flavors deepening over time.

Expert Tips for Pickled Mustard Seeds

  • Choose Quality Seeds: Use high-quality yellow mustard seeds for the best flavor and texture. Avoid old seeds, as they may not give the desired crunch.

  • Soaking Time Matters: Adjust the soaking time based on your preference; shorter yields crunchier seeds while longer makes them more tender.

  • Vinegar Variations: Experiment with different vinegars like apple cider or rice wine vinegar to customize your pickled mustard seeds for unique flavor profiles.

  • Control the Heat: If you prefer a milder condiment, reduce or omit the red pepper flakes, allowing the mustard flavor to shine without overpowering heat.

  • Give It Time: Allow the pickled mustard seeds to sit for at least 24 hours before using; this will enhance their flavor and complexity for a superior taste experience.

  • Store Properly: Use an airtight container when refrigerating your pickled mustard seeds to maintain freshness and prevent contamination.

Make Ahead Options

These Pickled Mustard Seeds are perfect for meal prep enthusiasts looking to save time during busy weeknights! You can soak the mustard seeds up to 24 hours in advance, allowing them to soften and be ready for pickling. Once soaked, simply follow the recipe to combine the seeds with the other ingredients. After cooking, let the mixture cool before transferring it to a jar; the flavors will only improve after refrigerating them for up to 2 weeks. To maintain their vibrant taste, store the seeds in an airtight container and refrigerate them until you’re ready to serve, ensuring they remain just as delicious!

Storage Tips for Pickled Mustard Seeds

  • Fridge: Store your pickled mustard seeds in an airtight container in the refrigerator, where they will stay fresh for up to 2 weeks. The flavors actually get better with time!

  • Room Temperature: It’s best not to leave pickled mustard seeds out at room temperature for more than 2 hours. Always keep them chilled to maintain their quality and taste.

  • Freezer: If you wish to enjoy your pickled mustard seeds for longer, transfer them to a freezer-safe container. They can be frozen for up to 3 months, and thawed in the fridge before use.

  • Reheating: There’s no need to reheat pickled mustard seeds; simply spoon them directly from the jar to your dishes for a burst of tangy flavor.

Pickled Mustard Seeds Variations & Substitutions

Feel free to get creative and make this recipe your own with these delightful twists and substitutions!

  • Spicy Heat: Add fresh or pickled chiles during cooking to crank up the heat. A touch of heat can transform the whole flavor profile, making it a fiery condiment that excites your palate.
  • Vinegar Swap: Use rice wine vinegar instead of white wine vinegar for a sweeter, milder taste. This switch creates a different yet deliciously unique flavor without losing that essential tang.
  • Sweet Alternative: Try using maple syrup in place of honey for a deep caramel flavor. It brings an earthy sweetness that beautifully complements the mustard seeds.
  • Herb Infusion: Toss in fresh herbs like dill or parsley after simmering for a delightful herbaceous note. Their freshness creates a beautiful balance and a burst of flavor that feels like a garden on your plate.
  • Fruity Twist: Incorporate finely diced fruits such as pears, apples, or even a hint of mango for a sweet and fruity take. This unexpectedly delicious twist can enhance the overall dynamic of your dishes.
  • Smoky Flavor: Add a pinch of smoked paprika for an earthy, smoky depth. The smokiness will create layers of taste that can elevate every meal with a barbecued essence.
  • Asian Influence: Mix in sesame oil and ginger to bring an Asian flair to your condiment. This combo provides an exciting taste experience, perfect for accompanying grilled vegetables or rice dishes.
  • Garlic Infusion: Enhance the savory characteristics by adding minced garlic to the mix. The garlic will soften in the cooking process and impart a wonderful aroma and flavor that complements the mustard seeds beautifully.

Whatever combination you choose, these variations will make your Pickled Mustard Seeds even more special! For more ideas on delicious condiments, visit our guide on easy homemade condiments.

What to Serve with Flavor-Packed Pickled Mustard Seeds

Elevate your culinary experience with delightful pairings that harmonize beautifully with these zesty pickled mustard seeds.

  • Grilled Chicken: Juicy grilled chicken topped with these mustard seeds adds a burst of tanginess that brightens each bite.

  • Fresh Garden Salad: Toss them into a vibrant salad for a pop of flavor and crunch, transforming a simple mix into a gourmet dish.

  • Cheese Platter: Serve on a charcuterie board with creamy cheeses, where the mustard seeds offer a zesty counterpoint to rich flavors.

  • Savory Burger: Slather on a grilled beef burger to introduce a tangy crunch that cuts through the richness of the meat perfectly.

  • Roasted Vegetables: Drizzle over roasted vegetables for an unexpected kick; the vinegar and sweetness complement the earthy tones beautifully.

  • Fish Tacos: Use these seeds as a fresh topping for fish tacos, adding a delightful crunch and a tangy twist that enhances the entire dish.

Consider serving a light white wine alongside these dishes to refresh your palate and enhance your dining experience further!

Pickled Mustard Seeds Recipe FAQs

How do I choose the best mustard seeds?
Absolutely! Opt for high-quality yellow mustard seeds for the best flavor and texture. When selecting, look for seeds that are firm and free from dark spots or damage. Fresh seeds will give you that desired crunch and vibrant flavor in your pickling process.

How long can I store my pickled mustard seeds?
You can store your pickled mustard seeds in an airtight container in the refrigerator for up to 2 weeks. The flavors deepen beautifully over time! Just be sure to keep them chilled to maintain their tangy goodness.

Can I freeze pickled mustard seeds?
Yes! For longer preservation, transfer your pickled mustard seeds to a freezer-safe container. They can be frozen for up to 3 months. When you’re ready to use them, simply thaw them in the fridge overnight, and they’ll be ready to add a delightful zing to your meals!

What if my mustard seeds don’t plump after soaking?
No worries! If your mustard seeds aren’t plumping up after soaking, it could be due to old seeds. Make sure to buy fresh mustard seeds and soak them adequately for at least 12 to 24 hours. If you find they remain too crunchy during cooking, you can simmer them a bit longer to achieve that tender texture you desire.

Are there any dietary restrictions for pickled mustard seeds?
Very! These pickled mustard seeds are gluten-free, making them suitable for individuals with gluten sensitivities. However, if you’re concerned about allergies, be mindful of ingredients you add, like honey, and opt for alternatives like agave syrup if necessary. Always check your spices and vinegar for potential allergens as well.

How can I customize the flavor of my pickled mustard seeds?
The more the merrier! You can customize your pickled mustard seeds easily by experimenting with different types of vinegar, like apple cider or rice wine vinegar, to suit your taste preferences. For extra flavor, mix in fresh or pickled chiles, or add herbs like dill or parsley for an aromatic touch. Enjoy crafting your signature blend!

Pickled Mustard Seeds

Zesty Pickled Mustard Seeds That Elevate Every Meal

Transform humble mustard seeds into a vibrant, tangy condiment with these easy pickled mustard seeds.
Prep Time 25 minutes
Cook Time 20 minutes
Resting Time 24 minutes
Total Time 1 hour 9 minutes
Servings: 12 tablespoons
Course: Other
Cuisine: American
Calories: 15

Ingredients
  

For the Base
  • ½ cup yellow mustard seeds can substitute with brown mustard seeds for a spicier kick
  • ½ cup white wine vinegar can switch to apple cider vinegar for a sweeter touch
  • 1 tablespoon sea salt regular table salt works too, but use less
For Sweetness
  • 2 tablespoons honey can substitute with agave syrup or brown sugar
For Depth of Flavor
  • 1 teaspoon mustard powder recommended for depth, can be left out
For a Kick
  • 1 pinch red pepper flakes adjust to taste or omit for milder flavor
For Aroma
  • ¼ cup finely minced shallots can replace with green onions or red onions

Equipment

  • Medium saucepan
  • Glass jar

Method
 

Step-by-Step Instructions for Pickled Mustard Seeds
  1. Soak the mustard seeds in enough water to cover them completely for 12 to 24 hours.
  2. In a medium saucepan, combine the soaked mustard seeds, white wine vinegar, sea salt, honey, mustard powder, and red pepper flakes.
  3. Place the saucepan over medium heat and bring the mixture to a simmer, cooking for approximately 20 minutes.
  4. Remove from heat, stir in the finely minced shallots and additional white wine vinegar if desired.
  5. Transfer the mixture to a clean glass jar and refrigerate for at least 24 hours before enjoying.

Notes

These pickled mustard seeds can enhance grilled meats, fresh salads, and charcuterie boards. Adjust the spices to customize your flavor profile.

Savory Bun Cha: Vietnamese Meatballs You’ll Crave at Home

Amidst the hustle of everyday life, I stumbled upon a refreshing gem from Vietnamese cuisine: Bun Cha, or Vietnamese Meatballs! These tender, caramelized pork meatballs are nestled atop a bed of rice vermicelli noodles, accompanied by a vibrant mix of fresh veggies. Not only is this dish a delightful homage to street food from Hanoi, but it also promises a quick and easy preparation—perfect for busy weeknights or a cozy weekend meal. In just 30 minutes, you can whip up this gluten-free friendly fare, packed with rich flavors and textural sensations that will take your taste buds on a journey. Curious about how to create this mouthwatering experience in your kitchen? Let’s dive in!

Why Choose Bun Cha Tonight?

Authentic Taste: Enjoy a bowl of Bun Cha that transports your taste buds straight to Vietnam with its bold flavors and fragrant aromas.

Quick Preparation: In just 30 minutes, you can whip up this tasty dish, making it ideal for a quick dinner after a busy day.

Versatile Ingredients: Customize it with various vegetables or swap ground pork for chicken or turkey—perfect for any dietary preference.

Flavor Explosion: The combination of caramelized meatballs, fresh herbs, and zesty nuoc cham sauce creates a deliciously complex flavor profile that’s truly irresistible.

Crowd-Pleasing Dish: Bun Cha is a hit with everyone, from family dinners to gatherings with friends. Transform your next meal with this delicious recipe! For more quick, flavorful ideas, consider trying out my delightful Matcha Sponge Cake.

Bun Cha Ingredients

For the Meatballs

  • Pork Mince (Ground Pork) – This is your main protein source for creating juicy meatballs; chicken or turkey can also work if you want a leaner option.
  • Fish Sauce – Essential for that authentic savory depth; if you’re going vegetarian, consider soy sauce as a substitute, though it will change the flavor slightly.
  • Sugar – Provides sweetness and assists in caramelization; white sugar or coconut sugar are both excellent choices.
  • Green Onions (Scallions) – Adds a fresh, sweet touch to your meatballs; you can use chives in a pinch if needed.
  • Garlic – Fresh minced garlic brings incredible flavor depth—garlic powder can be an alternative if necessary.
  • White Pepper & Salt – For seasoning; regular pepper can substitute but will slightly alter the flavor profile.

For the Noodles and Vegetables

  • Vermicelli Noodles – Forms the base of your dish; other noodles like rice or bean thread can be great substitutes.
  • Fresh Vegetables (Beansprouts, Lettuce, Carrots, Herbs) – Contributes crunch and freshness; feel free to switch these up with seasonal veggies, like cucumbers or radishes.

For the Nuoc Cham Sauce

  • Fish Sauce – A crucial ingredient providing umami; opt for a lighter soy sauce for a vegetarian version.
  • Rice Vinegar – Adds a tangy note that balances the sweetness; can be replaced with white vinegar if unavailable.
  • Lime Juice – Brings brightness and acidity; fresh lime is best, but bottled can work in a pinch.
  • Water – Helps to dilute the sauce to your desired taste; adjust based on preference.
  • Chili – For just the right amount of heat; adjust according to spice tolerance.

Enjoy making your Bun Cha (Vietnamese Meatballs) and delight yourself and your loved ones with this stunning dish!

Step‑by‑Step Instructions for Bun Cha (Vietnamese Meatballs!)

Step 1: Prepare the Nuoc Cham Sauce
In a bowl, mix together 2 tablespoons of sugar, 3 tablespoons of fish sauce, 1 tablespoon of rice vinegar, and the juice of 1 lime. Add 4-5 tablespoons of water, 1 minced garlic clove, and a chopped chili to taste. Stir until the sugar is fully dissolved, and the flavors meld together. Set this flavorful nuoc cham sauce aside to enhance your Bun Cha meal.

Step 2: Cook the Vermicelli Noodles
Bring a pot of water to a boil, then add the vermicelli noodles. Cook according to package instructions, usually around 3-5 minutes, until they’re tender but still slightly chewy. Once done, drain and rinse them under cold water to stop the cooking process. Set these aside in a bowl while you prepare the flavorful meatballs.

Step 3: Combine Meatball Ingredients
In a mixing bowl, combine 1 pound of pork mince, 2 tablespoons of fish sauce, 1 tablespoon of sugar, 2 finely chopped green onions, 2 minced garlic cloves, and a sprinkle of white pepper and salt. Mix thoroughly until combined. Shape this mixture into small patties, about the size of a golf ball, ensuring an even texture for your Bun Cha meatballs.

Step 4: Cook the Meatballs
Heat a skillet over medium-high heat and add 2 tablespoons of neutral oil. Once hot, carefully place the meatballs in the skillet, making sure not to overcrowd the pan. Cook for 2-3 minutes on each side until they are golden brown and cooked through. The delicious aroma will fill your kitchen as these Bun Cha meatballs come to life!

Step 5: Assemble Bun Cha Bowls
In each serving bowl, start by placing a generous portion of the cooked vermicelli noodles. Top with the golden meatballs, followed by a handful of fresh vegetables like bean sprouts, lettuce, and grated carrots. Finish by garnishing with fresh herbs like mint or cilantro for an extra burst of flavor, creating your stunning Bun Cha presentation.

What to Serve with Easy Bun Cha?

Transform your meal into a delightful feast with these complementary dishes and drinks that enhance the magic of your flavorful Vietnamese meatballs.

  • Crispy Spring Rolls: These light, crunchy appetizers provide a delightful contrast to the tender meatballs, making your dining experience even more exciting.

  • Fresh Herb Salad: A zesty mixture of Vietnamese herbs like mint, cilantro, and basil can add brightness and refreshment, making every bite a herbaceous delight.

  • Zucchini Noodles: For a low-carb option, swap traditional noodles for zoodles. Their mild flavor will pair well with the meatballs while keeping the dish lighter.

  • Pickled Vegetables: Lively, tangy pickled carrots and daikon complement the savory richness of Bun Cha by providing a crunchy, slightly sour counterpoint.

  • Lime Wedges: Fresh lime is an essential garnish—it adds a bright burst of acidity that elevates both the meatballs and the sauce.

  • Chilled Coconut Water: This refreshing drink balances the savory meal, hydration, and a touch of natural sweetness, perfectly rounding out your Bun Cha experience.

Allow these vibrant side dishes and drinks to transform your Bun Cha into a memorable meal bursting with flavor and freshness!

Bun Cha Variations & Substitutions

Feel free to experiment and make this Bun Cha recipe your own with any of these delightful twists!

  • Poultry Swap: Use ground chicken or turkey instead of pork for a lighter, leaner meatball option. Each bite will still be juicy and flavorful.

  • Vegetarian Delight: Replace meat with a mix of sautéed mushrooms and lentils for a hearty vegetarian take. Add more herbs for an extra flavor boost!

  • Gluten-Free Option: Substitute soy sauce with tamari to keep the dish gluten-free while still enhancing the savory notes of the meatballs.

  • Spice it Up: Add sliced jalapeños or red chili flakes to the nuoc cham sauce for an added kick! This is perfect for those who love their dishes with a bit more heat.

  • Herb Variations: Experiment with fresh herbs such as Thai basil, mint, or cilantro for different aromatic profiles. Each herb adds its unique charm to the dish.

  • Seasonal Veggies: Swap out the fresh vegetables based on what’s in season, like bell peppers or zucchini, for a different texture and taste. Keeping it fresh keeps it exciting!

  • Alternative Noodles: Try using other types of noodles such as glass noodles or wide rice noodles for a different eating experience. Each variation will lend its texture to the dish.

For more exciting recipes, don’t miss out on my scrumptious Matcha Sponge Cake or check out a simpler take on my delightful Vanilla Bean Pots de Crème to end your meal on a sweet note.

How to Store and Freeze Bun Cha

Fridge: Store leftover Bun Cha in an airtight container in the fridge for up to 2 days. Keep the meatballs, noodles, and veggies separate to maintain texture.

Freezer: For longer storage, freeze the cooked meatballs by placing them in a single layer on a baking sheet. Once frozen, transfer to a freezer bag. They’ll last up to 3 months.

Reheating: Thaw overnight in the fridge and reheat meatballs in a skillet over medium heat until warmed through. Noodles can be quickly soaked in hot water for a few minutes to revive them.

Sauce Storage: The nuoc cham sauce can be refrigerated in a sealed container for up to 1 week. Give it a stir before using, as the ingredients may settle.

Make Ahead Options

Bun Cha is a fantastic option for meal prep, saving you time on busy weeknights! You can prepare the meatballs and sauce up to 2 days in advance. Simply mix the meatball ingredients (pork mince, fish sauce, sugar, scallions, garlic, and seasoning) and shape them into patties. Place them in an airtight container and refrigerate. The nuoc cham sauce can be whisked together and stored in a separate container in the fridge as well. When you’re ready to enjoy your Bun Cha, simply cook the meatballs in a skillet until golden, boil the vermicelli noodles, and assemble your bowls with fresh veggies for a quick, delicious meal that’s just as flavorful as when freshly made!

Expert Tips for Bun Cha

  • Perfect Meatballs: Ensure meatballs are evenly shaped and not overcrowded in the pan; this helps them cook uniformly without drying out.

  • Adjusting Heat: Modify the amount of chili used in the nuoc cham sauce based on your spice tolerance—it’s all about making the dish yours!

  • Fresh Ingredients: Use fresh minced garlic and vegetables for the best flavors and textures; they enhance the overall taste of your Bun Cha.

  • Substitution Smart: If you’re avoiding fish sauce, remember soy sauce is an option, but it will provide a different flavor profile.

  • Generous Sauce: Serve with plenty of nuoc cham; it not only acts as a dipping sauce but also deepens the flavor experience for your Bun Cha.

Bun Cha (Vietnamese Meatballs) Recipe FAQs

What kind of pork should I use for Bun Cha?
Absolutely! The best choice for Bun Cha is finely ground pork, which provides a juicy texture and rich flavor. If you’re looking for a leaner option, you can substitute with ground chicken or turkey, though it will slightly alter the flavor profile.

How long can I store leftovers in the fridge?
Very! Leftover Bun Cha can be stored in an airtight container in the refrigerator for up to 2 days. It’s best to separate the meatballs, noodles, and veggies to help maintain their individual textures and flavors until you’re ready to enjoy them again.

Can I freeze the meatballs?
Absolutely! To freeze the cooked meatballs, place them in a single layer on a baking sheet and freeze them until solid. Afterward, transfer them to a freezer bag, where they’ll last for up to 3 months. When you’re ready to enjoy, simply thaw them overnight in the fridge and reheat in a skillet over medium heat until warmed through.

What can I do if my meatballs are too dry?
If you find your meatballs are dry, it’s often due to overcooking or using lean meat. For juicier meatballs, try mixing in an egg or some soaked bread crumbs into the meat mixture. This will add moisture and help hold them together. Additionally, ensure you’re not overcrowding the pan while cooking, allowing for even cooking and browning!

Is there a vegetarian option for Bun Cha?
Very! If you want to create a vegetarian Bun Cha, you can use plant-based ground meat or finely chopped tofu as a meat substitute. For the sauce, simply replace fish sauce with soy sauce or a vegan alternative. Just remember that while the flavor will differ slightly, it can still be delicious with the right seasonings!

How do I know if my fish sauce is good quality?
When selecting fish sauce, look for a brand with a deep umami aroma and a clear, light amber color. Quality fish sauce should not be overly salty—check the label for a lower sodium content. If it has a hint of sweetness and a rich, savory depth, you’re onto a winner for your Bun Cha!

Bun Cha (Vietnamese Meatballs!)

Savory Bun Cha: Vietnamese Meatballs You'll Crave at Home

Bun Cha (Vietnamese Meatballs) features tender pork meatballs on rice vermicelli with fresh veggies.
Prep Time 15 minutes
Cook Time 15 minutes
Total Time 30 minutes
Servings: 4 servings
Course: Dinner
Cuisine: Vietnamese
Calories: 450

Ingredients
  

For the Meatballs
  • 1 pound Pork Mince (Ground Pork) Alternatives: chicken or turkey.
  • 2 tablespoons Fish Sauce Can substitute with soy sauce.
  • 1 tablespoon Sugar Use white or coconut sugar.
  • 2 count Green Onions (Scallions) Finely chopped.
  • 2 count Garlic Minced, fresh preferred.
  • White Pepper & Salt To taste.
For the Noodles and Vegetables
  • 8 ounces Vermicelli Noodles Can use other types of noodles.
  • Fresh Vegetables (Beansprouts, Lettuce, Carrots, Herbs) Can substitute with seasonal veggies.
For the Nuoc Cham Sauce
  • 3 tablespoons Fish Sauce Lighter soy sauce for vegetarian.
  • 1 tablespoon Rice Vinegar Can replace with white vinegar.
  • 1 count Lime Juiced.
  • 4-5 tablespoons Water Adjust based on taste.
  • 1 count Chili Adjust according to spice tolerance.

Equipment

  • mixing bowl
  • Skillet
  • pot

Method
 

Preparation Steps
  1. Prepare the Nuoc Cham Sauce: In a bowl, mix sugar, fish sauce, rice vinegar, lime juice, water, minced garlic, and chili until the sugar is dissolved.
  2. Cook the Vermicelli Noodles: Boil water, add vermicelli noodles, cook for 3-5 minutes until tender, then drain and rinse.
  3. Combine Meatball Ingredients: Mix pork mince, fish sauce, sugar, green onions, garlic, white pepper and salt until combined, then shape into patties.
  4. Cook the Meatballs: Heat oil in a skillet, cook meatballs in batches for 2-3 minutes on each side until golden brown.
  5. Assemble Bun Cha Bowls: Place vermicelli noodles in bowls, top with meatballs and fresh vegetables, and garnish with herbs.

Notes

Ensure meatballs are evenly shaped for uniform cooking. Adjust spice levels in nuoc cham to your liking. Use fresh ingredients for the best flavor.

Decadent Chocolate Orange Rosemary Shortbread Delight

As I stood in my kitchen, the aroma of fresh rosemary mingling with zesty orange filled the air, instantly transporting me to a cozy holiday market. It’s amazing how the simple act of baking can evoke such warmth and nostalgia. These Chocolate Orange Rosemary Shortbread Cookies are the perfect blend of indulgent chocolate and refreshing citrus, all enhanced by the unexpected touch of rosemary. Not only are they incredibly easy to whip up, but they also make for an elegant addition to your festive cookie platter or a heartfelt homemade gift. Whether you’re gathering with family or simply treating yourself, these cookies are sure to impress. Are you ready to indulge in this delightful combination of flavors?

Why are these cookies a must-try?

Irresistible Flavor: The enchanting duo of orange and chocolate harmonizes beautifully, while the hint of rosemary elevates the flavor profile to new heights.

Effortless Baking: With simple ingredients and straightforward steps, you’ll be savoring your homemade treats in no time!

Perfect for Gifting: Pack these cookies into festive boxes, and you have elegant gifts that anyone would love to receive.

Versatile Option: Feel free to switch things up by trying out different chocolates or adding your favorite nuts for some added crunch.

Impressive Crowd-Pleaser: These cookies are bound to be the star of your holiday gatherings, bringing smiles to friends and family alike! Don’t forget to pair them with a warm cup of coffee or tea for the ultimate treat, just like the delightful Coffee Chocolate Truffles you’ll want to try next!

Chocolate Orange Rosemary Shortbread Ingredients

• Get ready to create these delectable cookies!

For the Cookie Dough

  • Unsalted Butter – Use room temperature for easy blending and a richer taste.
  • Confectioners Sugar – Adds a tender sweetness essential to the cookie’s melt-in-your-mouth texture.
  • Vanilla Extract – Enhances the overall flavor, bringing warmth to the profile.
  • Orange Zest – Infuses a refreshing citrus note that beautifully pairs with chocolate and rosemary.
  • Rosemary – Fresh rosemary is preferred for a bright green taste, but dried works in a pinch.
  • All-Purpose Flour – Provides the necessary structure for your shortbread cookies.
  • Cornstarch – Softens the texture, contributing to that melt-in-your-mouth quality. Substitution: You can replace some with flour for a firmer cookie.
  • Salt – A small pinch balances the sweetness and amplifies every flavor.
  • Dark Chocolate (cut into small pieces) – Offers a rich chocolate flavor that complements the other ingredients.
  • Candied Orange Peel (diced) – Sweetens and brightens the cookies; ensure it’s well-diced for even distribution.

Step‑by‑Step Instructions for Chocolate Orange Rosemary Shortbread

Step 1: Cream the Mixture
In a large mixing bowl, use an electric mixer to cream together 1 cup of unsalted butter and 1/2 cup of confectioners’ sugar until the mixture is light and fluffy, about 3-5 minutes. Incorporate 1 teaspoon of vanilla extract, 1 tablespoon of freshly grated orange zest, and 1 tablespoon of finely chopped rosemary until well combined. This fragrant base will ensure a rich flavor throughout your Chocolate Orange Rosemary Shortbread.

Step 2: Combine Dry Ingredients
In a separate bowl, whisk together 2 cups of all-purpose flour, 1/2 cup of cornstarch, and a pinch of salt until evenly mixed. This blend of dry ingredients will provide structure and softness to your cookies. Make sure there are no lumps in the flour mixture for a smooth dough. Prepare to combine this with the creamed mixture for your shortbread.

Step 3: Mix Together
Gradually fold the dry ingredients into the creamed butter mixture using a spatula or wooden spoon until just combined; do not overmix. Gently stir in 1 cup of small dark chocolate pieces and 1/2 cup of diced candied orange peel to distribute the flavors evenly throughout the dough. The dough should come together nicely and feel soft but not sticky.

Step 4: Shape the Cookies
Lightly flour a clean surface and turn the dough out onto it. Using your hands, shape the dough into a log about 1.5 inches in diameter. Wrap the log tightly in plastic wrap and chill in the refrigerator for at least 30 minutes. Chilling helps solidify the butter, which will yield beautifully shaped cookies for your Chocolate Orange Rosemary Shortbread.

Step 5: Bake
Preheat your oven to 325°F (170°C). After the dough has chilled, remove it from the refrigerator and slice into rounds approximately 1/4 inch thick. Place the slices on a parchment-lined baking sheet, leaving some space between them. Bake in the preheated oven for 10-15 minutes or until the bottoms are lightly golden brown. Keep a close eye, as the cookies can become overly brown quickly.

Step 6: Cool
Once baked, remove the baking sheet from the oven and let the cookies cool for about 5 minutes. Then, gently transfer the Chocolate Orange Rosemary Shortbread to a wire rack to cool completely. This step is essential for achieving the perfect delicate texture before indulging in these delightful cookies.

Chocolate Orange Rosemary Shortbread Variations

Customize these delightful cookies to suit your taste and dietary preferences!

  • Gluten-Free: Substitute all-purpose flour with a 1:1 gluten-free flour blend for a deliciously safe option without compromising texture.

  • Dairy-Free: Use a plant-based butter instead of unsalted butter, ensuring a rich flavor while keeping it dairy-free.

  • Nutty Crunch: Add 1/2 cup of finely chopped nuts, such as walnuts or pecans, into the dough for an extra crunchy texture that complements the soft crumb.

  • Herb Alternatives: Experiment with fresh thyme or even basil for a unique twist; these herbs provide a refreshing flavor shift from the rosemary.

  • White Chocolate Delight: Swap the dark chocolate chunks for white chocolate pieces for a sweeter balance with the zesty orange and fragrant rosemary.

  • Coconut Bliss: Fold in 1/2 cup of shredded coconut for a tropical touch that harmonizes beautifully with the orange and chocolate flavors.

  • Spicy Kick: Add a pinch of cayenne pepper or ground ginger for an unexpected heat that plays wonderfully with the sweetness.

  • Candied Citrus: You can substitute the diced candied orange peel with lemon or grapefruit peel for a citrus twist that adds a lovely contrast.

Feel free to explore these variations, and if you’re looking for more delightful treats, be sure to check out the elegant Coconut Chocolate Rolls or the delicious Nutty Chocolate Date Cookies. Each recipe is crafted to make your baking experience exciting and satisfying!

What to Serve with Chocolate Orange Rosemary Shortbread Cookies

These delightful treats are the perfect centerpiece for a charming holiday gathering or a cozy afternoon tea.

  • Creamy Hot Chocolate: Rich and velvety, this drink complements the cookies’ chocolate notes, creating a soothing indulgence.
  • Fresh Fruit Salad: A vibrant mix of berries and citrus brightens the palate, balancing the sweetness of the shortbread.
  • Roasted Nuts: Salted or spiced nuts introduce a crunch that contrasts beautifully with the buttery cookie texture, enhancing the overall experience.
  • Vanilla Ice Cream: A scoop of creamy vanilla offers a delightful temperature contrast with the warm flavors of the cookies. It’s simply heavenly!
  • Gingerbread Tea: With its warm spices, this tea pairs perfectly, echoing the comforting, aromatic quality of the rosemary.
  • Candied Citrus Peel: Add an extra layer of flavor by serving these cookies with more candied orange peel; it enhances the cookies’ natural brightness.
  • Sparkling Wine: A glass of bubbly elevates the whole experience, making it festive and elegant, perfect for special occasions.
  • Charcuterie Board: Create a savory counterpoint with a selection of cheeses and meats; the contrast will surprise and delight your guests.
  • Lemon Bars: The tangy citrus flavor invigorates your taste buds, harmonizing beautifully with the orange and chocolate in your cookies.

How to Store and Freeze Chocolate Orange Rosemary Shortbread

Airtight Container: Store cookies in an airtight container at room temperature for up to 1 week to maintain freshness and texture.

Freezer Storage: For longer storage, freeze the cookies in an airtight container or freezer bag for up to 3 months.

Baking from Frozen: If you freeze the unbaked dough, simply slice the cookie log and bake directly from frozen, adding an extra 2-3 minutes to the baking time.

Thawing: If frozen, allow cooked cookies to thaw at room temperature before enjoying or reheating briefly in the oven for that fresh-baked taste.

Make Ahead Options

These Chocolate Orange Rosemary Shortbread Cookies are a dream come true for busy home cooks wanting to save time without sacrificing flavor! You can prepare the dough up to 24 hours in advance by shaping it into a log, wrapping it tightly in plastic wrap, and refrigerating it. Additionally, the cookies can be baked and stored in an airtight container for up to 3 days – they’ll remain just as delicious, though for optimal freshness, consider refrigerating between layers of parchment paper. When you’re ready to enjoy, simply slice the chilled log into rounds, bake, and you’ll have delightful cookies ready to impress without the last-minute hassle!

Expert Tips for Chocolate Orange Rosemary Shortbread

  • Room Temperature Butter: Ensure your unsalted butter is at room temperature to create a creamy base, essential for tender shortbread texture.

  • Don’t Overmix: When combining dry and wet ingredients, mix until just combined to maintain the delicate, crumbly quality of your Chocolate Orange Rosemary Shortbread.

  • Chill the Dough: Refrigerating the shaped dough for 30 minutes is crucial for shaping the cookies nicely without spreading too much during baking.

  • Watch the Baking Time: Keep an eye on the cookies; they can go from perfect to overdone quickly. Aim for a light golden brown on the bottom.

  • Finely Chop Rosemary: If using dried rosemary, chop it finely to prevent overpowering the cookies; fresh rosemary adds a brighter flavor that’s best.

Chocolate Orange Rosemary Shortbread Cookies Recipe FAQs

How do I select the best oranges for this recipe?
Absolutely! Look for oranges that are firm with smooth skin and a bright color. Avoid those with dark spots or blemishes, as they may be overripe. A fresh orange will provide vibrant zest and juice for your cookies!

How should I store the cookies to keep them fresh?
I recommend storing your Chocolate Orange Rosemary Shortbread Cookies in an airtight container at room temperature. They will stay fresh for up to 1 week. Just make sure to place parchment paper between layers to prevent sticking!

Can I freeze the cookie dough or the baked cookies?
Yes, indeed! For freezing the dough, shape it into a log, wrap it tightly in plastic wrap, and place it in an airtight container or freezer bag. It can be frozen for up to 3 months. When ready to bake, slice the log and bake directly from frozen, adding an extra 2-3 minutes to the baking time.

What should I do if my cookies spread too much while baking?
If you find your cookies spreading too much, it could be due to warm dough. Make sure to chill the dough for at least 30 minutes before baking. If you’re still encountering issues, try adding a little more flour or cornstarch to balance the moisture.

Can pets eat these cookies, given the ingredients?
It’s best to keep these cookies away from pets. The chocolate is especially harmful to dogs and cats, along with the high sugar content. Always stick to pet-safe treats for your furry friends!

What’s a good alternative for the rosemary if I can’t find fresh?
If fresh rosemary isn’t available, dried rosemary can be used! Just remember to chop it finely to prevent overpowering the cookies. Use about 1/3 of the amount since dried herbs are more concentrated in flavor.

Chocolate Orange Rosemary Shortbread

Decadent Chocolate Orange Rosemary Shortbread Delight

Indulge in Chocolate Orange Rosemary Shortbread, a delightful combination of chocolate and citrus topped with rosemary, perfect for gifting and gatherings.
Prep Time 15 minutes
Cook Time 15 minutes
Chilling Time 30 minutes
Total Time 1 hour
Servings: 24 cookies
Course: Dessert
Cuisine: Baked
Calories: 120

Ingredients
  

For the Cookie Dough
  • 1 cup Unsalted Butter room temperature
  • 1/2 cup Confectioners Sugar
  • 1 teaspoon Vanilla Extract
  • 1 tablespoon Orange Zest freshly grated
  • 1 tablespoon Rosemary finely chopped
  • 2 cups All-Purpose Flour
  • 1/2 cup Cornstarch
  • 1 pinch Salt
  • 1 cup Dark Chocolate cut into small pieces
  • 1/2 cup Candied Orange Peel diced

Equipment

  • electric mixer
  • mixing bowl
  • whisk
  • spatula
  • parchment paper

Method
 

Step-by-Step Instructions
  1. Cream together the unsalted butter and confectioners' sugar until light and fluffy, about 3-5 minutes. Incorporate vanilla extract, orange zest, and chopped rosemary.
  2. In a separate bowl, whisk together flour, cornstarch, and a pinch of salt until evenly mixed.
  3. Fold the dry ingredients into the creamed mixture until just combined. Stir in chocolate pieces and candied orange peel.
  4. Shape the dough into a log about 1.5 inches in diameter, wrap in plastic wrap, and chill for at least 30 minutes.
  5. Preheat oven to 325°F (170°C). Slice the dough into rounds and place on a parchment-lined baking sheet. Bake for 10-15 minutes.
  6. Allow cookies to cool on the baking sheet for about 5 minutes before transferring to a wire rack to cool completely.

Notes

Store cookies in an airtight container at room temperature for up to 1 week or freeze for up to 3 months.

Savor Easy Air Fryer Soy Sauce Chicken That’s Irresistibly Crispy

As I pulled open the air fryer and caught a whiff of the sizzling soy sauce chicken, I felt transported to a bustling Taiwanese night market, where every bite is a burst of tradition and flavor. This Air Fryer Soy Sauce Chicken is not just a meal; it’s a culinary journey that marries crispy, golden skin with juicy, savory meat—all while being incredibly easy to prepare. Whether you’re pressed for time on a busy weeknight or looking for a crowd-pleaser at your next gathering, this recipe is the perfect solution. Just imagine serving up this delightful comfort dish while feeling like a five-star chef in your own kitchen! Curious about how to make this irresistible dish? Let’s dive right in!

Why Is This Chicken So Irresistible?

Crispy Perfection: Enjoy skin that crackles with every bite, ensuring a delightful texture that complements the juicy chicken inside.

Authentic Flavors: Infused with the rich and savory depths of soy sauce and five-spice powder, each bite transports you to the heart of Taiwan’s culinary scene.

Time-Saving Wonder: With easy marination and a quick 15 minutes in the air fryer, this recipe fits perfectly into your busy schedule.

Versatile Option: Not only is it great as a main dish, but you can also use the same marinade for salmon or tofu, making your meal prep flexible and fun!

Crowd-Pleasing Delight: Perfect for family dinners or gatherings, this dish will impress everyone and soon become a staple on your table.

Pair this with some Homemade Chicken Pot or serve alongside steamed rice and sautéed vegetables for a complete meal that satisfies and delights all!

Air Fryer Soy Sauce Chicken Ingredients

For the Marinade

  • Boneless Chicken Thigh (Skin On) – Provides juicy, flavorful meat with a crispy exterior. Avoid skinless chicken for the best texture.
  • Soy Sauce – Adds saltiness and umami depth. For a lower-sodium option, use a reduced-sodium soy sauce.
  • Dark Soy Sauce – Enhances color and deepens flavor. If unavailable, just increase the regular soy sauce slightly.
  • Five-Spice Powder – Contributes aromatic notes, a blend of warm spices. No direct substitute, but Chinese five-spice is a staple ingredient.
  • White Pepper – Offers a mild heat and distinct flavor; can substitute with black pepper if necessary.
  • Sugar or Honey – Balances out the saltiness; honey adds a touch of floral sweetness. Swap with maple syrup for a different flavor.
  • Garlic (minced) – Enhances flavor with a pungent kick; interchangeable with garlic powder, but fresh is recommended for best results.

For Cooking

  • Cooking Spray or Oil – Ensures the chicken skin crisps up beautifully. Use a high smoke point oil for optimal results.

This Air Fryer Soy Sauce Chicken is the perfect blend of flavor and texture, ready to bring joy to your tables!

Step‑by‑Step Instructions for Air Fryer Soy Sauce Chicken

Step 1: Marinate the Chicken
In a large bowl, whisk together the soy sauce, dark soy sauce, five-spice powder, white pepper, sugar, and minced garlic to create a fragrant marinade. Add the boneless chicken thighs into the mixture, ensuring they’re fully coated. Cover the bowl and let the chicken marinate for at least 30 minutes, and if you have the time, overnight in the fridge is ideal for maximum flavor.

Step 2: Prepare the Air Fryer
Preheat your air fryer to 380°F (193°C) while the chicken marinates. This ensures a hot cooking environment that will help achieve that coveted crispy skin. As your air fryer heats, take the marinated chicken out of the bowl, allowing any excess marinade to drip off gently, enhancing the texture as they cook.

Step 3: Air Fry the Chicken
Place the marinated chicken thighs skin side up in the air fryer basket, making sure they don’t touch each other for even cooking. Cook them at 380°F (193°C) for 15 minutes. Halfway through, check the chicken and flip it if desired, but keep the skin side up for that delightful crispiness.

Step 4: Check for Doneness
After 15 minutes, it’s time to check if your Air Fryer Soy Sauce Chicken is done. The skin should be beautifully golden and crispy, while the internal temperature should reach 165°F (74°C) for safe eating. If it needs more time, continue cooking in 2-minute increments until perfectly cooked through.

Step 5: Rest and Serve
Once cooked, carefully remove the chicken from the air fryer and allow it to rest for a few minutes. This resting period helps the juices redistribute throughout the meat, making it tender and juicy. Serve your Air Fryer Soy Sauce Chicken with steamed rice and sautéed vegetables for a delightful meal that’s bursting with flavor.

What to Serve with Air Fryer Soy Sauce Chicken

Imagine a vibrant dinner table filled with delightful flavors and textures, perfectly complementing your succulent chicken.

  • Fluffy Steamed Rice: A classic pairing that soaks up the rich soy sauce flavors, offering a comforting base for the chicken.
  • Stir-Fried Vegetables: Crisp, colorful veggies provide a fresh crunch that balances the rich, savory notes of the chicken.
  • Garlic Bok Choy: This tender green adds a mild bitterness and slight crunch, making every bite a delicious adventure.
  • Sesame Noodle Salad: Chilled noodles tossed in a nutty dressing add a refreshing, cold contrast to the warm, crispy chicken.
  • Coconut Rice: The sweetness of coconut rice perfectly offsets the savory, umami of the chicken, creating a harmonious flavor fusion.
  • Miso Soup: A warm, savory, and light soup that enhances the meal’s Asian theme, providing a soothing start to your dinner.
  • Chilled Cucumber Salad: A tangy cucumber salad refreshes the palate, delivering a light crunch that cuts through the chicken’s richness.
  • Chardonnay or Jasmine Tea: Pair with a glass of crisp Chardonnay or soothing jasmine tea to elevate your dining experience.

Expert Tips for Air Fryer Soy Sauce Chicken

  • Marination Time: Aim for at least 30 minutes, but overnight is best. This ensures your Air Fryer Soy Sauce Chicken is packed with flavor.

  • Avoid Overcrowding: Place chicken thighs in a single layer in the air fryer basket. Overcrowding can lead to uneven cooking and less crispy skin.

  • Check Doneness: Use a meat thermometer to ensure your chicken reaches 165°F (74°C) for safe consumption. A few extra minutes may be needed depending on your air fryer model.

  • Leave Skin Side Up: For optimal crispiness, always cook the chicken skin side up. This allows the skin to render fat and get that perfect crackle.

  • Rest Before Serving: Let the chicken rest for a few minutes post-cooking. This helps retain juices and keeps the meat tender and succulent.

How to Store and Freeze Air Fryer Soy Sauce Chicken

Fridge: Store leftover Air Fryer Soy Sauce Chicken in an airtight container for up to 3 days. Ensure it’s completely cooled before sealing to maintain freshness.

Freezer: For longer storage, freeze the cooked chicken in a freezer-safe bag or container for up to 3 months. Squeeze out excess air to prevent freezer burn.

Reheating: Reheat the chicken in the air fryer at 350°F (175°C) for about 5-8 minutes to restore its crispy texture. Alternatively, you can use the oven at 375°F (190°C) for about 10-15 minutes.

Serving Tip: To enjoy the flavors at their best, let the chicken rest for a few minutes after reheating before serving.
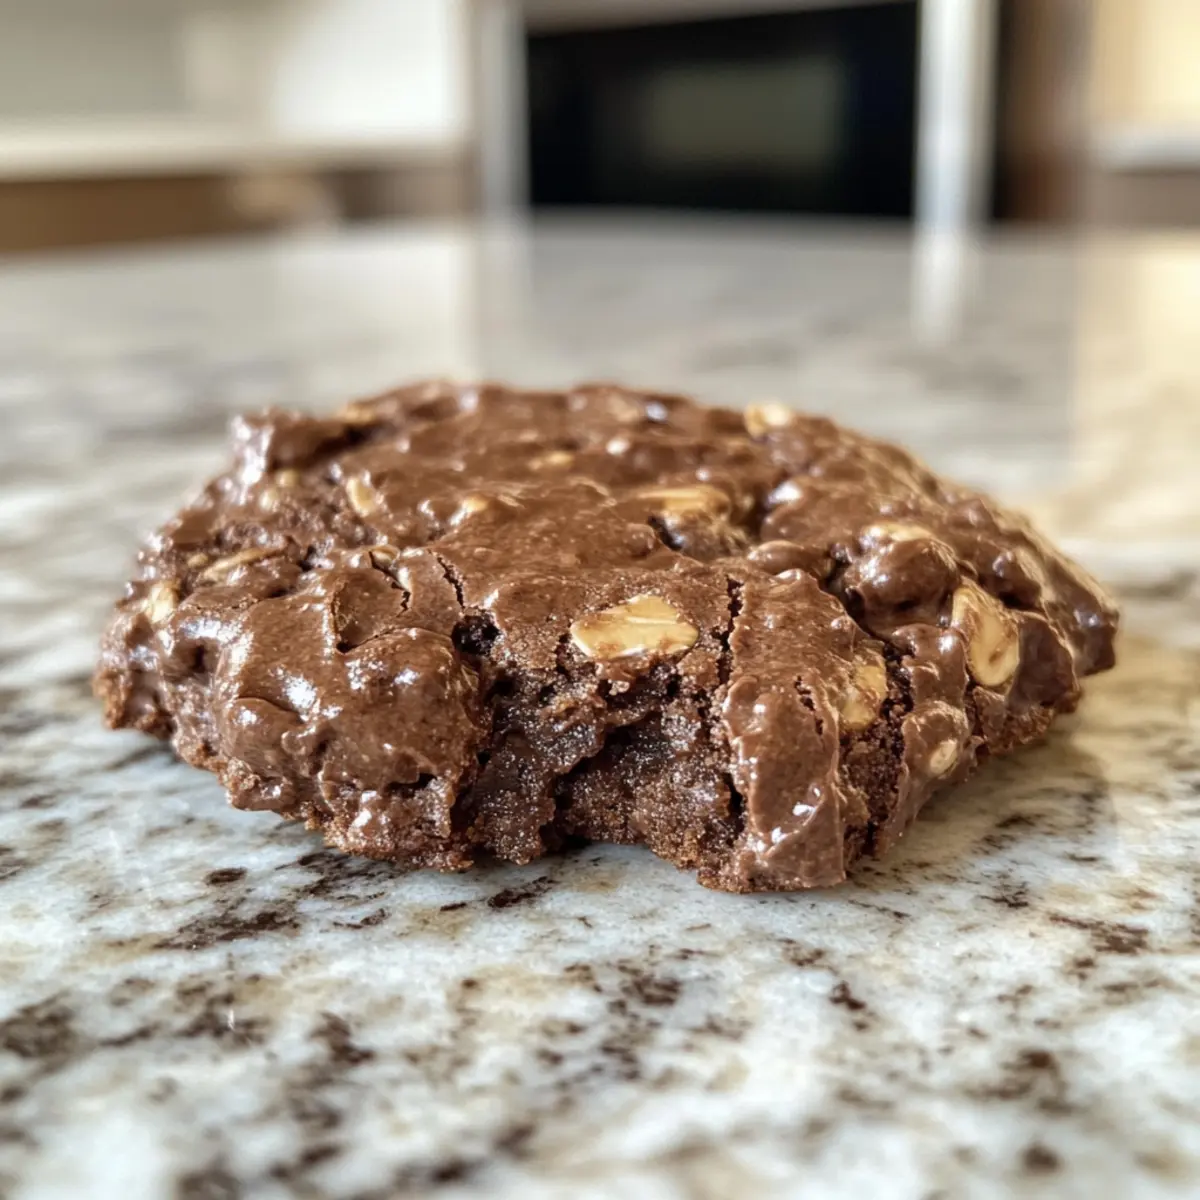
Air Fryer Soy Sauce Chicken Variations

Feel free to get creative and adapt the recipe to suit your taste preferences and dietary needs!

  • Lean Option: Substitute chicken thighs with skinless chicken breasts for a healthier dish, but be mindful that they may cook faster.
    For a lighter version of this recipe, opting for chicken breasts keeps it tender yet can lose some of that beloved crispiness. Just keep an eye on the cooking time, as the breasts will require less time in the air fryer!

  • Tofu Twist: For a plant-based version, replace the chicken with tofu, marinating it in the same delectable sauce.
    Firm tofu absorbs the marinade beautifully, delivering a deliciously satisfying meal that’s also vegetarian-friendly. This option is perfect for those looking for a lighter fare or plant-based alternative!

  • Pork Delight: Try swapping chicken with bone-in pork chops for a twist on flavors, cooking them for a few extra minutes.
    The savory marinade pairs perfectly with pork, creating an entirely new dish that feels just as comforting and indulgent.

  • Burst of Spice: Add a teaspoon of chili paste or red pepper flakes to the marinade for an extra kick of heat.
    If you love a bit of spice in your life, this variation brings that fiery kick while complementing the sweetness of the soy sauce.

  • Herb Infusion: Toss in fresh herbs like cilantro or green onions before serving for a burst of freshness.
    These herbs elevate the dish by adding vibrancy and a refreshing element that balances the savory notes beautifully.

  • Garlic-Lover’s Add-On: Increase the garlic amount or add minced ginger to intensify the aromatic flavor profile.
    For garlic enthusiasts, the more, the merrier! This twist emphasizes the savory depth while adding an invigorating punch to the dish.

  • Honey-Chili Glaze: Drizzle a honey-chili mixture over the cooked chicken for a sweet and spicy finish.
    This garnishing brings both sweetness and spiciness together in a delightful way, perfect for enjoying with sides like steamed rice or stir-fried vegetables.

Whichever variation you choose, you can easily mix and match these ideas to discover your ideal version of Tropical Chicken Sauce! Enjoy the deliciousness!

Make Ahead Options

These Air Fryer Soy Sauce Chicken thighs are perfect for meal prep! You can marinate the chicken up to 24 hours in advance; simply combine the soy sauces, five-spice powder, white pepper, sugar, and minced garlic in a bowl, adding the chicken thighs to soak. When you’re ready to cook, just preheat the air fryer and place the marinated chicken in the basket. For optimal quality, make sure to refrigerate the marinated chicken in an airtight container. The chicken can be stored in the refrigerator for up to 3 days after cooking, and to retain its crispiness, reheat in the air fryer for a few minutes before serving. Enjoy the convenience of having a delicious meal ready in no time!
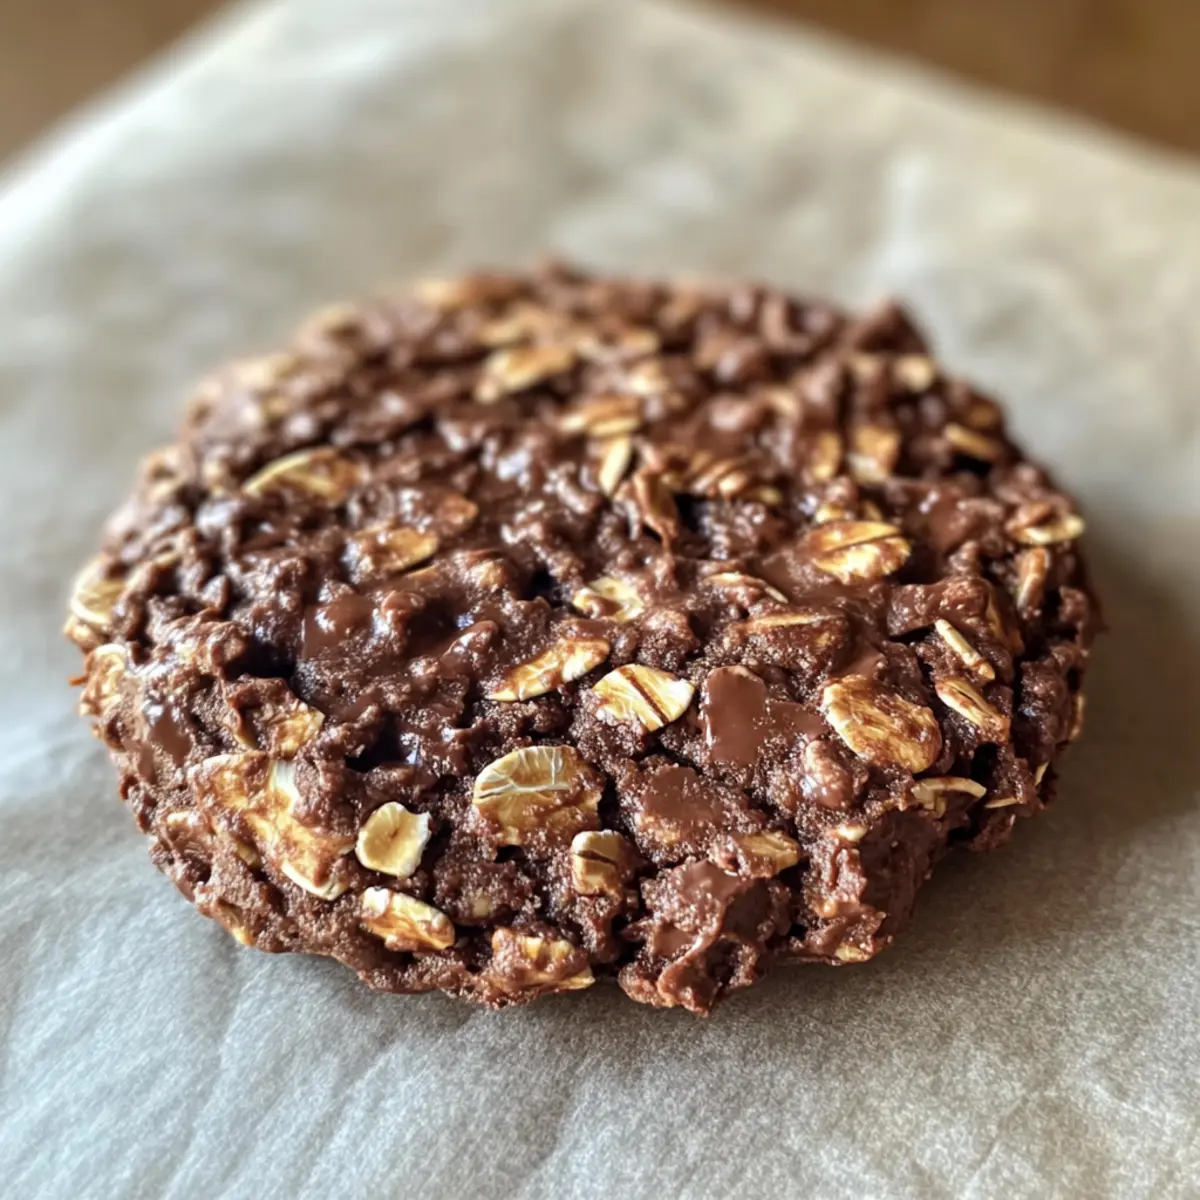
Air Fryer Soy Sauce Chicken Recipe FAQs

What type of chicken should I use for this recipe?
Absolutely! For the best flavor and texture, I recommend using boneless chicken thighs with the skin on. They provide juicy meat that’s a perfect match for the crispy exterior you’ll achieve in the air fryer. If you’re looking for a leaner option, chicken breasts can be used, but be aware that the cooking time may vary.

How should I store leftover Air Fryer Soy Sauce Chicken?
Very simply! Store any leftover chicken in an airtight container in the refrigerator for up to 3 days. Make sure the chicken is completely cooled before sealing it to keep it fresh and delicious.

Can I freeze Air Fryer Soy Sauce Chicken?
Yes, you can! To freeze, place the cooled, cooked chicken in a freezer-safe bag or container, ensuring you squeeze out excess air to prevent freezer burn. It can be stored in the freezer for up to 3 months. When you’re ready to enjoy it, thaw it in the refrigerator overnight before reheating.

How do I reheat the air-fried chicken without losing its crispiness?
For the best results, reheat the chicken in the air fryer at 350°F (175°C) for about 5-8 minutes, checking frequently to avoid overcooking. You can also use the oven at 375°F (190°C) for approximately 10-15 minutes. Allow the chicken to rest for a few minutes before serving to enhance its flavor.

What should I do if my chicken skin isn’t crispy?
Don’t worry! If the skin isn’t crispy after cooking, check two things: First, ensure that you cooked it skin side up. If you need more crispiness, cook it at a slightly higher temperature or for a few more minutes, checking for doneness with a meat thermometer (165°F/74°C).

Is this recipe suitable for dietary restrictions, like allergies?
Yes! However, please note that the recipe contains soy sauce, which is high in sodium and may not be suitable for individuals with soy allergies. You can substitute reduced-sodium soy sauce for a healthier option or use coconut aminos for a soy-free alternative. Always consider your own dietary needs and consult with a healthcare provider if necessary.

Air Fryer Soy Sauce Chicken

Savor Easy Air Fryer Soy Sauce Chicken That's Irresistibly Crispy

Indulge in Air Fryer Soy Sauce Chicken, featuring crispy skin and juicy meat, perfect for a quick meal or gathering.
Prep Time 30 minutes
Cook Time 15 minutes
Resting Time 5 minutes
Total Time 50 minutes
Servings: 4 pieces
Course: Chicken
Cuisine: Taiwanese
Calories: 300

Ingredients
  

For the Marinade
  • 4 pieces Boneless Chicken Thigh (Skin On) Provides juicy, flavorful meat with crispy exterior.
  • 1/2 cup Soy Sauce Adds saltiness and umami depth.
  • 2 tablespoons Dark Soy Sauce Enhances color and deepens flavor.
  • 1 teaspoon Five-Spice Powder Contributes aromatic notes.
  • 1/2 teaspoon White Pepper Offers a mild heat and distinct flavor.
  • 1 tablespoon Sugar or Honey Balances saltiness; honey adds floral sweetness.
  • 2 cloves Garlic (minced) Enhances flavor with a pungent kick.
For Cooking
  • 1 tablespoon Cooking Spray or Oil Ensures crispy chicken skin.

Equipment

  • Air Fryer

Method
 

Step‑by‑Step Instructions
  1. In a large bowl, whisk together the soy sauce, dark soy sauce, five-spice powder, white pepper, sugar, and minced garlic. Add chicken thighs and let marinate for at least 30 minutes, ideally overnight.
  2. Preheat your air fryer to 380°F (193°C) while the chicken marinates.
  3. Place marinated chicken thighs skin side up in the air fryer basket. Cook at 380°F (193°C) for 15 minutes.
  4. Check for doneness; the skin should be golden and crispy, and the internal temperature should reach 165°F (74°C).
  5. Remove from air fryer and let rest for 5 minutes before serving.

Notes

This Air Fryer Soy Sauce Chicken is perfect for family dinners or gatherings and pairs well with steamed rice and sautéed vegetables.

Melopita Greek Honey Pie: A Sweet Slice of Greece at Home

As I sat sipping coffee at a quaint café on a sunlit terrace in Greece, the aroma of warm honey wafted through the air, immediately enchanting my senses. That’s when I first encountered the irresistible Melopita Greek Honey Pie, a dessert so light and airy it felt like a hug from the Mediterranean sun. Perfect for any occasion—be it an elegant Easter feast or a simple family gathering—this traditional Greek delicacy is not just easy to make but also offers a gluten-free option for anyone looking to satisfy their sweet tooth without the guilt. With its wholesome ingredients and a knack for transporting you to idyllic islands, this Melopita is bound to become a staple in your dessert repertoire. Are you ready to indulge in a taste of Greece?

Why is Melopita Greek Honey Pie a must-try?

Indulgence is at your fingertips with this glorious pie! Each slice is a delightful blend of creamy filling and a buttery crust, perfect for dessert lovers. Versatility reigns supreme; whether you prefer a traditional version or a crustless twist, this recipe has you covered. Rich flavor shines with the natural sweetness of honey, while quick preparation makes it simple enough for any home cook. Plus, it’s a crowd-pleaser at gatherings, much like our delicious Honey Chili Chicken or warm Apple Pie. Treat yourself and your loved ones to a slice of Greece!

Melopita Greek Honey Pie Ingredients

For the Crust

  • Gluten-free flour or regular all-purpose flour – Use as the base for the crust; almond flour can create a delicious gluten-free option.
  • Salt – This enhances the flavor in the crust, and no substitution is needed.
  • Sugar (1 tablespoon) – Adds a touch of sweetness; coconut sugar is a healthier substitute.
  • Unsalted butter (½ cup, cold and cubed) – This ingredient adds richness to the crust, while vegan butter offers a dairy-free alternative.
  • Vinegar (1 teaspoon) – Helps make the crust tender; apple cider vinegar works well as a substitute.
  • Ice water (3–4 tablespoons) – Provides moisture for the dough; adjust based on consistency needed.

For the Filling

  • Large eggs (3) – Stabilizes and enriches the filling; flax eggs serve as a vegan substitute.
  • Honey (½ cup, preferably wild blossom) – Acts as the main sweetener with a floral note; maple syrup can replace it if needed.
  • Ground cinnamon (½ teaspoon) – Adds warmth and depth; nutmeg is a lovely alternative, too.
  • Cornstarch (2 tablespoons) – Thickens the filling perfectly; arrowroot powder is a fantastic substitute.
  • Salt (¼ teaspoon) – Balances the sweetness in the filling with no substitute required.
  • Fresh lemon juice (1 tablespoon) – Brightens the flavor profile; lime juice works equally well as a substitute.
  • Vanilla extract (1 teaspoon) – Enhances the overall flavor; almond extract gives a delightful twist.
  • Ricotta cheese (1 ½ cups) or myzithra – Provides creaminess; drained cottage cheese offers a similar texture.

For Garnish

  • Extra honey – Drizzle over the pie for added sweetness when serving.
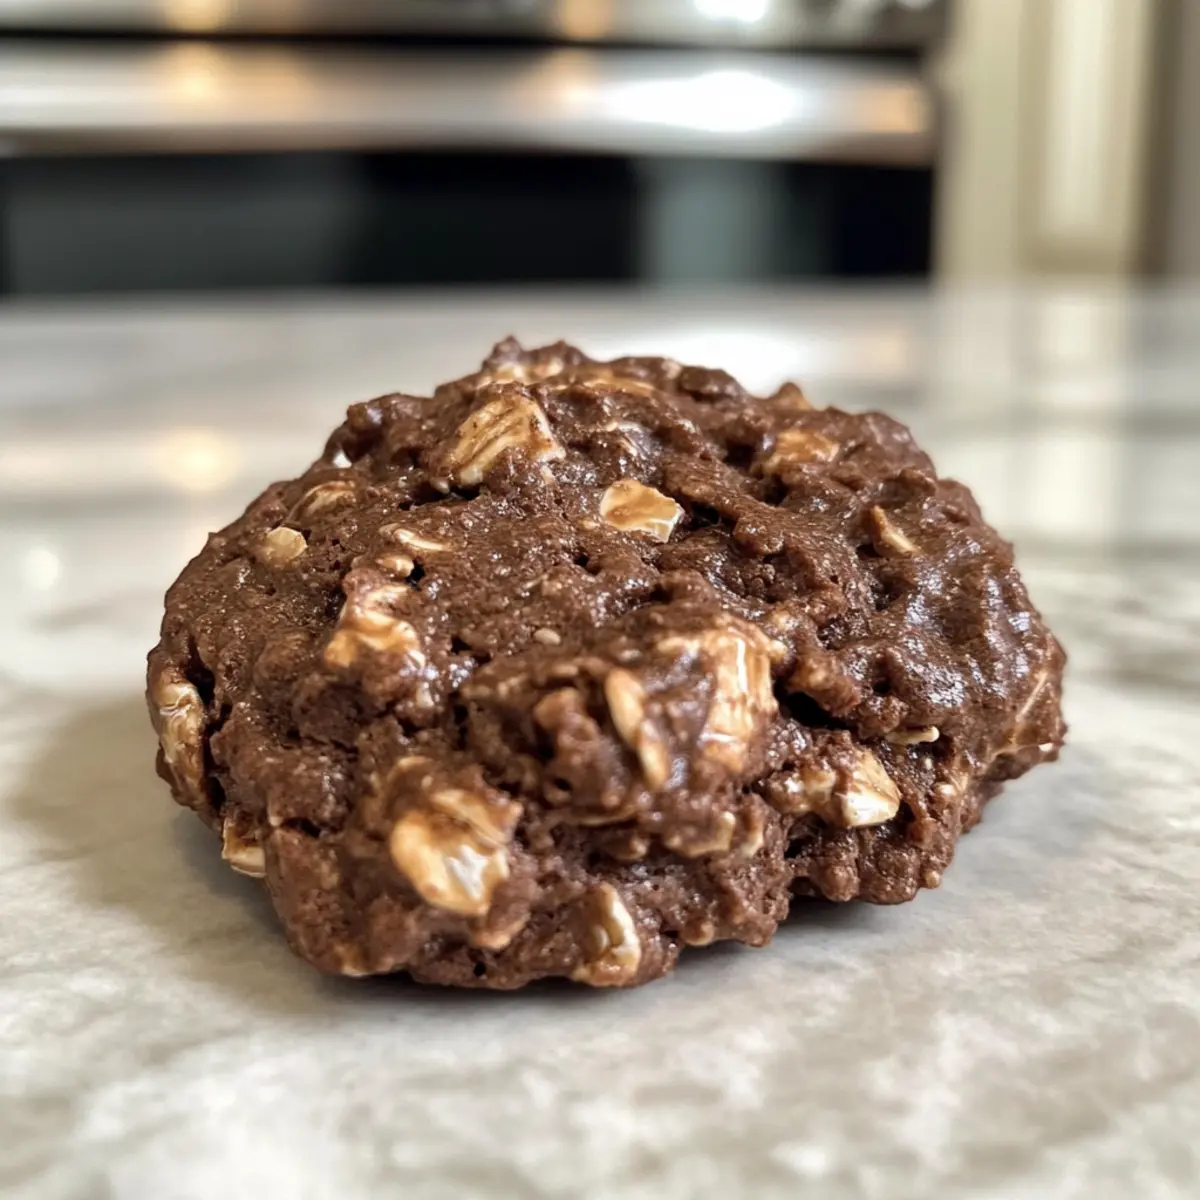
  • Ground cinnamon – Dust lightly before serving for that extra touch of warmth.

Enjoy diving into making your Melopita Greek Honey Pie—it’s a sweet adventure waiting to be savored!

Step‑by‑Step Instructions for Melopita Greek Honey Pie

Step 1: Preheat the Oven
Begin by preheating your oven to 400°F (200°C). This ensures that your Melopita Greek Honey Pie crust will have that perfectly crispy texture when baked. While the oven heats up, you can don your apron and gather your ingredients for the crust, setting the mood for a delicious baking session.

Step 2: Make the Crust Dough
In a food processor, combine the gluten-free or regular all-purpose flour, salt, and sugar. Pulse in the cold, cubed unsalted butter until the mixture resembles coarse crumbs, with no large butter pieces remaining. This step is crucial for achieving a flaky crust, so watch for the right texture as you pulse.

Step 3: Combine and Chill
Next, add the vinegar and gradually pour in the ice water, one tablespoon at a time, mixing until the dough comes together. Be careful not to overwork it! Once it’s formed, wrap the dough in plastic wrap and place it in the refrigerator to chill while you prepare the filling.

Step 4: Roll Out the Dough
After at least 30 minutes of chilling, take the dough out and roll it out between two sheets of parchment paper until it fits a 9-inch pie dish. Prick the bottom with a fork to prevent bubbling during baking. This rolling step helps maintain a uniform thickness, ensuring even baking.

Step 5: Par-Bake the Crust
Transfer the rolled-out dough into the pie dish and par-bake it in the preheated oven for about 10 minutes. This initial baking dries the crust and creates a solid base for the filling. Once lightly golden and set, remove it from the oven and let it cool while you prepare the filling.

Step 6: Lower the Oven Temperature
After removing the par-baked crust, lower the oven temperature to 350°F (175°C). This temperature is perfect for baking the creamy filling while preventing it from overcooking. Give your oven a moment to adjust while you mix the filling ingredients together.

Step 7: Prepare the Filling
In a mixing bowl, whisk together the large eggs and honey until the mixture is creamy and well combined. Then, incorporate the ground cinnamon, cornstarch, salt, fresh lemon juice, and vanilla extract, stirring until smooth. This filling brings the signature sweetness and flavor that make Melopita Greek Honey Pie so delightful.

Step 8: Add the Cheese
Gently fold in the ricotta or myzithra cheese to the filling mixture until fully incorporated. The cheese adds a creamy texture that complements the sweetness of the honey beautifully. Ensure there are no lumps for a smooth filling that will set perfectly during baking.

Step 9: Bake the Pie
Pour the luscious filling into the cooled pie crust, spreading it evenly. Place the pie back into the oven and bake for 25 to 35 minutes, or until the center is set but still slightly jiggly. Keep an eye on it; you want a slight quiver to indicate just the right creamy texture.

Step 10: Cool and Chill
Once baked, remove the Melopita Greek Honey Pie from the oven and allow it to cool on a wire rack for 1 to 2 hours. This cooling period is essential for flavor development. Afterward, chill the pie in the refrigerator for that perfect refreshing taste when you’re ready to serve.

Step 11: Garnish and Serve
Before serving, drizzle extra honey over the chilled pie and dust lightly with ground cinnamon. This final touch adds a touch of elegance and enhances the flavors. Now your delectable Melopita Greek Honey Pie is ready to impress friends and family with its delightful aroma and rich taste!

Storage Tips for Melopita Greek Honey Pie

Fridge: Store the Melopita Greek Honey Pie covered in the refrigerator for up to 3-4 days. The flavors will deepen after a day, making it even more delightful.

Freezer: For longer storage, wrap the pie tightly in plastic wrap and then aluminum foil. It can be frozen for up to 2 months. Thaw in the fridge before serving.
Reheating: If you prefer your pie warm, reheat individual slices in the oven at 350°F (175°C) for about 10-12 minutes, ensuring the filling stays creamy and delicious.

Make Ahead Options

These Melopita Greek Honey Pies are perfect for busy cooks looking to save time during meal prep! You can prepare the crust up to 24 hours in advance; simply roll it out, prick with a fork, and refrigerate. The filling can also be made ahead and stored in the refrigerator for up to 3 days. Just mix all the filling ingredients and keep it covered in an airtight container. When you’re ready to serve, pour the chilled filling into your pre-baked crust and bake as directed. This way, you can enjoy delightful slices of Melopita Greek Honey Pie with minimal last-minute effort, ensuring they are just as delicious as when freshly made!

Melopita Greek Honey Pie Variations

Feel free to let your creativity shine and customize this recipe to suit your taste and dietary preferences!

  • Citrus Twist: Add orange or lemon zest to the filling for a refreshing burst of flavor. This vibrant addition brightens the pie, enhancing its Mediterranean charm.

  • Nut Topping: Add toasted almonds or walnuts on top for a delightful crunch. The nutty flavor contrasts beautifully with the creamy filling, creating a satisfying textural experience.

  • Dairy-Free Delight: Substitute ricotta with silken tofu for a vegan version that’s just as creamy and delicious. It’s a wonderful way to make this sweet treat accessible to everyone at the table!

  • Spiced Variation: Incorporate a pinch of cardamom along with the cinnamon to elevate the flavor profile. This warm spice adds an exotic twist, reminiscent of an enchanting market in Greece.

  • Flavor Alternatives: Experiment using different cheeses, like cream cheese or mascarpone, for a richer taste and unique texture. Each variation brings its own charm to the Melopita honey pie.

  • Maple Sweetness: Swap out honey for pure maple syrup to create a different sweetness profile. It’s a lovely alternative that still maintains that delightful sweetness.

  • Chocolate Drizzle: For a twist that chocolate lovers will adore, drizzle melted dark chocolate over the top before serving. This adds a luscious touch that pairs surprisingly well with the honey.
  • Crustless Version: Skip the crust altogether by greasing a baking dish and pouring in the filling directly. It’ll bake up like a cheesecake, rich and satisfying. Perfect for those who want to avoid the extra carbs!

As you explore these variations, you might find yourself inspired to create delightful pairings with other dishes, just like our scrumptious Honey Garlic Slow or even treating yourself to a warm slice of Apple Pie alongside your Melopita. Enjoy experimenting!

What to Serve with Melopita Greek Honey Pie

Experience a delightful spread that balances sweetness and warmth to complement this creamy Mediterranean treat.

  • Fresh Berries: Ripe strawberries or blueberries add a burst of freshness, cutting through the richness of the pie. Their tartness pairs beautifully with honey’s sweetness.

  • Greek Yogurt: A dollop of thick, tangy Greek yogurt creates a creamy contrast, enhancing the pie’s flavor while adding a protein-rich dimension.

  • Espresso: A rich cup of espresso or a café latte offers a delightful balance of flavors, as the coffee’s bitterness highlights the pie’s honeyed notes.

  • Mint Leaves: Fresh mint leaves tucked beside your slice bring a refreshing touch, brightening each bite and enhancing the flavors of the luscious filling.

  • Almond Biscotti: Crunchy almond biscotti provides a delightful textural contrast, along with nutty tones that harmonize beautifully with the creamy honey filling.

  • Honey Ice Cream: A scoop of honey-flavored ice cream serves as an indulgent pairing, bringing additional creaminess and sweetness that echoes the pie’s flavors.

These accompaniments not only enhance the Melopita Greek Honey Pie but create a memorable dessert experience for family and friends alike!

Expert Tips for Melopita Greek Honey Pie

  • Use Cold Butter: Ensure your butter is well-chilled for a flaky crust. This is key to achieving that perfect texture in your Melopita Greek Honey Pie.

  • Egg Temperature Matters: Make sure your eggs are at room temperature before whisking. This helps them blend smoothly into the filling.

  • Cool for Flavor: Allow the pie to cool completely after baking. Not only does this enhance the flavor, but it also sets the filling better—your pie will taste even more amazing the next day!

  • Crustless Option: If you’re feeling adventurous, grease a baking dish well and pour the filling directly into it for a crustless variation that resembles a cheesecake.

  • Adjust Sweetness: Different honeys lend varied levels of sweetness. Taste your filling before baking and adjust the sweetness according to your personal preference.

  • Creative Garnishes: Elevate your presentation and flavor by garnishing the pie with a sprinkle of zest—like lemon or orange—or a handful of nuts for added crunch.

Melopita Greek Honey Pie Recipe FAQs

What kind of flour should I use for Melopita Greek Honey Pie?
You can use either gluten-free flour or regular all-purpose flour for the crust. If you prefer a gluten-free option, almond flour makes a delightful substitute without compromising the pie’s deliciousness. Just keep in mind that using a different flour may slightly alter the texture.

How should I store Melopita Greek Honey Pie?
To keep your Melopita fresh, store it covered in the refrigerator for up to 3-4 days. The flavors deepen with time, making it even more enjoyable on the second or third day! Just ensure it is well covered to prevent it from drying out.

Can I freeze Melopita Greek Honey Pie?
Absolutely! To freeze it, wrap the pie tightly in plastic wrap, followed by a layer of aluminum foil. This method will protect it from freezer burn and keep it fresh for up to 2 months. When you’re ready to enjoy a slice, simply thaw it in the refrigerator overnight before serving.
What if my pie crust is soggy after baking?
If your crust turns out soggy, it might be due to excess moisture in the filling or not par-baking the crust long enough. To avoid this, ensure you par-bake the crust until it’s lightly golden and dry, and make sure to cool it before adding the filling. You can always check for doneness by gently pressing the crust before proceeding with the filling.
Are there any dietary considerations when making Melopita?
Yes! For those with dietary restrictions, you can make the pie gluten-free by using almond flour instead of regular all-purpose flour. Additionally, if you need a dairy-free option, substituting the ricotta cheese with drained cottage cheese or using vegan butter in the crust can accommodate your needs. Always ensure to double-check ingredients for potential allergens!

Melopita Greek Honey Pie

Melopita Greek Honey Pie: A Sweet Slice of Greece at Home

Discover the delightful Melopita Greek Honey Pie, a light and airy dessert that transports you to Greece with every bite.
Prep Time 20 minutes
Cook Time 35 minutes
Cooling Time 2 hours
Total Time 2 hours 55 minutes
Servings: 8 slices
Course: Dessert
Cuisine: Greek
Calories: 250

Ingredients
  

For the Crust
  • 2 cups gluten-free flour or regular all-purpose flour almond flour can also be used for gluten-free option
  • 1 teaspoon salt
  • 1 tablespoon sugar coconut sugar as a healthier substitute
  • ½ cup unsalted butter, cold and cubed vegan butter can be used for dairy-free option
  • 1 teaspoon vinegar apple cider vinegar works well
  • 3–4 tablespoons ice water
For the Filling
  • 3 large eggs flax eggs can serve as vegan substitute
  • ½ cup honey, preferably wild blossom maple syrup can be a replacement
  • ½ teaspoon ground cinnamon nutmeg is a lovely alternative
  • 2 tablespoons cornstarch arrowroot powder is a good substitute
  • ¼ teaspoon salt
  • 1 tablespoon fresh lemon juice lime juice works too
  • 1 teaspoon vanilla extract almond extract adds a nice twist
  • 1 ½ cups ricotta cheese or myzithra drained cottage cheese can be used
For Garnish
  • extra honey to drizzle over the pie
  • ground cinnamon lightly dust before serving

Equipment

  • Food Processor
  • mixing bowl
  • Pie dish
  • Rolling Pin
  • parchment paper

Method
 

Step-by-Step Instructions
  1. Preheat the oven to 400°F (200°C).
  2. In a food processor, combine the gluten-free or regular all-purpose flour, salt, and sugar. Pulse in the cold, cubed unsalted butter until the mixture resembles coarse crumbs.
  3. Add the vinegar and pour in the ice water, one tablespoon at a time, mixing until the dough comes together. Chill the dough for 30 minutes.
  4. Roll out the dough between two sheets of parchment paper until it fits a 9-inch pie dish. Prick the bottom with a fork.
  5. Transfer the rolled-out dough into the pie dish and par-bake it for about 10 minutes until lightly golden.
  6. Lower oven temperature to 350°F (175°C) after removing the par-baked crust.
  7. In a mixing bowl, whisk together the large eggs and honey until creamy. Add ground cinnamon, cornstarch, salt, fresh lemon juice, and vanilla extract, stirring until smooth.
  8. Gently fold in the ricotta or myzithra cheese until fully incorporated.
  9. Pour the filling into the cooled pie crust and bake for 25 to 35 minutes until the center is set but still slightly jiggly.
  10. Cool the pie on a wire rack for 1 to 2 hours, then chill in the refrigerator before serving.
  11. Drizzle extra honey and dust with ground cinnamon before serving.

Notes

Use cold butter for a flaky crust, and allow the pie to cool completely for flavor enhancement.

Flourless Chocolate Crinkle Cookies: Guilt-Free Indulgence

As I stirred the mixing bowl filled with cocoa powder and a secret sweetener, the delightful aroma swept through my kitchen like a warm winter hug. This Flourless Chocolate Crinkle Cookies recipe is my go-to for tackling those chocolate cravings without compromising my health goals. Each cookie is a mere 53 calories—yes, you heard that right! Not only are they guilt-free, but they also happen to be sugar-free, gluten-free, and dairy-free, making them a hit for almost anyone popping by for a treat. The chewier texture and rich chocolate flavor will leave everyone wondering how something so decadent can be so wholesome. Ready to indulge in something sweet yet nourishing? Let’s dive into the world of these melt-in-your-mouth cookies together!

Why are Flourless Cookies a Game-Changer?

Irresistible Flavor: These Flourless Chocolate Crinkle Cookies pack a rich, chocolatey punch without the sugar, making them a delightful guilt-free treat.

Nutrient-Packed: At only 53 calories each, they offer a healthy dose of flavor with high-protein goodness that satisfies your sweet tooth without sabotaging your diet.

Versatile Treat: Perfect for holiday gatherings or afternoon snacks, they pair wonderfully with coffee or a glass of almond milk, making them a go-to option for any occasion.

Simple Ingredients: With just a few components like powdered monk fruit and cocoa powder, you’ll be whipping these up in no time—and they’re friendly to various dietary needs!

Dive into adventure with these nutritious cookies, and if you’re looking for more sweet alternatives, check out our Coconut Chocolate Rolls or Nutty Apricot Cookies for a wide range of delightful options!

Flourless Chocolate Crinkle Cookies Ingredients

For the Cookie Mix

  • Powdered Monk Fruit – This natural sweetener makes these cookies sugar-free without sacrificing flavor.
  • Cocoa Powder – Use unsweetened cocoa powder for a deep, rich chocolate experience.
  • Salt – A pinch enhances the sweetness and balances the flavors beautifully.
  • Egg Whites – Essential for structure, ensuring these cookies hold their shape perfectly.

These Flourless Chocolate Crinkle Cookies are not just a treat but a healthier indulgence you can enjoy without any guilt!

Step‑by‑Step Instructions for Flourless Chocolate Crinkle Cookies

Step 1: Preheat the Oven
Begin by preheating your oven to 350°F (177°C). This ensures that your Flourless Chocolate Crinkle Cookies bake evenly and achieve that delightful crinkle on top. While the oven preheats, line a baking sheet with parchment paper or a silicone mat to prevent sticking and make cleanup a breeze.

Step 2: Mix the Dry Ingredients
In a mixing bowl, combine the powdered monk fruit, unsweetened cocoa powder, and a pinch of salt. Whisk these dry ingredients together until they are fully blended, creating a uniform mix. The mixture should look deep and rich, foreshadowing the chocolatey goodness of your cookies.

Step 3: Incorporate the Egg Whites
Gradually add the egg whites into the dry mixture, mixing with a spatula or a spoon until a sticky dough forms. This dough will be quite thick and sticky—this is perfectly normal. Ensure that all dry ingredients are fully incorporated, creating a luscious, chocolatey batter that promises joy in every bite.

Step 4: Scoop and Shape the Dough
Using a portion scoop or two spoons, drop rounded tablespoons of dough onto the prepared baking sheet, spacing them about 2 inches apart. This spacing allows the cookies to spread as they bake, giving them room to form that beautiful crinkle texture. The dough should be sticky but manageable.

Step 5: Bake to Perfection
Place the baking sheet in your preheated oven and bake the cookies for approximately 10 minutes. Watch for the edges to set and the tops to develop that signature crinkled appearance. The cookies should look soft in the center but not underbaked, ensuring the perfect chewy texture.

Step 6: Cool and Enjoy
After baking, let the cookies cool on the baking sheet for a few minutes before transferring them to a wire rack to cool completely. This step is crucial—allowing them to firm up will enhance their delightful chewiness. Once cooled, they’ll be ready for indulging!

Flourless Chocolate Crinkle Cookies Swaps

Feel free to get creative and make these cookies your own with these fun and flexible variations!

  • Carob Powder: Swap cocoa powder for carob for a unique, slightly sweeter flavor profile. Carob also brings a delightful earthiness that pairs well with the sweetness of monk fruit.

  • Nut Butter Twist: Mix in a tablespoon of your favorite nut butter, like almond or peanut, to add a rich, creamy texture that enhances the chewy experience. Just be wary of how it changes the overall sweetness!

  • Crunchy Add-ins: Add chocolate chips or chopped nuts to the dough for an irresistible crunch. This twist introduces extra texture that will surprise and delight every bite—perfect for those who love a little extra bite in their cookies!

  • Enhanced Flavor: A teaspoon of vanilla extract can deepen the cookie’s flavor. The warmth from the vanilla works harmoniously with the rich chocolate, creating a well-rounded taste everyone will love.

  • Spicy Kick: If you like a little heat, a pinch of cayenne pepper can complement the chocolate surprisingly well. This intriguing combination creates a delightful balance—sweet meets spice in an unexpected harmony!

  • Sweetener Swap: Prefer other sugar alternatives? Feel free to substitute powdered monk fruit with erythritol or stevia, but check the conversion ratios to ensure they provide the same sweetness level.

  • Milk Chocolate Variations: Experiment using a blend of cocoa with milk chocolate for a not-so-dark experience! This simple swap creates a sweeter taste, making them even more irresistible.

  • Flavor Infusion: Infuse your cookies with citrus zest, such as orange or lemon, for a refreshing twist. The bright notes from the zest create a delightful contrast to the dark chocolate, invigorating each bite.

With these variation ideas, you can enjoy a range of textures and flavors in your Flourless Chocolate Crinkle Cookies. If you love experimenting with cookies like these, try our Nutty Apricot Cookies or Chocolate Date Cookies for more delicious delights!

What to Serve with Flourless Chocolate Crinkle Cookies

There’s nothing quite like wrapping your hands around a warm cookie and pairing it with delightful complements to enhance your indulgence.

  • Fresh Berries: The tartness of strawberries or raspberries brightens the rich chocolate, creating a balanced and refreshing bite.

  • Almond Milk: This creamy delight is a perfect drink to accompany your cookies, enhancing their flavors while keeping it dairy-free.

  • Espresso: A bold shot of espresso contrasts beautifully with the sweetness of the cookies, elevating your dessert experience with every sip.

  • Coconut Whipped Cream: A dollop of dairy-free coconut whipped cream adds a luscious texture, providing a heavenly touch to each cookie.

  • Nut Butter Drizzle: A drizzle of almond or peanut butter brings a nutty flavor and creamy richness that complements the chocolate perfectly.

  • Dark Chocolate Squares: Pair with a few squares of high-quality dark chocolate to satisfy the chocolate lover’s cravings and intensify the experience.

  • Banana Slices: Adding fresh banana slices brings in a creamy, fruity element that softens the richness of the chocolate cookies.

How to Store and Freeze Flourless Chocolate Crinkle Cookies

Room Temperature: Store cookies in an airtight container at room temperature for up to 4 days to maintain their soft and chewy texture.

Fridge: If you prefer, you can keep them in the fridge for up to a week, but this may alter their texture slightly.

Freezer: For longer storage, freeze the cookies in a zip-top bag for up to 2 months. Make sure to separate layers with parchment paper to prevent sticking.

Reheating: To enjoy your Flourless Chocolate Crinkle Cookies warm, pop them in the microwave for about 10-15 seconds. Enjoy the melt-in-your-mouth goodness!

Make Ahead Options

These Flourless Chocolate Crinkle Cookies are perfect for meal prep, saving you precious time during busy weeks! You can prepare the cookie dough up to 24 hours in advance; simply mix the dry ingredients and incorporate the egg whites before refrigerating the dough in an airtight container. This not only deepens the flavors but also allows you to bake fresh cookies right when the craving hits! When you’re ready to bake, just scoop the dough onto a lined baking sheet and bake as directed. For longer storage, you can freeze the unbaked cookies in a single layer; after they’ve hardened, transfer them to a zip-top bag for up to 2 months. Enjoy delicious, freshly baked cookies anytime with this simple make-ahead approach!

Expert Tips for Flourless Chocolate Crinkle Cookies

Sticky Dough: Remember, the dough will be very sticky due to the absence of flour. Don’t panic; it’s crucial for that chewy texture!

Watch Baking Time: Keep a close eye on the cookies! Overbaking can lead to tough cookies, so aim for soft centers that will set as they cool.

Beat Egg Whites: For a lighter texture, beat the egg whites until frothy before mixing them in. It elevates the overall fluffiness of your Flourless Chocolate Crinkle Cookies.

Use Quality Cocoa: Opt for unsweetened cocoa powder of high quality for the best flavor. Cheap cocoa can lead to a lackluster taste!

Proper Cooling: Allow the cookies to cool fully on a wire rack. This firmness is vital for achieving that perfect chewy bite!

Flourless Chocolate Crinkle Cookies Recipe FAQs

How do I choose the right cocoa powder for these cookies?
Make sure to use unsweetened cocoa powder for the best flavor. Brands can vary in taste, so I recommend going for high-quality options. This ensures your Flourless Chocolate Crinkle Cookies have that rich, deep chocolate essence that everyone loves!

What’s the best way to store left-over cookies?
Store your cookies in an airtight container at room temperature for up to 4 days. If you want them to last longer, you can pop them in the fridge for up to a week, but be aware that this may slightly change their texture, making them a bit firmer.

Can I freeze Flourless Chocolate Crinkle Cookies?
Absolutely! To freeze your cookies, place them in a zip-top bag and ensure to separate layers with parchment paper to avoid sticking—this way, they maintain their shape. They’ll stay fresh for up to 2 months. When you’re ready to enjoy, just warm them in the microwave for 10-15 seconds!

What if my cookie dough is too sticky?
This is entirely normal! The absence of flour makes the dough stickier than traditional cookie dough. If it feels unmanageable, try chilling it in the fridge for about 30 minutes—the coolness will help firm it up slightly, making it easier to scoop.

Are these cookies suitable for everyone?
Yes! These Flourless Chocolate Crinkle Cookies are gluten-free, dairy-free, and sugar-free, making them perfect for a variety of dietary needs. Just be cautious if there are nut allergies, especially if you decide to add chocolate chips or nuts as variations!

How can I enhance the flavor of my cookies?
Consider using high-quality monk fruit powder for a more robust sweetness. You can also add a pinch of vanilla extract or even a dash of espresso powder to intensify the chocolate flavor, making your cookies even more divine.

Flourless Chocolate Crinkle Cookies

Flourless Chocolate Crinkle Cookies: Guilt-Free Indulgence

These Flourless Chocolate Crinkle Cookies satisfy chocolate cravings guilt-free with rich flavor, low calories, and healthy ingredients.
Prep Time 10 minutes
Cook Time 10 minutes
Cooling Time 15 minutes
Total Time 35 minutes
Servings: 12 cookies
Course: Dessert
Cuisine: American
Calories: 53

Ingredients
  

Cookie Mix
  • 1 cup Powdered Monk Fruit Natural sweetener
  • 1/2 cup Cocoa Powder Unsweetened
  • 1/4 teaspoon Salt A pinch enhances sweetness
  • 3 large Egg Whites Essential for structure

Equipment

  • mixing bowl
  • baking sheet
  • parchment paper
  • spatula
  • oven

Method
 

Baking Instructions
  1. Preheat your oven to 350°F (177°C) and line a baking sheet with parchment paper.
  2. Combine the powdered monk fruit, cocoa powder, and salt in a mixing bowl.
  3. Gradually add the egg whites to the dry mixture, mixing until a sticky dough forms.
  4. Scoop rounded tablespoons of dough onto the prepared baking sheet, spacing them 2 inches apart.
  5. Bake for about 10 minutes until the edges are set and the tops are crinkled.
  6. Cool on the baking sheet for a few minutes before transferring to a wire rack.

Notes

The dough will be very sticky, which is crucial for the chewy texture. Watch baking time closely to avoid overbaking.

Cozy Chai White Chocolate Toffee Cookies for Fall Bliss

As the crisp autumn air begins to swirl with the scent of cinnamon and cardamom, I find myself craving something comforting and indulgent. These Cozy Chai White Chocolate Toffee Cookies are my go-to solution, perfectly capturing the essence of the season in every delightful bite. With a delightful combination of warmly spiced chai, creamy white chocolate chunks, and a sweet crunch from buttery toffee, these cookies are not just a treat—they’re a cozy hug in dessert form. Whether you’re preparing for the upcoming holiday festivities or simply looking for a cozy snack to enjoy at home, this recipe is a quick win that will impress everyone around. Who can resist the charm of homemade cookies? Let’s dive into this delightful baking adventure together!

Why are Chai White Chocolate Toffee Cookies irresistible?

Unique Flavor Profile: The blend of chai spices brings warmth and comfort, while the creamy white chocolate and crunchy toffee create an indulgent experience.

Quick and Easy: You won’t need advanced skills to whip these up—just some basic baking knowledge will suffice!

Perfect for Sharing: These cookies make a fantastic crowd-pleaser, ideal for holiday gatherings or casual get-togethers.

Versatile Ingredient Options: Feel free to customize the recipe by swapping white chocolate for dark, or adding in dried fruits for an extra twist.

Make-Ahead Convenience: You can prepare the dough in advance and bake fresh cookies whenever cravings hit. For a more fudgy experience, check out these yummy Chocolate Date Cookies!

Get ready for cozy vibes straight from your oven!

Chai White Chocolate Toffee Cookies Ingredients

• Here’s what you need for the most comforting cookies of the season:

For the Dough

  • Butter – Use unsalted butter for better control over excess salt.
  • Brown Sugar – Dark brown sugar enhances the toffee flavor and adds moisture.
  • Granulated Sugar – Balances sweetness while helping with the cookie’s browning.
  • Eggs – Ensure they’re at room temperature for better mixing and binding.
  • All-Purpose Flour – Provides structure; can be swapped with a gluten-free blend for dietary needs.
  • Baking Soda – This little agent gives your cookies a slight lift.
  • Chai Spice Blend – Key for flavor; mix your favorites like cinnamon and cardamom.

For the Mix-Ins

  • White Chocolate Chunks – Choose high-quality chocolate for creamy, decadent bursts in every bite.
  • Toffee Bits – Adds a delightful crunch; you can substitute with chopped toffee bars.
  • Pecans – Toast them for a richer flavor; alternatively, use walnuts or skip nuts entirely.

Get ready to bake some cozy Chai White Chocolate Toffee Cookies that will warm both your kitchen and your heart!

Step‑by‑Step Instructions for Chai White Chocolate Toffee Cookies

Step 1: Brown the Butter
In a medium saucepan over medium heat, melt 1 cup of unsalted butter, stirring frequently. Continue cooking until the butter turns golden brown and develops a nutty aroma, about 5-7 minutes. Remove from heat and allow the browned butter to cool slightly before using, as it adds a rich depth of flavor to your Chai White Chocolate Toffee Cookies.

Step 2: Mix Ingredients
In a large mixing bowl, combine the cooled browned butter with 1 cup dark brown sugar and 1/2 cup granulated sugar. Using a hand mixer, beat until the mixture is smooth and creamy, about 2 minutes. Incorporate two room-temperature eggs, mixing until well combined. Gradually sift in 2 cups of all-purpose flour, 1 teaspoon baking soda, and your chai spice blend until just combined—be careful not to over-mix.

Step 3: Fold in Add-Ins
Gently fold in 1 1/2 cups of white chocolate chunks, 1 cup of toffee bits, and 1/2 cup of toasted pecans using a spatula. Make sure the mix-ins are evenly distributed throughout the dough. This adds delightful bursts of sweetness and crunch to your Chai White Chocolate Toffee Cookies, making them truly irresistible.

Step 4: Chill the Dough
Cover the mixing bowl with plastic wrap and refrigerate the dough for at least 30 minutes. This chilling step is crucial for preventing spreading during baking, resulting in perfectly structured cookies that maintain their chewy texture. While the dough chills, you can clean up your workspace and gather your baking sheets.

Step 5: Preheat Oven
After chilling, preheat your oven to 350°F (175°C). Line two baking sheets with parchment paper to ensure easy removal of the cookies once baked. This simple step ensures your Chai White Chocolate Toffee Cookies have a lovely, golden bottom and do not stick to the sheets.

Step 6: Bake Cookies
Using a cookie scoop, drop tablespoonfuls of dough onto the prepared baking sheets, leaving enough space between each cookie. Bake in the preheated oven for 10-12 minutes or until the edges are lightly golden while the centers remain soft. The cookies will continue to set as they cool, so watch for that perfect golden hue.

Step 7: Cool
Once baked, remove the cookies from the oven and let them cool on the baking sheets for about 5 minutes. This resting time allows the cookies to firm up slightly. Carefully transfer the cookies to a wire rack to cool completely, where they will develop their full flavor and chewy texture, ready to be enjoyed.

Make Ahead Options

These Cozy Chai White Chocolate Toffee Cookies are perfect for meal prep, allowing you to enjoy fresh-baked cookies with minimal effort on busy days! You can prepare the cookie dough up to 3 days in advance; simply cover it tightly with plastic wrap and refrigerate. For longer storage, freeze the dough in scooped portions for up to 3 months. When you’re ready to bake, just preheat your oven, place the frozen scoops directly on a baking sheet, and add an extra minute or two to the baking time. This way, you can enjoy fresh cookies that are just as delightful and chewy as if they were made that day—the perfect treat any time you crave cozy fall flavors!

What to Serve with Chai White Chocolate Toffee Cookies

These cozy cookies are perfect for pairing with comforting sides that enhance their spiced sweetness.

  • Warm Chai Latte: A creamy, spiced chai latte mirrors the flavors in the cookies, creating a perfect harmony of warmth and comfort.

  • Vanilla Ice Cream: Soft scoops of vanilla ice cream provide a contrasting cold creaminess that melts beautifully with the warm cookie.

  • Toasted Pecans: Serve extra toasted pecans on the side; they echo the cookie’s crunch and add an earthy flavor contrast.

  • Apple Cider: A warm mug of apple cider brings out the fall spices in the cookies, creating a delightful seasonal experience.

  • Spiced Hot Chocolate: Rich hot chocolate made with spices adds another layer of indulgence, perfect for cozy evenings.

  • Dried Cranberries: Offer a joyous burst of tartness that balances the sweetness, creating delightful bites with each taste.

  • Maple Glazed Donuts: For a sweet brunch twist, complementary donuts can add joy to your cookie platter.

  • Cardamom Tea: This fragrant tea enhances the chai spices beautifully, making for a sophisticated pairing that warms the soul.

Embrace the cozy season with these delightful pairings, transforming your treat into a memorable meal!

Storage Tips for Chai White Chocolate Toffee Cookies

Room Temperature: Store the cookies in an airtight container at room temperature for up to 1 week. This keeps them fresh and chewy, perfect for indulging anytime!

Fridge: If preferred, you can refrigerate the cookies for extended freshness. They’ll last up to 2 weeks, but may lose some chewiness; let them warm slightly before serving.

Freezer: For longer storage, freeze the cookies in a single layer, then transfer them to a labeled freezer bag. They can be stored for up to 3 months and thawed at room temperature when you’re ready to enjoy them again.

Reheating: To revive any chilled or frozen Chai White Chocolate Toffee Cookies, simply warm in the oven at 350°F (175°C) for about 5 minutes. This restores their soft, gooey texture.

Chai White Chocolate Toffee Cookies Variations

Feel free to explore these delightful twists on the classic recipe, enhancing your cookie-baking adventure!

  • Dairy-Free: Swap the butter with coconut oil and use dairy-free chocolate. These cookies remain rich and delicious without dairy!

  • Nut-Free: Omit the pecans and replace them with a handful of oats for a chewy texture. This makes them safe for those with nut allergies!

  • Spiced Up: Add a pinch of cayenne pepper or a splash of vanilla extract to your batter for an unexpected flavor kick that dances on your palate. The warmth enhances that cozy vibe.

  • Chocolate Bliss: Instead of white chocolate, use dark chocolate for a bittersweet contrast. This variation adds depth while still being indulgent and comforting.

  • Fruity Touch: Mix in dried cranberries or cherries for a fruity twist. These juicy morsels infuse your cookies with a burst of flavor and a lovely chewy texture, perfect for the holiday season.

  • Gluten-Free: Substitute the all-purpose flour with a gluten-free blend. This ensures everyone can enjoy these delicious cookies while keeping their dietary preferences in mind!

  • Flavorful Infusion: Infuse the brown sugar with a teaspoon of maple syrup for a hint of sweetness that perfectly complements the chai spices. A touch of maple can enhance your cozy autumn flavors!

  • Explosion of Flavor: Incorporate a teaspoon of instant coffee granules for a subtle coffee flavor that beautifully pairs with the spices and chocolate. You might be inspired to try these with a cup of your favorite Coffee Chocolate Truffles as a pairing!

Let your creativity flow as you customize these Chai White Chocolate Toffee Cookies for the perfect touch to your fall gatherings!

Expert Tips for Chai White Chocolate Toffee Cookies

  • Brown Butter Care: Be attentive while browning butter; it’s quick to go from deliciously nutty to burnt. A little patience goes a long way in flavor!

  • Chill for Success: Make sure to chill the dough for at least 30 minutes. A well-chilled dough prevents the cookies from spreading too much during baking, keeping them chewy.

  • Don’t Over-Mix: When adding flour, mix just until combined. Over-mixing can lead to tough cookies, and that’s not the cozy texture you want in your Chai White Chocolate Toffee Cookies.

  • Quality Matters: For the best flavor, choose high-quality white chocolate and toffee bits. It makes a noticeable difference in taste!

  • Storage Tips: Keep your baked cookies in an airtight container at room temperature for up to a week. For longer storage, freeze them and enjoy later!

Chai White Chocolate Toffee Cookies Recipe FAQs

How do I choose the best butter for my cookies?
For the best results, opt for unsalted butter. This allows you to have complete control over the salt content in your cookies, enabling the warm spices to shine through without being masked by saltiness.

How should I store Chai White Chocolate Toffee Cookies?
Store these delightful cookies in an airtight container at room temperature for up to 1 week. To retain the chewy texture, you might also refrigerate them, but they may be less soft. If you’re looking for long-term storage, freeze them for up to 3 months—just make sure to place them in a single layer before transferring them to a labeled freezer bag.

Can I freeze the cookie dough?
Absolutely! To freeze the dough, scoop individual portions onto a baking sheet lined with parchment paper and freeze them until solid. Once frozen, transfer the dough balls to a zip-top freezer bag. You can store the cookie dough this way for up to 3 months. When ready to bake, simply preheat your oven, place the frozen dough balls on a baking sheet, and bake them as directed; you may need to add an extra minute or two to the bake time.

What if my cookies spread too much during baking?
To prevent excessive spreading, ensure that your dough is well-chilled. Chilling for at least 30 minutes is essential for maintaining shape. Additionally, try to measure the flour accurately—too little flour can lead to flat cookies. If you notice that the dough is too soft, you can add a little more flour, about a tablespoon at a time, until the desired consistency is reached.

Are there any allergy considerations with this recipe?
Yes! This recipe contains dairy (butter and white chocolate) and nuts (pecans). If making for someone with allergies, you can use dairy-free butter and chocolate alternatives. For nut allergies, feel free to skip the pecans entirely or substitute them with seeds like sunflower seeds for added crunch.

Can I modify the chai spice blend?
Definitely! The chai spice blend is adaptable, and you can customize it to your taste. Recommended spices include cinnamon, cardamom, ginger, and cloves—mix them to your preference! Just remember, a good chai blend should complement the sweetness of the white chocolate and toffee, enhancing your Cozy Chai White Chocolate Toffee Cookies.

Chai White Chocolate Toffee Cookies

Cozy Chai White Chocolate Toffee Cookies for Fall Bliss

These Cozy Chai White Chocolate Toffee Cookies are the perfect treat for fall, combining warm spices, creamy chocolate, and crunchy toffee in every bite.
Prep Time 15 minutes
Cook Time 12 minutes
Chilling Time 30 minutes
Total Time 57 minutes
Servings: 24 cookies
Course: Dessert
Cuisine: American
Calories: 180

Ingredients
  

For the Dough
  • 1 cup unsalted butter browned
  • 1 cup dark brown sugar
  • 1/2 cup granulated sugar
  • 2 large eggs room temperature
  • 2 cups all-purpose flour or gluten-free blend
  • 1 teaspoon baking soda
  • to taste chai spice blend cinnamon and cardamom mixed
For the Mix-Ins
  • 1 1/2 cups white chocolate chunks high-quality
  • 1 cup toffee bits
  • 1/2 cup toasted pecans or walnuts, optional

Equipment

  • Medium saucepan
  • Large mixing bowl
  • hand mixer
  • Cookie scoop
  • parchment paper
  • Wire rack

Method
 

Baking Instructions
  1. In a medium saucepan over medium heat, melt 1 cup of unsalted butter, stirring frequently until it turns golden brown, about 5-7 minutes.
  2. In a large mixing bowl, combine the cooled browned butter with 1 cup dark brown sugar and 1/2 cup granulated sugar. Beat until smooth and creamy.
  3. Incorporate two room-temperature eggs, mixing until well combined. Gradually sift in 2 cups of all-purpose flour, 1 teaspoon baking soda, and your chai spice blend until just combined.
  4. Gently fold in 1 1/2 cups of white chocolate chunks, 1 cup of toffee bits, and 1/2 cup of toasted pecans using a spatula.
  5. Cover the mixing bowl with plastic wrap and refrigerate the dough for at least 30 minutes.
  6. Preheat your oven to 350°F (175°C). Line two baking sheets with parchment paper.
  7. Using a cookie scoop, drop tablespoonfuls of dough onto the prepared baking sheets, leaving space between each cookie. Bake for 10-12 minutes.
  8. Remove the cookies from the oven and let them cool on the baking sheets for about 5 minutes before transferring to a wire rack.

Notes

For a fudgy experience, chill the dough longer. Use high-quality ingredients for best flavor.

Crispy Arancini with Calabrian Chili Aioli for a Flavor Blast

As I stood in my kitchen, the aroma of simmering risotto wafting through the air, I couldn’t help but feel a sense of accomplishment. Today, I was bringing a piece of Italy home with my Crispy Arancini with Spicy Calabrian Chili Aioli. This dish not only delivers a delightful crunch but is also a beloved comfort food that transforms simple ingredients into an irresistible treat. With its creamy risotto center infused with vibrant flavors and a molten mozzarella core, each bite promises to be a moment of pure happiness. Not to mention, the zesty aioli provides an exciting kick that takes this dish over the top! Whether you’re hosting a gathering or indulging in a cozy night in, these arancini are sure to impress. Are you ready to elevate your appetizer game? Let’s dive into this delicious adventure!

Why Arancini Will Steal Your Heart?

Irresistible Crunch: These crispy arancini deliver the perfect texture, providing a satisfying crunch with each bite.
Flavor Explosion: The creamy risotto center combined with spicy Calabrian chili aioli creates a symphony of flavors that excite your palate.
Versatile Delight: Perfect as an appetizer, snack, or main dish, these arancini can be paired with a fresh green salad or a classic marinara sauce for dipping.
Easy to Make: With simple ingredients and a straightforward process, even beginner cooks can master this dish!
Crowd-Pleaser: Whether it’s a family gathering or a friendly get-together, these arancini are sure to be a hit, leaving everyone wanting more. Explore more comfort food options like Honey Chili Chicken for a memorable feast!

Arancini with Calabrian Chili Aioli Ingredients

For the Risotto

  • Arborio Rice – Key for risotto’s creamy texture, but you can swap it for Carnaroli or sushi rice if needed.
  • Vegetable Stock – Provides flavor during risotto cooking; opt for low-sodium to better control your salt levels.
  • Butter – Adds richness to the risotto; olive oil can be used as a dairy-free alternative.
  • Onion – Essential for base flavor; substitute with shallots for a milder taste.
  • Garlic – Enhances the flavor in both risotto and aioli; fresh garlic is recommended for optimal taste.
  • Tomato Paste – Adds depth of flavor and color; fresh tomatoes can also work but may change the flavor profile.
  • Parmesan Cheese – Gives that rich, nutty flavor; substitute with Pecorino for a sharper taste, or omit for a vegan option.
  • Fresh Basil – Brightens the dish; parsley can be used for a different herbal note.
  • Lemon Zest – Brightens the flavors; use lime zest for a different citrus kick.
  • Mozzarella Cheese – Provides creaminess when melted; opt for provolone for similar melting qualities.

For Breading and Frying

  • All-purpose Flour – Coating for arancini before frying; use gluten-free flour if needed.
  • Eggs – Binds the breading; while there’s no direct egg substitute, try vegan aquafaba as a binding agent.
  • Breadcrumbs – Offers a crunchy finish; use seasoned panko or gluten-free breadcrumbs if required.
  • Neutral Oil (for frying) – Essential for deep frying to achieve perfect crispiness; canola or peanut oil works well.

For the Aioli

  • Calabrian Chili Peppers – Adds spice and flavor to the aioli; other spicy chili pastes or fresh chilies can be substituted if needed.

Get ready to enjoy the delightful crunch and creamy center of these arancini with Calabrian chili aioli that your friends and family will be raving about!

Step‑by‑Step Instructions for Crispy Arancini with Calabrian Chili Aioli

Step 1: Prepare the Stock
Begin by heating low-sodium vegetable stock in a saucepan over low heat, keeping it warm but not boiling. This step is crucial for making a creamy risotto, as the warm stock helps to gradually cook the arborio rice evenly throughout the process.

Step 2: Sauté Aromatics
In a large pot over medium heat, melt 2 tablespoons of butter. Add 1 finely chopped onion and 2 minced garlic cloves, sautéing until the onion is translucent, about 4-5 minutes. The fragrant aroma will signal it’s time to toast the arborio rice, leading to a beautifully creamy texture in your arancini.

Step 3: Toast the Rice
Add 1 cup of arborio rice to the pot, stirring gently for about 2 minutes until the rice grains become slightly translucent. This toasting step enhances the nutty flavor and sets the foundation for the rich risotto, preparing it beautifully for the gradual addition of stock.

Step 4: Gradually Add Stock
Slowly pour in the warm vegetable stock, about ½ cup at a time, stirring constantly until the liquid is mostly absorbed before adding more. Continue this process for about 20-25 minutes, until the rice is al dente and creamy. The risotto should be soft yet hold its shape, a perfect base for your arancini.

Step 5: Mix in Flavorings
Once the risotto reaches a creamy consistency, remove it from the heat. Stir in ½ cup grated parmesan cheese, a handful of chopped fresh basil, and the zest of one lemon. This adds layers of flavor, making your risotto rich and aromatic, perfect for forming into the arancini.

Step 6: Chill the Risotto
Spread the risotto evenly onto a sheet pan and let it cool to room temperature. For the best results, refrigerate it for at least 1 hour. Chilling helps the risotto firm up, making it easier to shape the balls for your crispy arancini with Calabrian chili aioli.

Step 7: Shape the Arancini
Once chilled, use an ice cream scoop to portion out the risotto. Flatten each portion in your palm, add a cube of mozzarella in the center, and carefully form the risotto around the cheese, rolling it into tight, even balls. This step creates that gooey center that makes your arancini irresistible.

Step 8: Prepare for Breading
Set up a breading station with three bowls: one for all-purpose flour, one for beaten eggs, and one for seasoned breadcrumbs. Dredge each risotto ball first in flour, then dip in the egg, and finally coat with breadcrumbs. This process will ensure a deliciously crispy exterior during frying.

Step 9: Heat the Oil
In a deep pot, heat about 3 inches of neutral oil to 350°F (175°C). Use a kitchen thermometer to monitor the temperature, ensuring the oil is perfectly hot before adding the arancini. Proper oil temperature is key to achieving that coveted crunch without making the arancini soggy.

Step 10: Fry the Arancini
Carefully lower the breaded arancini into the hot oil, frying in batches to avoid overcrowding. Cook for about 4-5 minutes, turning occasionally until they are golden brown and crispy all around. Remove them with a slotted spoon and drain on paper towels to absorb excess oil.

Step 11: Serve with Aioli
While the arancini drain, prepare your Calabrian chili aioli by mixing mayonnaise with finely chopped Calabrian chili peppers and a squeeze of lemon juice. Once your arancini have cooled slightly, serve them hot alongside the flavorful dipping sauce, perfect for enchanting your guests with every spicy, crispy bite!

How to Store and Freeze Arancini

Fridge: Keep leftover arancini in an airtight container for up to 3 days. This helps maintain their flavor and texture between snacking sessions!

Freezer: For longer storage, freeze the uncooked, breaded arancini in a single layer on a baking sheet. Once frozen, transfer them to a freezer bag for up to 3 months.

Reheating: To enjoy leftover arancini, reheat them in the oven at 375°F (190°C) until warmed through and crispy, about 15 minutes. This method refreshes their crunch and keeps the creamy center intact.

Thawing: If frozen, thaw arancini in the fridge overnight before frying or baking for optimal results.

What to Serve with Crispy Arancini with Spicy Calabrian Chili Aioli

Create a delightful dining experience by pairing these crispy treats with complementary flavors and textures.

  • Fresh Green Salad: The crispness of mixed greens and a light vinaigrette refreshes the palate and adds a vibrant touch to your meal.

  • Antipasto Platter: A selection of olives, cured meats, and cheeses harmonizes with the spicy sourness of the aioli, enhancing your flavor journey.

  • Garlic Bread: This classic side, with its buttery, garlicky goodness, pairs beautifully, adding rich, comforting notes to your appetizer spread.

  • Marinara Sauce: A warm bowl of this classic dipping sauce contrasts the aioli’s heat while providing a nostalgic Italian touch that everyone loves.

  • Grilled Vegetables: Smoky, seasoned zucchini, bell peppers, or eggplant offer a satisfying texture and balanced flavors to round out your meal.

  • Lemonade or Iced Tea: The refreshing acidity of lemonade or the herbal notes of iced tea cleanse the palate, making each bite of arancini delightful.

  • Chocolate Cannoli: Indulge in a sweet finish! The creamy filling balanced with crispy shells offers a delicious contrast to the savory arancini.

  • Prosecco: This sparkling wine’s crisp bubbles thrive alongside fried foods, enhancing your dining experience with a celebratory feel.

Arancini with Calabrian Chili Aioli Variations

Feel free to get creative and customize these arancini to your heart’s content, bringing your unique twist to this beloved dish!

  • Cheese Swap: Replace mozzarella with goat cheese for a tangy, creamy surprise inside. This adds a delightful flavor contrast, making each bite even more interesting.

  • Herb Infusion: Mix in thyme or saffron into the risotto for a fresh aromatic profile. These herbs elevate the dish, giving it a mesmerizing scent and flavor that transports you to Italy.

  • Spicy Kick: For an extra punch, include jalapeños or serrano peppers in the risotto. Their heat complements the creamy center and spicy aioli wonderfully.

  • Vegan Delight: Omit cheese and use nutritional yeast for a vegan-friendly option. The nutritional yeast offers a cheesy flavor while keeping the arancini light and plant-based.

  • Marinara Option: Serve with a side of classic marinara sauce for a comforting and traditional dipping experience. This pairs beautifully with the spiciness of the aioli and is always a crowd favorite.

  • Grain Alternative: Swap out arborio rice with quinoa or barley for a nutty twist in texture. This boosts the nutritional profile, giving the dish a wholesome aspect that is also satisfying.

  • Creamy Aioli: Add a touch of avocado to the aioli for a creamy, luscious version. The avocado brings an extra layer of richness that complements the spicy flavor perfectly.

  • Crispy Topping: For an added crunch, sprinkle crispy onions on top after frying. This unexpected crunch makes for a delightful textural contrast in each bite.

And if you’re looking for more delicious ideas, try pairing these with Honey Chili Chicken for a feast full of flavor or explore some other comfort food recipes like Tropical Chicken Sauce that can complement your spread beautifully!

Make Ahead Options

These Crispy Arancini with Calabrian Chili Aioli are perfect for busy weeknights! You can prepare the entire risotto mixture up to 24 hours in advance. Simply cook the risotto, let it cool, and refrigerate it tightly wrapped. The formed arancini balls can also be breaded and kept in the refrigerator for up to 3 days. To maintain their quality and crispiness, freeze the arancini on a baking sheet before transferring them to an airtight container. When you’re ready to enjoy, simply fry them straight from the fridge or frozen—no need to thaw! This way, you’re just minutes away from a delightful, restaurant-quality treat at home!

Expert Tips for Arancini with Calabrian Chili Aioli

  • Oil Temperature: Keep the oil at 350°F (175°C) to ensure crispy, golden brown arancini. Too cool, and they’ll absorb oil, becoming soggy.

  • Chill the Risotto: After cooking, chill the risotto for at least an hour. This helps it firm up, making it easier to shape into balls without falling apart.

  • Avoid Overcrowding: Fry in batches to prevent overcrowding the pot, which can lower the oil temperature and impact the crispiness of your arancini.

  • Explore Variations: Don’t hesitate to mix in different cheeses or herbs in the risotto for unique flavors. You’re in control of your arancini with Calabrian chili aioli!

  • Breadcrumbs Matter: Use seasoned panko for a crunchier texture. If gluten-free, opt for gluten-free breadcrumbs for a similar result.

Arancini with Calabrian Chili Aioli Recipe FAQs

What type of rice should I use for arancini?
I recommend using Arborio rice, as its high starch content creates the creamy texture essential for risotto. However, if you can’t find Arborio, Carnaroli or even sushi rice can serve as acceptable substitutes.

How should I store leftover arancini?
After allowing your arancini to cool, place any leftovers in an airtight container in the fridge. They’ll stay tasty for up to 3 days! Just remember to reheat them in the oven at 375°F (190°C) to regain that delightful crunch.

Can I freeze arancini?
Absolutely! To freeze your uncooked, breaded arancini, place them in a single layer on a baking sheet and freeze until solid. Then, transfer them to a freezer-safe bag or container. They can last up to 3 months in the freezer. When you’re ready to fry, thaw them overnight in the fridge before cooking.

What if my risotto won’t hold its shape when forming arancini?
If your risotto is too loose, it’s likely that it wasn’t cooked long enough or didn’t chill sufficiently. Ensure you let your risotto cool completely for at least an hour. If it’s still too soft, you can mix in a little more grated cheese or breadcrumbs to help firm it up.

Are arancini suitable for someone with gluten intolerance?
Yes, they can be! Simply swap the all-purpose flour for a gluten-free flour alternative, and use gluten-free breadcrumbs for the breading. This way, everyone can enjoy these delicious arancini with Calabrian chili aioli without worry!

Arancini with Calabrian Chili Aioli

Crispy Arancini with Calabrian Chili Aioli for a Flavor Blast

Enjoy Crispy Arancini with Calabrian Chili Aioli, a delicious comfort food that will elevate your appetizer game.
Prep Time 30 minutes
Cook Time 30 minutes
Chilling Time 1 hour
Total Time 2 hours
Servings: 4 arancini
Course: Dinner
Cuisine: Italian
Calories: 300

Ingredients
  

For the Risotto
  • 1 cup Arborio Rice Can substitute with Carnaroli or sushi rice
  • 4 cups Vegetable Stock Use low-sodium for better salt control
  • 2 tablespoons Butter Olive oil can be used as dairy-free alternative
  • 1 Onion Can substitute with shallots
  • 2 cloves Garlic Use fresh garlic for optimal taste
  • 2 tablespoons Tomato Paste Fresh tomatoes can be used but may alter flavor
  • ½ cup Parmesan Cheese Substitute with Pecorino for a sharper taste or omit for vegan
  • 1 tablespoon Fresh Basil Can use parsley for a different herbal note
  • 1 teaspoon Lemon Zest Use lime zest for an alternative citrus kick
  • 1 cup Mozzarella Cheese Opt for provolone for similar melting qualities
For Breading and Frying
  • 1 cup All-purpose Flour Use gluten-free flour if needed
  • 2 Eggs Use vegan aquafaba as a binding agent if needed
  • 1 cup Breadcrumbs Seasoned panko or gluten-free breadcrumbs if required
  • 3 cups Neutral Oil Canola or peanut oil works well for frying
For the Aioli
  • 2 tablespoons Calabrian Chili Peppers Other spicy chili pastes or fresh chilies can be substituted

Equipment

  • Saucepan
  • Large pot
  • Ice Cream Scoop
  • Deep Pot
  • Kitchen Thermometer

Method
 

Instructions
  1. Prepare the Stock: Heat low-sodium vegetable stock in a saucepan over low heat, keeping it warm but not boiling.
  2. Sauté Aromatics: In a large pot, melt the butter over medium heat. Add finely chopped onion and minced garlic, sautéing until transparent.
  3. Toast the Rice: Add arborio rice, stirring gently for about 2 minutes until slightly translucent.
  4. Gradually Add Stock: Pour warm vegetable stock gradually, stirring until mostly absorbed, for about 20-25 minutes.
  5. Mix in Flavorings: Stir in grated parmesan cheese, fresh basil, and lemon zest into the risotto.
  6. Chill the Risotto: Spread risotto on a sheet pan to cool for at least 1 hour.
  7. Shape the Arancini: Use an ice cream scoop to portion risotto. Flatten, add mozzarella, and form into balls.
  8. Prepare for Breading: Set up flour, egg, and breadcrumbs. Dredge each ball in flour, egg, and breadcrumbs.
  9. Heat the Oil: Heat neutral oil in a deep pot to 350°F (175°C).
  10. Fry the Arancini: Fry the breaded arancini in batches until golden brown and crispy.
  11. Serve with Aioli: Mix mayonnaise with chopped Calabrian chili peppers and lemon juice, serve alongside arancini.

Notes

Chill the risotto for at least an hour to make it easier to shape into balls. Fry in batches to maintain oil temperature and crispiness.