Strawberry Shortcake Dirty Soda: A Refreshing Summer Treat

On a sweltering summer afternoon, when the sun blazes and ice cream trucks play their familiar jingle, I find myself longing for something indulgent yet refreshing. Enter the Strawberry Shortcake Dirty Soda—a drink that beautifully combines creamy, fizzy, and sweet elements, reminiscent of childhood treats with a grown-up twist. With just five minutes of prep time, this delightful concoction offers a quick escape from the mundane, transforming your hot day into a vibrant flavor adventure. Plus, it’s easily customizable for any dietary preference, whether you’re looking for a dairy-free option or simply want to experiment with different flavors. Are you ready to make sipping this nostalgic wonder a cherished summer ritual?

Why is Strawberry Shortcake Dirty Soda a Must-Try?

Indulgent and refreshing, this drink is like summer in a glass, combining creamy textures with fizzy delight. Quick preparation means you can whip it up in just five minutes, making it perfect for unexpected guests or a last-minute treat. Customizable to your taste, you can easily adapt it for dairy-free diets or try out different flavored syrups, like raspberry for a fruity twist. Nostalgic flavors take you back to childhood ice cream sodas, while its vibrant presentation makes it a showstopper at any gathering. For an extra special experience, consider pairing it with a delightful dessert like Strawberry Cheesecake Dump to elevate your summer entertaining!

Strawberry Shortcake Dirty Soda Ingredients

For the Drink

  • Cream Soda – serves as the sweet, fizzy base for this nostalgic drink; substitute with vanilla or lemon-lime soda for a twist.
  • Strawberry Syrup – provides the signature fruity flavor; making it homemade enhances the taste and freshness.
  • Sweet Cream – adds a rich creaminess; for a lighter option, half-and-half works well, or choose dairy-free creamer for a customizable experience.
  • Vanilla Extract – amplifies the flavor profile with a warm vanilla note; a crucial ingredient in this Strawberry Shortcake Dirty Soda.
  • Ice Cubes – keeps your drink refreshingly cold; opt for clear ice for a beautiful presentation.

For the Toppings

  • Whipped Cream – optional but highly recommended for that indulgent touch; it adds a creamy finish to your drink.
  • Sliced Strawberries – a delightful garnish that enhances both flavor and aesthetics; fresh is best for a burst of fruity goodness.

Step‑by‑Step Instructions for Strawberry Shortcake Dirty Soda

Step 1: Prepare the Ice
Start by filling a tall glass with clear ice cubes, almost to the top. The ice will keep the drink refreshingly cold and visually appealing as you build your Strawberry Shortcake Dirty Soda. Using clear ice not only enhances presentation but also ensures that your concoction stays chilled for longer.

Step 2: Add Strawberry Syrup
Next, carefully pour strawberry syrup over the ice, allowing it to settle at the bottom of the glass. This initial layer infuses the drink with a vibrant, fruity flavor and a gorgeous red hue. Take your time to ensure the syrup flows smoothly, creating a delightful visual effect as it mingles with the ice.

Step 3: Drizzle Vanilla Extract
After the syrup, drizzle in some vanilla extract over the strawberry layer. This enhances the overall flavor of your Strawberry Shortcake Dirty Soda, introducing a lovely vanilla note that harmonizes beautifully with the fruitiness. Watch as it swirls gently through the syrup, adding to the drink’s delightful aesthetic.

Step 4: Incorporate Sweet Cream
Now, slowly add sweet cream to the mix, allowing it to swirl gently as it combines with the other ingredients. The creaminess balances the drink’s flavors perfectly, making it reminiscent of ice cream soda delights. Aim for a smooth blend, appreciating how the layers create a stunning visual through the glass.

Step 5: Pour the Cream Soda
With the layers prepared, carefully pour in cream soda over the top to fill the glass. As the soda flows, you’ll hear that satisfying fizz, creating a bubbly effervescence that elevates the experience. The cream soda gives the drink its signature sweetness and completes the refreshing profile of your Strawberry Shortcake Dirty Soda.

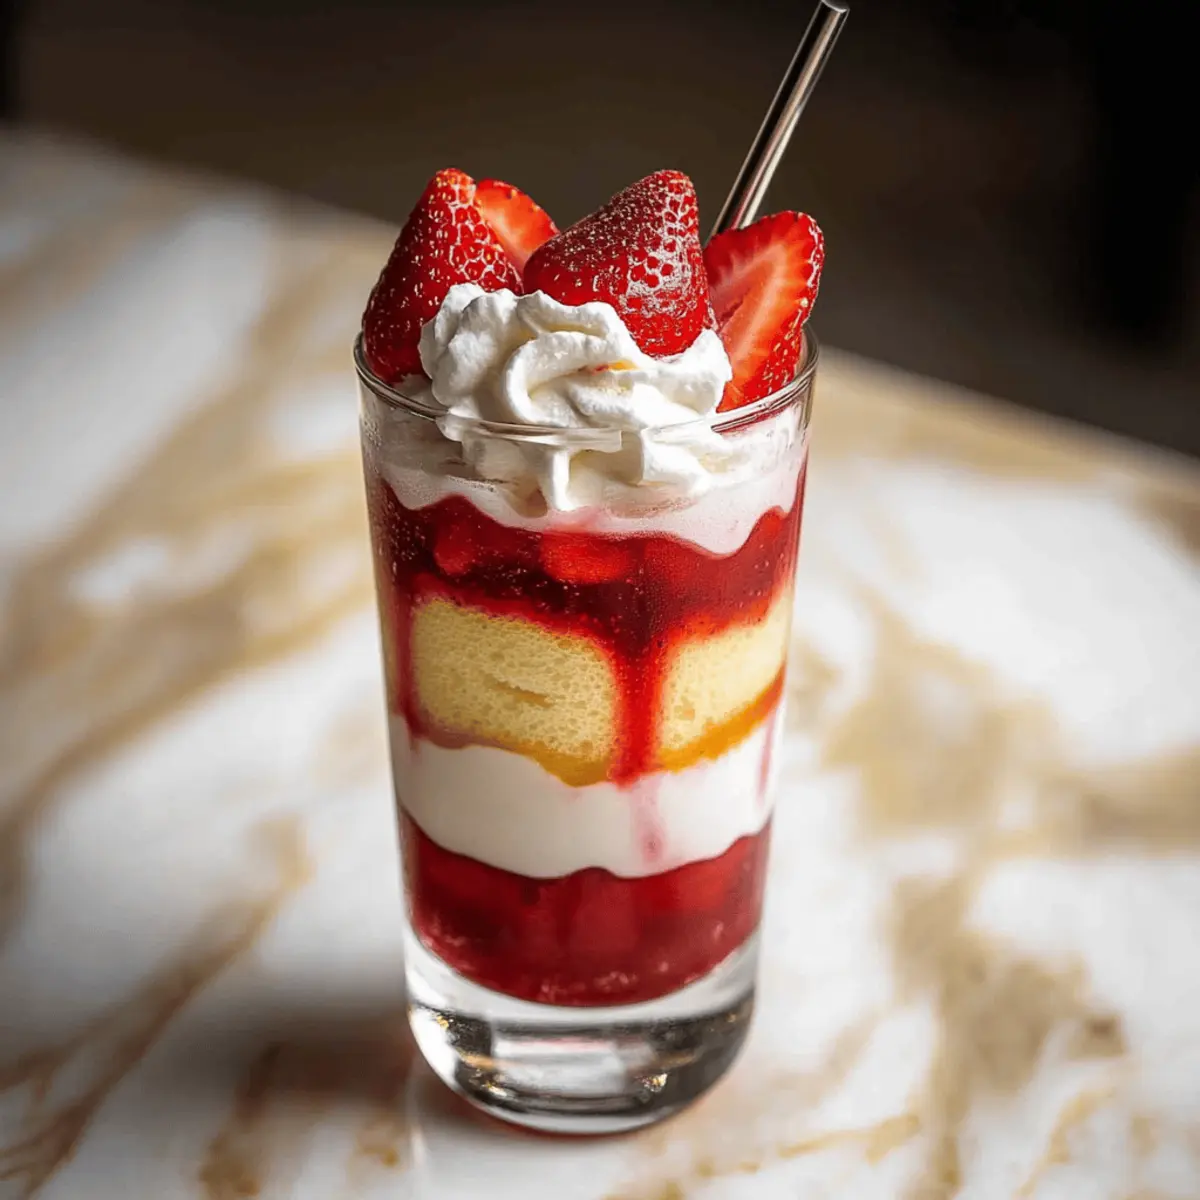
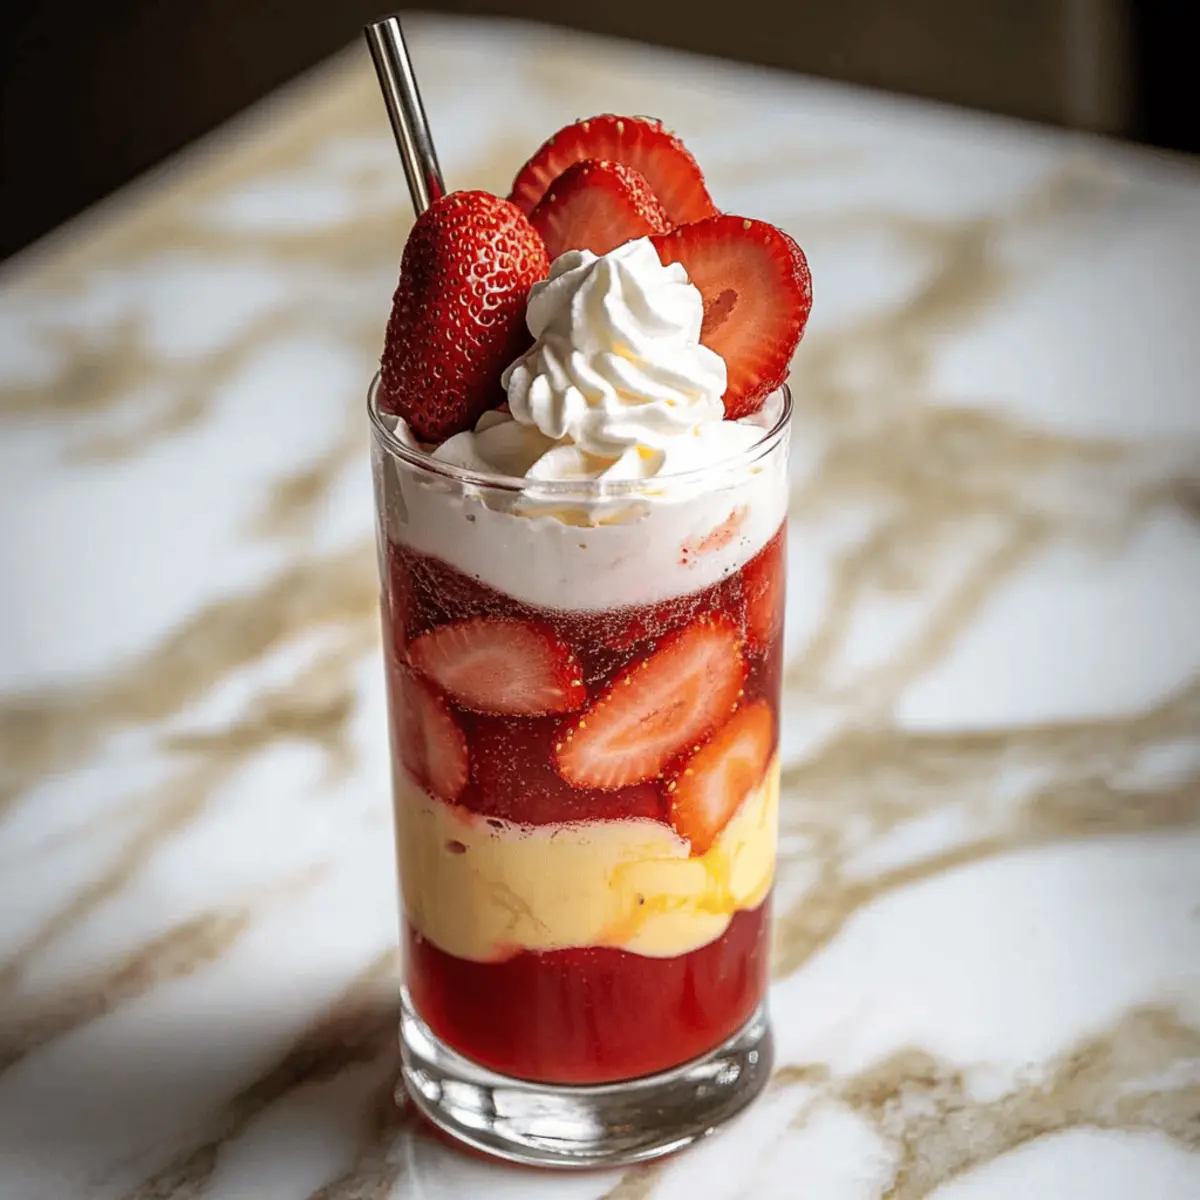
Step 6: Garnish and Serve
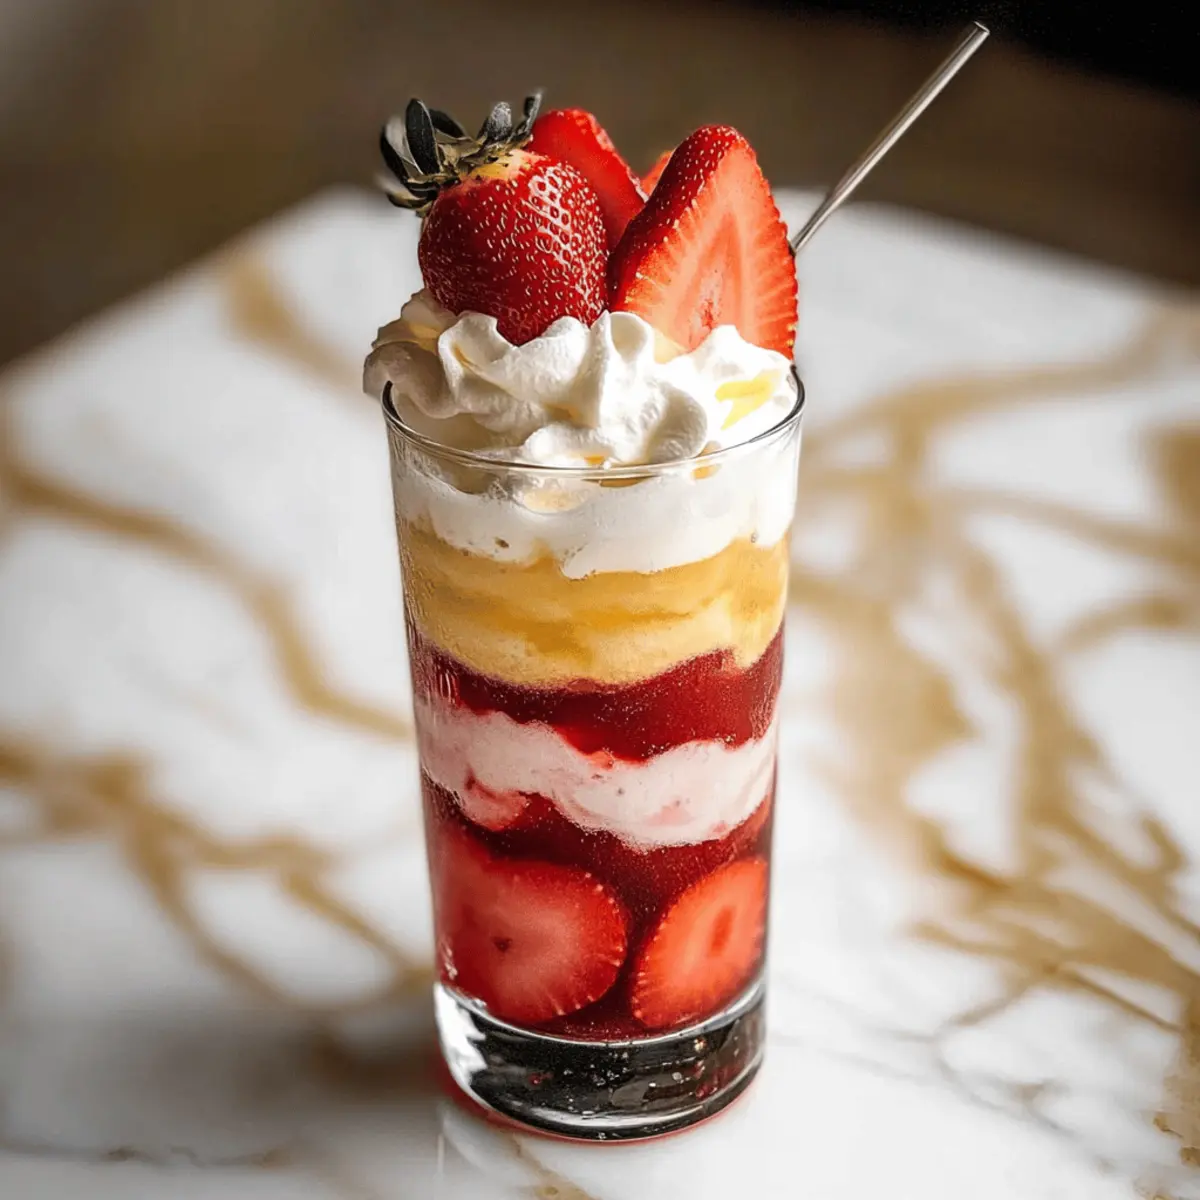
Finally, finish your creation by topping it with a generous dollop of whipped cream and a few sliced strawberries for a burst of color and flavor. This indulgent finishing touch not only enhances presentation but also adds a rich, creamy element that makes each sip a delight. Serve immediately with a straw, and enjoy the magic of your Strawberry Shortcake Dirty Soda!

Strawberry Shortcake Dirty Soda Variations

Feel free to get creative and personalize your Strawberry Shortcake Dirty Soda for a delightful twist!

  • Dairy-Free: Substitute sweet cream with oat milk creamer or coconut cream for a deliciously creamy, non-dairy option. This swap keeps all the indulgence while making it suitable for dairy sensitivities.

  • Different Syrups: Experiment with flavored syrups such as raspberry or peach to give your drink a unique fruity profile. Each flavor brings its own charm, making every sip a delightful surprise.

  • Herbal Infusion: Add a splash of mint syrup for a refreshing herbaceous note that elevates the drink. This twist is especially delightful on hot summer days, providing a cool finish.

  • Fruity Fusion: For an extra fruity kick, toss in a few fresh or frozen berries along with the layer of syrup. They’ll add texture and burst of flavors that create a refreshing experience.

  • Sparkling Water: If you’re looking to lighten up the drink, replace cream soda with sparkling water for a bubbly, refreshing alternative. Sweeten with a touch of honey or agave if desired for a lighter treat.

  • Seasonal Specials: Top your drink with a sprinkle of cinnamon or nutmeg during the fall for a seasonal flavor twist. This slight change transforms your tropical delight into a comforting autumn refreshment.

  • Add Some Heat: If you’re adventurous, consider adding a pinch of cayenne pepper or chili flakes to the layered syrup for a gentle heat that balances the sweetness, creating an exciting contrast.

For a delightful dessert pairing, enjoy it alongside a scrumptious Strawberry Cheesecake Dump or explore other fun ideas as you make this strawberry shortcake-inspired drink your own!

Expert Tips for Strawberry Shortcake Dirty Soda

  • Serve Fresh: Always prepare the Strawberry Shortcake Dirty Soda just before serving to keep the soda’s fizz and creaminess intact.

  • Customize Flavors: Don’t hesitate to experiment with different flavored syrups like raspberry or peach for a fun twist on this classic drink.

  • Layering Technique: Pour ingredients slowly to create visually appealing layers in your drink, enhancing both presentation and texture with each sip.

  • Keep It Cold: Use clear ice to not only maintain the chill but also showcase the beautiful layers of your Strawberry Shortcake Dirty Soda.

  • Make Ahead: Prep your strawberry syrup in advance. It can be stored in the fridge for up to 2 weeks, ensuring convenience for your delightful drink!

How to Store and Freeze Strawberry Shortcake Dirty Soda

Fridge: Store any leftover strawberry syrup in an airtight container for up to 1-2 weeks, making it easy to whip up a fresh glass of Strawberry Shortcake Dirty Soda whenever the craving strikes.

Freezer: Freeze any unused syrup in ice cube trays for up to 3 months. Simply pop a cube into a glass when you’re ready for another fizzy treat!

Preparation Tips: Since the drink is best enjoyed fresh, consider preparing the syrup ahead of time and combining it with the rest of the ingredients just before serving to maintain that delightful fizz.

Reheating: There’s no need to reheat any components, as this refreshing drink is best when served cold. Enjoy it as soon as it’s made for the ultimate experience!

Make Ahead Options

These Strawberry Shortcake Dirty Soda make-ahead tips are perfect for busy home cooks! You can prepare the strawberry syrup up to 2 weeks in advance and store it in the refrigerator (this enhances the flavor!). Additionally, you may mix the sweet cream (or your preferred dairy-free alternative) and keep it sealed in the fridge for up to 3 days. When ready to serve, simply fill your glass with clear ice, layer the syrup, add the vanilla extract and sweet cream, then pour in the cream soda for that fizzy effect. To maintain the refreshing quality, always add the soda just before serving, ensuring a delightful drink that’s just as delicious as when it was freshly made!

What to Serve with Strawberry Shortcake Dirty Soda

Imagine a playful gathering under the summer sun, where laughter dances in the air alongside delicious bites that complement your vibrant drink.

  • Fresh Fruit Salad: A colorful mix of seasonal fruits that echoes the flavors of strawberries while offering a refreshing, juicy contrast.
  • Mini Cheesecakes: Their creamy richness provides a decadent pairing, balancing the drink’s sweetness for a satisfying treat that invites seconds.
  • Savory Sliders: Bite-sized burgers add a savory dimension, making each sip of the Strawberry Shortcake Dirty Soda even sweeter by comparison.
  • Pineapple Skewers: Grilled or fresh, these skewers bring a tropical twist and bright, tangy notes that enhance the overall summery vibe.
  • Chocolate Chip Cookies: Warm, gooey cookies create a nostalgic pairing that’s hard to resist, enhancing the comforting childhood memories of your drink.
  • Lemonade or Iced Tea: Crisp, chilled beverages add a refreshing tang that contrasts perfectly with the creamy sweetness of your Strawberry Shortcake Dirty Soda.
  • No-Bake Strawberries and Cream Tart: This dessert harmonizes beautifully with the drink, emphasizing fresh strawberries in a delightful way that sings summer.
  • Sparkling Water: A fizzy companion that clears the palate between sips, mirroring the effervescence of your drink while keeping things light and refreshing.

Strawberry Shortcake Dirty Soda Recipe FAQs

What type of cream soda should I use for the best flavor?
Absolutely! For the best flavor, opt for a classic cream soda, as it provides the perfect balance of sweetness and carbonation. If you want to switch it up, vanilla soda or lemon-lime soda can be fun alternatives, but keep in mind they’ll change the overall flavor profile. Experimenting is part of the fun!

How should I store leftover strawberry syrup?
Great question! Store any leftover strawberry syrup in an airtight container in the fridge for up to 1-2 weeks. This makes it super convenient for when those bubbly cravings hit! If you’re not using it right away, freeze the syrup in ice cube trays for up to 3 months. Just pop a cube into your glass whenever you’re ready for another refreshing Strawberry Shortcake Dirty Soda!

Can I make a dairy-free version of this drink?
Very much so! To create a dairy-free version of your Strawberry Shortcake Dirty Soda, simply substitute the sweet cream with a plant-based alternative. Oat milk creamer or coconut cream work beautifully and maintain the creamy texture. You won’t miss out on that rich and indulgent sensation!

What do I do if my soda loses its fizz?
If your soda loses its fizz, fear not! The key to maintaining that refreshing effervescence is to add the cream soda just before serving. If you’ve already mixed everything and it’s gone flat, try pouring a little more soda on top; this may bring back some sparkle! Always serve it ASAP for the best experience.

Can I use flavored syrups other than strawberry?
The more the merrier! You can absolutely experiment with different flavored syrups like raspberry or peach. These alternatives will give your drink a unique twist and keep things exciting. Just remember that while each fruit syrup offers a different flavor, they should still complement the creamy base of the soda for a delightful result.

Is this drink suitable for pets?
It’s best to keep this delicious Strawberry Shortcake Dirty Soda away from your furry friends. The sugar content and cream can be harmful to pets, especially dogs. If you want to treat your pets with something special, consider making a safe version of ice cubes with pet-friendly fruits like watermelon and plain yogurt, keeping them refreshed in their way!

Strawberry Shortcake Dirty Soda

Strawberry Shortcake Dirty Soda: A Refreshing Summer Treat

Enjoy the nostalgic blend of creamy, fizzy, and sweet elements with Strawberry Shortcake Dirty Soda, a perfect summer treat.
Prep Time 5 minutes
Total Time 5 minutes
Servings: 1 drink
Course: Drinks
Cuisine: American
Calories: 200

Ingredients
  

For the Drink
  • 1 cup Cream Soda or substitute with vanilla or lemon-lime soda
  • 2 tablespoons Strawberry Syrup homemade enhances flavor
  • 1/4 cup Sweet Cream or use half-and-half or dairy-free creamer
  • 1 teaspoon Vanilla Extract amplifies flavor profile
  • 3-4 Ice Cubes clear ice recommended
For the Toppings
  • 1 dollop Whipped Cream optional but recommended
  • 2-3 slices Sliced Strawberries fresh is best for garnish

Equipment

  • tall glass

Method
 

Step-by-Step Instructions
  1. Fill a tall glass with clear ice cubes, almost to the top.
  2. Pour strawberry syrup over the ice, allowing it to settle at the bottom.
  3. Drizzle in some vanilla extract over the strawberry layer.
  4. Slowly add sweet cream to the mix, allowing it to swirl gently.
  5. Carefully pour in cream soda over the top to fill the glass.
  6. Top with whipped cream and sliced strawberries before serving.

Notes

Best made fresh to maintain fizz and creaminess; store leftover syrup in the fridge for up to 1-2 weeks.

Festive Halloween Layer Cake to Delight Everyone

As the golden leaves begin to fall and the air turns crisp, a delightful challenge awaits in the kitchen: creating a show-stopping Halloween Layer Cake! This vibrant Hocus Pocus Halloween Layer Cake brings that essential festive flair to your celebrations, boasting colorful layers that are as thrilling as they are delicious. With just a few simple ingredients, this cake is not only easy to whip up but also a guaranteed crowd-pleaser, making it perfect for parties or cozy family movie nights. The best part? It’s a wonderful opportunity to get the whole family involved, turning baking into a fun bonding experience. Ready to transform your kitchen into a magical baking haven this Halloween? Let’s dive into the spellbinding process!

Why Is This Halloween Cake a Must-Make?

Irresistible Festivity: This Halloween Layer Cake is a vibrant centerpiece that captures the spirit of the season, making your gatherings come alive with color and fun.

Family Fun: Involve your loved ones in the baking magic! Kids will adore the colorful layers and decorating process, making it a memorable activity together.

Easy to Customize: Whether you prefer classic vanilla, chocolate, or something unique, you can easily switch up the cake flavors to suit everyone’s taste.

Visual Appeal: The striking green, purple, and orange frosting layers topped with festive Halloween sprinkles will mesmerize your guests, ensuring it’s the star of the dessert table.

Quick Preparation: With minimal ingredients and straightforward steps, you’ll spend less time baking and more time enjoying the festivities. Pair it with delightful snacks or a batch of Halloween cookies for an unforgettable spread!

Halloween Layer Cake Ingredients

For the Cake
Cake Mix – The foundation of your Halloween Layer Cake, easily swapped for homemade batter for a personal touch.
Clarified Butter – Brings incredible richness and moisture; consider using unsalted butter to manage salt levels.

For the Frosting
Powdered Sugar – Essential for sweetness and structure; you can use confectioners’ sugar for a glossier finish.
Cream (Heavy Whipping Cream) – Provides smooth aeration for the frosting; milk can be an alternative for a lighter texture.

For the Decorations
Gel Food Colorings (Green, Purple, Orange) – These vibrant colors bring your cake to life; gel colorings deliver more intense hues than liquid.
Halloween Sprinkles – Fun and festive, these sprinkles enhance your cake’s appearance; feel free to mix in any themed sprinkles you find!

Step‑by‑Step Instructions for Halloween Layer Cake

Step 1: Prepare the Oven and Pans
Preheat your oven to 350°F (175°C) while you prepare your cake pans. Grease three round cake pans with clarified butter, then line the bottoms with parchment paper to ensure easy removal after baking. This will help your Halloween Layer Cake come out perfectly and keep its lovely shape.

Step 2: Mix the Cake Batter
In a large mixing bowl, prepare your cake mix according to the package instructions. Once blended, divide the batter evenly into the three prepared cake pans. Use a spatula to smooth the tops, ensuring even layers that will bake beautifully.

Step 3: Bake the Cake Layers
Place the pans in the preheated oven, baking for about 25 to 35 minutes. The cakes are done when a toothpick inserted into the center comes out clean. Keep an eye on them after 25 minutes to prevent overbaking. Once baked, let the layers cool in the pans for 10 minutes before transferring them to wire racks.

Step 4: Make the Frosting
While your cake layers cool, prepare the frosting. In an electric mixer, cream together softened butter until light and fluffy, then gradually add powdered sugar. Pour in heavy whipping cream as needed to achieve a smooth, spreadable consistency for your Halloween Layer Cake.

Step 5: Color the Frosting
Divide the frosting into four separate bowls. Leave one portion dark green for the cake’s outer layer, then dye the remaining frosting batches with gel food colorings: one green, one purple, and one orange. Mix until the colors are vibrant and well incorporated.

Step 6: Assemble the Cake Layers
Start assembling your Halloween Layer Cake by placing the first cooled cake layer onto a serving plate. Pipe rings of the colored frosting on top, alternating between green, purple, and orange. Repeat this process for the second and third layers, allowing the colorful icing to create a delightful visual effect.

Step 7: Frost the Cake
Once all layers are stacked, cover the entire cake with the reserved dark green frosting. Use an offset spatula to create a smooth finish. This dark green layer will beautifully contrast with the vibrant colors and enhances the Halloween theme.

Step 8: Add Decorations
To enhance the festive flair, generously apply Halloween sprinkles to the top and sides of the frosted cake. You can press them lightly into the frosting to ensure they stick. The colorful sprinkles will add that magical touch to your Halloween Layer Cake.

Step 9: Final Touches
For an extra spooky effect, pipe decorative dollops on the top using any remaining frosting, and if desired, add piping gel for “oozy” drips around the edges. Chill the cake for about 30 minutes before serving to firm up the frosting and make cutting easier.

What to Serve with Halloween Layer Cake

As your party buzzes with excitement, presenting the vibrant Halloween Layer Cake sets the stage for a magical feast of flavors and textures.

  • Spooky Punch: A refreshing, fruit-flavored drink can intrigue your guests while balancing the sweetness of the cake. Consider adding floating gummy worms for added fun!

  • Candy Corn Parfaits: Layered with yogurt and topped with candy corn, these colorful treats echo the cake’s festive theme, creating a delightful visual and flavor contrast.

  • Pumpkin Spice Cookies: The warm spices of pumpkin cookies provide a cozy, autumnal touch, perfectly complementing the cake’s rich sweetness.

  • Sweet Potato Fries: Their crunchy texture and slightly sweet flavor offer a contrast to the softness of the cake, making a delightful savory-sweet combination.

  • Cheese Board: A selection of cheeses, nuts, and dried fruits can elevate the celebration, creating a gourmet touch and catering to savory cravings in between sweet bites.

  • Caramel Popcorn: This crunchy, buttery treat adds a whimsical note to your dessert table, echoing the playful essence of Halloween while providing a satisfying texture.

  • Cider Mill Float: A scoop of vanilla ice cream topped with warm apple cider offers a comforting treat that pairs beautifully with the cake, enhancing the festive vibe.

  • Chocolate Dipped Pretzels: Their salty crunch meets sweet chocolate, offering a delightful snack alongside the Halloween Layer Cake, creating a perfect balance of flavors.

Expert Tips for Halloween Layer Cake

  • Frosting Perfection: Ensure your butter is softened before creaming; this creates a smooth frosting consistency for your Halloween Layer Cake.

  • Color Control: Start with small amounts of gel food coloring to achieve desired shades. You can always add more if needed!

  • Layer Cooling: Allow each cake layer to cool completely before frosting. This prevents the frosting from melting, keeping your layers intact.

  • Consistent Baking: Rotate the cake pans halfway through baking to promote even cooking, especially if your oven has hot spots.

  • Storage Advice: If you’re not serving the cake immediately, store it covered in the fridge for up to 3 days to keep it fresh and delicious.

Storage Tips for Halloween Layer Cake

  • Room Temperature: Store the Halloween Layer Cake at room temperature for up to 2 hours, covered with a cake dome or a loose plastic wrap to prevent drying out.

  • Fridge: Keep the frosted cake in the fridge for up to 3 days, ensuring it’s covered to maintain moisture and prevent odors from mingling.

  • Freezer: If you wish to save some cake for later, unfrosted cake layers can be frozen for up to 2 months. Wrap each layer tightly in plastic wrap, then in aluminum foil to avoid freezer burn.

  • Reheating: For the best texture when serving leftovers, allow the slice to come to room temperature before enjoying, or gently warm in the microwave for about 10-15 seconds.

Make Ahead Options

These Halloween Layer Cake preparations are perfect for busy home cooks looking to save time! You can prepare the cake layers up to 24 hours in advance by baking them, allowing them to cool completely, and then storing them tightly wrapped in the refrigerator. The frosting can also be made ahead and stored in an airtight container in the fridge for up to 3 days; just give it a good stir before using to restore its creamy texture. When you’re ready to assemble, simply layer the cakes with chilled frosting and finish decorating for your spooktacular event. This way, you’ll have more time to enjoy the festivities while still serving an impressive treat that’s just as delicious as when freshly made!

Halloween Layer Cake Variations

Feel free to let your imagination run wild with these delightful twists on the classic Halloween Layer Cake!

  • Flavor Swap: Try using chocolate or red velvet cake mix for a rich, decadent taste that complements the festive colors beautifully. Each flavor adds its own unique magic to the party!

  • Custard Center: Replace the frosting filling between the layers with pastry cream or chocolate pudding. This creates a creamy surprise that tantalizes every bite, making it an even more exciting dessert choice.

  • Gluten-Free: Use a gluten-free cake mix to make this festive treat accessible for everyone. Your gluten-sensitive friends will love you for it, and the cake will still be just as vibrant and delicious!

  • Fruit Filling: Incorporate fresh fruit like strawberries or raspberries between your layers for a fresh burst of flavor. This twist not only enhances the taste but also adds a pop of color that complements the Halloween theme.

  • Dairy-Free: For a dairy-free option, swap out the butter and cream with plant-based alternatives. Coconut cream makes for a fabulous frosting that is both lush and indulgent.

  • Nutty Crunch: Add chopped nuts like walnuts or pecans to the batter for a delightful crunch. This texture contrast elevates the cake and makes every slice an adventure.

  • Spiced Sensation: Incorporate warming spices like cinnamon or pumpkin spice into the batter for a seasonal twist. It’s a perfect way to infuse the cozy flavor of fall into your Halloween festivities!

  • Peppermint Twist: For a minty twist, choose peppermint extract in your frosting. This adds a refreshing twist to each bite, creating a festive dessert that surprises and delights!

Experimenting with these variations will not only elevate your cake but also create lasting memories with every bite! If you’re looking for more inspiration, check out this Nutty Vanilla Cake or perhaps a cheerful Sky Jelly Cake. Let your creativity shine!

Halloween Layer Cake Recipe FAQs

How do I choose the best cake mix for my Halloween Layer Cake?
Absolutely! For the best results, choose a cake mix that has good reviews for flavor and texture. A classic vanilla or chocolate flavor pairs wonderfully with vibrant frosting colors. If you prefer from-scratch, I often recommend using high-quality flour and fresh baking powder to boost flavor and structure.

What is the best way to store my Halloween Layer Cake?
After you’ve enjoyed your delicious creation, cover the cake gently and store it in the refrigerator for up to 3 days. This will help keep the frosting fresh and prevent it from drying out. If you need to store it longer, unfrosted layers can be frozen for up to 2 months. Just wrap each layer tightly in plastic wrap, followed by aluminum foil.

Can I freeze the Halloween Layer Cake? If so, how?
Yes, you can absolutely freeze the unfrosted cake layers! To do this, once your baked layers have cooled completely, wrap each one tightly in plastic wrap to prevent freezer burn, then place them in a freezer-safe container. They’ll stay fresh for about 2 months. When you’re ready to enjoy them, simply let them thaw in the refrigerator overnight, then frost as desired.

What if my frosting turns out too thick or too runny?
Very common! If your frosting is too thick, you can blend in a little more heavy cream, one tablespoon at a time, until you reach the desired consistency. Conversely, if it’s too runny, gradually add powdered sugar until it thickens up. Remember to beat it on high speed for about 2 minutes for fluffy results!

Are there any dietary considerations I should keep in mind?
Absolutely! Be mindful of any allergies to dairy or gluten. If you’re making the cake for someone with dietary restrictions, you can find gluten-free cake mixes and dairy-free butter for frosting. Always double-check labels to ensure safety. If sharing, let your guests know the ingredients for peace of mind!

Halloween Layer Cake

Festive Halloween Layer Cake to Delight Everyone

Create a show-stopping Halloween Layer Cake that delights everyone with colorful layers and festive flair.
Prep Time 30 minutes
Cook Time 35 minutes
Cooling Time 10 minutes
Total Time 1 hour 15 minutes
Servings: 12 slices
Course: Dessert
Cuisine: American
Calories: 320

Ingredients
  

For the Cake
  • 1 box Cake Mix can substitute with homemade batter
  • 1/2 cup Clarified Butter or unsalted butter
For the Frosting
  • 4 cups Powdered Sugar or confectioners' sugar
  • 1 cup Cream (Heavy Whipping Cream) milk can be an alternative
For the Decorations
  • 3 tsp Gel Food Colorings (Green, Purple, Orange)
  • 1 cup Halloween Sprinkles or themed sprinkles

Equipment

  • mixing bowl
  • electric mixer
  • spatula
  • cake pans
  • offset spatula

Method
 

Step-by-Step Instructions
  1. Preheat your oven to 350°F (175°C) and prepare three round cake pans by greasing them with clarified butter and lining with parchment paper.
  2. In a large bowl, prepare the cake mix according to the package instructions. Divide the batter evenly into the three cake pans and smooth the tops.
  3. Bake for 25 to 35 minutes, or until a toothpick comes out clean. Cool in the pans for 10 minutes before transferring to wire racks.
  4. Cream softened butter until fluffy, then gradually add powdered sugar. Pour in cream as needed to achieve a smooth frosting consistency.
  5. Divide frosting into four bowls. Leave one portion dark green and dye the others with gel colorings until vibrant.
  6. Assemble the cake by placing the first layer on a plate, piping rings of colored frosting on top, alternating colors for the second and third layers.
  7. Cover the entire cake with the dark green frosting and smooth with an offset spatula.
  8. Apply Halloween sprinkles generously on the cake's top and sides.
  9. Pipe decorative dollops on top and chill the cake for about 30 minutes before serving.

Notes

Store covered at room temperature for up to 2 hours, in the fridge for up to 3 days, or freeze unfrosted layers for up to 2 months.

High-Protein Cottage Cheese Veggie Bake That Delights Your Tastebuds

There’s something truly magical about the aroma of a hearty bake drifting through the kitchen—the anticipation building with every minute. This High-Protein Cottage Cheese Veggie Bake not only fills your space with comforting scents but also nourishes your body with its blend of vibrant vegetables and creamy cottage cheese. Whether you’re looking for a quick weeknight dinner or a crowd-pleasing dish for a gathering, this recipe is the answer. Packed with protein and customizable to fit your dietary preferences, it’s a delight for vegetarians and meat-lovers alike. Plus, this versatile bake can easily accommodate your favorite seasonal veggies or even a protein boost, making it a go-to meal every single time. Ready to taste the deliciousness? Let’s dive into this nutritious recipe together!

Why Is This Bake a Game Changer?

Nutritional Powerhouse: Each serving of this High-Protein Cottage Cheese Veggie Bake offers a delightful balance of protein and nutrients, making it a perfect choice for a satisfying meal.

Endless Customization: Tailor this recipe to your taste—swap in seasonal veggies like zucchini or bell peppers, or add protein like chicken or lentils for an extra boost.

Quick & Easy: With just a handful of ingredients and a simple preparation, you’ll have a nourishing dish ready in under an hour, making it ideal for busy weeknights.

Crowd-Pleasing Appeal: Its creamy texture and robust flavors will impress family and friends alike, ensuring it’s a hit at any dinner table.

Meal Prep Friendly: This veggie bake not only reheats well, but it also holds up for days in the fridge, perfect for meal prep enthusiasts looking for healthy, quick options.

Bring your meals to life with this comforting dish—after enjoying this, consider trying out our Savory Vegetable Cheese Pancakes for another heavenly option!

High-Protein Cottage Cheese Veggie Bake Ingredients

For the Base

  • Cottage Cheese – Provides creaminess and protein; substitute with ricotta for a different texture.
  • Large Eggs – Binds the mixture and adds protein; can replace with flax eggs for a vegan option.
  • Olive Oil – Prevents sticking and adds flavor; can use avocado oil instead.

For the Vegetables

  • Shredded Carrots – Adds sweetness and color; optional, can be replaced by grated zucchini.
  • Spinach (chopped) – Contributes vitamins and minerals; can swap with kale or Swiss chard.
  • Bell Pepper (diced) – Adds crunch and sweetness; any color works; can use cherry tomatoes for a different flavor.
  • Zucchini (sliced) – Ensures moisture and texture; can be omitted; substitute with squash if desired.
  • Broccoli Florets – Adds fiber and crunch; substitute with cauliflower for a similar texture.

For the Seasoning

  • Garlic Powder – For flavor enhancement; fresh minced garlic can also be used.
  • Onion Powder – Adds depth; fresh onions can also be sautéed before adding.
  • Salt and Pepper – Essential for seasoning; adjust to taste.
  • Fresh Herbs (optional) – For garnish and added flavor; basil or parsley work great.

For the Topping

  • Grated Cheese (mozzarella/blend) – Topping for a crispy finish; alternative: nutritional yeast for a dairy-free version.

This delightful High-Protein Cottage Cheese Veggie Bake is packed with wholesome ingredients that’ll elevate your weekly meals! Enjoy customizing it to your taste and dietary needs!

Step‑by‑Step Instructions for High-Protein Cottage Cheese Veggie Bake

Step 1: Preheat the Oven
Begin by preheating your oven to 375°F (190°C). This ensures a perfectly baked High-Protein Cottage Cheese Veggie Bake that remains moist on the inside while developing a golden, bubbly top. While the oven warms up, you can prepare your baking dish for the next steps.

Step 2: Prepare the Baking Dish
Grease a medium-sized baking dish with olive oil or cooking spray for easy release. An 8×8 inch or similar size works perfectly for this recipe. Proper greasing helps the bake achieve a nice crust while keeping the vegetables and cottage cheese mixture from sticking.

Step 3: Chop the Vegetables
Thoroughly prepare all your vegetables: to start, chop the spinach, dice the bell pepper, shred the carrots, and slice the zucchini and broccoli. Set these vibrant veggies aside in a bowl. This colorful mix not only enhances the flavor of your High-Protein Cottage Cheese Veggie Bake but also adds visual appeal.

Step 4: Mix Cottage Cheese and Eggs
In a large mixing bowl, combine the cottage cheese and large eggs. Use a whisk or spatula to blend them until the mixture is smooth and creamy. This step is crucial as it creates the base of the bake, ensuring that the texture remains rich and cohesive.

Step 5: Add Seasoning
Next, sprinkle in the garlic powder, onion powder, salt, and pepper into the cottage cheese mixture. Stir well to incorporate these flavors evenly. Seasoning is essential for enhancing your High-Protein Cottage Cheese Veggie Bake with depth and that homemade taste that everyone loves.

Step 6: Fold in the Vegetables
Gently fold in the prepared vegetables into the creamy mixture until everything is just combined. Be careful not to overmix, as you want to maintain the integrity of the veggies while ensuring they’re evenly distributed throughout the High-Protein Cottage Cheese Veggie Bake.

Step 7: Transfer to Baking Dish
Pour the mixed ingredients into the greased baking dish, smoothing the top for even cooking. Make sure to spread the mixture evenly to allow the bake to rise uniformly and achieve that lovely golden crust on top while baking.

Step 8: Add Topping
Sprinkle a generous layer of grated cheese on top of the mixture. This will form a delightful, crispy cheese crust as it bakes. Alternatively, sprinkle nutritional yeast if you prefer a dairy-free option. The topping enhances both flavor and texture, making your High-Protein Cottage Cheese Veggie Bake irresistible.

Step 9: Bake
Place the baking dish in the preheated oven and bake for 30-45 minutes. You’ll know it’s done when the top is golden brown and bubbly. Keep an eye on it during the last few minutes to prevent burning while achieving that perfect crispy finish.

Step 10: Cool and Serve
Once baked, remove your High-Protein Cottage Cheese Veggie Bake from the oven and allow it to cool for about 10 minutes. This resting period helps the bake set a little more, making it easier to slice into portions before serving. Enjoy your delicious and nutritious creation!

High-Protein Cottage Cheese Veggie Bake Variations

Feel free to explore the creative side of cooking with these delicious alternatives and substitutions!

  • Dairy-Free: Use cashew cream instead of cottage cheese for a rich, nutty flavor while keeping it vegan-friendly.
  • Protein Boost: Add cooked quinoa or lentils for an extra protein punch, making your dish hearty and satisfying.
  • Seasonal Swaps: Incorporate asparagus in spring or roasted butternut squash in the fall for a seasonal twist!
  • Spice it Up: Introduce smoked paprika or cayenne pepper to elevate the flavor profile with a delightful kick.
  • Herbal Infusion: Experiment with fresh dill or cilantro for a fresh and vibrant herbal touch—wonderful flavor enhancements!
  • Nutty Crunch: Toss in some chopped walnuts or sunflower seeds for added texture and a nutty flavor that complements the bake.
  • Cheesy Alternatives: Replace grated cheese with nutritional yeast for a cheesy flavor without dairy, perfect for plant-based diets.
  • Vegetable Medley: Mix up the veggies, swapping broccoli for cauliflower or adding in some sweet corn for a pop of sweetness.

This recipe is all about flexibility and personalization, so have fun experimenting! You might also enjoy our Savory Vegetable Cheese Pancakes for another tasty twist on healthy eating.

Make Ahead Options

This High-Protein Cottage Cheese Veggie Bake is perfect for meal prep, making weeknight dinners a breeze! You can chop all your vegetables and mix the cottage cheese and eggs up to 24 hours in advance. Simply cover the mixed ingredients and refrigerate them to keep them fresh. When you’re ready to bake, combine the veggies with the cottage cheese mixture and follow the usual instructions. If prepared correctly, the flavors will meld beautifully, ensuring your bake is just as delicious. For optimal quality, avoid adding the cheese topping until you’re ready to bake, then sprinkle it on before cooking for a perfectly golden finish.

Expert Tips for High-Protein Cottage Cheese Veggie Bake

  • Mix Thoroughly: Make sure to mix the cottage cheese and eggs well for a smooth base—this enhances the overall texture of your High-Protein Cottage Cheese Veggie Bake.

  • Vegetable Variations: Don’t hesitate to experiment with seasonal vegetables. This adds new flavors and keeps your bake exciting each time you make it!

  • Watch the Bake Time: Keep an eye on the bake during the last few minutes—remove it once golden brown to prevent overcooking and maintain that delightful creaminess.

  • Rest Before Serving: Allow the bake to cool for about 10 minutes before slicing. This helps it hold its shape and makes serving easier.

  • Add Extra Protein: For those looking to boost the protein content even further, consider adding cooked chicken, turkey, or lentils to the mixture for a heartier meal.

  • Use a Meat Thermometer: If unsure about doneness, use a thermometer—internal temperature should reach around 160°F (70°C) for the ideal texture and safety.

What to Serve with High-Protein Cottage Cheese Veggie Bake

Elevate your dining experience by pairing this delightful bake with sides that enhance its flavors and textures.

  • Mixed Green Salad: A refreshing salad drizzled with lemon vinaigrette adds crispness, balancing the creamy bake beautifully.

  • Roasted Sweet Potatoes: Their natural sweetness and soft texture contrast nicely with the savory bake, creating a harmonious plate.

  • Garlic Bread: Crunchy garlic bread provides a wonderful texture, perfect for scooping up the creamy veggie bake, making every bite delightful.

  • Grilled Asparagus: The slight char and earthy taste of asparagus enhances the dish, while its vibrant green color brings life to your meal.

  • Tomato Basil Soup: This comforting soup acts as a cozy companion, complementing the flavors of the veggie bake with its richness and warmth.

  • Quinoa Pilaf: A nutty, fluffy quinoa pilaf serves as a hearty side, adding protein and a lovely texture that pairs well with the creamy bake.

These pairing suggestions not only create a balanced meal but also invite warmth and flavor to your table.

Storage Tips for High-Protein Cottage Cheese Veggie Bake

Fridge: Store the High-Protein Cottage Cheese Veggie Bake in an airtight container for up to 4 days. This ensures freshness and maintains its delicious flavors.

Freezer: You can freeze individual portions of the bake in freezer-safe containers for up to 3 months. Wrap them tightly to prevent freezer burn.

Reheating: To reheat, simply place in the oven at 350°F (175°C) for about 20 minutes or until heated through. The microwave is also an option but may affect the texture slightly.

Make-Ahead: Feel free to prepare the mixture a day in advance and store it in the fridge. Just bake it fresh right before serving for a delightful meal that comes together quickly!

High-Protein Cottage Cheese Veggie Bake Recipe FAQs

What type of cottage cheese should I use for the bake?
Absolutely! It’s best to use low-fat or full-fat cottage cheese for a creamier base. If you’re looking for a different texture, try ricotta instead for a smoother consistency. Just make sure it’s not too watery, as that could affect the bake’s overall texture.

How long can I store the High-Protein Cottage Cheese Veggie Bake in the fridge?
You can store this delightful bake in an airtight container for up to 4 days. Make sure it’s completely cooled before sealing it to help retain its freshness. Reheating is easy—just pop it in the oven or microwave when you’re ready to enjoy leftovers!

Can I freeze the veggie bake, and if so, how?
Yes, you can absolutely freeze this bake! I recommend cutting it into individual portions first for convenience. Wrap each piece tightly in plastic wrap and then place them in freezer-safe containers or bags. It can be stored for up to 3 months. When you’re ready to enjoy, thaw it in the fridge overnight and reheat in the oven until warmed through.

What can I do if the bake is too watery after baking?
Very well! If you find the bake is too watery, it could be due to excess moisture from the vegetables. To fix this, try sautéing your chopped vegetables beforehand to remove some of their water content. Alternatively, you can let the bake rest a little longer before serving to help it set up.

Is this recipe suitable for those with dairy allergies?
For those with dairy allergies, you can easily adapt this recipe! Substitute the cottage cheese with a dairy-free option like tofu blended until smooth or cashew cream. Also, you can skip the grated cheese for a topping and use nutritional yeast instead to bring in that cheesy flavor without dairy.

How can I make this recipe more protein-packed?
Great question! To amp up the protein content of your High-Protein Cottage Cheese Veggie Bake, consider adding cooked chicken, turkey, or even lentils. You can mix in about 1 to 1.5 cups of your chosen protein source with the vegetable mixture for a hearty meal that keeps you full longer. Another option is to sprinkle some hemp seeds or chia seeds on top before baking for a nutritious boost.

High-Protein Cottage Cheese Veggie Bake

High-Protein Cottage Cheese Veggie Bake That Delights Your Tastebuds

This High-Protein Cottage Cheese Veggie Bake is a nourishing blend of vibrant vegetables and creamy cottage cheese, offering a delightful meal for any occasion.
Prep Time 15 minutes
Cook Time 30 minutes
Cooling Time 10 minutes
Total Time 55 minutes
Servings: 4 servings
Course: Dinner
Cuisine: Vegetarian
Calories: 200

Ingredients
  

For the Base
  • 2 cups Cottage Cheese Provides creaminess and protein; substitute with ricotta for a different texture.
  • 3 Large Eggs Binds the mixture and adds protein; can replace with flax eggs for a vegan option.
  • 2 tablespoons Olive Oil Prevents sticking and adds flavor; can use avocado oil instead.
For the Vegetables
  • 1 cup Shredded Carrots Adds sweetness and color; optional, can be replaced by grated zucchini.
  • 2 cups Spinach (chopped) Contributes vitamins and minerals; can swap with kale or Swiss chard.
  • 1 cup Bell Pepper (diced) Adds crunch and sweetness; any color works; can use cherry tomatoes for a different flavor.
  • 1 medium Zucchini (sliced) Ensures moisture and texture; can be omitted; substitute with squash if desired.
  • 1 cup Broccoli Florets Adds fiber and crunch; substitute with cauliflower for a similar texture.
For the Seasoning
  • 1 teaspoon Garlic Powder For flavor enhancement; fresh minced garlic can also be used.
  • 1 teaspoon Onion Powder Adds depth; fresh onions can also be sautéed before adding.
  • to taste Salt and Pepper Essential for seasoning; adjust to taste.
  • optional Fresh Herbs For garnish and added flavor; basil or parsley work great.
For the Topping
  • 1 cup Grated Cheese (mozzarella/blend) Topping for a crispy finish; alternative: nutritional yeast for a dairy-free version.

Equipment

  • Baking Dish
  • mixing bowl
  • whisk

Method
 

Preparation Steps
  1. Preheat your oven to 375°F (190°C).
  2. Grease a medium-sized baking dish with olive oil or cooking spray.
  3. Chop the spinach, dice the bell pepper, shred the carrots, and slice the zucchini and broccoli.
  4. In a large mixing bowl, combine the cottage cheese and large eggs until smooth and creamy.
  5. Add garlic powder, onion powder, salt, and pepper into the cottage cheese mixture and stir well.
  6. Fold in the prepared vegetables into the mixture until just combined.
  7. Pour the mixed ingredients into the greased baking dish and smooth the top.
  8. Sprinkle grated cheese on top of the mixture.
  9. Place the baking dish in the oven and bake for 30-45 minutes or until golden brown.
  10. Allow the bake to cool for about 10 minutes before slicing.

Notes

This recipe is customizable; feel free to experiment with different vegetables and proteins to suit your taste.

Crispy Chickpea Vegetable Nuggets Everyone Will Love

As I stood in my kitchen, the enticing aroma of sizzling vegetables mingled with the comforting sound of chickpeas whirring in the food processor. It was time to whip up my latest culinary masterpiece: Chickpea Vegetable Nuggets! This recipe is a delightful solution for anyone seeking a homemade snack that’s not only easy to prepare but also fun for the whole family. These charming, gluten-free nuggets are the perfect finger food for kids while satisfying the health-conscious adult longing for something guilt-free. With a crispy exterior that gives way to a tender, veggie-filled center, they’re bound to become a go-to dish in your household. Imagine diving into this scrumptious goodness with your favorite dipping sauce! Curious how to make these irresistible nuggets? Let’s jump right in!

Want a Healthy Snack Everyone Will Enjoy?

Crispy, these Chickpea Vegetable Nuggets are a delightful twist on traditional finger foods! Kid-friendly, children will love their fun shape and tasty flavors, while adults appreciate the nutritious ingredients. Versatile, you can easily swap in your favorite veggies or spices to suit your taste. Quick to prepare, this recipe saves you time without sacrificing flavor. Crowd-pleaser, serve them at parties or family gatherings and watch your guests go back for seconds! Don’t forget to explore pairing them with hummus for an extra flavor kick!

Chickpea Vegetable Nuggets Ingredients

For the Base
Canned Chickpeas – Rinse and drain beforehand for optimal creaminess and texture.
Grated Zucchini – Adds moisture; feel free to substitute with grated carrot for a different flair.
Grated Carrot – Provides sweetness and a pop of color; adjust the quantity to your liking.
Minced Onion – Enhances flavor; you can use onion powder as a quick substitute if needed.
Italian Seasoning – Brings a wonderful depth of flavor; swap it out for your preferred herbs if desired.

For Seasoning
Sea Salt – Vital for enhancing taste; remember to adjust according to your preference.
Garlic – Fresh garlic offers richness—use garlic powder in a pinch.
Black Pepper – Adjust the amount to suit your taste.
Paprika – For an extra dash of warmth and color; it’s optional but highly recommended!

For Binding and Structure
Eggs – Acts as a binder for the mixture; substitute with flax eggs (1 flax egg per egg) for a vegan version.
Oil (Olive/Avocado) – Essential for cooking and flavor; have extra on hand as needed.
Oat Flour (or Breadcrumbs) – Provides necessary structure; you can use any breadcrumbs available to you.

Feel free to unleash your creativity as you prepare these scrumptious Chickpea Vegetable Nuggets!

Step‑by‑Step Instructions for Chickpea Vegetable Nuggets

Step 1: Prepare the Vegetables
Begin by grating the zucchini and carrot, then use a clean kitchen towel to squeeze out excess moisture from both. This step is essential to ensure your Chickpea Vegetable Nuggets have the right texture and maintain their shape. Set the prepared vegetables aside while you get ready to mix the other ingredients.

Step 2: Mix Ingredients
In a food processor, combine the drained canned chickpeas, squeezed zucchini, grated carrot, minced onion, Italian seasoning, sea salt, garlic, black pepper, and paprika. Pulse the mixture until it’s well combined but not overworked—aim for a moist consistency that allows you to scoop it easily. Avoid pureeing to maintain some texture in your Chickpea Vegetable Nuggets.

Step 3: Cook Nuggets
Heat 2 tablespoons of olive or avocado oil in a non-stick skillet over medium-high heat. Once the oil shimmers, scoop a generous tablespoon of the mixture into the pan, flattening it slightly with the back of a spatula. Cook for 3-5 minutes until the bottom is golden brown, then carefully flip and cook the other side for an additional 3-5 minutes until both sides are crispy and golden.

Step 4: Serve
Once your Chickpea Vegetable Nuggets are golden and crispy on both sides, transfer them to a paper towel-lined plate to drain any excess oil. Serve warm with your favorite dipping sauce, such as hummus or yogurt dip, for an extra flavor boost. Enjoy these delicious nuggets fresh out of the pan, or store any leftovers in an airtight container in the fridge for up to 4-5 days.

What to Serve with Chickpea Vegetable Nuggets

These delightful bites are perfect for crafting a complete meal that pleases everyone at the table.

  • Creamy Hummus: The rich, nutty flavor of hummus contrasts perfectly with the crispy nuggets, making every bite an enjoyable experience.
  • Zesty Salsa: A punchy, fresh salsa adds a vibrant kick, enhancing the flavors of the chickpeas and veggies while offering a fresh texture.
  • Greek Yogurt Dip: Cool and creamy, this dip is not only delicious but also adds a touch of protein, making your meal even more satisfying.
  • Crispy Sweet Potato Fries: Their natural sweetness and crispy edges make a great pairing, plus they add a beautiful color contrast on the plate.
  • Mixed Green Salad: A light, refreshing salad with a tangy vinaigrette complements the hearty nuggets, making your meal feel balanced and wholesome.
  • Roasted Vegetables: The caramelized flavors of roasted seasonal vegetables elevate the meal while adding nutritional variety.
  • Refreshing Lemonade: A cold glass of lemonade enhances the meal’s flavors, providing a lovely balance to the savory nuggets.
  • Chocolate Avocado Mousse: For dessert, this creamy delight is a fitting conclusion, offering healthy indulgence that caps off the meal perfectly.
  • Pineapple Coconut Smoothie: A tropical twist; this smoothie refreshes and cleanses the palate while pairing beautifully with the savory notes of the nuggets.
  • Chilled White Wine: A light, crisp white wine will elevate your dinner experience, making every mouthful of nuggets feel extra special.

Expert Tips for Chickpea Vegetable Nuggets

  • Moisture Control: Squeeze excess moisture from vegetables, especially zucchini, to prevent your nuggets from becoming soggy or falling apart during cooking.

  • Mixing Method: Be careful not to over-mix the chickpeas and vegetables. A slightly chunky mixture will create a better texture for your Chickpea Vegetable Nuggets.

  • Binding Alternatives: For a vegan option, substitute regular eggs with flax eggs. Mix 1 tablespoon of ground flaxseed with 2.5 tablespoons of water for each egg you replace.

  • Cooking Techniques: Consider air frying for a healthier version: cook at 400°F for about 12 minutes, flipping halfway through for even crispiness.

  • Flavor Customization: Don’t hesitate to play with spices! Adding cumin or curry powder can elevate your Chickpea Vegetable Nuggets and introduce new flavor dimensions.

Chickpea Vegetable Nuggets Variations & Substitutions

Feel free to get creative and customize these Chickpea Vegetable Nuggets to suit your tastes and dietary needs!

  • Zucchini Swap: Switch out zucchini for grated sweet potato or spinach for a different flavor and texture. Sweet potatoes lend a natural sweetness that kids will adore.

  • Vegan Option: Substitute eggs with aquafaba (the liquid from a can of chickpeas) for a light and airy bind. This swap is not only plant-based but also works surprising wonders in texture!

  • Herb Infusion: Instead of Italian seasoning, try fresh herbs like dill or cilantro for a unique twist. Fresh herbs brighten the flavor profile, making each nugget burst with freshness.

  • Spice It Up: Add a pinch of cayenne pepper or chili powder to introduce a hint of heat. Adjust according to your family’s taste preference—an exciting way to keep everyone guessing at dinnertime!

  • Texture Choice: For a crunchier bite, toss in some crushed nuts or seeds like sunflower seeds or pumpkin seeds. This adds a delightful crunch that complements the softness of the chickpeas.

  • Dipping Delight: Think outside the box for dips! Instead of the standard hummus, serve with a tangy yogurt sauce or salsa verde for a zesty experience.

  • Grain-Free: Replace oat flour with almond flour or ground flaxseed to keep your nuggets grain-free. It adds a wonderful nutty flavor, enhancing the deliciousness.

  • Cheesy Goodness: Mix in some nutritional yeast or shredded cheese for a cheesy alternative that elevates the richness of your Chickpea Vegetable Nuggets, making them extra tasty!

As you experiment, consider pairing your nuggets with delightful side dishes like Rustic Vegetable Gratin or some crispy options paired with Vegetable Pancakes for a complete meal. Happy cooking!

Make Ahead Options

These Chickpea Vegetable Nuggets are perfect for meal prep, allowing you to save time on busy weeknights! You can prepare the chickpea mixture up to 24 hours in advance by following Steps 1 and 2, then refrigerating it in an airtight container. This keeps the ingredients fresh while enhancing their flavors. On the day you plan to serve, simply scoop the mixture and cook the nuggets as directed in Step 3. If you prefer, you can also cook them ahead of time and freeze the nuggets for up to 3 months. Reheat in the oven to maintain their crispy texture, ensuring your Chickpea Vegetable Nuggets are just as delicious as when they were freshly made!

How to Store and Freeze Chickpea Vegetable Nuggets

Fridge: Store your leftover Chickpea Vegetable Nuggets in an airtight container for up to 4-5 days. This keeps them fresh while maintaining their delightful texture.

Freezer: For longer storage, freeze cooked nuggets once cooled completely. Arrange them in a single layer on a baking sheet, then transfer to an airtight container after they’re frozen solid. They can stay good for up to 3 months.

Reheating: To reheat, pop them in the oven at 375°F for about 10-15 minutes, until heated through and crispy, or use an air fryer for a quick and efficient option.

Chickpea Vegetable Nuggets Recipe FAQs

What’s the best way to select fresh vegetables for my Chickpea Vegetable Nuggets?
Absolutely! When choosing vegetables, look for firm zucchini and carrots without any dark spots or soft areas. Fresh veggies will enhance the flavor and texture of your nuggets. For zucchini, pick those that are medium-sized; smaller ones might be too watery. If you’re choosing carrots, go for those that are vibrant in color and free of blemishes.

How should I store my leftover Chickpea Vegetable Nuggets?
Very easy! Store your Chickpea Vegetable Nuggets in an airtight container in the refrigerator for up to 4-5 days. Be sure they are completely cooled before sealing them up, as this helps maintain their crispy texture. If you want to keep them longer, consider freezing them.

Can I freeze the Chickpea Vegetable Nuggets, and how do I do that?
Certainly! To freeze the nuggets, let them cool completely after cooking. Lay them out in a single layer on a baking sheet and pop them in the freezer for 1-2 hours. Once they’re frozen solid, transfer them to an airtight container or freezer bag. They’ll stay fresh for up to 3 months. When you’re ready to enjoy them again, simply reheat in the oven at 375°F for 10-15 minutes for that crispy goodness!

What if my Chickpea Vegetable Nuggets fall apart while cooking?
If your nuggets are crumbling, it’s likely due to excess moisture in your mixture or overmixing. Make sure to squeeze out as much liquid from the grated vegetables as possible. Also, avoid pureeing the chickpeas—keeping them slightly chunky helps hold the mixture together. If needed, add a bit more oat flour or breadcrumbs to help bind everything.

Are Chickpea Vegetable Nuggets safe for kids with allergies?
Absolutely! These nuggets are vegetarian and can easily be made gluten-free by using gluten-free breadcrumbs. However, always double-check the labels of your ingredients. If you are looking to avoid common allergens, consider substituting the eggs with flax eggs (1 tablespoon ground flaxseed mixed with 2.5 tablespoons water for each egg), and ensure all vegetables are allergy-friendly. Always consult with a doctor or dietitian about specific dietary restrictions.

Chickpea Vegetable Nuggets

Crispy Chickpea Vegetable Nuggets Everyone Will Love

Chickpea Vegetable Nuggets are a delightful homemade snack that’s easy to prepare and fun for the whole family.
Prep Time 15 minutes
Cook Time 10 minutes
Total Time 25 minutes
Servings: 4 nuggets
Course: Other
Cuisine: American
Calories: 180

Ingredients
  

For the Base
  • 1 can Canned Chickpeas Rinse and drain beforehand for optimal creaminess and texture.
  • 1 cup Grated Zucchini Feel free to substitute with grated carrot for a different flair.
  • 1 medium Grated Carrot Provides sweetness and a pop of color.
  • 1/2 medium Minced Onion You can use onion powder as a quick substitute if needed.
  • 1 teaspoon Italian Seasoning Swap it out for your preferred herbs if desired.
For Seasoning
  • 1/2 teaspoon Sea Salt Adjust according to your preference.
  • 2 cloves Garlic Fresh garlic offers richness; use garlic powder in a pinch.
  • 1 teaspoon Black Pepper Adjust the amount to suit your taste.
  • 1 teaspoon Paprika For an extra dash of warmth and color.
For Binding and Structure
  • 2 large Eggs Acts as a binder for the mixture; use flax eggs for a vegan version.
  • 2 tablespoons Oil (Olive/Avocado) Essential for cooking and flavor.
  • 1 cup Oat Flour (or Breadcrumbs) Provides necessary structure.

Equipment

  • Food Processor
  • Non-Stick Skillet
  • Measuring cups
  • kitchen towel

Method
 

Step-by-Step Instructions for Chickpea Vegetable Nuggets
  1. Begin by grating the zucchini and carrot, then use a clean kitchen towel to squeeze out excess moisture from both.
  2. In a food processor, combine the drained canned chickpeas, squeezed zucchini, grated carrot, minced onion, Italian seasoning, sea salt, garlic, black pepper, and paprika. Pulse until well combined.
  3. Heat 2 tablespoons of olive or avocado oil in a non-stick skillet over medium-high heat. Scoop a tablespoon of the mixture into the pan, flattening it slightly. Cook for 3-5 minutes until golden brown, then flip and cook for another 3-5 minutes.
  4. Transfer the nuggets to a paper towel-lined plate to drain excess oil. Serve warm with your favorite dipping sauce.

Notes

Squeeze excess moisture from vegetables to prevent nuggets from becoming soggy. Consider air frying for a healthier version.

Creamy Copycat Applebee’s Oriental Salad Dressing in Minutes

At my last family gathering, I caught myself sneaking spoonfuls of a creamy dressing that had everyone raving—Applebee’s famous Oriental Salad Dressing. Inspired to recreate that irresistible flavor, I decided to whip up my own version right in my kitchen. This Copycat Applebee’s Oriental Salad Dressing perfectly balances sweetness with a nutty sesame finish, bringing a mouthwatering depth to salads and marinades alike. The best part? You can prepare this delightful dressing in just 5 minutes, making it a quick go-to for those busy weeknights. Ideal for anyone seeking a homemade twist on store-bought favorites, this dressing promises to elevate your meals effortlessly. Are you ready to bring a taste of Applebee’s home? Let’s dive into this simple yet delicious recipe!

Why is this dressing a must-try?

Speedy Preparation: You can whip up this dressing in just 5 minutes, making it perfect for busy weeknights.

Rich Flavor Profile: The blend of sweetness and nutty sesame notes brings a restaurant-quality taste right to your table.

Versatile Use: It’s not just for salads—you can use this dressing as a marinade or dipping sauce for an extra flavor boost.

Homemade Goodness: Say goodbye to store-bought brands and enjoy the freshness and richness of this homemade version.

Toss it over greens with sliced almonds for a delightful crunch, just like in my favorite Cabbage Cucumber Salad or drizzle it on grilled chicken as a flavorful marinade!

Copycat Applebee’s Oriental Salad Dressing Ingredients

For the Base

  • Sugar – Balances the tanginess of the vinegar perfectly; avoid seasoned rice wine vinegar as it is too sweet.
  • Rice Vinegar – Provides the tangy base essential for flavor; make sure it’s not seasoned.
  • Mayonnaise – The creamy foundation of this dressing, adding richness.

For the Flavor

  • Refined Sesame Oil – Offers a mild sesame flavor; you can find this in the cooking oil section.
  • Toasted Sesame Oil – Delivers a deeper, nuttier flavor; check for it in the Asian foods aisle.
  • Dijon Mustard – Elevates the overall flavor with a hint of tang.

Enjoy creating this delicious Copycat Applebee’s Oriental Salad Dressing that brings a taste of your favorite restaurant right to your kitchen!

Step‑by‑Step Instructions for Copycat Applebee’s Oriental Salad Dressing

Step 1: Dissolve the Sugar
In a medium mixing bowl, combine sugar and rice vinegar. Using a whisk or spoon, stir the mixture thoroughly for about 1-2 minutes until the sugar is fully dissolved. You’ll know it’s ready when the mixture is clear, with no visible granules remaining. This step creates the tangy base that is essential for your Copycat Applebee’s Oriental Salad Dressing.

Step 2: Mix in the Creaminess
Next, add the mayonnaise to your sugar and vinegar mixture. With the whisk, blend for approximately 1-2 minutes until the mixture is smooth and well combined. The mayonnaise will add that creamy richness that makes this dressing so delightful. As you mix, observe the dressing transforming into a thick, creamy consistency.

Step 3: Add the Sesame Oils and Dijon
Pour in both the refined and toasted sesame oils along with the Dijon mustard. Whisk everything together for another 1-2 minutes until all ingredients are fully incorporated. The fragrant sesame oils will infuse the dressing with a distinctive flavor, reminiscent of Applebee’s Oriental Salad for a wonderfully satisfying result.

Step 4: Adjust Consistency
Take a moment to evaluate your dressing’s thickness. If you prefer a lighter consistency, slowly add a teaspoon of water at a time while whisking until you reach your desired thickness. This step ensures that your Copycat Applebee’s Oriental Salad Dressing pours smoothly but still clings beautifully to greens.

Step 5: Refrigerate and Store
Transfer the dressing into a covered container or jar, sealing it tightly. Chill in the refrigerator for at least 30 minutes to allow the flavors to meld beautifully. You can store your homemade dressing for up to one week. Just remember to shake or stir before each use, as separation may occur.

Variations for Copycat Applebee’s Oriental Salad Dressing

Feel free to get creative with this delightful dressing and customize it to match your tastes!

  • Honey Sweetener:
    Replace sugar with honey for a natural sweetness that complements the dressing’s flavor. Honey adds a lovely floral note to each drizzle!

  • Peanut Oil:
    Swap out refined sesame oil for peanut oil to introduce a different but equally delicious nutty flavor. This variation will bring an exciting twist to your salads.

  • Chili Flakes:
    For a bit of heat, stir in a pinch of red chili flakes. This will elevate the dressing, adding a spicy kick that balances perfectly with the creaminess!

  • Garlic Powder:
    Incorporate a small teaspoon of garlic powder for an aromatic depth. This will give your dressing a robust taste reminiscent of homemade sauces.

  • Vegan Option:
    Substitute mayonnaise with a plant-based alternative to create a vegan-friendly version. You’ll maintain that creamy texture while catering to dietary needs!

  • Citrus Zest:
    Add a sprinkle of lime or lemon zest to brighten the flavor profile. The citrus will uplift the dressing and add a refreshing twist that’s ideal for summer.

  • Sesame Seeds:
    Include toasted sesame seeds for an added crunch. This not only enhances texture but also amplifies the sesame flavor, making every bite more delightful!

  • Tangy Soy Sauce:
    Mix in a teaspoon of soy sauce for a savory twist. This can enhance the umami notes and make the dressing even more delectable over Asian-inspired salads.

These variations can transform your Copycat Applebee’s Oriental Salad Dressing experience! Try them with dishes like my favorite Crunch Cucumber Salad or as a tasty dip. Choose your favorite or mix and match to suit your preferences!

Make Ahead Options

These Copycat Applebee’s Oriental Salad Dressing can be prepared in advance, making it an excellent option for busy home cooks seeking to save time during the week. You can mix the dressing up to 3 days ahead, allowing the flavors to meld beautifully for improved taste. Simply follow the recipe instructions to combine all ingredients, then refrigerate in a sealed container. To maintain quality, give it a good shake or stir before serving, as separation may occur. When it’s time to serve, just dollop it over your favorite salads or use it as a marinade, and your meals will be both effortless and delicious!

How to Store and Freeze Copycat Applebee’s Oriental Salad Dressing

Fridge: Store the dressing in an airtight container in the refrigerator for up to 1 week to maintain its freshness and flavor.

Freezer: While not recommended for freezing due to its creamy texture, you may freeze it for up to 3 months. Thaw in the fridge and whisk well before using.

Reheating: If you find the dressing has separated after storage, simply give it a good shake or stir to restore its creamy consistency.

Usage: Always shake or stir before each use, especially after refrigeration, as separation may occur naturally in the Copycat Applebee’s Oriental Salad Dressing.

What to Serve with Copycat Applebee’s Oriental Salad Dressing

Elevate your meals with delightful pairings that will enhance every bite and leave your family asking for seconds.

  • Mixed Greens Salad: A fresh bed of mixed greens allows the dressing’s rich flavors to shine while adding crunch.
  • Grilled Chicken: Juicy grilled chicken thighs or breasts drizzled with this dressing create a flavor-packed main course.
  • Sliced Almonds: Adding crunchy, toasted sliced almonds on top of salads adds texture that complements the smoothness of the dressing.
  • Cucumber Slices: Crisp cucumber slices refreshing the palette between bites; their mild flavor pairs beautifully with the nutty dressing.
  • Roasted Vegetables: A colorful medley of roasted veggies brings a warm, earthy element that balances out the sweetness of the dressing.
  • Rice Bowls: Serve this dressing over a rice bowl filled with veggies and protein for a satisfying, wholesome meal.
  • Sesame Noodles: Toss cooked noodles in this dressing for an easy, flavorful side that echoes the sesame notes.
  • Sweet Tea: A chilled glass of sweet tea brings a Southern twist, perfectly balancing the savory elements on your plate.
  • Chocolate Mousse: To finish your meal, a velvety chocolate mousse serves as a rich dessert that contrasts beautifully with the dressing’s flavors.

Expert Tips for Copycat Applebee’s Oriental Salad Dressing

  • Fresh Ingredients: Use fresh rice vinegar and good-quality mayonnaise for the best flavor. Avoid expired ingredients as they can alter the taste.

  • Mixing Thoroughly: Make sure to whisk the sugar into the rice vinegar until fully dissolved. Undissolved sugar can create a grainy texture in your dressing.

  • Storage Reminder: Always shake or stir the dressing well before each use. Separation is normal; just give it a quick mix to restore the creamy consistency.

  • Consistency Adjustment: If you like a thinner dressing, add water gradually. Start with a teaspoon at a time to avoid overly thinning out your Copycat Applebee’s Oriental Salad Dressing.

  • Flavor Boost: Experiment with adding a pinch of garlic powder or sesame seeds for an extra layer of flavor that complements the existing profile!

Copycat Applebee’s Oriental Salad Dressing Recipe FAQs

How do I choose the right ingredients?
Absolutely! For the best flavor in your dressing, choose fresh rice vinegar and high-quality mayonnaise. Avoid using seasoned rice wine vinegar as it can make the dressing too sweet. Look for refined sesame oil in the cooking oil section and toasted sesame oil in the Asian foods aisle for that authentic nutty flavor.

How should I store the dressing and how long does it last?
You can store your Copycat Applebee’s Oriental Salad Dressing in an airtight container in the refrigerator for up to 1 week. Ensure the container is well-sealed to maintain its freshness and flavor. As a tip, always give it a shake or stir before each use, since separation may happen naturally.

Can I freeze Copycat Applebee’s Oriental Salad Dressing?
While not recommended due to its creamy texture, you can freeze the dressing for up to 3 months. To freeze, transfer the dressing into a freezer-safe container or bag. When you’re ready to use it, thaw it in the refrigerator overnight, then whisk it well to restore its creamy consistency before serving.

What should I do if the dressing seems too thick?
If you find your dressing is too thick, don’t worry! Simply add water a teaspoon at a time while whisking until you reach your desired consistency. This allows you to maintain that perfect coating for your salads without losing flavor. I often adjust my dressing, and it’s a quick fix!

Can I make this dressing healthier?
Very! If you’re looking to cut down on sugar, consider using honey or a sugar alternative. You can also experiment with different oils, such as peanut oil for a unique twist. This allows you to tailor the dressing to your health goals while keeping that delightful flavor intact.

Is this dressing safe for pets or those with allergies?
If you have pets, it’s best to keep this dressing away from them as it contains mayonnaise and oils that might not be suitable. Regarding allergies, be cautious with ingredients like sesame oil, which can provoke allergic reactions in some individuals. Always check for specific allergies and you can customize the recipe to suit your dietary needs.

Copycat Applebee’s Oriental Salad Dressing

Creamy Copycat Applebee’s Oriental Salad Dressing in Minutes

This Copycat Applebee’s Oriental Salad Dressing is a quick and delicious homemade version of the restaurant favorite.
Prep Time 5 minutes
Chilling Time 30 minutes
Total Time 35 minutes
Servings: 4 servings
Course: Other
Cuisine: American
Calories: 120

Ingredients
  

For the Base
  • 1 cup sugar Avoid seasoned rice wine vinegar as it is too sweet.
  • 1/2 cup rice vinegar Make sure it's not seasoned.
  • 1 cup mayonnaise The creamy foundation of this dressing.
For the Flavor
  • 1 tablespoon refined sesame oil Offers a mild sesame flavor.
  • 1 tablespoon toasted sesame oil Delivers a deeper, nuttier flavor.
  • 1 tablespoon Dijon mustard Elevates the overall flavor.

Equipment

  • medium mixing bowl
  • whisk
  • Measuring spoons
  • airtight container

Method
 

Step-by-Step Instructions
  1. In a medium mixing bowl, combine sugar and rice vinegar. Whisk for about 1-2 minutes until the mixture is clear and the sugar is fully dissolved.
  2. Add the mayonnaise to the mixture and whisk for approximately 1-2 minutes until smooth and well combined.
  3. Pour in both the refined and toasted sesame oils along with the Dijon mustard. Whisk for another 1-2 minutes until fully incorporated.
  4. Evaluate the dressing’s thickness; add a teaspoon of water at a time while whisking if a lighter consistency is preferred.
  5. Transfer the dressing into a covered container, chill in the refrigerator for at least 30 minutes before using.

Notes

Use fresh ingredients for the best flavor and always shake or stir before use to restore consistency.

Duchess Potatoes: Creamy, Elegant Side Dish for Every Occasion

“Did you hear about the potatoes who aspired to be elegant?” My friend chuckled while we stirred a pot of russet potatoes, and I couldn’t help but smile at the thought. Enter Duchess Potatoes: creamy swirls of delight that can transform any meal into a feast. With their crispy tops and smooth inside, these little clouds of flavor are the side dish that steals the spotlight. What I adore most about Duchess Potatoes is their versatility; you can whip them up simply for a cozy family dinner or dress them up for a festive gathering. Plus, they’re make-ahead friendly, meaning you can spend less time in the kitchen and more time savoring those special moments with loved ones. Curious how to elevate your next meal with this recipe? Let’s dive in!

Why Choose Duchess Potatoes Today?

Creamy Texture: Each bite delivers a wonderfully creamy interior, ensuring comfort in every mouthful that can compete with your favorite mashed potatoes.

Elegant Presentation: The beautiful piped shapes make these potatoes not only delicious but visually stunning, perfect for impressing guests at any dinner party.

Versatility Galore: Feel free to explore various flavors by adding bleu cheese, fresh herbs, or even smoky paprika to suit your family’s taste.

Make-Ahead Convenience: Prepare these delightful mounds ahead of time and refrigerate, freeing you up for more quality time with friends and family. For more time-saving tips, check out our meal prep strategies.

Crowd-Pleasing Appeal: With their delightful flavor and unique texture, Duchess Potatoes are sure to be a hit at any gathering, leaving everyone asking for seconds!

Duchess Potatoes Ingredients

For the Base
Russet Potatoes – The foundation of this dish; Yukon Golds can also be used for a richer flavor.
Salt (1 tsp) – Essential for enhancing the potato flavor during cooking; reserve half for later use.
Salted Butter (¼ cup) – Adds richness and smoothness; unsalted can also be used if you adjust the overall salt accordingly.
Heavy Cream (½ cup) – Delivers that creamy texture; milk or half-and-half can be substituted for a lighter option.

For the Flavor Mix
Chive and Onion Cream Cheese (3 tbsp) – Introduces a savory flavor; you can use plain cream cheese as a substitute.
Grated Parmesan Cheese (¼ cup) – Enhances flavor and richness; Asiago or Pecorino can also work well.
Granulated Garlic (1 tsp) – Provides garlic flavor; if you prefer fresh garlic, be sure to use less.

Binding and Garnishing
Egg Yolks (2 large) – Helps bind the mixture; for a vegan option, substitute with a flax or chia egg.
Chopped Fresh Chives (2 tbsp) – Perfect for garnish and added flavor; don’t be shy about using them for a touch of elegance!

Duchess Potatoes are not only a hit for their taste but also for their ability to adapt flavors. Consider these ingredients the starting point for your culinary creativity!

Step‑by‑Step Instructions for Duchess Potatoes

Step 1: Prep Potatoes
Begin by peeling and cubing about 3 pounds of russet potatoes. Place the cubed potatoes in a large pot and cover them with cold water, adding 1 teaspoon of salt. This helps to enhance their flavor as they cook. Let the potatoes sit while you prepare for the next steps.

Step 2: Boil
Bring the pot to a boil over medium-high heat, then reduce to a gentle simmer. Cook the potatoes for 8-10 minutes or until they are fork-tender and easily break apart. Once done, carefully drain the potatoes in a colander and let them steam for a minute to remove excess moisture.

Step 3: Mash
Transfer the drained potatoes back to the pot. Using a potato masher or ricer, mash the potatoes until they are smooth and creamy. While still warm, mix in ¼ cup of salted butter, ½ cup of heavy cream, 3 tablespoons of chive and onion cream cheese, and 1 teaspoon of granulated garlic. Stir until everything is well combined and creamy.

Step 4: Cool & Combine
Allow the potato mixture to cool for about 5 minutes, which prevents the egg yolks from cooking when added. Once cooled, beat in 2 large egg yolks until the mixture is cohesive and silky. This step is crucial for achieving the airy texture of your Duchess Potatoes.

Step 5: Prepare Oven
Preheat your oven to 425°F (220°C) while you get ready to pipe the potatoes. Line two baking sheets with parchment paper to ensure easy removal after baking. This preparation will help achieve the perfect crispy edges on your delightful Duchess Potatoes.

Step 6: Pipe Mounds
Using a piping bag fitted with a star tip, carefully pipe 12 mounds of the potato mixture onto the prepared baking sheets. Aim for a height of about 2 inches for each mound to ensure those charming swirls. The piped shapes will give a lovely visual appeal when baked, making your Duchess Potatoes truly elegant.

Step 7: Bake
Place the baking sheets in the preheated oven and bake for 20-25 minutes. Keep an eye on them; they should develop a beautiful golden brown color on top and become crispy around the edges. This delightful contrast in texture is what makes Duchess Potatoes stand out.

Step 8: Garnish & Serve
Once baked, remove the Duchess Potatoes from the oven and let them cool slightly on the baking sheets. Serve warm, garnished with additional grated Parmesan and chopped fresh chives for an added touch of elegance. These creamy and enticing Duchess Potatoes are ready to complement your meal beautifully!

Make Ahead Options

Duchess Potatoes are perfect for busy home cooks looking to save time without sacrificing flavor! You can prepare the potato mixture up to 24 hours in advance. Simply follow the recipe up to the point of piping mounds, then cover the baking sheets with plastic wrap and refrigerate. This method helps maintain their creamy texture and prevents drying out. When you’re ready to serve, just preheat the oven to 425°F (220°C) and bake the potato mounds directly from the fridge for 20-25 minutes until golden brown and crispy. You’ll enjoy the same elegant results with minimal effort!

Storage Tips for Duchess Potatoes

Fridge: Store leftovers in an airtight container for up to 3 days. Make sure they’re completely cool before sealing to prevent condensation.

Freezer: For longer storage, freeze piped Duchess Potatoes on a baking sheet until solid, then transfer to a zip-top bag for up to 2 months.

Reheating: Thaw overnight in the fridge, then reheat in a 350°F (175°C) oven for about 15-20 minutes, until warmed through and crispy.

Make-Ahead: These make-ahead friendly Duchess Potatoes can be prepared 24 hours ahead. Simply refrigerate after piping and bake when ready to enjoy!

Duchess Potatoes Variations & Substitutions

Add your personal twist to these delightful Duchess Potatoes with some fun and flavorful ideas!

  • Bleu Cheese: Swap Parmesan for bleu cheese for a bolder flavor that adds a rich and tangy dimension.
  • Fresh Herbs: Add rosemary or thyme to the potato mixture for a fragrant and aromatic kick. Herbs elevate the taste and freshness!
  • Sweet Potatoes: Use sweet potatoes in place of russets for a vibrant and naturally sweet option that delights the eyes and palate alike.
  • Smoky Paprika: Mix in some smoky paprika for an unexpected warmth and beautiful color that gives an entirely new character to the dish.
  • Vegan Option: To make this dish vegan-friendly, use vegan cream cheese and almond or soy milk in place of regular dairy.
  • Roasted Garlic: Substitute fresh garlic for roasted garlic to introduce a sweeter, mellower garlic flavor that enhances the creamy texture beautifully.
  • Truffle Oil: Drizzle a bit of truffle oil on top after baking for an upscale flair that turns your dish into a gourmet experience.

Feeling inspired? Try adding a hint of spice with a sprinkle of cayenne for heat, or throw in a dash of mustard for a tangy surprise! For more creative ideas, be sure to explore our versatile potato recipes that transform comfort food into gourmet dishes.

What to Serve with Duchess Potatoes

Elevate your meal with delightful pairings that complement the creamy elegance of this dish.

  • Roasted Chicken: The tender, juicy flavors of roasted chicken harmonize beautifully with Duchess Potatoes, creating a comforting and satisfying dinner.

  • Herb-Crusted Salmon: The flaky, fresh taste of salmon meets the rich, velvety texture of the potatoes, making for a luxurious meal experience.

  • Grilled Asparagus: This vibrant vegetable adds a crisp, fresh touch that balances the creamy decadence of Duchess Potatoes, bringing excitement to your plate.

  • Beef Wellington: Indulge in a festive affair by serving these potatoes alongside a savory, well-seasoned Beef Wellington, enhancing the elegance of your gathering.

  • Garlic Bread Knots: Pairing these with soft, buttery garlic bread knots provides a delightful contrast in texture, making every bite an adventure.

  • Cranberry Salad: A refreshing cranberry salad introduces a tart brightness that elevates the flavors and cuts through the richness of the potatoes.

  • Red Wine: The deep notes of a well-balanced red wine will enhance the flavors of both the Duchess Potatoes and savory main dishes, creating a complete dining experience.

Expert Tips for Duchess Potatoes

Drain Thoroughly: Ensure potatoes are well-drained after boiling to avoid a watery mixture that will affect texture.

Cool Before Eggs: Allow the mixture to cool for about 5 minutes before adding the egg yolks; this prevents them from cooking and ensures a creamy consistency.

Piping Perfection: Use a piping bag for even shapes and an elegant presentation; if you don’t have one, a zip-top bag with a corner snipped off works too.

Watch the Bake: Keep an eye on the baking time; they should be golden brown before removing, but avoid overcooking to retain creaminess inside.

Savory Variations: Don’t hesitate to experiment—add herbs, cheeses, or even spices to customize your Duchess Potatoes and make them your own!

Make Ahead Tip: These can be prepared up to 24 hours in advance; simply pipe onto sheets, refrigerate, and bake when ready to serve.

Duchess Potatoes Recipe FAQs

What kind of potatoes should I use for Duchess Potatoes?
I recommend using russet potatoes for their fluffy texture, but Yukon Golds can also add a richer flavor. Just ensure they are fresh and free from dark spots for the best results!

How should I store leftovers of Duchess Potatoes?
Store any leftovers in an airtight container in the fridge for up to 3 days. Allow them to cool completely beforehand; this helps prevent condensation, which can make them soggy.

Can I freeze Duchess Potatoes?
Absolutely! To freeze, pipe the mounds onto a baking sheet and place them in the freezer until solid (about 1-2 hours). Once frozen, transfer them to a zip-top bag and store them for up to 2 months. When you’re ready to eat, thaw overnight in the fridge and reheat them in a 350°F (175°C) oven for about 15-20 minutes.

How do I prevent my Duchess Potatoes from being too watery?
Make sure to drain the cooked potatoes thoroughly after boiling. Also, mashing them while they are still warm helps release moisture. Avoid overcooking during boiling, which can cause them to absorb extra water.

Can I make Duchess Potatoes ahead of time?
Yes! You can prepare them up to 24 hours in advance. After piping them onto the baking sheets, simply cover and refrigerate. When you’re ready, just pop them into a preheated oven for baking—perfect for saving time during gatherings!

Are there any dietary considerations for Duchess Potatoes?
If you’re vegan or have dietary restrictions, you can substitute the egg yolks with a flax or chia egg, and use vegan cream cheese. This way, everyone can enjoy these delectable Duchess Potatoes without worry!

Duchess Potatoes

Duchess Potatoes: Creamy, Elegant Side Dish for Every Occasion

Duchess Potatoes are creamy, elegant, and versatile, making them the perfect side dish for any occasion.
Prep Time 20 minutes
Cook Time 30 minutes
Cooling Time 5 minutes
Total Time 55 minutes
Servings: 12 mounds
Course: Dinner
Cuisine: American
Calories: 150

Ingredients
  

For the Base
  • 3 pounds russet potatoes Yukon Golds can also be used for a richer flavor.
  • 1 tsp salt Reserve half for later use.
  • ¼ cup salted butter Unsalted can also be used if adjusting overall salt.
  • ½ cup heavy cream Milk or half-and-half can be substituted.
For the Flavor Mix
  • 3 tbsp chive and onion cream cheese Plain cream cheese can be used as a substitute.
  • ¼ cup grated Parmesan cheese Asiago or Pecorino can also be used.
  • 1 tsp granulated garlic Use less if preferring fresh garlic.
Binding and Garnishing
  • 2 large egg yolks For a vegan option, substitute with a flax or chia egg.
  • 2 tbsp chopped fresh chives For garnish and added flavor.

Equipment

  • Large pot
  • Colander
  • potato masher or ricer
  • piping bag with star tip
  • Baking sheets
  • parchment paper

Method
 

Step‑by‑Step Instructions
  1. Begin by peeling and cubing about 3 pounds of russet potatoes and placing them in a large pot. Cover them with cold water and add 1 teaspoon of salt.
  2. Bring the pot to a boil over medium-high heat, then reduce to a gentle simmer. Cook for 8-10 minutes or until fork-tender. Carefully drain the potatoes in a colander and let them steam.
  3. Transfer the drained potatoes back to the pot and mash until smooth. Mix in ¼ cup of salted butter, ½ cup of heavy cream, 3 tablespoons of chive and onion cream cheese, and 1 teaspoon of granulated garlic.
  4. Allow the mixture to cool for about 5 minutes, then beat in 2 large egg yolks until cohesive and silky.
  5. Preheat your oven to 425°F (220°C) and line two baking sheets with parchment paper.
  6. Using a piping bag fitted with a star tip, pipe 12 mounds of the potato mixture onto the prepared baking sheets, aiming for a height of about 2 inches.
  7. Bake in the preheated oven for 20-25 minutes, until golden brown and crispy around the edges.
  8. Once baked, remove from the oven, let cool slightly, and serve warm, garnished with additional grated Parmesan and chopped fresh chives.

Notes

These Duchess Potatoes are not only delicious but adaptable for various flavors. Feel free to experiment with additional ingredients to make them your own.

Sweet and Spicy Ground Turkey & Broccoli Bowls for Quick Dinners

“How can something so healthy also be so delicious?” I found myself asking as I dug into my first Sweet and Spicy Ground Turkey & Broccoli Bowl. This vibrant dish is not just a feast for the palate but also a time-saver, coming together in under 30 minutes—a lifesaver for busy weeknights. The balance of sweet honey and spicy sriracha elevates the lean ground turkey and crunchy broccoli, creating a meal that satisfies both hunger and taste buds. Plus, it’s incredibly customizable; you can easily swap in your favorite veggies or make it vegetarian-friendly with lentils or tofu. Ready to experience a whole new weeknight favorite that will keep your family coming back for seconds? Let’s get cooking!

Why is this recipe a game-changer?

Quick, hassle-free preparation: This recipe can be on your table in under 30 minutes, making it perfect for busy weeknights or last-minute cravings.

Packed with nutrients: The combination of lean ground turkey and broccoli offers a healthy dose of protein, fiber, and vitamins, making it great for anyone looking to eat well.

Customizable for everyone: Whether you prefer it as vegetarian by swapping turkey with lentils or want to add your favorite veggies like bell peppers, the options are endless!

Family-approved flavor: With the perfect balance of sweet and spicy, it’s a guaranteed crowd-pleaser that even picky eaters will love.

Meal prep friendly: Make a batch ahead of time, store it, and enjoy delicious leftovers that maintain their flavor and freshness!

Sweet and Spicy Ground Turkey & Broccoli Bowl Ingredients

For the Turkey Mixture

  • Ground Turkey – A lean protein source that adds savory depth; substitute with ground chicken or lentils for a vegetarian twist.
  • Soy Sauce – Adds umami and saltiness; use tamari if you’re looking for a gluten-free alternative.
  • Honey – Balances the dish with a touch of sweetness; maple syrup works great as a substitute if desired.
  • Sriracha – Infuses heat; adjust based on your spice preference or omit for a milder flavor.
  • Olive Oil – Ideal for sautéing your turkey and broccoli; avocado oil is a great substitute if you prefer.

For the Vegetables

  • Broccoli Florets – Packed with fiber and essential nutrients; feel free to swap with bell peppers or zucchini for variety.

For Serving

  • Cooked Rice or Quinoa – Acts as a hearty base for your bowls; for lower carbs, consider using cauliflower rice instead.

Step‑by‑Step Instructions for Sweet and Spicy Ground Turkey & Broccoli Bowls

Step 1: Prepare the Base
Begin by cooking your rice or quinoa according to package instructions; typically, this takes about 15-20 minutes. Once cooked, fluff it with a fork and set it aside, creating a warm base for your Sweet and Spicy Ground Turkey & Broccoli Bowls.

Step 2: Heat the Oil
In a large skillet, pour in 1 tablespoon of olive oil and heat it over medium heat, allowing it to shimmer for about 1-2 minutes. This step is essential for achieving a nice sear on the turkey and ensures that the flavors meld beautifully as you continue cooking.

Step 3: Cook the Turkey
Add 1 pound of ground turkey to the hot skillet. Cook for 5-7 minutes, breaking it apart with a spatula, until it is browned and no longer pink. The turkey should reach an internal temperature of 165°F, indicating it’s fully cooked and flavorful.

Step 4: Add Broccoli
Once the turkey is browned, stir in 2 cups of broccoli florets. Cook them for another 3-4 minutes, stirring occasionally. The broccoli should turn bright green and be tender yet crisp; this will give your Sweet and Spicy Ground Turkey & Broccoli Bowls a lovely texture.

Step 5: Make the Sauce
In a separate bowl, whisk together ¼ cup of soy sauce, 2 tablespoons of honey, and 1 tablespoon of sriracha until well combined. This sweet and spicy sauce will infuse the turkey and broccoli with incredible flavor, enhancing your dish with every bite.

Step 6: Combine Ingredients
Pour the sauce over the turkey and broccoli mixture in the skillet. Stir thoroughly to ensure every piece is coated in the delicious sauce, allowing the heat to help meld the flavors together beautifully in your Sweet and Spicy Ground Turkey & Broccoli Bowls.

Step 7: Simmer
Allow the mixture to simmer for 2-3 minutes on low heat, stirring occasionally. This step is key, as it enhances the flavors of the sauce and incorporates them into the turkey and broccoli, creating a rich and vibrant dish.

Step 8: Serve
Spoon the colorful turkey and broccoli mixture generously over the rice or quinoa. The combination of textures and flavors creates a nourishing meal that’s both satisfying and quick to prepare—perfect for your new go-to recipe, Sweet and Spicy Ground Turkey & Broccoli Bowls!

Sweet and Spicy Ground Turkey Variations

Feel free to mingle with the flavors and textures in these delightful variations, enhancing your culinary adventure!

  • Vegetarian Twist: Replace ground turkey with lentils or crumbled tofu, creating a hearty vegetarian option packed with protein.

  • Nutty Crunch: Toss in a handful of cashews or peanuts to introduce a delightful crunch and nutty flavor contrast in every bite.

  • Colorful Veggies: Swap broccoli for vibrant snap peas or bell peppers; each option adds a unique flair and nutritional boost to your dish.

  • Alternative Bases: Serve your turkey and broccoli over cauliflower rice or quinoa for a low-carb alternative that still feels satisfying and wholesome.

  • Herb Infusion: Garnish with fresh herbs like cilantro or basil to enhance flavor and appearance; it adds a refreshing twist to the overall dish!

  • Spice It Up: For those who like it hot, consider adding sliced jalapeños or a sprinkle of red pepper flakes; it’ll ignite your taste buds!

  • Creamy Addition: Stir in a dollop of Greek yogurt or avocado after cooking to create a creamy topping that complements the sweet and spicy flavors perfectly.

As you explore these variations, you might also enjoy checking out some of my other favorite recipes like Savor Comforting Broccoli and Homemade Sweet Orange for even more culinary inspiration!

Expert Tips for Sweet and Spicy Ground Turkey & Broccoli Bowls

  • Fresh Ingredients: Use fresh broccoli and high-quality ground turkey for the best flavor and texture. Avoid wilted veggies or low-grade meat to ensure satisfaction.

  • Sweetness and Spice Balance: Adjust the amounts of honey and sriracha to fit your family’s taste preferences. Remember, a little goes a long way!

  • Cooking Technique: Steaming or blanching broccoli separately before adding it to the pan helps maintain its crispness. Overcooking can lead to a mushy texture.

  • Enhance Flavor: Incorporating minced garlic or grated ginger can add an aromatic kick to your Sweet and Spicy Ground Turkey & Broccoli Bowls.

  • Leftover Magic: This dish reheats beautifully! Store leftovers in an airtight container for a quick meal that tastes just as good the next day.

Make Ahead Options

These Sweet and Spicy Ground Turkey & Broccoli Bowls are ideal for meal prep, allowing you to save valuable time during busy weeknights! You can prepare the ground turkey and broccoli mixture up to 3 days in advance, storing it in an airtight container in the refrigerator. To maintain quality, cook the turkey until fully browned, then cool it before refrigerating; this prevents sogginess. The rice or quinoa can also be cooked and stored separately for up to 5 days in the fridge. When you’re ready to serve, simply reheat the turkey and broccoli in a skillet over medium heat until warmed through, and fluff the rice or quinoa before plating. You’ll love the ease of having a nutritious meal ready to go!

What to Serve with Sweet and Spicy Ground Turkey & Broccoli Bowls

Elevate your dining experience with these flavorful sides, creating a well-rounded meal that delights the senses.

  • Coconut Jasmine Rice: A fragrant finish that adds a hint of sweetness, complementing the spicy turkey beautifully. The creamy flavor and fluffy texture balance the dish perfectly.

  • Garlic-Sautéed Green Beans: Crisp and vibrant, these green beans offer a crunchy texture and earthy flavor that pairs wonderfully with the savory bowls.

  • Mango Salad: A refreshing mix of diced mango, cucumber, and mint that brings brightness and sweetness, offsetting the heat of the dish, making each bite a surprise.

  • Sesame Spinach: Lightly sautéed spinach with a sprinkle of sesame seeds brings earthy tones and a delightful crunch, completing your bowl with vibrant color.

  • Chilled Cucumber Soup: Cool and refreshing, this soup is a delightful contrast to the warmth of the turkey bowls, providing a light and hydrating element.

  • Iced Green Tea: A subtle and refreshing drink option that helps cleanse the palate, allowing the bold flavors of the turkey bowls to shine through.

  • Lemon Sorbet: A light and zesty dessert to finish your meal, cleansing the palate with a vibrant burst of citrus after the rich, savory flavors.

  • Spicy Roasted Cauliflower: An addictive crunchy side that mirrors the sweet and spicy theme, adding texture and further layers of flavor to your meal experience.

Whatever you choose, these delightful pairings will perfect your Sweet and Spicy Ground Turkey & Broccoli Bowls for dining that feels special every time!

Storage Tips for Sweet and Spicy Ground Turkey & Broccoli Bowls

Fridge: Store leftovers in airtight containers for up to 3-4 days. Keep the rice or quinoa separate if you prefer them to stay fluffy and fresh.

Freezer: Freeze Sweet and Spicy Ground Turkey & Broccoli Bowls in airtight containers for up to 3 months. Consider portioning for easy reheating later!

Reheating: When ready to eat, thaw overnight in the fridge before reheating. Warm thoroughly in the microwave or on the stovetop until piping hot.

Serving Suggestions: For optimal taste, reheat just the turkey and broccoli mixture and spoon it over freshly cooked rice or quinoa for that freshly made feel!

Sweet and Spicy Ground Turkey & Broccoli Bowls Recipe FAQs

How do I select the best broccoli for this recipe?
Absolutely! When choosing broccoli, look for florets that are bright green with tight bud clusters. Avoid ones that have yellowing or dark spots all over, indicating overripeness. Fresh broccoli is crunchy and adds great texture to your Sweet and Spicy Ground Turkey & Broccoli Bowls.

What is the best way to store leftovers?
Very simple! You can store your Sweet and Spicy Ground Turkey & Broccoli Bowls in airtight containers in the refrigerator for up to 3-4 days. If you want to enjoy them later, consider separating the turkey mixture from the rice or quinoa to keep everything fresh.

Can I freeze the Sweet and Spicy Ground Turkey & Broccoli Bowls?
Yes, you can! Portion the bowls into airtight containers and freeze for up to 3 months. Make sure to label them with the date. To reheat, thaw overnight in the fridge, then warm in the microwave or on the stovetop until heated through.

Why is my dish too salty or sweet?
It’s all about balancing flavors! If your Sweet and Spicy Ground Turkey & Broccoli Bowls end up too salty because of the soy sauce or too sweet from the honey, I recommend adjusting the amounts next time. Start with 2 tablespoons of soy sauce and 1 tablespoon of honey, then taste and modify as you cook. Remember, you can always add more, but it’s harder to take away!

Can my pet eat the ingredients in this dish?
Good question! While ground turkey and broccoli are generally safe for dogs, avoid giving them anything seasoned with soy sauce, honey, or sriracha, as those can be harmful. Always consult your vet before introducing new foods to your pet’s diet to ensure their safety.

What if I have food allergies?
Of course! For those allergic to gluten, substitute soy sauce with tamari. If you need to avoid honey due to dietary restrictions, maple syrup makes a great alternative. Feel free to make your Sweet and Spicy Ground Turkey & Broccoli Bowls truly your own by adjusting according to your needs!

Sweet and Spicy Ground Turkey & Broccoli Bowls

Sweet and Spicy Ground Turkey & Broccoli Bowls for Quick Dinners

Quick and nutritious Sweet and Spicy Ground Turkey & Broccoli Bowls perfect for busy weeknights.
Prep Time 10 minutes
Cook Time 20 minutes
Total Time 30 minutes
Servings: 4 bowls
Course: Dinner
Cuisine: American
Calories: 450

Ingredients
  

For the Turkey Mixture
  • 1 pound Ground Turkey Lean protein; can substitute with ground chicken or lentils.
  • 1/4 cup Soy Sauce Use tamari for gluten-free.
  • 2 tablespoons Honey Maple syrup can be used as a substitute.
  • 1 tablespoon Sriracha Adjust according to spice preference.
  • 1 tablespoon Olive Oil Avocado oil is a great substitute.
For the Vegetables
  • 2 cups Broccoli Florets Can substitute with bell peppers or zucchini.
For Serving
  • 4 servings Cooked Rice or Quinoa Use cauliflower rice for lower carbs.

Equipment

  • Skillet
  • pot

Method
 

Step-by-Step Instructions
  1. Begin by cooking your rice or quinoa according to package instructions; typically, this takes about 15-20 minutes. Once cooked, fluff it with a fork and set it aside.
  2. In a large skillet, pour in 1 tablespoon of olive oil and heat it over medium heat for about 1-2 minutes.
  3. Add 1 pound of ground turkey to the hot skillet. Cook for 5-7 minutes, breaking it apart with a spatula.
  4. Once the turkey is browned, stir in 2 cups of broccoli florets. Cook them for another 3-4 minutes.
  5. In a separate bowl, whisk together 1/4 cup of soy sauce, 2 tablespoons of honey, and 1 tablespoon of sriracha.
  6. Pour the sauce over the turkey and broccoli mixture in the skillet. Stir thoroughly.
  7. Allow the mixture to simmer for 2-3 minutes on low heat, stirring occasionally.
  8. Spoon the turkey and broccoli mixture generously over the rice or quinoa.

Notes

Store leftovers in airtight containers for up to 3-4 days. Reheat the turkey and broccoli mixture for a quick meal.

Protein Loaded Breakfast Hash Browns for a Power-Packed Morning

As the aroma of crispy, golden potatoes fills the air, I can’t help but feel excited about serving up my Protein Loaded Breakfast Hash Browns. This dish transforms a classic comfort food into a high-protein powerhouse, perfectly balancing taste and nutrition. Not only are these hash browns easy to whip up, but their customizable nature means you can tailor them to suit any dietary preference—whether it’s a vegetarian delight or a meat lover’s dream. Imagine impressing family and friends with this delicious start to their day, all while knowing you’re providing them with a nutritious meal that fuels their morning. Are you ready to elevate your breakfast game? Let’s dive into the recipe!

Why Choose Protein Loaded Breakfast Hash Browns?

Healthy Ingredients: Packed with nutrient-rich potatoes and fresh greens, these hash browns offer a wholesome start to your day.

Customizable Delight: Whether you’re craving chicken or prefer a vegetarian twist with black beans, you can easily make them your own.

Quick and Easy: Ready in less than 30 minutes, this dish is perfect for busy mornings or lazy brunches alike.

Crowd-Pleasing: Impress your family and friends with this delicious meal that caters to various taste preferences, making it a perfect dish for gatherings.

Versatile Toppings: Elevate your breakfast by adding avocado, salsa, or a dollop of sour cream for freshness and extra flavor.

Meal Prep Friendly: Make a big batch and store leftovers in the fridge for quick, nutritious breakfasts throughout the week!

Protein Loaded Breakfast Hash Browns Ingredients

Ready to whip up something delicious? Here’s what you’ll need to create these high-protein hash browns!

For the Hash Browns

  • Grated Potatoes – Provides the base; creates a crispy texture when cooked. Substitution: Yukon Gold or another starchy potato.
  • Chopped Spinach – Adds nutrition and color; enhances flavor. Substitution: Kale or other leafy greens.
  • Cooked Protein (Chicken, Turkey, or Black Beans) – Boosts protein content for energy. Substitution: Tofu for a vegetarian option.
  • Grated Cheese (Cheddar or Mozzarella) – Adds creaminess and flavor; helps hold the hash browns together. Substitution: Vegan cheese for a dairy-free option.
  • Large Eggs – Binds ingredients and adds moisture; contributes to protein. Substitution: Flaxseed mixture for a vegan version (1 tbsp flaxseed + 2.5 tbsp water).
  • Salt – Enhances overall flavor.
  • Black Pepper – Adds mild heat.
  • Onion Powder – Offers savory depth.
  • Garlic Powder – Provides aromatic flavor.
  • Olive Oil or Cooking Spray – For frying and achieving crispiness; enhances flavor. Substitution: Coconut oil or butter for cooking.

Optional Toppings

  • Avocado – Adds creaminess and healthy fats for a nourished bite.
  • Salsa – Introduces a fresh and zesty kick; perfect for flavor lovers.
  • Sour Cream – Offers cool creaminess to balance the warm hash browns.

Elevate your mornings with these Protein Loaded Breakfast Hash Browns, packed with flavor and nutrition!

Step‑by‑Step Instructions for Protein Loaded Breakfast Hash Browns

Step 1: Prep Potatoes
Start by peeling and grating your potatoes, ensuring you select a starchy variety for that perfect crispy texture. After grating, wrap the potatoes in a clean kitchen towel and squeeze out as much excess moisture as possible. This step is crucial for achieving the delightful crunch in your Protein Loaded Breakfast Hash Browns.

Step 2: Mix Ingredients
In a large mixing bowl, combine the squeezed grated potatoes, chopped spinach, your choice of cooked protein, grated cheese, eggs, salt, black pepper, onion powder, and garlic powder. Stir the mixture thoroughly until all the ingredients are evenly incorporated, creating a vibrant and hearty blend. Get ready for some delicious hash brown magic!

Step 3: Heat Skillet
Place a non-stick skillet over medium heat and add a drizzle of olive oil or a light spray of cooking spray. Allow the oil to heat up for about 2 minutes until it shimmers—this will ensure your hash browns get that golden-brown exterior. The right temperature is key to making your Protein Loaded Breakfast Hash Browns flawlessly crisp.

Step 4: Form Patties
Once the skillet is ready, take a handful of the mixture and shape it into a patty, about 1 inch thick. Carefully place the patties in the skillet, ensuring not to overcrowd them; this allows them to fry evenly and get that gorgeous crispy edge. Depending on your skillet size, you may need to cook in batches.

Step 5: Cook Hash Browns
Cook each patty for approximately 4 to 5 minutes on one side until they turn golden brown and develop a slightly crisp texture. Use a spatula to gently flip each patty over, cooking for an additional 4 to 5 minutes on the other side. Keep an eye on them; perfect hash browns will be crunchy yet tender inside!

Step 6: Drain Oil
Once cooked, carefully transfer your hash brown patties to a plate lined with paper towels, allowing them to drain any excess oil. This step enhances both the flavor and texture of your Protein Loaded Breakfast Hash Browns, ensuring they remain crispy as you prepare the remaining batches.

Step 7: Repeat
If you have more mixture to cook, return the skillet to medium heat and add additional olive oil if needed. Repeat the process for the remaining mixture, forming new patties and frying them until golden. No need to rush; take your time to make each serving as delightful as the first.

Step 8: Serve
Once your Protein Loaded Breakfast Hash Browns are all cooked, it’s time to serve! Plate them hot and garnish with your favorite toppings like fresh avocado, vibrant salsa, or a dollop of creamy sour cream. Invite your family to the table, and enjoy a deliciously satisfying breakfast together!

How to Store and Freeze Protein Loaded Breakfast Hash Browns

  • Fridge: Store leftovers in an airtight container for up to 3 days. This keeps them fresh and ready for quick reheating during busy mornings.

  • Freezer: Freeze cooked hash browns in a single layer on a baking sheet. Once frozen, transfer to freezer bags and enjoy for up to 3 months.

  • Reheating: Reheat in an oven at 400°F (200°C) for 10-15 minutes until crispy, ensuring the Protein Loaded Breakfast Hash Browns maintain their delightful crunch.

  • Make-Ahead Option: Prepare the mixture and refrigerate for up to 1 day before cooking. This way, you can easily whip up a nutritious breakfast in no time!

What to Serve with Protein Loaded Breakfast Hash Browns

Transform your breakfast table into a delightful feast with vibrant accompaniments that perfectly complement the rich flavors of your hash browns.

  • Fresh Fruit Salad: A colorful mix of seasonal fruits brings brightness and a refreshing contrast to the savory hash browns.
  • Scrambled Eggs: Fluffy, soft eggs add extra protein and a creamy texture that blends beautifully with the crispiness of the hash browns.
  • Creamy Avocado Toast: Smooth avocado adds richness and healthy fats, creating a satisfying balance with the hearty hash browns.
  • Zesty Salsa: A spoonful of tangy salsa awakens the palate and enhances the flavor profile of your breakfast spread.
  • Greek Yogurt Parfait: Layered with berries and granola, this parfait offers a sweet and crunchy treat that rounds out your meal.
  • Herb-Infused Salad: A light salad with fresh herbs and vinaigrette adds freshness and balances the richness of the dish.
  • Smoothies: A berry or green smoothie delivers a boost of vitamins while being a quick and flavorful drink pairing.
  • Hot Beverages: Serve with a freshly brewed coffee or a warming herbal tea to heighten the breakfast experience.

These delightful pairings not only elevate your Protein Loaded Breakfast Hash Browns but also create a comforting and memorable morning meal!

Expert Tips for Protein Loaded Breakfast Hash Browns

  • Squeeze Thoroughly: Ensure the grated potatoes are well-squeezed to remove moisture for a crispier texture.
  • Soak for Extra Crispiness: Try soaking grated potatoes in cold water for 10 minutes before squeezing to enhance their crunchiness.
  • Maintain Skillet Temperature: Keep the heat at medium; too high can burn the hash browns before they’re fully cooked.
  • Avoid Overcrowding: Fry in batches instead of cramming all patties in the skillet to ensure even cooking and perfect browning.
  • Store Leftovers Safely: Refrigerate any unused mixture in an airtight container for up to a day to preserve freshness before cooking.
  • Flavor Variations: Feel free to experiment with spices like smoked paprika or add a sprinkle of cheese to customize your Protein Loaded Breakfast Hash Browns!

Protein Loaded Breakfast Hash Browns Variations

Customize your Protein Loaded Breakfast Hash Browns for a delightful twist, allowing your creativity to shine in the kitchen!

  • Vegetarian Delight: Replace meat with hearty mushrooms, colorful bell peppers, and zucchini for a satisfying vegetarian option. This medley brings a fresh explosion of flavors and textures, satisfying even the meat lovers at your table.

  • Cheesy Goodness: Experiment with unique cheese varieties like tangy feta or spicy pepper jack. Each cheese melts beautifully, adding richness and an exciting flavor profile that’ll have everyone asking for seconds!

  • Spicy Kick: Add diced jalapeños or a sprinkle of red pepper flakes for those who love a touch of heat. This fiery twist will wake up your taste buds and make your mornings feel vibrant and alive.

  • Sweet and Savory: Combine grated sweet potatoes with regular potatoes for a delightful balance of natural sweetness and savory goodness. This creative swap offers a unique flavor twist that adds a burst of color to your breakfast plate.

  • Herb-Infused: Incorporate fresh herbs like basil or chives into the mixture for a bright, aromatic kick. This addition not only enhances flavor but also gives your hash browns a lovely freshness that brightens up every bite.

  • Smoky Flavor: Introduce smoked paprika to your spice blend for an intense flavor boost. This earthy note transforms your hash browns into a smoky delight that’s simply unforgettable!

  • Nutty Crunch: Sprinkle in some toasted sunflower seeds or chopped walnuts for added texture. This adds a delightful crunch and elevates the dish while providing healthy fats to keep you satisfied.

  • Low-Carb Version: Swap regular potatoes for riced cauliflower or zucchini for a low-carb alternative without sacrificing flavor. This variation is perfect for those following a ketogenic or low-carb diet, allowing you to enjoy breakfast guilt-free!

Feel free to explore these variations and make your Protein Loaded Breakfast Hash Browns a culinary masterpiece tailored to your family’s taste! For additional tips on ingredient swaps, check out our guide on creative cooking substitutions or discover more ways to elevate your breakfast with delicious toppings.

Make Ahead Options

These Protein Loaded Breakfast Hash Browns are a lifesaver for busy mornings! You can prep the mixture of grated potatoes, chopped spinach, protein, cheese, and spices up to 24 hours in advance—just store it in an airtight container in the refrigerator. To maintain that wonderful crispy texture, ensure the grated potatoes are squeezed well to remove moisture before combining with the other ingredients. When you’re ready to cook, simply form patties and fry them in a preheated skillet as you normally would. Feel free to make a big batch and reheat leftovers for another quick breakfast—just as delicious the next day!

Protein Loaded Breakfast Hash Browns Recipe FAQs

What type of potatoes are best for hash browns?
Absolutely! Starchy potatoes like Russet or Yukon Gold are ideal for achieving that crispy texture in your hash browns. They hold up well when grated and create the perfect balance between crunch on the outside and tenderness on the inside.

How should I store leftovers of Protein Loaded Breakfast Hash Browns?
Very! To keep your leftover hash browns fresh, place them in an airtight container and store in the refrigerator for up to 3 days. This allows for quick and easy meals throughout the week; just reheat and they’re ready to enjoy!

Can I freeze these hash browns?
Absolutely! To freeze, first cook the hash browns and let them cool completely. Then, lay them out in a single layer on a baking sheet until frozen solid (about 1-2 hours). Once frozen, transfer them to freezer bags. They can last up to 3 months. When you’re ready to eat, reheat them in the oven at 400°F (200°C) for 10-15 minutes to restore that crispy texture.

What should I do if my hash browns are soggy after cooking?
No worries! If your hash browns turn out soggy, it’s likely because the grated potatoes had too much moisture. To troubleshoot, ensure you squeeze out as much liquid as possible before cooking, and consider soaking the grated potatoes in water for 10 minutes then draining them for extra crispiness.

Are there any allergy considerations I should be aware of?
Very! This recipe can include common allergens like dairy (if using cheese) and eggs. For a dairy-free option, you can substitute with vegan cheese, and for a vegan alternative, replace the eggs with a flaxseed mixture (1 tbsp flaxseed + 2.5 tbsp water). Always check labels for pre-cooked proteins to avoid any hidden allergens.

How can I customize the Protein Loaded Breakfast Hash Browns for dietary preferences?
You can easily tailor this recipe! For a vegetarian option, simply use black beans instead of meat or try adding a variety of vegetables like mushrooms and bell peppers. Feel free to switch up the cheese or omit it altogether for a dairy-free version. The more the merrier in terms of creativity and flavor!

Protein Loaded Breakfast Hash Browns

Protein Loaded Breakfast Hash Browns for a Power-Packed Morning

These Protein Loaded Breakfast Hash Browns offer a high-protein, customizable meal for a delicious start to your day.
Prep Time 15 minutes
Cook Time 15 minutes
Total Time 30 minutes
Servings: 4 servings
Course: Breakfast
Cuisine: American
Calories: 350

Ingredients
  

For the Hash Browns
  • 3 cups Grated Potatoes Substitution: Yukon Gold or another starchy potato
  • 2 cups Chopped Spinach Substitution: Kale or other leafy greens
  • 1 cup Cooked Protein (Chicken, Turkey, or Black Beans) Substitution: Tofu for a vegetarian option
  • 1 cup Grated Cheese (Cheddar or Mozzarella) Substitution: Vegan cheese for a dairy-free option
  • 2 Large Eggs Substitution: Flaxseed mixture for a vegan version (1 tbsp flaxseed + 2.5 tbsp water)
  • 1 teaspoon Salt
  • 1 teaspoon Black Pepper
  • 1 teaspoon Onion Powder
  • 1 teaspoon Garlic Powder
  • 2 tablespoons Olive Oil or Cooking Spray Substitution: Coconut oil or butter for cooking
Optional Toppings
  • 1 Avocado Sliced Adds creaminess and healthy fats
  • 1 cup Salsa Fresh and zesty kick
  • 1 cup Sour Cream For cool creaminess

Equipment

  • Non-Stick Skillet
  • mixing bowl
  • kitchen towel

Method
 

Preparation Steps
  1. Start by peeling and grating your potatoes, ensuring you select a starchy variety for that perfect crispy texture. After grating, wrap the potatoes in a clean kitchen towel and squeeze out as much excess moisture as possible.
  2. In a large mixing bowl, combine the squeezed grated potatoes, chopped spinach, your choice of cooked protein, grated cheese, eggs, salt, black pepper, onion powder, and garlic powder. Stir the mixture thoroughly until all the ingredients are evenly incorporated.
  3. Place a non-stick skillet over medium heat and add a drizzle of olive oil or a light spray of cooking spray.
  4. Once the skillet is ready, take a handful of the mixture and shape it into a patty, about 1 inch thick. Carefully place the patties in the skillet, ensuring not to overcrowd them.
  5. Cook each patty for approximately 4 to 5 minutes on one side until they turn golden brown. Flip each patty over, cooking for an additional 4 to 5 minutes on the other side.
  6. Once cooked, carefully transfer your hash brown patties to a plate lined with paper towels to drain any excess oil.
  7. If you have more mixture to cook, return the skillet to medium heat and add additional olive oil if needed. Repeat the process for the remaining mixture.
  8. Once your hash browns are all cooked, plate them hot and garnish with your favorite toppings like fresh avocado, vibrant salsa, or a dollop of creamy sour cream.

Notes

Squeeze grated potatoes thoroughly to achieve crispiness and experiment with spices for flavor variations.

Blueberry Cheesecake Protein Bites for Guilt-Free Indulgence

While flipping through my recipe notebook, the vibrant image of Blueberry Cheesecake Protein Bites caught my eye. Oh, the thrill of a dessert you can feel great about indulging in! These no-bake delights are not only a healthy snack but also effortlessly quick to whip up for any occasion. Bursting with creamy goodness from cream cheese and a natural sweetness from ripe blueberries, they truly offer a satisfying treat without the guilt. Imagine enjoying these bites as post-workout fuel or a midday pick-me-up, all while knowing they’re high in protein and adaptable for dietary needs. Whether you’re a fitness fanatic or simply looking to swap out fast food for something homemade, trust me, these protein bites will become your go-to snack. What flavor twist will you try first?

Why are these bites a must-try?

No-Bake Simplicity: These Blueberry Cheesecake Protein Bites are a breeze to prepare, saving you time and mess while delivering big flavor.

Creamy Delight: The combination of cream cheese and Greek yogurt gives these bites a luscious, cheesecake-like texture.

Customizable Flavors: Feel free to swap the blueberries for strawberries or raspberries, or even add chocolate chips for a decadent twist!

Health-Conscious Indulgence: With high protein and healthy ingredients, they satisfy your sweet tooth without compromising your diet.

Perfect Snack for Everyone: They make an excellent post-workout treat, lunchbox favorite, or afternoon pick-me-up. Try pairing them with a Guilt-Free Energy Bites recipe for an energizing snack combo!

Experience the joy of a healthy homemade snack that everyone will love!

Blueberry Cheesecake Protein Bites Ingredients

For the Bites

  • Rolled Oats – Provides structure and fiber; substitute with quick oats if you prefer a finer texture.
  • Almond Flour – Adds healthy fats and enhances the cheesecake flavor; can be replaced with oat flour for a nut-free option.
  • Vanilla Protein Powder – Serves as the main source of protein; opt for plant-based protein powder for a vegan version.
  • Cream Cheese – Creates that creamy, luscious texture; substitute with dairy-free cream cheese for a vegan alternative.
  • Greek Yogurt – Contributes extra protein and creaminess; can be swapped with dairy-free yogurt for a vegan-friendly option.
  • Honey or Maple Syrup – Acts as a natural sweetener; choose maple syrup for a vegan alternative.
  • Blueberries – Offers a burst of flavor and antioxidants; feel free to swap with raspberries, strawberries, or dried fruits for variety.
  • Vanilla Extract – Enhances the overall flavor; ensure it’s pure for the best taste.
  • Salt – Balances sweetness and enhances flavors; just a pinch will do!

Experience these Blueberry Cheesecake Protein Bites as a delightful option for a healthy snack that genuinely satisfies!

Step‑by‑Step Instructions for Blueberry Cheesecake Protein Bites

Step 1: Prepare the Dry Ingredients
In a large mixing bowl, combine rolled oats, almond flour, and vanilla protein powder. Mix these dry ingredients together using a whisk to ensure they’re evenly blended, creating a solid base for your Blueberry Cheesecake Protein Bites. Aim for a uniform color and texture, which should take about 1-2 minutes.

Step 2: Blend the Wet Ingredients
In a separate bowl, blend the softened cream cheese, Greek yogurt, honey or maple syrup, and vanilla extract. Use an electric mixer or a sturdy spatula to achieve a smooth, creamy consistency, ensuring there are no lumps. This should take about 3-4 minutes. The mixture will look glossy and well combined.

Step 3: Incorporate Blueberries
Gently fold in the fresh blueberries into the creamy mixture from Step 2. Take care to mix slowly, ensuring the blueberries remain intact and provide delightful bursts of flavor in your Blueberry Cheesecake Protein Bites. This process will take roughly 1-2 minutes to avoid crushing the berries.

Step 4: Combine Wet and Dry Mixtures
Gradually add the dry mixture from Step 1 into the creamy blueberry blend. Stir with a spatula until just combined, and a sticky dough forms. Avoid overmixing as this can affect the texture of your bites. This step should take about 2-3 minutes, until no dry ingredients are visible.

Step 5: Form the Bites
Using a tablespoon, scoop out portions of the dough and roll them into balls using your palms. Aim for roughly the size of a standard tablespoon for uniformity. Place each rolled bite onto a parchment-lined baking sheet. This step will take about 5-7 minutes, depending on the quantity you’re making.

Step 6: Chill to Firm Up
Once all the bites are formed, place the baking sheet in the refrigerator and chill for at least 30 minutes. This will help the bites firm up and hold their shape, making them perfect for snacking. You’ll know they’re ready when they feel solid to the touch.

Step 7: Store and Enjoy
After chilling, transfer the Blueberry Cheesecake Protein Bites to an airtight container. They can be stored in the fridge for up to a week or frozen for longer-lasting freshness. Just thaw as needed for quick snacking or meal prep occasions—enjoy these luscious bites of goodness whenever you crave something sweet!

Make Ahead Options

These Blueberry Cheesecake Protein Bites are perfect for meal prep, making them an excellent choice for busy weeknights! You can prepare the mixture up to 24 hours in advance by following the first four steps and then refrigerating the formed dough. When you’re ready to enjoy, simply scoop and roll the bites into balls and chill for at least 30 minutes to firm up before serving. To maintain the freshness and delightful texture, store any leftovers in an airtight container in the fridge for up to 7 days or freeze them for longer storage. Thaw as needed, and you’ll have a delicious snack ready to fuel your day!

What to Serve with Blueberry Cheesecake Protein Bites

These delightful bites are perfect for building a meal that feels indulgent yet healthy.

  • Fresh Fruit Salad: A medley of seasonal fruits adds a refreshing contrast and enhances the fruity flavor of the bites.
  • Greek Yogurt Parfait: Layer yogurt with granola and extra blueberries for a complete breakfast or snack, making it creamy and satisfying.
  • Nut Butter Dip: Serve with almond or peanut butter for a deliciously protein-packed pairing, bringing a nutty richness to each bite.
  • Chilled Sparkling Water: A light, bubbly drink refreshes your palate and creates an uplifting, clean experience alongside the bites.
  • Dark Chocolate Squares: The slight bitterness of dark chocolate complements the sweetness of the bites, creating a beautifully balanced dessert moment.
  • Herbal Tea: A soothing cup of chamomile or mint tea provides warmth and harmony, making it a perfect afternoon treat option.

Enjoy crafting your ideal snack spread, bringing together flavors and textures that make every bite a celebration!

Blueberry Cheesecake Protein Bites Variations

Embrace your creativity and make these delicious bites uniquely yours with these fun twists and substitutions!

  • Berry Mix: Swap blueberries for a delightful combination of raspberries and strawberries for a fruity explosion. Each bite will offer a refreshing twist, adding variety to your snack time.

  • Chocolate Lovers: For a decadent chocolatey flavor, mix in mini dark chocolate chips or a spoonful of cocoa powder into the dough. This delightful addition turns your bites into an indulgent treat without losing their healthy edge.

  • Nut-Free Delight: Replace almond flour with oat flour for a nut-free option, perfect for those with allergies. You’ll still achieve a satisfying texture, keeping every bite delicious and safe for everyone!

  • Vegan-Friendly: Use plant-based protein powder and dairy-free cream cheese to whip up vegan-friendly Blueberry Cheesecake Protein Bites. Enjoy the same comforting flavors while catering to your dietary preferences.

  • Extra Fiber Boost: Stir in chia seeds or ground flax seeds for a nutritious fiber boost. This twist not only enhances the health benefits but also adds a pleasant crunch to the bites.

  • Citrus Kick: Add a splash of fresh lemon or lime juice to the mixture for a zesty flavor boost. This tanginess complements the sweetness of the blueberries beautifully, making each bite a flavor adventure.

  • Spicy Sweetness: If you enjoy a bit of heat, sprinkle in a dash of cayenne or chili powder to add warmth. This unique twist is perfect for those who relish the combination of sweet and spicy!

  • Oatmeal Cream Pies: For an exciting twist, layer the mix into a round mold with Greek yogurt in the center to create layered bites resembling oatmeal cream pies. These are perfect for sharing and a fun way to enjoy the flavors!

Adding unique flavors or dietary swaps can transform these Blueberry Cheesecake Protein Bites into countless variations. Explore and find your favorite, and don’t forget to check out our Guilt-Free Energy Bites or Grandma’s Homemade Bites for more delightful snack inspiration!

Expert Tips for Blueberry Cheesecake Protein Bites

  • Softened Cream Cheese: Ensure your cream cheese is at room temperature for easy blending, preventing lumps and achieving a smooth texture.

  • Don’t Overmix: Mix the dough only until combined. Overworking it can lead to a tough texture in your Blueberry Cheesecake Protein Bites.

  • Use a Cookie Scoop: For evenly sized bites, consider using a cookie scoop. This ensures they cook uniformly and look attractive.

  • Chill Thoroughly: Chilling the bites for at least 30 minutes helps them firm up, making them easier to handle and enhancing their texture.

  • Experiment with Flavors: Feel free to swap blueberries with your favorite fruits or mix in chocolate chips for an exciting flavor twist!

How to Store and Freeze Blueberry Cheesecake Protein Bites

Fridge: Store the Blueberry Cheesecake Protein Bites in an airtight container in the fridge for up to 7 days. This keeps them fresh and ready for snacking any time you crave something sweet.

Freezer: For longer storage, freeze the protein bites on a baking sheet until firm, then transfer them to a freezer-safe bag. They can keep well for up to 3 months.

Thawing: When you’re ready to enjoy, simply thaw them in the fridge overnight or at room temperature for about 30 minutes. They’ll be just as delightful!

Reheating: These bites are best enjoyed chilled; however, if desired, you can warm them for 10-15 seconds in the microwave for a softer treat.

Blueberry Cheesecake Protein Bites Recipe FAQs

How do I select the best blueberries for this recipe?
Absolutely! Choose blueberries that are plump and firm, with a deep blue color. Avoid any that have dark spots or appear shriveled, as these may be overripe and less flavorful. The best blueberries are ones that are in season and fresh, typically found at local farmer’s markets.

What are the best storage methods for Blueberry Cheesecake Protein Bites?
Store your Blueberry Cheesecake Protein Bites in an airtight container in the fridge for up to 7 days. If you want to keep them longer, you can freeze them for up to 3 months. Just make sure to separate the bites with parchment paper before freezing to prevent sticking!

Can I freeze these protein bites, and if so, how?
Certainly! To freeze, arrange the protein bites on a parchment-lined baking sheet and place them in the freezer until firm, about 1-2 hours. Once hardened, transfer them to a freezer-safe bag, ensuring to remove as much air as possible to prevent freezer burn. Label the bag with the date, and enjoy them anytime within 3 months!

What if my mixture is too dry or crumbly?
If you find the mixture is too dry, try adding a splash of milk or yogurt (dairy or non-dairy) to help bind the ingredients together. Add just a tablespoon at a time until you achieve a sticky consistency that holds when rolled into a ball. Mixing too long can also dry it out, so gentle blending is key!

Are there any allergens I should consider?
Definitely! If you or someone you’re serving has allergies, keep in mind that this recipe contains cream cheese, which has dairy. For a vegan alternative, substitute with dairy-free cream cheese. Also, check that your protein powder is free of allergens if you’re using flavored versions, as they can contain various ingredients.

How can I adapt these bites for different dietary needs?
These Blueberry Cheesecake Protein Bites are incredibly versatile! To make them gluten-free, ensure you use certified gluten-free rolled oats and almond flour. For a vegan option, simply swap out the cream cheese and Greek yogurt for dairy-free versions and use maple syrup instead of honey. The possibilities are endless!

Blueberry Cheesecake Protein Bites

Blueberry Cheesecake Protein Bites for Guilt-Free Indulgence

Delicious Blueberry Cheesecake Protein Bites are a healthy, no-bake snack perfect for post-workout fuel or a sweet treat without guilt.
Prep Time 15 minutes
Chilling Time 30 minutes
Total Time 45 minutes
Servings: 12 bites
Course: Dessert
Cuisine: American
Calories: 100

Ingredients
  

For the Bites
  • 2 cups Rolled Oats Substitute with quick oats for finer texture.
  • 1 cup Almond Flour Can be replaced with oat flour for nut-free option.
  • 1 scoop Vanilla Protein Powder Opt for plant-based protein powder for vegan version.
  • 8 oz Cream Cheese Substitute with dairy-free cream cheese for vegan option.
  • 1 cup Greek Yogurt Can be swapped for dairy-free yogurt for vegan-friendly option.
  • 1/4 cup Honey or Maple Syrup Choose maple syrup for vegan alternative.
  • 1 cup Blueberries Feel free to swap with raspberries, strawberries, or dried fruits.
  • 1 tsp Vanilla Extract Ensure it's pure for best flavor.
  • 1/4 tsp Salt Just a pinch will do!

Equipment

  • mixing bowl
  • spatula
  • electric mixer
  • baking sheet
  • parchment paper

Method
 

Step-by-Step Instructions
  1. In a large mixing bowl, combine rolled oats, almond flour, and vanilla protein powder. Whisk until evenly blended.
  2. In a separate bowl, blend softened cream cheese, Greek yogurt, honey or maple syrup, and vanilla extract. Mix until smooth and creamy.
  3. Gently fold fresh blueberries into the creamy mixture.
  4. Gradually add the dry mixture into the creamy blueberry blend stirring until just combined.
  5. Using a tablespoon, scoop portions of the dough and roll them into balls. Place on a parchment-lined baking sheet.
  6. Refrigerate the bites for at least 30 minutes to firm up.
  7. Transfer the bites to an airtight container. They can be stored in the fridge for up to a week or frozen.

Notes

These bites are suitable for meal prep, providing a nutritious snack for various occasions. Feel free to experiment with different flavors and ingredients!

Delicious French Onion Broccoli Cheese Casserole Bliss

A comforting dish bubbling away in the oven is like a warm hug on a chilly evening. Enter my 5-Ingredient French Onion Broccoli Cheese Casserole—a simple yet satisfying side that even the most dedicated broccoli naysayers won’t be able to resist! With just five ingredients, this quick and easy recipe marries the creaminess of mushroom soup and rich French onion dip with tender broccoli, all topped off with gooey cheddar and crispy fried onions. It’s not just a crowd-pleaser; it’s also perfect for busy weeknights or those potluck gatherings when you want to impress without spending hours in the kitchen. Ready in just 35 minutes, this casserole is here to rescue you from fast food spells and elevate your homemade meals. Curious how this delicious combination comes together? Let’s dive into the recipe!

Why is this casserole a must-try?

Simplicity: With just five ingredients, making this dish is a breeze, perfect for busy weeknights.

Rich Flavor: The combination of creamy mushroom soup and savory French onion dip delivers a depth of flavor that will leave taste buds dancing.

Crowd-Pleasing: This casserole tends to win over even the pickiest eaters, making it a stellar choice for gatherings or family dinners.

Versatile: Feel free to get creative by adding protein like rotisserie chicken or more vegetables for an even heartier meal.

Quick Preparation: In just 35 minutes, you can serve a delicious side that feels like comfort food, without the hassle of fast food options. For more easy recipes, check out my Easy Stovetop Cheese and Green Onion Flatbread or Homemade French Fries to elevate your meal experience!

French Onion Broccoli Cheese Casserole Ingredients

• Discover the perfect blend of flavors with these simple ingredients!

For the Casserole

  • Broccoli Florets – Provides the main vegetable base; both fresh or frozen work beautifully.
  • Unsalted Cream of Mushroom Soup – Adds a creamy texture; unsalted helps control sodium.
  • Sour Cream Based French Onion Dip – Imparts a rich onion flavor essential for the casserole; opt for sour cream-based varieties for best results.
  • Shredded Cheddar Cheese – Gives a melty, cheesy finish; sharp cheddar enhances the overall flavor.
  • French Fried Onions – Adds a delightful crunch; critical for that contrasting texture in the casserole.

Embrace the warmth of this French Onion Broccoli Cheese Casserole—your taste buds will thank you!

Step‑by‑Step Instructions for French Onion Broccoli Cheese Casserole

Step 1: Preheat the Oven
Begin by preheating your oven to 350ºF (175ºC). While the oven heats up, spray a 9×9-inch baking dish lightly with cooking spray to prevent sticking. This step is crucial as it ensures that your French Onion Broccoli Cheese Casserole can be easily served later and retains its lovely texture.

Step 2: Prepare the Casserole Mixture
In a large mixing bowl, combine the chopped broccoli florets, cream of mushroom soup, and sour cream-based French onion dip. Stir well to incorporate all the ingredients. Add in 1 cup of shredded cheddar cheese and half of the French fried onions, mixing until everything is evenly coated—a colorful medley of flavors and textures.

Step 3: Transfer to Baking Dish
Carefully spoon the broccoli mixture into your prepped baking dish, spreading it out evenly. Use a spatula to ensure that it reaches all corners of the dish. This even layering is important for consistent cooking and ensures that every bite of the French Onion Broccoli Cheese Casserole is deliciously infused with the flavors.

Step 4: Initial Baking
Place the assembled casserole in the preheated oven and bake for 25 minutes. Keep an eye on it—the edges should begin to bubble, and the top will start to set, indicating that your delightful concoction is coming together beautifully.

Step 5: Add Cheese and Onions
After the initial bake, carefully remove the casserole from the oven. Sprinkle the remaining shredded cheddar cheese and French fried onions evenly on top. This adds a rich, cheesy layer and a crunchy finish to your French Onion Broccoli Cheese Casserole that everyone will love.

Step 6: Final Bake
Return the casserole to the oven for an additional 5 minutes. Watch closely as the cheese melts and forms a bubbly, golden layer on top. The combination of the melted cheese and crispy onions provides a delicious contrast to the creamy interior, making your French Onion Broccoli Cheese Casserole irresistible.

Step 7: Serve and Enjoy
Once baked, remove your casserole from the oven and let it cool for a few minutes. This brief pause allows the layers to set slightly, making it easier to serve. Spoon generous portions onto plates, and enjoy this heartwarming dish with family and friends, knowing it’s a fantastic side that adds comfort to any meal.

What to Serve with French Onion Broccoli Cheese Casserole

Create a memorable meal with delightful sides that enhance your casserole experience!

  • Grilled Chicken: Tender, smoky chicken complements the creamy richness of the casserole and adds lean protein for a balanced meal.

  • Garlicky Green Beans: Crisp green beans sautéed with garlic provide a fresh, vibrant contrast to the casserole’s hearty texture, brightening up the plate.

  • Quinoa Salad: A light, nutty quinoa salad with cherry tomatoes and cucumbers adds a refreshing element, making each bite of the casserole even more satisfying.

  • Herbed Rice Pilaf: Fluffy rice pilaf cooked with fresh herbs offers a lovely base that absorbs the casserole’s cheesy sauce, elevating the overall flavor profile of the meal.

  • Tangy Coleslaw: A crunchy coleslaw with a tangy vinaigrette adds a refreshing crunch, balancing out the creaminess of the casserole beautifully.

  • Sparkling Apple Cider: A glass of sparkling apple cider provides a sweet, bubbly contrast, enhancing the flavors of your dish and making your meal feel festive.

French Onion Broccoli Cheese Casserole Variations

Feel free to personalize this dish and make it your own—your creativity will shine in every bite!

  • Cream of Chicken: Swap the cream of mushroom soup for cream of chicken for a savory twist that adds depth to the casserole.
    Adding cream of chicken not only switches up the flavor but also keeps the creaminess intact, making it equally delightful.

  • Gluten-Free Option: Look for gluten-free cream of mushroom soup to keep this dish safe for gluten-sensitive friends.
    Many brands offer gluten-free options, ensuring everyone at the table can enjoy the casserole without worry.

  • Protein Booster: Toss in shredded rotisserie chicken for a heartier casserole that turns this side dish into a satisfying main.
    This addition boosts the protein content, making it perfect for a filling meal that pleases the crowd.

  • Extra Veggies: Include bell peppers or spinach for added nutrition and a splash of color within the casserole.
    These veggies not only enhance the flavor but also provide additional vitamins, making each bite healthier.

  • Spice it Up: Add some red pepper flakes or chopped jalapeños if you want a bit of heat.
    A sprinkle of spice can transform your casserole into a delightfully zesty dish that will have taste buds tingling.

  • Dairy-Free Delight: Use a dairy-free cream of mushroom soup and vegan cheese for a delicious plant-based version.
    This variation ensures that those who prefer dairy-free options don’t miss out on the comfort of this beloved casserole.

  • Herb Infusion: Add fresh or dried herbs like thyme or rosemary to deepen the flavors significantly.
    A touch of herbs brings new life to the dish, elevating it from simple comfort food to a fabulous culinary experience.

  • Crunchy Alternate: Instead of French fried onions, top with toasted breadcrumbs or crushed nuts for a different kind of crunch.
    This switch offers a unique texture and flavor profile while keeping the allure of a crunchy topping intact.

Explore these variations, and let your French Onion Broccoli Cheese Casserole become a personal masterpiece!

Expert Tips for French Onion Broccoli Cheese Casserole

  • Use Quality Dip: Ensure you select a sour cream-based French onion dip for optimal flavor; cheaper dips may lack the richness you want.

  • Broccoli Prep: If using fresh broccoli, steam lightly before mixing to ensure tenderness; undercooked broccoli can result in a crunchy texture that doesn’t blend well.

  • Cheese Choice: Opt for sharp cheddar cheese; its stronger flavor enhances the overall taste of your casserole, making each bite exciting.

  • Layering Matters: Spread the casserole mixture evenly in the baking dish to ensure even cooking; uneven layers can lead to mixed textures.

  • Make-Ahead Tip: Assemble your French Onion Broccoli Cheese Casserole in advance, cover, and refrigerate. Just add a few extra minutes to the baking time if it’s cold from the fridge.

Make Ahead Options

The French Onion Broccoli Cheese Casserole is an excellent choice for meal prep, saving you valuable time during busy weekdays. You can assemble the casserole up to 24 hours in advance, simply cover it with plastic wrap and refrigerate until you’re ready to bake. For even longer storage, you can freeze the assembled casserole for up to 3 months; just ensure it’s tightly wrapped to prevent freezer burn. When you’re ready to cook, if frozen, let it thaw in the refrigerator overnight before baking. This way, you’ll enjoy a fresh, delicious casserole that’s just as comforting, with all the creamy and crunchy goodness ready to impress!

How to Store and Freeze French Onion Broccoli Cheese Casserole

Fridge: Keep leftovers in an airtight container for up to 3 days to maintain freshness and flavor.

Freezer: Freeze the assembled casserole by tightly wrapping it in plastic wrap, then foil. It can be stored for up to 2 months. Thaw in the refrigerator before baking for best results.

Reheating: Reheat individual servings in the microwave or warm the entire casserole in the oven at 350ºF until bubbling, about 20-25 minutes. Enjoy every cheesy bite of your French Onion Broccoli Cheese Casserole!

French Onion Broccoli Cheese Casserole Recipe FAQs

What should I look for when selecting broccoli?
Absolutely! When picking broccoli, you want to look for vibrant green florets and firm stems. Avoid any yellowing or dark spots, as those are signs of age. I recommend fresh broccoli for the best texture and flavor, but frozen florets can also be a convenient option; just make sure they are cooked according to package instructions before adding to your casserole.

How should I store leftover casserole?
Very important! After enjoying your delicious French Onion Broccoli Cheese Casserole, store leftovers in an airtight container. They’ll stay fresh in the refrigerator for up to 3 days. Make sure to let the casserole cool completely before sealing it up to prevent condensation, which can make your dish soggy.

Can I freeze the casserole?
Of course! To freeze your French Onion Broccoli Cheese Casserole, wrap it tightly with plastic wrap, followed by aluminum foil, ensuring no air can get in. This method can keep it fresh for up to 2 months. When you’re ready to enjoy it, simply thaw in the refrigerator overnight before baking in the oven as per the instructions—this way, your casserole will bake evenly and deliciously.

What if the casserole is too runny after baking?
No worries! If your casserole turns out a bit watery, it may be due to excess moisture from the broccoli. For next time, lightly steam the fresh broccoli before mixing it with the other ingredients. If you’re already baking, simply bake the casserole a bit longer—up to 10 more minutes should help evaporate some moisture. Just keep an eye on the top to avoid over-browning!

Is this recipe suitable for those with allergies?
Definitely! While this French Onion Broccoli Cheese Casserole uses common ingredients, if you’re cooking for someone with dietary restrictions, you can make adjustments. To cater to a gluten allergy, use certified gluten-free cream of mushroom soup and check the fried onions packaging. For vegan alternatives, consider replacing the cheese and sour cream-based dip with plant-based options to maintain the creamy texture. Always check ingredient labels to ensure safety!

French Onion Broccoli Cheese Casserole

Delicious French Onion Broccoli Cheese Casserole Bliss

A simple yet satisfying French Onion Broccoli Cheese Casserole with creaminess and flavor that even broccoli naysayers will love!
Prep Time 10 minutes
Cook Time 25 minutes
Cooling Time 5 minutes
Total Time 35 minutes
Servings: 6 servings
Course: Dinner
Cuisine: French
Calories: 320

Ingredients
  

For the Casserole
  • 4 cups Broccoli Florets fresh or frozen
  • 1 can Unsalted Cream of Mushroom Soup adds creaminess
  • 1 cup Sour Cream Based French Onion Dip for rich onion flavor
  • 2 cups Shredded Cheddar Cheese sharp cheddar enhances flavor
  • 1 cup French Fried Onions for crunch and texture

Equipment

  • 9x9-inch baking dish

Method
 

Cooking Instructions
  1. Preheat your oven to 350ºF (175ºC) and spray a 9x9-inch baking dish with cooking spray.
  2. In a large mixing bowl, combine broccoli florets, cream of mushroom soup, and French onion dip. Mix well, then add 1 cup of cheddar cheese and half of the French fried onions, mixing until coated.
  3. Transfer the mixture into the prepared baking dish, spreading it evenly to ensure consistent cooking.
  4. Bake the casserole in the oven for 25 minutes until the edges bubble and the top begins to set.
  5. Remove from the oven and sprinkle the remaining cheddar cheese and French fried onions on top.
  6. Return to the oven for an additional 5 minutes until the cheese is melted and bubbly.
  7. Let the casserole cool for a few minutes before serving.

Notes

For a heartier meal, consider adding protein such as rotisserie chicken.