Filipino Style Chicken Curry with Coconut Milk: Creamy Delight

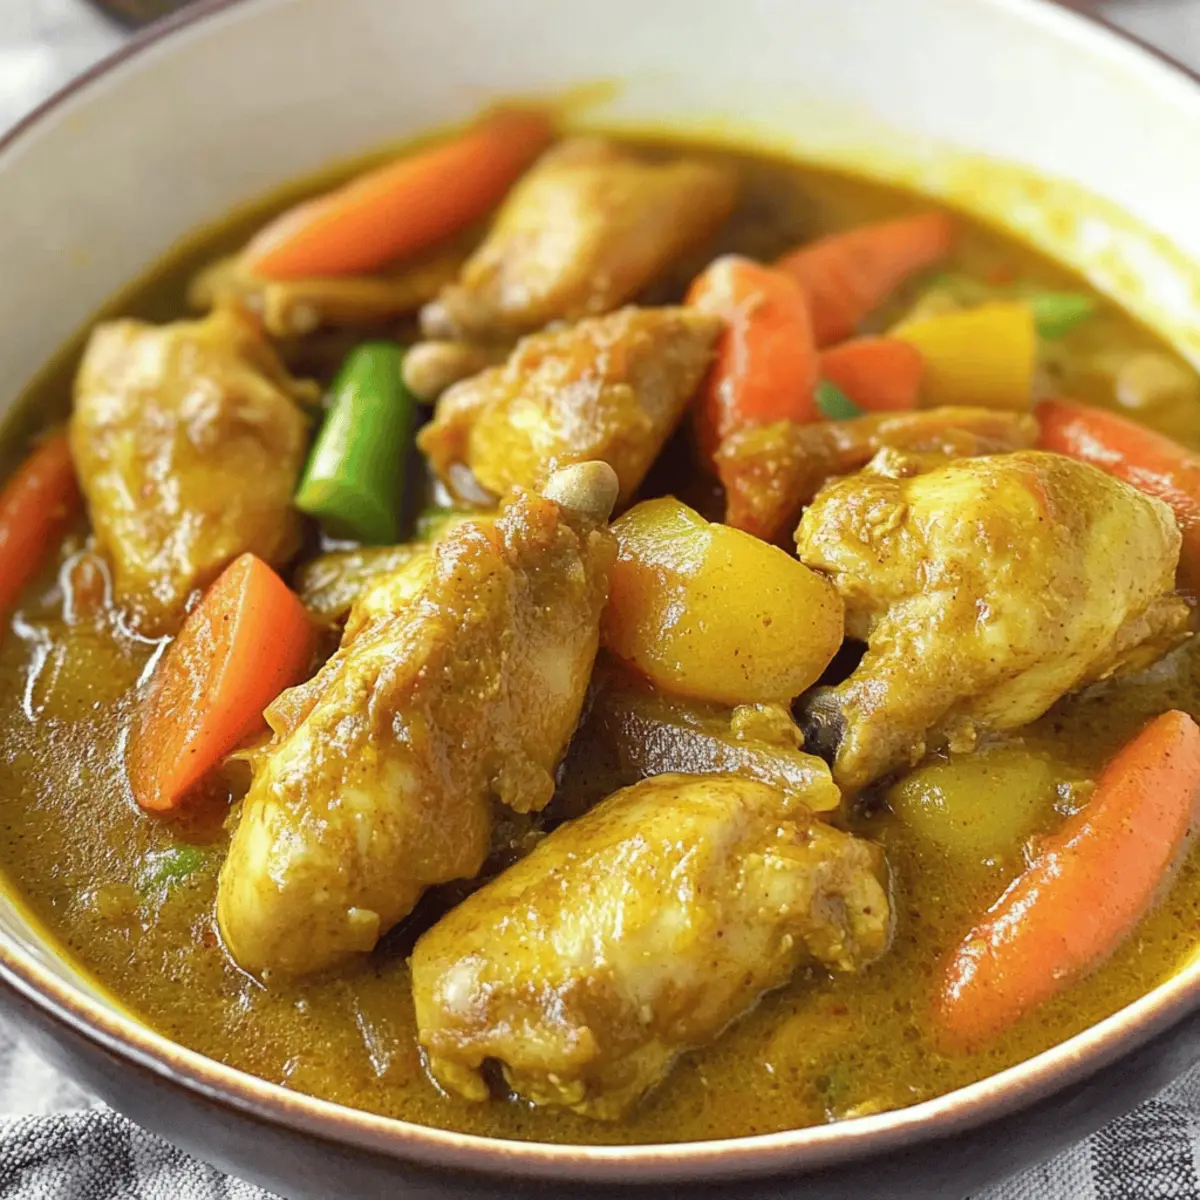
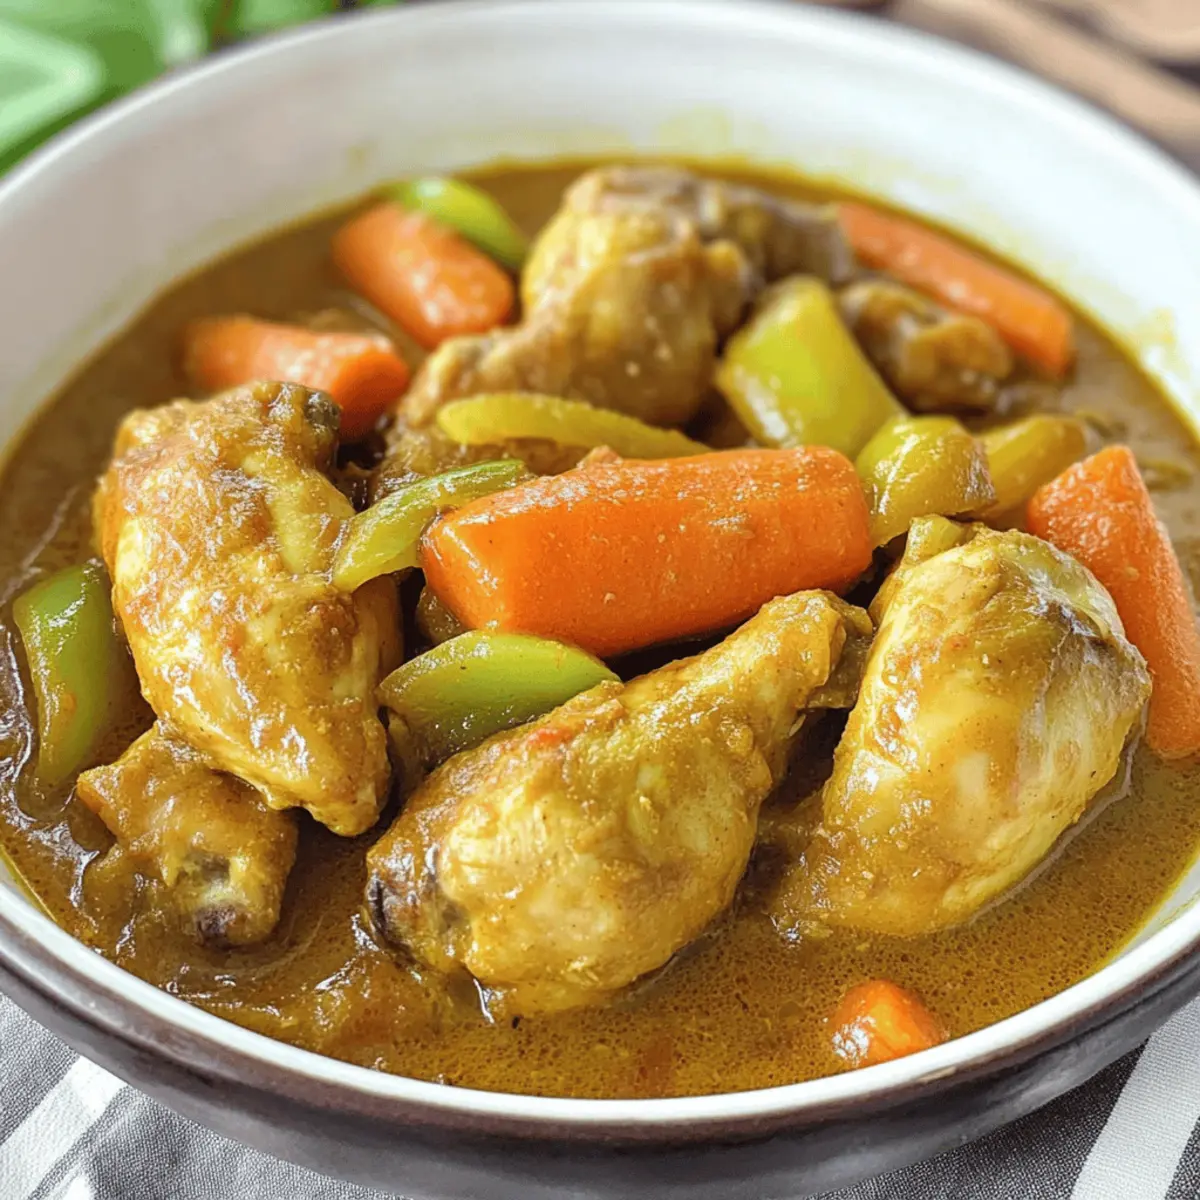
As I stirred a pot filled with vibrant colors and aromatic spices, the rich scent of my Filipino Style Chicken Curry with Coconut Milk filled the kitchen, wrapping me in a warm embrace of nostalgia. This delicious dish doesn’t just celebrate the bold flavors of traditional Filipino cuisine; it also promises quick prep without sacrificing taste, making it a go-to option for any busy weeknight. In under 30 minutes, you’ll have a satisfying meal that will impress family and friends, all while being gluten-free—a total win! As the creamy coconut milk melds beautifully with tender chicken and vegetables, you’ll find yourself transported to a comforting space reminiscent of home-cooked family dinners. Ready to bring a little taste of the Philippines into your kitchen? Let’s dive into this culinary adventure together!

Why is this Chicken Curry a Must-Try?

Quick and Easy: With a cook time of under 30 minutes, this Filipino Style Chicken Curry fits perfectly into your busy schedule, just like our Honey Chili Chicken.

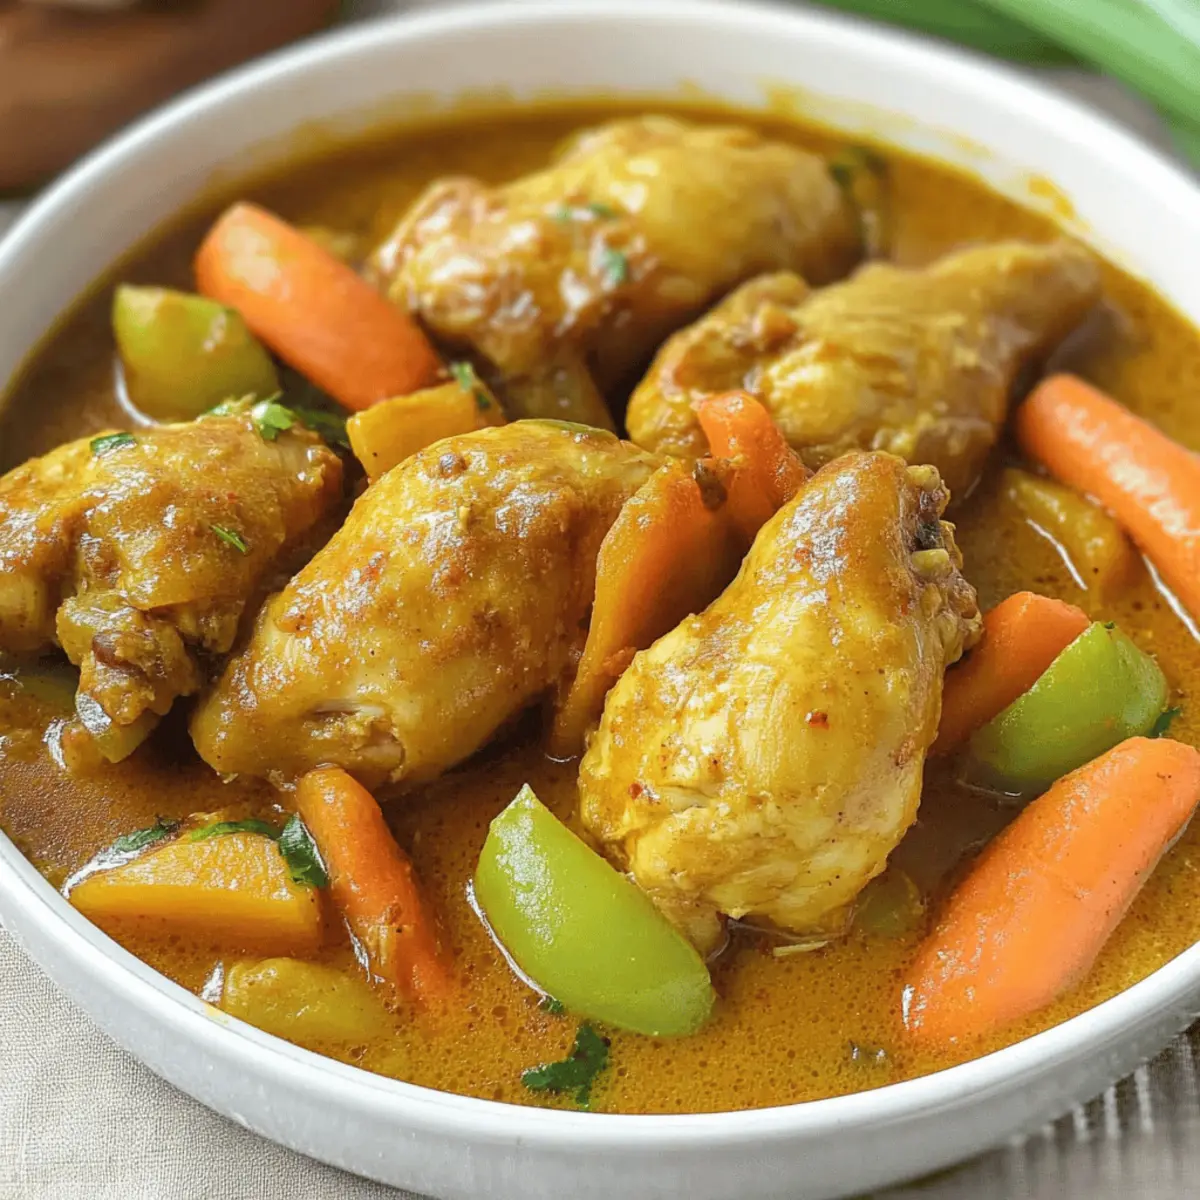
Comforting Creaminess: The rich coconut milk brings unparalleled creaminess that complements the tender chicken, creating an indulgent meal with every bite.

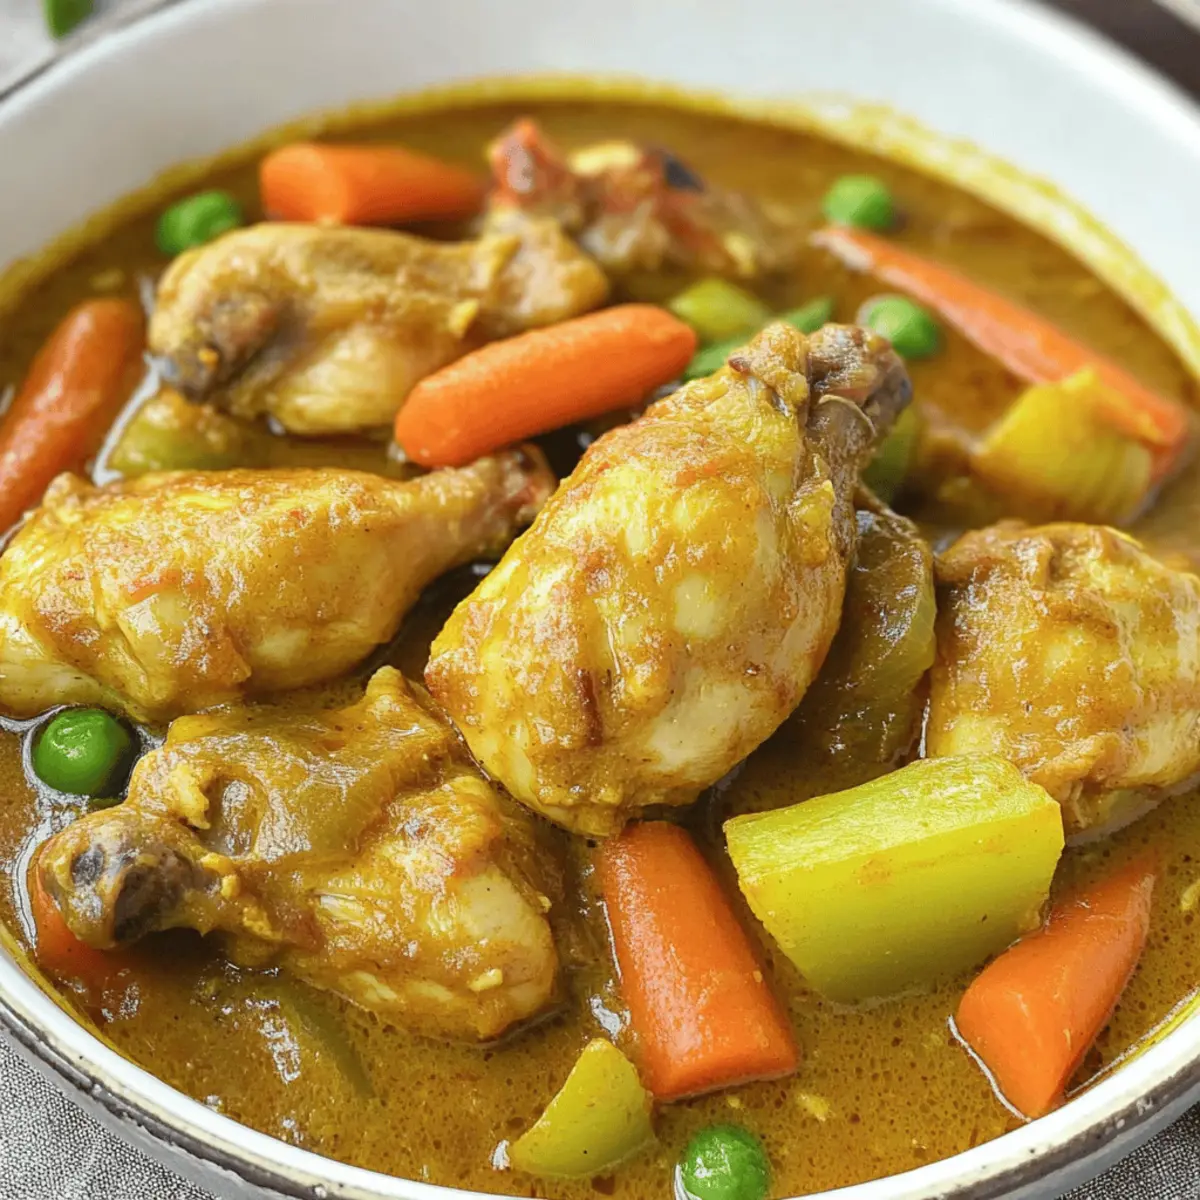
Endless Variations: Feeling adventurous? You can easily swap in different meats or add extra veggies like peas or zucchini for a personalized twist.

Gluten-Free Delight: Enjoy this dish guilt-free, as it caters to gluten sensitivities while still delivering bold flavors.

Crowd-Pleasing Dish: Perfect for family dinners or gatherings, it’s a surefire hit that will leave everyone coming back for seconds!

Filipino Style Chicken Curry Ingredients

For the Curry Base

  • Vegetable Oil – Provides the fat needed for frying; any neutral oil will work in a pinch.
  • Small Onion – Caramelizes beautifully and adds essential flavor; shallots can be a lovely substitute.
  • Garlic (3 cloves) – Enhances the dish’s aroma and flavor; fresh minced garlic is always the best choice.
  • Fish Sauce (2 tablespoons) – Introduces umami depth; if you’re out, soy sauce is a good alternative.
  • Curry Powder (2 tablespoons) – Gives the dish its distinct flavor; adjust to a milder or spicier version based on your preference.
  • Ground Black Pepper (½ teaspoon) – Adds warmth to the dish; freshly ground produces the best flavor.

For the Chicken

  • Chicken (2 pounds) – The star of the dish; thighs and drumsticks offer more flavor, but boneless breasts can work if chopped small.

For the Vegetables

  • Medium Potato – Adds heartiness; sweet potatoes can offer a delightful twist.
  • Medium Carrot – Provides sweetness and color; green beans make a nice alternative.
  • Medium Green Bell Pepper – Brings a crunchy texture; substitute with red bell pepper for added sweetness.
  • Fresh Chili Pepper (1 piece, cut into 4-5 pieces) – Adds spice; adjust based on your desired heat level.

For Creaminess

  • Coconut Milk (1 can, 400 mL) – Central to the recipe for that creamy texture; coconut cream infuses even more richness.

Optional Additions

  • Paprika Powder (1 tablespoon) – Introduces mild sweetness and vibrant color; this is purely optional based on your taste.

Step‑by‑Step Instructions for Filipino Style Chicken Curry with Coconut Milk

Step 1: Fry Vegetables
In a large skillet, heat 2 tablespoons of vegetable oil over medium heat. Add 1 medium potato and 1 medium carrot, frying until they are tender and the edges are golden, about 5–7 minutes. Once cooked, remove them from the pan and set aside; this helps build the foundation of flavors for your Filipino Style Chicken Curry.

Step 2: Sauté Aromatics
Using the same pan, add a bit more oil if needed and sauté 3 minced garlic cloves and 1 small onion for about 2–3 minutes, until they become fragrant and the onion turns translucent. This step is essential as it infuses the oil with aromatic goodness that will enrich the entire dish.

Step 3: Cook Chicken
Once the aromatics are ready, add 2 pounds of chicken (preferably thighs or drumsticks) to the pan. Sear the chicken for about 1–2 minutes on each side until it’s lightly browned. This step locks in those delicious juices, ensuring your Filipino Style Chicken Curry is flavorful and tender.

Step 4: Season
Stir in 2 tablespoons of fish sauce, 2 tablespoons of curry powder, 1 tablespoon of paprika (optional), and ½ teaspoon of ground black pepper. Mix everything well, cover the pan, and let it simmer for about 5 minutes. This allows the spices to meld together, creating a fragrant base for your curry.

Step 5: Integrate Coconut Milk
Reduce the heat and slowly pour in 1 can (400 mL) of coconut milk. Stir the mixture until fully combined and let it simmer uncovered for about 8–10 minutes, or until the sauce thickens slightly and the chicken is cooked through. Keep an eye on it to achieve your desired consistency for the ideal Filipino Style Chicken Curry.

Step 6: Add Vegetables
Return the cooked potato and carrot to the pan, along with 1 medium green bell pepper and 1 fresh chili pepper (cut into pieces). Stir everything together and cook for an additional 2 minutes, allowing the vegetables to warm through and the flavors to unite harmoniously.

Step 7: Serve
Carefully transfer the finished Filipino Style Chicken Curry to a serving dish. This dish pairs beautifully with steamed jasmine rice or your preferred side. Let the warmth of this delightful curry wrap around you and enjoy the comfort of homemade goodness!

Filipino Style Chicken Curry Variations

Feel free to add your personal touch to this delightful dish and make it uniquely yours!

  • Pork or Beef: Swap chicken with pork or beef for a heartier version that brings a different depth of flavor.

  • Turkey Twist: Use turkey instead of chicken for a leaner option; it still packs a delicious punch! This is perfect if you’re looking for a light alternative.

  • Vegetable Boost: Toss in peas, zucchini, or bell peppers to elevate the veggie content and add vibrant colors to your curry.

  • Creamy & Rich: For a more indulgent version, replace coconut milk with coconut cream for a gloriously creamy consistency.

  • Spice It Up: Adjust the heat level by adding more or fewer fresh chili peppers or sprinkle in some cayenne for extra kick.

  • Sweet Potato Delight: Substitute regular potatoes with sweet potatoes for a sweeter flavor and added nutrition.

  • Mild Curry Option: Opt for a milder curry powder if you’re cooking for kids or those who prefer a gentle spice.

  • Coconut & Lime: Add a splash of lime juice before serving for a zesty twist that brightens the rich flavors.

This is your canvas for creativity! You might also enjoy these comforting meals like Tropical Chicken Pineapple or Savory Chicken and Cheesy Potato Drumsticks to keep your culinary adventures going!

Make Ahead Options

These Filipino Style Chicken Curry with Coconut Milk are perfect for meal prep enthusiasts! You can chop your vegetables and marinate the chicken in the fish sauce and spices up to 24 hours in advance, storing everything in airtight containers in the refrigerator to maintain freshness. Additionally, you can prepare the coconut milk sauce separately and refrigerate it for up to 3 days. When you’re ready to enjoy this comforting dish, simply sauté the aromatics, add the marinated chicken, and incorporate your prepped vegetables and sauce. This way, you’ll have a decadent, flavorful curry with minimal effort, making your busy weeknights a breeze!

What to Serve with Filipino Style Chicken Curry with Coconut Milk

Elevate your dining experience by exploring delightful side dishes and beverages that perfectly complement the rich flavors of your curry.

  • Steamed Jasmine Rice:
    The delicate aroma of jasmine rice provides the perfect base, soaking up the creamy sauce and balancing the spices beautifully.

  • Warm Naan Bread:
    Soft and inviting, naan is ideal for scooping up the luscious curry, adding a comforting touch to your meal.

  • Aromatic Cucumber Salad:
    Crisp cucumbers tossed with vinegar and sugar add a refreshing crunch, brightening the palate between bites of rich curry.

  • Roasted Vegetables:
    Colorful roasted vegetables enhance the meal with an earthy flavor, offering a delightful contrast to the creamy curry.

  • Chilled Coconut Drink:
    Stay within the theme by sipping a chilled coconut drink which harmonizes with your dish’s coconut milk base for extra indulgence.

  • Mango Sticky Rice:
    This classic dessert, sweet and sticky, brings a satisfying finish, blending tropical flavors with the savory curry you just enjoyed!

  • Ginger Lemonade:
    A refreshing glass of ginger lemonade awakens the senses, providing a zingy contrast to the rich and creamy tastes of your curry, ensuring a balanced dining experience.

  • Fried Plantains:
    Sweet and crispy on the outside, they add a delightful textural contrast while bringing a hint of sweetness to your savory meal.

Expert Tips for Filipino Style Chicken Curry

  • Perfect Timing: Keep an eye on your chicken while cooking; overcooking can lead to toughness. Aim for just the right tenderness.

  • Thickening Control: For a thicker curry, allow the coconut milk to simmer longer. Adjust according to your preference for its creamy consistency.

  • Flavor Balancing: Don’t skimp on the fish sauce—it’s essential for the umami depth in your Filipino Style Chicken Curry. If using soy sauce, start with less to avoid overpowering flavors.

  • Veggie Variations: Feel free to be creative with your vegetables! Adding extras like zucchini or peas can enhance the dish while personalizing it to your family’s tastes.

  • Spice Levels: Adjust the number of chili peppers based on your spice tolerance. A mild curry can be made hot by gently increasing the chili count.

  • Meal Prep Magic: This curry keeps well in the fridge! Store any leftovers in an airtight container and enjoy them for up to 3 days.

Storage Tips for Filipino Style Chicken Curry

Fridge: Store leftovers in an airtight container for up to 3 days. Allow the curry to cool before refrigerating to preserve its creamy texture.

Freezer: If you want to keep it longer, freeze the Filipino Style Chicken Curry in a freezer-safe container or bag for up to 3 months. Thaw in the fridge overnight before reheating.

Reheating: Reheat gently on the stove over low heat, stirring occasionally to prevent sticking. You can add a splash of coconut milk or water to restore creaminess as it warms up.

Filipino Style Chicken Curry with Coconut Milk Recipe FAQs

What type of chicken is best for Filipino Style Chicken Curry?
I recommend using thighs or drumsticks, as they provide more flavor and remain tender during cooking. If you prefer white meat, boneless, skinless chicken breasts can work well too; just be sure to cut them into smaller pieces for even cooking.

How do I store leftovers of Filipino Style Chicken Curry?
Store any leftover Filipino Style Chicken Curry in an airtight container in the refrigerator for up to 3 days. Make sure to cool it completely before transferring to the fridge to maintain its creamy texture.

Can I freeze Filipino Style Chicken Curry?
Absolutely! You can freeze the curry in a freezer-safe container for up to 3 months. To reheat, simply thaw it in the fridge overnight and warm it gently on the stove. If needed, you can add a splash of coconut milk or water to help restore its creamy consistency.

What if the curry is too thick?
If you find your Filipino Style Chicken Curry too thick, you can easily adjust this during cooking. Simply add a bit of coconut milk or water and stir until you reach your desired thickness. For an extra creamy result, I often add a small amounts of coconut milk while stirring.

Are there any common substitutions for ingredients in this curry?
Certainly! If you’re out of fish sauce, soy sauce is a fantastic substitute, just start with a smaller quantity to prevent overwhelming the flavor. For vegetables, feel free to swap the bell pepper with zucchinis or peas to suit your taste preferences and use sweet potatoes instead of regular potatoes for a different twist.

Can pets eat Filipino Style Chicken Curry?
While the chicken itself is safe for pets, it’s best to avoid giving them any curry made for human consumption due to ingredients like garlic and onion, which can be harmful to pets. If you want to share the love, set aside a plain piece of cooked chicken for them!

Filipino Style Chicken Curry with coconut milk

Filipino Style Chicken Curry with Coconut Milk: Creamy Delight

A quick and delicious Filipino Style Chicken Curry with coconut milk, perfect for busy weeknights.
Prep Time 10 minutes
Cook Time 20 minutes
Total Time 30 minutes
Servings: 4 servings
Course: Chicken
Cuisine: Filipino
Calories: 450

Ingredients
  

For the Curry Base
  • 2 tablespoons Vegetable Oil Any neutral oil will work
  • 1 small Onion Shallots can be used as a substitute
  • 3 cloves Garlic Minced fresh garlic is best
  • 2 tablespoons Fish Sauce Soy sauce can be a substitute
  • 2 tablespoons Curry Powder Adjust based on spice preference
  • ½ teaspoon Ground Black Pepper Freshly ground produces better flavor
For the Chicken
  • 2 pounds Chicken Thighs or drumsticks are preferable
For the Vegetables
  • 1 medium Potato Sweet potatoes can be used
  • 1 medium Carrot Green beans can be a substitute
  • 1 medium Green Bell Pepper Red bell pepper can be used
  • 1 piece Fresh Chili Pepper Cut into 4-5 pieces
For Creaminess
  • 1 can Coconut Milk 400 mL, coconut cream can be richer
Optional Additions
  • 1 tablespoon Paprika Powder Optional based on taste

Equipment

  • large skillet

Method
 

Step-by-Step Instructions
  1. In a large skillet, heat vegetable oil over medium heat. Add potato and carrot, frying until tender and golden, about 5–7 minutes. Set aside.
  2. Add more oil if needed, and sauté minced garlic and onion for about 2–3 minutes, until fragrant and translucent.
  3. Add chicken to the pan, searing for about 1–2 minutes on each side until lightly browned.
  4. Stir in fish sauce, curry powder, optional paprika, and ground black pepper. Mix well, cover, and simmer for 5 minutes.
  5. Slowly pour in the coconut milk, stir, and let simmer uncovered for 8–10 minutes until sauce thickens slightly.
  6. Return potato and carrot to the pan, along with green bell pepper and fresh chili pepper. Cook for an additional 2 minutes.
  7. Transfer the curry to a serving dish and enjoy with steamed jasmine rice.

Notes

This curry is gluten-free and offers a comforting blend of flavors and textures.

Crispy Air Fryer Mozzarella Balls for Cheesy Bliss

As I set foot in the kitchen, the comforting aroma of cheese instantly makes my mouth water. When it comes to satisfying my snack cravings, these Air Fryer Mozzarella Balls are never far from my mind. With their crispy golden exterior and gooey center, they’ve become my go-to for quick and easy snacks that impress family and friends alike. What I love most is the ability to ditch the deep fryer for a healthier option that still delivers all the crunchy deliciousness I crave. Plus, they’re perfect for any occasion, whether it’s game day or a casual get-together. Are you ready to elevate your snack game? Let’s dive into this cheesy delight!

Why You’ll Crave Air Fryer Mozzarella Balls?

Crispy Perfection: These mozzarella balls deliver an irresistible crunch, making every bite a delightful experience.

Gooey Center: With warm, melted cheese oozing from the center, your taste buds will be dancing with joy!

Quick & Easy: Perfect for those busy days, this recipe comes together in a flash and is effortless to make.

Crowd-Pleasing Snack: Ideal for parties or game nights, they’re sure to impress friends and family with their cheesy goodness.

Versatile Dipping: Pair them with various dipping sauces like marinara or garlic aioli for an exciting flavor twist.

Healthier Alternative: Enjoy all the crunch without the guilt, thanks to the air fryer’s lower oil usage. If you love easy, delicious snacks, you’ll want to check out our Zucchini Potato Mozzarella for another crowd-pleaser.

Air Fryer Mozzarella Balls Ingredients

For the Mozzarella
Mozzarella Cheese – Choose string cheese or mozzarella pearls for the perfect gooey center; block cheese can be cubed.

For the Breading
Breadcrumbs – Combine plain and seasoned breadcrumbs for a flavorful coating; feel free to add Italian seasoning or garlic powder for an extra kick.
Egg – This acts as the binding agent, ensuring the breadcrumbs stick perfectly to the cheese.
Flour – A light dusting helps the egg adhere to the cheese, creating a crispy coating during air frying.
Salt and Pepper – Just a pinch each enhances the mozzarella’s flavor, balancing its richness.

Optional Dipping Sauces
Marinara Sauce – A classic pairing that adds a fresh, tangy contrast to your cheesy snack.
Ranch Dressing – Perfect for those who enjoy a creamy, herbaceous dip to enjoy alongside.

Step‑by‑Step Instructions for Air Fryer Mozzarella Balls

Step 1: Prepare the Cheese
If you’re using block mozzarella, start by cutting it into bite-sized cubes. For string cheese or mozzarella pearls, skip this step. This ensures that each mozzarella ball has the perfect gooey center that oozes deliciousness once air-fried. Aim for pieces around an inch in size for optimal melting and crispiness.

Step 2: Set Up the Breading Station
Prepare a breading station by placing three shallow bowls in a row. Fill the first bowl with flour seasoned lightly with salt and pepper, the second with a whisked egg, and the third with a blend of plain and seasoned breadcrumbs. This setup will help you achieve that irresistible crunch on your Air Fryer Mozzarella Balls.

Step 3: Bread the Mozzarella
Take each mozzarella piece and roll it in the flour to create a light coating that helps the egg adhere. Next, dip it into the beaten egg, letting excess drip off, before rolling it in the breadcrumb mixture. Ensure each piece is evenly coated for a satisfying crunch when air-fried. Repeat this for all cheese pieces.

Step 4: Preheat the Air Fryer
Preheat your air fryer to 375°F (190°C), ensuring the basket is ready for that crispy magic. While the air fryer heats up, consider placing the breaded mozzarella balls in the freezer for 10-15 minutes. This step helps prevent any cheese from leaking out during the cooking process and guarantees a gooey center.

Step 5: Air Fry the Mozzarella Balls
Once the air fryer is ready, lightly spray the basket with cooking oil to prevent sticking. Arrange the breaded mozzarella balls in a single layer without overcrowding. Air fry for 5-6 minutes, shaking the basket halfway through to ensure even browning. You’re looking for a golden brown, crispy exterior that signals they’re ready to devour!

Step 6: Serve and Enjoy
After air frying, let the mozzarella balls cool for a minute, as the filling will be quite hot. Arrange them on a platter and serve with your favorite dipping sauces, such as marinara or ranch. Each bite promises a delightful crunch followed by a warm, cheesy indulgence that’s perfect for snacking or entertaining!

What to Serve with Air Fryer Mozzarella Balls

Looking to create a mouthwatering spread that complements the cheesy delight of crispy mozzarella balls?

  • Creamy Marinara Sauce: Offers a perfect tangy contrast to the rich, gooey cheese, making every bite even more delightful.
  • Fresh Arugula Salad: A light, peppery salad balances the heaviness of the mozzarella, adding a refreshing crunch with each bite.
  • Garlic Breadsticks: The buttery, garlicky flavor pairs beautifully with the cheese, creating a satisfying snack duo everyone will enjoy.
  • Spicy Buffalo Sauce: For those who crave a fiery kick, this sauce adds heat that enhances the creamy mozzarella and excites the palate.
  • Homemade Ranch Dip: Creamy and herby, this dressing offers a cool balance to the warm, crispy bites, perfect for dipping.
  • Zesty Coleslaw: The crunchy, tangy slaw provides a vibrant contrast, complementing the mozzarella balls’ texture while adding a refreshing element.
  • Sweet Chili Sauce: If you’re in the mood for a sweet and spicy twist, this sauce delivers an exciting flavor that pairs wonderfully with gooey cheese.
  • Antipasto Platter: Combine olives, sliced meats, and marinated vegetables for a delightful spread that elevates your casual snacking experience.
  • Chilled Sparkling Water: A refreshing drink that cleanses the palate, allowing the flavors of the mozzarella balls to shine through with every bite.
  • Chocolate Lava Cake: For a sweet finale, this rich dessert creates a luxurious ending after indulging in savory cheesy bites.

Expert Tips for Air Fryer Mozzarella Balls

  • Chill Before Cooking: Freeze the breaded mozzarella balls for 10-15 minutes before air frying to prevent leaking during cooking.

  • Choose the Right Cheese: Stick to string cheese or mozzarella pearls; using shredded cheese might lead to too much melting, causing leakage.

  • Adjust Cooking Time: Keep an eye on cooking time, as air fryers can vary; aim for a golden brown color for the perfect crunchy coating.

  • Avoid Overcrowding: Air fry in a single layer to ensure even cooking and crispiness; overcrowding can result in soggy portions.

  • Experiment with Dips: Pair your Air Fryer Mozzarella Balls with various sauces like buffalo sauce or garlic aioli for added flavor excitement!

Make Ahead Options

These Air Fryer Mozzarella Balls are perfect for meal prep enthusiasts looking to save time on busy weeknights! You can bread the mozzarella balls up to 24 hours in advance and store them in the refrigerator to maintain their delicious crunch. To prepare, simply roll each cheese piece in flour, dip in egg, and coat with breadcrumbs. For best results, freeze the breaded balls for about 10-15 minutes before air frying to prevent cheese leakage during cooking. When you’re ready to serve, just pop them straight into the air fryer for 5-6 minutes for that golden-brown exterior and gooey center. You’ll enjoy restaurant-quality snacks with minimal effort!

Air Fryer Mozzarella Balls Variations

Feel free to get creative with these ideas to make the recipe your own!

  • Cheese Swap: Substitute mozzarella with cheddar or pepper jack for a different flavor experience. Each cheese melts differently, lending a unique twist to the classic.

  • Spicy Kick: Add crushed red pepper flakes to the breadcrumb mixture for a spicy version. This adds an inviting heat that complements the gooey cheese beautifully.

  • Herb-Infused: Mix dried Italian herbs like oregano or basil into the breadcrumbs. This adds a fragrant touch, making each bite even more delightful.

  • Whole Wheat Breadcrumbs: For a healthier option, use whole wheat breadcrumbs instead of regular ones. This subtle change brings a nuttier flavor and more fiber to your snack.

  • Gluten-Free: Use crushed gluten-free crackers as a substitute for breadcrumbs. This option maintains the crunchy texture while catering to dietary needs.

  • Vegetable Addition: Add finely chopped spinach or kale to the breading for added nutrients. It’s a sneaky way to make these indulgent bites a little healthier!

  • Different Dips: Swap marinara with ranch or buffalo sauce for a new twist with each serving. Versatile dipping options keep the excitement alive!

  • Baking Option: No air fryer? Bake these delicious morsels in the oven at 400°F for a crunchy treat that’s just as satisfying! If you’d like to try something else, consider our Hearty Spaghetti with Homemade Meatballs for another hearty meal option.

How to Store and Freeze Air Fryer Mozzarella Balls

Fridge: Store any leftover Air Fryer Mozzarella Balls in an airtight container for up to 3 days. Reheat in the air fryer for a crispy texture after storing.

Freezer: For long-term storage, freeze the breaded mozzarella balls before air frying. Place them in a single layer on a baking sheet until solid, then transfer to a freezer bag for up to 2 months.

Reheating: To reheat, air fry the frozen mozzarella balls at 375°F (190°C) for about 6-8 minutes until heated through and crispy again.

Prep Ahead: You can prepare the mozzarella balls and keep them in the fridge for a few hours before cooking, saving you time during gatherings.

Air Fryer Mozzarella Balls Recipe FAQs

What type of mozzarella cheese works best for this recipe?
Absolutely! For making Air Fryer Mozzarella Balls, I recommend using string cheese or mozzarella pearls for that perfect gooey center. If you opt for block cheese, cut it into approximately one-inch cubes to achieve the best melting results. Avoid using shredded mozzarella as it tends to melt too quickly and can lead to leakage.

How should I store leftover Air Fryer Mozzarella Balls?
Very good question! You can store any leftover Air Fryer Mozzarella Balls in an airtight container in the fridge for up to 3 days. To maintain their delightful crispiness, simply reheat them in the air fryer for a few minutes. This method will revive their crunchy texture and ensure they taste just as delicious!

Can I freeze the mozzarella balls before cooking them?
Definitely! To freeze your Air Fryer Mozzarella Balls, first, bread them as per the recipe and then lay them on a baking sheet in a single layer. Freeze them for 10-15 minutes until solid. Afterward, you can transfer them to a freezer bag and store them for up to 2 months. This way, you can pull them out whenever you’re craving a cheesy snack!

What should I do if the mozzarella leaks during cooking?
If you’re experiencing leakage while cooking your Air Fryer Mozzarella Balls, don’t worry; it happens! To minimize this, ensure you freeze the breaded mozzarella balls for a good 10-15 minutes before air frying. Also, use string cheese or mozzarella pearls to reduce melting risk. If they still leak a bit, make sure to monitor your cooking time and temperature to achieve that perfect golden crunch without overcooking!

Are Air Fryer Mozzarella Balls safe for pets or those with allergies?
It’s great to be concerned about safety! While Air Fryer Mozzarella Balls are delicious, they are not pet-friendly due to their cheese and seasoning content. Additionally, if you’re cooking for someone with lactose intolerance or a dairy allergy, consider using dairy-free cheese alternatives that melt well. Just keep in mind that the texture and flavor might differ slightly from traditional mozzarella!

Air Fryer Mozzarella Balls

Crispy Air Fryer Mozzarella Balls for Cheesy Bliss

Delicious Air Fryer Mozzarella Balls with a crispy exterior and gooey center, perfect for any occasion.
Prep Time 15 minutes
Cook Time 6 minutes
Chill Time 15 minutes
Total Time 36 minutes
Servings: 4 balls
Course: Other
Cuisine: American
Calories: 90

Ingredients
  

For the Mozzarella
  • 8 ounces Mozzarella Cheese String cheese or mozzarella pearls are recommended.
For the Breading
  • 1 cup Breadcrumbs Combination of plain and seasoned breadcrumbs.
  • 1 large Egg Whisked as a binding agent.
  • 1/4 cup Flour For dusting.
  • 1 teaspoon Salt
  • 1 teaspoon Pepper
Optional Dipping Sauces
  • 1 cup Marinara Sauce For dipping.
  • 1/2 cup Ranch Dressing For dipping.

Equipment

  • Air Fryer

Method
 

Step‑by‑Step Instructions
  1. Prepare the cheese: Cut block mozzarella into bite-sized cubes or use string cheese.
  2. Set up the breading station with flour, whisked egg, and breadcrumb mixture.
  3. Bread the mozzarella by rolling in flour, dipping in egg, and coating with breadcrumbs.
  4. Preheat air fryer to 375°F (190°C) and chill breaded mozzarella balls for 10-15 minutes.
  5. Air fry the mozzarella balls for 5-6 minutes, shaking halfway through.
  6. Serve with your favorite dipping sauces.

Notes

Chill the mozzarella balls before frying to prevent leaking. Adjust cooking time based on air fryer model.

Zesty Butter Beans: Creamy Vegan Comfort in Minutes

As I stirred the pot, a captivating aroma of spices filled my kitchen, inviting me to indulge in something truly special. Today, I’m excited to share my recipe for Zesty Butter Beans, a vibrant dish that strikes the perfect balance between taste and nutrition. This creamy, vegan delight utilizes rich coconut milk and zesty lemon to create a comforting meal that is both quick to prepare and incredibly satisfying. Whether you’re looking for a delightful side dish or a wholesome main course, these butter beans provide a generous boost of fiber and protein while keeping your cooking time to a minimum. Ready to elevate your weeknight dinner? Let’s dive into this delicious recipe that’s sure to become a favorite in your home!

Why are Zesty Butter Beans irresistible?

Creamy Perfection: This dish boasts a rich, velvety texture thanks to the luscious coconut milk, making every bite comforting and indulgent.
Quick & Easy: Ready in under 15 minutes, these butter beans are a lifesaver for busy weeknights. Perfect for those who crave homemade goodness without the fuss!
Nutritious Delight: Loaded with fiber and plant-based protein, this meal is not just satisfying but also contributes to a balanced diet.
Versatile Pairing: Serve them over quinoa, rice, or with crusty bread for a complete meal- this dish adapts to any craving!
Crowd-Pleasing Flavor: The zesty lemon and aromatic spices create a vibrant flavor profile that will impress your family or guests while keeping things simple.
Check out my delicious Garlic Butter French for a great side to pair with these butter beans!

Zesty Butter Beans Ingredients

For the Base

  • Oil – Adds richness and helps sauté the aromatics; avocado or olive oil works well.
  • Red Onion – Provides a zesty, sweet flavor; swap for yellow or white onion if needed.
  • Garlic Cloves – Fresh garlic elevates taste; you can use garlic powder (1 tsp) as a sub.

For the Beans

  • Pre-Cooked Butter Beans – The star of the dish, creamy and versatile; rinse and drain before use.
  • Coconut Milk – Creates a creamy texture; for non-vegan options, heavy cream can be substituted.

For Flavor

  • Lemon Juice – Brightens the dish; lime juice can serve as an alternative for a citrus twist.
  • Ground Turmeric – Adds color and earthiness; known for its anti-inflammatory benefits.
  • Black Pepper – Enhances the flavors of turmeric; freshly ground is preferred.
  • Smoked Paprika – Imparts delightful smoky undertones; avoid substitutions for the best result.
  • Dried Oregano – Adds herbaceous notes to the dish; thyme works in a pinch.
  • Salt – Balances overall flavors; adjust to taste.

For Garnish (Optional)

  • Red Chili Flakes – Adds a hint of spice to kick it up a notch.
  • Hemp Seeds – Boosts nutrition and adds texture; sprinkle on just before serving.

These Zesty Butter Beans are bursting with flavor and nutrition, designed for your culinary delight!

Step‑by‑Step Instructions for Zesty Butter Beans

Step 1: Sauté the Aromatics
Heat 1 tablespoon of avocado or olive oil in a small saucepan over medium heat. Add finely chopped red onion and minced garlic, cooking for about 5 minutes. Stir occasionally until the onion is softened and golden. The enticing aroma will fill your kitchen, setting a warm stage for your Zesty Butter Beans.

Step 2: Combine Ingredients
Once the onion and garlic are ready, add in 2 cups of rinsed and drained pre-cooked butter beans and pour in 1 cup of creamy coconut milk. Squeeze in the juice of half a lemon, followed by 1 teaspoon of ground turmeric, a pinch of black pepper, 1 teaspoon of smoked paprika, 1 teaspoon of dried oregano, and salt to taste. Stir everything together until well combined.

Step 3: Simmer and Thicken
Bring the mixture to a gentle simmer over medium heat while continuously stirring to prevent sticking. Allow it to cook for about 5 minutes, as the sauces meld together and thicken slightly. You’ll know it’s ready when the Zesty Butter Beans have become creamy and luscious, inviting you to dive into a bowl.

Step 4: Garnish and Serve
Once the dish reaches a creamy consistency, remove it from the heat. Serve warm, garnished with a sprinkle of red chili flakes and hemp seeds for added texture and nutrition. Whether you enjoy them on their own or over a bed of rice or quinoa, these Zesty Butter Beans are bound to delight your taste buds!

Expert Tips

  • Creamy Texture: Use full-fat coconut milk for the best creamy result in your Zesty Butter Beans; low-fat versions will yield a thinner consistency.
  • Flavor Boost: Fresh garlic is highly recommended for enhanced flavor; if using garlic powder, remember just one teaspoon will suffice.
  • Proper Simmering: Simmer gently to avoid burning; stir frequently to maintain an even creaminess throughout the dish.
  • Thickening Hack: If your Zesty Butter Beans turn out soupy, lightly mash a few beans to release their starch and thicken the dish naturally.
  • Quality Counts: The texture and taste can vary by brand, so experiment with different brands of butter beans to find your favorite.

Zesty Butter Beans: Creative Twists

Feel free to explore these exciting variations to make your Zesty Butter Beans truly your own!

  • Coconut-Free: Substitute coconut milk with evaporated milk for a creamier texture with a different flavor profile.
  • Add Veggies: Mix in fresh spinach or diced bell peppers during the cooking process for an additional nutritional boost. These vibrant colors will not only enhance the dish but also keep it fresh and lively.
  • Cheesy Flavor: Stir in nutritional yeast towards the end of cooking to add a dairy-free cheesy richness that complements the dish beautifully.
  • Smoky Kick: For those who love heat, adding a dash of hot sauce or extra red chili flakes can elevate your butter beans to a whole new level of deliciousness.
  • Herb Swaps: Try swapping dried oregano for fresh basil or parsley for a fragrant herbaceous twist that brings complexity to your dish. Fresh herbs can drastically change the dish’s aroma and freshen it up!
  • Grain Pairing: Serve over brown rice or quinoa to create a complete, hearty meal that’s packed with nutrients. The grains add a satisfying texture and help soak up the creamy goodness.
  • Spice Up the Citrus: Instead of lemon juice, give lime juice a try for a zesty, tangy flavor. This subtle change can really brighten the dish!
  • Nutty Crunch: For added texture, sprinkle some roasted pumpkin seeds on top before serving. This deliciously nutty addition gives a satisfying crunch and is packed with nutrients!

These delightful variations make it easy to adapt your Zesty Butter Beans to suit your needs or to simply get creative! And if you’re looking for a delicious side to balance these flavors, don’t forget to check out my Garlic Butter French for the perfect pairing. Enjoy your culinary journey!

How to Store and Freeze Zesty Butter Beans

Fridge: Store leftovers in an airtight container for up to 7 days. Reheat on the stove over low heat, stirring occasionally until warmed through.

Freezer: For longer storage, freeze Zesty Butter Beans in a freezer-safe container for up to 3 months. Thaw overnight in the refrigerator before reheating.

Reheating: Reheat gently on the stovetop, adding a splash of water or coconut milk to restore creaminess if needed. Avoid overheating to maintain the texture.

Room Temperature: If serving right away, it’s safe to leave the dish out for up to 2 hours. However, leftovers should be refrigerated promptly to ensure freshness.

Make Ahead Options

These Zesty Butter Beans are perfect for meal prep, allowing you to save valuable time during busy weeknights! You can prepare the base by sautéing the onion and garlic, then combine all ingredients (except garnishes) up to 24 hours in advance. Store the mixture in an airtight container in the refrigerator to keep the flavors fresh and prevent browning. When you’re ready to serve, simply reheat the mixture on the stove for about 5 minutes until warmed through and creamy. For the best results, avoid cooking the butter beans until you’re ready, ensuring they remain just as delicious when you finally enjoy this nutritious dish!

What to Serve with Zesty Butter Beans

Imagine a cozy dinner table filled with vibrant flavors and delightful textures that delight your senses.

  • Fluffy Quinoa: This nutty grain adds a wonderful chewiness and absorbs the creamy sauce beautifully, enhancing each luxurious bite.
  • Crusty Whole Wheat Bread: Perfect for soaking up the rich flavors of the butter beans, this bread offers satisfying crunch and warmth to your meal.
  • Fresh Green Salad: A mix of greens with a light vinaigrette provides a refreshing contrast to the creamy dish, balancing flavors while adding nutrients.
  • Roasted Vegetables: Caramelized carrots, sweet potatoes, or Brussels sprouts add depth and create a colorful platter next to your Zesty Butter Beans.
  • Coconut Rice: Complement the beans with a tropical twist; the flavors intertwine perfectly, making every mouthful a delightful escape.
  • Herbaceous Pea Mash: Creamy peas rich in flavor and a pop of color enhance your plate, making it visually appealing and deliciously rich.
  • Light Citrus Dessert: Finish off with a refreshing lemon sorbet or citrus salad, providing a sweet-tart contrast that lifts the palate after a hearty meal.
  • Chilled White Wine: A glass of crisp Sauvignon Blanc pairs beautifully with the creamy texture and zesty flavor, enhancing your dining experience.

Zesty Butter Beans Recipe FAQs

How do I select the best butter beans?
Absolutely! Look for butter beans that are plump and firm. Avoid those with dark spots all over or any signs of mushiness. Freshness is key for the best texture and flavor, so check the packaging date if you’re buying canned beans.

What is the best way to store leftover Zesty Butter Beans?
To keep your Zesty Butter Beans at their best, place any leftovers in an airtight container in the refrigerator. They’ll stay fresh for up to 7 days. When ready to enjoy again, reheat on the stovetop over low heat, stirring occasionally to ensure even warming.

Can I freeze Zesty Butter Beans?
Yes, you can! Freeze your Zesty Butter Beans in a freezer-safe container for up to 3 months. Here’s how:

  1. Allow the beans to cool completely before packing.
  2. Portion them into airtight containers or freezer bags, removing as much air as possible.
  3. Label with the date for easy tracking. When you’re ready to use them, thaw overnight in the refrigerator. Reheat gently on the stovetop, adding a splash of water or coconut milk to revive creaminess.

What can I substitute for coconut milk if I have allergies?
If you’re allergic to coconut, you can substitute it with heavy cream for a non-vegan option or use almond milk for a dairy-free alternative. However, for creaminess, you might want to thicken almond milk by adding a bit of cornstarch or a tablespoon of tahini when cooking.

How can I ensure my dish doesn’t turn out too soupy?
Very! If your Zesty Butter Beans end up too soupy, you can lightly mash a few of the beans during simmering. This releases their natural starches and helps thicken the dish. Stir well after mashing to integrate the thickness throughout the mixture.

Is this recipe suitable for my pet?
It’s important to note that while the individual ingredients aren’t harmful, dogs and cats shouldn’t consume large amounts of onion or garlic. If you’re serving this recipe, it’s best to keep it to yourself and opt for pet-safe meals for your furry friend. Enjoy your cooking adventure!

Zesty Butter Beans

Zesty Butter Beans: Creamy Vegan Comfort in Minutes

Experience the creamy and zesty flavors of Zesty Butter Beans, a nutritious vegan delight ready in no time.
Prep Time 5 minutes
Cook Time 10 minutes
Total Time 15 minutes
Servings: 4 servings
Course: Other
Cuisine: Vegan
Calories: 250

Ingredients
  

For the Base
  • 1 tablespoon Avocado or Olive Oil Adds richness and helps sauté the aromatics.
  • 1 medium Red Onion Provides zesty and sweet flavor.
  • 2 cloves Garlic Fresh garlic elevates taste.
For the Beans
  • 2 cups Pre-Cooked Butter Beans Rinse and drain before use.
  • 1 cup Coconut Milk Creates a creamy texture.
For Flavor
  • 0.5 cup Lemon Juice Brightens the dish.
  • 1 teaspoon Ground Turmeric Adds color and earthiness.
  • 1 pinch Black Pepper Enhances flavors of turmeric.
  • 1 teaspoon Smoked Paprika Imparts smoky undertones.
  • 1 teaspoon Dried Oregano Adds herbaceous notes.
  • to taste Salt Balances overall flavors.
For Garnish (Optional)
  • 1 teaspoon Red Chili Flakes Adds a hint of spice.
  • 2 tablespoons Hemp Seeds Boosts nutrition.

Equipment

  • Small saucepan

Method
 

Step-by-Step Instructions
  1. Heat 1 tablespoon of avocado or olive oil in a small saucepan over medium heat. Add finely chopped red onion and minced garlic, cooking for about 5 minutes until softened and golden.
  2. Once ready, add in 2 cups of rinsed and drained pre-cooked butter beans and pour in 1 cup of creamy coconut milk. Squeeze in the juice of half a lemon, followed by 1 teaspoon each of ground turmeric, smoked paprika, dried oregano, and a pinch of black pepper. Stir until well combined.
  3. Bring the mixture to a gentle simmer over medium heat while stirring continuously. Allow it to cook for about 5 minutes until creamy.
  4. Once creamy, remove from heat and garnish with red chili flakes and hemp seeds. Serve warm.

Notes

Use full-fat coconut milk for the richest results. Fresh garlic is recommended for optimal flavor.

Mouthwatering Sloppy Joe Mac and Cheese Wraps for Cozy Nights

There’s something undeniably satisfying about uniting beloved comfort foods into one incredible dish. These Sloppy Joe Mac and Cheese Wraps do just that, combining the zesty, rich flavors of classic Sloppy Joes with the creamy goodness of mac and cheese, all enveloped in a warm tortilla. This delightful recipe simplifies weeknight dinners, transforming them into a fun, shareable experience that everyone at the table will love. Plus, the customizable nature of these wraps means you can easily cater to dietary preferences, whether opting for gluten-free tortillas or swapping in hearty vegetables for a vegetarian delight. Are you ready to elevate your dinner game and impress your family with this melting pot of flavor?

Why Are These Wraps So Irresistible?

Comforting Fusion: These Sloppy Joe Mac and Cheese Wraps wonderfully combine two classic favorites, creating a delightful twist that satisfies cravings.

Customizable Joy: With options for gluten-free tortillas or veggie swaps, everyone can enjoy their ideal version of this dish.

Effortless Preparation: The simple cooking steps make these wraps achievable for even busy weeknights—dinner can be on the table in no time!

Crowd-Pleaser: Their cheesy, savory goodness is sure to impress family and friends alike, making them perfect for gatherings or fun family dinners.

Meal Prep Friendly: Prepare the fillings ahead of time for a quick assembly during mealtime—perfect for busy schedules. If you love cozy comfort food, you’ll also enjoy these delicious Beef Bacon Cheese rolls!

Sloppy Joe Mac and Cheese Wraps Ingredients

For the Sloppy Joe Filling

Olive Oil – Cooking fat for sautéing; can substitute with any cooking oil or butter.
Onion – Adds sweetness and aroma; shallots can be a substitute.
Garlic – Enhances flavor profile; use fresh or pre-prepared garlic.
Ground Beef – Delivers protein and richness; substitute with ground turkey or plant-based meat for lighter or vegetarian options.
Ketchup – Provides sweetness and tang; BBQ sauce can be used for a smoky flavor.
Tomato Paste – Adds depth and richness to the filling; no direct substitute necessary.
Worcestershire Sauce – Enhances umami depth; consider soy sauce as a gluten-free alternative.
Brown Sugar – Adds sweetness; can be replaced with honey or maple syrup.
Smoked Paprika – Provides smoky flavor; regular paprika or chili powder can be used in its place.
Salt and Pepper – Enhance overall flavor; adjust to taste.

For the Mac and Cheese

Cooked Macaroni – Base for mac and cheese; use gluten-free pasta for dietary needs.
Whole Milk – Creates a creamy sauce; heavy cream or plant-based milk can be used.
Shredded Cheddar Cheese – Provides creaminess and flavor; different cheese blends can be experimented with.

For the Wraps

Flour Tortillas – Encases the filling; gluten-free tortillas can be a suitable option.
Butter or Oil (for grilling) – Used for crisping the wraps; any cooking oil of choice is suitable.

With these amazing ingredients for the Sloppy Joe Mac and Cheese Wraps, you’ll be on your way to a cozy feast that is sure to bring smiles to your family!

Step‑by‑Step Instructions for Sloppy Joe Mac and Cheese Wraps

Step 1: Prepare the Sloppy Joe Filling
Heat a tablespoon of olive oil in a large skillet over medium heat. Sauté one chopped onion and two cloves of minced garlic for 2-3 minutes until they soften and become fragrant. Add one pound of ground beef, cooking it thoroughly for 5-7 minutes until browned. Drain any excess fat, then stir in half a cup of ketchup, two tablespoons of tomato paste, one tablespoon of Worcestershire sauce, a tablespoon of brown sugar, one teaspoon of smoked paprika, salt, and pepper. Let it simmer for 5-7 minutes until the mixture thickens.

Step 2: Make the Mac and Cheese
In a separate saucepan over low heat, combine 2 cups of cooked macaroni, one cup of whole milk, and two cups of shredded cheddar cheese. Stir continuously for about 5 minutes until the cheese melts entirely and a creamy sauce forms. If needed, season to taste with salt and pepper to enhance the flavors. It’s essential to keep mixing to prevent sticking and ensure a luscious mac and cheese consistency.

Step 3: Assemble the Wraps
Lay out four large flour tortillas on a clean surface. Spoon a generous scoop of mac and cheese onto each tortilla, followed by a scoop of the Sloppy Joe filling. Carefully roll the tortillas tightly from one end to enclose the fillings, making sure that the edges are tucked in to prevent spillage during grilling. This forms a delightful combination of the Sloppy Joe Mac and Cheese Wraps.

Step 4: Grill the Wraps
Heat a skillet over medium heat and add a small amount of butter or oil to coat the surface. Place the assembled wraps seam-side down in the skillet, grilling them for 2-3 minutes until they turn golden brown and crispy. Flip each wrap carefully to grill the other side for an additional 2-3 minutes, achieving a perfect crunchy exterior that complements the soft filling inside.

Step 5: Serve the Wraps
Once grilled, remove the wraps from the skillet and allow them to cool slightly before serving. For a fun presentation, slice each wrap in half diagonally if desired. Serve these delicious Sloppy Joe Mac and Cheese Wraps warm alongside your favorite dipping sauces or a fresh garden salad. Enjoy this comforting meal that brings the family together!

What to Serve with Sloppy Joe Mac and Cheese Wraps

Bring your family together for a satisfying meal that echoes cozy evenings spent at home.

  • Fresh Garden Salad: A crisp, refreshing salad adds a light contrast to the rich, cheesy wraps and enhances your meal’s nutrition. Toss in some vibrant cherry tomatoes and cucumbers for added crunch and flavor.

  • Creamy Coleslaw: This tangy, crunchy side perfectly complements the savory fillings of the wraps, adding a delightful bite. The coolness of the slaw balances the warmth of the wraps harmoniously.

  • Sweet Potato Fries: Crispy, sweet fries bring a delightful twist to your side dish. Their natural sweetness contrasts beautifully with the bold flavors of the Sloppy Joe mixture.

  • Garlic Breadsticks: These buttery breadsticks are perfect for mopping up any remaining filling or cheese sauce, taking the flavor experience to another level. Their golden crust and soft interior create an inviting addition.

  • Homemade Potato Chips: Crunchy and seasoned to perfection, these chips make for an addictive side that echoes the comfort of the wraps. Pair them with different dips for an extra layer of fun.

  • Iced Tea: A refreshing glass of iced tea complements the meal, offering a sweet balance to savory flavors. Consider adding slices of fresh lemon or mint for an uplifting twist.

  • Chocolate Chip Cookies: End the meal on a sweet note with warm, gooey cookies. Their comforting familiarity is the perfect sweet treat to accompany your Sloppy Joe Mac and Cheese Wraps.

How to Store and Freeze Sloppy Joe Mac and Cheese Wraps

Fridge: Store in an airtight container for up to 2 days to maintain freshness, keeping the wraps from becoming soggy.

Freezer: Individual wraps can be securely wrapped in plastic wrap and then placed in a freezer bag for up to 3 months; they’ll be ready for a cozy meal anytime!

Reheating: To reheat, thaw in the refrigerator overnight, then grill in a skillet over medium heat for 3-5 minutes per side until warmed through and crispy.

Make-Ahead: Preparing the Sloppy Joe and mac and cheese fillings in advance and storing them separately simplifies the assembly of the Sloppy Joe Mac and Cheese Wraps at mealtime.

Expert Tips for Sloppy Joe Mac and Cheese Wraps

  • Advance Prep: Prepare the Sloppy Joe and mac and cheese fillings up to 3 days ahead. Store them separately in the fridge for a quick assembly.

  • Taste Test: Always sample the Sloppy Joe mixture before assembling wraps. Adjust seasonings like salt and pepper to suit your family’s preferences.

  • Avoid Sogginess: Ensure you drain excess fat from the ground beef and let the Sloppy Joe filling cool slightly before adding to the wraps, preventing soggy tortillas.

  • Tortilla Types: While flour tortillas work beautifully, try whole wheat or corn tortillas for a unique flavor and texture in your Sloppy Joe Mac and Cheese Wraps.

  • Grill Heat: Grill the wraps on medium heat to achieve that perfect golden crisp without burning, ensuring a delightful crunch every time!

Make Ahead Options

These Sloppy Joe Mac and Cheese Wraps are perfect for meal prep enthusiasts! You can prepare the Sloppy Joe filling and mac and cheese components up to 3 days in advance. Simply cook and cool the fillings, storing them separately in airtight containers in the refrigerator to maintain freshness and prevent sogginess. When you’re ready to enjoy, reheat the fillings on the stove until warmed through. Assemble the wraps in fresh tortillas, and grill them as directed for crispy, restaurant-quality results. This approach not only saves you time during busy weeknights but also ensures the flavors meld beautifully while still being just as delicious!

Sloppy Joe Mac and Cheese Wraps Variations

Feel free to get creative with these wraps, tailoring them to your taste buds and dietary preferences!

  • Ground Turkey: Swap ground beef for ground turkey for a leaner option with similar flavor.

  • Vegetarian Delight: Use lentils or black beans in place of meat, packing the wraps with fiber and goodness.

  • Cheese Variety: Experiment with different cheeses like pepper jack for a kick or creamy mozzarella for a milder flavor.

  • Tortilla Twist: Try whole wheat or corn tortillas instead of flour for a unique texture and heartier bite.

  • Spice it Up: Add diced jalapeños or crushed red pepper flakes for a spicy punch that dances on your palate.

  • Veggie Boost: Incorporate sautéed bell peppers, spinach, or mushrooms into the filling for added nutrition and flavor.

  • Sweet BBQ Sauce: Swap ketchup with your favorite BBQ sauce for a smoky, sweet twist that complements the Sloppy Joe zest.

  • Creamy Upgrade: For an extra creamy mac and cheese, consider mixing in a little cream cheese or sour cream for richness.

With these variations, your Sloppy Joe Mac and Cheese Wraps can become a new family favorite, tailored to suit every occasion! If you’re looking for inspiration, why not try adding some flavors from these delightful Savory Zucchini Cheese dishes to brighten up your meal?

Sloppy Joe Mac and Cheese Wraps Recipe FAQs

How do I choose ripe ingredients for my Sloppy Joe Mac and Cheese Wraps?
Absolutely! For the best Sloppy Joe filling, choose plump and firm tomatoes if you’re using fresh. Select onions that are dry, with a sturdy outer skin free from dark spots. Garlic should be firm and heavy, with no signs of sprouting. For the cheese, opt for blocks of cheddar rather than pre-shredded; it melts smoother and gives a richer flavor.

How should I store leftover Sloppy Joe Mac and Cheese Wraps?
You can store these delicious wraps in an airtight container in the fridge for up to 2 days. Just make sure to let them cool completely before sealing to prevent sogginess. If you’d like to keep them longer, individually wrap each in plastic wrap and place them in a freezer bag—these can be frozen for up to 3 months!

Can I freeze Sloppy Joe Mac and Cheese Wraps for later?
Yes! To freeze, wrap each completed Sloppy Joe Mac and Cheese Wrap tightly in plastic wrap, then place them in a freezer-safe bag. This will help lock in flavor and prevent freezer burn. When you’re ready to enjoy them, let them thaw overnight in the fridge, then reheat in a skillet over medium heat for 3-5 minutes on each side until they’re crispy and heated thoroughly.

What if my Sloppy Joe filling is too runny?
Very! If your filling seems a bit too wet, try simmering it longer on low heat to allow some of the moisture to evaporate. Alternatively, you can add a teaspoon of cornstarch diluted in a tablespoon of water to thicken the mixture. Stir it in while the filling continues to cook; this should help achieve the perfect consistency for your wraps.

Are there any dietary considerations I should be aware of for the wraps?
Absolutely! If you’re accommodating gluten sensitivities, simply substitute regular flour tortillas with gluten-free tortillas. For vegetarian options, use ground lentils or plant-based meat substitutes in your Sloppy Joe filling. Also, confirm that your cheese is free of animal rennet if you’d like to keep it vegetarian. Always check ingredient labels to be cautious about allergens!

Can I make these wraps in advance?
Yes, it’s quite easy! You can prepare the Sloppy Joe filling and mac and cheese up to 3 days ahead. Just store them separately in airtight containers in the fridge. When you’re ready, simply assemble the wraps, grill, and enjoy a quick and satisfying meal that feels freshly made!

Sloppy Joe Mac and Cheese Wraps

Mouthwatering Sloppy Joe Mac and Cheese Wraps for Cozy Nights

These Sloppy Joe Mac and Cheese Wraps are a delicious fusion of comfort foods, perfect for cozy dinners.
Prep Time 15 minutes
Cook Time 25 minutes
Total Time 40 minutes
Servings: 4 wraps
Course: Dinner
Cuisine: American
Calories: 500

Ingredients
  

For the Sloppy Joe Filling
  • 1 tablespoon Olive Oil or any cooking oil or butter
  • 1 medium Onion chopped
  • 2 cloves Garlic minced
  • 1 pound Ground Beef can substitute with ground turkey or plant-based meat
  • 0.5 cup Ketchup or BBQ sauce
  • 2 tablespoons Tomato Paste
  • 1 tablespoon Worcestershire Sauce or soy sauce for gluten-free
  • 1 tablespoon Brown Sugar or honey
  • 1 teaspoon Smoked Paprika or regular paprika
  • to taste Salt
  • to taste Pepper
For the Mac and Cheese
  • 2 cups Cooked Macaroni can use gluten-free pasta
  • 1 cup Whole Milk or heavy cream
  • 2 cups Shredded Cheddar Cheese can experiment with different cheese blends
For the Wraps
  • 4 large Flour Tortillas or gluten-free tortillas
  • as needed Butter or Oil for grilling

Equipment

  • large skillet
  • Saucepan
  • spatula
  • Measuring cups
  • Measuring spoons

Method
 

Preparation
  1. Heat a tablespoon of olive oil in a large skillet over medium heat. Sauté one chopped onion and two cloves of minced garlic for 2-3 minutes until they soften and become fragrant.
  2. Add one pound of ground beef, cooking it thoroughly for 5-7 minutes until browned. Drain any excess fat.
  3. Stir in half a cup of ketchup, two tablespoons of tomato paste, one tablespoon of Worcestershire sauce, a tablespoon of brown sugar, one teaspoon of smoked paprika, salt, and pepper. Let it simmer for 5-7 minutes until thickened.
  4. In a separate saucepan over low heat, combine 2 cups of cooked macaroni, one cup of whole milk, and two cups of shredded cheddar cheese. Stir until melted and creamy, about 5 minutes.
  5. Lay out four large flour tortillas. Spoon mac and cheese onto each, followed by Sloppy Joe filling. Roll tightly to enclose.
  6. Heat a skillet over medium and add butter or oil. Grill wraps seam-side down for 2-3 minutes until golden, then flip.
  7. Remove from the skillet, cool slightly, and slice diagonally if desired. Serve warm.

Notes

Make fillings ahead for easier assembly. Adjust seasonings to taste before wrapping.

Deliciously Easy Special Fried Rice in Just 15 Minutes

The sizzling sound of shrimp and ham dancing in a hot wok never fails to ignite my enthusiasm for cooking. This Quick and Easy Special Fried Rice comes together in just 15 minutes, delivering a comforting meal that perfectly fits those busy weeknights when takeout feels very tempting. With a savory blend of tender shrimp, flavorful ham, and vibrant green peas, this dish is not only quick to whip up but also incredibly customizable, catering to whatever you have on hand in your kitchen. Whether you’re feeding a hungry family or just looking to stir up something different, this stir-fry is sure to become a favorite. Ready to swap out takeout for a homemade triumph? Let’s dive into making this delightful fried rice that will have everyone asking for seconds!

Why is Special Fried Rice a Must-Try?

Quick and Easy: This dish comes together in just 15 minutes, making it perfect for those hectic weeknights when you need something fast and satisfying.
Flavor Explosion: The delightful mix of shrimp, ham, and peas creates a robust taste that will awaken your taste buds, reminding you of your favorite takeout without leaving home.
Customizable Goodness: Whether you have leftover chicken or veggies, this special fried rice easily adapts to whatever you have on hand, allowing you to get creative in the kitchen.
Healthy Indulgence: Packed with protein from shrimp and eggs, plus fiber from peas, this meal strikes a balance between indulgence and nutrition, leaving you feeling good about what you eat.
Crowd-Pleaser: Whether you’re serving a family dinner or hosting friends, everyone loves a hearty plate of this special fried rice. Pair it with some stir-fried vegetables for a complete feast!

Special Fried Rice Ingredients

For the Base
Cooked RiceUse chilled, day-old rice for optimal texture; freshly cooked rice may clump.
EggsAdd protein and richness; substitute with scrambled tofu for a vegan option.

For the Savory Mix
ShrimpAdds a delicate seafood flavor; use uncooked shrimp and cook until opaque (2-3 mins).
Cooked HamContributes savory flavor and texture; leftover ham works perfectly for convenience.
Green PeasProvide sweetness and color; frozen peas are handy and recommended.

For the Flavor Boost
Soy SauceDelivers umami and saltiness; opt for gluten-free soy sauce if necessary.
Sesame OilImparts a nutty aroma; substitute with vegetable oil, though it may not be as fragrant.
Chinese Rice Wine or Dry SherryEnhances the dish’s depth; can be substituted with white wine or omitted.

For Stir-Frying
Vegetable OilEssential for frying; use any neutral oil if sesame oil isn’t available.
Green Onions (Scallions)Adds a fresh onion flavor as a garnish; yellow onions can be used but lack the same brightness.

Final Touches
SaltSeason to taste; adjust based on the sodium content in the soy sauce.

With these ingredients at your fingertips, you’ll be well on your way to creating a mouthwatering Special Fried Rice that shines!

Step‑by‑Step Instructions for Special Fried Rice

Step 1: Beat the Eggs
Begin by cracking the eggs into a bowl, adding a pinch of salt, and whisking them lightly until the yolks and whites are fully combined and frothy. This process should take about 1 minute. Set the bowl aside as you prepare the rest of your ingredients, ensuring you have everything ready to go since the cooking process will be quick.

Step 2: Cook the Shrimp and Ham
Heat a wok over medium-high heat and add 1 tablespoon of sesame oil. Once the oil is shimmering, toss in the shrimp, cooked ham, and green peas. Stir-fry the mixture for about 1 minute, or until the shrimp turns opaque and the peas are bright green. Pour in the soy sauce and Chinese rice wine, then transfer everything to a bowl and set it aside.

Step 3: Scramble the Eggs
In the same wok, add another tablespoon of vegetable oil and heat it over medium-high. Carefully pour in the beaten eggs, swirling them gently with a spatula. Cook for about 1-2 minutes until the eggs are softly scrambled and just set; they should appear fluffy and lightly golden. Remove the eggs from the wok and set aside.

Step 4: Heat the Rice
Next, add the chilled, day-old rice to the wok, breaking apart any clumps gently with your spatula. Stir-fry the rice for about 2-3 minutes, allowing it to heat through and absorb the flavors from the wok. Look for the grains to start turning slightly golden, ensuring they are not soggy.

Step 5: Combine All Ingredients
Return the shrimp, ham, and pea mixture back to the wok with the rice. Add the scrambled eggs and chopped green onions, mixing everything thoroughly for another 1-2 minutes. This step allows the flavors of the Special Fried Rice to meld beautifully, so ensure everything is well-combined and heated fully.

Step 6: Final Seasoning and Serve
Taste your finished Special Fried Rice and adjust with salt or more soy sauce as needed. Remove from the heat, and serve your dish hot, garnished with additional green onions if desired. The wonderful aroma will surely draw everyone to the table, ready for a delightful meal!

Special Fried Rice Variations

Embrace the joy of customizing your dish with these inspiring twists that take your fried rice to new heights!

  • Chicken Swap: Substitute shrimp for diced chicken breast, cooked until golden brown for a hearty alternative.
  • Tofu Twist: For a vegan option, replace shrimp and ham with cubed scrambled tofu, retaining that protein punch.
  • Veggie Boost: Add chopped bell peppers, carrots, or even broccoli for extra crunch and nutrition, elevating the dish’s colorful appeal.
  • Spicy Kick: Incorporate a dash of sriracha or chili sauce while stir-frying for a delightful heat that brings life to every bite.
  • Garlic Infusion: Sauté minced garlic with the shrimp for an aromatic boost that adds depth to your fried rice, making each mouthful irresistible.
  • Flavorful Layering: Experiment with adding diced pineapple during the final mix for a sweet and savory fusion that tantalizes the taste buds.
  • Rice Variety: Use jasmine or basmati rice instead of regular rice for a fragrant touch that complements the dish beautifully.
  • Umami Punch: Consider adding a sprinkle of oyster sauce along with the soy sauce, enhancing the umami factor and giving your special fried rice a remarkable flavor twist.

With so many options, your Special Fried Rice can truly be a reflection of what you love. Don’t hesitate to explore other culinary adventures, like pairing it with some delightful stir-fried vegetables for a vibrant meal that delights the senses!

Expert Tips for Special Fried Rice

  • Cold Rice is Key: Always use chilled, day-old rice for the best texture. Freshly cooked rice can become mushy and clump together.
  • Prep Ahead: Have all ingredients ready before you start cooking. Stir-frying is a quick process, and you’ll want everything at your fingertips.
  • Don’t Overcrowd the Wok: To achieve that perfect fried rice consistency, cook in batches if necessary. Overcrowding can lead to steaming instead of frying.
  • Adjust to Taste: Remember, cooking is about personal preference. Feel free to tweak the seasonings to match your flavor profile for the perfect Special Fried Rice.
  • Garnish Wisely: Enhance the presentation and freshness by garnishing with additional chopped green onions right before serving. It brightens up the dish beautifully!

What to Serve with Quick and Easy Special Fried Rice?

There’s something magical about pairing this flavorful fried rice with complementary dishes that enhance its delightful flavors.

  • Stir-Fried Vegetables: Colorful and crunchy, they add freshness and variety, creating a balanced plate that feels wholesome. A medley of bell peppers, broccoli, and carrots can brighten the meal further.

  • Sweet and Sour Chicken: The tangy sweetness of this classic dish contrasts beautifully with the savory notes of special fried rice, making every bite feel like a feast.

  • Egg Rolls: Crispy and filled with savory goodness, these make for a wonderful appetizer that pairs seamlessly with fried rice, offering different textures for your palate to enjoy.

  • Teriyaki Salmon: Rich and succulent, this dish introduces a different protein that enhances the umami flavors found in fried rice while adding a deliciously sticky glaze.

  • Asian Slaw: A refreshing side, tangy slaw brings out the savory elements of special fried rice and adds a delightful crunch, perfectly balancing flavors and textures.

  • Chili Garlic Tofu: Spicy and satisfyingly chewy, this tofu dish introduces a kick that complements the mild and savory taste of the rice, creating a fabulous contrast.

  • Mango Sticky Rice: For dessert, this sweet treat with its creamy coconut flavor serves as the perfect ending, leaving your taste buds with a satisfying finish after the savory main course.

Each of these pairings invites you to a delightful culinary journey, turning your meal into a memorable experience.

Make Ahead Options

These Special Fried Rice preparations are perfect for busy home cooks looking to save time during the week! You can prepare the ingredients (diced ham, shelled shrimp, and chopped green onions) up to 24 hours in advance, storing them in airtight containers in the refrigerator to maintain freshness. The rice can be cooked and chilled any time within the previous 3 days—just ensure it’s stored properly in the fridge to prevent clumping. When you’re ready to serve, simply stir-fry everything together as per the original instructions, and you’ll have a quick, delicious meal ready in no time, just as vibrant and enticing as if you’d made it fresh!

How to Store and Freeze Special Fried Rice

Fridge: Store leftover Special Fried Rice in an airtight container in the refrigerator for up to 3 days. This will keep the flavors fresh and enjoyable.

Freezer: For longer storage, freeze the fried rice in a zip-top bag or airtight container for up to 3 months. Make sure to remove as much air as possible to prevent freezer burn.

Reheating: When ready to enjoy, thaw in the refrigerator overnight. Reheat on the stovetop over medium heat for the best texture, adding a splash of water or oil if necessary to restore moisture.

Serving Suggestion: Garnish with fresh green onions and serve hot. Reheating in the microwave is an option but may result in a less desirable texture.

Special Fried Rice Recipe FAQs

What type of rice should I use for best results?
Absolutely! The best choice is chilled, day-old rice. Freshly cooked rice tends to be too moist and can clump together. If you don’t have leftover rice, spread freshly cooked rice on a baking sheet to cool quickly and dry out for about 30 minutes before using it in your Special Fried Rice.

How long can I store leftover Special Fried Rice?
You can store it in an airtight container in the refrigerator for up to 3 days. Make sure to let it cool completely before sealing it up to preserve its flavors and prevent condensation.

Can I freeze Special Fried Rice?
Yes, you can! Portion the fried rice into zip-top bags or airtight containers, removing as much air as possible. It will keep well in the freezer for up to 3 months. To thaw, simply place it in the refrigerator overnight before reheating.

What should I do if my fried rice is too sticky?
If your Special Fried Rice turns out stickier than you’d like, don’t worry! Next time, ensure your rice is cold and ideally day-old. If you’re already cooking and facing sticky rice, try adding a tiny bit of oil while you stir-fry, as this can help separate the grains. Stirring gently without smashing them will also help achieve that fluffy texture.

Can I make Special Fried Rice gluten-free?
Yes! To make your Special Fried Rice gluten-free, simply swap regular soy sauce for a gluten-free soy sauce. Also, check the labels on any other sauces or condiments you use to ensure they meet your dietary needs.

What can I substitute for shrimp and ham?
Very! If shrimp or ham isn’t your thing, you can replace them with chicken, tofu, or any other leftover proteins you have lying around. Feel free to add in chopped veggies like bell peppers or carrots as well, enhancing both flavor and nutrition!

Special Fried Rice

Deliciously Easy Special Fried Rice in Just 15 Minutes

This Special Fried Rice is a quick, comforting dish perfect for busy weeknights.
Prep Time 5 minutes
Cook Time 10 minutes
Total Time 15 minutes
Servings: 4 servings
Course: Dinner
Cuisine: Asian
Calories: 400

Ingredients
  

For the Base
  • 4 cups Cooked Rice Use chilled, day-old rice for optimal texture; freshly cooked rice may clump.
  • 2 Eggs Add protein and richness; substitute with scrambled tofu for a vegan option.
For the Savory Mix
  • 1 cup Shrimp Adds a delicate seafood flavor; use uncooked shrimp and cook until opaque (2-3 mins).
  • 1 cup Cooked Ham Contributes savory flavor and texture; leftover ham works perfectly for convenience.
  • 1 cup Green Peas Provide sweetness and color; frozen peas are handy and recommended.
For the Flavor Boost
  • 3 tbsp Soy Sauce Delivers umami and saltiness; opt for gluten-free soy sauce if necessary.
  • 2 tbsp Sesame Oil Imparts a nutty aroma; substitute with vegetable oil, though it may not be as fragrant.
  • 1 tbsp Chinese Rice Wine or Dry Sherry Enhances the dish's depth; can be substituted with white wine or omitted.
For Stir-Frying
  • 2 tbsp Vegetable Oil Essential for frying; use any neutral oil if sesame oil isn't available.
  • 2 Green Onions (Scallions) Adds a fresh onion flavor as a garnish; yellow onions can be used but lack the same brightness.
Final Touches
  • to taste Salt Season to taste; adjust based on the sodium content in the soy sauce.

Equipment

  • wok

Method
 

Step-by-Step Instructions for Special Fried Rice
  1. Beat the Eggs: Begin by cracking the eggs into a bowl, adding a pinch of salt, and whisking them lightly until the yolks and whites are fully combined and frothy. This process should take about 1 minute. Set the bowl aside as you prepare the rest of your ingredients.
  2. Cook the Shrimp and Ham: Heat a wok over medium-high heat and add 1 tablespoon of sesame oil. Once the oil is shimmering, toss in the shrimp, cooked ham, and green peas. Stir-fry the mixture for about 1 minute, or until the shrimp turns opaque and the peas are bright green. Pour in the soy sauce and Chinese rice wine, then transfer everything to a bowl and set it aside.
  3. Scramble the Eggs: In the same wok, add another tablespoon of vegetable oil and heat it over medium-high. Carefully pour in the beaten eggs, swirling them gently with a spatula. Cook for about 1-2 minutes until the eggs are softly scrambled and just set; they should appear fluffy and lightly golden. Remove the eggs from the wok and set aside.
  4. Heat the Rice: Next, add the chilled, day-old rice to the wok, breaking apart any clumps gently with your spatula. Stir-fry the rice for about 2-3 minutes, allowing it to heat through and absorb the flavors from the wok. Look for the grains to start turning slightly golden, ensuring they are not soggy.
  5. Combine All Ingredients: Return the shrimp, ham, and pea mixture back to the wok with the rice. Add the scrambled eggs and chopped green onions, mixing everything thoroughly for another 1-2 minutes. This step allows the flavors of the Special Fried Rice to meld beautifully.
  6. Final Seasoning and Serve: Taste your finished Special Fried Rice and adjust with salt or more soy sauce as needed. Remove from the heat, and serve your dish hot, garnished with additional green onions if desired.

Notes

For best results, always use chilled, day-old rice and prepare all ingredients beforehand.

Moist Zucchini Orange Bread That Will Brighten Your Day

As I walked through the vibrant farmer’s market, a peculiar sight caught my eye: mountains of fresh zucchini and bright oranges, practically calling out to be transformed into something special. That’s when the idea hit me—why not marry these two ingredients in a delightful Zucchini Orange Bread? This recipe is a game-changer, serving as a quick and easy treat that’s not only incredibly moist but also cleverly incorporates a vegetable for a nutritious twist. Whether you’re looking to add a unique item to your breakfast table or whip up a thoughtful gift, this quick bread is sure to impress. Curious about how this delicious combination comes together? Let’s dive into this simple yet satisfying recipe!

Why Is Zucchini Orange Bread So Irresistible?

Moist, Delicious Flavor: This Zucchini Orange Bread is bursting with vibrant citrus notes, perfectly complementing the subtle earthiness of zucchini.

Simple Preparation: With just a few easy steps, you’ll have a delightful treat ready in no time, making it perfect for busy mornings.

Hidden Veggies: It’s an excellent way to sneak in a serving of vegetables, making it a guilt-free indulgence for all ages.

Versatile Options: Feel free to play with flavors—add chocolate chips for sweetness or experiment with spices like nutmeg.

Ideal for Gifting: Charming and delicious, it’s a thoughtful homemade gift for friends and family that’ll truly brighten their day.

Give this Moist Zucchini Orange Bread a try and serve it warm with a pat of butter, or check out our Savory Zucchini Pancakes for another delightful zucchini twist!

Zucchini Orange Bread Ingredients

For the Batter

  • Large Eggs – Provide structure and moisture, making the bread soft and fluffy.
  • Sugar – Adds sweetness, enhancing the flavors of orange and spices; brown sugar can be used for a deeper flavor.
  • Vegetable Oil – Keeps the bread moist and tender; can substitute with canola oil or melted coconut oil.
  • Orange Juice – Introduces a bright citrusy flavor; freshly squeezed juice is preferred for the best taste.
  • Shredded Unpeeled Zucchini – Adds moisture without overpowering the taste; remember to squeeze out excess water after grating to avoid sogginess.
  • All-Purpose Flour – The base of the bread, providing structure; can substitute with a gluten-free flour blend.
  • Baking Powder & Baking Soda – Essential leavening agents that help the bread rise; ensure they are fresh for the best effect.
  • Salt – Balances the sweetness; use fine sea salt for even distribution.
  • Grated Orange Zest – Intensifies citrus aroma and flavor; using organic oranges is recommended to avoid pesticide residues.
  • Ground Cinnamon & Ground Cloves – Warm spices that add depth; nutmeg can be a great replacement for cloves.
  • Chopped Nuts (optional) – Adds crunch and flavor; consider walnuts or pecans, folded into the batter before baking.

For the Glaze

  • Powdered Sugar – The base of the glaze for a smooth finish; sifting ensures a lump-free glaze.
  • Orange Juice (for glaze) – Adds a citrusy tang; use as needed to achieve the desired glaze consistency.

Step‑by‑Step Instructions for Zucchini Orange Bread

Step 1: Preheat the Oven
Begin by preheating your oven to 350°F (175°C). While the oven warms up, prepare your loaf pans by greasing and lightly flouring them to ensure your Zucchini Orange Bread releases easily once baked. Take this time to gather all your ingredients and equipment for a smooth cooking process.

Step 2: Beat the Eggs
In a large mixing bowl, crack open your large eggs and beat them with a whisk until they are thick and pale, which should take about 2-3 minutes. This crucial step adds air, ensuring a light texture in your Zucchini Orange Bread. Once the eggs are fluffy, gradually mix in the sugar until combined.

Step 3: Mix in the Liquids
Next, pour in the vegetable oil and freshly squeezed orange juice into the egg and sugar mixture. Stir gently until everything is fully combined, then carefully fold in the shredded unpeeled zucchini. Be sure to squeeze out any excess moisture from the zucchini beforehand to avoid a soggy bread.

Step 4: Combine the Dry Ingredients
In a separate bowl, whisk together the all-purpose flour, baking powder, baking soda, salt, ground cinnamon, ground cloves, and grated orange zest. This step ensures an even distribution of leavening agents and spices throughout your Zucchini Orange Bread, contributing to its deliciously aromatic flavor and texture.

Step 5: Fold Wet and Dry Mixtures
Now, gradually fold the wet mixture into the dry ingredients, stirring gently until just combined. Be careful not to overmix, as this can lead to dense bread. If you’re using chopped nuts, like walnuts or pecans, fold them into the batter at this stage for added crunch and flavor.

Step 6: Pour and Bake
Pour the batter evenly into your prepared loaf pans, smoothing the top with a spatula. Place the pans in the oven and bake for 45-55 minutes, or until a toothpick inserted into the center comes out clean. You want the tops to be golden brown and firm to the touch, signaling that your Zucchini Orange Bread is ready.

Step 7: Cool the Bread
Once baked, remove the loaves from the oven and allow them to cool in the pans for about 10 minutes. This step is essential as it allows the bread to set properly. Then, carefully transfer the loaves to a wire rack to cool completely, ensuring they maintain their moist texture.

Step 8: Prepare the Glaze
While the bread cools, whisk together the powdered sugar and additional orange juice in a small bowl until you reach a smooth consistency. This citrus glaze will enhance the sweetness and add a lovely finishing touch to your Zucchini Orange Bread, making it even more irresistible.

Step 9: Drizzle the Glaze
Once your Zucchini Orange Bread has cooled completely, drizzle the glaze generously over the top of each loaf. Allow the glaze to set slightly before slicing, which will provide a beautiful, shiny finish, and a delightful taste contrast that complements the moist bread perfectly.

Step 10: Store or Serve
If you aren’t enjoying the Zucchini Orange Bread immediately, wrap it tightly in plastic wrap or store it in an airtight container to keep it fresh for up to a week. Alternatively, freeze it for longer storage, ensuring you have this delicious treat on hand whenever the craving strikes!

Make Ahead Options

These Zucchini Orange Bread loaves are perfect for busy home cooks looking to save time during hectic weeks! You can prepare the batter up to 24 hours in advance; just keep it stored in the refrigerator to maintain freshness. If you’re short on time, consider shredding and squeezing the zucchini a day ahead, as this will prevent moisture buildup and keep the bread from getting soggy. When you’re ready to bake, simply fold in your dry ingredients and pour the batter into the prepared pans. Bake as per the instructions for just as delicious results! Enjoy the convenience of having this delightful quick bread ready to slice anytime!

Zucchini Orange Bread Variations

Feel free to unleash your creativity and make this recipe your own with these delightful twists and substitutions!

  • Chocolate Chip: Add 1 cup of chocolate chips for a sweet surprise in every bite. This delicious addition takes the bread to a whole new level of indulgence.

  • Gluten-Free: Swap all-purpose flour with a 1:1 gluten-free flour blend to make it suitable for gluten-sensitive friends. Enjoy all the same flavors without the gluten!

  • Nutty Delight: Use your favorite chopped nuts, such as pecans or hazelnuts, for added crunch and flavor. The nutty richness pairs wonderfully with the citrusy sweetness.

  • Spice It Up: Experiment with spices like cardamom or turmeric to elevate the flavor profile. A pinch of these spices can add warmth and an unexpected twist to your bread.

  • Whole Wheat Twist: Substitute half of the all-purpose flour with whole wheat flour for a heartier texture and added nutrition. This small change can enhance the bread’s wholesome appeal.

  • Dairy-Free Option: Replace the vegetable oil with melted coconut oil for a dairy-free version. The subtle coconut flavor complements the citrus beautifully.

  • Zesty Lime Variation: Try using lime juice and zest instead of orange for a refreshing twist. This brings a bright flavor that’s perfect for warm days.

  • Savory Touch: Add fresh herbs like rosemary or thyme to create a savory version of the bread. This unexpected twist is delightful for serving alongside savory dishes or soups.

If you’re looking for more vegetable-inspired recipes, check out our Savory Zucchini Pancakes or indulge in a sweet treat with our delicious Homemade Sweet Orange jam!

Expert Tips for Zucchini Orange Bread

Egg Beating: Ensure to beat your eggs until they are thick and pale to achieve a light and fluffy texture in your zucchini orange bread.

Zucchini Prep: Squeeze out excess moisture from the grated zucchini to prevent your bread from becoming soggy; this is a crucial step!

Gentle Mixing: Avoid overmixing when combining wet and dry ingredients; stir until just blended to keep the bread from turning dense.

Flavor Variations: Feel free to substitute nuts with chocolate chips for a sweeter twist, enhancing the overall flavor of your zucchini orange bread.

Glaze Technique: Sift your powdered sugar before mixing for the glaze to ensure it’s lump-free for a smooth, professional finish.

Storage Tips for Zucchini Orange Bread

Room Temperature: Store your Zucchini Orange Bread wrapped in plastic wrap or in an airtight container for up to 3 days to maintain its freshness and flavor.

Fridge: If you want to extend its shelf life, you can refrigerate the bread for up to a week, but be aware it may dry out slightly. Ensure it’s well-wrapped to keep moisture in.

Freezer: For longer storage, freeze your Zucchini Orange Bread by wrapping it tightly in plastic wrap and then placing it in a freezer-safe bag for up to 3 months.

Reheating: To enjoy your bread warm, simply thaw in the fridge overnight and reheat slices in the microwave for 15-20 seconds or toast them for a crispy finish.

What to Serve with Zucchini Orange Bread?

Imagine the warm aroma of freshly baked Zucchini Orange Bread wafting through your kitchen, inviting everyone to gather around the table for a cozy meal.

  • Creamy Yogurt: The tangy creaminess of yogurt provides a delightful balance to the sweetness of the bread, perfect for breakfast or a snack.
  • Fresh Fruit Salad: A burst of juicy fruits like berries and citrus adds freshness and a vibrant color contrast to your table.
  • Buttery Croissant: For a special brunch, serve alongside flaky croissants; their rich texture complements the moist bread beautifully.
  • Spiced Chai Tea: A warm cup of chai enhances the spices in the bread, creating a comforting pairing that feels like a hug in a mug.
  • Honey Glazed Nuts: Crunchy, sweet nuts bring an added texture and a nutty flavor, fantastic when served on the side or sprinkled on top.
  • Maple Glaze Icing: Drizzling additional maple icing over individual slices turns each piece into a gourmet treat for brunch gatherings.
  • Cinnamon Coffee: A warm cup of cinnamon-infused coffee elevates the flavors in the bread while making mornings feel extra special.
  • Dark Chocolate Squares: For those with a sweet tooth, pairing it with rich dark chocolate enhances the citrus notes and satisfies cravings.
  • Lemonade or Sparkling Water: Refreshing drinks like homemade lemonade bring another layer of brightness, cooling off each bite perfectly.

Zucchini Orange Bread Recipe FAQs

What is the best way to select ripe zucchini for this recipe?
Absolutely! When choosing zucchini, look for ones that are firm with smooth, shiny skin. The ideal size is around 6 to 8 inches long; anything larger may have a more mature flavor and tougher skin. Avoid zucchini with dark spots or blemishes, as these can indicate overripeness.

How should I store Zucchini Orange Bread, and how long will it last?
For optimum freshness, store your Zucchini Orange Bread in an airtight container or wrap it tightly in plastic wrap. At room temperature, it will stay fresh for about 3 days. If you prefer to keep it longer, refrigerating it can extend its life to a week, but make sure it’s well-wrapped to prevent it from drying out.

Can I freeze Zucchini Orange Bread? If so, how?
Very! To freeze your Zucchini Orange Bread, let it cool completely first. Then, wrap the loaf tightly in plastic wrap and place it in a freezer-safe bag. This way, it will stay fresh for up to 3 months. When you’re ready to enjoy it, thaw it overnight in the fridge and reheat in the microwave or toaster for a few minutes for that freshly baked taste.

What should I do if my Zucchini Orange Bread turns out soggy?
If your bread turns out soggy, it may be due to excess moisture from the zucchini. Next time, make sure to squeeze out as much water as possible after grating. Additionally, avoid overmixing the batter, as this can contribute to a dense texture. If it’s already baked, try serving it toasted to crisp the edges!

Can pets eat Zucchini Orange Bread?
While zucchini is safe and healthy for pets in moderate amounts, the bread contains sugar and other ingredients that aren’t advisable for them. It’s best to refrain from sharing your Zucchini Orange Bread with pets, as the added sugars and spices may upset their stomachs.

Is there a gluten-free version of Zucchini Orange Bread?
Absolutely! You can substitute the all-purpose flour with a gluten-free flour blend. Many blends work great in quick bread recipes. Just make sure to adjust the measurements according to the blend you’re using, as some may require additional binding agents like xanthan gum for optimal texture.

Zucchini Orange Bread

Moist Zucchini Orange Bread That Will Brighten Your Day

Delightful and moist Zucchini Orange Bread that combines fresh zucchini and oranges for a nutritious twist.
Prep Time 15 minutes
Cook Time 50 minutes
Cooling Time 10 minutes
Total Time 1 hour 15 minutes
Servings: 10 slices
Course: Breakfast
Cuisine: American
Calories: 180

Ingredients
  

For the Batter
  • 2 large Eggs Provide structure and moisture, making the bread soft and fluffy.
  • 1 cup Sugar Adds sweetness, enhancing the flavors of orange and spices; brown sugar can be used for a deeper flavor.
  • 1/2 cup Vegetable Oil Keeps the bread moist and tender; can substitute with canola oil or melted coconut oil.
  • 1/2 cup Orange Juice Introduces a bright citrusy flavor; freshly squeezed juice is preferred for the best taste.
  • 1 cup Shredded Unpeeled Zucchini Adds moisture without overpowering the taste; remember to squeeze out excess water after grating to avoid sogginess.
  • 1 1/2 cups All-Purpose Flour The base of the bread, providing structure; can substitute with a gluten-free flour blend.
  • 1 tsp Baking Powder Essential leavening agents that help the bread rise; ensure they are fresh for the best effect.
  • 1/2 tsp Baking Soda Essential leavening agents that help the bread rise; ensure they are fresh for the best effect.
  • 1/2 tsp Salt Balances the sweetness; use fine sea salt for even distribution.
  • 1 tbsp Grated Orange Zest Intensifies citrus aroma and flavor; using organic oranges is recommended to avoid pesticide residues.
  • 1 tsp Ground Cinnamon Warm spices that add depth; nutmeg can be a great replacement for cloves.
  • 1/4 tsp Ground Cloves Warm spices that add depth; nutmeg can be a great replacement for cloves.
  • 1/2 cup Chopped Nuts (optional) Adds crunch and flavor; consider walnuts or pecans, folded into the batter before baking.
For the Glaze
  • 1 cup Powdered Sugar The base of the glaze for a smooth finish; sifting ensures a lump-free glaze.
  • 2 tbsp Orange Juice (for glaze) Adds a citrusy tang; use as needed to achieve the desired glaze consistency.

Equipment

  • Loaf pan
  • mixing bowl
  • whisk
  • spatula
  • Wire rack

Method
 

Step‑by‑Step Instructions for Zucchini Orange Bread
  1. Preheat your oven to 350°F (175°C). Prepare your loaf pans by greasing and lightly flouring them.
  2. In a large mixing bowl, beat the eggs until thick and pale. Mix in the sugar until combined.
  3. Pour in the vegetable oil and orange juice, stirring gently, then fold in the shredded zucchini after squeezing out excess moisture.
  4. In a separate bowl, whisk together the flour, baking powder, baking soda, salt, cinnamon, cloves, and orange zest.
  5. Gradually fold the wet mixture into the dry ingredients until just combined. If using nuts, add them now.
  6. Pour the batter into the prepared pans and bake for 45-55 minutes, or until a toothpick comes out clean.
  7. Cool in the pans for 10 minutes, then transfer to a wire rack to cool completely.
  8. Whisk together powdered sugar and orange juice until smooth for the glaze.
  9. Drizzle the glaze over the cooled loaves and allow to set before slicing.
  10. Wrap tightly to store or freeze for later enjoyment.

Notes

This bread is not only delicious but also a great way to incorporate veggies into your diet. Experiment with flavors to make it your own.

Grilled Corn Orzo Salad with Scallion Dill Dressing Yum!

The sun is shining, and the grill is fired up—it’s the perfect time to whip up a dish that screams summer! My Grilled Corn Orzo Salad with Scallion Dill Dressing brings together the sweet crunch of grilled corn and the delightful creaminess of a herby dressing, making it an ultimate crowd-pleaser. Not only is this salad a feast for the eyes with its vibrant colors, but it’s also a quick and nutritious option that fits seamlessly into any outdoor gathering or BBQ. Plus, it’s vegan and can be gluten-free with a simple swap, allowing you to share it with everyone at the table. Ready to elevate your summer meal game? Let’s dive into this delicious recipe and discover the joy of homemade goodness together!

Why is this salad a must-try?

Simplicity at its Finest: This Grilled Corn Orzo Salad is quick to prepare, making it perfect for busy summer days.

Vibrant Flavors: The sweet grilled corn combined with creamy scallion dill dressing adds a burst of freshness to every bite.

Versatile Ingredients: Feel free to substitute with any pasta or veggies you have on hand, making it easy to tailor to your pantry.

Nutrient-Packed: Rich in plant proteins and fiber, this salad is not just delicious but also good for you—making it an ideal choice for health-conscious diners.

Crowd-Pleasing: Whether it’s a BBQ or a picnic, this salad is sure to impress guests, pairing beautifully with grilled veggies or even a side of Crisp Cabbage Cucumber Salad.

Easy Storage: Leftovers can be stored for up to four days, making it a convenient meal prep option for busy weeknights.

Grilled Corn Orzo Salad Ingredients

For the Salad
Orzo – The primary pasta base; substitute with any small pasta or gluten-free grains like quinoa for a lighter option.
Corn – Fresh sweet yellow corn adds sweetness and texture; frozen charred corn can be a quicker alternative.
Scallions – Provide a mild onion flavor; sautéed shallots or marinated red onions work well as substitutes.
Edamame – This adds plant-protein and fiber; fava beans or white beans can be used instead.
Artichoke Hearts – Jarred marinated ones enhance flavor; sun-dried tomatoes or capers are great alternatives.
Arugula – A fresh base for serving; consider swapping it with spinach or baby kale if you prefer.

For the Dressing
Miso Paste – Adds umami to the dressing; for a vegan alternative, replace it with nutritional yeast or Dijon mustard.
Lemon – Freshly juiced and zested for brightness; this is essential for the perfect creamy scallion dill dressing.
Herbs – Dill and oregano bring flavor depth; feel free to substitute with basil or parsley for a different twist.
Oil – Avocado oil for grilling and extra virgin olive oil for dressing provide healthy fats; any high-heat neutral oil will work too.

Optional Toppings
Vegan Parm – A sprinkle of this optional ingredient gives an extra flavor boost; it’s great for those wanting a cheesy touch without dairy.

With these ingredients, you can easily prepare your own delicious Grilled Corn Orzo Salad with Scallion Dill Dressing!

Step‑by‑Step Instructions for Grilled Corn Orzo Salad with Scallion Dill Dressing

Step 1: Cook the Orzo
Begin by bringing a large pot of water to a rolling boil, adding a generous amount of salt to enhance flavor. Once the water is boiling, stir in the orzo and cook according to package instructions until al dente, usually about 8-10 minutes. Drain the orzo in a colander and rinse it briefly under cold water to stop the cooking process. Set it aside to cool completely.

Step 2: Grill the Corn
Preheat your grill or grill pan to medium-high heat. Husk the corn and place it directly on the grill. Grill the corn for 10-12 minutes, turning occasionally, until it develops a beautiful char and is tender. After grilling, remove the corn from heat and allow it to cool down. Once cool, carefully cut the kernels off the cob and set them aside.

Step 3: Sear Scallions & Garlic
In a skillet, heat a couple of tablespoons of avocado oil over medium heat. Sear the white parts of the scallions for about 2-3 minutes until they are tender and lightly charred. In the same skillet, add minced garlic and sauté for another minute until fragrant. Transfer the scallions and garlic to a bowl and let them cool while you prepare the dressing.

Step 4: Make the Dressing
In a blender, combine the sautéed garlic, seared scallions, lemon zest, lemon juice, vinegar, extra virgin olive oil, miso paste, and salt. Blend until smooth and creamy, pausing to scrape down the sides as necessary. Once blended to your liking, add the fresh dill and pulse a few more times until incorporated. Taste and adjust seasoning if needed.

Step 5: Assemble the Salad
In a large mixing bowl, combine the grilled corn, seared scallions, artichoke hearts, edamame, oregano, and fresh arugula. Add the cooled orzo to the bowl and pour the creamy dressing over the mixture. Gently toss everything together until all the ingredients are evenly coated with the dressing.

Step 6: Serve
Your Grilled Corn Orzo Salad with Scallion Dill Dressing is ready to enjoy! You can serve it immediately for a fresh burst of flavors or let it chill in the refrigerator for about 30 minutes to meld the flavors even more. Before serving, consider sprinkling with vegan parmesan for an extra touch of flavor.

How to Store and Freeze Grilled Corn Orzo Salad

Fridge: Store your Grilled Corn Orzo Salad in an airtight container for up to 4 days. Best enjoyed cold or at room temperature, it makes a splendid meal prep option!

Freezer: While it’s best fresh, you can freeze individual portions of the salad without the dressing for up to 2 months. Thaw in the fridge overnight before serving.

Reheating: If stored with dressing, you can gently heat the salad in a pan on low heat, stirring occasionally until warmed through; however, it’s typically served cold.

Wrapping: For optimal freshness, cover the salad tightly with plastic wrap or use a container that seals well to prevent drying out.

Make Ahead Options

These Grilled Corn Orzo Salad with Scallion Dill Dressing are perfect for meal prep enthusiasts! You can cook the orzo and grill the corn up to 24 hours in advance, letting you save valuable time during busy weeknights. Simply store the cooled orzo and corn separately in airtight containers in the refrigerator. Additionally, you can prepare the creamy scallion dill dressing in advance and refrigerate it for up to 3 days; just give it a good stir before serving to maintain its delightful creaminess. When you’re ready to enjoy your salad, combine the prepped ingredients, toss with the dressing, and savor a delicious, hassle-free meal that tastes just as fresh as if it were made that day!

Grilled Corn Orzo Salad Variations

Feel free to get creative with your Grilled Corn Orzo Salad by trying out these fun twists and swaps!

  • Chickpeas: Replace edamame with chickpeas for a nuttier flavor and extra protein. This hearty combo adds great texture and makes for a satisfying meal.

  • Pasta Alternatives: Swap out the orzo for quinoa or any small gluten-free pasta to cater to specific dietary needs. These options keep the salad light while providing a lovely base.

  • Herb Swap: If you’re not a fan of dill, try substituting with fresh basil or parsley for a fragrant twist in the dressing. You’ll enjoy a summery burst of flavor that harmonizes beautifully with the salad.

  • Mediterranean Flair: Enhance your salad by adding sun-dried tomatoes or capers instead of artichoke hearts. This change brings in a delightful tang that will brighten every bite.

  • Cheesy Addition: For those craving a cheesy flavor, sprinkle in nutritional yeast or your favorite vegan parmesan. It’s an easy way to amplify the umami notes in your dressing.

  • Grilled Veggies: Add grilled zucchini or bell peppers for an extra layer of sweetness and a colorful pop. These veggies really complement the corn’s sweetness.

  • Heat Level: Jazz it up by sprinkling some red pepper flakes or diced jalapeños for a spicy kick. This small twist adds excitement to the overall flavor profile.

  • Mixed Greens: Instead of arugula, consider spinach or kale for a different texture in the base. These greens provide a nutrient boost while keeping things fresh.

These variations make it so easy to customize your salad to suit your taste or to use what you have on hand. Experimenting is part of the joy of cooking, so feel free to mix and match! Pair this salad delightfully with a refreshing Cucumber Carrot Salad from your collection for the perfect summer spread. Enjoy your culinary journey!

Expert Tips for Grilled Corn Orzo Salad

Salt the Pasta Water: Make sure to season your boiling water generously. This enhances the flavor of the orzo and prevents it from tasting bland.

Chill for Flavor: Allowing the salad to rest for a few hours or overnight melds the flavors beautifully, making every bite even more delicious.

Modify the Dressing: Feel free to adjust the acidity by adding more lemon juice or vinegar to the dressing. This creates a balance that suits your personal taste.

Use Fresh Ingredients: For the best results, opt for fresh corn and herbs when making your Grilled Corn Orzo Salad. Fresh ingredients add vibrant flavor and nutrition.

Watch Your Grilling Time: Keep an eye on the corn while grilling; overcooked corn can lose its sweetness and crunch. Aim for that perfect char without burning!

What to Serve with Grilled Corn Orzo Salad with Scallion Dill Dressing

Imagine a summer gathering filled with vibrant flavors and fresh ingredients that perfectly complement the delightful notes of your salad.

  • Grilled Vegetable Skewers: Juicy, smoky vegetables enhance the summer vibe and balance the creamy salad with their charred flavors.
  • Toasted Garlic Bread: Crisp and buttery, garlic bread adds a delightful crunch that pairs beautifully with the soft orzo.
  • Chilled White Wine Spritzer: A refreshing drink option, this light wine cocktail keeps you cool while harmonizing with the salad’s herbaceous tones.
  • Lemon Herb Hummus: Creamy and zesty, serve it alongside pita chips, providing a dip that echoes the salad’s herbaceous notes.
  • Zesty Lemon Sorbet: A refreshing dessert choice, this sorbet cleanses the palate after the rich flavors of the salad, leaving you feeling satisfied.
  • Caprese Salad Skewers: Fresh, juicy tomatoes and creamy mozzarella add a contrasting texture to the vibrant orzo salad, creating a delightful burst of flavor.
  • Spicy Grilled Tofu: This plant-based protein option packs a punch, making it an excellent match that echoes the dish’s zest while enriching the meal.

With these pairings, you’ll create a cohesive and enjoyable dining experience that celebrates the seasons!

Grilled Corn Orzo Salad with Scallion Dill Dressing Recipe FAQs

How do I choose the best corn for this salad?
Absolutely! Look for fresh sweet yellow corn with bright green husks and firm kernels. If the kernels have dark spots all over, they may be past their prime. Additionally, when pressing on a kernel, it should yield a bit of moisture. If you’re short on time, frozen charred corn is a fantastic alternative!

What’s the best way to store leftovers?
Very! Store your Grilled Corn Orzo Salad in an airtight container in the fridge for up to 4 days. I recommend letting it chill for at least 30 minutes before eating, as the flavors meld beautifully this way. If you like, you can serve it cold or at room temperature.

Can I freeze the salad?
Absolutely! While it tastes best fresh, you can freeze individual portions without the dressing for up to 2 months. To do this, follow these steps: First, omit the dressing and mix the salad ingredients in a freezer-safe container. Then, cover tightly with plastic wrap or use a freezer-safe bag. Once you’re ready to enjoy it, simply thaw in the fridge overnight before serving.

What if my dressing is too thick?
No worries! If the dressing becomes too thick, simply add a teaspoon of water or additional lemon juice to thin it out until you reach your desired consistency. Blend it again for a smoother finish. Adjusting the acidity with more lemon juice can also enhance the overall flavor!

Are there any dietary considerations I should keep in mind?
Definitely! This Grilled Corn Orzo Salad is vegan and can be adjusted to fit gluten-free diets by swapping orzo with gluten-free grains like quinoa. If you’re serving guests with allergies, always double-check each ingredient. You might also want to mention that the salad can be customized to avoid any specific food sensitivities or preferences.

Grilled Corn Orzo Salad with Scallion Dill Dressing

Grilled Corn Orzo Salad with Scallion Dill Dressing Yum!

Enjoy a vibrant, vegan Grilled Corn Orzo Salad with Scallion Dill Dressing, perfect for summer gatherings.
Prep Time 15 minutes
Cook Time 20 minutes
Chilling Time 30 minutes
Total Time 1 hour 5 minutes
Servings: 4 servings
Course: Lunch
Cuisine: American, Vegan
Calories: 250

Ingredients
  

For the Salad
  • 1 cup Orzo or any small pasta or quinoa
  • 2 ears Corn fresh sweet yellow corn
  • 4 scallions Scallions white parts only
  • 1 cup Edamame or fava beans or white beans
  • 1 cup Artichoke Hearts jarred marinated
  • 2 cups Arugula or spinach or baby kale
For the Dressing
  • 2 tablespoons Miso Paste or nutritional yeast for vegan
  • 1 whole Lemon juiced and zested
  • 2 teaspoons Herbs dill and oregano, or basil/parsley
  • 3 tablespoons Oil avocado oil and extra virgin olive oil
Optional Toppings
  • ¼ cup Vegan Parm

Equipment

  • grill
  • Blender
  • Large pot
  • Skillet
  • Colander

Method
 

Preparation Steps
  1. Cook the Orzo by boiling water with salt, add orzo, cook until al dente (8-10 mins), drain and rinse.
  2. Grill the Corn on medium-high heat for 10-12 minutes, turning until charred, then cut kernels off the cob.
  3. Sear Scallions & Garlic in a skillet with avocado oil until tender, then let cool.
  4. Make the Dressing by blending garlic, scallions, lemon zest & juice, vinegar, oils, miso, and salt until smooth. Add fresh dill.
  5. Assemble the Salad by combining grilled corn, scallions, artichoke hearts, edamame, oregano, and arugula with cooled orzo and dressing.
  6. Serve immediately or chill for 30 minutes to meld flavors. Optional: sprinkle with vegan parmesan before serving.

Notes

Store in an airtight container for up to 4 days. For the best flavor, allow to chill before serving.

Mexican Street Cauliflower: A Low-Carb Flavor Explosion

The moment I took my first bite of Mexican Street Cauliflower, I knew I was onto something special. This recipe captures the essence of the beloved elote—smoky, savory, and utterly irresistible—while providing a healthy low-carb side dish that fits perfectly into any meal. Grilling the cauliflower not only enhances its natural flavor but also delivers that satisfying charred texture we all crave. Plus, it’s ready in just 30 minutes, making it an effortless addition to taco night or a fulfilling snack on its own. With creamy mayo, crumbly cotija cheese, and a zesty squeeze of lime, this dish is sure to impress friends and family alike. Are you ready to elevate your grilling game with this delightful twist?

Why is this dish a must-try?

Fresh, Bold Flavors: The combination of smoky grilled cauliflower, creamy mayonnaise, and tangy lime creates an explosion of taste that will keep you coming back for more.

Quick and Easy: Ready in just 30 minutes, this recipe is perfect for busy weeknights or impromptu gatherings. It requires minimal prep but delivers maximum flavor!

Healthy Alternative: Embrace a low-carb lifestyle without sacrificing taste. This dish is a wonderful substitute for heavier sides, making it ideal for keto and vegetarian diets.

Versatile Side Dish: Serve it alongside grilled meats, in tacos, or on top of a keto taco salad for a fun twist.

Crowd Pleaser: Even the pickiest eaters will love this delicious take on a classic Mexican street food, making it a hit at any gathering!

Try this healthy substitute for your next barbecue and watch it disappear!

Mexican Street Cauliflower Ingredients

For the Cauliflower
Cauliflower – The main ingredient, providing a hearty, low-carb base; opt for a large head for the best texture.
Mild Tasting Oil – Use avocado, vegetable, or sunflower oil for brushing; steer clear of oils with overpowering flavors.

For the Topping
Mayonnaise – Adds creaminess and helps adhere the toppings; choose high-quality or homemade for the best flavor.
Chili Powder – Brings subtle smoky heat; feel free to adjust according to your spice preference.
Cotija Cheese – Provides a salty, crumbly texture that echoes traditional elotes; feta or ricotta salata work as substitutes if needed.
Fresh Cilantro – Brightens the dish and adds herby notes for freshness.

For Serving
Lime Wedges – Perfect for squeezing over the finished dish; this enhances the overall freshness and highlights the Mexican flavors.

This beautifully vibrant Mexican Street Cauliflower is sure to become a favorite in your home-cooked repertoire!

Step‑by‑Step Instructions for Mexican Street Cauliflower

Step 1: Preheat the Grill
Begin by preheating your grill to medium heat, about 350°F (175°C). This step is crucial to achieve a perfect char on your Mexican Street Cauliflower. Allow the grill to heat for approximately 10-15 minutes, ensuring it reaches the right temperature for grilling.

Step 2: Prepare the Cauliflower
Remove the leaves and the bottom stem from the cauliflower, creating a stable base for cutting. Carefully slice the cauliflower head into four thick “steaks.” Each steak should be about 1-inch thick to hold up well on the grill, providing that robust texture we love in Mexican Street Cauliflower.

Step 3: Brush with Oil
Using a silicone brush, generously brush both sides of the cauliflower steaks with your choice of mild-tasting oil, such as avocado or vegetable oil. This step not only helps to prevent sticking on the grill but also enhances the smoky flavor of the grilled cauliflower. Make sure each side is well-coated for the best results.

Step 4: Grill the Cauliflower
Place the oiled cauliflower steaks directly on the preheated grill. Grill each side for 5-6 minutes until you see beautiful char marks forming, and the edges are slightly crispy. To achieve a softer texture, after charring, move the steaks to indirect heat and grill for an additional 10 minutes, checking for tenderness.

Step 5: Add the Creamy Topping
Once your Mexican Street Cauliflower is grilled to perfection, carefully remove the steaks from the grill. Brush the tops generously with mayonnaise while they are still hot. This creamy layer allows the other toppings to stick and enhances the flavor of each bite.

Step 6: Season with Flavor
Sprinkle the grilled cauliflower steaks with chili powder, followed by crumbled cotija cheese. This step adds a delightful salty note that balances the creaminess of the mayonnaise. For a fresh touch, add chopped fresh cilantro on top to elevate the flavors of your Mexican Street Cauliflower.

Step 7: Serve and Enjoy
Finish off your vibrant creation by squeezing fresh lime juice over the top of each cauliflower steak. This last touch will brighten the dish and enhance the overall flavor profile. Serve immediately to savor the smokiness, tanginess, and crunch of your Mexican Street Cauliflower, making it an unforgettable side dish!

What to Serve with Grilled Mexican Street Cauliflower (Elote)

The tantalizing flavors of grilled Mexican Street Cauliflower make it a standout dish, and pairing it with the right sides can create a delicious, well-rounded meal.

  • Cilantro Lime Rice: This fragrant rice dish infuses zesty lime and fresh cilantro, complementing the smoky cauliflower beautifully.

  • Black Bean Salad: A refreshing mix of black beans, corn, and bell peppers adds a satisfying crunch and balances the richness of the creamy toppings.

  • Grilled Chicken Tacos: Stuffed with marinated chicken, these tacos bring juicy protein to the table and enhance the Mexican theme of your meal.

  • Avocado Salsa: Creamy avocado blends well with the grilled flavors, while its freshness contrasts delightfully with the charred cauliflower.

  • Corn Tortillas: These warm, soft tortillas serve as a perfect vessel for enjoying bites of the Mexican Street Cauliflower, creating a delightful fusion.

  • Margaritas: A classic margarita, with its tangy lime and refreshing taste, pairs wonderfully with the smoky flavors of the cauliflower and brings a festive touch to your meal.

  • Chili Lime Popcorn: For a fun and crispy side, this snack brings a spicy kick that nicely echoes the spices in the cauliflower.

Elevate your dining experience with these complementary sides and make your meal a vibrant feast your friends and family will adore!

How to Store and Freeze Mexican Street Cauliflower

Fridge: Store leftover Mexican Street Cauliflower in an airtight container for up to 3 days. This keeps the flavors intact while maintaining its texture as much as possible.

Freezer: While freezing is not recommended, you can freeze the cooked cauliflower for up to 2 months. Wrap each steak tightly in plastic wrap and then place in a freezer bag.

Reheating: To reheat, grill or sauté the cauliflower on medium heat for 5-7 minutes until warmed through, ensuring it retains its delicious charred flavor. Avoid microwaving as it can make the cauliflower soggy.

Serving Leftovers: Use leftover cauliflower in salads, tacos, or as a topping for grain bowls to enjoy the smoky flavors in new ways!

Expert Tips for Mexican Street Cauliflower

Preheat Perfectly: Ensure your grill is hot before placing the cauliflower on it. A properly preheated grill prevents sticking and promotes that desirable char.

Choose Optimal Cuts: Slice your cauliflower into thick “steaks” about 1-inch thick. This thickness retains moisture and prevents the cauliflower from falling apart while grilling.

Season Generously: Don’t skimp on the toppings! A good amount of mayonnaise, cotija cheese, and lime juice will elevate the flavors of your Mexican Street Cauliflower.

Serve Immediately: For the best taste and texture, serve the grilled cauliflower right off the grill. Letting it sit can make it lose its delightful char and crispness.

Experiment Wisely: Feel free to try different toppings or spices, but avoid overpowering flavors, so the essence of the Mexican Street Cauliflower shines through.

Mexican Street Cauliflower: Creative Twists

Customize your Mexican Street Cauliflower with these delightful variations that will make every bite a new adventure!

  • Spicy Kick: Add Sriracha or hot sauce to the mayonnaise for a zesty kick that elevates your dish from mild to wild. A little spice can bring out amazing flavors, perfect for those who crave that extra heat!

  • Herb-Infused Oil: Try using herb-infused oil such as garlic or rosemary oil for a fragrant twist. Brush your cauliflower steaks with this aromatic oil before grilling to infuse every bite with rich, savory depth.

  • Cheesy Delight: For a cheesy variation, consider adding shredded cheese like Monterey Jack or cheddar before serving. Not only will it create a gooey, melty texture, but it will also please cheese lovers around the table!

  • Veggie Medley: Don’t stop at cauliflower! Grill zucchini and bell peppers alongside to add pops of color and crunch. Mix and match with the same toppings for a fabulous, vibrant platter. Your grill will become a canvas of colors!

  • Crunchy Topping: Sprinkle crushed tortilla chips or panko breadcrumbs on top for added crunch. This delightful texture contrasts beautifully with the creamy layers and grilled cauliflower.

  • Sweet and Savory: Drizzle a bit of honey or agave syrup along with the lime juice for a sweet contrast to the savory flavors. The sweet notes will surprise your palate, balancing the heat and tang.

  • Fresh Salsa: Top with a fresh pico de gallo or mango salsa for a burst of freshness and color. This addition introduces a zesty and fruity element that pairs beautifully with the smoky cauliflower.

These variations will elevate your Mexican Street Cauliflower to new culinary heights, making it a versatile dish suitable for any occasion. Pair this with a refreshing keto taco salad for a complete feast!

Make Ahead Options

These Mexican Street Cauliflower steaks are perfect for busy home cooks looking to save time! You can prep the cauliflower steaks by cutting and brushing them with oil up to 24 hours in advance, placing them in an airtight container in the refrigerator. When you’re ready to grill, simply remove them from the fridge and proceed with grilling as directed. While it’s best to top them with mayonnaise, cheese, and seasonings right before serving for the best texture, you can mix the toppings in a separate container for easy assembly later. This way, you’ll enjoy the same smoky, savory flavors, all while cutting down on your meal prep time!

Mexican Street Cauliflower Recipe FAQs

What type of cauliflower is best to use?
Absolutely! For the best texture and size, I recommend selecting a large head of cauliflower. Look for firm, compact heads without any dark spots or blemishes to ensure freshness and flavor.

How should I store leftover Mexican Street Cauliflower?
Once you’ve enjoyed your grilled Mexican Street Cauliflower, store any leftovers in an airtight container in the refrigerator. They will stay fresh for up to 3 days. When you’re ready to dig in again, simply reheat them on a grill or in a skillet for about 5-7 minutes for the best texture.

Can I freeze Mexican Street Cauliflower?
Yes, you can freeze the cooked cauliflower, although it’s not typically recommended for the best taste. Wrap each steak tightly in plastic wrap and then place them in a freezer bag. They can be frozen for up to 2 months. When you’re ready to eat, grill or sauté them on medium heat for about 5-7 minutes until warmed through. Avoid microwaving, as that can lead to a soggy texture.

What if my cauliflower steaks are falling apart on the grill?
If your cauliflower steaks start to fall apart, ensure you’re cutting them at about 1-inch thickness. Thicker pieces hold together better on the grill. Additionally, brush both sides with oil to help them stay intact while they cook. If they begin to break, gently move them to indirect heat to finish cooking without further charring.

Is this recipe suitable for people with dietary restrictions?
Very! This Mexican Street Cauliflower is perfect for those following a low-carb, keto-friendly, or vegetarian diet. If you have any dairy allergies, consider using a dairy-free mayonnaise alternative along with non-dairy cheese substitutes. Just remember to check ingredient labels to stay safe!

What other toppings can I use on Mexican Street Cauliflower?
Feel free to get creative! You could top your Mexican Street Cauliflower with avocado slices, diced tomatoes, or even a drizzle of hot sauce for an extra kick. The more, the merrier! Just be mindful of overpowering flavors to maintain that delightful elote essence.

Mexican Street Cauliflower

Mexican Street Cauliflower: A Low-Carb Flavor Explosion

Mexican Street Cauliflower combines smoky, savory flavors in a low-carb side dish that's easy to make and perfect for any meal.
Prep Time 10 minutes
Cook Time 20 minutes
Total Time 30 minutes
Servings: 4 steaks
Course: Other
Cuisine: Mexican
Calories: 150

Ingredients
  

For the Cauliflower
  • 1 large head Cauliflower providing a hearty, low-carb base
  • 2 tablespoons Mild Tasting Oil like avocado, vegetable or sunflower oil
For the Topping
  • 1/2 cup Mayonnaise high-quality or homemade for best flavor
  • 1 teaspoon Chili Powder adjust according to spice preference
  • 1/2 cup Cotija Cheese or feta/ricotta salata as substitutes
  • 1/4 cup Fresh Cilantro chopped for freshness
For Serving
  • 2 wedges Lime for squeezing over the dish

Equipment

  • grill
  • silicone brush

Method
 

Step‑by‑Step Instructions
  1. Preheat your grill to medium heat, about 350°F (175°C), for about 10-15 minutes.
  2. Remove the leaves and bottom stem from the cauliflower, then slice it into four thick 'steaks'.
  3. Brush both sides of the cauliflower steaks with mild-tasting oil.
  4. Grill each side for 5-6 minutes until char marks form, then move to indirect heat for an additional 10 minutes.
  5. Once grilled, brush the tops of the cauliflower steaks with mayonnaise.
  6. Sprinkle with chili powder and crumbled cotija cheese, then top with fresh cilantro.
  7. Squeeze fresh lime juice over the steaks and serve immediately.

Notes

Store leftovers in an airtight container in the fridge for up to 3 days or freeze for up to 2 months.

Spiced Irish Oatmeal with Cream and Crunchy Sugar Delight

As the sun peeks through the window, the aroma of warm spices fills the kitchen, pulling me into a cozy moment of culinary bliss. Today, I’m excited to share my recipe for Baked Steel-Cut Oats with Caramelized Demerara Sugar, a delightful twist on traditional oatmeal that transforms breakfast into something truly special. Not only is this dish a time-saver—allowing you to prep the night before—but it also doubles as a delightful brunch centerpiece, perfect for impressing friends or family. The rich creaminess and the sweet, crispy topping create a satisfying balance that’s sure to please everyone at the table. Are you ready to elevate your morning routine with this scrumptious treat? Let’s dive in!

Why is oatmeal so delightful?

Comforting Warmth: There’s nothing quite like waking up to a dish that warms your soul. This baked oatmeal envelops you in a cozy embrace, making it the perfect start to your day.

Easy Prep Work: Simply whip it up the night before and pop it in the oven when you’re ready. It’s a hassle-free breakfast that fits your busy schedule beautifully.

Versatile Options: Get creative! Add your favorite fruits or nuts, or try savory versions for a breakfast that’s uniquely yours. Consider pairing with a side of a refreshing Crunchy Cucumber and Egg Salad for added nutrition.

Crowd-Pleaser: This dish is sure to impress at brunch gatherings, making it a standout centerpiece that friends and family will rave about.

Gourmet Twist: With caramelized Demerara sugar and warm spices, each bite sings of simple elegance and indulgence—making breakfast feel like a special occasion!

Spiced Irish Oatmeal Ingredients

For the Oats
Unsalted Butter – Adds a rich flavor and helps toast the oats for a deeper taste.
Steel-Cut Oats – The hearty base of this dish, providing a chewy texture that makes baked oatmeal special.
Ground Cardamom – Infuses the oats with an aromatic floral note; feel free to swap this with extra cinnamon if you don’t have it.
Ground Cinnamon – Essential for warming up the flavor profile; it’s a comforting spice that complements the sweetness.
Boiling Water – Transforms the oats into a soft, creamy texture; this step is crucial for proper cooking.
Heavy Cream – Gives the dish a decadent, creamy finish; can be replaced with non-dairy alternatives for a lighter version.
Kosher Salt – Enhances the overall flavor; a small but important addition that should not be missed.
Demerara Sugar – Provides a delightful crunchy topping with a hint of caramel sweetness; can be substituted with brown sugar if needed.

For Serving
Flaky Sea Salt – A finishing touch that elevates the flavor balance, adding a sophisticated twist to each bite.
Fresh Fruits – Consider serving with berries or bananas for added color and nutritional boost.
Cream or Yogurt – Adds another layer of creaminess and can bridge the flavors beautifully, enhancing this spiced Irish oatmeal experience.

Elevate your breakfast with this spiced Irish oatmeal with cream and crunchy sugar, making every morning feel like a special occasion!

Step‑by‑Step Instructions for Spiced Irish Oatmeal With Cream and Crunchy Sugar

Step 1: Preheat and Prepare
Begin by preheating your oven to 350°F (175°C). While it warms up, generously grease a 2-quart baking dish with unsalted butter, ensuring every inch is coated to prevent sticking. This will help create a delicious crust on your baked steel-cut oats as they cook.

Step 2: Toast the Oats
In a medium skillet, melt 4 tablespoons of unsalted butter over medium heat. Once it sizzles, add the steel-cut oats and toast them for 2-4 minutes, stirring occasionally until they turn a lovely golden brown and emit a toasty aroma. This step enhances the flavor of your spiced Irish oatmeal and sets the stage for deliciousness.

Step 3: Blend in the Spices
Next, stir in the ground cardamom and cinnamon into the skillet, continuing to sauté for an additional minute. This brief cooking will release the spices’ essential oils, creating an inviting fragrance that fills your kitchen. It’s the perfect way to awaken the cozy vibes for your oatmeal.

Step 4: Combine Ingredients
Transfer the toasted oats into your prepared baking dish. Carefully mix in 4 cups of boiling water, 1 cup of heavy cream, and 1 teaspoon of kosher salt. Stir until all ingredients are well combined, ensuring every oat is soaked, which is essential for that hearty creaminess that defines the spiced Irish oatmeal.

Step 5: Bake the Oatmeal
Slide the baking dish into the preheated oven and bake for 40 minutes. Halfway through baking, give the mixture a gentle stir to ensure even cooking and prevent any sticking. The oats should be bubbling and set with a slight jiggle when done.

Step 6: Add the Sweet Topping
Once the initial baking time is up, take the oatmeal out and sprinkle the Demerara sugar evenly over the top. Place small cubes of reserved butter gently atop the sugar, which will melt and create a beautiful glaze. This step brings a satisfying crunch to your spiced Irish oatmeal.

Step 7: Final Bake for Crunch
Return the baking dish to the oven and bake for an additional 15-20 minutes, or until the top is golden and glazed, bubbling with delicious caramelization. Keep an eye on it, as you want that cue of a beautiful crisp top without burning.

Step 8: Serve and Enjoy
After baking, let the dish cool slightly before serving. Optionally, sprinkle some flaky sea salt over the top to amplify flavors. Spoon out generous portions, adding fresh fruits or a dollop of cream to elevate your morning experience, transforming each bite of this spiced Irish oatmeal with cream and crunchy sugar into a delightful celebration.

What to Serve with Baked Steel-Cut Oats with Caramelized Sugar

Brighten your breakfast table with delightful accompaniments that elevate your experience beyond the ordinary.

  • Creamy Yogurt: A dollop of tangy yogurt complements the sweet oats while adding a luscious creaminess that enhances each bite.
  • Fresh Berries: Ripe strawberries, blueberries, or raspberries bring a burst of freshness, balancing the warm spices perfectly. Try tossing them in a bit of honey for extra sweetness!
  • Crunchy Granola: Top with your favorite granola for an additional layer of crunch. This contrast in texture pairs beautifully with the creamy oatmeal.
  • Maple Syrup Drizzle: A light drizzle of pure maple syrup enhances the delicious caramelized notes, creating a sweet symphony that envelops your palate.
  • Herbal Tea: While enjoying your oatmeal, sip on a soothing herbal tea. Its warm and fragrant qualities make for a comforting breakfast experience.
  • Cinnamon Apples: Serve alongside spiced apples sautéed in butter and cinnamon. Their sweetness beautifully complements the oatmeal, creating a uniquely comforting combination.
  • Savory Spinach Salad: For a more filling brunch, consider a fresh spinach salad topped with a poached egg, bringing rich, savory flavors that contrast delightfully with the oats.
  • Iced Coffee: An iced coffee with a hint of creaminess provides a refreshing kick, especially during warmer months, enhancing the sweet and spicy notes of the oatmeal.
  • Flaky Sea Salt: A sprinkle of flaky sea salt on top of the oatmeal adds a sophisticated finishing touch, heightening each delicious element of this spiced Irish oatmeal with cream and crunchy sugar.

Expert Tips for Spiced Irish Oatmeal

Oven Precautions: Ensure your baking dish is large enough to prevent spillovers during baking. Using a too-small dish can lead to a messy oven.

Ingredient Swaps: If you don’t have Demerara sugar, brown sugar can be a suitable replacement for that crunchy topping, just keep a close eye on the caramelization!

Flavor Enhancements: For deeper flavor, try increasing the spices by an extra half teaspoon—balance is key in your spiced Irish oatmeal.

Perfect Texture: To avoid a gummy texture, make sure to stir the oats halfway through baking, which promotes even cooking.

Serving Suggestions: Pair creamy yogurt or fresh fruits to add brightness. This makes your dish a wholesome experience and enhances the overall flavor!

Make Ahead Options

These Baked Steel-Cut Oats with Caramelized Demerara Sugar are perfect for meal prep, giving you a hearty breakfast ready to go on busy mornings! You can assemble the dish up to 24 hours in advance—just prepare everything and store it covered in the refrigerator. This not only allows the flavors to meld beautifully but ensures you wake up to a simple solution. When you’re ready to bake, simply increase the baking time by about 10 minutes if starting from cold. Just follow the baking instructions as directed, and you’ll still achieve that deliciously creamy texture and crunchy top—making your mornings smooth and satisfying!

How to Store and Freeze Baked Steel-Cut Oats

Room Temperature: Leftover baked steel-cut oats can be kept at room temperature for up to 2 hours. If they sit longer, refrigerate to maintain freshness.

Fridge: Store your spiced Irish oatmeal with cream and crunchy sugar in an airtight container in the refrigerator for up to 3 days. Reheat portions in the microwave or oven for a cozy breakfast.

Freezer: For longer storage, freeze individual portions in freezer-safe containers for up to 2 months. Thaw overnight in the fridge before reheating to enjoy a delightful meal anytime.

Reheating: To reheat, add a splash of cream or water to the oats and microwave until heated through, or bake at 350°F (175°C) until warm, ensuring they stay creamy and delicious!

Variations & Substitutions for Spiced Irish Oatmeal

Unleash your creativity and make this oatmeal dish truly yours with these fun variations. Each option brings a unique twist that enhances the flavors or adjusts for dietary preferences!

  • Berry Delight: Add fresh or frozen berries into the mixture before baking for a vibrant burst of sweetness and color.

  • Nutty Alternative: Substitute half of the steel-cut oats with almond meal for a richer, nuttier flavor and delightful texture contrast. Imagine the creaminess mingling with crunch!

  • Fruit Medley: Stir in dried fruits like raisins or cranberries. Their natural sweetness and chewy texture beautifully complement the creamy oats.

  • Savory Spin: Replace the sugar with savory spices like smoked paprika or herbs for a breakfast twist, making it a satisfying dish well beyond sweet mornings.

  • Dairy-Free Option: Use coconut cream instead of heavy cream for a dairy-free delight that still delivers on creaminess. It adds a hint of tropical flavor, too!

  • Higher Heat: For those who crave a kick, sprinkle in some cayenne pepper or crushed red pepper flakes. The heat beautifully balances the sweetness of the Demerara sugar.

  • Cinnamon Bun Vibe: Drizzle some maple syrup over the top after baking to mimic the sweet glaze of a cinnamon bun. Talk about indulgence!

Feel free to journey down other paths too! Pairing with a refreshing side like a Crunchy Cabbage Carrot or a delightful Crunchy Nut Seed adds fantastic variety to your brunch table. Happy cooking!

Baked Steel-Cut Oats with Caramelized Demerara Sugar Recipe FAQs

What type of oats should I use for this recipe?
For this recipe, I recommend using steel-cut oats because they provide a wonderfully chewy texture that makes baked oatmeal special. If you only have rolled oats, you can use those instead, but be prepared for a softer texture in your final dish.

How should I store any leftovers?
Store your spiced Irish oatmeal with cream and crunchy sugar in an airtight container in the refrigerator for up to 3 days. Reheating is simple; just microwave individual portions or warm them in the oven until heated through.

Can I freeze baked steel-cut oats?
Absolutely! To freeze, portion the baked oats into freezer-safe containers and store them for up to 2 months. For reheating, simply thaw overnight in the fridge, then warm in the microwave or oven with a splash of cream or water to keep them creamy.

What’s the best way to know when the oats are done?
Once the oatmeal has baked for 40 minutes, give it a gentle stir. If the oats are bubbling slightly and appear set with a little jiggle, they are ready! The final crunchy topping should be golden brown after the additional baking time.

Are there any dietary considerations I should keep in mind?
If you or your guests have dairy allergies, you can substitute heavy cream with non-dairy alternatives like coconut cream. Always check for any nut allergies if you plan on adding options like almond meal to your oatmeal.

How can I make my oatmeal more flavorful?
For a deeper flavor profile, consider adding an extra half teaspoon of cardamom or cinnamon. This small adjustment can elevate your spiced Irish oatmeal to a new level of deliciousness!

Spiced Irish Oatmeal With Cream and Crunchy Sugar

Spiced Irish Oatmeal with Cream and Crunchy Sugar Delight

A cozy twist on oatmeal featuring spiced steel-cut oats topped with cream and a crunchy Demerara sugar finish.
Prep Time 15 minutes
Cook Time 55 minutes
Total Time 1 hour 10 minutes
Servings: 6 servings
Course: Breakfast
Cuisine: Irish
Calories: 300

Ingredients
  

For the Oats
  • 4 tablespoons Unsalted Butter For greasing and toasting the oats
  • 1 cup Steel-Cut Oats Hearty base of the dish
  • 1 teaspoon Ground Cardamom Aromatic floral flavor
  • 1 teaspoon Ground Cinnamon Essential warming spice
  • 4 cups Boiling Water For proper cooking of oats
  • 1 cup Heavy Cream Can be replaced with non-dairy alternative
  • 1 teaspoon Kosher Salt Enhances flavor
  • 2 tablespoons Demerara Sugar Crunchy topping option
For Serving
  • 1 teaspoon Flaky Sea Salt Finishing touch
  • Fresh Fruits Berries or bananas for serving
  • Cream or Yogurt Optional for serving

Equipment

  • Medium skillet
  • 2-quart baking dish

Method
 

Step-by-Step Instructions
  1. Preheat your oven to 350°F (175°C) and grease a 2-quart baking dish with unsalted butter.
  2. Melt 4 tablespoons of unsalted butter in a medium skillet over medium heat. Add the steel-cut oats and toast for 2-4 minutes, stirring occasionally until golden brown.
  3. Stir in ground cardamom and cinnamon, sautéing for an additional minute to release the spices’ essential oils.
  4. Transfer the toasted oats to the baking dish. Mix in 4 cups of boiling water, 1 cup of heavy cream, and 1 teaspoon of kosher salt.
  5. Bake the mixture in the preheated oven for 40 minutes, stirring halfway through.
  6. Sprinkle Demerara sugar over the top and add small cubes of reserved butter before returning to the oven.
  7. Bake for an additional 15-20 minutes, or until the top is golden and bubbling.
  8. Let cool slightly before serving. Optionally sprinkle flaky sea salt and add fresh fruits or cream.

Notes

Leftover baked oatmeal can be stored in the fridge for up to 3 days and can be frozen for longer storage.

Creamy Custard Oats with Mixed Berry Compote Bliss

The gentle sizzle of a pan and the comforting aroma of warm oats take me back to early mornings filled with possibility. Today, I’m excited to share my recipe for creamy Custard Oats with Mixed Berry Compote—an enticing way to kick-start your day that combines rich, silky oats with a naturally sweet topping. Packed with high protein and customizable to your taste, this nutritious breakfast is not only perfect for busy mornings but also a delightful treat when you want to savor the moment. Picture a bowl filled with velvety custard-like oats topped with a vibrant berry compote, bursting with tangy goodness. Whether enjoyed solo or with your favorite nuts and yogurt, this dish is bound to satisfy. So, what toppings will you choose to make this comforting breakfast truly yours?

Why are Custard Oats so Irresistible?

Simplicity and Speed: This recipe is not only easy to make but also quick, perfect for those busy mornings.

Nutritious Delight: Packed with protein from eggs and wholesome oats, it’s the ideal way to fuel your day.

Flavor Explosion: The sweet mixed berry compote offers a burst of fruity goodness that perfectly complements the creamy oats.

Customizable Options: Feel free to switch up the toppings with nuts, seeds, or even a drizzle of honey for added flavor.

Crowd-Pleaser: Whether you’re cooking for family or just yourself, this dish consistently impresses and satisfies!

With these Custard Oats with Mixed Berry Compote, you can start every day on a deliciously nourishing note!

Custard Oats with Mixed Berry Compote Ingredients

For the Oats
Old-fashioned oats – Provides structure and creaminess to the dish; steel-cut oats can also be used with a longer cooking time.
Water – Essential for cooking the oats; substituting some with milk adds a creamy texture.
Salt – Enhances the flavor; a pinch is all you need to keep it balanced.
Cold milk – Helps temper the eggs and cools the oatmeal slightly; dairy-free milk is a great alternative.
Large eggs – Adds creaminess and boosts protein content; feel free to start with one and adjust as you like.

For the Mixed Berry Compote
Frozen mixed berries – Offers natural sweetness and freshness; fresh berries can be a delightful substitute in season.
Vanilla extract – Adds aromatic flavor to the compote; it’s optional, but I always recommend it for an extra layer of taste.
Honey or maple syrup – Naturally sweetens the compote; adjust to your taste for the perfect balance.

With these simple yet wholesome ingredients, making delicious Custard Oats with Mixed Berry Compote becomes a joy, whether you are serving a crowd or treating yourself!

Step‑by‑Step Instructions for Custard Oats with Mixed Berry Compote

Step 1: Prepare Berry Compote
In a small saucepan, combine frozen mixed berries with honey or maple syrup and a splash of vanilla extract. Heat over medium-low for about 5–7 minutes, stirring gently until the mixture thickens and becomes jammy. You can mash the berries with a fork for quicker breakdown and a smoother compote, infusing sweetness into the tart berries for the perfect topping.

Step 2: Cook Oats
In a medium saucepan, bring water and a pinch of salt to a boil, then add the old-fashioned oats. Once boiling, reduce the heat to low and allow the oats to simmer for 5–8 minutes, stirring occasionally. This should thicken the oats, creating a comforting base; you’ll know they’re ready when they absorb most of the liquid and become creamy.

Step 3: Temper Eggs
While the oats are cooking, crack your large eggs into a separate bowl and whisk them until well combined. Once the oats have finished cooking, remove the saucepan from the heat and stir in cold milk to help cool them slightly. Gradually add the whisked eggs into the oats, stirring continuously. Return to medium-low heat and cook for another 60–90 seconds, until the mixture is slightly thickened but still creamy.

Step 4: Serve
Spoon the luscious custard oats into bowls, allowing the warm oats to create a welcoming mound. Generously drizzle the homemade mixed berry compote over the top, letting it mingle with the custard-like oats. Feel free to add toppings like nuts, seeds, or a dollop of yogurt for extra texture and flavor, crafting your own delightful version of Custard Oats with Mixed Berry Compote.

Custard Oats with Mixed Berry Compote Variations

Feel free to get creative and personalize your custard oats with these fun twists that’ll suit your taste buds perfectly!

  • Vegan Option: Replace the eggs with chia seeds or flax eggs for a plant-based custardy texture.
  • Fruit Substitution: Swap mixed berries with seasonal fruits like peaches or ripe bananas for a flavor boost.
  • Extra Spice: Sprinkle in some cinnamon or nutmeg for a warm and cozy aroma that elevates the dish.
  • Nutty Crunch: Top with a handful of toasted nuts or seeds for a delightful crunch that complements the creamy oats.
  • Yogurt Swirl: Add a dollop of Greek yogurt or a plant-based alternative right before serving for extra creaminess and protein.
  • Savory Twist: Mix in sautéed spinach and a sprinkle of feta cheese for an unexpected savory option that breaks the breakfast mold.
  • Sweet Boost: Drizzle with additional honey or maple syrup for those who enjoy a sweeter indulgence to start their day.
  • Infused Oats: Experiment by cooking the oats in almond or coconut milk for a subtle nutty flavor that harmonizes with the compote.

Your breakfast adventure awaits, whether you stick to the classic recipe or mix it up with these delicious variations! Don’t forget to check out Cucumber Carrot Salad for a refreshing side or indulge in a slice of Vanilla Cake Filling for dessert!

Make Ahead Options

These Creamy Custard Oats with Mixed Berry Compote are perfect for make-ahead meal prepping! You can prepare the mixed berry compote up to 3 days in advance. Simply make the compote by cooking the frozen berries with honey or maple syrup and refrigerate it in an airtight container. For the custard oats, cook them as instructed and store in the fridge for up to 24 hours before serving; just be sure to cool them completely before covering. When you’re ready to enjoy, simply reheat the oats gently on the stove or in the microwave, then stir in a splash of cold milk to achieve that creamy consistency. This way, you can start your busy mornings with ease, savoring every delicious bite of your homemade breakfast!

What to Serve with Creamy Custard Oats with Sweet Mixed Berry Compote

Imagine the comforting warmth of custard oats paired with delightful accompaniments that enhance your breakfast experience.

  • Crunchy Granola: Adds a satisfying crunch and nutty flavor that contrasts beautifully with the creamy oats. A perfect way to incorporate some extra fiber!

  • Dollop of Greek Yogurt: This creamy addition adds a rich texture and tangy flavor, balancing the sweetness of the berry compote splendidly. It also boosts protein content further!

  • Toasted Almonds: These nutty bites provide a wonderful crunch and healthy fats, making each spoonful even more enjoyable. Their subtle sweetness complements the fruity topping.

  • Maple Syrup Drizzle: A warm drizzle not only enhances sweetness but also brings a lovely aromatic depth, elevating the entire dish to a new level of deliciousness.

  • Fresh Mint Leaves: Their vibrant flavor adds a refreshing touch to the custard oats, creating a bright pop that complements the warm berries perfectly. A little green goes a long way!

  • Cinnamon Sprinkle: This familiar spice adds warmth and a spicy aroma, enhancing the overall flavor profile; it pairs especially well with the fruit’s natural sweetness.

  • Berry Infused Herbal Tea: A warm cup of berry-flavored tea harmonizes with the mixed berry compote, creating a cohesive breakfast feel that’s both comforting and rejuvenating.

As you explore these delightful pairings, you’ll transform your creamy custard oats into a breakfast feast that your taste buds will thank you for!

How to Store and Freeze Custard Oats

Fridge: Store leftover custard oats in an airtight container for up to 3 days. Gently reheat in the microwave, adding a splash of milk if needed to maintain creaminess.

Freezer: You can freeze the custard oats for up to 2 months. Portion them in freezer-safe containers, allowing some space for expansion. Thaw overnight in the fridge before reheating.

Berry Compote: Keep the mixed berry compote in an airtight container in the fridge for up to one week. It pairs beautifully with the custard oats, making breakfast prep easier!

Reheating: When ready to enjoy, reheat the custard oats and compote separately in the microwave or on the stovetop until warmed through. Mixing them just before serving gives a delightful balance of flavors.

Expert Tips for Custard Oats

  • Perfect Texture: Stir continuously after adding eggs to the hot oats to prevent scrambling. This ensures a silky custard-like finish.

  • Avoid Runny Oats: Ensure oats absorb all water before adding eggs. This prevents a runny consistency in your custard oats.

  • Customize Toppings: Feel free to add your favorite nuts, seeds, or yogurt to personalize your Custard Oats with Mixed Berry Compote and enhance flavor.

  • Prep Ahead: Make the mixed berry compote in advance and store it in the refrigerator for up to a week. It saves time for busy mornings!

  • Experiment with Flavors: Try using different fruits or spices, like cinnamon, for a unique twist on the classic custard oats recipe.

Custard Oats with Mixed Berry Compote Recipe FAQs

What type of oats should I use for custard oats?
I recommend using old-fashioned oats for the best creamy texture, but steel-cut oats can also work if you adjust the cooking time accordingly. Steel-cut oats will take longer to cook—about 20-30 minutes—so keep that in mind if you’re in a hurry.

How long can I store leftover custard oats?
Leftover custard oats can be stored in an airtight container in the fridge for up to 3 days. To reheat, simply pop them in the microwave, adding a splash of milk for creaminess. Remember, the oats may thicken as they chill, so this little trick will keep them soft!

Can I freeze custard oats?
Absolutely! You can freeze the custard oats for up to 2 months. Portion the oats into freezer-safe containers, leaving some room for expansion. When you’re ready to enjoy, thaw them in the fridge overnight and reheat in the microwave or on the stovetop for a warm breakfast.

What if my custard oats are too runny?
If your custard oats turn out runny, it could be because they didn’t absorb enough liquid while cooking. Next time, ensure the oats are fully cooked and absorbed the water before adding the eggs. You can also add a bit more oats while cooking to reach your desired thickness!

Are custard oats suitable for a vegan diet?
Yes, you can make this recipe vegan! Simply omit the eggs and replace them with chia seeds or flax eggs. To create a similar custard-like texture, mix 1 tablespoon of chia seeds or ground flaxseed with 2.5 tablespoons of water, let it sit for 5 minutes to thicken, and stir it in just as you would the eggs.

How long does the mixed berry compote last in the fridge?
The mixed berry compote can be stored in an airtight container in the refrigerator for up to one week. This makes it a fantastic make-ahead option, allowing you to quickly assemble your breakfast on busy mornings!

Custard Oats with Mixed Berry Compote

Creamy Custard Oats with Mixed Berry Compote Bliss

Enjoy creamy custard oats topped with mixed berry compote, a nourishing breakfast experience.
Prep Time 10 minutes
Cook Time 15 minutes
Total Time 25 minutes
Servings: 2 bowls
Course: Breakfast
Cuisine: American
Calories: 320

Ingredients
  

For the Oats
  • 1 cup Old-fashioned oats Steel-cut oats can also be used with a longer cooking time.
  • 2 cups Water Essential for cooking the oats; substituting some with milk adds a creamy texture.
  • 1 pinch Salt Enhances the flavor.
  • 1 cup Cold milk Dairy-free milk is a great alternative.
  • 2 large Eggs Adds creaminess and boosts protein content.
For the Mixed Berry Compote
  • 2 cups Frozen mixed berries Fresh berries can be a substitute in season.
  • 1 teaspoon Vanilla extract Optional but recommended for extra flavor.
  • 2 tablespoons Honey or maple syrup Adjust to your taste.

Equipment

  • Medium saucepan
  • Small saucepan
  • Bowl
  • whisk
  • Fork

Method
 

Step-by-Step Instructions
  1. In a small saucepan, combine frozen mixed berries with honey or maple syrup and a splash of vanilla extract. Heat over medium-low for about 5–7 minutes, stirring gently until the mixture thickens and becomes jammy.
  2. In a medium saucepan, bring water and a pinch of salt to a boil, then add the old-fashioned oats. Reduce the heat to low and allow the oats to simmer for 5–8 minutes, stirring occasionally.
  3. While the oats are cooking, crack your large eggs into a separate bowl and whisk them until well combined. Stir in cold milk into the oats, then gradually add the whisked eggs, stirring continuously.
  4. Spoon the custard oats into bowls and drizzle the mixed berry compote over the top, adding any additional toppings you desire.

Notes

Feel free to customize with nuts, seeds, or yogurt. The mixed berry compote can be made in advance and stored for ease.