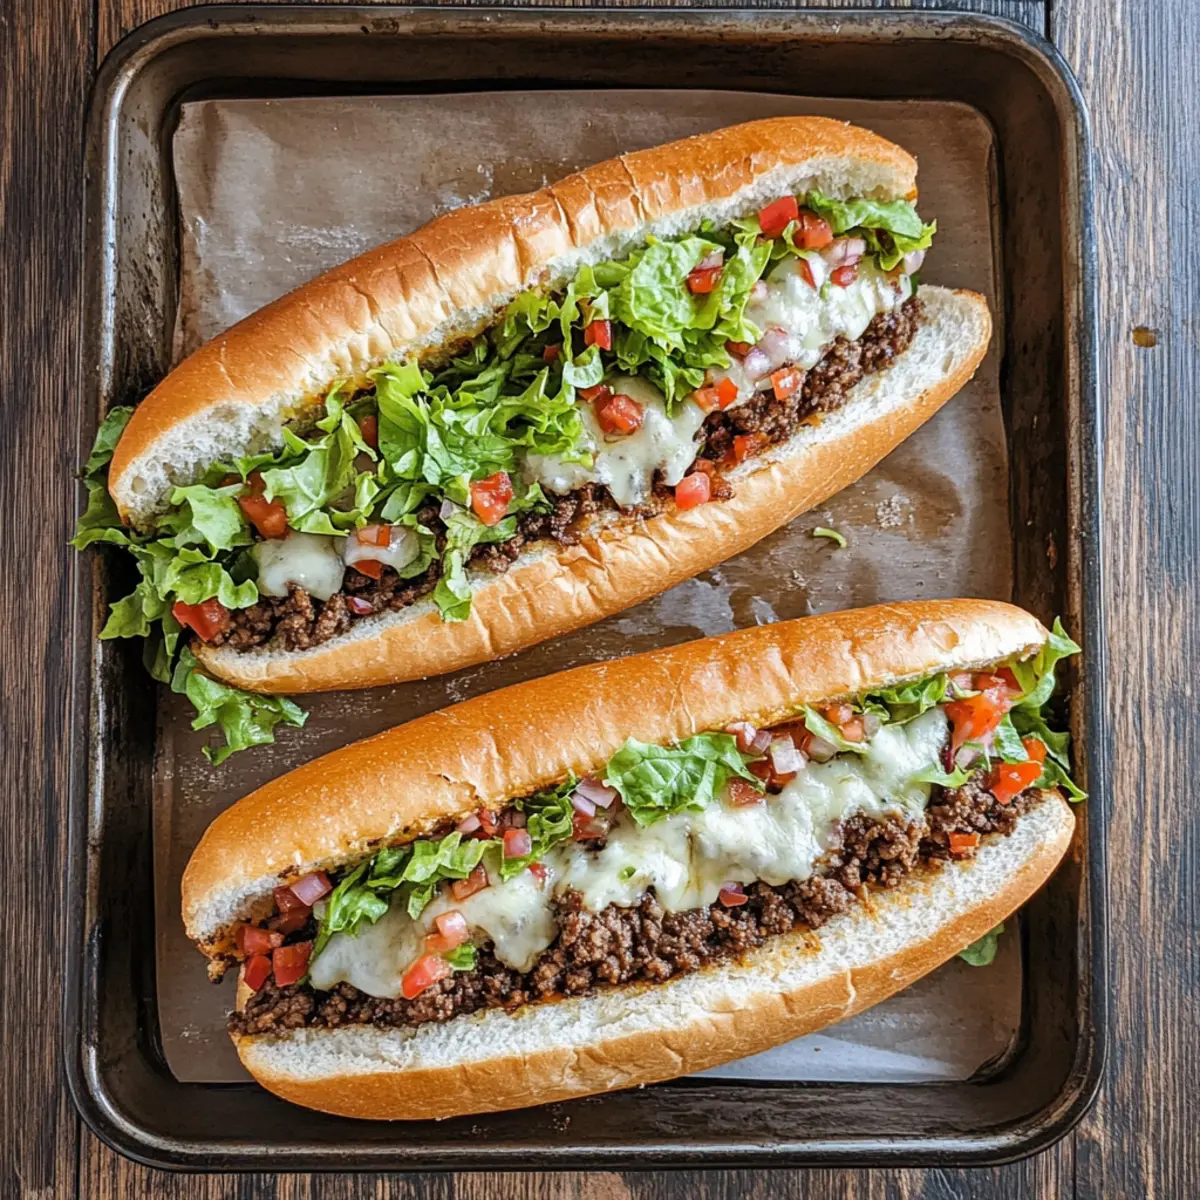
Nothing beats the thrill of flipping through a food magazine and stumbling upon an eye-catching dish that sparks creativity in the kitchen. That’s exactly how I felt when I discovered the Mexican Chopped Cheese Sandwich, a delightful fusion of flavors that pays homage to New York City’s vibrant food scene. This spicy Mexican Chopped Cheese Sandwich with Pepper Jack is a meal that promises to please your taste buds and impress your family. The best part? It’s quick to prepare, making it a perfect weeknight solution that skips the fast food routine. Plus, the customization options are endless! Whether you’re adding jalapeños for a kick or opting for a vegetarian twist, this sandwich can be your new culinary canvas. Are you ready to take your taste buds on a spicy adventure? Let’s dive into this scrumptious recipe!
Why is this sandwich so irresistible?
Simplicity at its core: You only need a few familiar ingredients to whip up this delicious Mexican Chopped Cheese Sandwich.
Flavor explosion: The melt-in-your-mouth pepper jack cheese combined with crispy beef and fresh pico de gallo delivers a taste that will keep you coming back for more.
Endless customization: Add your favorite toppings like grilled onions or avocado for a personal touch, catering to every palate.
Quick and easy: Perfect for busy weeknights or a spontaneous lunch, this sandwich comes together in just minutes.
Crowd-pleaser: Whether you’re feeding a family or impressing friends, it’s an adaptable dish everyone will love! Don’t forget to try it alongside a Savory Cheese Egg for an exciting twist!
Mexican Chopped Cheese Sandwich Ingredients
Elevate your cooking game with these essential components!
For the Filling
- Ground Beef – The perfect hearty protein, but feel free to swap it for turkey or plant-based meat for a lighter option.
- Pepper Jack Cheese – This creamy cheese adds a spicy kick that makes the sandwich sing; use cheddar for a milder flavor.
For the Sandwich Base
- Hoagie Buns – They provide the ideal structure for holding all that deliciousness; whole wheat or gluten-free options work well too.
- Lettuce – Adds a refreshing crunch; choose from romaine, iceberg, or spinach for extra texture.
For the Topping
- Pico de Gallo – A fresh and vibrant addition that brightens every bite; mix in jalapeños or avocado if you like it extra zesty.
Step‑by‑Step Instructions for Mexican Chopped Cheese Sandwich
Step 1: Preheat the Griddle
Begin by preheating your griddle or skillet over medium heat for about 5 minutes. This step is crucial for achieving that perfect crispy exterior on your hoagie buns and a well-cooked, flavorful ground beef filling. A hot surface will ensure everything cooks evenly and to perfection.
Step 2: Cook the Ground Beef
Once the griddle is hot, add your ground beef, spreading it across the surface. Cook for about 5-7 minutes, stirring occasionally until it’s nicely browned and crispy. You want that golden color to develop, which brings out the beef’s rich flavor and pairs wonderfully with the spicy kick of the pepper jack cheese in your Mexican Chopped Cheese Sandwich.
Step 3: Melt the Cheese
After the beef is browned, lower the heat slightly and pile the shredded pepper jack cheese on top of the beef. Cover the griddle with a lid for a couple of minutes, allowing the cheese to melt beautifully. Once you see the cheese bubbling and gooey, it’s time to take poise of that mouthwatering filling for your sandwich.
Step 4: Toast the Hoagie Buns
While your beef and cheese mixture is finishing up, place the hoagie buns on the griddle cut side down. Toast them until they’re golden brown and slightly crisp, which should take about 2-4 minutes. This step adds a delightful crunch to your Mexican Chopped Cheese Sandwich while providing the perfect vessel for that savory filling.
Step 5: Assemble the Sandwich
Once the buns are toasted and the cheese is melted, it’s time to assemble! Spoon a generous portion of the beef and cheese mixture into the toasted hoagie buns. Don’t be shy—each bite should be loaded with that creamy, spicy goodness that defines the Mexican Chopped Cheese Sandwich.
Step 6: Add Fresh Toppings
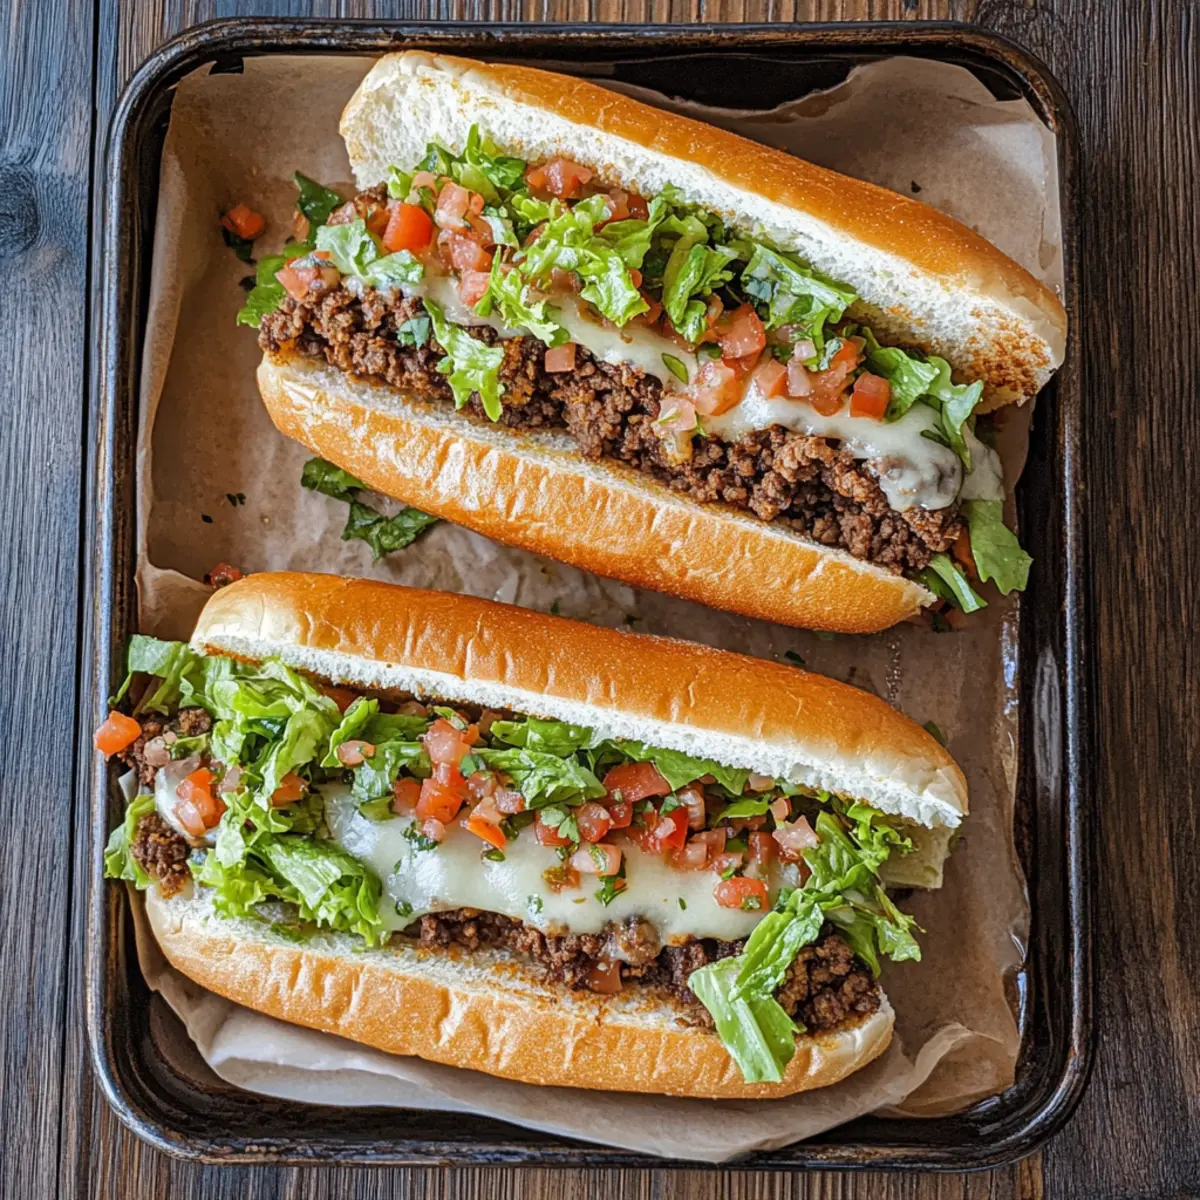
Next, top your loaded sandwich with a handful of crispy lettuce and a generous scoop of fresh pico de gallo. The crunch of the lettuce and the vibrant flavors of the pico will elevate the sandwich, creating a delightful balance against the rich beef and melted cheese.
Step 7: Serve and Enjoy
Finally, close the sandwich and, if you like, roll it in parchment paper to help keep the toppings intact and retain warmth. Your delicious Mexican Chopped Cheese Sandwich is ready to enjoy! Perfect for a family meal or a quick lunch on a busy day, it promises flavors that will delight.
Make Ahead Options
These Spicy Mexican Chopped Cheese Sandwiches are perfect for meal prepping! You can cook the ground beef and melt the pepper jack cheese up to 24 hours in advance—just store them in an airtight container in the refrigerator to maintain that rich flavor and juicy texture. When you’re ready to enjoy, simply reheat the mixture on a griddle until warmed through. Toast the hoagie buns fresh before assembling for maximum crunch, and pile on the crispy lettuce and pico de gallo just before serving to keep the toppings vibrant. This strategy saves time on busy weeknights while ensuring your sandwiches are just as delicious!
What to Serve with Mexican Chopped Cheese Sandwich
Transform your homemade Mexican Chopped Cheese Sandwich into a delightful feast with these complementary side dishes and drinks.
- Creamy Guacamole: This rich, creamy dip brings a fresh twist, providing a cooling contrast to the spicy sandwich.
- Crispy Sweet Potato Fries: Their sweetness and crispy texture offer a satisfying balance to the savory, cheesy goodness of your sandwich.
- Southwest Creamed Corn: This rich and slightly sweet side aligns beautifully with the flavors of the sandwich and adds creaminess to each bite.
- Refried Beans: Packed with protein and flavor, they complement the meaty filling while ensuring a hearty meal.
- Chilled Mexican Corn Salad: Bright and zesty, this salad delivers refreshing flavors that enhance the tasty elements of the sandwich.
- Sparkling Limeade: A refreshing beverage choice that echoes the vibrant tastes of the culinary experience, perfect for washing it all down.
- Mango Salsa: Sweet and tangy, it adds a fruity kick and pairs seamlessly with the sandwich’s savory notes.
- Apple Pie: For a sweet finish, this classic dessert adds comforting warmth and a hint of nostalgia after your scrumptious meal.
How to Store and Freeze Mexican Chopped Cheese Sandwich
Fridge: Keep any leftover sandwiches in an airtight container for up to 2 days. Reheat gently in a skillet to avoid sogginess and to achieve a melty cheese texture.
Freezer: For longer storage, wrap the individual sandwiches tightly in plastic wrap, then foil, before placing them in the freezer. They can be stored for up to 2 months.
Reheating: When ready to enjoy, let the sandwich thaw in the fridge overnight. Reheat it on a griddle or in an oven at 350°F until heated through and the cheese is melty again.
Assembly Tip: If you choose to freeze, consider storing the toppings separately to maintain freshness, enjoying your Mexican Chopped Cheese Sandwich the way it was meant to be!
Expert Tips for Mexican Chopped Cheese Sandwich
-
Ingredient Quality: Use fresh ground beef for better flavor and texture. Avoid lean varieties to keep your filling juicy and satisfying.
-
Cheese Melting: Cover the beef with cheese while cooking to trap heat and melt it perfectly. This step is crucial for achieving that gooey, spicy cheese experience.
-
Avoid Sogginess: Use a slotted spoon for pico de gallo to keep out excess liquid, preventing your Mexican Chopped Cheese Sandwich from getting soggy.
-
Toasting Buns: Toast the hoagie buns on medium heat until golden brown—this adds delightful crunch and helps contain the filling.
-
Experiment with Toppings: Don’t hesitate to mix and match toppings! Add avocado and jalapeños, or try a sprinkle of lime juice for a zesty kick.
Mexican Chopped Cheese Sandwich Variations
Your culinary adventure doesn’t have to stop here! Feel free to unleash your creativity and make this recipe your own.
-
Dairy-Free: Substitute pepper jack with a dairy-free cheese alternative for a creamy and satisfying option.
Using vegan cheese can give you that delightful melt without the dairy! -
Spicy Kick: Add jalapeños or a drizzle of hot sauce to give your sandwich an extra zing.
A little heat can take the savory experience to a whole new level — perfect for spice lovers! -
Vegetarian Delight: Swap the ground beef for a hearty mix of black beans and roasted vegetables.
This twist maintains the flavor profile while making the sandwich a delicious plant-based option! -
Cheese Lover’s Dream: Mix different cheeses like sharp cheddar, queso blanco, or even a sprinkle of feta.
Each cheese brings its unique charm, providing a tantalizing blend of flavors that will amaze your taste buds! -
Crunchy Texture: Layer in some pickled red onions or crunchy bell peppers for added texture.
These toppings add a satisfying crunch that beautifully contrasts with the gooey cheese and savory beef. -
Gluten-Free: Use gluten-free hoagie buns to create a delicious sandwich suitable for everyone.
Enjoying this dish shouldn’t come with restrictions — be sure to cater to all diets! -
The Ultimate Loaded: Add layers of guacamole, salsa, or even grilled corn to enhance flavor.
More toppings mean more flavor and fun — customize it just to your liking!
Each variation invites you to explore new tastes and textures that can make your Mexican Chopped Cheese Sandwich uniquely yours. If you’re looking for even more flavor combinations, consider pairing it with Savory Vegetable Cheese Pancakes or indulging in a sweet finish, like Blueberry Cream Cheese. Happy cooking!
Mexican Chopped Cheese Sandwich Recipe FAQs
What kind of ground beef should I use for the Mexican Chopped Cheese Sandwich?
I recommend using fresh ground beef for the best flavor and juiciness. Avoid lean varieties, as they can lead to a dry filling; a blend with around 80% lean to 20% fat is perfect. However, you can also substitute ground turkey or a plant-based meat alternative for a lighter option!
How do I store leftovers from the Mexican Chopped Cheese Sandwich?
Store any leftovers in an airtight container in the refrigerator for up to 2 days. When reheating, place the sandwich in a skillet on medium heat to avoid sogginess and ensure the cheese becomes melty once again. This method will help maintain the sandwich’s delightful texture and flavor.
Can I freeze the Mexican Chopped Cheese Sandwich?
Absolutely! To freeze, wrap individual sandwiches tightly in plastic wrap and then in aluminum foil to prevent freezer burn. You can keep them in the freezer for up to 2 months. When you’re ready to enjoy, let them thaw in the refrigerator overnight before reheating them on a griddle or in an oven preheated to 350°F until warmed through.
What are some alternatives for pico de gallo if I want to mix it up?
If you’re looking to customize your toppings, you can use store-bought salsa, diced avocado, or even grilled corn for a twist. Adding jalapeños for extra heat or fresh cilantro for a pop of flavor can also make your Mexican Chopped Cheese Sandwich even more delicious and vibrant!
Is the Mexican Chopped Cheese Sandwich suitable for people with allergies?
When considering allergies, it’s important to be cautious with the ingredients. Ensure that your hoagie buns are gluten-free if necessary, and check the cheese for any specific dairy allergies. For individuals avoiding meat, substitute with a mix of black beans and veggies for a delicious vegetarian option. Always double-check ingredient labels to accommodate dietary restrictions!
Ultimate Mexican Chopped Cheese Sandwich You’ll Crave
Ingredients
Equipment
Method
- Preheat your griddle or skillet over medium heat for about 5 minutes.
- Add ground beef to the griddle, cook for about 5-7 minutes until browned and crispy.
- Pile shredded pepper jack cheese on top of cooked beef and cover to melt.
- Toast hoagie buns cut side down on the griddle until golden brown, about 2-4 minutes.
- Assemble by spooning beef and cheese mixture into toasted buns.
- Top with lettuce and pico de gallo.
- Close sandwich and serve, optionally rolled in parchment paper.