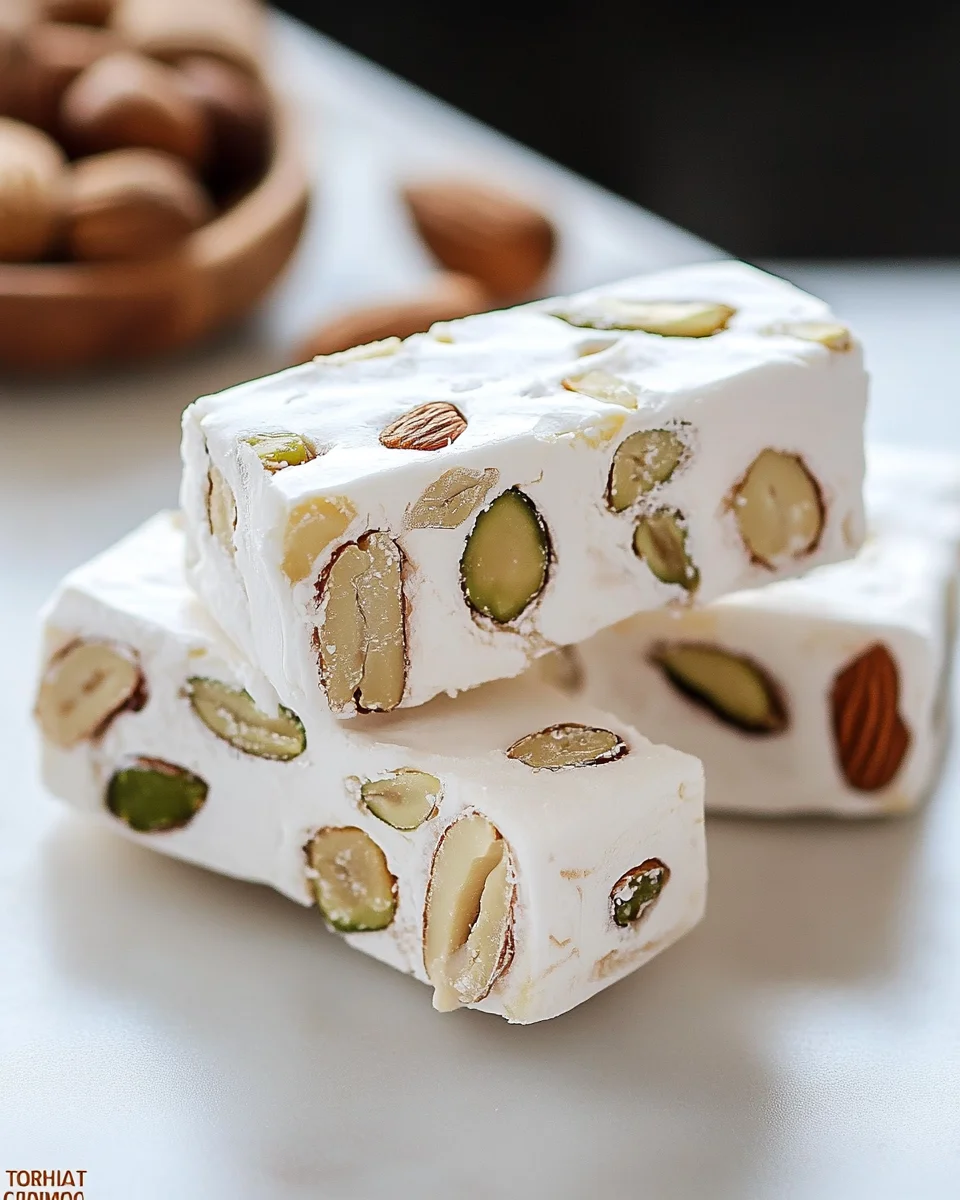
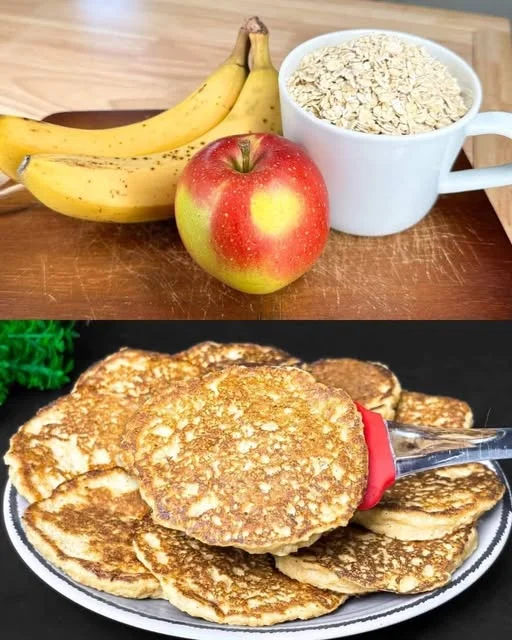
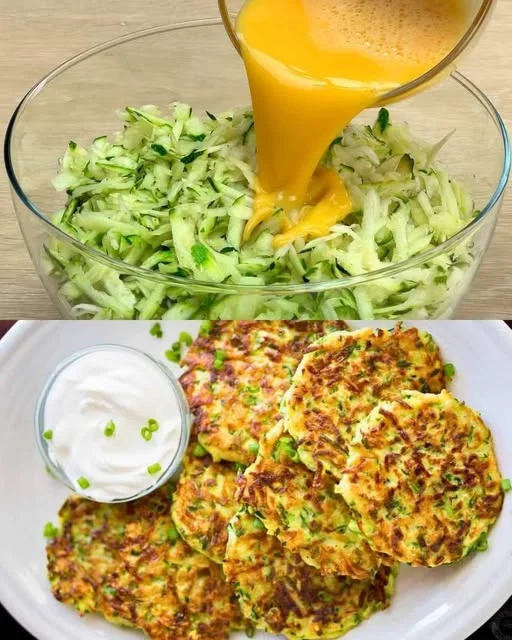
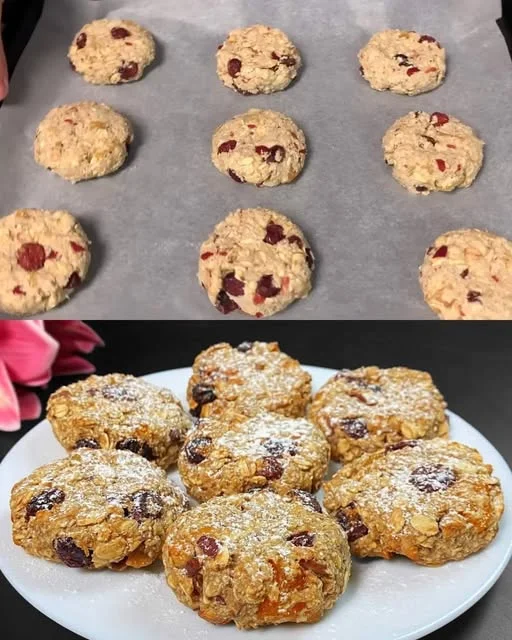
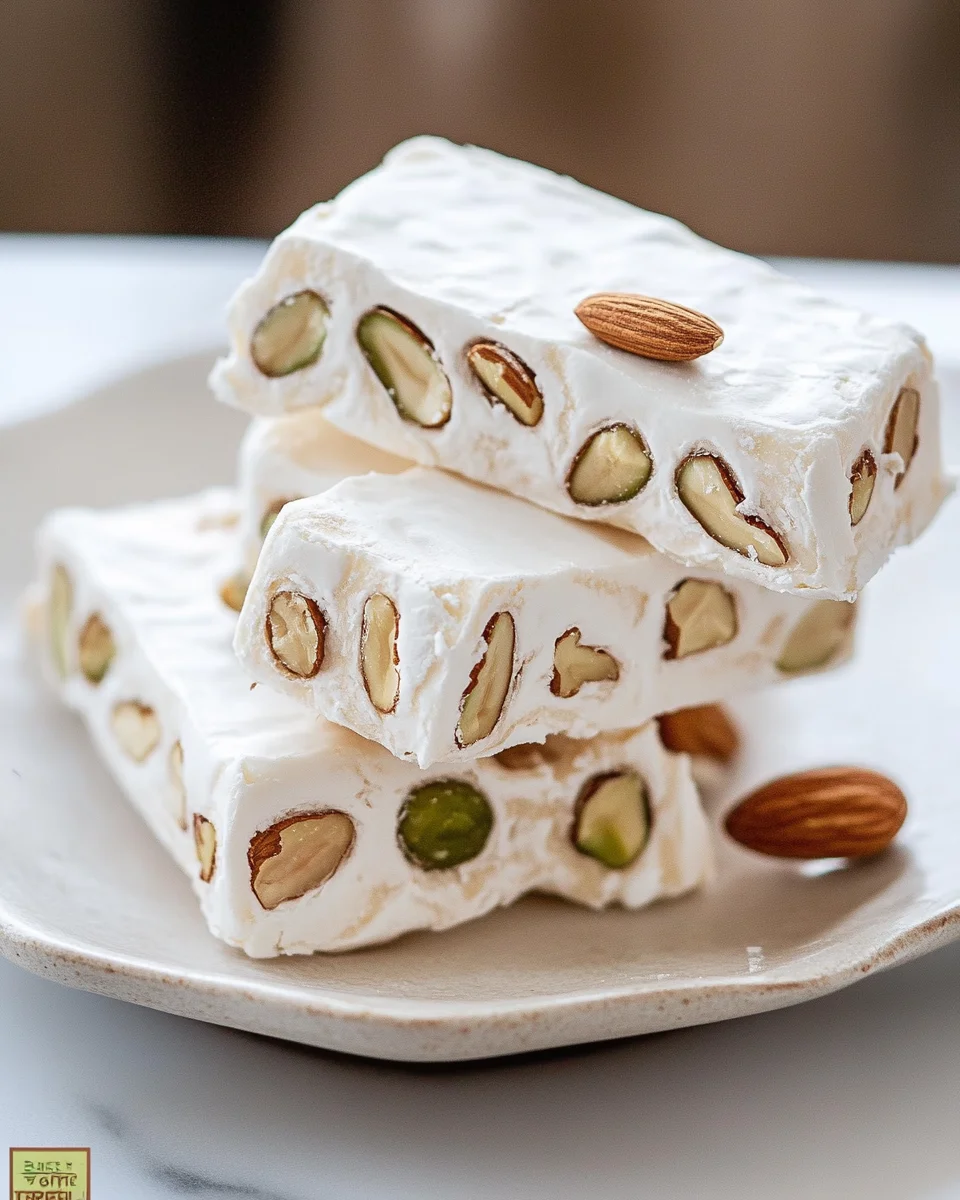
Torrone: The Timeless Italian Treat That Brings Families Together

A Sweet Memory Wrapped in Nougat

There’s something magical about food that connects generations. For me, torrone is more than just a confection; it’s a memory, a story, and a tradition woven into my family’s holiday gatherings. I remember being a child, standing by the kitchen counter, watching my grandmother carefully stir a bubbling pot of golden honey. The sweet aroma filled the air, blending with the nutty scent of toasted almonds and pistachios. She would hum an old Italian tune as she worked, her hands moving with the precision of someone who had done this a hundred times before.

When the torrone was ready, she pressed it into a pan lined with delicate wafer paper, smoothing it down with a well-worn wooden spoon. Then, we waited—an eternity for a child—until the nougat had set. When she finally cut the torrone into perfect little squares, she handed me the first piece. It was warm, chewy, and bursting with the flavors of honey and nuts. That moment was the essence of the holidays for me: love, warmth, and the joy of sharing something handmade.

Now, I make torrone every year, passing the tradition on to my own family. There’s something deeply satisfying about carrying on a recipe that has been cherished for centuries, knowing that each bite holds a history of celebration, love, and craftsmanship. Whether you’re making it for a festive gathering or as a thoughtful homemade gift, torrone is a timeless treasure that brings people together.

The History of Torrone: A Treat With a Story

Torrone has been a part of Italian culinary history for centuries, with origins that stretch back to at least the 15th century. Some say the name comes from the Latin word torrere, meaning “to toast,” a reference to the toasted nuts at the heart of the recipe. Others believe it was inspired by an Arabic confection introduced to Italy during medieval times.

One of the most famous stories about torrone’s origins comes from the city of Cremona, where it is said to have been first made in 1441 for the wedding of Francesco Sforza and Bianca Maria Visconti. The nougat was shaped to resemble the city’s bell tower, Torrazzo, giving rise to the name “torrone.” Whether or not this story is true, Cremona remains one of the most well-known producers of torrone today.

Over the centuries, torrone has evolved into many regional varieties. In some areas, it is soft and chewy, while in others, it is hard and brittle. Some recipes include chocolate, citrus zest, or even a splash of liqueur. But at its core, torrone is always a blend of honey, sugar, whipped egg whites, and nuts—a simple yet elegant confection that has stood the test of time.

Why Torrone Is More Than Just a Candy

Torrone isn’t just another holiday sweet; it carries deep cultural significance. It is a symbol of festivity, family, and tradition. In Italy, you’ll find it in abundance during Christmas markets, wrapped in colorful paper and sold in charming little shops. Families gift it to friends and neighbors, a sweet gesture of goodwill and togetherness.

Beyond Italy, torrone has found its way into Spanish (turrón), French (nougat de Montélimar), and even Latin American cuisines. Each culture has its own spin on the classic treat, but the essence remains the same—a delightful blend of chewy nougat and crunchy nuts that brings joy with every bite.

How to Enjoy Torrone Like an Italian

Torrone is incredibly versatile. It can be enjoyed on its own, but Italians often pair it with espresso or dessert wine for a truly indulgent experience. Here are a few ways to serve it:

  • With Coffee or Espresso: The slight bitterness of coffee complements the sweet and nutty flavors of torrone beautifully.
  • On a Dessert Platter: Arrange pieces of torrone alongside biscotti, amaretti cookies, and dried fruit for an elegant holiday spread.
  • Dipped in Chocolate: Some variations of torrone are coated in a thin layer of dark chocolate, adding an extra layer of richness.
  • Crumpled Over Ice Cream: A little crushed torrone sprinkled over vanilla gelato is pure heaven.
  • As a Gift: Wrap individual pieces in parchment paper or decorative boxes for a thoughtful homemade present.

Ingredients – A Sweet Symphony

  • 1 cup (340g) honey – The heart of the nougat, adding deep sweetness
  • 1 cup (200g) sugar – For balance and texture
  • 1/4 cup (60ml) water – Helps dissolve the sugar
  • 2 egg whites – Whipped for a light, airy consistency
  • 1 cup (100g) toasted almonds – Traditional and rich in flavor
  • 1 cup (100g) toasted pistachios or mixed nuts – Adds crunch and color
  • 1 tsp vanilla extract or citrus zest – Enhances the aroma and taste

Directions – The Art of Nougat Crafting

  1. Toast the Nuts:
    • Preheat the oven to 350°F (175°C).
    • Spread almonds and pistachios on a baking sheet and toast for 8-10 minutes until fragrant. Let cool.
  2. Create the Honey Base:
    • In a heavy-bottomed saucepan, heat honey over low heat.
    • Stir occasionally and cook until it reaches 250°F (120°C) on a candy thermometer.
  3. Prepare the Sugar Syrup:
    • In a separate saucepan, combine sugar and water.
    • Heat over medium heat until it reaches 300°F (150°C).
  4. Whip the Egg Whites:
    • Using a stand mixer, beat egg whites until soft peaks form.
    • Slowly drizzle in the hot honey while continuing to whip.
  5. Combine and Mix:
    • Gradually add the sugar syrup, whipping continuously until thick and glossy.
    • Fold in the toasted nuts and vanilla extract or zest.
  6. Shape the Torrone:
    • Line a baking dish with edible wafer paper or parchment paper.
    • Pour the nougat mixture into the dish and spread evenly.
    • Cover with another sheet of wafer paper.
  7. Set and Slice:
    • Allow the torrone to cool at room temperature for at least 4 hours (overnight is best).
    • Slice into rectangles or squares using a sharp knife.

Nutritional Breakdown – A Sweet Indulgence

  • Calories: 210 kcal
  • Carbohydrates: 35g
  • Sugar: 30g
  • Fat: 6g
  • Saturated Fat: 1g
  • Protein: 4g

Pro Tips for the Perfect Torrone

  • Use a candy thermometer to ensure the perfect texture.
  • Toast the nuts to enhance their flavor.
  • Work quickly—the mixture sets fast.
  • Experiment with flavors—try cinnamon, cocoa powder, or even a splash of almond liqueur.

Torrone is a timeless Italian treat, perfect for holidays, gifting, or simply indulging in something special. Enjoy!

Frequently Asked Questions About Torrone

1. What’s the Difference Between Soft and Hard Torrone?

Torrone comes in two main textures: soft (morbido) and hard (duro). The difference lies in the cooking temperature of the sugar and honey mixture. Soft torrone is cooked to a lower temperature, making it chewy and airy, while hard torrone is heated to a higher temperature, resulting in a firm, brittle texture.

2. Can I Make Torrone Without Wafer Paper?

Yes! While wafer paper gives torrone a smooth, professional finish and prevents sticking, you can line your baking dish with parchment paper instead. Just be sure to grease it lightly to make removing the torrone easier.

3. How Long Does Torrone Last?

Torrone has a long shelf life when stored properly. Keep it in an airtight container at room temperature, away from humidity and direct sunlight. It will stay fresh for up to two weeks. If you want to store it longer, you can freeze it for up to two months.

4. Can I Use Different Nuts?

Absolutely! While almonds are the traditional choice, many variations use pistachios, hazelnuts, or a mix of nuts. Toasting the nuts before adding them to the nougat enhances their flavor.

5. What’s the Best Honey for Torrone?

High-quality honey makes all the difference. Acacia honey or orange blossom honey works beautifully, as they have delicate flavors that don’t overpower the nougat. Avoid overly strong honeys, like buckwheat, which can dominate the taste.

6. Can I Add Other Flavors to Torrone?

Yes! Many people like to add a touch of citrus zest (lemon or orange), a pinch of cinnamon, or even a splash of liqueur like Amaretto for a more complex flavor.

7. Why Did My Torrone Turn Out Too Hard or Too Soft?

The texture of torrone depends on reaching the right sugar and honey temperatures. Using a candy thermometer is crucial. If the temperature is too low, the nougat will be too soft and sticky. If it’s too high, the torrone will be too hard.

Final Thoughts: A Tradition Worth Keeping

Torrone is more than just a candy; it’s a tradition, a story, and a piece of history wrapped in every chewy bite. Whether you’re making it for the first time or continuing a long-standing family tradition, the process of creating torrone is just as rewarding as eating it.

There’s something special about standing over a warm pot of honey and sugar, watching it transform into something magical. The anticipation as it sets, the joy of slicing into the finished nougat, and the pleasure of sharing it with loved ones—all of these moments make torrone a treat worth savoring.

So, the next time you take a bite of this delightful confection, remember that you’re not just enjoying a sweet—you’re indulging in centuries of history, love, and craftsmanship.
aiting

Torrone: The Timeless Italian Treat That Brings Families Together

A classic Italian confection, this Heavenly Torrone is a sweet, nutty nougat with a perfectly chewy texture. Made with honey, toasted nuts, and a touch of vanilla or citrus, this treat is perfect for holidays, gifting, or a luxurious homemade indulgence.
Prep Time 15 minutes
Cook Time 20 minutes
Total Time 4 hours 35 minutes
Servings: 12 -16 pieces
Course: Dessert
Cuisine: Italian

Ingredients
  

  • 1 cup 340g honey
  • 1 cup 200g sugar
  • 1/4 cup 60ml water
  • 2 egg whites
  • 1 cup 100g toasted almonds
  • 1 cup 100g toasted pistachios or mixed nuts
  • 1 tsp vanilla extract or citrus zest

Method
 

Toast the Nuts:
  1. Preheat the oven to 350°F (175°C).
  2. Spread almonds and pistachios on a baking sheet and toast for 8-10 minutes until fragrant. Let cool.
Create the Honey Base:
  1. In a heavy-bottomed saucepan, heat honey over low heat.
  2. Stir occasionally and cook until it reaches 250°F (120°C) on a candy thermometer.
Prepare the Sugar Syrup:
  1. In a separate saucepan, combine sugar and water.
  2. Heat over medium heat until it reaches 300°F (150°C).
Whip the Egg Whites:
  1. Using a stand mixer, beat egg whites until soft peaks form.
  2. Slowly drizzle in the hot honey while continuing to whip.
Combine and Mix:
  1. Gradually add the sugar syrup, whipping continuously until thick and glossy.
  2. Fold in the toasted nuts and vanilla extract or zest.
Shape the Torrone:
  1. Line a baking dish with edible wafer paper or parchment paper.
  2. Pour the nougat mixture into the dish and spread evenly.
  3. Cover with another sheet of wafer paper.
Set and Slice:
  1. Allow the torrone to cool at room temperature for at least 4 hours (overnight is best).
  2. Slice into rectangles or squares using a sharp knife.

Notes

  • Use a candy thermometer to ensure the perfect texture.
  • Toast the nuts to enhance their flavor.
  • Work quickly—the mixture sets fast.
  • Experiment with flavors—try cinnamon, cocoa powder, or even a splash of almond liqueur.

Black Cocoa & White Chocolate Cookies: A Deeply Decadent Delight

A Cookie That Feels Like Home

There is something truly magical about the combination of dark, rich cocoa and smooth, sweet white chocolate. It reminds me of childhood evenings spent baking with my grandmother. She was the kind of woman who always had a tin of cookies on the counter, ready for anyone who stopped by. One of my favorites was her chocolate crinkle cookies—crisp on the outside, chewy on the inside, dusted with powdered sugar like freshly fallen snow.

Years later, when I started experimenting with black cocoa powder, I found myself longing for those same nostalgic flavors but with a modern twist. That’s when I created these black cocoa cookies with white chocolate. They take that deep, almost smoky chocolate flavor and balance it with the smooth, creamy sweetness of high-quality white chocolate. The way the white chocolate melts into the dark dough, creating marbled cracks across the surface, makes them just as beautiful as they are delicious.

These cookies aren’t just a treat; they’re a moment of comfort, a reminder of home, and a perfect companion to a quiet evening with a cup of coffee.

Why Black Cocoa? The Secret to the Deepest Chocolate Flavor

Black cocoa powder is not your average cocoa. It has been heavily alkalized, meaning the natural acidity of the cocoa bean is neutralized, resulting in a cocoa powder that is darker, smoother, and less bitter than traditional Dutch-processed cocoa. This is the same type of cocoa used to make Oreo cookies, which explains why these cookies have that signature deep, almost smoky chocolate taste.

While you could substitute regular cocoa powder in this recipe, you wouldn’t get the same striking color or the same depth of flavor. The black cocoa gives these cookies their dramatic appearance and an intense chocolate profile that pairs beautifully with the sweetness of white chocolate.

If you’ve never baked with black cocoa before, this recipe is the perfect introduction. Once you start using it, you’ll find yourself wanting to experiment with it in brownies, cakes, and even homemade hot cocoa.

The Art of the Perfect Cookie Texture

One of the things that makes these cookies so irresistible is their texture. They have crisp, delicate edges that give way to a soft and chewy center. Achieving that perfect texture comes down to a few key elements:

  • Butter Preparation: Instead of using softened butter, this recipe starts with melted butter. This helps create a denser, chewier cookie rather than a cakey one.
  • Chilling the Dough: Letting the dough rest in the fridge for at least four hours (or overnight) is essential. This allows the flour to fully absorb the moisture, preventing excess spread during baking and enhancing the chewiness.
  • Baking Time: Pulling the cookies out of the oven at just the right moment—when the edges are set but the centers still look slightly underbaked—ensures they remain soft once they cool.

These steps might require a little patience, but the result is well worth it.

White Chocolate: Choosing the Best for Baking

Not all white chocolate is created equal. If you’ve ever been disappointed by white chocolate that tastes overly sweet or artificial, it’s likely because it wasn’t made with real cocoa butter. The best white chocolate for baking will have cocoa butter listed as one of the main ingredients, rather than just vegetable oils.

For this recipe, look for a high-quality white chocolate bar rather than white chocolate chips. Chips are often formulated to hold their shape and won’t melt as beautifully over the cookies as a chopped chocolate bar will. Some great options include:

  • Valrhona Ivoire
  • Lindt Classic White Chocolate
  • Green & Black’s Organic White Chocolate

Breaking the chocolate into rough squares rather than uniform pieces adds to the rustic, artistic look of these cookies.

Ingredients: Midnight Magic Mix

  • Butter – 140g (½ cup + 2 tbsp), unsalted, cold is fine
  • Brown Sugar – 150g (¾ cup), light or dark
  • Granulated Sugar – 100g (½ cup), fine
  • Egg – 1 large
  • Salt – ½ tsp fine sea salt
  • Vanilla Extract – 1 tsp, pure
  • Baking Powder – ¼ tsp
  • Baking Soda – ½ tsp
  • Black Cocoa Powder – 25g (¼ cup)
  • Dutch-Process Cocoa Powder – 25g (¼ cup)
  • Flour – 200g (1 cup + scant ⅔ cup), high protein (11-12%) all-purpose
  • White Chocolate – 125g, good quality (made with cocoa butter)

Directions: The Path to Perfection

  1. Butter Magic – Melt butter halfway, then whisk to fully liquefy.
  2. Sweet Fusion – Add both sugars, salt, and vanilla. Whisk thoroughly for one minute.
  3. Egg Elevation – Add the egg and whisk until smooth and creamy.
  4. Dry Mix Alchemy – Stir in baking powder, baking soda, both cocoas, and flour. Mix until no dry spots remain.
  5. Chill & Rest – Cover dough and refrigerate for at least 4 hours or overnight.
  6. Prep for Greatness – Preheat oven to 350°F (175°C). Grease and line two baking sheets with parchment paper.
  7. Scoop & Shape – Portion dough into 1.5 tbsp rounds, leaving space for spreading.
  8. Chocolate Crown – Place a 1-inch square of white chocolate on each dough ball, pressing gently.
  9. Bake to Brilliance – Bake for 10-12 minutes, until cookies spread, crackle, and the white chocolate begins to caramelize at the edges.
  10. Cool & Enjoy – Let cookies rest on the baking sheet before devouring! Store leftovers in an airtight container.

Nutritional Notes: A Bite of the Details

(Approximate values per cookie)

  • Calories – ~200 kcal
  • Carbohydrates – ~25g
  • Sugar – ~15g
  • Fat – ~10g
  • Protein – ~2.5g
  • Fiber – ~1g

These chewy, chocolatey delights bring together deep black cocoa richness with the creamy contrast of melting white chocolate. A true treat for chocolate lovers!

FAQs: Everything You Need to Know

1. Why didn’t my cookies spread properly?

If your cookies didn’t spread, there could be a few reasons:

  • The dough was too cold when it went into the oven. Let it sit at room temperature for a few minutes before baking.
  • You may have used too much flour. Measuring by weight (instead of cups) ensures accuracy.
  • Your oven temperature may be too low. Use an oven thermometer to check if your oven runs cooler than the set temperature.

2. My cookies spread too much. What happened?

Overly flat cookies can be caused by:

  • Too little flour or too much butter. Again, using a kitchen scale helps prevent measuring errors.
  • Using European-style butter, which has a higher fat content. This can cause extra spreading.
  • Not chilling the dough long enough. The colder the dough, the slower it will spread in the oven.

3. Can I freeze the dough?

Absolutely. In fact, freezing cookie dough is a great way to always have freshly baked cookies on hand. Scoop the dough into balls, freeze them on a baking sheet for about 30 minutes, then transfer to a freezer bag. When you’re ready to bake, let the dough come to a cool room temperature before adding the white chocolate and baking.

4. Can I make these cookies without black cocoa powder?

Yes, but they won’t have the same deep flavor or color. If you don’t have black cocoa, you can use all Dutch-processed cocoa, but expect a lighter brown cookie with a slightly different taste.

5. What’s the best way to store these cookies?

Store them in an airtight container at room temperature for up to five days. If you want to keep them fresh longer, you can refrigerate them for up to a week or freeze them for up to three months.

Serving Suggestions: Making the Most of Every Bite

These cookies are a treat on their own, but here are a few ways to take them to the next level:

  • Pair with Coffee or Tea: The slightly bitter notes of black cocoa balance beautifully with a strong cup of espresso or a lightly sweetened chai tea.
  • Ice Cream Sandwiches: Use two cookies to sandwich a scoop of vanilla or cookies-and-cream ice cream for a truly indulgent dessert.
  • Holiday Gifting: Their striking black-and-white contrast makes them perfect for holiday cookie boxes or special occasions. Wrap them in parchment paper and tie with a ribbon for an elegant homemade gift.

Conclusion: A Cookie Worth Every Bite

These black cocoa and white chocolate cookies aren’t just about satisfying a sweet tooth—they’re about contrast, balance, and indulgence. The rich, bold cocoa meets the creamy sweetness of white chocolate, and together they create something truly special.

More than just a recipe, these cookies are an experience. They remind us of childhood comforts while offering a sophisticated twist. They require patience, but in return, they give you the kind of homemade treat that brings joy to anyone who takes a bite.

So whether you’re baking these for a holiday gathering, a late-night snack, or just because you need a little chocolate therapy, know that every crackly, chewy, deeply flavorful cookie is worth the effort.

aiting

Black Cocoa & White Chocolate Cookies: A Deeply Decadent Delight

Indulge in these rich, chewy Dark & Dreamy White Chocolate Cookies! Featuring deep black cocoa, velvety Dutch-process cocoa, and creamy white chocolate, these cookies are an irresistible treat for any chocolate lover. Perfectly crackled and loaded with flavor, they are sure to satisfy your sweet tooth!
Prep Time 10 minutes
Cook Time 4 hours
Total Time 4 hours 20 minutes
Servings: 12 -16 cookies
Course: Dessert
Cuisine: American

Ingredients
  

  • 140 g ½ cup + 2 tbsp unsalted butter, cold is fine
  • 150 g ¾ cup light or dark brown sugar
  • 100 g ½ cup granulated sugar
  • 1 large egg
  • ½ tsp fine sea salt
  • 1 tsp pure vanilla extract
  • ¼ tsp baking powder
  • ½ tsp baking soda
  • 25 g ¼ cup black cocoa powder
  • 25 g ¼ cup Dutch-process cocoa powder
  • 200 g 1 cup + scant ⅔ cup high-protein (11-12%) all-purpose flour
  • 125 g good-quality white chocolate made with cocoa butter

Method
 

Butter Magic:
  1. Melt butter halfway, then whisk to fully liquefy.
Sweet Fusion:
  1. Add both sugars, salt, and vanilla. Whisk thoroughly for one minute.
Egg Elevation:
  1. Add the egg and whisk until smooth and creamy.
Dry Mix Alchemy:
  1. Stir in baking powder, baking soda, both cocoas, and flour. Mix until no dry spots remain.
Chill & Rest:
  1. Cover dough and refrigerate for at least 4 hours or overnight.
Prep for Greatness:
  1. Preheat oven to 350°F (175°C). Grease and line two baking sheets with parchment paper.
Scoop & Shape:
  1. Portion dough into 1.5 tbsp rounds, leaving space for spreading.
Chocolate Crown:
  1. Place a 1-inch square of white chocolate on each dough ball, pressing gently.
Bake to Brilliance:
  1. Bake for 10-12 minutes, until cookies spread, crackle, and the white chocolate begins to caramelize at the edges.
Cool & Enjoy:
  1. Let cookies rest on the baking sheet before devouring! Store leftovers in an airtight container.

Notes

  • Using high-quality white chocolate ensures a creamy, rich contrast to the dark cookie.
  • Chilling the dough enhances the texture and deepens the flavors.
  • These cookies freeze well—store dough balls in the freezer and bake as needed.
  • Slightly underbaking keeps them soft and chewy!

Cheesy Zucchini Oatmeal Fritters – A Healthy and Irresistible Meal

Some of the best meals are created from simple, wholesome ingredients. Growing up, homemade meals were always a special part of the day, bringing everyone together to enjoy food made with care. Among the many recipes passed down in my family, one dish always stood out—crispy zucchini oatmeal fritters.

At first, they seemed too simple to be extraordinary, but once I tasted them, I understood why they were a favorite. The combination of fresh zucchini, hearty oatmeal, and melted cheese created a balance of flavors and textures that was impossible to resist. The crispy edges, the soft and cheesy center, and the subtle garlic and onion flavors made each bite more satisfying than the last.

Now, this recipe has become a staple in my own kitchen. It is easy to make, packed with nutrients, and incredibly versatile. Whether served as a light meal, a side dish, or even as a snack, these fritters always disappear quickly. They are a great alternative to traditional comfort foods, offering the same satisfying experience with healthier ingredients.

If you are looking for a meal that is both nourishing and delicious, these zucchini oatmeal fritters are an excellent choice.

Why This Recipe Stands Out

These fritters are not only flavorful but also packed with nutrients that make them a great addition to a balanced diet.

  • Crisp on the outside and soft on the inside, they offer the perfect texture.
  • They are made with simple, affordable ingredients.
  • Oatmeal replaces traditional flour, making them higher in fiber and more filling.
  • They are a great way to include more vegetables in your meals.
  • The recipe can be easily customized with different herbs, cheeses, or seasonings.
  • They can be made in under 30 minutes, making them perfect for busy days.

For those who want a healthier alternative to processed snacks or fast food, this dish is a satisfying option that does not compromise on taste.

Ingredients

Main Dish:

IngredientQuantity
Zucchini1
SaltTo taste
Carrot1
Oatmeal5 tbsp
Eggs2
Green onion, choppedTo taste
Garlic cloves, minced2
Cheese, shredded100g
Olive oil, for cookingAs needed

Sauce:

(Customize as per your preference – yogurt, sour cream, or tomato-based sauces work well!)

Directions

  1. Prepare the zucchini – Grate the zucchini, sprinkle with salt, and let sit for 10 minutes. Squeeze out excess liquid.
  2. Grate the carrot – Add it to a bowl with the zucchini.
  3. Make the batter – Mix in oatmeal, eggs, green onions, garlic, shredded cheese, and salt. Stir well.
  4. Heat the oil – In a pan, heat olive oil over medium heat.
  5. Cook the fritters – Shape the mixture into small patties and cook for 3–4 minutes per side until golden brown.
  6. Serve with sauce – Enjoy warm with your favorite dip or sauce.

Nutritional Information (Per Serving, Approx.)

NutrientAmount
Calories180–220 kcal
Protein8–10 g
Fat10–12 g
Carbohydrates15–18 g
Fiber3–4 g
Sodium250–300 mg

The Nutritional Benefits of Zucchini Oatmeal Fritters

This dish is packed with essential nutrients that contribute to overall health.

Zucchini – A Low-Calorie, High-Nutrient Ingredient

  • High in fiber, which supports digestion and promotes a feeling of fullness.
  • Rich in vitamins A and C, which help support the immune system.
  • Contains antioxidants that reduce inflammation.

Oatmeal – A Healthy Alternative to Flour

  • Provides slow-releasing carbohydrates for sustained energy.
  • High in fiber, which helps with digestion and gut health.
  • Naturally gluten-free when using certified gluten-free oats.

Eggs – A Source of High-Quality Protein

  • Contain essential vitamins and minerals that support brain function and energy levels.
  • Help bind the ingredients together for a perfect texture.

Cheese – A Flavorful and Nutritious Addition

  • Adds calcium for strong bones.
  • Provides healthy fats that promote satiety.
  • Enhances the overall flavor and texture of the fritters.

Garlic and Green Onions – Natural Flavor Boosters

  • Have anti-inflammatory and immune-boosting properties.
  • Add depth and richness to the taste.

By combining these ingredients, this dish provides a satisfying meal that supports overall well-being.

How to Enhance the Flavor

While these fritters are already delicious, a few simple additions can make them even better.

Add More Cheese

For those who enjoy a richer taste, increasing the amount of shredded cheese will make the fritters even more flavorful and gooey inside.

Experiment with Spices

A pinch of paprika, cumin, or red pepper flakes can add an extra layer of flavor.

Include Fresh Herbs

Dill, parsley, or basil can bring a fresh and aromatic element to the dish.

Serve with a Dipping Sauce

Pairing the fritters with a complementary sauce enhances the overall experience. Some great options include:

  • Greek yogurt mixed with garlic and lemon juice.
  • A spicy sriracha or chili mayo for those who enjoy heat.
  • A classic marinara sauce for a familiar and comforting flavor.

By making small adjustments, it is possible to create different variations that suit personal preferences.

Common Questions About Zucchini Oatmeal Fritters

Can These Fritters Be Made Gluten-Free?

Yes. Oatmeal is naturally gluten-free, but those with sensitivities should use certified gluten-free oats to avoid cross-contamination.

Can They Be Baked Instead of Fried?

Yes. To bake them, preheat the oven to 400°F (200°C) and place the fritters on a lined baking sheet. Lightly brush with olive oil and bake for 20–25 minutes, flipping halfway through. While baking will not achieve the same level of crispiness as frying, it is a great alternative for a lower-fat option.

How Should They Be Stored and Reheated?

  • Store leftovers in an airtight container in the refrigerator for up to four days.
  • To freeze, place parchment paper between the fritters to prevent them from sticking together. They can be frozen for up to three months.
  • Reheat in a skillet, air fryer, or oven for the best texture. Avoid microwaving, as it may make them soft.

Can This Recipe Be Made Dairy-Free?

Yes. Simply omit the cheese or use a plant-based alternative.

What Can They Be Served With?

  • A fresh salad for a lighter meal.
  • Grilled chicken or fish for added protein.
  • Quinoa or brown rice for a more filling dish.

These fritters are versatile and pair well with a variety of sides.

A Recipe Worth Making Again and Again

Cheesy zucchini oatmeal fritters are a perfect example of how simple ingredients can create something truly special. They are crispy, flavorful, and packed with nutrients, making them a great addition to any meal plan. Whether served as a main dish, a snack, or a side, they offer a delicious way to enjoy vegetables in a new and exciting way.

For anyone looking for a satisfying meal that is easy to prepare, this recipe is an excellent choice. The next time there is a craving for something cheesy and crispy, these fritters are the perfect solution. They bring together the best of both worlds—comfort and nutrition—making them a dish that will quickly become a household favorite.

Amal

Cheesy Zucchini Oatmeal Fritters – A Healthy and Irresistible Meal

These Cheesy Zucchini Oatmeal Fritters are the perfect balance of crispy, cheesy, and nutritious. Made with fresh zucchini, wholesome oats, and melted cheese, they offer a delicious way to enjoy a healthy meal. Whether served as a light lunch, a side dish, or a quick snack, these fritters are easy to prepare and packed with flavor. A simple, budget-friendly dish that the whole family will love!
Prep Time 10 minutes
Cook Time 15 minutes
Total Time 25 minutes
Servings: 10 –12 fritters
Course: Snack
Cuisine: International

Ingredients
  

Main Dish:
  • 1 zucchini grated
  • Salt to taste
  • 1 carrot grated
  • 5 tbsp oatmeal
  • 2 eggs
  • Green onion chopped
  • 2 garlic cloves minced
  • 100 g cheese shredded
  • Olive oil for cooking
Sauce (Optional):
  • Greek yogurt or sour cream
  • Lemon juice
  • Garlic minced
  • Fresh herbs such as dill or parsley

Method
 

  1. Prepare the zucchini – Grate the zucchini, sprinkle with salt, and let it sit for 10 minutes. Squeeze out excess moisture using a clean kitchen towel.
  2. Combine ingredients – In a mixing bowl, add the zucchini, grated carrot, oatmeal, eggs, green onions, minced garlic, and shredded cheese. Stir well to combine.
  3. Heat the oil – In a large skillet, heat olive oil over medium heat.
  4. Cook the fritters – Scoop small portions of the mixture into the pan, flatten slightly, and cook for 3–4 minutes per side until golden brown.
  5. Drain and serve – Remove from the pan and place on a paper towel to absorb excess oil. Serve warm with your preferred sauce.

Notes

  • Squeeze out as much water as possible from the zucchini for crispier fritters.
  • Use gluten-free oats for a gluten-free version.
  • For added flavor, mix in paprika, cumin, or dried herbs.
  • Store in the refrigerator for up to 4 days, or freeze for up to 3 months. Reheat in a skillet or oven for the best texture.

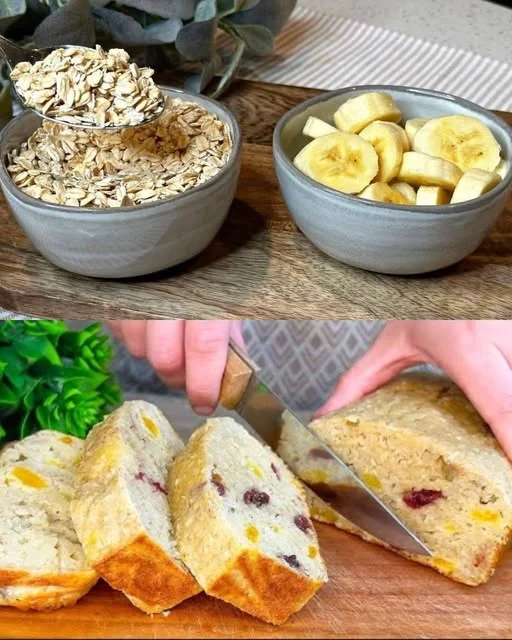
Apple Oatmeal Bake – A Simple Breakfast That Transformed My Mornings

There was a time when I struggled with breakfast. Mornings were always rushed, and I often skipped eating altogether or grabbed something processed on the go. I knew that I needed to change my habits, especially after feeling sluggish throughout the day. That’s when I discovered this simple, wholesome apple oatmeal bake—a recipe that became a game-changer for my health and weight-loss journey.

At first, I wasn’t sure if something so easy could actually make a difference. But after committing to starting my day with this fiber-rich, nutrient-packed meal, I noticed real changes. I felt full longer, had more energy, and even lost weight effortlessly. The best part? It didn’t feel like a diet food—it was naturally sweet, warm, and comforting, just like a homemade apple pie.

Now, this recipe has become a staple in my kitchen. It’s something I look forward to every morning, and I love knowing that I’m fueling my body with healthy, whole ingredients. Whether you’re trying to lose weight, improve your digestion, or simply want a delicious and filling breakfast, this apple oatmeal bake is a must-try.

Why This Apple Oatmeal Bake Is Perfect for a Healthy Lifestyle

This recipe isn’t just about weight loss—it’s about fueling your body with real, nourishing food. Here’s why it stands out:

  • Made with 100% natural ingredients – No processed sugar, flour, or unhealthy fats.
  • Packed with fiber and protein – Helps you stay full longer and supports digestion.
  • Supports weight loss naturally – Balanced nutrients prevent cravings and overeating.
  • Quick and easy to make – A perfect meal prep option for busy mornings.
  • Tastes like dessert – Naturally sweetened with bananas and apples, making it feel indulgent without guilt.

If you’re looking for a breakfast that’s delicious, satisfying, and helps with weight management, this is it.

Ingredients

IngredientQuantity
Oatmeal1 cup
Apples, peeled and chopped2
Bananas, mashed2
Eggs2
Yogurt150g
Baking powder1 teaspoon
CinnamonTo taste

Directions

  1. Preheat the oven – Set to 180°C (350°F) and grease a baking dish.
  2. Prepare the batter – In a mixing bowl, combine mashed bananas, eggs, yogurt, and cinnamon. Stir well.
  3. Add dry ingredients – Mix in oatmeal, baking powder, and chopped apples until fully incorporated.
  4. Transfer to a baking dish – Spread the mixture evenly in the dish.
  5. Bake – Place in the oven and bake for 25–30 minutes until golden brown and firm.
  6. Cool and serve – Let it cool slightly before serving. Enjoy warm or cold!

Nutritional Information (Per Serving, Approx.)

NutrientAmount
Calories180–220 kcal
Protein6–8 g
Fat4–6 g
Carbohydrates30–35 g
Fiber4–5 g
Natural Sugar12–15 g

The Nutritional Benefits of This Apple Oatmeal Bake

This isn’t just a delicious breakfast—it’s a powerhouse of nutrients that fuel your body throughout the day.

1. Oatmeal – The Ultimate Weight-Loss Ingredient

Oats are rich in fiber, particularly beta-glucan, which helps:

  • Keep you full longer by slowing digestion.
  • Stabilize blood sugar levels, reducing cravings.
  • Support heart health by lowering cholesterol.

2. Apples – A Natural Source of Sweetness and Fiber

Apples are a great addition to a healthy diet because they:

  • Are packed with vitamins and antioxidants.
  • Help with digestion and gut health.
  • Add natural sweetness without refined sugar.

3. Bananas – A Perfect Natural Sweetener

Bananas make this recipe moist and naturally sweet while also providing:

  • Essential vitamins and minerals like potassium.
  • Energy-boosting carbohydrates for sustained energy.
  • Prebiotic fiber to support gut health.

4. Yogurt – A Creamy, Protein-Rich Addition

Yogurt adds protein, calcium, and probiotics, making this recipe:

  • Great for muscle recovery and bone health.
  • More satisfying and creamy without needing butter or oil.

5. Cinnamon – A Metabolism-Boosting Spice

Beyond adding warmth and depth to the flavor, cinnamon is known to:

  • Regulate blood sugar levels, preventing energy crashes.
  • Have anti-inflammatory and antioxidant properties.

Each ingredient plays a role in making this one of the healthiest breakfasts you can eat.

How This Apple Oatmeal Bake Supports Weight Loss

Unlike processed breakfasts that spike blood sugar and leave you hungry soon after, this meal is designed to:

Keep you full for hours – Thanks to fiber and protein, you won’t feel the need to snack before lunch.
Boost metabolism naturally – Oatmeal and cinnamon help regulate digestion and energy levels.
Reduce cravings – The natural sweetness satisfies sugar cravings without added sugars.
Provide steady energy – No crashes, just sustained fuel for your body and brain.

By making this your daily breakfast, you’ll notice how easy it is to stay on track with your health goals.

Tips for Making the Best Apple Oatmeal Bake

While this recipe is simple, a few small adjustments can enhance flavor and texture.

1. Choose the Right Apples

For the best taste, use sweet-tart apples like Honeycrisp, Pink Lady, or Fuji. They hold their texture well and add natural sweetness.

2. Use Extra-Ripe Bananas

The riper the bananas, the sweeter and more flavorful your bake will be. No need for added sugar!

3. Adjust the Texture to Your Liking

  • For a softer, pudding-like texture, add an extra ¼ cup of yogurt.
  • For a firmer texture, let it cool completely before slicing.

4. Add Nuts or Seeds for Extra Crunch

If you want to add healthy fats and crunch, top your bake with:

  • Chopped walnuts or almonds for extra protein.
  • Pumpkin or sunflower seeds for a nut-free option.

5. Meal Prep for the Week

  • Bake a batch and store in the fridge for up to 5 days.
  • Warm a slice each morning for a quick, ready-to-eat breakfast.

These small tips will make sure you get the perfect texture and flavor every time.

FAQs About Apple Oatmeal Bake

1. Can I make this recipe vegan?

Yes! Simply swap the yogurt for plant-based yogurt and replace eggs with flax eggs (1 tbsp ground flaxseed + 3 tbsp water per egg).

2. Can I use instant oats instead of rolled oats?

You can, but rolled oats provide a better texture and more fiber. Instant oats will make the bake softer and less structured.

3. How do I store and reheat this bake?

  • Store in an airtight container in the fridge for up to 5 days.
  • To reheat, warm in the microwave for 30 seconds or in the oven for 5 minutes at 180°C (350°F).

4. Can I freeze this for later?

Absolutely! Slice and freeze individual portions. Reheat directly from frozen in the microwave for 60 seconds.

5. What can I serve with this?

  • Top with almond or peanut butter for extra protein.
  • Pair with a cup of coffee or tea for a complete morning routine.

This bake is incredibly versatile, making it easy to customize and enjoy in different ways.

Final Thoughts – A Breakfast Worth Making Every Day

This Apple Oatmeal Bake is more than just a breakfast—it’s a healthy habit that supports your body, satisfies your cravings, and makes mornings easier.

✅ It’s delicious.
✅ It’s nutrient-dense.
✅ It’s easy to make.

Whether you’re on a weight-loss journey or just want a nutritious meal to start your day, this recipe is a must-try.

So the next time you’re looking for a quick, satisfying, and healthy breakfast, skip the processed cereals and make this instead—you won’t regret it!

Amal

Apple Oatmeal Bake – A Simple Breakfast That Transformed My Mornings

This Apple Oatmeal Bake is the perfect healthy breakfast that’s naturally sweet, fiber-rich, and incredibly satisfying. Made with oats, apples, bananas, and yogurt, this flour-free and sugar-free dish is a great way to start your day while supporting your weight-loss goals. It’s soft, warm, and packed with natural sweetness—like eating apple pie for breakfast, but without the guilt!
Prep Time 10 minutes
Cook Time 15 minutes
Total Time 25 minutes
Servings: 6 servings
Course: Breakfast
Cuisine: International

Ingredients
  

  • 1 cup oatmeal
  • 2 apples peeled and chopped
  • 2 bananas mashed
  • 2 eggs
  • 150 g yogurt
  • 1 teaspoon baking powder
  • Cinnamon to taste

Method
 

  1. Preheat oven to 180°C (350°F) and grease a baking dish.
  2. Mix wet ingredients – In a bowl, combine mashed bananas, eggs, yogurt, and cinnamon. Stir until smooth.
  3. Add dry ingredients – Mix in the oatmeal, baking powder, and chopped apples until fully incorporated.
  4. Transfer to a baking dish – Spread the mixture evenly.
  5. Bake for 25–30 minutes, or until golden brown and firm.
  6. Cool and serve – Let it rest for a few minutes before slicing. Enjoy warm or cold!

Notes

  • Use ripe bananas for extra natural sweetness.
  • Swap yogurt for plant-based yogurt to make it dairy-free.
  • Store in an airtight container in the fridge for up to 5 days or freeze for up to 2 months.
  • Serve with Greek yogurt, nut butter, or fresh fruit for an extra boost of flavor and protein.

Crispy Zucchini Fritters – A Healthy, Delicious, and Budget-Friendly Dish

Some recipes have a way of bringing back warm memories, and for me, zucchini fritters are one of them. Growing up, my grandmother would make these crispy, golden fritters every summer when zucchinis were in abundance. I remember watching her effortlessly grate the zucchini, mix it with eggs and flour, and drop spoonfuls of batter into a sizzling pan. The sound of the fritters frying, the delicious aroma filling the kitchen, and the first warm, crispy bite made it one of my favorite meals.

Now, every time I make them, I feel the same sense of comfort. They are simple yet incredibly flavorful, and best of all, they’re made with just a few pantry staples. Whether you’re looking for a quick snack, a light meal, or a side dish, these zucchini fritters are a perfect choice.

Why You’ll Love These Zucchini Fritters

These fritters aren’t just easy to make—they’re also nutritious, versatile, and budget-friendly. Here’s why they’re worth adding to your recipe collection:

  • Crispy on the outside, soft on the inside – The perfect balance of textures makes them irresistible.
  • Made with simple ingredients – You probably already have everything you need in your kitchen.
  • Healthy and nutritious – Zucchini is low in calories but high in fiber, vitamins, and antioxidants.
  • Quick to prepare – Ready in under 30 minutes, making them perfect for busy days.
  • Budget-friendly – Uses affordable, everyday ingredients.
  • Customizable – You can add cheese, herbs, or spices to change up the flavors.

These zucchini fritters are proof that healthy food can be incredibly tasty and satisfying.

Ingredients

IngredientQuantity
Zucchini4 medium
Salt1 teaspoon
Eggs, lightly beaten3–4
Green onions (scallions), finely chopped4
All-purpose flour1 cup
Baking powder1 teaspoon
Ground black pepper1/2 teaspoon
Olive oil, for frying2–3 tablespoons

Directions

  1. Prepare the zucchini – Grate the zucchini and sprinkle with salt. Let it sit for 10 minutes, then squeeze out the excess liquid.
  2. Mix the batter – In a bowl, combine the grated zucchini, eggs, green onions, flour, baking powder, and black pepper. Mix until well combined.
  3. Heat the oil – In a skillet, heat olive oil over medium heat.
  4. Fry the fritters – Scoop small portions of batter into the pan, flatten slightly, and cook for 2–3 minutes per side until golden brown.
  5. Drain and serve – Remove and place on a paper towel to absorb excess oil. Serve warm with yogurt or your favorite dipping sauce.

Nutritional Information (Per Serving, Approx.)

NutrientAmount
Calories150–180 kcal
Protein5–7 g
Fat7–9 g
Carbohydrates15–18 g
Fiber2–3 g
Sodium250–300 mg

Tips for Making the Best Zucchini Fritters

While this recipe is straightforward, a few small tricks will help you get the crispiest, most flavorful fritters every time.

1. Squeeze Out the Zucchini Well

Zucchini contains a lot of water, which can make the fritters soggy. After grating, sprinkle with salt and let it sit for a few minutes. Then, squeeze out as much liquid as possible using a clean kitchen towel or cheesecloth. The drier the zucchini, the crispier the fritters.

2. Use Fresh Ingredients

For the best flavor, use fresh zucchini and green onions. Fresh ingredients will enhance the taste and texture of the fritters.

3. Don’t Overmix the Batter

Mix just until everything is combined. Overmixing can make the fritters dense instead of light and crispy.

4. Heat the Oil Properly

If the oil is too hot, the fritters will burn on the outside before cooking through. If it’s too cold, they’ll absorb too much oil and become greasy. A medium heat is perfect—test with a small drop of batter; if it sizzles, the oil is ready.

5. Fry in Batches

Avoid overcrowding the pan. Cooking in small batches ensures that each fritter gets evenly browned and stays crispy.

6. Serve Immediately for Maximum Crispiness

Zucchini fritters taste best when eaten fresh. If making a large batch, keep them warm in the oven at 90°C (200°F) until ready to serve.

Delicious Variations to Try

One of the best things about this recipe is how easily customizable it is. Here are a few ways to switch things up:

1. Cheese Zucchini Fritters

  • Add 1/2 cup grated Parmesan or feta cheese to the batter for an extra savory kick.
  • Cheese makes them even more flavorful and adds a creamy texture inside.

2. Spicy Zucchini Fritters

  • Mix in chili flakes, cayenne pepper, or diced jalapeños for a spicy twist.
  • Serve with spicy yogurt or sriracha mayo for extra heat.

3. Herb-Infused Fritters

  • Add fresh herbs like parsley, dill, or cilantro to brighten the flavor.
  • A pinch of dried oregano or thyme also enhances the taste.

4. Gluten-Free Zucchini Fritters

  • Swap all-purpose flour for almond flour or chickpea flour for a gluten-free version.
  • This makes them even healthier and adds extra nutrients.

5. Oven-Baked or Air-Fried Fritters

  • Instead of frying, bake at 200°C (400°F) for 20–25 minutes, flipping halfway through.
  • For an even lighter option, air-fry at 180°C (350°F) for 12–15 minutes.

With so many variations, you’ll never get bored of these fritters!

How to Serve Zucchini Fritters

These fritters are delicious on their own, but they also pair well with different dips and side dishes. Here are some great serving ideas:

  • With Yogurt or Sour Cream – A simple dip of Greek yogurt with garlic, lemon juice, and herbs complements the fritters perfectly.
  • In a Wrap or Sandwich – Use them as a filling for pita bread or sandwiches with fresh veggies and a drizzle of tahini.
  • As a Side Dish – Serve alongside grilled meats, fish, or roasted vegetables for a complete meal.
  • With a Fresh Salad – A cucumber and tomato salad or a light arugula salad makes a refreshing pairing.

Whether served as a main dish, appetizer, or snack, these fritters are always a crowd-pleaser.

Storage & Reheating Tips

If you have leftovers (which is rare because they disappear fast!), here’s how to store and reheat them properly:

Refrigeration

  • Store in an airtight container for up to 3 days.
  • Reheat in a pan over medium heat for 2–3 minutes per side to keep them crispy.

Freezing

  • Freeze uncooked fritters by placing them on a baking sheet in a single layer. Once frozen, transfer them to a sealed freezer bag for up to 2 months.
  • To cook from frozen, thaw in the fridge overnight and fry as usual.

With these storage tips, you can always have a quick and healthy meal ready to go!

FAQs About Zucchini Fritters

1. Can I make zucchini fritters without eggs?

Yes! Replace eggs with flax eggs (1 tbsp ground flaxseed + 3 tbsp water per egg) or use chickpea flour to help bind the mixture.

2. How do I prevent my fritters from being soggy?

The key is squeezing out as much liquid as possible from the zucchini before mixing. This prevents excess moisture from making the batter too wet.

3. Can I bake these fritters instead of frying?

Absolutely! Bake at 200°C (400°F) for 20–25 minutes, flipping halfway, or air-fry at 180°C (350°F) for 12–15 minutes.

4. Can I add other vegetables?

Yes! Try mixing in grated carrots, potatoes, or sweet potatoes for added texture and flavor.

5. What’s the best way to reheat zucchini fritters?

For the crispiest results, reheat in a pan over medium heat for a couple of minutes per side. Avoid microwaving, as it can make them soft.

Final Thoughts – A Simple Yet Satisfying Dish

These Crispy Zucchini Fritters are proof that healthy food doesn’t have to be boring or expensive. They’re flavorful, nutritious, and easy to make, making them a perfect addition to any meal.

Next time you have extra zucchini on hand, try making these fritters—you’ll be amazed at how quick, delicious, and versatile they are!

Amal

Crispy Zucchini Fritters – A Healthy, Delicious, and Budget-Friendly Dish

These Crispy Zucchini Fritters are light, flavorful, and incredibly easy to make! With just a few simple ingredients, you get a golden, crispy outside and a soft, delicious inside. Perfect for breakfast, lunch, or as a healthy snack, these fritters are budget-friendly and packed with nutrients. Serve them with yogurt, sour cream, or your favorite dip for an irresistible meal!
Prep Time 10 minutes
Cook Time 15 minutes
Total Time 25 minutes
Servings: 10 –12 fritters
Course: Snack
Cuisine: International

Ingredients
  

  • 4 medium zucchini grated
  • 1 teaspoon salt
  • 3 –4 eggs lightly beaten
  • 4 green onions scallions, finely chopped
  • 1 cup all-purpose flour
  • 1 teaspoon baking powder
  • 1/2 teaspoon ground black pepper
  • 2 –3 tablespoons olive oil for frying

Method
 

  1. Prepare the zucchini – Grate the zucchini, sprinkle with salt, and let sit for 10 minutes. Squeeze out excess liquid.
  2. Make the batter – In a bowl, mix the zucchini with eggs, green onions, flour, baking powder, and black pepper. Stir until combined.
  3. Heat the oil – In a large skillet, heat olive oil over medium heat.
  4. Cook the fritters – Drop spoonfuls of batter into the pan, flatten slightly, and fry for 2–3 minutes per side until golden brown.
  5. Drain and serve – Remove and place on paper towels to absorb excess oil. Serve warm with yogurt or your favorite sauce.

Notes

  • For extra crispiness, squeeze out as much water as possible from the zucchini.
  • Add Parmesan or feta cheese for a richer flavor.
  • Use gluten-free flour for a gluten-free version.
  • Store in the fridge for up to 3 days or freeze for up to 2 months.

Melt-in-Your-Mouth Cheese and Spinach Pie – A Healthy and Satisfying Dish

Food has a way of creating memories, and for me, cheese and spinach pie is one of those dishes that instantly takes me back to my childhood. Growing up, my family loved making savory pies, especially on weekends when we had time to cook together. There was something special about the way the buttery crust came together, how the spinach wilted just right in the pan, and how the cheese melted into the filling, creating the perfect balance of texture and flavor.

One of the things I love most about this recipe is its simplicity. It requires just a handful of ingredients, yet the end result is rich, flavorful, and incredibly satisfying. Whether I’m making it for a weekend brunch, a light dinner, or as a meal-prep option for busy days, this pie never disappoints. It’s a dish that is both comforting and nutritious, making it a favorite for anyone looking for a wholesome yet indulgent meal.

If you’re someone who enjoys flaky, buttery crusts and creamy, savory fillings, this cheese and spinach pie will quickly become one of your go-to recipes.

Why You’ll Love This Cheese and Spinach Pie

This pie is more than just a meal—it’s a perfect balance of health and comfort. Here’s why it stands out:

  • Rich, creamy filling – A combination of cheese and spinach gives the pie a perfect melt-in-your-mouth texture.
  • Flaky, golden crust – The homemade dough is buttery and crisp, adding the perfect contrast to the filling.
  • Packed with nutrientsSpinach is rich in iron, vitamins, and antioxidants, while vegan cheese provides creaminess without dairy.
  • Easy to customize – You can add different herbs, spices, or extra vegetables to make it your own.
  • Perfect for any meal – Serve it for breakfast, lunch, or dinner, or even as a light snack with tea.

This is the kind of dish that you can enjoy guilt-free—delicious enough to feel indulgent, yet nutritious enough to be part of a balanced diet.

Tips for Making the Best Cheese and Spinach Pie

Even though this recipe is simple, a few small details can make a big difference in taste and texture.

1. Use Cold Butter for the Flakiest Crust

For a perfectly flaky crust, make sure the butter is cold and cubed before mixing it into the flour. This prevents the dough from becoming too soft and helps create those beautiful, crispy layers.

2. Let the Dough Rest

Once the dough is mixed, let it rest in the fridge for at least 20 minutes. This helps develop the flavor and makes the dough easier to roll out.

3. Cook the Spinach to Remove Excess Moisture

Spinach naturally contains a lot of water, which can make the pie soggy if not handled properly. Sautéing the spinach for a few minutes allows the water to evaporate, ensuring a firm, creamy filling.

4. Choose the Right Cheese

If you want a stronger, richer flavor, use a mix of vegan cheddar and mozzarella. If you prefer a milder taste, opt for a creamy plant-based ricotta or feta alternative.

5. Bake Until Golden Brown

The crust should be lightly golden and crisp, which usually takes about 25–30 minutes. If the edges start to brown too quickly, cover them with foil while the rest of the pie finishes baking.

How to Serve This Spinach and Cheese Pie

One of the best things about this pie is how versatile it is. It pairs well with many different dishes, making it easy to serve for any occasion.

1. As a Main Course

  • Serve with a side salad for a light yet satisfying meal.
  • Pair with roasted vegetables for extra flavor and nutrition.

2. As a Side Dish

  • Great alongside soups, stews, or grilled proteins.
  • Works well as a side for a Mediterranean-style mezze platter.

3. As a Snack or Breakfast

  • Enjoy cold or warm with a cup of tea or coffee.
  • Slice into small squares for an easy on-the-go snack.

No matter how you serve it, this pie is guaranteed to be a hit!

Storage & Reheating Tips

This pie stores well, making it great for meal prep. Here’s how to keep it fresh:

Refrigeration

  • Store leftovers in an airtight container in the fridge for up to 4 days.
  • Reheat in the oven at 160°C (320°F) for 10 minutes to keep the crust crispy.

Freezing

  • Freeze unbaked pie dough for up to 2 months. Thaw in the fridge before using.
  • Freeze baked pie slices in a sealed container for up to 3 months. Reheat directly in the oven.

With these storage tips, you can enjoy fresh, homemade pie anytime!

FAQs About Cheese and Spinach Pie

1. Can I use store-bought pastry dough?

Yes! If you’re short on time, pre-made pastry dough works just fine. However, homemade dough gives a flakier, richer flavor.

2. Can I make this pie completely vegan?

Absolutely! Just replace the egg with a flaxseed egg (1 tbsp ground flaxseed + 3 tbsp water) and use vegan butter and dairy-free cheese.

3. What if I don’t have fresh spinach?

Frozen spinach works well too! Just thaw and squeeze out excess water before using.

4. How can I make the filling creamier?

Add a tablespoon of plant-based yogurt or cashew cream for a richer texture.

5. Can I add extra ingredients?

Yes! Try mixing in mushrooms, sun-dried tomatoes, or caramelized onions for extra flavor.

Final Thoughts – A Recipe That Brings Comfort and Flavor

This Melt-in-Your-Mouth Cheese and Spinach Pie is the perfect balance of flavor, texture, and nutrition. Whether you’re looking for a quick weeknight dinner, a healthy meal-prep option, or a dish to impress guests, this recipe is a must-try.

With its crispy, flaky crust and creamy, savory filling, this pie proves that healthy food can be indulgent too. Every bite is filled with rich, cheesy goodness and the earthy taste of spinach, making it a dish you’ll come back to again and again.

So, the next time you’re craving something comforting yet wholesome, give this recipe a try—you won’t regret it!

Amal

Melt-in-Your-Mouth Cheese and Spinach Pie – A Healthy and Satisfying Dish

This Cheese and Spinach Pie is a flaky, buttery, and delicious savory pie packed with nutrient-rich spinach and creamy vegan cheese. With a crispy homemade crust and a rich, flavorful filling, this pie is the perfect healthy meal for breakfast, lunch, or dinner. Easy to make and full of wholesome ingredients, it’s a dish that’s both comforting and nutritious!
Prep Time 20 minutes
Cook Time 30 minutes
Total Time 50 minutes
Servings: 6 –8 servings
Course: Main Dish
Cuisine: Mediterranean

Ingredients
  

Dough:
  • 200 g wheat flour
  • 80 g butter cold and cubed
  • 1 tsp baking powder
  • 1 tsp sugar
  • 1/3 tsp salt
  • 1 egg
  • 1 –2 tbsp cold water
  • 1 tbsp lemon juice optional
Filling:
  • 200 g fresh spinach chopped
  • 150 g vegan cheese grated
  • 1 small onion finely chopped
  • 1 tbsp olive oil
  • 1/2 tsp black pepper
  • 1/2 tsp garlic powder
  • 1/3 tsp nutmeg optional

Method
 

  1. Prepare the dough – In a bowl, mix flour, baking powder, sugar, and salt. Add cold butter and rub it into the flour until crumbly.
  2. Form the dough – Add the egg, cold water, and lemon juice (if using). Knead until smooth, then wrap in plastic and refrigerate for 20 minutes.
  3. Prepare the filling – Heat olive oil in a pan, sauté onions until soft, then add spinach. Cook until wilted. Remove from heat and mix with vegan cheese, black pepper, garlic powder, and nutmeg.
  4. Assemble the pie – Roll out the dough and place it in a greased pie dish. Spread the spinach and cheese filling evenly over the dough.
  5. Bake – Preheat oven to 180°C (350°F) and bake for 25–30 minutes until golden brown.
  6. Cool and serve – Let the pie rest for 10 minutes before slicing.

Notes

  • To make it vegan, replace the egg with a flax egg (1 tbsp ground flaxseed + 3 tbsp water).
  • Swap vegan cheese for plant-based ricotta or feta for a different texture.
  • If using frozen spinach, thaw and squeeze out excess water before adding to the filling.
  • Store in the fridge for up to 4 days or freeze for up to 3 months.

Nutty Oatmeal & Fruit Cookies – The Guilt-Free Snack You’ll Want Every Day

For years, I struggled with finding the perfect snack—something healthy, naturally sweet, and satisfying without being loaded with refined sugar or processed ingredients. Store-bought options always seemed to have too much sugar, hidden preservatives, or unnecessary fillers, making me feel like I had to choose between taste and health.

That all changed the day I started experimenting with homemade oatmeal cookies. I wanted a recipe that was simple, nutritious, and naturally sweetened—something I could eat without guilt, any time of the day. After a few trials, I landed on this Nutty Oatmeal & Fruit Cookie recipe, and it became an instant favorite.

These cookies require no flour, no added sugar, and no butter, yet they are incredibly chewy, satisfying, and full of flavor. The sweetness comes from fruit, the crunch from nuts, and the fiber from oats, making them the perfect combination of texture and taste. Whether you need a quick breakfast, a pre-workout snack, or something to satisfy your sweet cravings, these cookies will never disappoint.

Now, they have become a regular part of my diet, and the best part? I never feel like I’m compromising on taste. They are so delicious that they disappear within minutes whenever I make them.

Why These Cookies Are a Game-Changer for Healthy Eating

Unlike traditional cookies, these are:

  • Made with all-natural ingredients – No refined sugar, flour, or processed additives.
  • High in fiber and protein – Keep you full longer and curb cravings.
  • Quick and easy to make – Just mix, shape, and bake in minutes.
  • Naturally sweetened – With bananas, apples, and dried fruit, so there’s no need for added sugar.
  • Perfect for weight loss – Low in calories, but rich in nutrients that fuel your body.

If you’re looking for a healthy cookie that tastes amazing, this is the only recipe you need.

Ingredients

IngredientQuantity
Oatmeal1 cup
Dried cranberries50g
Dried apricots, chopped50g
Nuts (almonds, walnuts, or pecans), chopped60g
Banana, mashed1
Apple, grated1
Oat flakes50g

Directions

  1. Preheat oven to 180°C (350°F) and line a baking sheet with parchment paper.
  2. Mix the wet ingredients – In a large bowl, combine mashed banana and grated apple until smooth.
  3. Add the dry ingredients – Stir in oatmeal, oat flakes, dried cranberries, chopped apricots, and nuts. Mix well until the ingredients are evenly combined.
  4. Form the cookies – Scoop small portions onto the baking sheet and flatten them slightly.
  5. Bake for 15–20 minutes or until the cookies turn golden brown.
  6. Cool and enjoy – Let them cool for a few minutes before serving.

Nutritional Information (Per Cookie, Approx.)

NutrientAmount
Calories90–120 kcal
Protein2–3 g
Fat4–6 g
Carbohydrates15–18 g
Fiber2–3 g
Natural Sugar6–8 g

Secrets to the Perfect Healthy Oatmeal Cookies

Although this recipe is incredibly simple, a few small tweaks can take it to the next level.

1. Use a Ripe Banana for Maximum Sweetness

The riper the banana, the sweeter your cookies will be. Spotty, overripe bananas work best because they blend easily and naturally sweeten the dough.

2. Don’t Overmix the Dough

Since these cookies don’t contain flour, overmixing isn’t a major concern, but stirring just until combined will keep them light and chewy.

3. Soak the Dried Fruit for Extra Moisture

If your dried cranberries or apricots are too firm, soak them in warm water for 5–10 minutes before adding them to the dough. This makes them juicier and enhances the texture.

4. Press the Cookies Lightly Before Baking

Since these cookies don’t contain baking soda or butter, they won’t spread much while baking. Gently flatten them before baking to ensure the perfect shape.

5. Let Them Cool for the Best Texture

These cookies are naturally soft and chewy, but letting them cool completely helps them firm up while keeping their moisture.

How to Enjoy These Healthy Cookies

These cookies are incredibly versatile and can be eaten any time of day. Here’s how to make the most of them:

1. Breakfast on the Go

  • Pair them with Greek yogurt and fresh fruit for a balanced morning meal.
  • Spread almond or peanut butter on top for extra protein.

2. A Pre- or Post-Workout Snack

  • The combination of healthy carbs and protein makes these cookies ideal for refueling after exercise.
  • Add chia or flaxseeds for an extra boost of omega-3s.

3. A Healthy Dessert Alternative

  • Drizzle with melted dark chocolate for an indulgent touch.
  • Serve with a scoop of banana “nice cream” for a guilt-free treat.

However you choose to enjoy them, these cookies never feel like a “diet” food—they’re just delicious, wholesome, and satisfying.

Storage & Meal Prep Tips

These cookies are perfect for meal prep and stay fresh for days.

Refrigeration

  • Store in an airtight container for up to 5 days.
  • For a fresh taste, reheat for 10 seconds in the microwave before eating.

Freezing

  • Freeze in a sealed container for up to 2 months.
  • Thaw overnight in the fridge or pop in the microwave for a quick snack.

Making a big batch and freezing some means you’ll always have a healthy snack ready when cravings strike.

FAQs About Healthy Oatmeal Cookies

1. Can I use instant oats instead of rolled oats?

Yes, but instant oats will make the cookies softer and less chewy. Rolled oats provide a better texture.

2. Can I make these cookies nut-free?

Absolutely! Just omit the nuts or replace them with seeds like sunflower or pumpkin seeds for a similar crunch.

3. How can I make these cookies vegan?

This recipe is already dairy-free, but to make it fully vegan:

  • Use a flaxseed or chia seed egg instead of regular eggs.
  • Ensure the dried fruit and nuts have no honey or animal-derived coatings.

4. What if I don’t have dried cranberries or apricots?

You can swap them for:

  • Raisins or chopped dates for extra sweetness.
  • Shredded coconut for a tropical twist.

5. Can I add protein powder to this recipe?

Yes! You can add 1–2 tablespoons of vanilla or unflavored protein powder to the mixture. If it makes the batter too dry, add a little extra mashed banana or a splash of milk.

Final Thoughts – The Perfect Healthy Cookie for Every Occasion

These Nutty Oatmeal & Fruit Cookies are proof that healthy eating doesn’t mean giving up on delicious treats. With their natural sweetness, wholesome ingredients, and satisfying crunch, they offer the perfect balance of taste and nutrition.

Whether you’re looking for:
✅ A quick breakfast
✅ A nutritious snack
✅ A healthy dessert alternative

These cookies fit the bill without compromise.

So the next time you want a sweet treat that’s good for you, skip the processed snacks and make a batch of these instead—you won’t believe how quick, easy, and delicious they are!

Amal

Nutty Oatmeal & Fruit Cookies – The Guilt-Free Snack You’ll Want Every Day

These Nutty Oatmeal & Fruit Cookies are the perfect guilt-free snack! Made with oats, dried fruit, nuts, banana, and apple, they are flour-free, sugar-free, and packed with nutrients. Soft, chewy, and naturally sweetened, these cookies are great for breakfast, a quick snack, or a healthy dessert. They are so delicious that they disappear in minutes!
Prep Time 10 minutes
Cook Time 15 minutes
Total Time 25 minutes
Servings: 10 -12 cookies
Course: Snack
Cuisine: International

Ingredients
  

  • 1 cup oatmeal
  • 50 g dried cranberries
  • 50 g dried apricots chopped
  • 60 g nuts such as almonds, walnuts, or pecans, chopped
  • 1 banana mashed
  • 1 apple grated
  • 50 g oat flakes

Method
 

  1. Preheat oven to 180°C (350°F) and line a baking sheet with parchment paper.
  2. Prepare the wet ingredients – In a mixing bowl, mash the banana and mix with the grated apple.
  3. Combine dry ingredients – Stir in the oatmeal, oat flakes, dried cranberries, chopped apricots, and nuts. Mix until well combined.
  4. Form the cookies – Scoop small portions onto the baking sheet and press lightly to flatten.
  5. Bake for 15–20 minutes until golden brown.
  6. Cool and enjoy – Let them rest for a few minutes before serving.

Notes

  • Use ripe bananas for natural sweetness.
  • Swap cranberries for raisins or apricots for dates for a different flavor.
  • Store in an airtight container for up to 5 days or freeze for up to 2 months.
  • Enjoy with Greek yogurt, peanut butter, or a cup of tea for a wholesome treat.

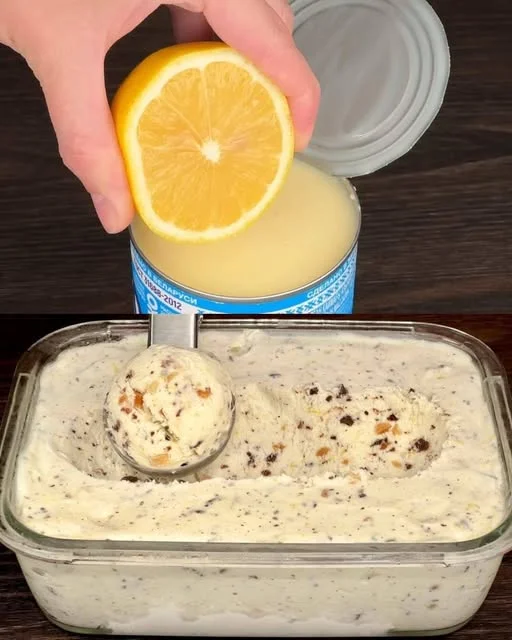
Creamy Lemon Delight – A Zesty Dessert That Disappears in Minutes

There’s something about the flavor of lemon that instantly takes me back to childhood. My grandmother used to make the most refreshing, creamy lemon desserts that would vanish from the table almost as soon as she served them. It was always the same scene: she’d prepare the dessert with a smile, letting me sneak a spoonful before it set in the fridge. The moment I tasted that smooth, citrusy sweetness, I knew something special was about to be served.

Fast forward to today, and I still find myself craving that perfect balance of tangy and sweet. That’s why this Creamy Lemon Delight has become a staple in my kitchen. It’s a dessert that requires minimal effort, no baking, and just a handful of ingredients, yet it delivers incredible flavor and a luxurious texture.

The best part? It takes just a few minutes to prepare, making it the perfect last-minute dessert when you want something special but don’t want to spend hours in the kitchen. Whether you’re hosting a dinner party, treating yourself after a long day, or looking for a fresh and light treat, this zesty, creamy dessert will never let you down.

Why You’ll Love This Dessert

This Creamy Lemon Delight is more than just a quick dessert—it’s an experience. Here’s why it’s worth making:

  • No Baking Required – Perfect for when you need a dessert without turning on the oven.
  • Few Ingredients, Big Flavor – Just a handful of pantry staples come together for a rich, creamy treat.
  • Light and Refreshing – The zesty lemon cuts through the sweetness, making it perfect for warm days.
  • Texture Perfection – A combination of whipped cream, condensed milk, and crunchy toppings creates the perfect bite.
  • Foolproof Recipe – Whether you’re a beginner or an experienced cook, this dessert is effortless to make.

If you love easy, creamy, citrusy desserts, this one will quickly become a favorite.

Ingredients

IngredientQuantity
Lemon1 pc
Sweetened condensed milk380g / 13.4 oz
Heavy cream500 ml / 16.7 fl oz
Chocolate60g / 2.1 oz
Peanuts60g / 2.1 oz

Directions

  1. Prepare the lemon mixture – Zest and juice the lemon, then set aside.
  2. Whip the heavy cream – In a large bowl, beat the heavy cream until soft peaks form.
  3. Incorporate the condensed milk – Gently fold in the sweetened condensed milk and lemon juice until well combined.
  4. Add texture – Chop the chocolate and peanuts, then fold them into the creamy mixture.
  5. Chill and serve – Transfer the mixture to a serving dish and refrigerate for at least 2 hours before serving.
  6. Garnish and enjoy – Top with extra chocolate shavings, peanuts, or lemon zest before serving.

Nutritional Information (Per Serving, Approx.)

NutrientAmount
Calories320–350 kcal
Protein6–8 g
Fat22–25 g
Carbohydrates28–32 g
Fiber1–2 g
Sugar20–24 g

Secrets to Making the Best Creamy Lemon Dessert

Although this recipe is incredibly simple, small adjustments can make a big difference in taste and texture.

1. Use Fresh Lemon Juice for Maximum Flavor

Bottled lemon juice lacks the brightness and depth of freshly squeezed lemon juice. Fresh lemons also provide zest, which enhances the flavor even more.

2. Don’t Overwhip the Cream

For a smooth, creamy consistency, whip the heavy cream just until soft peaks form. Overwhipping can make it grainy, while underwhipping won’t give the dessert enough structure.

3. Let It Chill Before Serving

While this dessert can be eaten right away, chilling it for at least 2 hours allows the flavors to meld and the texture to set properly.

4. Chop the Peanuts and Chocolate Finely

Smaller pieces blend better into the creamy base, ensuring every bite has a bit of crunch without overpowering the smooth texture.

5. Adjust the Sweetness to Your Taste

If you prefer a more tangy dessert, add extra lemon zest. For a sweeter version, drizzle some honey or add a little powdered sugar to the whipped cream.

These small tweaks will elevate your dessert from simple to unforgettable.

Delicious Variations to Try

This recipe is incredibly versatile, allowing you to experiment with flavors and textures. Here are a few fun ways to change it up:

1. Berry Lemon Bliss

  • Fold in fresh raspberries, blueberries, or strawberries for a fruity twist.
  • The natural sweetness of berries pairs beautifully with the tangy lemon flavor.

2. Chocolate Citrus Dream

  • Swap white chocolate for dark chocolate shavings to create a richer, deeper contrast with the lemon.
  • Add a pinch of cocoa powder to the cream mixture for a hint of chocolate flavor.

3. Tropical Lemon Delight

  • Replace peanuts with toasted coconut flakes for a tropical vibe.
  • Add a little pineapple juice to the cream mixture for an exotic touch.

4. Caramel Nut Crunch

  • Drizzle salted caramel over the top before serving.
  • Use crushed almonds or pecans instead of peanuts for a different texture.

Each version brings a new dimension to the dessert, making it easy to customize to your preference.

How to Serve This Dessert

This Creamy Lemon Delight is light yet indulgent, making it a perfect treat for different occasions. Here’s how to serve it:

  • In Elegant Glasses – Spoon it into small dessert glasses and top with extra chocolate and peanuts for a sophisticated touch.
  • As a Pie Filling – Pour the mixture into a graham cracker crust for a quick no-bake lemon pie.
  • With Cookies or Biscuits – Serve alongside buttery shortbread or biscotti for a satisfying crunch.
  • Frozen for a Summer Treat – Freeze it for a few hours for a refreshing frozen dessert.

However you serve it, this dessert will always impress.

Storage & Make-Ahead Tips

One of the best things about this dessert is that it stores well, making it great for meal prep or special occasions.

Refrigeration

  • Store in an airtight container for up to 3 days.
  • Stir before serving if separation occurs.

Freezing

  • Freeze in an airtight container for up to 1 month.
  • Thaw in the fridge for 20 minutes before serving, or enjoy it frozen like ice cream.

Making it ahead ensures you always have a quick, impressive dessert on hand.

FAQs About This Creamy Lemon Dessert

1. Can I use evaporated milk instead of condensed milk?

No, condensed milk is sweetened and much thicker, which gives this dessert its creamy texture. Evaporated milk won’t provide the same richness.

2. Can I make this dessert dairy-free?

Yes! Use coconut cream instead of heavy cream and sweetened condensed coconut milk for a dairy-free version.

3. What can I use instead of peanuts?

Almonds, walnuts, or even granola work well for added crunch.

4. How can I make it even more tangy?

Increase the lemon zest or add a little extra lemon juice to intensify the citrus flavor.

5. Can I serve this immediately?

Yes, but chilling it for at least 2 hours enhances the flavor and texture, making it even better.

Final Thoughts – A Simple Yet Luxurious Dessert

This Creamy Lemon Delight proves that you don’t need complicated ingredients or hours in the kitchen to create something truly special. With a perfect balance of tangy and sweet flavors, a silky-smooth texture, and a delightful crunch, this dessert is one you’ll find yourself making again and again.

Whether you’re serving it at a dinner party, enjoying it as a mid-week treat, or surprising your family with a quick dessert, this recipe is guaranteed to be a hit.

So the next time you need a fast, refreshing, and delicious dessert, give this recipe a try—you won’t believe how effortlessly it comes together!

Amal

Creamy Lemon Delight – A Zesty Dessert That Disappears in Minutes

This Creamy Lemon Delight is a smooth, zesty, and effortlessly delicious dessert that comes together in minutes. With the perfect balance of sweet, tangy, and creamy flavors, this no-bake treat is light, refreshing, and incredibly satisfying. Whether you’re looking for a quick dessert for guests or a simple treat to enjoy at home, this lemon-infused delight will disappear before you know it!
Prep Time 5 minutes
Cook Time 2 hours
Total Time 2 hours 5 minutes
Servings: 6 –8 servings
Course: Dessert
Cuisine: International

Ingredients
  

  • 1 lemon zested and juiced
  • 380 g 13.4 oz sweetened condensed milk
  • 500 ml 16.7 fl oz heavy cream
  • 60 g 2.1 oz chocolate, chopped
  • 60 g 2.1 oz peanuts, chopped

Method
 

  1. Whip the cream – In a large mixing bowl, beat the heavy cream until soft peaks form.
  2. Combine ingredients – Gently fold in the condensed milk, lemon zest, and lemon juice, mixing until smooth and creamy.
  3. Add texture – Stir in the chopped chocolate and peanuts for extra crunch.
  4. Chill – Transfer the mixture to a serving dish and refrigerate for at least 2 hours to allow the flavors to blend and the texture to set.
  5. Serve and enjoy – Garnish with additional chocolate shavings, crushed peanuts, or extra lemon zest before serving.

Notes

  • For a stronger lemon flavor, increase the lemon zest or add a little extra juice.
  • Swap peanuts for almonds or hazelnuts for a different flavor.
  • To make it dairy-free, use coconut cream and condensed coconut milk instead.
  • Store in the refrigerator for up to 3 days or freeze for a firmer, ice-cream-like texture.

Healthy Oatmeal & Fruit Cake – A Quick and Nutritious Guilt-Free Treat

For years, I believed that desserts and healthy eating couldn’t coexist. Cakes were always associated with indulgence, sugar, and guilt—until I discovered this Healthy Oatmeal & Fruit Cake.

It all started when I was trying to cut back on refined sugar and flour, but I still craved something sweet. One day, I experimented with oatmeal, bananas, and dried fruit, hoping to create something both satisfying and nourishing. The result? A moist, naturally sweet cake packed with fiber, protein, and healthy fats—without a single gram of refined sugar or white flour.

I remember the first time I made it. The warm aroma of bananas, vanilla, and toasted almonds filled the kitchen, and I could hardly wait for it to cool before slicing into it. One bite, and I was hooked. Soft, chewy, and bursting with the sweetness of dried fruit, it tasted just as indulgent as a traditional cake—but without the guilt.

Now, this cake is a regular part of my diet. It’s a perfect breakfast, post-workout snack, or afternoon pick-me-up. The best part? It’s so easy to make that I can have it ready in minutes whenever I need something healthy and delicious.

If you’re looking for a way to enjoy cake without compromising your health goals, this is the recipe for you.

Why This Cake is a Game-Changer for a Healthy Diet

This cake has gained popularity for a reason—it’s easy, nutritious, and incredibly satisfying. Here’s why you’ll love it:

  • No refined sugar or flour – Made with natural ingredients, so you can enjoy guilt-free sweetness.
  • Rich in fiber and protein – Keeps you full longer and prevents energy crashes.
  • Quick and easy – Ready in 5 minutes with minimal prep.
  • Supports weight loss – Packed with nutrients, not empty calories, helping you maintain a balanced diet.
  • Versatile and customizable – Swap or add ingredients to suit your taste.

This is not just a dessert—it’s a healthy habit in cake form!

Ingredients

IngredientQuantity
Oatmeal1 cup
Milk150 ml
Bananas, mashed2
Eggs, beaten2 (wash before using)
VanillinA pinch
Cranberries50 g
Dried apricots, chopped50 g
Almond flakes30 g
Baking powder1 teaspoon

Directions

  1. Preheat oven to 180°C (350°F) and grease a baking dish or line it with parchment paper.
  2. Mix wet ingredients – In a large bowl, combine mashed bananas, beaten eggs, milk, and vanillin. Stir until smooth.
  3. Add dry ingredients – Mix in oatmeal, baking powder, dried apricots, cranberries, and almond flakes. Stir until well combined.
  4. Transfer to a baking dish – Spread the batter evenly in the prepared dish.
  5. Bake for 25–30 minutes – Check with a toothpick; it should come out clean.
  6. Cool and serve – Let the cake cool slightly before slicing. Enjoy as a healthy snack or breakfast!

Nutritional Information (Per Serving, Approx.)

NutrientAmount
Calories180–200 kcal
Protein6–8 g
Fat5–7 g
Carbohydrates30–35 g
Fiber4–5 g
SugarNatural only

Secrets to Making the Perfect Healthy Oatmeal Cake

Even though this cake is incredibly simple, a few small adjustments can make it even better.

1. Use Ripe Bananas for Natural Sweetness

The riper the bananas, the sweeter the cake. No need for added sugar—let nature do the work!

2. Don’t Overmix the Batter

This cake doesn’t need traditional flour, so overmixing can make it dense. Stir just until everything is combined.

3. Soak the Dried Fruit for Extra Juiciness

For a softer, more flavorful texture, soak the cranberries and chopped apricots in warm water for 10 minutes before adding them to the batter.

4. Bake Until Golden Brown

Because there’s no refined flour, this cake might not rise like a traditional cake. Instead, watch for a golden brown color and a slightly firm texture.

5. Let It Cool Before Slicing

This cake is naturally moist. Letting it cool helps it set properly so that it slices cleanly.

Ways to Enjoy This Cake

One of the best things about this recipe is how versatile it is. Here are some delicious ways to enjoy it:

1. Breakfast Boost

  • Serve warm with Greek yogurt and fresh berries for a balanced morning meal.
  • Spread a little almond or peanut butter on top for extra protein.

2. Post-Workout Snack

  • Pair it with a protein shake for a muscle-repairing, energy-boosting treat.
  • Add chia seeds or flaxseeds to the batter for an omega-3 boost.

3. Healthy Dessert Alternative

  • Drizzle with a bit of honey or dark chocolate for a naturally sweet treat.
  • Serve with a scoop of banana “nice cream” for a dairy-free dessert.

With so many ways to enjoy it, this cake never gets boring!

Storage & Meal Prep Tips

This cake is perfect for meal prep, making healthy eating even easier.

Refrigeration

  • Store in an airtight container for up to 5 days.
  • Reheat for 15 seconds in the microwave for a freshly baked taste.

Freezing

  • Slice and freeze individually in a sealed container for up to 2 months.
  • Thaw overnight or warm in the microwave before eating.

Having a batch of this cake ready means you always have a healthy snack on hand!

FAQs About This Healthy Cake

1. Can I make this cake gluten-free?

Yes! Oats are naturally gluten-free, but if you’re sensitive, use certified gluten-free oats to avoid cross-contamination.

2. Can I use a plant-based milk alternative?

Absolutely! Almond, coconut, oat, or soy milk all work well in this recipe.

3. How can I make this cake even higher in protein?

You can:

  • Add a scoop of protein powder (vanilla or unflavored).
  • Replace half of the milk with Greek yogurt for extra protein.
  • Mix in chopped nuts or seeds for added nutrients.

4. What can I use instead of bananas?

If you’re not a fan of bananas, try replacing them with:

  • Unsweetened applesauce (1/2 cup per banana)
  • Mashed sweet potato for a heartier texture

5. Can I make this in the microwave?

Yes! Pour the batter into a microwave-safe mug or dish and cook for 2–3 minutes until set. This makes a quick single-serving cake!

Final Thoughts – A Healthy Cake You Can Enjoy Anytime

This Healthy Oatmeal & Fruit Cake is proof that you don’t have to give up sweets to eat well. With wholesome ingredients, natural sweetness, and zero refined sugar or flour, this cake is a delicious way to stay on track with your health goals.

Whether you’re trying to lose weight, eat clean, or simply enjoy a nourishing snack, this cake fits perfectly into any lifestyle. It’s easy to make, packed with flavor, and endlessly versatile—so there’s no reason not to try it!

So next time you crave something sweet, skip the processed treats and bake this instead. You’ll love how it nourishes your body while satisfying your cravings—guilt-free!

Amal

Healthy Oatmeal & Fruit Cake – A Quick and Nutritious Guilt-Free Treat

This Healthy Oatmeal & Fruit Cake is the perfect way to enjoy a sweet treat without the guilt! Made with oatmeal, bananas, dried fruit, and almonds, this cake is flour-free, sugar-free, and packed with nutrients. It’s soft, naturally sweet, and ready in just minutes—perfect for breakfast, a post-workout snack, or a light dessert. If you’re looking for a healthy and delicious alternative to traditional cakes, this is the recipe for you!
Prep Time 5 minutes
Cook Time 25 minutes
Total Time 30 minutes
Servings: 6 –8 servings
Course: Breakfast
Cuisine: International

Ingredients
  

  • 1 cup oatmeal
  • 150 ml milk
  • 2 bananas mashed
  • 2 eggs beaten (wash eggs before use)
  • A pinch of vanillin
  • 50 g cranberries
  • 50 g dried apricots chopped
  • 30 g almond flakes
  • 1 teaspoon baking powder

Method
 

  1. Preheat oven to 180°C (350°F) and grease a baking dish or line it with parchment paper.
  2. Mix wet ingredients – In a bowl, combine mashed bananas, eggs, milk, and vanillin. Stir until well mixed.
  3. Add dry ingredients – Mix in the oatmeal, baking powder, cranberries, dried apricots, and almond flakes. Stir until combined.
  4. Transfer to a baking dish – Pour the mixture into the prepared dish, spreading it evenly.
  5. Bake for 25–30 minutes – Check with a toothpick; if it comes out clean, the cake is ready.
  6. Cool and serve – Let the cake cool slightly before slicing. Enjoy it warm or chilled!

Notes

  • Use ripe bananas for extra natural sweetness.
  • Swap cranberries for raisins or almond flakes for walnuts for a different flavor.
  • To make it dairy-free, replace milk with almond or oat milk.
  • Store in an airtight container in the fridge for up to 5 days or freeze for up to 2 months.

Soft & Fluffy Skillet Bread – A Quick and Delicious Bread for Any Time of Day

Bread has always been a comfort food in my home. There’s something about the smell of fresh, warm bread that makes everything feel a little better. Growing up, I remember watching my grandmother effortlessly prepare the softest, most delicious bread in a matter of minutes—no oven, no complicated steps, just simple ingredients and a hot pan.

I would sit by the kitchen table, watching as she mixed warm milk with a little yogurt, oil, and a pinch of sugar and salt. She never measured anything, yet somehow, the dough always came out perfectly soft and pliable. After a quick rest, she’d roll out the dough, place it on a hot skillet, and within minutes, the bread would puff up, forming golden brown spots. The best part was spreading a little butter on top while it was still warm, letting it melt into every soft, pillowy bite.

Now, every time I make this quick skillet bread, I feel like I’m bringing a piece of my childhood into my kitchen. It’s a recipe that doesn’t require hours of rising or any fancy equipment—just a few pantry staples and a little love. Whether you enjoy it for breakfast, alongside tea, or as a side for your favorite meal, this bread is guaranteed to become a go-to recipe in your home too.

Why This Bread Is So Popular

This skillet bread is a lifesaver when you need fresh bread fast. It’s:

  • Quick and easy – No yeast, no waiting for dough to rise, and no baking required.
  • Made with simple ingredients – Everything you need is already in your kitchen.
  • Versatile – Serve it with butter and jam for breakfast, with soup for lunch, or as a wrap for sandwiches.
  • Soft and fluffy – Despite its simplicity, the combination of warm milk and yogurt creates a tender, airy texture.
  • Cooked in a pan – Perfect for those who don’t have an oven or just want a quicker alternative to traditional bread.

If you’ve never made homemade bread before, this is the perfect place to start.

Ingredients

IngredientQuantity
Sugar1 teaspoon (5 g)
Salt1 teaspoon (5 g)
Vegetable oil1 tablespoon (10 ml)
Yogurt1 tablespoon (20 g)
Warm milk1 glass (200 ml)

Directions

  1. Mix the wet ingredients – In a bowl, combine warm milk, yogurt, vegetable oil, sugar, and salt. Stir well.
  2. Gradually add flour – Mix in enough flour until a soft, non-sticky dough forms. Knead for about 5 minutes until smooth.
  3. Rest the dough – Cover and let it rest for 10 minutes to allow the gluten to relax.
  4. Shape the bread – Divide the dough into portions and roll into thin rounds.
  5. Cook on a skillet – Heat a dry pan over medium heat and cook each piece for 2–3 minutes per side, until golden brown with air pockets.
  6. Serve warm – Enjoy as a side, with tea, or as a wrap for your favorite fillings.

Nutritional Information (Per Serving, Approx.)

NutrientAmount
Calories120–150 kcal
Protein3–5 g
Fat4–6 g
Carbohydrates18–22 g
Fiber1 g
Sodium200–250 mg

Secrets to Making the Best Skillet Bread

Even though this recipe is simple, a few small tricks can make a big difference in achieving the best texture and flavor.

1. Use Warm Milk for a Soft Dough

Milk adds richness to the dough, and using it warm (not hot) helps the ingredients blend together smoothly. This keeps the bread soft and fluffy.

2. Rest the Dough for a Few Minutes

Even though this bread doesn’t need yeast, letting the dough rest for 10–15 minutes helps relax the gluten, making it easier to roll out and giving the bread a better texture.

3. Don’t Roll It Too Thin

For soft, pillowy bread, roll the dough out to about 1/4 inch thick. If it’s too thin, it won’t be as fluffy. If you want crispier bread, roll it slightly thinner.

4. Cook on Medium Heat

A hot skillet is key to getting those beautiful golden brown spots. However, if the heat is too high, the bread will burn on the outside before it fully cooks inside.

5. Brush with Butter for Extra Flavor

Brushing the warm bread with butter right after cooking adds a delicious richness and keeps it from drying out. You can also sprinkle it with herbs, garlic, or a little sea salt for extra flavor.

Different Ways to Enjoy This Bread

One of the best things about this quick skillet bread is how versatile it is. Here are a few delicious ways to serve it:

1. Classic Buttered Bread

Simply brush with butter and enjoy warm. Add a drizzle of honey or jam for a sweet twist.

2. Perfect Side for Soups and Stews

This bread is perfect for dipping into warm soups, stews, or curries, soaking up all the delicious flavors.

3. Quick Sandwich Wraps

Use it as a wrap for grilled meats, roasted vegetables, or fresh salad fillings. It’s soft and pliable, making it a great alternative to tortillas.

4. Cheese-Stuffed Skillet Bread

Before cooking, add a thin layer of shredded cheese between two rolled-out pieces of dough. Press the edges to seal and cook as usual for a gooey, cheesy flatbread.

5. Garlic and Herb Bread

Mix minced garlic, melted butter, and fresh herbs together and brush over the warm bread for a savory garlic bread version.

With so many ways to enjoy it, this bread will never get boring!

Storage & Reheating Tips

If you have leftovers (which is rare because it’s so good!), here’s how to keep your bread fresh:

Storing at Room Temperature

  • Keep in an airtight container or wrap in a clean cloth for up to 2 days.

Refrigeration

  • Store in an airtight container for up to 5 days. Warm it up before serving for the best texture.

Freezing

  • Freeze cooked bread in a zip-top bag with parchment paper between each piece for up to 2 months.
  • Reheat directly in a dry pan or microwave for 30 seconds before serving.

FAQs About This Quick Skillet Bread

1. Can I use water instead of milk?

Yes, but milk makes the bread softer and richer. If using water, consider adding a tablespoon of oil for extra moisture.

2. Can I make this bread vegan?

Absolutely! Simply replace milk with plant-based milk (such as almond or oat milk) and use vegan yogurt.

3. Why is my bread too dry?

If your bread feels dry or tough, it may have been rolled too thin or cooked on too high heat. Also, brushing with a little butter or oil after cooking helps keep it soft.

4. Can I add whole wheat flour instead of all-purpose flour?

Yes! Whole wheat flour adds a nutty flavor and more fiber, but the bread will be a little denser. Try using half whole wheat and half all-purpose flour for the best texture.

5. Can I make the dough ahead of time?

Yes! You can prepare the dough and store it in the fridge for up to 24 hours. Just bring it to room temperature before rolling and cooking.

Final Thoughts – A Quick and Easy Bread for Any Occasion

This Soft & Fluffy Skillet Bread is proof that you don’t need yeast, an oven, or hours of waiting to enjoy delicious homemade bread. Whether you’re having it for breakfast, tea time, or as a side to your favorite meal, this recipe is quick, simple, and incredibly satisfying.

With just a handful of ingredients and a skillet, you can have warm, fresh bread in minutes. So the next time you’re craving bread but don’t want the hassle of baking, try this recipe—it just might become your new favorite go-to bread!

Amal

Soft & Fluffy Skillet Bread – A Quick and Delicious Bread for Any Time of Day

This Soft & Fluffy Skillet Bread is the perfect solution when you need fresh bread fast! Made with simple pantry ingredients and cooked in a pan, it’s light, tender, and incredibly versatile. Whether served for breakfast, as a side with soup, or as a wrap, this quick and easy bread is soft on the inside, golden on the outside, and full of flavor—all without yeast or an oven!
Prep Time 10 minutes
Cook Time 15 minutes
Total Time 25 minutes
Servings: 6 –8 pieces
Course: Side Dish
Cuisine: International

Ingredients
  

  • 1 teaspoon 5 grams sugar
  • 1 teaspoon 5 grams salt
  • 1 tablespoon 10 ml vegetable oil
  • 1 tablespoon 20 grams yogurt
  • 1 glass 200 ml warm milk
  • 2 ½ to 3 cups all-purpose flour adjust as needed

Method
 

  1. In a bowl, whisk together the warm milk, yogurt, vegetable oil, sugar, and salt until combined.
  2. Gradually add the flour while mixing, until a soft dough forms. Knead for about 5 minutes until smooth.
  3. Cover and let the dough rest for 10–15 minutes.
  4. Divide the dough into equal portions and roll each piece into a thin, round shape.
  5. Heat a dry skillet over medium heat. Cook each flatbread for 2–3 minutes per side, until golden brown spots appear.
  6. Brush with melted butter or olive oil for extra flavor, then serve warm.

Notes

  • Use whole wheat flour for a healthier alternative, but add extra liquid if needed.
  • Brush with garlic butter or sprinkle with herbs for extra flavor.
  • Store leftovers in an airtight container for up to 3 days or freeze for up to 2 months.
  • To reheat, warm in a dry skillet or microwave for 30 seconds.

Stay Connected

Get recipes via email: