There’s something incredibly comforting about the scent of potatoes sizzling in a pan. It reminds me of childhood mornings when my grandmother would whip up something magical with whatever ingredients she had on hand. She didn’t follow strict recipes—she simply cooked with love, intuition, and whatever was available in the kitchen.
One of my favorite memories is waking up to the sound of a grater scraping against a wooden cutting board. That meant something delicious was on its way. The dish she made wasn’t fancy, but it had everything a perfect meal needed—crispy edges, soft and hearty insides, and a flavor that lingered long after the last bite.
This recipe follows that same philosophy: simple ingredients, minimal effort, and a satisfying result. It’s cheaper than ordering pizza, easier than making dough, and flexible enough to suit different tastes. Whether you’re a student looking for an affordable meal, a busy parent needing a quick dinner, or just someone craving comfort food, this dish delivers.
Why You’ll Love This Recipe
1. Budget-Friendly and Accessible
With only a handful of inexpensive ingredients, this dish is proof that great food doesn’t have to cost a fortune. Potatoes, onions, and carrots are pantry staples in many homes, making this a perfect recipe for those moments when you need something delicious but don’t want to make an extra trip to the store.
2. Quick and Easy to Prepare
Forget waiting for dough to rise or kneading endlessly. The beauty of this recipe lies in its simplicity—just grate, mix, and cook. Within 30 minutes, you’ll have a golden, crispy dish that rivals anything you’d order from a restaurant.
3. Versatile and Customizable
This dish is like a blank canvas—you can add whatever flavors you like. Throw in cheese for extra richness, swap out the chives for parsley, or even add a pinch of chili flakes for a bit of heat. You can make it gluten-free by using a different type of flour or even turn it into a protein-packed meal by adding shredded chicken or beans.
4. Perfect for Any Occasion
Whether you’re making a quick breakfast, a side dish for dinner, or even a midnight snack, this recipe fits the bill. It’s hearty enough to stand alone but also pairs beautifully with soups, salads, or grilled meats.
Ingredients
| Ingredient | Quantity |
|---|---|
| Potatoes (grated) | 3 large |
| Onion (finely chopped) | 1 |
| Carrot (grated) | 1 |
| Pepper (chopped) | 1 |
| Salt | To taste |
| Chives (chopped) | As desired |
| Eggs | 3 |
| Milk | 300 ml |
| Wholemeal Flour | 200 g |
| Baking Powder | 2 tsp |
Directions
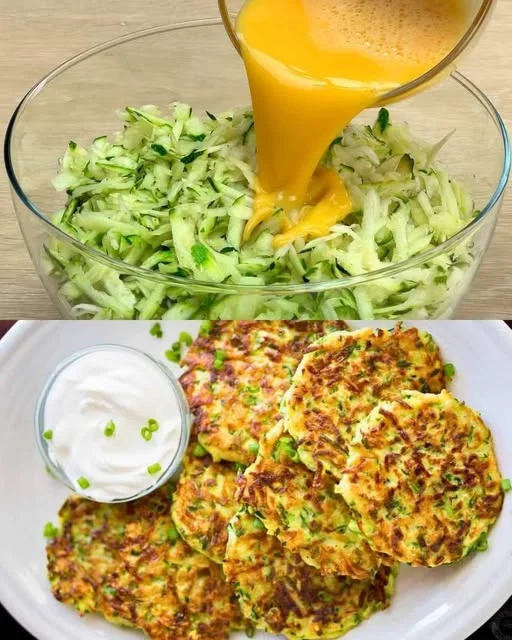
- Prepare the Vegetables:
- Grate the potatoes and carrot, then squeeze out excess liquid.
- Finely chop the onion and pepper.
- Mix the Dry Ingredients:
- In a bowl, combine wholemeal flour, baking powder, and salt.
- Combine Wet Ingredients:
- In a separate bowl, beat the eggs and mix with the milk.
- Create the Batter:
- Add the grated vegetables and chives to the egg-milk mixture.
- Gradually stir in the dry ingredients until well combined.
- Cook to Perfection:
- Heat a pan with a little oil.
- Pour the batter into small portions and cook on medium heat until golden brown on both sides.
- Serve and Enjoy:
- Best served warm with sour cream, yogurt, or your favorite dip!
Nutritional Information
| Nutrient | Amount per Serving |
|---|---|
| Calories | ~250 kcal |
| Protein | ~9 g |
| Carbohydrates | ~40 g |
| Fats | ~6 g |
| Fiber | ~5 g |
Common Questions About This Recipe
Can I Prepare This Dish in Advance?
Yes! You can prepare the batter ahead of time and store it in the refrigerator for up to 24 hours. Just give it a good stir before cooking, as the ingredients may settle. If you have leftovers, they can be stored in an airtight container and reheated in a pan or oven for the best texture.
Can I Make This Recipe Gluten-Free?
Absolutely. Swap out the wholemeal flour for a gluten-free alternative like rice flour, oat flour, or a gluten-free blend. The texture might be slightly different, but the flavor remains just as delicious.
What Can I Use Instead of Eggs?
If you’re looking for an egg-free version, you can substitute eggs with a flaxseed or chia seed mixture (1 tablespoon of ground flaxseed or chia seeds mixed with 3 tablespoons of water per egg). Mashed potatoes or yogurt can also help bind the ingredients together.
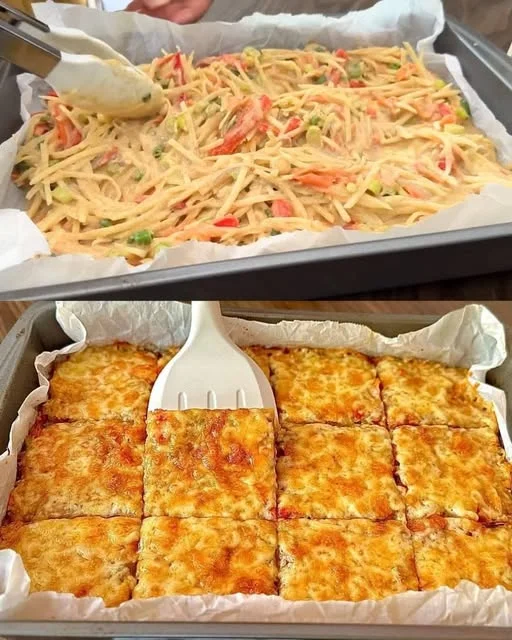
Can I Bake This Instead of Frying?
Yes, for a healthier alternative, you can bake the mixture in a greased muffin tin or spread it onto a baking sheet and bake at 375°F (190°C) for about 20-25 minutes until golden brown.
What Are the Best Toppings or Side Dishes?
This dish pairs well with a variety of toppings and sides. Some favorites include:
- Sour Cream or Greek Yogurt – Adds a creamy contrast to the crispy texture.
- Fresh Herbs – Chopped parsley, dill, or cilantro enhance the flavor.
- Cheese – A sprinkle of grated cheese makes it even more indulgent.
- Avocado or Guacamole – Adds creaminess and a fresh twist.
- Soup or Salad – Serve as a side for a complete meal.
Nutritional Benefits of This Recipe
While this dish is undeniably delicious, it also has several health benefits:
- Potatoes: A great source of fiber, vitamin C, and potassium. Contrary to popular belief, when prepared healthily, potatoes can be a nutritious part of any diet.
- Carrots: Packed with beta-carotene, which supports eye health and immunity.
- Onions: Contain antioxidants and compounds that promote heart health.
- Wholemeal Flour: Offers more fiber than refined flour, keeping you full for longer.
- Eggs: Provide protein and essential nutrients like choline and vitamin B12.
If you want to make it even healthier, consider swapping out some of the flour for ground oats or adding spinach for extra nutrients.
The Magic of ASMR Cooking
Cooking is not just about making food—it’s an experience. The sound of the grater scraping against the potatoes, the soft whisking of eggs and milk, the gentle sizzle as the batter hits the pan—these small details create a sensory experience that can be surprisingly soothing.
ASMR (Autonomous Sensory Meridian Response) cooking videos have gained popularity for this exact reason. The calming sounds of chopping, mixing, and sizzling can be therapeutic, making cooking feel less like a chore and more like a moment of mindfulness. So, the next time you make this dish, take a moment to enjoy the process—the sounds, the textures, and the transformation of simple ingredients into something delicious.
Conclusion: A Dish to Keep in Your Back Pocket
This recipe is proof that you don’t need fancy ingredients or complicated techniques to make a satisfying meal. Whether you’re making it for yourself, your family, or even guests, it’s a dish that never disappoints.
More than just food, it’s a reminder that some of the best meals come from simple, humble beginnings. Just like my grandmother’s cooking, it’s about resourcefulness, creativity, and most importantly, the joy of sharing something made with love.
So, the next time you’re wondering what to cook, skip the pizza delivery and grate those three potatoes instead. You might just discover a new favorite.
Easier Than Pizza! Just Grate 3 Potatoes – A Budget-Friendly Comfort Dish
Ingredients
Method
- Prepare the Vegetables: Grate the potatoes and carrot, then squeeze out excess moisture using a clean kitchen towel. Chop the onion and pepper finely.
- Mix the Batter: In a large bowl, whisk the eggs and milk together. Stir in the grated vegetables, chopped chives, salt, and any additional seasonings.
- Incorporate Dry Ingredients: Gradually add the wholemeal flour and baking powder to the mixture, stirring until well combined. The batter should be slightly thick but pourable.
- Cook the Patties: Heat a pan over medium heat and add a small amount of oil. Spoon the batter onto the pan, forming small rounds. Cook for about 3–4 minutes on each side, or until golden brown and crispy.
- Serve and Enjoy: Remove from the pan and let them rest on a paper towel to absorb excess oil. Serve warm with sour cream, yogurt, or your favorite dipping sauce.
Notes
- Texture Tip: Removing excess moisture from the potatoes helps achieve a crispier result.
- Storage: Leftovers can be stored in an airtight container in the fridge for up to 3 days. Reheat in a pan or oven for the best texture.
- Customization: Feel free to add cheese, herbs, or even cooked meat for extra flavor.
- Baking Alternative: If you prefer a healthier option, bake at 375°F (190°C) for 20-25 minutes until golden brown.