Slow-Roasted Barbecue Brisket Recipe for Perfect Flavor

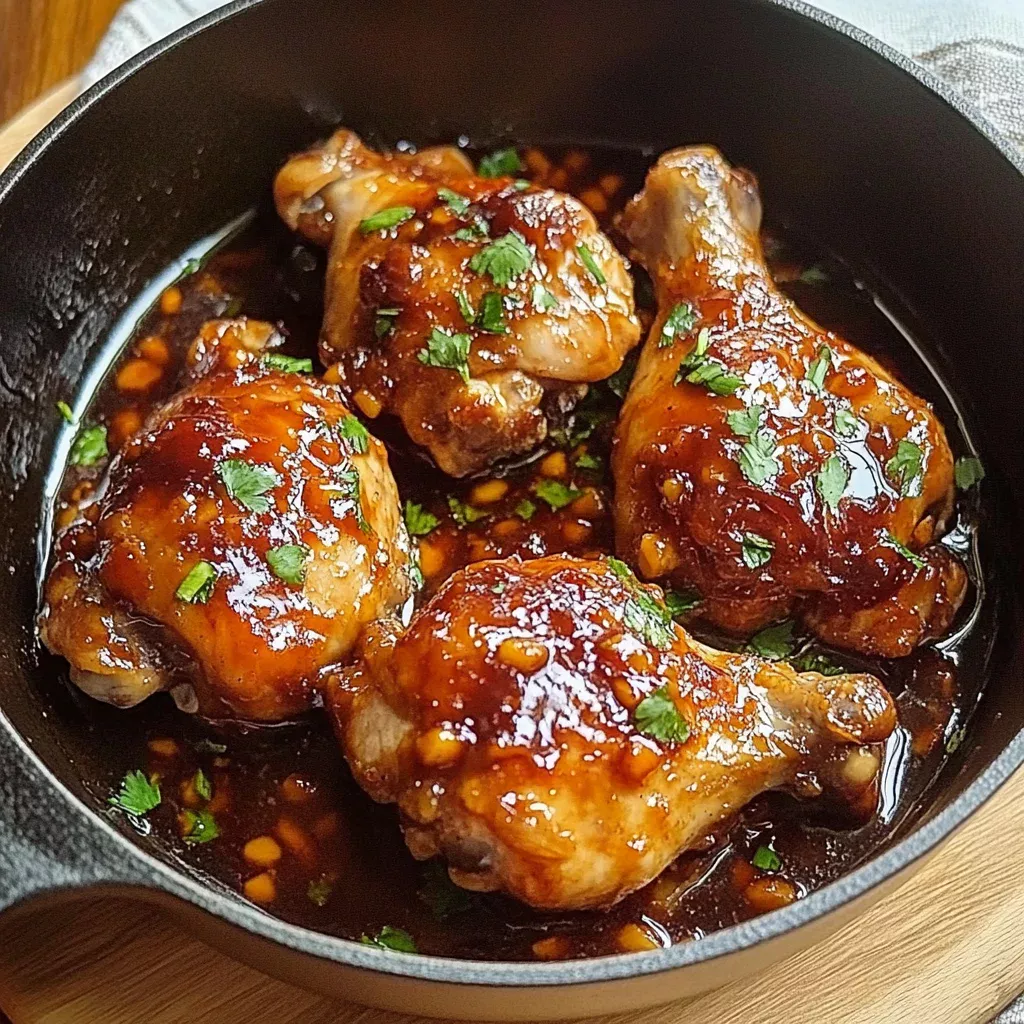
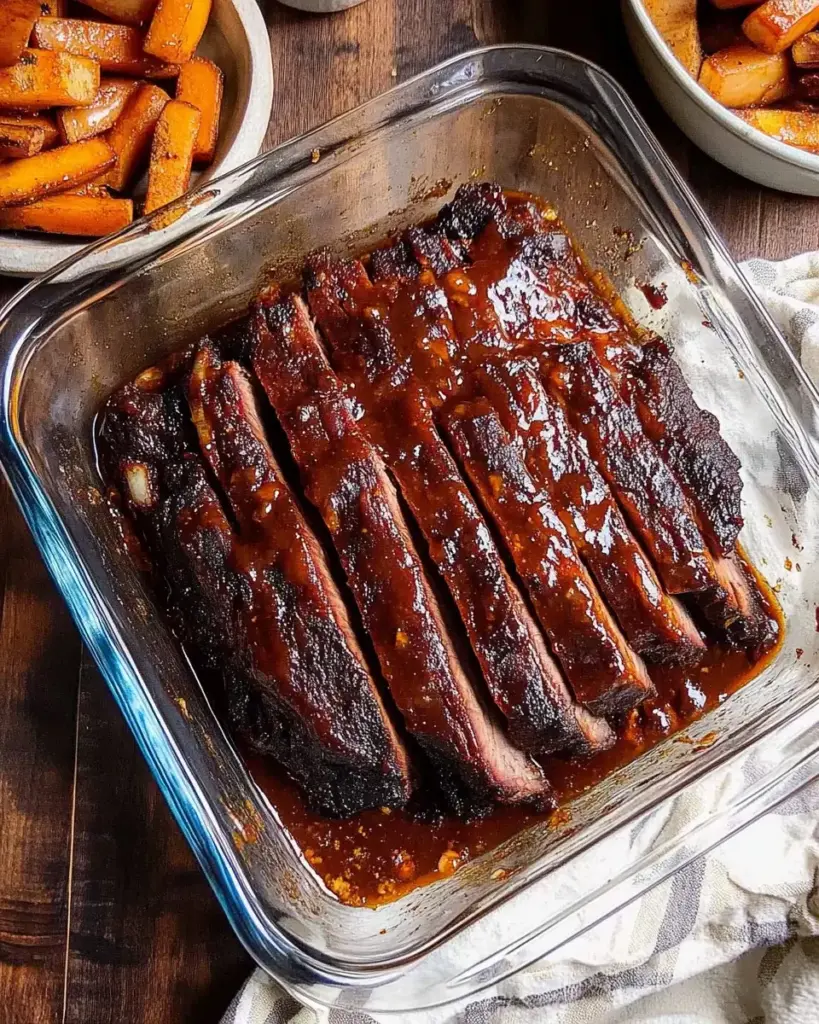
Slow-Roasted Barbecue Brisket Recipe is a true delight for meat lovers. This dish is not just a meal; it’s an experience that brings family and friends together. With its rich, smoky flavor and juicy tenderness, it’s no wonder this recipe has become a favorite at gatherings and celebrations.

What Makes This Recipe Special?

What sets this brisket recipe apart? First, it’s all about the slow cooking process. Cooking the brisket at a low temperature allows the meat to become incredibly tender. The spice rub adds a burst of flavor that seeps into every bite. Plus, the final touch of barbecue sauce caramelizes beautifully, creating a sticky, sweet glaze that’s hard to resist. This recipe is perfect for both novice cooks and seasoned chefs, making it accessible to everyone.

The History of Barbecue Brisket

Barbecue brisket has a rich history that dates back to the early days of American cooking. Originating from Texas, this dish has roots in both Mexican and Southern cuisine. Traditionally, brisket was a cut of meat that was tough and required long cooking times to become tender. Over the years, pitmasters have perfected the art of smoking and slow-roasting brisket, turning it into a beloved staple at barbecues and cookouts. Today, brisket is celebrated not just in Texas but across the United States and beyond, with each region adding its unique twist to this classic dish.

Ingredients for Slow-Roasted Barbecue Brisket Recipe

Slow-Roasted Barbecue Brisket Recipe, you’ll need a few key ingredients. Each component plays a vital role in building flavor and ensuring the brisket turns out tender and delicious. Here’s what you’ll need:

  • 3 to 4 pounds beef brisket: Choose a well-marbled cut for the best flavor and tenderness.
  • 2 tablespoons brown sugar: This adds sweetness and helps create a caramelized crust.
  • 1 tablespoon smoked paprika: This ingredient gives the brisket a smoky flavor, enhancing the barbecue experience.
  • 1 tablespoon garlic powder: Garlic powder adds depth and richness to the spice rub.
  • 1 tablespoon onion powder: This complements the garlic and adds a savory note.
  • 1 teaspoon black pepper: Freshly ground black pepper adds a bit of heat and flavor.
  • 1 teaspoon salt: Salt is essential for enhancing all the flavors in the dish.
  • 1 teaspoon cayenne pepper (optional): If you like a little kick, this will spice things up!
  • 1 cup barbecue sauce: Use your favorite brand for a delicious glaze.
  • 1/2 cup beef broth: This keeps the brisket moist during cooking and adds extra flavor.

Gathering these ingredients is the first step toward creating a memorable meal. Each item contributes to the overall taste and texture of the brisket, making it a dish that everyone will love. Now that you have your ingredients ready, let’s move on to the preparation steps!

Step-by-Step Preparation of Slow-Roasted Barbecue Brisket Recipe

Slow-Roasted Barbecue Brisket Recipe. Each step is crucial for achieving that tender, flavorful brisket you crave. Let’s break it down step by step!

Step 1: Preparing the Brisket

Start by taking your brisket out of the packaging. Rinse it under cold water and pat it dry with paper towels. This helps remove any excess moisture, allowing the spice rub to stick better. Next, trim any excess fat from the brisket, but leave a thin layer. This fat will melt during cooking, keeping the meat juicy and flavorful.

Step 2: Creating the Marinade

In a small bowl, combine the brown sugar, smoked paprika, garlic powder, onion powder, black pepper, salt, and cayenne pepper (if you’re using it). Mix these ingredients well to create a spice rub. This blend will add a wonderful depth of flavor to your brisket, making each bite a delight.

Step 3: Marinating the Brisket

Now it’s time to apply the spice rub. Generously coat the brisket with the spice mixture, ensuring every inch is covered. For the best flavor, consider marinating the brisket overnight in the refrigerator. This allows the spices to penetrate the meat, enhancing the overall taste. If you’re short on time, a few hours will still work wonders!

Step 4: Prepping the Oven or Smoker

Preheat your oven to 300°F. If you prefer using a smoker, set it to 225°F. Both methods will yield delicious results, but the oven is a great option for those without a smoker. Prepare a roasting pan by placing the brisket fat side up in the center. Pour the beef broth around the brisket to keep it moist during cooking.

Step 5: Slow-Roasting the Brisket

Cover the roasting pan tightly with aluminum foil. This helps trap steam, ensuring the brisket cooks evenly and becomes tender. Place the pan in the preheated oven and roast for 3 to 4 hours. You’ll know it’s done when the brisket is tender and easily pulls apart with a fork. The low and slow cooking method is key to achieving that melt-in-your-mouth texture.

Step 6: Resting the Brisket

Once the brisket is cooked, remove it from the oven. Carefully take off the foil, as steam will escape. Brush your favorite barbecue sauce generously over the top of the brisket. Increase the oven temperature to 350°F and return the brisket to the oven, uncovered, for an additional 30 minutes. This step caramelizes the sauce, creating a delicious glaze. Afterward, let the brisket rest for at least 15 minutes before slicing against the grain. This resting period allows the juices to redistribute, ensuring each slice is juicy and flavorful.

Variations of Slow-Roasted Barbecue Brisket Recipe

Slow-Roasted Barbecue Brisket Recipe is a crowd-pleaser, there are many ways to switch things up! Exploring different marinades and cooking methods can elevate your brisket experience. Let’s dive into some exciting variations!

Different Marinade Options

Marinades can transform your brisket, adding unique flavors that cater to your taste. Here are a few ideas:

  • Sweet and Spicy: Combine honey, soy sauce, and a splash of hot sauce for a sweet and spicy kick.
  • Herb-Infused: Use fresh herbs like rosemary and thyme mixed with olive oil and garlic for a fragrant twist.
  • Citrus Zest: Add orange or lemon juice to your spice rub for a refreshing citrus flavor that brightens the dish.
  • Beer Marinade: Soak the brisket in your favorite beer mixed with mustard and brown sugar for a rich, malty flavor.

Feel free to experiment with these marinades! Each one brings a different taste profile, making your brisket unique every time you cook it.

Cooking Methods: Oven vs. Smoker

When it comes to cooking your brisket, you have options! Both the oven and smoker yield delicious results, but they offer different experiences:

  • Oven: The oven is a convenient choice, especially for those who may not have a smoker. It allows for controlled cooking temperatures and is easy to monitor. Plus, it’s perfect for indoor cooking, regardless of the weather!
  • Smoker: Smoking the brisket adds a deep, smoky flavor that many barbecue enthusiasts love. Cooking at a low temperature for several hours allows the meat to absorb the smoke, resulting in a tender and flavorful brisket. If you have a smoker, this method is worth trying!

Whichever method you choose, you’ll end up with a delicious brisket that’s sure to impress. So, gather your ingredients and get ready to enjoy a fantastic meal!

Cooking Note for Slow-Roasted Barbecue Brisket Recipe

Slow-Roasted Barbecue Brisket Recipe requires patience and attention to detail. The key to a perfect brisket lies in understanding the cooking process and making adjustments as needed. Here are some important notes to keep in mind while preparing your brisket:

  • Temperature Matters: Always use a meat thermometer to check the internal temperature of the brisket. Aim for around 195°F to 205°F for optimal tenderness. This temperature allows the collagen in the meat to break down, resulting in a juicy and flavorful brisket.
  • Resting is Crucial: After cooking, let the brisket rest for at least 15 minutes. This step is essential as it allows the juices to redistribute throughout the meat. If you skip this step, you may end up with dry slices.
  • Adjust Cooking Time: Cooking times can vary based on the size of your brisket and your oven’s accuracy. Always check for tenderness rather than relying solely on time. If it’s not tender yet, give it more time in the oven.
  • Foil Technique: When covering the brisket with foil, ensure it’s tightly sealed. This helps trap moisture and steam, which is vital for achieving that melt-in-your-mouth texture.
  • Experiment with Flavors: Don’t hesitate to tweak the spice rub or barbecue sauce to suit your taste. Adding different spices or sauces can create a unique flavor profile that your family and friends will love.

By keeping these cooking notes in mind, you’ll be well on your way to mastering the art of slow-roasting brisket. Enjoy the process, and remember that great food takes time and care!

Serving Suggestions for Slow-Roasted Barbecue Brisket Recipe

Slow-Roasted Barbecue Brisket Recipe is ready, it’s time to think about how to serve it! The right side dishes can elevate your meal, making it even more enjoyable. Plus, there are creative ways to use any leftovers, ensuring nothing goes to waste. Let’s explore some delicious options!

Best Side Dishes to Pair

When it comes to pairing side dishes with brisket, you want options that complement its rich flavors. Here are some fantastic choices:

  • Coleslaw: A crunchy, tangy coleslaw adds a refreshing contrast to the smoky brisket. The coolness of the slaw balances the richness of the meat.
  • Macaroni and Cheese: Creamy mac and cheese is a classic comfort food that pairs perfectly with brisket. The cheesy goodness makes every bite delightful!
  • Grilled Vegetables: Seasonal grilled vegetables, like zucchini and bell peppers, add color and nutrition to your plate. Their smoky flavor complements the brisket beautifully.
  • Potato Salad: A creamy potato salad is another great option. It’s filling and adds a nice texture to your meal.
  • Cornbread: Sweet cornbread is a Southern favorite that goes hand-in-hand with barbecue. Its sweetness balances the savory flavors of the brisket.

These side dishes not only enhance the meal but also create a well-rounded dining experience. Feel free to mix and match based on your preferences and what you have on hand!

Creative Ways to Serve Leftovers

Leftover brisket is a treasure! There are many creative ways to enjoy it beyond just reheating. Here are some fun ideas:

  • Brisket Tacos: Shred the leftover brisket and serve it in warm tortillas with your favorite toppings like salsa, avocado, and cilantro. It’s a tasty twist!
  • Brisket Sandwiches: Pile slices of brisket on a bun with coleslaw and barbecue sauce for a delicious sandwich. It’s perfect for lunch or a casual dinner.
  • Brisket Chili: Chop the brisket and add it to a pot of chili for a hearty meal. The smoky flavor will enhance the chili, making it even more satisfying.
  • Brisket Hash: Dice the brisket and sauté it with potatoes, onions, and peppers for a flavorful breakfast hash. Top it with a fried egg for extra goodness!
  • Brisket Pizza: Use the brisket as a topping for pizza. Add barbecue sauce, cheese, and your favorite veggies for a unique and delicious pie.

These ideas will help you make the most of your leftovers, ensuring that every bite is just as enjoyable as the first. Get creative and have fun with your brisket!

Tips for Perfecting Your Slow-Roasted Barbecue Brisket Recipe

Slow-Roasted Barbecue Brisket Recipe, a few tips can make all the difference. From selecting the right cut of meat to maintaining the perfect cooking temperature, these insights will help you create a brisket that’s tender, flavorful, and unforgettable. Let’s explore these essential tips!

Choosing the Right Cut of Brisket

The cut of brisket you choose plays a significant role in the final outcome of your dish. Here are some key points to consider:

  • Flat vs. Point Cut: Brisket comes in two main cuts: the flat and the point. The flat cut is leaner and cooks evenly, while the point cut has more marbling and fat, making it juicier. For a balance of flavor and tenderness, consider using a whole packer brisket, which includes both cuts.
  • Marbling Matters: Look for brisket with good marbling. The fat within the meat melts during cooking, keeping it moist and flavorful. A well-marbled brisket will yield a more tender result.
  • Freshness is Key: Always choose fresh brisket from a reputable butcher or grocery store. Check the sell-by date and look for bright red color. Avoid any cuts that appear brown or have an off smell.

By selecting the right cut of brisket, you set the foundation for a delicious meal. Take your time to choose wisely, and you’ll be rewarded with a fantastic dish!

Importance of Temperature Control

Temperature control is crucial when cooking brisket. Here’s why it matters and how to manage it effectively:

  • Low and Slow: The key to tender brisket is cooking it at a low temperature for an extended period. This method allows the collagen in the meat to break down, resulting in a melt-in-your-mouth texture. Aim for a cooking temperature of around 225°F to 300°F, depending on your method.
  • Use a Meat Thermometer: Invest in a good meat thermometer to monitor the internal temperature of your brisket. The ideal range for a perfectly cooked brisket is between 195°F and 205°F. This ensures that the meat is tender and juicy.
  • Resting Time: After cooking, let your brisket rest for at least 15 minutes before slicing. This resting period allows the juices to redistribute throughout the meat, preventing dryness and enhancing flavor.

By mastering temperature control, you’ll elevate your brisket cooking skills. Remember, patience is key, and the results will be worth the wait!

Breakdown of Time for Slow-Roasted Barbecue Brisket Recipe

Slow-Roasted Barbecue Brisket Recipe is essential for planning your cooking process. Here’s a detailed breakdown of the time you’ll need to prepare and cook this delicious dish.

Prep Time

The prep time for this recipe is relatively short, making it easy to get started. Here’s what to expect:

  • Brisket Preparation: 10-15 minutes. This includes rinsing, drying, and trimming the brisket.
  • Spice Rub Preparation: 5 minutes. Mixing the spices together is quick and straightforward.
  • Marinating Time: 1 hour (or overnight for best results). While this isn’t active prep time, it’s important to plan for it.

In total, you can expect about 15-20 minutes of active prep time, plus additional marinating time if you choose to let it sit overnight.

Cooking Time

The cooking time is where the magic happens! Here’s how long you’ll need:

  • Slow-Roasting: 3 to 4 hours. This low and slow method is crucial for achieving tender brisket.
  • Caramelizing the Sauce: 30 minutes. This step adds a delicious glaze to your brisket.

Overall, the cooking time will take approximately 3.5 to 4.5 hours, depending on the size of your brisket and your oven’s accuracy.

Total Time

When you combine the prep and cooking times, here’s the total time you’ll need:

  • Total Active Time: 15-20 minutes (not including marinating).
  • Total Cooking Time: 3.5 to 4.5 hours.
  • Total Time (including marinating): 4.5 to 24 hours, depending on whether you marinate overnight.

Slow-Roasted Barbecue Brisket Recipe without any stress. Just remember, the longer you let it marinate, the more flavorful your brisket will be!

Nutritional Information for Slow-Roasted Barbecue Brisket Recipe

Slow-Roasted Barbecue Brisket Recipe is essential for making informed choices about your meals. This dish is not only delicious but also provides a good balance of nutrients. Here’s a breakdown of the key nutritional components per serving:

Calories

Each serving of this flavorful brisket contains approximately 350 calories. This makes it a hearty option for dinner, especially when paired with nutritious side dishes. The calorie count can vary slightly based on the specific ingredients and portion sizes you use, but it remains a satisfying choice for meat lovers.

Protein

One of the standout features of brisket is its high protein content. Each serving provides around 30 grams of protein. Protein is essential for building and repairing tissues, making it a vital part of a balanced diet. Enjoying this brisket can help you meet your daily protein needs, especially when served alongside protein-rich sides.

Sodium

The sodium content in this recipe is approximately 800 milligrams per serving. While sodium is necessary for various bodily functions, it’s important to monitor your intake, especially if you’re watching your salt consumption. To reduce sodium levels, consider using low-sodium beef broth and barbecue sauce. This way, you can enjoy the rich flavors of the brisket while keeping your health in check.

Slow-Roasted Barbecue Brisket Recipe while maintaining a balanced diet. Remember, moderation is key, and pairing this dish with fresh vegetables or whole grains can enhance its nutritional value even further!

FAQs about Slow-Roasted Barbecue Brisket Recipe

How long should I marinate the brisket?

Marinating the brisket is a great way to enhance its flavor. Ideally, you should marinate it for at least 1 hour. However, for the best results, consider marinating it overnight in the refrigerator. This allows the spices to penetrate the meat deeply, resulting in a more flavorful brisket. If you’re short on time, even a quick 30-minute marinade can still add some nice flavor!

Can I use a different cut of meat?

Yes, you can use different cuts of meat if brisket isn’t available. Cuts like chuck roast or beef shoulder can work well, but keep in mind that they may require different cooking times. These cuts are also tougher and benefit from slow cooking, just like brisket. The key is to ensure that the meat is well-marbled, as this will help keep it juicy and tender during the cooking process.

What is the best way to store leftovers?

To store leftover brisket, first let it cool to room temperature. Then, wrap it tightly in plastic wrap or aluminum foil, or place it in an airtight container. Store it in the refrigerator for up to 3-4 days. If you want to keep it longer, consider freezing it. Wrap the brisket well and place it in a freezer-safe bag. It can last for up to 3 months in the freezer. When ready to eat, thaw it in the refrigerator overnight and reheat gently.

How do I know when the brisket is done?

The best way to check if your brisket is done is by using a meat thermometer. Aim for an internal temperature of 195°F to 205°F. At this temperature, the collagen in the meat breaks down, making it tender and juicy. Additionally, you can test for tenderness by inserting a fork into the meat; it should pull apart easily. If it feels tough, give it more time in the oven!

Conclusion on Slow-Roasted Barbecue Brisket Recipe

Slow-Roasted Barbecue Brisket Recipe is a fantastic dish that brings warmth and joy to any gathering. With its tender texture and rich flavors, it’s sure to impress your family and friends. The slow cooking method allows the spices to meld beautifully, creating a mouthwatering experience that’s hard to forget.

Whether you’re a seasoned cook or just starting out, this recipe is approachable and rewarding. By following the steps outlined, you can create a brisket that rivals those found in the best barbecue joints. Remember, the key is patience—allowing the meat to cook slowly ensures it becomes tender and flavorful.

As you explore different marinades and cooking methods, don’t hesitate to make this recipe your own. Each variation can bring a new twist to the classic dish, keeping your meals exciting and fresh. Plus, with the tips provided, you’ll be well-equipped to tackle any challenges that may arise during the cooking process.

Slow-Roasted Barbecue Brisket Recipe is not just about the food; it’s about creating memories around the table. Happy cooking!

Paul

Slow-Roasted Barbecue Brisket Recipe for Perfect Flavor

This tender, juicy Slow Roasted Barbecue Brisket is loaded with smoky, savory flavor and melts in your mouth with every bite. A bold spice rub, tangy BBQ sauce, and low-and-slow oven roasting come together to make this a crave-worthy centerpiece for any meal—perfect for Sunday dinner, game day, or holiday gatherings. Minimal effort, maximum reward.
Prep Time 15 minutes
Servings: 6 –8 servings
Course: Main Dish
Cuisine: American BBQ

Ingredients
  

  • 3½ to 4½ pound flat cut beef brisket fat cap trimmed to ¼-inch
  • 1 tablespoon dried thyme leaves
  • 1 tablespoon smoked paprika
  • 2 teaspoons freshly ground black pepper
  • 2 teaspoons kosher salt
  • 1 teaspoon onion powder
  • ½ teaspoon garlic powder
  • ½ teaspoon cayenne pepper
  • ½ teaspoon ground cumin
  • 2 tablespoons Worcestershire sauce
  • 1 cup BBQ sauce use your favorite brand or homemade

Method
 

  1. Preheat oven to 300°F (150°C). Line a roasting pan or baking dish with foil.
  2. Trim the brisket fat cap to about ¼-inch if needed. Pat dry.
  3. In a small bowl, mix the thyme, smoked paprika, black pepper, salt, onion powder, garlic powder, cayenne pepper, and cumin to create the dry rub.
  4. Rub the spice mixture generously over both sides of the brisket.
  5. Place the brisket in the prepared pan, fat side up. Drizzle with Worcestershire sauce and BBQ sauce, then spread evenly with a spatula.
  6. Cover the pan tightly with foil and roast for 2 hours without uncovering.
  7. Remove from the oven, flip the brisket, re-cover with foil, and return to the oven. Roast for another 1½ to 2 hours, or until the brisket is fork-tender.
  8. Transfer the brisket to a cutting board, slice against the grain, and drizzle with pan sauce before serving.

Notes

  • Use a meat thermometer to ensure the brisket reaches around 190–205°F internally for optimal tenderness.
  • Let the brisket rest for 10–15 minutes before slicing to retain juices.
  • Leftovers make excellent sandwiches, tacos, or wraps the next day.
  • For extra smoky flavor, use a smoked BBQ sauce or add a few drops of liquid smoke.

Hawaiian Shoyu Chicken: Discover This Delicious Recipe!

Introduction to Hawaiian Shoyu Chicken

Have you ever found yourself dreaming of a dish that whisks you away to a tropical paradise with just one bite? Well, let me introduce you to Hawaiian Shoyu Chicken. This delightful recipe is like a mini-vacation for your taste buds, offering a savory-sweet escape that’s perfect for those hectic days when you need a quick yet impressive meal. As a busy mom myself, I know how precious time is, and this dish is a lifesaver. It’s not just a meal; it’s a warm hug on a plate, ready to bring joy to your dinner table.

Why You’ll Love This Hawaiian Shoyu Chicken

Imagine a dish that’s as easy as pie but tastes like a gourmet masterpiece. Hawaiian Shoyu Chicken is your go-to for those whirlwind days. It’s quick to prepare, bursting with flavor, and a guaranteed crowd-pleaser. The savory-sweet marinade transforms simple chicken thighs into a succulent delight. Plus, it’s versatile enough to pair with your favorite sides, making dinner a breeze.

Ingredients Hawaiian Shoyu Chicken

Creating this Hawaiian Shoyu Chicken is a breeze with a handful of pantry staples and a few fresh ingredients. Let’s dive into what you’ll need:

  • Chicken Thighs: Opt for bone-in, skin-on for juicy, flavorful results. You can substitute with boneless if preferred.
  • Soy Sauce: The heart of the marinade, providing that umami punch. Choose low-sodium if you’re watching salt intake.
  • Brown Sugar: Adds a touch of sweetness, balancing the savory notes. Feel free to swap with honey or maple syrup.
  • Water: Helps to dilute the marinade, ensuring the flavors meld beautifully.
  • Rice Vinegar: Offers a subtle tang, enhancing the overall taste. Apple cider vinegar works as a substitute.
  • Garlic: Freshly minced for a robust, aromatic kick. Garlic powder can be used in a pinch.
  • Fresh Ginger: Grated for a warm, spicy undertone. Ground ginger is an alternative, though fresh is best.
  • Black Pepper: Adds a hint of heat, complementing the sweetness.
  • Red Pepper Flakes: Optional, for those who like a bit of spice. Adjust to your heat preference.
  • Green Onions: Sliced for a fresh, vibrant garnish that adds color and flavor.
  • Sesame Seeds: Optional, for a nutty crunch that elevates the dish’s presentation.

Exact quantities for each ingredient are listed at the bottom of the article, ready for printing.

How to Make Hawaiian Shoyu Chicken

Prepare the Marinade

Start by gathering all your ingredients. In a large bowl, whisk together the soy sauce, brown sugar, water, rice vinegar, minced garlic, grated ginger, black pepper, and red pepper flakes. Stir until the sugar dissolves completely. This marinade is the heart of your Hawaiian Shoyu Chicken, infusing it with that irresistible savory-sweet flavor.

Marinate the Chicken

Place the chicken thighs into the marinade, ensuring each piece is well-coated. Cover the bowl with plastic wrap and pop it in the fridge. Let the chicken soak up all those delicious flavors for at least an hour. If you have time, marinate overnight for an even deeper taste. Trust me, the wait is worth it!

Preheat the Oven

When you’re ready to cook, preheat your oven to 375°F (190°C). This temperature is perfect for baking the chicken to juicy perfection. While the oven heats up, take a moment to prepare your baking dish. A little anticipation goes a long way in the kitchen.

Bake the Chicken

Transfer the marinated chicken thighs to your baking dish, pouring the remaining marinade over the top. This ensures every bite is packed with flavor. Slide the dish into the oven and bake for 35-40 minutes. You’ll know it’s done when the chicken reaches an internal temperature of 165°F (74°C).

Broil for Extra Flavor

If you love a bit of caramelization, switch your oven to broil for the last 5 minutes. Keep a close eye to prevent burning. This step adds a delightful crispiness to the skin, making your Hawaiian Shoyu Chicken even more irresistible.

Rest and Garnish

Once out of the oven, let the chicken rest for about 5 minutes. This allows the juices to redistribute, keeping the meat tender. Before serving, sprinkle with sliced green onions and sesame seeds for a pop of color and flavor. Now, you’re ready to enjoy a taste of paradise!

Tips for Success

  • For maximum flavor, marinate the chicken overnight. The longer it sits, the better it tastes.
  • Use a meat thermometer to ensure the chicken reaches 165°F for safe consumption.
  • For a thicker sauce, simmer the leftover marinade on the stove until it reduces.
  • Experiment with adding pineapple juice for a tropical twist.
  • Always let the chicken rest before serving to lock in the juices.

Equipment Needed

  • Large Bowl: For mixing the marinade. A deep dish works too.
  • Baking Dish: To bake the chicken. A roasting pan is a good alternative.
  • Whisk: For blending the marinade ingredients. A fork can substitute.
  • Meat Thermometer: Ensures chicken is cooked through. Essential for safety.
  • Plastic Wrap: To cover the marinating chicken. A lid or foil works as well.

Variations

  • Gluten-Free: Swap soy sauce with tamari or coconut aminos for a gluten-free version.
  • Spicy Kick: Add more red pepper flakes or a dash of sriracha for extra heat.
  • Low-Sodium: Use low-sodium soy sauce and reduce added salt for a heart-friendly option.
  • Vegetarian: Substitute chicken with firm tofu or tempeh, marinating and baking as directed.
  • Citrus Twist: Add a splash of orange or lime juice to the marinade for a zesty flavor.

Serving Suggestions

  • Steamed Rice: A classic pairing that soaks up the savory sauce beautifully.
  • Quinoa: For a nutty, protein-packed alternative to rice.
  • Grilled Pineapple: Adds a sweet, tropical touch to your plate.
  • Green Salad: A fresh, crisp side to balance the rich flavors.
  • Chilled White Wine: Complements the dish with its light, refreshing notes.

FAQs about Hawaiian Shoyu Chicken

Can I use chicken breasts instead of thighs?

Absolutely! While chicken thighs offer a juicier result, chicken breasts work well too. Just be mindful of the cooking time, as breasts may cook faster. Ensure they reach an internal temperature of 165°F to avoid dryness.

Is it possible to make this dish ahead of time?

Yes, Hawaiian Shoyu Chicken is perfect for meal prep. You can marinate the chicken up to 24 hours in advance. After baking, store it in an airtight container in the fridge for up to three days. Reheat gently to maintain its succulent texture.

What can I do with leftover marinade?

Leftover marinade can be transformed into a delicious sauce. Simply bring it to a boil on the stove, then simmer until it thickens. This makes a great drizzle over the chicken or rice, adding an extra burst of flavor.

Can I freeze Hawaiian Shoyu Chicken?

Yes, you can freeze both the marinated raw chicken and the cooked dish. For raw, place the chicken and marinade in a freezer-safe bag, removing excess air. For cooked, store in an airtight container. Both can be frozen for up to three months.

What if I don’t have rice vinegar?

No worries! You can substitute rice vinegar with apple cider vinegar or white wine vinegar. Each will add a slightly different tang, but the dish will still be deliciously flavorful.

Final Thoughts

Hawaiian Shoyu Chicken is more than just a meal; it’s a culinary journey to the islands, right from your kitchen. The savory-sweet harmony of flavors is like a gentle ocean breeze, soothing and satisfying. Whether you’re a busy mom juggling a million tasks or a professional seeking a quick yet delightful dinner, this dish is your ticket to a stress-free evening. It’s a reminder that even on the busiest days, a delicious, home-cooked meal can bring warmth and joy to your table. So, gather your loved ones and savor the taste of paradise together.

Hawaiian Shoyu Chicken
Paul

Hawaiian Shoyu Chicken: Discover This Delicious Recipe!

Hawaiian Shoyu Chicken is a flavorful dish featuring chicken thighs marinated in a savory-sweet soy sauce mixture, then baked to perfection.
Prep Time 1 hour 10 minutes
Cook Time 40 minutes
Total Time 1 hour 50 minutes
Servings: 4 servings
Course: Main Course
Cuisine: Hawaiian
Calories: 350

Ingredients
  

  • 2 pounds chicken thighs bone-in and skin-on
  • 1 cup soy sauce
  • 1/2 cup brown sugar
  • 1/2 cup water
  • 1/4 cup rice vinegar
  • 4 cloves garlic minced
  • 1 tablespoon fresh ginger grated
  • 1 teaspoon black pepper
  • 1/2 teaspoon red pepper flakes optional
  • 2 green onions sliced (for garnish)
  • Sesame seeds for garnish, optional

Method
 

  1. In a large bowl, whisk together the soy sauce, brown sugar, water, rice vinegar, garlic, ginger, black pepper, and red pepper flakes until the sugar is dissolved.
  2. Add the chicken thighs to the marinade, ensuring they are well coated. Cover and refrigerate for at least 1 hour, or up to overnight for best flavor.
  3. Preheat your oven to 375°F (190°C).
  4. Place the marinated chicken thighs in a baking dish, pouring the marinade over the top.
  5. Bake for 35-40 minutes, or until the chicken is cooked through and reaches an internal temperature of 165°F (74°C).
  6. For extra caramelization, switch the oven to broil for the last 5 minutes of cooking, watching closely to prevent burning.
  7. Remove from the oven and let the chicken rest for 5 minutes before serving. Garnish with sliced green onions and sesame seeds if desired.

Notes

  • For a sweeter flavor, add a tablespoon of pineapple juice to the marinade.
  • Serve the chicken over steamed rice or quinoa to soak up the delicious sauce.

The Ultimate Walnut Delight Cake: A Simple Indulgence for the Soul

When I first discovered this recipe for walnut cake, it was on a cold winter evening, wrapped in the warmth of a cozy kitchen filled with the scent of melted butter and chocolate. The sky outside was a dull grey, and the cold air had driven everyone indoors. My grandmother, always the heart of family gatherings, invited me into the kitchen to help her prepare a cake she swore would “lift the spirits.” At that moment, I had no idea that this simple dessert would hold so much sentimental value for me.

As we went through the motions of preparing the cake, it struck me how a recipe so simple could hold such deep emotional ties. The act of baking, combined with the memories of laughter and love shared around the table, became a ritual that I would cherish forever. This walnut delight cake is more than just a dessert — it’s a symbol of warmth, comfort, and the timeless bonds we share with those we love. Every bite brings back a flood of memories, and each time I make it, I’m reminded of those cozy winter nights spent with family.

Now, with a quick and easy recipe in hand, you can create that same sense of warmth and togetherness in your own home. Whether you’re preparing it for a special occasion or simply as a sweet treat to enjoy with loved ones, this walnut delight cake is sure to bring joy and satisfaction to your table. So, let’s dive into what makes this dessert so irresistible.

Why This Cake is the Ultimate Comfort Dessert

In a world where time is often in short supply, there’s something special about a dessert that comes together effortlessly but still delivers an unforgettable taste. This walnut delight cake is exactly that — quick, easy, and utterly delicious. The combination of crushed cookies, walnuts, and cocoa powder creates a base that is rich in flavor and texture, while the creamy top layer adds a luxurious touch. The best part? It only takes about 5 minutes to prepare, making it the perfect option for busy individuals who want something sweet without the time commitment.

What makes this cake so special is not just its simplicity, but also its versatility. Whether you’re craving a light afternoon snack, a dessert for a dinner party, or even a thoughtful homemade gift for a loved one, this cake ticks all the boxes. It’s not overly sweet, so it can be enjoyed at any time of the day. The richness of the walnuts and the crunch they provide offer a contrast to the smooth, indulgent top layer, creating a balance that’s both comforting and sophisticated.

Ingredients

For the Base:

IngredientQuantity
Walnuts (cut into small pieces)120 g (4.2 oz)
Cookies (crushed)400 g (14 oz)
Sugar120 g (0.6 cup)
Vanilla sugar2 g (0.5 tsp)
Cocoa powder60 g (0.5 cup)
Milk250 ml (1.25 cups)
Butter150 g (5.3 oz)

For the Top Layer:

IngredientQuantity
Walnuts (for garnish)50 g (1.8 oz)
Powdered sugar30 g (2 tbsp)

Directions:

  1. Prepare the Base: Begin by crushing the cookies into fine crumbs. You can use a food processor or place them in a plastic bag and crush them with a rolling pin. Set aside.
  2. Make the Base Mixture: In a medium saucepan, melt the butter over low heat. Once melted, stir in the milk, sugar, and vanilla sugar. Gradually add the cocoa powder while stirring to avoid lumps. Allow the mixture to come together smoothly.
  3. Combine the Base Ingredients: Remove the saucepan from heat and stir in the crushed cookies and chopped walnuts. Mix until everything is well combined, forming a thick and sticky dough-like consistency.
  4. Form the Base Layer: Press the base mixture into the bottom of a greased or lined cake pan. Make sure to spread it evenly, pressing it down gently to create a firm base. Chill it in the refrigerator for about 10–15 minutes to set.
  5. Prepare the Top Layer: After the base has chilled, sprinkle the top layer with powdered sugar and top with the remaining chopped walnuts for garnish.
  6. Chill and Serve: Allow the cake to chill in the fridge for at least 30 minutes to an hour before slicing and serving. This will give the layers time to set and develop their full flavor.

Nutritional Breakdown

NutrientAmount (per serving)
Calories320 kcal
Protein5 g
Carbohydrates40 g
Fiber4 g
Fat18 g
Saturated Fat8 g
Sodium45 mg
Cholesterol30 mg
Calcium4% of Daily Value
Iron8% of Daily Value

The Secret Behind the Flavor

Though the ingredients in this recipe are basic, it’s the careful balance of flavors and textures that makes this walnut delight cake truly stand out. The crushed cookies form a sturdy base that holds the cake together while providing a light, buttery crunch. When mixed with the cocoa powder, sugar, and milk, the cookies become more than just a simple ingredient — they transform into a rich, decadent layer that gives the cake its signature flavor.

The walnuts play an essential role in the texture of the cake. Chopped into small pieces, they add a delightful crunch that contrasts beautifully with the creamy top layer. Walnuts are also packed with nutrients, including healthy fats and antioxidants, making this dessert not only indulgent but also somewhat nourishing.

The top layer is where the magic truly happens. Powdered sugar gives it a subtle sweetness, and the fresh walnuts sprinkled on top add another layer of texture and visual appeal. The cake’s simple presentation belies its complexity, and when you take your first bite, you’ll immediately taste the deep, rich flavors that come from the perfect combination of cocoa and walnuts.

Perfect for Any Occasion

One of the best things about this walnut delight cake is its versatility. Whether you’re making it for a holiday gathering, a family dinner, or a casual get-together with friends, it’s sure to impress. Its unique combination of flavors and textures makes it stand out from traditional cakes, and it pairs wonderfully with a cup of tea or coffee.

Not only does it look impressive, but it’s also incredibly easy to make, which makes it ideal for both beginner bakers and seasoned experts. This cake can also be modified to suit different tastes and dietary preferences. You can experiment with adding other nuts like almonds or hazelnuts, or even switch out the cocoa powder for a different flavor profile such as cinnamon or espresso.

The best part is that this cake doesn’t require baking, making it a great option for those who might not have access to an oven or simply don’t want to spend time in the kitchen. In just a few simple steps, you’ll have a dessert that looks and tastes as though it came from a bakery, with minimal effort required.

Frequently Asked Questions (FAQs)

1. Can I make this cake ahead of time?

Yes! This walnut delight cake actually tastes even better after being refrigerated for a few hours or overnight. The flavors have time to meld together, and the cake sets more firmly, making it easier to slice. If you’re planning to serve it at a party or family gathering, you can prepare it the night before and simply garnish it before serving.

2. Can I use a different type of nut instead of walnuts?

Absolutely! While walnuts add a rich, earthy flavor and texture, you can easily swap them out for other nuts like almonds, pecans, or hazelnuts. Each nut will give the cake a slightly different flavor, but all will work well with the cocoa and cookies.

3. Can I make this cake gluten-free?

Yes, it’s easy to make this cake gluten-free by using gluten-free cookies in place of regular cookies. There are plenty of gluten-free cookie options available in stores, or you can even make your own. Just be sure to check the ingredients of any other items (like the cocoa powder and sugar) to ensure they’re gluten-free.

4. How can I make this cake more decadent?

If you want to make this walnut delight cake even more indulgent, consider adding a layer of whipped cream or chocolate ganache on top. A drizzle of caramel or a sprinkle of chocolate shavings can also enhance the flavor and presentation.

5. How long will this cake keep in the fridge?

The walnut delight cake will keep well in the fridge for about 3-4 days. It’s best stored in an airtight container to prevent it from drying out. If you need to store it for longer, you can also freeze the cake for up to 1 month. Just make sure to wrap it tightly before freezing.

Tips for Perfecting the Walnut Delight Cake

  • Use high-quality cocoa powder: The richness of cocoa powder is key to the flavor of the cake. Invest in a good quality cocoa powder for the best results.
  • Don’t skip the chilling time: While this cake is quick to make, allowing it to chill for at least 30 minutes helps the layers set properly. This also improves the flavor, as the ingredients have time to meld together.
  • Customize your cake: Experiment with different flavor combinations! Add a bit of cinnamon for a warm, spiced flavor or even a splash of coffee to enhance the chocolate notes.

Conclusion: A Simple Cake with a Big Impact

The walnut delight cake may be quick and simple, but it delivers big on flavor. It’s a dessert that brings comfort, joy, and warmth, making it the perfect treat for any occasion. Whether you’re preparing it for a gathering or just to indulge in something sweet, this cake will quickly become a favorite in your recipe collection. It’s more than just a cake — it’s a reminder of the special moments shared with those we love. So go ahead, make this walnut delight cake, and let it become a part of your own family traditions.

Amal

The Ultimate Walnut Delight Cake: A Simple Indulgence for the Soul

This rich, indulgent walnut delight cake is the perfect dessert for any occasion. With a crisp, cookie-based layer topped with a creamy, cocoa-infused mixture and garnished with walnuts, it’s a simple yet decadent treat. Easy to make and full of flavor, this dessert will have your guests coming back for seconds!
Prep Time 10 minutes
Cook Time 30 minutes
Total Time 40 minutes
Servings: 8 -10 servings
Course: Dessert
Cuisine: American Comfort Food

Ingredients
  

For the Base:
  • 120 g walnuts cut into small pieces
  • 400 g cookies crushed
  • 120 g sugar
  • 2 g vanilla sugar
  • 60 g cocoa powder
  • 250 ml milk
  • 150 g butter
For the Top Layer:
  • 50 g walnuts for garnish
  • 30 g powdered sugar

Method
 

  1. Prepare the Base: Start by crushing the cookies into fine crumbs. You can use a food processor or place them in a plastic bag and crush them with a rolling pin. Set the crumbs aside.
  2. Make the Base Mixture: In a medium saucepan, melt the butter over low heat. Stir in the milk, sugar, and vanilla sugar. Gradually add the cocoa powder while stirring until fully combined and smooth.
  3. Combine the Base Ingredients: Remove the saucepan from heat and stir in the crushed cookies and chopped walnuts. Mix until everything is well combined into a thick, sticky mixture.
  4. Form the Base Layer: Press the cookie-walnut mixture into the bottom of a greased or lined cake pan. Use a spoon to press it down evenly to create a firm, solid base. Chill the mixture in the refrigerator for about 10–15 minutes to allow it to set.
  5. Prepare the Top Layer: After the base has set, sprinkle the powdered sugar over the top and garnish with the remaining chopped walnuts.
  6. Chill and Serve: Allow the cake to chill for at least 30 minutes in the fridge to firm up and allow the flavors to meld together. Slice and serve!

Notes

  • This cake can be prepared ahead of time, making it a great dessert for gatherings or holiday parties.
  • Feel free to experiment with different nuts, such as almonds or hazelnuts, to customize the flavor.
  • You can also add a bit of cinnamon or espresso powder to the cocoa mixture for a flavor twist.

A Dish for All Seasons: Broccoli and Cheese Delight

There’s something inherently comforting about a dish that combines fresh vegetables with rich, creamy sauce and melted cheese. For many of us, food is not just sustenance but a way to connect with memories, traditions, and moments that fill our hearts with warmth. This Broccoli and Cheese Delight evokes just that—a sense of contentment and nostalgia. I first made this dish one chilly evening when I was craving something hearty, yet light. I had a fridge full of fresh vegetables and a lingering yearning for the perfect balance of savory flavors. As I chopped the broccoli, onions, and bell peppers, I remembered how my grandmother used to make a similar dish when we were children, always gathering around the table to share meals that spoke of love and care.

The creamy sauce bubbling on the stove brought me back to those days of simple, soulful food that nourished more than just the body. With each bite of this dish, I could taste the generations before me—who had spent hours in kitchens, crafting dishes like this to feed their families. Whether it’s a family dinner, a potluck, or a quiet meal for yourself, this Broccoli and Cheese Delight will remind you of those moments of connection that go beyond the food itself.

The Appeal of Broccoli and Cheese

There’s a reason why the combination of broccoli and cheese is a timeless pairing in the culinary world. This dish is a beautiful way to enjoy the nutritional benefits of broccoli without compromising on flavor. Broccoli, rich in vitamins, minerals, and fiber, is one of the most healthful vegetables you can eat. When combined with a creamy sauce and melted cheese, it takes on a whole new dimension, making the vegetable both appealing to children and adults alike.

The texture of broccoli in this dish is perfectly tender, yet still retains enough bite to provide a satisfying contrast against the creaminess of the sauce. The vibrant red and yellow bell peppers add color, sweetness, and crunch to the dish, balancing out the rich flavors. Paired with a rich cheese and egg sauce, the result is a comforting dish that feels indulgent but is surprisingly simple to make.

Ingredients

IngredientQuantity
Broccoli (cut into small florets)1 medium-sized head
Onion (chopped)1 medium
Olive oil for fryingAs needed
Red bell pepper (diced)1 medium
Yellow bell pepper (diced)1 medium
Tomatoes (diced)2 medium
Eggs3 large
Milk2 cups (400 ml)
Flour130 g (4.58 oz)
Cheese (grated, e.g., cheddar)100 g (3.52 oz)
Dried garlic1 tsp
Salt and black pepperTo taste

For the Sauce:

IngredientQuantity
Olive oil2 tbsp
Garlic (minced)2 cloves
Heavy cream½ cup (120 ml)
Lemon juice1 tbsp
Fresh parsley (chopped)2 tbsp
Salt and pepperTo taste

Directions:

  1. Prep the Veggies:
    Start by prepping your vegetables. Cut the broccoli into small florets and dice the red and yellow bell peppers. Chop the onion and tomatoes. Set everything aside.
  2. Cook the Veggies:
    In a large skillet, heat olive oil over medium heat. Add the chopped onion, bell peppers, and tomatoes. Sauté until the veggies soften, about 5–7 minutes.
  3. Prepare the Cauliflower Mix:
    In a large bowl, whisk the eggs and milk together. Stir in the flour, garlic, and grated cheese. Season with salt and black pepper to taste. Fold in the sautéed vegetables, including the broccoli florets.
  4. Fry the Veggie Mixture:
    In the same skillet, add a little more olive oil if needed, and pour in the cauliflower mixture. Cook over medium heat for about 10–15 minutes, or until the edges turn golden and the center is set. You can cover the skillet with a lid to ensure even cooking.
  5. Make the Sauce:
    While the cauliflower cooks, make the sauce. In a small saucepan, heat olive oil over medium heat. Add the minced garlic and cook for 1 minute. Pour in the heavy cream, stirring occasionally. Add lemon juice and season with salt and pepper. Let the sauce simmer for a couple of minutes until thickened.
  6. Finish the Dish:
    Once the cauliflower is cooked through, remove from the skillet and plate it. Drizzle the creamy garlic sauce on top and garnish with fresh chopped parsley for a touch of color and flavor.

Nutritional Breakdown

NutrientAmount (per serving)
Calories320 kcal
Protein12 g
Carbohydrates25 g
Fiber4 g
Fat22 g
Saturated Fat8 g
Sodium450 mg
Cholesterol120 mg
Vitamin C90% of Daily Value
Calcium15% of Daily Value

Why This Recipe Works

This dish works because it is incredibly versatile. You can serve it as a standalone meal or as a side to complement any protein. It’s perfect for vegetarian meals, providing a substantial, filling dish without the need for meat. The beauty of this recipe is in its flexibility. You can swap in different types of cheese based on what you have in your fridge—cheddar, mozzarella, or even a sharp blue cheese can give the dish a completely different flavor profile. The creamy sauce can be adjusted based on dietary needs too. For those seeking a dairy-free or vegan alternative, swapping milk for plant-based milk and cheese for a dairy-free version still results in a satisfying dish.

The ease of preparation makes it an ideal choice for busy weeknights, but its comforting, rich flavors also make it worthy of special occasions. Plus, with ingredients like broccoli, tomatoes, and bell peppers, it’s packed with nutrients, making it a wholesome choice for those trying to eat more vegetables in their diet.

Frequently Asked Questions (FAQs)

Q: Can I use frozen broccoli for this recipe?
A: Yes, frozen broccoli can be used in place of fresh. However, make sure to thaw and drain any excess water from the frozen broccoli before adding it to the skillet. Fresh broccoli tends to retain a bit more texture, but frozen broccoli works just as well for this dish.

Q: What kind of cheese works best in this recipe?
A: This recipe is extremely flexible when it comes to cheese. Cheddar is a classic choice, but mozzarella can also add a stretchy, melty texture. For a stronger flavor, blue cheese or goat cheese can be used. It’s all about personal preference, so feel free to experiment!

Q: Can I make this dish ahead of time?
A: Absolutely! You can make this dish in advance and store it in the fridge. Simply assemble everything and refrigerate it before baking. When you’re ready to eat, reheat it in the oven or microwave. The flavors will have had time to meld together, making it even more delicious.

Q: How do I make this dish dairy-free?
A: To make this dish dairy-free, swap out the cheese for a dairy-free cheese alternative and use plant-based milk (like almond, soy, or oat milk). You can also skip the cream altogether or use coconut cream for a rich, dairy-free substitute.

Q: Can I add meat to this dish?
A: Yes, you can add meat to this dish to make it more filling. Ground turkey, chicken, or sausage can all be added. Simply brown the meat first, then incorporate it with the vegetables before adding the egg and cheese mixture

Nutritional Benefits of Broccoli

Broccoli is widely recognized for its health benefits. Packed with vitamin C, vitamin K, and fiber, it provides several important nutrients that promote overall health. It is rich in antioxidants, which help protect cells from damage, and it contains compounds that have been linked to improved heart health and cancer prevention. Additionally, broccoli is low in calories, making it a great addition to any healthy diet.

The Perfect Dish for Any Occasion

One of the best things about this dish is how adaptable it is. It can be served as a hearty vegetarian main course, a delicious side to a roast, or even a great addition to a brunch spread. Whether it’s for a busy weeknight dinner, a lazy weekend meal, or a festive holiday gathering, this Broccoli and Cheese Delight is sure to please.

Conclusion: A Recipe to Remember

Cooking is often about more than just following a set of instructions. It’s about creating an experience, building memories, and enjoying the flavors that come from love and care in the kitchen. This Broccoli and Cheese Delight is a recipe that brings people together, whether you’re sharing it with family at the dinner table or serving it at a gathering with friends. It’s a dish that’s both comforting and nourishing, and one that will leave everyone feeling satisfied and content. So next time you find yourself with a head of broccoli and a craving for something warm and creamy, reach for this recipe and create a little magic in the kitchen.

Whether you’re a novice cook or a seasoned chef, this recipe will be one you come back to time and time again. The combination of fresh vegetables, creamy sauce, and melted cheese is a timeless combination that will always have a place in your kitchen. So grab your apron, get cooking, and enjoy the delicious flavors of this Broccoli and Cheese Delight!

Amal

A Dish for All Seasons: Broccoli and Cheese Delight

A savory, cheesy skillet dish loaded with vibrant vegetables and creamy goodness, this cauliflower recipe is the ultimate comfort food with a healthy twist. Perfect for a quick dinner or meal prep, it’s packed with flavor and texture.
Prep Time 15 minutes
Cook Time 20 minutes
Total Time 35 minutes
Servings: 4 –6 servings
Course: Main Dish
Cuisine: American Comfort Food

Ingredients
  

  • 1 broccoli cut into small florets
  • 1 onion chopped
  • Olive oil for frying
  • 1 red bell pepper diced
  • 1 yellow bell pepper diced
  • 2 tomatoes diced
  • 3 eggs
  • 2 cups 400 ml milk
  • 130 g 4.58 oz flour
  • 100 g 3.52 oz cheese, grated (cheddar or mozzarella)
  • 1 tsp dried garlic
  • Salt and black pepper to taste
For the Sauce:
  • 2 tbsp olive oil
  • 2 cloves garlic minced
  • ½ cup 120 ml heavy cream
  • 1 tbsp lemon juice
  • 2 tbsp fresh parsley chopped
  • Salt and pepper to taste

Method
 

  1. Prepare the Veggies: Begin by cutting the broccoli into small florets. Dice the red and yellow bell peppers, chop the onion, and dice the tomatoes.
  2. Cook the Veggies: Heat olive oil in a large skillet over medium heat. Add the onion, bell peppers, and tomatoes. Sauté for about 5-7 minutes until softened.
  3. Make the Cauliflower Batter: In a large bowl, whisk together the eggs and milk. Stir in the flour, garlic, and grated cheese. Season with salt and pepper. Add the sautéed vegetables and fold them into the batter.
  4. Cook the Cauliflower Skillet: In the same skillet, add a bit more olive oil, if necessary, and pour the cauliflower mixture into the pan. Cook over medium heat for 10-15 minutes, until the edges are golden and the center is set. Cover the skillet with a lid to ensure even cooking.
  5. Make the Creamy Sauce: In a small saucepan, heat the olive oil over medium heat. Add the minced garlic and cook for 1 minute. Pour in the heavy cream, stirring occasionally. Add lemon juice, salt, and pepper, and let it simmer until thickened.
  6. Finish the Dish: Once the cauliflower skillet is ready, plate it. Drizzle the creamy garlic sauce over the top and garnish with chopped parsley.

Notes

  • This dish can be customized by adding other vegetables like spinach, zucchini, or mushrooms.
  • For a spicier twist, you can add a pinch of chili flakes to the sauce.
  • If you’re not a fan of heavy cream, you can substitute it with a lighter version or even coconut milk for a dairy-free alternative.

The Heartwarming Story Behind the Apricot Cake

Growing up, I spent countless afternoons in my grandmother’s kitchen, the smell of fresh-baked cakes and sweet fruit filling the air. One of my fondest memories is the apricot cake she would make during the summer months, when the trees in her garden were heavy with ripe, golden fruit. There was something about the way the tangy apricots blended with the soft, pillowy cake that made every bite feel like a little piece of home.

Every time we gathered around the table to enjoy her creations, the room would fill with laughter, stories, and a sense of togetherness. The apricot cake became more than just a dessert—it was a symbol of comfort, family, and the magic that happens when ingredients come together to create something truly special. Today, I’m passing on this cherished recipe, hoping to create new memories in my own kitchen with friends and family, just as my grandmother did with me.

What Makes This Apricot Cake So Special?

The beauty of this apricot cake lies in its perfect balance of textures and flavors. It’s not just a cake; it’s an experience. The light, airy layers of the cake pair perfectly with the smooth and creamy pudding center, creating a dessert that’s both indulgent and refreshing. The pudding is rich and velvety, providing a delightful contrast to the softness of the cake. The addition of apricots, whether fresh or canned, adds a lovely hint of sweetness and a touch of tartness that enhances every bite.

This cake is ideal for any occasion, whether you’re hosting a gathering, celebrating a special event, or simply treating yourself to something delightful. It’s a dessert that is sure to impress and become a staple in your recipe collection.

Ingredients:

For the Pudding Cream

IngredientAmount
Egg (separated)1
Egg yolk1
Milk (divided)350 ml (1 1/2 cups)
Cornstarch2 heaped tablespoons
Vanilla extract1 teaspoon
Sugar50 g (1/4 cup)

For the Cake

IngredientAmount
Eggs3
Egg white (reserved)1
SaltA pinch
Sugar130 g (2/3 cup)

Directions:

  1. Prepare the Pudding Cream:
    • In a bowl, whisk the egg yolk, cornstarch, and sugar together until smooth.
    • In a saucepan, bring 250 ml (1 cup) of milk to a simmer. Gradually whisk in the egg mixture, continuing to stir until it thickens, about 2-3 minutes.
    • Remove from heat and stir in the remaining 100 ml of milk and vanilla extract. Set aside to cool.
  2. Make the Cake:
    • Preheat your oven to 180°C (350°F) and grease a cake pan or line it with parchment paper.
    • In a bowl, whisk together 3 eggs, the reserved egg white, a pinch of salt, and the sugar until the mixture is frothy and light.
    • Pour the cake batter into the prepared pan, smoothing the top.
    • Bake for 15-18 minutes, or until a toothpick inserted comes out clean. Let the cake cool slightly once it’s done.
  3. Assemble the Cake:
    • Once the cake has cooled a bit, carefully slice it in half horizontally.
    • Spread the pudding cream evenly over the bottom layer.
    • Place the top layer back on and refrigerate the assembled cake for 1-2 hours before serving.

Nutritional Information (per serving):

NutrientAmount
Calories180
Carbohydrates25 g
Protein5 g
Fat7 g
Fiber1 g

Why You Should Try This Recipe

A Perfect Balance of Flavors and Textures

One of the standout features of this apricot cake is the fusion of cake and pudding. While the fluffy cake provides a light and airy base, the creamy pudding filling adds a smooth, indulgent richness. Together, they create a harmony of textures that’s incredibly satisfying. Each bite offers something unique—soft, moist cake paired with a rich, custard-like filling that melts in your mouth.

Versatility and Customization

While this recipe features apricots, the beauty of this cake is its versatility. You can easily swap out apricots for other fruits, such as peaches, berries, or even pears, depending on what’s in season or what you have on hand. The pudding cream is also incredibly customizable. If you prefer a more decadent option, you could add a bit of chocolate or caramel to the cream, or even infuse it with spices like cinnamon or nutmeg for an autumn-inspired twist. The possibilities are endless, allowing you to make this cake your own.

Easy to Prepare Yet Impressive to Serve

One of the most appealing aspects of this apricot cake is how easy it is to make. While it may look and taste like a dessert that took hours to prepare, it comes together fairly quickly. The steps are simple, and the ingredients are easy to find, making it a great choice for both novice and experienced bakers. Despite its simplicity, the cake has an elegant appearance and rich flavors that are sure to impress your guests.

Frequently Asked Questions (FAQs)

Can I Use Fresh Apricots Instead of Canned?

Yes, absolutely! Fresh apricots are a great alternative to canned apricots. Simply peel and slice them into thin pieces before layering them onto the cake. If you choose to use fresh apricots, be sure they are ripe for the best flavor. If they’re too tart, you might want to sprinkle a little sugar over them before baking to balance out the flavor.

How Do I Store Leftover Cake?

This apricot cake should be stored in an airtight container in the refrigerator to keep it fresh. The pudding filling will need to be refrigerated to maintain its texture, and the cake will last for about 3-4 days. If you want to store the cake for longer, you can freeze it. Wrap the cake tightly in plastic wrap and foil before placing it in the freezer. It should keep for up to 3 months. To thaw, simply let it sit at room temperature for a few hours.

Can I Make This Cake Ahead of Time?

Yes, this cake can be made ahead of time. In fact, it’s often even better the next day after the flavors have had time to meld together. You can prepare the cake and pudding cream a day in advance, store them separately in the refrigerator, and then assemble the cake when you’re ready to serve. This makes it an excellent choice for entertaining since much of the work can be done in advance.

Can I Make This Cake Gluten-Free?

Yes, you can make this cake gluten-free by substituting the all-purpose flour with a gluten-free flour blend. Keep in mind that the texture may differ slightly from the original recipe, but the flavor will still be delicious. If you’re using a gluten-free flour blend, ensure that it’s one designed for baking, as this will provide the best results.

How Can I Make the Cake Lighter?

If you prefer a lighter cake, you can substitute some of the sugar with a natural sweetener like honey or maple syrup. Additionally, you can reduce the amount of sugar in the pudding cream for a less sweet result. If you’re looking for a lower-calorie option, you can also use a lighter milk alternative, such as almond milk, and reduce the amount of butter or oil in the cake.

How to Personalize Your Apricot Cake

While this cake is already a showstopper, there are a few simple ways to make it even more personalized and reflective of your own tastes.

Fruit Variations

The apricot is the star of this recipe, but it’s versatile enough to allow for substitutions. You can experiment with other fruits like peaches, plums, or berries. If you’re using a different fruit, consider the sweetness of the fruit you choose, as this may affect the amount of sugar needed in the recipe.

Flavor Enhancements

Want to elevate the flavor profile? Consider adding a splash of liqueur such as amaretto or brandy to the pudding cream for an adult twist. You could also infuse the cream with vanilla bean or citrus zest for an added layer of flavor. For an indulgent touch, add a dollop of whipped cream or a drizzle of caramel sauce when serving.

Frosting and Garnishes

If you want to add a decorative touch, try topping the cake with a dusting of powdered sugar or finely chopped nuts like almonds or pistachios. You can also use fresh apricot slices to garnish the top of the cake before serving, enhancing its visual appeal and adding a fresh, fruity element.

Conclusion: A Cake That Brings People Together

This apricot cake is more than just a dessert—it’s an invitation to create memories. Whether you’re baking it for a holiday, a celebration, or a simple weekend gathering, this cake has the power to bring people together over shared moments and delicious food. Just like my grandmother’s kitchen was a place for laughter and connection, I hope this recipe finds its way into your home and becomes a part of your family’s traditions.

Its light, airy texture, creamy filling, and fresh fruit topping make it a perfect choice for any occasion. It’s a cake that can be personalized to your tastes and shared with the people you love, making it a timeless addition to your recipe collection.

Amal

The Heartwarming Story Behind the Apricot Cake

This Apricot Cake is the perfect blend of airy, soft cake layers and a smooth, creamy pudding filling. The combination of sweet apricots and rich pudding makes it an irresistible treat for any occasion.
Prep Time 20 minutes
Cook Time 30 minutes
Total Time 50 minutes
Servings: 8 -10 servings
Course: Dessert
Cuisine: European-inspired

Ingredients
  

For the Pudding Cream:
  • 1 egg separated
  • 1 egg yolk
  • 350 ml 1 1/2 cups milk (divided)
  • 2 heaped tablespoons cornstarch
  • 1 teaspoon vanilla extract
  • 50 g 1/4 cup sugar
For the Cake:
  • 3 eggs
  • 1 egg white reserved from the pudding cream
  • A pinch of salt
  • 130 g 2/3 cup sugar

Method
 

  1. Prepare the Pudding Cream: In a saucepan, whisk together the egg yolk, cornstarch, sugar, and vanilla extract. Gradually add 150 ml of milk while whisking continuously to create a smooth mixture. Heat the mixture over medium heat, stirring constantly until it begins to thicken. Once thickened, remove from heat and set aside to cool. In a separate bowl, whisk the egg white until stiff peaks form. Gently fold the whipped egg white into the cooled pudding mixture, ensuring it’s evenly incorporated. Set aside.
  2. Prepare the Cake: Preheat the oven to 180°C (350°F). Grease and flour a cake pan. In a mixing bowl, beat the 3 eggs with sugar and a pinch of salt until the mixture becomes light and fluffy. Gently fold in the pudding cream mixture. Mix well until smooth. Pour the batter into the prepared cake pan and bake for 25-30 minutes or until a toothpick inserted comes out clean. Once baked, let the cake cool completely before frosting or serving.
  3. Assemble and Serve: Once the cake has cooled, cut it into slices or serve as a whole. Top with fresh apricot slices or apricot jam for extra flavor.

Notes

  • If you prefer a stronger apricot flavor, you can add apricot jam or fresh apricot slices into the batter before baking.
  • Make sure to allow the cake to cool completely before slicing to ensure it holds its shape and the pudding filling stays intact.
  • For an extra touch of elegance, dust the cake with powdered sugar or garnish with a few fresh mint leaves before serving.

Banana, Cocoa & Oat: A Slice of Comfort in Every Bite

There are recipes that whisper comfort the moment you begin preparing them. For me, this banana, cocoa, and oat dessert wasn’t just another healthy treat—it was born in a quiet morning moment that I’ll never forget.

It started with a leftover banana, too ripe for cereal but too precious to waste. The kettle had just whistled, and as I poured hot milk into my mug, I reached for my jar of oats. That was the moment. I remembered the way my grandmother used to mash bananas into her oatmeal and sprinkle cocoa on top when we were kids. It felt indulgent, even magical back then. And suddenly, I wasn’t just making breakfast—I was about to revive a memory in the form of a bake.

With nothing but intuition and warmth guiding my hands, I mixed those familiar ingredients together, added a pinch of vanillin, some baking powder, and a handful of walnuts from the pantry. A few minutes later, a rich chocolate aroma filled the kitchen—one that took me straight back to my childhood. The result? A cake that wasn’t too sweet, perfectly moist, and bursting with flavor and nostalgia.

Now, this banana-oat chocolate bake has become a tradition in my kitchen. It’s the dessert I bake when I want to give my family something hearty, healthy, and deeply satisfying. It’s also my answer when someone asks, “What can I make with ripe bananas that isn’t banana bread?”

The Magic Behind the Mix

This dessert isn’t your standard banana bread, nor is it a classic chocolate cake. It’s something in between—soft, fudgy, gently sweet, and made with ingredients that nourish without compromising on taste.

Oats: The Backbone of Texture

Oats give the structure and heartiness to this bake. When soaked in hot milk, they swell and soften, providing a tender texture that mimics flour while packing in fiber and nutrients. You can use quick oats or rolled oats, depending on the texture you prefer—rolled oats give a bit more bite, while quick oats make it more tender.

Bananas: Nature’s Sweetener

Ripe bananas add more than just sweetness. They bring moisture, richness, and a creamy consistency. Their natural sugars replace the need for added sweeteners in many cases, making this dessert a healthier option that still satisfies sweet cravings.

Cocoa Powder: The Deep Flavor Layer

Bitter cocoa balances the natural sugars of the banana. It brings a rich, chocolaty depth to the dish without overwhelming it. You can use Dutch-processed cocoa for a smoother flavor or natural cocoa powder if you want a bolder kick.

Eggs, Baking Powder, and Vanillin: The Binders and Lifters

Eggs bind everything together, ensuring the final bake is tender yet stable. Baking powder adds lift, and a pinch of vanillin (or pure vanilla extract) brightens the whole flavor profile.

Optional, but Worth It: Walnuts and Chocolate Chips

These add texture and decadence. Walnuts bring crunch and healthy fats; chocolate chips melt into gooey surprises with every bite.

INGREDIENTS

IngredientQuantity
Oat flakes120 g (3/4 cup + 1 tbsp)
Hot milk200 ml (5/6 cup)
Eggs2
Bananas (ripe, mashed)2
VanillinA pinch
Bitter cocoa powder40 g (1/2 cup)
Baking powder1 teaspoon
Walnuts (chopped)To taste
Chocolate chipsTo taste

DIRECTIONS

  1. Preheat your oven to 180°C (350°F). Grease or line a small baking pan.
  2. In a bowl, pour hot milk over oat flakes and let them soak for 10 minutes until softened.
  3. Add mashed bananas, eggs, and a pinch of vanillin to the oat mixture. Stir to combine.
  4. Mix in cocoa powder and baking powder until smooth and evenly incorporated.
  5. Fold in chopped walnuts and chocolate chips to taste.
  6. Pour the mixture into the prepared baking pan and level the surface.
  7. Bake for 25–30 minutes or until a toothpick inserted comes out with moist crumbs.
  8. Let it cool slightly before slicing. Serve warm or chilled for a fudgier texture.

NUTRITION INFORMATION (Per Serving – Based on 8 Slices)

NutrientAmount
Calories~210 kcal
Protein6 g
Carbohydrates24 g
Sugars10 g
Fiber4 g
Fat10 g
Saturated Fat2.5 g
Sodium70 mg
Potassium~300 mg
Iron8% DV

Why This Recipe Works for Every Occasion

Whether you’re catering to kids, guests, or simply yourself, this chocolate-banana oat dessert adapts beautifully.

As a Breakfast

Yes, it’s technically a dessert—but its healthy profile makes it perfect for breakfast too. Pair it with a cup of black coffee or a matcha latte and you’re starting your day with fuel and flavor.

As a Snack

Cut it into bars and pack them in lunchboxes or tote bags. It doesn’t crumble easily, making it ideal for on-the-go snacking.

As a Dessert

Serve it warm with a dollop of Greek yogurt or a spoonful of whipped coconut cream. Sprinkle with powdered cinnamon for added warmth.

Healthier Sweet Tooth Satisfaction

This bake feels indulgent but stays grounded in whole food ingredients:

  • No refined sugar needed (thanks to bananas)
  • Whole grains from oats
  • Healthy fats from walnuts and eggs
  • Antioxidants from cocoa
  • No processed flour, keeping it light and gluten-friendly (if using certified GF oats)

It’s ideal for those who want to treat themselves without the sugar crash or post-dessert guilt.

Common Questions About the Recipe (FAQs)

1. Can I make this recipe vegan?

Absolutely. Replace the eggs with flax eggs (1 tbsp flaxseed meal + 2.5 tbsp water per egg, let sit 5 min) and use plant-based milk like almond, oat, or soy. The result will be slightly more moist but still delicious.

2. Can I use steel-cut oats?

Steel-cut oats are not recommended for this recipe as they do not soften enough in the soak. Stick to rolled or quick oats.

3. How ripe should the bananas be?

The riper, the better. Bananas with brown speckles or fully browned skin have higher sugar content and mash more easily, which improves both taste and texture.

4. Is it freezer-friendly?

Yes. Slice and freeze in an airtight container for up to 3 months. Defrost overnight in the fridge or reheat in the oven or microwave for a warm, gooey treat.

5. Can I make it in muffin form?

Definitely. Divide the batter into muffin tins and bake for 15–20 minutes or until a toothpick comes out clean.

6. How long does it last?

Stored in the fridge, it stays fresh for 4–5 days. You can also store it at room temperature for 2 days in an airtight container.

7. Can I skip the cocoa or add other flavors?

You can omit cocoa for a banana-oat version, or add cinnamon, nutmeg, or cardamom for a spiced twist. A handful of raisins or dried cranberries also works beautifully.

Tips for Success

  • Let it rest: After baking, allow it to sit for at least 10 minutes. This helps it firm up and intensifies the flavors.
  • Use parchment paper: It helps prevent sticking and makes cleanup easier.
  • Don’t overmix: Stir just enough to combine. Overmixing can lead to a denser texture.

A Slice of Home in Every Bite

What started as a spontaneous breakfast experiment became one of the most-loved recipes in my home. There’s something deeply satisfying about baking something so simple, so honest, and having it come out not just tasty, but memorable. Each slice carries the warmth of banana, the richness of cocoa, and the nourishment of oats—wrapped up in love and shared freely.

Food doesn’t need to be extravagant to be special. It just needs to be made with purpose and enjoyed with gratitude.

In Conclusion: A Dessert That Speaks of Comfort and Nourishment

This chocolate-banana oat dessert is more than a recipe—it’s a reminder. A reminder that the best flavors often come from humble ingredients, and that baking can be both healing and nourishing. It celebrates the everyday—what’s in the fruit bowl, what’s in the pantry—and transforms it into something that feels like a hug on a plate.

Whether you bake it for your family, a friend, or just for yourself, may it bring the same joy to your table as it has to mine.

Amal

Banana, Cocoa & Oat: A Slice of Comfort in Every Bite

A wholesome, fudgy chocolate dessert made with ripe bananas, oats, and cocoa—naturally sweet, nutrient-rich, and perfect for guilt-free indulgence. Moist, rich, and just the right amount of sweet, this bake is a crowd-pleaser at any time of day.
Prep Time 10 minutes
Cook Time 30 minutes
Total Time 40 minutes
Servings: 8 slices
Course: Dessert
Cuisine: Fusion

Ingredients
  

  • 120 g oat flakes approximately 3/4 cup + 1 tbsp
  • 200 ml hot milk
  • 2 ripe bananas mashed
  • 2 eggs
  • A pinch of vanillin or vanilla extract
  • 40 g unsweetened cocoa powder about 1/2 cup
  • 1 teaspoon baking powder
  • Chopped walnuts optional, to taste
  • Chocolate chips optional, to taste

Method
 

  1. Preheat the oven to 180°C (350°F). Grease or line a small baking pan.
  2. In a mixing bowl, pour the hot milk over the oat flakes and let them soak for 10 minutes.
  3. Add the mashed bananas, eggs, and vanillin to the soaked oats. Stir until well combined.
  4. Mix in cocoa powder and baking powder until the batter is smooth.
  5. Fold in chopped walnuts and chocolate chips if using.
  6. Pour the mixture into the prepared baking pan and smooth the top.
  7. Bake for 25–30 minutes, or until a toothpick inserted comes out with moist crumbs.
  8. Let cool slightly before slicing and serving.

Notes

  • This recipe is naturally sweetened by ripe bananas; no extra sugar needed unless desired.
  • For a more intense chocolate flavor, increase cocoa powder slightly or add dark chocolate chips.
  • For added protein, you can replace one egg with 2 tablespoons of Greek yogurt.
  • Keeps well in the fridge for up to 3 days and tastes even fudgier when chilled.

Cool & Crunchy: A Cucumber Snack That’s Always in Season

Some of the best recipes don’t come from a cookbook. They come from memories, trial and error, and a need to make something special out of what we already have. That’s exactly how this cucumber snack came to life in my kitchen—unexpectedly, during a summer afternoon when the sun was high, the fridge was nearly empty, and hunger was knocking.

I remember standing barefoot on the kitchen tiles, a slight breeze coming through the window. I had cucumbers from the garden—still cool from the soil—half a lemon, a small bunch of fresh dill, and garlic waiting patiently in the pantry. With a dash of olive oil and a sprinkle of salt, something magic happened. That first bite was crunchy, refreshing, and unexpectedly addictive. My family devoured the entire bowl before the iced tea had even been poured.

Since that day, this quick cucumber snack has become a permanent resident in my recipe box. It’s served on lazy weekends, at BBQs, as a fresh side to rich meals, or simply when I need something satisfying but light. It reminds me that great food doesn’t need fanfare—just a little balance, freshness, and intention.

The Humble Power of Cucumbers

Cucumbers are often seen as a sidekick ingredient—tucked into salads, sliced for sandwiches, or floating in spa water. But this recipe places them center stage, where they belong. Their naturally high water content, gentle crunch, and subtle flavor make cucumbers ideal for soaking up vibrant dressings and aromatic herbs.

This snack highlights the cucumber’s clean flavor and complements it with a touch of acidity, a hint of sweetness, a burst of garlic, and the bright, unmistakable flavor of fresh dill. It’s a recipe that brings balance: tangy yet mellow, crunchy yet juicy, familiar yet new.

Beyond flavor, cucumbers are a nutritional powerhouse. Low in calories, high in hydration, and packed with antioxidants and vitamins like C and K, they are the perfect guilt-free snack.

Ingredients

IngredientQuantity
Cucumbers400 g
Salt1/2 teaspoon
Fresh dill (chopped)1 bunch
Garlic (minced)3 cloves
Lemon juice2 tablespoons
Sugar1/2 teaspoon
Olive oil1 tablespoon
Salt and pepperTo taste

Directions

  1. Wash the cucumbers thoroughly. Slice them thinly or into sticks, depending on your preference.
  2. Place the cucumbers in a bowl and toss with the 1/2 teaspoon of salt. Let them sit for 10 minutes to release excess moisture.
  3. Drain any liquid, then add the chopped dill, minced garlic, lemon juice, sugar, olive oil, and additional salt and pepper to taste.
  4. Mix everything thoroughly, ensuring the cucumbers are evenly coated.
  5. Chill in the fridge for at least 15 minutes before serving.

Nutritional Information (Per serving, based on 4 servings)

NutrientAmount
Calories60 kcal
Protein1 g
Carbohydrates4 g
Fiber1 g
Sugars1.5 g
Fat4.5 g
Saturated Fat0.6 g
Sodium250 mg
Vitamin C10% DV
Vitamin K25% DV

Why This Snack Works Anytime, Anywhere

This cucumber snack isn’t tied to seasons or trends. It’s timeless. And more importantly, it’s flexible.

  • Hot summer day? This dish cools you down.
  • Hearty dinner menu? It balances heavy mains with something light.
  • Hosting a brunch? Serve it in little cups as a refreshing side.
  • Busy weekday? Prep it ahead and keep it chilled for a grab-and-go moment of freshness.

The prep is so minimal that you can whip it together in under 10 minutes, and the ingredients are pantry and fridge staples. No complicated steps. No fancy tools. Just a bowl, a spoon, and your hands.

Flavor Notes and Customizations

While the classic combination of lemon, garlic, dill, and olive oil is a surefire hit, the recipe is endlessly adaptable:

  • Love spice? Add chili flakes or a splash of hot sauce.
  • Craving richness? Stir in a spoonful of Greek yogurt or sour cream to make a creamy cucumber salad.
  • Want more crunch? Toss in thinly sliced radishes or red onions.
  • No lemon? Use vinegar—apple cider, rice, or white wine all work beautifully.

The core concept remains the same: cucumbers + acidity + seasoning + herb = a snack that sings.

Pairing Ideas: More Than Just a Snack

Though it shines on its own, this cucumber snack also plays well with others. Here are some great ways to serve it:

  • As a side dish with grilled meats, roasted chicken, or baked fish
  • With sandwiches or wraps as a crisp counterpoint
  • Alongside a mezze platter with olives, hummus, pita, and feta
  • As a cooling topping on spicy rice bowls, tacos, or curries
  • Or simply served in small bowls as a refreshing starter at your next gathering

Its simplicity allows it to complement bold, rich, or spicy foods without overwhelming them.

Health Benefits That Make You Feel Good

This cucumber snack isn’t just tasty—it’s nourishing. Each bite offers a health boost:

  • Hydration: Cucumbers are over 95% water, supporting hydration and skin health.
  • Digestive Support: Garlic can help stimulate digestion and support the gut microbiome.
  • Heart Health: Olive oil offers heart-friendly fats, and lemon juice adds vitamin C.
  • Low in Calories: This snack is ideal for anyone watching their intake or seeking lighter fare.
  • Detoxifying: The combination of cucumber and lemon is a natural detox duo, loved for cleansing effects.

It’s a great choice for wellness-focused eaters, but even the most indulgent food lovers will appreciate its flavor and crunch.

FAQs: All Your Cucumber Snack Questions Answered

Can I make this ahead of time?

Absolutely. It actually tastes better after chilling in the fridge for 15–30 minutes. Just note that cucumbers release water over time, so stir before serving and drain any excess liquid if needed.

What type of cucumbers should I use?

Persian or English cucumbers are ideal because they’re less watery and have tender skins. If using regular cucumbers, peel and deseed them for the best texture.

How long does it keep in the fridge?

For the best taste and crunch, enjoy within 24 hours. After that, it becomes softer, though still flavorful.

Can I use dried dill instead of fresh?

Yes, though fresh dill offers a brighter, more vibrant flavor. Use about 1 teaspoon of dried dill if that’s what you have.

Is this snack suitable for kids?

Definitely! It’s mild, fresh, and crunchy—great for little ones, especially if you reduce the garlic.

Can I add protein to make it more filling?

Yes! Add chickpeas, cooked shrimp, or grilled tofu for a protein-packed version that still keeps the light vibe.

What if I don’t like garlic?

You can leave it out or substitute with shallots, chives, or green onions for a milder flavor.

Culinary Inspiration from the Everyday

Recipes like this cucumber snack are a reminder that great food isn’t about expensive ingredients or complicated techniques—it’s about thoughtful combinations, intuitive flavor, and sharing moments.

It’s the kind of dish that feels more like a gesture than a production. Something you whip up without stress, knowing it will always bring smiles, freshness, and comfort. Whether it accompanies a lavish dinner or stands on its own as a quick bite between errands, it never fails to deliver a satisfying experience.

Conclusion: The Snack That Keeps Giving

There’s a reason this cucumber snack has stood the test of time in my kitchen. It’s the perfect example of what I love most about cooking: taking something ordinary and turning it into something memorable.

It reminds us that snacks don’t have to come from a package, meals don’t have to take hours, and flavor doesn’t have to be complicated. With a cucumber, a bit of dill, and a squeeze of lemon, you have something refreshing, nourishing, and deeply satisfying.

Keep this recipe close—it’s your go-to for heatwaves, unexpected guests, and those little moments when your taste buds crave something real. It might just become the most underrated star of your recipe collection.

Amal

Cool & Crunchy: A Cucumber Snack That’s Always in Season

A crisp, refreshing cucumber snack tossed with lemon, garlic, dill, and a hint of sweetness. This quick and healthy bite is perfect for hot days, party platters, or as a light side that always delivers on flavor.
Prep Time 10 minutes
Total Time 10 minutes
Servings: 2 -3 servings
Course: Snack
Cuisine: Healthy

Ingredients
  

  • 400 g cucumbers
  • 1/2 teaspoon salt
  • 1 bunch of fresh dill chopped
  • 3 cloves of garlic minced
  • 2 tablespoons lemon juice
  • 1/2 teaspoon sugar
  • 1 tablespoon olive oil
  • Salt and pepper to taste

Method
 

  1. Slice cucumbers into thin rounds or sticks.
  2. Toss them in a bowl with 1/2 tsp of salt and let sit for 10 minutes.
  3. Drain any excess water released from the cucumbers.
  4. Add dill, garlic, lemon juice, sugar, and olive oil.
  5. Season with additional salt and pepper to taste.
  6. Mix well and refrigerate for 15–30 minutes before serving for best flavor.

Notes

  • For extra zing, add a splash of apple cider vinegar or a pinch of chili flakes.
  • This snack is best served chilled.
  • You can make it ahead and store it for up to 2 days in the fridge.
  • Works wonderfully as a side for grilled meats, falafel, or rice dishes.

Pumpkin Power Bake: From Humble Ingredients to Hearty Delight

It all started one crisp autumn afternoon, the kind where the kitchen becomes the heart of the home. I was rummaging through the fridge, searching for inspiration, when I stumbled upon a half-used pumpkin, some eggs, and a small stash of ground meat left from the previous night’s dinner. I didn’t have a recipe in mind, just a desire to make something warm, filling, and comforting—a dish that could bring everyone to the table without the need for a grand occasion.

As the scent of roasting pumpkin began to fill the kitchen, something special began to happen. It wasn’t just the transformation of simple ingredients into a nourishing meal—it was the way the aroma pulled my family out from their screens, their distractions, and into the moment. That afternoon, this pumpkin-based creation became a new family favorite. What started as an improvised bake quickly became a signature dish in our home, a recipe now requested at gatherings, weekday dinners, and cozy weekends alike.

This pumpkin and meat bake, simple as it may seem, carries with it a powerful lesson: the best meals are not always the most elaborate. Sometimes, all it takes is a handful of basic ingredients, a baking sheet, and a bit of heart to create something unforgettable.

Why Pumpkin Deserves a Starring Role

Pumpkin is often underrated outside of its seasonal spotlight. We associate it with pies and lattes, but its versatility in savory dishes is where it truly shines. Naturally sweet and packed with nutrients like vitamin A, fiber, and potassium, pumpkin makes an ideal base for baked dishes.

In this recipe, it creates a soft, lightly sweet canvas that balances the savory richness of ground meat and cheese. The eggs bind everything together, forming a sliceable bake with texture and depth. Unlike pasta or pastry-heavy casseroles, this dish is gluten-light, vegetable-rich, and satisfying without being overly heavy.

Ingredients

IngredientQuantity
Eggs4
Cheese150 g
Pumpkin (peeled & grated or chopped)1 and a half pumpkins
Flour50 g
Salt10 g
Black pepper5 g
Oil for frying50 g
Ground meat400 g
Baking sheet size47 cm x 35 cm

Directions:

  1. Prep the Pumpkin Base:
    Grate or finely chop the pumpkin and combine it with flour, salt, pepper, and eggs in a large bowl. Mix thoroughly to form a thick batter.
  2. Cook the Meat:
    In a frying pan, heat oil and brown the ground meat. Season lightly with salt and pepper and set aside.
  3. Assemble the Layers:
    On a greased 47 x 35 cm baking sheet, spread half the pumpkin mixture evenly as the first layer. Distribute the cooked ground meat evenly on top, followed by grated cheese. Cover with the remaining pumpkin mixture.
  4. Bake to Perfection:
    Preheat oven to 180°C (350°F). Bake for 30–35 minutes until golden and firm. Allow it to rest before slicing.

Nutritional Information (per serving, based on 6 servings)

NutrientAmount
Calories370 kcal
Protein22 g
Carbohydrates12 g
Fiber2 g
Fat26 g
Saturated Fat9 g
Cholesterol150 mg
Sodium680 mg

The Unexpected Charm of Simplicity

One of the most charming aspects of this recipe is how little it asks of you—and how much it gives back. It doesn’t demand fancy techniques or expensive ingredients. It’s forgiving and flexible, perfect for beginner cooks or seasoned home chefs looking for something low-maintenance yet crowd-pleasing.

Have extra vegetables? Grate them in. Want more protein? Swap ground beef for turkey or plant-based crumbles. Want to keep it vegetarian? Leave out the meat and add spinach, mushrooms, or chickpeas. The base recipe is strong enough to handle creativity, which makes it ideal for weeknight dinners or clearing out the fridge in a delicious way.

Versatility for Every Occasion

While it was born as a no-fuss dinner, this bake has evolved to suit many needs in our household:

  • Meal Prep Hero: It stores beautifully in the fridge and reheats well, making it perfect for lunches throughout the week.
  • Brunch Showstopper: Sliced into squares and served warm with sour cream or yogurt, it pairs beautifully with salads or soup.
  • Kid-Friendly Favorite: Its soft texture and mild flavors appeal to picky eaters, and you can sneak in extra veggies without detection.
  • Dinner Party Dish: When dressed with herbs, spices, or drizzled with a flavorful sauce, it elevates into an elegant yet rustic offering.

Frequently Asked Questions (FAQs)

1. Can I use canned or frozen pumpkin instead of fresh?
Yes, though fresh pumpkin gives the best texture. If using canned, make sure it’s pure pumpkin (not pumpkin pie filling). Frozen pumpkin should be thawed and drained well to avoid excess moisture.

2. Is this recipe gluten-free?
Not as written due to the small amount of flour. However, you can easily substitute a gluten-free flour blend or oat flour without altering the results too much.

3. What kind of cheese works best?
The recipe is flexible. Hard cheeses like cheddar, mozzarella, or gouda melt beautifully, while sharper cheeses like feta or parmesan add bold flavor. Manchego also pairs wonderfully with pumpkin.

4. Can I prepare it in advance?
Absolutely. You can prepare the entire mixture and refrigerate it (uncooked) for a few hours, or bake it and reheat individual portions later. It keeps well in the fridge for 3–4 days and can be frozen for up to 2 months.

5. Is it suitable for vegetarians?
Yes, simply omit the meat and increase the amount of pumpkin or add sautéed vegetables like mushrooms, peppers, or lentils for added substance.

6. Can I make it dairy-free?
You can replace the cheese with a dairy-free version or leave it out entirely. For creaminess, add a few tablespoons of plant-based yogurt or a dairy-free béchamel layer.

7. How do I know when it’s done?
The top should be golden brown and set, and a knife inserted in the center should come out clean. If the top is browning too quickly, cover loosely with foil and continue baking until the inside is cooked through.

8. Can I add spices or herbs?
Definitely. This bake welcomes flavor! Try paprika, cumin, nutmeg, thyme, or rosemary. Fresh parsley or basil can also add a lovely brightness when served.

Nutrition and Health Benefits

This pumpkin bake isn’t just delicious—it’s good for you too. Pumpkin is low in calories and high in antioxidants, especially beta-carotene, which converts to vitamin A in the body. Combined with protein-rich eggs and meat, it makes a satisfying meal that supports muscle growth, eye health, and immune function.

Compared to traditional casseroles or pies, this version is lower in carbohydrates and can be modified to suit many dietary needs. It’s a great way to enjoy comfort food while still eating mindfully.

Serving Suggestions and Pairings

To make it a complete meal, serve this bake with a light side:

  • A fresh green salad with lemon vinaigrette
  • Steamed green beans or sautéed zucchini
  • Roasted garlic yogurt sauce or sour cream
  • A slice of rustic bread or flatbread on the side

For drinks, try pairing with:

  • A glass of dry white wine or light red (if you’re serving it for dinner)
  • Fresh mint lemonade or unsweetened iced tea

Tips for Success

  • Grate the pumpkin finely for even cooking and smoother texture.
  • Drain excess moisture from grated pumpkin if it’s too watery. A quick squeeze in a towel works well.
  • Let it rest after baking before slicing—this helps the layers settle and makes it easier to portion.

Conclusion: More Than Just a Bake

This simple pumpkin recipe is more than a quick dinner—it’s a story on a plate. It’s about resourcefulness, warmth, and the magic that happens when you bring together humble ingredients with care and creativity. Whether you’re feeding a crowd, trying to sneak vegetables into a kid’s plate, or just craving something wholesome and nourishing, this dish is a reminder that the best meals don’t always come from cookbooks—they come from the heart.

So next time you have a pumpkin in your pantry and no grand plan, remember this recipe. It might just become a family favorite, just like it did in my home.

Amal

Pumpkin Power Bake: From Humble Ingredients to Hearty Delight

A cozy, savory pumpkin bake layered with ground meat and melty cheese—this simple yet hearty dish transforms humble ingredients into a golden, comforting meal that the whole family will love. Perfect for chilly evenings, meal prepping, or when you want something wholesome without a lot of fuss.
Prep Time 15 minutes
Cook Time 35 minutes
Total Time 50 minutes
Servings: 4 –6 servings
Course: Main Dish
Cuisine: Comfort Food

Ingredients
  

  • 4 eggs
  • 150 g cheese grated
  • 1 and a half pumpkins peeled, grated or chopped finely
  • 50 g flour
  • 10 g salt
  • 5 g black pepper
  • 50 g oil for frying
  • 400 g ground meat
  • Baking sheet size: 47 cm x 35 cm

Method
 

  1. Preheat oven to 180°C (350°F). Grease your 47 x 35 cm baking sheet.
  2. In a large bowl, combine grated pumpkin, eggs, flour, salt, and pepper. Mix well.
  3. In a pan, heat oil and cook ground meat until browned and crumbly. Season lightly.
  4. Spread half of the pumpkin mixture over the baking sheet. Add the cooked meat on top, then sprinkle with grated cheese.
  5. Cover with the remaining pumpkin mixture, spreading evenly.
  6. Bake for 30–35 minutes or until golden and set.
  7. Let cool slightly before slicing and serving.

Notes

  • You can use mozzarella, cheddar, or even feta for a different cheese profile.
  • For added flavor, mix fresh herbs like thyme or parsley into the pumpkin batter.
  • The recipe works well for meal prep—just slice and reheat.
  • This dish also freezes well after baking.

Oatmeal, Egg, and Cheese Pizza: A Delicious Fusion of Comfort and Creativity

There are those dishes in life that begin as mere experiments, a blend of ingredients gathered in the kitchen based on whim, necessity, or a desire to use up what’s left in the fridge. These dishes, however, often end up being far more than just an improvised meal. They become staples in our homes, carrying with them stories of family gatherings, moments of solitude, and even the pure joy of creating something out of nothing. For me, oatmeal, egg, and cheese pizza is one such dish.

I remember the first time I stumbled upon the idea. It was a lazy Saturday morning when the weather outside had turned unexpectedly chilly. I didn’t want anything too heavy for breakfast, but I also wanted something hearty enough to fuel my day. The ingredients were simple: oatmeal, eggs, and some cheese in the fridge. At first, I wasn’t sure how they would come together, but I decided to give it a shot. To my surprise, not only did the combination work, but it also satisfied my cravings in a way that no typical pizza ever could. What started as an experiment quickly became a cherished recipe in my kitchen, one that I continue to make for myself and my loved ones when we need something warm, comforting, and just a little bit different.

What I love about this dish is how it combines the richness of eggs and cheese with the humble heartiness of oatmeal. It’s a marriage of two worlds: the savory and the nourishing. The result is a crispy, cheesy, and satisfying “pizza” that can easily be enjoyed for breakfast, lunch, or dinner. This recipe is an ode to the beauty of simplicity and creativity in cooking. It’s not just about what’s in the dish, but about how the ingredients come together in ways we least expect, surprising us with new flavors and textures.

The Fusion of Flavors: Why This Dish Works

At first glance, oatmeal might seem like an unusual base for pizza. After all, oatmeal is typically associated with breakfast, not something savory and satisfying like pizza. But that’s the beauty of this dish—it challenges our expectations and introduces us to a new way of looking at our favorite foods. Oatmeal, when prepared properly, provides a soft yet slightly chewy texture that holds up well as a base for toppings. Its mild flavor acts as the perfect canvas for the richness of eggs and the saltiness of cheese, while the addition of herbs and spices adds depth and complexity.

The eggs serve as both a flavor enhancer and a binding agent, holding the oatmeal base together and adding a creamy richness that complements the other ingredients. The cheese, of course, is the star of the show. Its meltiness and savory flavor bring the whole dish together, making each bite satisfying and full of flavor. Whether you opt for sharp cheddar, creamy mozzarella, or any other cheese you prefer, it adds an indulgent quality that transforms this simple dish into something special.

What’s more, this dish is highly customizable. You can add fresh herbs like parsley or basil to brighten the flavor, or sprinkle a bit of chili flakes for a gentle kick. The beauty of oatmeal, egg, and cheese pizza lies in its adaptability. You can experiment with different cheeses, herbs, and spices, or even add vegetables, bacon, or sausage to make it more filling. It’s a dish that can evolve with your taste preferences and the ingredients you have on hand, making it a go-to recipe when you need something easy, quick, and satisfying.

Ingredients

IngredientQuantity
Oatmeal1 cup
Eggs2
Milk1 glass
Parsley, choppedTo taste
Cheese, grated100g
SaltTo taste
Dry Provençal herbsTo taste
Chili flakesTo taste
Oil for fryingAs needed
Sesame seeds for garnishTo taste

Directions:

  1. Prepare the Oatmeal Mixture:
    In a medium-sized bowl, combine the oatmeal, eggs, and milk. Mix well until all ingredients are fully incorporated. Season with salt, dry Provençal herbs, and chili flakes to taste.
  2. Cook the Base:
    Heat a little oil in a frying pan over medium heat. Pour the oatmeal mixture into the pan, spreading it evenly to form a base. Cook for 3-4 minutes, allowing the base to firm up slightly.
  3. Add the Cheese and Parsley:
    Sprinkle the grated cheese and chopped parsley evenly over the top of the base. Let the cheese melt and the base cook for another 3-4 minutes until golden and crispy.
  4. Flip and Cook the Other Side:
    Carefully flip the base using a spatula, and cook for an additional 2-3 minutes until the other side is browned and the cheese has fully melted.
  5. Serve and Garnish:
    Remove the pizza from the pan and transfer to a plate. Sprinkle sesame seeds on top for an added crunch and serve hot.

Nutritional Information (per serving, assuming 2 servings):

NutrientAmount per serving
Calories350 kcal
Protein17g
Carbohydrates30g
Fiber4g
Fat20g
Saturated Fat5g
Cholesterol160mg
Sodium400mg
Sugars4g

A Healthier Take on Traditional Pizza

One of the key reasons I love this dish is that it’s a healthier alternative to traditional pizza. While the classic pizza dough is often heavy with refined flour, oatmeal provides a more nutrient-dense base. Oatmeal is high in fiber, which can help promote digestion and keep you feeling fuller for longer. It’s also a great source of complex carbohydrates, which provide sustained energy without causing blood sugar spikes.

In addition to the fiber, oatmeal is rich in vitamins and minerals, including manganese, phosphorus, magnesium, and iron. These nutrients support everything from bone health to immune function. Eggs, meanwhile, are an excellent source of high-quality protein, vitamins A, B12, and D, and choline, an essential nutrient that supports brain health. Cheese, though rich in fats, is also packed with protein and calcium, making it a good addition to a balanced diet when consumed in moderation.

This combination of nutrients makes oatmeal, egg, and cheese pizza not only delicious but also a filling and satisfying meal. It’s a great option for anyone looking for a healthier alternative to traditional pizza without sacrificing flavor or satisfaction. Plus, it’s a dish that can easily be adapted to suit various dietary preferences, from vegetarian to gluten-free.

How This Dish Can Be Customizable to Your Tastes

One of the reasons this dish has become a personal favorite is its versatility. It can be made to suit any occasion or mood, depending on what you feel like eating. If you’re in the mood for a more hearty meal, you can add sautéed mushrooms, spinach, or bell peppers to the top for extra nutrients and flavor. If you prefer a touch of sweetness, try adding a sprinkle of caramelized onions or roasted tomatoes. The possibilities are endless.

Another variation of this dish could include swapping out the cheese for a dairy-free option, making it suitable for those with lactose intolerance or vegan preferences. You could also experiment with adding a variety of spices to give the dish a more international flair. Imagine a sprinkle of cumin, coriander, or turmeric for a Middle Eastern-inspired twist, or perhaps a dash of smoked paprika for a touch of Spanish flavor.

What I particularly enjoy is that this recipe can easily be tailored to accommodate what you have in your pantry. The beauty of this dish lies in its simplicity, and its adaptability makes it a great go-to when you’re short on time or ingredients but still want something flavorful.

FAQs: Answering Your Questions About Oatmeal, Egg, and Cheese Pizza

  1. Can I make this dish ahead of time? Yes! You can prepare the base ahead of time and store it in the fridge. When ready to serve, just add the cheese and other toppings, then heat it through. This makes it a perfect meal prep option for busy mornings.
  2. Can I use instant oatmeal for this recipe? While it’s best to use traditional rolled oats for texture, you can use instant oatmeal in a pinch. However, be aware that the texture might be slightly different, and you may need to adjust the liquid amount.
  3. What if I don’t have milk on hand? You can substitute milk with water or a plant-based milk like almond or soy milk. This will not affect the overall flavor too much but might slightly change the texture.
  4. Can I add meat to this dish? Absolutely! Adding cooked bacon, sausage, or ham can make this dish more substantial and add an extra layer of savory flavor.
  5. How can I make this dish spicier? If you like heat, feel free to increase the amount of chili flakes or add fresh sliced jalapeños to the top for an extra kick.

Conclusion: A Dish That Brings Comfort, Creativity, and Flavor

Oatmeal, egg, and cheese pizza is more than just a quirky take on traditional pizza—it’s a dish that combines comfort, creativity, and nourishment in one delicious bite. Whether you’re cooking for yourself, your family, or friends, this recipe provides a satisfying meal that’s both healthy and indulgent. It’s a perfect example of how sometimes, the best dishes come from unexpected combinations, where simplicity and flavor collide in ways that leave you craving more.

This dish reminds us that cooking doesn’t always need to be complicated to be rewarding. With just a handful of ingredients, you can create something that feels both familiar and new. It’s the kind of recipe that invites experimentation, yet still delivers a comforting and satisfying result every time. So the next time you’re in need of a quick, nourishing meal, give oatmeal, egg, and cheese pizza a try. It might just become your new favorite go-to recipe.

Amal

Oatmeal, Egg, and Cheese Pizza: A Delicious Fusion of Comfort and Creativity

This oatmeal, egg, and cheese pizza is a creative and nutritious alternative to traditional pizza, blending the heartiness of oats with the richness of eggs and cheese. It’s crispy on the outside, soft on the inside, and packed with flavor. Perfect for breakfast, lunch, or a light dinner, this dish is quick to prepare and surprisingly satisfying.
Prep Time 5 minutes
Cook Time 10 minutes
Total Time 15 minutes
Servings: 2 -3 servings
Course: Breakfast
Cuisine: Healthy

Ingredients
  

  • 1 cup oatmeal
  • 2 eggs
  • 1 glass of milk
  • Parsley chopped
  • 100 g cheese grated
  • Salt to taste
  • Dry Provençal herbs to taste
  • Chili flakes to taste
  • Oil for frying
  • Sesame seeds for garnish

Method
 

  1. In a bowl, mix oatmeal, eggs, and milk until well combined. Season with salt, dry Provençal herbs, and chili flakes.
  2. Heat oil in a frying pan over medium heat. Pour the mixture in, spreading it evenly to form a round shape.
  3. Cook for 3-4 minutes until the bottom is firm, then sprinkle cheese and chopped parsley on top.
  4. Flip the base carefully and cook for another 2-3 minutes until golden and crispy.
  5. Transfer to a plate, garnish with sesame seeds, and serve hot.

Notes

  • Use any cheese you like—cheddar, feta, or mozzarella all work well.
  • For a spicier kick, add extra chili flakes or black pepper.
  • This dish pairs beautifully with a fresh salad or a dollop of yogurt on the side.
  • If you prefer a crunchier texture, cook the base a little longer before flipping.

Cabbage with Eggs: A Comforting Journey to Simplicity and Flavor

There are moments in life when food is not just sustenance, but a doorway to memories. For me, cabbage with eggs is one of those dishes. I remember my grandmother making it in her warm, cozy kitchen, where the scent of sautéed cabbage and onions would fill the house, wrapping everyone in a comforting embrace. This dish was humble, yet so satisfying—simple ingredients coming together to create something much greater than the sum of its parts. It was the kind of meal that brought the whole family around the table, sharing stories, laughter, and comfort.

At first glance, cabbage with eggs may seem like a basic, no-frills dish. However, its beauty lies in its simplicity and versatility. It’s a dish that can be made quickly with ingredients you probably already have in your kitchen, yet it offers an unexpected depth of flavor and heartiness. Over the years, this dish has become more than just a family favorite for me; it’s a symbol of the joy found in simple pleasures. Cooking this dish brings me back to those quiet moments in my grandmother’s kitchen, reminding me that sometimes the simplest meals are the ones that leave the most lasting impressions.

The Beauty of Cabbage with Eggs: Why This Dish Resonates

In a world filled with complex recipes and elaborate techniques, cabbage with eggs stands as a testament to the power of simplicity. It’s a dish that doesn’t require fancy ingredients or intricate methods. Yet, it delivers a deep, nourishing satisfaction that is hard to beat. Whether you are looking for a quick weeknight meal or something to serve for breakfast, brunch, or dinner, cabbage with eggs is an option that can easily fit into any part of your day.

The beauty of this dish lies in its balance of flavors and textures. The cabbage, when sautéed just right, becomes soft and sweet, while still maintaining a slight crunch. The eggs, whether scrambled or gently cooked, provide a creamy texture that complements the cabbage perfectly. Add a bit of grated cheese and fresh parsley, and you have a meal that is bursting with flavor yet grounded in a sense of comfort and warmth.

This dish is also incredibly versatile. The cabbage can be prepared in a variety of ways: shredded, chopped, or even lightly sautéed for a different texture. The eggs can be scrambled for a more traditional approach, or you can make them more runny if you prefer a softer consistency. If you’re feeling adventurous, you can even add other vegetables or spices to enhance the flavor. Some people enjoy a bit of garlic or onions, while others may add a dash of hot sauce for a touch of heat. The possibilities are endless, but no matter how you prepare it, cabbage with eggs always tastes like home.

Ingredients

IngredientQuantity
Olive oil2 tbsp
Medium onion, finely chopped1 medium
Carrot, grated1
White cabbage, shredded2 lb / 900g
Eggs, beaten5-6
All-purpose flour (optional)1 tbsp
Manchego cheese, grated (optional)As needed
Fresh parsley, chopped (optional)As needed

Directions:

  1. Sauté the Vegetables:
    Heat the olive oil in a large skillet over medium heat. Add the finely chopped onion and sauté for 2-3 minutes until softened. Add the grated carrot and shredded cabbage to the skillet. Stir well and cook for about 8-10 minutes until the cabbage is tender but still slightly crisp.
  2. Prepare the Eggs:
    While the cabbage mixture is cooking, beat the eggs in a bowl. If you’d like a thicker texture, you can whisk in the optional tablespoon of flour. This step is optional, but it helps to bind the ingredients together and give the dish a little extra body.
  3. Cook the Eggs:
    Once the cabbage is tender, create a little space in the center of the skillet, then pour in the beaten eggs. Allow them to cook for 1-2 minutes, stirring occasionally to scramble the eggs into the vegetables.
  4. Add the Finishing Touches:
    If desired, sprinkle some grated Manchego cheese over the top of the cabbage and eggs, allowing it to melt into the dish. Garnish with freshly chopped parsley for a burst of color and flavor.
  5. Serve and Enjoy:
    Once the eggs are fully cooked and the cheese has melted, serve your cabbage and eggs hot, either as a main dish or as a side dish with your favorite protein.

Nutritional Information (per serving, assuming 4 servings):

NutrientAmount per serving
Calories250 kcal
Protein10g
Carbohydrates15g
Fiber5g
Fat18g
Saturated Fat3g
Cholesterol180mg
Sodium150mg
Sugars6g

Why Cabbage with Eggs is the Ultimate Comfort Food

Comfort food is about more than just flavor. It’s about the memories, the feelings it evokes, and the nourishment it provides for the body and soul. Cabbage with eggs is the epitome of comfort food—unpretentious, yet incredibly satisfying. In a busy world full of distractions and demands, this dish offers a quiet moment of reprieve. It’s a chance to slow down, savor a homemade meal, and reconnect with something simple and grounding.

In many ways, cabbage with eggs is a perfect example of how food can bring people together. Whether served at a family dinner or made for yourself after a long day, this dish has a way of making everything feel just a little bit better. There’s something undeniably comforting about a hot plate of cabbage with eggs, especially when shared with loved ones.

The Nutritional Benefits of Cabbage with Eggs

While cabbage with eggs may be simple, it’s also surprisingly nutritious. Cabbage is a powerhouse of vitamins and minerals, packed with vitamin C, vitamin K, fiber, and antioxidants. It’s a great addition to any diet, helping to support digestion, reduce inflammation, and promote overall health. Eggs, of course, are an excellent source of protein, vitamins, and minerals, particularly vitamin B12 and choline, which are essential for brain health.

When combined, cabbage and eggs create a well-rounded, balanced dish that can help fuel your body for hours. This dish is low in carbohydrates, making it a great option for those following low-carb or ketogenic diets. It’s also a great option for vegetarians, provided you skip the optional meat additions. The healthy fats from the olive oil, along with the protein from the eggs, provide a filling meal that doesn’t leave you feeling overly full or sluggish.

Additionally, cabbage is incredibly versatile. It’s a low-calorie vegetable, which makes it an ideal choice for those looking to manage their weight while still enjoying a satisfying meal. The richness of the eggs and olive oil helps to balance out the dish, so you won’t feel deprived, even on a calorie-conscious diet.

A Versatile Dish: Customizing Cabbage with Eggs

One of the reasons cabbage with eggs continues to be such a beloved dish in my family is its versatility. There are endless variations of this recipe, and you can easily make it your own depending on your tastes and dietary preferences. Here are just a few ways you can customize this dish to make it uniquely yours:

  1. Add More Vegetables: While cabbage and eggs are the stars of this dish, feel free to add other vegetables you enjoy. Mushrooms, bell peppers, or zucchini would work wonderfully in this recipe. You can sauté them alongside the cabbage for a more hearty, veggie-packed meal.
  2. Try Different Cheeses: The recipe calls for Manchego cheese, which adds a rich, nutty flavor to the dish. However, you can substitute this with any cheese you like—cheddar, feta, or goat cheese would all work beautifully. Experiment with different cheeses to find your perfect match.
  3. Herbs and Spices: Fresh parsley is a great addition to this dish, but you can also add other herbs like thyme, dill, or rosemary. If you prefer a little heat, consider adding a pinch of chili flakes or a dash of hot sauce.
  4. Add Meat: For those who enjoy a bit of protein with their meal, adding bacon, sausage, or ham would make a delicious variation of this dish. These meats pair wonderfully with the sweetness of the cabbage and the richness of the eggs.
  5. Change the Cooking Method: While the eggs are typically scrambled into the cabbage, you can also prepare them in a different style. Try frying or poaching the eggs separately and serving them on top of the cabbage for a more elegant presentation.

FAQs about Cabbage with Eggs

1. Can I use a different type of cabbage?
Yes! While green cabbage is the most common choice for this recipe, you can use red cabbage or Savoy cabbage for a different flavor and texture. Each type of cabbage has its own unique flavor, so feel free to experiment.

2. Can I make this dish ahead of time?
Cabbage with eggs is best served fresh, but you can store leftovers in an airtight container in the refrigerator for up to 2 days. Reheat gently in a skillet to avoid overcooking the eggs.

3. Can I make this dish vegan?
Yes, this dish can easily be made vegan by replacing the eggs with a plant-based egg substitute, such as tofu scramble or chickpea flour batter. You can also omit the cheese or use a dairy-free alternative.

Conclusion: A Dish That Connects Generations

Cabbage with eggs may be simple, but it’s a dish that’s rich with meaning. It connects us to the past, to our roots, and to the people who taught us how to cook with love and care. Whether you’re preparing this dish for a family meal or a solo dinner, it’s a reminder that sometimes the best meals are the ones that don’t require a lot of effort—just a few good ingredients and a lot of heart. Cabbage with eggs is more than just food; it’s a celebration of simplicity, nourishment, and tradition.

Amal

Cabbage with Eggs: A Comforting Journey to Simplicity and Flavor

Cabbage with eggs is a simple yet delicious dish that combines the earthy flavor of sautéed cabbage with the rich, creamy texture of eggs. This hearty and nutritious meal is perfect for any time of day, whether you’re enjoying it as a satisfying breakfast, lunch, or dinner. With just a few basic ingredients, this dish offers both comfort and nourishment, all in one bowl.
Prep Time 10 minutes
Cook Time 15 minutes
Total Time 25 minutes
Servings: 4 –6 servings
Course: Main Dish
Cuisine: Mediterranean-Inspired

Ingredients
  

  • 2 tbsp olive oil
  • 1 medium onion finely chopped
  • 1 carrot grated
  • 2 lb / 900g white cabbage shredded
  • 5-6 eggs beaten
  • 1 tbsp all-purpose flour optional
  • Manchego cheese grated (optional)
  • Fresh parsley chopped (optional)

Method
 

  1. Heat the olive oil in a large skillet over medium heat. Add the finely chopped onion and cook for 2-3 minutes until softened.
  2. Stir in the grated carrot and shredded cabbage. Continue sautéing for 8-10 minutes, stirring occasionally, until the cabbage is tender but slightly crisp.
  3. In a separate bowl, beat the eggs. If you prefer a thicker texture, whisk in the optional tablespoon of flour. Add the beaten eggs to the skillet, stirring gently to combine with the cabbage and carrots. Cook for 2-3 minutes, allowing the eggs to scramble and cook through.
  4. If desired, sprinkle grated Manchego cheese over the top of the dish and let it melt into the eggs and cabbage.
  5. Garnish with freshly chopped parsley and serve hot.

Notes

  • For a creamier texture, you can add a splash of milk or cream to the beaten eggs before adding them to the skillet.
  • To make the dish more filling, you can add cooked sausage or bacon for extra protein and flavor.
  • Feel free to experiment with different cheeses like cheddar or feta for a unique twist on the dish.

Stay Connected

Get recipes via email: