Cinnamon Swirl Apple Fritter Bread: Fall’s Cozy Favorite

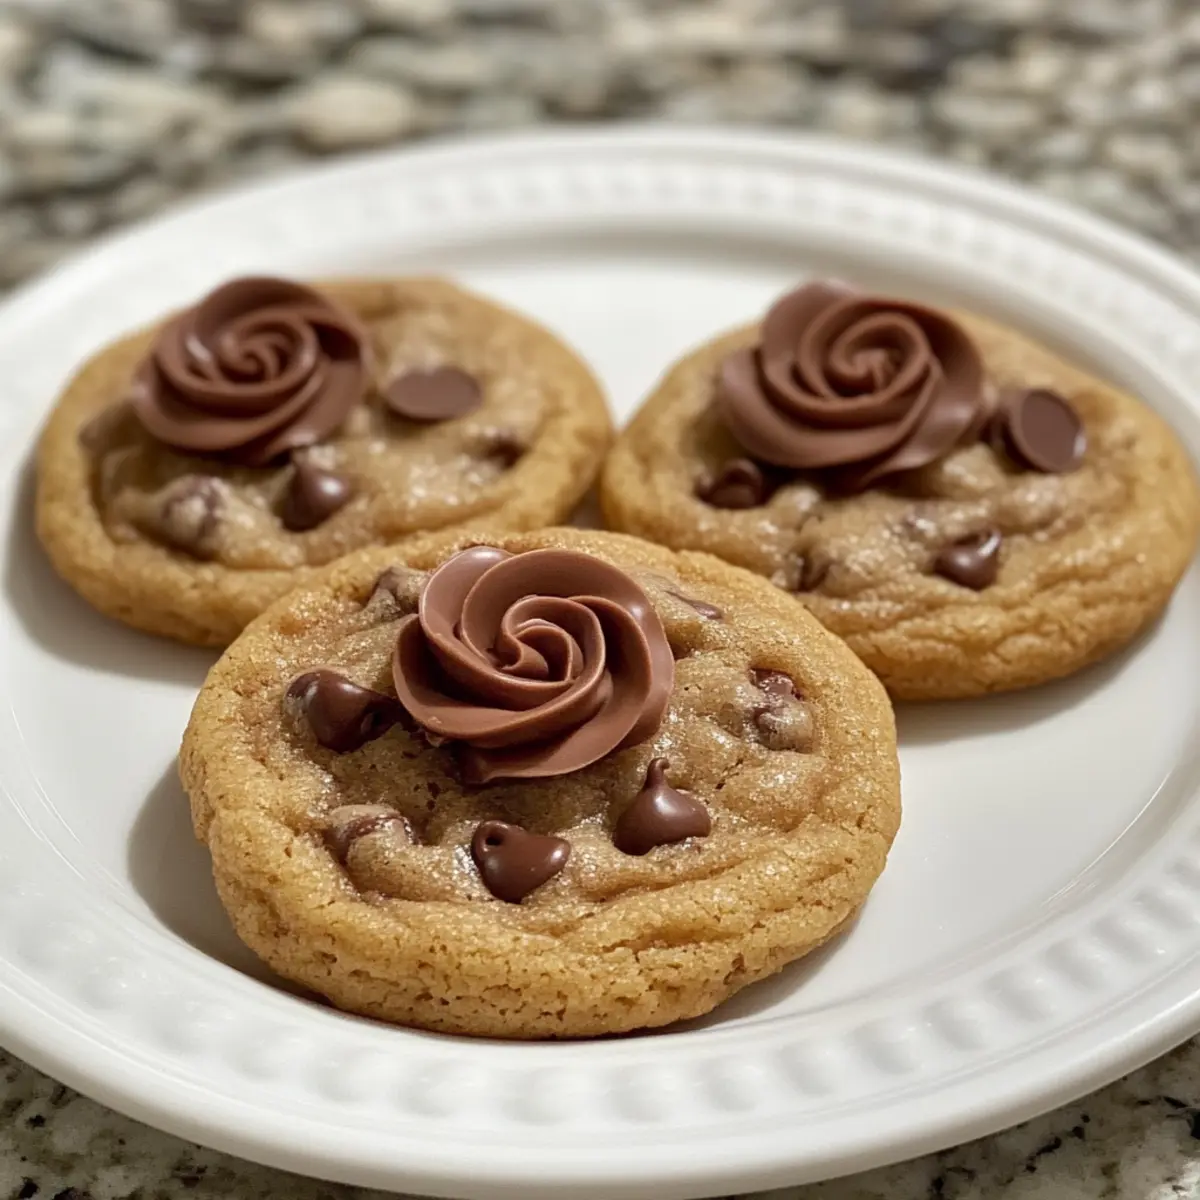
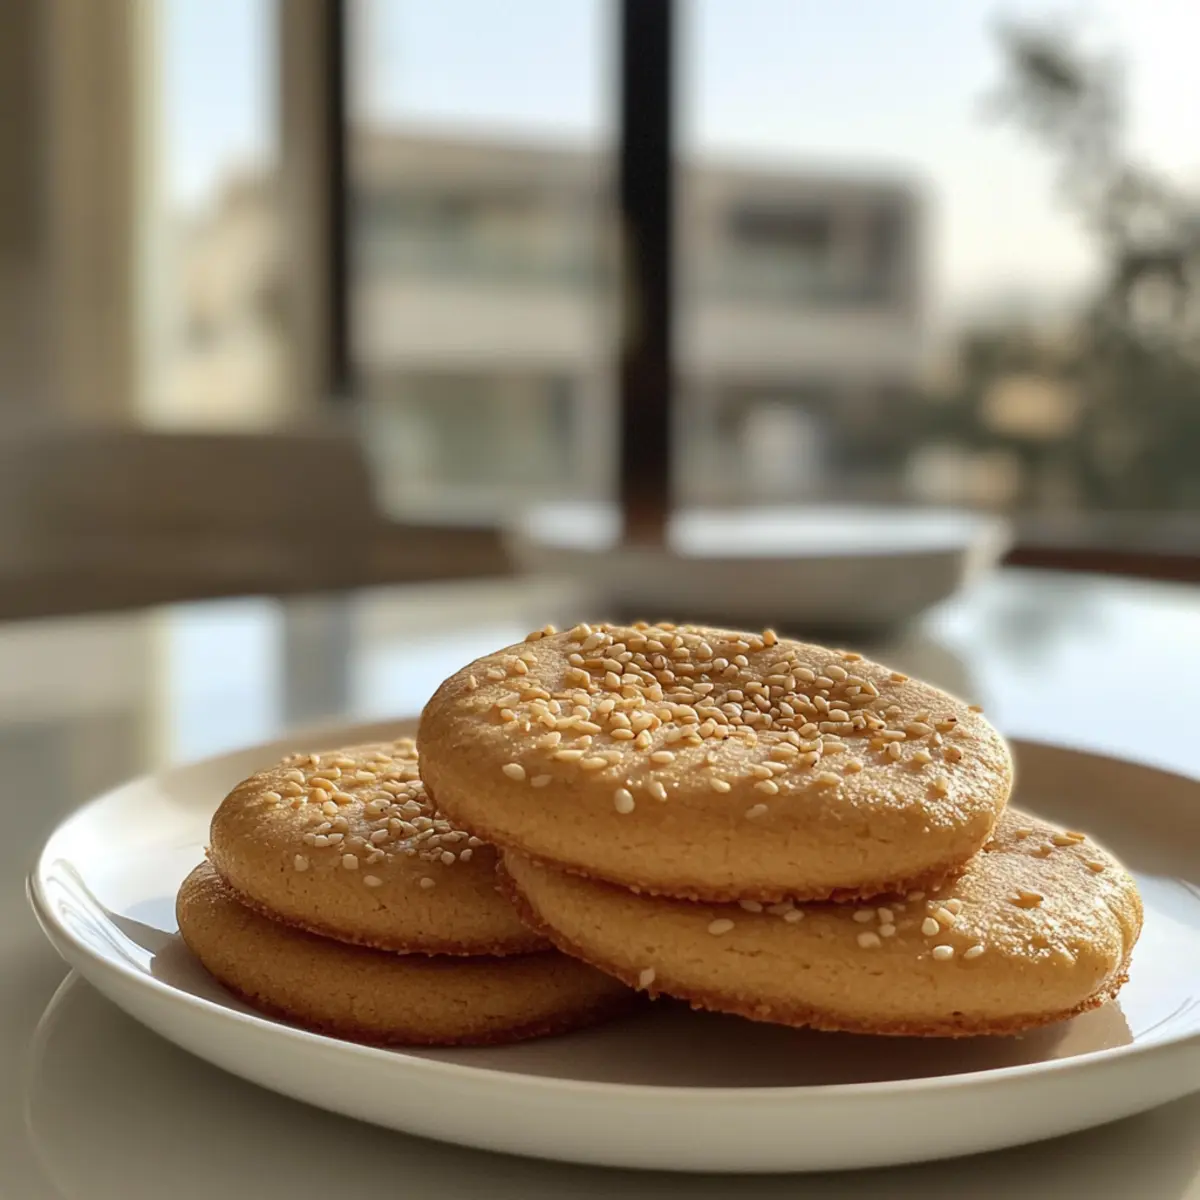
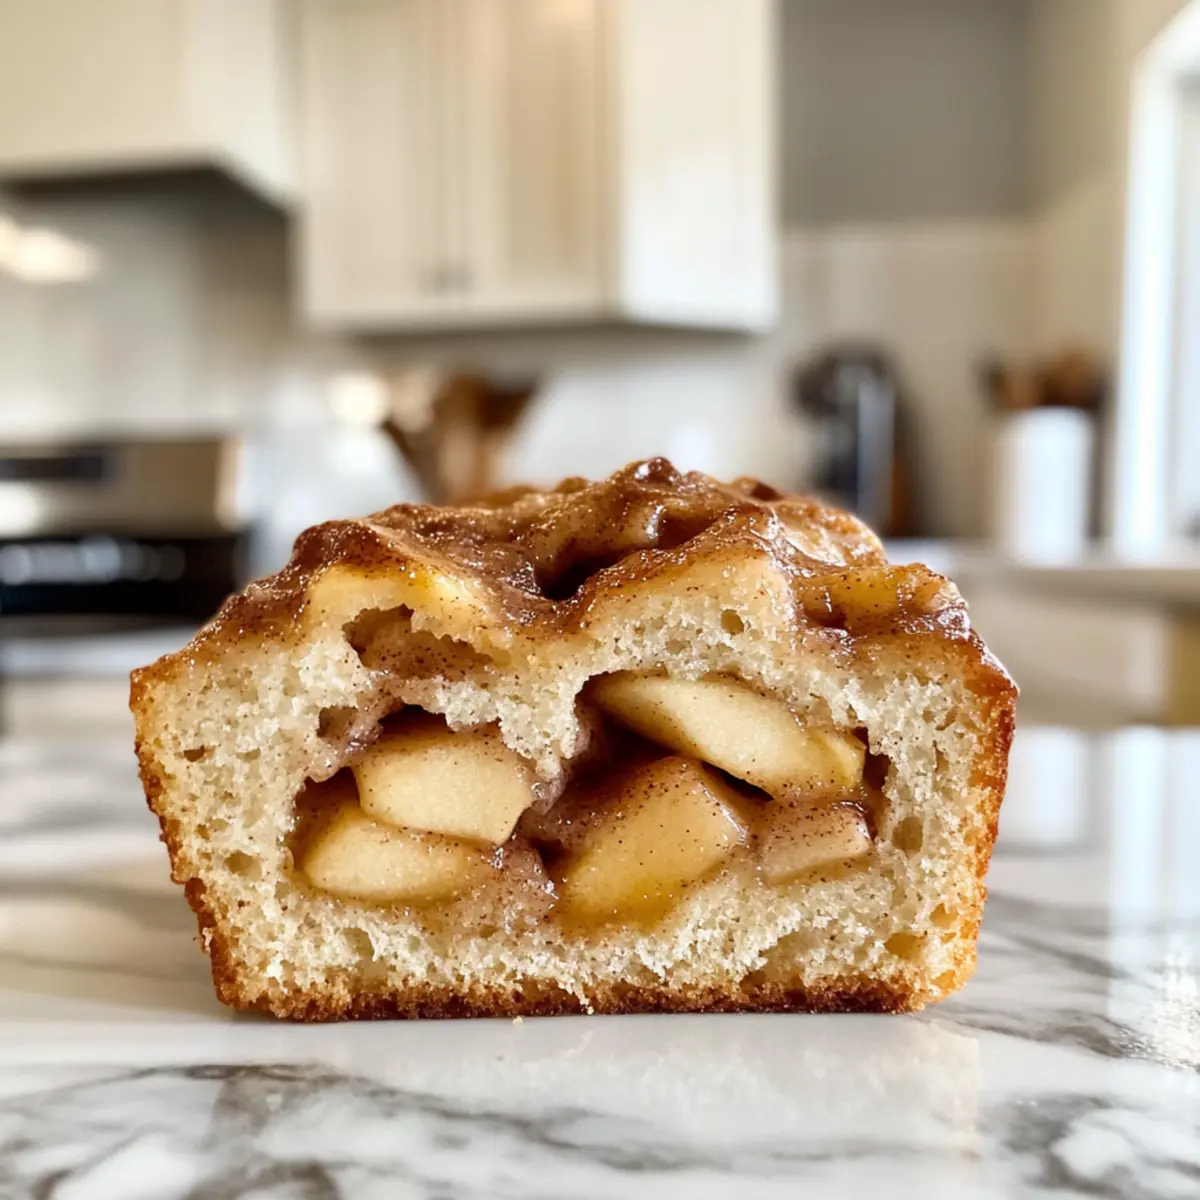
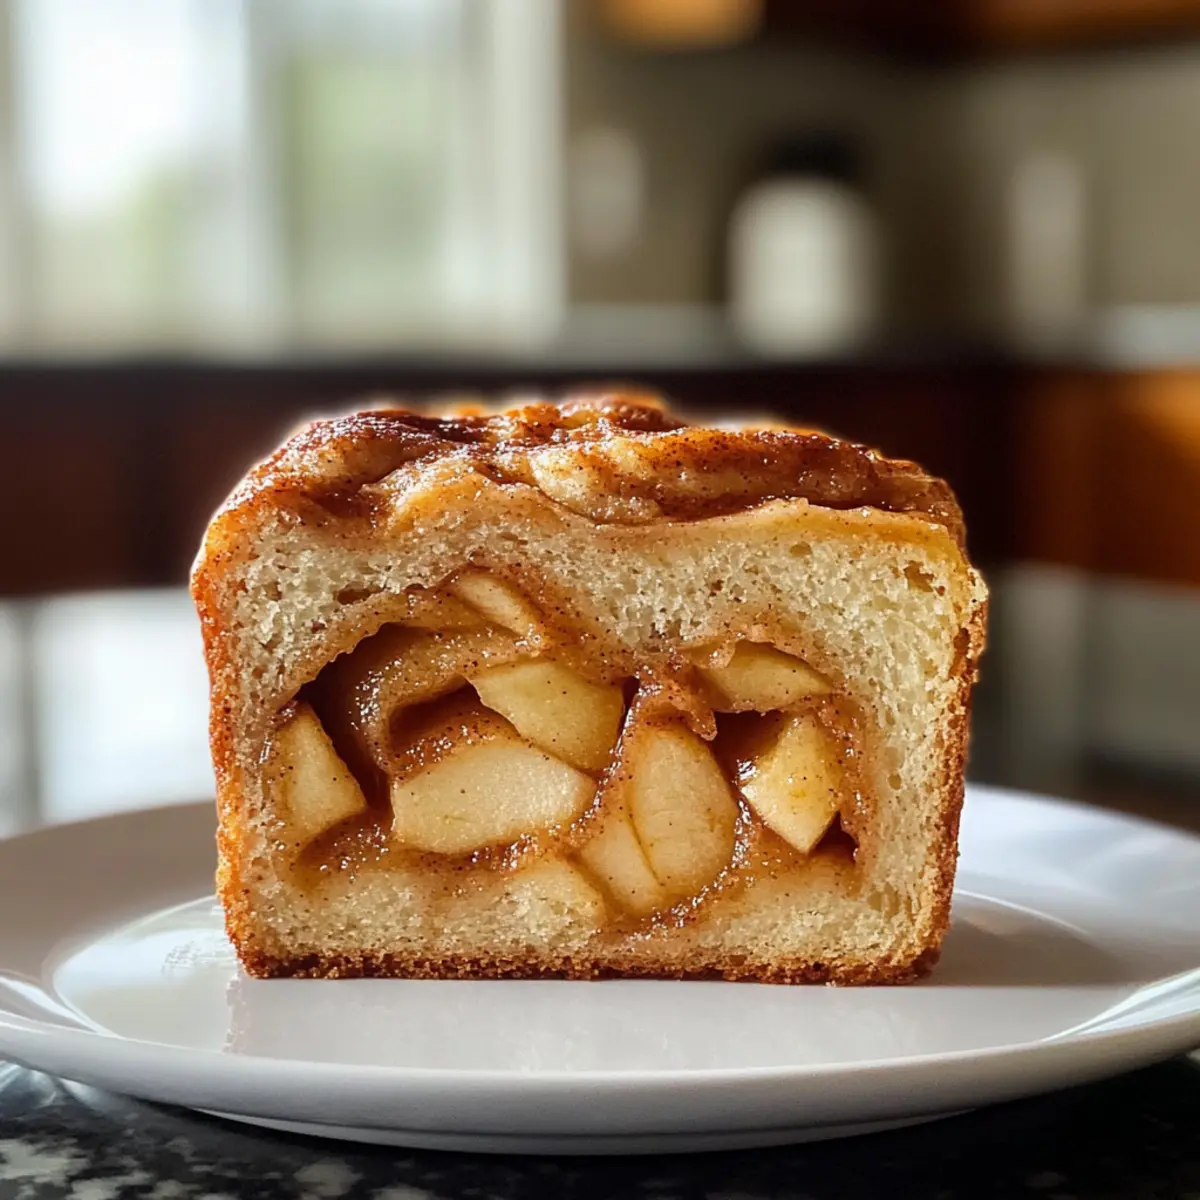
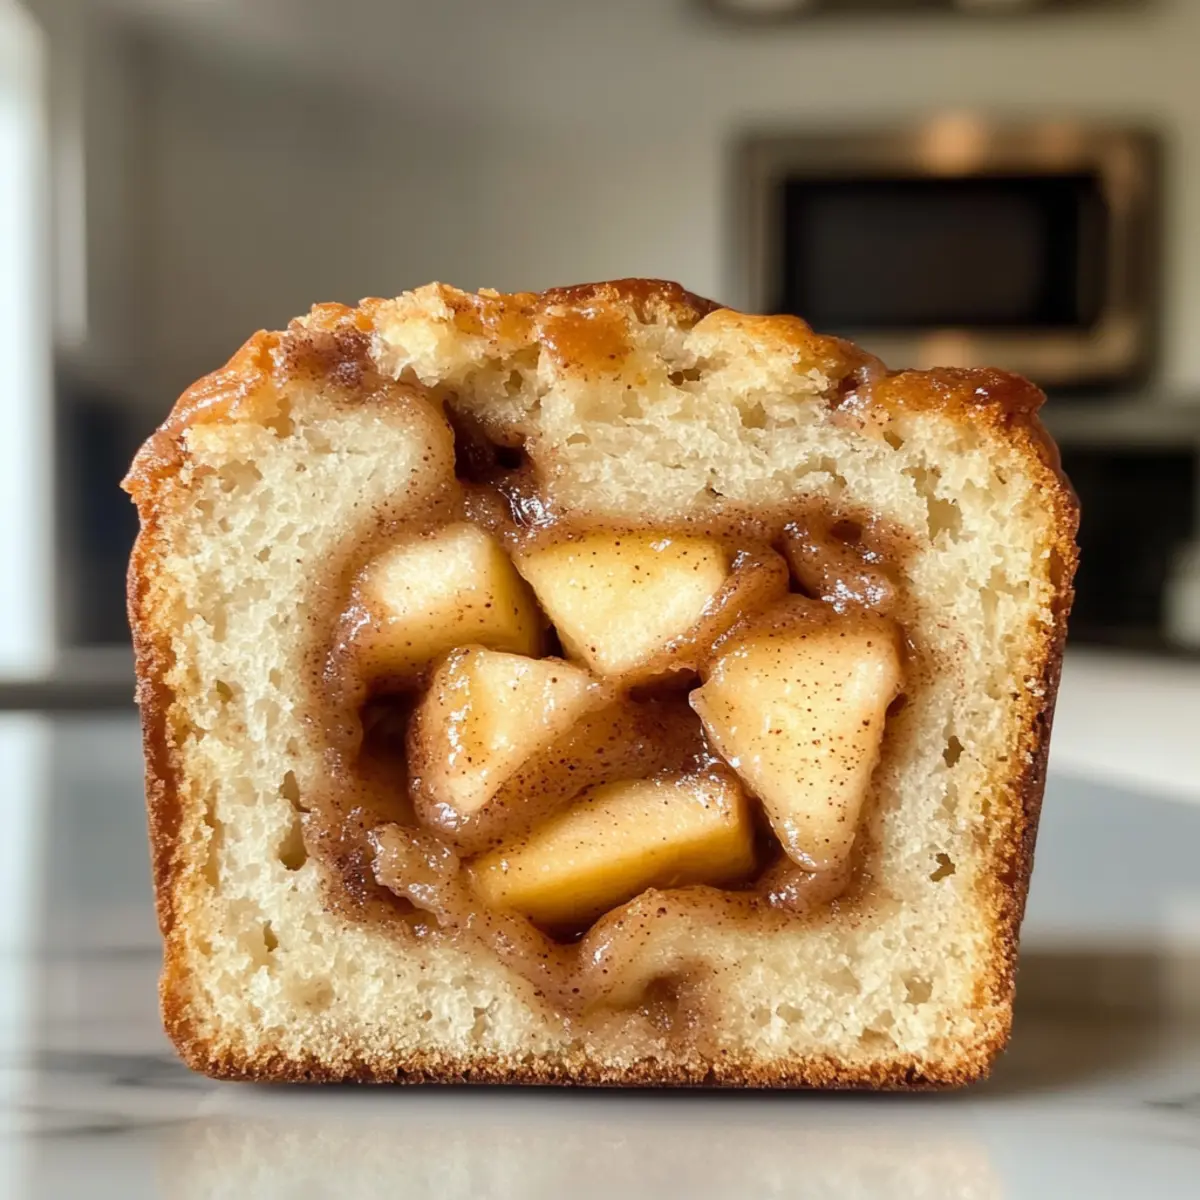
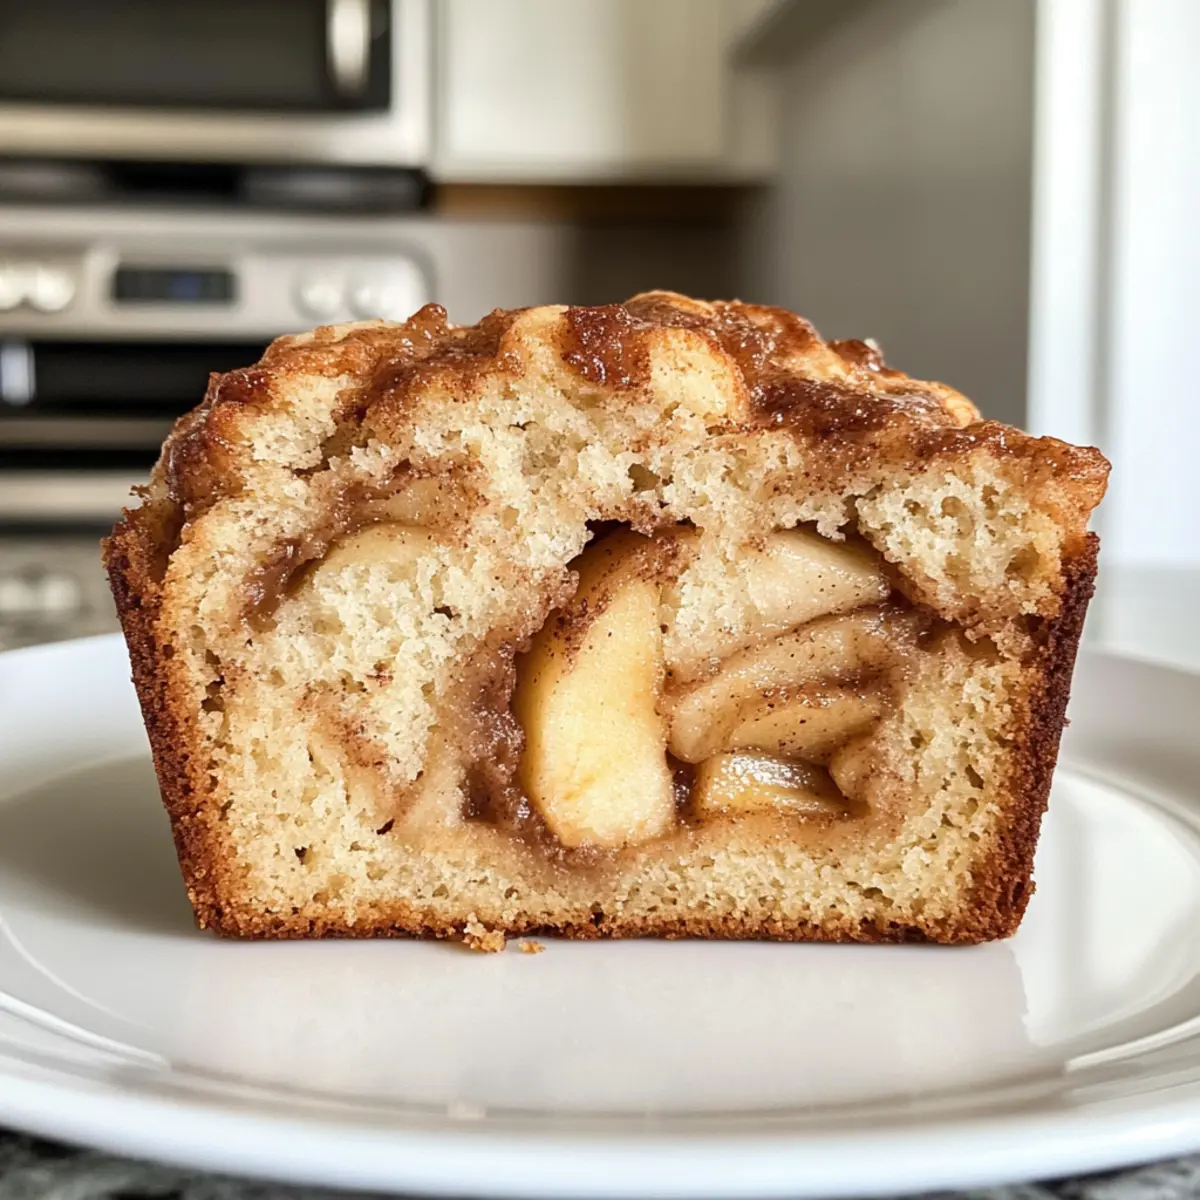
As I stood in my kitchen, the rich scent of cinnamon and apples swirling around me, I couldn’t help but feel a wave of warmth wash over my soul. It was the perfect moment to bake my beloved Cinnamon Swirl Apple Fritter Bread. This delightful recipe combines the comfort of fresh-baked bread with the warm, cozy flavors of fall, making it a versatile option for breakfast, dessert, or an afternoon snack. What I love most about this bread is its simple preparation—ready to bake in under an hour—and how it effortlessly transforms ordinary ingredients into something truly special. Whether you’re serving it at a brunch gathering or enjoying a quiet moment with a cup of coffee, this treasure will leave you craving more. Ready to dive into a slice of pure delight? Let’s get started!

Why is This Bread a Must-Bake?

Irresistible Aroma: Imagine stepping into your home filled with the sweet and spicy scent of cinnamon and baked apples. It’s an aromatic hug that warms your heart!

Simple Ingredients: You’ll find that this recipe uses everyday pantry staples, making it accessible for any home cook. Plus, it’s perfect for when you’re bored of fast food.

Versatile Treat: Whether you crave a sweet breakfast or a comforting dessert, this Cinnamon Swirl Apple Fritter Bread fits the bill beautifully, much like our Homemade Bread Sunflower recipe!

Quick to Make: In less than an hour, you can pull a delightful loaf from the oven, saving you time in the busy mornings or as an evening snack.

Showstopper Appeal: Your guests will be wowed by its beautiful marbling of apples and cinnamon, making it a perfect centerpiece for brunch or gatherings, just like our Rustic Apple Walnut dish.

Cinnamon Swirl Apple Fritter Bread Ingredients

For the Batter

  • Milk – Adds moisture to the batter; can substitute with almond milk for a dairy-free option.
  • Brown Sugar – Provides sweetness and a rich flavor; light brown sugar can be used if dark is unavailable.
  • Salt – Enhances flavor; no substitutions are recommended.
  • Ground Cinnamon – Key spice that complements apples; use more for a stronger cinnamon flavor.
  • Baking Powder – Leavening agent that helps the bread rise; ensure it’s fresh for optimal results.
  • Granny Smith Apples – Adds tartness and moisture; any firm apple variety can be substituted, such as Honeycrisp.
  • Flour – Provides structure to the bread; all-purpose flour is recommended; for gluten-free, use a 1:1 blend.
  • Sugar – Sweetens the bread; granulated sugar can be replaced with coconut sugar as an alternative.
  • Vanilla Extract – Adds depth of flavor; pure vanilla is preferred over imitation.
  • Large Eggs – Binds ingredients and adds moisture; egg substitutes like flaxseed meal can also be used for a vegan version.
  • Butter – Adds richness to the bread; can substitute with unsweetened applesauce for a lower-fat option.

For the Glaze

  • Powdered Sugar – Sweetens the glaze; no direct substitutions needed, but sugar-free powdered sugar can be used.
  • Additional Milk – Adjusts consistency for glazing; any milk alternative can be used.

Step‑by‑Step Instructions for Cinnamon Swirl Apple Fritter Bread

Step 1: Preheat and Prepare
Begin by preheating your oven to 350°F (175°C). While the oven warms up, take a 9×5-inch bread pan and line it with parchment paper, then spray the paper with non-stick spray to ensure easy removal. This preparation will set you up for the delightful baking process ahead with your Cinnamon Swirl Apple Fritter Bread.

Step 2: Mix Cinnamon Sugar
In a small bowl, combine 1/4 cup of brown sugar with 1 teaspoon of ground cinnamon. Stir thoroughly until evenly mixed, and set this fragrant blend aside. This cinnamon sugar mixture will create that irresistible swirl throughout your bread, enhancing its sweet, cozy flavor.

Step 3: Coat the Apples
Take 2 cups of chopped Granny Smith apples and place them in a medium bowl. Sprinkle 2 tablespoons of granulated sugar and 1 teaspoon of cinnamon over the apples, tossing gently to coat them evenly. This step is crucial as it ensures each bite of Cinnamon Swirl Apple Fritter Bread bursts with a delightful apple-cinnamon flavor.

Step 4: Cream the Butter and Sugar
In a large mixing bowl, beat together 1/2 cup of softened butter and 2/3 cup of granulated sugar with an electric mixer until the mixture is light and fluffy, typically about 2-3 minutes. Add in 2 large eggs and 1 teaspoon of vanilla extract, blending until everything is smooth and well incorporated, laying the foundation for your luscious batter.

Step 5: Combine the Dry Ingredients
In another bowl, whisk together 2 cups of all-purpose flour, 1 tablespoon of baking powder, and 1/2 teaspoon of salt. Gradually add this dry mix to the butter mixture, stirring until just combined. Then, pour in 1/2 cup of milk, mixing gently until the batter is smooth. Take care not to over-mix, as this could affect the texture of your Cinnamon Swirl Apple Fritter Bread.

Step 6: Layer the Batter and Apple Mixture
Spoon half of the batter into the prepared bread pan, spreading it evenly. Next, sprinkle half of the apple mixture and half of the cinnamon sugar on top. Repeat this process with the remaining batter, apples, and cinnamon sugar, creating beautiful layers that will both look and taste fantastic once baked.

Step 7: Bake the Bread
Place the assembled bread pan in your preheated oven and bake for approximately 1 hour. Keep an eye out for a golden-brown top and use a toothpick to check for doneness—it should come out clean when inserted into the center of the loaf, signaling it’s time to take your Cinnamon Swirl Apple Fritter Bread out of the oven.

Step 8: Cool and Glaze
After baking, let the bread cool in the pan for about 15 minutes. Once cooled, carefully remove it from the pan and place it on a wire rack. For the glaze, mix 1 cup of powdered sugar with 1 tablespoon of milk until smooth, adding more milk for your desired consistency. Drizzle the glaze over the bread before serving, ensuring a sweet finish to your beautiful creation.

Cinnamon Swirl Apple Fritter Bread Variations

Feel free to get creative with your Cinnamon Swirl Apple Fritter Bread by trying out these delightful twists!

  • Dairy-Free: Substitute whole milk with almond milk or oat milk for a delicious vegan experience. You can still enjoy the same rich flavors without the dairy!

  • Sweet Swap: Replace Granny Smith apples with sweet Honeycrisp apples for an even sweeter treat. The lovely balance of flavors will make your taste buds dance!

  • Nutty Texture: Add 1/2 cup of chopped walnuts or pecans for extra crunch and richness. The nutty flavor pairs wonderfully with cinnamon and apples, adding a delightful texture to each slice.

  • Gluten-Free Option: Use a 1:1 gluten-free flour blend instead of all-purpose flour for a gluten-free version that’s just as delicious. You won’t miss the wheat in this heartwarming loaf!

  • Spiced Up: Mix in 1/4 teaspoon of nutmeg or allspice for an extra layer of warmth. This subtle twist will take your Cinnamon Swirl Apple Fritter Bread to a whole new level of comfort!

  • Fruit Medley: Toss in a handful of dried cranberries or raisins to introduce a burst of fruity sweetness. These dried fruits give a lovely chewy contrast to the moist bread.

  • Cinnamon Roll Glaze: For an indulgent twist, use a cream cheese frosting instead of powdered sugar glaze. This creamy topping will elevate each slice to a morning celebration!

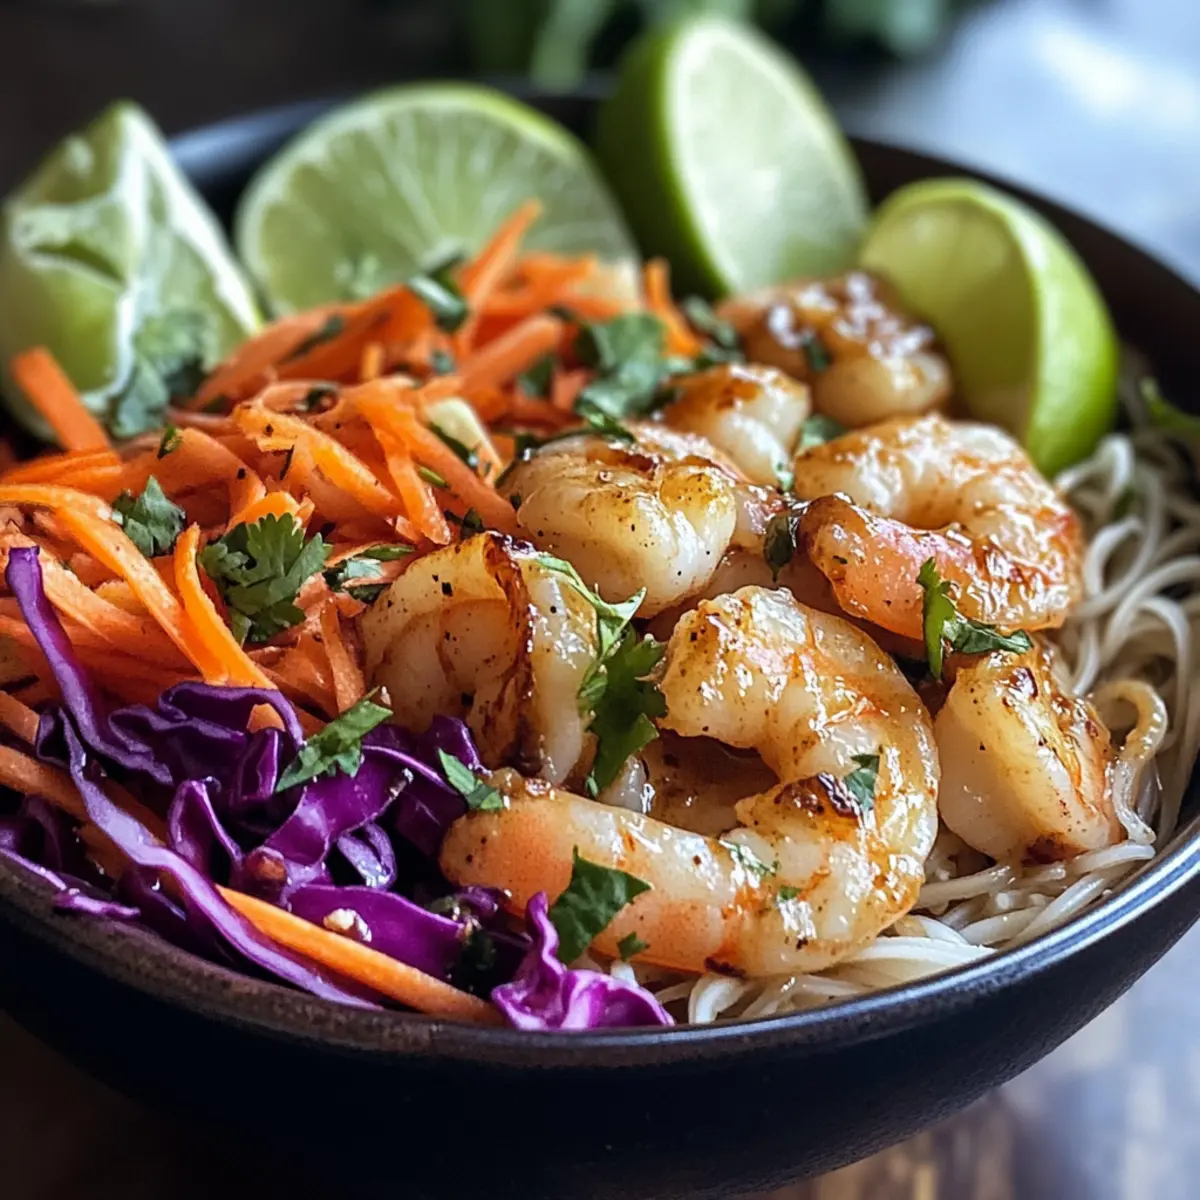
  • Serve with Delight: Enjoy slices warm with a pat of butter or alongside a steaming cup of coffee for the ultimate cozy experience. For a brunch twist, pair it with a refreshing side like our Crisp Cabbage Apple salad for contrast!

How to Store and Freeze Cinnamon Swirl Apple Fritter Bread

Room Temperature: Store the bread in an airtight container at room temperature for up to 3 days to maintain its fresh taste and texture.

Fridge: If you prefer a longer shelf life, refrigerate the bread for up to a week, ensuring it’s wrapped properly to avoid drying out.

Freezer: For longer storage, wrap individual slices or the whole loaf tightly in plastic wrap and aluminum foil, freezing for up to 3 months. Let it thaw at room temperature before enjoying.

Reheating: Warm slices in the microwave for about 10-15 seconds or pop them in a toaster oven for a few minutes to regain that comforting fresh-baked feel.

What to Serve with Cinnamon Swirl Apple Fritter Bread

Looking to create the ultimate cozy meal experience? Here are some delightful ideas to serve alongside your baked masterpiece that will enhance its flavors and elevate your autumn gatherings.

  • Creamy Vanilla Yogurt: This smooth, rich yogurt is perfect for dipping and adds a refreshing, tangy contrast to the sweet bread.

  • Fresh Fruit Salad: A vibrant mix of seasonal fruits, such as pears and pomegranates, brings a burst of color and fresh flavors to your plate.

  • Warm Spiced Cider: The rich spices in warm apple cider complement the cozy taste of the bread, creating an inviting pairing that whispers autumn.

  • Maple-Glazed Bacon: The salty, smoky flavor of bacon drizzled with maple syrup adds an irresistible crunch, perfectly balancing the sweetness of the bread.

  • Caramel Drizzle: Drizzled over slices, this sweet and buttery sauce enhances the apple-cinnamon notes, making each bite even more indulgent.

  • Coffee or Chai Latte: A smooth cup of coffee or a spiced chai latte will bring out the flavors of the cinnamon and apples. It’s a match made in morning heaven!

  • Nutty Granola Topping: Sprinkle some homemade nutty granola over a slice for added crunch and texture, bringing in an additional layer of flavor to your cozy treat.

Make Ahead Options

These Cinnamon Swirl Apple Fritter Bread preparations are perfect for busy home cooks! You can mix the batter and prepare the apple mixture up to 24 hours in advance. Simply store the batter in an airtight container in the refrigerator and refrigerate the apples tossed in sugar and cinnamon in a separate bowl. To maintain quality, cover both tightly to prevent drying out. When you’re ready to bake, just combine the ingredients in the prepared pan, layer as directed, and pop it in the oven. You’ll enjoy fresh-baked, comforting Cinnamon Swirl Apple Fritter Bread with minimal hassle, making your mornings so much easier!

Tips for the Best Cinnamon Swirl Apple Fritter Bread

  • Mix Gently: Avoid over-mixing your batter. Stir until just combined to prevent a dense texture in your Cinnamon Swirl Apple Fritter Bread.

  • Uniform Apple Size: Cut your apples into even pieces for consistent cooking and delightful bites. This helps ensure every slice is packed with flavor.

  • Fresh Ingredients: Use fresh baking powder for optimal rise. Stale ingredients can lead to disappointing results and a flat loaf.

  • Cool Completely: Allow the bread to cool before glazing. This prevents the glaze from melting away and ensures a beautiful, shiny finish.

  • Add Spice Variations: Don’t be afraid to experiment with spices! A dash of nutmeg or allspice can elevate your Cinnamon Swirl Apple Fritter Bread to new flavor heights.

Cinnamon Swirl Apple Fritter Bread Recipe FAQs

How do I select the right apples for this recipe?
Absolutely! When choosing apples for your Cinnamon Swirl Apple Fritter Bread, I recommend going for firm, tart varieties like Granny Smith or Honeycrisp. Look for apples that are free from bruises or dark spots; you want them to feel firm to the touch. Fresh apples not only enhance the flavor but keep the bread moist and delicious.

What’s the best way to store leftover bread?
For maximum freshness, store your Cinnamon Swirl Apple Fritter Bread in an airtight container at room temperature for up to 3 days. If you plan to keep it longer, refrigerate it wrapped properly for up to a week. This helps maintain its soft texture and delightful flavors.

Can I freeze the Cinnamon Swirl Apple Fritter Bread?
Very much so! To freeze your bread, I suggest wrapping individual slices or the whole loaf tightly in plastic wrap, then in aluminum foil, to prevent freezer burn. You can freeze it for up to 3 months. When you’re ready to enjoy it, let it thaw at room temperature for a couple of hours or overnight in the fridge, and warm it up in the microwave or toaster oven for that freshly-baked allure.

What should I do if my batter is too thick?
If you find that your batter for the Cinnamon Swirl Apple Fritter Bread is too thick, don’t worry! Simply add a tablespoon of milk at a time until you reach your desired consistency. The batter should be thick but pourable—just enough to create that beautiful marbling with your apples and cinnamon sugar!

Can I modify this recipe to make it vegan or gluten-free?
Absolutely! For a vegan version, you can substitute eggs with flaxseed meal (mix 1 tablespoon of flaxseed meal with 3 tablespoons of water, resting for 5 minutes before adding it to the batter). Use almond milk instead of regular milk. For gluten-free versions, a 1:1 gluten-free flour blend works beautifully; just make sure all ingredients are certified gluten-free to avoid cross-contamination. Enjoy adapting this cozy loaf to suit your dietary needs!

Cinnamon Swirl Apple Fritter Bread

Cinnamon Swirl Apple Fritter Bread: Fall’s Cozy Favorite

This Cinnamon Swirl Apple Fritter Bread is a delightful combination of fresh-baked goodness, warm cinnamon, and apples, perfect for fall.
Prep Time 15 minutes
Cook Time 1 hour
Cooling Time 15 minutes
Total Time 1 hour 30 minutes
Servings: 8 slices
Course: Breakfast
Cuisine: American
Calories: 210

Ingredients
  

For the Batter
  • 1 cup Milk Can substitute with almond milk.
  • 2/3 cup Brown Sugar Light brown sugar can be used.
  • 1/2 teaspoon Salt
  • 1 teaspoon Ground Cinnamon Use more for stronger flavor.
  • 1 tablespoon Baking Powder Ensure it’s fresh.
  • 2 cups Granny Smith Apples Can substitute with any firm apple variety.
  • 2 cups Flour All-purpose is recommended; use gluten-free 1:1 blend if needed.
  • 1 cup Sugar Granulated sugar can be replaced with coconut sugar.
  • 1 teaspoon Vanilla Extract Pure vanilla preferred.
  • 2 large Eggs Can use flaxseed meal for vegan.
  • 1/2 cup Butter Can substitute with unsweetened applesauce.
For the Glaze
  • 1 cup Powdered Sugar Sugar-free option available.
  • 1 tablespoon Additional Milk Can substitute with any milk alternative.

Equipment

  • 9x5-inch bread pan
  • mixing bowls
  • electric mixer

Method
 

Preparation Steps
  1. Preheat your oven to 350°F (175°C) and prepare a 9x5-inch bread pan with parchment paper and non-stick spray.
  2. In a small bowl, combine 1/4 cup of brown sugar with 1 teaspoon of ground cinnamon and set aside.
  3. Coat 2 cups of chopped Granny Smith apples with 2 tablespoons of granulated sugar and 1 teaspoon of cinnamon.
  4. Cream together 1/2 cup of softened butter and 2/3 cup of granulated sugar until light and fluffy. Add 2 large eggs and 1 teaspoon of vanilla extract, blending smoothly.
  5. Whisk together 2 cups of flour, 1 tablespoon of baking powder, and 1/2 teaspoon of salt. Gradually add to the butter mixture, then mix in 1/2 cup of milk until smooth.
  6. Layer half of the batter in the prepared pan, followed by half of the apple mixture and half of the cinnamon sugar. Repeat with remaining ingredients.
  7. Bake for approximately 1 hour, or until a toothpick comes out clean. Let cool for 15 minutes.
  8. Mix 1 cup of powdered sugar with 1 tablespoon of milk for the glaze and drizzle over the cooled bread.

Notes

For the best results, avoid over-mixing, use uniform apple sizes, and ensure all ingredients are fresh.

Muddy Buddy Rice Krispies: Irresistible No-Bake Delight

As I stood in my kitchen with a sticky spoon and a bowl brimming with crispy Rice Krispies, I couldn’t help but smile at the idea of transforming these crunchy morsels into something truly delightful. Enter the No-Bake Muddy Buddy Rice Krispies—a whimsical twist on two classic favorites! This irresistible recipe not only combines the rich flavors of chocolate and peanut butter but also brings the joy of guilt-free snacking to your table. It’s a breeze to make and offers the flexibility of dietary swaps, such as gluten-free and nut-free options, making it perfect for gatherings or just a cozy night in. With no baking required, you’re just moments away from a nostalgic treat that will have you reaching for seconds! Who can resist that sweet, crunchy goodness? Let’s dive into this quick and easy recipe and indulge in a little bit of homemade magic!

Why Are Muddy Buddy Rice Krispies So Special?

No-Bake Delight: The beauty of this recipe lies in its simplicity. You’ll whip up these tasty treats without ever turning on the oven.

Crunchy Texture: The crispy Rice Krispies provide the perfect foundation, making every bite satisfyingly crunchy.

Versatile Indulgence: Feel free to customize with different chocolate or nut butter options—there’s a combination for everyone!

Crowd-Pleaser: These are perfect for parties, movie nights, or just satisfying that sweet tooth, offering nostalgia and fun in every bite.

Quick and Easy: With only a few minutes spent mixing, you can enjoy a delicious treat without any complicated cooking processes.

So, if you’re also looking for a savory option to accompany your snacks, why not try Sizzling Rice Wrapped hot dogs for an unforgettable flavor combo? You’re just a few moments away from creating magic in your kitchen!

Muddy Buddy Rice Krispies Ingredients

For the Base

  • Rice Krispies – Provides that irresistible crunch; you can swap with Rice Chex or Corn Chex for a gluten-free twist.
  • Peanut Butter – Adds a creamy, nutty flavor that binds everything together; consider sunflower seed butter for a nut-free alternative.

For the Chocolate Coating

  • Chocolate Chips – The star of the show, delivering rich sweetness; feel free to experiment with dark, milk, or white chocolate for varied flavors.

For the Sweet Dusting

  • Powdered Sugar – Creates a sweet, delightful coating; using a zip-top bag ensures even coverage for those Muddy Buddy Rice Krispies.

This delightful combination of ingredients promises a treat that’s easy to whip up and enjoy—perfect for those moments when you crave something sweet without the fuss of baking!

Step‑by‑Step Instructions for Muddy Buddy Rice Krispies

Step 1: Prepare Your Ingredients
Start by gathering all your ingredients—Rice Krispies, chocolate chips, peanut butter, and powdered sugar. Measure them out for easy access. You’ll need a large mixing bowl, a saucepan, and a zip-top bag for coating later. This organization will streamline the process, ensuring you’re ready to create your delightful Muddy Buddy Rice Krispies without interruptions.

Step 2: Melt the Chocolate and Peanut Butter
In a medium saucepan over low heat, combine the chocolate chips and peanut butter, stirring continuously until the mixture is smooth and fully melted, about 3-5 minutes. Keep a close eye to prevent the chocolate from scorching. Once melted, remove the saucepan from the heat and allow it to cool slightly while you prep the Rice Krispies.

Step 3: Combine the Mixture
In the large bowl, add the measured Rice Krispies. Pour the warm chocolate and peanut butter mixture over them, ensuring all the crispy pieces are evenly coated. Stir gently but thoroughly with a spatula for about 1-2 minutes until they are fully covered in the rich mixture. This ensures that every bite of your Muddy Buddy Rice Krispies is deliciously indulgent.

Step 4: Cool and Coat
Let the Rice Krispies mixture cool for a few minutes, just enough to handle without burning your hands. Transfer the slightly warm mixture into a zip-top bag along with the powdered sugar. Seal the bag and shake gently to coat the crispy treats evenly. This step is crucial for that signature sweet dusting that enhances the flavor of your Muddy Buddy Rice Krispies.

Step 5: Serve or Store
Once coated, portion out your delightful Muddy Buddy Rice Krispies into bowls or snack bags for easy serving. They can be enjoyed immediately or stored in an airtight container at room temperature for up to a week. These no-bake treats are perfect for gatherings or a cozy movie night, making them an instant hit!

Expert Tips for Muddy Buddy Rice Krispies

  • Perfect Cooling: Allow the mixture to cool completely before adding powdered sugar to prevent clumping; this ensures a lovely coating on your Muddy Buddy Rice Krispies.

  • Ingredient Quality: Use high-quality chocolate chips for a richer taste; this elevates the entire flavor profile of your no-bake treat.

  • Even Coating: When shaking in the zip-top bag, do it gently but thoroughly to achieve an even dusting; this simple step makes all the difference in presentation and taste.

  • Dietary Swaps: Don’t hesitate to experiment with various nut butters or chocolate types; it’s a fun way to customize your Muddy Buddy Rice Krispies for different preferences.

  • Stay Organized: Prep your ingredients beforehand to ensure a smooth process; this makes the experience enjoyable and hassle-free.

How to Store and Freeze Muddy Buddy Rice Krispies

Airtight Container: Store your Muddy Buddy Rice Krispies in an airtight container at room temperature for up to one week to maintain their crispness.

Refrigeration: If you’d like to extend freshness, keep them in the fridge for up to two weeks. Just remember to let them come to room temperature before enjoying.

Freezing: To freeze, place the Rice Krispies in a sturdy freezer bag, ensuring you press out as much air as possible. They can be stored for up to three months.

Reheating: For a quick treat, let them thaw at room temperature for a few minutes. Enjoy the sweet, crunchy goodness without losing its delightful texture!

What to Serve with Muddy Buddy Rice Krispies?

Indulging in these sweet, crunchy treats is just the beginning; let’s round out your experience with perfect pairings!

  • Creamy Vanilla Ice Cream: The cool creaminess balances the sweet crunch, creating a delightful contrast that’s simply irresistible.

  • Fresh Fruit Salad: A refreshing medley of vibrant fruits adds a burst of flavor and color, lightening up your dessert table beautifully.

  • Milk or Dairy-Free Alternative: Whether cold, warm, or chocolate-flavored, pairing with milk enhances the nostalgic childhood feel of these treats.

  • Homemade Coffee: A cozy cup of fresh-brewed coffee complements the sweetness perfectly, making for an indulgent afternoon break.

  • Chocolate-Dipped Strawberries: Elevate your dessert experience with these elegant bites that echo the rich chocolate notes in the Rice Krispies.

  • Sizzling Rice Wrapped Hot Dogs: This savory option adds a unique twist, balancing the sweetness with a hearty, flavorful crunch.

  • Fruity Smoothies: Whip up a berry or mango smoothie for a refreshing drink that pairs beautifully with the sweetness of Muddy Buddy Rice Krispies.

Consider these delightful pairings to make your snack time truly special and share the joy of homemade goodness with loved ones!

Make Ahead Options

These Muddy Buddy Rice Krispies are a fantastic choice for busy home cooks looking to save time! You can prepare the chocolate-peanut butter mixture and the Rice Krispies up to 24 hours in advance. Simply follow the recipe until the mixing step, then cover the combined mixture and refrigerate. To maintain that delightful crunch, store the coated treats in an airtight container at room temperature. When you’re ready to serve, just dust with powdered sugar and mix lightly before enjoying. This way, you’ll have sweet, crunchy snacks at your fingertips, ready for any occasion or quick grab-and-go treat!

Muddy Buddy Rice Krispies Variations

Customize your Muddy Buddy Rice Krispies to create exciting twists that will satisfy everyone’s cravings!

  • Nut-Free: Swap peanut butter for sunflower seed butter for a delicious nut-free option. Perfect for school snacks!
  • Gluten-Free: Use certified gluten-free Rice Krispies or substitute with Rice Chex for a crunchy base that’s safe for everyone.
  • Chocolate Variety: Experiment with dark, milk, or white chocolate chips to create unique flavor combinations that tantalize your taste buds.
  • Flavor Boost: Add a splash of vanilla extract to the melted chocolate mixture to enhance the overall flavor depth.
  • Texture Twist: Incorporate crispy cereal clusters or mini marshmallows for added texture and an enticing surprise in every bite.
  • Heat Elevation: Drizzle melted chili chocolate or add a pinch of cayenne pepper for a surprising spicy kick that complements the sweetness beautifully.
  • Crunchy Add-Ins: Mix in chopped pretzels or crushed graham crackers for a delicious crunch—this little touch brings extra joy to each mouthful!

And for those looking for a savory treat to pair with your sweets, consider preparing some Sizzling Rice Wrapped hot dogs for a delightful experience! You’re just a couple of ingredients away from making your snack table irresistible!

Muddy Buddy Rice Krispies Recipe FAQs

What types of Rice Krispies can I use?
Absolutely! While traditional Rice Krispies work great, you can also substitute with Rice Chex or Corn Chex for a gluten-free option. Each alternative offers a slightly different texture, adding a fun twist to your no-bake Muddy Buddy Rice Krispies!

How long can I store my Muddy Buddy Rice Krispies?
For the best flavor and crunch, store your Muddy Buddy Rice Krispies in an airtight container at room temperature for up to one week. If you want to keep them fresh longer, refrigerate them for up to two weeks. Just allow them to come back to room temperature before indulging!

Can I freeze Muddy Buddy Rice Krispies?
Definitely! To freeze your treats, simply place them in a sturdy freezer bag, pressing out as much air as possible. Make sure to flatten the bag for easier storage. They can be kept in the freezer for up to three months. When you’re ready to enjoy, just let them thaw at room temperature for a delightful comeback to their sweet, crunchy goodness!

What should I do if my chocolate and peanut butter mixture clumps?
Very! To ensure a smooth mixture, keep the heat low and stir continuously while melting. If something does go awry and clumping occurs, simply return the mixture to low heat, adding a splash of warm water or a bit more peanut butter to help it regain a smooth texture.

Are there any allergy considerations I should keep in mind?
For sure! If you’re accommodating dietary restrictions, you can easily make these Muddy Buddy Rice Krispies nut-free by using sunflower seed butter in place of peanut butter. Additionally, always check the labels on your chocolate chips and Rice Krispies to confirm they are gluten-free and suitable for those with allergies. It’s always better to be safe and enjoy delicious treats together!

Can I add mix-ins or variations to my Muddy Buddy Rice Krispies?
The more the merrier! Feel free to customize your Muddy Buddy Rice Krispies with mini marshmallows, different flavored chocolate chips, or even a sprinkle of sea salt on top for an extra flavor kick. Just remember that every mix-in might slightly alter the texture, so have fun experimenting!

Muddy Buddy Rice Krispies

Muddy Buddy Rice Krispies: Irresistible No-Bake Delight

Muddy Buddy Rice Krispies are a delightful no-bake treat combining chocolate and peanut butter for a crunchy, guilt-free snack.
Prep Time 10 minutes
Cook Time 5 minutes
Cooling Time 5 minutes
Total Time 20 minutes
Servings: 8 pieces
Course: Dessert
Cuisine: American
Calories: 150

Ingredients
  

Base Ingredients
  • 4 cups Rice Krispies Can substitute with Rice Chex or Corn Chex for gluten-free.
  • 1 cup Peanut Butter Use sunflower seed butter for a nut-free option.
Chocolate Coating
  • 1 cup Chocolate Chips Choose dark, milk, or white chocolate as desired.
Sweet Dusting
  • 1 cup Powdered Sugar Use a zip-top bag for even coating.

Equipment

  • Large mixing bowl
  • Medium saucepan
  • Zip-top bag

Method
 

Instructions
  1. Prepare your ingredients: Gather Rice Krispies, chocolate chips, peanut butter, and powdered sugar. Measure for easy access.
  2. Melt the chocolate and peanut butter: In a medium saucepan over low heat, combine chocolate chips and peanut butter, stirring until smooth, about 3-5 minutes.
  3. Combine the mixture: In a large bowl, add Rice Krispies. Pour the warm chocolate and peanut butter mixture over them. Stir gently for 1-2 minutes.
  4. Cool and coat: Let the mixture cool slightly, then transfer to a zip-top bag with powdered sugar. Seal and shake to coat.
  5. Serve or store: Portion into bowls or snack bags. Enjoy immediately or store in an airtight container for up to a week.

Notes

Use high-quality chocolate chips for a richer taste. Prep ingredients beforehand for a smooth experience.

Delicious No Bake Strawberry Crunch Topping for Easy Treats

One delightful sunny afternoon, I found myself daydreaming about the sweet, nostalgic flavors of summer—those strawberry shortcake bars that always brought a smile to my face. That inspired me to create an Easy No Bake Strawberry Crunch Topping, a perfect blend of strawberry and vanilla that makes my heart sing. This incredibly simple recipe requires just two ingredients and is ready in only five minutes, making it an effortless solution for anyone craving a sweet treat without the fuss of baking. Whether you’re looking to elevate your ice cream game or transform last-minute desserts into showstoppers, this crunchy topping will do the trick. Plus, it’s budget-friendly, allowing you to savor a taste of summer without breaking the bank. Curious to see how this vibrant crumble can add magic to your favorite desserts? Keep scrolling for all the details!

Why is this recipe a must-try?

Simplicity at Its Best: This No Bake Strawberry Crunch Topping is incredibly easy to whip up with just two ingredients, perfect for busy afternoons.

Flavor Explosion: The delightful blend of strawberry and vanilla flavors brings a burst of nostalgia and bliss to every bite.

Versatile Delight: Use it to elevate any dessert, from ice cream sundaes to cheesecakes, or even sprinkle it on Veggie Crunch Cucumber salads for a surprise twist!

Quick and Effortless: Ready in just five minutes, this topping is ideal for last-minute gatherings or when you need a sweet fix.

Budget-Friendly: With a cost of around $4-$5, you won’t have to splurge to enjoy this delicious treat. Whether you’re hosting a summer barbecue or just indulging on a weekday, this topping is a delightful choice!

No Bake Strawberry Crunch Topping Ingredients

This vibrant topping requires just two easy ingredients!

For the Crunchy Base

  • Strawberry Sugar Wafers – Provides a sweet, fruity flavor and eye-catching color; swap with pink sugar-free wafers for a lighter option.
  • Vanilla Creme Filled Cookies – Adds richness and creaminess; consider using Golden Oreos or lemon-flavored cookies for a unique twist.

Now you’re just moments away from making your No Bake Strawberry Crunch Topping! Get ready to sprinkle joy onto your favorite desserts.

Step‑by‑Step Instructions for No Bake Strawberry Crunch Topping

Step 1: Crumble the Wafers
Begin by breaking the strawberry sugar wafers into smaller pieces for easier processing. Using a food processor, pulse these wafers until you achieve a chunky consistency, avoiding fine powder. This should take about 30 seconds. Transfer the crumbled wafers into a large mixing bowl, ready for blending with the cookies.

Step 2: Process the Cookies
Next, place the vanilla creme filled cookies in the food processor. Pulse them similarly for about 30 seconds, or until you have a desirable chunky texture. Just like the strawberry wafers, ensure they aren’t over-processed. The mixture should look crumbly but slightly coarse, adding a delightful texture to your No Bake Strawberry Crunch Topping.

Step 3: Combine the Crumbles
Pour the processed vanilla cookie crumbs into the bowl with the strawberry wafer crumbs. Gently mix the two crumbles together with a spatula until evenly combined. You’ll see the pretty pink and creamy white colors mingling, creating a tempting visual and flavor harmony. This combination is key for achieving a delightful crunch that elevates desserts.

Step 4: Store the Topping
Once your No Bake Strawberry Crunch Topping is mixed, transfer it to an airtight container. Seal tightly and store it in a cool, dry place for up to one month. Alternatively, for longer storage, refrigerate it for up to two months or freeze for six months. Having this vibrant topping at the ready ensures spontaneous dessert magic whenever you need it!

Make Ahead Options

These No Bake Strawberry Crunch Topping preparations are perfect for busy home cooks looking to save time! You can crumble both the strawberry sugar wafers and vanilla cookies up to 24 hours in advance. Just store them separately in airtight containers at room temperature to maintain their delightful crunch. When you’re ready to serve, simply mix the crumbles together, and your topping is good to go! This not only streamlines your dessert assembly but keeps everything fresh and just as delicious as when made on the spot. With these make-ahead tips, you can enjoy spontaneous sweet creations without any stress!

No Bake Strawberry Crunch Topping Variations

Feel free to get creative with this recipe and make it your own!

  • Gluten-Free: Use gluten-free strawberry wafers and cookies to accommodate dietary needs while maintaining flavor.
  • Toasted Almond Crunch: Add chopped toasted almonds to the mix for a nutty twist that complements the sweet strawberry flavor beautifully.
  • Creamy Banana Twist: Substitute vanilla cookies with banana-flavored ones for a deliciously fruity crunch that reminds you of summertime treats.
  • Chocolate Lover’s Delight: Incorporate chocolate sandwich cookies instead of vanilla for a rich, indulgent topping that will satisfy any chocolate craving.
  • Coconut Dream: Mix in toasted coconut flakes for an exotic twist that pairs perfectly with tropical desserts or fruit salads.
  • Sprinkle Magic: Add colorful sprinkles to the crumbles for a festive burst of color and fun, perfect for celebrating special occasions!
  • Savory Spin: Try incorporating crushed pretzels for a unique sweet-and-salty flavor profile that adds contrast to your favorite desserts. A sprinkle of Zucchini Oatmeal Bake can enhance this flavor journey!
  • Dairy-Free: Use dairy-free cream-filled cookies and vegan strawberry wafers to make this topping suitable for a dairy-free diet—deliciousness for everyone!

Each variation opens a world of delicious possibilities, inviting you to explore and enjoy every bite!

What to Serve with Easy No Bake Strawberry Crunch Topping

Imagine transforming your desserts into vibrant, dreamy delights with just a sprinkle of magic!

  • Creamy Vanilla Ice Cream: The coolness of vanilla ice cream perfectly complements the crunchy sweetness, creating a delightful contrast of temperatures and textures.
  • Fluffy Strawberry Shortcake: Add layers of this crunchy topping to your strawberry shortcake for an irresistible crunch that pairs beautifully with soft cake and whipped cream.
  • Decadent Chocolate Mousse: The strawberry and vanilla flavors provide a refreshing twist, balancing the rich chocolate for a heavenly dessert experience.
  • Smooth Yogurt Parfait: Layer it over yogurt with fresh fruit for a nutritious breakfast or snack, adding a delightful crunch and vibrant color.
  • Tangy Lemon Cheesecake: The refreshing burst of strawberry complements the tanginess of lemon, making your cheesecake unforgettable.
  • Frozen Yogurt Sundaes: Top off your frozen yogurt with this crumble, bringing texture and flavor that elevates your sweet treat.
  • Refreshing Cucumber Salad: Surprise your guests by sprinkling some on a veggie crunch cucumber salad, adding unexpected sweetness and crunch.
  • Chilled Fruit Salad: Enhance a mixed fruit salad by adding this topping, giving it that extra zing and making fruit even more delightful.
  • Sparkling Wine: Pair your dessert with a glass of fizzy wine, as the bubbles will brighten the fruity flavors while offering a festive touch.

Expert Tips for No Bake Strawberry Crunch Topping

Avoid Over-Blending: Ensure you pulse the wafers and cookies just enough to achieve a chunky texture; fine powder will result in a dense topping.

Mix It Up: Feel free to experiment with different flavored cookies or add-ins like nuts or sprinkles, enhancing your No Bake Strawberry Crunch Topping’s appeal.

Storage Matters: Keep the topping in an airtight container for optimal freshness. A cool, dry pantry is perfect, but refrigerating extends its life even more!

Adapt for Dietary Needs: Need it gluten-free? Simply opt for gluten-free cookie alternatives or switch to freeze-dried strawberries for a safe, delicious twist.

Serve Creatively: Use this crunchy topping not just on desserts, but also as a unique addition to salads or yogurt, adding texture and visible appeal!

How to Store and Freeze No Bake Strawberry Crunch Topping

Room Temperature: Store your No Bake Strawberry Crunch Topping in an airtight container in a cool, dry place for up to 1 month.

Fridge: For longer freshness, refrigerate your topping in an airtight container for up to 2 months. It will remain just as crunchy and flavorful!

Freezer: Freeze your topping in a sealed container or freezer bag for up to 6 months. Thaw at room temperature before serving for the best texture.

Reheating: This topping is best enjoyed cold; simply sprinkle over your desserts directly from the fridge or freezer for a delightful crunch!

No Bake Strawberry Crunch Topping Recipe FAQs

How do I choose the right strawberry sugar wafers?
Absolutely! Opt for strawberry sugar wafers with bright color and a fresh aroma. Avoid any wafers with dark spots or a stale smell, as these can indicate they are past their prime. If you’re aiming for a low-calorie alternative, pink sugar-free wafers are a great substitute.

What’s the best way to store No Bake Strawberry Crunch Topping?
For short-term storage, place your topping in an airtight container in a cool, dry pantry for up to 1 month. If you want to extend its freshness, you can keep it in the refrigerator for up to 2 months. Just make sure the container is sealed tightly.

Can I freeze my strawberry crunch topping?
Very! To freeze, transfer your No Bake Strawberry Crunch Topping into a sealed freezer bag or an airtight container. It can last up to 6 months in the freezer. When you’re ready to use it, simply thaw overnight in the refrigerator or leave it out at room temperature for a couple of hours for the perfect texture.

What if my topping is too powdery after processing?
No problem! If your No Bake Strawberry Crunch Topping turns out too powdery, you can still salvage it. Try adding a few more larger pieces of wafer or cookie and gently mix them in to create a better texture. If that doesn’t work, reintroducing it in the food processor for just a second or two can help combine the textures without going too fine.

Is this topping safe for those with allergies?
Definitely! However, please check the packaging of your strawberry wafers and cookies, as some may contain gluten or other allergens. For a gluten-free version, use decorations and cookies made specifically for that dietary need. Always check with those served about potential allergy issues.

Can I use different flavors of cookies?
The more the merrier! Feel free to experiment with different cookie flavors. Lemon or birthday cake-flavored cookies can add a delightful twist to your No Bake Strawberry Crunch Topping. Just remember to balance the flavors so they complement the strawberry nicely!

No Bake Strawberry Crunch Topping

Delicious No Bake Strawberry Crunch Topping for Easy Treats

This No Bake Strawberry Crunch Topping is a quick, budget-friendly way to elevate your desserts with delightful flavors.
Prep Time 5 minutes
Total Time 5 minutes
Servings: 8 servings
Course: Dessert
Cuisine: American
Calories: 150

Ingredients
  

Crunchy Base
  • 1 pack Strawberry Sugar Wafers Swap with pink sugar-free wafers for a lighter option
  • 1 pack Vanilla Creme Filled Cookies Consider using Golden Oreos or lemon-flavored cookies for a unique twist

Equipment

  • Food Processor
  • mixing bowl
  • spatula
  • airtight container

Method
 

Cooking Steps
  1. Begin by breaking the strawberry sugar wafers into smaller pieces for easier processing. Pulse these wafers in a food processor until chunky, about 30 seconds. Transfer to a large mixing bowl.
  2. Place the vanilla creme filled cookies in the food processor. Pulse for about 30 seconds until a chunky texture is achieved. The mixture should be crumbly but slightly coarse.
  3. Pour the processed vanilla cookie crumbs into the bowl with the strawberry wafer crumbs. Gently mix with a spatula until evenly combined, creating a tempting visual and flavor harmony.
  4. Transfer the mixed topping to an airtight container. Store in a cool, dry place for up to one month, or refrigerate for up to two months, or freeze for six months.

Notes

Avoid over-blending the wafers and cookies for a chunky texture. Experiment with different cookies and toppings for variety.

Irresistibly Soft Valentine M&M Cookies to Melt Hearts!

As I rolled out the dough, the delightful aroma of butter and brown sugar swirled around my kitchen, wrapping me in a warm, nostalgic embrace. It struck me just how simple acts of baking can fill our hearts with joy, especially when preparing these festive Valentine M&M Cookies. With their soft, chewy texture and vibrant, candy-coated crunch, these cookies are not only irresistible but also the perfect treat to share with loved ones or indulge in solo. It’s a recipe that welcomes creativity—adjust sweetness to match your taste or swap in different mixes for a personal twist. Plus, they’re quick to whip up, making them an ideal last-minute dessert for any gathering. Are you ready to bake a batch and spread the love this Valentine’s Day?

Why Are Valentine M&M Cookies a Must-Bake?

Irresistible Taste: Each bite of these cookies combines soft, chewy goodness with the vibrant crunch of M&Ms, creating a delightful contrast that will make anyone’s taste buds dance with joy.

Quick and Easy: You don’t need to be a master baker! This simple recipe comes together quickly, making it perfect for a last-minute dessert or surprise gift.

Versatile Fun: Swap in different M&Ms or even add nuts for an added layer of flavor! Explore variations for other holidays, like pastel colors for Easter.

Perfect for Sharing: These cookies are ideal for parties, packed lunches, or sweet gifts. Brighten someone’s day with a batch you made yourself!

Festive Appeal: Beautifully adorned with Valentine’s Day sprinkles, these cookies are not just a treat but a visual delight that speaks the language of love.

Indulge in the joy of baking and discover more flavor-packed recipes like Nutty Apricot Cookies and Crunchy Banana Seed Cookies that will also bring smiles to your kitchen!

Valentine M&M Cookies Ingredients

• Whip up a batch with these essentials!

For the Cookie Dough

  • Unsalted Butter – Provides richness and moisture; use cold for thicker cookies.
  • Brown Sugar – Adds moisture and depth; packed brown sugar enhances sweetness.
  • Granulated Sugar – Balances sweetness and texture; substitute with coconut sugar for a twist.
  • Large Eggs – Binds ingredients and adds moisture; room temperature is best for mixing.
  • Vanilla Extract – Boosts flavor; pure extract offers a richer taste than imitation.
  • All-Purpose Flour – Main structural element; swap with a gluten-free blend if needed.
  • Cornstarch – Contributes to chewiness and a tender crumb.
  • Baking Soda – Acts as a leavening agent for cookie spread.
  • Baking Powder – Ensures cookies rise perfectly.
  • Salt – Enhances flavor, balancing out the sweetness.

For the Mix-Ins

  • M&Ms (red, white, pink) – Sweetness and vibrant color; use seasonal varieties for different occasions.
  • Chocolate Chips – Adds extra chocolatey indulgence; choose semi-sweet or milk chocolate based on preference.
  • Valentine Sprinkles – Decorative touch to make cookies festive; use different shapes to match the holiday.

With these Valentine M&M Cookies ingredients, you’re well on your way to making delightful treats that bring hearts together!

Step‑by‑Step Instructions for Valentine M&M Cookies

Step 1: Prep Dough
Start by preheating your oven to 400°F (200°C) and lining a baking sheet with a silicone mat or parchment paper. In a large mixing bowl, beat 1 cup of cold unsalted butter until smooth and creamy. Gradually add 1 cup each of brown sugar and granulated sugar, blending until just combined. Mix in 2 large eggs and 2 teaspoons of vanilla extract until the mixture is smooth and well incorporated.

Step 2: Add Dry Ingredients
In a separate bowl, whisk together 3 cups of all-purpose flour, 2 teaspoons of cornstarch, 1 teaspoon of baking soda, 1 teaspoon of baking powder, and 1/2 teaspoon of salt. Gradually add this dry mixture to the wet ingredients on low speed, mixing until just combined. Be careful not to overmix; this helps ensure your Valentine M&M Cookies maintain a rich, chewy texture.

Step 3: Fold in Mix-ins
Gently fold in approximately 1 cup of M&Ms and 1 cup of chocolate chips into the dough using a spatula. Ensure the candy and chocolate are evenly distributed throughout the dough, creating a colorful allure for your Valentine M&M Cookies. The vibrant colors will pop as you prepare to shape your cookies, setting the stage for a delightful treat.

Step 4: Shape Cookies
Using a cookie scoop or measuring cup, scoop dough portions of about 1/4 cup and roll them into balls. For an extra festive touch, roll each ball in Valentine sprinkles, and don’t hesitate to add additional M&Ms and chocolate chips on top for a visually appealing look. This step adds to both the visual appeal and the delightful crunch!

Step 5: Bake
Place the cookie balls on your prepared baking sheet, ensuring to space them about 2 inches apart (approximately 6 per sheet). Bake in your preheated oven for 8 to 12 minutes, or until the edges are lightly golden while the centers remain soft. Allow the cookies to cool on the baking sheet for 10 minutes, letting them firm up slightly before transferring them to a wire rack to cool completely. Enjoy your cherished Valentine M&M Cookies!

How to Store and Freeze Valentine M&M Cookies

Room Temperature: Keep your Valentine M&M Cookies in an airtight container at room temperature for up to 5 days to maintain their soft, chewy texture.

Fridge: Storing in the fridge can extend their freshness; simply place them in a sealed container for up to 1 week. However, they may lose some of their softness.

Freezer: For longer storage, freeze leftover cookies in a single layer on a parchment-lined baking sheet before transferring them into an airtight container or freezer bag. They can be frozen for up to 3 months.

Reheating: To enjoy frozen cookies, simply thaw them at room temperature or warm them in the microwave for 10-15 seconds. They’ll be as delightful as the day they were baked!

Valentine M&M Cookies Variations & Substitutions

Feel free to get creative with these cookies, adding your personal touch to make them uniquely yours!

  • Dairy-Free: Swap unsalted butter with coconut oil or a plant-based butter for a dairy-free version while maintaining that rich flavor.

  • Gluten-Free: Use a gluten-free baking blend in place of all-purpose flour to accommodate gluten sensitivities without compromising taste.

  • Nutty Variation: Incorporate chopped nuts, like walnuts or pecans, for a delightful crunch that complements the soft texture of the cookies.

  • Flavor Boost: Replace chocolate chips with white chocolate or peanut butter chips for a fresh twist that adds different flavor dimensions to your cookies.

  • Lower Sugar: Use half the amount of granulated sugar and focus on using a sweeter chocolate to create a slightly less sugary cookie that still satisfies.

  • Seasonal Swaps: Change M&Ms for seasonal varieties; think pastel colors for Easter or autumn-themed colors for Halloween, keeping your treats festive year-round.

  • Spicy Kick: Add a pinch of cinnamon or a dash of cayenne pepper to the cookie dough for a warm spice that surprises with every bite.

  • Extra Texture: Incorporate oats or crushed pretzels for an unexpected crunch and chewiness that pairs beautifully with the sweetness of the cookies.

Dive into a world of delightful options, and if you need more sweet inspiration, don’t miss delicious recipes like Apple Oatmeal Cookies or Nut Seed Cookies. Happy baking!

Expert Tips for Valentine M&M Cookies

Mix Carefully: Don’t overmix the dough after adding flour; mixing just until incorporated helps maintain the soft, chewy texture of your Valentine M&M Cookies.

Chill for Thicker: For a thicker cookie, chill the dough for 15-30 minutes before baking. This allows the dough to firm up and prevents excessive spreading.

Watch the Bake: Be cautious not to overbake; cookies should be golden around the edges but remain soft in the middle to achieve that perfect melt-in-your-mouth experience.

Room Temp Eggs: Ensure your eggs are at room temperature before mixing; this will help them blend more easily into the dough for a smoother texture.

Customize with Love: Feel free to personalize your cookies! Swap in different M&Ms or add nuts to create a unique flavor profile while maintaining the festive touch.

Make Ahead Options

These Valentine M&M Cookies are perfect for meal prep enthusiasts! You can prepare the cookie dough up to 24 hours in advance; simply shape it into balls and refrigerate them in an airtight container to maintain freshness and prevent drying out. For even longer storage, freeze the dough for up to 3 months—just make sure to wrap each portion tightly in plastic wrap before placing them in a freezer bag. When ready to bake, there’s no need to thaw; simply place the frozen cookie balls on your baking sheet and bake for an extra minute or two. This way, you’ll have delicious, warm cookies ready to enjoy with minimal effort, making your busy weeknights a little sweeter!

What to Serve with Valentine M&M Cookies

These vibrant, chewy delights deserve a beautifully arranged table filled with flavors that complement their charm.

  • Fruity Parfait: Layers of yogurt, fresh berries, and granola offer a refreshing balance to the sweetness of the cookies.
  • Whipped Cream: A dollop of lightly sweetened whipped cream adds a cloud-like texture, enhancing the cookie experience.
  • Chocolate Milkshake: Rich, creamy, and indulgent, this pairs perfectly with the candy-coated crunch of M&Ms.
  • Coffee or Latte: A warm cup brings out the flavors, creating a comforting contrast to the cookies’ sweetness.
  • Fresh Fruit Salad: A medley of citrus and berries brightens the palate, providing a refreshing counterpoint to each cookie’s richness.
  • Ice Cream Sundae: Combining a scoop of vanilla ice cream topped with a drizzle of chocolate sauce creates the ultimate dessert experience.

Bringing these delightful pairings to the table elevates your cookie experience and creates lasting memories with loved ones.

Valentine M&M Cookies Recipe FAQs

How do I choose ripe ingredients for my Valentine M&M Cookies?
Absolutely! For the best cookies, use room temperature large eggs for better incorporation. Select unsalted butter that is cold for a thicker texture, and pick packed brown sugar to enhance sweetness. When choosing M&Ms, opt for bright colors, and feel free to experiment with seasonal varieties for added fun!

How should I store my Valentine M&M Cookies?
To keep your cookies fresh, store them in an airtight container at room temperature for up to 5 days. This helps maintain their delightful soft and chewy texture. If you want them to last longer, consider refrigerating them; they can stay fresh in a sealed container for about a week!

Can I freeze my Valentine M&M Cookies?
Yes, you can! To freeze, place your cookies in a single layer on a parchment-lined baking sheet until solid, then transfer them into an airtight container or freezer bag. They can be frozen for up to 3 months. When you want to enjoy a cookie, simply thaw them at room temperature or pop them in the microwave for 10-15 seconds for that fresh-baked warmth!

What should I do if my cookies spread too much while baking?
Very good question! If your cookies spread excessively, consider chilling the dough for 15-30 minutes before shaping and baking. This prevents the cookies from spreading too wide. Also, ensure you’re not overmixing after adding the flour; that’s key to keeping them thick and chewy!

Are there any dietary restrictions I should be aware of with this recipe?
These Valentine M&M Cookies contain common allergens such as eggs, wheat, and dairy. If you or someone you’re baking for has allergies, you can substitute all-purpose flour with a gluten-free baking blend and use dairy-free butter. For a nut-free option, skip any nuts or chocolate that may contain nuts. Always double-check the ingredient labels to ensure safety!

Valentine M&M Cookies

Irresistibly Soft Valentine M&M Cookies to Melt Hearts!

Experience the joy of baking with these delightful Valentine M&M Cookies, perfect for sharing love and sweetness.
Prep Time 10 minutes
Cook Time 12 minutes
Cooling Time 10 minutes
Total Time 32 minutes
Servings: 24 cookies
Course: Dessert
Cuisine: American
Calories: 150

Ingredients
  

For the Cookie Dough
  • 1 cup Unsalted Butter cold for thicker cookies
  • 1 cup Brown Sugar packed enhances sweetness
  • 1 cup Granulated Sugar can substitute with coconut sugar
  • 2 large Eggs room temperature is best
  • 2 teaspoons Vanilla Extract pure extract preferred
  • 3 cups All-Purpose Flour can substitute with gluten-free blend
  • 2 teaspoons Cornstarch
  • 1 teaspoon Baking Soda
  • 1 teaspoon Baking Powder
  • 1/2 teaspoon Salt
For the Mix-Ins
  • 1 cup M&Ms (red, white, pink) use seasonal varieties
  • 1 cup Chocolate Chips semi-sweet or milk chocolate
  • 1/4 cup Valentine Sprinkles decorative touch for festive appeal

Equipment

  • baking sheet
  • mixing bowl
  • silicone mat or parchment paper
  • Cookie scoop

Method
 

Step-by-Step Instructions
  1. Preheat your oven to 400°F (200°C) and line a baking sheet with a silicone mat or parchment paper.
  2. In a large mixing bowl, beat 1 cup of cold unsalted butter until smooth. Gradually add 1 cup each of brown sugar and granulated sugar, mixing until combined. Add 2 large eggs and 2 teaspoons of vanilla extract.
  3. In a separate bowl, whisk together 3 cups of all-purpose flour, 2 teaspoons of cornstarch, 1 teaspoon of baking soda, 1 teaspoon of baking powder, and 1/2 teaspoon of salt. Gradually add to the wet ingredients.
  4. Gently fold in 1 cup of M&Ms and 1 cup of chocolate chips using a spatula.
  5. Scoop dough portions of about 1/4 cup, roll into balls, and optionally roll in Valentine sprinkles before placing on the baking sheet.
  6. Bake for 8 to 12 minutes until edges are golden and centers are soft. Cool on the baking sheet for 10 minutes before transferring to a wire rack.

Notes

For a thicker cookie, chill the dough for 15-30 minutes before baking. Customize by using different types of M&Ms or adding nuts.

Rose Chocolate Chip Cookies: A Floral Twist on a Classic Treat

As I stood in my kitchen, the sweet scent of blooming roses filled the air, a delightful unexpected twist on the usual baking aromas. Today, I’m thrilled to share my take on Rose Chocolate Chip Cookies, a gentle fusion of classic flavors with an aromatic floral touch. These cookies are not only a quick 30-minute bake but also a charming way to elevate your dessert game, impressing guests and delighting family alike. Infused with fragrant rose extract and dotted with both semisweet chocolate chips and cute little mini chocolate roses, they bring a touch of elegance to any occasion. So, are you ready to turn your cookie routine into a floral adventure? Let’s get baking!

Why are Rose Chocolate Chip Cookies special?

Unique Twist: These cookies reimagine the classic, infusing them with the delicate essence of rose extract, ensuring a delightful surprise in every bite.
Quick to Make: With just 30 minutes from start to finish, you’ll have a batch ready to impress without the long wait.
Visual Appeal: Topped with adorable mini chocolate roses, these cookies look as beautiful as they taste—perfect for impressing guests or treating yourself!
Versatile Flavor: Pair them with tea for a delightful afternoon snack, or enjoy them as an elegant dessert after dinner.
Gift-Worthy: Packaged beautifully, they make for heartfelt homemade gifts that showcase your creativity and baking skills. For more delightful cookie recipes, check out Nutty Apricot Cookies and Coconut Chocolate Rolls.

Rose Chocolate Chip Cookie Ingredients

• Transform your baking with these delightful flavors!

For the Cookie Dough

  • All-purpose flour – Provides structure; consider using cake flour for a lighter texture.
  • Baking soda – A leavening agent; make sure it’s fresh for the best rise.
  • Baking powder – Adds lightness; substitute more baking soda if needed.
  • Salted butter – Contributes moisture and flavor; use unsalted if you prefer and adjust added salt.
  • Granulated sugar – Sweetness and texture; brown sugar can be swapped for a richer taste.
  • Light brown sugar – Adds moisture with caramel notes; consider dark brown sugar as a substitution.
  • Large egg – Binds everything together; a flax egg works for a vegan alternative.
  • Rose extract – Infuses that gorgeous floral flavor; vanilla extract is a suitable alternative.

For the Chocolate Addition

  • Semisweet chocolate chips – Brings sweetness and a rich chocolate essence; dark chocolate boosts flavor depth.
  • Rose chocolate chips (optional) – They’re a decorative touch; not necessary but enhance visual appeal.

These Rose Chocolate Chip Cookies will not only taste delightful but look stunning too!

Step‑by‑Step Instructions for Rose Chocolate Chip Cookies

Step 1: Preheat the Oven
Begin by preheating your oven to 350°F (180°C). While the oven warms up, prepare two baking sheets by lining them with parchment paper. This step is essential to achieve that perfect texture for your Rose Chocolate Chip Cookies, preventing them from sticking and ensuring even baking.

Step 2: Mix the Dry Ingredients
In a medium sized bowl, whisk together 2 cups of all-purpose flour, 1 teaspoon of baking soda, and 1 teaspoon of baking powder. This mixture is crucial as it creates the structure of your cookies while allowing them to rise beautifully. Set aside this bowl so the flour blend can develop its flavors while you move on to the next step.

Step 3: Cream the Butter and Sugars
In a large mixing bowl, beat together ½ cup of softened salted butter with ½ cup of granulated sugar and ½ cup of light brown sugar for about 2-3 minutes. You want to achieve a light and fluffy texture, which is key to maintaining softness in your Rose Chocolate Chip Cookies. Make sure to scrape down the sides of the bowl to incorporate all ingredients.

Step 4: Add Egg and Rose Extract
Now, mix in one large egg and 1 teaspoon of fragrant rose extract until fully blended. The addition of the egg acts as a binder, while the rose extract elevates the cookie’s flavor profile. Give the mixture a good stir until it is smooth, ensuring that the sweet scent of rose permeates the mixture.

Step 5: Combine Dry and Wet Ingredients
Gradually add the dry ingredients mixture to the butter mixture, stirring gently until just combined. It’s important to avoid overmixing at this stage to maintain the tender texture of your Rose Chocolate Chip Cookies. You should see tiny flecks of flour throughout the dough, indicating it’s ready for the next step.

Step 6: Fold in the Chocolate Chips
Gently fold in 1 cup of semisweet chocolate chips, distributing them evenly throughout your cookie dough. This step adds that rich chocolatey goodness that perfectly complements the floral notes of the rose. If you’re using optional rose chocolate chips, feel free to mix them in at this point for a lovely visual effect.

Step 7: Scoop the Cookie Dough
Using a cookie scoop or a tablespoon, drop tablespoons of dough onto the prepared baking sheets, spacing them about 2 inches apart. This spacing allows the cookies to spread without merging into each other as they bake. The cookie dough will become beautifully fluffy and delightful as it cooks, promising a warm, chewy center.

Step 8: Bake the Cookies
Place the baking sheets in the preheated oven and bake for 8-10 minutes. Keep a close eye on the edges; you want them to turn a lovely golden color while the center remains slightly soft. Remove them from the oven promptly to maintain that beautiful chewy texture characteristic of perfect Rose Chocolate Chip Cookies.

Step 9: Add Chocolate Roses
As soon as the cookies are out of the oven, gently press a few mini chocolate roses into the top of each warm cookie. This addition not only enhances the cookie’s appearance but also offers a delightful surprise of chocolate flavor. Be quick, as the heat will help the roses adhere without melting too much.

Step 10: Cool and Set
Transfer the cookies to a small baking sheet and place them in the freezer for 5 minutes to set the chocolate roses. This quick chill will solidify the chocolate and make for a beautiful presentation. Afterward, allow the cookies to cool further on a wire rack before enjoying or storing.

Step 11: Store or Serve
Once cooled, serve your Rose Chocolate Chip Cookies for an elegant treat or store them in an airtight container at room temperature. They’ll stay fresh for up to a week, or you can freeze them for longer storage. Each bite promises the right balance of soft, floral sweetness and chocolate richness that will delight everyone!

Make Ahead Options

These Rose Chocolate Chip Cookies are perfect for busy home cooks looking to save time! You can prepare the dough up to 24 hours in advance by mixing it and refrigerating it in an airtight container. This helps the flavors meld beautifully while maintaining freshness. For longer storage, the unbaked dough can be frozen for up to 3 months; simply scoop the dough onto baking sheets and freeze until solid, then transfer to a freezer bag. When you’re ready to bake, there’s no need to thaw—just add an extra minute to the baking time. With these prep-ahead instructions, you’ll have freshly baked cookies with minimal effort on busy weeknights!

Expert Tips for Rose Chocolate Chip Cookies

  • Butter Softness: Ensure your butter is softened to room temperature for easy creaming. Cold butter can lead to denser cookies that won’t rise as well.

  • Avoid Overmixing: Gently combine your wet and dry ingredients. Overmixing can result in tough cookies, so mix until just combined for perfect rose chocolate chip cookies.

  • Baking Time: Keep an eye on your cookies while they bake. They should be golden around the edges but still soft in the center for a chewy texture.

  • Chocolate Rose Placement: Quickly press the chocolate roses into warm cookies right after baking. This prevents them from melting too much while ensuring a beautiful presentation.

  • Chilling for Set: Don’t skip the quick chill in the freezer for setting the chocolate roses. It helps them adhere better and maintains their shape.

How to Store and Freeze Rose Chocolate Chip Cookies

Room Temperature: Store cookies in an airtight container at room temperature for up to 1 week to maintain their soft, chewy texture.

Freezer: To freeze, place cooled cookies in a single layer on a baking sheet, then cover with plastic wrap or transfer to a freezer bag. They can be frozen for up to 3 months.

Thawing: For the best flavor and texture, thaw your rose chocolate chip cookies at room temperature for about 30 minutes before enjoying.

Reheating: If desired, reheat cookies in the microwave for 10-15 seconds for that warm, freshly-baked experience.

What to Serve with Rose Chocolate Chip Cookies

When savoring the delicate sweetness of floral cookies, consider these scrumptious pairings to elevate your experience.

  • Creamy Vanilla Ice Cream: A scoop of this cool treat creates a delightful contrast with warm cookies and enhances the rich chocolate flavors.

  • Mint Tea: The refreshing notes of mint complement the floral undertones of rose, making for a soothing pairing that delights the palate.

  • Raspberry Coulis: Drizzling this tangy sauce over your cookies adds a burst of freshness that beautifully balances their sweetness.

  • Fresh Berries: Strawberries or raspberries provide a light and juicy element that pairs perfectly with the chewy texture of the cookies. They bring out the cookie’s floral flavors beautifully.

  • Champagne or Sparkling Wine: A glass of bubbly elevates any occasion, and its light effervescence pairs harmoniously with the sweet and floral notes of the cookies.

  • Chocolate-Covered Strawberries: These sweet bites make an exquisite companion, as their rich chocolate flavor harmonizes wonderfully with the chocolate chips in the cookies.

  • Lemonade: A refreshing, tart beverage like lemonade cuts through the sweetness just right, summoning vibrant flavors to your dessert plate.

  • Earl Grey Tea: The bergamot in this aromatic tea complements the rose, creating a fragrant experience that invites leisurely enjoyment.

  • Floral Cupcakes: For a lovely dessert spread, pair with cupcakes infused with floral flavors to enhance the overall theme of your gathering.

Indulging in these delightful accompaniments will not only enhance your enjoyment but also create a full, polished presentation for your guests.

Rose Chocolate Chip Cookies Variations

Feel free to explore these delightful twists on your rose chocolate chip cookies!

  • Lavender Delight: Replace rose extract with lavender extract for a unique floral flavor that will transport you to a relaxing garden.
    A hint of lavender adds an enchanting aroma and hints of calmness with every bite.

  • Nutty Crunch: Incorporate chopped almonds or pistachios for a delightful crunch that contrasts beautifully with the cookie’s soft texture.
    This variation not only boosts flavor but also adds an inviting texture that enhances every mouthful.

  • White Chocolate Bliss: Swap semisweet chocolate chips for white chocolate chips for a sweeter version that pairs nicely with the floral notes.
    The creamy sweetness of white chocolate complements the rose flavors perfectly, creating an indulgent treat.

  • Citrus Zing: Add a teaspoon of lemon or orange zest to the dough for a refreshing zing that brightens the overall flavor profile.
    The citrusy pop combines beautifully with the floral notes, creating a tantalizing contrast.

  • Herbal Infusion: Mix in some finely chopped fresh mint for a cool twist that will surprise and delight the palate.
    Mint’s refreshing qualities balance well with the cookies, making them a perfect treat for warm days.

  • Spicy Surprise: For those who like heat, add a pinch of cayenne pepper or chili powder to the dough for a spicy kick.
    The heat enhances the sweetness of the chocolate and the floral elements, creating an unforgettable experience.

  • Gluten-Free Option: Substitute all-purpose flour with a 1:1 gluten-free baking blend for a safe option for your gluten-intolerant friends.
    You’ll still enjoy the soft and chewy texture, ensuring everyone can indulge in these delightful cookies!

Explore these variations to elevate your rose chocolate chip cookies! And if you enjoy cookie adventures, don’t miss our delicious Coconut Chocolate Rolls and Coffee Chocolate Truffles.

Rose Chocolate Chip Cookies Recipe FAQs

How do I choose the right rose extract?
Make sure to pick a high-quality rose extract that indicates it’s pure and natural. The flavor should be fragrant and not overly artificial. If rose extract isn’t available, using vanilla extract can provide a nice alternative that enhances sweetness without overshadowing the chocolate.

What’s the best way to store Rose Chocolate Chip Cookies?
Store your cookies in an airtight container at room temperature for up to one week. For longer freshness, pop them into the freezer. Just ensure they are fully cooled, and layer them between parchment paper before placing them in a freezer bag. This method helps retain their freshness and soft texture.

Can I freeze Rose Chocolate Chip Cookies?
Absolutely! To freeze, arrange the cooled cookies in a single layer on a baking sheet, then cover them tightly with plastic wrap or transfer them into a sealed freezer bag. They can remain frozen for up to 3 months. When you’re ready to enjoy them, simply thaw at room temperature for about 30 minutes.

What if my cookies are too flat or dense?
If your cookies turn out flat, it might be due to using softened butter that was too warm, or the dough was overmixed. Ensure that the butter is just soft enough to cream and avoid overmixing once the dry ingredients are incorporated. For denser cookies, check your baking soda and baking powder for freshness, as expired leaveners can result in insufficient rising.

Are there any dietary considerations when making these cookies?
If you’re baking for someone with allergies, be cautious with the ingredients. The recipe contains gluten (from flour) and dairy (from butter and chocolate). For a gluten-free version, you could use a 1:1 gluten-free baking flour. To make them dairy-free, substitute the butter with a plant-based alternative and use dairy-free chocolate chips.

Rose Chocolate Chip Cookies

Rose Chocolate Chip Cookies: A Floral Twist on a Classic Treat

Rose Chocolate Chip Cookies are a delightful blend of classic cookies infused with floral rose extract, perfect for impressing guests.
Prep Time 10 minutes
Cook Time 10 minutes
Cooling Time 5 minutes
Total Time 30 minutes
Servings: 12 cookies
Course: Dessert
Cuisine: American
Calories: 150

Ingredients
  

For the Cookie Dough
  • 2 cups all-purpose flour Consider using cake flour for a lighter texture.
  • 1 teaspoon baking soda Make sure it’s fresh for the best rise.
  • 1 teaspoon baking powder Adds lightness; substitute more baking soda if needed.
  • ½ cup salted butter Use unsalted if preferred and adjust added salt.
  • ½ cup granulated sugar Brown sugar can be swapped for a richer taste.
  • ½ cup light brown sugar Consider dark brown sugar as a substitution.
  • 1 large egg A flax egg works for a vegan alternative.
  • 1 teaspoon rose extract Vanilla extract is a suitable alternative.
For the Chocolate Addition
  • 1 cup semisweet chocolate chips Dark chocolate boosts flavor depth.
  • 1 cup rose chocolate chips Optional; enhances visual appeal.

Equipment

  • oven
  • mixing bowls
  • whisk
  • Cookie scoop
  • Baking sheets
  • parchment paper

Method
 

Instructions
  1. Preheat the oven to 350°F (180°C) and prepare two baking sheets with parchment paper.
  2. In a medium bowl, whisk together the all-purpose flour, baking soda, and baking powder.
  3. In a large mixing bowl, beat together the softened butter, granulated sugar, and light brown sugar until light and fluffy.
  4. Mix in the egg and rose extract until fully blended.
  5. Gradually add the dry ingredients mixture to the butter mixture, stirring gently until just combined.
  6. Gently fold in the semisweet chocolate chips and optional rose chocolate chips.
  7. Scoop tablespoons of dough onto the baking sheets, spacing them about 2 inches apart.
  8. Bake for 8-10 minutes, until the edges are golden but the center remains soft.
  9. Press mini chocolate roses into the top of each warm cookie right after baking.
  10. Transfer the cookies to a baking sheet and place in the freezer for 5 minutes to set.
  11. Allow to cool on a wire rack before serving or storing.

Notes

Store cookies in an airtight container at room temperature for up to 1 week, or freeze for up to 3 months.

Juicy Pink Mac and Cheese: Fun Comfort Food for Everyone

As I hovered over the bubbling pot of pasta, the playful pink hue caught the eye and sparked a delightful giggle from my little ones. This Juicy Pink Mac and Cheese not only transforms a beloved classic but also adds a vibrant twist that the whole family will adore. The secret lies in the beautiful beet juice, which creates an irresistible color while keeping the recipe quick and simple—a major win for any home chef. This creamy, cheesy delight is the perfect antidote to the fast-food frenzy, making dinner time both fun and nutritious. Plus, it’s a fantastic dairy-free option if you’re looking to swap out the traditional ingredients. Curious how to create your own colorful masterpiece? Let’s dive in!

Why Is Juicy Pink Mac and Cheese Fun?

Vibrant, Kid-Friendly Appeal: The stunning pink color turns a simple dish into an exciting feast that kids will love.

Easy to Make: With just a few ingredients and straightforward steps, you can whip up this playful mac and cheese in no time.

Nutritious Twist: Packed with natural ingredients like beet juice, this recipe adds a healthy flair without sacrificing flavor.

Versatile Usage: Customize the dish by mixing in your favorite proteins or alternative sauces. You can even enjoy it alongside savory zucchini and potato mini pancakes with suluguni cheese for an unforgettable meal!

Dairy-Free Option: Easily transform this classic into a dairy-free delight using plant-based cheese and milk, ensuring everyone can enjoy it.

Leftovers Made Simple: When prepared a day ahead, this dish only gets better, and reheating is a breeze—just add a splash of milk!

Juicy Pink Mac and Cheese Ingredients

For the Pasta
Pasta – Use any preferred type for a hearty base, such as elbow, penne, or spirals.

For the Sauce
Cheese – Choose your favorite cheese or dairy-free substitute to create a creamy, delicious flavor.
Beet Juice – This natural coloring agent provides the distinctive pink hue; use juice from canned plain beets or make your own for freshness.
Milk (or Plant-Based Milk) – Enhances creaminess; adjust the amount to get your desired thickness for leftovers.
Butter (or Dairy-Free Substitute) – Promotes richness and a smooth texture in the cheese sauce.
Salt – Add to taste to enhance the overall flavor of your Juicy Pink Mac and Cheese.

Step‑by‑Step Instructions for Juicy Pink Mac and Cheese

Step 1: Cook Pasta
Start by bringing a large pot of salted water to a boil over high heat. Add your choice of pasta, such as elbow or penne, and cook according to the package instructions until al dente, usually around 7-10 minutes. Once done, carefully drain the pasta in a colander and set it aside while you prepare the sauce.

Step 2: Make the Sauce
In a blender, combine any pre-prepared veggies with a small amount of beet juice, starting with about 1-2 tablespoons. Blend on high until smooth and creamy, ensuring there are no lumps. Gradually add more beet juice until you achieve a vibrant pink color, blending until you have a silky texture. This beet juice will give your Juicy Pink Mac and Cheese its delightful hue.

Step 3: Heat Sauce
Transfer the blended beet juice mixture to a medium saucepan and set it over low heat. Stir gently to warm the sauce without boiling it, which usually takes about 3-5 minutes. Keep an eye on the sauce as it heats through; a gentle simmer helps meld the flavors while preserving the bright pink color.

Step 4: Combine
Once the sauce is warm, add the drained pasta to the saucepan, tossing it gently with the sauce. Make sure each piece of pasta is coated evenly in the creamy sauce. Continue stirring for another 2-3 minutes, allowing the pasta to absorb some flavors and heat through completely.

Step 5: Serve
When the Juicy Pink Mac and Cheese is heated through and beautifully combined, serve it immediately. Ladle it into bowls while it’s hot, letting the bright pink color be the star of the show. Consider garnishing with fresh herbs or serving alongside colorful veggies for a nutritious and appealing presentation.

Make Ahead Options

These Juicy Pink Mac and Cheese are perfect for busy home cooks looking to save time! You can prepare the sauce up to 24 hours in advance, blending your veggies and beet juice, then storing the mixture in an airtight container in the refrigerator. Before serving, simply reheat the sauce over low heat, stirring in a splash of milk for added creaminess if needed. The pasta can be cooked and stored separately for up to 3 days; just remember to toss it with a little olive oil to prevent sticking. When ready to enjoy, combine the warm pasta with the reheated sauce, and you’ll have a delightful meal that’s just as satisfying as when it’s freshly made!

Storage Tips for Juicy Pink Mac and Cheese

Fridge: Store your Juicy Pink Mac and Cheese in an airtight container for up to 3-4 days. The vibrant color may deepen over time, but the taste will remain delicious.

Freezer: If you’d like to make it ahead, freeze leftovers in airtight containers for up to 2 months. To reheat, thaw overnight in the fridge before warming up.

Reheating: Gently warm your mac and cheese in a saucepan with a splash of milk. Heat on low to preserve creaminess, avoiding boiling to prevent separation of the sauce.

Make Ahead: Prepare the dish a day in advance, keeping it slightly saucier since pasta absorbs sauce as it sits. Your family will love it just as much the next day!

Expert Tips for Juicy Pink Mac and Cheese

  • Color Control: Add beet juice gradually to avoid excess liquid that can make the sauce watery. A little at a time ensures the perfect pink hue!

  • Temperature Matters: Incorporate beet juice after removing the sauce from heat to preserve vibrant color and flavor. This helps maintain that delightful pink!

  • Reheating Glory: To bring leftovers back to life, add a splash of milk and heat gently—don’t overheat to prevent sauce separation, making your Juicy Pink Mac and Cheese just as creamy as the first serving.

  • Make Ahead Magic: Consider preparing your dish a day in advance, but be sure to make it slightly saucier, as pasta absorbs sauce over time, ensuring every bite remains delicious.

  • Perfect Pairings: Serve with fresh steamed veggies or a side salad to enhance the meal’s nutritional profile and balance the richness of the mac and cheese.

Juicy Pink Mac and Cheese Variations

Feel free to let your imagination run wild while customizing this delightful recipe for added fun and flavor!

  • Different Pasta Shapes: Switch to shells, fusilli, or even star-shaped pasta for a whimsical presentation. Kids will love the new shapes!

  • Veggie Swaps: Replace beet juice with colorful purees like carrot, sweet potato, or spinach for vibrant hues. Each provides its own unique flavor twist!

  • Protein Boost: Stir in cooked chicken, crispy bacon, or chickpeas for a heartier meal. This adds texture and protein, making it even more satisfying.

  • Herb-Infused: Add fresh herbs like basil or parsley to the sauce for an aromatic flavor lift. They not only enhance taste but make your dish look even more inviting!

  • Cheddar Twist: Use sharp cheddar or add cream cheese for an extra creamy texture and tangy flavor. It brings a traditional mac and cheese flair that everyone loves!

  • Spicy Kick: Sprinkle in red pepper flakes or cayenne for added heat. Just a little will elevate the flavor profile, pleasing those who enjoy a spicy twist!

  • Cheesy Level Up: Mix in a combination of different cheeses, such as mozzarella for stretchiness or goat cheese for creaminess. Each variety adds depth to the flavor.

  • Color Layering: Consider layering this pink mac and cheese with green spinach or a layer of colorful roasted veggies for a beautiful presentation. Everyone will be curious about the layers!

If you’re interested in more delightful cheesy dishes, check out our Crispy Cheese Chili French Fries or try our comforting Blueberry Cream Cheese Cake for dessert!

What to Serve with Juicy Pink Mac and Cheese

Enhance your dining experience with delightful pairings that complement this playful dish’s vibrant flavors.

  • Steamed Broccoli: A classic side that adds a nutritious crunch and a beautiful green contrast to the pink mac and cheese.
  • Garlic Breadsticks: The buttery, crispy texture brings a comforting element that complements the creaminess of the mac and cheese perfectly.
  • Roasted Cherry Tomatoes: Burst of freshness with a hint of sweetness that brightens the plate and balances the richness of the dish.
  • Crispy Garden Salad: Mixed greens with a tangy vinaigrette offer a refreshing, crunchy counterpart to the creamy mac and cheese.
  • Veggie Sticks with Hummus: Colorful raw veggies add a playful touch, and dipping them in hummus brings a nutritious and fun aspect to the meal.
  • Fruit Salad: A sweet and juicy medley of seasonal fruits brightens up the table while providing a refreshing contrast to the savory flavors.
  • Iced Herbal Tea: Light and refreshing, this drink can cleanse the palate, complementing the rich mac and cheese experience without overwhelming your senses.
  • Chocolate Chip Cookies: For dessert, warm chocolate chip cookies add a familiar comfort factor, making any meal feel special and sweetly memorable.

Juicy Pink Mac and Cheese Recipe FAQs

What type of pasta works best for this recipe?
Absolutely! For the Juicy Pink Mac and Cheese, you can use any type of pasta you enjoy, such as elbow, penne, or even spiral shapes. My personal favorite is elbow macaroni for that classic comfort feel, but feel free to get creative!

How should I store leftover Juicy Pink Mac and Cheese?
Store your Juicy Pink Mac and Cheese in an airtight container in the fridge for up to 3-4 days. Don’t worry if the vibrant pink color deepens over time; it doesn’t affect the taste at all! Just give it a stir before serving, and you’re good to go.

Can I freeze Juicy Pink Mac and Cheese?
Yes! To freeze, simply place the cooled mac and cheese into airtight containers or freezer bags. Remove excess air, and it can last for up to 2 months in the freezer. When you’re ready to enjoy, thaw overnight in the fridge and reheat gently on the stove with a splash of milk.

What if my pink mac and cheese turns out too watery?
Very good question! If you find your sauce is too thin, try adding more cheese to thicken it up. It’s also helpful to add beet juice gradually to avoid excess liquid in the first place. If it’s already made, let it simmer on low while stirring, and it should thicken nicely.

Is this recipe suitable for those with dairy allergies?
Certainly! You can easily make this Juicy Pink Mac and Cheese dairy-free by using plant-based cheese and milk. Many brands offer delicious alternatives that melt wonderfully, allowing everyone to savor this dish without worry.

How can I make this dish more nutritious?
I often add veggies to my mac and cheese for extra nutrition! You can stir in cooked broccoli, peas, or even pureed sweet potatoes. These not only enhance the nutritional value but also add a lovely pop of color, making your meal even more delightful.

Juicy Pink Mac and Cheese

Juicy Pink Mac and Cheese: Fun Comfort Food for Everyone

Juicy Pink Mac and Cheese is a vibrant, fun twist on a classic dish that the whole family will adore.
Prep Time 10 minutes
Cook Time 15 minutes
Total Time 25 minutes
Servings: 4 servings
Course: Dinner
Cuisine: Comfort Food
Calories: 350

Ingredients
  

For the Pasta
  • 8 ounces Pasta Any preferred type such as elbow, penne, or spirals.
For the Sauce
  • 2 cups Cheese Choose dairy or dairy-free substitute.
  • 1 cup Beet Juice Use juice from canned plain beets or fresh.
  • 1 cup Milk Or plant-based milk to enhance creaminess.
  • 2 tablespoons Butter Or dairy-free substitute.
  • 1 teaspoon Salt Add to taste.

Equipment

  • Large pot
  • Colander
  • Blender
  • Medium saucepan

Method
 

Step-by-Step Instructions
  1. Bring a large pot of salted water to a boil. Add pasta and cook until al dente, usually around 7-10 minutes. Drain and set aside.
  2. In a blender, combine pre-prepared veggies with beet juice, blending until smooth. Gradually add more beet juice to achieve a vibrant pink color.
  3. Transfer the beet juice mixture to a medium saucepan over low heat, stirring to warm without boiling for about 3-5 minutes.
  4. Add the drained pasta to the saucepan, tossing gently with the sauce until evenly coated. Stir for another 2-3 minutes.
  5. Serve immediately in bowls, garnished with fresh herbs or colorful veggies.

Notes

Consider making this dish a day ahead for improved flavor and texture. Reheat gently with a splash of milk to maintain creaminess.

Irresistible Flaky Buttery Ham Pot Pie for Cozy Family Meals

“You wouldn’t believe the deliciousness hiding in last night’s dinner leftovers! If you’ve ever found yourself staring down a fridge full of leftover ham, let me introduce you to my Flaky Buttery Ham Pot Pie. This comforting dish marries a rich, creamy filling packed with tender ham and vibrant vegetables, all nestled beneath a golden crescent dough crust. The best part? It’s a quick and easy recipe, perfect for whipping up on a busy weeknight, turning what could have been a mundane meal into a satisfying family favorite. Plus, it’s super versatile—feel free to swap in chicken or even a medley of seasonal veggies! Ready to take your leftovers from ordinary to extraordinary? Let’s dive into this delightful twist on comfort food!”

Why Is This Pot Pie So Irresistible?

Comforting, cozy flavors: The creamy filling and tender ham create a dish that warms both heart and home.

Quick and easy prep: With simple steps and minimal fuss, you can transform leftover ham into a showstopper dinner in no time.

Versatile options: Substitute chicken or try fresh veggies for a twist that suits any taste or dietary need.

Flaky golden crust: The buttery crescent dough bakes to perfection, providing a satisfying crunch that contrasts beautifully with the savory filling.

Family-friendly appeal: This pot pie is sure to please even the pickiest eaters; it’s a guaranteed crowd-pleaser!

For a delightful pairing, consider serving it alongside a refreshing green salad. You might also love this Chicken Pot Pie for another hearty meal option!

Flaky Buttery Ham Pot Pie Ingredients

Transform those leftovers into a delicious meal!

For the Crust

  • Crescent Roll Dough – Perfectly flaky and buttery; swap for pie crust or biscuit dough for a different texture.

For the Filling

  • Butter – Essential for sautéing onions and enhancing richness; always use melted butter for best results.
  • Onion – Adds sweet and aromatic flavors; shallots or leeks make great substitutes.
  • Chicken Broth – Forms the creamy filling base; use vegetable broth for a vegetarian-friendly option.
  • Heavy Cream – Delivers that rich creaminess; half-and-half or milk can lighten things up if you prefer.
  • Ham – The star ingredient! Use leftover ham or cube a fresh ham steak for optimal taste.
  • Garlic Powder – Provides depth; fresh minced garlic works as a flavorful alternative.
  • Thyme – Infuses savory herbal notes; rosemary or Italian seasoning can step in superbly.
  • Black Pepper – A simple seasoning to enhance flavors; feel free to adjust to your taste.
  • Frozen Mixed Vegetables – Adds color and nutrition; substitute fresh veggies like carrots, peas, or corn for a crisp bite.
  • Cheese (optional) – For added creaminess and flavor; cheddar or mozzarella can really elevate the dish.

Step‑by‑Step Instructions for Flaky Buttery Ham Pot Pie

Step 1: Preheat the Oven
Begin by preheating your oven to 375°F (190°C). While the oven warms up, grease a 9-inch pie plate or baking dish with butter or cooking spray to ensure the pot pie releases easily once baked. This makes serving your Flaky Buttery Ham Pot Pie effortless and keeps that beautiful crust intact.

Step 2: Sauté the Onions
In a medium skillet, melt 2 tablespoons of butter over medium heat. Once the butter is bubbling, add 1 cup of diced onions and sauté them for about 5–7 minutes until they are soft and fragrant. Stir occasionally, allowing the onions to become translucent and develop a sweet aroma, which forms a flavorful base for your pot pie.

Step 3: Make the Roux
Sprinkle in ¼ cup of flour into the sautéed onions, stirring constantly for about 1-2 minutes. You’ll want the mixture to turn a light golden color, which indicates the flour is cooking properly. This roux will thicken your filling, creating that perfect creamy consistency in your Flaky Buttery Ham Pot Pie.

Step 4: Add the Liquids
Gradually whisk in 1 cup of chicken broth and then ½ cup of heavy cream, stirring continuously for about 3-5 minutes until the mixture thickens. Watch for bubbles forming as the sauce becomes creamy and smooth. This step is crucial for achieving that deliciously rich filling everyone will love.

Step 5: Combine the Filling
Now, stir in 2 cups of chopped leftover ham, 1 teaspoon of garlic powder, 1 teaspoon of dried thyme, and freshly ground black pepper to taste. Add 1 cup of frozen mixed vegetables, ensuring everything is well incorporated. Let the mixture simmer for an additional 2-3 minutes as the flavors meld together.

Step 6: Transfer to Dish
Pour the hearty filling into your greased pie dish, spreading it evenly. If you like, sprinkle ½ cup of shredded cheese on top for an extra layer of flavor. This cheesy touch elevates your Flaky Buttery Ham Pot Pie and will make it even more irresistible as it bakes.

Step 7: Bake
Finally, cover the filling with the crescent roll dough, sealing the edges to trap all the delicious flavors inside. Place the pie in the preheated oven and bake for 25–35 minutes, or until the crust is golden brown. Look for the filling to be bubbling, which means it’s ready to come out and be enjoyed.

Storage Tips for Flaky Buttery Ham Pot Pie

Fridge: Store leftover Flaky Buttery Ham Pot Pie in an airtight container for up to 3 days. Make sure it’s covered well to retain its delicious moisture.

Freezer: For longer storage, freeze the unbaked pot pie wrapped tightly in plastic wrap and then aluminum foil for up to 2 months. This keeps the flavors fresh and ready for later.

Reheating: To reheat, bake the pot pie at 350°F for about 20 minutes until heated through. Alternatively, microwave individual servings for 2-3 minutes, just enough to enjoy every comforting bite.

Thawing Tips: If frozen, allow the Flaky Buttery Ham Pot Pie to thaw in the fridge overnight before baking to ensure even cooking and a perfectly crispy crust.

What to Serve with Flaky Buttery Ham Pot Pie

A warm, inviting meal isn’t complete without a few charming companions that elevate your dining experience.

  • Crunchy Green Salad: A crisp salad with fresh greens and a tangy vinaigrette offers a refreshing contrast to the creamy pot pie.

  • Garlic Bread: This warm, buttery bread complements the hearty flavors of the pot pie while providing a delightful crunch with every bite.

  • Roasted Seasonal Vegetables: Adding a side of sweet, caramelized vegetables not only enhances the meal’s nutrition but also brings a burst of vibrant color to the table.

  • Creamy Mashed Potatoes: The smooth, buttery texture of mashed potatoes pairs perfectly with the rich filling, making every spoonful a comforting delight.

  • Homemade Applesauce: The sweet-tart flavor of applesauce cleanses the palate and adds a delightful, fruity note to your cozy meal.

  • Sparkling Cider: A chilled glass of sparkling cider is a festive, non-alcoholic drink that beautifully complements the comforting flavors of the pot pie.

  • Classic Coleslaw: A crunchy, tangy coleslaw balances the richness of the pot pie, adding another layer of texture and flavor.

  • Chocolate Pudding Cups: For dessert, creamy chocolate pudding is a blissful way to end your meal on a sweet note.

Make Ahead Options

These Flaky Buttery Ham Pot Pies are a lifesaver for meal prep enthusiasts! You can prepare the filling (sautéed onions, roux, ham, vegetables, and seasonings) up to 3 days in advance by storing it in an airtight container in the refrigerator. To keep the filling just as delicious, avoid adding the cream until you’re ready to bake the pie, as it maintains the creaminess and prevents separation. When it’s time to serve, simply combine the refrigerated filling with the cheese, pour it into your greased dish, top with crescent dough, and bake. In just 25-35 minutes, you’ll have a heartwarming Flaky Buttery Ham Pot Pie ready to delight your family with minimal effort!

Flaky Buttery Ham Pot Pie Variations

Feel empowered to personalize this delightful dish with these tasty twists!

  • Chicken Swap: Replace ham with cooked chicken or turkey for a comforting twist. It’s a classic you can’t resist!

  • Vegetarian Version: Use vegetable broth and load up on fresh vegetables for a meatless delight that doesn’t skimp on flavor.

  • Cheesy Goodness: Add a layer of shredded cheese on top of the filling before baking for an extra creamy, indulgent finish.

  • Herb Infusion: Substitute thyme with fresh rosemary or sage to enhance the savory notes of the filling.

  • Pie Dough Option: Switch out the crescent roll dough for traditional pie crust for a heartier texture that holds up exceptionally well.

  • Crispy Topping: Try topping the pie with Jiffy Corn Muffin mix instead of dough for a sweet, crunchy contrast to the savory filling.

  • Heat it Up: For those who love a kick, sprinkle some red pepper flakes or a dash of hot sauce in the filling for an unexpected heat boost.

  • Fresh Veggies: Swap frozen mixed vegetables for fresh ones like diced carrots, snap peas, or bell peppers for vibrant colors and added crunch.

Explore these variations to keep your meals exciting and scrumptious! If you’re in the mood for more cozy dishes, check out my recipe for Chicken Pot Pie or sneak a slice of my delicious Apple Pie. Happy cooking!

Expert Tips for Flaky Buttery Ham Pot Pie

Perfect Roux: Ensure the roux is cooked lightly until golden to maintain a creamy sauce color; a dark roux can alter the dish’s flavor profile.

Loosen Up: If your filling thickens too much, don’t hesitate to add more chicken broth or water gradually until you reach the desired consistency.

Prevent Sogginess: Consider blind baking a bottom crust if using one to keep it crisp; otherwise, the filling may make it soggy.

Flavor Boost: Don’t skimp on seasonings! Fresh herbs can elevate your dish, so feel free to tweak thyme, garlic, or pepper to enhance the flavor of your Flaky Buttery Ham Pot Pie.

Veggie Substitutions: Experiment with fresh vegetables instead of frozen ones for a brighter taste and varied textures; carrots and peas are always a hit.

Cheesy Delight: Adding shredded cheese on top of the filling before baking not only gives a rich flavor but also adds a lovely golden crust that beckons everyone to the table.

Flaky Buttery Ham Pot Pie Recipe FAQs

What type of ham should I use?
Absolutely! You can use any leftover ham you have on hand, whether it’s from a holiday dinner or a home-cooked meal. Alternatively, a ham steak can be cubed for this recipe. Feel free to mix it up according to your preferences!

How should I store leftovers?
Store any leftover Flaky Buttery Ham Pot Pie in an airtight container in the fridge for up to 3 days. To keep it fresh, make sure it’s covered well to retain its delicious moisture and flavors.

Can I freeze this pot pie?
Yes, you can! For longer storage, wrap the unbaked Flaky Buttery Ham Pot Pie tightly in plastic wrap followed by aluminum foil. It will stay delicious in the freezer for up to 2 months. When you’re ready to bake it, simply thaw overnight in the fridge before cooking.

What if my filling is too thick?
If you find that your filling has thickened more than you’d like, don’t worry! Just gradually add a little more chicken broth or water, stirring until you reach your desired consistency. This will ensure your pot pie remains creamy and enjoyable.

Can I use fresh vegetables instead of frozen?
Very! Fresh vegetables can bring a delightful pop of flavor and texture to your pot pie. I often suggest using a mix of carrots, peas, and corn. Just remember, if using fresh veggies, you may want to sauté them slightly before combining them with the filling to ensure they cook through properly.

Is this recipe suitable for vegetarians?
Absolutely! You can easily adapt the Flaky Buttery Ham Pot Pie into a vegetarian dish. Simply use vegetable broth instead of chicken broth and replace the ham with a mix of hearty vegetables like mushrooms, zucchini, and bell peppers for a delicious twist.

Flaky Buttery Ham Pot Pie

Irresistible Flaky Buttery Ham Pot Pie for Cozy Family Meals

Transform last night's ham into this Flaky Buttery Ham Pot Pie, perfect for cozy family dinners.
Prep Time 15 minutes
Cook Time 35 minutes
Total Time 50 minutes
Servings: 6 slices
Course: Dinner
Cuisine: American
Calories: 350

Ingredients
  

For the Crust
  • 1 package Crescent Roll Dough Perfectly flaky and buttery; can swap for pie crust or biscuit dough.
For the Filling
  • 2 tablespoons Butter Essential for sautéing onions.
  • 1 cup Onion Diced; can substitute with shallots or leeks.
  • 1 cup Chicken Broth Can use vegetable broth for vegetarian option.
  • ½ cup Heavy Cream Half-and-half or milk can lighten things up.
  • 2 cups Ham Chopped leftover ham or cubed fresh ham steak.
  • 1 teaspoon Garlic Powder Fresh minced garlic can be substituted.
  • 1 teaspoon Thyme Dried; rosemary or Italian seasoning can be used.
  • to taste Black Pepper Simple seasoning to enhance flavors.
  • 1 cup Frozen Mixed Vegetables Can substitute fresh vegetables like carrots, peas, or corn.
  • ½ cup Cheese (optional) Shredded; cheddar or mozzarella can elevate the dish.

Equipment

  • oven
  • Skillet
  • Pie dish

Method
 

Preparation Steps
  1. Preheat the oven to 375°F (190°C) and grease a 9-inch pie plate.
  2. Melt 2 tablespoons of butter in a skillet over medium heat and sauté 1 cup of diced onions for 5-7 minutes.
  3. Sprinkle in ¼ cup of flour into the sautéed onions and stir for 1-2 minutes until golden.
  4. Whisk in 1 cup of chicken broth and ½ cup of heavy cream, stirring until thickened.
  5. Stir in 2 cups of chopped leftover ham, 1 teaspoon of garlic powder, 1 teaspoon of dried thyme, black pepper, and 1 cup of frozen mixed vegetables. Simmer for 2-3 minutes.
  6. Pour the filling into the greased pie dish, top with ½ cup of shredded cheese if desired.
  7. Cover with the crescent roll dough, seal the edges and bake for 25-35 minutes until golden brown.

Notes

Serve with a refreshing green salad for a delightful pairing. Can substitute meat or veggies based on preferences.

Chewy Sesame Honey Cookies That Will Melt Your Heart

Nestled within the warm embrace of nostalgia, these Irresistibly Chewy Sesame Honey Cookies are the sweet remedy for any baking blues. As the dough melds together, the nutty scent wafts through your kitchen, inviting everyone to gather around. With just a handful of simple ingredients, you can create these delightful cookies that strike the perfect balance between chewy and crunchy. Whether you’re looking for an easy treat to brighten up an afternoon or a comforting dessert to savor with your loved ones, these cookies fit the bill. Plus, they can easily cater to various dietary needs, making them a versatile choice for any occasion. Which tempting variation will you try first?

Why are these cookies so irresistible?

Nostalgic Flavor: The blend of sesame and honey will transport you back to your favorite childhood treats.
Adaptable Recipes: Feel free to swap ingredients; try maple syrup for a different sweetness or even add chocolate chips for a delightful twist!
Easy to Make: With straightforward steps, these cookies are accessible for bakers of all levels—perfect for those bored with fast food.
Ideal for Sharing: Bring these cookies to gatherings, or pair them with black tea for an afternoon delight that everyone will love!
Diet-Friendly Options: They can easily be made gluten-free or dairy-free, making them a crowd-pleaser for various taste preferences. Enjoy your batch alongside some delicious Nutty Apricot Cookies or Crunchy Nut and Seed Cookies for a delightful surprise!

Chewy Sesame Honey Cookies Ingredients

  • For the Cookies

  • All-Purpose Flour – Provides structure; substitute with a 1:1 gluten-free baking blend for a gluten-free option.

  • Baking Powder – Essential for leavening; needed for that fluffy texture.

  • Baking Soda – Aids in spread and browning; crucial for achieving the right cookie texture.

  • Kosher Salt – Enhances flavors, and regular salt can be used in a pinch.

  • Light Brown Sugar – Adds sweetness and moisture; ensure it’s lightly packed for the best results.

  • Granulated Sugar – Provides extra sweetness and helps with texture; optional if you prefer less sweetness.

  • Unsalted Butter – Adds richness; ensure it’s softened for easy mixing.

  • Honey – Infuses natural sweetness and floral notes; can be substituted with maple syrup for a different flavor profile.

  • Large Egg – Acts as a binder, ensuring a moist cookie.

  • Vanilla Extract – Enhances flavor, making these Chewy Sesame Honey Cookies irresistible.

  • Toasted Sesame Seeds – Adds a nutty flavor and delightful crunch; toast raw seeds if using.

  • Optional Toppings

  • Additional Toasted Sesame Seeds – Roll cookie tops before baking for extra crunch and flavor.

  • Flaky Sea Salt – Sprinkle a pinch on top before baking to balance the sweetness beautifully.

Step‑by‑Step Instructions for Irresistibly Chewy Sesame Honey Cookies

Step 1: Mix Dry Ingredients
In a large mixing bowl, whisk together 2 cups of all-purpose flour, 1 teaspoon of baking powder, 1/2 teaspoon of baking soda, and 1/4 teaspoon of kosher salt until well combined. This forms the foundation for your Chewy Sesame Honey Cookies, ensuring everything is evenly distributed. Set this mixture aside for later use.

Step 2: Cream Butter & Sugars
In a separate bowl, beat together 1/2 cup of softened unsalted butter, 1/2 cup of light brown sugar, and 1/4 cup of granulated sugar until fluffy, roughly 2-3 minutes using an electric mixer. Incorporate 1/3 cup of honey, 1 large egg, and 1 teaspoon of vanilla extract, mixing until smooth. This mixture will add richness and sweetness to your cookies.

Step 3: Combine & Chill Dough
Gradually add the flour mixture to the wet ingredients, stirring gently until a smooth dough forms. Fold in 4 tablespoons of toasted sesame seeds, which will enhance the flavor and provide delightful texture. Cover the bowl with plastic wrap and refrigerate for at least 2 hours or overnight to develop flavors and prevent spreading during baking.

Step 4: Shape & Bake
When ready to bake, preheat your oven to 350°F (175°C) and line a baking sheet with parchment paper. Scoop the chilled dough into 1.5-tablespoon portions, rolling them into balls and then into additional toasted sesame seeds if you desire. Place them on the prepared baking sheet, leaving space in between. Bake for 10-12 minutes, until the edges are golden and the centers remain soft.

Step 5: Cool & Serve
Once baked, let the cookies cool on the baking sheet for about 5 minutes to set. Then, transfer them to a wire rack to cool completely. These Irresistibly Chewy Sesame Honey Cookies can be enjoyed warm or stored in an airtight container for up to 5 days, perfect for sharing with family and friends!

How to Store and Freeze Chewy Sesame Honey Cookies

Room Temperature: Keep cookies in an airtight container at room temperature for up to 5 days. This ensures they stay fresh and chewy for your snacking delight.

Freezer: For longer storage, freeze cookies in a single layer, then transfer to an airtight container for up to 1 month. They’ll be just as delightful when you pull them out for a treat!

Reheating: To enjoy a warm cookie from the freezer, reheat in the microwave for about 10-15 seconds or in an oven set to 350°F (175°C) for 5-7 minutes. This will revive the chewy texture perfectly.

Air Tight Tips: Ensure your container is completely airtight to prevent cookies from becoming stale or losing their irresistible chewiness while stored.

Chewy Sesame Honey Cookies Variations

Feel free to let your creativity shine by trying out these delicious variations for your Chewy Sesame Honey Cookies!

  • Nut-Free: Substitute butter with coconut oil for a dairy-free option, ensuring your cookies are safe for nut allergies. They’ll still remain rich and flavorful.
  • Spice It Up: Add a teaspoon of ground cinnamon or ginger to the dough for a cozy warmth. These spices pair beautifully with the sweetness of honey, creating an inviting aroma as they bake.
  • Citrus Zest: Fold in some grated lemon or orange zest for a bright, refreshing twist that elevates your cookies to a whole new level of flavor. Just imagine the sunny notes dancing on your palate!
  • Chocolate Love: Mix in a handful of dark chocolate chips for a sweet, gooey contrast to the nutty sesame. Chocolate lovers will rejoice at this delightful combination!
  • Seed Swap: Replace half of the toasted sesame seeds with sunflower seeds for an extra crunch and a dose of healthy fats. This twist adds texture and makes these cookies even more enticing.
  • Sweetness Variations: Try using maple syrup or agave nectar instead of honey for a different kind of sweetness. Each option adds its unique flavor profile and caters to your preferences.
  • Bourbon Vanilla: Enhance the depth of flavor by using bourbon vanilla extract instead of regular vanilla. This little change adds a sophisticated note perfect for adult gatherings.
  • Nut Variety: Add chopped nuts like pistachios or hazelnuts for a delightful crunch and rich flavor. The addition of nuts can transform each bite into a gourmet experience.

Don’t miss pairing these cookies with a sweet treat like Nutty Apricot Cookies or serving them alongside a warm cup of black tea! Enjoy the magic of customization and create your perfect batch today.

Make Ahead Options

These Irresistibly Chewy Sesame Honey Cookies are perfect for meal prep enthusiasts! You can prepare the cookie dough up to 24 hours in advance by following the first three steps. After you mix and chill the dough, simply cover it tightly with plastic wrap and refrigerate. This helps enhance the flavors while maintaining the perfect texture. When you’re ready to bake, preheat your oven, scoop and shape the chilled dough, then roll the cookie balls in sesame seeds before baking them for 10-12 minutes. This way, you’ll have delicious cookies that are just as fresh and delightful as if they were made on the spot, saving you precious time for your busy weeknights!

Expert Tips for Chewy Sesame Honey Cookies

  • Chill the Dough: Always chill your dough for at least 2 hours. This step is crucial for developing flavor and reducing spreading, ensuring perfect cookie texture.
  • Measure Flour Properly: Spoon flour into your measuring cup and level it off. This technique will help avoid dense cookies—not what we want for these Chewy Sesame Honey Cookies!
  • Experiment with Mix-ins: Get creative! Try adding spices or different seeds. Just remember to maintain the balance of sweetness and chewiness for the best result.
  • Watch Your Bake Time: Keep an eye on the cookies as they bake; every oven is different. Remove them when the edges are golden, but the centers should still feel soft to guarantee a chewy finish.
  • Perfect Pairing: Enjoy these cookies warm with a cup of black tea or a scoop of vanilla ice cream for a delightful treat that enhances their amazing flavor!

What to Serve with Irresistibly Chewy Sesame Honey Cookies

These delightful cookies create a warm, inviting experience that pairs beautifully with a variety of flavors and textures, enhancing your dessert spread.

  • Black Tea: The earthy notes of black tea complement the honey’s sweetness while balancing the nutty flavors for a soothing pairing.
  • Vanilla Ice Cream: The creaminess and coldness of vanilla ice cream against the chewy cookies create a comforting contrast. It’s a timeless treat that feels luxurious!
  • Greek Yogurt with Honey: A refreshing, slightly tangy yogurt drizzled with honey pairs well, cutting through the sweetness while creating a deliciously creamy texture.
  • Fresh Berries: Serve a side of juicy raspberries or strawberries for a bright, tart contrast that enhances the honey flavor while adding vibrant color to your dessert plate.
  • Flaky Sea Salt Caramel: Drizzling warm caramel with a pinch of sea salt will elevate the cookie experience, adding a sweet-savory kick that’s utterly delightful.
  • Homemade Chai Latte: Cozy up with a warm chai latte, where the spiced flavors deeply resonate with the sesame and honey, making every bite feel like a warm hug.
  • Chopped Nuts: Serve alongside a mix of chopped pistachios or almonds for added crunch and nutty flavor, which harmonizes beautifully with the cookies’ sesame notes.
  • Cinnamon-Spiced Coffee: A cup of cinnamon-spiced coffee offers warmth and depth, creating a perfect moment for savoring each delicious bite.

Chewy Sesame Honey Cookies Recipe FAQs

What is the best way to select ripe ingredients for these cookies?
Absolutely! When choosing honey, look for pure, raw honey with a light golden color, as it will enhance the flavor of your cookies. For sesame seeds, opt for fresh, lightly toasted seeds, as this will give your cookies that delightful crunch. Also, make sure the egg you use is fresh, as this will contribute to the binding and moisture.

How should I store my Chewy Sesame Honey Cookies?
The more the merrier! For storage, keep your cookies in an airtight container at room temperature for up to 5 days. You can also place a slice of bread in the container to help maintain moisture levels; the bread will absorb excess air and keep your cookies nice and chewy.

Can I freeze Chewy Sesame Honey Cookies, and how do I do it?
Certainly! To freeze, first allow the cookies to cool completely, then arrange them in a single layer on a baking sheet. Freeze until firm, about 1-2 hours. Once solid, transfer them to an airtight container or a resealable freezer bag for up to 1 month. To enjoy, reheat in the microwave for 10-15 seconds or bake at 350°F (175°C) for 5-7 minutes until warmed through.

What should I do if my cookies spread too much while baking?
Very! If you notice that your cookies spread too much, it’s likely due to either warm dough or not chilling it long enough. Make sure to chill the dough for at least 2 hours, and if it seems overly soft when you’re ready to bake, pop it back in the fridge for an additional 30 minutes. Additionally, measuring your flour correctly is key; spooning and leveling off help avoid this common pitfall.

Can I adapt this recipe for allergies or special diets?
Absolutely! These Chewy Sesame Honey Cookies are quite adaptable. You can easily make them gluten-free by substituting all-purpose flour with a 1:1 gluten-free baking blend. For a dairy-free option, replace butter with coconut oil or a dairy-free butter alternative. Lastly, if you have nut allergies, you can omit any nuts or seed mix-ins for a safe and still delicious treat!

Chewy Sesame Honey Cookies

Chewy Sesame Honey Cookies That Will Melt Your Heart

These Chewy Sesame Honey Cookies are a nostalgic blend of flavor and texture, perfect for any occasion.
Prep Time 20 minutes
Cook Time 12 minutes
Chilling Time 2 hours
Total Time 2 hours 32 minutes
Servings: 24 cookies
Course: Dessert
Cuisine: American
Calories: 120

Ingredients
  

For the Cookies
  • 2 cups all-purpose flour can substitute with gluten-free flour
  • 1 teaspoon baking powder
  • 1/2 teaspoon baking soda
  • 1/4 teaspoon kosher salt regular salt can be used
  • 1/2 cup light brown sugar lightly packed
  • 1/4 cup granulated sugar optional
  • 1/2 cup unsalted butter softened
  • 1/3 cup honey can substitute with maple syrup
  • 1 large egg
  • 1 teaspoon vanilla extract
  • 4 tablespoons toasted sesame seeds to enhance flavor
Optional Toppings
  • to taste additional toasted sesame seeds for rolling cookie tops
  • to taste flaky sea salt for sprinkling on top

Equipment

  • mixing bowl
  • electric mixer
  • baking sheet
  • parchment paper
  • Measuring cups
  • Measuring spoons
  • Wire rack

Method
 

Step-by-Step Instructions
  1. In a large mixing bowl, whisk together 2 cups of all-purpose flour, 1 teaspoon of baking powder, 1/2 teaspoon of baking soda, and 1/4 teaspoon of kosher salt until well combined.
  2. In a separate bowl, beat together 1/2 cup of softened unsalted butter, 1/2 cup of light brown sugar, and 1/4 cup of granulated sugar until fluffy, about 2-3 minutes.
  3. Incorporate 1/3 cup of honey, 1 large egg, and 1 teaspoon of vanilla extract into the butter mixture, mixing until smooth.
  4. Gradually add the flour mixture to the wet ingredients, stirring gently until a smooth dough forms. Fold in 4 tablespoons of toasted sesame seeds.
  5. Cover the bowl with plastic wrap and refrigerate for at least 2 hours or overnight.
  6. Preheat your oven to 350°F (175°C) and line a baking sheet with parchment paper. Scoop the chilled dough into 1.5-tablespoon portions.
  7. Roll the dough into balls and then into additional toasted sesame seeds if desired. Place them on the prepared baking sheet, leaving space in between.
  8. Bake for 10-12 minutes until the edges are golden and the centers remain soft.
  9. Let the cookies cool on the baking sheet for about 5 minutes, then transfer to a wire rack to cool completely.

Notes

These cookies can be made gluten-free or dairy-free. Store in an airtight container for up to 5 days.

Cranberry Pecan Chicken Salad with Poppy Seed Dressing Bliss

As the crisp air signals the arrival of holiday gatherings, I find myself yearning for a dish that embodies both comfort and celebration. Enter the Cranberry Pecan Chicken Salad with Poppy Seed Dressing — a vibrant blend that marries tender chicken with sweet, chewy cranberries and crunchy pecans. This easy-to-make salad comes together in just 30 minutes, making it the perfect gluten-free side dish to grace your Thanksgiving or Christmas table. Not only is it a crowd-pleaser, but it also doubles as a light dinner option when you’re craving something fresh and satisfying. So, why not take a break from the hustle and treat your taste buds? Ready to dive into culinary joy?

Why is this salad a holiday favorite?

Festive appeal: The vibrant colors of dried cranberries and pecans bring a celebratory touch to your table.
Quick preparation: Whip it up in just 30 minutes—perfect for busy holiday schedules.
Gluten-free delight: This recipe caters to various dietary needs, ensuring all guests feel included.
Crowd-pleasing flavors: The sweet and savory blend makes it a hit at any gathering, just like my popular Cabbage Cucumber Salad or Chicken Drumsticks with Veggies.
Versatile serving options: Enjoy it as a festive side dish or a light lunch with crackers, inviting endless ways to savor its deliciousness.
Leftover magic: Transform your holiday turkey into this delightful salad, adding a twist to your holiday meal.

Cranberry Pecan Chicken Salad with Poppy Seed Dressing Ingredients

• This Cranberry Pecan Chicken Salad with Poppy Seed Dressing is easy to make with simple ingredients that everyone will love!

For the Dressing

  • Mayonnaise – Creaminess and base for dressing; substitute with Greek yogurt for a lighter option.
  • Sour Cream – Adds tang and richness; for a dairy-free option, use a plant-based sour cream.
  • Honey – Provides sweetness to balance flavors; maple syrup is a great substitute for a vegan version.
  • Dijon Mustard – Adds a tangy flavor; yellow mustard can be used instead for a milder taste.
  • Poppy Seeds – Provides texture and visual appeal; can be omitted if unavailable.
  • Salt – Enhances flavor; adjust to taste.

For the Salad

  • Chicken Breast – Primary protein source, cooked and chopped (about 2 chicken breasts); leftover turkey makes a great alternative.
  • Pecans – Adds crunch and flavor; substitute with walnuts or almonds if desired.
  • Dried Cranberries – Introduces sweetness and complements savory flavors; other dried fruits like raisins can be used.
  • Green Onions – Offers a mild flavor and freshness; regular onions can be substituted but may alter the taste slightly.

Step‑by‑Step Instructions for Cranberry Pecan Chicken Salad with Poppy Seed Dressing

Step 1: Prepare the Dressing
In a medium bowl, whisk together 1 cup of mayonnaise, ½ cup of sour cream, 2 tablespoons of honey, 1 tablespoon of Dijon mustard, 2 teaspoons of poppy seeds, and a pinch of salt. Mix this creamy combination until it’s smooth and well blended. Taste the dressing and adjust the seasoning if needed, setting it aside to let the flavors meld while you prepare the salad.

Step 2: Combine the Salad Ingredients
In a large mixing bowl, combine 2 cups of cooked and chopped chicken breast, 1 cup of chopped pecans, 1 cup of dried cranberries, and ½ cup of sliced green onions. Gently stir the ingredients together, ensuring that everything is evenly distributed. The contrast of textures in the Cranberry Pecan Chicken Salad with Poppy Seed Dressing will make your dish come alive with flavor and crunch.

Step 3: Dress the Salad
Pour your prepared poppy seed dressing over the chicken and salad mixture in the large bowl. Using tongs or a sturdy spoon, carefully toss everything together until the dressing coats each ingredient evenly. This will create a lovely creamy blend, ensuring the delicious flavors permeate the crunchy pecans and sweet cranberries for the perfect harmony in each bite.

Step 4: Chill if Desired
For optimal flavor blending, you can either serve the salad immediately or cover it and chill it in the refrigerator for about 30 minutes. This time allows the ingredients to harmonize beautifully, enhancing the overall taste of your Cranberry Pecan Chicken Salad with Poppy Seed Dressing.

Step 5: Serve and Enjoy
Once chilled, give the salad one last gentle toss, and then serve it in a bowl or on individual plates. The vibrant colors and textures will entice your guests, making this salad a perfect centerpiece for any holiday gathering. Enjoy the juicy sweetness of cranberries contrasted with the savory chicken and crisp pecans.

Expert Tips for Cranberry Pecan Chicken Salad

  • Quality Ingredients: Use fresh, high-quality chicken and nuts for the best flavor. Freshness makes a noticeable difference in your Cranberry Pecan Chicken Salad.
  • Cooling Chicken: Make sure the chicken is cooled before mixing to prevent wilting the greens and ensure a more vibrant presentation.
  • Adjusting Sweetness: Taste your dressing! Some may prefer it sweeter or tangier; always adjust honey or mustard for your desired flavor.
  • Mixing Techniques: Toss gently to avoid breaking up the pecans or cranberries; you want to keep the texture intact for that delightful crunch.
  • Serve Fresh: Try to serve the salad fresh or within a day. While it stores well, the texture of pecans can soften if left too long.

Make Ahead Options

These Cranberry Pecan Chicken Salad with Poppy Seed Dressing options are perfect for busy home cooks who want to simplify meal planning! You can prepare the salad ingredients, including the cooked chicken, chopped pecans, and dried cranberries, up to 3 days in advance by storing them separately in airtight containers in the refrigerator. For the dressing, mix it up and refrigerate for up to 24 hours; this will allow the flavors to meld beautifully. When you’re ready to serve, simply combine the salad components with the dressing right before serving to maintain that fresh crunch and deliciousness. Enjoy a stress-free meal that’s just as vibrant and tasty!

What to Serve with Cranberry Pecan Chicken Salad with Poppy Seed Dressing

Elevate your meal with delightful accompaniments that enhance the flavors and create a memorable dining experience.

  • Creamy Mashed Potatoes: Their buttery richness balances the salad’s tangy poppy seed dressing, adding a comforting touch to your table.

  • Garlic Bread: The crispy, airy texture and savory garlic flavor are perfect for sopping up any remaining dressing, making it a satisfying side.

  • Roasted Brussels Sprouts: These tender, caramelized sprouts provide a delightful crunch and earthy flavor that complements the sweetness of the cranberries.

  • Fresh Fruit Salad: A vibrant medley of seasonal fruits adds a refreshing contrast to the rich dressing, enticing everyone to keep coming back for more.

  • Quinoa Pilaf: Light yet hearty, this nutty grain dish offers protein and fiber, enhancing the meal while keeping it gluten-free.

  • Sparkling Apple Cider: This fizzy drink pairs beautifully with the salad, offering a crisp sweetness that enhances the dish’s flavors while serving as a festive touch.

  • Pecan Pie: A classic holiday dessert that ties back to the salad’s pecan element, this sweet treat rounds off the meal beautifully.

  • Herbed Rice: Aromatic herbs elevate the simplicity of rice, making it an elegant side that melds effortlessly with the vibrant flavors of the chicken salad.

How to Store and Freeze Cranberry Pecan Chicken Salad

Fridge: Store this salad in an airtight container for up to 2 days to maintain its freshness. It’s best enjoyed soon after preparation, ensuring the textures remain delightful.

Freezer: Freezing is not recommended for the Cranberry Pecan Chicken Salad, as the dressing and textures may alter significantly upon thawing.

Reheating: Serve cold and do not reheat; the flavors are best enjoyed straight from the fridge. If you prefer it warm, gently mix in freshly cooked chicken just before serving.

Make-Ahead: Prepare the chicken salad a day in advance, but keep the dressing separate until serving to prevent wilting the ingredients.

Cranberry Pecan Chicken Salad Variations

Feel free to embrace creativity and personalize your salad experience with these delightful twists and substitutes!

  • Greek Yogurt: Replace mayonnaise with Greek yogurt for a lighter, tangy alternative that offers a creamy texture without the extra calories.
  • Herb Infusion: Add fresh herbs like parsley or dill. These will brighten the flavors, making every bite feel as vibrant as spring.
  • Celery Crunch: Mix in diced celery for an additional layer of crunch. The refreshing taste of celery will give your salad an extra zing!
  • Nutty Swap: Substitute pecans with walnuts or sliced almonds for a different nutty flavor that enhances the overall texture of the salad.
  • Sweet Twist: Use dried cherries or raisins instead of cranberries. This small change can bring an exciting sweetness perfect for the holiday table.
  • Spicy Kick: Add a sprinkle of cayenne pepper to the dressing for a hint of heat. This fiery addition brings warmth to the dish, ideal for those who love a brave flavor!
  • Vegan Marvel: Make it entirely plant-based! Use vegan mayo and a plant-based sour cream for a salad that caters to everyone, without sacrificing flavor.
  • Fruit Medley: Toss in a handful of diced apples or pears for a sweet crunch that pairs beautifully with the creaminess of the dressing.

As you explore these variations, you might find inspiration to serve your salad alongside a light dish like Cucumber Carrot Salad or lighten up your meal plan with delicious Crunchy Nut and Seed Cookies for dessert. Enjoy your culinary adventure!

Cranberry Pecan Chicken Salad with Poppy Seed Dressing Recipe FAQs

What is the best way to select ripe ingredients for this salad?
Absolutely! For chicken, opt for fresh, high-quality breasts or use leftover turkey for an added holiday twist. When choosing cranberries, look for those that are plump and vibrantly colored without any dark spots. For pecans, select whole nuts that are firm and crunchy. Fresh green onions should have bright green tops and firm white bases.

How should I store Cranberry Pecan Chicken Salad and for how long?
Very! Store this salad in an airtight container in the refrigerator for up to 2 days. To maintain the crispiness of the pecans and ensure freshness, avoid mixing in the dressing until you’re ready to serve. This helps preserve the delightful textures our salad is known for.

Can I freeze Cranberry Pecan Chicken Salad?
The more the merrier! However, I wouldn’t recommend freezing this salad. The creamy poppy seed dressing doesn’t hold up well once thawed, leading to a less appealing texture. Instead, enjoy it fresh! If you want to make it ahead, prepare the salad components separately and mix them right before serving.

What should I do if the salad seems dry or lacks flavor?
No worries! If you find your salad lacking in flavor, consider drizzling in a little extra honey or a splash more of Dijon mustard to brighten it up. Also, mixing in freshly cooked chicken can add moisture and allow for a deliciously warm twist. Flavor varies with ingredients, so adjusting based on preferences is key.

Are there any dietary considerations for this salad?
Yes! This recipe can easily accommodate various dietary needs. Use Greek yogurt instead of mayonnaise for a lighter option, and plant-based sour cream for a dairy-free alternative. Be sure to check for any nut allergies as pecans (or substitutes like walnuts or almonds) are used in the recipe. This makes it friendly for gluten-free diets as well!

How can I make this salad a day ahead of time without losing freshness?
Great question! To make this salad a day in advance, prepare the chicken salad base and store it in an airtight container. Keep the poppy seed dressing separate in another container to maintain the ingredients’ crunchiness and flavor. Mix together when you’re ready to serve!

Cranberry Pecan Chicken Salad with Poppy Seed Dressing

Cranberry Pecan Chicken Salad with Poppy Seed Dressing Bliss

A vibrant and easy-to-make Cranberry Pecan Chicken Salad with Poppy Seed Dressing, perfect for holiday gatherings.
Prep Time 30 minutes
Total Time 30 minutes
Servings: 4 servings
Course: Lunch
Cuisine: American
Calories: 300

Ingredients
  

Dressing
  • 1 cup mayonnaise substitute with Greek yogurt for a lighter option
  • ½ cup sour cream for a dairy-free option, use a plant-based sour cream
  • 2 tablespoons honey maple syrup is a great substitute for a vegan version
  • 1 tablespoon Dijon mustard yellow mustard can be used for a milder taste
  • 2 teaspoons poppy seeds can be omitted if unavailable
  • to taste salt enhances flavor
Salad
  • 2 cups cooked and chopped chicken breast leftover turkey makes a great alternative
  • 1 cup chopped pecans substitute with walnuts or almonds if desired
  • 1 cup dried cranberries other dried fruits like raisins can be used
  • ½ cup sliced green onions regular onions can be substituted but may alter the taste

Equipment

  • mixing bowl
  • whisk
  • tongs

Method
 

Preparation
  1. In a medium bowl, whisk together mayonnaise, sour cream, honey, Dijon mustard, poppy seeds, and salt until smooth.
  2. In a large mixing bowl, combine chicken, pecans, cranberries, and green onions. Gently stir together.
  3. Pour dressing over the salad mixture and toss until evenly coated.
  4. Chill in the refrigerator for about 30 minutes if desired, then serve in a bowl or on plates.

Notes

Best enjoyed fresh. Store in an airtight container for up to 2 days. Do not freeze.

Fresh Spring Roll Bowls with Irresistible Peanut Sauce

As the sun warms the air and the desire for lighter meals kicks in, I find myself reaching for vibrant dishes that celebrate freshness. Enter the Easy Spring Roll Bowls with Peanut Sauce—a colorful feast that transforms classic spring rolls into a convenient bowl format. With tender rice noodles, succulent shrimp, and a rainbow of crunchy vegetables, this recipe is not only meal prep-friendly but also encourages the fun of customizations! It’s an effortless way to savor a light and balanced meal that can be chilled or enjoyed at room temperature. Perfect for those busy weeknights, when time is short but the craving for homemade goodness is strong. What will you add to your bowl to make it your own?

Why are these Spring Roll Bowls perfect?

Flavor Explosion: Each bowl bursts with vibrant flavors, thanks to the combination of tender shrimp, crunchy vegetables, and a creamy peanut sauce that ties everything together seamlessly.

Customization Galore: Feel free to swap shrimp for grilled chicken or tofu, and add whatever seasonal veggies you have on hand—like snap peas or radishes—to make it your own!

Meal Prep Dream: These bowls are not just delicious; they are also meal prep-friendly, making them a fantastic choice for busy weeks. Prepare the components in advance for effortless lunches or dinners.

Light and Balanced: With a perfect balance of proteins, carbs, and healthy fats, these Spring Roll Bowls provide nourishment without weighing you down. Enjoy them cold for a refreshing twist!

Culinary Adventure: This recipe puts a creative spin on classic spring rolls, offering a delightful way to enjoy familiar flavors in a new and exciting format. Looking to try more delicious rolls? Check out my Coconut Chocolate Rolls or Savory Beef Rolls for more inspiration!

Spring Roll Bowls Ingredients

For the Bowls
Shrimp – Lean and flavorful protein; substitute with tofu or chicken for variations.
Rice Noodles – A satisfying base; alternative options include Pad Thai noodles or vermicelli.
Vegetables – Customize with colorful veggies like red bell pepper, carrots, and cucumbers for crunch and nutrients.

For the Peanut Sauce
Peanut Butter – Creamy and nutty; use almond butter for a unique twist.
Lime Juice – Brightens the sauce; fresh is best, but bottled works in a pinch.
Honey – Adds sweetness; maple syrup makes a great vegan alternative.
Soy Sauce – Provides umami flavor; opt for tamari as a gluten-free substitute.
Sriracha – Adds a dash of heat; omit if you prefer a milder sauce.
Fish Sauce – Optional for depth; can be left out if desired.
Fresh Ginger – Enhances freshness in the sauce; ground ginger can work in smaller amounts.
Garlic – Adds savory flavor; grating yields the best results.

For Garnish
Cilantro – Adds a fresh touch; optional based on preference.
Lime Wedges – Extra zing right before serving; enhance the overall flavor.

Feel inspired to assemble your perfect Spring Roll Bowls while enjoying the versatility of each ingredient!

Step‑by‑Step Instructions for Easy Spring Roll Bowls with Peanut Sauce

Step 1: Prepare the Fresh Vegetables
Start by washing and prepping your colorful veggies. Thinly slice the red bell pepper and cucumber, shred the red cabbage, and julienne the carrots. If using jalapeño, slice it thinly as well. Arrange the vegetables vibrantly on a cutting board, as this will give your Spring Roll Bowls an attractive presentation.

Step 2: Cook the Rice Noodles
Bring a pot of water to a boil and add the rice noodles. Cook according to package instructions until tender, usually about 4–6 minutes. Once cooked, drain the noodles and rinse them under cold water for about a minute to stop the cooking process. This keeps them chewy and prevents sticking, making them perfect for your Spring Roll Bowls.

Step 3: Whisk Together the Peanut Sauce
In a medium bowl, combine the peanut butter, lime juice, honey, soy sauce, sriracha, fish sauce (if using), ginger, and grated garlic. Whisk everything together until smooth, which should take about 2–3 minutes. If the sauce is too thick, add a splash of water to reach your desired consistency, ensuring it will drizzle easily onto your bowls.

Step 4: Cook the Shrimp
Heat olive oil in a skillet over medium-high heat. Season shrimp with salt and pepper, then add them to the skillet. Cook for 1–2 minutes on each side, or until they turn pink and opaque, signaling they are fully cooked. This should take roughly 4–6 minutes total. Set the shrimp aside once done, ready to elevate your Spring Roll Bowls.

Step 5: Assemble the Bowls
Begin assembling your Easy Spring Roll Bowls by placing a generous portion of rice noodles at the base of each bowl. Top the noodles with a beautiful arrangement of cooked shrimp and your freshly prepped vegetables. This layering builds variety and serves to tantalize both the eyes and palates of your diners.

Step 6: Drizzle with Peanut Sauce
Finally, drizzle the irresistible peanut sauce over each bowl, ensuring each ingredient gets a lovely coating. Garnish your bowls with a sprinkle of chopped cilantro and lime wedges on the side for an extra zesty finish. This adds brightness to your Easy Spring Roll Bowls, making them visually appealing and delicious.

Make Ahead Options

These Easy Spring Roll Bowls are perfect for meal prep enthusiasts! You can prepare the rice noodles, shrimp, and vegetables up to 24 hours in advance. To do this, cook the rice noodles and then rinse them under cold water; store them in an airtight container. Similarly, season and cook the shrimp, allowing it to cool before refrigerating. As for the vegetables, wash and chop them ahead of time, keeping them crisp by storing them separately in the fridge. When you’re ready to enjoy your bowls, simply combine everything and drizzle with peanut sauce for a fresh, vibrant meal that tastes just as delicious as when made fresh!

What to Serve with Easy Spring Roll Bowls

Elevate your dining experience by adding complementary sides and beverages to these delightful bowls!

  • Crispy Asian Slaw: A crunchy slaw tossed in sesame dressing adds extra texture and freshness, enhancing the lightness of the bowls. Each bite will harmonize beautifully with the peanut sauce and shrimp.

  • Steamed Edamame: These young soybeans sprinkled with sea salt offer a protein-packed, savory bite that pairs perfectly with the vibrant flavors of your spring roll bowls.

  • Sweet Chili Chicken Bites: These delightful bites bring a touch of sweetness and heat, making for an exciting contrast to your bowl’s ingredients. Guests will love the explosion of flavor in every bite.

  • Mango Avocado Salad: This refreshing salad, featuring sweet mango and creamy avocado, serves as a delicious palate cleanser. Its bright colors echo the vibrant vegetables in your bowls.

  • Coconut Rice: Lightly sweetened and infused with coconut milk, this dish adds depth and tropical vibes. The creaminess complements the crunchiness of your fresh ingredients.

  • Citrus-infused Sparkling Water: A refreshing drink option that lightens the palate, enhancing the flavors of the meal. The citrus notes echo the lime in the peanut sauce, creating a cohesive dining experience.

  • Green Tea: Known for its health benefits, this soothing tea offers a gentle finish to your meal while balancing the rich flavors present in the spring roll bowls.

Expert Tips for Spring Roll Bowls

  • Fresh Veggies Only: Always use fresh vegetables to maintain crunch and vibrant flavors. Avoid soggy or wilted produce for the best Spring Roll Bowls.

  • Noodle Timing: Rinse rice noodles thoroughly after cooking to stop the cooking process and prevent them from becoming mushy. This will keep your bowls delightful.

  • Customize Sauce: Adjust the peanut sauce to your taste by altering the sweetness or spiciness. If it thickens, simply add a little water to achieve the desired consistency.

  • Protein Alternatives: For a different protein option, substitute shrimp with grilled chicken or tofu. This not only varies the flavor but caters to dietary preferences as well.

  • Storage Tips: If making ahead, store shrimp and veggies separately to keep everything fresh. Combine them just before serving your delicious Spring Roll Bowls!

How to Store and Freeze Spring Roll Bowls

  • Fridge: Store assembled Spring Roll Bowls in an airtight container for up to 3 days. Keep the peanut sauce separate until serving to ensure freshness.

  • Freezer: If you’ve prepared extra shrimp or noodles, freeze them in a single layer on a baking sheet, then transfer to a freezer bag for up to 2 months. Thaw before reheating.

  • Reheating: Gently reheat shrimp in a skillet over low heat until warmed through, around 2-3 minutes. For noodles, add a splash of water and microwave for about 30 seconds, or until heated.

  • Make-Ahead Tip: Prep the components in advance but store veggies and sauce separately from noodles and shrimp. This keeps everything crisp and vibrant for your Spring Roll Bowls!

Spring Roll Bowls Variations & Substitutions

Feel free to get creative and customize these Spring Roll Bowls to match your taste preferences or dietary needs!

  • Shrimp Substitute: Try grilled chicken or crispy tofu in place of shrimp for a delightful twist. Both options bring their unique flavor profiles, creating a satisfying variation.

  • Noodle Alternatives: Swap rice noodles for Pad Thai noodles or vermicelli for a different bite. You can also use zucchini noodles for a refreshing low-carb alternative that adds a lovely crunch.

  • Nut-Free Option: Use tahini or sunflower seed butter in the peanut sauce instead of peanut butter for a nut-free version. This change keeps the sauce creamy while accommodating nut allergies.

  • Vegetable Variety: Mix and match your favorite seasonal vegetables like snap peas, radishes, or even shredded cabbage to keep things fresh and exciting. Let your creative side lead the way!

  • Sweetness Level: Adjust the sweetness in your peanut sauce by using agave nectar or coconut sugar instead of honey. This can create a deeper, more complex flavor profile that complements the other ingredients beautifully.

  • Heat Adjustments: Spice up your dish by adding more sriracha, or for a milder taste, simply omit it. You can also use fresh chopped chili instead for a burst of flavor.

  • Vegan Version: Keep it plant-based by using tofu, maple syrup, tamari, and omitting fish sauce or chicken. This way, everyone at the table can enjoy a delicious meal.

  • Herb Variations: Switch up the herbs by using mint or basil instead of cilantro for a completely new taste experience that elevates your Spring Roll Bowls to new heights.

As you play with these substitutions, consider trying other roll recipes such as Homemade Chicken Rolls or even Cheesy Zucchini Rolls. There’s no limit to your culinary creativity!

Spring Roll Bowls Recipe FAQs

How do I select ripe vegetables for my Spring Roll Bowls?
Absolutely! Choosing ripe vegetables is key for a vibrant dish. Look for bell peppers with shiny skin, firm cucumbers, and bright green cilantro. Avoid veggies with dark spots or wilting leaves, as these can detract from the freshness of your bowls.

How should I store my Spring Roll Bowls?
Very good question! Store your assembled Spring Roll Bowls in an airtight container in the refrigerator for up to 3 days. To maintain the crispness of the veggies, I suggest keeping the peanut sauce separate until you are ready to eat.

Can I freeze leftovers from my Spring Roll Bowls?
Yes, you can! If you have leftover shrimp or noodles, freeze them in a single layer on a baking sheet for a couple of hours, then transfer to a freezer bag for up to 2 months. Just thaw them before using or reheating for a quick meal!

What if my peanut sauce turns out too thick?
No worries! If your peanut sauce thickens up after sitting, simply whisk in a little water, one tablespoon at a time, until it reaches your desired consistency. This should help it drizzle beautifully over your Spring Roll Bowls again.

Are there any dietary considerations I should keep in mind?
Definitely! If you or someone you’re serving has a nut allergy, substitute peanut butter with tahini or sunflower seed butter in the sauce. For a gluten-free option, use tamari instead of regular soy sauce. Always check ingredient labels if you’re unsure!

How can I adjust the spiciness of my Spring Roll Bowls?
Feel free to customize! If you prefer a milder flavor, simply omit the Sriracha from the peanut sauce. You can also reduce the amount gradually until you find just the right level of heat for your taste buds!

Spring Roll Bowls

Fresh Spring Roll Bowls with Irresistible Peanut Sauce

Delight in these Spring Roll Bowls, a vibrant meal featuring shrimp, rice noodles, and crunchy vegetables, all drizzled with a creamy peanut sauce.
Prep Time 20 minutes
Cook Time 10 minutes
Total Time 30 minutes
Servings: 4 bowls
Course: Lunch
Cuisine: Asian
Calories: 450

Ingredients
  

For the Bowls
  • 1 pound Shrimp Lean and flavorful; substitute with tofu or chicken for variations.
  • 8 ounces Rice Noodles A satisfying base; alternative options include Pad Thai noodles or vermicelli.
  • 2 cups Vegetables Customize with colorful veggies like red bell pepper, carrots, and cucumbers for crunch and nutrients.
For the Peanut Sauce
  • 1/2 cup Peanut Butter Creamy and nutty; use almond butter for a unique twist.
  • 2 tablespoons Lime Juice Brightens the sauce; fresh is best, but bottled works in a pinch.
  • 2 tablespoons Honey Adds sweetness; maple syrup makes a great vegan alternative.
  • 2 tablespoons Soy Sauce Provides umami flavor; opt for tamari as a gluten-free substitute.
  • 1 tablespoon Sriracha Adds a dash of heat; omit if you prefer a milder sauce.
  • 1 teaspoon Fish Sauce Optional for depth; can be left out if desired.
  • 1 tablespoon Fresh Ginger Enhances freshness in the sauce; ground ginger can work in smaller amounts.
  • 2 cloves Garlic Adds savory flavor; grating yields the best results.
For Garnish
  • 1/4 cup Cilantro Adds a fresh touch; optional based on preference.
  • 2 pieces Lime Wedges Extra zing right before serving; enhance the overall flavor.

Equipment

  • Skillet
  • Medium bowl
  • pot
  • Cutting Board

Method
 

Step-by-Step Instructions
  1. Prepare the Fresh Vegetables: Start by washing and prepping your colorful veggies. Thinly slice the red bell pepper and cucumber, shred the red cabbage, and julienne the carrots. If using jalapeño, slice it thinly as well. Arrange the vegetables vibrantly on a cutting board, as this will give your Spring Roll Bowls an attractive presentation.
  2. Cook the Rice Noodles: Bring a pot of water to a boil and add the rice noodles. Cook according to package instructions until tender, usually about 4–6 minutes. Once cooked, drain the noodles and rinse them under cold water for about a minute to stop the cooking process. This keeps them chewy and prevents sticking, making them perfect for your Spring Roll Bowls.
  3. Whisk Together the Peanut Sauce: In a medium bowl, combine the peanut butter, lime juice, honey, soy sauce, sriracha, fish sauce (if using), ginger, and grated garlic. Whisk everything together until smooth, which should take about 2–3 minutes. If the sauce is too thick, add a splash of water to reach your desired consistency, ensuring it will drizzle easily onto your bowls.
  4. Cook the Shrimp: Heat olive oil in a skillet over medium-high heat. Season shrimp with salt and pepper, then add them to the skillet. Cook for 1–2 minutes on each side, or until they turn pink and opaque, signaling they are fully cooked. This should take roughly 4–6 minutes total. Set the shrimp aside once done, ready to elevate your Spring Roll Bowls.
  5. Assemble the Bowls: Begin assembling your Easy Spring Roll Bowls by placing a generous portion of rice noodles at the base of each bowl. Top the noodles with a beautiful arrangement of cooked shrimp and your freshly prepped vegetables. This layering builds variety and serves to tantalize both the eyes and palates of your diners.
  6. Drizzle with Peanut Sauce: Finally, drizzle the irresistible peanut sauce over each bowl, ensuring each ingredient gets a lovely coating. Garnish your bowls with a sprinkle of chopped cilantro and lime wedges on the side for an extra zesty finish. This adds brightness to your Easy Spring Roll Bowls, making them visually appealing and delicious.

Notes

Always use fresh vegetables to maintain crunch and vibrant flavors. If making ahead, store shrimp and veggies separately to keep everything fresh.