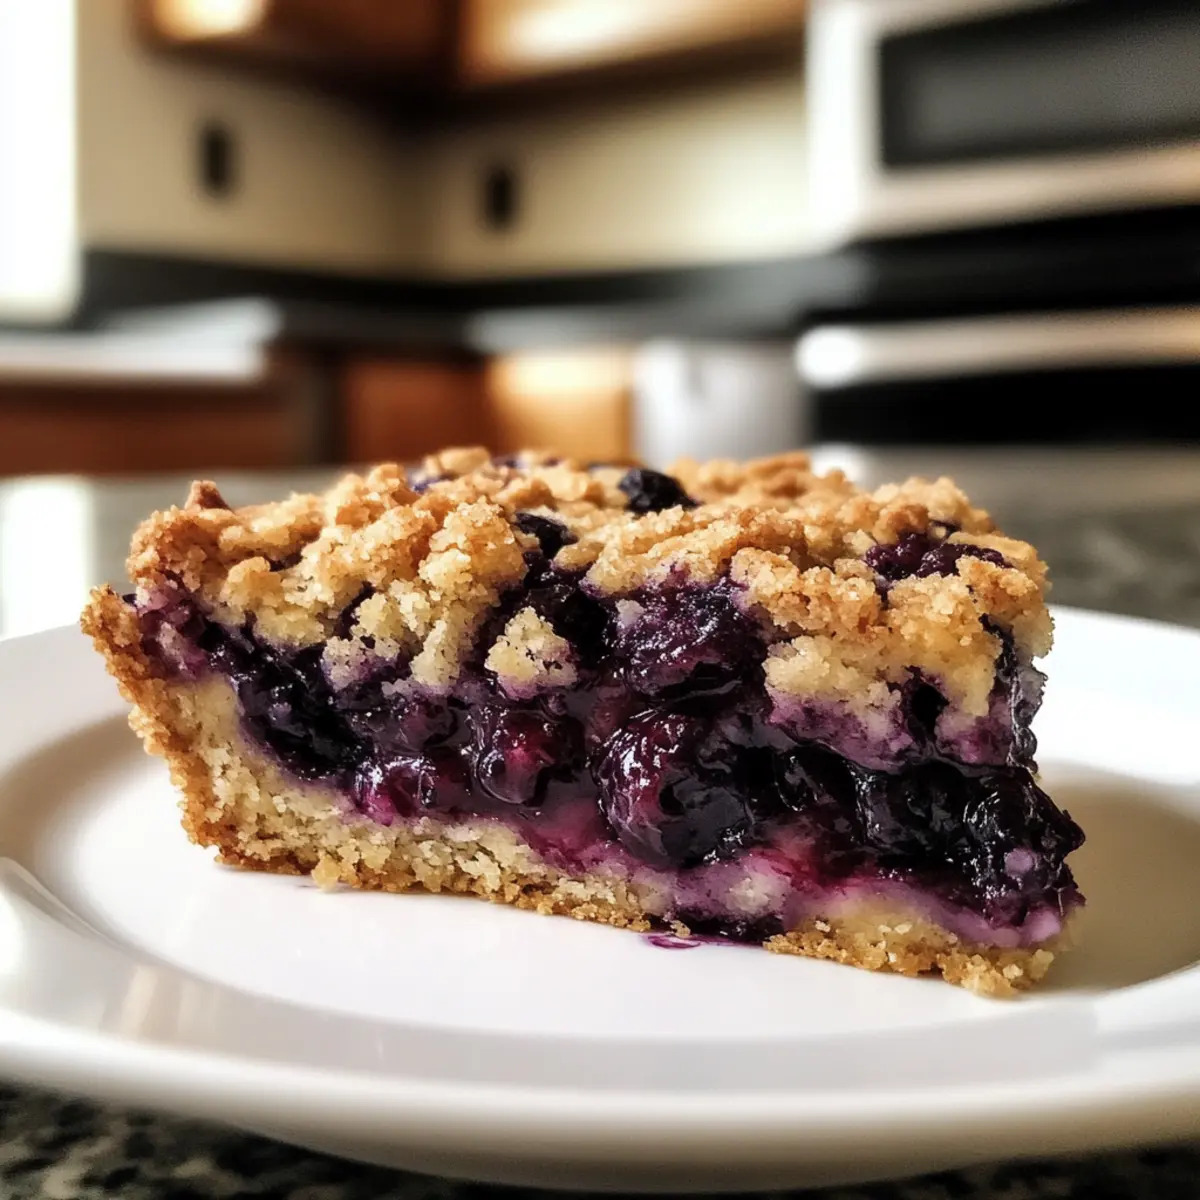
Grilled Parmesan Garlic Oysters: A Flavor Explosion Awaits!

Introduction to Grilled Parmesan Garlic Oysters

There’s something magical about the ocean’s bounty, especially when it comes to fresh oysters.

Grilled Parmesan Garlic Oysters are not just a dish; they’re an experience.

Whether you’re hosting a backyard barbecue or simply looking to impress your loved ones, this recipe is a quick solution that delivers big on flavor.

The combination of rich Parmesan, zesty garlic, and smoky grill notes creates a flavor explosion that’s hard to resist.

Plus, they’re surprisingly easy to make, making them perfect for both seasoned chefs and kitchen novices alike.

Let’s dive into this culinary adventure!

Why You’ll Love This Grilled Parmesan Garlic Oysters

These Grilled Parmesan Garlic Oysters are a game-changer for any seafood lover.

They come together in just 17 minutes, making them a fantastic option for busy weeknights or spontaneous gatherings.

The rich, savory flavors of garlic and Parmesan meld beautifully, creating a dish that’s both comforting and sophisticated.

Plus, they’re gluten-free, so everyone can enjoy them.

Trust me, once you try these, they’ll become a staple in your grilling repertoire!

Ingredients for Grilled Parmesan Garlic Oysters

To create these mouthwatering Grilled Parmesan Garlic Oysters, you’ll need a handful of fresh ingredients that pack a punch.

Here’s what you’ll gather:

  • Fresh oysters: The star of the show! Look for plump, juicy oysters that are tightly closed. They should smell like the sea, fresh and briny.
  • Grated Parmesan cheese: This adds a rich, nutty flavor and a delightful crust when grilled. Feel free to experiment with other cheeses if you’re feeling adventurous!
  • Unsalted butter: Melting this down creates a luscious base for your garlic mixture. Unsalted allows you to control the seasoning better.
  • Garlic: Minced garlic brings a robust flavor that complements the oysters beautifully. Fresh is best, but jarred can work in a pinch.
  • Fresh parsley: Chopped parsley adds a pop of color and a hint of freshness. You can substitute with other herbs like cilantro or chives if you prefer.
  • Lemon juice: A splash of acidity brightens the dish and balances the richness of the cheese and butter.
  • Red pepper flakes (optional): For those who like a little heat, these flakes add a nice kick. Adjust to your taste!
  • Salt and pepper: Essential for seasoning. Use them to enhance the flavors of your ingredients.
  • Lemon wedges: Serve these on the side for an extra burst of citrusy goodness when you dig in.

For exact measurements, check the bottom of the article where you can find everything listed for easy printing.

Gather these ingredients, and you’re on your way to a seafood delight that’s sure to impress!

How to Make Grilled Parmesan Garlic Oysters

Creating Grilled Parmesan Garlic Oysters is a straightforward process that will have your taste buds dancing.

Follow these simple steps, and you’ll be savoring the deliciousness in no time!

Step 1: Preheat the Grill

Start by preheating your grill to medium-high heat.

This ensures that the oysters cook evenly and the cheese melts beautifully.

If you’re using a charcoal grill, let the coals burn down until they’re covered with white ash.

For gas grills, simply turn on the burners and let it heat up for about 10 minutes.

Step 2: Prepare the Garlic Butter Mixture

In a mixing bowl, combine the melted unsalted butter, minced garlic, chopped parsley, lemon juice, and red pepper flakes.

Mix everything well until it’s nicely blended.

This garlic butter mixture is the heart of the dish, so don’t skimp on the garlic!

Feel free to adjust the red pepper flakes based on your spice preference.

Step 3: Arrange the Oysters

Next, place the shucked oysters on a grill-safe tray or directly on the grill grates.

If you’re using a tray, make sure it’s sturdy enough to hold the oysters without tipping over.

Arrange them so they’re not crowded; this allows for even cooking and prevents them from steaming.

Step 4: Add the Toppings

Spoon the garlic butter mixture generously over each oyster.

Then, top them off with a generous sprinkle of grated Parmesan cheese.

The cheese will create a delicious crust as it melts and bubbles.

Don’t be shy with the toppings; they’re what make these oysters truly special!

Step 5: Grill the Oysters

Now it’s time to grill!

Place the oysters on the grill and close the lid.

Grill them for about 5-7 minutes, or until the cheese is bubbly and golden brown.

Keep an eye on them; you want that perfect melt without burning.

Step 6: Serve and Enjoy

Once they’re done, carefully remove the oysters from the grill.

Let them cool slightly before serving.

Serve with lemon wedges on the side for that extra zing.

These Grilled Parmesan Garlic Oysters are best enjoyed fresh off the grill, so gather your friends and dig in!

Tips for Success

  • Use fresh oysters for the best flavor; they should smell like the ocean.
  • Don’t rush the grilling process; let the cheese melt and bubble for that perfect crust.
  • Experiment with different cheeses for unique flavor profiles.
  • Keep an eye on the grill; every grill heats differently, so adjust cooking time as needed.
  • Serve immediately for the best taste and texture.

Equipment Needed

  • Grill: A gas or charcoal grill works perfectly. If you don’t have one, a broiler can be a good alternative.
  • Grill-safe tray: Use a sturdy tray to hold the oysters. A cast-iron skillet can also do the trick.
  • Mixing bowl: For combining the garlic butter mixture.
  • Spoon: To generously dollop the garlic butter on the oysters.

Variations

  • Cheese Swap: Try using mozzarella or feta for a different flavor twist. Each cheese brings its own unique character to the dish.
  • Herb Infusion: Experiment with different herbs like thyme or basil instead of parsley for a fresh take.
  • Spicy Kick: Add diced jalapeños or a splash of hot sauce to the garlic butter for an extra layer of heat.
  • Vegan Option: Substitute the butter with olive oil and use a plant-based cheese alternative for a vegan-friendly version.
  • Smoky Flavor: Incorporate a few drops of liquid smoke into the garlic butter mixture for a deeper, smoky taste.

Serving Suggestions

  • Pair with a crisp white wine: A chilled Sauvignon Blanc or Pinot Grigio complements the oysters beautifully.
  • Serve with crusty bread: Fresh baguette or garlic bread is perfect for soaking up the delicious garlic butter.
  • Garnish with fresh herbs: A sprinkle of extra parsley or chives adds a vibrant touch.
  • Accompany with a light salad: A simple arugula or mixed greens salad balances the richness of the oysters.

FAQs about Grilled Parmesan Garlic Oysters

Can I use frozen oysters for this recipe?

While fresh oysters are ideal for Grilled Parmesan Garlic Oysters, you can use frozen ones if necessary. Just make sure to thaw them completely and drain any excess liquid before grilling.

How do I know when the oysters are done?

You’ll know the oysters are ready when the cheese is bubbly and golden brown. The oysters should also be slightly curled at the edges. Keep an eye on them to avoid overcooking!

What can I serve with Grilled Parmesan Garlic Oysters?

These oysters pair wonderfully with a crisp white wine, crusty bread, or a light salad. The acidity from the lemon wedges also enhances the overall flavor.

Can I make the garlic butter mixture ahead of time?

Absolutely! You can prepare the garlic butter mixture a day in advance. Just store it in the fridge and reheat it slightly before using it on the oysters.

Are Grilled Parmesan Garlic Oysters gluten-free?

Yes, this recipe is gluten-free! Just ensure that any additional ingredients you use, like sauces or seasonings, are also gluten-free to keep it safe for those with dietary restrictions.

Final Thoughts

Grilled Parmesan Garlic Oysters are more than just a dish; they’re a celebration of flavor and togetherness.

Each bite transports you to a seaside escape, where the ocean meets the grill in a delightful dance of taste.

Whether you’re sharing them with friends at a summer cookout or enjoying a quiet evening at home, these oysters bring joy and satisfaction.

The simplicity of the recipe allows you to focus on what truly matters—creating memories around the table.

So fire up that grill, gather your loved ones, and indulge in this seafood delight that’s sure to impress!

Paul

Grilled Parmesan Garlic Oysters: A Flavor Explosion Awaits!

Grilled Parmesan Garlic Oysters are a delicious seafood dish featuring fresh oysters topped with a flavorful garlic butter mixture and grilled to perfection.
Prep Time 10 minutes
Cook Time 7 minutes
Total Time 17 minutes
Course: Appetizer
Cuisine: Seafood
Calories: 250

Ingredients
  

  • 24 fresh oysters shucked
  • 1 cup grated Parmesan cheese
  • 4 tablespoons unsalted butter melted
  • 4 cloves garlic minced
  • 2 tablespoons fresh parsley chopped
  • 1 teaspoon lemon juice
  • 1/2 teaspoon red pepper flakes optional
  • Salt and pepper to taste
  • Lemon wedges for serving

Method
 

  1. Preheat your grill to medium-high heat.
  2. In a mixing bowl, combine the melted butter, minced garlic, chopped parsley, lemon juice, red pepper flakes, salt, and pepper. Mix well.
  3. Place the shucked oysters on a grill-safe tray or directly on the grill grates.
  4. Spoon the garlic butter mixture generously over each oyster, then top with grated Parmesan cheese.
  5. Grill the oysters for about 5-7 minutes, or until the cheese is bubbly and golden brown.
  6. Remove the oysters from the grill and let them cool slightly before serving.
  7. Serve with lemon wedges on the side for an extra burst of flavor.

Notes

  • For a smoky flavor, add a few drops of liquid smoke to the garlic butter mixture before grilling.
  • Experiment with different cheeses, such as mozzarella or feta, for a unique twist on the classic recipe.

Raspberry Pistachio Sourdough Bagels: A Delightful Recipe!

Introduction to Raspberry Pistachio Sourdough Bagels

When I think of weekend mornings, the aroma of freshly baked bread fills my mind. There’s something magical about the combination of tangy raspberries and crunchy pistachios in these Raspberry Pistachio Sourdough Bagels.

This recipe is not just a treat; it’s a delightful way to impress your loved ones or simply indulge yourself.

Whether you’re looking for a quick breakfast solution or a unique addition to your brunch spread, these bagels are sure to brighten your day.

Let’s dive into this delicious adventure together!

Why You’ll Love This Raspberry Pistachio Sourdough Bagels

These Raspberry Pistachio Sourdough Bagels are a game-changer for your breakfast routine.

They’re easy to make, even for a novice baker, and the flavor combination is simply irresistible.

The tangy raspberries burst with sweetness, while the pistachios add a satisfying crunch.

Plus, the sourdough starter gives them a unique depth that store-bought bagels just can’t match.

You’ll find yourself reaching for these bagels again and again!

Ingredients for Raspberry Pistachio Sourdough Bagels

Creating these delightful Raspberry Pistachio Sourdough Bagels starts with gathering the right ingredients.

Here’s what you’ll need:

  • All-purpose flour: This forms the base of your bagels, providing structure and chewiness.
  • Bread flour: Higher in protein, it gives the bagels that perfect chewy texture.
  • Active sourdough starter: The heart of the recipe, it adds tanginess and helps the bagels rise beautifully.
  • Salt: Essential for flavor, it also strengthens the dough.
  • Sugar: A touch of sweetness balances the tang of the raspberries.
  • Warm water: Activates the sourdough starter and helps bring the dough together.
  • Fresh raspberries: These juicy gems provide a burst of flavor and color.
  • Shelled pistachios: Their crunch complements the softness of the bagels, adding a nutty richness.
  • Baking soda: Used in the boiling process, it gives the bagels that classic shiny crust.
  • Egg: For the egg wash, it creates a beautiful golden finish on the bagels.

Feel free to experiment!

For a sweeter twist, consider adding honey or maple syrup to the dough.

You can also swap in different nuts or fruits, like walnuts or blueberries, to create your own unique flavor combinations.

Exact measurements are available at the bottom of the article for easy printing.

How to Make Raspberry Pistachio Sourdough Bagels

Step 1: Prepare the Dough

Start by grabbing a large mixing bowl.

Combine the all-purpose flour, bread flour, salt, and sugar.

Mix them well to ensure even distribution.

Next, add your active sourdough starter and warm water.

Stir until a shaggy dough forms.

Don’t worry if it looks a bit messy; that’s part of the charm!

This is where the magic begins, as the sourdough starter will work its wonders.

Let’s move on to the next step!

Step 2: Knead the Dough

Now, it’s time to get your hands a little dirty.

Transfer the shaggy dough onto a lightly floured surface.

Knead it for about 8-10 minutes until it becomes smooth and elastic.

This is a great workout for your arms!

As you knead, gently fold in the fresh raspberries and chopped pistachios.

Be careful not to squish the raspberries too much; we want those juicy bursts of flavor intact.

Once everything is well incorporated, you’re ready for the first rise.

Step 3: First Rise

Place your kneaded dough in a lightly greased bowl.

Cover it with a damp cloth to keep it cozy.

Let it rise at room temperature for about 4-6 hours, or until it doubles in size.

This is the perfect time to kick back and relax.

The sourdough starter will work its magic, creating that delightful tang we love.

Keep an eye on it; the dough will be ready before you know it!

Step 4: Shape the Bagels

Once your dough has risen, it’s time to punch it down gently.

Divide it into 8 equal pieces.

Shape each piece into a ball, then poke a hole in the center to form a bagel shape.

Make sure the hole is big enough; it will shrink during boiling and baking.

Place the shaped bagels on a parchment-lined baking sheet.

Let them rest for about 30 minutes while you preheat the oven.

You’re almost there!

Step 5: Boil the Bagels

Bring a large pot of water to a boil and add the baking soda.

This step is crucial for that classic bagel texture.

Carefully drop each bagel into the boiling water, cooking for about 1 minute on each side.

Use a slotted spoon to flip them over.

Once boiled, return them to the baking sheet.

This process gives your bagels that shiny crust we all love.

You’re just a few steps away from enjoying these delicious treats!

Step 6: Bake the Bagels

Preheat your oven to 425°F.

While it heats up, beat an egg and brush it over the bagels for a beautiful golden finish.

Bake them for 20-25 minutes, or until they turn a lovely golden brown.

The aroma will fill your kitchen, making it hard to resist.

Once baked, let them cool on a wire rack before serving.

You’ve just created a batch of Raspberry Pistachio Sourdough Bagels that will impress everyone!

Tips for Success

  • Use a kitchen scale for precise measurements, especially for the flours.
  • Ensure your sourdough starter is active and bubbly for the best rise.
  • Don’t rush the first rise; patience is key to flavor development.
  • Experiment with different toppings like sesame seeds or everything bagel seasoning.
  • Store leftover bagels in an airtight container to keep them fresh.

Equipment Needed

  • Mixing bowl: A large bowl for combining ingredients; any size will do.
  • Measuring cups and spoons: Essential for accuracy; a kitchen scale is a great alternative.
  • Slotted spoon: Perfect for boiling bagels; a regular spoon works in a pinch.
  • Baking sheet: A standard sheet will suffice; line it with parchment paper for easy cleanup.
  • Wire rack: Ideal for cooling; a plate can work if you don’t have one.

Variations

  • Nut Alternatives: Swap pistachios for walnuts or almonds for a different nutty flavor.
  • Fruit Options: Try blueberries or chopped strawberries instead of raspberries for a fruity twist.
  • Herb Infusion: Add fresh herbs like rosemary or thyme for a savory bagel experience.
  • Gluten-Free Version: Use a gluten-free flour blend to make these bagels suitable for gluten-sensitive diets.
  • Sweet Additions: Incorporate chocolate chips or dried fruits for a sweeter bagel option.

Serving Suggestions

  • Spread Options: Cream cheese or mascarpone pairs beautifully with these bagels.
  • Fruit Pairing: Serve with fresh fruit like sliced strawberries or a fruit salad.
  • Beverage Match: Enjoy with a hot cup of coffee or a refreshing herbal tea.
  • Presentation: Arrange on a wooden board for a rustic brunch display.

FAQs about Raspberry Pistachio Sourdough Bagels

Can I use frozen raspberries in this recipe?

Absolutely! Frozen raspberries work just fine. Just make sure to thaw and drain them before adding to the dough to avoid excess moisture.

How do I store leftover bagels?

Store your Raspberry Pistachio Sourdough Bagels in an airtight container at room temperature for up to 2 days. For longer storage, freeze them in a zip-top bag.

Can I make these bagels without a sourdough starter?

While the sourdough starter adds unique flavor, you can substitute it with instant yeast. Use about 2 teaspoons of yeast and adjust the water accordingly.

What can I serve with these bagels?

These bagels pair wonderfully with cream cheese, butter, or even a fruit spread. A side of fresh fruit or a hot beverage makes for a perfect breakfast!

How can I make these bagels vegan?

To make vegan Raspberry Pistachio Sourdough Bagels, simply replace the egg wash with a mixture of plant-based milk and a bit of maple syrup for a shiny finish.

Final Thoughts

Baking Raspberry Pistachio Sourdough Bagels is more than just a recipe; it’s an experience that fills your kitchen with warmth and joy.

The vibrant colors and delightful aromas create a sense of anticipation that’s hard to resist.

Each bite offers a perfect balance of tangy raspberries and crunchy pistachios, making them a true treat for the senses.

Whether you’re sharing them with family or savoring them solo, these bagels bring a touch of happiness to any morning.

So roll up your sleeves, embrace the process, and enjoy the delicious rewards of your hard work!

Paul

Raspberry Pistachio Sourdough Bagels: A Delightful Recipe!

A delightful recipe for Raspberry Pistachio Sourdough Bagels that combines the tanginess of raspberries with the crunch of pistachios.
Prep Time 30 minutes
Cook Time 25 minutes
Total Time 6 hours
Servings: 8 bagels
Course: Breakfast
Cuisine: American
Calories: 210

Ingredients
  

  • 2 cups all-purpose flour
  • 1 cup bread flour
  • 1 cup active sourdough starter fed and bubbly
  • 1 teaspoon salt
  • 1 tablespoon sugar
  • 3/4 cup warm water about 110°F
  • 1/2 cup fresh raspberries
  • 1/2 cup shelled pistachios roughly chopped
  • 1 tablespoon baking soda for boiling
  • 1 egg for egg wash

Method
 

  1. In a large mixing bowl, combine the all-purpose flour, bread flour, salt, and sugar. Mix well.
  2. Add the active sourdough starter and warm water to the dry ingredients. Stir until a shaggy dough forms.
  3. Knead the dough on a lightly floured surface for about 8-10 minutes until smooth and elastic.
  4. Gently fold in the raspberries and chopped pistachios until evenly distributed.
  5. Place the dough in a lightly greased bowl, cover with a damp cloth, and let it rise at room temperature for about 4-6 hours or until doubled in size.
  6. Once risen, punch down the dough and divide it into 8 equal pieces. Shape each piece into a ball and then poke a hole in the center to form a bagel shape.
  7. Place the shaped bagels on a parchment-lined baking sheet and let them rest for 30 minutes.
  8. Preheat the oven to 425°F. In a large pot, bring water to a boil and add the baking soda.
  9. Boil each bagel for about 1 minute on each side, then return them to the baking sheet.
  10. Beat the egg and brush it over the bagels for a shiny finish.
  11. Bake the bagels for 20-25 minutes or until golden brown. Let cool on a wire rack before serving.

Notes

  • For a sweeter bagel, add 1 tablespoon of honey or maple syrup to the dough.
  • Experiment with different nuts or fruits, such as walnuts or blueberries, for unique flavor combinations.

Oven-Baked Steak with Garlic Herb Butter for Perfect Flavor

Introduction to Oven-Baked Steak with Garlic Herb Butter

There’s something undeniably satisfying about a perfectly cooked steak, especially when it’s oven-baked and topped with a rich garlic herb butter.

This Oven-Baked Steak with Garlic Herb Butter is not just a meal; it’s an experience.

Whether you’re looking to impress a date or simply treat yourself after a long day, this recipe is your go-to solution.

With minimal prep and a short cooking time, you can enjoy a restaurant-quality dish right in your own kitchen.

Let’s dive into this culinary adventure that promises to elevate your dinner game!

Why You’ll Love This Oven-Baked Steak with Garlic Herb Butter

This recipe is a game-changer for busy weeknights or special occasions.

It combines simplicity with incredible flavor, making it perfect for anyone, even if you’re not a seasoned chef.

In just 25 minutes, you can serve up a juicy ribeye steak that’s bursting with taste.

The garlic herb butter adds a gourmet touch, transforming a regular dinner into a memorable feast.

Trust me, your taste buds will thank you!

Ingredients for Oven-Baked Steak with Garlic Herb Butter

Creating a mouthwatering Oven-Baked Steak with Garlic Herb Butter starts with the right ingredients.

Here’s what you’ll need:

  • Ribeye Steaks: These are the stars of the show. Their marbling ensures a juicy, flavorful bite.
  • Olive Oil: A splash of this liquid gold helps achieve that perfect sear while adding a hint of richness.
  • Salt and Pepper: Simple yet essential. They enhance the natural flavors of the steak.
  • Unsalted Butter: The base for our garlic herb butter. Unsalted allows you to control the seasoning better.
  • Garlic: Freshly minced garlic brings a punch of flavor that pairs beautifully with the steak.
  • Fresh Parsley: This herb adds a pop of color and a fresh taste that brightens the dish.
  • Fresh Thyme: Earthy and aromatic, thyme complements the richness of the steak perfectly.
  • Worcestershire Sauce: A dash of this sauce adds depth and umami, elevating the overall flavor.

Feel free to get creative!

For a smoky twist, consider adding a teaspoon of smoked paprika to the garlic herb butter.

And if you’re out of fresh herbs, dried ones can work in a pinch—just use less since they’re more concentrated.

Exact quantities for each ingredient are available at the bottom of the article for easy printing.

How to Make Oven-Baked Steak with Garlic Herb Butter

Cooking a delicious Oven-Baked Steak with Garlic Herb Butter is easier than you might think.

Follow these simple steps, and you’ll be on your way to a mouthwatering meal that impresses.

Step 1: Preheat the Oven

Start by preheating your oven to 400°F (200°C).

This step is crucial because a hot oven ensures even cooking and helps achieve that perfect steak crust.

While the oven heats up, you can focus on preparing the steaks.

Step 2: Prepare the Steaks

Pat the ribeye steaks dry with paper towels.

This helps the seasoning stick and promotes a better sear.

Generously season both sides with salt and pepper.

Don’t be shy! This simple seasoning enhances the natural flavors of the meat.

Step 3: Sear the Steaks

In a large oven-safe skillet, heat the olive oil over medium-high heat until it shimmers.

Carefully add the steaks to the skillet.

Sear them for 3-4 minutes on each side until a beautiful crust forms.

This step locks in the juices and adds a rich flavor.

If you hear that satisfying sizzle, you’re on the right track!

Step 4: Make the Garlic Herb Butter

While the steaks are searing, mix the softened butter, minced garlic, parsley, thyme, and Worcestershire sauce in a small bowl.

Stir until well combined.

This garlic herb butter is the secret weapon that elevates your steak to gourmet status.

Feel free to adjust the herbs to your taste!

Step 5: Bake the Steaks

Once the steaks are seared, remove the skillet from heat.

Spread the garlic herb butter evenly over the top of each steak.

Now, transfer the skillet to your preheated oven.

Bake for 5-7 minutes for medium-rare, or until your desired doneness is reached.

Keep an eye on them; every oven is a little different!

Step 6: Rest and Serve

After baking, remove the skillet from the oven and let the steaks rest for 5 minutes.

This resting period allows the juices to redistribute, ensuring a tender bite.

Slice and serve your delicious oven-baked steak topped with that irresistible garlic herb butter.

Enjoy every flavorful bite!

Tips for Success

  • Use a meat thermometer to check for doneness—130°F for medium-rare.
  • Let the steaks rest after cooking; this keeps them juicy.
  • Experiment with different herbs in the garlic butter for unique flavors.
  • Don’t overcrowd the skillet; cook one or two steaks at a time for the best sear.
  • Pair with a good red wine to enhance the meal experience.

Equipment Needed

  • Oven-safe Skillet: A cast iron skillet works wonders, but any oven-safe pan will do.
  • Meat Thermometer: Essential for checking doneness; a simple instant-read thermometer is perfect.
  • Mixing Bowl: Use any bowl to combine the garlic herb butter ingredients.
  • Paper Towels: Handy for patting the steaks dry before seasoning.

Variations

  • Herb Variations: Swap out parsley and thyme for rosemary or oregano for a different flavor profile.
  • Spicy Kick: Add a pinch of red pepper flakes to the garlic herb butter for a spicy twist.
  • Low-Carb Option: Serve with a side of sautéed spinach or cauliflower mash for a low-carb meal.
  • Marinade Option: Marinate the steaks in a mixture of olive oil, garlic, and herbs for a few hours before cooking for extra flavor.
  • Cheesy Delight: Top the finished steak with crumbled blue cheese or grated Parmesan for a rich, savory finish.

Serving Suggestions

  • Roasted Vegetables: Pair your steak with a medley of roasted carrots, Brussels sprouts, and potatoes for a colorful plate.
  • Fresh Salad: A crisp arugula salad with lemon vinaigrette complements the richness of the steak.
  • Wine Pairing: Enjoy with a bold red wine, like Cabernet Sauvignon, to enhance the flavors.
  • Presentation: Serve on a wooden board for a rustic touch, garnished with fresh herbs.

FAQs about Oven-Baked Steak with Garlic Herb Butter

Can I use other cuts of steak for this recipe?

Absolutely! While ribeye is a fantastic choice due to its marbling, you can also use sirloin, filet mignon, or even flank steak. Just adjust the cooking time based on the thickness of the cut.

How do I know when my steak is done?

The best way to check for doneness is with a meat thermometer. Aim for 130°F for medium-rare, 140°F for medium, and 150°F for medium-well. Remember, the steak will continue to cook slightly while resting.

Can I make the garlic herb butter ahead of time?

Yes! You can prepare the garlic herb butter a day in advance. Just store it in the fridge, and let it soften at room temperature before spreading it on the steaks.

What should I serve with my oven-baked steak?

For a complete meal, consider pairing your steak with roasted vegetables, a fresh salad, or even a creamy mashed potato. A good red wine also complements the flavors beautifully!

Can I grill the steak instead of baking it?

Definitely! If you prefer grilling, simply sear the steaks on the grill for a few minutes on each side, then brush with the garlic herb butter before serving. It adds a delightful smoky flavor!

Final Thoughts

Cooking this Oven-Baked Steak with Garlic Herb Butter is more than just preparing a meal; it’s about creating a moment.

The aroma of sizzling steak and melting garlic herb butter fills your kitchen, wrapping you in warmth and comfort.

Each bite is a celebration of flavor, a reminder that great food doesn’t have to be complicated.

Whether you’re sharing it with loved ones or enjoying a quiet dinner alone, this dish brings joy to the table.

So, roll up your sleeves, embrace the process, and savor the delicious rewards of your culinary adventure!

Paul

Oven-Baked Steak with Garlic Herb Butter for Perfect Flavor

A delicious recipe for oven-baked steak topped with a flavorful garlic herb butter, perfect for a satisfying meal.
Prep Time 10 minutes
Cook Time 15 minutes
Total Time 25 minutes
Course: Main Course
Cuisine: American
Calories: 600

Ingredients
  

  • 2 ribeye steaks about 1 inch thick, 12 ounces each
  • 2 tablespoons olive oil
  • Salt and pepper to taste
  • 4 tablespoons unsalted butter softened
  • 2 cloves garlic minced
  • 1 tablespoon fresh parsley chopped
  • 1 tablespoon fresh thyme chopped
  • 1 teaspoon Worcestershire sauce

Method
 

  1. Preheat your oven to 400°F (200°C).
  2. Pat the steaks dry with paper towels and season both sides generously with salt and pepper.
  3. In a large oven-safe skillet, heat the olive oil over medium-high heat until shimmering.
  4. Add the steaks to the skillet and sear for 3-4 minutes on each side until a nice crust forms.
  5. While the steaks are searing, in a small bowl, mix together the softened butter, minced garlic, parsley, thyme, and Worcestershire sauce until well combined.
  6. Once the steaks are seared, remove the skillet from heat and spread the garlic herb butter evenly over the top of each steak.
  7. Transfer the skillet to the preheated oven and bake for 5-7 minutes for medium-rare, or until the desired doneness is reached.
  8. Remove the skillet from the oven and let the steaks rest for 5 minutes before slicing and serving.

Notes

  • For a smoky flavor, add a teaspoon of smoked paprika to the garlic herb butter mixture.
  • Serve the steak with a side of roasted vegetables or a fresh salad for a complete meal.

Peanut Butter Baked Oatmeal: A Delicious Breakfast Treat!

Introduction to Peanut Butter Baked Oatmeal

There’s something magical about the aroma of baked oatmeal wafting through the kitchen, isn’t there? Peanut Butter Baked Oatmeal is not just a breakfast; it’s a warm hug on a plate. Perfect for those busy mornings or lazy weekends, this dish combines the heartiness of rolled oats with the creamy goodness of peanut butter. It’s a quick solution for a busy day, yet impressive enough to share with loved ones. Trust me, once you try this delightful recipe, it’ll become a staple in your breakfast rotation, bringing joy and nourishment to your mornings.

Why You’ll Love This Peanut Butter Baked Oatmeal

This Peanut Butter Baked Oatmeal is a game-changer for breakfast lovers. It’s incredibly easy to whip up, taking just 10 minutes of prep time. The combination of creamy peanut butter and sweet bananas creates a flavor explosion that will have you coming back for seconds. Plus, it’s versatile enough to cater to your taste buds, whether you prefer it plain or loaded with chocolate chips. Breakfast has never been this delicious!

Ingredients for Peanut Butter Baked Oatmeal

Gathering the right ingredients is the first step to creating this delightful breakfast treat. Here’s what you’ll need:

  • Rolled oats: The base of this dish, providing fiber and a hearty texture.
  • Baking powder: This helps the oatmeal rise, giving it a fluffy consistency.
  • Ground cinnamon: Adds warmth and a hint of spice, elevating the flavor profile.
  • Salt: Just a pinch enhances all the other flavors beautifully.
  • Milk: Dairy or non-dairy options work well, adding creaminess to the mix.
  • Creamy peanut butter: The star ingredient, offering rich flavor and healthy fats.
  • Maple syrup: A natural sweetener that complements the peanut butter perfectly.
  • Eggs: They bind everything together and add protein for a satisfying meal.
  • Vanilla extract: A splash of this brings a lovely aroma and depth of flavor.
  • Chopped bananas: They add natural sweetness and moisture, making each bite delightful.
  • Chocolate chips (optional): For those who want a sweet twist, these are a fun addition.
  • Chopped nuts (optional): Add some crunch and extra nutrition if you like.

For exact measurements, check the bottom of the article where you can find everything listed for easy printing. Feel free to mix and match ingredients based on your preferences or dietary needs!

How to Make Peanut Butter Baked Oatmeal

Now that you have all your ingredients ready, let’s dive into the fun part—making this delicious Peanut Butter Baked Oatmeal! Follow these simple steps, and you’ll have a warm, comforting breakfast in no time.

Step 1: Preheat and Prepare

First things first, preheat your oven to 350°F (175°C). This ensures your baked oatmeal cooks evenly. While the oven warms up, grease a 9×9-inch baking dish or line it with parchment paper. This little step makes cleanup a breeze!

Step 2: Mix Dry Ingredients

In a large bowl, combine the rolled oats, baking powder, ground cinnamon, and salt. Stir them together until they’re well mixed. This dry mixture is the foundation of your baked oatmeal, so make sure it’s evenly blended for the best texture.

Step 3: Whisk Wet Ingredients

In another bowl, whisk together the milk, creamy peanut butter, maple syrup, eggs, and vanilla extract. You want this mixture to be smooth and well combined. The peanut butter should blend in nicely, creating a rich, creamy base that will flavor your oatmeal.

Step 4: Combine Mixtures

Now, pour the wet ingredients into the bowl with the dry ingredients. Gently stir until just combined. Be careful not to overmix! Then, fold in the chopped bananas and any optional ingredients like chocolate chips or nuts. This is where you can get creative!

Step 5: Bake

Pour the mixture into your prepared baking dish, spreading it out evenly. Pop it in the oven and bake for 25-30 minutes. You’ll know it’s done when the top is golden brown and a toothpick inserted in the center comes out clean. The aroma will be irresistible!

Step 6: Cool and Serve

Once baked, allow the oatmeal to cool for a few minutes. This makes it easier to slice into squares. Serve warm, and enjoy the delightful combination of flavors. Trust me, your mornings just got a whole lot better!

Tips for Success

  • Use ripe bananas for natural sweetness and moisture.
  • Don’t skip greasing the baking dish; it prevents sticking.
  • Let the baked oatmeal cool slightly before slicing for cleaner squares.
  • Experiment with spices like nutmeg or ginger for a unique twist.
  • Store leftovers in the fridge for a quick breakfast option throughout the week.

Equipment Needed

  • 9×9-inch baking dish: A standard size for this recipe; you can also use an 8×8-inch dish if that’s what you have.
  • Mixing bowls: Two bowls are ideal for separating dry and wet ingredients.
  • Whisk: Perfect for blending wet ingredients; a fork works in a pinch.
  • Spatula: Great for folding in ingredients and scraping the bowl clean.
  • Measuring cups and spoons: Essential for accuracy; you can use a kitchen scale if you prefer.

Variations

  • Nut Butter Swap: Try almond butter or sunflower seed butter for a different nutty flavor.
  • Fruit Medley: Mix in other fruits like blueberries, apples, or strawberries for added sweetness and nutrition.
  • Spice It Up: Add a pinch of nutmeg or ginger for a warm, spicy kick.
  • Vegan Option: Substitute eggs with flax eggs and use plant-based milk for a vegan-friendly version.
  • Protein Boost: Stir in a scoop of your favorite protein powder for an extra protein punch.

Serving Suggestions

  • Fresh Fruit: Serve with sliced strawberries or a handful of blueberries for a refreshing contrast.
  • Yogurt: A dollop of Greek yogurt adds creaminess and extra protein.
  • Drinks: Pair with a hot cup of coffee or a smoothie for a balanced breakfast.
  • Presentation: Drizzle with extra maple syrup or sprinkle with nuts for a beautiful finish.

FAQs about Peanut Butter Baked Oatmeal

Curious about Peanut Butter Baked Oatmeal? Here are some common questions I often hear, along with helpful answers to guide you through this delicious breakfast treat.

Can I make Peanut Butter Baked Oatmeal ahead of time?

Absolutely! You can prepare the mixture the night before and store it in the fridge. Just bake it in the morning for a quick and easy breakfast.

How do I store leftovers?

Store any leftovers in an airtight container in the fridge for up to five days. You can reheat individual squares in the microwave for a quick breakfast.

Can I freeze Peanut Butter Baked Oatmeal?

Yes, this baked oatmeal freezes well! Cut it into squares, wrap them tightly, and store in the freezer for up to three months. Just thaw and reheat when you’re ready to enjoy.

What can I substitute for peanut butter?

If you have nut allergies, almond butter or sunflower seed butter are great alternatives. They provide a similar creamy texture and flavor.

Is this recipe suitable for kids?

Definitely! Kids love the sweet banana and peanut butter combination. Plus, it’s a nutritious way to start their day!

Final Thoughts

Peanut Butter Baked Oatmeal is more than just a breakfast; it’s a delightful experience that brings warmth and comfort to your mornings. Each bite is a perfect blend of creamy peanut butter and sweet bananas, making it a treat you’ll look forward to. Whether you’re enjoying it solo or sharing with family, this dish creates moments of joy and satisfaction. Plus, it’s versatile enough to adapt to your taste. So, roll up your sleeves and give this recipe a try. Your mornings will never be the same, and you might just find a new favorite in your breakfast lineup!

Paul

Peanut Butter Baked Oatmeal: A Delicious Breakfast Treat!

Peanut Butter Baked Oatmeal is a delicious and nutritious breakfast treat that combines rolled oats, creamy peanut butter, and sweet bananas, baked to perfection.
Prep Time 10 minutes
Cook Time 30 minutes
Total Time 40 minutes
Servings: 6 servings
Course: Breakfast
Cuisine: American
Calories: 220

Ingredients
  

  • 2 cups rolled oats
  • 1 teaspoon baking powder
  • 1 teaspoon ground cinnamon
  • 1/2 teaspoon salt
  • 2 cups milk dairy or non-dairy
  • 1/2 cup creamy peanut butter
  • 1/4 cup maple syrup
  • 2 large eggs
  • 1 teaspoon vanilla extract
  • 1/2 cup chopped bananas about 1 medium banana
  • 1/2 cup chocolate chips optional
  • 1/4 cup chopped nuts optional

Method
 

  1. Preheat your oven to 350°F (175°C) and grease a 9x9-inch baking dish or line it with parchment paper.
  2. In a large bowl, combine the rolled oats, baking powder, cinnamon, and salt. Mix well.
  3. In another bowl, whisk together the milk, peanut butter, maple syrup, eggs, and vanilla extract until smooth and well combined.
  4. Pour the wet ingredients into the dry ingredients and stir until just combined. Gently fold in the chopped bananas, chocolate chips, and nuts if using.
  5. Pour the mixture into the prepared baking dish, spreading it evenly.
  6. Bake for 25-30 minutes, or until the top is golden brown and a toothpick inserted in the center comes out clean.
  7. Allow to cool for a few minutes before slicing into squares and serving.

Notes

  • For added flavor, try mixing in a teaspoon of vanilla extract or a tablespoon of cocoa powder for a chocolatey twist.
  • Substitute the peanut butter with almond butter or sunflower seed butter for a different nutty flavor or to accommodate nut allergies.

Honey Bourbon Shrimp: Taste the Sweet, Savory Bliss!

Introduction to Honey Bourbon Shrimp

There’s something magical about the combination of sweet and savory, isn’t there?

Honey Bourbon Shrimp brings that delightful balance right to your dinner table.

This dish is not just a meal; it’s an experience.

Whether you’re looking to impress your friends or simply want a quick solution for a busy weeknight, this recipe has you covered.

In just 20 minutes, you can whip up a plate of succulent shrimp that’s bursting with flavor.

Trust me, once you try it, you’ll be hooked on this sweet, savory bliss!

Why You’ll Love This Honey Bourbon Shrimp

This Honey Bourbon Shrimp recipe is a game-changer for busy nights.

It’s quick, taking only 20 minutes from start to finish, making it perfect for those evenings when time is tight.

The flavors? Absolutely irresistible!

The sweet honey and rich bourbon create a mouthwatering glaze that clings to each shrimp, ensuring every bite is packed with taste.

Plus, it’s a dish that’s sure to impress anyone at your table!

Ingredients for Honey Bourbon Shrimp

Creating the perfect Honey Bourbon Shrimp starts with gathering the right ingredients.

Here’s what you’ll need:

  • Shrimp: Large, peeled, and deveined shrimp are ideal. They cook quickly and soak up the marinade beautifully.
  • Honey: This natural sweetener adds a rich sweetness that balances the bourbon’s depth. Look for pure honey for the best flavor.
  • Bourbon: A splash of bourbon brings warmth and complexity. Choose a good-quality bourbon that you enjoy sipping.
  • Soy Sauce: This adds a savory umami kick. If you’re watching your sodium, low-sodium soy sauce works just as well.
  • Olive Oil: Used for cooking, it adds a nice richness. You can substitute with another oil, like avocado oil, if preferred.
  • Garlic: Freshly minced garlic infuses the dish with aromatic flavor. You can use garlic powder in a pinch, but fresh is best.
  • Ginger: Grated ginger adds a zesty warmth. If you don’t have fresh ginger, ground ginger can be a substitute.
  • Red Pepper Flakes: Optional, but they give a nice kick. Adjust the amount based on your spice tolerance.
  • Salt and Pepper: Essential for seasoning. Use them to taste, enhancing the overall flavor of the dish.
  • Green Onions: Sliced green onions are perfect for garnish, adding a fresh crunch and a pop of color.

For exact measurements, check the bottom of the article where you can find everything available for printing.

With these ingredients, you’re well on your way to creating a dish that’s not just a meal, but a celebration of flavors!

How to Make Honey Bourbon Shrimp

Making Honey Bourbon Shrimp is a straightforward process that packs a punch of flavor.

Follow these simple steps, and you’ll have a delicious dish ready in no time!

Step 1: Prepare the Marinade

Start by whisking together the honey, bourbon, soy sauce, minced garlic, grated ginger, red pepper flakes, salt, and pepper in a medium bowl.

This marinade is the heart of the dish, so make sure it’s well combined.

Set aside half of the marinade for later; it’ll add an extra layer of flavor when you finish cooking.

Step 2: Marinate the Shrimp

Add the peeled and deveined shrimp to the remaining marinade.

Let them soak up those flavors in the refrigerator for 15 to 30 minutes.

This step is crucial; it allows the shrimp to absorb the sweet and savory goodness, making each bite unforgettable.

Step 3: Heat the Skillet

While the shrimp are marinating, heat olive oil in a large skillet over medium-high heat.

You want the oil hot enough to sizzle when the shrimp hit the pan.

This ensures a nice sear, locking in the flavors and giving the shrimp a beautiful color.

Step 4: Cook the Shrimp

Once the skillet is hot, remove the shrimp from the marinade and add them in a single layer.

Cook for about 2 to 3 minutes on one side until they turn pink and opaque.

Don’t overcrowd the pan; you want them to sear, not steam.

Step 5: Add the Reserved Marinade

Flip the shrimp over and pour the reserved marinade over them.

Let it cook for an additional 2 to 3 minutes.

This will thicken the sauce slightly, creating a sticky, flavorful glaze that clings to the shrimp.

Step 6: Garnish and Serve

Remove the skillet from heat and garnish with sliced green onions.

This adds a fresh crunch and a pop of color to your dish.

Serve your Honey Bourbon Shrimp over rice or quinoa to soak up that delicious sauce.

Enjoy the sweet, savory bliss that you’ve just created!

Tips for Success

  • Don’t rush the marinating process; let the shrimp soak up the flavors for maximum taste.
  • Use a non-stick skillet to prevent the shrimp from sticking and ensure even cooking.
  • Adjust the red pepper flakes to your spice preference for a personalized kick.
  • For a thicker sauce, let it simmer a bit longer after adding the reserved marinade.
  • Always taste and adjust seasoning before serving to ensure the perfect balance.

Equipment Needed

  • Large Skillet: A non-stick skillet works best, but any large skillet will do.
  • Medium Bowl: For mixing the marinade; a whisk or fork will help combine the ingredients.
  • Measuring Cups: Essential for accurate ingredient portions.
  • Spatula: Use it to flip the shrimp easily while cooking.

Variations

  • Spicy Honey Bourbon Shrimp: Add more red pepper flakes or a splash of your favorite hot sauce for an extra kick.
  • Honey Bourbon Chicken: Swap shrimp for chicken breast or thighs for a hearty alternative that’s just as delicious.
  • Vegetarian Option: Use tofu or tempeh instead of shrimp, marinating and cooking them in the same way for a plant-based delight.
  • Honey Bourbon Glaze: Reduce the marinade further to create a thick glaze, perfect for drizzling over grilled vegetables or meats.
  • Herb-Infused: Add fresh herbs like cilantro or basil to the marinade for a fresh twist that brightens the dish.

Serving Suggestions

  • Rice or Quinoa: Serve the Honey Bourbon Shrimp over fluffy rice or quinoa to soak up the delicious sauce.
  • Steamed Vegetables: Pair with steamed broccoli or green beans for a colorful, nutritious side.
  • Refreshing Salad: A crisp garden salad with a light vinaigrette complements the dish perfectly.
  • Drink Pairing: Enjoy with a chilled glass of white wine or a refreshing iced tea.
  • Presentation: Garnish with extra green onions and a sprinkle of sesame seeds for an appealing finish.

FAQs about Honey Bourbon Shrimp

Can I use frozen shrimp for this recipe?

Absolutely! Just make sure to thaw the shrimp completely before marinating. Frozen shrimp can be just as delicious when cooked properly.

What can I substitute for bourbon?

If you prefer not to use bourbon, you can try using apple juice or a non-alcoholic bourbon alternative. The flavor will differ, but it will still be tasty!

How do I store leftovers?

Store any leftovers in an airtight container in the refrigerator for up to 2 days. Reheat gently in a skillet to avoid overcooking the shrimp.

Can I make this dish ahead of time?

While it’s best enjoyed fresh, you can marinate the shrimp a few hours in advance. Just cook them right before serving for the best flavor.

What sides pair well with Honey Bourbon Shrimp?

This dish goes wonderfully with rice, quinoa, or a fresh salad. The sweet and savory flavors complement a variety of sides, making it versatile!

Final Thoughts

Cooking Honey Bourbon Shrimp is more than just preparing a meal; it’s about creating moments.

The sweet, savory aroma wafting through your kitchen will draw everyone in, sparking conversations and smiles.

Each bite is a delightful dance of flavors, making it a dish that’s sure to impress.

Whether you’re sharing it with family or enjoying a quiet dinner alone, this recipe brings joy and satisfaction.

So, roll up your sleeves, embrace the process, and savor the sweet, savory bliss that is Honey Bourbon Shrimp.

Trust me, it’s a culinary adventure you won’t want to miss!

Paul

Honey Bourbon Shrimp: Taste the Sweet, Savory Bliss!

Honey Bourbon Shrimp is a delicious dish that combines the sweetness of honey with the rich flavor of bourbon, creating a savory and sweet experience.
Prep Time 10 minutes
Cook Time 10 minutes
Total Time 20 minutes
Servings: 4 servings
Course: Main Dish
Cuisine: American
Calories: 220

Ingredients
  

  • 1 pound large shrimp peeled and deveined
  • 1/4 cup honey
  • 1/4 cup bourbon
  • 2 tablespoons soy sauce
  • 2 tablespoons olive oil
  • 3 cloves garlic minced
  • 1 teaspoon ginger grated
  • 1/2 teaspoon red pepper flakes optional
  • Salt and pepper to taste
  • 2 green onions sliced (for garnish)

Method
 

  1. In a medium bowl, whisk together honey, bourbon, soy sauce, minced garlic, grated ginger, red pepper flakes, salt, and pepper. Set aside half of the marinade for later use.
  2. Add the shrimp to the remaining marinade and let it marinate for 15-30 minutes in the refrigerator.
  3. Heat olive oil in a large skillet over medium-high heat.
  4. Remove shrimp from the marinade and add to the skillet in a single layer. Cook for 2-3 minutes on one side until they turn pink and opaque.
  5. Flip the shrimp and pour the reserved marinade over them. Cook for an additional 2-3 minutes until the sauce thickens slightly.
  6. Remove from heat and garnish with sliced green onions before serving.

Notes

  • For a spicier kick, increase the amount of red pepper flakes or add a dash of hot sauce.
  • Serve the shrimp over rice or quinoa to soak up the delicious sauce for a complete meal.

Sweet and Savory Honey Garlic Chicken is Irresistible!

Introduction to Sweet and Savory Honey Garlic Chicken

There’s something magical about the aroma of chicken simmering in a sweet and savory honey garlic sauce. It takes me back to family dinners where laughter filled the air, and the table was a canvas of deliciousness. This Sweet and Savory Honey Garlic Chicken is not just a meal; it’s a quick solution for those busy weeknights or a dish that will impress your loved ones during gatherings. With tender chicken thighs coated in a rich, flavorful sauce, it’s a recipe that brings comfort and joy to any table. Let’s dive into this culinary adventure together!

Why You’ll Love This Sweet and Savory Honey Garlic Chicken

This dish is a game-changer for anyone juggling a busy schedule. It’s incredibly easy to prepare, requiring just a few minutes of hands-on time. The slow cooker does the heavy lifting, transforming simple ingredients into a mouthwatering meal. Plus, the balance of sweet and savory flavors will have your taste buds dancing. It’s comfort food at its finest, perfect for impressing family or friends without breaking a sweat!

Ingredients for Sweet and Savory Honey Garlic Chicken

Gathering the right ingredients is the first step to creating this delightful dish. Here’s what you’ll need:

  • Boneless, skinless chicken thighs: These are juicy and tender, perfect for soaking up the sauce.
  • Honey: Adds that sweet touch, balancing the savory elements beautifully.
  • Soy sauce: A staple in many kitchens, it brings depth and umami to the dish.
  • Ketchup: This might surprise you, but it adds a tangy sweetness that complements the honey.
  • Garlic: Freshly minced garlic infuses the dish with a robust flavor that’s hard to resist.
  • Rice vinegar: A splash of acidity to brighten the sauce and enhance the flavors.
  • Ground ginger: This spice adds warmth and a hint of earthiness to the mix.
  • Black pepper: Just a pinch for a subtle kick that rounds out the flavors.
  • Cornstarch: Used to thicken the sauce, giving it that luscious texture.
  • Water: Helps create the cornstarch slurry for thickening.
  • Green onions: Sliced for garnish, they add a fresh crunch and a pop of color.
  • Sesame seeds: Optional, but they bring a nutty flavor and a nice visual touch.

For those looking to spice things up, consider adding red pepper flakes for a kick. You can also serve this dish over steamed rice or quinoa for a complete meal. Exact measurements for each ingredient can be found at the bottom of the article, ready for printing!

How to Make Sweet and Savory Honey Garlic Chicken

Creating this Sweet and Savory Honey Garlic Chicken is a breeze. Follow these simple steps, and you’ll have a delicious meal ready to impress. Let’s get cooking!

Step 1: Prepare the Sauce

Start by whisking together the honey, soy sauce, ketchup, minced garlic, rice vinegar, ground ginger, and black pepper in a large bowl. This sauce is the heart of the dish, so make sure it’s well combined. The sweet and savory notes will blend beautifully, creating a flavor explosion!

Step 2: Coat the Chicken

Next, place the boneless, skinless chicken thighs in your slow cooker. Pour the prepared honey garlic sauce over the chicken, ensuring each piece is generously coated. This step is crucial; the sauce will infuse the chicken with flavor as it cooks.

Step 3: Slow Cook the Chicken

Cover the slow cooker and set it to low for 6-7 hours or high for 3-4 hours. The longer, the better! The chicken will become tender and soak up all that delicious sauce. If you’re short on time, the high setting works just fine, but I recommend low for the best results.

Step 4: Thicken the Sauce

Once the chicken is cooked, remove it from the slow cooker and set it aside. In a small bowl, mix cornstarch with water to create a slurry. Pour this into the sauce in the slow cooker and stir well. Turn the slow cooker to high and let the sauce thicken for about 10-15 minutes. Stir occasionally to prevent sticking. This step gives the sauce that luscious, velvety texture!

Step 5: Shred and Serve

Using two forks, shred the chicken into bite-sized pieces and return it to the slow cooker. Mix it well with the thickened sauce. Serve hot, garnished with sliced green onions and sesame seeds if desired. This dish is best enjoyed over steamed rice or quinoa, soaking up all that sweet and savory goodness!

Tips for Success

  • For maximum flavor, marinate the chicken in the sauce for a few hours before cooking.
  • Don’t skip the cornstarch slurry; it’s key for that thick, luscious sauce.
  • Adjust the sweetness by adding more or less honey to suit your taste.
  • Use fresh garlic for the best flavor; it makes a noticeable difference.
  • Experiment with different garnishes like cilantro or crushed peanuts for a twist!

Equipment Needed

  • Slow Cooker: Essential for this recipe; a Dutch oven can work too if you prefer stovetop cooking.
  • Whisk: For mixing the sauce; a fork can do the job in a pinch.
  • Measuring Cups: To ensure accurate ingredient amounts; use any standard measuring tools you have.
  • Cutting Board: For chopping garlic and green onions; a plate can suffice in a hurry.

Variations

  • Spicy Honey Garlic Chicken: Add 1 teaspoon of red pepper flakes to the sauce for a fiery kick.
  • Honey Garlic Tofu: Substitute chicken with firm tofu for a delicious vegetarian option.
  • Low-Carb Version: Use cauliflower rice instead of regular rice to keep it low-carb.
  • Herb-Infused: Add fresh herbs like thyme or rosemary to the sauce for an aromatic twist.
  • Honey Garlic Shrimp: Swap chicken for shrimp, adjusting the cooking time to just a few hours on low.

Serving Suggestions

  • Steamed Rice: Serve the chicken over fluffy steamed rice to soak up the delicious sauce.
  • Quinoa: For a healthier option, pair it with quinoa for added protein.
  • Fresh Salad: A crisp green salad balances the richness of the dish.
  • Cold Beverages: Enjoy with iced tea or a light beer to complement the flavors.
  • Presentation: Garnish with extra green onions and sesame seeds for a pop of color!

FAQs about Sweet and Savory Honey Garlic Chicken

Can I use chicken breasts instead of thighs?

Absolutely! While I love the tenderness of chicken thighs, boneless, skinless chicken breasts can work just as well. Just keep an eye on the cooking time, as breasts may cook faster.

How can I store leftovers?

Leftovers can be stored in an airtight container in the fridge for up to 3 days. Reheat gently in the microwave or on the stovetop, adding a splash of water if needed to keep it moist.

Can I freeze Sweet and Savory Honey Garlic Chicken?

Yes! This dish freezes beautifully. Just let it cool completely, then transfer it to a freezer-safe container. It can be frozen for up to 3 months. Thaw in the fridge overnight before reheating.

What can I serve with this dish?

This chicken pairs wonderfully with steamed rice, quinoa, or a fresh salad. You can also serve it with roasted vegetables for a complete meal.

Is this recipe gluten-free?

Yes, as long as you use gluten-free soy sauce, this Sweet and Savory Honey Garlic Chicken is gluten-free. Always check labels to ensure all ingredients meet your dietary needs.

Final Thoughts

Cooking this Sweet and Savory Honey Garlic Chicken is more than just preparing a meal; it’s about creating memories. The aroma wafting through your kitchen will draw everyone in, sparking conversations and laughter. Each bite is a delightful balance of sweet and savory, making it a dish that pleases even the pickiest eaters. Whether it’s a weeknight dinner or a gathering with friends, this recipe brings warmth and joy to the table. I hope you enjoy making it as much as I do, and that it becomes a cherished favorite in your home, just like it is in mine!

Paul

Sweet and Savory Honey Garlic Chicken is Irresistible!

Sweet and Savory Honey Garlic Chicken is a delicious dish featuring tender chicken thighs coated in a flavorful honey garlic sauce, perfect for any meal.
Prep Time 15 minutes
Course: Main Dish
Cuisine: American
Calories: 320

Ingredients
  

  • 2 pounds boneless skinless chicken thighs
  • 1/2 cup honey
  • 1/4 cup soy sauce
  • 1/4 cup ketchup
  • 4 cloves garlic minced
  • 1 tablespoon rice vinegar
  • 1 teaspoon ground ginger
  • 1/2 teaspoon black pepper
  • 1 tablespoon cornstarch
  • 2 tablespoons water
  • 2 green onions sliced (for garnish)
  • Sesame seeds for garnish, optional

Method
 

  1. In a large bowl, whisk together honey, soy sauce, ketchup, minced garlic, rice vinegar, ground ginger, and black pepper until well combined.
  2. Place the chicken thighs in the slow cooker and pour the honey garlic sauce over them, ensuring the chicken is well coated.
  3. Cover and cook on low for 6-7 hours or on high for 3-4 hours, until the chicken is tender and fully cooked.
  4. Once cooked, remove the chicken from the slow cooker and set aside.
  5. In a small bowl, mix cornstarch and water to create a slurry. Pour this into the sauce in the slow cooker and stir well.
  6. Turn the slow cooker to high and let the sauce thicken for about 10-15 minutes, stirring occasionally.
  7. Shred the chicken using two forks and return it to the slow cooker, mixing it with the thickened sauce.
  8. Serve hot, garnished with sliced green onions and sesame seeds if desired.

Notes

  • For a spicier kick, add 1 teaspoon of red pepper flakes to the sauce.
  • Serve the chicken over steamed rice or quinoa for a complete meal.

Korean BBQ Meatballs: A Delicious and Easy Recipe!

Introduction to Korean BBQ Meatballs

There’s something magical about the aroma of Korean BBQ wafting through the kitchen. It takes me back to family gatherings where laughter mingled with the sizzle of meat on the grill. Now, I can bring that same joy home with these Korean BBQ Meatballs. This recipe is a quick solution for busy weeknights or a delightful dish to impress your loved ones. With just a handful of ingredients and minimal prep time, you’ll have a flavorful meal that’s sure to please. Let’s dive into this easy and delicious recipe that will elevate your dinner game!

Why You’ll Love This Korean BBQ Meatballs

These Korean BBQ Meatballs are a game-changer for any home cook. They come together in just 30 minutes, making them perfect for those hectic evenings. The combination of savory flavors and a hint of sweetness creates a taste explosion that will have everyone asking for seconds. Plus, they’re versatile enough to serve as an appetizer or a main dish, ensuring they fit seamlessly into any meal plan. You’ll love how easy they are to whip up!

Ingredients for Korean BBQ Meatballs

Gathering the right ingredients is the first step to creating these mouthwatering Korean BBQ Meatballs. Here’s what you’ll need:

  • Ground beef: The star of the show! Choose a good quality ground beef for a juicy texture.
  • Breadcrumbs: These help bind the meatballs together while adding a nice texture.
  • Green onions: Finely chopped, they add a fresh, mild onion flavor that brightens the dish.
  • Soy sauce: This brings a savory umami kick, essential for that authentic Korean flavor.
  • Brown sugar: A touch of sweetness balances the saltiness of the soy sauce, creating depth.
  • Sesame oil: Just a tablespoon adds a nutty aroma that’s characteristic of Korean cuisine.
  • Minced garlic: Fresh garlic infuses the meatballs with a robust flavor that’s hard to resist.
  • Grated ginger: This adds a warm, spicy note that complements the other flavors beautifully.
  • Black pepper: A simple seasoning that enhances the overall taste without overpowering it.
  • Red pepper flakes (optional): For those who like a little heat, these can spice things up!
  • Sesame seeds (for garnish): These add a lovely crunch and a touch of elegance when serving.

For those looking to mix things up, consider substituting ground turkey or chicken for a lighter option. You can also sneak in finely chopped veggies like bell peppers or carrots for added nutrition and flavor. Exact measurements for these ingredients can be found at the bottom of the article, ready for printing!

How to Make Korean BBQ Meatballs

Creating these Korean BBQ Meatballs is a straightforward process that anyone can master. Follow these simple steps, and you’ll have a delicious dish ready in no time!

Step 1: Preheat the Oven

Start by preheating your oven to 400°F. This step is crucial for even cooking. A hot oven ensures that the meatballs brown nicely on the outside while remaining juicy on the inside. Trust me, you want that perfect texture!

Step 2: Mix the Ingredients

In a large mixing bowl, combine all your ingredients. Gently mix the ground beef, breadcrumbs, green onions, soy sauce, brown sugar, sesame oil, garlic, ginger, black pepper, and red pepper flakes. Be careful not to overmix; just combine until everything is evenly distributed. Overmixing can lead to tough meatballs, and nobody wants that!

Step 3: Shape the Meatballs

Now it’s time to shape your meatballs. Grab a small amount of the mixture and roll it into a ball about 1 inch in diameter. This size is perfect for even cooking and easy eating. Use wet hands to prevent sticking, and place them on a baking sheet lined with parchment paper. This makes cleanup a breeze!

Step 4: Bake the Meatballs

Pop the baking sheet into your preheated oven and bake for 15-20 minutes. Keep an eye on them! You’ll know they’re done when they’re browned on the outside and cooked through. A meat thermometer should read 160°F in the center. This ensures they’re safe to eat and perfectly juicy.

Step 5: Prepare the Dipping Sauce

While the meatballs are baking, whip up a quick dipping sauce. Mix some additional soy sauce with a splash of sesame oil and a sprinkle of sesame seeds. For a twist, add a dash of chili sauce or honey for sweetness. This sauce elevates the flavor and adds a delightful touch!

Step 6: Serve and Garnish

Once your meatballs are cooked, let them cool for a few minutes. Serve them warm, garnished with sesame seeds and extra green onions for a pop of color. Presentation matters! Arrange them on a platter, and watch your guests’ eyes light up. Enjoy the compliments!

Tips for Success

  • Use a cookie scoop for uniform meatballs; they’ll cook evenly.
  • Chill the meat mixture for 15 minutes before shaping to make it easier to handle.
  • Experiment with different ground meats for unique flavors.
  • Don’t skip the resting time after baking; it helps the meatballs firm up.
  • Double the recipe and freeze extras for quick meals later!

Equipment Needed

  • Baking sheet: A standard sheet works, but a rimmed one prevents spills.
  • Parchment paper: Use it for easy cleanup; aluminum foil is a good alternative.
  • Mixing bowl: Any large bowl will do; a stand mixer can save time.
  • Cookie scoop: For uniform meatballs; a tablespoon works in a pinch.

Variations

  • Spicy Korean BBQ Meatballs: Add more red pepper flakes or a splash of gochujang for an extra kick.
  • Vegetarian Option: Substitute ground beef with a mix of lentils and mushrooms for a hearty, plant-based version.
  • Asian Fusion: Incorporate chopped water chestnuts and cilantro for a fresh twist.
  • Gluten-Free: Use gluten-free breadcrumbs and tamari instead of soy sauce to keep it celiac-friendly.
  • Sweet and Sour: Mix in pineapple chunks or serve with a sweet and sour sauce for a tropical flair.

Serving Suggestions

  • Steamed rice: Serve the meatballs over fluffy white or brown rice to soak up the delicious sauce.
  • Pickled vegetables: Add a side of tangy pickled cucumbers or radishes for a refreshing contrast.
  • Cold beer: Pair with a light lager or a crisp IPA to complement the flavors.
  • Garnish: Top with extra green onions and sesame seeds for an appealing presentation.

FAQs about Korean BBQ Meatballs

Can I use ground turkey instead of beef for Korean BBQ Meatballs?

Absolutely! Ground turkey is a great alternative for a lighter option. Just keep in mind that it may require a bit more seasoning to achieve that rich flavor.

How do I know when the meatballs are fully cooked?

The best way to check is by using a meat thermometer. The internal temperature should reach 160°F. If you don’t have one, cut a meatball in half; it should be no longer pink inside.

Can I make Korean BBQ Meatballs ahead of time?

Yes! You can prepare the meatballs and refrigerate them before baking. They can also be frozen for later use. Just thaw and bake when you’re ready to enjoy!

What can I serve with Korean BBQ Meatballs?

These meatballs pair wonderfully with steamed rice, pickled vegetables, or even in a lettuce wrap for a fun twist. They’re versatile enough to fit any meal!

Are Korean BBQ Meatballs gluten-free?

To make them gluten-free, simply use gluten-free breadcrumbs and tamari instead of soy sauce. This way, everyone can enjoy this delicious dish!

Final Thoughts

Cooking these Korean BBQ Meatballs is more than just preparing a meal; it’s about creating memories. The delightful blend of flavors and the aroma that fills your kitchen will transport you to a bustling Korean BBQ restaurant. Whether you’re serving them at a family dinner or enjoying them as a late-night snack, these meatballs bring joy to every occasion. Plus, the ease of preparation means you can focus on what truly matters—sharing good food and laughter with loved ones. So roll up your sleeves, get cooking, and savor the deliciousness that awaits!

Paul

Korean BBQ Meatballs: A Delicious and Easy Recipe!

Korean BBQ Meatballs are a delicious and easy recipe that combines ground beef with flavorful ingredients for a tasty dish.
Prep Time 10 minutes
Cook Time 20 minutes
Total Time 30 minutes
Course: Main Dish
Cuisine: Korean
Calories: 280

Ingredients
  

  • 1 pound ground beef
  • 1/2 cup breadcrumbs
  • 1/4 cup green onions finely chopped
  • 1/4 cup soy sauce
  • 2 tablespoons brown sugar
  • 1 tablespoon sesame oil
  • 1 tablespoon minced garlic
  • 1 teaspoon grated ginger
  • 1/2 teaspoon black pepper
  • 1/4 teaspoon red pepper flakes optional
  • 1 tablespoon sesame seeds for garnish

Method
 

  1. Preheat your oven to 400°F.
  2. In a large mixing bowl, combine the ground beef, breadcrumbs, green onions, soy sauce, brown sugar, sesame oil, garlic, ginger, black pepper, and red pepper flakes (if using). Mix until just combined; do not overmix.
  3. Shape the mixture into meatballs, about 1 inch in diameter, and place them on a baking sheet lined with parchment paper.
  4. Bake for 15-20 minutes or until the meatballs are cooked through and browned on the outside.
  5. While the meatballs are baking, prepare a dipping sauce by mixing additional soy sauce with a splash of sesame oil and a sprinkle of sesame seeds.
  6. Once cooked, remove the meatballs from the oven and let them cool for a few minutes. Serve warm, garnished with sesame seeds and additional green onions if desired.

Notes

  • For a healthier option, substitute ground turkey or chicken for the beef.
  • You can also add finely chopped vegetables like bell peppers or carrots to the meat mixture for added nutrition and flavor.

Shrimp and Broccoli Stir-Fry: A Quick, Healthy Recipe!

Introduction to Shrimp and Broccoli Stir-Fry

After a long day, the last thing I want is to spend hours in the kitchen. That’s where my go-to Shrimp and Broccoli Stir-Fry comes in. It’s quick, healthy, and bursting with flavor, making it the perfect solution for busy weeknights. I remember my first attempt at stir-frying; I was amazed at how simple it was to whip up a delicious meal in under 30 minutes. This dish not only satisfies my cravings but also impresses my family. Trust me, once you try it, you’ll want to add it to your regular rotation!

Why You’ll Love This Shrimp and Broccoli Stir-Fry

This Shrimp and Broccoli Stir-Fry is a culinary lifesaver. It’s not just quick to make; it’s also packed with nutrients and flavor. In about 25 minutes, you can serve a dish that feels gourmet but requires minimal effort. The vibrant colors of the broccoli and the succulent shrimp make it visually appealing, too. Plus, it’s a fantastic way to sneak in some veggies without anyone noticing!

Ingredients for Shrimp and Broccoli Stir-Fry

Gathering the right ingredients is key to making a fantastic Shrimp and Broccoli Stir-Fry. Here’s what you’ll need:

  • Large shrimp: Fresh or frozen, peeled and deveined shrimp are the stars of this dish. They cook quickly and add a delightful sweetness.
  • Broccoli florets: These vibrant green gems not only provide crunch but are also packed with vitamins. Fresh is best, but frozen works in a pinch.
  • Vegetable oil: A neutral oil like canola or grapeseed is perfect for high-heat cooking. It helps achieve that beautiful stir-fry sear.
  • Garlic: Minced garlic adds a punch of flavor. It’s aromatic and pairs perfectly with shrimp.
  • Fresh ginger: This zesty root brings warmth and depth to the dish. If you don’t have fresh, ground ginger can be a substitute.
  • Soy sauce: A staple in Asian cuisine, soy sauce adds saltiness and umami. Low-sodium options are available for a healthier choice.
  • Oyster sauce: This thick, savory sauce enhances the overall flavor. If you’re vegetarian, look for mushroom-based alternatives.
  • Cornstarch: Used to thicken the sauce, it gives the dish a glossy finish. You can also use arrowroot powder as a substitute.
  • Water: Just a splash to help mix the sauce ingredients smoothly.
  • Sesame oil: A drizzle at the end adds a nutty aroma and flavor. It’s a little goes a long way!
  • Salt and pepper: Essential for seasoning, adjust to your taste.
  • Cooked rice or noodles: Serve your stir-fry over rice or noodles for a complete meal. Brown rice or whole grain noodles are great healthier options.

For exact measurements, check the bottom of the article where you can find everything listed for easy printing!

How to Make Shrimp and Broccoli Stir-Fry

Creating a delicious Shrimp and Broccoli Stir-Fry is all about timing and preparation. Having everything ready before you start cooking makes the process smooth and enjoyable. Let’s dive into the steps that will lead you to a mouthwatering meal!

Step 1: Prepare the Ingredients

Before you even think about turning on the heat, take a moment to prep your ingredients. This means peeling and deveining the shrimp, cutting the broccoli into florets, and mincing the garlic and ginger. Having everything ready to go not only saves time but also ensures that you won’t be scrambling around the kitchen while your stir-fry cooks. Trust me, it makes a world of difference!

Step 2: Sauté Garlic and Ginger

Now, let’s get cooking! Heat up your vegetable oil in a large skillet or wok over medium-high heat. Once the oil is shimmering, toss in the minced garlic and ginger. Sauté them for about 30 seconds until they become fragrant. This step is crucial; it’s where the magic begins, filling your kitchen with an irresistible aroma that sets the stage for the rest of the dish.

Step 3: Cook the Shrimp

Next, add the shrimp to the skillet. Cook them for about 2-3 minutes, stirring occasionally, until they turn pink and opaque. This is the moment when they transform from raw to perfectly cooked. Once they’re done, remove the shrimp from the skillet and set them aside. Don’t worry; they’ll be back in the spotlight soon!

Step 4: Stir-Fry the Broccoli

In the same skillet, it’s time to add the broccoli florets. Stir-fry them for about 3-4 minutes until they’re bright green and tender-crisp. You want them to retain a bit of crunch for that satisfying texture. If you like your broccoli a little softer, feel free to cook it a minute longer. Just keep an eye on it!

Step 5: Make the Sauce

While the broccoli is cooking, grab a small bowl and mix together the soy sauce, oyster sauce, cornstarch, and water until smooth. This sauce is the heart of your Shrimp and Broccoli Stir-Fry. Once the broccoli is ready, pour the sauce over it and stir well to coat. The cornstarch will help thicken the sauce, giving it that glossy finish we all love.

Step 6: Combine and Serve

Finally, return the cooked shrimp to the skillet. Add a drizzle of sesame oil for that nutty flavor, and stir everything together. Cook for an additional 2 minutes until the sauce thickens slightly. Season with salt and pepper to taste. Serve your stir-fry hot over cooked rice or noodles, and enjoy the delightful blend of flavors!

Tips for Success

  • Prep all ingredients before cooking to streamline the process.
  • Use high heat for a quick stir-fry; it helps retain the veggies’ crunch.
  • Don’t overcrowd the skillet; cook in batches if necessary.
  • Adjust the sauce to your taste; add more soy sauce for saltiness or oyster sauce for richness.
  • Experiment with different proteins like chicken or tofu for variety.

Equipment Needed

  • Large skillet or wok: Essential for stir-frying. A non-stick skillet works well too.
  • Spatula or wooden spoon: Perfect for tossing ingredients without scratching your cookware.
  • Cutting board and knife: For prepping your shrimp and veggies.
  • Measuring cups and spoons: Handy for accurate ingredient measurements.

Variations

  • Spicy Shrimp and Broccoli: Add red pepper flakes or sliced jalapeños for a kick of heat.
  • Vegetarian Option: Substitute shrimp with tofu or tempeh for a plant-based twist.
  • Different Veggies: Mix in bell peppers, snap peas, or carrots for added color and nutrition.
  • Coconut Curry Style: Incorporate coconut milk and curry powder for a creamy, exotic flavor.
  • Low-Carb Version: Serve over cauliflower rice instead of traditional rice or noodles.

Serving Suggestions

  • Pair your Shrimp and Broccoli Stir-Fry with steamed jasmine rice or whole grain noodles for a hearty meal.
  • A side of crispy spring rolls adds a delightful crunch.
  • For drinks, consider a chilled Asian lager or a refreshing iced green tea.
  • Garnish with sesame seeds and sliced green onions for a pop of color.

FAQs about Shrimp and Broccoli Stir-Fry

Can I use frozen shrimp for this recipe?

Absolutely! Frozen shrimp work just fine. Just make sure to thaw them completely before cooking. This will help them cook evenly and maintain that juicy texture.

What can I substitute for broccoli?

If broccoli isn’t your thing, feel free to swap it out for other veggies like bell peppers, snap peas, or even asparagus. Just keep in mind that cooking times may vary slightly.

How can I make this dish gluten-free?

To make a gluten-free Shrimp and Broccoli Stir-Fry, simply use tamari instead of soy sauce. It has a similar flavor but is made without wheat.

Can I prepare this stir-fry in advance?

While stir-fries are best enjoyed fresh, you can prep the ingredients ahead of time. Chop the veggies and marinate the shrimp, then store them in the fridge until you’re ready to cook.

What’s the best way to store leftovers?

Store any leftovers in an airtight container in the fridge for up to 2 days. Reheat in a skillet over medium heat for the best results, adding a splash of water to keep it moist.

Final Thoughts

Cooking this Shrimp and Broccoli Stir-Fry is more than just preparing a meal; it’s about creating a moment of joy in your kitchen. The vibrant colors and enticing aromas fill the air, making it hard not to smile. Each bite is a delightful blend of flavors and textures, reminding me of the simple pleasures in life. Whether you’re whipping it up for a family dinner or a quick weeknight meal, this dish brings everyone together. I hope it becomes a staple in your home, just as it has in mine, bringing warmth and satisfaction to your table.

Paul

Shrimp and Broccoli Stir-Fry: A Quick, Healthy Recipe!

A quick and healthy shrimp and broccoli stir-fry recipe that is perfect for a weeknight dinner.
Prep Time 10 minutes
Cook Time 15 minutes
Total Time 25 minutes
Servings: 4 servings
Course: Main Dish
Cuisine: Asian
Calories: 220

Ingredients
  

  • 1 pound large shrimp peeled and deveined
  • 4 cups broccoli florets
  • 2 tablespoons vegetable oil
  • 3 cloves garlic minced
  • 1 tablespoon fresh ginger minced
  • 1/4 cup soy sauce
  • 2 tablespoons oyster sauce
  • 1 tablespoon cornstarch
  • 1/4 cup water
  • 1 teaspoon sesame oil
  • Salt and pepper to taste
  • Cooked rice or noodles for serving

Method
 

  1. Heat vegetable oil in a large skillet or wok over medium-high heat. Add minced garlic and ginger, sauté for about 30 seconds until fragrant.
  2. Add the shrimp to the skillet and cook for 2-3 minutes until they turn pink and opaque. Remove shrimp from the skillet and set aside.
  3. In the same skillet, add broccoli florets and stir-fry for about 3-4 minutes until they are bright green and tender-crisp.
  4. In a small bowl, mix soy sauce, oyster sauce, cornstarch, and water until smooth. Pour the sauce over the broccoli and stir well.
  5. Return the shrimp to the skillet, add sesame oil, and stir everything together. Cook for an additional 2 minutes until the sauce thickens slightly. Season with salt and pepper to taste.
  6. Serve hot over cooked rice or noodles.

Notes

  • For a spicier kick, add red pepper flakes or sliced jalapeños during cooking.
  • You can also substitute shrimp with chicken or tofu for a different protein option.

Black Raspberry Cake: A Delightful Dessert Recipe!

Introduction to Black Raspberry Cake

There’s something magical about a homemade cake, especially when it’s a Black Raspberry Cake. I remember the first time I tasted this delightful dessert at a family gathering. The burst of sweet-tart black raspberries paired with a moist, fluffy cake was unforgettable. This recipe is perfect for those busy days when you want to whip up something special without spending hours in the kitchen. Whether you’re looking to impress your loved ones or simply treat yourself, this cake is a delicious solution that brings joy to any occasion.

Why You’ll Love This Black Raspberry Cake

This Black Raspberry Cake is a true gem in the world of desserts. It’s incredibly easy to make, requiring just a handful of ingredients and minimal prep time. The flavor? Absolutely divine! The sweet-tart black raspberries create a delightful contrast with the moist cake, making every bite a burst of joy. Plus, it’s versatile enough for any occasion, whether it’s a casual family dinner or a festive celebration.

Ingredients for Black Raspberry Cake

Gathering the right ingredients is the first step to creating a mouthwatering Black Raspberry Cake. Here’s what you’ll need:

  • All-purpose flour: The backbone of your cake, providing structure and a light texture.
  • Granulated sugar: Sweetens the cake and helps create that lovely golden crust.
  • Baking powder: This leavening agent gives the cake its rise, making it fluffy and light.
  • Baking soda: Works alongside baking powder to ensure a perfect rise and texture.
  • Salt: Enhances the flavors, balancing the sweetness of the cake.
  • Unsalted butter: Adds richness and moisture, making the cake tender and flavorful.
  • Eggs: Provide structure and stability, while also adding moisture and richness.
  • Vanilla extract: A classic flavor enhancer that brings warmth and depth to the cake.
  • Buttermilk: Contributes to the cake’s moistness and adds a subtle tang that complements the black raspberries.
  • Black raspberries: The star of the show! Their sweet-tart flavor and vibrant color make this cake truly special.

For those looking to experiment, consider adding a teaspoon of almond extract for a nutty twist. If black raspberries are hard to find, blueberries or regular raspberries can be great substitutes. You’ll find the exact measurements for these ingredients at the bottom of the article, ready for printing!

How to Make Black Raspberry Cake

Now that you have your ingredients ready, let’s dive into the fun part: making the Black Raspberry Cake! Follow these simple steps, and you’ll have a delightful dessert in no time.

Step 1: Preheat and Prepare

Start by preheating your oven to 350°F (175°C). This ensures your cake bakes evenly. While the oven warms up, grab a 9×13-inch baking pan. Grease it with butter or cooking spray, then dust it with flour. This will help your cake slide out easily once it’s baked.

Step 2: Mix Dry Ingredients

In a large mixing bowl, whisk together the all-purpose flour, granulated sugar, baking powder, baking soda, and salt. This step is crucial! It ensures that the leavening agents are evenly distributed, giving your cake that perfect rise. The mixture should look light and fluffy.

Step 3: Combine Wet Ingredients

In a separate bowl, mix the softened unsalted butter with the dry ingredients. Use a mixer on medium speed until the mixture resembles coarse crumbs. Next, beat the eggs in another bowl, then add the vanilla extract and buttermilk. Mix until smooth. This combination adds moisture and flavor to your cake.

Step 4: Combine Mixtures

Now, it’s time to bring it all together! Gradually add the wet mixture to the dry ingredients. Stir gently until just combined—overmixing can lead to a dense cake. Finally, fold in the black raspberries carefully. You want to keep them whole for those delightful bursts of flavor!

Step 5: Bake the Cake

Pour the batter into your prepared baking pan, spreading it evenly. Pop it into the preheated oven and bake for 30-35 minutes. To check for doneness, insert a toothpick into the center. If it comes out clean, your cake is ready!

Step 6: Cool and Serve

Once baked, let the cake cool in the pan for about 10 minutes. This helps it set. Then, transfer it to a wire rack to cool completely. For a finishing touch, consider dusting it with powdered sugar or drizzling a simple glaze made from powdered sugar and milk. Your Black Raspberry Cake is now ready to impress!

Tips for Success

  • Use room temperature ingredients for better mixing and a fluffier cake.
  • Don’t overmix the batter; it can lead to a tough texture.
  • Gently fold in the black raspberries to keep them intact.
  • Check for doneness a few minutes early to avoid overbaking.
  • Let the cake cool completely before serving for the best flavor.

Equipment Needed

  • Mixing bowls: A set of various sizes is ideal; you can use any large bowl if needed.
  • Electric mixer: A hand mixer works great, but a whisk can do the job too.
  • Baking pan: A 9×13-inch pan is perfect; any similar-sized pan will suffice.
  • Measuring cups and spoons: Essential for accuracy; you can use a kitchen scale as an alternative.
  • Wire rack: For cooling; a plate can work in a pinch.

Variations

  • Gluten-Free Option: Substitute all-purpose flour with a gluten-free flour blend for a delicious gluten-free Black Raspberry Cake.
  • Vegan Twist: Replace eggs with flaxseed meal mixed with water and use plant-based butter and non-dairy milk for a vegan-friendly version.
  • Chocolate Lovers: Add cocoa powder to the dry ingredients for a chocolatey version that pairs beautifully with black raspberries.
  • Nutty Flavor: Incorporate chopped walnuts or pecans into the batter for added crunch and flavor.
  • Spiced Up: Add a teaspoon of cinnamon or nutmeg to the dry ingredients for a warm, spiced flavor profile.

Serving Suggestions

  • Pair your Black Raspberry Cake with a scoop of vanilla ice cream for a delightful contrast.
  • Serve with a dollop of whipped cream and fresh black raspberries on top for an elegant touch.
  • A cup of coffee or tea complements the cake beautifully.
  • For a festive presentation, dust with powdered sugar before serving.

FAQs about Black Raspberry Cake

Can I use frozen black raspberries for this cake?

Absolutely! Frozen black raspberries work just as well as fresh ones. Just make sure to gently fold them into the batter while still frozen to prevent them from breaking apart too much.

How should I store leftover Black Raspberry Cake?

Store any leftover cake in an airtight container at room temperature for up to three days. If you want to keep it longer, refrigerate it for up to a week. Just remember to let it come to room temperature before serving for the best flavor!

Can I make this cake ahead of time?

Yes! You can bake the Black Raspberry Cake a day in advance. Just cool it completely, wrap it tightly in plastic wrap, and store it at room temperature. It’ll be just as delicious the next day!

What can I substitute for buttermilk?

If you don’t have buttermilk on hand, you can easily make a substitute. Just mix one cup of milk with one tablespoon of vinegar or lemon juice. Let it sit for about five minutes, and you’ll have a perfect buttermilk replacement!

Can I add other fruits to this cake?

Definitely! While black raspberries are the star, you can mix in blueberries, strawberries, or even chopped peaches for a fruity twist. Just keep in mind that the flavor profile will change slightly, but it’ll still be delicious!

Final Thoughts

Creating a Black Raspberry Cake is more than just baking; it’s about crafting memories. The joy of mixing ingredients, the aroma wafting through your kitchen, and the anticipation of that first slice are all part of the experience. Each bite offers a delightful balance of sweetness and tartness, making it a perfect treat for any occasion. Whether you’re celebrating a special moment or simply indulging in a sweet escape, this cake brings happiness to the table. So, roll up your sleeves, embrace the process, and enjoy the delicious rewards of your efforts!

Paul

Black Raspberry Cake: A Delightful Dessert Recipe!

A delightful dessert recipe featuring black raspberries in a moist cake.
Prep Time 15 minutes
Total Time 50 minutes
Servings: 12 servings
Course: Dessert
Cuisine: American
Calories: 220

Ingredients
  

  • 2 cups all-purpose flour
  • 1 ½ cups granulated sugar
  • 1 teaspoon baking powder
  • ½ teaspoon baking soda
  • ½ teaspoon salt
  • ¾ cup unsalted butter softened
  • 3 large eggs
  • 1 teaspoon vanilla extract
  • 1 cup buttermilk
  • 1 ½ cups fresh or frozen black raspberries

Method
 

  1. Preheat your oven to 350°F (175°C). Grease and flour a 9x13-inch baking pan.
  2. In a large mixing bowl, whisk together the flour, sugar, baking powder, baking soda, and salt.
  3. Add the softened butter to the dry ingredients and mix on medium speed until the mixture is crumbly and well combined.
  4. In a separate bowl, beat the eggs and then add the vanilla extract and buttermilk. Mix until smooth.
  5. Gradually add the wet ingredients to the dry mixture, mixing until just combined. Be careful not to overmix.
  6. Gently fold in the black raspberries, being careful not to break them apart too much.
  7. Pour the batter into the prepared baking pan and spread it evenly.
  8. Bake for 30-35 minutes, or until a toothpick inserted in the center comes out clean.
  9. Allow the cake to cool in the pan for about 10 minutes, then transfer it to a wire rack to cool completely.

Notes

  • For a richer flavor, consider adding a teaspoon of almond extract to the batter.
  • You can top the cooled cake with a dusting of powdered sugar or a simple glaze made from powdered sugar and milk for added sweetness.
  • If black raspberries are unavailable, feel free to substitute with blueberries or raspberries for a different twist.

Bruschetta Dip: A Tasty Twist on a Classic Favorite

Introduction to Bruschetta Dip

There’s something magical about gathering around a table with friends and family, sharing stories and laughter over delicious food. That’s where Bruschetta Dip comes in—a creamy twist on the classic Italian appetizer that’s perfect for any occasion. Whether you’re hosting a game night or just looking for a quick solution for a busy day, this dip is a crowd-pleaser. It’s easy to whip up, and the vibrant flavors will impress your loved ones. Trust me, once you serve this dip, it’ll become a staple at your gatherings!

Why You’ll Love This Bruschetta Dip

This Bruschetta Dip is a game-changer for anyone who loves quick and tasty appetizers. It comes together in just 15 minutes, making it perfect for last-minute gatherings or a cozy night in. The creamy texture combined with fresh ingredients creates a flavor explosion that’s hard to resist. Plus, it’s versatile enough to pair with anything from toasted baguette slices to crunchy veggies. You’ll find yourself making it again and again!

Ingredients for Bruschetta Dip

Gathering the right ingredients is the first step to creating this delightful Bruschetta Dip. Each component plays a vital role in building flavor and texture. Here’s what you’ll need:

  • Diced tomatoes: Fresh tomatoes are the star of this dip, bringing a juicy sweetness that balances the creaminess.
  • Red onion: Finely chopped, it adds a sharp bite and a pop of color to the mix.
  • Fresh basil: This aromatic herb infuses the dip with a fragrant, earthy flavor that screams Italian cuisine.
  • Balsamic vinegar: A splash of this tangy vinegar enhances the overall taste, adding depth and brightness.
  • Olive oil: A drizzle of good-quality olive oil enriches the dip, making it silky and smooth.
  • Minced garlic: Just a hint of garlic elevates the flavor profile, giving it that classic Italian kick.
  • Salt and black pepper: Essential seasonings that bring all the flavors together, enhancing every bite.
  • Cream cheese: The creamy base that holds everything together, providing a luscious texture.
  • Shredded mozzarella cheese: This cheese adds a melty, gooey element that makes the dip irresistible.
  • Grated Parmesan cheese: A sprinkle of this cheese adds a nutty flavor and a touch of sophistication.

For those looking to spice things up, consider adding a pinch of red pepper flakes to the tomato mixture. If you want a lighter version, Greek yogurt can be a fantastic substitute for cream cheese. You can find the exact quantities for each ingredient at the bottom of the article, ready for printing!

How to Make Bruschetta Dip

Creating this Bruschetta Dip is as easy as pie, or should I say, as easy as dip? Follow these simple steps, and you’ll have a delicious appetizer ready in no time. Let’s dive in!

Step 1: Prepare the Tomato Mixture

Start by combining the diced tomatoes, finely chopped red onion, and fresh basil in a medium bowl. Add the balsamic vinegar, olive oil, minced garlic, salt, and black pepper. Give it a good mix to ensure everything is well combined. This is where the magic begins! Let the mixture sit for about 15 minutes. This resting time allows the flavors to meld beautifully, creating a vibrant and zesty base for your dip.

Step 2: Mix the Cream Cheese

In a separate bowl, beat the softened cream cheese until it’s smooth and creamy. This step is crucial for achieving that luscious texture. Once it’s nice and fluffy, stir in the shredded mozzarella and grated Parmesan cheeses. Mix until everything is well combined. The creaminess of the cheese will balance perfectly with the fresh tomato mixture.

Step 3: Assemble the Dip

Now it’s time to bring it all together! Spread the creamy cheese mixture evenly in the bottom of a serving dish. Make sure it’s nice and smooth. Then, spoon the tomato mixture over the cream cheese layer, spreading it evenly. The colorful layers will not only taste amazing but also look stunning on your table!

Step 4: Serve and Enjoy

Finally, it’s time to dig in! Serve your Bruschetta Dip immediately with toasted baguette slices, crunchy crackers, or fresh vegetables. Each bite will be a delightful explosion of flavors. Trust me, your guests will be coming back for seconds!

Tips for Success

  • Use ripe, juicy tomatoes for the best flavor.
  • Let the tomato mixture sit longer if you have time; it enhances the taste.
  • Soften the cream cheese at room temperature for easier mixing.
  • Experiment with different herbs like oregano or parsley for a unique twist.
  • Make it ahead of time and refrigerate; just add the tomato layer before serving.

Equipment Needed

  • Medium mixing bowl: A standard bowl works, but a glass bowl lets you see the vibrant colors.
  • Spatula: Use a rubber spatula for easy mixing and spreading.
  • Knife and cutting board: Essential for chopping tomatoes and onions.
  • Serving dish: Any shallow dish will do, but a clear one showcases the layers beautifully.

Variations

  • Spicy Bruschetta Dip: Add a pinch of red pepper flakes or diced jalapeños to the tomato mixture for a fiery kick.
  • Caprese Style: Incorporate diced fresh mozzarella and a drizzle of balsamic glaze for a Caprese-inspired twist.
  • Vegan Option: Substitute cream cheese with a plant-based cream cheese and use nutritional yeast instead of Parmesan for a dairy-free version.
  • Herbed Delight: Mix in fresh herbs like oregano or thyme for an aromatic flavor boost.
  • Roasted Garlic: Swap out raw garlic for roasted garlic for a sweeter, milder taste.

Serving Suggestions

  • Pair with toasted baguette slices for a classic touch.
  • Serve alongside crunchy crackers for added texture.
  • Fresh vegetables like bell peppers and cucumbers make for a healthy option.
  • Consider a chilled white wine or sparkling water to complement the flavors.
  • Garnish with extra basil leaves for a pop of color.

FAQs about Bruschetta Dip

As you dive into making this Bruschetta Dip, you might have a few questions. Here are some common queries that can help you along the way:

Can I make Bruschetta Dip ahead of time?

Absolutely! You can prepare the cream cheese layer in advance and store it in the fridge. Just add the tomato mixture right before serving to keep everything fresh and vibrant.

What can I use instead of cream cheese?

If you’re looking for a lighter option, Greek yogurt works wonderfully as a substitute. It adds a tangy flavor while keeping the dip creamy.

How long does Bruschetta Dip last in the fridge?

This dip is best enjoyed fresh, but it can last up to 3 days in the fridge. Just make sure to store it in an airtight container to maintain its flavor.

Can I add other ingredients to the dip?

Definitely! Feel free to get creative. Chopped olives, sun-dried tomatoes, or even diced avocado can add a unique twist to your Bruschetta Dip.

Is this Bruschetta Dip gluten-free?

The dip itself is gluten-free, but be cautious with what you serve it with. Opt for gluten-free crackers or veggies to keep it safe for those with gluten sensitivities.

Final Thoughts

Creating this Bruschetta Dip is more than just whipping up a tasty appetizer; it’s about bringing people together. The vibrant colors and fresh flavors spark joy and conversation, making every gathering feel special. Whether it’s a casual get-together or a festive celebration, this dip is sure to impress. Plus, the ease of preparation means you can focus on what truly matters—enjoying time with loved ones. So, roll up your sleeves, gather your ingredients, and let the magic of this Bruschetta Dip elevate your next event. Trust me, it’ll be a hit!

Paul

Bruschetta Dip: A Tasty Twist on a Classic Favorite

Bruschetta Dip is a delicious and creamy twist on the classic Italian appetizer, perfect for parties and gatherings.
Prep Time 15 minutes
Total Time 15 minutes
Servings: 8 servings
Course: Appetizer
Cuisine: Italian
Calories: 150

Ingredients
  

  • 1 cup diced tomatoes
  • 1/2 cup finely chopped red onion
  • 1/4 cup fresh basil chopped
  • 1 tablespoon balsamic vinegar
  • 1 tablespoon olive oil
  • 1 teaspoon minced garlic
  • 1/2 teaspoon salt
  • 1/4 teaspoon black pepper
  • 8 ounces cream cheese softened
  • 1/2 cup shredded mozzarella cheese
  • 1/4 cup grated Parmesan cheese

Method
 

  1. In a medium bowl, combine the diced tomatoes, red onion, basil, balsamic vinegar, olive oil, garlic, salt, and black pepper. Mix well and set aside to let the flavors meld for about 15 minutes.
  2. In a separate bowl, beat the softened cream cheese until smooth. Stir in the mozzarella and Parmesan cheeses until well combined.
  3. Spread the cream cheese mixture evenly in the bottom of a serving dish.
  4. Spoon the tomato mixture over the cream cheese layer, spreading it evenly.
  5. Serve immediately with toasted baguette slices, crackers, or fresh vegetables.

Notes

  • For a spicier kick, add a pinch of red pepper flakes to the tomato mixture.
  • Substitute the cream cheese with Greek yogurt for a lighter version.