There I was, standing in the kitchen, hunting for comfort on a chilly evening when inspiration struck—Instant Pot Scalloped Potatoes would be my hero tonight. This dish marries the creamy, cheesy goodness we all crave with the speed and convenience of an Instant Pot. Whether you’re cooking for a Thanksgiving feast or simply craving a cozy side for your weeknight meal, this recipe checks all the boxes. In just minutes, you’ll delight your family with perfectly tender potatoes blanketed in a silky cheese sauce, all topped with a golden, bubbly finish. Plus, it’s a breeze to make, freeing up your time to enjoy those magical moments at the dinner table. Are you ready to transform your meals with this comforting classic?
Why choose Instant Pot Scalloped Potatoes?
Ease of Preparation: With just a few simple steps, you can whip up these creamy scalloped potatoes without the fuss of traditional methods.
Flavor Explosion: Each bite is bursting with a rich cheesy flavor, thanks to the blend of heavy cream and melted cheddar—it’s comfort food at its finest!
Time-Saving Cooking: Utilizing the Instant Pot means this satisfying side dish is ready in a fraction of the time, making it perfect for those busy weeknights or last-minute gatherings.
Versatile Variations: Want to switch it up? Try adding some cooked ham or fresh veggies for a unique twist! You can also explore our Zucchini Potato Fritters for a fun potato variation.
Stunning Presentation: Bake until golden and bubbly for a dish that’s not only delicious but visually appealing, making it a hit at any table.
Perfect Complement: These scalloped potatoes pair wonderfully with roasted meats or can stand alone as a vegetarian delight, similar to our Homemade Chicken Pot for comforting family meals.
Instant Pot Scalloped Potatoes Ingredients
For the Potatoes
• Yukon Potatoes – Provides a creamy texture and buttery taste; cut into 1/4 inch slices for optimal cooking.
• Chicken Broth – Adds flavor while keeping the dish moist; substitute with vegetable broth for a vegetarian option.
• Salt – Essential for enhancing the overall flavor of the dish.
• Ground Black Pepper – Adds a subtle heat that complements the richness.
For the Cheese Sauce
• Heavy Cream – Creates a rich and creamy sauce; avoid low-fat versions to maintain delectable texture.
• Cheddar Cheese – The star ingredient for its sharp and creamy finish; shredding it yourself ensures better melting.
• Garlic Powder – Offers a depth of flavor without the hassle of fresh prep.
• Minced Garlic – Fresh garlic enhances the aroma and flavor, elevating the dish.
For Seasoning
• Dried Oregano – Provides a fragrant, slightly sweet herbal touch that balances the savory cheese.
• Ground Black Pepper – Adds another layer of flavor, perfectly pairing with the creamy components.
You have everything you need for these delicious Instant Pot Scalloped Potatoes! Get ready to impress your family with this quick and easy comfort food.
Step‑by‑Step Instructions for Instant Pot Scalloped Potatoes
Step 1: Prepare Potatoes
Begin by washing and slicing the Yukon potatoes into 1/4 inch thick rounds for optimal cooking. Place the sliced potatoes into your Instant Pot along with the chicken broth, salt, ground black pepper, dried oregano, and garlic powder. Stir gently to combine all the ingredients, ensuring the potatoes are evenly coated.
Step 2: Cook Potatoes
Secure the Instant Pot lid in place and select the high-pressure setting. Cook the potatoes for 1 minute, and when the cooking time is up, allow a natural pressure release for 3 minutes. Afterward, carefully perform a manual pressure release to let out any remaining steam, revealing tender potatoes ready for the next steps.
Step 3: Preheat Oven
While your Instant Pot is working its magic, preheat your oven to 375°F (190°C). Once the potatoes are cooked, carefully remove them from the pot and transfer them to a pie dish. Set them aside while you prepare the creamy cheese sauce that will bring everything together.
Step 4: Make Cheese Sauce
Using the sauté feature on the Instant Pot, add the minced garlic to the remaining liquid inside and sauté for about 30 seconds, allowing the garlic’s aroma to fill the air. Next, pour in the heavy cream and let it simmer on low heat. Gradually stir in the shredded cheddar cheese until it melts smoothly into a rich sauce.
Step 5: Combine and Bake
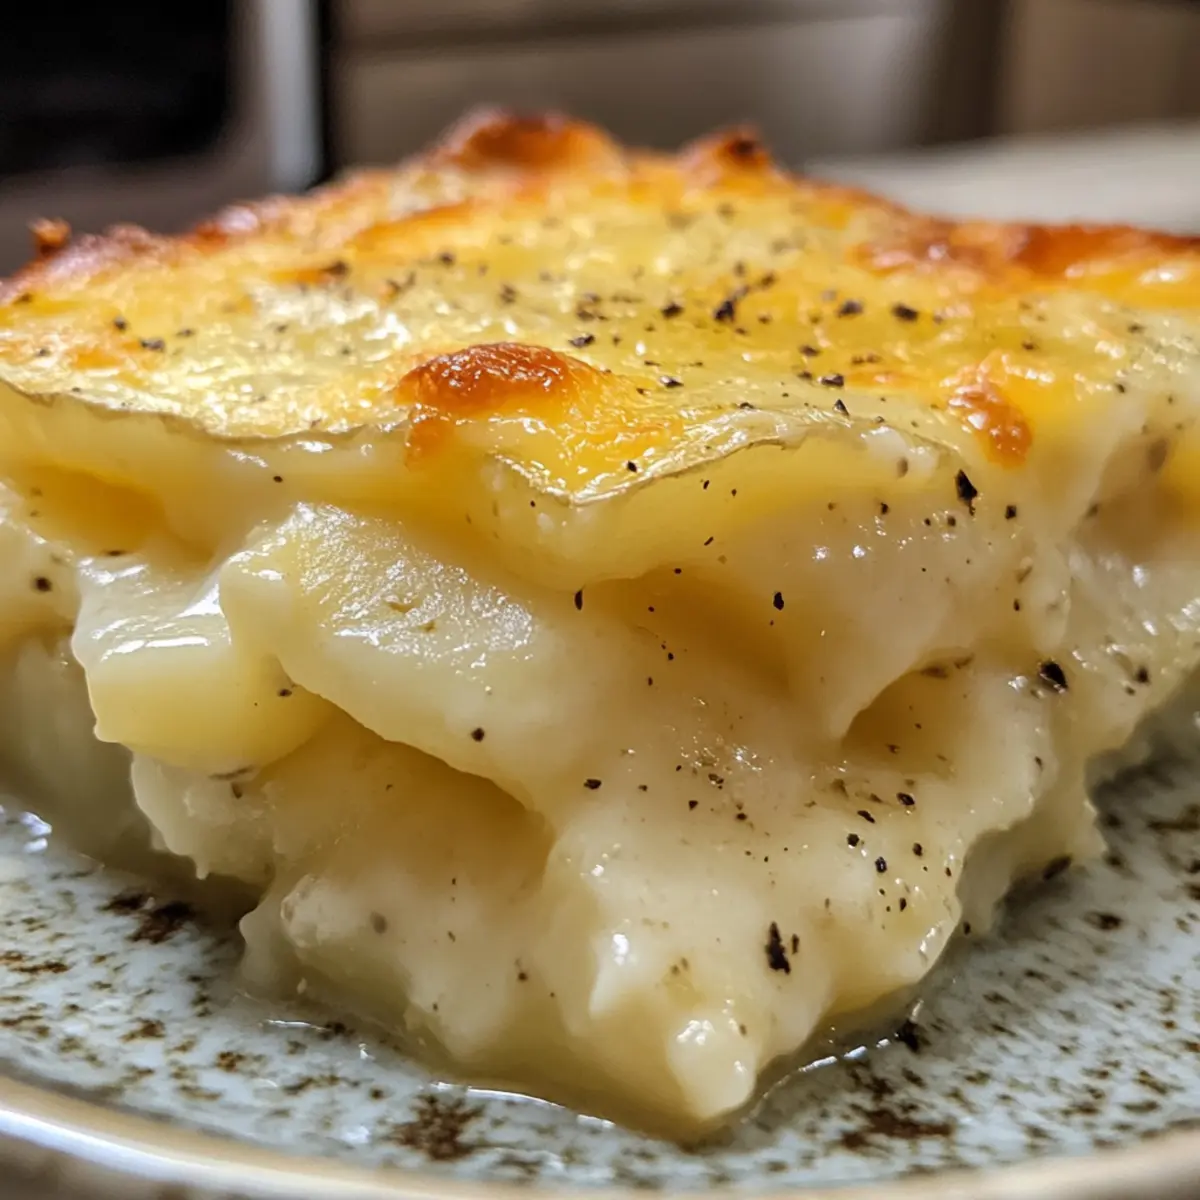
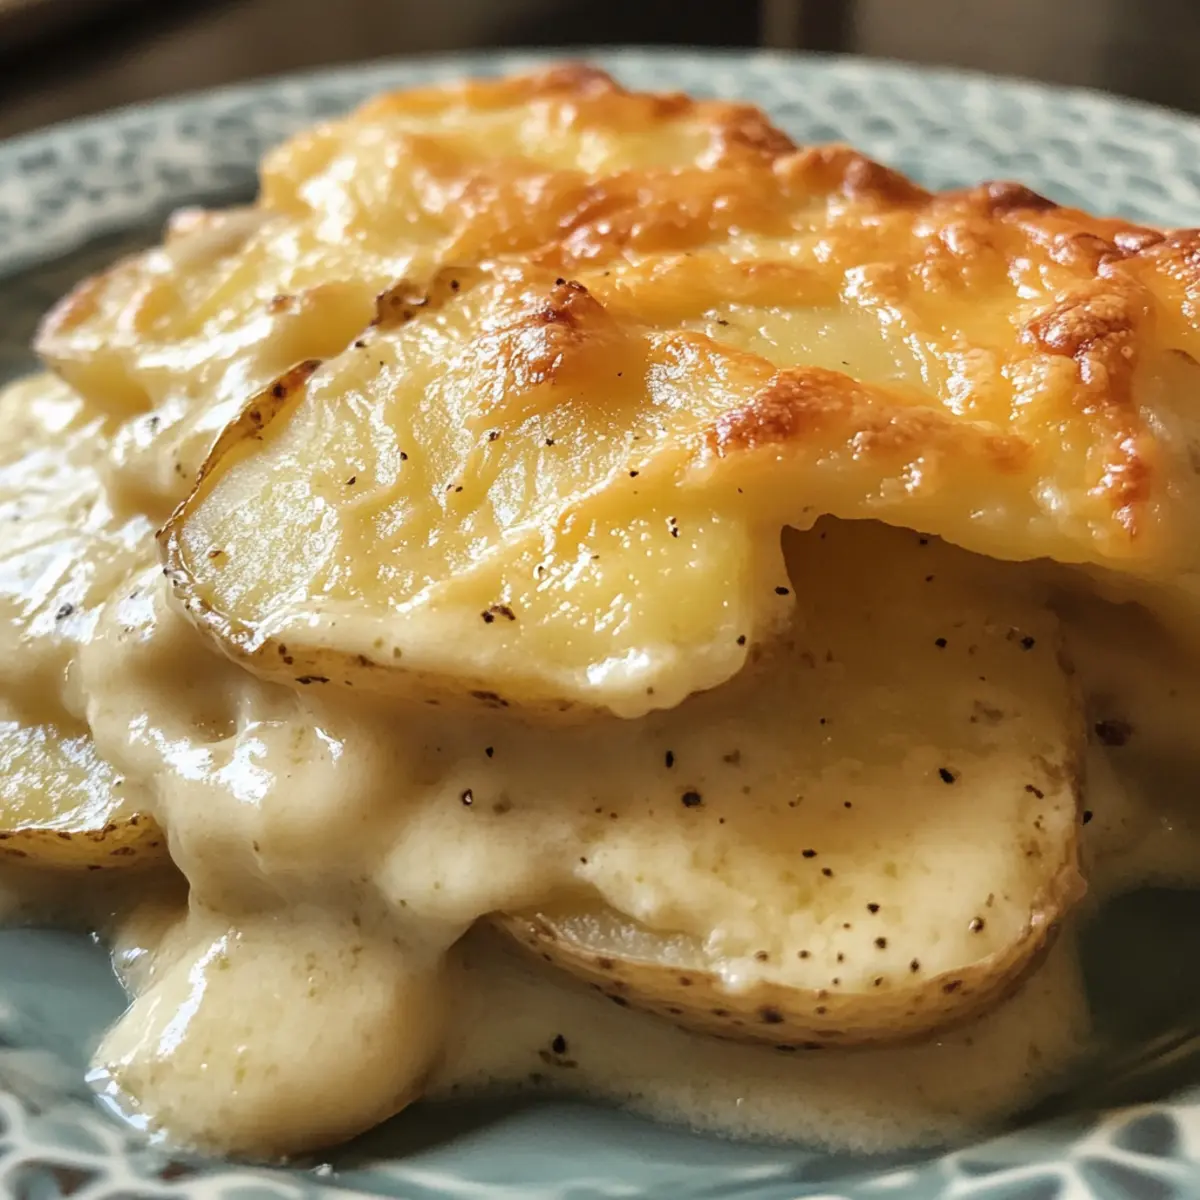
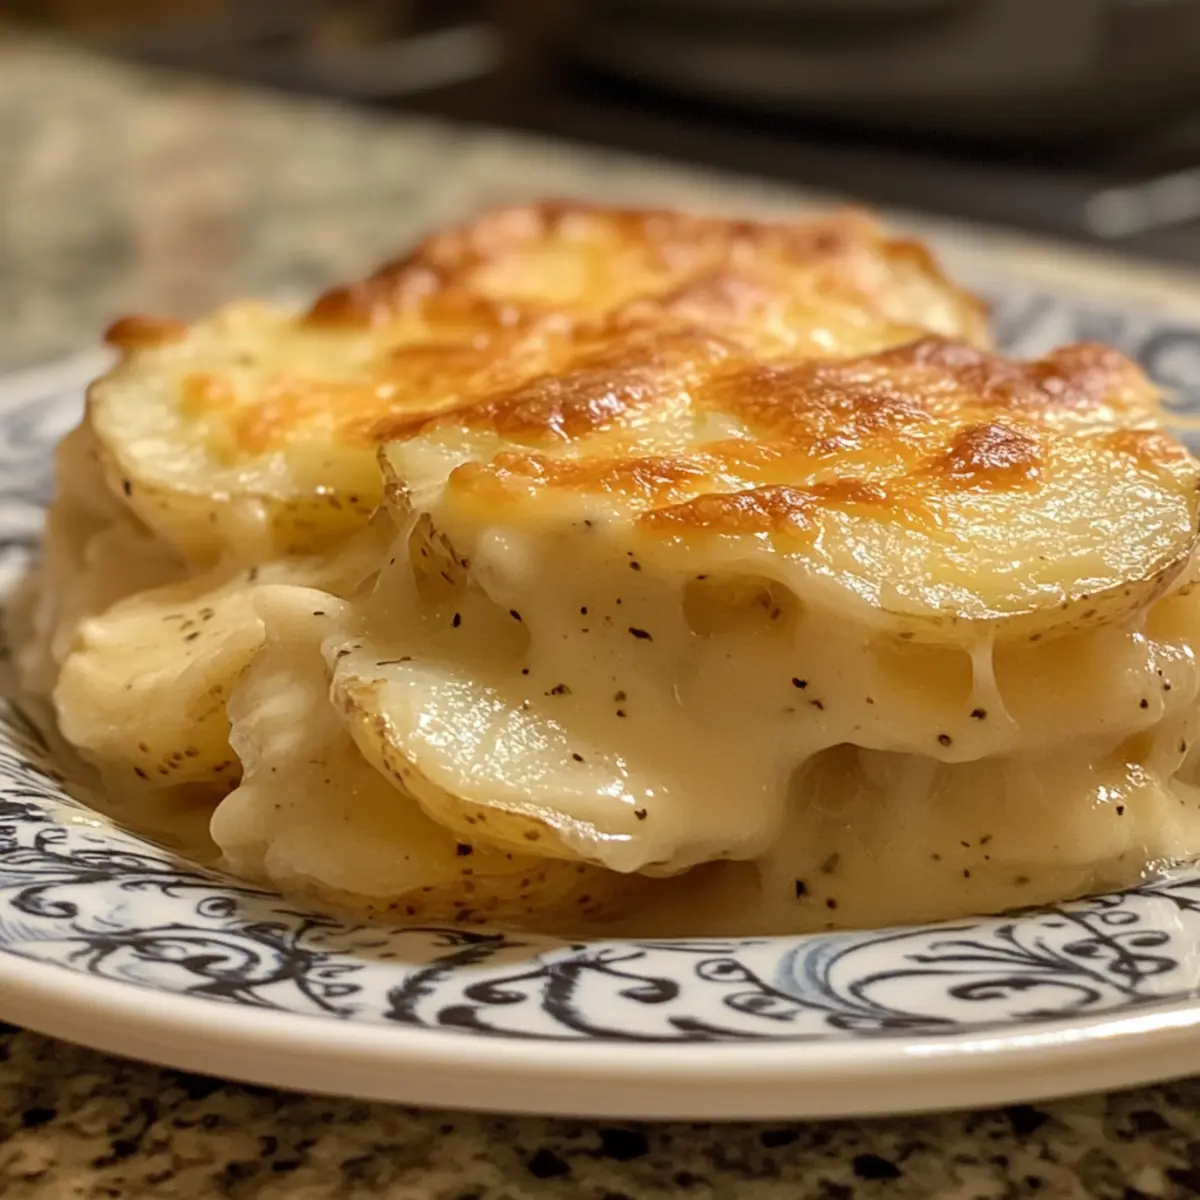
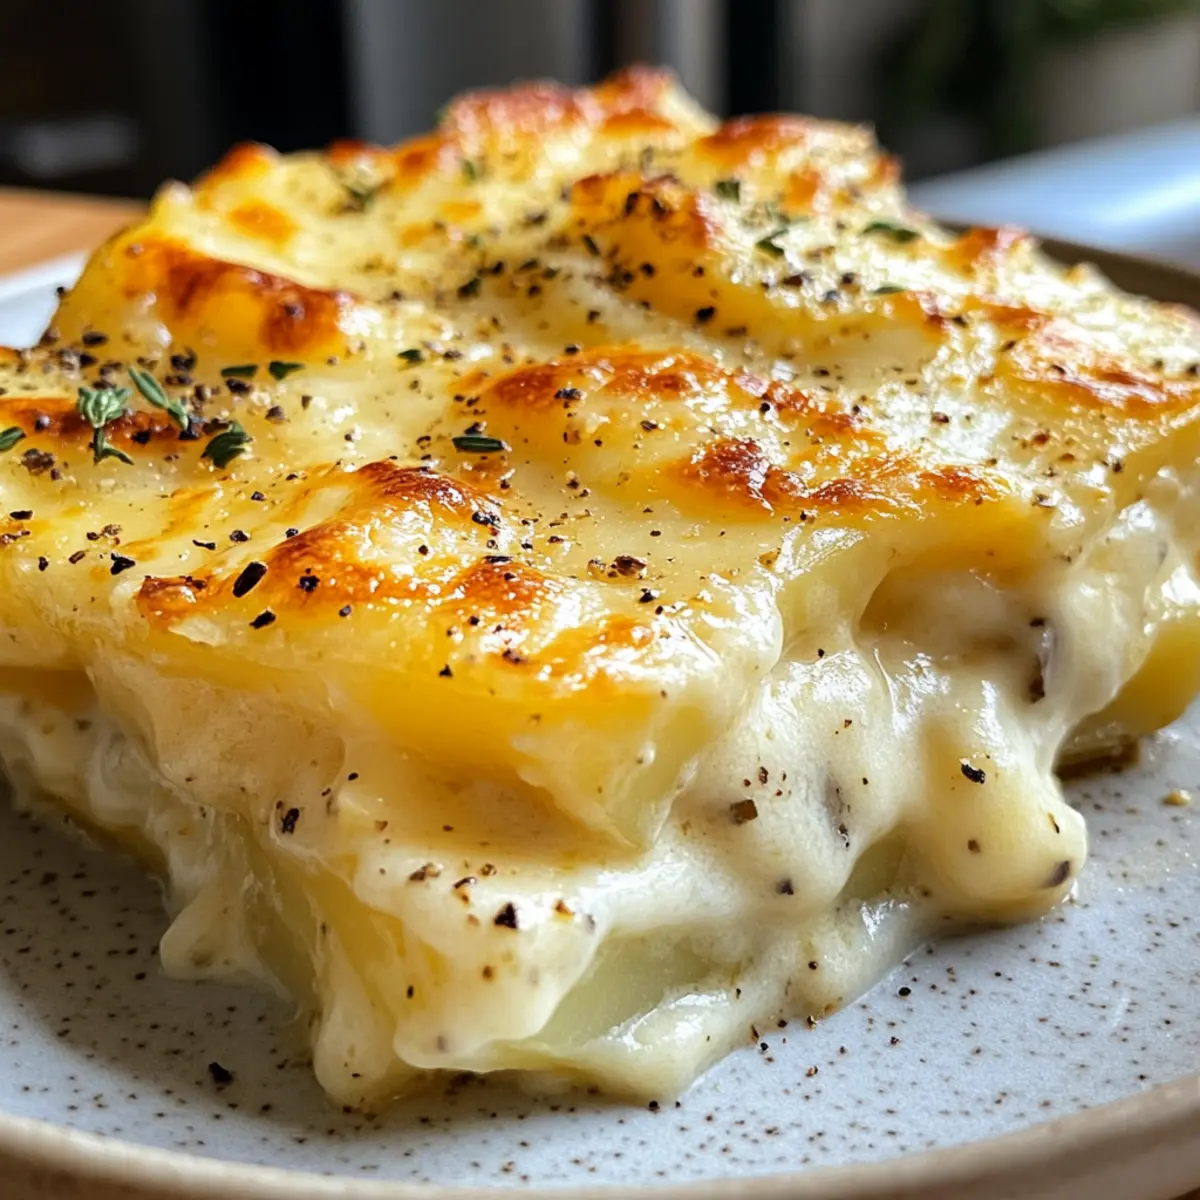
Pour the velvety cheese sauce over the cooked potatoes, tossing gently to ensure each slice is well coated. Sprinkle any remaining cheddar cheese on top for an extra cheesy finish. Now, place the pie dish in the preheated oven and bake for 15 minutes, or until the top is golden and bubbly. Optionally, broil for a couple of minutes for additional browning and texture.
Make Ahead Options
These Instant Pot Scalloped Potatoes are a fantastic choice for meal prep! You can slice the Yukon potatoes and store them in cold water in the refrigerator up to 24 hours ahead of time to prevent browning. Additionally, prepare the cheese sauce in advance; just refrigerate it for up to 3 days in an airtight container. When you’re ready to finish the dish, simply transfer the potatoes into a pie dish, pour the cheese sauce over them, and proceed to bake as directed. This way, you’ll have a creamy, cheesy comfort food on the table with minimal effort, perfect for busy weeknights!
Instant Pot Scalloped Potatoes Variations
Feel free to let your creativity shine by customizing this recipe with delicious twists that will tantalize your taste buds!
-
Add Meat: Toss in cubed ham, chicken, or turkey for a heartier dish that adds a protein boost. It’s like having two meals in one!
-
Veggies Instead: Incorporate chopped bell peppers, spinach, or ~broccoli~ for an extra serving of nutrients and flavor. The bright colors will make this dish even more appealing!
-
Extra Cheese: Mix in different cheeses such as Gouda, Swiss, or Parmesan for a more complex flavor profile. Each cheese brings its unique twist to this creamy classic.
-
Spicy Variation: For those who like a kick, add some cayenne pepper, jalapeños, or crushed red pepper flakes. This spicy twist elevates the comforting experience of scalloped potatoes to a new level!
-
Herb Infusion: Try adding fresh herbs like thyme or rosemary for a fragrant twist that complements the creamy cheese sauce beautifully. It’s a delightful way to savor the scent while cooking!
-
Smoky Flavor: Introduce a bit of smoked paprika or even some crumbled bacon for a smoky flavor explosion. The result is a combination of rich creaminess and savory smokiness that’s hard to resist.
-
Gluten-Free Swap: For a gluten-free version, make sure to use gluten-free chicken broth. Everyone can enjoy this comforting dish without worry!
-
Pasta-Baked Twist: You can even mix in cooked pasta to turn this into a creamy pasta bake! The result is a hearty entree that everyone will love. You might also want to check out our Savory Onion Potato for an even more tantalizing potato option!
Storage Tips for Instant Pot Scalloped Potatoes
Fridge: Store leftover Instant Pot scalloped potatoes in an airtight container for up to 3 days. Make sure they are cool before sealing to prevent moisture buildup.
Freezer: For longer storage, freeze in a freezer-safe container for up to 2 months. Allow to cool completely before freezing to retain texture.
Reheating: To reheat, thaw in the fridge overnight and warm in the oven at 350°F (175°C) until heated through, about 15-20 minutes for best results.
Avoid Texture Loss: When reheating, adding a splash of cream can help restore that creamy texture, making your scalloped potatoes just as delicious as when they were freshly made.
What to Serve with Instant Pot Scalloped Potatoes
Complement your meal with delightful pairings that enhance the creamy goodness of this comforting dish.
- Roasted Turkey: Juicy turkey pairs beautifully, balancing the rich flavors of the scalloped potatoes for a memorable feast.
- Honey-Glazed Ham: The sweetness of ham contrasts nicely with the savory cheese, creating a perfect harmony on your plate.
- Garlic Green Beans: Fresh, crisp green beans add a vibrant touch and a pop of color while providing a crunchy textural contrast.
- Creamy Coleslaw: The tangy crunch of coleslaw cuts through the richness, making for a refreshing side that complements each bite.
- Grilled Chicken: Light and smoky, grilled chicken provides a lighter option alongside your decadent scalloped potatoes.
- Seasonal Roasted Vegetables: A mix of roasted veggies brings a burst of color and nutrients, balancing the comfort of your potatoes.
- Cranberry Sauce: A dollop of tart cranberry sauce can elevate your dish, providing a refreshing burst that contrasts deliciously with creaminess.
- Apple Pie: End your meal on a sweet note with classic apple pie—its warmth and flavor perfectly rounding out the comfort food experience.
Expert Tips for Instant Pot Scalloped Potatoes
-
Uniform Slicing: Use a mandolin to achieve even potato slices, ensuring they cook uniformly and create a perfect creamy texture.
-
Cream Choice: Stick with heavy cream; low-fat versions can curdle and ruin the luxurious cheese sauce consistency.
-
Soak Potatoes: If preparing in advance, soak your potato slices in cold water to avoid browning but ensure they are thoroughly dried before cooking.
-
Check Doneness: Thicker potato slices may require additional cooking time, so check for tenderness after the initial cook to avoid undercooking.
-
Cheese Melting: Shred your own cheddar cheese for better melting and flavor in the sauce, enhancing the overall taste of these Instant Pot scalloped potatoes.
Instant Pot Scalloped Potatoes Recipe FAQs
What type of potatoes should I use for scalloped potatoes?
Absolutely! I recommend using Yukon potatoes for the best results. They provide a creamy texture and buttery taste when sliced into 1/4 inch rounds, which is perfect for ensuring optimal cooking in the Instant Pot.
How should I store leftover scalloped potatoes?
To keep your leftover Instant Pot scalloped potatoes fresh, store them in an airtight container in the fridge. They’ll last for up to 3 days. Make sure they cool down completely before sealing to avoid moisture buildup and sogginess.
Can I freeze scalloped potatoes?
Yes, you can freeze them! Transfer your fully cooled scalloped potatoes to a freezer-safe container, and they will stay good for up to 2 months. Just be sure to allow them to cool completely before freezing, as this helps maintain their texture.
What can I do if my cheese sauce isn’t creamy enough?
If your cheese sauce isn’t as creamy as you’d like, it could be due to using low-fat cream, which can curdle. Stick with heavy cream and make sure to gradually add the shredded cheese while stirring on low heat to ensure a smooth consistency. If it still doesn’t thicken as you wish, try mixing in a little cornstarch with water, then add it to the pot and heat until combined.
Can I make scalloped potatoes in advance?
Absolutely! You can prepare everything up to the baking step a day ahead. Simply follow the recipe until the cheese sauce stage, then store the assembled dish in the fridge for up to 24 hours. When you’re ready to serve, bake it straight from the fridge—just be sure to add a few extra minutes to the baking time to ensure thorough heating.
Are scalloped potatoes suitable for vegetarians?
Definitely! To make your Instant Pot scalloped potatoes vegetarian, simply substitute chicken broth with vegetable broth. This maintains that rich flavor while keeping the dish vegetarian-friendly.
Instant Pot Scalloped Potatoes – Creamy Comfort in Every Bite
Ingredients
Equipment
Method
- Begin by washing and slicing the Yukon potatoes into 1/4 inch thick rounds for optimal cooking. Place the sliced potatoes into your Instant Pot along with the chicken broth, salt, ground black pepper, dried oregano, and garlic powder. Stir gently to combine all the ingredients.
- Secure the Instant Pot lid in place and select the high-pressure setting. Cook the potatoes for 1 minute, and after the cooking time is up, allow a natural pressure release for 3 minutes. Carefully perform a manual pressure release to let out remaining steam.
- While the Instant Pot is working, preheat your oven to 375°F (190°C). Once the potatoes are cooked, carefully remove them from the pot and transfer to a pie dish.
- Using the sauté feature on the Instant Pot, add the minced garlic to the remaining liquid and sauté for about 30 seconds. Pour in the heavy cream and let it simmer on low heat, gradually stirring in the shredded cheddar cheese until it melts smoothly.
- Pour the cheese sauce over the cooked potatoes, tossing gently to coat. Sprinkle any remaining cheddar cheese on top and place in the preheated oven. Bake for 15 minutes, or until the top is golden and bubbly.