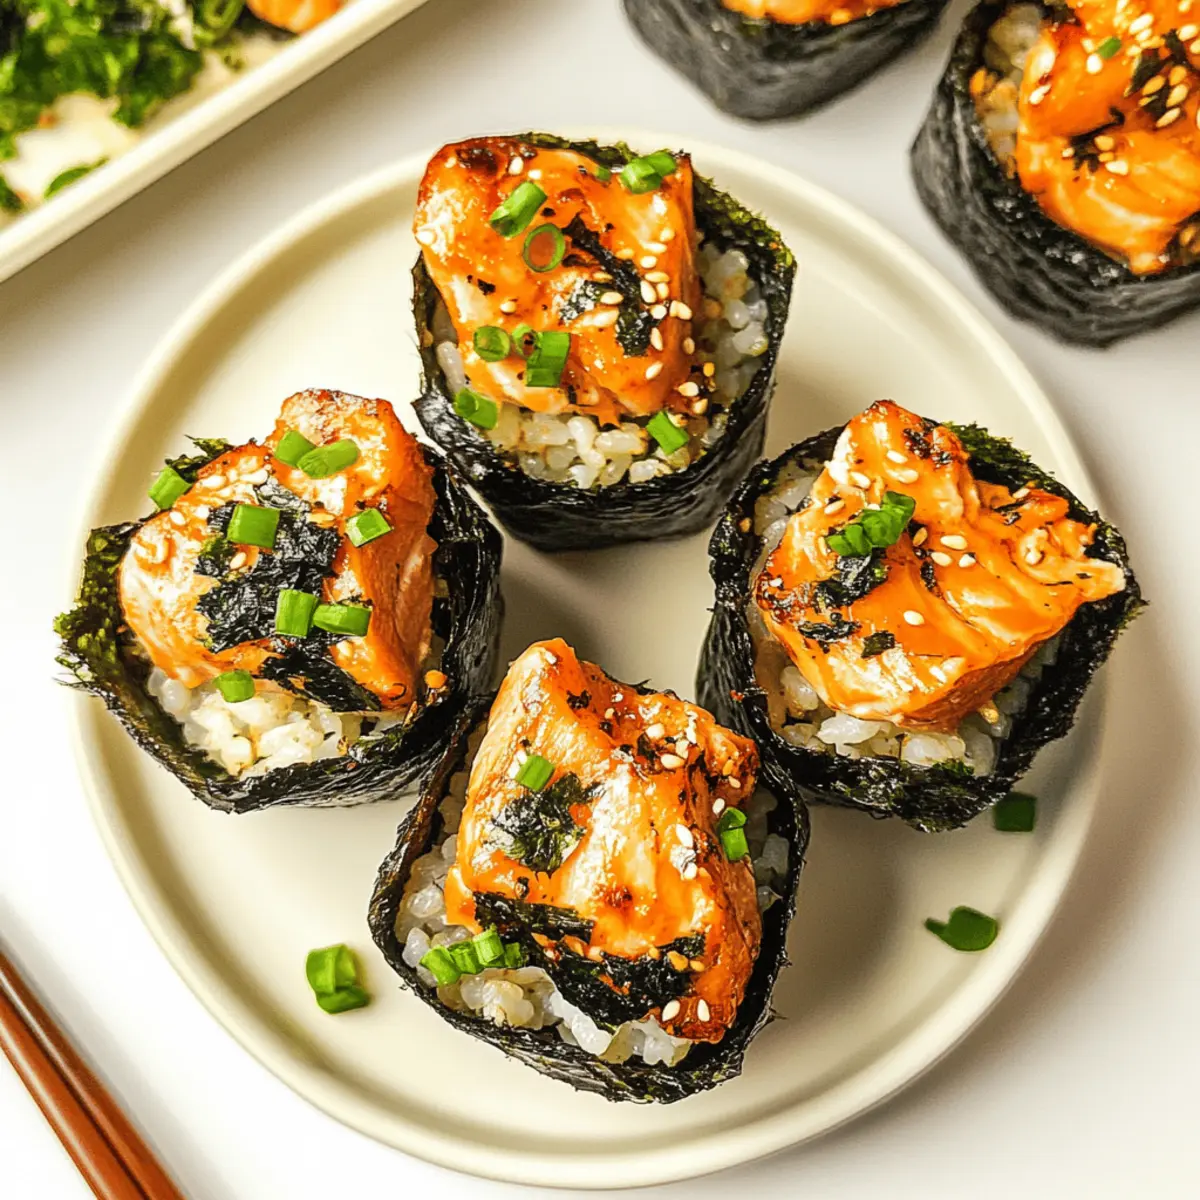
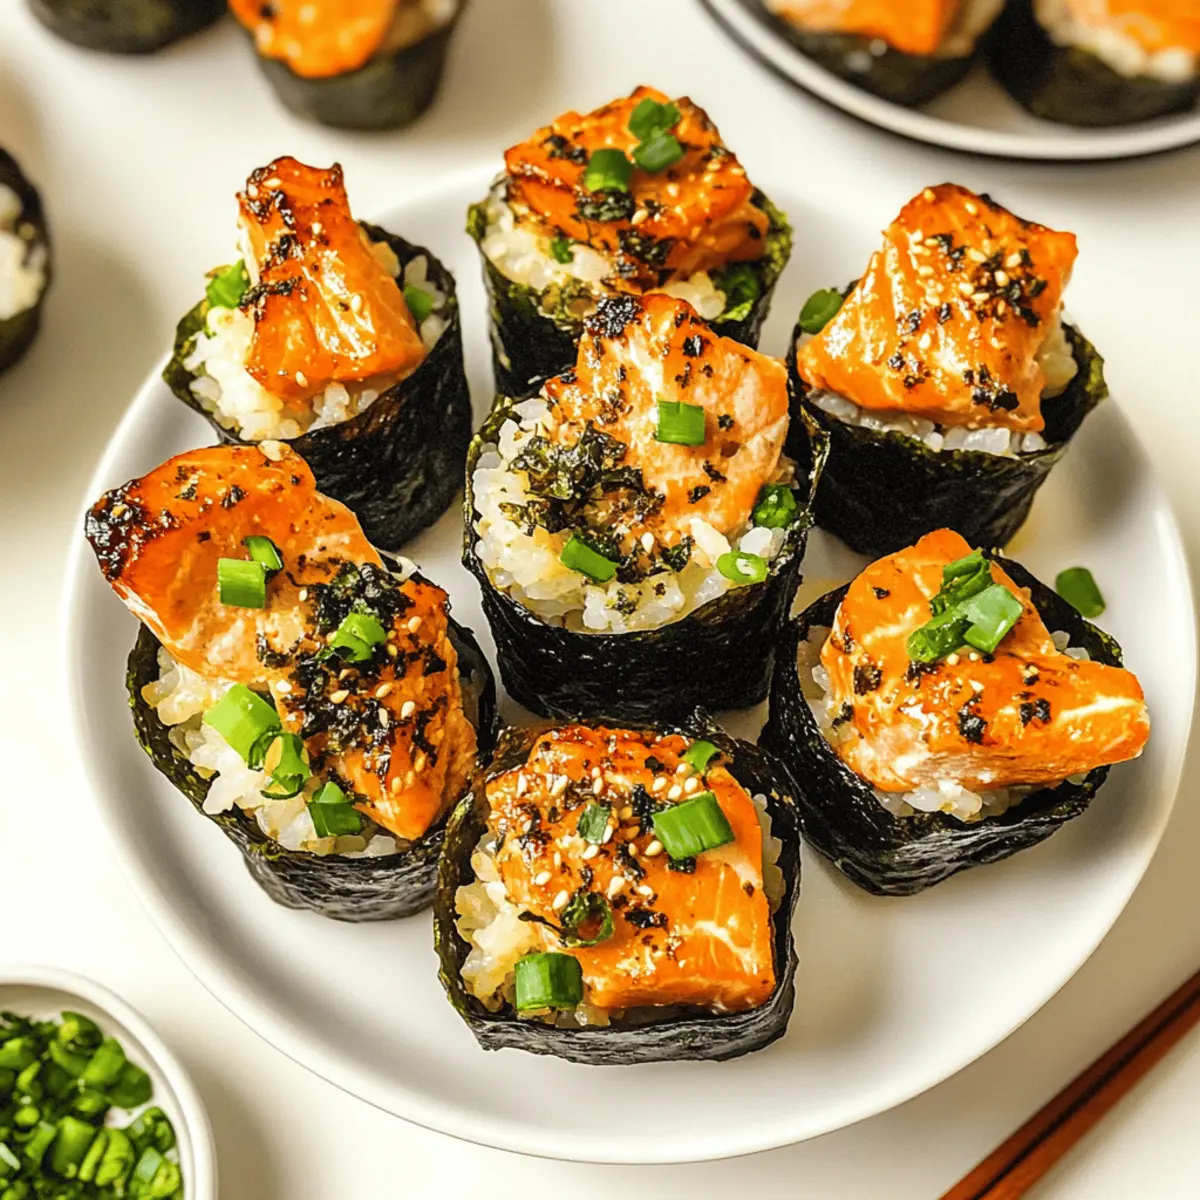
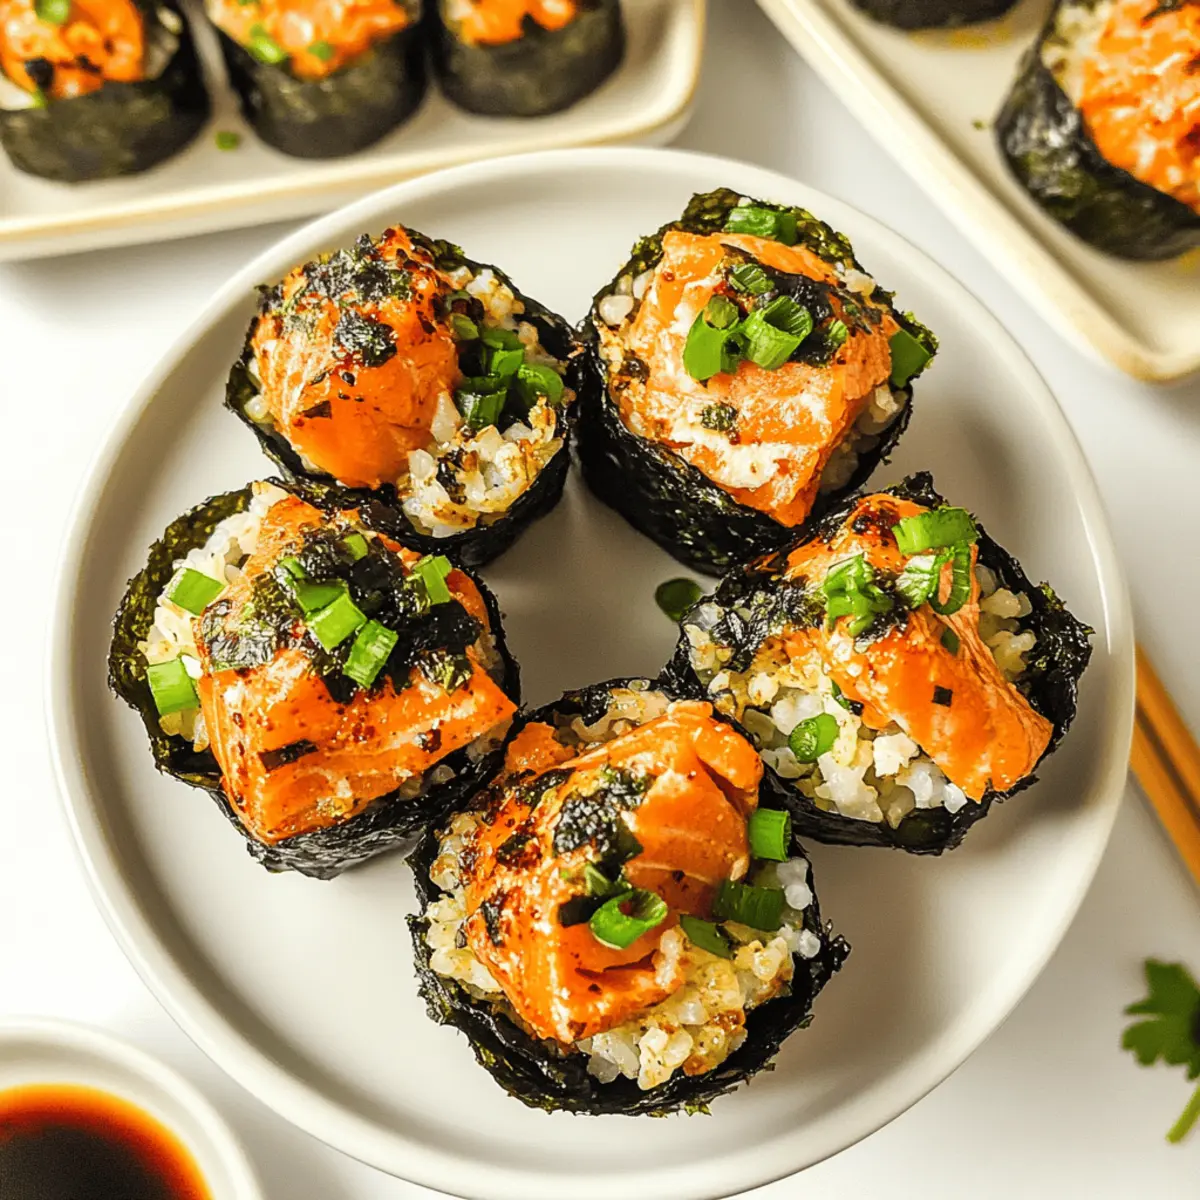
As I rummaged through my pantry, searching for a way to satisfy my sushi cravings without the fuss of rolling, inspiration struck. Enter these Easy Baked Salmon Sushi Cups—a delightful deconstructed sushi experience that’s just as satisfying as it is simple. With a warm and savory filling of tender salmon and fluffy sushi rice, each cup is lovingly wrapped in crispy nori, making them perfect as a quick appetizer or a crowd-pleasing snack. Not only do they whip up in a flash, but they also invite endless customization—substituting in your favorite seafood or even tossing in fresh veggies. Ready to elevate your appetizer game and enjoy a unique twist on sushi? Let’s dive into this easy, flavorful recipe!
Why are Baked Salmon Sushi Cups a Must-Try?
Flavor Explosion: Each cup is packed with warm, tender salmon and fluffy sushi rice, creating a savory delight that will leave your taste buds dancing.
Crowd-Pleaser: Ideal for parties, these bite-sized treats are universally loved, making them perfect for gatherings or family dinners.
Quick and Easy: With a simple prep time, you’ll whip up these cups faster than conventional sushi, giving you more time to relax and enjoy.
Versatile Options: Feel free to swap out the salmon for shrimp or even crab, and toss in veggies like avocado or cucumber for an extra fresh twist. For more veggie ideas, check out these delicious Harvest Salad Cups.
Nostalgic Comfort: The combination of warm sushi rice and crispy nori brings together a comforting, cozy experience that feels nostalgic yet innovative.
Baked Salmon Sushi Cups Ingredients
• Discover what makes these Baked Salmon Sushi Cups irresistible!
For the Filling
- Salmon – Provides a rich, savory flavor; substitute with cooked shrimp or crab for a unique twist.
- Light Soy Sauce – Enhances umami and seasoning; switch to tamari for a gluten-free option.
- Kewpie Mayo – Adds creaminess and a hint of sweetness; regular mayonnaise works although the flavor might differ.
- Sriracha – Infuses heat and spice; can be replaced with your favorite hot sauce or omitted for a milder flavor.
- Sesame Oil – Contributes a nutty aroma; olive oil may be used, keeping in mind it alters the taste.
For the Rice
- Sushi Rice – Forms the essential base; use short-grain or sticky rice as alternatives.
- Rice Vinegar – Season the rice perfectly; apple cider vinegar can work too, though it slightly changes the flavor.
- White Sugar – Balances acidity; honey or agave can substitute for a different sweet touch.
For Serving
- Nori Sheets – Provide that signature sushi flavor and structure; lettuce leaves are great for a lower-carb variation.
- Furikake – A traditional Japanese seasoning for finishing touches, but feel free to skip or use sesame seeds instead.
- Green Onion – Adds a fresh crunch; chives can be used if needed.
- Cooking Spray – Prevents sticking in the muffin tin; olive oil or melted butter also works well.
Enjoy crafting your delicious Baked Salmon Sushi Cups with these carefully selected ingredients!
Step‑by‑Step Instructions for Baked Salmon Sushi Cups
Step 1: Cook the Sushi Rice
Begin by cooking the sushi rice according to the package instructions, usually taking about 20 minutes. Once cooked, transfer the rice to a large bowl and mix it gently with rice vinegar and sugar to season. Allow the seasoned rice to cool, stirring occasionally, until it reaches room temperature—this will be the delicious base for your Baked Salmon Sushi Cups.
Step 2: Prep the Oven and Salmon Mixture
Preheat your oven to 400°F (200°C) to prepare for baking. Meanwhile, take a medium bowl and combine diced salmon, light soy sauce, Kewpie mayo, sriracha, and sesame oil. Mix thoroughly until the salmon is well-coated; this flavorful filling will be the star of your Baked Salmon Sushi Cups!
Step 3: Prepare the Nori Cups
While the oven is heating, cut the nori sheets into square pieces that fit snugly into your muffin tin. You will need enough pieces to line each muffin cup, creating a lovely crispy structure for your Baked Salmon Sushi Cups. Set these nori squares aside as you prepare to assemble.
Step 4: Assemble the Sushi Cups
Spray the muffin tin with cooking spray or lightly grease it with olive oil to prevent sticking. Place the nori squares into each muffin cup and gently press down. Spoon the prepared sushi rice into the nori, filling each cup just under the top, and press it down lightly. Finally, spoon the salmon mixture on top of the rice to complete the assembly.
Step 5: Bake the Cups
Carefully place the muffin tin in the preheated oven and bake for about 15 minutes. Keep an eye out for the salmon to cook thoroughly and the tops of the cups to turn a beautiful golden brown. The aroma wafting from the oven will surely make your mouth water in anticipation of the Baked Salmon Sushi Cups!
Step 6: Garnish and Serve
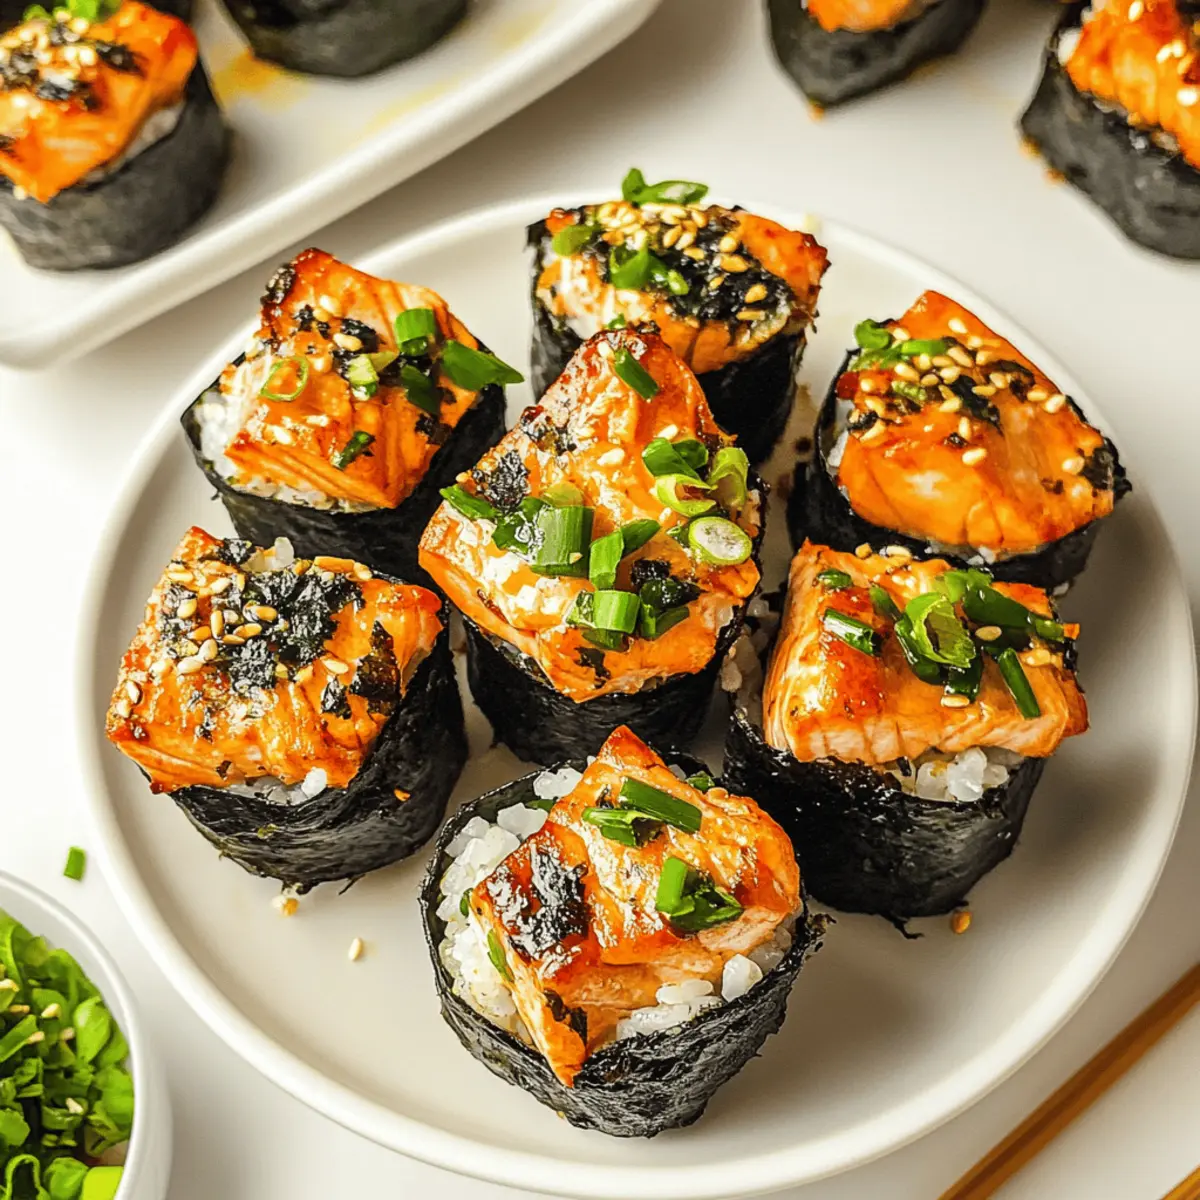
Once baked, remove the muffin tin from the oven and allow the sushi cups to cool slightly. For a finishing touch, drizzle with additional sriracha or Kewpie mayo, and sprinkle furikake and thinly sliced green onions on top. Serve your Baked Salmon Sushi Cups warm, alongside pickled ginger and soy sauce to enhance the flavor experience.
Make Ahead Options
These Easy Baked Salmon Sushi Cups are perfect for meal prep enthusiasts! You can prepare the sushi rice and salmon mixture up to 24 hours in advance. Simply cook the rice and allow it to cool completely before mixing with rice vinegar and sugar. For the salmon, combine diced salmon, soy sauce, Kewpie mayo, sriracha, and sesame oil in a bowl, then cover and refrigerate. Additionally, you can assemble the cups up to 3 days ahead by layering the prepared rice in the nori and topping with the salmon mixture, then cover tightly with plastic wrap. To finish, bake them in a preheated oven for about 15 minutes until golden and cooked through, and you’ll have warm, delicious Baked Salmon Sushi Cups ready to impress your guests!
What to Serve with Easy Baked Salmon Sushi Cups
Elevate your dining experience with delightful accompaniments that perfectly balance the warm, savory goodness of each sushi cup.
- Pickled Ginger: Offers a refreshing palate cleanser that complements the rich flavors of salmon and adds a zingy crunch.
- Soy Sauce: A classic condiment that enhances umami notes, allowing the salmon and rice to shine even brighter.
- Wasabi: For those who like it spicy! Just a hint of wasabi elevates the flavor profile and adds an exciting kick.
- Crispy Seaweed Salad: The crunchiness of seaweed salad creates a textural contrast to the tender sushi cups, refreshing every bite.
- Japanese Sake: Pairing with a chilled glass of sake adds a sophisticated touch, beautifully enhancing the overall dining experience.
- Miso Soup: A warm bowl of miso soup beside your sushi cups provides a comforting, soothing balance to your meal.
- Edamame: These steamed, salty soybeans make for a fun finger food and a protein-packed side that complements sushi nicely.
- Refreshing Cucumber Salad: A light and crisp cucumber salad, dressed with rice vinegar, offers brightness and contrast to the rich sushi cups.
- Coconut Sticky Rice: Sweet coconut sticky rice can be a deliciously unusual dessert to round out your meal after the savory sushi cups.
Expert Tips for Baked Salmon Sushi Cups
- Fresh Ingredients Matter: Use the freshest salmon available for optimal flavor and texture; frozen salmon may work but can lose quality.
- Avoid Overcooking: Keep a close eye on the baking time; overcooked salmon tends to dry out, ruining your delightful cups.
- Customize Wisely: Don’t hesitate to experiment with fillings; however, ensure the textures balance well for a cohesive bite in the Baked Salmon Sushi Cups.
- Grease Generously: Ensure muffin tins are coated well; this prevents cups from sticking and ensures easy removal without mess.
- Taste as You Go: Adjust seasonings in the filling to suit your preference; tasting the mixture allows for better flavor in the final cups.
Baked Salmon Sushi Cups Variations
Feel free to get creative and customize your Baked Salmon Sushi Cups to suit your taste buds!
-
Tuna Twist: Substitute salmon with fresh or canned tuna for a different seafood experience. The lightness of tuna adds a delightful flavor profile.
-
Crab Delight: Use crab meat in place of salmon, bringing a sweet, tender taste to the cups. It’s a luxurious option that any seafood lover will adore.
-
Veggie Boost: Add diced avocado or shredded cucumber into the salmon mixture for an extra layer of freshness. These ingredients will elevate the flavor and texture.
-
Spicy Kick: Mix in diced jalapeños or a sprinkle of crushed red pepper for an extra fiery touch. Adjust the amount to match your heat preference!
-
Mediterranean Flair: Switch nori for grape leaves to create a Mediterranean-inspired version. Fill them with salmon, rice, and a hint of lemon for zingy goodness.
-
Sweet and Savory: Drizzle in a touch of honey or agave with your salmon mixture for a sweet contrast against the salty ingredients. It adds an exciting layer of flavor.
-
Crunchy Topping: For added texture, sprinkle some breadcrumbs or crushed sesame sticks on top before baking. This will create a delightful crunch in every bite.
-
Deconstructed Bowl: Try reimagining these cups as a deconstructed sushi bowl. Layer the ingredients in a bowl with sushi rice, salmon, and toppings like furikake and green onions, for a quick lunch.
Explore these variations to find your favorite twist, and for a refreshing side, check out these lovely Harvest Salad Cups that pair beautifully with the salmon!
How to Store and Freeze Baked Salmon Sushi Cups
Fridge: Store Baked Salmon Sushi Cups in an airtight container for up to 2-3 days. Reheat in the oven for the best taste and texture.
Freezer: If you wish to freeze them, wrap each cup tightly in plastic wrap then place them in a freezer-safe bag. They can be frozen for up to 2 months.
Reheating: For frozen sushi cups, let them thaw in the fridge overnight. Reheat in the oven or microwave until warmed through to maintain that delightful warmth and flavor.
Prep Ahead: Making these cups ahead of time can save you effort; just ensure they are stored properly to enjoy at their best!
Baked Salmon Sushi Cups Recipe FAQs
How do I select the right salmon for my Baked Salmon Sushi Cups?
Absolutely! Look for fresh, high-quality salmon that has a bright color and a clean scent. If you’re buying frozen, ensure it’s properly packaged without ice crystals. Avoid salmon that has dark spots or a fishy odor, which can indicate poor quality. I often go for wild-caught salmon when available for its rich flavor!
What’s the best way to store leftover Baked Salmon Sushi Cups?
Baked Salmon Sushi Cups can be stored in an airtight container in the refrigerator for up to 2-3 days. Before enjoying them again, simply reheat in the oven at 350°F for about 10 minutes for the best texture, or pop them in the microwave for a quicker approach, though this may make them a bit softer.
Can I freeze these sushi cups, and if so, how?
Yes, you can freeze Baked Salmon Sushi Cups! Wrap each cup tightly in plastic wrap, then place them in a freezer-safe bag or container. They can be enjoyed even after 2 months in the freezer. When you’re ready to eat, let them thaw in the fridge overnight, and reheat as you normally would.
What should I do if my sushi cups stick to the muffin tin?
To prevent sticking, ensure that you generously grease the muffin tin with cooking spray, olive oil, or melted butter before adding the nori and rice. If they do stick, use a butter knife or silicone spatula to gently loosen the edges before lifting them out. You’ll want to be cautious so you don’t ruin the shape, as these cups are quite delicate!
Are Baked Salmon Sushi Cups suitable for people with allergies?
Very! Be mindful of your ingredients to ensure they meet the dietary needs of your guests. For instance, you can use gluten-free tamari instead of soy sauce and make sure that your mayonnaise is egg-free for those with egg allergies. If you have guests with seafood allergies, consider substituting salmon with fully cooked vegetables or tofu. Always check labels to avoid cross-contamination, especially with any toppings or sauces used.
How long does it take to make these Baked Salmon Sushi Cups?
From start to finish, cooking these delightful cups usually takes about 30-40 minutes. This includes preparing the sushi rice, seasoning it, mixing the salmon filling, assembling, and baking. It’s a quick recipe that allows you to enjoy delicious sushi flavors in no time!
Baked Salmon Sushi Cups: A Cozy, Savory Sushi Adventure
Ingredients
Equipment
Method
- Cook the sushi rice according to package instructions, about 20 minutes. Transfer to a large bowl and mix with rice vinegar and sugar. Allow to cool to room temperature.
- Preheat oven to 400°F (200°C). In a medium bowl, combine diced salmon, light soy sauce, Kewpie mayo, sriracha, and sesame oil. Mix until well-coated.
- Cut nori sheets into squares that fit into muffin tin. Prepare enough pieces to line each muffin cup.
- Spray muffin tin with cooking spray. Place nori squares in each cup, press down. Spoon sushi rice into nori, filling each cup just under the top. Spoon salmon mixture on top.
- Bake in preheated oven for about 15 minutes until salmon is cooked thoroughly and cups are golden brown.
- Remove from oven and let cool slightly. Drizzle with sriracha or Kewpie mayo, sprinkle with furikake and green onions. Serve warm with pickled ginger and soy sauce.