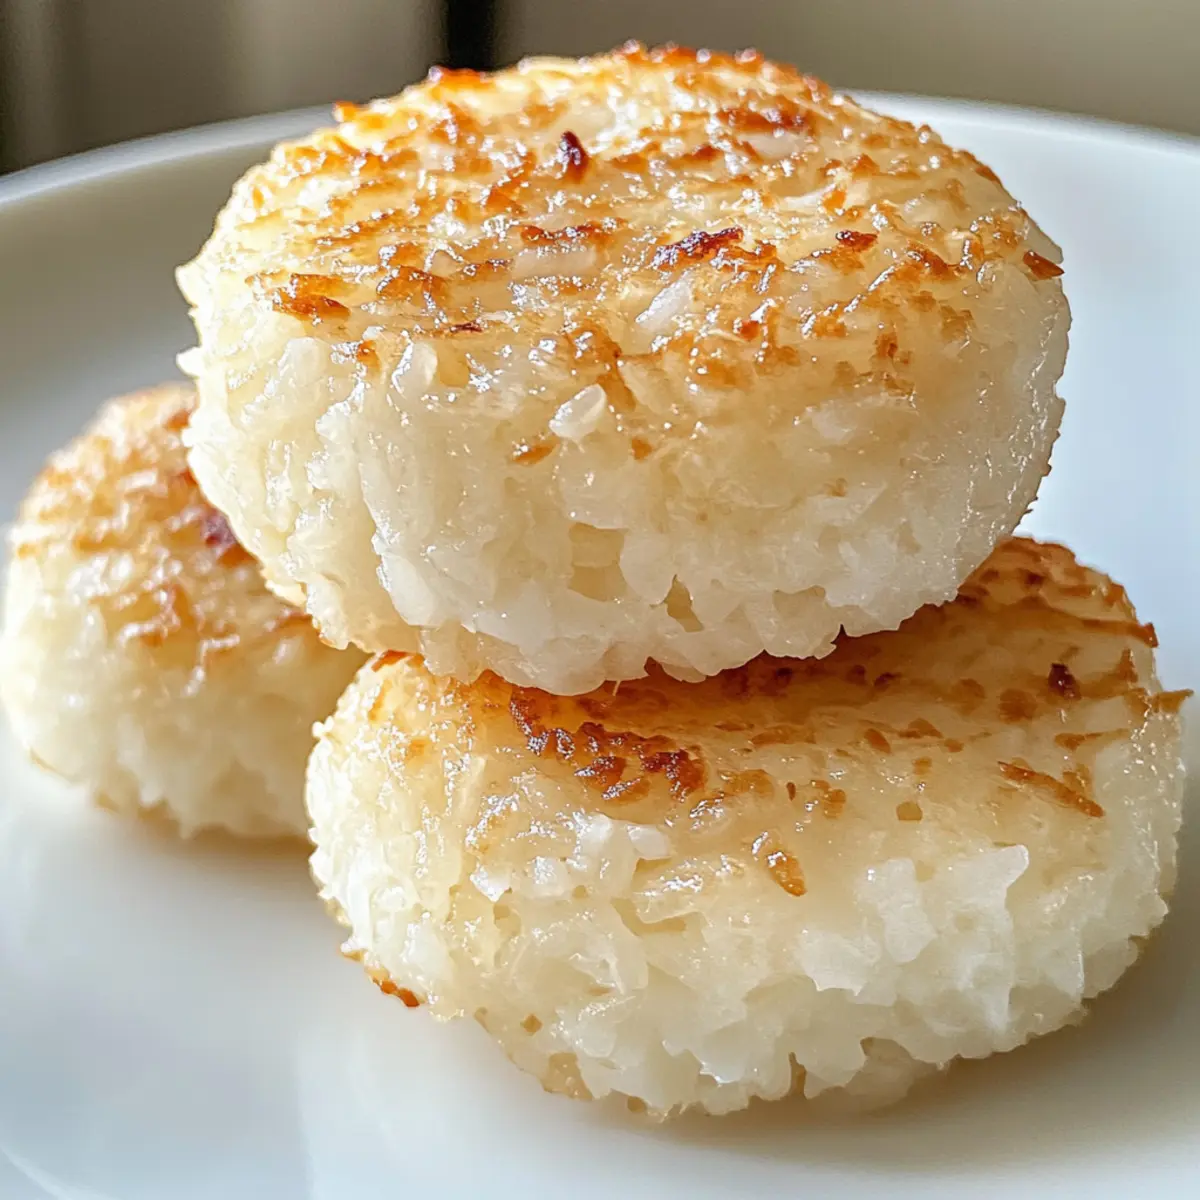
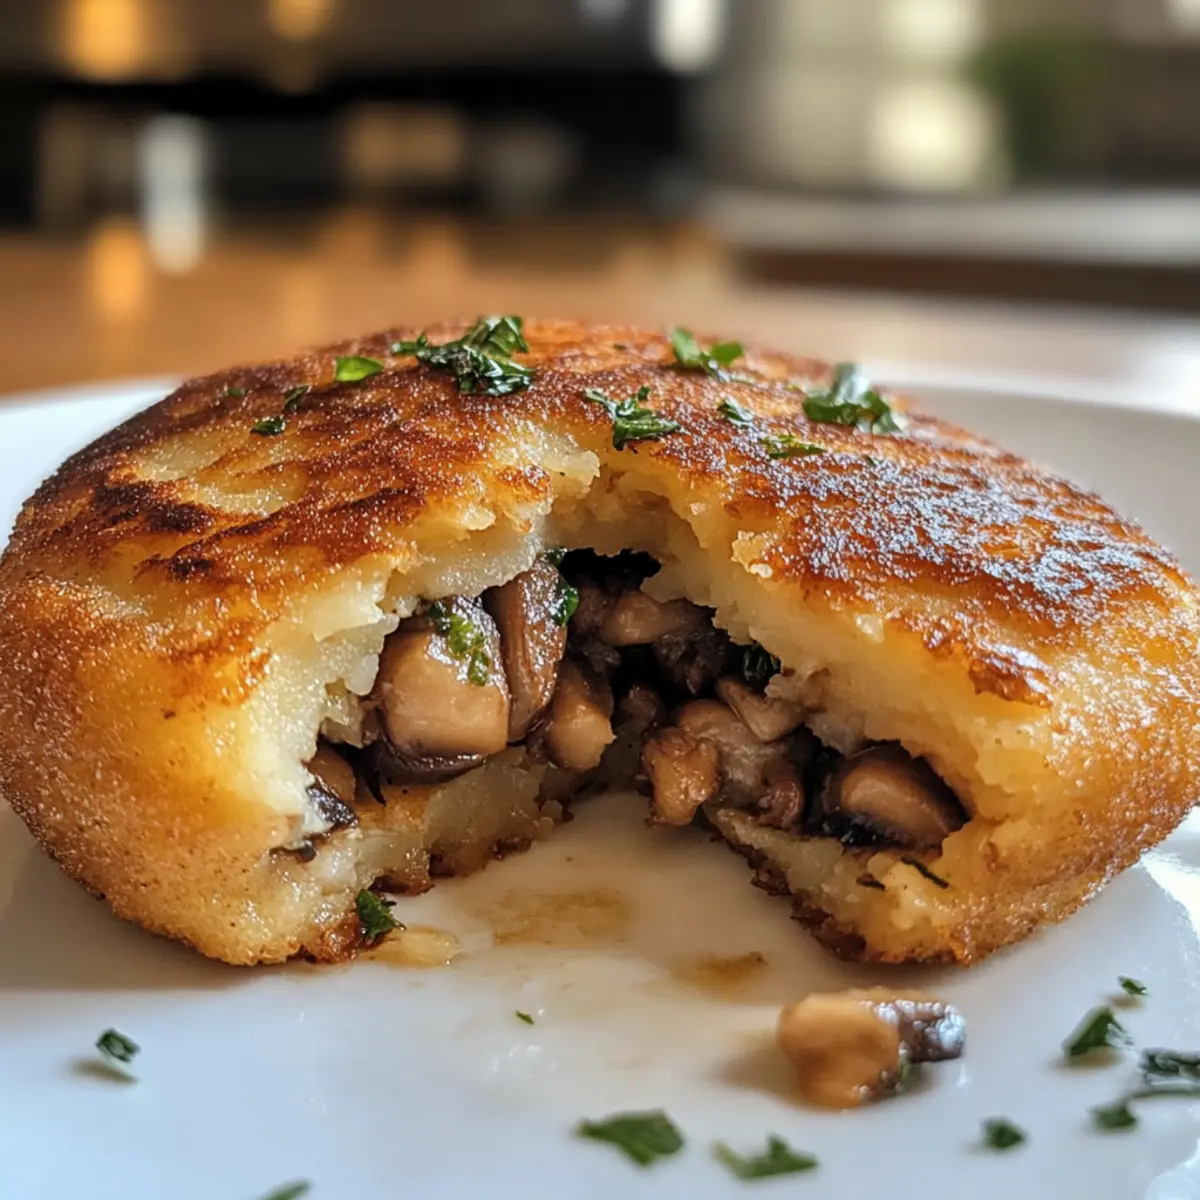
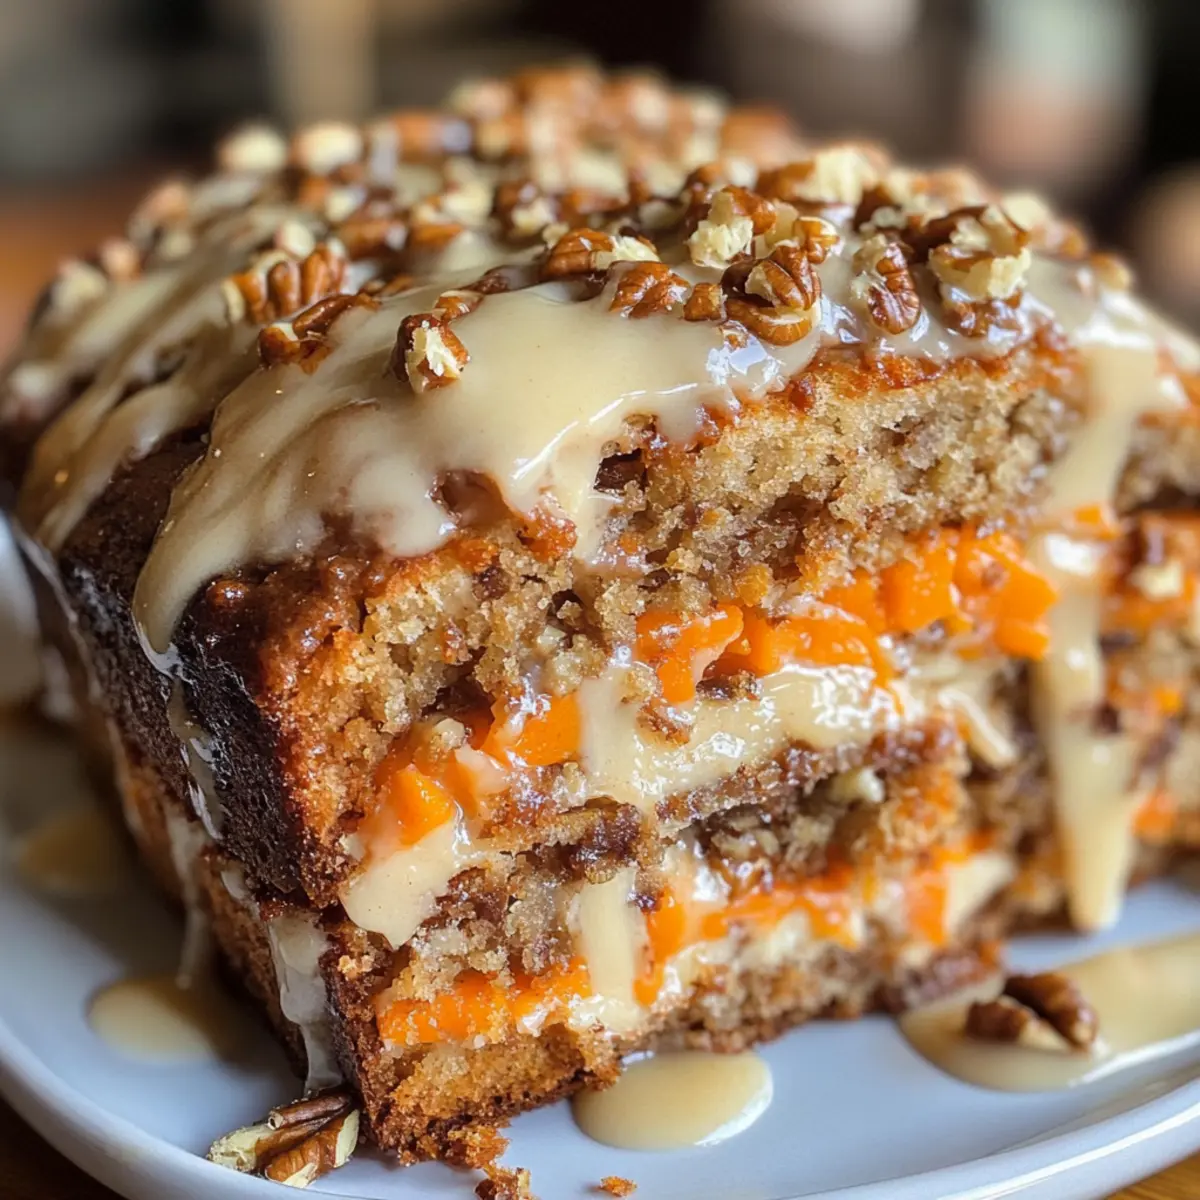
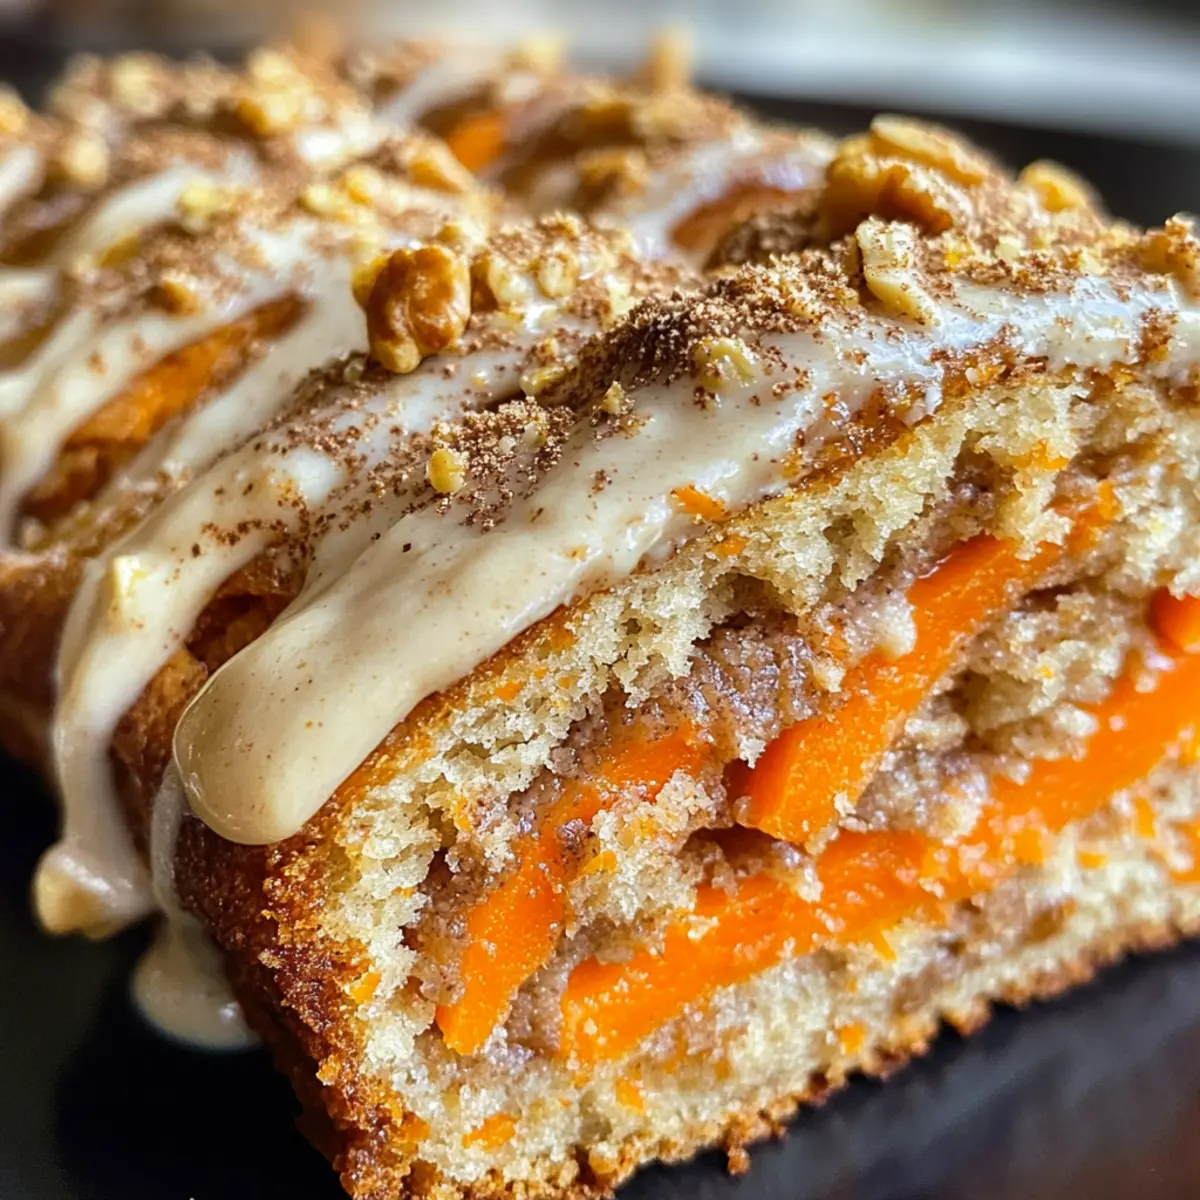
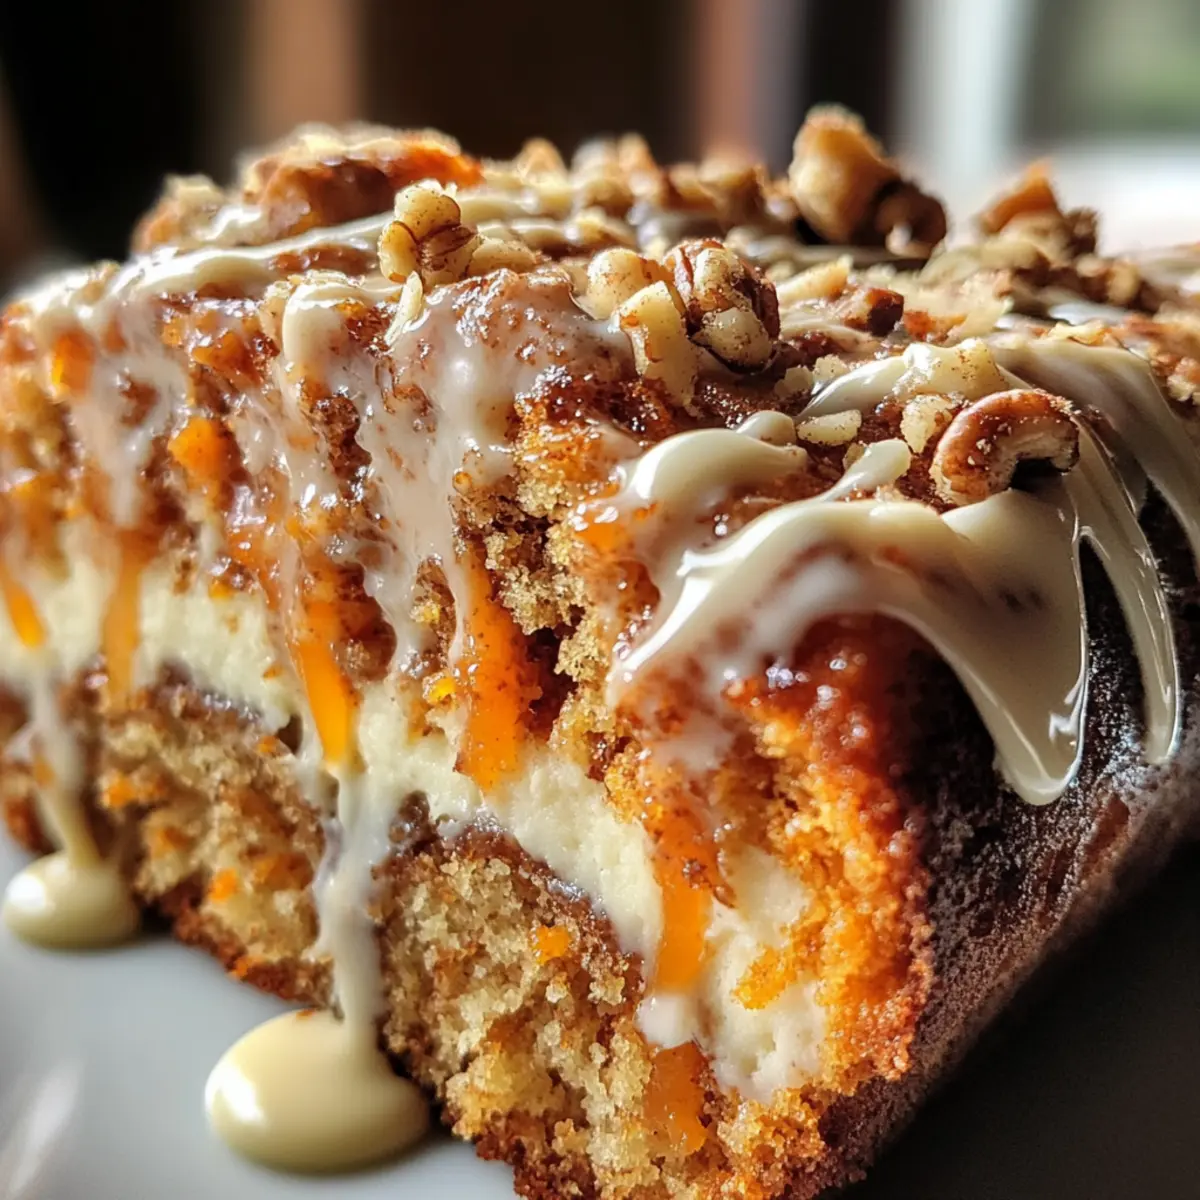
As I pulled the warm Carrot Cake Babka from the oven, the air was filled with the comforting aromas of cinnamon and cardamom that instantly transported me to my grandmother’s kitchen during holiday gatherings. This indulgent dessert isn’t just a sweet treat; it’s a modern twist on a beloved classic, perfect for Rosh Hashanah or any celebration. Its fluffy, moist layers are enveloped in a spiced filling that captures the essence of traditional carrot cake, while the luscious cardamom cream cheese drizzle adds the perfect finishing touch. With just a bit of prep and some waiting time for the dough to rise, you can impress friends and family with a homemade dessert that’s both show-stopping and delightful. So, are you ready to discover how to create this stunning Carrot Cake Babka with Cardamom Cream Cheese Drizzle?
Why is this Carrot Cake Babka a must-try?
Unique Flavor Fusion: This recipe combines the beloved flavors of traditional carrot cake with the delightful twist of babka, making every bite a joyful surprise.
Aromatic Spice: Infused with warm cinnamon and cardamom, it elevates your dessert game and fills your kitchen with irresistible scents.
Impressive Presentation: Its braided design creates an eye-catching centerpiece, perfect for gatherings or holiday celebrations.
Time-Efficient: With minimal hands-on time, this indulgent treat requires only a bit of patience while the dough rises, ensuring you can spend time with loved ones.
Versatile Serving Options: Whether alongside a cup of coffee or as a star dessert at a holiday feast, it suits any occasion beautifully!
Cultural Connection: Each slice honors traditional Jewish flavors, making it a thoughtful choice for Rosh Hashanah celebrations while appealing to everyone.
Carrot Cake Babka Ingredients
This Carrot Cake Babka with Cardamom Cream Cheese Drizzle is made with everyday ingredients that come together to create a flavorful experience.
For the Dough
- Active Dry Yeast – Essential for fluffiness; ensure freshness for optimal rise.
- Warm Whole Milk – Adds moisture and richness; can be swapped for almond milk for a dairy-free version.
- Granulated Sugar – Sweetens the dough and enhances browning; substitute coconut sugar for a healthier option.
- All-Purpose Flour – Provides the structure; bread flour can be used for a slightly different texture.
- Eggs – Acts as a binder and adds moisture; room-temperature eggs mix in better.
- Kosher Salt – Elevates flavor; feel free to substitute with sea salt.
- Unsalted Butter – Delivers rich flavor and tenderness; opt for dairy-free butter if needed.
For the Filling
- Carrots, Shredded – Adds natural sweetness and moisture; make sure to thoroughly dry them after shredding.
- Brown Sugar – Provides depth of flavor and moisture in the filling.
- All-Purpose Flour (for filling) – Helps thicken and bind the filling.
- Ground Cinnamon, Ginger, Nutmeg, Cloves, Cardamom – This warm spice blend enhances the overall flavor profile.
- Chopped Toasted Walnuts – Adds delightful crunch and flavor; can replace with pecans or omit for a nut-free option.
For the Drizzle
- Cream Cheese – Forms the creamy base for the drizzle, creating a smooth texture.
- Powdered Sugar – Sweetens and thickens the drizzle to achieve the perfect consistency.
- Milk (for drizzle) – Helps adjust the drizzle to your desired pouring consistency.
This delightful carrot cake babka is not just a dessert; it’s a loving tribute to tradition that will resonate with anyone at your table.
Step‑by‑Step Instructions for Carrot Cake Babka with Cardamom Cream Cheese Drizzle
Step 1: Make Dough
In a mixing bowl, combine 2 tablespoons of active dry yeast with 1 cup of warm whole milk and 2 tablespoons of granulated sugar. Let it sit for about 5–10 minutes until foamy. Gradually mix in 4 cups of all-purpose flour, 2 eggs, 1 teaspoon of kosher salt, and ½ cup of unsalted butter until the mixture is smooth and cohesive.
Step 2: First Rise
Lightly oil a large bowl and place the dough inside, covering it with a damp cloth. Allow it to rise at room temperature for 1.5–2 hours or refrigerate overnight for a slow rise of 12–24 hours. You’ll know it’s ready when the dough has doubled in size and feels light and airy to the touch.
Step 3: Prepare Filling
While the dough rises, prepare the filling. Pulse 2 cups of shredded carrots in a food processor until finely chopped, then squeeze out excess moisture with a clean kitchen towel. In a bowl, mix the carrots with ½ cup of brown sugar, 1 tablespoon of all-purpose flour, and 1 teaspoon each of cinnamon, ginger, nutmeg, cloves, and cardamom until well combined.
Step 4: Roll Dough
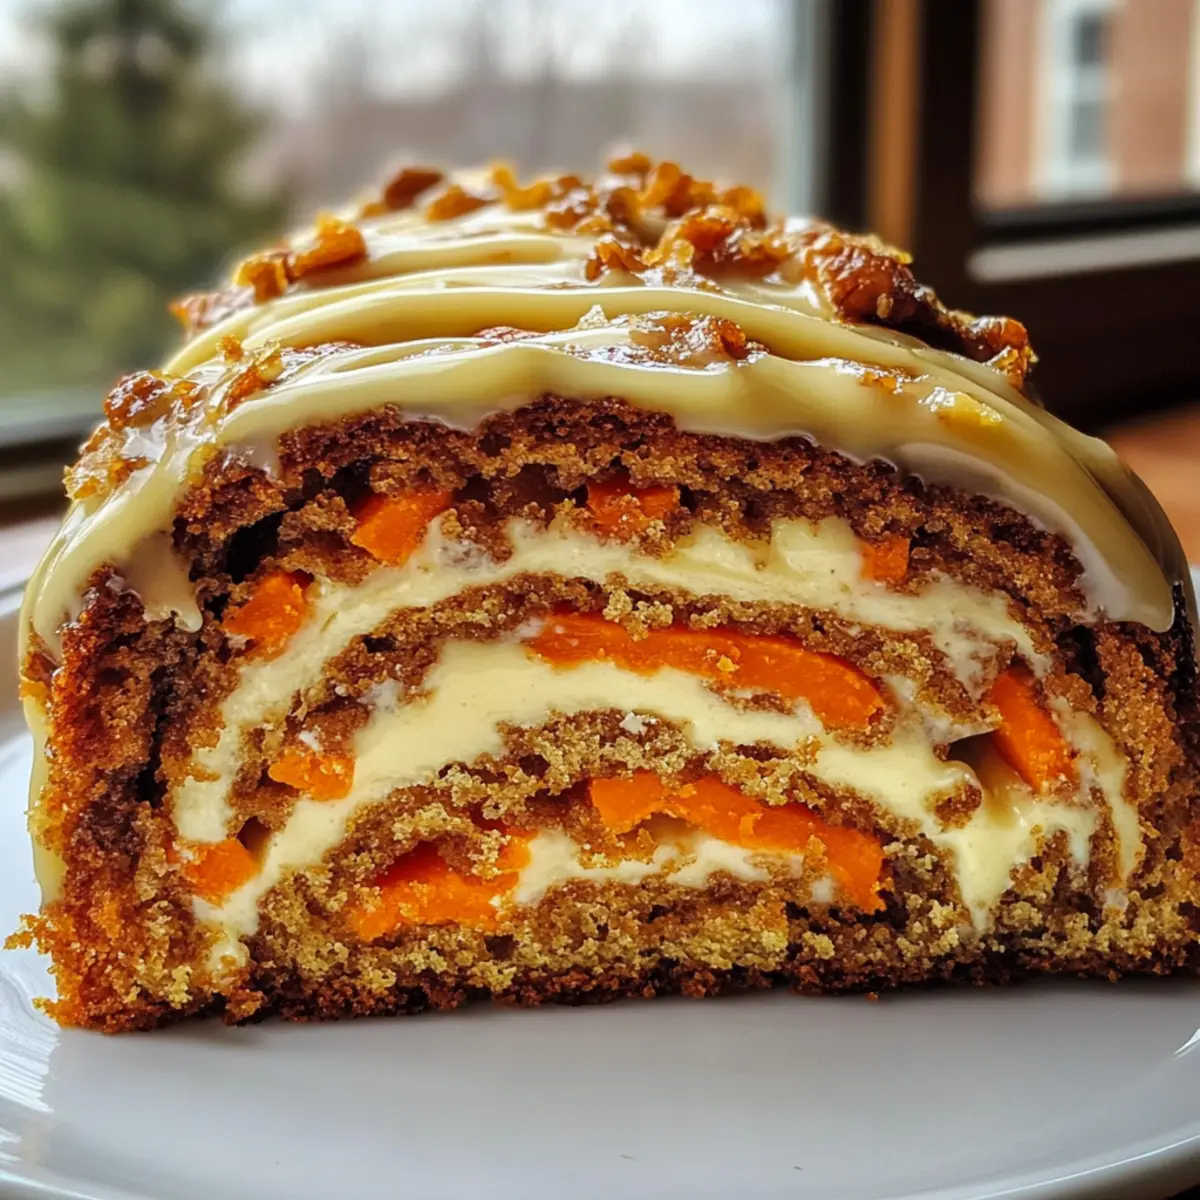
Once the dough has risen, punch it down and divide it into two equal pieces. Roll out one piece into a rectangle approximately 12×18 inches. Spread half of the carrot filling over the dough, then sprinkle with ½ cup of chopped toasted walnuts. Roll the dough tightly into a log, pinch the edges, and repeat with the second piece of dough.
Step 5: Shape Babka
Cut each log in half lengthwise, exposing the filling layers. Twist the two halves together, then place the twisted dough into a greased loaf pan. Cover with a cloth and let it rise for about 1 hour until puffy and nearly doubled.
Step 6: Bake
Preheat your oven to 350°F (175°C). Brush the tops of the babka loaves with an egg wash (1 beaten egg) for a beautiful glaze. Bake for 40–50 minutes until golden brown, and a toothpick inserted in the center comes out clean; internal temperature should reach 190°F (88°C).
Step 7: Make Drizzle
While the babka cools, prepare the cardamom cream cheese drizzle. In a bowl, blend 4 ounces of cream cheese, 2 tablespoons of unsalted butter, and 1 cup of powdered sugar. Add milk gradually until you reach your desired drizzle consistency.
Step 8: Cool and Drizzle
Allow the babkas to cool in the pans for 10 minutes, then transfer them to a wire rack to cool completely. Once cool, generously drizzle the cardamom cream cheese mixture over the babkas, allowing it to cascade over the tops for a delightful finish.
How to Store and Freeze Carrot Cake Babka
Room Temperature: Keep unglazed babkas in an airtight container at room temperature for up to 3 days; they are best enjoyed fresh.
Fridge: If you want to extend freshness, refrigerate the babka in a wrapped container for up to a week. Just note the texture may slightly change.
Freezer: To freeze, wrap the cooled babka tightly in plastic wrap and then foil, keeping it for up to 3 months. Thaw overnight in the fridge before enjoying.
Reheating: For a delightful experience, reheat slices in the microwave or oven to restore some warmth and softness, while maintaining the flavors of this Carrot Cake Babka with Cardamom Cream Cheese Drizzle.
What to Serve with Carrot Cake Babka with Cardamom Cream Cheese Drizzle
Elevate your dining experience by pairing this luscious babka with delightful sides that harmonize its warm spices and creamy finish.
- Fresh Berries: The tartness of strawberries or raspberries adds a refreshing contrast to the sweetness of the babka, brightening every bite.
- Whipped Cream: Light and airy, this classic accompaniment complements the rich cream cheese drizzle while adding a lovely texture.
- Hot Tea: A fragrant cup of chai or herbal tea creates a soothing moment, enhancing the warm spices and inviting aromas from the babka.
- Ice Cream: A scoop of vanilla bean or caramel ice cream introduces a creamy coldness that beautifully balances the warm dessert, creating a delightful contrast.
- Nutty Granola: Sprinkle some homemade or store-bought granola for a satisfying crunch that pairs well with the soft babka and adds another layer of flavor.
- Fruit Compote: A homemade apple or pear compote drizzled on top provides a sweet and fruity layer that enhances the spiced flavors in each slice.
Carrot Cake Babka Variations & Substitutions
Feel free to get creative and make this Carrot Cake Babka your own – there are so many delicious possibilities!
- Nut-Free: Omit walnuts and replace with seeds like sunflower or pumpkin for a delightful crunch without the nuts.
- Dairy-Free: Substitute both the cream cheese and butter with coconut cream or vegan butter to keep it indulgent and dairy-free.
- Spice Up: Swap the cardamom for pumpkin spice to add a unique twist, while still capturing that cozy autumn vibe.
- Sweeten the Deal: Use mashed bananas or unsweetened applesauce in place of some granulated sugar for a naturally sweetened filling. This can amplify the flavor and moisture beautifully.
- Try Chocolate: Incorporate mini chocolate chips into the filling for an irresistible chocolate-caramel fusion with rich, spiced flavors. Picture it – every slice bursting with sweet surprise!
- Fruit Additions: Fold in some raisins or dried cranberries for a fruity contrast that brings a delightful chewiness. You might even find this twist makes your babka sing!
- Glaze Upgrade: Drizzle with melted dark chocolate instead of cream cheese for a decadent finish that chocolate lovers will adore.
- Festive Shape: Instead of a loaf, form your babka into a wreath for added festivity, perfect for holiday gatherings, or use a bundt pan for a show-stopping effect when serving.
As you explore these variations, remember you can enjoy this indulgence at your holiday gatherings, just like when we gather around for comforting slices of moist cake. Don’t forget, you can also pair your slice of deliciousness with a warm cup of tea or coffee for a perfect treat any time!
Expert Tips for Carrot Cake Babka
- Fresh Yeast Check: Ensure your active dry yeast is fresh by observing for foaming. Old yeast can lead to dense babkas.
- Moisture Management: Properly dry your shredded carrots to avoid sogginess in the filling. Use a clean towel to squeeze out excess moisture.
- Kneading Consistency: If your dough feels too sticky, gradually add more flour until it’s smooth and elastic. This will help achieve that perfect texture.
- Cool Before Drizzling: Allow your babkas to cool completely before adding the cardamom cream cheese drizzle. This prevents the glaze from melting and ensures a beautiful finish.
- Storage Suggestions: Store any leftovers at room temperature for up to three days. Enjoy fresh for the best flavor from this Carrot Cake Babka with Cardamom Cream Cheese Drizzle.
Make Ahead Options
These Carrot Cake Babkas with Cardamom Cream Cheese Drizzle are perfect for busy home cooks looking to save time during the hustle and bustle of festive gatherings! You can prepare the dough up to 24 hours in advance by letting it rise in the refrigerator, which also enhances its flavor. The filling can be made a day ahead as well; just store it in an airtight container in the fridge to keep it fresh. When you’re ready to bake, shape the babkas and allow them to rise for about 1 hour before baking them. This way, you’ll have freshly baked babkas that are just as delicious, yet less stressful to create on the day of your celebration!
Carrot Cake Babka with Cardamom Cream Cheese Drizzle Recipe FAQs
What should I look for when selecting carrots for the filling?
Choose fresh, firm carrots that have a vibrant orange color and no dark spots or blemishes. The fresher they are, the sweeter they’ll taste in your Carrot Cake Babka with Cardamom Cream Cheese Drizzle!
How should I store leftover Carrot Cake Babka?
Store unglazed babkas at room temperature in an airtight container for up to 3 days for optimal freshness. If you have leftovers, refrigerate them for up to a week; however, be aware that the texture may change slightly.
Can I freeze the Carrot Cake Babka?
Absolutely! Once the babka has cooled, wrap it tightly in plastic wrap and then in foil to prevent freezer burn. You can freeze it for up to 3 months. To enjoy, simply thaw it overnight in the fridge and warm it up before serving!
What can I do if my babka dough isn’t rising?
If your dough isn’t rising, it might be due to inactive yeast. To check, ensure your yeast is fresh. If the yeast didn’t foam during the initial step, the milk may have been too hot or too cold. For best results, use milk around 110°F, and ensure you’re in a warm environment for rising.
Can I make any substitutions for dietary restrictions?
Yes! You can swap whole milk for almond milk for a dairy-free option and use dairy-free butter instead of unsalted butter. If you need a nut-free version, skip the walnuts or replace them with sunflower seeds. Always check ingredient labels for allergens if cooking for someone with food sensitivities.
Irresistible Carrot Cake Babka with Cardamom Cream Cheese Drizzle
Ingredients
Equipment
Method
- Combine yeast, warm milk, and granulated sugar in a mixing bowl. Let it sit for 5–10 minutes until foamy.
- Gradually mix in flour, eggs, salt, and butter until smooth and cohesive.
- Oil a large bowl, place the dough inside, and cover with a damp cloth. Let it rise for 1.5–2 hours.
- Alternatively, refrigerate overnight for a slow rise of 12–24 hours.
- Pulse shredded carrots in a food processor until finely chopped, then squeeze out excess moisture.
- Mix carrots with brown sugar, flour, and spices until well combined.
- Punch down the risen dough and divide it into two equal pieces. Roll out one piece into a rectangle.
- Spread half of the filling over the dough and sprinkle with walnuts. Roll tightly into a log.
- Cut each log in half lengthwise and twist the halves together.
- Place the twisted dough in a greased loaf pan and let rise for about 1 hour.
- Preheat the oven to 350°F (175°C). Brush tops with egg wash and bake for 40–50 minutes.
- Check for doneness with a toothpick; internal temperature should reach 190°F (88°C).
- Blend cream cheese, butter, and powdered sugar in a bowl. Add milk gradually until desired consistency.
- Allow babkas to cool in pans for 10 minutes, then transfer to a wire rack to cool completely.
- Drizzle the cream cheese mixture generously over the babkas.