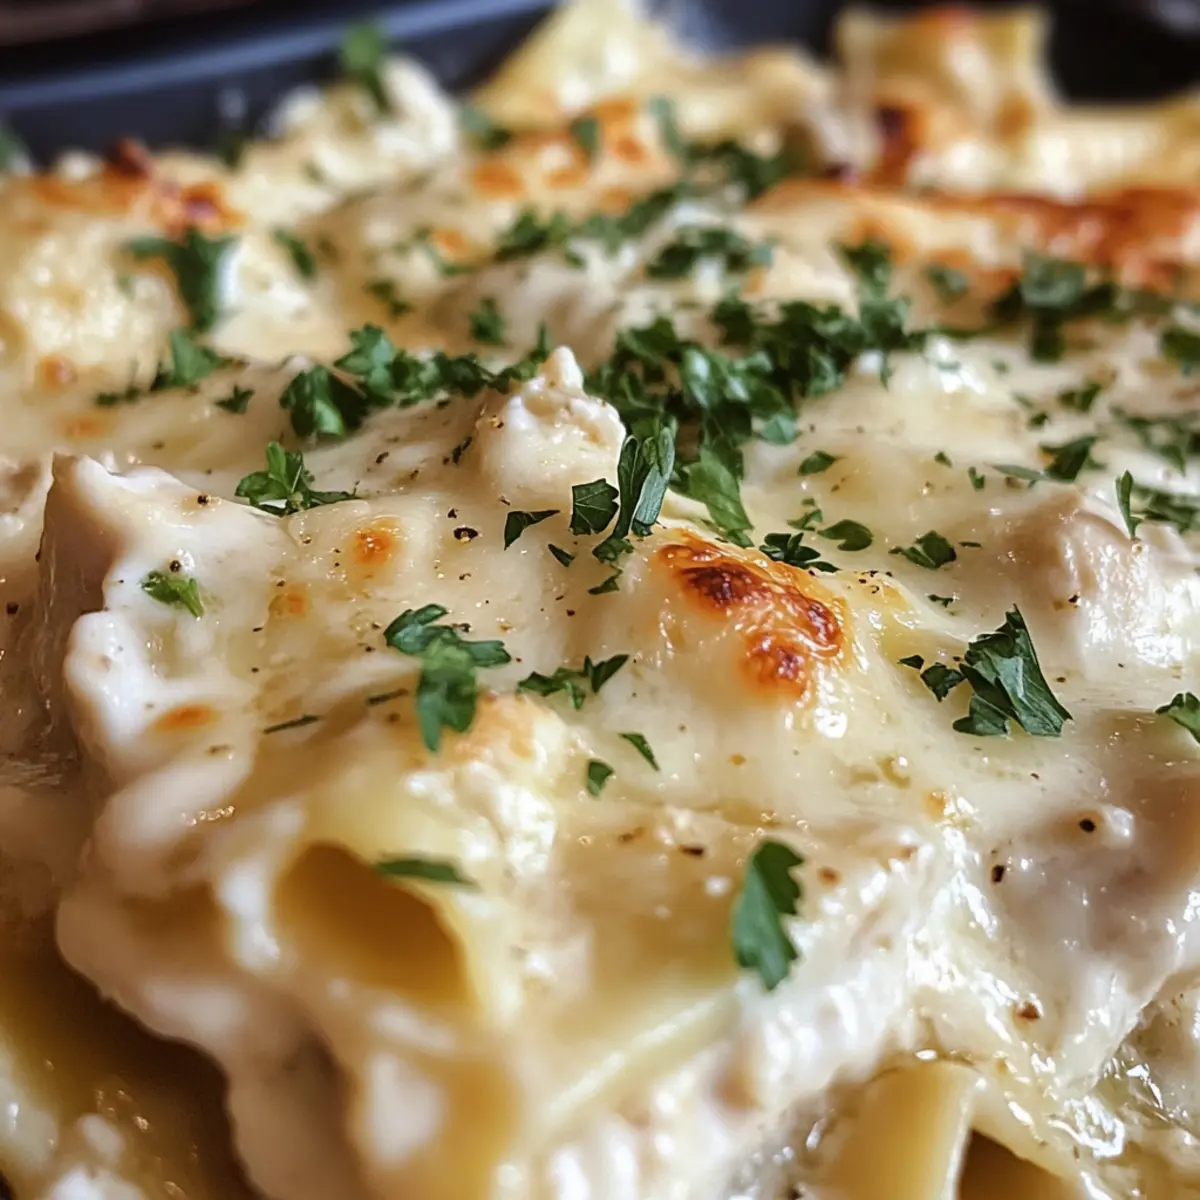
Delicious PANESCONE: A Festive Twist on Classic Scones

In the heart of the kitchen, where the warmth of baking mingles with the aromas of sweet nostalgia, I stumbled upon a delightful fusion: the PaneScone. This charming creation marries the classic English scone with the festive essence of Italian Panettone. Imagine biting into a tender scone, its crumbly texture melting effortlessly in your mouth, all while being incredibly simple to whip up! This recipe not only brightens any breakfast or tea time but also brings festive cheer to your table without the fuss. Plus, it’s an excellent way to impress friends and family who may think baking requires advanced skills. Are you ready to step into a world where scones and Panettone collide? Let’s dive into this deliciously unique treat!

Why is PaneScone a Must-Try?

Flavor Explosion: Every bite brings together the rich, festive notes of Panettone mixed with the delightful crumbly texture of a scone. It’s like a holiday celebration in your mouth!

Effortless Baking: Quick and easy to whip up, this recipe is perfect for those who want homemade goodness without the hassle of complicated techniques.

Crowd-Pleasing Delight: Ideal for sharing, whether at brunch with friends or a cozy afternoon tea, these scones are sure to impress.

Versatile Treat: Customize it by adding dried fruits or flavored extracts to tweak the taste to your liking, keeping things exciting each time you bake!

Perfect Pairing: Enjoy them warm with clotted cream or a sweet spread for a delightful treat that complements any setting, from casual snacks to festive gatherings!

PaneScone Ingredients

For the Scone Base
Flour – Provides structure and base for the PaneScone; whole wheat flour can be used for a nuttier flavor.
Sugar – Adds sweetness and complements the festive flavors of Panettone; reduce slightly for a less sweet option.
Baking Powder – A leavening agent for a light and airy texture; no substitutions needed.
Butter – Creates a rich, tender crumb and enhances flavor; margarine is a good dairy-free substitute.
Eggs – Binds ingredients together and adds moisture; flax eggs are a viable vegan alternative.
Milk – Adds moisture and richness; non-dairy milk serves as an excellent alternative.

Optional Add-ins
Dried Fruits – Mix in raisins or cranberries for added sweetness and texture; a nod to traditional Panettone.
Flavorings – Experiment with orange zest or almond extract to infuse classic Panettone nuances into your PaneScone.

Step‑by‑Step Instructions for PANESCONE

Step 1: Preheat Oven
Begin by preheating your oven to 200°C (400°F). This temperature ensures that your PaneScone bakes evenly and develops a beautifully golden-brown crust. While the oven heats up, gather your mixing bowls and a baking tray lined with parchment paper, ready for the delicious creation to come.

Step 2: Mix Dry Ingredients
In a large mixing bowl, combine the flour, sugar, and baking powder. Use a whisk to blend these dry ingredients thoroughly until evenly distributed, creating a perfect base for your PaneScone. This process helps incorporate air and ensures that every bite of your scone will be light and fluffy.

Step 3: Cut in the Butter
Cut cold butter into small cubes and add it to the flour mixture. Using a pastry cutter or your fingertips, work the butter into the flour until it resembles coarse crumbs. This step is crucial for achieving that rich, tender crumb in your PaneScone, so be gentle and swift, avoiding overworking the mixture.

Step 4: Combine Wet Ingredients
In a separate bowl, whisk together the eggs and milk until well blended. This combination adds moisture and richness to your PaneScone. Once combined, make sure to create a small well in the dry ingredients to prepare for the next step where these wet ingredients will be added.

Step 5: Mix Wet and Dry Ingredients
Pour the egg and milk mixture into the dry ingredients, gently folding them together with a spatula. Mix until just combined; be careful not to overmix, as this could lead to dense scones. You want to maintain a light texture, characteristic of a delightful PaneScone.

Step 6: Shape the Dough
Transfer the dough onto a lightly floured surface and form it into a disc about 1 inch thick. Use a sharp knife or a pizza cutter to cut the disc into desired scone shapes, whether triangles or circles. This shaping allows the PaneScones to bake evenly and look inviting.

Step 7: Bake the PaneScones
Place the cut scones on your prepared baking tray, spacing them apart to allow for expansion. Slide the tray into the preheated oven and bake for about 15 minutes or until the scones turn golden brown. Your kitchen will soon fill with a tempting aroma, signaling that baking magic is happening.

Step 8: Cool and Serve
Once baked to perfection, remove the PaneScones from the oven and let them cool slightly on a wire rack. This cooling step allows them to set up nicely before serving. Enjoy them warm with clotted cream or your favorite sweet spread for a delightful treat!

What to Serve with PaneScone?

Enhance your baking experience by pairing these delightful scones with flavorful complements that will elevate your gatherings.

  • Clotted Cream: This rich cream adds a luxurious touch, balancing the sweetness of the PaneScone before each satisfying bite. Serve generously for an indulgent experience that will transport you straight to a cozy café.

  • Fresh Berries: Juicy strawberries or vibrant raspberries provide a refreshing contrast and a burst of freshness, enhancing the festive appeal of your scone. Their tartness perfectly cuts through the richness, making each mouthful a delightful balance.

  • Honey or Jam: Think of a sweet spread that mirrors the flavors of the scone. A drizzle of honey or a dollop of tangy jam adds a sweet element that tickles the taste buds, bringing out the fruitiness of Panettone flavors within the scone.

  • Italian Coffee: A warm cup of espresso or creamy cappuccino creates an authentic Italian experience. The hearty coffee grounds are a smooth match, providing a rich backdrop that enhances the scone’s flavor profile.

  • Herbal Tea: Light, fragrant teas such as chamomile or Earl Grey make a great combination, offering herbal notes that soothe and complement the sweet and rich nature of your PaneScone, making every tea-time special.

  • Chocolate Ganache: For a decadent twist, serve with a side of silky ganache. The sweetness of chocolate beautifully enhances the festive nature of PaneScone, perfect for those having a sweet tooth or anyone celebrating a special occasion.

  • Cheese Platter: Include a range of cheeses like creamy brie or aged cheddar to pair with the scone. This unexpected twist adds savory depth, balancing the sweet notes and creating a unique spread for your next gathering or brunch.

How to Store and Freeze PaneScone

Airtight Container: Keep your PaneScone in an airtight container at room temperature for up to 3 days to maintain freshness and flavor.

Freezer Storage: For longer preservation, wrap individual PaneScones tightly in plastic wrap and place them in a freezer-safe bag or container. They can freeze for up to 2 months.

Reheating Tips: To enjoy your frozen PaneScones, thaw them overnight in the fridge, then warm in the oven at 180°C (350°F) for about 10 minutes to restore their delightful texture.

Reviving Freshness: If stored at room temperature, you can warm leftover PaneScones in the microwave for a few seconds for a deliciously soft treat!

PANESCONE Customization Options

Feel free to get creative and make this PaneScone your own with these delightful variations!

  • Dried Fruits: Add raisins or cranberries to the dough for a pop of sweetness and texture, reminiscent of Panettone’s traditional ingredients. Each bite becomes a little surprise, adding to the festive feel of the scone.

  • Nutty Twist: Swap out some of the all-purpose flour for whole wheat flour for a deliciously nutty flavor. This substitution not only enhances the taste but provides a bit of extra fiber, making your scone a tad healthier.

  • Citrus Zing: Incorporate fresh orange zest or lemon zest into the dough for a bright, refreshing burst that complements the festive flavors beautifully. The aroma of citrus as they bake will fill your kitchen with warmth.

  • Almond Extract: Substitute vanilla extract for almond extract to give your PaneScone a lovely nutty richness, echoing those classic Panettone flavors. The gentle almond notes create a deliciously unique scone.

  • Spicy Kick: For an unexpected depth, add a dash of ground cinnamon or nutmeg to the dry ingredients. The spices give the scone a cozy warmth, perfect for chilly mornings.

  • Dairy-Free Option: Replace butter with margarine or coconut oil for a dairy-free version of your PaneScone. Your kitchen will still fill with a delightful aroma, and the scones will remain tender and crumbly.

  • Plant-Based Innovation: Use flax eggs in place of regular eggs to create a vegan PaneScone. This simple swap keeps the same tender texture while making it suitable for everyone at your table.

  • Berry Delight: Fold in blueberries or chopped strawberries into the dough for a fruity explosion, bringing a burst of juiciness that contrasts beautifully with the scone’s fluffy texture.

As you explore these variations, don’t forget to check out other delicious recipes like Dried Fruit Scones or Classic English Scones for inspiring ideas!

Make Ahead Options

These PaneScones are perfect for meal prep enthusiasts! You can prepare the dry ingredients (flour, sugar, and baking powder) and store them in an airtight container for up to 3 days. This also applies to cutting the cold butter into the flour mixture; just keep it in the refrigerator to maintain that flaky texture. If you want to go a step further, you can shape the scones and place them on a baking tray, then refrigerate them overnight. When you’re ready to bake, simply preheat the oven and pop them in for about 15 minutes. This way, you’ll enjoy fresh, delicious PaneScones with minimal effort on your busy mornings!

Expert Tips for PaneScone

  • Cold Butter is Key: Ensure your butter is very cold when cutting it into the flour for the best flakiness in your PaneScone.

  • Gentle Mixing: Avoid overmixing the dough to maintain that light and crumbly texture; mix just until combined.

  • Shape with Care: Use a sharp knife or pizza cutter for clean edges when cutting your scones, enhancing their charming appearance.

  • Fresh Ingredients Matter: Use fresh baking powder for optimal rise and texture; expired leavening agents can lead to dense scones.

  • Customize Flavor: Feel free to experiment by adding dried fruits or flavorings to your PaneScone for a custom twist each time you bake!

PaneScone Recipe FAQs

Which flour is best for PaneScone?
Using all-purpose flour provides the ideal structure for your PaneScone. However, if you’re looking for a nuttier flavor, I often recommend substituting half of it with whole wheat flour. Just keep in mind that a whole wheat mixture may yield a denser texture.

How should I store leftovers?
To keep your PaneScone fresh, place them in an airtight container at room temperature for up to 3 days. If you’ve baked more than you can enjoy in that timeframe, you can freeze them for longer storage and prevent waste.

Can I freeze PaneScone? If so, how?
Absolutely! To freeze your PaneScone, first let them cool completely. Then, wrap each scone tightly in plastic wrap and place them in a freezer-safe bag. They can be frozen for up to 2 months. When you’re ready to enjoy, thaw them in the fridge overnight and warm them in the oven at 180°C (350°F) for about 10 minutes to reclaim their fresh-baked warmth.

What if my scone dough is too wet?
If you find your dough is overly sticky, don’t panic! This can happen with various factors. Gradually add small amounts of flour until it reaches a workable consistency. Remember, though, the more you handle it, the denser your scones may become, so try to mix just until incorporated!

Is PaneScone suitable for people with dairy allergies?
Definitely! For a dairy-free version of PaneScone, simply substitute butter with margarine and use non-dairy milk. Additionally, you can replace eggs with flax eggs by mixing 1 tablespoon of ground flaxseeds with 2.5 tablespoons of water and letting it sit for a few minutes until it thickens. This keeps all the wonderful flavors while making it friendly for dietary needs!

PANESCONE

Delicious PANESCONE: A Festive Twist on Classic Scones

Experience a delightful fusion of English scones and Italian Panettone with PANESCONE, perfect for festive gatherings.
Prep Time 30 minutes
Cook Time 15 minutes
Cooling Time 10 minutes
Total Time 55 minutes
Servings: 8 scones
Course: Breakfast
Cuisine: British, Italian
Calories: 200

Ingredients
  

For the Scone Base
  • 2 cups Flour Whole wheat flour can be used for a nuttier flavor.
  • 1/4 cup Sugar Reduce slightly for a less sweet option.
  • 1 tbsp Baking Powder No substitutions needed.
  • 1/2 cup Butter Margarine is a good dairy-free substitute.
  • 1 large Eggs Flax eggs are a viable vegan alternative.
  • 1/2 cup Milk Non-dairy milk serves as an excellent alternative.
Optional Add-ins
  • 1/2 cup Dried Fruits Mix in raisins or cranberries.
  • 1 tsp Flavorings Experiment with orange zest or almond extract.

Equipment

  • mixing bowls
  • baking tray
  • whisk
  • pastry cutter

Method
 

Step-by-Step Instructions for PANESCONE
  1. Preheat oven to 200°C (400°F).
  2. In a large bowl, combine flour, sugar, and baking powder.
  3. Cut cold butter into small cubes and add to the flour mixture.
  4. In a separate bowl, whisk together eggs and milk.
  5. Pour egg and milk mixture into the dry ingredients, gently fold together.
  6. Transfer the dough onto a lightly floured surface and form into a disc.
  7. Place the cut scones on the prepared baking tray and bake for about 15 minutes.
  8. Once baked, cool slightly on a wire rack before serving.

Notes

Enjoy with clotted cream or your favorite sweet spread for a delightful treat.

Cinnamon Rugelach: Irresistibly Flaky Holiday Pastries

As I rolled out the buttery dough, a sweet aroma enveloped my kitchen—it’s the unmistakable scent of nostalgia. These cinnamon rugelach pastries bring to life the love of holiday traditions, deliciously bridging generations through their flaky goodness. This recipe not only delights your senses but also boasts a nippy 20-minute prep time, making them surprisingly quick to whip up! Perfect for sharing at gatherings or simply enjoying with a warm cup of tea, these crescent-shaped treats are the epitome of comfort food and a fantastic way to embrace homemade baking. Ready to fill your kitchen with warmth and sweetness? Let’s dive into making these irresistible cinnamon rugelach together!

Why try this cinnamon rugelach recipe?

Tradition Meets Flavor: These flaky pastries are steeped in history, bringing a touch of cherished Jewish culture to your kitchen, making them perfect for any holiday gathering.

Easy to Make: With a 20-minute prep time, you can create these delicious delights without spending hours in the kitchen.

Deliciously Versatile: Feel free to experiment with fillings like apricot jam or even chocolate for a fun twist!

Perfect for Sharing: These bite-sized treats are great for gatherings and are guaranteed to be a crowd favorite.

Guilt-Free Indulgence: At around 84 calories each, enjoy satisfying your sweet tooth without the guilt.

Unleash the warmth of holiday baking with these cinnamon rugelach pastries, where every bite is a beautiful blend of nostalgia and comfort!

Cinnamon Rugelach Ingredients

For the Dough

  • Cream Cheese (8 oz / 226 g) – Provides a tender and flaky texture to the dough. Substitute with full-fat Greek yogurt for a lactose-free option.
  • Unsalted Butter (8 oz / 226 g) – Adds richness and moisture to the dough. Ensure it’s room temperature for easy mixing.
  • Granulated Sugar (¼ cup / 50 g) – Sweetens the dough and balances the flavors. Can be substituted with coconut sugar.
  • Salt (½ teaspoon) – Enhances the overall flavor of the pastries.
  • Vanilla Extract (1 teaspoon) – Adds aromatic sweetness. Use pure vanilla for better flavor.
  • All-Purpose Flour (2 cups / 240 g) – Provides structure to the dough. For gluten-free, substitute with a gluten-free all-purpose blend.

For the Filling

  • Dark Brown Sugar (½ cup / 106 g) – Sweetens the filling while adding depth due to its molasses content. Light brown sugar can be used as a substitute.
  • Ground Cinnamon (1 tablespoon) – Infuses the filling with warm spice. Adjust to taste for more or less sweetness.
  • Chopped Pecans or Walnuts (1 cup / 114 g) – Adds crunch and richness to the filling. Can be omitted or substituted with almonds.

For the Egg Wash

  • Egg (1 large) – Used for making an egg wash to give the pastries a golden brown finish. Milk or cream can be used as a substitute for a dairy-free option.
  • Milk (1 tablespoon) – Used in the egg wash to enhance color and shine.

Bring the festive feel to your kitchen with these delicious cinnamon rugelach pastries!

Step‑by‑Step Instructions for Cinnamon Rugelach

Step 1: Prepare the Dough
In a mixing bowl, combine 8 oz of cream cheese and 8 oz of unsalted butter at room temperature and beat until creamy and smooth. Add ¼ cup of granulated sugar, ½ teaspoon of salt, and 1 teaspoon of vanilla extract, mixing until fully combined. Gradually incorporate 2 cups of all-purpose flour on low speed until just blended. Shape the dough into a ball, divide it into four quarters, flatten each into a disc, wrap tightly in plastic, and refrigerate for 30 minutes.

Step 2: Prepare the Filling
While the dough chills, prepare the filling by mixing together ½ cup of dark brown sugar, 1 tablespoon of ground cinnamon, and 1 cup of chopped pecans or walnuts in a medium bowl. Set this filling mixture aside to allow the flavors to meld together, creating a deliciously sweet and nutty blend that will perfectly complement the flaky nature of your cinnamon rugelach.

Step 3: Roll and Fill
After chilling, preheat your oven to 350°F (175°C) and line baking sheets with parchment paper. On a floured surface, roll out one disc of dough into a 9-10 inch circle. Lightly brush the surface with water and evenly spread a thin layer of your filling mixture over the dough. Cut the circle into 12 wedges, then starting at the outer edge, carefully roll each wedge inward to form a miniature crescent shape. Place the rolled pastries on the prepared baking sheets with the pointed ends facing down.

Step 4: Bake
Once all the cinnamon rugelach are arranged, prepare an egg wash by whisking together 1 large egg and 1 tablespoon of milk. Brush the tops of each pastry with this mixture for a gorgeous golden finish. Bake in the preheated oven for 18-22 minutes, or until the pastries are golden brown and fragrant. When done, transfer them to a wire rack to cool completely, allowing the flaky layers to set perfectly.

Expert Tips for Cinnamon Rugelach

  • Perfectly Measure Flour: Use a kitchen scale to weigh the flour for accurate measurements, ensuring the right dough consistency. Too much flour can make your cinnamon rugelach dense.
  • Chill the Dough: Don’t skip the refrigeration step! Chilling the dough makes it easier to roll out and helps achieve that flaky texture.
  • Prevent Sticking: Dust your surface with flour while rolling out the dough, and use parchment paper for baking to avoid any sticking issues.
  • Watch the Bake Time: Keep an eye on them in the oven! Each oven is different, so check a minute or two earlier to prevent overbaking these delicious treats.
  • Custom Fillings: Feel free to swap nuts for fruits or chocolate to add a unique twist to your cinnamon rugelach. Get creative with your favorite flavors!

Make Ahead Options

These cinnamon rugelach are perfect for making ahead, saving you precious time during busy holiday preparations! You can prepare the dough up to 24 hours in advance by following the first two steps, then wrap the discs tightly in plastic wrap and refrigerate. The filling can also be mixed and stored in an airtight container for up to 3 days; just keep it in the fridge to maintain its freshness. When you’re ready to serve, roll out the chilled dough, spread the filling, shape, and bake as directed. These make-ahead tips ensure that your cinnamon rugelach are just as delicious, flaky, and warm when they finally touch the festive table!

Cinnamon Rugelach Variations & Substitutions

Dive into the world of creativity with these cinnamon rugelach variations, each inviting you to explore new flavors and textures that will enchant your taste buds.

  • Fruit Preserves: Substitute the nut filling with fruit preserves like apricot or raspberry for a fruity spin. The sweetness of the fruit pairs beautifully with the flaky pastry.

  • Chocolate Lovers: For a decadent twist, swap out nuts for finely chopped chocolate or chocolate chips. Who can resist that rich, melty goodness?

  • Nut-Free Option: If you’re nut-sensitive, omit nuts entirely and replace them with rolled oats or sunflowers for added crunch and texture.

  • Spice It Up: Enhance your filling by adding a pinch of nutmeg or cardamom to elevate those warm, cozy flavors. A dash of warmth transforms these pastries into something extraordinary.

  • Dairy-Free: Use full-fat coconut cream in place of cream cheese for a dairy-free dough. It lends an incredible richness that complements the sweetness.

  • Sweetener Substitution: If you prefer natural sweeteners, substitute regular sugar with maple syrup or honey; adjust the quantity as needed for sweetness level—just remember to account for the moisture!

  • Gluten-Free Dough: Replace all-purpose flour with a gluten-free flour blend to cater to gluten sensitivities. Just be sure to add a little xanthan gum for the right texture.

These variations are just the beginning! Feel free to explore more delicious possibilities. Try out these modifications and create a personalized version of cinnamon rugelach that speaks to your taste. Enjoy with a warm cup of chai or alongside a delightful afternoon tea while sharing these treats with loved ones; they’ll surely love your delectable creations!

Storage Tips for Cinnamon Rugelach

Room Temperature: Store baked rugelach in an airtight container at room temperature for up to 5 days, allowing them to retain their delightful flakiness.

Freezer: For longer storage, freeze the pastries for up to 3 months. Wrap them tightly in plastic wrap and place them in a freezer-safe bag.

Thawing: When ready to enjoy, allow the frozen cinnamon rugelach to thaw at room temperature for 1-2 hours before serving, to regain their tender texture.

Reheating: For a warm treat, reheat in a 350°F (175°C) oven for 5-10 minutes, making them as tasty as when they were fresh-baked!

What to Serve with Cinnamon Rugelach

Indulge in the deliciousness of these flaky pastries paired with delightful accompaniments that elevate your holiday experience.

  • Rich Hot Chocolate: The velvety texture of hot chocolate contrasts beautifully with the flaky rugelach, creating a blissful taste sensation that warms the heart.

  • Fresh Berries: Bright and juicy berries add a refreshing tartness, perfectly balancing the sweet cinnamon filling and bringing a pop of color to your plate.

  • Whipped Cream: Light, airy whipped cream enhances the pastries’ richness, making every bite an indulgent delight; it’s like a cloud of sweetness atop your rugelach!

  • Coffee or Tea: A warm cup of your favorite brew brings out the spices in the rugelach while enhancing the comforting nostalgia of this holiday treat.

  • Vanilla Ice Cream: The creamy richness of vanilla ice cream melts beautifully with warm rugelach for an irresistible dessert that’s both comforting and festive.

  • Spiced Apple Cider: This warm drink, infused with cinnamon and cloves, adds a seasonal flair, making your gathering feel extra cozy and inviting.

  • Nuts and Dried Fruits Platter: Crunchy nuts and chewy dried fruits provide a delightful textural contrast, making for an elegant addition to your dessert spread.

Embrace the festive spirit and create a heartwarming gathering by pairing these treats with delightful beverages and snacks!

Cinnamon Rugelach Recipe FAQs

How do I select ripe ingredients for this cinnamon rugelach?
Absolutely! When choosing your ingredients, opt for fresh, quality items. Make sure your cream cheese and butter are at room temperature for easy mixing, and select unsalted butter to better control the flavors. Your nuts should be fresh; avoid those with dark spots or a rancid smell. If using dried fruits, like apricot jam for variations, look for vibrant colors and minimal additives.

How should I store cinnamon rugelach?
Baked rugelach stay delicious when stored properly! You can keep them in an airtight container at room temperature for up to 5 days. To maintain their delightful flakiness, ensure the container is completely sealed. If you’re not going to enjoy them within that time, I recommend freezing them. Wrap each pastry tightly in plastic wrap and place them in a freezer-safe bag. They can last for up to 3 months when frozen.

What is the best way to freeze cinnamon rugelach?
Very good question! To freeze your cinnamon rugelach, follow these simple steps:

  1. Allow the baked pastries to cool completely on a wire rack.
  2. Once cooled, wrap each pastry tightly in plastic wrap, making sure there’s no exposed area.
  3. Place the wrapped pastries in a freezer-safe bag or container, labeling it with the date.
  4. Freeze them for up to 3 months. When you want to enjoy them, just let them sit at room temperature for about 1-2 hours to thaw out. For a fresh-out-of-the-oven treat, reheat in a 350°F (175°C) oven for 5-10 minutes.

Can I make cinnamon rugelach gluten-free?
Absolutely! To make your cinnamon rugelach gluten-free, simply substitute the 2 cups of all-purpose flour with a gluten-free all-purpose blend. It’s best to look for a mix that includes xanthan gum, which helps mimic the texture of wheat flour. Just remember to keep an eye on the dough as you mix, ensuring not to overwork it—a gentle hand is key to achieving that flaky pastry!

Are there any common troubleshooting tips for this recipe?
Yes! If you find that your dough is too sticky while rolling, don’t hesitate to sprinkle a bit of flour on your surface to help with maneuvering. Alternatively, if your rugelach are not browning nicely, try rotating the baking sheets halfway through the baking time for even cooking. Lastly, if the filling oozes out while baking, it may be too generous; ensure you spread a thin layer for best results!

Can I share these rugelach with my pets?
While many human foods are safe for pets, cinnamon rugelach is not suitable for dogs or cats due to the sugar content and other ingredients like nuts that may not be digestible for them. It’s best to keep these treats exclusively for human enjoyment, so maybe bake your furry friends a special dog-friendly treat instead!

Cinnamon Rugelach

Cinnamon Rugelach: Irresistibly Flaky Holiday Pastries

Delight in the nostalgic flavors of cinnamon rugelach, perfect for holiday gatherings and quick to prepare.
Prep Time 20 minutes
Cook Time 20 minutes
Chilling Time 30 minutes
Total Time 1 hour 10 minutes
Servings: 24 pastries
Course: Dessert
Cuisine: Jewish
Calories: 84

Ingredients
  

For the Dough
  • 8 oz Cream Cheese Provides a tender and flaky texture to the dough.
  • 8 oz Unsalted Butter Adds richness and moisture to the dough.
  • ¼ cup Granulated Sugar Sweetens the dough.
  • ½ teaspoon Salt Enhances flavor.
  • 1 teaspoon Vanilla Extract Adds aromatic sweetness.
  • 2 cups All-Purpose Flour Provides structure to the dough.
For the Filling
  • ½ cup Dark Brown Sugar Sweetens the filling.
  • 1 tablespoon Ground Cinnamon Infuses the filling with warm spice.
  • 1 cup Chopped Pecans or Walnuts Adds crunch and richness.
For the Egg Wash
  • 1 large Egg Used for egg wash.
  • 1 tablespoon Milk Enhances color.

Equipment

  • mixing bowl
  • Rolling Pin
  • Baking sheets
  • parchment paper
  • Wire rack

Method
 

Step‑by‑Step Instructions
  1. In a mixing bowl, combine cream cheese and unsalted butter, beat until creamy. Add granulated sugar, salt, and vanilla, mixing until fully combined. Gradually incorporate flour. Shape into a ball, divide into quarters, flatten each into a disc, wrap in plastic, and refrigerate for 30 minutes.
  2. Mix dark brown sugar, ground cinnamon, and chopped pecans or walnuts in a medium bowl and set aside.
  3. Preheat oven to 350°F (175°C). Roll out one disc into a 9-10 inch circle. Brush water on the surface, spread filling, cut into 12 wedges, roll each wedge inward.
  4. Prepare egg wash by whisking egg and milk. Brush tops of pastries. Bake for 18-22 minutes until golden brown.

Notes

Store baked rugelach in an airtight container at room temperature for up to 5 days or freeze for 3 months. Reheat in a 350°F oven for 5-10 minutes before serving.

Irresistible Bagel Goat Cheese Truffles for Easy Entertaining

When I first discovered the magic of Everything Bagel Goat Cheese Truffles, I knew I’d stumbled upon a recipe that would change my appetizer game forever. These delightful bites encapsulate all the comforting nostalgia of a favorite bagel, snugly wrapped in creamy goat cheese and coated with that irresistible everything bagel spice blend. Not only are they a breeze to whip up, but they also serve as a fantastic gluten-free option, making them perfect for gatherings where everyone can enjoy them. Whether you’re hosting a cozy get-together or simply craving a tasty snack, these truffles promise to impress your guests and satisfy your palate. Ready to elevate your entertaining game with this easy party food that will please any crowd? Let’s dive in!

Why are Bagel Goat Cheese Truffles a Must-Try?

Irresistible Flavor: Each truffle delivers a creamy burst of goat cheese, perfectly enhanced by the savory crunch of everything bagel seasoning.

Quick to Make: With just a few simple steps, you can prepare these delightful appetizers in no time, leaving you ample opportunity to enjoy your gathering.

Gluten-Free Delight: Perfect for gluten-free diets, everyone at your party can indulge freely without missing out.

Versatile Serving Options: Serve them plain or alongside fresh veggies, crackers, or even on bagel chips for a fun twist. For more creative ideas, check out these recipes for Savory Cheese Egg or Savory Vegetable Cheese.

Crowd-Pleasing Treat: Whether at a holiday party or casual gathering, these truffles are guaranteed to be a hit, leaving your guests asking for seconds!

Bagel Goat Cheese Truffles Ingredients

For the Truffles

  • Goat Cheese Log – A creamy, tangy base that makes the truffles irresistible; substitute with cream cheese for a milder flavor if desired.
  • Everything Bagel Spice Blend – Infuses the truffles with savory goodness; you can use store-bought or make your own blend for a personal touch.

Optional Garnishes

  • Chopped Scallions – Mix them into the cheese for an extra layer of flavor and a pop of color.
  • Vegetable Slices – Pair the truffles with cucumbers or cherry tomatoes for a refreshing crunch.
  • Bagel Chips – Serve on top or alongside to bring a delightful texture contrast to your presentation.

These Bagel Goat Cheese Truffles are not only quick to make but also a stunning addition to any appetizer spread! Enjoy creating and sharing these delightful bites!

Step‑by‑Step Instructions for Bagel Goat Cheese Truffles

Step 1: Prepare the Spice Blend
Begin by pouring your Everything Bagel Spice Blend into a shallow bowl or plate. Spread it out evenly to ensure all surfaces are coated later. This savory mix will add a delightful crunch to your Bagel Goat Cheese Truffles, so take the time to arrange it nicely for easier rolling.

Step 2: Shape the Cheese
Next, take your goat cheese log and use a tablespoon to scoop out portions, rolling them into balls about 1/2″ to 1″ in diameter. This uniform size will help ensure even coating and a delightful bite. Continue shaping the cheese until you’ve formed all the truffles, placing them on a parchment-lined plate to keep them from sticking.

Step 3: Coat the Truffles
Now, take each cheese ball and gently drop it into the spice blend, rolling it until fully coated. Aim for even coverage, ensuring every bit of the truffle is embraced by the flavorful seasoning. This step is crucial as the spice blend gives the Bagel Goat Cheese Truffles their signature taste and appearance.

Step 4: Chill Before Serving
Once coated, carefully place the truffles on a plate lined with wax paper. This will help them maintain their shape as they chill. Refrigerate the truffles for at least 30 minutes before serving. This chilling time allows the flavors to meld beautifully and makes them easier to handle when it’s time to serve your guests.

Step 5: Serve with Style
After the truffles have chilled, they’re ready to shine at your gathering. Arrange the Bagel Goat Cheese Truffles on a beautiful platter, garnishing with optional vegetable slices or bagel chips for added flair and texture. Serve them chilled or at room temperature, and watch your guests enjoy these delightful bites!

What to Serve with Everything Bagel Goat Cheese Truffles

When hosting a gathering, creating a complete meal experience elevates your table and delights your guests’ senses.

  • Crispy Veggie Platter: Fresh, assorted veggies like cucumbers, carrots, and bell peppers add a crunchy contrast that balances the creamy truffles. They also invite guests to reach for more!

  • Savory Crackers: Selecting a variety of savory crackers provides interesting textures and enhances the experience, allowing everyone to dip or stack the truffles as they please.

  • Creamy Hummus: The richness of hummus paired alongside these truffles introduces a delightful creaminess that complements the goat cheese while offering a different flavor profile.

  • Fruit Chutney: A sweet fruit chutney, like fig or apple, brings a lovely balance of sweetness that pairs beautifully with the savory flavors of the truffles, creating a harmonious bite.

  • Sparkling Wine: A flute of chilled sparkling wine or prosecco elevates the celebration, as its effervescence enhances the flavors while cleansing the palate.

  • Mini Bagel Chips: For the ultimate bagel experience, serve these alongside crunchy mini bagel chips, creating a fun and interactive appetizer that guests can enjoy endlessly.

Delight your guests by presenting a dynamic array of flavors and textures that make a statement next to your Everything Bagel Goat Cheese Truffles!

Expert Tips for Bagel Goat Cheese Truffles

  • Blend for Budget: Mixing goat cheese with cream cheese not only stretches your ingredients but gives a creamier texture, perfect for those easy Bagel Goat Cheese Truffles.

  • Size Matters: Roll your truffles smaller for more bite-sized pieces, or larger if you want a bold, indulgent treat that stands out on the platter.

  • Chill Time is Key: Refrigerate your truffles for at least 30 minutes before serving to help maintain their shape and allow the flavors to meld, enhancing every bite.

  • Custom Coatings: Get creative! Try rolling your truffles in different spices or herbs to customize the flavor profile beyond the classic everything bagel seasoning.

  • Presentation Perfect: Use colorful vegetable garnishes like sliced cucumbers or cherry tomatoes around your truffles for a stunning visual appeal that enhances the experience at your next gathering.

How to Store and Freeze Bagel Goat Cheese Truffles

Fridge: Keep your truffles in an airtight container in the refrigerator for up to 7 days. This helps preserve their creamy texture and vibrant flavors.

Freezer: For longer storage, freeze the uncoated truffles on a baking sheet, then transfer them to an airtight container or freezer bag for up to 3 months. Coat them with the everything bagel spice blend after thawing.

Thawing: To enjoy frozen Bagel Goat Cheese Truffles, thaw them in the refrigerator overnight before coating them with spices and serving.

Reheating: These truffles are best enjoyed chilled or at room temperature, so no reheating is necessary!

Make Ahead Options

Making these Everything Bagel Goat Cheese Truffles ahead of time is a breeze and perfect for busy weeknights! You can shape the cheese balls and coat them in the Everything Bagel Spice Blend up to 24 hours in advance, then refrigerate them in an airtight container to maintain their freshness. If you’d like to prepare them even further in advance, you can roll them into balls and store the uncoated cheese in the fridge for up to 3 days. When you’re ready to serve, simply coat the chilled truffles in the spice blend, and you’ll have a delicious appetizer that’s just as delightful as freshly made—saving you time and stress when the guests arrive!

Bagel Goat Cheese Truffles Variations

Explore delightful twists to elevate your Bagel Goat Cheese Truffles and enjoy these cheesy bites in new ways!

  • Creamy Blend: Mix goat cheese with cream cheese for a milder flavor and creamier texture. This variation stretches your ingredients while adding richness.

  • Herb Infusion: Fold fresh herbs like dill or chives into your cheese mixture for an aromatic surprise. This simple addition enhances flavor while adding a burst of freshness.

  • Spicy Kick: Incorporate red pepper flakes into the spice blend for those who crave a spicy punch. This variation introduces a subtle heat, balancing with the creamy cheese beautifully.

  • Nutty Crunch: Roll your truffles in finely chopped nuts, such as pistachios or walnuts, for an added texture twist. It creates a wonderful contrast of creaminess and crunch.

  • Veggie Boost: Mix in finely chopped bell peppers or sun-dried tomatoes into the cheese mixture for extra flavor and vibrant color. This brings a fresh taste that will delight your guests.

  • Sweet Surprise: For a unique twist, roll truffles in toasted coconut or drizzle with a honey glaze just before serving. This unexpected combination brings a sweet balance to the savory flavor.

  • Savory Vegetable Serve: Pair your truffles with a mix of colorful vegetable slices for a vibrant presentation. Sliced cucumbers and cherry tomatoes work wonderfully and complement the truffles beautifully.

These variations offer fun ways to customize your Bagel Goat Cheese Truffles! For more delicious ideas around cheese, consider trying the Savory Vegetable Cheese or check out the delightful Blueberry Cream Cheese for an inviting dessert treat.

Bagel Goat Cheese Truffles Recipe FAQs

What type of goat cheese should I use?
I recommend using a plain goat cheese log for the best flavor profile, as it provides that creamy, tangy base. If you want a milder taste, can easily substitute it with cream cheese, which also helps stretch your batch further!

How should I store leftover truffles?
To keep your Bagel Goat Cheese Truffles fresh, store them in an airtight container in the refrigerator. They will remain delicious for up to 7 days. Make sure you have them tightly sealed to prevent any moisture from compromising their creamy texture.

Can I freeze Bagel Goat Cheese Truffles?
Absolutely! To freeze, simply place the uncoated truffles on a baking sheet in a single layer. Freeze them for about 1-2 hours until firm, then transfer them to an airtight container or a freezer bag. They can be stored frozen for up to 3 months. Once you’re ready to serve, thaw them overnight in the fridge before coating with the everything bagel spice blend.

What if my truffles are too soft to roll?
If you find your truffles are a bit too soft, no worries! Chill the goat cheese mixture for about 15-20 minutes in the refrigerator to help firm it up. Once it’s a bit cooler, it will be much easier to roll them into the perfect bite-sized balls.

Are these truffles safe for people with allergies?
While Bagel Goat Cheese Truffles are gluten-free due to the use of everything bagel seasoning, check your spice blend to ensure no gluten-containing ingredients are present. Additionally, these truffles contain dairy, so they may not be suitable for those with dairy allergies. Always consider your guests’ dietary restrictions when serving!

Bagel Goat Cheese Truffles

Irresistible Bagel Goat Cheese Truffles for Easy Entertaining

Discover the magic of Bagel Goat Cheese Truffles, a creamy appetizer that captivates any crowd.
Prep Time 15 minutes
Chilling Time 30 minutes
Total Time 45 minutes
Servings: 12 truffles
Course: Other
Cuisine: American
Calories: 100

Ingredients
  

For the Truffles
  • 8 ounces Goat Cheese Log A creamy, tangy base
  • 1 tablespoon Everything Bagel Spice Blend Store-bought or homemade
Optional Garnishes
  • 2 tablespoons Chopped Scallions For extra flavor
  • Vegetable Slices Cucumbers or cherry tomatoes for pairing
  • Bagel Chips For serving alongside

Equipment

  • mixing bowl
  • parchment paper
  • Wax paper

Method
 

Step‑by‑Step Instructions
  1. Prepare the Spice Blend: Pour Everything Bagel Spice Blend into a shallow bowl, spreading it out evenly.
  2. Shape the Cheese: Scoop portions of goat cheese and roll into balls about 1/2" to 1" in diameter, placing them on a parchment-lined plate.
  3. Coat the Truffles: Roll each cheese ball in the spice blend until fully coated.
  4. Chill Before Serving: Place truffles on wax paper and refrigerate for at least 30 minutes.
  5. Serve with Style: Arrange on a platter and garnish with vegetables or bagel chips before serving.

Notes

These truffles are perfect for any gathering and can be customized with different spice blends.

Sticky Miso Chicken: Bold Flavors in 20 Minutes Flat

The kitchen buzzes with excitement as the aroma of Sticky Miso Chicken sizzles in the air, drawing everyone in like a delicious magnet. This dish is not just another entry in your weeknight rotation; it’s a vibrant celebration of sweet and savory flavors that you can whip up in under 20 minutes. Perfect for those busy evenings or a delightful lunch when you’re ready to put down the takeout menus and embrace homemade goodness. Each tender piece of chicken enveloped in a luscious miso glaze pairs perfectly with steaming egg fried rice, promising a satisfying meal without the fuss. Plus, it’s adaptable—you can easily swap in tofu for a vegetarian delight or toss in your favorite veggies for an extra boost of nutrition. Are you ready to bring the magic of Sticky Miso Chicken into your home?

Why is Sticky Miso Chicken a Must-Try?

Quick and Easy: This dish takes under 20 minutes from start to finish, making it the perfect solution for busy weeknights.

Flavor Explosion: The unique combination of miso and honey creates an incredibly satisfying sweet-savory sauce that will leave everyone asking for seconds.

Versatile Base: Serve it over fluffy egg fried rice or switch it up with quinoa or veggies for a nutritious twist.

Crowd-Pleaser: Whether cooking for family or hosting friends, this Sticky Miso Chicken delights taste buds and warms hearts, just like our Homemade Chicken Roll recipe.

Health-Conscious: High in protein and easily customizable, it’s a meal you can feel good about serving. Perfect for those seeking to ditch fast food for something homemade!

Sticky Miso Chicken Ingredients

For the Chicken
Chicken – The main protein that offers satisfying richness; feel free to swap with tofu for a vegetarian option.

For the Sauce
Miso Paste – This key ingredient adds a savory umami flavor that defines the dish; if unavailable, tahini or soy sauce can be alternatives.
Soy Sauce – Enhances flavor depth and salinity, with tamari making it gluten-free if needed.
Honey or Sugar – Provides the perfect amount of sweetness to balance the salty miso; consider using maple syrup for a vegan-friendly choice.
Garlic (optional) – Lends aromatic depth; garlic powder can stand in if fresh isn’t on hand.

For Serving
Egg Fried Rice – This base complements the Sticky Miso Chicken perfectly; plain rice or quinoa works well for a healthier twist.

Step‑by‑Step Instructions for Sticky Miso Chicken

Step 1: Prepare Marinade
In a medium bowl, whisk together miso paste, soy sauce, honey, and minced garlic until you achieve a smooth, well-combined mixture. The color should be a lovely caramel hue. This marinade will create the sticky glaze that makes the Sticky Miso Chicken irresistible!

Step 2: Marinate Chicken
Add chicken pieces to the bowl containing the marinade, ensuring each piece is fully coated. Let the chicken marinate for at least 15 minutes at room temperature to absorb the flavors. For an even richer taste, consider marinating it in the refrigerator for up to 24 hours.

Step 3: Heat the Pan
Place a large wok or non-stick frying pan over medium-high heat and allow it to heat up for 2-3 minutes. A sizzling sound when adding the chicken indicates that the pan is ready, which is essential for achieving that delicious sear on the chicken.

Step 4: Cook Chicken
Add the marinated chicken in a single layer to the hot pan, allowing it to cook undisturbed for about 4-5 minutes. This will help develop a nice caramelized surface. After 5 minutes, stir the chicken occasionally and continue cooking for an additional 4-5 minutes until it’s fully cooked through and no longer pink in the center.

Step 5: Final Glaze
Once the chicken is cooked, pour any remaining marinade over the chicken. Stir to combine and let it simmer for another 2-3 minutes, allowing the sauce to thicken slightly and coat the chicken beautifully in a glossy sheen. The sticky glaze should cling well to each piece of chicken.

Step 6: Serve
Spoon the sticky miso chicken over prepared egg fried rice or your favorite base. Drizzle with extra sauce from the pan if desired for added flavor. Bright garnishes like chopped green onions or sesame seeds can enhance the dish’s presentation and taste. Enjoy your homemade Sticky Miso Chicken!

Sticky Miso Chicken Variations

Feel free to get creative with your Sticky Miso Chicken to suit your taste preferences and dietary needs!

  • Protein Swap: Substitute chicken with shrimp or tofu for a delightful twist. Shrimp cooks quickly, adding a sweet flavor that pairs beautifully with the miso sauce. Tofu, on the other hand, soaks up the marinade, making it a fantastic vegetarian substitute.

  • Veggie Boost: Incorporate vegetables like bell peppers or broccoli into the stir-fry for added nutrition. Not only do they lend vibrant colors, but they also add a satisfying crunch that balances the tenderness of the chicken.

  • Spicy Kick: For those who crave a bit of heat, add a splash of chili sauce or sprinkle in red pepper flakes. It elevates the dish, giving your taste buds an exciting surprise with each bite.

  • Sweet and Sour: Mix in a tablespoon of rice vinegar or lime juice for a tangy contrast that brightens the flavors. This zesty addition will bring a refreshing note to your Sticky Miso Chicken.

  • Teriyaki Style: For a flavorful variation, mix equal parts of teriyaki sauce with the miso sauce. This blend adds a rich sweetness that complements the savory notes while offering a unique twist to your dish.

  • Coconut Creaminess: Stir in a touch of coconut milk after cooking for a creamy, dreamy texture. The mild coconut flavor pairs well with the miso sauce, providing a decadent finish to your Sticky Miso Chicken.

  • Rice Alternatives: Serve over quinoa or cauliflower rice for a lighter, gluten-free option. These alternatives provide a different texture and soak up the delicious miso sauce beautifully.

  • Fresh Herbs: Garnish with fresh cilantro or basil to brighten the dish. A sprinkle of these aromatic herbs right before serving can transform your Sticky Miso Chicken into a vibrant culinary experience.

As you explore these variations, remember the magic of this dish lies in its adaptability. If you enjoy these flavors, don’t forget to check out our other family-loved recipes, like Honey Chili Chicken and Savory Chicken Cheesy, to keep your mealtime exciting!

What to Serve with Sticky Miso Chicken

Elevate your dining experience by creating a delightful spread that complements the rich, sweet-savory profile of your Sticky Miso Chicken.

  • Fluffy Egg Fried Rice: A must-have base, its soft texture absorbs the luscious miso sauce beautifully, enhancing every bite.

  • Steamed Broccoli: The vibrant green adds a crunchy contrast to the tender chicken while providing a nutritious boost.

  • Crispy Spring Rolls: These golden delights add an exciting crunch and a fresh vegetable filling that balances the meal perfectly.

  • Asian Cucumber Salad: Light and refreshing, this cool salad cuts through the richness, offering a vibrant contrast that enlivens your palate.

  • Sesame Noodles: Their nutty flavor and chewy texture make a delightful pairing, soaking up any leftover sauce for a second helping of goodness.

  • Chilled Sake or Green Tea: For drinks, a glass of chilled sake enhances the meal’s flavors, while green tea serves as a soothing complement to the dish.

  • Mango Sticky Rice: For dessert, the sweetness of ripe mango and creamy coconut sticky rice wraps up the meal on a heavenly note.

Create your perfect plate by combining any of these ideas, ensuring a flavorful journey with every bite!

Make Ahead Options

Sticky Miso Chicken is an excellent recipe for meal prep aficionados! To save time during those hectic weeknights, you can marinate the chicken up to 24 hours in advance. Just mix the miso paste, soy sauce, honey, and garlic, coat the chicken, and refrigerate it in an airtight container. When you’re ready to cook, simply heat your pan and stir-fry the marinated chicken until fully cooked, which should take about 8-10 minutes. This method ensures that the chicken retains its delicious flavor and tender texture. If you have leftovers, store them in the fridge for up to 3 days, and simply reheat before serving for a satisfying, hassle-free meal!

Expert Tips for Sticky Miso Chicken

  • Uniform Chicken Size: Ensure your chicken pieces are even for consistent cooking. This prevents some pieces from overcooking while others remain undercooked.

  • Hot Wok Magic: Always preheat your wok before adding chicken. A hot pan enhances the sear and keeps the chicken juicy, avoiding dryness.

  • Avoid Overcrowding: Give each piece space in the pan! Overcrowding causes steaming instead of searing, so cook in batches if necessary for optimal flavor.

  • Marinade Time: For maximum flavor, let the chicken marinate for at least 15 minutes or overnight. The longer it marinates, the deeper the sticky miso flavor will penetrate.

  • Thickening Tips: If the sauce isn’t as thick as desired, allow it to simmer longer after adding the leftover marinade. This will help it cling beautifully to the chicken.

  • Customize Wisely: Don’t hesitate to add vegetables for color and nutrition! Bell peppers or broccoli not only enhance the dish but also introduce a nutritious crunch.

How to Store and Freeze Sticky Miso Chicken

Fridge: Store leftover Sticky Miso Chicken in an airtight container for up to 3 days. Make sure to let it cool before sealing to preserve texture and flavor.

Freezer: For longer storage, freeze the chicken in a freezer-safe container for up to 3 months. Ensure it’s well-wrapped to prevent freezer burn.

Reheating: To reheat, thaw overnight in the fridge, then heat gently in a pan over medium heat until warmed through. You can add a splash of water or additional sauce to prevent drying.

Marinating Ahead: If you want to prep in advance, marinate the chicken a day before cooking. Just store it in the refrigerator, ensuring it’s sealed well to lock in that delicious miso flavor.

Sticky Miso Chicken Recipe FAQs

What should I look for when selecting miso paste?
Absolutely! When choosing miso paste, look for a rich, smooth texture and a fresh aroma. Avoid any brands that contain dark spots or off smells, as this indicates spoilage. Opt for light miso (like white or yellow) for a sweeter flavor, or go for red miso for a bolder, saltier taste. Check your local Asian grocery store or the international aisle of larger supermarkets for a variety of choices.

How should I store leftover Sticky Miso Chicken?
For sure! Store any leftover Sticky Miso Chicken in an airtight container for up to 3 days in the refrigerator. Be sure to let it cool completely before sealing to maintain its delicious texture. You can reheat it gently on the stovetop or microwave, adding a splash of water to keep it moist.

Can I freeze Sticky Miso Chicken, and if so, how?
Very easily! To freeze Sticky Miso Chicken, ensure it’s cooled and transfer it to a freezer-safe container. It can last in the freezer for up to 3 months. When you’re ready to enjoy it again, thaw it overnight in the refrigerator. To reheat, warm it gently in a pan over medium heat, adding a little water or extra sauce if needed to keep it juicy.

What if my chicken is dry after cooking?
No worries! If your chicken turns out a bit dry, it may have cooked too long or at too high a heat. To avoid this next time, be sure to cut the chicken into uniform pieces for even cooking, and keep an eye on the time. You can also try marinating for longer or adding moisture back in when reheating by incorporating some sauce or broth.

Are there any dietary considerations for Sticky Miso Chicken?
Absolutely! This recipe can cater to various dietary needs. To keep it gluten-free, use tamari instead of soy sauce. For a vegetarian version, substitute the chicken with tofu or even chickpeas. In terms of allergies, be cautious with ingredients: miso often contains soy, which is a common allergen. Always check labels for any specific dietary requirements.

Sticky Miso Chicken

Sticky Miso Chicken: Bold Flavors in 20 Minutes Flat

Sticky Miso Chicken is a vibrant celebration of sweet and savory flavors ready in under 20 minutes.
Prep Time 15 minutes
Cook Time 10 minutes
Marinating Time 15 minutes
Total Time 20 minutes
Servings: 4 servings
Course: Chicken
Cuisine: Asian
Calories: 380

Ingredients
  

For the Chicken
  • 2 pounds chicken can be substituted with tofu for a vegetarian option
For the Sauce
  • 3 tablespoons miso paste key ingredient for umami flavor
  • 2 tablespoons soy sauce tamari for gluten-free option
  • 2 tablespoons honey or sugar; maple syrup for vegan option
  • 2 cloves garlic optional; use garlic powder if fresh is not available
For Serving
  • 4 cups egg fried rice can use plain rice or quinoa

Equipment

  • wok or non-stick frying pan

Method
 

Step-by-Step Instructions
  1. In a medium bowl, whisk together miso paste, soy sauce, honey, and minced garlic until well-combined.
  2. Add chicken pieces to the marinade and coat fully; let marinate for at least 15 minutes.
  3. Heat a wok or non-stick frying pan over medium-high heat for 2-3 minutes.
  4. Add marinated chicken in a single layer to the hot pan and cook undisturbed for 4-5 minutes.
  5. Stir chicken occasionally and cook for an additional 4-5 minutes until fully cooked.
  6. Pour remaining marinade over chicken, stir, and simmer for another 2-3 minutes.
  7. Serve sticky miso chicken over egg fried rice, garnished with green onions or sesame seeds.

Notes

Store leftovers in an airtight container for up to 3 days; for longer, freeze for up to 3 months.

Savory Rice Paper Spanakopita That Crunches with Every Bite

The sound of a sizzling pan filled with the rich aroma of spinach and feta instantly transports me to the heart of a bustling Greek kitchen. Today, I’m thrilled to share a delightful twist on a classic: Rice Paper Spanakopita. This quick and easy recipe swaps traditional phyllo dough for crispy rice paper, making it a gluten-free choice that’s lighter yet just as satisfying. Perfect as an appetizer, a light lunch, or a charming side dish, this version of spanakopita not only cuts down prep time but also offers a fun way to indulge in beloved Mediterranean flavors. Are you ready to take your taste buds on a delicious journey with this savory delight? Let’s dive in!

Why is Rice Paper Spanakopita Amazing?

Unexpected Crunch: This recipe replaces traditional phyllo dough with rice paper, offering a unique twist that’s both crispy and delightful.
Quick and Easy: You’re just a few steps away from enjoying this savory treat—perfect for those busy weeknights!
Gluten-Free Option: By using rice paper, you can enjoy this dish without the gluten, making it suitable for guests with dietary restrictions.
Versatile Filling: Feel free to switch out the spinach for other greens or pack in your favorite herbs for a tailored flavor experience.
Crowd-Pleasing Delight: Whether it’s a party appetizer or a cozy family lunch, you’re sure to impress with this delicious spanakopita! For additional fun, try pairing it with a refreshing cucumber-tomato salad for the perfect meal balance.

Rice Paper Spanakopita Ingredients

For the Filling

  • Cooked Spinach – Provides the foundational leafy flavor; feel free to swap for any cooked greens like kale.
  • Feta Cheese – Adds a creamy, tangy depth; you can substitute with goat cheese or a cream cheese-parmesan mix for a richer filling.
  • Egg – Acts as a binder for your filling and gives a beautiful golden-brown finish to the outside.

For the Wrapper

  • Rice Paper – The star of this dish, providing a delightful crunch; if unavailable, try using another gluten-free wrapper.

For Topping

  • Sesame Seeds – Sprinkle on top for extra crunch and flavor; these can be replaced with dried oregano or za’atar for a different twist.

This Rice Paper Spanakopita combines simple ingredients for a light yet savory treat that’s sure to impress!

Step‑by‑Step Instructions for Rice Paper Spanakopita

Step 1: Preheat the Oven
Start by preheating your oven to 180°C (350°F). This temperature ensures that your Rice Paper Spanakopita comes out perfectly crispy and golden. As the oven warms, prepare your baking sheet by lining it with parchment paper, which will help prevent sticking and make cleanup easy.

Step 2: Prepare the Egg Wash
In a small bowl, crack one egg and beat it until smooth. This egg wash will serve two purposes: it seals the rice paper and gives the finished spanakopita a beautiful, golden sheen. Set the egg wash aside for later use while you work on the rice paper wrappers.

Step 3: Assemble the Rice Paper Wraps
Take two rice paper sheets and dip them quickly into the egg wash, allowing any excess to drip off. Overlap the sheets slightly to create a wider base for the filling. Keep them on a clean surface, ready for the delicious spinach and feta filling that awaits.

Step 4: Mix the Filling
In a bowl, combine your cooked spinach and crumbled feta cheese, mixing well to create a flavorful filling. For an added touch, you can incorporate herbs or spices if desired. Once mixed, place a generous tablespoon of the filling in the center of the rice paper, preparing to wrap it snugly.

Step 5: Roll the Spanakopita
Fold the sides of the rice paper over the filling, then carefully roll it up from the bottom to form a tight log shape. Ensure no filling spills out, pressing down gently to keep everything secure. This step is key to achieving the ideal shape for your Rice Paper Spanakopita.

Step 6: Brush and Sprinkle
Place the rolled Spanakopita on the prepared parchment-lined baking sheet. Brush the outside with more egg wash to promote browning. For an added crunch and flavor, generously sprinkle sesame seeds on top before sending it into the oven.

Step 7: Bake the Spanakopita
Place the baking sheet in your preheated oven and bake the Rice Paper Spanakopita for 30 minutes. Keep an eye on them; they should turn a lovely golden color as they cook and become crisp. This is when those delightful Mediterranean flavors start to fill your kitchen!

Step 8: Broil for Extra Crispiness
Once the baking time is up, switch your oven to grill/broil mode. Broil the spanakopita for about 5 minutes on each side. This step will enhance the crunchiness and provide a beautiful finish. Turn them carefully halfway through so both sides develop that perfect golden color.

Step 9: Serve Your Creation
Remove the Rice Paper Spanakopita from the oven and let them cool slightly on the baking sheet. Serve immediately while they’re still warm and crispy. These can be enjoyed alone or paired with a refreshing cucumber-tomato salad for a delightful meal!

Make Ahead Options

These Rice Paper Spanakopita are perfect for meal prep enthusiasts looking to save time during busy weeknights! You can assemble the spanakopita by filling and rolling them up to 24 hours in advance. To do this, simply prepare your rolls and place them in a single layer on a parchment-lined baking sheet, cover tightly with plastic wrap, and refrigerate. This helps maintain their quality and flavor. When you’re ready to enjoy your freshly baked spanakopita, bake them straight from the fridge, adding an extra 5-10 minutes to the cooking time to ensure they’re heated through and crisp. This way, you can have a delicious, homemade treat with minimal effort!

How to Store and Freeze Rice Paper Spanakopita

Fridge: Store any leftover Rice Paper Spanakopita in an airtight container for up to 2 days. Reheat in the oven or air fryer for the best texture, avoiding the microwave which may make them soggy.

Freezer: To freeze, assemble the spanakopita but do not bake. Wrap each roll tightly in plastic wrap and place them in a freezer-friendly bag for up to 2 months. Bake directly from frozen, adding 5-10 minutes to the cooking time.

Layering: If stacking in the fridge or freezer, place parchment paper between layers to prevent them from sticking together and ensure easy removal.

Reheating: For optimal crispness, always reheat in an oven or air fryer instead of the microwave. This way, you can enjoy that delicious crunch every time!

What to Serve with Crispy Rice Paper Spanakopita?

Elevate your meal experience with delightful pairings that complement the savory, crispy goodness of this spanakopita.

  • Cucumber-Tomato Salad: A refreshing combination of crunch and acidity that balances the rich flavors of the spanakopita beautifully. The coolness enhances every bite!

  • Lemony Yogurt Dip: Creamy and tangy, this dip adds moisture and zesty brightness, creating a harmonious contrast with the crunchy exterior of the rice paper.

  • Herbed Quinoa: The nutty, fluffy quinoa adds a wholesome touch, while fresh herbs infuse a bright flavor. It’s a hearty yet light side that pairs wonderfully!

  • Roasted Vegetables: Opt for seasonal veggies like zucchini, bell peppers, or asparagus. Their caramelization and natural sweetness complement the savory filling perfectly.

  • Mediterranean Olives: A small bowl of assorted olives adds a briny, savory depth. The saltiness pairs exceptionally well with the creamy feta, enhancing your culinary journey.

  • Sparkling Water with Mint: Refresh your palate with this light drink that cleanses and uplifts the flavors of your meal. It’s a simple yet elegant touch!

Indulging in any of these pairings alongside your Rice Paper Spanakopita will certainly create a feast that keeps everyone coming back for more!

Expert Tips for Rice Paper Spanakopita

  • Moisture Control: Wet the rice paper quickly and avoid soaking to prevent a soggy texture. Pat cooked greens dry before mixing to ensure crispiness.
  • Watch the Bake: Every oven is different! Keep an eye on your spanakopita to achieve that perfect golden-brown color without overcooking.
  • Seal Properly: Ensure your rolls are tightly sealed to avoid leaks during baking. If needed, add a bit more egg wash to secure the edges.
  • Serving Fresh: For the best experience, serve your Rice Paper Spanakopita immediately after baking. Reheated leftovers may lose their crunchiness.
  • Flavor Your Filling: Feel free to experiment by adding herbs or spices to your filling; this makes each batch uniquely delicious and tailored to your taste!

Rice Paper Spanakopita Variations

Feel free to get creative with this savory delight—each variation adds a fresh twist to the classic flavors!

  • Nutty Addition: Blend in some chopped walnuts or almonds for extra crunch and a lovely nutty flavor that complements the filling beautifully.
  • Herb-Infused: Add fresh herbs like dill or parsley into the spinach and feta mixture, enhancing the Mediterranean flair with every bite.
  • Spicy Kick: Incorporate crushed red pepper flakes or chopped jalapeños into the filling for a zesty twist that ignites the taste buds.
  • Cheesy Medley: Mix the feta with a medley of your favorite cheeses, like mozzarella or asiago, for a richer, creamier filling that melts to perfection.
  • Exotic Flavor: Try spicing up the filling with a pinch of cumin or coriander for a unique, warm flavor profile reminiscent of Middle Eastern cuisine.
  • Veggie Boost: Swap in roasted peppers or artichokes for a colorful inclusion that brightens up this dish while packing in extra flavor and texture.
  • Sweet Surprise: For a sweet and savory touch, add a spoonful of sun-dried tomatoes or the zest of a lemon to your spinach filling, creating a burst of enticing flavor.
  • Crispy Alternative: Experiment with phyllo pastry for a more traditional take, achieving that classic flaky texture while still enjoying that filling you love.

For a delightful experience, consider pairing your Rice Paper Spanakopita with a refreshing cucumber-tomato salad or a zesty yogurt dip to balance all those wonderful flavors!

Rice Paper Spanakopita Recipe FAQs

How do I choose the right type of rice paper?
Absolutely! When selecting rice paper, look for brands that are thin and flexible, typically found in Asian grocery stores or international aisle sections. They should be clear and smooth, without dark spots or cracks, indicating freshness. For a more chewy texture, opt for thicker rice papers, but ensure they still allow for even frying or baking.

How should I store leftover Rice Paper Spanakopita?
Very simple! Store any leftovers in an airtight container in the fridge for up to 2 days. To reheat, place them in an oven set at 180°C (350°F) for about 10-15 minutes to regain their crispiness. Avoid microwaving as it tends to make them soggy!

Can I freeze Rice Paper Spanakopita?
Yes, you can! To freeze, prepare the spanakopita rolls but do not bake them. Wrap each roll tightly in plastic wrap and group them in a freezer-safe bag, lasting up to 2 months. When you’re ready to enjoy them, bake directly from frozen—just add an extra 5-10 minutes to the original baking time!

What if my rice paper is tearing while assembling?
Absolutely possible! If your rice paper is tearing, try reducing the soaking time in the egg wash. I recommend dipping it just until it’s slightly pliable rather than fully soaked, which lessens the chance of tears. If a sheet does tear, simply place the filling on it and use another piece to cover it up like a patch!

Is this recipe suitable for people with allergies?
Yes, indeed! This Rice Paper Spanakopita can be a good vegetarian option, but always check the specific brands of rice paper, feta, and any spices used, as they can contain allergens. If you have concerns about dairy, feel free to use a non-dairy cheese alternative to keep it safe for lactose-intolerant friends or family members.

Can I add different fillings to the Rice Paper Spanakopita?
Of course! This recipe is quite versatile. Feel free to mix it up by adding ingredients like cooked mushrooms, cheeses, or herbs. For example, adding garlic or dill can enhance the flavor profile beautifully. Adjust to your taste, and let the creativity flow!

Rice Paper Spanakopita

Savory Rice Paper Spanakopita That Crunches with Every Bite

This gluten-free Rice Paper Spanakopita is a delightful twist on the classic dish, offering a crispy and savory taste in every bite.
Prep Time 15 minutes
Cook Time 40 minutes
Broiling Time 5 minutes
Total Time 1 hour
Servings: 4 pieces
Course: Lunch
Cuisine: Mediterranean
Calories: 220

Ingredients
  

Filling
  • 1 cup Cooked Spinach You can swap for kale or other cooked greens.
  • 200 grams Feta Cheese Can substitute with goat cheese or cream cheese-parmesan mix.
  • 1 large Egg Acts as a binder for the filling.
Wrapper
  • 8 sheets Rice Paper If unavailable, try another gluten-free wrapper.
Topping
  • 2 tablespoons Sesame Seeds Can replace with dried oregano or za’atar.

Equipment

  • oven
  • baking sheet
  • parchment paper
  • mixing bowl
  • Small bowl

Method
 

Preparation Steps
  1. Preheat your oven to 180°C (350°F). Prepare a baking sheet lined with parchment paper.
  2. In a small bowl, crack one egg and beat it until smooth to make the egg wash.
  3. Take two rice paper sheets, dip them into the egg wash, allowing excess to drip off, and overlap slightly.
  4. In a bowl, combine cooked spinach and crumbled feta cheese to create the filling.
  5. Place a generous tablespoon of the filling in the center of the rice paper and roll it tightly to form logs.
  6. Brush the outside of the rolled spanakopita with egg wash and sprinkle sesame seeds on top.
  7. Bake the spanakopita in the preheated oven for 30 minutes until golden and crisp.
  8. Switch to broil for an additional 5 minutes on each side for extra crispiness.
  9. Remove from the oven, cool slightly, and serve while still warm.

Notes

Serve immediately for best texture and flavor. Pairs well with a refreshing cucumber-tomato salad.

Delicious Chicken Caesar Sandwiches Ready in 30 Minutes

As I stood in my kitchen, the aroma of sizzling chicken filled the air, bringing back memories of cozy lunches shared with friends and family. These Crispy Chicken Caesar Sandwiches are a delightful, hearty meal that perfectly balances crunchy goodness with a creamy twist. In under 30 minutes, you can whip up this flavorful sandwich, making it ideal for a busy weekday lunch or a casual dinner. The combination of well-seasoned chicken, fresh Caesar salad, and garlicky toasted bread transforms a simple meal into something special. Whether you’re in need of a quick fix or looking to impress, these sandwiches are a satisfying solution. Ready to elevate your lunchtime experience with a taste of homemade comfort? Let’s dive into how to create this delicious dish!

Why are these Chicken Caesar Sandwiches a must-try?

Quick and Easy: You’ll adore how simple it is to pull this meal together in under 30 minutes. Perfect for those busy days when you crave something homemade!

Crispy and Hearty: The well-seasoned chicken delivers a crispy exterior while maintaining a juicy interior, ensuring each bite is satisfying.

Creamy Flavor Explosion: With a rich Caesar dressing and fresh Parmesan, you’ll find layers of flavor that will leave your taste buds dancing!

Customizable Delight: Feel free to swap proteins or dressings, adapting this recipe to fit your dietary needs or preference. For a lighter spin, try it with Savory Chicken Cheesy roasted!

Perfect for Sharing: Whether hosting friends or enjoying a family dinner, these sandwiches are sure to wow your guests and make mealtimes memorable. Enjoy them with some sweet potato fries for a complete experience!

Chicken Caesar Sandwiches Ingredients

• Discover the perfect blend of flavors and textures!

For the Chicken

  • Chicken Breasts – The main protein source; for a quicker option, use pre-cooked or rotisserie chicken.
  • Egg (whisked with milk) – Binds the breadcrumbs to chicken, creating a crispy coating; aquafaba can be used as an egg replacement for binding.
  • Garlic Powder, Salt, Pepper – Essential for flavor enhancement; adjust seasoning to your taste.
  • Breadcrumbs & Panko – Provides a crispy exterior for frying; use gluten-free breadcrumbs for a gluten-free version.
  • Vegetable Oil – Necessary for frying the chicken to achieve the perfect crispiness; avocado oil can be a healthier substitute.

For the Garlic Butter Bread

  • Salted Butter – Adds richness to the garlic butter; unsalted butter can be used with added salt to taste.
  • Minced Garlic & Fresh Parsley – Infuses fresh flavor into the garlic butter; dried garlic and parsley can be substituted if needed.

For the Caesar Dressing

  • Mayonnaise – A creamy base for the dressing; Greek yogurt can lighten it up with a healthier twist.
  • Parmesan Cheese (grated) – Jack of all trades for flavor; swap for vegan Parmesan to go dairy-free.
  • Sour Cream or Greek Yogurt – Adds tang and creaminess to the dressing; coconut yogurt works as a dairy-free option.
  • Lemon Juice, Dijon Mustard, Anchovy Paste, Worcestershire Sauce – Essential for tang and umami flavor; omit anchovy paste for a vegetarian version.

For the Freshness

  • Romaine Lettuce – Provides a crunchy texture and freshness; kale or mixed greens work well too.

Step‑by‑Step Instructions for Chicken Caesar Sandwiches

Step 1: Prepare Chicken Cutlets
Start by slicing the chicken breasts into 4-6 thin cutlets to ensure they cook evenly and quickly. In a bowl, whisk an egg with a splash of milk to create a binding mixture. Dip each chicken cutlet into the egg mixture, then coat them thoroughly with a blend of breadcrumbs and panko to achieve that perfect crispy exterior for your Chicken Caesar Sandwiches.

Step 2: Fry Chicken
Heat vegetable oil in a large skillet over medium heat until it reaches 350°F (175°C). Carefully lay the breaded chicken cutlets in the hot oil, frying them for about 5 minutes on each side or until they turn golden brown and crispy. Use a slotted spatula to remove the chicken from the oil and place them on paper towels to drain excess oil while you prepare the bread.

Step 3: Make Garlic Butter Bread
In a small bowl, mix together softened salted butter, minced garlic, and chopped fresh parsley until well combined. Spread this fragrant garlic butter generously onto slices of your chosen bread. Preheat your oven to 450°F (230°C) and place the buttered bread on a baking sheet, toasting it for about 3-4 minutes, or until it becomes golden and crispy, adding a delicious layer to your Chicken Caesar Sandwiches.

Step 4: Whisk Dressing
In a mixing bowl, whisk together mayonnaise, sour cream or Greek yogurt, freshly squeezed lemon juice, Dijon mustard, anchovy paste, Worcestershire sauce, and minced garlic. Season the Caesar dressing with salt and pepper to taste. Blend these ingredients until smooth, producing a creamy dressing that will elevate the flavors of your Chicken Caesar Sandwiches.

Step 5: Assemble Sandwiches
Now it’s time to put your Chicken Caesar Sandwiches together! Start with a slice of the garlic butter toasted bread, then layer on the crispy chicken cutlets. Top the chicken with the freshly dressed romaine lettuce and sprinkle additional grated Parmesan cheese for an extra kick of flavor. Place another slice of toasted bread on top, and enjoy your delicious, homemade sandwich for a hearty meal!

Make Ahead Options

These Chicken Caesar Sandwiches are the ultimate solution for meal prep enthusiasts! You can prepare the chicken cutlets and garlic butter bread up to 24 hours in advance—simply store the cutlets in an airtight container in the refrigerator and keep the bread wrapped to maintain freshness. When you’re ready to serve, just reheat the cutlets in a skillet or oven until warmed through, which keeps them crispy, then toast the garlic butter bread just before assembly. For best flavor, mix the Caesar dressing a day ahead and store it in the fridge. By prepping these components, you can enjoy delicious, homemade Chicken Caesar Sandwiches on even the busiest days!

What to Serve with Chicken Caesar Sandwiches

Elevate your meal experience with these delightful pairings that perfectly complement the crispy, savory goodness of your sandwich.

  • Sweet Potato Fries: Crispy on the outside and fluffy inside, they bring a fun twist that balances the creaminess of the sandwich.

  • Classic Potato Chips: Their satisfying crunch adds texture, while the salty flavor enhances the savory notes of the Chicken Caesar Sandwiches.

  • Garlic Roasted Brussels Sprouts: The caramelized edges offer a delicious roasted flavor that pairs beautifully with the Caesar dressing and enhances the overall meal.

  • Caesar Salad: Keeping it classic, a side salad with crunchy romaine and creamy dressing mirrors the sandwich, creating a cohesive dining experience.

  • Coleslaw: The tangy sweetness and crispy cabbage provide a refreshing contrast, cutting through the richness of the sandwich.

  • Iced Lemonade: This refreshing drink offers a zesty counterpoint, brightening the meal with its citrusy flair and balancing flavors.

  • Wine Spritzer: A light and bubbly spritzer can wonderfully complement the sandwich, adding a touch of fun without overwhelming flavors.

  • Chocolate Chip Cookies: End on a sweet note! The warm, gooey cookies provide a comforting finish that delights after the savory meal.

  • Fruit Salad: A fresh mix of seasonal fruits provides a light and refreshing side, adding color and a natural sweetness to your plate.

Chicken Caesar Sandwiches Variations

Feel the freedom to mix things up with these delightful variations that will take your Chicken Caesar Sandwiches to the next level!

  • Grilled Shrimp: Swap chicken for grilled shrimp for a seafood twist that adds a fresh, zesty flavor. Perfect for summer gatherings!

  • Tofu Magic: Use crispy tofu instead of chicken for a vegetarian option that’s equally satisfying and full of flavor. The tofu soaks up the dressing beautifully!

  • Whole Grain Bread: Choose whole grain or seeded bread for added texture and nutrition, making your sandwiches even more heart-healthy.

  • Dairy-Free Dream: Transform the sandwich into a dairy-free delight by using vegan mayonnaise and dairy-free Parmesan. You won’t miss the creaminess!

  • Kickin’ Heat: Add sliced jalapeños or a dash of hot sauce to the dressing for a spicy kick. This simple addition brings a new level of excitement to each bite.

  • Mediterranean Spin: Incorporate olives and feta cheese into your Caesar dressing for a Mediterranean flair. The olives add a beautiful briny flavor that complements the creamy dressing perfectly.

  • Savory Twist: Craving extra flavor? Try adding fresh herbs like basil or dill to your dressing for an aromatic flourish. Each bite will transport you to summer gardens!

  • Crunchy Veggie Delight: Stack on extra veggies, like sliced bell peppers or cucumbers, for a refreshing crunch. These additions not only enhance texture but also boost nutrition.

Feel inspired? You might also enjoy pairing your sandwiches with some sweet potato fries or a fresh salad to round out your meal! And if you’re looking for more chicken flavor, check out my Honey Chili Chicken that will make your dinner table shine!

Expert Tips for Chicken Caesar Sandwiches

  • Frying Benefits: Keep the oil at 350°F for that perfect crispy texture. If the temperature drops, the chicken may absorb excess oil, leading to sogginess.

  • Breadcrumb Coating: Let your chicken cutlets sit in the breadcrumb mixture for a few minutes before frying. This helps the coating adhere better, ensuring a crunchy finish for your Chicken Caesar Sandwiches.

  • Dressing Balance: Taste your dressing and adjust ingredients gradually. Adding lemon juice or Worcestershire sauce in small increments allows you to achieve the perfect tanginess without overpowering your dish.

  • Fresh Ingredients: For optimal flavor, always use fresh garlic and parsley in the garlic butter. Don’t overlook this step, as using dried herbs can dull the overall taste.

  • Alternatives Galore: Experiment with different proteins or breads to keep things interesting. Grilled shrimp or a vegan substitute can offer new flavors while catering to dietary preferences!

How to Store and Freeze Chicken Caesar Sandwiches

Fridge: Store leftover Chicken Caesar Sandwiches in an airtight container for up to 3 days. Keep the chicken, salad, and bread separate to maintain freshness and texture.

Freezer: If you want to freeze the chicken cutlets, wrap them tightly in plastic wrap and then in foil. They can be frozen for up to 2 months. Reheat directly from frozen for a quick meal!

Reheating: To reheat, place the chicken cutlets in a preheated oven at 350°F for about 10-15 minutes until heated through. Toast the garlic butter bread just before serving to recreate the crispy texture.

Assembling Freshly: For the best flavor experience, assemble your Chicken Caesar Sandwiches fresh right before serving, especially if you’re using lettuce that may wilt over time.

Chicken Caesar Sandwiches Recipe FAQs

What type of chicken is best for these sandwiches?
Absolutely! Fresh chicken breasts work best as they can be sliced into thin cutlets to achieve perfect crispiness. If you’re short on time, feel free to use pre-cooked or rotisserie chicken for a quick fix!

How should I store leftover Chicken Caesar Sandwiches?
To keep your leftovers fresh, store them in an airtight container in the fridge for up to 3 days. However, I recommend keeping the chicken, salad, and bread separate to maintain maximum crispiness and freshness.

Can I freeze the chicken cutlets, and how?
Yes, you can freeze the chicken cutlets! Wrap them tightly in plastic wrap, followed by aluminum foil. They will stay good in the freezer for up to 2 months. When you’re ready to enjoy, simply reheat directly from frozen in a 350°F oven for about 10-15 minutes.

Why are my chicken cutlets soggy?
Very! This can happen if the oil temperature drops when frying. Always maintain the oil at 350°F to achieve that perfect crispy coating. Additionally, try not to let the breaded chicken sit too long before frying, as this might cause some moisture buildup.

Can I make this recipe dairy-free?
Absolutely! You can easily make these Chicken Caesar Sandwiches dairy-free by substituting regular mayonnaise with a dairy-free alternative and using vegan Parmesan cheese. Additionally, swap sour cream for coconut yogurt for a delicious twist!

Can my pets enjoy any of the leftover sandwich ingredients?
The grilled chicken can be a tasty treat for pets, but do ensure it’s unseasoned. Avoid giving them any garlic, onions, or seasoned parts of the sandwich, as those can be harmful to pets!

Chicken Caesar Sandwiches

Delicious Chicken Caesar Sandwiches Ready in 30 Minutes

Enjoy these quick and easy Chicken Caesar Sandwiches, perfect for a busy lunch or dinner, with crispy chicken and flavorful dressing.
Prep Time 15 minutes
Cook Time 15 minutes
Total Time 30 minutes
Servings: 4 sandwiches
Course: Lunch
Cuisine: American
Calories: 520

Ingredients
  

For the Chicken
  • 2 pieces Chicken Breasts For a quicker option, use pre-cooked or rotisserie chicken.
  • 1 large Egg Whisked with milk.
  • 1 cup Breadcrumbs Use gluten-free breadcrumbs for a gluten-free version.
  • 1 cup Panko
  • 1 cup Vegetable Oil Avocado oil can be a healthier substitute.
  • 1 teaspoon Garlic Powder
  • 1 teaspoon Salt Adjust seasoning to taste.
  • 1 teaspoon Pepper Adjust seasoning to taste.
For the Garlic Butter Bread
  • 4 tablespoons Salted Butter Or unsalted with added salt to taste.
  • 2 tablespoons Minced Garlic
  • 2 tablespoons Fresh Parsley Chopped.
For the Caesar Dressing
  • 1/2 cup Mayonnaise Greek yogurt can lighten it up.
  • 1/2 cup Parmesan Cheese Grated.
  • 1/4 cup Sour Cream Or Greek yogurt.
  • 2 tablespoons Lemon Juice
  • 1 teaspoon Dijon Mustard
  • 1 teaspoon Anchovy Paste Omit for vegetarian version.
  • 1 teaspoon Worcestershire Sauce
For the Freshness
  • 4 leaves Romaine Lettuce Or kale or mixed greens.

Equipment

  • large skillet
  • mixing bowl
  • baking sheet
  • slotted spatula

Method
 

Step-by-Step Instructions
  1. Prepare Chicken Cutlets by slicing chicken breasts into 4-6 thin cutlets. Whisk an egg with a splash of milk, dip each cutlet into the mixture, then coat with breadcrumbs and panko.
  2. Fry Chicken in heated vegetable oil at 350°F, frying each side for about 5 minutes until golden brown and crispy. Drain on paper towels.
  3. Make Garlic Butter Bread by mixing butter, minced garlic, and parsley. Spread on slices of bread and toast in an oven at 450°F for 3-4 minutes.
  4. Whisk Dressing ingredients together in a bowl until smooth, season with salt and pepper to taste.
  5. Assemble Sandwiches by layering toasted bread, crispy chicken, dressed romaine, and additional Parmesan, topping with another slice of bread.

Notes

For optimal flavor, use fresh garlic and parsley. Leftovers should be stored separately to maintain texture.

Irresistible Garlic Butter Pasta That’s Sure to Comfort You

Amid the hustle and bustle of daily life, it’s a moment of pure bliss when the comforting aroma of garlic wafts through the kitchen. This Insanely Delicious Garlic Butter Pasta with Confit Garlic is more than just a meal; it’s a warm embrace on a plate. With only a handful of pantry staples, this easy recipe is perfect for anyone seeking a quick weeknight dinner or a delightful dish for special occasions. The confit garlic infuses the pasta with an incredible richness, creating a silky sauce that clings lovingly to each strand. Imagine gathering around the table, sharing laughter and stories, as you savor every bite of this Italian-inspired comfort food. So, are you ready to transform your pasta nights into a perfect culinary experience? Let’s dive in!

Why is Garlic Butter Pasta a Must-Try?

Comforting and delicious, this garlic butter pasta is the ultimate comfort food that elevates any dinner occasion. Simplicity shines through with minimal ingredients and easy steps—perfect for both novice cooks and seasoned chefs. Versatile enough to adapt to your taste, you can add veggies or spices for extra flair! Indulgent flavors from confit garlic create a rich sauce that’s simply irresistible. Plus, it’s an excellent way to use up pantry staples, making it a smart choice for busy weeknights or entertaining guests. Try pairing it with a side of Garlic Butter French for a meal that’s sure to impress!

Garlic Butter Pasta Ingredients

Here’s everything you need to create your own incredible garlic butter pasta experience.

For the Confit Garlic

  • Garlic – Provides a sweet, mellow flavor when confit; prepare two bulbs to have extra for other uses.
  • Fresh Herbs (Rosemary) – Infuses the oil for added flavor during the confit process; can substitute with thyme or omit if desired.
  • Extra Virgin Olive Oil – Used for confit garlic; contributes to the sauce richness; any olive oil can be used.

For the Pasta Dish

  • Room Temperature Butter – Creates a creamy texture for the sauce; use salted butter for flavor, but unsalted is acceptable—just add salt to taste.
  • Black Pepper – Adds heat and depth; adjust quantity to personal taste and spice level.
  • Pasta Cooking Water – Essential for emulsifying the sauce and achieving the desired thickness; always reserve some before draining pasta.
  • Dried or Fresh Pasta – The base of the dish; use 200 grams dried or 300 grams fresh for best results.
  • Parmesan Cheese – Optional garnish that enhances flavor and adds a delightful umami kick.

This garlic butter pasta is not just a dish—it’s a culinary hug that brings warmth and joy to the table!

Step‑by‑Step Instructions for Insanely Delicious Garlic Butter Pasta

Step 1: Confit Garlic Preparation
Preheat your oven to 275°F (135°C). In a baking dish, combine peeled garlic cloves from two bulbs with a few sprigs of fresh rosemary. Pour enough extra virgin olive oil over the garlic to fully submerge them. Bake for 45 minutes to 1 hour, until the garlic is soft and golden, fragrant and tender, turning this humble ingredient into delicious confit garlic perfect for your sauce.

Step 2: Make Garlic Butter
Once the confit garlic has cooled slightly, blend it together with the infused oil and room temperature butter in a food processor until smooth and creamy. Transfer this delightful garlic butter back into a container and refrigerate for about 30 minutes or until it’s set. This garlic butter will become the luscious base of your garlic butter pasta.

Step 3: Cook Pasta
Bring a large pot of salted water to a boil and add your choice of pasta—use 200 grams of dried or 300 grams of fresh pasta. Cook according to the package instructions, leaving the pasta just slightly al dente for best results, usually around 8–10 minutes for dried pasta. Reserve about a cup of the starchy pasta cooking water before draining.

Step 4: Prepare Sauce
In a large skillet over medium heat, melt the refrigerated garlic butter until it becomes bubbly and fragrant, about 2–3 minutes. Add freshly cracked black pepper to taste, continuing to stir to combine the flavors. The buttery aroma will begin to fill your kitchen, setting the stage for the delicious garlic butter pasta to come.

Step 5: Combine Pasta and Sauce
Add the cooked pasta directly into the skillet with the garlic butter sauce. Pour in a splash of the reserved pasta cooking water to help emulsify the sauce, tossing everything together gently with tongs. This creates a beautifully silky texture that allows the sauce to cling lovingly to your pasta, turning it into the irresistible garlic butter pasta you crave.

Step 6: Serve
Plate your garlic butter pasta hot, garnishing with freshly grated Parmesan cheese and a sprinkle of additional herbs or freshly ground black pepper, if desired. The glossy, rich sauce should coat each strand of pasta beautifully, creating an inviting and comforting dish ready for family or guests to savor.

Storage Tips for Garlic Butter Pasta

  • Fridge: Store any leftover garlic butter pasta in an airtight container for up to 3 days to maintain freshness and flavor.
  • Freezer: For longer storage, freeze the pasta in a tightly sealed container for up to 2 months. Thaw in the fridge before reheating.
  • Reheating: Gently reheat in a skillet over low heat, adding a splash of reserved pasta cooking water to revive the silky sauce. Stir well to combine.
  • Extra Garlic Storage: Any confit garlic not used in your dish can be stored in oil for up to 2 weeks, making it handy for future recipes!

Make Ahead Options

These Insanely Delicious Garlic Butter Pasta components are perfect for meal prep enthusiasts! You can confit the garlic up to 3 days in advance, storing it submerged in oil in the refrigerator to maintain its rich, sweet flavor. Additionally, prepare the garlic butter and refrigerate it overnight to allow the flavors to meld beautifully. When you’re ready to enjoy your pasta, simply cook your choice of pasta (up to 24 hours ahead) and store it in an airtight container. To finish, melt the refrigerated garlic butter in a skillet, toss in your cooked pasta with reserved cooking water, and you’ll have a comforting, homemade meal that feels fresh and indulgent with minimal effort!

What to Serve with Insanely Delicious Garlic Butter Pasta

Imagine a beautifully set table, filled with vibrant colors and aromas that beckon everyone to gather and share a meal together.

  • Crispy Garlic Bread: Freshly baked and golden, it adds a crunchy contrast to the buttery pasta while echoing the garlic flavors. Each bite is heavenly when dipped in the buttery sauce!

  • Simple Leafy Salad: A mix of greens with a zesty vinaigrette offers a refreshing balance to the richness of the pasta, cleansing the palate and brightening each bite.

  • Roasted Vegetables: The caramelized sweetness of roasted zucchini and bell peppers pairs perfectly with the savory garlic butter pasta, adding delightful texture and flavor contrasts.

  • Sautéed Spinach: Quickly sautéed with a hint of lemon and olive oil, spinach adds a nutritious green element that complements the hearty pasta beautifully.

  • Parmesan Crisps: Baked until crispy and golden, these can be crumbled over the pasta or enjoyed as a crunchy side snack for an extra burst of cheesy flavor.

  • White Wine Spritzer: Light and bubbly, this drink echoes the Italian charm—perfect for sipping alongside the garlic butter pasta, enhancing the overall dining experience.

Helpful Tricks for Garlic Butter Pasta

  • Extra Garlic: Always confit more garlic than you need; it stores well in oil for up to two weeks and can elevate other dishes.
  • Moderate Heat: Keep the oven temperature steady; if the garlic burns, it will turn bitter. Aim for a gentle golden hue instead.
  • Pasta Texture: Cook the pasta slightly al dente to ensure it absorbs the creamy garlic butter sauce beautifully, enhancing the overall flavor.
  • Emulsification Magic: Remember to use a good amount of pasta cooking water; this helps create a silky garlic butter pasta that clings to every strand.
  • Garnishing Tips: Freshly grated Parmesan elevates the dish. Consider adding fresh herbs or a drizzle of olive oil for a touch of elegance.

Garlic Butter Pasta Variations & Substitutions

Feel free to make this garlic butter pasta your own with these delightful twists that will tickle your taste buds!

  • Roasted Garlic: Replace confit garlic with roasted garlic for a nuttier, sweeter flavor that adds a delicious twist.
  • Spicy Kick: Toss in red pepper flakes for a fiery version that brightens every bite. Just a pinch can make a world of difference!
  • Veggie Boost: Add sautéed spinach or broccolini to incorporate some greens—this adds both nutrition and a pop of color to your dish. Your family will love the fresh crunch!
  • Dairy-Free Delight: Substitute vegan butter and gluten-free pasta for a completely dairy-free dish that everyone can enjoy!
  • Herb Infusion: Swap the rosemary for fresh basil or parsley to ignite the flavors with a fresh twist. This creates a delightful aromatic experience!
  • Creamy Sauce: For a richer sauce, stir in a splash of heavy cream or a dollop of cream cheese before combining with pasta. It will create an irresistible indulgence!
  • Zesty Flavor: Squeeze fresh lemon juice over the finished dish to brighten its flavor palette. It’s a small addition with a big impact!
  • Umami Boost: Drizzle a little soy sauce or liquid aminos before serving to enhance the savory depth of flavor. This adds an unexpected yet delicious note!

Don’t forget about pairing this delicious garlic butter pasta with a side of Heirloom Herb Garlic for the ultimate indulgence or serve it alongside Honey Garlic Slow cooked ribs for a fantastic family feast!

Garlic Butter Pasta Recipe FAQs

How do I choose ripe garlic for confit?
Absolutely! When selecting garlic for your confit, look for bulbs that are firm, with no dark spots or signs of sprouting. The skins should be papery and not too soft. Fresh garlic will produce the sweetest and most flavorful confit.

What’s the best way to store leftover garlic butter pasta?
You can store any leftover garlic butter pasta in an airtight container in the fridge for up to 3 days. Ensure it’s well-sealed to help maintain its freshness. To avoid dry pasta, add a little splash of olive oil or reserved pasta water before storing.

Can I freeze garlic butter pasta?
Yes, you can! To freeze your garlic butter pasta, place it in a tightly sealed container or freezer bag. It will keep well for up to 2 months. For best results, thaw in the fridge overnight before gently reheating in a skillet over low heat with a splash of reserved pasta cooking water.

What if my garlic butter sauce is too thick?
If your sauce is too thick, don’t fret! The key to a silky garlic butter pasta is reserving some pasta cooking water. If you find your sauce thickening too much, simply add a few tablespoons of the starchy pasta water while mixing to loosen it. Just stir until you achieve the desired consistency.

Is this recipe suitable for vegetarians?
Absolutely! This garlic butter pasta is vegetarian-friendly, making it an ideal dish for those who prefer plant-based options. To make it dairy-free, you can easily substitute traditional butter with vegan butter. Enjoy experimenting with flavors while keeping it completely vegetarian!

Can I use any kind of pasta?
Very! You can customize this dish with any pasta you enjoy. Whether it’s spaghetti, fettuccine, or even gluten-free options, the sauce will perfectly complement your preferred choice. Just remember to adjust the cooking time according to the type of pasta you choose.

Garlic Butter Pasta

Irresistible Garlic Butter Pasta That's Sure to Comfort You

This Garlic Butter Pasta is a comforting dish with simple ingredients, perfect for quick dinners or special occasions.
Prep Time 15 minutes
Cook Time 1 hour
Chilling Time 30 minutes
Total Time 1 hour 45 minutes
Servings: 4 servings
Course: Dinner
Cuisine: Italian
Calories: 400

Ingredients
  

For the Confit Garlic
  • 2 bulbs Garlic Provides a sweet, mellow flavor when confit.
  • a few sprigs Fresh Herbs (Rosemary) Can substitute with thyme or omit if desired.
  • 1 cup Extra Virgin Olive Oil Used for confit garlic.
For the Pasta Dish
  • 1 cup Room Temperature Butter Use salted butter for flavor, unsalted acceptable.
  • to taste Black Pepper Adjust quantity to personal taste.
  • 1 cup Pasta Cooking Water Essential for emulsifying the sauce.
  • 200 grams Dried Pasta Use 300 grams fresh for best results.
  • to taste Parmesan Cheese Optional garnish.

Equipment

  • oven
  • Baking Dish
  • Food Processor
  • Large pot
  • Skillet

Method
 

Step-by-Step Instructions
  1. Preheat your oven to 275°F (135°C). Combine peeled garlic cloves from two bulbs with fresh rosemary in a baking dish and cover with olive oil. Bake for 45 minutes to 1 hour.
  2. Blend the cooled confit garlic, infused oil, and room temperature butter in a food processor until smooth. Refrigerate for 30 minutes.
  3. Boil salted water and add your choice of pasta, cooking until slightly al dente. Reserve 1 cup of cooking water before draining.
  4. Melt the garlic butter in a skillet over medium heat for 2–3 minutes. Add black pepper to taste.
  5. Add cooked pasta to the skillet with garlic butter sauce, incorporating reserved pasta cooking water until emulsified.
  6. Plate hot pasta, garnishing with fresh Parmesan cheese and herbs or additional black pepper.

Notes

Confit garlic can be stored in oil for up to two weeks and adds flavor to other dishes. Ensure to reserve pasta water to achieve the right sauce texture.

Salted Brown Sugar Butterscotch Ice Cream Sandwiches Bliss

The aroma of freshly baked cookies fills the air, instantly transporting me back to summer afternoons spent in the kitchen. There’s something magical about combining warm, chewy salted brown sugar cookies with velvety butterscotch ice cream, turning them into Salted Brown Sugar Butterscotch Ice Cream Sandwiches that are nothing short of delightful. With a no-churn ice cream method, this recipe effortlessly caters to your seasonal cravings while keeping your kitchen cool. Not only do these sandwiches come together quickly, but they’re sure to be a showstopper when shared with family and friends. So, are you ready to treat yourself to a sweet indulgence that combines the best of both worlds?

Why are these ice cream sandwiches irresistible?

Chewy Texture: Each bite of the salted brown sugar cookies delivers a soft, chewy experience that’s simply delightful.

Butterscotch Bliss: The creamy butterscotch ice cream adds a rich, sweet layer, creating a magical flavor combination that feels like a summer dream.

No Churn Magic: Effortlessly whip up the velvety ice cream without the need for specialized equipment, making it accessible for everyone!

Quick Assembly: These sandwiches come together in no time, perfect for impromptu gatherings or a cozy night in.

Versatile Delight: Feel free to experiment with flavors or toppings, like drizzling chocolate sauce or using different cookie types for a fun twist!

Crowd-Pleasing Treat: Whether it’s a family barbecue or a casual get-together, these ice cream sandwiches are a guaranteed hit!

Salted Brown Sugar Butterscotch Ice Cream Sandwich Ingredients

For the Cookies

  • AP Flour – Provides structure and stability for the cookies; no direct substitution suggested.
  • Bread Flour – Enhances chewiness and texture; can be replaced with all-purpose flour for a softer cookie.
  • Baking Soda – Acts as a leavening agent for cookie spread and rise; ensure it’s fresh for optimal results.
  • Salt – Balances sweetness and enhances flavor; fleur de sel or sea salt can be used as substitutes.
  • Softened Butter – Adds moisture and richness; can use unsalted butter, but adjust salt content.
  • Sugar – Contributes sweetness and structure; granulated sugar can be replaced with coconut sugar for a slight caramel flavor.
  • Brown Sugar – Imparts moisture and a delightful toffee-like flavor; light or dark varieties can be used interchangeably.
  • Eggs – Serve as a binding agent and contribute moisture; flax eggs can be a vegan substitute.
  • Vanilla Extract – Enhances overall flavor; use pure vanilla for the best results.
  • Coarse Salt – Elevates the cookies’ flavor post-baking; use flaky sea salt for a gourmet touch.

For the Butterscotch Ice Cream

  • Heavy Cream – Creates a rich, creamy texture; coconut cream provides a non-dairy version.
  • Sweetened Condensed Milk – Offers sweetness and creamy texture without the need for churning; evaporated milk can be a lower-sugar alternative, but texture will differ.
  • Butterscotch Chips – Add flavor and texture to the ice cream; can be replaced with chocolate chips if preferred.

These ingredients, combined, yield the perfect Salted Brown Sugar Butterscotch Ice Cream Sandwiches that are bursting with rich flavors and delightful textures!

Step‑by‑Step Instructions for Salted Brown Sugar Butterscotch Ice Cream Sandwiches

Step 1: Preheat the Oven
Begin by preheating your oven to 350°F (175°C). While the oven warms up, line two baking sheets with parchment paper, ensuring ample space between cookies when placing the dough. This setup will help create perfectly baked salted brown sugar cookies that are essential for your delicious ice cream sandwiches.

Step 2: Mix Dry Ingredients
In a medium bowl, whisk together all-purpose flour, bread flour, baking soda, and salt until thoroughly combined. This mixture is vital for the structure and chewiness of your cookies, providing a delightful texture. Once combined, set it aside for later use as you proceed with the wet ingredients.

Step 3: Cream Butter and Sugars
In a large mixing bowl, beat softened butter with granulated and brown sugar until the mixture becomes light and fluffy, about 3-4 minutes. This step incorporates air into the butter, enhancing the cookie’s texture. Next, add in the eggs and vanilla extract, mixing until everything is smooth and well blended, ensuring your cookies are rich in flavor.

Step 4: Combine Mixtures
Gradually add the dry ingredient mixture to the wet ingredients, stirring gently until just combined. Be mindful not to overmix; you want your salted brown sugar butterscotch cookies to remain tender. The dough should be soft yet slightly sticky, perfect for scooping onto the baking sheets.

Step 5: Scoop Dough
Using a tablespoon or a cookie scoop, portion out the dough onto the lined baking sheets, leaving about 2 inches of space between each scoop. This allows the cookies to spread during baking, creating that perfect chewy center and slightly crisp edges that you’re looking for in these sandwiches.

Step 6: Bake the Cookies
Place the baking sheets in the preheated oven and bake for 8-10 minutes, or until the edges are golden brown while the centers remain soft. Once baked, immediately sprinkle the cookies with coarse salt to enhance their flavor. Allow the cookies to cool on the baking sheets for a few minutes before transferring them to a wire rack.

Step 7: Cool Cookies
After a gentle resting period on the baking sheets, transfer your cookies to a wire rack to cool completely. This cooling process is crucial, as it helps the cookies firm up and retain their chewy texture, making them perfect for holding the luscious butterscotch ice cream.

Step 8: Prepare Ice Cream Mixture
In a large bowl, beat the heavy cream with a hand mixer until stiff peaks form, indicating it’s perfectly whipped. Gently fold in the sweetened condensed milk, vanilla extract, and a pinch of salt until just combined. Be cautious not to deflate the whipped cream, as this is the key to a light and creamy ice cream.

Step 9: Mix in Butterscotch Chips
Quickly and gently fold the melted butterscotch chips into the whipped cream mixture. This step is essential, as the rich butterscotch flavor infuses the ice cream, creating a delightful flavor profile in your salted brown sugar butterscotch ice cream sandwiches. Work swiftly before the mixture begins to thicken.

Step 10: Freeze the Ice Cream
Divide the ice cream mixture evenly between two lined cake pans. Smooth the surface with a spatula and freeze for at least 2 hours or until fully set. This no-churn ice cream method allows you to prepare the dessert without an ice cream maker, resulting in creamy butterscotch ice cream ready for sandwiches.

Step 11: Assemble the Sandwiches
Once the ice cream is solidified, remove it from the cake pans and prepare to assemble your sandwiches. Use a round cutter or knife to create circles of ice cream and place one round between two cookies. Press down gently to adhere, ensuring the creamy butterscotch ice cream is well encapsulated by the chewy cookies.

Step 12: Wrap and Freeze
Wrap each assembled salted brown sugar butterscotch ice cream sandwich tightly in plastic wrap or place them in individual zippered bags. Return them to the freezer to set for a more extended period or until ready to serve. This makes for a perfect make-ahead sweet treat for those warm summer days!

What to Serve with Salted Brown Sugar Butterscotch Ice Cream Sandwiches

Imagine a warm summer evening, laughter echoing through the air, and the sweet, rich aroma of dessert beckoning you to indulge.

  • Fresh Berries: Juicy strawberries or tangy raspberries provide a refreshing contrast to the rich flavors of the sandwich, balancing sweetness with tartness.

  • Chocolate Sauce: A drizzle of warm chocolate sauce adds a decadent touch, enhancing the butterscotch flavor and making every bite even more indulgent.

  • Whipped Cream: Light and airy whipped cream brings a silky texture that complements the chewy cookies and creamy ice cream, making it a delightful addition.

  • Mint Leaves: A sprig of fresh mint offers a pop of color and a refreshing herbal note that cuts through the richness, adding brightness to the whole dessert.

  • Coffee: A cup of warm, freshly brewed coffee pairs beautifully with these ice cream sandwiches, providing a perfect contrast to the sweetness and enriching the flavors.

  • Fruit Sorbet: For an extra cooling effect, serve a scoop of fruit sorbet on the side. The fruity ice treat will elevate the dessert experience with its bright and refreshing taste.

  • Nutty Caramel Sauce: Drizzling nutty caramel sauce enhances the complexity of flavors, leaving a rich taste that lingers delightfully on the palate.

  • Ice Cold Milk: A classic pairing, a tall glass of ice-cold milk not only balances the sweetness but also ties together the flavors of childhood classics and indulgent desserts.

Make Ahead Options

These Salted Brown Sugar Butterscotch Ice Cream Sandwiches are perfect for meal prep, allowing you to savor the summer treat without all the last-minute fuss! You can prepare the cookie dough up to 24 hours in advance; simply cover and refrigerate it until you’re ready to bake. The cookies can also be baked ahead of time and stored in an airtight container for up to 3 days. For the ice cream, you can mix and freeze it at least 2 hours prior to assembling the sandwiches. When you’re ready to enjoy, simply cut ice cream rounds, sandwich them between the cookies, and wrap them tightly before returning them to the freezer until needed. This way, you’ll have delicious homemade treats ready to serve with minimal effort whenever sweet cravings strike!

Expert Tips for Salted Brown Sugar Butterscotch Ice Cream Sandwiches

  • Quality Ingredients: Use high-quality butter and pure vanilla extract to elevate flavors, ensuring your salted brown sugar butterscotch ice cream sandwiches truly shine.

  • Monitor Baking Time: Keep a close eye on your cookies while baking; they should be golden at the edges but still soft in the center to prevent them from hardening once frozen.

  • Chill the Dough: If your dough feels too warm, chill it for 30 minutes before baking. This helps maintain the chewy texture in your final salted brown sugar cookies.

  • Mix Carefully: When combining the ice cream ingredients, fold gently to keep the whipped cream’s airiness, resulting in smooth, creamy butterscotch ice cream.

  • Wrap Tight: Ensure you wrap your assembled sandwiches tightly in plastic wrap or place them in bags to prevent freezer burn, keeping each sandwich fresh and delicious.

How to Store and Freeze Salted Brown Sugar Butterscotch Ice Cream Sandwiches

Room Temperature: Serve the sandwiches immediately after assembly for the best taste. They should not be left out for more than 30 minutes to prevent ice cream melting.

Fridge: If you have leftover ice cream, it can be stored in the refrigerator for up to 3 days, but it’s best enjoyed fresh in your salted brown sugar butterscotch ice cream sandwiches.

Freezer: Wrap each sandwich tightly in plastic wrap or place in individual zippered bags. They can be kept in the freezer for up to 2-3 weeks while maintaining their delightful flavor and texture.

Reheating: There’s no need to reheat ice cream sandwiches, but if they have been frozen for a long time, let them sit at room temperature for a few minutes to soften slightly before enjoying.

Salted Brown Sugar Butterscotch Ice Cream Sandwiches Variations

Feel free to explore these delightful twists to make your ice cream sandwiches even more appealing and personalized!

  • Chocolate Swap: Replace butterscotch chips with semi-sweet or dark chocolate chips for a deeper flavor. The richness of chocolate pairs beautifully with the brown sugar cookies.

  • Nutty Crunch: Add chopped nuts like pecans or walnuts to your cookie dough for a delightful crunch. This adds an unexpected texture that elevates the entire sandwich!

  • Cinnamon Twist: Incorporate a teaspoon of cinnamon into the cookie dough for a warm, spiced flavor. The scent of cinnamon wafting through your kitchen is irresistible!

  • Caramel Drizzle: Drizzle some caramel sauce over the ice cream before sandwiching it between the cookies. This extra indulgence enhances the overall sweetness and offers a sticky surprise.

  • Fruit Addition: Layer ripe banana or fresh berries into your sandwiches for a refreshing burst of flavor. The natural sweetness from fruits complements the cookies perfectly.

  • Dairy-Free Delight: Swap heavy cream with coconut cream for a delicious non-dairy option. Your sandwiches will still be creamy, with a hint of tropical flavor!

  • Different Sugar: Experiment by substituting brown sugar with maple sugar for a unique, rich taste that adds depth to your cookies. It’s a fun way to change up the sweetness without extra effort.

  • Savory Pairing: Add a sprinkle of sea salt on top of the ice cream before sandwiching. This little touch heightens the flavor and brings balance to the sweetness.

As you explore these variations, consider pairing your sandwiches with a side of refreshing avocado and tomato salad to balance the sweetness or serve them alongside a scoop of rich, creamy blueberry cream cheese for a delightful dessert spread!

Salted Brown Sugar Butterscotch Ice Cream Sandwiches Recipe FAQs

How do I select the right brown sugar for the cookies?
Absolutely! You can use either light or dark brown sugar in this recipe, depending on your flavor preference. Light brown sugar has a milder flavor, while dark brown sugar provides a richer, more pronounced caramel taste due to its higher molasses content. For a unique twist, consider experimenting with a blend of both!

What’s the best way to store these ice cream sandwiches?
I recommend wrapping each sandwich tightly in plastic wrap or placing them in individual zippered bags to maintain freshness. When stored properly, these Salted Brown Sugar Butterscotch Ice Cream Sandwiches can last in the freezer for up to 2-3 weeks. Just remember to take them out a few minutes before serving for the best taste!

Can I freeze the ice cream mixture before assembling the sandwiches?
Very! You can freeze the prepared butterscotch ice cream mixture in lined cake pans for at least 2 hours until solid. Once set, scoop out rounds of the ice cream to assemble your sandwiches. If you plan to make the ice cream mixture in advance, it’s best to do so and then assemble the sandwiches right before serving, much to everyone’s delight.

What are some common issues when making these ice cream sandwiches?
A common issue is overbaking the cookies, which can lead to a hard texture, especially after freezing. Make sure to bake them until the edges are golden but the centers remain soft. If your cookies spread too much during baking, the dough might have been too warm; you can chill it for about 30 minutes before scooping.

Can my pets share in this treat?
While your furry friends may be curious about these sandwiches, they should stick to their own treats! The cookies contain sugar and the butterscotch ice cream is not suitable for pets due to the dairy content. If you want to treat your pets, consider making dog-friendly cookies or ice cream made especially for them.

Salted Brown Sugar Butterscotch Ice Cream Sandwiches

Salted Brown Sugar Butterscotch Ice Cream Sandwiches Bliss

Indulge in delightful Salted Brown Sugar Butterscotch Ice Cream Sandwiches, featuring chewy cookies and creamy ice cream.
Prep Time 30 minutes
Cook Time 10 minutes
Freezing Time 2 hours
Total Time 2 hours 40 minutes
Servings: 12 sandwiches
Course: Dessert
Cuisine: American
Calories: 320

Ingredients
  

For the Cookies
  • 2 cups All-purpose flour Provides structure and stability.
  • 1 cup Bread flour Enhances chewiness and texture.
  • 1 teaspoon Baking soda Acts as a leavening agent.
  • 1 teaspoon Salt Balances sweetness.
  • 1 cup Softened butter Adds moisture and richness.
  • 1 cup Granulated sugar Contributes sweetness.
  • 1 cup Brown sugar Imparts moisture and toffee-like flavor.
  • 2 large Eggs Serves as a binding agent.
  • 2 teaspoons Vanilla extract Enhances overall flavor.
  • 1 teaspoon Coarse salt Elevates flavor post-baking.
For the Butterscotch Ice Cream
  • 2 cups Heavy cream Creates a rich texture.
  • 1 can Sweetened condensed milk Offers sweetness without churning.
  • 1 cup Butterscotch chips Adds flavor and texture.

Equipment

  • oven
  • mixing bowls
  • Baking sheets
  • whisk
  • hand mixer
  • spatula
  • Cookie scoop
  • plastic wrap

Method
 

Step-by-Step Instructions
  1. Preheat your oven to 350°F (175°C) and line two baking sheets with parchment paper.
  2. In a medium bowl, whisk together all-purpose flour, bread flour, baking soda, and salt until combined.
  3. In a large bowl, beat softened butter with granulated and brown sugar until light and fluffy, then add eggs and vanilla extract.
  4. Gradually add the dry mixture to the wet ingredients, stirring until just combined.
  5. Scoop dough onto baking sheets, leaving space for spreading.
  6. Bake for 8-10 minutes until edges are golden and centers soft, then sprinkle with coarse salt.
  7. Transfer cookies to a wire rack to cool completely.
  8. Beat the heavy cream until stiff peaks form, then fold in sweetened condensed milk, vanilla extract, and salt until combined.
  9. Gently fold butterscotch chips into whipped cream mixture.
  10. Divide ice cream mixture between lined cake pans and freeze for at least 2 hours until set.
  11. Assemble sandwiches by placing a round of ice cream between two cookies and gently pressing together.
  12. Wrap each sandwich tightly and freeze until ready to serve.

Notes

Use high-quality ingredients and monitor baking times for perfect results. The sandwiches can be made ahead and stored in the freezer for later enjoyment.

Creamy Bacon Ranch Macaroni and Cheese for Ultimate Comfort

As I stood by the stove, the sizzling sound of bacon filled the air, sending waves of nostalgia rushing back from family gatherings. The blend of crispy bacon and creamy cheeses is irresistible, especially when paired with a zesty twist from ranch seasoning. This is my version of comfort food—Bacon Ranch Macaroni and Cheese. Not only is this dish incredibly easy to whip up, making it perfect for busy weeknights, but it also serves as a crowd-pleaser at potlucks and gatherings. It can play the role of a hearty main dish, especially when accompanied by a juicy rotisserie chicken. Are you ready to dive into this creamy, dreamy bowl of goodness? Let’s get cooking!

Why Is Bacon Ranch Mac and Cheese Irresistible?

Comfort Food Redefined: This Bacon Ranch Macaroni and Cheese delivers that warm, hearty feeling we all crave, making it the ultimate comfort food.
Quick to Prepare: With minimal prep time, you can have this delicious dish ready in no time—perfect for weeknight dinners!
Flavor Explosion: The scrumptious combination of crispy bacon and zesty ranch seasoning infuses every bite with rich, bold flavors.
Customizable Goodness: Whether you’re adding veggies or substituting noodles for gluten-free options, this recipe allows for endless variations to suit your preferences—like adding a touch of Savory Zucchini Cheese for a nutritious twist!
Family Favorite: This dish is guaranteed to please everyone at the table, from kids to adults, making it a surefire hit at potlucks or family gatherings.

Bacon Ranch Macaroni and Cheese Ingredients

For the Pasta Base
Pasta – Use elbow macaroni or any pasta shape of your choice for the foundation of this creamy delight.

For the Cheese Sauce
Unsalted Butter – Creates a roux for a silky cheese sauce; margarine can be an alternative.
All-Purpose Flour – Thickens the cheese sauce beautifully; gluten-free flour can be used for a gluten-free variation.
Ranch Seasoning – Infuses the macaroni with a rich flavor; consider homemade ranch seasoning for a personal touch.
Milk – Forms the creamy base; whole milk is ideal, but almond milk works for a dairy-free option.
Cream Cheese – Adds outstanding creaminess; vegan cream cheese is a great substitute for a dairy-free version.
Shredded Cheddar Cheese – Offers that classic cheese flavor; mixing with Monterey Jack or Pepper Jack gives a kick.
Dry Mustard – Enhances depth in the cheese sauce; Dijon mustard can be a good substitute.
White Pepper – Provides a gentle heat without altering the color; black pepper can replace it but may be more visible.

For Topping and Garnish
Bacon – Adds that savory, crispy texture; turkey bacon can lighten up the dish if desired.
Fresh Parsley (optional) – Offers a pop of color and freshness for serving.

Get ready to create the ultimate comfort food experience with this Bacon Ranch Macaroni and Cheese—your taste buds will thank you!

Step‑by‑Step Instructions for Bacon Ranch Macaroni and Cheese

Step 1: Cook the Bacon
In a large skillet over medium heat, cook the bacon until it becomes crispy, about 8–10 minutes. Make sure to turn the strips occasionally for even cooking. Once done, let the bacon cool on a paper towel-lined plate to absorb excess grease. Chop it into bits and set aside, reserving a few pieces for garnish later.

Step 2: Boil Pasta
Bring a large pot of salted water to a rolling boil. Add your chosen pasta—elbow macaroni is ideal—and cook according to package instructions, usually about 10 minutes, until al dente. Drain the pasta in a colander and set it aside. This step prepares the base for your delicious Bacon Ranch Macaroni and Cheese.

Step 3: Make the Cheese Sauce
In the same pot, melt 4 tablespoons of unsalted butter over medium heat. Once melted, whisk in ¼ cup of all-purpose flour and cook for 1–2 minutes until it turns a light golden brown. Gradually add 2 cups of milk, whisking diligently until the mixture is smooth and bubbling. Incorporate 8 ounces of cream cheese, stirring until fully melted and combined.

Step 4: Add Seasoning and Cheese
Stir in 1 packet of ranch seasoning, 2 cups of shredded cheddar cheese, ½ teaspoon of dry mustard, and a dash of white pepper. Keep stirring until the cheese is completely melted and the sauce is creamy and thickening, which should take about 3–4 minutes. This savory sauce brings all the flavors together in your Bacon Ranch Macaroni and Cheese.

Step 5: Combine Pasta and Bacon
Add the drained pasta and chopped bacon into the cheese sauce, mixing gently until all pasta is well coated. Cook everything together on low heat for an additional 2–3 minutes, allowing the flavors to meld and the dish to warm through. You’ll want to keep an eye on it to prevent sticking.

Step 6: Serve Up Your Comfort
Spoon out generous portions of your Bacon Ranch Macaroni and Cheese onto plates or into bowls. Optionally, sprinkle the reserved bacon bits and chopped fresh parsley on top for a pop of color and flavor. Serve warm to share with family and friends, and watch as this creamy delight becomes a favorite!

What to Serve with Bacon Ranch Macaroni and Cheese

Pairing this creamy bowl of goodness with delightful sides will take your meal to the next delicious level.

  • Crispy Grilled Chicken: The smoky flavors of grilled chicken harmonize beautifully with the decadent macaroni, making for a harmonious, mouth-watering combination.

  • Steamed Broccoli: Bright green, tender broccoli adds a fresh crunch and vital nutrients to balance the richness of the mac and cheese.

  • Garlic Bread: Crunchy, buttery garlic bread is perfect for mopping up any leftover cheese sauce, making every bite a flavorful experience.

  • Caesar Salad: A crisp Caesar salad provides an extra layer of texture and freshness, cutting through the creaminess with its zesty dressing and crunchy croutons.

  • Coleslaw: The tangy, crunchy coleslaw complements the creamy flavors of the dish, adding a refreshing twist to your meal.

  • Sweet Tea or Lemonade: Refreshing beverages like sweet tea or tart lemonade offer a balance to the richness, enhancing your overall dining experience.

  • Chocolate Chip Cookies: For dessert, classic chocolate chip cookies provide a sweet finish, contrasting perfectly with the savory mac and cheese.

These pairings create an inviting and complete meal that everyone will rave about!

Expert Tips for Bacon Ranch Macaroni and Cheese

  • Cheese Variety: Using a mix of cheeses like sharp cheddar and creamy Monterey Jack elevates the flavor profile. Avoid using pre-shredded cheese, which can clump due to anti-caking agents.

  • Pasta Perfection: Undercook your pasta slightly so it’s al dente. It will absorb some sauce in the final baking, keeping the texture perfect.

  • Homemade Ranch: If you have time, making your own ranch seasoning can enhance the freshness of the dish, ensuring that the flavors are vibrant and homemade.

  • Storage Solutions: Leftovers can dry out. Store them in an airtight container and add a splash of milk when reheating to restore creaminess.

  • Vegetable Boost: Consider folding in cooked greens like spinach or peas before serving. This adds nutrition and a pop of color without sacrificing the dish’s indulgence.

  • Garnish Like a Chef: A sprinkle of fresh parsley or crispy bacon bits on top not only looks beautiful but also adds a burst of flavor to your Bacon Ranch Macaroni and Cheese.

Bacon Ranch Macaroni and Cheese Variations

Feel free to get creative with this recipe, enhancing it with flavors and ingredients that tantalize your taste buds!

  • Vegetable Boost: Mix in chopped veggies like spinach or broccoli for a nutritious kick that adds texture and color to your dish. Trust me, a little greenery never hurt anyone!

  • Protein-Packed: Add shredded rotisserie chicken for a heartier meal that transforms your mac and cheese into a fully satisfying dinner option. This is perfect for using up leftovers while keeping things delicious!

  • Spicy Twist: Incorporate sliced jalapeños or a dash of hot sauce for those who crave a little heat. The zing will elevate your dish to a whole new level!

  • Gluten-Free Goodness: Use gluten-free pasta instead of traditional options, ensuring everyone can enjoy this comforting dish without worry. It’s just as creamy and delightful!

  • Creamy Vegan Option: Swap the cream cheese for vegan cream cheese and use almond milk to create a plant-based version that’s still incredibly rich and satisfying. You won’t even miss the dairy!

  • Cheesy Variations: Blend different cheeses like Gouda or Pepper Jack for an exciting flavor explosion. The more, the merrier when it comes to cheese!

  • Baked Delight: For a crunchy topping, sprinkle breadcrumbs mixed with parmesan cheese before baking until golden. This adds a wonderful texture contrast to the creamy base.

  • Herb-Infused: Add fresh herbs like basil or chives to the mix before serving to brighten up the dish and provide a lovely aroma. Fresh herbs create such a delightful dining experience!

As you explore these variations, you might also enjoy incorporating elements from other beloved recipes, like Beef Bacon Cheese for that extra layer of flavor or pairing your mac with a side of Stovetop Cheese Green. With so many possibilities, your Bacon Ranch Macaroni and Cheese adventure can continue endlessly!

Make Ahead Options

These Bacon Ranch Macaroni and Cheese are perfect for meal prep aficionados! You can cook the bacon and pasta up to 24 hours in advance; simply store them separately in airtight containers to maintain their texture. Additionally, you can prepare the cheese sauce, letting it cool before refrigerating. When you’re ready to enjoy this creamy delight, reheat each component on the stovetop over low heat. Combine the bacon and pasta with the warmed cheese sauce, stirring gently until everything is piping hot. This way, you’ll have a homemade, comforting dish ready in a snap, saving valuable time on those busy weeknights!

How to Store and Freeze Bacon Ranch Macaroni and Cheese

Fridge: Store leftovers in an airtight container for up to 3 days. Make sure to cool it down before refrigerating to maintain texture.

Freezer: For longer storage, freeze in a freezer-safe container for up to 2 months. Defrost overnight in the refrigerator before reheating.

Reheating: When ready to enjoy, reheat in the microwave or oven. Add a splash of milk while warming to restore that creamy goodness of the Bacon Ranch Macaroni and Cheese.

Make-Ahead Tip: You can prepare the cheese sauce and pasta separately ahead of time. Combine and bake when ready to serve for optimal flavor.

Bacon Ranch Macaroni and Cheese Recipe FAQs

What type of pasta is best for Bacon Ranch Macaroni and Cheese?
Absolutely! Elbow macaroni is a classic choice for this creamy dish. However, feel free to experiment with other pasta shapes like shells or cavatappi for a fun twist. The key is to choose a pasta that holds the sauce well!

How should I store leftovers of Bacon Ranch Macaroni and Cheese?
Very simply! Store any leftovers in an airtight container in the fridge for up to 3 days. Make sure the dish has cooled down before sealing to maintain its texture.

Can I freeze Bacon Ranch Macaroni and Cheese?
Yes, you can! To freeze, transfer the cooled macaroni and cheese into a freezer-safe container, ensuring to press out any excess air. It can be stored for up to 2 months. When you’re ready to enjoy it, defrost overnight in the fridge before reheating.

What can I do if my cheese sauce is too thick?
If your cheese sauce turns out too thick, don’t worry! Simply add a little bit of milk—start with a tablespoon at a time—while gently stirring over low heat until you achieve your desired consistency. This will help to loosen it up without compromising the flavor.

Are there any dietary considerations for Bacon Ranch Macaroni and Cheese?
Yes, indeed! To make this dish more suitable for various dietary needs, you can substitute regular pasta with gluten-free varieties or use zucchini noodles for a low-carb option. Additionally, you can replace dairy ingredients with non-dairy alternatives, like almond milk and vegan cream cheese, to accommodate lactose sensitivities. Always check the ranch seasoning for gluten if needed!

Can I add vegetables to the Bacon Ranch Macaroni and Cheese?
Absolutely! Adding veggies like spinach, broccoli, or even peas not only boosts the nutritional value but also adds delightful color and texture to the dish. Simply steam or sauté your chosen vegetables before mixing them in with the pasta and sauce for a delicious twist!

Bacon Ranch Macaroni and Cheese

Creamy Bacon Ranch Macaroni and Cheese for Ultimate Comfort

This Bacon Ranch Macaroni and Cheese is a warm, creamy delight perfect for comforting weeknight dinners.
Prep Time 15 minutes
Cook Time 30 minutes
Total Time 45 minutes
Servings: 6 servings
Course: Dinner
Cuisine: American
Calories: 500

Ingredients
  

For the Pasta Base
  • 8 ounces Elbow macaroni or any pasta shape of your choice
For the Cheese Sauce
  • 4 tablespoons Unsalted butter or margarine as an alternative
  • ¼ cup All-purpose flour or gluten-free flour
  • 1 packet Ranch seasoning homemade can be used
  • 2 cups Milk whole milk or almond milk for dairy-free
  • 8 ounces Cream cheese or vegan cream cheese
  • 2 cups Shredded cheddar cheese mix with Monterey Jack or Pepper Jack for extra flavor
  • ½ teaspoon Dry mustard Dijon mustard can be a substitute
  • 1 dash White pepper black pepper can be used
For Topping and Garnish
  • 8 slices Bacon or turkey bacon for a lighter option
  • 1 tablespoon Fresh parsley optional, for garnish

Equipment

  • large skillet
  • Large pot
  • Colander

Method
 

Directions
  1. In a large skillet over medium heat, cook the bacon until crispy, about 8–10 minutes. Turn occasionally. Let cool and chop, reserving some for garnish.
  2. Bring a large pot of salted water to a boil. Add the pasta and cook according to package instructions (about 10 minutes). Drain and set aside.
  3. In the same pot, melt the butter over medium heat. Whisk in flour and cook for 1–2 minutes. Gradually add milk, whisking until smooth and bubbling. Stir in cream cheese until melted.
  4. Add ranch seasoning, cheddar cheese, dry mustard, and white pepper. Stir until cheese is melted and sauce is creamy (3–4 minutes).
  5. Combine the drained pasta and chopped bacon in the cheese sauce, mixing gently. Cook on low for 2–3 minutes to meld flavors.
  6. Serve generously on plates or bowls, topped with reserved bacon and parsley.

Notes

Using a mix of cheeses like sharp cheddar and Monterey Jack enhances flavor. Store leftovers in an airtight container; add milk when reheating to restore creaminess.

Cinnamon Oatmeal Cookie Ice Cream that Brings Joy in Every Scoop

A waft of warmth fills the kitchen as I mix together the comforting spices and sweet ingredients for my latest creation: Homemade Cinnamon Oatmeal Cookie Ice Cream. Inspired by one of my all-time favorite Ben & Jerry’s flavors, this delightful dessert merges the rich, creamy goodness of ice cream with chewy oatmeal cookie chunks. Not only is it a crowd-pleaser perfect for warm summer nights, but it’s also surprisingly simple to whip up right at home. Plus, you can customize it with your favorite mix-ins, like chocolate chips, for that extra touch. As I scoop out this dreamy concoction, I can’t help but wonder—what toppings will you choose to add to your scoop?

Why is homemade ice cream so special?

Irresistible Flavor: This Cinnamon Oatmeal Cookie Ice Cream is a delicious twist on a classic, blending creamy ice cream with chunks of chewy cookies for an unforgettable treat.

Easy to Make: With simple ingredients and straightforward steps, anyone can master this recipe in no time.

Customizable Delight: Feel free to mix in chocolate chips or experiment with different spices, making every batch your own.

Perfect for Gatherings: Whether it’s summer barbecues or cozy family nights, this ice cream is sure to impress your guests and elevate any occasion.

Nostalgic Treat: Reminiscent of childhood favorites, this homemade version will take you down memory lane, reminiscent of those sweet, leisurely summer days.

Treat yourself with a scoop of this delightful creation, and for another inspired flavor, check out our Wholesome Oatmeal Fruit for a fruit twist!

Cinnamon Oatmeal Cookie Ice Cream Ingredients

For the Cookies

  • Butter – Provides richness and creaminess; substitute with coconut oil for a dairy-free version.
  • Brown Sugar – Adds moisture and depth of flavor; light brown sugar can be swapped for dark for a caramel note.
  • Granulated Sugar – Contributes sweetness and structure; can be replaced with a sugar alternative for a low-calorie option.
  • Egg – Binds ingredients and provides structure; use a flax egg for a vegan twist.
  • Vanilla Extract – Enhances overall flavor; pure vanilla is best, but imitation will work in a pinch.
  • All-Purpose Flour – Supplies necessary structure; use gluten-free flour blends as a substitute.
  • Baking Soda – A leavening agent for cookies; ensure it’s fresh for the best rise.
  • Cinnamon – Imparts a warm, spicy note; increase the quantity for a stronger cinnamon flavor.
  • Nutmeg – Adds warmth; can be omitted or replaced with cardamom for variety.
  • Salt – Balances sweetness; essential for both the cookies and ice cream.
  • Old Fashioned Oats – Provides chewiness and texture; instant oats can be used, but will alter the texture.

For the Ice Cream Base

  • Whole Milk – Forms the base for the ice cream; substitute with almond or oat milk for a lighter option.
  • Heavy Cream – Contributes to the creamy consistency; light cream can replace it, but the texture will be less rich.
  • Pure Maple Syrup – Adds sweetness and complexity; honey can be used but may slightly change the flavor.
  • Coarse Kosher Salt – Enhances all flavors; use regular salt in lesser amounts as it’s saltier.

This delightful Cinnamon Oatmeal Cookie Ice Cream is calling your name—gather these ingredients, and let the fun begin!

Step‑by‑Step Instructions for Cinnamon Oatmeal Cookie Ice Cream

Step 1: Preheat Your Oven
Start by preheating your oven to 350°F (175°C). This is the ideal temperature for baking the cookies that will add a delightful chewy texture to your Cinnamon Oatmeal Cookie Ice Cream. Allow the oven to heat fully while you prepare the cookie dough, ensuring a beautifully baked finish.

Step 2: Mix the Cookie Dough
In a large mixing bowl, combine softened butter, brown sugar, and granulated sugar. Beat these together until the mixture is light and fluffy, which should take about 2-3 minutes. Next, add in the egg and vanilla extract, blending until fully incorporated. Gradually sift in all-purpose flour, baking soda, cinnamon, nutmeg, salt, and old-fashioned oats, mixing until just combined for a chunky cookie dough.

Step 3: Prepare the Baking Sheet
Line a baking sheet with parchment paper to prevent sticking. Scoop evenly spaced dollops of cookie dough onto the prepared sheet, allowing some room for spreading. Bake in the preheated oven for 11-13 minutes, or until the edges turn golden brown and the centers are set. Once done, remove from the oven and cool completely before breaking the cookies into chunks.

Step 4: Make the Ice Cream Base
In a medium saucepan over medium heat, combine whole milk, granulated sugar, pure maple syrup, and cinnamon. Stir gently until the mixture is foamy and heated through, about 5-7 minutes, without boiling. Once heated, remove from the heat and mix in the heavy cream, vanilla extract, and coarse kosher salt until everything is well blended.

Step 5: Cool and Chill the Mixture
Pour your ice cream base mixture into a large freezer bag or bowl. To cool the mixture quickly, place it in an ice water bath for approximately 15 minutes. Once cooled, refrigerate the mixture for at least 1 hour, or up to overnight, allowing the flavors to meld and the base to chill thoroughly before churning.

Step 6: Churn the Ice Cream
Once chilled, pour the ice cream base into your ice cream maker and churn according to the manufacturer’s instructions. In the last few minutes of churning, gently fold in the cookie chunks you prepared earlier, allowing them to mix well into the creamy base of your Cinnamon Oatmeal Cookie Ice Cream.

Step 7: Freeze for Optimal Texture
Transfer the churned ice cream into an airtight container, smoothing the top to prevent air exposure. Freeze the ice cream for at least 1 hour to firm it up, achieving the perfect scoopable consistency. For the best texture, ensure the ice cream is stored properly in the freezer.

Cinnamon Oatmeal Cookie Ice Cream Variations

Feel free to unleash your creativity with this delightful recipe, crafting flavors and textures that tantalize your taste buds!

  • Chocolate Chip Surprise: Mix in semi-sweet chocolate chips for a rich and decadent taste that elevates your ice cream experience. Each scoop becomes a delicious fusion of flavors that can take you back to childhood.

  • Nutty Crunch: Add chopped nuts, such as walnuts or pecans, for a delightful crunch and added protein. The nuttiness beautifully contrasts with the creamy ice cream, giving it both texture and a deeper flavor profile.

  • Unique Spice Blend: Experiment with a combination of spices like ginger and allspice for a warm twist on the classic flavor. These spices can add a vibrant layer of warmth and depth that will keep your taste buds guessing.

  • Fruity Delight: Incorporate dried fruits like raisins or cranberries into the mix for a chewy texture and a pop of sweetness. This variation adds a delightful, natural sweetness that pairs beautifully with the spices.

  • Granola Crunch: Swap traditional oats with crunchy granola for a new texture and a hint of sweetness. The granola offers a delightful alternative that can turn your ice cream into a breakfast-inspired treat.

  • Coconut Creaminess: Replace half of the heavy cream with coconut milk, lending a tropical flair and a creamy texture. This Coconut twist can surprise your guests and refresh their dessert experience!

  • Coffee Infusion: Adding a shot of espresso or coffee granules can create a delightful mocha flavor profile. This variation not only enhances the taste but also provides an energizing kick to your dessert!

As your ice cream journey unfolds, consider how these variations can create delightful moments, just like the ones you’ll find with our Blueberry Cream Cheese pairing!

Make Ahead Options

These Cinnamon Oatmeal Cookie Ice Cream treats are perfect for busy home cooks looking to save time! You can prepare the cookie dough and bake the cookies up to 3 days ahead; simply cool them completely and store them in an airtight container at room temperature. Additionally, you can make the ice cream base up to 24 hours in advance, cooling it in the refrigerator overnight to allow flavors to develop. When you’re ready to serve, just churn the chilled base in your ice cream maker and fold in the cookie chunks during the last few minutes of churning. This way, you’ll have a delicious dessert that’s just as creamy and flavorful, with minimal effort when it’s time to gather friends and family!

What to Serve with Cinnamon Oatmeal Cookie Ice Cream

The perfect summer dessert calls for delicious pairings that elevate your experience—each bite is a chance to indulge!

  • Warm Chocolate Brownies: Rich and fudgy, these brownies provide a decadent contrast to the cold, creamy ice cream, creating a delightful temperature play. Warm them slightly before serving for a melting effect as they meet the ice cream.

  • Fresh Berries Medley: Juicy strawberries, raspberries, and blueberries add a refreshing zing that cuts through the richness, offering a bright, fruity contrast that is vibrant and refreshing.

  • Caramel Sauce Drizzle: A sweet, buttery caramel sauce drizzled on top enhances the flavors, adding a rich layer of sweetness that complements the cinnamon and oatmeal.

  • Honey Roasted Nuts: Crunchy and slightly sweet, honey-roasted nuts provide a lovely contrast in texture while their nutty flavor pairs beautifully with the creamy ice cream.

  • Coconut Macaroons: Chewy and sweet, these coconut confections can add a tropical twist to your serving, harmonizing with the spice notes and creamy texture.

  • Mint Lemonade: For a refreshing drink, mint lemonade brings a zesty, herbal brightness that complements the dessert and cleanses the palate between bites.

  • Chocolate Chip Cookies: Classic and beloved, pairing your homemade ice cream with warm chocolate chip cookies means you never have to decide between two iconic treats!

  • Classic Waffle Cone: Serve your ice cream in a crisp waffle cone to add a crunchy texture while enhancing the overall experience of enjoying a classic ice cream treat.

Let your imagination guide you as you assemble the perfect spread to enjoy with your beloved Cinnamon Oatmeal Cookie Ice Cream!

How to Store and Freeze Cinnamon Oatmeal Cookie Ice Cream

Fridge: Keep your ice cream in the refrigerator for up to 4 days after making. It’s best to store it in a well-sealed container to maintain freshness.

Freezer: For long-term storage, place cinnamon oatmeal cookie ice cream in an airtight container in the freezer. It can last up to 2 weeks, but for the best texture and flavor, enjoy it sooner!

Reheating: If your ice cream becomes too hard, allow it to sit at room temperature for about 10 minutes before scooping to make serving easier.

Ice Crystals: To prevent ice crystals, press plastic wrap against the surface of the ice cream before sealing the container, ensuring your homemade treat remains creamy and indulgent.

Expert Tips for Cinnamon Oatmeal Cookie Ice Cream

  • Use Fresh Ingredients: Always ensure your baking soda and spices like cinnamon are fresh; this will significantly enhance the flavor of your Cinnamon Oatmeal Cookie Ice Cream.
  • Monitor Cookie Baking: Watch closely as the cookies bake. Remove them when the edges are golden and the centers are soft to prevent dryness.
  • Let Ice Cream Chill: After mixing your ice cream base, allow it to chill thoroughly in the refrigerator for at least an hour; this step helps develop a richer flavor.
  • Avoid Ice Crystals: To maintain a smooth texture, press plastic wrap directly onto the ice cream’s surface before sealing the container to minimize air exposure.
  • Scoop with Ease: For easier serving, allow the ice cream to soften at room temperature for about 10 minutes before scooping.

Cinnamon Oatmeal Cookie Ice Cream Recipe FAQs

How do I select the right oats for my ice cream?
Absolutely! For the best texture in your Cinnamon Oatmeal Cookie Ice Cream, I recommend using old-fashioned oats. These provide the perfect chewiness and texture. Instant oats can also work, but they’ll change the overall texture of the cookie bits in the ice cream, making them less chewy.

How should I store my homemade ice cream?
To keep your ice cream fresh, store it in an airtight container in the freezer. It will stay good for up to 2 weeks, but for the best texture and flavor, aim to enjoy it within the first week. If you notice ice crystals forming on the surface, press plastic wrap directly onto the ice cream before sealing, which helps maintain that creamy consistency.

Can I freeze additional chunks of cookie dough?
Absolutely! If you want to make this treat even easier, you can freeze any leftover cookie dough. Simply scoop it into individual portions and place them on a baking sheet to freeze. Once frozen solid, transfer the dough balls to a freezer bag. These can be stored for up to 3 months. Just bake them straight from the freezer when a sweet craving hits!

Can this ice cream be made dairy-free?
Yes, indeed! For a dairy-free version of your Cinnamon Oatmeal Cookie Ice Cream, substitute whole milk with almond or oat milk, and use coconut cream instead of heavy cream. Make sure to use dairy-free butter or coconut oil in your cookie recipe. You can still enjoy that rich, creamy consistency without the dairy!

What if my ice cream turns out too hard?
Not to worry! If your ice cream freezes too hard, simply let it sit at room temperature for about 10 minutes before scooping. This will soften it to the ideal consistency for serving. To prevent this from happening in the first place, you can also churn it for an extra minute or two to incorporate a bit more air into the mixture, resulting in a creamier texture.

How can I make this ice cream allergy-friendly?
If allergies are a concern, simply replace the ingredients accordingly. For a nut allergy, opt for a dairy-free milk alternative that is nut-free, and use flax eggs instead of regular eggs for a vegan twist. Always read labels to ensure that other ingredients (like vanilla extract or baking soda) are also allergen-free, keeping your Cinnamon Oatmeal Cookie Ice Cream safe and delicious!

Cinnamon Oatmeal Cookie Ice Cream

Cinnamon Oatmeal Cookie Ice Cream that Brings Joy in Every Scoop

This Cinnamon Oatmeal Cookie Ice Cream is a delicious homemade treat that combines creamy ice cream with chewy cookie chunks.
Prep Time 30 minutes
Cook Time 20 minutes
Chilling Time 1 hour
Total Time 1 hour 50 minutes
Servings: 8 scoops
Course: Dessert
Cuisine: American
Calories: 250

Ingredients
  

For the Cookies
  • 1 cup Butter softened
  • 1 cup Brown Sugar light or dark
  • 1/2 cup Granulated Sugar
  • 1 large Egg flax egg for vegan
  • 1 teaspoon Vanilla Extract pure preferred
  • 1 1/2 cups All-Purpose Flour gluten-free substitute available
  • 1 teaspoon Baking Soda ensure freshness
  • 1 teaspoon Cinnamon increase for stronger flavor
  • 1/4 teaspoon Nutmeg optional
  • 1/2 teaspoon Salt
  • 2 cups Old Fashioned Oats instant oats may alter texture
For the Ice Cream Base
  • 2 cups Whole Milk substitute with non-dairy milk
  • 1 cup Heavy Cream or light cream
  • 1/2 cup Pure Maple Syrup honey can be a substitute
  • 1/2 teaspoon Coarse Kosher Salt use less regular salt

Equipment

  • oven
  • mixing bowl
  • baking sheet
  • Ice Cream Maker
  • Saucepan

Method
 

Step-by-Step Instructions
  1. Preheat your oven to 350°F (175°C).
  2. In a large mixing bowl, combine softened butter, brown sugar, and granulated sugar until light and fluffy.
  3. Add the egg and vanilla extract, blending until fully incorporated. Gradually mix in the flour, baking soda, cinnamon, nutmeg, salt, and oats until combined.
  4. Line a baking sheet with parchment paper and scoop dollops of cookie dough onto it. Bake for 11-13 minutes until edges are golden.
  5. In a medium saucepan over medium heat, combine whole milk, granulated sugar, maple syrup, and cinnamon, stirring until foamy.
  6. Remove from heat and mix in the heavy cream, vanilla, and coarse salt.
  7. Pour the ice cream base into a large bowl and cool in an ice water bath for about 15 minutes. Refrigerate for at least 1 hour.
  8. Churn the chilled mixture in an ice cream maker and mix in cookie chunks in the last few minutes.
  9. Transfer to a container and freeze for at least 1 hour to firm up.

Notes

This homemade ice cream is customizable with various mix-ins and is sure to be a crowd-pleaser at any gathering.