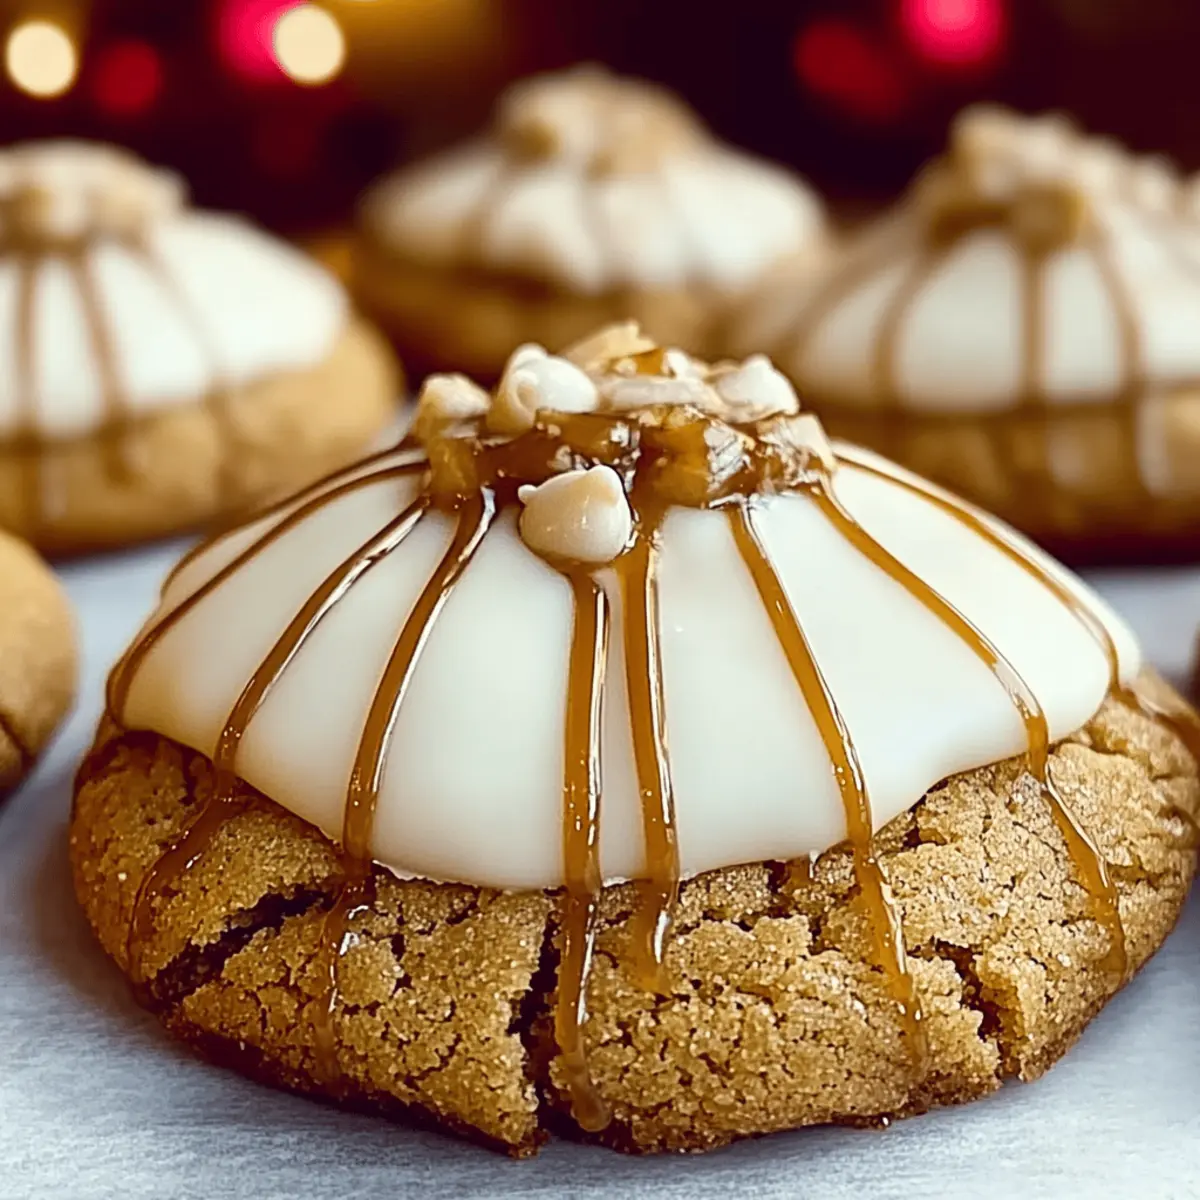
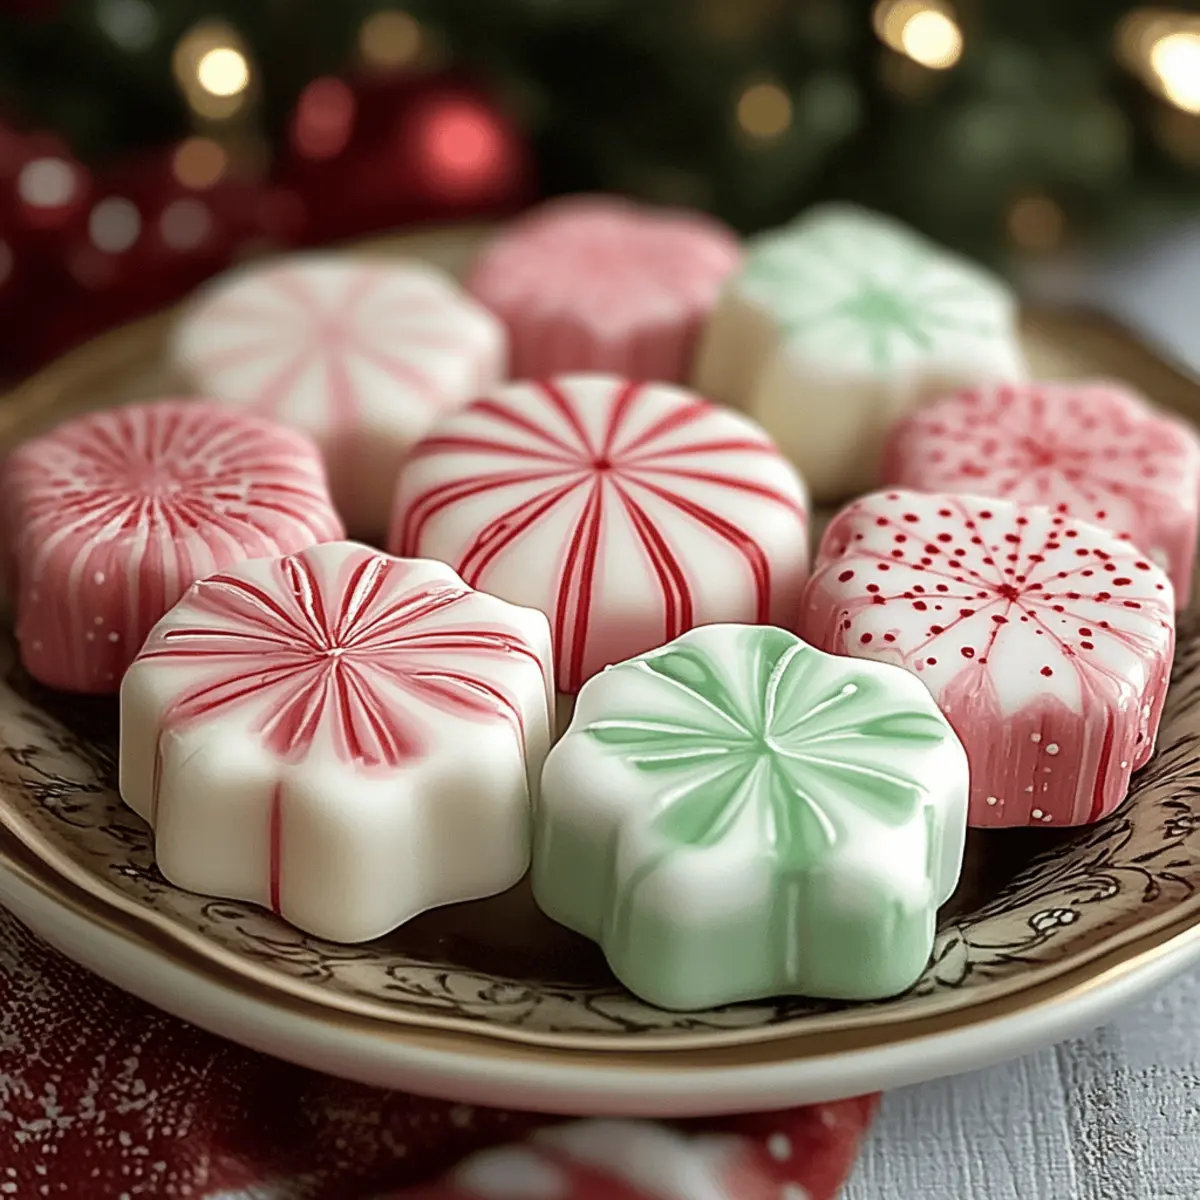
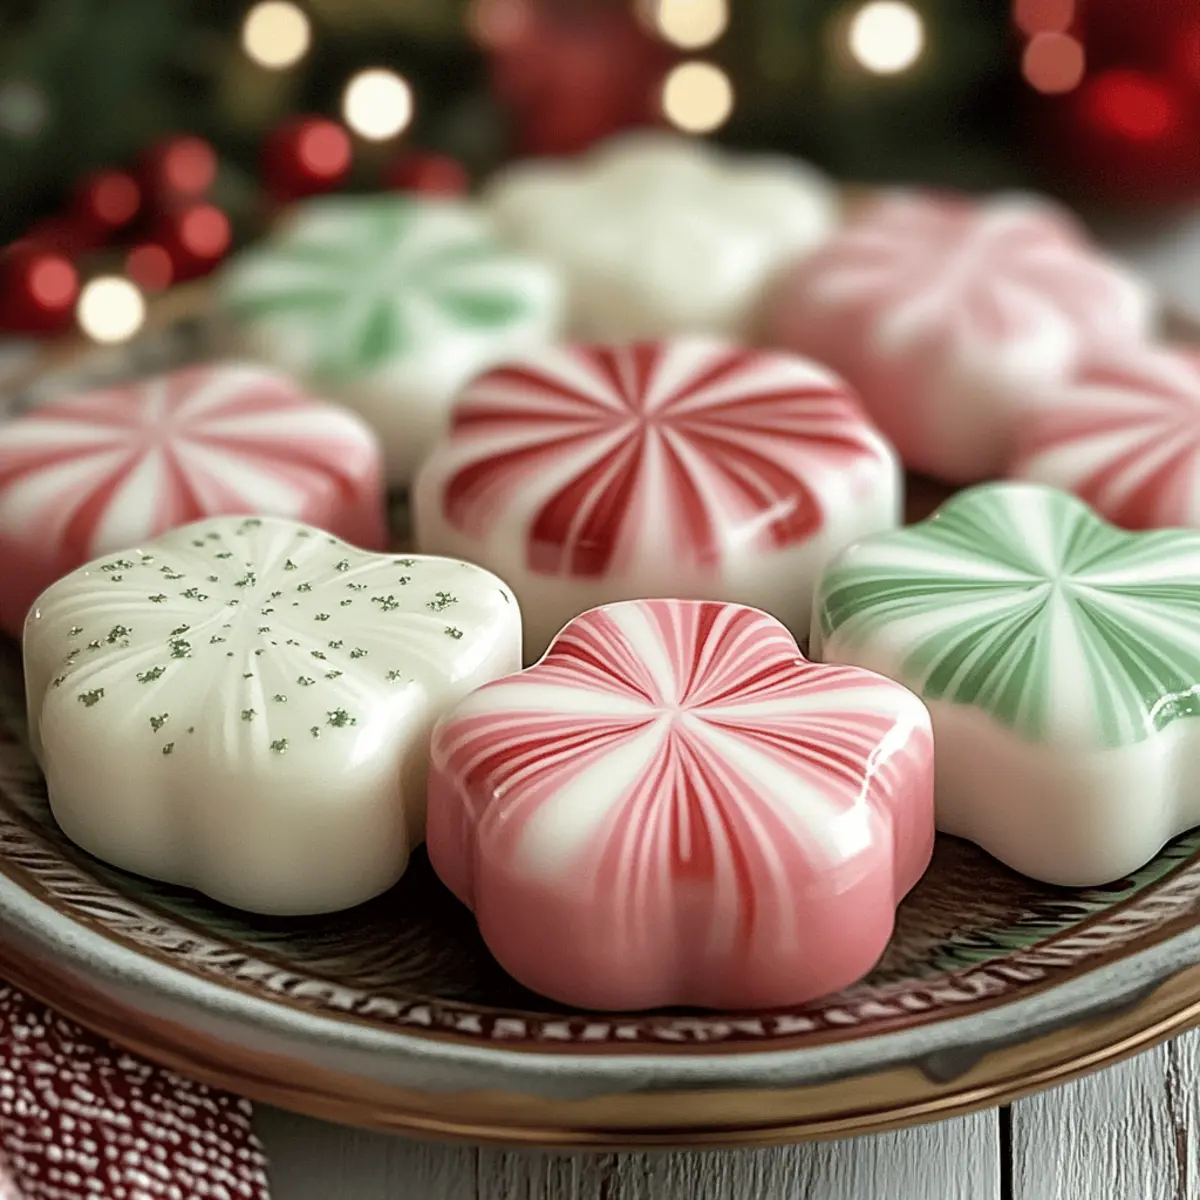
Irresistible Christmas Spice Cake with Eggnog Buttercream

The aroma of warm spices fills the air, wrapping around you like a cozy blanket—just what you need as the holiday season approaches. This Christmas Spice Cake with Eggnog Buttercream is a delightful nod to festive traditions, bringing together the rich flavors of cinnamon, nutmeg, and ginger in a luscious, moist cake. Not only is it a quick-prep dessert that impresses family and friends, but the creamy eggnog buttercream adds a luxurious touch that turns any gathering into a celebration. Bake this cake to create delicious memories and to fill your kitchen with the essence of Christmas cheer. Are you ready to elevate your holiday dessert game?

Why is this cake a holiday must-have?

Irresistible flavors: The blend of cinnamon, nutmeg, and ginger evokes the warmth of the holiday season, making every bite a nostalgic pleasure.

Quick prep: You’ll love how straightforward this recipe is, allowing you to whip up a stunning dessert without fuss.

Luxurious frosting: The rich eggnog buttercream elevates your cake from ordinary to extraordinary, giving it a festive flair that will have everyone asking for seconds.

Perfect for gatherings: Whether it’s a cozy family dinner or a festive party, this Christmas Spice Cake is sure to impress your guests as a delightful holiday treat.

Versatile variations: Feel free to mix in nuts or add a fruity twist with cranberries or orange zest for a fresh contrast to the spices.

Bake this cake, and enjoy a slice of holiday magic reminiscent of joyful seasons past!

Christmas Spice Cake Ingredients

• Get ready to create a festive delight!

For the Cake Base

  • All-Purpose Flour – Provides structure and stability; gluten-free flour is a great substitute for those with dietary restrictions.
  • Baking Powder – Ensures the cake rises beautifully; make sure it’s fresh for optimal results.
  • Baking Soda – Works with acidic ingredients to enhance leavening; essential for a fluffy texture.
  • Salt – Enhances flavor and balances sweetness; sea salt adds an extra layer of complexity.
  • Cinnamon – A warm spice essential for holiday flavors; use ground or freshly grated for best results.
  • Ginger – Adds a zesty warmth; can be substituted with ground ginger for convenience.
  • Nutmeg – Imparts a rich, aromatic quality; opt for freshly grated for the best flavor experience.
  • Sugar – Sweetens the cake and adds moisture; brown sugar provides a deeper taste if preferred.
  • Eggs – Binds ingredients and aids in leavening; remember to use room temperature eggs for a lighter cake.
  • Buttermilk – Keeps the cake moist and tender; regular milk with a splash of vinegar works as a substitute.
  • Vegetable Oil – Contributes to tenderness; melted butter adds richness if you’re aiming for a buttery flavor.
  • Vanilla Extract – Enhances overall flavor; pure vanilla extract is highly recommended for a fragrant boost.

For the Eggnog Buttercream

  • Butter – Creates the creamy base; ensure it’s softened for easy mixing and spreading.
  • Powdered Sugar – Sweetens the frosting while providing a smooth texture; sift it for an extra fine consistency.
  • Eggnog – Adds festive flavor and richness; choose a good quality eggnog for best results.
  • Nutmeg (additional) – Perfect as a garnish, enhancing the visual presentation and flavor profile of the cake.

Indulge in this Christmas Spice Cake with Eggnog Buttercream and let the festive flavors transform your holiday baking experience!

Step‑by‑Step Instructions for Christmas Spice Cake with Eggnog Buttercream

Step 1: Prepare Spice Cake Batter
Preheat your oven to 350°F (175°C) and grease two 9-inch round cake pans. In a large mixing bowl, whisk together the dry ingredients: flour, baking powder, baking soda, salt, cinnamon, ginger, and nutmeg. In another bowl, mix sugars with eggs, then blend in vegetable oil, buttermilk, and vanilla extract until well combined. Gradually add the dry ingredients to the wet mixture, stirring gently until just incorporated for your Christmas Spice Cake.

Step 2: Bake the Cake
Pour the batter evenly into your prepared cake pans and smooth the tops with a spatula. Bake in your preheated oven for 25-30 minutes, or until a toothpick inserted into the center comes out clean. Once done, remove the cakes from the oven and let them cool in the pans for about 10 minutes. Then, carefully transfer the cakes to a wire rack to cool completely before frosting.

Step 3: Prepare Eggnog Buttercream
While the cakes cool, you can prepare the eggnog buttercream. In a mixing bowl, beat the softened butter with an electric mixer until creamy and fluffy. Gradually sift in the powdered sugar, mixing on low speed until smooth and combined. Add in the eggnog and a pinch of nutmeg, continuing to mix until the frosting is light and spreads easily, creating the perfect topping for your Christmas Spice Cake.

Step 4: Assemble the Cake
Once the cake layers are fully cooled, place one layer on a serving plate. Spread a generous layer of eggnog buttercream evenly over the top, making sure to reach the edges. Place the second cake layer on top, and use the remaining buttercream to frost the top and sides of the cake, creating a beautiful and festive presentation. You can sprinkle additional nutmeg on top for a finishing touch.

How to Store and Freeze Christmas Spice Cake

Room Temperature: Keep uneaten cake covered at room temperature for up to 3 days to maintain its moisture and flavor.

Fridge: For longer freshness, refrigerate the cake, ensuring it’s well-wrapped in plastic wrap or stored in an airtight container. It can last for up to one week.

Freezer: This Christmas Spice Cake can be frozen before frosting for up to 3 months. Wrap the cake layers tightly in plastic wrap, then place them in a freezer-safe bag.

Reheating: When ready to enjoy, thaw the cake in the fridge overnight. You can frost it after it’s completely defrosted for the best results!

Expert Tips for Christmas Spice Cake

  • Room Temperature Ingredients: Ensure all ingredients are at room temperature, especially the eggs and buttermilk. This helps achieve a smooth batter for your Christmas Spice Cake.

  • Gentle Mixing: Avoid over-mixing the batter. Stir until just combined to keep the cake light and fluffy, preventing it from becoming dense.

  • Fresh Spices: Use freshly grated nutmeg and freshly ground ginger for the best flavor. Their vibrant profiles bring warmth and authenticity to the cake.

  • Cooling Time: Allow the cake layers to cool completely before frosting. Frosting on a warm cake can lead to melting buttercream, ruining your festive creation.

  • Storage Safety: Keep any uneaten cake covered at room temperature for up to 3 days or refrigerate. This ensures your Christmas Spice Cake stays fresh and delicious throughout the holiday season.

Christmas Spice Cake Variations

Feel free to make this festive dessert your own with these delightful twists!

  • Gluten-Free: Use a gluten-free flour blend instead of all-purpose flour for a cake everyone can enjoy without sacrificing taste.

  • Nutty Addition: Fold in chopped walnuts or pecans into the batter for a delightful crunch that enhances the texture and depth of flavor.

  • Fruit Infusion: Add a burst of freshness by mixing in dried cranberries or orange zest, offering a lovely contrast to the warm spices.

  • Dairy-Free: Substitute buttermilk with almond milk mixed with a splash of vinegar and use dairy-free butter for the frosting.

  • Spicy Kick: Elevate the flavor profile by adding a hint of cayenne or black pepper to the batter for a subtle heat that balances the sweetness.

  • Fruity Frosting: Swap the eggnog with a flavored cream like spiced rum for the buttercream, bringing an adult twist to your dessert.

  • Chocolate Twist: Incorporate unsweetened cocoa powder into the batter for a rich chocolatey version that pairs wonderfully with eggnog buttercream.

  • Festive Garnish: Top the finished cake with candied ginger or pecans for a beautiful and flavorful holiday presentation.

For more delicious ideas, check out these wonderful recipes: Nutty Vanilla Cake, Savory Zucchini Pancakes, or try a slice of Heavenly No-Bake Cake during your holiday gatherings!

What to Serve with Christmas Spice Cake with Eggnog Buttercream

Savoring a slice of this moist, spiced cake invites joyful memories and festive gatherings around the holiday table.

  • Whipped Cream: Light and airy, a dollop of freshly whipped cream enhances the cake’s flavors while adding a touch of elegance. Pair it with a sprinkle of cinnamon for a comforting finish.

  • Cranberry Sauce: The tartness of cranberry sauce balances the sweetness of eggnog buttercream, providing a delightful contrast that excites the palate. A side of homemade sauce can really elevate your holiday spread.

  • Warm Spiced Apple Cider: A cup of warm apple cider, infused with spices, offers a cozy drink pairing that echoes the flavors of the cake. It sets the perfect ambiance for any holiday gathering.

  • Vanilla Ice Cream: Creamy vanilla ice cream melts beautifully against the warm spices of the cake, adding a delightful chill. The juxtaposition of hot and cold creates a truly satisfying dessert experience.

  • Festive Fruit Salad: A bright fruit salad with seasonal fruits like oranges, pomegranates, and apples refreshes the palate while complementing the cake. Its natural sweetness contrasts with the rich buttercream.

  • Nutty Biscotti Cookies: Crunchy biscotti dipped in coffee or tea provides a rustic, homespun addition. The nutty flavors echo the spices of the cake, enhancing the festive spirit of your dessert table.

  • Espresso or Coffee: A robust cup of espresso or your favorite coffee brings depth to the rich flavors of the cake. The bitterness of coffee beautifully contrasts the sweetness of the eggnog buttercream.

Embrace the spirit of the season by pairing your Christmas Spice Cake with these charming accompaniments, and create a truly memorable holiday feast!

Make Ahead Options

This Christmas Spice Cake with Eggnog Buttercream is perfect for those busy holiday schedules! You can prepare the cake layers up to 24 hours in advance by baking, cooling completely, and tightly wrapping them in plastic wrap. For the eggnog buttercream, make it up to 3 days ahead; simply refrigerate it in an airtight container—this helps to meld those delicious flavors. When you’re ready to serve, let the frosting sit at room temperature to soften slightly, then frost your cake as usual. By prepping these components ahead, you’ll save precious time on the day of your celebration, allowing you to enjoy the festivities just as much as the delicious cake!

Christmas Spice Cake with Eggnog Buttercream Recipe FAQs

How do I select the best spices for this cake?
Absolutely! Fresh spices make a world of difference in flavor. For optimal taste, use whole nutmeg and grate it yourself, as the aroma will be much more intense compared to pre-ground versions. Ground ginger should be fresh or you can even use freshly grated ginger for an added zing. Be sure to store your spices in a cool, dark place, and check expiration dates to ensure potency.

How can I store leftover Christmas Spice Cake?
Very! If you have leftover cake, keep it covered at room temperature for up to 3 days. For longer storage, wrap the cake in plastic wrap or place it in an airtight container and refrigerate for up to a week. This will help maintain its moisture and keep it tasting fresh. Enjoy the leftover treat during the cozy days following your celebration!

Can I freeze the Christmas Spice Cake?
You absolutely can! To freeze the cake, it’s best to do so before frosting. Wrap each cake layer tightly in plastic wrap, ensuring no air can escape, and then place them in a freezer-safe bag. This way, the cake can be stored for up to 3 months. When you’re ready to enjoy, simply thaw in the fridge overnight, then frost once fully defrosted for the best results.

What should I do if the cake sinks in the middle?
Understanding the science behind baking is important! If your cake sinks in the middle, it may be due to over-mixing the batter or not baking it long enough. To troubleshoot, ensure all your ingredients are at room temperature and mix gently, just until combined. Always check for doneness by inserting a toothpick in the center; it should come out clean. If the cake sinks despite this, you might also want to check your oven temperature with a thermometer for accuracy.

Is this cake suitable for people with allergies?
Great question! This Christmas Spice Cake does contain common allergens like eggs and dairy. However, you can adjust it to accommodate various dietary needs. For a dairy-free version, substitute buttermilk with a non-dairy milk mixed with vinegar. You can also replace regular eggs with flaxseed or chia eggs—mix 1 tablespoon of ground flaxseeds or chia seeds with 2.5 tablespoons of water and let it sit for 5 minutes until it becomes gel-like. Always double-check ingredient labels if allergies are a concern.

How long can I keep this festive cake?
This delightful cake can be covered and kept at room temperature for up to 3 days or refrigerated for about a week. If you freeze the layers before frosting, you can extend its life for up to 3 months! Just remember to wrap it securely to preserve the texture and taste. Enjoy making sweet memories with this lovely holiday treat!

Christmas Spice Cake with Eggnog Buttercream

Irresistible Christmas Spice Cake with Eggnog Buttercream

Delight in this Christmas Spice Cake with Eggnog Buttercream, a festive dessert filled with warm spices.
Prep Time 30 minutes
Cook Time 30 minutes
Cooling Time 10 minutes
Total Time 1 hour 10 minutes
Servings: 12 slices
Course: Dessert
Cuisine: American
Calories: 350

Ingredients
  

For the Cake Base
  • 2 cups All-Purpose Flour Gluten-free flour is a great substitute.
  • 2 teaspoons Baking Powder Ensure it's fresh.
  • 1 teaspoon Baking Soda Essential for a fluffy texture.
  • 1 teaspoon Salt Sea salt adds complexity.
  • 2 teaspoons Cinnamon Use ground or freshly grated.
  • 1 teaspoon Ginger Can be substituted with ground ginger.
  • 1 teaspoon Nutmeg Opt for freshly grated.
  • 1 cup Sugar Brown sugar provides a deeper taste.
  • 3 large Eggs Use room temperature for better results.
  • 1 cup Buttermilk Regular milk with vinegar can substitute.
  • 1/2 cup Vegetable Oil Melted butter can add richness.
  • 2 teaspoons Vanilla Extract Pure vanilla is highly recommended.
For the Eggnog Buttercream
  • 1 cup Butter Ensure it's softened.
  • 4 cups Powdered Sugar Sift for extra fine consistency.
  • 1/2 cup Eggnog Choose a good quality eggnog.
  • 1/4 teaspoon Nutmeg For garnish and flavor.

Equipment

  • 9-inch round cake pans
  • mixing bowls
  • electric mixer
  • spatula

Method
 

Prepare the Cake
  1. Preheat oven to 350°F (175°C) and grease two 9-inch round cake pans.
  2. Whisk together dry ingredients (flour, baking powder, baking soda, salt, cinnamon, ginger, and nutmeg) in a large bowl.
  3. In another bowl, mix sugars with eggs, then blend in vegetable oil, buttermilk, and vanilla until well combined.
  4. Gradually add dry ingredients to wet mixture, stirring gently until just incorporated.
Bake the Cake
  1. Pour batter evenly into prepared cake pans and smooth the tops.
  2. Bake for 25-30 minutes, or until a toothpick inserted comes out clean.
  3. Remove cakes from oven, let cool in pans for about 10 minutes, then transfer to a wire rack to cool completely.
Prepare Eggnog Buttercream
  1. Beat softened butter with an electric mixer until creamy and fluffy.
  2. Gradually sift in powdered sugar, mixing on low speed until smooth.
  3. Add eggnog and a pinch of nutmeg, mixing until light and spreadable.
Assemble the Cake
  1. Once cake layers are cooled, place one layer on a serving plate.
  2. Spread a generous layer of eggnog buttercream over the top.
  3. Place the second layer on top and frost the top and sides with remaining buttercream.
  4. Sprinkle additional nutmeg on top for garnish.

Notes

Ensure all ingredients, especially eggs and buttermilk, are at room temperature for a smooth batter. Avoid over-mixing to keep the cake light and fluffy.

Delightful Christmas Spice Cake with Eggnog Buttercream Bliss

As the scent of warm spices fills the air, I can’t help but feel the holiday spirit wrapping around me like a cozy blanket. This Christmas Spice Cake with Eggnog Buttercream is a true celebration of festive flavors, blending the comforting notes of cinnamon, ginger, and nutmeg with the rich creaminess of eggnog in the frosting. What I adore about this recipe is its effortless appeal; it’s not only a crowd-pleaser but also a delightful quick bake that can easily be prepared ahead of time. Imagine serving this as the grand finale to your holiday gathering or as a sweet surprise for loved ones—it’s the kind of dessert that sparks joy and warmth. So, are you ready to create a festive masterpiece that will have everyone reaching for seconds?

Why is This Cake a Festive Favorite?

Irresistible flavors: The Christmas Spice Cake with Eggnog Buttercream is a celebration of warming spices that evoke holiday nostalgia. Easy to make: With straightforward steps, you can whip this up even on a busy holiday schedule. Make-ahead magic: Bake in advance and simply frost before serving, making your holiday prep a breeze. Perfect for gatherings: This cake is bound to be a hit at any holiday party, served alongside a warm drink or as a captivating centerpiece. Versatile touches: Feel free to customize it with nuts or dried fruits for an extra treat, or serve it simply dusted with powdered sugar for a lighter elegance.

Christmas Spice Cake with Eggnog Buttercream Ingredients

Get ready to bake the most delightful holiday dessert!

For the Cake

  • All-purpose flour – Forms the structure of the cake. Substitution: Use gluten-free flour for a gluten-free version.
  • Baking powder – Essential for helping the cake rise to perfection.
  • Baking soda – Works with the spices and acid, ensuring a fluffy texture.
  • Ground cinnamon – Infuses the cake with warm, aromatic flavor.
  • Ground ginger – Adds a zesty kick that’s perfect for the holidays.
  • Ground nutmeg – Lends a sweet, nutty essence that rounds out the spices.
  • Salt – Balances and enhances the sweetness of the cake.
  • Granulated sugar – Sweetens and contributes to the cake’s texture.
  • Brown sugar – Brings moisture and a hint of caramel flavor.
  • Large eggs – Bind the ingredients together, adding rich moisture.
  • Vanilla extract – Enhances the overall flavor profile of the cake.
  • Buttermilk – Ensures tenderness and a slight tang to the cake.
  • Unsalted butter – Provides a rich, moist texture that everyone loves.

For the Eggnog Buttercream

  • Powdered sugar – Sweetens the buttercream and gives it a light texture.
  • Eggnog – Infuses the frosting with delightful holiday flavor.
  • Cream – Adds an irresistible creaminess to the buttercream.
  • Nutmeg or cinnamon (for garnish) – Optional dusting for a festive finish.

This Christmas Spice Cake with Eggnog Buttercream will be the star of your holiday dessert table!

Step‑by‑Step Instructions for Christmas Spice Cake with Eggnog Buttercream

Step 1: Preheat the Oven
Begin by preheating your oven to 350°F (175°C). While the oven warms up, prepare two 9-inch round cake pans by greasing them lightly and lining the bottoms with parchment paper. This ensures that your lovely Christmas Spice Cake comes out easily after baking.

Step 2: Mix the Dry Ingredients
In a large mixing bowl, whisk together 2 cups of all-purpose flour, 1 teaspoon of baking powder, 1 teaspoon of baking soda, ½ teaspoon of salt, and your warming spices: 1 teaspoon of ground cinnamon, 1 teaspoon of ground ginger, and ½ teaspoon of ground nutmeg. Keep whisking until the mixture is well combined, and set it aside to create the moist base of your cake.

Step 3: Cream the Sugars and Butter
In another bowl, beat together ¾ cup of granulated sugar and ¾ cup of brown sugar with ¾ cup of softened unsalted butter until the mixture is light and fluffy, about 3-5 minutes using an electric mixer. This step is key to achieving the perfect texture for your Christmas Spice Cake, so be sure to notice the fluffiness before adding the next ingredients.

Step 4: Incorporate Eggs and Vanilla
Add 3 large eggs, one at a time, mixing thoroughly after each addition. Then, blend in 1 teaspoon of vanilla extract until fully incorporated. The mixture should be smooth and creamy, filling your kitchen with delightful aromas that hint at the festive treat to come.

Step 5: Combine Wet and Dry Ingredients
Gradually add your dry ingredient mixture to the wet mixture, alternating with 1 cup of buttermilk. Mix just until combined to prevent overmixing, which can make the cake dense. The batter should be thick yet pourable, with the rich scents of spices enveloping you like a warm hug, signaling that it’s almost time to bake.

Step 6: Bake the Cake
Divide the batter evenly between your prepared cake pans and smooth the tops with a spatula. Bake in your preheated oven for 25-30 minutes, or until a toothpick inserted in the center comes out clean. The cakes should rise beautifully and develop a golden-brown color, filling your home with the comforting fragrance of the holiday spices.

Step 7: Cool the Cakes
Once baked, remove the cakes from the oven and let them cool in the pans for about 10 minutes. Afterward, carefully transfer the cakes to wire racks to cool completely. Ensure they cool thoroughly; this prevents the eggnog buttercream frosting from melting off, ensuring a lovely presentation for your Christmas Spice Cake.

Step 8: Prepare the Eggnog Buttercream
While your cakes cool, prepare the eggnog buttercream. In a bowl, beat 1 cup of softened unsalted butter until creamy. Gradually add 4 cups of powdered sugar, ¼ cup of eggnog, and 2 tablespoons of cream. Mix until the buttercream is light and fluffy, showcasing a smooth and luscious texture that reflects the joy of the season.

Step 9: Frost the Cake Layers
Once the cakes are completely cool, place one layer on a serving plate and generously frost the top with the eggnog buttercream. Carefully place the second cake layer on top and frost the top and sides of the entire cake for an impressive finish. The creamy frosting beautifully complements the spiced cake layers, making each bite irresistible!

Step 10: Garnish and Serve
For an extra festive touch, dust the top of your beautifully frosted Christmas Spice Cake with a sprinkle of ground nutmeg or cinnamon. Slice and serve this delightful holiday treat alongside coffee or hot cocoa, and watch your loved ones savor every moment. The warm spices and creamy buttercream are sure to be a festive favorite!

Christmas Spice Cake with Eggnog Buttercream Variations

Feel free to personalize this festive recipe to match your taste and dietary needs!

  • Gluten-Free: Substitute all-purpose flour with a gluten-free blend for a delicious gluten-free version.
  • Nutty Delight: Fold in ½ cup of chopped walnuts or pecans into the batter for a crunchy twist that complements the spices beautifully.
  • Fruity Addition: Add 1 cup of dried cranberries or raisins to the cake batter for a lovely burst of sweetness and texture.
  • Lighter Option: Dust the cooled cake with powdered sugar instead of frosting for a lighter take on this cozy dessert.
  • Dairy-Free: Swap buttermilk for almond or coconut milk and use dairy-free butter for a deliciously creamy, dairy-free frosting.
  • Spicy Kick: Incorporate ½ teaspoon of cayenne pepper into the cake batter for a surprising, spicy note that plays perfectly with the sweet frosting.
  • Eggnog Twist: For the buttercream, opt for spiced rum-flavored eggnog to elevate the festive vibe and introduce a new layer of flavor.
  • Cocoa Variation: Add 2 tablespoons of cocoa powder to the frost to create a delightful chocolate eggnog buttercream, appealing to chocolate lovers!

No matter which variation you try, your Christmas Spice Cake with Eggnog Buttercream is bound to be a star on your holiday dessert table! And for more delightful holiday inspirations, consider trying our Nutty Vanilla Cake or our inviting Savory Zucchini Pancakes. Enjoy experimenting and making this recipe your own!

How to Store and Freeze Christmas Spice Cake

Room Temperature: Store the cake at room temperature in an airtight container for up to 3 days to maintain its moist texture.

Fridge: If you plan to keep it longer, refrigerate the cake for up to a week. Wrap it tightly to prevent drying out.

Freezer: You can freeze the cake layers individually (wrapped in plastic wrap and foil) for up to 3 months. Just thaw in the fridge before frosting.

Reheating: For a warm treat, gently reheat slices in the microwave for 10-15 seconds. Enjoy your Christmas Spice Cake with Eggnog Buttercream at its best!

What to Serve with Christmas Spice Cake with Eggnog Buttercream

Imagine the joy of pairing this festive delight with accompaniments that elevate your holiday dessert experience.

  • Creamy Hot Cocoa: This rich drink enhances the warmth of the spices, making each sip a cozy celebration. Perfect for chilly winter nights, it’s a classic pairing that brings smiles to everyone.

  • Spiced Apple Cider: A fragrant blend of apple cider infused with cinnamon and cloves adds a refreshing twist that complements the cake’s spices beautifully. This drink is not just delicious; it’ll warmth your heart and remind you of family gatherings.

  • Whipped Cream: A dollop of fresh whipped cream adds a light touch, enhancing the cake’s richness. It gives contrast to the dense spices of the cake, creating an ideal balance of flavors.

  • Glazed Nuts: Roasted and lightly sweetened nuts can bring an exciting crunch, adding texture that contrasts the soft cake. Their buttery finish harmonizes perfectly with the creamy frosting.

  • Vanilla Ice Cream: A scoop of creamy vanilla ice cream melts against the warm cake, creating a delightful mix of temperatures and flavors. Who doesn’t love the classic cake-and-ice-cream pairing?

  • Coffee or Espresso: A freshly brewed cup of coffee or rich espresso provides the necessary caffeine kick to awaken your senses. The bitter notes cut through the sweetness, enhancing each bite of the festive cake.

  • Fruit Salad: A bright and refreshing fruit salad adds a burst of natural sweetness and acidity, balancing the cake’s richness. Opt for seasonal fruits for a holiday-inspired twist.

  • Nutmeg-Infused Eggnog: For the ultimate pairing, serve the cake with a glass of delicious eggnog infused with nutmeg that echoes the flavors found in the buttercream. This is a holiday classic that can’t be missed!

Make Ahead Options

These festive Christmas Spice Cake with Eggnog Buttercream are perfect for busy cooks looking to save time during the holiday rush! You can bake the cake layers up to 3 days in advance; simply cool them completely, wrap them tightly in plastic wrap, and refrigerate. The eggnog buttercream can also be made up to 24 hours ahead—just store it in an airtight container in the fridge. When ready to serve, let the cake layers come to room temperature and then frost with the buttercream. This method not only saves you time but ensures your cake stays moist and delicious, allowing the flavors to mingle for an even richer taste!

Expert Tips for the Best Christmas Spice Cake

  • Room Temperature Ingredients: Ensuring that all ingredients are at room temperature encourages better emulsification in your Christmas Spice Cake, resulting in a lighter texture.

  • Don’t Overmix: To keep the cake tender, mix just until combined. Overmixing can make it dense and chewy—no one wants that for a festive favorite!

  • Cool Completely: Allow the cake layers to cool completely on wire racks. If not, the eggnog buttercream may melt and slide off, ruining your beautiful creation.

  • Add Texture: Consider folding in finely chopped nuts or dried fruits for additional flavor and a delightful texture in your Christmas Spice Cake.

  • Frosting Precision: For a smooth finish, apply a thin layer of eggnog buttercream first (a crumb coat) before the final layer. This prevents crumbs from appearing in your beautiful frosting.

Christmas Spice Cake with Eggnog Buttercream Recipe FAQs

What type of flour should I use for the cake?
I recommend using all-purpose flour as it provides the perfect structure for your Christmas Spice Cake. If you need a gluten-free option, you can substitute it with a gluten-free flour blend. Just be sure to check that it’s a 1:1 substitute to ensure the right texture!

How should I store the cake once it’s baked?
To keep your Christmas Spice Cake with Eggnog Buttercream fresh, store it in an airtight container. It’s best enjoyed at room temperature for up to 3 days. If you need to keep it longer, pop it in the fridge where it will stay good for about a week.

Can I freeze the cake for later use?
Absolutely! If you’d like to freeze your Christmas Spice Cake, wrap each layer tightly in plastic wrap, then foil to prevent freezer burn. It will keep well for up to 3 months. When you’re ready to enjoy it, thaw it in the fridge overnight before icing it with the eggnog buttercream.

What should I do if my cake is too dry?
If you find your cake has turned out too dry, don’t worry! One trick is to brush the cooled cake layers with a simple syrup (made of equal parts water and sugar boiled together until the sugar dissolves). This will add moisture back. Also, make sure not to overbake the cake, as that can lead to dryness, so keep an eye on it in the oven—26-28 minutes is often just right.

Is this recipe safe for those with allergies?
This Christmas Spice Cake is generally safe for vegetarians, but it does contain eggs, dairy, and gluten. For those with egg allergies, you can substitute flax eggs (1 tablespoon ground flaxseed mixed with 2.5 tablespoons water per egg) to help bind the ingredients. Additionally, for a dairy-free option, you can use almond milk in place of buttermilk and vegan butter in the frosting. Always check labels if you have severe allergies!

How long can the buttercream be stored?
You can make the eggnog buttercream in advance and store it in the refrigerator for up to one week. Just make sure to give it a good stir before using it again, as it may thicken upon cooling. If you want to keep it longer, consider freezing it for up to 3 months. Just thaw it in the fridge overnight and whip it back into shape before frosting your cake!

Christmas Spice Cake with Eggnog Buttercream

Delightful Christmas Spice Cake with Eggnog Buttercream Bliss

This Christmas Spice Cake with Eggnog Buttercream combines warm spices and rich creaminess, perfect for holiday celebrations.
Prep Time 20 minutes
Cook Time 30 minutes
Cooling Time 10 minutes
Total Time 1 hour
Servings: 12 slices
Course: Dessert
Cuisine: American
Calories: 350

Ingredients
  

For the Cake
  • 2 cups All-purpose flour Substitution: Use gluten-free flour for a gluten-free version.
  • 1 teaspoon Baking powder
  • 1 teaspoon Baking soda
  • 1 teaspoon Ground cinnamon
  • 1 teaspoon Ground ginger
  • 1/2 teaspoon Ground nutmeg
  • 1/2 teaspoon Salt
  • 3/4 cup Granulated sugar
  • 3/4 cup Brown sugar
  • 3 large Large eggs
  • 1 teaspoon Vanilla extract
  • 1 cup Buttermilk
  • 3/4 cup Unsalted butter Softened
For the Eggnog Buttercream
  • 4 cups Powdered sugar
  • 1/4 cup Eggnog
  • 2 tablespoons Cream
  • Nutmeg or cinnamon (for garnish) Optional dusting for a festive finish.

Equipment

  • mixing bowls
  • electric mixer
  • cake pans
  • whisk
  • spatula
  • Measuring cups
  • Measuring spoons
  • parchment paper
  • Cooling racks

Method
 

Directions
  1. Preheat your oven to 350°F (175°C) and prepare two 9-inch round cake pans by greasing and lining with parchment paper.
  2. In a large bowl, whisk together all-purpose flour, baking powder, baking soda, salt, cinnamon, ginger, and nutmeg. Set aside.
  3. In another bowl, beat together granulated sugar, brown sugar, and softened butter until light and fluffy, about 3-5 minutes.
  4. Add eggs one at a time, mixing well after each. Then blend in vanilla extract until smooth.
  5. Gradually add the dry mixture to the wet mixture, alternating with buttermilk until just combined.
  6. Divide the batter between the prepared pans and bake for 25-30 minutes until a toothpick comes out clean.
  7. Let the cakes cool in the pans for about 10 minutes, then transfer to wire racks to cool completely.
  8. For the buttercream, beat softened butter until creamy, then gradually add powdered sugar, eggnog, and cream, mixing until fluffy.
  9. Frost the top of one cake layer with buttercream, add the second layer, and frost the top and sides of the cake.
  10. Garnish with a sprinkle of nutmeg or cinnamon before serving.

Notes

For best results, use room temperature ingredients and avoid overmixing the batter. Allow the cakes to cool completely before frosting to prevent melting.

Festive Christmas Sprinkle Buttermilk Bread for Holiday Cheer

As the scent of warm spices and fresh bread envelops my kitchen, I can’t help but feel the magic of the holidays coming alive. This Christmas Sprinkle Buttermilk Bread is a delightful, moist loaf that brings joy to every gathering. With its rich buttery flavor and festive red and green sprinkles, it’s not just a treat; it’s a celebration on a plate! What makes this recipe shine are its effortless prep and kid-friendly nature—perfect for those busy mornings or last-minute gifts. Imagine the smiles as you slice into this cheerful loaf, each piece a sweet reminder of coziness and togetherness. Will you join me in crafting this holiday favorite?

Why Is This Bread a Must-Make?

Festive and Colorful: This Christmas Sprinkle Buttermilk Bread is a feast for the eyes, adding a pop of color to your holiday table.

Effortless Preparation: With just a few simple steps, you can whip up this delightful loaf without breaking a sweat, making it perfect for last-minute gatherings.

Kid-Friendly Fun: Involve the little ones in folding in the sprinkles, creating memories while baking together.

Versatile Versioning: Want to change it up? Add white chocolate chips or dried cranberries for a twist on this classic recipe.

Perfectly Moist Texture: The combination of buttermilk and melted butter gives this bread its irresistible moistness, ensuring every slice is delicious.

Gifting Joy: Wrap it up as a sweet homemade gift to brighten someone’s holiday season. Pair it with a cozy drink, like hot cocoa, for a thoughtful touch!

Christmas Sprinkle Buttermilk Bread Ingredients

  • For the Batter

  • 1 ¾ cups all-purpose flour (210g) – Provides structure; gluten-free flour works as a substitute.

  • 1 teaspoon baking powder – A vital leavening agent; ensure it’s fresh for optimal rise.

  • ½ teaspoon baking soda – Reacts with buttermilk to help the bread rise beautifully.

  • ½ teaspoon salt – Enhances all the flavors; omitting can dull the taste.

  • ½ cup (1 stick) unsalted butter, melted – Adds richness and moisture; consider coconut oil for a dairy-free option.

  • 1 cup granulated sugar (200g) – Sweetness is key; brown sugar can deepen the flavor.

  • 2 large eggs – Binds the ingredients together; use ½ cup unsweetened applesauce for a vegan alternative.

  • 1 cup buttermilk (240ml) – Provides moisture and a tender crumb; milk with lemon juice can be substituted.

  • 2 teaspoons vanilla extract – Boosts flavor; almond extract can be a lovely variation.

  • ½ cup red and green sprinkles – Adds a festive touch; avoid nonpareils to prevent color bleeding.

  • Optional Topping

  • 1 tablespoon coarse sugar – Creates a delightful crunch on top.

  • Additional sprinkles for garnish – Brightens the visual appeal and holiday spirit.

Step‑by‑Step Instructions for Christmas Sprinkle Buttermilk Bread

Step 1: Preheat the Oven
Start by preheating your oven to 350°F (175°C). While the oven warms up, prepare a 9×5-inch loaf pan by lining it with parchment paper or greasing it with butter. This ensures your Christmas Sprinkle Buttermilk Bread will easily release after baking, providing a beautifully shaped loaf.

Step 2: Mix Dry Ingredients
In a medium bowl, whisk together the all-purpose flour, baking powder, baking soda, and salt until well blended. Aim for a uniform mixture to ensure an even rise in your bread. Set this aside as you move on to the wet ingredients, which will bring your Christmas Sprinkle Buttermilk Bread to life.

Step 3: Combine Wet Ingredients
In a large bowl, whisk the melted butter and granulated sugar together until smooth and creamy. Next, add the eggs one at a time, mixing well after each addition. Stir in the vanilla extract and buttermilk until the mixture is light and well combined. This rich blend will infuse your bread with moistness and flavor.

Step 4: Incorporate Dry Ingredients
Gradually add the dry ingredients to the wet mixture, stirring gently until just combined. Be careful not to overmix, as this will keep your Christmas Sprinkle Buttermilk Bread tender. The batter should reflect a slightly lumpy texture, which indicates it’s ready for the festive additions.

Step 5: Fold in Sprinkles
Now it’s time to add the fun! Gently fold in the red and green sprinkles using a spatula, mixing just enough to evenly distribute them throughout the batter. Avoid overmixing to keep the colors bright and not bleed into the batter, ensuring your bread looks festive and cheerful.

Step 6: Pour and Smooth the Batter
Pour the batter into your prepared loaf pan and smooth the top with a spatula for an even surface. If you wish, sprinkle coarse sugar or additional sprinkles on top for a bit of extra crunch and visual appeal. This finishing touch brings out the holiday spirit in your Christmas Sprinkle Buttermilk Bread.

Step 7: Bake the Bread
Place your loaf pan in the preheated oven and bake for 45–55 minutes. The bread is done when a toothpick inserted into the center comes out clean or with a few moist crumbs. As it bakes, a delightful aroma will fill your kitchen, signaling the holiday cheer.

Step 8: Cool and Serve
Once baked, allow the bread to cool in the pan for 10–15 minutes on a wire rack. This helps solidify its structure. Carefully remove the bread from the pan and let it cool completely on the rack before slicing. Your Christmas Sprinkle Buttermilk Bread is now ready to be enjoyed fresh or shared with loved ones!

How to Store and Freeze Christmas Sprinkle Buttermilk Bread

Room Temperature: Store the bread in an airtight container at room temperature for up to 3 days to maintain its freshness and flavor.

Fridge: If you need to keep it longer, wrap the loaf tightly in plastic wrap and refrigerate for up to 1 week. This helps retain moisture while preventing spoilage.

Freezer: For extended storage, freeze the bread wrapped in plastic wrap and aluminum foil for up to 2 months. Thaw overnight in the fridge before serving.

Reheating: To enjoy leftover slices, pop them in the microwave for 10-15 seconds or lightly toast them for a few minutes to regain their delightful softness.

What to Serve with Christmas Sprinkle Buttermilk Bread

Imagine gathering around the table, savoring the delightful sweetness of this festive loaf alongside carefully selected accompaniments.

  • Creamy Hot Cocoa: A rich cup of hot cocoa enhances the festive spirit, making each bite of bread even more comforting. The perfect partner for chilly mornings!
  • Honey Butter: Spread this sweet blend over warm slices, adding a luscious creaminess that contrasts beautifully with the light, fluffy texture of the bread.
  • Fresh Fruit Salad: Bright, juicy fruits complement the sweetness of the bread while introducing a refreshing balance and a burst of vitamins to your holiday meal.
  • Cinnamon-Spiced Apples: Warm, spiced apples provide a wonderful contrast to the sugar sprinkles, offering a cozy, homestyle feel to your breakfast or brunch table.
  • Cream Cheese Frosting: For a decadent twist, drizzle or spread this sweet cream cheese delight on each slice, elevating the festive flavor to new heights.
  • Festive Yogurt Parfait: Layer this bread with yogurt and berries in a glass for a cheerful, nutritious breakfast that looks as good as it tastes.
  • Chai Tea or Fruit-Infused Iced Tea: Serve with chai for a warming drink or iced tea for a refreshing pairing; both enhance the sweet notes of the bread.
  • Mini Muffin Assortment: Pair with a selection of mini muffins for an inviting and colorful brunch spread, providing texture and diverse flavors to enjoy together.
  • Maple Glaze: Drizzle this earthy, sweet glaze over the bread for an extra treat that complements the festive flavors perfectly.
  • Homemade Eggnog: Serve this classic holiday drink chilled to bring a creamy, spiced touch that pairs delightfully with the lightness of the Christmas Sprinkle Buttermilk Bread.

Christmas Sprinkle Buttermilk Bread Variations

Feel free to put your unique spin on this festive favorite and delight in every bite!

  • Dairy-Free: Substitute buttermilk with a non-dairy milk mixed with lemon juice and use coconut oil instead of butter.

  • Gluten-Free: Swap out all-purpose flour for a gluten-free blend, ensuring everyone can enjoy this treat.

  • Nutty Flavor: Stir in ½ cup of chopped walnuts or pecans for a crunch that complements the sweet softness of the bread.

  • Chocolate Lover’s Twist: Add ½ cup of chocolate chips to the batter for a sweet surprise in every slice.

  • Spicy Warmth: Incorporate 1 teaspoon ground cinnamon or ginger for a touch of warmth that dances on your palate.

  • Mini Versions: Bake the batter in mini loaf pans for adorable gift-sized portions, reducing the baking time to about 30 minutes.

  • Fruitful Addition: Mix in ¾ cup of dried cranberries or chopped apricots for a chewy texture and a pop of fruity flavor.

  • Glazed Delight: Drizzle a simple glaze made of powdered sugar and vanilla extract over the cooled loaf for a sweet finishing touch.

With so many variations, why not experiment with different combinations? You could even whip up a few loaves and share them with friends alongside a cozy drink or pair with creamy yogurt for a festive breakfast! If you’re curious about more easy and scrumptious recipes, don’t miss out on the Homemade Bread Sunflower or Savory Chicken Bread. Happy baking!

Expert Tips for Christmas Sprinkle Buttermilk Bread

  • Avoid Overmixing: Gently combine the ingredients to keep your bread tender. Overmixing can lead to a tough loaf, diminishing its holiday spirit.

  • Test for Doneness: Always check with a toothpick around the 45-minute mark. It should come out clean or with just a few moist crumbs, ensuring you’re left with a perfect Christmas Sprinkle Buttermilk Bread.

  • Sprinkle Selection: Use jimmies-style sprinkles only, as nonpareils can bleed into the batter. Keeping your colors vibrant is key for that festive look!

  • Cool Completely: Let the bread cool fully on a wire rack before slicing. This step ensures that the texture remains moist and crumbly, making each slice a delightful treat.

  • Flavor Variations: Want to elevate your loaf further? Try adding white chocolate chips or dried cranberries. These add-ins bring extra flavors and textures, making your Christmas Sprinkle Buttermilk Bread even more memorable!

Make Ahead Options

This Christmas Sprinkle Buttermilk Bread is perfect for meal prep, allowing you to bring festive cheer to your table with ease! You can prepare the batter up to 24 hours in advance, storing it in an airtight container in the refrigerator to maintain freshness. Alternatively, you can mix the dry ingredients and store them separately for up to 3 days, keeping them in a cool, dry place. When you’re ready to bake, simply combine the wet ingredients, add the dry mix, and fold in the sprinkles. This way, you save precious time and can enjoy delicious, festive bread with minimal effort, ensuring it remains just as delightful for your holiday celebrations!

Christmas Sprinkle Buttermilk Bread Recipe FAQs

What type of sprinkles should I use?
I recommend using jimmies-style sprinkles for this bread. Nonpareil sprinkles may bleed their colors into the batter, potentially making it look less festive. Aim for bright, cheerful colors by carefully choosing your sprinkles to enhance the holiday spirit!

How should I store leftover bread?
To keep your Christmas Sprinkle Buttermilk Bread fresh, store it in an airtight container at room temperature for up to 3 days. You can also wrap it tightly in plastic wrap and refrigerate it for up to 1 week. This prevents it from drying out while maintaining that delightful moisture.

Can I freeze this bread?
Absolutely! To freeze your Christmas Sprinkle Buttermilk Bread, wrap it tightly in plastic wrap followed by aluminum foil. You can freeze it for up to 2 months. When you’re ready to enjoy it, simply thaw the bread overnight in the fridge before serving. This method helps preserve the texture and flavor.

What if my bread comes out dense?
If your bread turns out dense, it may be due to overmixing the batter or using too much flour. To avoid this, mix the ingredients until just combined—lumps are okay! Additionally, let the bread cool completely in the pan before slicing to ensure a tender crumb. Checking the freshness of your baking powder and baking soda is also vital for a proper rise.

Can I make this bread vegan?
Yes, you can easily adapt the recipe to be vegan! Simply replace the eggs with ½ cup of unsweetened applesauce and use coconut oil instead of butter. For the buttermilk substitute, mix milk of your choice with 1 tablespoon of lemon juice and let it sit for a few minutes. These swaps will keep your Christmas Sprinkle Buttermilk Bread deliciously moist and festive!

How can I enhance the flavor of the bread?
You can elevate the flavor by incorporating add-ins like white chocolate chips, chopped nuts, or dried cranberries for extra texture and taste. Additionally, consider adding ½ teaspoon of almond extract for a nutty twist. These variations can make this festive loaf even more delightful!

Christmas Sprinkle Buttermilk Bread

Festive Christmas Sprinkle Buttermilk Bread for Holiday Cheer

This Christmas Sprinkle Buttermilk Bread is a delightful, moist loaf that brings joy to every gathering.
Prep Time 15 minutes
Cook Time 50 minutes
Cooling Time 15 minutes
Total Time 1 hour 20 minutes
Servings: 10 slices
Course: Breakfast
Cuisine: American
Calories: 180

Ingredients
  

Batter
  • 1.75 cups all-purpose flour Provides structure; gluten-free flour works as a substitute.
  • 1 teaspoon baking powder A vital leavening agent; ensure it’s fresh for optimal rise.
  • 0.5 teaspoon baking soda Reacts with buttermilk to help the bread rise beautifully.
  • 0.5 teaspoon salt Enhances all the flavors; omitting can dull the taste.
  • 0.5 cups unsalted butter Adds richness and moisture; consider coconut oil for a dairy-free option.
  • 1 cups granulated sugar Sweetness is key; brown sugar can deepen the flavor.
  • 2 large eggs Binds the ingredients together; use ½ cup unsweetened applesauce for a vegan alternative.
  • 1 cups buttermilk Provides moisture and a tender crumb; milk with lemon juice can be substituted.
  • 2 teaspoons vanilla extract Boosts flavor; almond extract can be a lovely variation.
  • 0.5 cups red and green sprinkles Adds a festive touch; avoid nonpareils to prevent color bleeding.
Optional Topping
  • 1 tablespoon coarse sugar Creates a delightful crunch on top.
  • additional sprinkles Brightens the visual appeal and holiday spirit.

Equipment

  • 9x5-inch loaf pan
  • mixing bowls
  • whisk
  • spatula

Method
 

Preparation
  1. Preheat your oven to 350°F (175°C) and prepare a 9x5-inch loaf pan by lining it with parchment paper or greasing it with butter.
  2. In a medium bowl, whisk together the all-purpose flour, baking powder, baking soda, and salt until well blended.
  3. In a large bowl, whisk the melted butter and granulated sugar together until smooth and creamy, then add the eggs one at a time, mixing well after each addition.
  4. Stir in the vanilla extract and buttermilk until the mixture is light and well combined.
  5. Gradually add the dry ingredients to the wet mixture, stirring gently until just combined.
  6. Fold in the red and green sprinkles gently using a spatula.
  7. Pour the batter into your prepared loaf pan and smooth the top, optionally add coarse sugar or additional sprinkles on top.
  8. Bake the bread for 45–55 minutes until a toothpick inserted into the center comes out clean or with a few moist crumbs.
  9. Allow the bread to cool in the pan for 10–15 minutes, then remove and let it cool completely on a wire rack before slicing.

Notes

Gifting joy is easy with this bread that can be wrapped for a sweet homemade gift. Pair with hot cocoa for a thoughtful touch.

Delightful Tree Meringue Cookies for a Festive Celebration

The kitchen filled with the sweet aroma of fresh vanilla and sugar as I piped delicate shapes onto the baking sheet, creating little works of art that are bound to charm. These Tree Meringue Cookies are not only beautiful but also incredibly easy to make, making them a perfect addition to your holiday celebrations. Picture them gracing your dessert table, their light, crisp texture and melt-in-your-mouth sweetness inviting everyone to take a bite. Plus, they are gluten-free and can be beautifully decorated to add a personal touch. Imagine surprising loved ones with these whimsical treats that look as delightful as they taste! Are you ready to learn how to create these enchanting holiday confections?

Why Make Tree Meringue Cookies?

Visual Appeal: These cookies resemble whimsical trees, instantly adding festive charm to any gathering or dessert table.
Gluten-Free Goodness: Perfect for those who avoid gluten, allowing everyone to enjoy the holiday treat without worry.
Simple Process: With just a few ingredients and minimal steps, these cookies are easy enough for anyone to master.
Endless Decorating Options: Get creative! Decorate with edible glitter, sprinkles, or gel icing to make them uniquely yours. Looking for another festive cookie idea? Check out our delicious Nutty Apricot Cookies!
Deliciously Light: Enjoy a melt-in-your-mouth experience that leaves your taste buds craving more—perfect to pair with hot chocolate!

Tree Meringue Cookies Ingredients

• Create these enchanting cookies with ease simply by following this ingredient list!

For the Meringue

  • Egg Whites – Provide structure and leavening for meringue; make sure your bowls are clean for the best results.
  • Cream of Tartar – Stabilizes egg whites, crucial for that airy meringue texture; lemon juice or vinegar can be a handy substitute if needed.
  • Granulated Sugar – Sweetens the meringue while helping achieve glossy peaks; remember to add it gradually for optimal incorporation.
  • Vanilla Extract – Adds a lovely flavor; feel free to swap in almond extract for a unique twist.

For the Cookie Base

  • Sugar Cookie Base – Offers a sturdy foundation for your meringue tree design, blending sweetness and structure effortlessly.

Now you’re well-equipped to whip up these stunning Tree Meringue Cookies that are bound to make your holiday celebrations even more delightful!

Step‑by‑Step Instructions for Tree Meringue Cookies

Step 1: Preheat and Prepare
Begin by preheating your oven to 200°F (93°C). While the oven warms up, line a baking sheet with parchment paper, ensuring it’s smooth and free of wrinkles. This will help your Tree Meringue Cookies hold their shape as they bake. Take a moment to gather your equipment, including a mixing bowl, electric mixer, and piping bag ready for action.

Step 2: Beat Egg Whites
In a clean mixing bowl, add in the egg whites and start beating them on medium speed. Continue mixing until the egg whites become frothy, which should take about 2-3 minutes. This initial step is crucial for creating the perfect base for your Tree Meringue Cookies. Be sure your bowl is completely grease-free to achieve fluffy peaks.

Step 3: Stabilize with Cream of Tartar
Once your egg whites are frothy, add the cream of tartar and increase the mixer speed to medium-high. Watch carefully as you continue to beat the mixture until soft peaks begin to form, which will take about another 2-3 minutes. The mixture should look glossy and hold a soft shape when you lift the beaters, setting the stage for the perfect meringue.

Step 4: Add Sugar Gradually
Now, it’s time to sweeten things up! Gradually add in the granulated sugar, about a tablespoon at a time, while keeping the mixer running at high speed. Continue this for about 5-7 minutes until the mixture forms stiff, glossy peaks. The goal is to create a sturdy meringue that will hold its shape, ideal for your Tree Meringue Cookies.

Step 5: Flavor the Meringue
Gently fold in the vanilla extract using a spatula—this addition will infuse your Tree Meringue Cookies with delightful flavor. Be careful not to deflate the meringue during this process; continue to fold until the extract is fully incorporated. Your meringue is now ready to create those whimsical tree shapes!

Step 6: Pipe the Meringue
Transfer the meringue into a piping bag fitted with a star tip. Begin piping the meringue onto the prepared sugar cookie bases, starting from the bottom and working your way up to create a beautiful tree shape. Aim for a whimsical look, allowing the peaks and swirls to add to the festive charm of your Tree Meringue Cookies.

Step 7: Bake to Perfection
Place the baking sheet in the preheated oven and bake your Tree Meringue Cookies for approximately 1.5 to 2 hours. Keep an eye on them; they should feel firm and dry to the touch when ready. The longer baking time at low temperature helps achieve that delightful crisp texture while retaining the airy inside.

Step 8: Cool Gradually
After baking, turn off the oven and leave the cookies to cool inside with the door slightly ajar. This gradual cooling process helps prevent cracks in your meringues. Allow them to sit in the oven for at least 30 minutes before carefully removing them. Now your Tree Meringue Cookies are ready to dazzle at your holiday gathering!

Make Ahead Options

These Tree Meringue Cookies are a fantastic option for meal prep, making your holiday baking stress-free! You can whip up the meringue mixture up to 24 hours in advance; simply store it in an airtight container in the fridge. Additionally, the baked cookies can be made up to 3 days ahead of your celebration. Just ensure they are completely cooled and stored in an airtight container at room temperature to maintain their crisp texture. When you’re ready to serve, feel free to decorate them with icing or sprinkles for a festive touch. With these make-ahead options, you’ll enjoy delightful Tree Meringue Cookies without the last-minute rush!

Expert Tips for Tree Meringue Cookies

  • Clean Equipment: Ensure all mixing bowls and utensils are completely grease-free to help the meringue reach its full volume and stability.

  • Check Egg Whites: Older eggs work best for meringue as they whip up to a better volume. However, fresh egg whites are crucial for a clean flavor.

  • Sugar Gradual Addition: Add granulated sugar slowly to ensure it dissolves fully, which will help create that glossy texture in your Tree Meringue Cookies.

  • Avoid Humidity: Bake on a dry day, as moisture can deflate the meringue. If the atmosphere is humid, consider using a dehumidifier or air conditioning while baking.

  • Perfect Cooling: Allow meringues to cool gradually in the oven, as this prevents cracks and helps maintain their lovely shape, enhancing their festive appeal.

  • Coloring Tips: If using gel colors, add them lightly to avoid deflating the meringue. Mix gently to give your Tree Meringue Cookies a vibrant, cheerful look!

Tree Meringue Cookies Variations

Feel free to get creative and make these delightful cookies your own with these fun twists!

  • Gingerbread Base: Swap the sugar cookie base for gingerbread for a warm, spiced flavor contrast that’s perfect for the holidays.

  • Chocolate Meringue: Add cocoa powder to the meringue mixture for a rich, chocolatey flavor. This simple change will have everyone guessing the secret ingredient!

  • Colorful Layers: Use multiple colors of gel food coloring in separate bowls to create a layered effect in your piping bag. A beautiful swirl of colors can turn your meringue trees into a visual showstopper.

  • Citrus Zest: Incorporate lemon or orange zest into the meringue for a refreshing citrus twist. This bright flavor will complement the sweetness beautifully.

  • Nutty Crunch: Fold finely chopped nuts, like pistachios or almonds, into the meringue for added texture and a delightful crunch. Pairing nut flavors offers a delicious surprise!

  • Spiced Whip: Mix in a pinch of cinnamon or nutmeg to your meringue for a warm holiday essence. These spices enhance the festive spirit without overpowering the cookie.

  • Sparkling Decor: After piping the meringue, sprinkle with edible glitter or colored sanding sugar before baking for an eye-catching, magical finish. Perfect for capturing the holiday sparkle!

And if you’re looking for another festive treat, don’t miss trying our delightful Apple Oatmeal Cookies! The possibilities for variations are endless, so get encouraged to experiment and find your unique favorite!

How to Store and Freeze Tree Meringue Cookies

Airtight Container: Store your Tree Meringue Cookies in an airtight container at room temperature for up to one week to maintain their delightful crispness.

Moisture Control: Keep them away from moisture, as this can cause the cookies to soften. Place a small packet of desiccant inside the container if needed.

Freezing: For longer storage, you can freeze meringue cookies in a single layer in an airtight container for up to three months. Layer parchment paper between the cookies to prevent sticking.

Reheating: If desired, gently re-crisp cookies in a 200°F (93°C) oven for about 10 minutes before serving. This will help restore their light, crisp texture!

What to Serve with Tree Meringue Cookies

These whimsical treats deserve a spread that complements their lightness and holiday charm, enhancing your festive gatherings.

  • Hot Chocolate: Indulge in a rich, creamy mug of hot chocolate; the sweetness pairs perfectly with the crisp meringue.
  • Herbal Tea: A soothing cup of herbal tea adds warmth, making for a delightful contrast to the airy texture.
  • Gingerbread Cookies: Offer a spiced flavor balance; their chewiness beautifully complements the light, crisp meringues.
  • Fruit Platter: Fresh, seasonal fruits provide a refreshing burst; consider berries or citrus to brighten up your dessert table.
  • Sparkling Cider: Enjoying bubbly sparkling cider elevates the occasion, adding fizz that mingles wonderfully with sweet confections.
  • Edible Glitter: For an eye-catching finishing touch, sprinkle edible glitter for added festive flair on your dessert table.

Serve these delectable Tree Meringue Cookies with any of these ideas to create a scene that’s as inviting as it is delicious!

Tree Meringue Cookies Recipe FAQs

What should I look for when selecting egg whites?
Absolutely! Fresh egg whites should be free of any fat, so use clean bowls and utensils. Older eggs tend to whip better, creating more volume for your meringue. It’s crucial that no yolk gets into your egg whites, as even a tiny drop of fat can prevent them from whipping up to their full potential.

How should I store my Tree Meringue Cookies?
To keep your Tree Meringue Cookies in tip-top shape, store them in an airtight container at room temperature for up to one week. Ensure they are kept away from moisture, which can lead to a soft, sticky texture. Adding a silica gel packet inside the container can help control any moisture levels.

Can I freeze Tree Meringue Cookies?
Yes, you can! For longer storage, freeze your Tree Meringue Cookies by placing them in a single layer in an airtight container. Make sure to separate layers with parchment paper to prevent sticking, and they will last up to three months in the freezer. When you’re ready to enjoy them, gently re-crisp in a 200°F (93°C) oven for about 10 minutes.

What if my meringues are sticky after baking?
Very! If your meringues feel sticky after baking, this usually indicates they need more time in the oven. Continue baking for an additional 10-15 minutes, checking frequently until they feel firm and dry to the touch. Low humidity days are perfect for making meringue, as moisture can cause them to become sticky.

Are Tree Meringue Cookies safe for pets or those with allergies?
While these delightful cookies are naturally gluten-free, they’re made with egg whites and sugar, which aren’t suitable for pets or anyone with egg allergies. Always ensure to inform guests about the ingredients in these cookies if serving at gatherings! Consider using alternatives like aquafaba (chickpea brine) for a vegan meringue option.

Can I change the flavor of my meringue?
Absolutely! You can effortlessly customize the flavor of your Tree Meringue Cookies by swapping the vanilla extract for almond extract or adding a hint of peppermint or citrus zest. For a fun twist, fold in some cocoa powder for chocolate-flavored meringues. Just remember, adding extra ingredients might affect the texture, so use sparingly!

Tree Meringue Cookies

Delightful Tree Meringue Cookies for a Festive Celebration

These Tree Meringue Cookies are beautiful, gluten-free, and easy to make, perfect for holiday celebrations.
Prep Time 30 minutes
Cook Time 2 hours
Cooling Time 30 minutes
Total Time 3 hours
Servings: 12 cookies
Course: Dessert
Cuisine: American
Calories: 70

Ingredients
  

For the Meringue
  • 3 large Egg Whites Ensure bowls are clean for best results.
  • 1/4 teaspoon Cream of Tartar Stabilizes egg whites.
  • 1 cup Granulated Sugar Add gradually for optimal incorporation.
  • 1 teaspoon Vanilla Extract Almond extract can be swapped in.
For the Cookie Base
  • 2 cups Sugar Cookie Base Offers a sturdy foundation.

Equipment

  • mixing bowl
  • electric mixer
  • Piping bag
  • baking sheet
  • parchment paper

Method
 

Step-by-Step Instructions
  1. Preheat your oven to 200°F (93°C) and line a baking sheet with parchment paper.
  2. In a clean mixing bowl, beat egg whites on medium speed until frothy (2-3 minutes).
  3. Add cream of tartar, increase the speed to medium-high, and beat until soft peaks form (2-3 minutes).
  4. Gradually add in the granulated sugar while the mixer runs on high speed until stiff peaks form (5-7 minutes).
  5. Gently fold in vanilla extract using a spatula without deflating the meringue.
  6. Transfer meringue into a piping bag fitted with a star tip and pipe onto the prepared sugar cookie bases.
  7. Bake for approximately 1.5 to 2 hours until firm and dry to the touch.
  8. Turn off the oven and let the cookies cool inside for at least 30 minutes before removing.

Notes

Ensure all equipment is grease-free and store cookies in an airtight container to maintain crispness.

Delightful Christmas Cranberry Honey Butter for Festive Cheer

As I was spreading homemade cranberry concoctions at a holiday gathering, a friend turned to me and exclaimed, “This is like Christmas on a biscuit!” That’s when I knew I needed to share my recipe for Christmas Cranberry Honey Butter. This festive spread is not only a feast for the eyes with its rosy hue, but it also expertly melds the tartness of cranberries with the natural sweetness of honey. Best of all, it’s ready in under 15 minutes, making it not just a delicious addition to your holiday table, but also a thoughtful homemade gift to share with loved ones. Whether slathered on warm biscuits, drizzled over pancakes, or paired with roasted meats, this Christmas Cranberry Honey Butter is destined to be a shining star of your festive feasts. Curious about how to whip up this delightful spread in your own kitchen? Let’s dive into the recipe!

Why is this cranberry butter so special?

Simplicity: This Christmas Cranberry Honey Butter can be whipped up in just 15 minutes, making it an ideal last-minute addition to your holiday spread.

Festive Flavor: The unique blend of tart cranberries and sweet honey creates a taste sensation that perfectly complements your favorite dishes.

Customizable: Feel free to experiment by adding warm spices like cinnamon or nutmeg, or even switch to plant-based butter and agave syrup for a vegan twist!

Gifting Ready: Packaged in charming jars, this butter makes for thoughtful homemade gifts that friends and family will adore.

Versatility: It’s a delightful topping for everything from warm biscuits to festive roasted meats, ensuring that every meal is filled with holiday cheer. Whether you’re spreading it on toast or jazzing up your pancakes, this butter is sure to impress!

Christmas Cranberry Honey Butter Ingredients

For the Butter

  • Fresh or Dried Cranberries – They add tartness and rich flavor; if using fresh, be sure to adjust sweetness due to their moisture.
  • Butter – This gives the butter its creamy texture; for a vegan twist, substitute with plant-based butter.
  • Honey – A natural sweetener that perfectly enhances the flavor; swap with agave or maple syrup for a vegan option.

Optional Flavor Boosters

  • Cinnamon – For a warm, festive spice; feel free to adjust to taste based on your preference.
  • Vanilla Extract – Adds depth to the flavor profile, giving your Christmas Cranberry Honey Butter an aromatic touch.

Step‑by‑Step Instructions for Christmas Cranberry Honey Butter

Step 1: Prepare the Cranberries
If you’re using fresh cranberries, start by washing them thoroughly and placing them in a small saucepan over medium heat. Cook for about 5 minutes, stirring occasionally, until the cranberries soften and begin to burst. If they are too moist, drain any excess liquid before proceeding to the next step, ensuring a perfect blend for your Christmas Cranberry Honey Butter.

Step 2: Beat the Butter
In a mixing bowl, add your softened butter, ensuring it’s at room temperature for optimal creaminess. Using an electric mixer, beat the butter on medium speed for about 2 to 3 minutes until it’s fluffy and pale in color. This helps create a light texture in your Christmas Cranberry Honey Butter, making it easy to spread once finished.

Step 3: Combine Ingredients
Gradually add the cranberries and honey to the beaten butter, mixing on low speed. Continue to blend for another 2 minutes until the mixture is smooth and evenly combined. Pay attention to the color; a beautiful rosy hue indicates that your flavors are melding perfectly, ensuring the tartness from the cranberries balances nicely with the sweetness of honey.

Step 4: Add Flavor Boosters
If desired, incorporate optional ingredients like cinnamon or vanilla extract at this stage. Mix well on low speed for an additional minute, ensuring these warm spices infuse into the Christmas Cranberry Honey Butter. Taste the mixture to check for sweetness and flavor, adjusting honey or spices if necessary to suit your preference.

Step 5: Store Your Butter
Once fully mixed, transfer your Christmas Cranberry Honey Butter into an airtight container using a spatula to scrape every last bit. Smooth the top with the spatula for a nice finish and seal the container. Refrigerate for up to two weeks or freeze in smaller portions for up to three months, making this delightful spread ready for those festive meals whenever you need it.

Expert Tips for Christmas Cranberry Honey Butter

  • Butter Temperature: Ensure the butter is at room temperature—this makes it easier to beat and creates a fluffier texture for your Christmas Cranberry Honey Butter.

  • Fresh Cranberries: If using fresh cranberries, cook them slightly to reduce moisture; this helps avoid a runny butter texture and ensures proper blending.

  • Sweeter Adjustments: Always taste your mixture before storing; if it’s too tart, add a little more honey until you reach your desired sweetness.

  • Fun Gift Ideas: For a charming gift, portion the butter into small jars. Add festive labels and ribbons to make them look extra special!

  • Flavor Variations: Feel free to experiment! Adding spices like nutmeg or substituting cranberries with other fruits can create unique flavors that elevate your Christmas Cranberry Honey Butter.

Make Ahead Options

These Christmas Cranberry Honey Butter is perfect for busy home cooks looking to save time during the holiday rush! You can prepare the entire mixture up to 24 hours in advance by blending the cranberries, butter, and honey, and then storing it in an airtight container in the refrigerator. This allows the flavors to meld beautifully while maintaining freshness. Alternatively, you can freeze the butter in smaller portions for up to three months; just thaw overnight in the fridge before serving. When you’re ready to use it, simply give it a quick stir to restore its creamy texture. With these make-ahead tips, you’ll have your festive spread ready with minimal effort, ensuring your gatherings are as delightful as possible!

What to Serve with Christmas Cranberry Honey Butter

Indulge your senses and create a festive feast that beautifully complements the vibrant flavors of this delightful spread.

  • Warm Biscuits: A classic choice, the flaky texture of warm biscuits perfectly absorbs the sweet-tart goodness of the cranberry butter. Imagine the contrast of buttery layers melting into the spread.

  • Pancakes or Waffles: Drizzle this spread atop golden pancakes or waffles for a holiday breakfast that feels special. The sweetness mingling with maple syrup makes mornings merry!

  • Toasted Sourdough Bread: A hearty slice of toasted sourdough adds a satisfying crunch, making it an ideal base for the creamy cranberry butter. Each bite delivers a delightful and unexpected taste experience.

  • Roasted Turkey or Chicken: Elevate your holiday meat dishes by using this butter as an exquisite topping, adding both flavor and a touch of elegance to your festive table.

  • Cheeseboard Partner: Pair it with soft cheeses like Brie or goat cheese. The rich, creamy textures contrast beautifully, while the cranberry butter adds a hint of sweetness that livens up your spread.

  • Sparkling Wine: Celebrate with bubbly! A glass of sparkling wine will complement the fruity notes wonderfully, making every sip resonate with holiday cheer.

  • Vanilla Ice Cream: For a surprising dessert, use this butter as a topping on vanilla ice cream. The warmth and sweetness create an indulgent treat that will delight every palate as it melts.

Embrace the joy of the season by creating a memorable meal around this Christmas Cranberry Honey Butter!

How to Store and Freeze Christmas Cranberry Honey Butter

Fridge: Store your Christmas Cranberry Honey Butter in an airtight container in the refrigerator for up to 2 weeks, keeping it fresh for your holiday meals.

Freezer: For longer storage, freeze the butter in small portions using airtight containers or freezer bags. It will maintain its quality for up to 3 months.

Thawing: When ready to use, simply thaw overnight in the fridge or allow it to sit at room temperature for about 30 minutes before spreading.

Refrigeration Tip: Always make sure the container is sealed tightly to maintain flavor and texture.

Christmas Cranberry Honey Butter Variations

Feel free to sprinkle in your own creativity to make this festive spread truly yours!

  • Vegan Twist: Substitute traditional butter with plant-based butter and honey with agave syrup for a delightful vegan version. This way, everyone can indulge!

  • Cinnamon Spice: Add a teaspoon of ground cinnamon for a warm, holiday flavor boost that will remind you of festive baked goods. It gives a comforting and nostalgic essence to the butter.

  • Nutmeg Kick: Spice things up by incorporating a pinch of nutmeg alongside cinnamon. It enhances the overall warmth of the spread, making it cozy for winter gatherings.

  • Berry Blend: Substitute cranberries with fresh or frozen raspberries for a sweeter, tart combination. The vibrant color and flavor will be simply irresistible!

  • Apple Jam Fusion: Mix in apple jam or preserves for a unique twist that brings an added sweetness and layer of flavor to your butter. This pairing sings beautifully on toast or pancakes.

  • Citrus Zest Surprise: Grate in a little orange or lemon zest to brighten the flavor profile. The citrus adds a refreshing zing that complements the sweetness!

  • Maple Magic: Swap out honey for maple syrup for a rich, earthy sweetness that pairs wonderfully with the tartness of cranberries. It’s an unexpected yet delightful flavor boost!

  • Roasted Spice: Incorporate a hint of roasted spices like cardamom or clove for a sophisticated spin. This will create a warm and inviting experience perfect for holiday festivities.

For more delicious variations, don’t forget to check out our recipe for Honey Chili Chicken or try our flavorful Garlic Butter French Fries as amazing accompaniments!

Christmas Cranberry Honey Butter Recipe FAQs

What type of cranberries should I use for the Christmas Cranberry Honey Butter?
Absolutely! You can use either fresh or dried cranberries. Fresh cranberries will provide a tartness that balances beautifully with the sweetness of honey, but if they’re too moist, you may need to cook them down slightly before mixing. Dried cranberries are convenient and sweet but might require an adjustment in the amount of honey used for proper balance.

How should I store my Christmas Cranberry Honey Butter?
For the best results, store your Christmas Cranberry Honey Butter in an airtight container in the refrigerator. It can stay fresh for up to 2 weeks. If you want to enjoy it longer, consider portioning it into small jars and freezing. Stored properly, it will maintain its flavor and texture for up to 3 months!

Can I freeze Christmas Cranberry Honey Butter?
Absolutely! Freezing is a great way to keep your butter fresh for those spontaneous festive gatherings. To freeze, scoop your Christmas Cranberry Honey Butter into smaller airtight containers or freezer bags. Make sure to remove as much air as possible to prevent freezer burn. When you’re ready to use it, simply thaw overnight in the fridge or let it sit at room temperature for about 30 minutes before enjoying.

What can I do if my butter is too runny after mixing?
Very common! If your Christmas Cranberry Honey Butter turns out runny, it could be due to using overly moist cranberries or not beating the butter enough. If using fresh cranberries, make sure to cook and drain any excess liquid before mixing. For a thicker texture, you can also beat in more softened butter, one tablespoon at a time, until you reach the desired consistency.

Is this recipe suitable for people with dietary restrictions?
Definitely! The Christmas Cranberry Honey Butter is quite versatile. For a vegan adaptation, you can substitute traditional butter with plant-based butter and replace honey with agave syrup or maple syrup. Just be mindful of allergies! If someone in your party has a allergy to honey, using agave or maple syrup is a great alternative. Always double-check ingredient labels to ensure a safe and enjoyable experience for everyone!

Christmas Cranberry Honey Butter

Delightful Christmas Cranberry Honey Butter for Festive Cheer

A delightful Christmas Cranberry Honey Butter recipe that combines tart cranberries with sweet honey, perfect for the holiday season.
Prep Time 15 minutes
Cook Time 5 minutes
Total Time 20 minutes
Servings: 10 servings
Course: Other
Cuisine: American
Calories: 100

Ingredients
  

For the Butter
  • 1 cup Fresh or Dried Cranberries Adjust sweetness if using fresh due to moisture.
  • 1 cup Butter Use plant-based butter for a vegan option.
  • 1/2 cup Honey Can substitute with agave or maple syrup.
Optional Flavor Boosters
  • 1 teaspoon Cinnamon Adjust to taste for warmth.
  • 1 teaspoon Vanilla Extract Adds aromatic depth.

Equipment

  • mixing bowl
  • electric mixer
  • Small saucepan
  • airtight container

Method
 

Step-by-Step Instructions
  1. Prepare the cranberries: Wash fresh cranberries thoroughly and cook in a small saucepan over medium heat for 5 minutes until they soften.
  2. Beat the butter: In a mixing bowl, add softened butter and beat for 2 to 3 minutes until fluffy and pale.
  3. Combine ingredients: Gradually add cranberries and honey to the beaten butter and blend on low speed for another 2 minutes.
  4. Add flavor boosters: Incorporate optional cinnamon and vanilla extract, mixing well for an additional minute.
  5. Store your butter: Transfer the mixture to an airtight container and refrigerate for up to two weeks.

Notes

Ensure butter is at room temperature for easier mixing. Taste before storing to adjust sweetness if necessary.

Irresistible Christmas Sprinkle Buttermilk Bread Recipe

As I stood in my kitchen, the scent of melting butter and warm sugar wafting through the air, I couldn’t help but think of the joy that comes with baking during the holidays. Enter my festive Christmas Sprinkle Buttermilk Bread, a delightful way to add a sprinkle of cheer to your seasonal gatherings. This easy-to-make loaf isn’t just a treat for the taste buds; it’s also a feast for the eyes, with its vibrant red and green sprinkles that brighten any holiday table. Perfect for cozy breakfasts or thoughtful gifts, this vegetarian delight brings families together, making memories with every slice. Plus, its quick prep time ensures you can spend more moments savoring the celebration rather than slaving away in the kitchen. Ready to spread some holiday cheer with your own warm loaf? Let’s dive into this charming recipe!

Why Is This Bread So Festive?

Festive Appeal: The vibrant red and green sprinkles make this loaf a true centerpiece for any holiday gathering, instantly brightening up your table.

Moist & Flavorful: Made with rich buttermilk and butter, this bread offers a tender crumb that’s deliciously soft with every bite!

Quick & Easy: Whip up a delightful loaf in no time; this recipe is perfect for those busy holiday mornings or last-minute gifts.

Versatile: Enjoy it as a holiday breakfast with cream cheese, or slice it for charming dessert platters. The options are endless!

Family-Friendly: Kids will love decorating the bread with sprinkles, making it a fun cooking activity for the whole family.

If you’re also interested in adding a delicious touch to your breakfast table, you might want to check out my Savory Chicken Bread or try my scrumptious Banana Bread Brownies.

Christmas Sprinkle Buttermilk Bread Ingredients

• A sweet loaf to cherish!

For the Bread

  • 1 ¾ cups all-purpose flour (210g) – Provides structure; a gluten-free flour blend can be used here.
  • 1 teaspoon baking powder – A leavening agent; ensure it’s fresh for the best rise.
  • ½ teaspoon baking soda – Works with buttermilk for that perfect lift.
  • ½ teaspoon salt – Enhances the flavors; omitting it can dull the taste.
  • ½ cup (1 stick) unsalted butter, melted and slightly cooled – Adds moisture and richness; substitute with coconut oil for a dairy-free option.
  • 1 cup granulated sugar (200g) – Sweetness factor; brown sugar can offer a deeper flavor.
  • 2 large eggs – Acts as a binding agent; replace with ½ cup unsweetened applesauce for a vegan alternative.
  • 1 cup buttermilk (240ml) – Provides moisture and flavor; you can use milk with 1 tablespoon of lemon juice as a substitute.
  • 2 teaspoons vanilla extract – A flavor enhancer; almond extract can be used for a delightful twist.
  • ½ cup red and green sprinkles (jimmies style) – Adds a festive flair; avoid nonpareil sprinkles as they may bleed colors.

Optional Topping

  • 1 tablespoon coarse sugar – Sprinkles a crunchy texture on top.
  • Additional sprinkles for garnish – Elevates the visual appeal even further.

Step‑by‑Step Instructions for Christmas Sprinkle Buttermilk Bread

Step 1: Preheat and Prepare
Begin by preheating your oven to 350°F (175°C). While the oven warms, prepare a 9×5-inch loaf pan by greasing it with butter or lining it with parchment paper. This will ensure your Christmas Sprinkle Buttermilk Bread slides out effortlessly after baking, leaving a beautiful loaf ready for your holiday table.

Step 2: Combine Dry Ingredients
In a medium mixing bowl, whisk together 1¾ cups of all-purpose flour, 1 teaspoon of baking powder, ½ teaspoon of baking soda, and ½ teaspoon of salt. This mixture is essential for providing the loaf with structure and lift. Make sure to mix well until the dry ingredients are evenly combined, allowing the baking powder and soda to distribute properly.

Step 3: Mix Wet Ingredients
In a large bowl, whisk ½ cup of melted and slightly cooled unsalted butter with 1 cup of granulated sugar until the mixture is smooth. Next, add 2 large eggs, mixing in one at a time to ensure they’re well incorporated. Pour in 1 teaspoon of vanilla extract and 1 cup of buttermilk, stirring until the mixture is creamy and well-blended, creating a luscious base for your bread.

Step 4: Combine Dry and Wet Mixtures
Gradually add the bowl of dry ingredients to the wet mixture, using a spatula to gently fold them together. Mix until just combined, being careful not to overmix, as this will help keep your Christmas Sprinkle Buttermilk Bread tender and light. You want to see a few floury streaks remaining in the batter; this is perfect!

Step 5: Add Sprinkles
Gently fold in ½ cup of festive red and green sprinkles, taking care not to overmix. This step adds cheerful color and a touch of joy to your bread, making it perfect for the holidays. Keep the bustling energy of the holiday season in mind, enjoying each moment as you prepare this delightful loaf.

Step 6: Transfer Batter to Pan
Pour the batter into your prepared loaf pan, using a spatula to smooth the top for even baking. If desired, sprinkle 1 tablespoon of coarse sugar and additional sprinkles on top, which will create a charming crunchy finish as the bread bakes. The festive topping will add both texture and an extra festive touch to your Christmas Sprinkle Buttermilk Bread.

Step 7: Bake the Bread
Place the loaf pan in the preheated oven and bake for 45–55 minutes. Check for doneness by inserting a toothpick into the center; it should come out clean or with a few moist crumbs. As it bakes, enjoy the wonderful scent wafting through your kitchen, signaling that your holiday treat is nearly ready.

Step 8: Cool and Serve
Once baked, remove the loaf from the oven and allow it to cool in the pan for 10–15 minutes. After that, gently transfer the bread to a wire rack to cool completely. The delightful aroma and festive colors will have everyone gathering around in anticipation for a slice of your Christmas Sprinkle Buttermilk Bread.

Make Ahead Options

These Christmas Sprinkle Buttermilk Bread loaves are perfect for meal prep enthusiasts! You can prepare the batter and refrigerate it for up to 24 hours in advance, allowing the flavors to meld beautifully without compromising quality. Simply mix all the wet ingredients with the dry, fold in the sprinkles, and store the batter in an airtight container. When you’re ready to bake, give it a gentle stir and pour it into the prepared loaf pan. Bake as directed, and enjoy a freshly-made loaf that’s just as delicious as if you made it the same day! Plus, this method saves you precious time during busy holiday mornings.

What to Serve with Christmas Sprinkle Buttermilk Bread

Enjoying a slice of this cheerful bread can inspire delightful meal pairings to create a beautifully festive spread.

  • Creamy Butter: A generous spread of creamy butter enhances the moistness of the bread, elevating each bite to pure bliss.

  • Sweetened Cream Cheese: Whipped with a touch of honey, this rich spread complements the sweetness of the bread while adding a smooth, tangy richness.

  • Fresh Fruit Salad: A colorful medley of seasonal fruits provides a fresh contrast to the richness of the bread and adds vibrant color to your table.

  • Festive Hot Cocoa: Rich and chocolatey, a cup of homemade hot cocoa pairs wonderfully, warming both hearts and hands during chilly holiday mornings.

  • Yogurt Parfait: Layer creamy yogurt with granola and festive dried fruits for a delightful breakfast or dessert option that balances sweetness with tang.

  • Holiday Spritz Cookies: These lovely, buttery cookies echo the festive spirit of the bread, creating a joyous dessert platter that’s sure to impress.

  • Chocolate-Covered Strawberries: The sweet and slightly tart strawberries dipped in chocolate make an elegant dessert that pairs beautifully with the vibrant sprinkles of the bread.

  • Sparkling Cider: Toast the season with a fizzy glass of sparkling cider—its fruity notes harmonize beautifully, making any meal feel special.

Expert Tips for Christmas Sprinkle Buttermilk Bread

Measure Flour Correctly: Use the spoon-and-level method to avoid dense bread; too much flour can ruin your Christmas Sprinkle Buttermilk Bread’s texture.

Don’t Overmix: Be gentle when combining wet and dry ingredients to keep your bread tender and fluffy; overmixing can lead to a tough loaf.

Check Oven Temperature: Ovens can vary; use an oven thermometer to ensure proper baking temps, ensuring your bread cooks evenly.

Cool Completely: Allow the bread to cool completely on a wire rack before slicing to maintain its moist texture and prevent crumbling.

Experiment with Sprinkles: While jimmies are ideal for colorful fun, try using other decorations like edible glitter for a unique festive look!

Storage Tips for Christmas Sprinkle Buttermilk Bread

Room Temperature: Store the bread in an airtight container at room temperature for up to 3 days to keep it moist and fresh without drying out.

Fridge: For extended freshness, wrap tightly in plastic wrap and refrigerate for up to 1 week. Make sure it’s well-sealed to prevent it from absorbing fridge odors.

Freezer: Freeze the bread for up to 2 months by wrapping it securely in plastic wrap, then placing it in a freezer-safe bag or container for added protection against freezer burn.

Reheating: When ready to enjoy, thaw the bread in the fridge overnight and warm slices in the microwave for about 10-15 seconds or toast them for a lovely warm treat.

Christmas Sprinkle Buttermilk Bread Variations

Feel free to mix things up and make this festive loaf uniquely yours with some delightful twists!

  • Dairy-Free: Substitute buttermilk with almond milk mixed with 1 tablespoon of vinegar for a creamy alternative.
  • Nutty Flavor: Incorporate ½ cup of chopped walnuts or pecans into the batter for a delightful crunch. Just be careful not to overmix to keep that soft crumb!
  • Spice It Up: Add 1 teaspoon of cinnamon or nutmeg to the dry ingredients for a warmly spiced flavor. This will infuse your kitchen with cozy holiday scents.
  • Gluten-Free: Use a 1:1 gluten-free flour blend in place of all-purpose flour to cater to those avoiding gluten. This makes the bread accessible while keeping it wonderfully tender.
  • Fruity Twist: Fold in ½ cup of dried cranberries or cherries for extra sweetness and a pop of color. The tangy notes meld beautifully with the bread’s sweetness.
  • Mini Loaves: Bake the batter in mini loaf pans for easy gifting or sharing; adjust your baking time to around 30 minutes for perfect little treats.
  • Tropical Flare: Swap vanilla extract for coconut extract to whisk your taste buds away to an island paradise.
  • Zesty Lemon: Add the zest of one lemon to the batter for a bright citrus note that pairs beautifully with the festive sprinkles.

With these ideas, your Christmas Sprinkle Buttermilk Bread can shine in many different ways! If you’re also in the mood for other delightful baked goods, be sure to try my Homemade Bread Sunflower or indulge in some warm Soft Milk Bread that everyone will love!

Christmas Sprinkle Buttermilk Bread Recipe FAQs

What kind of sprinkles should I use for this bread?
Absolutely! For the Christmas Sprinkle Buttermilk Bread, I recommend using jimmies-style sprinkles, as they hold their shape and don’t bleed colors. Avoid using nonpareil sprinkles because they can create a muddy appearance in the batter.

How should I store the finished bread?
You can store the bread in an airtight container at room temperature for up to 3 days to keep it moist. For longer storage, wrap it tightly in plastic wrap and refrigerate for up to 1 week. It’s best to make sure it’s well-sealed to prevent any absorption of other fridge odors.

Can I freeze the Christmas Sprinkle Buttermilk Bread?
Yes, you can! To freeze your bread, start by wrapping it securely in plastic wrap, then place it in a freezer-safe bag or container to prevent freezer burn. It can be frozen for up to 2 months. When you’re ready to enjoy it, thaw it in the fridge overnight before reheating or serving.

How do I know if the bread is done baking?
To check for doneness, insert a toothpick into the center of the loaf; it should come out clean or with a few moist crumbs. The baking time typically ranges from 45 to 55 minutes, but be sure to keep an eye on it to avoid overbaking for that delightful moisture.

Can I substitute any ingredients for dietary restrictions?
Very! If you’re looking for a dairy-free version, you can replace the buttermilk with plant-based milk mixed with 1 tablespoon of lemon juice. For a vegan option, substitute the eggs with ½ cup of unsweetened applesauce. Plus, a gluten-free flour blend works perfectly in place of all-purpose flour!

What can I do if my bread rises too much and then collapses?
This can happen for a few reasons, but don’t worry! If your Christmas Sprinkle Buttermilk Bread rises too much, it may be due to overmixing the batter or using too much baking soda/powder. To avoid this, ensure that you’re gently mixing the ingredients until just combined, and double-check your leavening agents for freshness!

Christmas Sprinkle Buttermilk Bread

Irresistible Christmas Sprinkle Buttermilk Bread Recipe

This festive Christmas Sprinkle Buttermilk Bread adds a sprinkle of cheer to your holiday gatherings.
Prep Time 15 minutes
Cook Time 55 minutes
Cooling Time 15 minutes
Total Time 1 hour 25 minutes
Servings: 12 slices
Course: Breakfast
Cuisine: American
Calories: 180

Ingredients
  

For the Bread
  • 1 ¾ cups all-purpose flour Provides structure; a gluten-free flour blend can be used here.
  • 1 teaspoon baking powder A leavening agent; ensure it's fresh for the best rise.
  • ½ teaspoon baking soda Works with buttermilk for that perfect lift.
  • ½ teaspoon salt Enhances the flavors; omitting it can dull the taste.
  • ½ cup unsalted butter melted and slightly cooled; adds moisture and richness, substitute with coconut oil for a dairy-free option.
  • 1 cup granulated sugar Sweetness factor; brown sugar can offer a deeper flavor.
  • 2 large eggs Acts as a binding agent; replace with ½ cup unsweetened applesauce for a vegan alternative.
  • 1 cup buttermilk Provides moisture and flavor; substitute with milk and 1 tablespoon of lemon juice.
  • 2 teaspoons vanilla extract A flavor enhancer; almond extract can be used for a delightful twist.
  • ½ cup red and green sprinkles Adds a festive flair; avoid nonpareil sprinkles as they may bleed colors.
Optional Topping
  • 1 tablespoon coarse sugar Sprinkles a crunchy texture on top.
  • Additional sprinkles for garnish Elevates visual appeal.

Equipment

  • 9x5-inch loaf pan
  • mixing bowls
  • whisk
  • spatula

Method
 

Step-by-Step Instructions
  1. Preheat your oven to 350°F (175°C) and prepare a 9x5-inch loaf pan by greasing it with butter or lining it with parchment paper.
  2. In a medium mixing bowl, whisk together all-purpose flour, baking powder, baking soda, and salt.
  3. In a large bowl, whisk melted butter and granulated sugar until smooth, then add eggs one at a time, followed by vanilla extract and buttermilk.
  4. Gradually add the dry ingredients to the wet mixture and fold gently until just combined.
  5. Gently fold in red and green sprinkles.
  6. Pour the batter into the prepared loaf pan and sprinkle with coarse sugar and additional sprinkles if desired.
  7. Bake for 45–55 minutes, checking for doneness with a toothpick.
  8. Cool in the pan for 10–15 minutes before transferring to a wire rack to cool completely.

Notes

Measure flour correctly to avoid dense bread and be gentle when mixing to keep the bread tender.

Homemade Kingston Biscuits: Sweet Coconut Oat Delights

As the sun sets, the scent of freshly baked cookies wafts through my kitchen, transporting me to the golden shores of Australia with every whiff. Today, I’m sharing my cherished recipe for Homemade Kingston Biscuits—delicious oat and coconut cookies filled with smooth chocolate that are truly a crowd-pleaser. These delightful treats take just 30 minutes to whip up, making them perfect for those busy days when you crave something sweet yet homemade. With their crunchy exterior and slightly chewy center, these biscuits offer a nostalgic taste of childhood, whether enjoyed with a steaming cup of tea or gifted to a friend. Ready to take a delicious bite of Aussie tradition? Let’s dive into making these scrumptious Kingston Biscuits together!

Why Make Homemade Kingston Biscuits?

Quick and Easy: Baking these Kingston biscuits is a breeze! With just 30 minutes from start to finish, you’ll have a scrumptious treat ready to enjoy or share.

Irresistible Flavor: The harmonious blend of oats, coconut, and smooth chocolate will transport your taste buds straight to Australia.

Perfect for Any Occasion: Whether it’s a cozy afternoon snack, a party treat, or a heartfelt gift, these biscuits work wonderfully in any setting.

Nostalgic Crunch: Experience the delightful contrast of a crunchy exterior and a chewy center, reminiscent of childhood memories.

Customizable Options: Feel free to experiment! Swap chocolate fillings or add nuts to create your unique version of these classic cookies.

If you’re also looking for more homemade treats, check out my Homemade Chicken Pot or whip up a batch of Grandmas Homemade Bake for a delightful experience!

Homemade Kingston Biscuits Ingredients

• Perfect for your tasty creations!

For the Biscuit Dough

  • Plain Flour (All-Purpose Flour) – This gives structure to the biscuits; swap with spelt flour for a nuttier taste.
  • White Granulated Sugar – Adds sweetness and golden color; caster sugar can be used for a finer texture.
  • Salt – Essential for enhancing overall flavor.
  • Quick Oats – Contributes to the chewy texture; roll oats can be pulsed for a finer consistency.
  • Desiccated Coconut – A must for authentic flavor; avoid shredded coconut for an even texture.
  • Golden Syrup – Acts as a sweet binder; can substitute with honey for a different taste.
  • Unsalted Butter – Provides rich flavor; margarine can work, but the taste may differ.
  • Baking Soda (Bicarbonate of Soda) – Important for slight rising during baking.
  • Water – Helps activate the baking soda.

For the Chocolate Filling

  • Milk Chocolate – Used to sandwich the biscuits together, offering a creamy sweetness; dark chocolate can be used for a more intense flavor.

Feel free to dive into making these Homemade Kingston Biscuits that fill your home with warmth and sweet cravings!

Step‑by‑Step Instructions for Homemade Kingston Biscuits

Step 1: Preheat and Prepare
Preheat your oven to 180°C (350°F) and line two baking sheets with parchment paper. This step is crucial to ensure the Homemade Kingston Biscuits bake evenly and don’t stick. While the oven is heating up, get your mixing bowls and measuring cups ready for the dough.

Step 2: Mix Dry Ingredients
In a large mixing bowl, combine the plain flour, white granulated sugar, desiccated coconut, quick oats, and salt. Stir the ingredients together until they are fully mixed, resulting in a uniform dry mixture. Pay attention to the textures as you mix; this is the base for your delicious Kingston biscuits.

Step 3: Create the Wet Mixture
In a saucepan over low heat, melt the unsalted butter together with golden syrup and water. Stir gently until the butter is fully melted, avoiding any boiling. Then, add baking soda to the warm mixture, causing it to foam, which will boost the biscuits’ texture. This exciting reaction is essential for your cookies!

Step 4: Combine Mixtures
Pour the warm wet mixture into the bowl of dry ingredients, mixing them together thoroughly with a spatula or wooden spoon. Make sure the dough comes together smoothly without dry patches. The dough should be slightly sticky; this is a good indication that your Homemade Kingston Biscuits will be chewy and flavorful.

Step 5: Rest the Dough
Allow the biscuit dough to rest for about 5-10 minutes. This waiting period lets the oats absorb some moisture, which enhances the texture of your Kingston biscuits. While the dough rests, you can enjoy a quick clean-up or prepare your chocolate filling.

Step 6: Shape the Dough
Using a tablespoon, scoop portions of dough and roll them into balls. Place them onto the prepared baking sheets, spacing them about 2 inches apart to allow for spreading. This step is essential to ensure that each cookie has enough room to rise and bake evenly without touching.

Step 7: Flatten and Bake
Gently flatten each dough ball with your hand; this creates a nice shape for your Homemade Kingston Biscuits. Bake in the preheated oven for 12-14 minutes until the biscuits are golden brown around the edges. Keep an eye on them as they bake, making sure they don’t over-bake and become too dark.

Step 8: Cool the Biscuits
Once the biscuits are done, remove them from the oven and let them cool on the baking sheets for about 5 minutes. After cooling slightly, transfer them to a wire rack to cool completely. This step is vital to allow their texture to set; they’ll be perfect for sandwiching with chocolate later.

Step 9: Assemble with Chocolate
Once the biscuits are completely cool, melt your milk chocolate. Spread a generous layer of melted chocolate on the bottom of one biscuit and sandwich it with another biscuit. Repeat this process until all of your Homemade Kingston Biscuits are assembled, creating delightful treats filled with chocolate goodness.

Homemade Kingston Biscuits Variations

Feel free to add your personal touch to these delicious Kingston biscuits, making them your own with just a few simple tweaks!

  • Nuts Galore: Substitute desiccated coconut with finely chopped nuts like almonds or pecans for a crunchy twist. The new texture will elevate each bite!
  • Chocolate Swap: Switch milk chocolate for dark chocolate or even a layer of peanut butter for different flavor profiles. Imagine the rich combination of chocolate and nutty goodness!
  • Gluten-Free Delight: Use gluten-free all-purpose flour and ensure your oats are certified gluten-free for a delightful version everyone can enjoy. So tasty, nobody will know the difference!
  • Spiced Up: Add a pinch of cinnamon or nutmeg to the dry ingredients for an extra layer of warmth and flavor. The aromas will fill your kitchen with coziness.
  • Almond Joy: Incorporate a dash of almond extract into the wet ingredients for a hint of nutty flavor that beautifully complements the coconut. It’s a delightful variation!
  • Fruit Infusion: Drop some dried fruit like cranberries or apricots into the dough to add a sweet and chewy surprise in every biscuit. These fruity bursts create a delightful contrast.
  • Herb Blend: Consider adding a touch of fresh mint or basil for a unique twist that pairs surprisingly well with chocolate. It’s a refreshing surprise that will tantalize your taste buds!

For more sweet homemade adventures, don’t forget to try out my Homemade Sweet Orange or whip up a batch of Hearty Spaghetti Homemade for a satisfying meal after those biscuits!

Enjoy experimenting with these variations as you create your perfect Homemade Kingston Biscuits!

What to Serve with Homemade Kingston Biscuits?

As you savor the sweet and crunchy delights of Kingston biscuits, imagine pairing them with these wonderful accompaniments for a complete experience.

  • Freshly Brewed Tea: The warmth and subtle flavors of tea balance perfectly with the sweet biscuits, creating a cozy afternoon treat. Imagine sipping your favorite brew while enjoying the smooth chocolate filling.

  • Rich Coffee: A strong cup of coffee complements the sweet, buttery biscuits beautifully, making for an invigorating combination that energizes your day. This pairing is perfect for those moments when you need a coffee break or a pick-me-up.

  • Fruit Salad: A refreshing mix of fresh fruits adds a light, vibrant contrast to the richness of the Kingston biscuits. The fruity textures create a delightful balance, brightening up any snack time table.

  • Vanilla Ice Cream: Indulge in the creamy, cool sensation of vanilla ice cream alongside your biscuits. The contrast between temperatures and flavors enhances every bite, inviting you to experience blissful decadence.

  • Chocolate Dipping Sauce: Elevate your biscuits by drizzling or dipping them in a luscious chocolate sauce, amplifying their chocolate filling for an utterly decadent treat. This is a delightful option to excite guests during gatherings.

  • Sparkling Water with Lime: For a refreshing beverage, the zesty notes of lime in sparkling water cleanse the palate and pair wonderfully with the sweet flavors of your biscuits, making it a light, enjoyable accompaniment.

Pairing these delicious options with your Homemade Kingston Biscuits transforms your snack into an unforgettable moment!

Make Ahead Options

These Homemade Kingston Biscuits are perfect for meal prep enthusiasts looking to save time during busy weeks! You can prepare the dough up to 24 hours in advance by following steps 1 through 5 and then refrigerating it in an airtight container. Additionally, the baked biscuits can be stored in an airtight container at room temperature for up to 5 days, allowing you to enjoy them throughout the week. When you’re ready to indulge, simply sandwich the cooled biscuits with melted chocolate filling (steps 8 and 9), and you’ll have a delightful treat that’s just as delicious as if you made them fresh!

How to Store and Freeze Homemade Kingston Biscuits

Room Temperature: Keep your biscuits in an airtight container at room temperature for up to 5-6 days to maintain their crunchy texture and fresh flavor.

Fridge: If stored in the fridge, Homemade Kingston Biscuits can last up to 1 week, but they may lose some of their delightful crunch.

Freezer: For longer storage, freeze the assembled biscuits in an airtight container or freezer bag for up to 2-3 months. To enjoy, simply thaw at room temperature.

Reheating: To refresh the biscuits, briefly microwave them for 10-15 seconds or warm them in the oven at 160°C (320°F) for a few minutes until they soften.

Expert Tips for Homemade Kingston Biscuits

  • Butter Temperature: Make sure your butter is just melted, not boiling, to prevent spreading during baking.

  • Chill Dough Balls: If your biscuits spread too much, refrigerate the dough balls for 15 minutes before baking.

  • Measure Accurately: Use a kitchen scale for precise measurements, particularly for flour and sugar, ensuring consistent results in your Homemade Kingston Biscuits.

  • Watch the Bake Time: Ovens vary, so keep an eye on the biscuits; look for a deep golden color to indicate they’re perfectly baked.

  • Use Quality Ingredients: For the best flavor, opt for fresh desiccated coconut and high-quality chocolate to truly elevate your Kingston biscuits.

Homemade Kingston Biscuits Recipe FAQs

What type of oats should I use for Kingston biscuits?
Absolutely use quick oats! They give the biscuits that chewy texture we all love. If you only have rolled oats, you can pulse them in a food processor to achieve a finer consistency, which will mimic the texture of quick oats.

How long can I store homemade Kingston biscuits?
Store your biscuits in an airtight container at room temperature for up to 5-6 days. They can stay fresh for a little longer in the fridge for about a week, but this might affect their delightful crunch.

Can I freeze homemade Kingston biscuits?
Yes, you can! To freeze, place the assembled biscuits in an airtight container or freezer bag. They’ll stay good for up to 2-3 months. When you’re ready to enjoy, simply thaw them at room temperature.

What should I do if my biscuits spread too much while baking?
Very common! If you notice this happening, try refrigerating your dough balls for 15 minutes before baking. This helps them hold their shape better. Also, make sure your butter mixture is just melted and not boiling to avoid excess spreading.

Are there any dietary considerations for Kingston biscuits?
Absolutely! For a gluten-free version, simply use certified gluten-free all-purpose flour and ensure your oats are also gluten-free. Also, if you’re concerned about allergies, replace the milk chocolate with dairy-free chocolate or peanut butter for the filling!

How do I know when my Kingston biscuits are done baking?
Look for a deep golden color around the edges! The biscuits should be golden and slightly firm to the touch but still have a little chewiness in the center. Keep an eye on them as oven temperatures can vary.

Homemade Kingston Biscuits

Homemade Kingston Biscuits: Sweet Coconut Oat Delights

Try these Homemade Kingston Biscuits—a delightful blend of oats, coconut, and chocolate filling that is perfect for any occasion.
Prep Time 15 minutes
Cook Time 12 minutes
Resting Time 10 minutes
Total Time 37 minutes
Servings: 12 biscuits
Course: Dessert
Cuisine: Australian
Calories: 150

Ingredients
  

Biscuit Dough
  • 1 cup Plain Flour (All-Purpose Flour) or spelt flour for a nuttier taste
  • 1 cup White Granulated Sugar or caster sugar for a finer texture
  • 1 teaspoon Salt essential for flavor enhancement
  • 1 cup Quick Oats or roll oats pulsed for a finer consistency
  • 1 cup Desiccated Coconut avoid shredded coconut for an even texture
  • 0.5 cup Golden Syrup can substitute with honey
  • 0.5 cup Unsalted Butter or margarine but taste may differ
  • 1 teaspoon Baking Soda (Bicarbonate of Soda) for slight rising during baking
  • 2 tablespoons Water to activate the baking soda
Chocolate Filling
  • 200 grams Milk Chocolate can use dark chocolate for a more intense flavor

Equipment

  • oven
  • mixing bowls
  • Measuring cups
  • Spatula or wooden spoon
  • Baking sheets
  • parchment paper
  • Saucepan

Method
 

Preparation Steps
  1. Preheat your oven to 180°C (350°F) and line two baking sheets with parchment paper.
  2. In a large mixing bowl, combine the plain flour, white granulated sugar, desiccated coconut, quick oats, and salt.
  3. In a saucepan over low heat, melt the unsalted butter together with golden syrup and water. Stir gently until the butter is fully melted and then add baking soda.
  4. Pour the warm wet mixture into the bowl of dry ingredients and mix them together thoroughly.
  5. Allow the biscuit dough to rest for about 5-10 minutes.
  6. Using a tablespoon, scoop portions of dough and roll them into balls, placing them onto the prepared baking sheets.
  7. Gently flatten each dough ball with your hand and bake in the preheated oven for 12-14 minutes.
  8. Once the biscuits are done, let them cool on the baking sheets for about 5 minutes before transferring them to a wire rack.
  9. Once the biscuits are completely cool, melt your milk chocolate. Spread melted chocolate on the bottom of one biscuit and sandwich it with another.

Notes

Store biscuits in an airtight container for up to 5-6 days at room temperature.

Brown Butter Dulce de Leche Rice Krispie Treats to Satisfy Cravings

The sweet smell of nostalgia fills the air as I recreate a childhood favorite with a twist—Brown Butter Dulce de Leche Rice Krispie Treats. These scrumptious no-bake delights bring together the rich, nutty flavor of browned butter and the creamy sweetness of dulce de leche, enveloped in the classic crunch of Rice Krispies. What I love most about this dessert is that it comes together in just 10 minutes, making it perfect for those busy afternoons when you crave something special without spending hours in the kitchen. Plus, it’s a crowd-pleaser—trust me, everyone will be sneaking seconds! Curious to discover how to whip up these indulgent treats with effortless flair? Let’s dive into the recipe!

Why Are These Treats So Irresistible?

Decadent Indulgence: The rich combination of brown butter and dulce de leche creates a flavor explosion that is nothing short of heavenly.

Quick & Easy: You’ll love that these treats come together in just 10 minutes—perfect for last-minute gatherings or sweet cravings!

Crowd-Pleasing Delight: Whether you’re hosting friends or enjoying a cozy night in, these Brown Butter Dulce de Leche Rice Krispie Treats are guaranteed to wow everyone, just like my Garlic Butter French Fries did!

Flexibly Delicious: Try incorporating different ingredients, like cinnamon sugar Rice Krispies or even layer them with peanut butter for a fun twist!

Nostalgic Crunch: This recipe combines childhood favorites with a gourmet touch, making it a memorable treat for all ages.

Brown Butter Dulce de Leche Rice Krispie Treats Ingredients

For the Base

  • Butter – Use unsalted for a better control of salt levels in the recipe.
  • Mini Marshmallows – Essential for the chewy, delightful texture; mix standard and mini for layered fun!
  • Rice Krispies Cereal – Provides that perfect crunch; consider using cinnamon sugar flavored Rice Krispies for a twist.
  • Sea Salt – Just a pinch will enhance the overall sweetness, balancing the flavors beautifully.

For the Flavor

  • Vanilla Extract – Enhances the aroma and sweetness; don’t skip this for the best flavor.
  • Dulce de Leche – Adds a creamy caramel essence that makes these treats irresistible; homemade caramel sauce works too if preferred.

These rich and crunchy Brown Butter Dulce de Leche Rice Krispie Treats are sure to satisfy your dessert cravings!

Step‑by‑Step Instructions for Brown Butter Dulce de Leche Rice Krispie Treats

Step 1: Prep the Pan
Start by preparing your workspace—spray a 9×9-inch baking pan with non-stick spray, ensuring every corner is covered. Then, line the pan with parchment paper, allowing some overhang on the edges for easy removal later. This step is vital for a smooth release of your Brown Butter Dulce de Leche Rice Krispie Treats.

Step 2: Brown the Butter
In a medium pot over medium heat, add 5 tablespoons of unsalted butter, stirring constantly with a wooden spoon. Keep a close eye on it as the butter melts, transforms into a golden hue, and develops a nutty aroma, which should take about 4-5 minutes. Once the butter is browned but not burnt, remove it from the heat to prevent further cooking.

Step 3: Melt Marshmallows
Carefully stir in 8 cups of mini marshmallows and a pinch of sea salt into the browned butter while it’s still warm; the heat will help them melt. Using your wooden spoon, mix until the marshmallows are completely melted and the mixture is smooth, which will take about 2-3 minutes. This marshmallow mixture is the heart of your Brown Butter Dulce de Leche Rice Krispie Treats.

Step 4: Combine & Add Vanilla
Once your marshmallow mixture is smooth, add 1/4 teaspoon of pure vanilla extract to enhance the flavors. Stir thoroughly to ensure the vanilla is evenly distributed. This extra step not only adds aroma but also elevates the overall sweetness of your treats!

Step 5: Mix with Cereal
In a large mixing bowl, pour in 6 cups of Rice Krispies cereal. Then, slowly pour your melted marshmallow mixture over the cereal. Using a spatula or your hands (lightly greased), gently fold the cereal and marshmallow together until every piece is coated. This combination creates the crunchy base for your treats.

Step 6: Layer the Treats
Transfer half of the Rice Krispie mixture into the prepared pan, pressing it down evenly with your hands. Next, spread half a can of creamy dulce de leche over the layer, ensuring it’s well-distributed. Finally, top with the remaining Rice Krispie mixture, pressing down lightly to create a cohesive treat without squishing!

Step 7: Cool & Set
Allow the Brown Butter Dulce de Leche Rice Krispie Treats to cool at room temperature for at least 30 minutes, or until set completely. You’ll know they are ready when they hold their shape and are no longer warm to the touch. Once cooled, use the parchment paper overhang to lift them out of the pan, making it simple to slice them into squares.

What to Serve with Brown Butter Dulce de Leche Rice Krispie Treats

Imagine a cozy gathering where sweet and savory delights dance on your taste buds, perfectly enhancing your dessert experience.

  • Vanilla Ice Cream: The creamy, cool contrast of vanilla ice cream is heavenly with the warm, gooey treats, creating a delightful melt-in-your-mouth experience.
  • Dulce de Leche Sauce: Drizzling extra dulce de leche on top deepens the flavor profile, making every bite even more indulgent and luscious.
  • Fresh Berries: Juicy strawberries or raspberries add a refreshing tartness that balances the sweetness of the treats and brings a pop of color to your plate.
  • Coffee or Espresso: A rich cup of coffee complements the sweetness perfectly, enhancing the nutty flavors of browned butter and giving you an energizing pick-me-up.
  • Whipped Cream: Light, airy whipped cream adds a decadent touch while cutting through the richness of the treats, providing a delightful contrast.
  • Nuts: Chopped pecans or hazelnuts add a crunch that echoes the Rice Krispies while introducing a nutty depth that elevates the dessert experience.
  • Chocolate Sauce: A drizzle of chocolate sauce adds an extra layer of sweetness and decadence, making these treats feel even more indulgent.
  • Chai Latte: This warm, spiced drink beautifully complements the caramel flavors of the treats, enhancing the overall experience with cozy notes.
  • Milk: A classic pairing, a tall glass of cold milk is the perfect refresher that balances the sweetness of the treats and brings a nostalgic touch.

Expert Tips for Brown Butter Dulce de Leche Rice Krispie Treats

Watch the Butter: Pay close attention while browning the butter to prevent it from burning. The perfect brown butter should have a nutty aroma but not be dark or bitter.

Grease for Ease: Use a buttered spoon or spatula to press down the mixture into the pan to avoid sticking. This will also help achieve a uniform texture in your treats.

Layer Wisely: When adding the dulce de leche, ensure it’s evenly spread to enhance every bite of your Brown Butter Dulce de Leche Rice Krispie Treats.

Marshmallow Melting: Remove the pot from heat before adding marshmallows. This prevents them from becoming too hot and sticky, ensuring a smooth, creamy mixture.

Flavor Adjustments: If using cinnamon sugar Rice Krispies, taste the mixture before adding any extra sugar; adjust as needed to balance sweetness.

Storage Tips: Store treats in an airtight container to keep them fresh for up to a week; they may become chewier over time.

How to Store and Freeze Brown Butter Dulce de Leche Rice Krispie Treats

Room Temperature: Store these delightful treats in an airtight container at room temperature for up to 4-5 days for optimal freshness.

Fridge: If you prefer a firmer texture, place the treats in an airtight container in the refrigerator, where they can last up to a week while maintaining their deliciousness.

Freezer: For longer storage, wrap individual squares tightly in plastic wrap and store them in a freezer-safe container. They’ll keep well for up to 3 months.

Reheating: To enjoy them after freezing, simply thaw at room temperature or warm briefly in the microwave for a soft, gooey treat that tastes freshly made.

Make Ahead Options

These Brown Butter Dulce de Leche Rice Krispie Treats are a fantastic choice for meal prep, saving you precious time on busy days! You can prepare the Rice Krispie mixture and layer it with dulce de leche up to 24 hours in advance. Simply follow steps 1 through 6 of the instructions, then cover your pan tightly with plastic wrap to keep it fresh. This helps maintain the chewy texture and prevent any hardening. When you’re ready to serve, let the treats sit at room temperature for a few minutes before slicing, ensuring they’re just as delicious as the day you made them. Enjoy the luxury of having a decadent dessert at your fingertips!

Brown Butter Dulce de Leche Rice Krispie Treats Variations

Customize your treats for a delightful twist that excites your taste buds and sparks creativity!

  • Cinnamon Sugar Rice Krispies:
    Substitute traditional Rice Krispies for cinnamon sugar flavored ones to elevate sweetness and add warmth. This twist gives every bite a cozy, spiced kick!

  • Nutty Lotus Delight:
    Incorporate chopped nuts, like pecans or almonds, into the mixture for a crunchy texture. This makes your treats not only tasty but also adds a special nutty flavor to the overall experience.

  • Chocolate Layered:
    Drizzle melted chocolate over the top layer or mix chocolate chips into the marshmallow mixture. The combination of chocolate and dulce de leche creates an irresistible dessert that no one can resist!

  • Nutella Swirl:
    Replace dulce de leche with Nutella for a luscious hazelnut twist! Its creamy, chocolatey goodness blends perfectly with the crunchy base, making it a chocolate lover’s dream.

  • Peanut Butter Bliss:
    Swap out dulce de leche with creamy peanut butter for a salty-sweet treat. The combination of rice cereal and peanut butter makes for an unforgettable flavor fusion that’s perfect for snacking.

  • Mini S’mores Treats:
    Add mini marshmallows, crushed graham crackers, and a touch of cocoa powder. Layer the mixture for a nostalgic summer campfire twist that’s simply delightful!

  • Spicy Kick:
    For an adventurous flair, sprinkle cayenne pepper or chili powder into the marshmallow mixture before combining with the Rice Krispies. This adds heat that contrasts beautifully with the sweetness of dulce de leche, creating a unique taste experience!

  • Layered Cream Treats:
    Try layering the Rice Krispies with a smooth cream cheese or vanilla frosting in addition to the dulce de leche. This not only enhances the creaminess but brings an unexpected richness to each bite.

Let your creativity flow as you try these variations, and don’t forget to whip up a side of my Sizzling Rice Wrapped Hotdogs to complete your dessert spread!

Brown Butter Dulce de Leche Rice Krispie Treats Recipe FAQs

What is the best way to select and ripen ingredients for this recipe?
When choosing butter for your Brown Butter Dulce de Leche Rice Krispie Treats, opt for unsalted butter for better control over the sweetness. Make sure your mini marshmallows are fresh; they should be soft and pliable. If using dulce de leche from a can, look for a brand with a smooth texture and rich flavor. Avoid any that appear grainy or overly thick for the best results.

How should I store my Brown Butter Dulce de Leche Rice Krispie Treats?
To keep your treats fresh, store them in an airtight container at room temperature for up to 4-5 days. If you prefer a firmer bite, you can refrigerate them in the same way for about a week. Just make sure to place parchment paper between layers if stacking, to prevent sticking!

Can I freeze Brown Butter Dulce de Leche Rice Krispie Treats?
Absolutely! For freezing, wrap individual squares tightly in plastic wrap and place them in a freezer-safe container. They can be frozen for up to 3 months. When you’re ready to enjoy them, let them thaw at room temperature or warm them in the microwave for a delightful gooey texture that feels freshly made.

What should I do if my Rice Krispie mixture is too sticky?
If you find your Rice Krispie mixture too sticky, it may be helpful to lightly grease your hands or utensils when mixing and pressing the mixture into the pan. Additionally, ensure that the marshmallows are fully melted and mixed well with the brownie butter before adding the Rice Krispies. If the mixture still seems too sticky, consider adding an extra cup of Rice Krispies to help balance the texture.

Are there any dietary considerations for this recipe?
Yes! If you’re making these Brown Butter Dulce de Leche Rice Krispie Treats for someone with dietary restrictions, consider using gluten-free Rice Krispies and ensure your marshmallows are free from any allergens (like gelatin for those who might be vegetarian). If someone has a dairy allergy, you can experiment with dairy-free alternatives for butter and dulce de leche.

Can I modify the ingredients for different flavors?
Yes, definitely! You can substitute cinnamon sugar Rice Krispies for the original ones for an extra flavor boost. For a different twist, try layering with peanut butter or Nutella instead of dulce de leche. Just be mindful of the ratios to maintain the treats’ structure and texture.

Brown Butter Dulce de Leche Rice Krispie Treats

Brown Butter Dulce de Leche Rice Krispie Treats to Satisfy Cravings

Delightful Brown Butter Dulce de Leche Rice Krispie Treats combining rich flavors in a quick no-bake dessert.
Prep Time 10 minutes
Cooling Time 30 minutes
Total Time 40 minutes
Servings: 12 squares
Course: Dessert
Cuisine: American
Calories: 180

Ingredients
  

For the Base
  • 5 tablespoons unsalted butter Use unsalted for better control of salt levels
  • 8 cups mini marshmallows Essential for the chewy texture
  • 6 cups Rice Krispies cereal Consider using cinnamon sugar flavored for a twist
  • 1 pinch sea salt Enhances overall sweetness
For the Flavor
  • 1/4 teaspoon pure vanilla extract Enhances aroma and sweetness
  • 1 can creamy dulce de leche Adds creamy caramel essence

Equipment

  • 9x9-inch baking pan
  • medium pot
  • spatula
  • Wooden Spoon

Method
 

Step-by-Step Instructions
  1. Prep the Pan: Spray a 9x9-inch baking pan with non-stick spray and line with parchment paper.
  2. Brown the Butter: Melt 5 tablespoons of unsalted butter in a medium pot over medium heat for 4-5 minutes until golden.
  3. Melt Marshmallows: Stir in 8 cups of mini marshmallows and a pinch of sea salt until fully melted.
  4. Combine & Add Vanilla: Add 1/4 teaspoon of pure vanilla extract to the warm marshmallow mixture.
  5. Mix with Cereal: In a large bowl, mix 6 cups of Rice Krispies with the melted marshmallow mixture.
  6. Layer the Treats: Transfer half of the Rice Krispie mixture into the pan, layer with dulce de leche, and top with remaining mixture.
  7. Cool & Set: Allow to cool for at least 30 minutes before slicing into squares.

Notes

Store in an airtight container for up to a week. Can be frozen for up to 3 months.

Irresistibly Healthy Raw Cranberry Nut Energy Bars You’ll Love

Picture this: the sun peeks through the window as I unwrap a chewy Raw Cranberry Nut Energy Bar, its bright red cranberries glistening in the light. I can’t help but smile knowing I’ve created a snack that’s not only deliciously satisfying but also incredibly good for me. These irresistibly healthy no-bake bars are the perfect blend of tart cranberries, crunchy almonds, and naturally sweet medjool dates, making them a guilt-free indulgence for busy mornings or a post-workout boost. With easy prep and wholesome ingredients, it’s no wonder these energy bars have become a staple in my kitchen. They come together in a flash and are both vegan and gluten-free, making them a versatile choice for anyone looking to make healthier snacking choices. Ready to add this nutritious delight to your routine? Let’s dive into the recipe!

Why You’ll Crave These Energy Bars?

Simplicity in Preparation: With just a few minutes of blending and pressing, you’re on your way to delicious homemade snacks.

Nutritious and Wholesome: Packed with the goodness of nuts and fruits, these bars provide a perfect energy boost without any refined sugars.

Versatile for Everyone: Whether you’re vegan, gluten-free, or simply looking for a healthy treat, these bars cater to all dietary needs.

Perfect for On-the-Go: Ideal for busy schedules, they make excellent breakfast options or post-workout fuel—grab one and go!

Crowd-Pleasing Flavor: The combination of tart cranberries and crunchy nuts offers a delightful taste that your family and friends will adore. Add a bit of variety by checking out our Energizing Nut Seed for another guilt-free treat!

Irresistibly Healthy Raw Cranberry Nut Ingredients

For the Base
150g Medjool Dates – Provides natural sweetness and acts as a binder; for best results, choose fresh, sticky dates.
75g Dried Cranberries – Adds a tart flavor and chewy texture; consider using unsweetened varieties for lower sugar options.
75g Roasted Almonds – Contributes crunch and nutty flavor; feel free to substitute with other nuts or seeds for a twist.
75g Roasted Cashews – Adds creaminess and sweetness; swap for sunflower or pumpkin seeds to make it nut-free.
50g Desiccated Coconut – Gives the bars texture and moisture; you can use coconut flakes if you prefer.

For Binding
1 tablespoon Coconut Oil (melted) – Helps bind the ingredients together and adds richness; almond butter can also be used for a different flavor profile.
Pinch of Sea Salt – Enhances flavor and balances sweetness, bringing all the ingredients together beautifully.

Now you’re all set with the ingredients for your irresistibly healthy raw cranberry nut energy bars!

Step‑by‑Step Instructions for Irresistibly Healthy Raw Cranberry Nut Energy Bars

Step 1: Prep the Tin
Begin by lining an 8×8 inch baking tin with parchment paper, ensuring it extends over the edges for easy removal later. This step is crucial to prevent sticking, allowing your irresistibly healthy raw cranberry nut energy bars to come out neatly once set.

Step 2: Blend the Base Ingredients
In a food processor, combine the freshly pitted medjool dates, dried cranberries, roasted almonds, roasted cashews, and desiccated coconut. Pulse the mixture for about 1-2 minutes until it’s finely chopped and well mixed. You want a uniform consistency, so keep blending until the nuts are chopped but not overly processed, leaving some texture for your bars.

Step 3: Add the Binding Ingredients
Next, pour in the melted coconut oil and add a pinch of sea salt to enhance the flavors. Pulse the mixture again for about 30 seconds, ensuring that everything combines into a sticky, cohesive dough. The mixture should easily hold together when pressed; if it’s too crumbly, you may need to add a touch more coconut oil.

Step 4: Press into the Tin
Transfer the mixture into the prepared tin, using a spatula or the back of a spoon to press it down firmly and evenly. Make sure to compact the mixture well to prevent your bars from crumbling when cut. Aim for an even thickness of about 1 inch across the tin for uniform energy bars.

Step 5: Chill to Set
Cover the tin with plastic wrap or foil and place it in the refrigerator for a minimum of 2 hours. This chilling time allows the ingredients to firm up, making the texture perfect for slicing and giving your irresistibly healthy raw cranberry nut energy bars their shape.

Step 6: Cut and Store
Once the mixture is set and firm, remove the bars from the tin using the overhanging parchment paper. Place onto a cutting board and slice into 12 equal bars. Store these nutritious delights in an airtight container in the refrigerator for up to one week, or freeze for longer-lasting freshness. Enjoy them as a delicious snack anytime!

How to Store and Freeze Irresistibly Healthy Raw Cranberry Nut Energy Bars

Fridge: Store your energy bars in an airtight container in the refrigerator for up to one week. This keeps them fresh and ready for quick snacking!

Freezer: For longer storage, freeze the bars in an airtight container for up to three months. Wrap them individually for easy grab-and-go moments.

Thawing: When you’re ready to enjoy a frozen bar, simply thaw them at room temperature for 10–15 minutes. This will restore their chewy texture perfectly!

Portioning: Consider cutting the bars beforehand and separating them with parchment paper in the container to make it easy to grab a snack on busy days.

What to Serve with Irresistibly Healthy Raw Cranberry Nut Energy Bars

Treat your taste buds to a delightful array of complementary flavors and textures that elevate your snacking experience!

  • Creamy Greek Yogurt: A dollop of creamy Greek yogurt provides a tangy contrast, making for a satisfying dip for your energy bars.
  • Fresh Apple Slices: Crisp and juicy, fresh apple slices add a refreshing crunch that pairs well with the chewy texture of the bars.
  • Nutty Granola: A sprinkle of nutty granola on the side gives an extra crunch and a boost of flavor, enhancing your snack even further.
  • Herbal Tea: Enjoy a warm cup of herbal tea alongside your bars; the light, floral flavors will balance the sweetness beautifully.
  • Smoothie Bowl: Serve your energy bars with a smoothie bowl for a nourishing breakfast—mix in your favorite fruits for added sweetness and nutrition.
  • Dark Chocolate: Pair with a few squares of dark chocolate for a decadent yet healthy treat; the bitterness complements the sweetness perfectly.
  • Raw Veggie Sticks: Fresh carrot or cucumber sticks offer a crunchy, clean contrast that balances the energy bars’ richness while adding fiber.
  • Coconut Water: Quench your thirst with refreshing coconut water; its natural sweetness is a wonderful match for the tart cranberries.
  • Trail Mix: Create a mini trail mix with dried fruits and nuts and serve alongside your bars for an extra boost of nutrition and fun textures.
  • Fruit Salad: A bowl of vibrant fruit salad will lighten the experience, bringing fresh, seasonal flavors that harmonize with your energy bars.

Expert Tips for Irresistibly Healthy Bars

  • Choose Fresh Dates: Use fresh medjool dates for better binding; soak dry dates if necessary to enhance texture and moisture.
  • Chop Nuts First: Pre-chop the roasted almonds and cashews to avoid over-processing, ensuring your energy bars retain some delightful crunch.
  • Press Firmly: Compact the mixture firmly in the tin to prevent crumbling when cutting, giving you perfect slices of your irresistibly healthy raw cranberry nut bars.
  • Cool Down: Don’t skip the chilling phase; this is crucial for helping the bars hold their shape and ensuring they are easy to cut.
  • Experiment with Add-Ins: Feel free to incorporate extras like chia seeds, protein powder, or a sprinkle of cinnamon to enhance flavor and nutrition.

Make Ahead Options

These irresistibly healthy raw cranberry nut energy bars are perfect for meal prep, saving you valuable time during your busy week! You can blend and press the mixture into the tin up to 24 hours in advance; simply store it in the refrigerator until you’re ready to chill it for at least 2 hours. If you prefer, you can also slice the bars ahead of time and store them in an airtight container, keeping them fresh in the fridge for up to 7 days or freeze them for up to 3 months. To ensure the bars maintain their chewy and crunchy texture, it’s best to wrap them individually if you’re freezing them. When you’re ready to enjoy, just take out the desired number of bars and let them thaw at room temperature for 10–15 minutes before serving—just as delicious as if freshly made!

Irresistibly Healthy Raw Cranberry Nut Variations

Feel free to play with these energy bars and create your own perfect snack experience!

  • Nut-Free Option: Substitute almonds and cashews with sunflower or pumpkin seeds. This makes for a deliciously crunchy and nut-free treat!

  • Extra Protein Boost: Add a tablespoon of protein powder to the mix. Adjust the coconut oil slightly to maintain texture; the added boost will keep you fueled for longer!

  • Flavorful Chia Seeds: Mix in some chia seeds for an added nutritional kick. They bring a subtle crunch and are excellent for heart health.

  • Tropical Twist: Replace dried cranberries with dried mango or pineapple for a tropical vibe. This will give your bars a sweet and chewy fruity explosion!

  • Cocoa Lovers Delight: Incorporate a tablespoon of cocoa powder into the mix. The chocolatey flavor will complement the sweetness of the dates beautifully.

  • Warm Spice: Add a sprinkle of cinnamon or nutmeg for a warm flavor profile. This cozy touch makes these bars perfect for chilly evenings.

  • Coconut Lovers Dream: Try swapping out desiccated coconut for shredded coconut and toasting it lightly for extra richness. It brings an irresistible flavor that makes eating these bars even more enjoyable.

If you’re interested in exploring more creative energy bites, check out our Energizing Nut Seed recipe or whip up some Milky Coconut Cheese for a delightful addition to your healthy snacking repertoire!

Irresistibly Healthy Raw Cranberry Nut Energy Bars Recipe FAQs

How do I select ripe medjool dates?
Absolutely! When choosing medjool dates, look for ones that are plump, shiny, and slightly sticky to the touch. Avoid those that have dark spots all over or feel dry, as they may not bind well. Fresh dates are key to achieving that perfect chewy texture in your bars.

What’s the best way to store these energy bars?
I recommend storing your energy bars in an airtight container in the refrigerator, where they will stay fresh for up to one week. If you want to keep them longer, you can freeze them for up to three months. Just remember to thaw them at room temperature for about 10–15 minutes before enjoying for the best texture!

Can I freeze the raw cranberry nut energy bars, and how should I do it?
Yes, you can definitely freeze them! To do this, slice the energy bars into individual pieces after they’ve set in the fridge. Wrap each bar in plastic wrap or place them in a freezer-safe container with parchment paper between layers. This prevents them from sticking together, and they’ll stay fresh for up to three months. When you’re ready to snack, just let them thaw for 10–15 minutes at room temperature.

What can I do if my mixture is too crumbly?
Very! If your energy bar mixture feels too crumbly and doesn’t stick together, try adding a little more melted coconut oil or a splash of water. Mix it in a tiny bit at a time until the texture becomes sticky and cohesive enough to hold together. Remember, it should hold its shape when pressed but shouldn’t be soggy.

Are these energy bars suitable for people with nut allergies?
Certainly! If you or someone you’re serving has nut allergies, simply swap the almonds and cashews for seeds like sunflower or pumpkin seeds. This will create a nut-free version while still offering that satisfying crunch and flavor. Plus, feel free to get creative with different dried fruits to suit your taste!

How long do these energy bars last, and can I see visual cues for freshness?
These delicious bars will last in the fridge for about one week and up to three months in the freezer. For freshness, keep an eye out for any signs of dryness or changes in color. If they start to look dull or develop weird textures, it’s a good idea to discard them for safety. Enjoy your healthy snacking!

Irresistibly Healthy Raw Cranberry Nut

Irresistibly Healthy Raw Cranberry Nut Energy Bars You’ll Love

These irresistibly healthy raw cranberry nut energy bars are a deliciously satisfying snack packed with wholesome ingredients.
Prep Time 10 minutes
Chilling Time 2 hours
Total Time 2 hours 10 minutes
Servings: 12 bars
Course: Breakfast
Cuisine: Vegan
Calories: 150

Ingredients
  

For the Base
  • 150 g Medjool Dates Provides natural sweetness and acts as a binder; for best results, choose fresh, sticky dates.
  • 75 g Dried Cranberries Adds a tart flavor and chewy texture; consider using unsweetened varieties for lower sugar options.
  • 75 g Roasted Almonds Contributes crunch and nutty flavor; feel free to substitute with other nuts or seeds for a twist.
  • 75 g Roasted Cashews Adds creaminess and sweetness; swap for sunflower or pumpkin seeds to make it nut-free.
  • 50 g Desiccated Coconut Gives the bars texture and moisture; you can use coconut flakes if you prefer.
For Binding
  • 1 tablespoon Coconut Oil (melted) Helps bind the ingredients together and adds richness; almond butter can also be used for a different flavor profile.
  • 1 pinch Sea Salt Enhances flavor and balances sweetness, bringing all the ingredients together beautifully.

Equipment

  • Food Processor
  • 8×8 inch baking tin
  • parchment paper

Method
 

Step‑by‑Step Instructions
  1. Begin by lining an 8×8 inch baking tin with parchment paper, ensuring it extends over the edges for easy removal later.
  2. In a food processor, combine the freshly pitted medjool dates, dried cranberries, roasted almonds, roasted cashews, and desiccated coconut. Pulse for about 1-2 minutes until finely chopped and well mixed.
  3. Pour in the melted coconut oil and add a pinch of sea salt. Pulse again for about 30 seconds until everything combines into a sticky, cohesive dough.
  4. Transfer the mixture into the prepared tin, using a spatula or the back of a spoon to press it down firmly and evenly.
  5. Cover the tin with plastic wrap or foil and place it in the refrigerator for a minimum of 2 hours to firm up.
  6. Once set, remove the bars from the tin using the overhanging parchment paper, place onto a cutting board, and slice into 12 equal bars.
  7. Store these bars in an airtight container in the refrigerator for up to one week, or freeze for longer-lasting freshness.

Notes

Use fresh medjool dates for better binding. Pre-chop the nuts and compact the mixture firmly to prevent crumbling when cutting.

Fluffy Mashed Potato Flatbread That’s Gluten-Free Delight

As the warm aroma of baking bread fills the kitchen, I can’t help but feel a wave of comfort wash over me. This Gluten Free Everything Mashed Potato Flatbread brings a delightful twist to your dinner table, transforming leftover mashed potatoes into an enticing side dish that’s light yet satisfying. Not only is this easy bread recipe perfect for scooping up soups or slathering with your favorite spreads, but it also caters to gluten-free lifestyles without sacrificing flavor. Whether you’re looking to impress your guests or simply enjoy a homemade treat, these flatbreads will elevate any meal. Are you ready to embrace the joy of cooking and create a dish that’ll leave your family asking for more? Let’s dive in!

Why Choose Mashed Potato Flatbread?

Flavor Explosion: The blend of potatoes with everything bagel spices delivers a unique taste that elevates everyday meals.

Easy Preparation: You’ll love how quick and simple it is to whip together this flatbread, making it perfect for any weeknight dinner.

Gluten-Free Delight: Ideal for those avoiding gluten, this recipe doesn’t skimp on taste or texture.

Versatile Use: Enjoy these flatbreads as a side, sandwich base, or even with your favorite spreads. Try pairing them with a warm soup or alongside zesty dishes like Savory Onion Potato for an even more delightful experience!

Crowd-Pleaser: Homemade comfort food always impresses, ensuring they’ll be a hit at the dinner table. Get ready for compliments!

Mashed Potato Flatbread Ingredients

For the Dough
Prepared Mashed Potatoes – Use 2 cups of freshly made or leftover mashed potatoes for a moist base.
Melted Butter – Adds richness and flavor; substitute with dairy-free butter for a dairy-free option.
Egg – Binds the dough and helps give structure; can be replaced with a flax or chia seed egg for a vegan version.
Rice Flour – Supplies the gluten-free structure; sorghum or almond flour can also work as substitutes.
Corn Starch (or Tapioca/Potato Starch) – Essential for a light and fluffy texture in your mashed potato flatbread.
Baking Powder – Acts as a leavening agent to give the flatbreads their desired rise.
Salt – Enhances overall flavor and balances the dough.

For the Everything Topping
Poppy Seeds – Add a delightful crunch and nutty flavor to the finish.
Sesame Seeds – Contributes a rich nutty taste and extra texture.
Dried Garlic – Brings a depth of flavor; can be swapped with garlic powder if desired.
Dried Onion – Adds a savory, aromatic element for a full-flavored topping.
Dried Basil – Offers a lovely aromatic note that complements the everything spices.
Salt – Don’t forget to season the everything topping to elevate its flavor.

Embrace this mashed potato flatbread recipe for an easy and delicious side that’s sure to be a family favorite!

Step‑by‑Step Instructions for Mashed Potato Flatbread

Step 1: Prepare Potatoes
Begin by boiling 2 cups of peeled potatoes in salted water for about 15–20 minutes, or until tender. Once cooked, drain and mash the potatoes until smooth. If using leftover mashed potatoes, ensure they are at room temperature before proceeding. Allow the mashed potatoes to cool completely before combining with the other ingredients.

Step 2: Mix Ingredients
In a large mixing bowl, combine the cooled mashed potatoes, 4 tablespoons of melted butter, and 1 egg. Utilize a wooden spoon or spatula to mix these ingredients until the mixture becomes smooth and well-combined. This step will ensure your mashed potato flatbread has a rich and cohesive flavor profile.

Step 3: Add Dry Ingredients
Next, sift in 1 cup of rice flour, ½ cup of corn starch, 1 teaspoon of baking powder, and ½ teaspoon of salt into the potato mixture. Stir gently until a smooth dough forms. The dough should be slightly sticky but manageable; if it feels too wet, you can gradually add more rice flour until you reach the desired consistency.

Step 4: Chill Dough
Wrap the dough tightly in plastic wrap and place it in the refrigerator for 30 minutes. This resting period allows the dough to firm up, making it easier to shape into flatbreads later. Take this time to preheat your oven for optimal baking conditions.

Step 5: Preheat Oven
Set your oven to 450°F (230°C) and let it preheat while the dough chills. A hot oven is essential for achieving that beautifully golden-brown exterior on your mashed potato flatbread. Make sure the oven is fully heated before placing the flatbreads inside to bake.

Step 6: Shape Flatbreads
Once the dough has chilled, dust a clean surface with rice flour. Divide the dough into 8 equal pieces, rolling each into a ball. Then, flatten each ball gently with your hands until they are approximately ½ inch thick. This shaping will help create the ideal form for your mashed potato flatbread.

Step 7: Prepare Topping
In a small mixing bowl, combine 1 tablespoon each of poppy seeds and sesame seeds, along with 1 teaspoon each of dried garlic, dried onion, and dried basil, and a pinch of salt. Mix these ingredients well to create your everything topping, which will add irresistible flavor and texture to the flatbreads.

Step 8: Bake
Line a baking sheet with parchment paper and arrange the shaped flatbreads evenly on it. Brush each flatbread with the remaining melted butter, then generously sprinkle the everything topping over the surface. Bake the flatbreads in the preheated oven for about 15 minutes, or until they are golden brown and slightly crisp on the edges, keeping a close eye to avoid overbaking.

Make Ahead Options

These Gluten Free Everything Mashed Potato Flatbreads are perfect for meal prep enthusiasts looking to save time during busy weeknights! You can prepare the dough up to 24 hours in advance; simply follow the recipe through Step 4, then wrap the dough tightly in plastic wrap and refrigerate it. This chilling step not only makes the dough easier to work with but also helps maintain its quality. When you’re ready to bake, preheat your oven and shape the flatbreads as described in Steps 5 through 8. You’ll have delicious, homemade flatbreads that are just as fluffy and flavorful, making dinner a breeze!

Storage Tips for Mashed Potato Flatbread

Room Temperature: Keep any leftover flatbreads at room temperature for up to 2 days, wrapped in a clean kitchen towel to maintain moisture.

Fridge: Store flatbreads in an airtight container in the refrigerator for up to 3 days. This helps retain their freshness and flavor.

Freezer: Freeze the flatbreads for up to 2 months. Place parchment paper between each flatbread to prevent sticking, then seal in an airtight bag.

Reheating: For the best results, reheat frozen flatbreads in the oven or air fryer at 350°F (175°C) until warm and crispy, bringing back that delicious flavor of homemade mashed potato flatbread!

What to Serve with Gluten Free Everything Mashed Potato Flatbread?

Transform your meal into a complete experience that delights every palate with these delightful pairing suggestions.

  • Creamy Tomato Soup: This classic combo offers comforting flavors that complement the soft texture of the flatbread perfectly. Dip your flatbread to soak up the rich soup!

  • Herbed Garden Salad: A fresh salad with crisp greens, tomatoes, and a zesty vinaigrette balances the fluffy bread, adding a refreshing crunch. Each bite can be made better with a touch of flatbread.

  • Savory Roasted Vegetables: Oven-roasted veggies, seasoned to perfection, provide earthy flavors that enhance the taste of your flatbread. It’s a hearty side that makes for an inviting plate.

  • Pulled Pork or Chicken: Serve your flatbread as a delicious sandwich base for tender pulled meat, topped with tangy coleslaw. The soft bun-like texture plays well with the juicy fillings.

  • Cheesy Spinach Dip: Warm, gooey spinach dip is the perfect spread for your flatbread, offering a delightful savory explosion with every bite. The flatbread serves as an excellent vehicle for that cheesy goodness.

  • Chilled White Wine: A crisp, refreshing glass of white wine, like Sauvignon Blanc, brings out the flavors of everything topping, making each bite of the flatbread shine as you sip.

  • Chocolate Chip Cookies: Satisfy your sweet tooth after a meal with soft, warm cookies. The dessert contrasts beautifully with the savory flatbread, rounding out your dining experience perfectly!

Tips for the Best Mashed Potato Flatbread

  • Cool Potatoes First: Ensure the mashed potatoes are completely cool before mixing; warm potatoes can affect the texture and make the dough sticky.

  • Watch Baking Time: Keep a close eye on the flatbreads while baking; they should turn golden brown, but overbaking can lead to a dry result.

  • Adjust Flour Gradually: If the dough feels too sticky, add rice flour a little at a time until it reaches the right consistency for shaping your mashed potato flatbread.

  • Perfect Topping: Don’t skimp on the everything topping; it adds vital flavor. Make sure to mix it well to evenly distribute the spices.

  • Store Properly: For leftovers, store in an airtight container and refrigerate, or freeze for longer storage. Reheat in the oven for the best taste!

Mashed Potato Flatbread Variations

Feel the freedom to personalize this recipe and enhance its deliciousness to your liking!

  • Dairy-Free: Swap melted butter with coconut oil or a plant-based butter for a totally dairy-free version. Enjoy the fantastic richness without any dairy!

  • Vegan: Replace the egg with a flax or chia seed egg to make this flatbread vegan-friendly. A simple mix of water and ground seeds brings a lovely binding and nutrient-rich element to your dough.

  • Herb-Infused: Mix in your favorite herbs like rosemary or thyme into the dough for an aromatic twist. Imagine the delicious scents filling your kitchen as these flavor-infused flatbreads bake!

  • Cheesy Goodness: Stir in nutritional yeast or grated vegan cheese for an extra savory flavor. The cheesy touch will add depth and richness that everyone will love.

  • Spicy Kick: Add a pinch of crushed red pepper flakes to the dough for a hint of heat. Whether it’s alongside your sandwich or dipped into sizzling soups, that little spice can take your flatbread to the next level!

  • Nutty Texture: Substitute half of the rice flour with almond flour for a delightful nutty flavor and unique texture. This change will give your flatbreads an intriguing crunch for a fun twist!

  • Sweet Treat: Use sweet potato instead of regular potatoes for a naturally sweet flavor. Top with cinnamon sugar for a delightful dessert flatbread that pairs wonderfully with coffee or tea.

  • Serving Suggestions: Try serving these delightful flatbreads with a warm bowl of your favorite soup or alongside Savory Chicken and Cheesy Potato Drumsticks for a comforting meal!

Let your creativity soar with these variations and create something truly special!

Mashed Potato Flatbread Recipe FAQs

How do I choose the right potatoes for this recipe?
Absolutely! For the best mashed potato flatbread, I recommend using starchy potatoes like Russets or Yukon Golds. These types yield a fluffier texture when mashed. If you choose waxy potatoes, your flatbread may turn out denser, which we want to avoid for that delightful lightness.

How should I store leftovers?
Very simple! Leftover flatbreads can be kept in an airtight container in the refrigerator for up to 3 days. I often wrap them in parchment paper before placing them in the container to preserve their moisture. If you have a larger batch, consider freezing them for up to 2 months, separating each flatbread with parchment paper to prevent sticking.

Can I freeze mashed potato flatbreads, and how?
Yes, indeed! To freeze your flatbreads, first let them cool completely after baking. Then, stack them with a piece of parchment paper between each one to prevent sticking and place them in a freezer-safe bag or container. They’re best enjoyed within 2 months, but they’re still delicious if longer stored. When you’re ready to eat, reheat them in an oven at 350°F (175°C) for about 10-15 minutes to revive that fresh-baked texture.

What if the dough is too sticky?
No worries! If you find your dough to be too sticky while preparing, simply sprinkle a little extra rice flour into the mixture, a tablespoon at a time, kneading gently until you reach a smoother consistency. Remember, it’s better to add it gradually to avoid making the dough too dry, which can happen if you add too much flour at once.

Are there any dietary considerations I should keep in mind?
Certainly! This recipe is naturally gluten-free, which makes it a great choice for those with celiac disease or gluten intolerance. If you’re making it vegan, simply replace the egg with a flax or chia seed egg. Additionally, for allergies, use dairy-free butter if lactose is a concern. Just check your specific ingredient labels to ensure they meet dietary needs.

How can I transport these flatbreads?
Transporting your flatbreads is quite easy! Once they have cooled, wrap them in foil or wax paper and place them in a container to keep them fresh. If you’re bringing them to a potluck or picnic, consider adding a small container of your favorite dip or spread to complement the flatbreads, making them an even more inviting offering!

This Mashed Potato Flatbread recipe is not only versatile and delicious but also simple to customize to fit your preferences. Happy cooking!

Mashed Potato Flatbread

Fluffy Mashed Potato Flatbread That's Gluten-Free Delight

This Fluffy Mashed Potato Flatbread is a gluten-free dish that transforms leftover mashed potatoes into a delightful side that's perfect for any meal.
Prep Time 30 minutes
Cook Time 15 minutes
Chill Time 30 minutes
Total Time 1 hour 15 minutes
Servings: 8 flatbreads
Course: Other
Cuisine: Gluten-Free
Calories: 120

Ingredients
  

For the Dough
  • 2 cups Prepared Mashed Potatoes freshly made or leftover
  • 4 tablespoons Melted Butter substitute with dairy-free butter for dairy-free option
  • 1 large Egg can replace with flax or chia seed egg for vegan option
  • 1 cup Rice Flour can substitute with sorghum or almond flour
  • ½ cup Corn Starch or tapioca/potato starch
  • 1 teaspoon Baking Powder
  • ½ teaspoon Salt
For the Everything Topping
  • 1 tablespoon Poppy Seeds
  • 1 tablespoon Sesame Seeds
  • 1 teaspoon Dried Garlic can swap with garlic powder
  • 1 teaspoon Dried Onion
  • 1 teaspoon Dried Basil
  • pinch Salt to season everything topping

Equipment

  • Large mixing bowl
  • oven
  • baking sheet
  • parchment paper
  • plastic wrap

Method
 

Step-by-Step Instructions
  1. Begin by boiling 2 cups of peeled potatoes in salted water for about 15–20 minutes, or until tender. Once cooked, drain and mash the potatoes until smooth. If using leftover mashed potatoes, ensure they are at room temperature before proceeding. Allow the mashed potatoes to cool completely before combining with the other ingredients.
  2. In a large mixing bowl, combine the cooled mashed potatoes, 4 tablespoons of melted butter, and 1 egg. Utilize a wooden spoon or spatula to mix these ingredients until the mixture becomes smooth and well-combined.
  3. Next, sift in 1 cup of rice flour, ½ cup of corn starch, 1 teaspoon of baking powder, and ½ teaspoon of salt into the potato mixture. Stir gently until a smooth dough forms.
  4. Wrap the dough tightly in plastic wrap and place it in the refrigerator for 30 minutes.
  5. Set your oven to 450°F (230°C) and let it preheat while the dough chills.
  6. Once the dough has chilled, dust a clean surface with rice flour. Divide the dough into 8 equal pieces, rolling each into a ball. Flatten each ball gently until they are approximately ½ inch thick.
  7. In a small mixing bowl, combine 1 tablespoon each of poppy seeds and sesame seeds, along with 1 teaspoon each of dried garlic, dried onion, and dried basil, and a pinch of salt. Mix these ingredients well.
  8. Line a baking sheet with parchment paper and arrange the shaped flatbreads evenly on it. Brush each flatbread with the remaining melted butter, then generously sprinkle the everything topping over the surface. Bake the flatbreads for about 15 minutes, or until they are golden brown and slightly crisp on the edges.

Notes

For the best results, ensure the mashed potatoes are completely cool, watch the baking time, adjust flour gradually, and store properly in an airtight container.