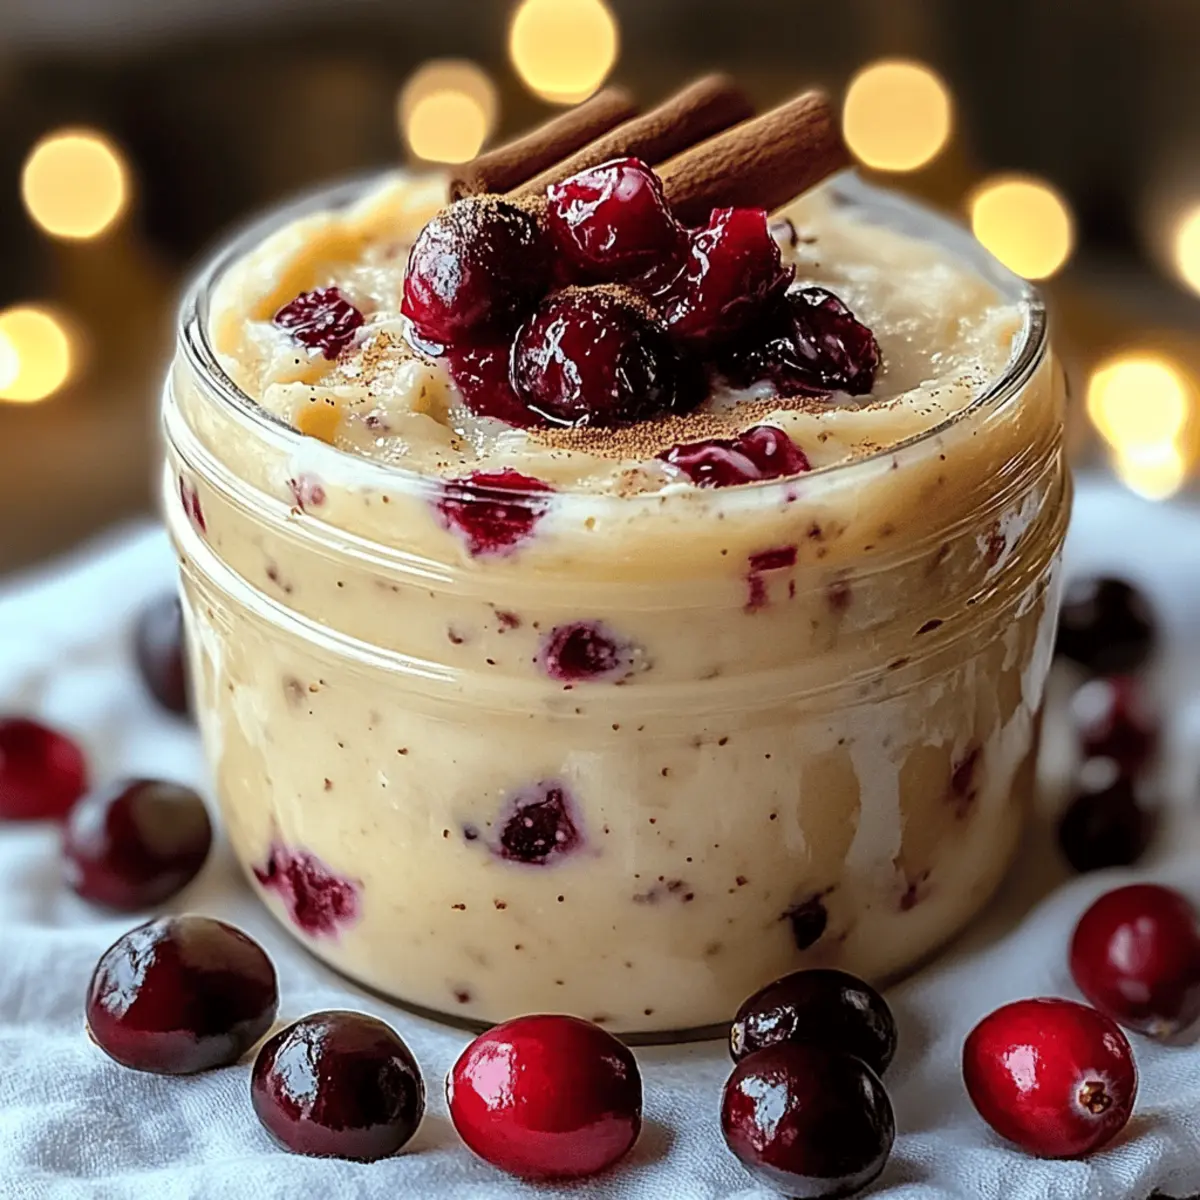
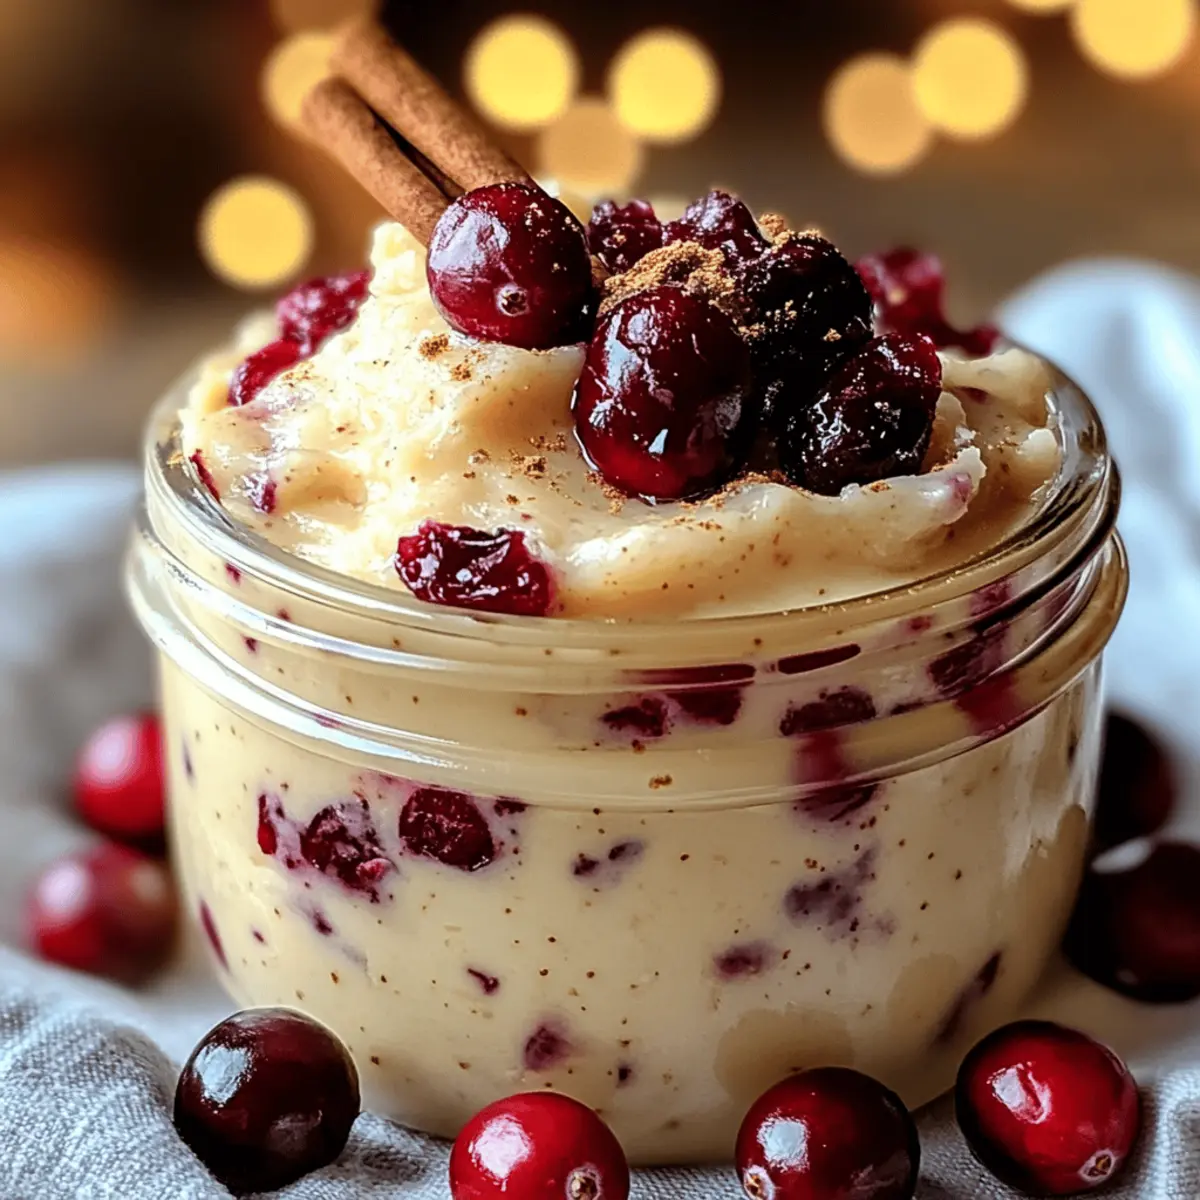
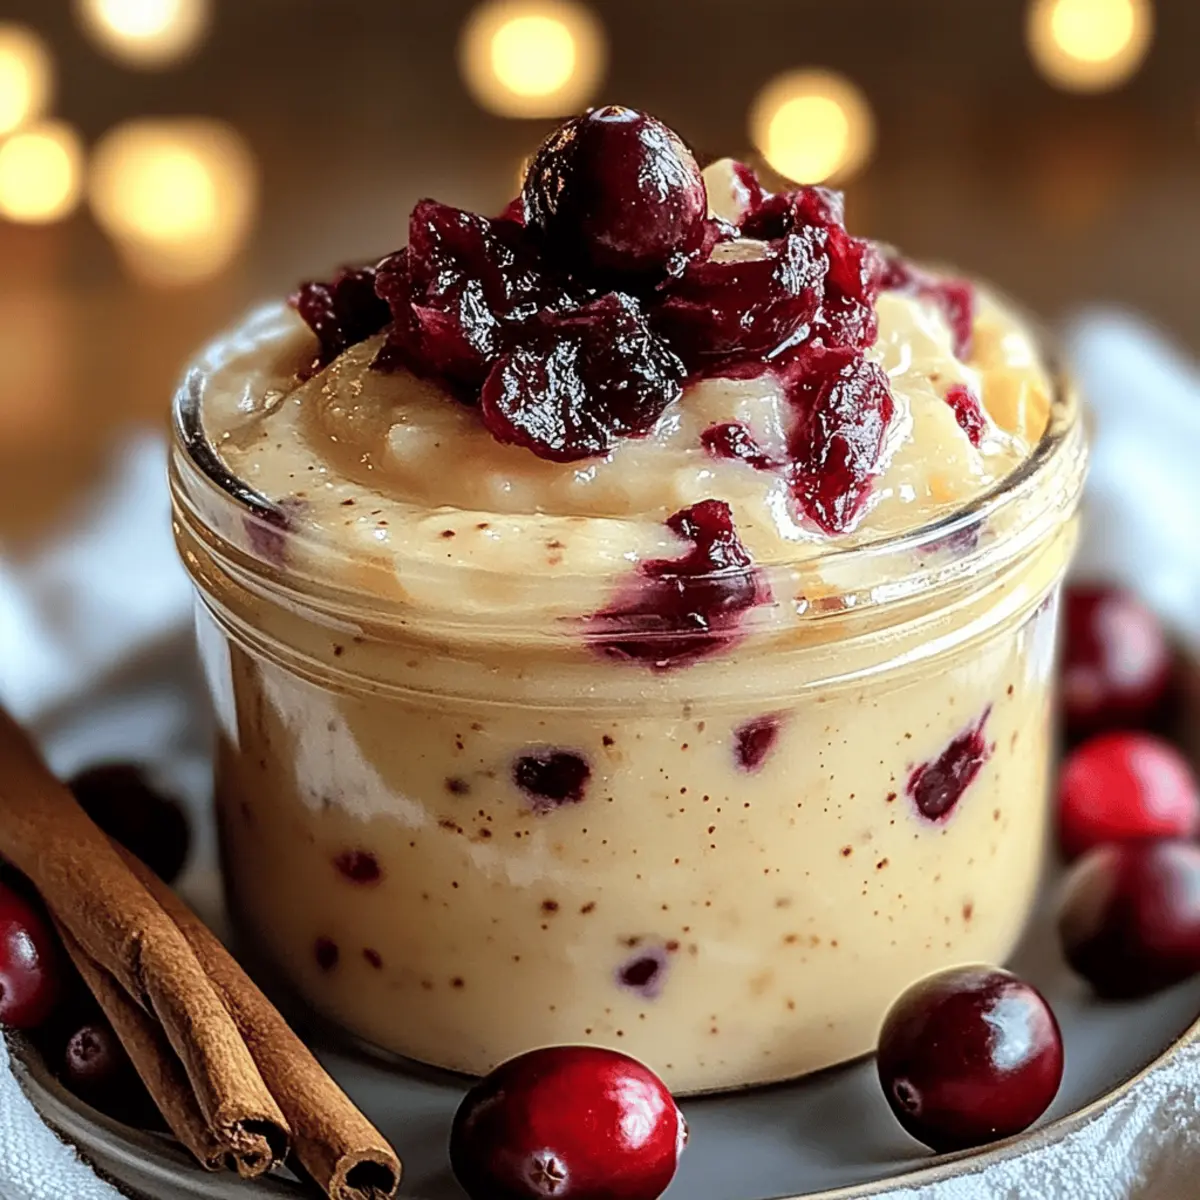
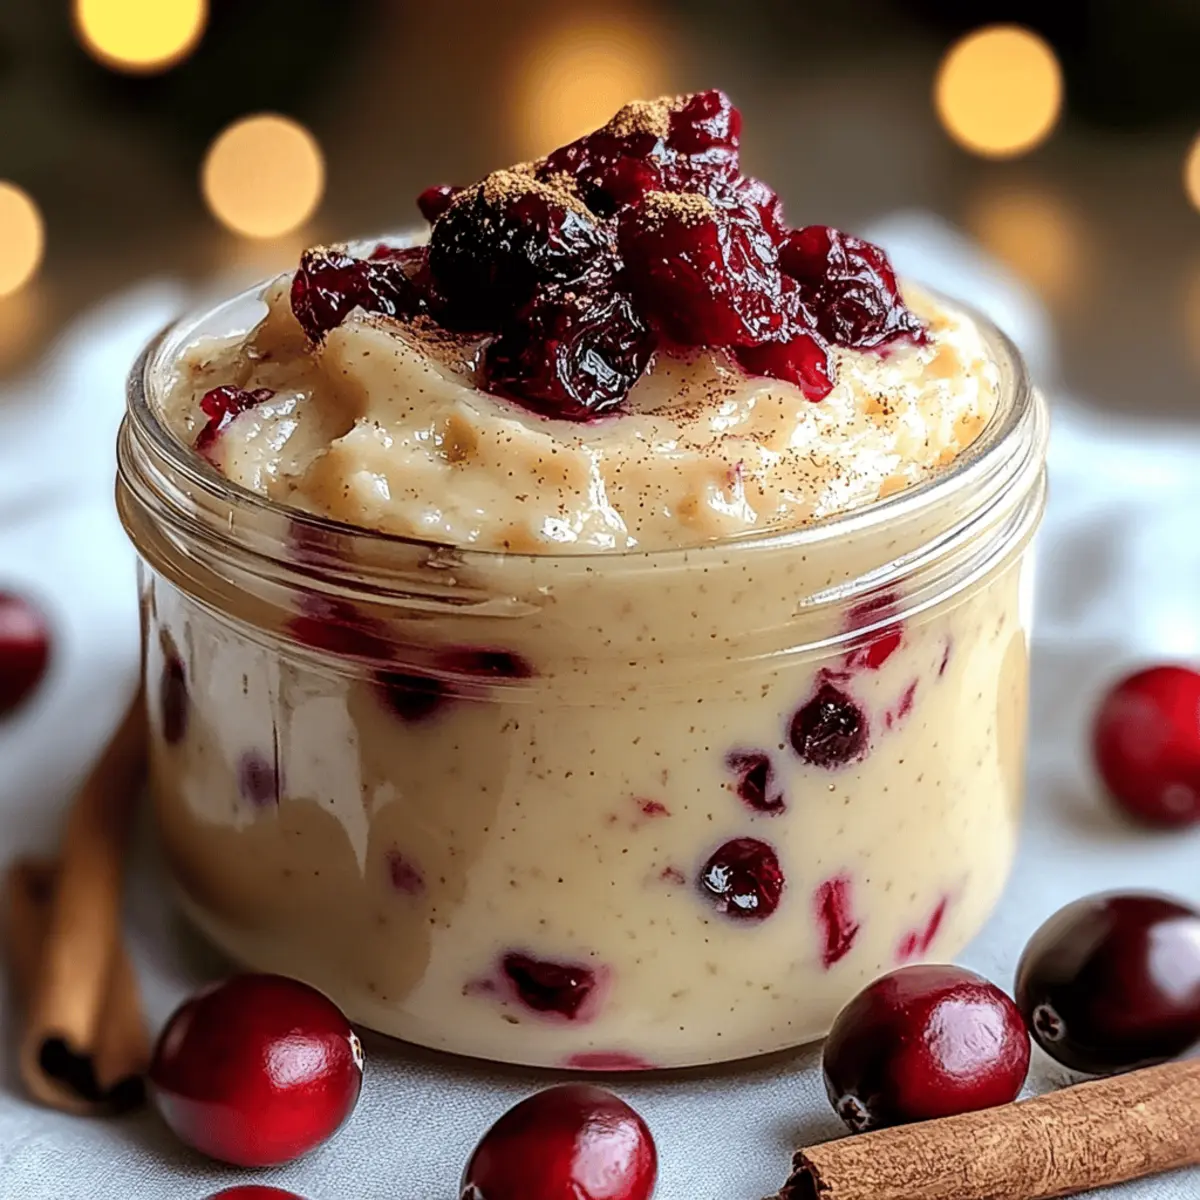
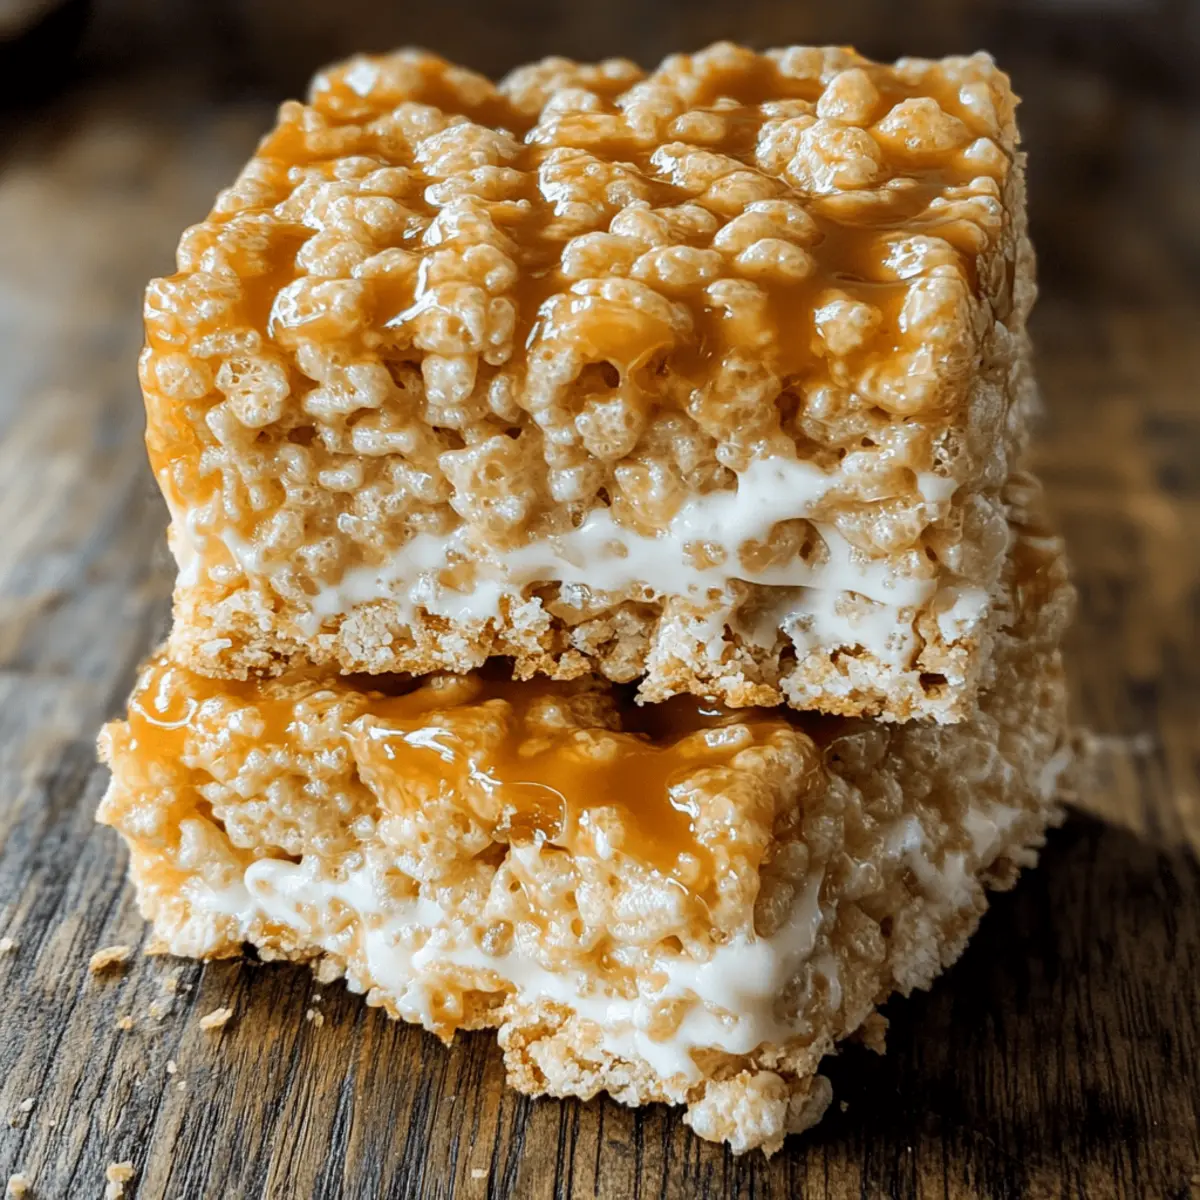
Delight in Homemade Leche Frita: Crispy Creamy Spanish Treat

Aromatic spices wafted through the air as I wandered through a quaint Spanish mercado, and my eyes landed on a charming stall featuring a golden, crispy delight: Leche Frita. This traditional Spanish dessert is a delightful fusion of texture—crunchy on the outside and decadently creamy within. Infused with vibrant notes of citrus and a hint of cinnamon, this recipe is not just a treat for the taste buds; it’s also an effortless way to impress guests or add a special touch to your afternoon coffee. Plus, with a gluten-free option to cater to diverse dietary needs, Leche Frita invites everyone to indulge. Curious about how to create your own delightful version? Let’s dive in!

Why is Leche Frita a Must-Try?

Unique Flavor Fusion: This delightful dessert combines creamy milk with zesty citrus and warm spices, offering a taste explosion that will transport your senses to Spain.
Quick & Easy: With simple ingredients and straightforward instructions, you can whip up this sweet treat without any fuss. Perfect for busy home cooks!
Versatile Variations: Feel free to experiment with flavorings—add vanilla, chocolate, or even coconut milk for a tropical twist that keeps things exciting.
Crowd-Pleasing Delight: Whether for a special occasion or a cozy night in, Leche Frita is sure to impress family and friends, making it an Instagram-worthy dish that invites compliments.
Gluten-Free Option: With a few adjustments, you can make this traditional treat accessible for gluten-sensitive friends, ensuring everyone can indulge!

Leche Frita Ingredients

For the Milk Mixture
Whole Milk – Provides a creamy base; substitute with lactose-free milk if needed.
Granulated Sugar – Sweetens the mixture; you can also use powdered sugar for a smoother coating.
Cinnamon Stick – Infuses warm flavor into the milk; ground cinnamon can be used as an alternative.
Lemon Peel – Adds a zesty citrus note; lemon zest is a great substitute for a bright flavor.
Orange Peel – Enhances the aromatic profile; feel free to swap with lemon peel for a different taste.

For the Thickening Agent
Cornstarch – Thickens the mixture for the right texture; use exclusively for a gluten-free Leche Frita.
All-Purpose Flour – Contributes to structure; can be fully substituted by cornstarch for a gluten-free option.

For Frying
Sunflower Oil – Essential for frying, creates that crispy texture; vegetable oil can be used instead.
Medium Eggs – Binds the coating nicely; adjust the use of yolk or white based on preference.

For the Coating
Granulated Sugar (Coating) – Adds sweetness; replace with a sweetener of your choice if desired.
Ground Cinnamon (Coating) – Enhances flavor; adjust the quantity according to your taste.

Enjoy creating this Leche Frita and savor each bite of its delightful combination!

Step‑by‑Step Instructions for Leche Frita

Step 1: Infuse the Milk
In a medium saucepan, combine 4.5 cups of whole milk with the peels of lemon and orange, along with ¾ cup of granulated sugar and a cinnamon stick. Bring the mixture to a gentle boil over medium heat, stirring occasionally, until the sugar dissolves. Once it reaches a boil, remove it from the heat and allow it to cool to room temperature, infusing rich flavors into your Leche Frita.

Step 2: Prepare the Thickening Agent
While the infused milk cools, whisk together ¼ cup of cornstarch and ¼ cup of all-purpose flour in a bowl. Gradually add the remaining 1.5 cups of milk to the dry mixture, whisking until completely dissolved. This will create a smooth thickening agent that is essential for achieving the perfect texture in your Leche Frita.

Step 3: Combine and Thicken the Mixture
Once the infused milk has cooled, strain it into a larger pot, discarding the solids. Slowly mix in the cornstarch and flour mixture while stirring continuously. Heat the combined mixture over medium heat, stirring constantly, until it thickens and starts to bubble, about 6-7 minutes. You’ll know it’s ready when it’s thick enough to coat the back of a spoon.
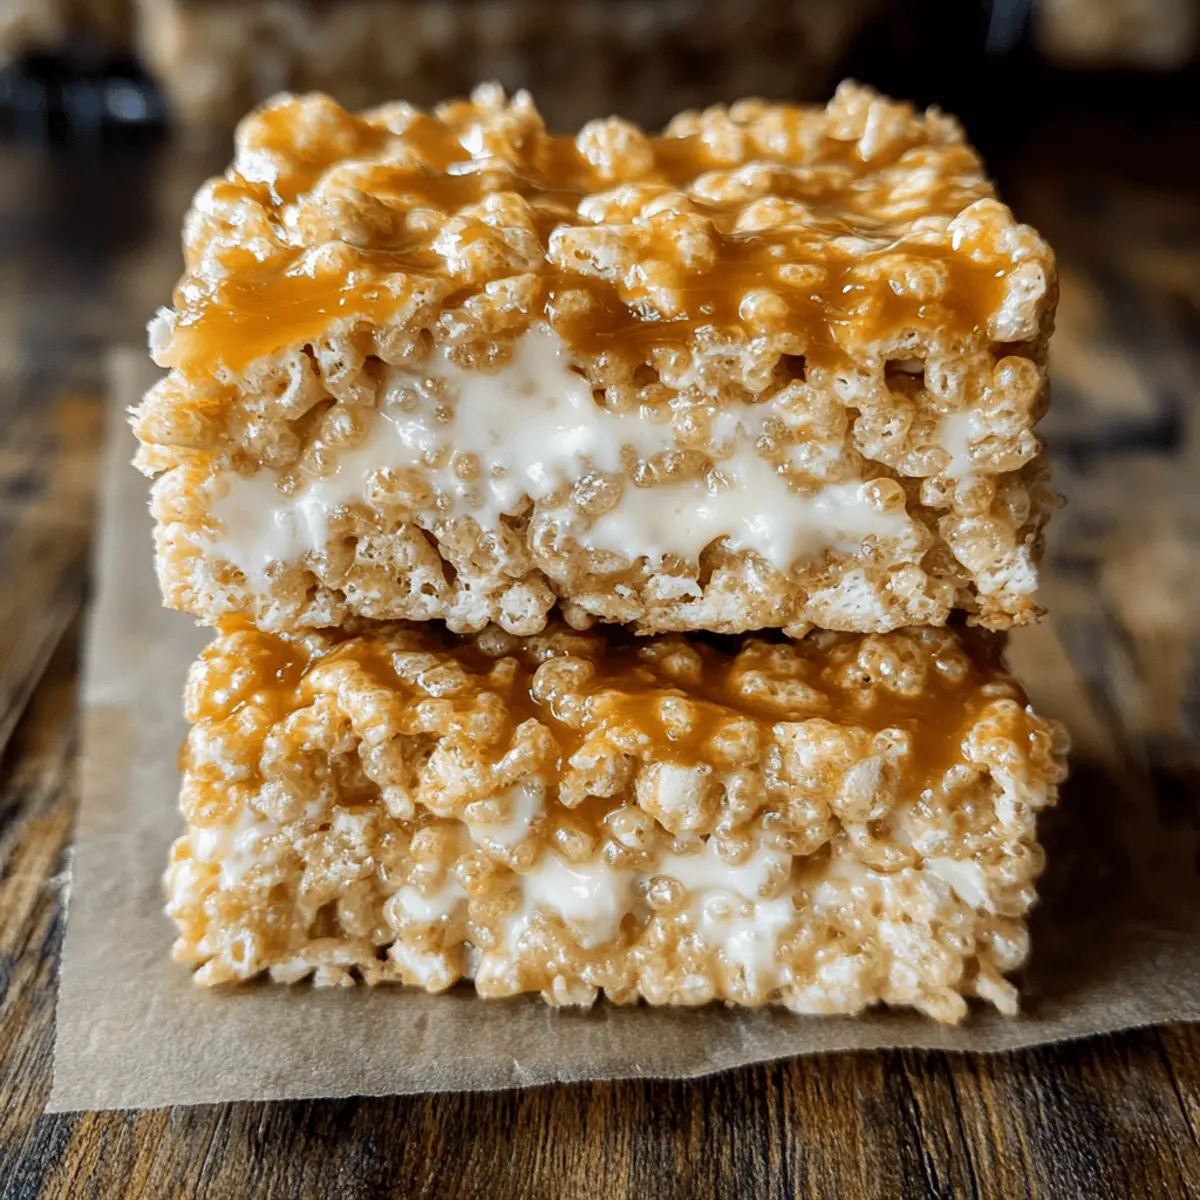
Step 4: Set the Mixture
Pour the thickened milk mixture into a lightly greased rectangular baking dish, spreading it evenly. Cover with plastic wrap to prevent a skin from forming, and refrigerate the dish for at least 3 hours, or preferably overnight. This cooling process allows the Leche Frita to firm up, making it easier to cut into squares later.

Step 5: Cut the Portions
Once the mixture is fully chilled and firm, remove it from the refrigerator. Carefully lift the set mixture out of the baking dish and transfer it to a cutting board. Using a sharp knife, cut it into squares or rectangles, depending on your preferred portion size for serving the delightful Leche Frita.

Step 6: Prepare the Coating
Set up a coating station with three shallow bowls: one for ½ cup of all-purpose flour, one for 2 beaten eggs, and another for a mix of ½ cup of granulated sugar and 1 teaspoon of ground cinnamon. This setup will help ensure your Leche Frita is perfectly coated before frying, creating a crispy exterior to contrast with its creamy inside.

Step 7: Fry the Leche Frita
In a large skillet, heat about ½ inch of sunflower oil over medium heat until it reaches around 350°F. Carefully dip each piece of Leche Frita first into the flour, then into the egg mixture, ensuring they’re well-coated. Fry the pieces in batches for about 2-3 minutes on each side, or until they become golden brown and crispy. Remove them and let the excess oil drain on a paper towel-lined plate.

Step 8: Coat and Serve
After frying, immediately toss each piece of Leche Frita in the sugar-cinnamon mixture, ensuring a generous coating on all sides. These sweet treats are best served warm, showcasing their delightful contrast of creamy and crispy textures. Enjoy your Leche Frita as a delightful dessert or with a warm beverage!

Expert Tips for Leche Frita

  • Milk Care: Ensure you stir the milk mixture constantly while thickening to avoid lumps, which can ruin the creamy texture of your Leche Frita.

  • Temperature Check: Use a thermometer to ensure the frying oil is around 350°F; this temperature is key for achieving a crispy exterior without soggy results.

  • Chill Properly: Allow the Leche Frita to chill well before frying; properly chilling helps it hold its shape during cooking, leading to better results.

  • Don’t Overcrowd: Fry in small batches to maintain the oil temperature and ensure each piece gets that perfect golden crispiness. Overcrowding can lead to uneven cooking.

  • Taste Adjustments: Feel free to experiment with the sugar and cinnamon coating; it can be tailored to your personal sweetness preference or creativity.

How to Store and Freeze Leche Frita

Fridge: Store leftover Leche Frita in an airtight container lined with paper towels for up to 5 days. This will help maintain its delicious texture and prevent sogginess.

Freezer: If you want to enjoy Leche Frita later, freeze well-wrapped portions for up to 3 months. Allow them to cool completely before wrapping tightly in plastic wrap or foil.

Reheating: For the best results, reheat in an oven at 350°F until warmed through and crispy, about 10-15 minutes. Avoid microwaving to maintain that delightful crunch!

Portion Control: Cut Leche Frita into individual serving sizes before freezing to make it easier to grab a quick treat whenever that sweet craving strikes!

What to Serve with Leche Frita?

Indulging in the warm, crispy delight of Leche Frita opens the door to a world of pairing possibilities that will enhance your dessert experience.

  • Espresso or Strong Coffee: Perfectly complements the sweetness of Leche Frita while adding rich, robust flavors to your palate.
  • Citrus Salad: A refreshing blend of fruits like oranges and grapefruits brightens up the meal and echoes the citrus notes in the dessert.
  • Creamy Vanilla Ice Cream: The cold, creamy texture of ice cream balances the warm, crispy Leche Frita for a delightful contrast.
  • Sweet Spiced Chai: Fragrant spices in chai echo the warm flavors of cinnamon and sugar in Leche Frita, making for a cozy pairing.
  • Toasted Almonds: Adding a crunchy texture and nutty flavor, toasted almonds can elevate your dessert experience with contrasting bites.
  • Honey Drizzle: A light drizzle of honey can enhance the sweetness while adding a floral note that beautifully complements the dish.
  • Chocolate Sauce: For chocolate lovers, a rich chocolate sauce brings a decadent twist that plays off the creamy interior of Leche Frita perfectly.
  • Fresh Mint Sprig: A fragrant touch of mint not only beautifies the plate but also provides a refreshing contrast to the dish’s sweetness.
  • Red Wine: A glass of fruity red wine can enhance the flavors of this dessert, creating a perfect finish to a delightful meal.

Make Ahead Options

These delicious Leche Frita are perfect for meal prep enthusiasts! You can prepare the milk mixture and let it set in the fridge up to 24 hours ahead of time, ensuring the flavors meld beautifully. Simply follow the initial steps to infuse the milk, then pour it into your baking dish and refrigerate overnight. For optimal texture, ensure it’s tightly covered to prevent any skin from forming. When you’re ready to serve, cut the chilled mixture into pieces, coat them, and fry them fresh. By doing this prep ahead of time, you’ll enjoy the luxury of freshly fried, crispy treats with minimal effort during busy weeknights!

Leche Frita Variations & Substitutions

Customize your Leche Frita to suit your taste and dietary needs—it’s all about making this delightful dessert your own!

  • Gluten-Free: Substitute all-purpose flour entirely with cornstarch for a completely gluten-free treat. This maintains the desired texture while ensuring everyone can enjoy it.
  • Dairy-Free: Replace whole milk with almond or oat milk for a lactose-free version. These alternatives will add a subtle nutty flavor and keep things creamy!
  • Citrus Twist: Try using just orange peel or lemon zest instead of both for a distinct citrus flavor. This small change can make a big difference in aroma and taste.
  • Sweet Spice: Add a pinch of nutmeg or cardamom along with cinnamon in the coating for a unique flavor profile. This creates an exotic twist that’s sure to impress your guests.
  • Chocolate Lovers: Use chocolate-infused milk for the base or drizzle melted chocolate over the finished Leche Frita. This transforms your dessert into a rich chocolate experience!
  • Texture Variation: Swap out half of the cornstarch for rice flour for a slightly different texture. This variation can introduce a delightful crunch that contrasts nicely with the creamy middle.
  • Tropical Delight: Consider using coconut milk instead of regular milk for a taste of the tropics. This will enhance the creaminess and add a hint of coconut flavor that’s simply irresistible.
  • Flavor Infusion: Infuse the milk with vanilla extract or a splash of rum for an added depth of flavor that takes your Leche Frita to the next level. The aroma alone will enchant you!

Feel free to explore these delightful variations! Whether you’re crafting a classic Spanish dessert or a uniquely personalized treat, check out our other recipes that cater to diverse dietary preferences for more delicious ideas!

Leche Frita Recipe FAQs

What type of milk is best for Leche Frita?
Absolutely! For the creamiest texture, I recommend using whole milk, as it provides the richness needed for this dessert. However, if you have dietary restrictions, lactose-free milk works wonderfully as a substitute. Just ensure it’s whole or a high-fat option to keep that creamy goodness intact.

How should I store leftover Leche Frita?
Very simple! To keep your Leche Frita fresh and maintain its delightful texture, store leftover pieces in an airtight container lined with paper towels. This method helps absorb any moisture and keeps them from becoming soggy. They can be stored in the fridge for up to 5 days, making them a perfect sweet treat for days to come.

Can I freeze Leche Frita for later?
Of course! Freezing Leche Frita is a great option for enjoying this dessert later on. Once you’ve cut the pieces, wrap each one tightly in plastic wrap or aluminum foil, making sure they’re well-protected from freezer burn. You can freeze them for up to 3 months. When you’re ready to enjoy, simply reheat them in an oven at 350°F for about 10-15 minutes to regain that crispy texture!

How do I prevent lumps when thickening the milk mixture?
Great question! To avoid those pesky lumps, it’s crucial to stir the milk mixture continuously while cooking. After combining the cornstarch and flour with the remaining milk, whisk it smoothly before adding it to the warm infused milk. If any lumps do appear, don’t worry—just use a whisk or an immersion blender for a quick fix.

Are there any common allergens in Leche Frita?
Absolutely, it’s important to be aware of dietary considerations! Leche Frita contains dairy, eggs, and gluten (due to flour). If you need to cater to gluten-sensitive friends, simply replace the all-purpose flour entirely with cornstarch, making it a gluten-free dessert. Always consider individual allergies and preferences when serving!

What are some popular variations of Leche Frita?
The more the merrier in the world of flavors! You can switch things up by adding vanilla extract to the milk mixture for an additional flavor kick. Alternatively, consider experimenting with chocolate-infused milk or coconut milk for a tropical twist on this traditional Spanish dessert. Each version offers a unique spin that keeps things exciting!

Leche Frita

Delight in Homemade Leche Frita: Crispy Creamy Spanish Treat

Discover the bliss of Leche Frita, a crispy and creamy Spanish dessert that enchants with its unique flavor fusion.
Prep Time 15 minutes
Cook Time 15 minutes
Chilling Time 3 hours
Total Time 3 hours 30 minutes
Servings: 8 squares
Course: Dessert
Cuisine: Spanish
Calories: 250

Ingredients
  

For the Milk Mixture
  • 4.5 cups Whole Milk or lactose-free milk
  • 3/4 cup Granulated Sugar or powdered sugar for coating
  • 1 stick Cinnamon Stick or ground cinnamon as alternative
  • 1 piece Lemon Peel or lemon zest
  • 1 piece Orange Peel or lemon peel
For the Thickening Agent
  • 1/4 cup Cornstarch gluten-free option
  • 1/4 cup All-Purpose Flour or substitute with cornstarch
For Frying
  • 1/2 inch Sunflower Oil or vegetable oil
  • 2 medium Eggs beaten
For the Coating
  • 1/2 cup Granulated Sugar (Coating) or your choice of sweetener
  • 1 teaspoon Ground Cinnamon (Coating) adjust to taste

Equipment

  • Medium saucepan
  • large skillet
  • mixing bowls
  • sharp knife
  • Cutting Board

Method
 

Step-by-Step Instructions for Leche Frita
  1. Infuse the Milk: In a medium saucepan, combine 4.5 cups of whole milk with the peels of lemon and orange, granulated sugar, and a cinnamon stick. Bring to a gentle boil, stir occasionally. Once boiling, remove from heat and let cool.
  2. Prepare the Thickening Agent: Whisk together 1/4 cup cornstarch and 1/4 cup all-purpose flour in a bowl. Gradually add 1.5 cups of milk, whisk until dissolved.
  3. Combine and Thicken: Strain the cooled milk into a larger pot, discard solids. Mix in cornstarch and flour mixture while stirring. Heat over medium heat until thickened, about 6-7 minutes.
  4. Set the Mixture: Pour thickened mixture into a greased rectangular dish, cover with plastic wrap. Refrigerate for at least 3 hours.
  5. Cut the Portions: Once chilled, lift the set mixture and cut into squares.
  6. Prepare the Coating: Set up three bowls: one with 1/2 cup flour, one with 2 beaten eggs, and another with 1/2 cup sugar and 1 teaspoon ground cinnamon.
  7. Fry the Leche Frita: Heat oil over medium heat until 350°F. Dip pieces first in flour, then eggs, and fry for 2-3 minutes on each side until golden.
  8. Coat and Serve: Toss fried Leche Frita in sugar-cinnamon mixture and serve warm.

Notes

Ensure to chill the mixture properly and fry in small batches for best results.

Creamy Indian Overnight Oats – No Yogurt in Just 10 Minutes

As I rummaged through my pantry one evening, the sight of my neglected oats sparked an exciting idea. That’s when I embarked on my journey to create Indian Overnight Oats – No Yogurt in 10 Minutes. This delightful spin on traditional oats transforms humble ingredients into a vibrant, spiced breakfast that’s not only a feast for the eyes but also a nutritious start to any day. With just ten minutes of prep the night before, these vegan oats make busy mornings a breeze and keep you feeling satisfied for hours. Plus, they’re sugar-free and customizable to suit any dietary preference! Are you ready to discover how to whip up a bowl of goodness that’s as easy as it is delicious? Let’s dive in!

Why Are Indian Overnight Oats So Special?

Quick and Easy: With only 10 minutes of prep the night before, you’ll wake up to a nutritious breakfast that’s ready to go.

Vegan Goodness: These oats are entirely plant-based, making them suitable for vegan diets while still offering a deliciously rich flavor.

Customize Your Way: Whether you prefer berries, bananas, or a sprinkle of nuts, the topping options are endless, ensuring variety every morning!

Health Benefits: Packed with fiber and protein from oats and chia seeds, this recipe supports a healthy lifestyle without any added sugars.

Meal Prep Friendly: Make a double batch for four delightful breakfasts, perfectly suited for anyone who wants to eat healthy on-the-go. For more meal prep inspiration, check out my Broccoli Patties Yogurt recipe!

Flavorful Twist: The spices like turmeric and cinnamon provide a comforting warmth that sets these overnight oats apart from traditional recipes.

Indian Overnight Oats Ingredients

For the Base
Rolled Oats – The hearty foundation of this dish; for more chew, try steel-cut oats.
Chia Seeds – Adds thickness and enhances nutrition; ground flaxseeds work as a great substitute.
Turmeric – Infuses warmth and offers health benefits; a fundamental spice in Indian cuisine.
Cinnamon Powder – Enhances flavor with a cozy sweetness, perfect for breakfast.

For the Liquid
Almond Milk (or alternative) – The key soaking liquid; feel free to swap in any milk substitute like soy or oat milk.

For Sweetness
Honey (or maple syrup) – Provides a touch of natural sweetness; opt for agave nectar for a fully vegan choice.

For Toppings
Fruits (Banana/Berries) – Fresh toppings that add natural sweetness and extra nutrition; mix and match seasonal fruits!
Nuts/Coconut Flakes – Optional toppings for delightful crunchiness and a flavor boost.

These Indian Overnight Oats – No Yogurt are not just delicious; they’re a canvas for your creativity each morning!

Step‑by‑Step Instructions for Indian Overnight Oats – No Yogurt in 10 Minutes

Step 1: Combine the Dry Ingredients
In a mixing bowl, combine 1 cup of rolled oats, 2 tablespoons of chia seeds, 1 teaspoon of turmeric, and 1 teaspoon of cinnamon. Stir the dry ingredients well until evenly mixed, ensuring that the chia seeds are distributed throughout the oats. This mixture provides a hearty base for your Indian Overnight Oats, adding both flavor and nutrition to your breakfast.

Step 2: Add the Liquid Ingredients
Pour in 2 cups of almond milk and 2 tablespoons of honey (or maple syrup) into the dry mixture. Stir vigorously to ensure all the oats and chia seeds are well-coated and absorbed by the liquid. This step is essential for achieving a creamy texture, so keep mixing until no dry patches are visible. The mixture should look slightly thick, indicating it’s ready for the next phase.

Step 3: Prepare for Refrigeration
Divide the oat mixture evenly into two airtight containers, or use a larger container for a double batch if desired. Make sure to flatten the top slightly with a spoon. Sealing them properly is key to keeping your Indian Overnight Oats fresh and preventing any leaks or unwanted flavors from mingling in the fridge overnight.

Step 4: Layer with Fruits and Nuts
Slice up your choice of fruits, like bananas or berries, and layer them generously over the oat mixture in each container. Optionally, sprinkle a handful of nuts or coconut flakes on top for extra crunch. This adds not just flavor but also an appealing visual finish to your breakfast prep, inspiring anticipation for the morning delight.

Step 5: Refrigerate Overnight
Seal the containers tightly and place them in the refrigerator for at least 6 hours, ideally overnight. This chilling time allows the oats and chia seeds to soak up the almond milk, softening and expanding for an ideal texture. By morning, you’ll have a delicious, ready-to-eat vegan breakfast waiting for you!

Step 6: Add Final Touches in the Morning
In the morning, stir the Indian Overnight Oats gently to combine the layers. If the mixture seems too thick, add a splash of almond milk to reach your desired consistency. Top with additional fresh fruits or nuts as desired, and enjoy your nutritious start to the day, fully energizing you for whatever lies ahead!

Make Ahead Options

These Indian Overnight Oats – No Yogurt are ideal for making ahead, streamlining your busy mornings! You can prepare the oat mixture and refrigerate it for up to 3 days in advance, allowing you to enjoy a delicious, nutritious breakfast all week long. Simply combine the rolled oats, chia seeds, turmeric, cinnamon, almond milk, and honey in an airtight container the night before, then seal and refrigerate. For optimal freshness, add your sliced fruits and nuts the night you’re ready to eat or right before serving to maintain their crunch and flavor. With these easy make ahead options, you’ll save time and ensure delightful, healthy meals await you!

Expert Tips for Indian Overnight Oats

Liquid Measurements: Ensure you measure the almond milk accurately; too little can lead to dry oats, while too much may result in a runny consistency.

Chia Seeds Ratio: Use 1:5 chia seeds to oats ratio for ideal thickness. Many overlook this, making their oats soggy instead of creamy.

Spice Variations: Try adding a pinch of nutmeg or cardamom for a delicious twist. This can elevate your Indian Overnight Oats to new flavor heights.

Freshness Matters: Opt for fresh fruits just before serving to maintain their vibrant flavor and texture. Old or frozen toppings can diminish the overall experience!

Customizable Sweetness: Adjust sweetness to your taste; if you prefer a less sweet version, scale back on honey or maple syrup without sacrificing flavor.

Indian Overnight Oats – No Yogurt Customization

Feel free to make this recipe your own—it’s all about what makes your taste buds dance!

  • Nut-Free: Replace nuts with seeds such as sunflower or pumpkin to ensure a nut-free delight without losing the crunch.
  • Sweetness Boost: For those with a sweet tooth, add a splash of vanilla extract or a sprinkle of coconut sugar for a flavor lift.
  • Fruit Variety: Swap in seasonal fruits like peaches or pears to keep breakfast exciting and fresh throughout the year. A mix of fruits provides vibrant colors and flavors!
  • Creamy Texture: Use coconut or cashew milk instead of almond milk for a richer, creamier taste experience.
  • Protein Power: Add a tablespoon of nut butter or protein powder for an extra protein punch, keeping you full and fueled all morning long.
  • Flavor Adventure: Toss in a bit of matcha or cocoa powder for a fun twist that adds interesting flavors and vibrant colors to your oats.
  • Chia Pudding Style: Let the mixture sit for a while before layering, thickening much like chia pudding for a delightful, custardy texture. Don’t miss the chance to enjoy both styles!

For meal-prep inspiration, try pairing these oats with some hearty Broccoli Patties Yogurt for a nourishing breakfast combo. Enjoy experimenting and creating your perfect morning masterpiece!

Storage Tips for Indian Overnight Oats

Fridge: Keep your Indian Overnight Oats sealed in airtight containers in the refrigerator for up to 3 days. This ensures they stay fresh and flavorful for your busy mornings.

Freezer: For longer storage, you can freeze these oats in individual portions. Just thaw overnight in the fridge before you plan to enjoy them, ensuring a quick, healthy breakfast.

Reheating: If you prefer your oats warm, simply add a splash of almond milk and warm them gently in the microwave or stovetop. Mix well to achieve the desired creamy consistency.

Preparation Batch: Consider making multiple batches ahead of time for a week’s worth of nutritious breakfasts; feel free to get creative with different fruit and nut toppings!

What to Serve with Indian Overnight Oats – No Yogurt

Elevate your delightful breakfast with complementary sides and drinks that enhance every spoonful of these spiced oats.

  • Fresh Fruit Salad: A mix of seasonal fruits adds a vibrant pop of color and extra sweetness, enhancing the overall freshness.
  • Chai Tea: A warm cup of spiced chai tea perfectly complements the flavors of your overnight oats, creating a cozy breakfast experience.
  • Nut Butter Toast: A slice of whole-grain toast with almond or peanut butter offers a hearty crunch and additional protein.
  • Granola Parfait: Layered granola with yogurt alternative gives a delightful crunch and creaminess to contrast the creaminess of the oats.
  • Smoothie Bowl: A cool, fruity smoothie bowl balances the warmth of the spiced oats while providing a nutritious start to your day.
  • Savory Avocado Toast: Topped with herbs or spices, this savory option adds a fulfilling dimension to your breakfast table.
  • Coconut Water: Refreshing and hydrating, coconut water offers a light, tropical flavor that complements the spices beautifully.
  • Almond Milk Latte: A creamy almond milk latte enhances the vegan theme and provides a comforting caffeine boost for the morning.

Indian Overnight Oats – No Yogurt Recipe FAQs

How do I select ripe fruits for my Indian Overnight Oats?
Absolutely! When choosing fruits, look for fresh, firm options without dark spots or bruising. Bananas should have a slight give when gently squeezed, while berries should be bright and plump. This ensures you get the best flavor and nutrition for your oats.

How should I store Indian Overnight Oats?
For optimal freshness, keep your Indian Overnight Oats in airtight containers in the refrigerator for up to 3 days. This storage method preserves their creamy texture and delightful flavors, making your busy mornings easier, especially when batch-prepping!

Can I freeze Indian Overnight Oats?
Very! You can freeze individual portions of your Indian Overnight Oats for up to 3 months. Simply scoop the mixture into freezer-safe containers and seal tightly. To enjoy, thaw overnight in the refrigerator and add a splash of almond milk before serving to restore creaminess.

What if my oats turned out too thick after refrigeration?
No worries, this can easily happen! If you find your oats too thick, just stir in a little extra almond milk until you reach your desired consistency. You can also heat them gently in the microwave; just add the milk before reheating to help loosen them up.

Are these oats suitable for people with nut allergies?
Absolutely! You can easily adapt the recipe to accommodate nut allergies by using alternative milk, such as oat or rice milk, instead of almond milk. Just remember to check the labels for any potential cross-contamination with nuts, and use seeds or dried fruit instead of nuts for topping!

Do these oats contain added sugars?
Not at all! The Indian Overnight Oats – No Yogurt recipe is naturally sweetened with honey or maple syrup; you can adjust the sweetness to your taste or opt for agave nectar for a fully vegan, sugar-free alternative. It’s a delicious way to enjoy a healthy breakfast without the extra sugar!

Indian Overnight Oats – No Yogurt in 10 Minutes

Creamy Indian Overnight Oats – No Yogurt in Just 10 Minutes

Discover Indian Overnight Oats – No Yogurt prepared in just 10 minutes for a nutritious breakfast.
Prep Time 10 minutes
Refrigeration Time 6 hours
Total Time 6 hours 10 minutes
Servings: 2 servings
Course: Breakfast
Cuisine: Indian
Calories: 250

Ingredients
  

For the Base
  • 1 cup Rolled Oats For more chew, try steel-cut oats.
  • 2 tablespoons Chia Seeds Ground flaxseeds work as a great substitute.
  • 1 teaspoon Turmeric A fundamental spice in Indian cuisine.
  • 1 teaspoon Cinnamon Powder Enhances flavor with a cozy sweetness.
For the Liquid
  • 2 cups Almond Milk Feel free to swap in any milk substitute.
For Sweetness
  • 2 tablespoons Honey Opt for agave nectar for a fully vegan choice.
For Toppings
  • 1 cup Fruits Banana/Berries for natural sweetness.
  • 1/4 cup Nuts/Coconut Flakes Optional toppings for extra crunch.

Equipment

  • mixing bowl
  • airtight containers
  • Measuring cups
  • Measuring spoons

Method
 

Step-by-Step Instructions
  1. In a mixing bowl, combine rolled oats, chia seeds, turmeric, and cinnamon. Stir well until evenly mixed.
  2. Pour in almond milk and honey (or maple syrup) into the dry mixture. Stir vigorously until well-coated.
  3. Divide the oat mixture evenly into airtight containers. Flatten the top slightly with a spoon.
  4. Layer with sliced fruits and optionally sprinkle with nuts or coconut flakes.
  5. Seal the containers and refrigerate for at least 6 hours, ideally overnight.
  6. In the morning, stir gently and add almond milk if too thick. Top with additional fruits or nuts as desired.

Notes

These oats can be customized with various toppings each morning for variety.

Succulent Garlic Thanksgiving Turkey That Steals the Show

The kitchen filled with warm scents of garlic and savory herbs can bring a smile to anyone’s face, especially during a holiday gathering. This Herb-Butter Roasted Garlic Thanksgiving Turkey takes center stage for any feast, showcasing a stunning golden skin that contrasts perfectly with the juicy, tender meat beneath. It’s not just a turkey; it’s an experience wrapped in comfort and tradition, making it ideal for creating lasting memories with family and friends. Best of all, this recipe is surprisingly simple to follow, ensuring your Thanksgiving feast is hassle-free while impressing your guests. Are you ready to elevate your holiday table with this garlic-infused delight? Let’s dive into making a turkey that will have everyone coming back for seconds!

Why You’ll Love This Turkey Recipe

Simplicity: The steps are straightforward, making it easy for both novice cooks and seasoned chefs to create a stunning centerpiece with ease.

Irresistible Flavor: Infused with garlic and fresh herbs, every bite bursts with savory goodness that will delight your taste buds.

Perfect for Gatherings: With a generous size, this turkey can feed a crowd, making it the ideal choice for Thanksgiving or any festive occasion.

Customizable: Feel free to experiment with different herbs or add your favorite sides, similar to how I pair my Garlic Butter French Fries or serve with delicious Broccoli Patties Yogurt for an extra veggie option!

Crowd-Pleaser: This turkey is not just a meal; it’s a centerpiece that brings family and friends together, creating memories that last a lifetime.

Garlic Thanksgiving Turkey Ingredients

For the Turkey
Turkey (12 to 18 lb, fully thawed) – The star of the show; choose fresh for unbeatable flavor or frozen for a budget-friendly option.

For the Aromatics
Onion – Adds depth to the flavor; substitute with shallots if you prefer a sweeter note.
Lemon – Brightens up the dish with acidity; orange can be a lovely sweet alternative.

For the Herbs
Fresh Rosemary – Infuses earthy tones; use dried as a last resort for a quick fix.
Fresh Thyme – Imparts a gentle minty flavor; dried thyme works well in smaller quantities.
Fresh Sage – Brings warmth to the turkey; skip it if unavailable and adjust with more thyme.

For Seasoning
Kosher Salt – Enhances overall flavor; add cautiously if using other salty ingredients.
Fresh Ground Black Pepper – Adds spice and balance; white pepper can substitute for a milder kick.

For the Herb Butter
Unsalted Butter (3/4 cup, softened) – Essential for moisture and richness; switch to olive oil for a lighter twist.
Garlic (6 cloves, minced) – The heart of the flavor profile; provides a savory and aromatic essence.

For Roasting Vegetables
Carrots and Celery – They complement the drippings beautifully; feel free to swap in parsnips or other root vegetables.

This Garlic Thanksgiving Turkey is guaranteed to steal the show with its warm, inviting flavors!

Step‑by‑Step Instructions for Garlic Thanksgiving Turkey

Step 1: Prepare Turkey
Start by bringing your fully thawed turkey to room temperature, allowing it to rest for about 1 hour. This helps ensure even cooking. Carefully remove the giblets from the cavity and pat the turkey dry using paper towels, making the skin ready for that golden, crispy finish.

Step 2: Preheat Oven
Set your oven to 325°F (160°C). This moderate heat will help your Garlic Thanksgiving Turkey roast evenly, developing that coveted crispy skin while keeping the meat juicy. Make sure your oven rack is positioned in the center for optimal cooking.

Step 3: Season Cavity
Generously season the inside of the turkey with kosher salt and fresh ground black pepper, ensuring every bite is flavorful. Stuff the cavity with the chopped onion, lemon wedges, and a handful of fresh rosemary, thyme, and sage. Avoid overfilling; air circulation is key for a well-cooked turkey.

Step 4: Make Herb Butter
In a medium bowl, combine the softened unsalted butter with the minced garlic, salt, black pepper, rosemary, and thyme. Mix until completely blended—this rich herb butter will be a delightful flavor bomb for your Garlic Thanksgiving Turkey.

Step 5: Apply Herb Butter
Gently loosen the skin of the turkey, especially over the breast, using your fingers. Rub a portion of the herb butter beneath the skin for deep flavor, and then spread the remaining butter generously over the outer skin. This step is crucial for achieving that beautiful, crispy finish.

Step 6: Set Roasting Bed
In a large roasting pan, layer the chopped onion, celery, and carrots to create a flavorful bed for your turkey. These vegetables will roast beautifully, enriching the natural drippings. Place your seasoned turkey atop this aromatic base, ready for roasting.

Step 7: Roast Turkey
Slide the roasting pan into your preheated oven and bake the Garlic Thanksgiving Turkey for approximately 15 minutes per pound. Keep an eye on the turkey; when the thigh temperature reaches 158°F-160°F, it’s time to check for doneness. If the skin browns too quickly, tent it with foil.

Step 8: Rest
Once the turkey is cooked through, remove it from the oven and let it rest for 30 minutes before carving. This resting period allows the juices to redistribute, resulting in moist, tender meat. Cover it loosely with foil while it rests to keep it warm.

Step 9: Carve & Serve
After resting, it’s time to carve your stunning Garlic Thanksgiving Turkey. Slice into the moist, flavorful meat and serve with the roasted vegetables and pan juices, perfect for making a delicious gravy. Relish in the satisfaction of a beautiful holiday feast!

Make Ahead Options

These Herb-Butter Roasted Garlic Thanksgiving Turkey preps are perfect for busy cooks looking to save time during the holiday rush! You can prepare the herb butter and season the turkey up to 24 hours in advance; simply store the butter in the refrigerator and rub it onto the turkey just before roasting. Additionally, stuff the turkey cavity with the onion, lemon, and herbs a few hours in advance, keeping it covered in the fridge to maintain freshness. When it’s time to roast, just follow the usual instructions, tenting with foil if necessary for that golden skin. With these make-ahead options, you’ll enjoy a stress-free cooking experience while still serving a spectacular centerpiece.

How to Store and Freeze Garlic Thanksgiving Turkey

Fridge: Store leftover garlic Thanksgiving turkey in an airtight container or wrap tightly with plastic wrap for up to 4 days.

Freezer: For longer storage, freeze turkey pieces in airtight bags for up to 3 months. Be sure to label them with the date!

Reheating: Reheat gently in the oven at 325°F until warmed through, ensuring you retain moisture. Consider adding a splash of broth or covering with foil.

Tips: To prevent freezer burn, remove as much air as possible from bags before sealing; the delicious flavors of your garlic Thanksgiving turkey deserve the best care!

Variations & Substitutions for Garlic Thanksgiving Turkey

Feeling inspired to make this Garlic Thanksgiving Turkey your own? Let your creativity shine and enhance your holiday flavors!

  • Dairy-Free: Swap the unsalted butter with olive oil or vegan butter for a lighter option that still keeps the turkey moist.

  • Citrus Twist: Use orange or lime instead of lemon for a unique sweetness that brightens the flavors, bringing a refreshing twist to your dish.

  • Herb Medley: Mix in fresh tarragon or oregano with the traditional herbs for a unique flavor profile that dazzles the palate. Each variation tells a culinary story.

  • Spicy Kick: Add crushed red pepper flakes or a dash of cayenne pepper to the herb butter for a touch of heat that can awaken the taste buds!

  • Umami Boost: Incorporate some finely chopped mushrooms or sun-dried tomatoes into the herb mixture for an extra depth of flavor that pairs beautifully with garlic.

  • Nutty Flavor: Add a sprinkle of toasted nuts, like pecans or walnuts, to the roasting bed for enhanced flavor and crunch that contrast wonderfully with the tender meat.

  • Smoke Infusion: If you enjoy a smoky flavor, consider adding a few drops of liquid smoke to the herb butter for a unique twist that complements the garlic beautifully.

As you embrace these variations, consider pairing your turkey with delightful sides like my wonderful Heirloom Herb Garlic Bread or classic mashed potatoes for a holiday feast that’s sure to impress. Enjoy the journey of flavor exploration!

What to Serve with Garlic Thanksgiving Turkey

Creating the perfect meal isn’t just about the turkey; it’s about crafting a beautifully balanced feast that delights the senses and warms the heart.

  • Creamy Mashed Potatoes: The velvety texture of buttery mashed potatoes complements the savory turkey, soaking up every bit of delicious gravy.

  • Savory Stuffing: A fragrant stuffing filled with herbs and spices adds a comforting contrast, and it’s a classic pairing that feels like home.

  • Cranberry Sauce: Bright and tangy, this sauce cuts through the richness of the turkey, providing a refreshing burst of flavor that balances each bite.

  • Green Bean Almondine: Crunchy green beans tossed with toasted almonds offer a delightful crunch and a fresh touch that perfectly offsets the turkey’s richness.

  • Roasted Root Vegetables: Carrots and parsnips caramelized to perfection enhance the earthy flavors of the turkey, creating a warm and inviting plate that will have everyone reaching for seconds.

  • Garlic Bread: For a cozy, nostalgic feel, serve garlicky breadsticks or slices that can be enjoyed with the turkey’s drippings, bringing comfort and satisfaction.

  • Apple Pie: End your meal with a warm slice of homemade apple pie. The sweet and spiced notes of the dessert will leave everyone with a satisfying finish to the Thanksgiving feast.

  • Spiced Apple Cider: A warm beverage like spiced apple cider heightens the festive atmosphere and blends beautifully with the flavors of the meal, inviting guests to linger a little longer.

Expert Tips for Garlic Thanksgiving Turkey

  • Thawing Method: Ensure your turkey is entirely thawed before cooking, as this prevents uneven cooking. Allocate 24 hours of fridge thawing time per 4-5 lbs of turkey.

  • Use a Thermometer: Invest in a meat thermometer to check the thickest part of the thigh. Properly cooked turkey should reach an internal temperature of 158°F-160°F for juicy results.

  • Resting Matters: Letting the turkey rest for 30 minutes after roasting is crucial. This step allows juices to settle, ensuring every slice of your Garlic Thanksgiving Turkey is moist and tender.

  • Mind the Stuffing: When adding aromatics to the cavity, don’t overstuff! A loosely filled cavity allows for better airflow, promoting even cooking throughout the turkey.

  • Herb Variations: Feel free to experiment with herbs in the butter. Fresh tarragon or parsley can give your Garlic Thanksgiving Turkey a unique twist, perfect for impressing those at your table!

Garlic Thanksgiving Turkey Recipe FAQs

What’s the best way to choose a turkey for roasting?
Absolutely! When selecting a turkey, aim for one that is fully thawed, weighing between 12 to 18 pounds for a hearty feast. Fresh turkeys are ideal for flavor but if you’re on a budget, frozen options are perfectly acceptable. Look for turkeys that are plump with smooth skin and no dark spots—this ensures the best quality and taste for your Garlic Thanksgiving Turkey.

How should I store leftover turkey?
Very! Store any leftover garlic Thanksgiving turkey in an airtight container or wrap it tightly with plastic wrap. It’s best kept in the fridge and should be consumed within 4 days for optimal freshness. If you need to store it longer, consider freezing it and it will last up to 3 months. Reheating should be done gently to keep the moisture intact!

Can I freeze the garlic Thanksgiving turkey?
Of course! To freeze your garlic Thanksgiving turkey, slice the cooked turkey into portions and place them in airtight freezer bags. Press out as much air as possible before sealing. You can enjoy your frozen turkey for up to 3 months! Just remember to label the bags with the date. When ready to enjoy, thaw in the fridge overnight and reheat gently in the oven.

What do I do if my turkey is browning too quickly?
No worries! If your garlic Thanksgiving turkey begins to brown too quickly during roasting, simply tent it with aluminum foil. This slows down the browning process while the inside continues to cook to perfection. Ensure you check the internal temperature in the thickest part of the thigh; it should reach 158°F-160°F.

Can I use dried herbs instead of fresh in the recipe?
Absolutely! While fresh herbs provide a vibrant flavor, dried herbs can be used as well. Just remember to use about one-third of the amount called for fresh—so if the recipe calls for 1 tablespoon of fresh thyme, use about 1 teaspoon of dried. This helps maintain balance in your Garlic Thanksgiving Turkey’s flavor without being overpowering.

Is this recipe safe for pets?
Very! While turkey is generally safe for dogs and cats in moderation, it’s important to avoid giving them seasoned meat or skin. Always ensure the turkey is plain and boneless when sharing leftovers with your furry friends. Avoid ingredients like garlic and onions, which can be harmful to pets, ensuring everyone enjoys Thanksgiving safely!

Garlic Thanksgiving Turkey

Succulent Garlic Thanksgiving Turkey That Steals the Show

This Garlic Thanksgiving Turkey recipe is a flavorful centerpiece ideal for holiday gatherings, showcasing tender meat and irresistible flavor.
Prep Time 1 hour
Cook Time 3 hours
Resting Time 30 minutes
Total Time 4 hours 30 minutes
Servings: 10 slices
Course: Dinner
Cuisine: American
Calories: 350

Ingredients
  

For the Turkey
  • 12 to 18 lbs Turkey, fully thawed Choose fresh for better flavor
For the Aromatics
  • 1 medium Onion Substitute with shallots for sweetness
  • 1 medium Lemon Orange is a sweet alternative
For the Herbs
  • 2 tbsp Fresh Rosemary Dried can be used if necessary
  • 2 tbsp Fresh Thyme Use dried in smaller quantities
  • 2 tbsp Fresh Sage Skip if unavailable
For Seasoning
  • 1 tbsp Kosher Salt Adjust if using other salty ingredients
  • 1 tbsp Fresh Ground Black Pepper White pepper may be used
For the Herb Butter
  • 3/4 cup Unsalted Butter, softened Olive oil can be a lighter option
  • 6 cloves Garlic, minced Essential for flavor
For Roasting Vegetables
  • 2 cups Carrots and Celery Parsnips can be a tasty alternative

Equipment

  • large roasting pan
  • Meat thermometer
  • mixing bowl
  • Paper Towels

Method
 

Step-by-Step Instructions for Garlic Thanksgiving Turkey
  1. Prepare Turkey: Bring your fully thawed turkey to room temperature for about 1 hour. Remove giblets and pat dry with paper towels.
  2. Preheat Oven: Set your oven to 325°F (160°C) and ensure the rack is in the center.
  3. Season Cavity: Stuff the cavity with onion, lemon, rosemary, thyme, sage, and season with salt and pepper.
  4. Make Herb Butter: Combine softened butter, garlic, salt, black pepper, rosemary, and thyme in a bowl.
  5. Apply Herb Butter: Rub herb butter under the turkey skin and over the outer skin.
  6. Set Roasting Bed: Layer chopped onion, celery, and carrots in a roasting pan as a bed for the turkey.
  7. Roast Turkey: Roast for approximately 15 minutes per pound until the thigh temperature reaches 158°F-160°F.
  8. Rest: Remove turkey from oven and let it rest for 30 minutes covered with foil.
  9. Carve & Serve: Carve the turkey and serve with roasted vegetables and pan juices.

Notes

Ensure the turkey is fully thawed and use a meat thermometer for best results. Experiment with different herbs if desired.

Irresistible Apple Upside Down Cake That Steals Hearts

As I stood in my kitchen, the warm aroma of caramelizing apples filled the air, transporting me back to cherished family gatherings where dessert was the highlight of the day. This Classic Caramel Apple Upside Down Cake is not just a treat; it’s a slice of nostalgia, beautifully showcasing tender apple slices soaked in a rich, luscious caramel. With its quick prep time and moist, fluffy texture, this cake is the perfect way to impress guests or simply indulge on a cozy evening at home. The blend of spices and sweetness is bound to evoke those comforting memories that linger long after the last bite. Are you ready to elevate your dessert game with this delightful cake? Let’s dive in!

Why Is This Cake So Special?

Comforting Nostalgia: Each bite of this cake takes you back to family gatherings filled with laughter and love.
Decadent Caramel Bliss: The rich caramel topping melts in your mouth, leaving a heavenly sweetness behind.
Simple Preparation: With just a few ingredients and easy steps, you can whip this up in no time!
Versatile Delight: Swap out apples for seasonal fruits like pears or peaches, or even try adding nuts for an extra crunch. Why not serve it warm with a scoop of vanilla ice cream or a dollop of whipped cream for an elevated experience? Crisp Cabbage Apple pairs perfectly as a refreshing side dish for your meal.
Crowd-Pleasing Dessert: Bring this cake to your next gathering, and watch it disappear!

Apple Upside Down Cake Ingredients

For the Caramel Layer

  • Apples – Three medium-sized (Granny Smith or Honeycrisp) are perfect for flavor and texture; feel free to consider pears or peaches as substitutions for a unique twist.
  • Unsalted Butter – ½ cup adds richness and moisture to the cake; you can substitute with margarine or coconut oil if needed.
  • Brown Sugar – 1 cup contributes sweetness and creates a delicious caramel-like base; both light or dark brown sugar work interchangeably for this recipe.
  • Ground Cinnamon – 1 teaspoon enhances the flavor of the apples; try vanilla or nutmeg as alternatives for a delightful spice profile.

For the Cake Batter

  • All-Purpose Flour – 1½ cups provides structure; for a gluten-free option, simply substitute with a gluten-free flour blend.
  • Baking Powder – 1 teaspoon acts as a leavening agent for a light and fluffy cake texture.
  • Baking Soda – ½ teaspoon works alongside the baking powder for a better rise.
  • Salt – ½ teaspoon balances the sweetness of the cake beautifully.
  • Granulated Sugar – 1 cup adds sweetness and contributes to the cake’s overall texture.
  • Eggs – 2 large ones add necessary structure and moisture; consider using flaxseed meal or applesauce for a vegan substitute.
  • Vanilla Extract – 1 teaspoon adds depth of flavor; almond extract can be a lovely substitute for something different.
  • Milk – ½ cup provides moisture; you can use almond milk or coconut milk for a lactose-free alternative.

Embrace the warm, cozy flavors in this Apple Upside Down Cake and bring a slice of comfort to your table!

Step‑by‑Step Instructions for Apple Upside Down Cake

Step 1: Prepare the Apples
Start by peeling, coring, and slicing your three medium-sized apples into thin wedges, ensuring uniformity for even cooking. Opt for Granny Smith or Honeycrisp varieties for the best flavor. This essential step will set the foundation for your Classic Caramel Apple Upside Down Cake, as the tender apple slices will soon soak up all that delicious caramel goodness.

Step 2: Make the Caramel Base
In a saucepan over medium heat, melt the ½ cup of unsalted butter, incorporating 1 cup of brown sugar and 1 teaspoon of ground cinnamon until the mixture becomes smooth and bubbly, about 3-5 minutes. This decadent caramel layer will eventually transform into the cake’s sweet and gooey topping. Once combined, pour this luscious mix into a greased 9-inch round cake pan.

Step 3: Arrange the Apples
Carefully layer the freshly sliced apple wedges over the warm caramel mixture in a circular pattern, creating an appealing design. The apple slices will absorb the flavors of the caramel as they bake, making for a beautiful presentation. Make sure the apple slices overlap slightly to ensure every slice of the Apple Upside Down Cake is packed with that delightful sweetness.

Step 4: Prepare the Cake Batter
In a large mixing bowl, whisk together 1½ cups of all-purpose flour, 1 teaspoon of baking powder, ½ teaspoon of baking soda, and ½ teaspoon of salt to ensure even distribution of leavening agents. In another bowl, cream together 1 cup of granulated sugar and 2 large eggs until the mixture is light and fluffy—around 5 minutes. Stir in the 1 teaspoon of vanilla extract and ½ cup of milk, followed by combining the wet and dry ingredients.

Step 5: Combine and Bake
Pour the cake batter evenly over the arranged apple slices in the cake pan, ensuring complete coverage. Preheat your oven to 350°F (175°C) and bake the cake for about 40 minutes, or until you can insert a toothpick into the center and it comes out clean. This step is crucial for a moist and fluffy texture in your Apple Upside Down Cake.

Step 6: Cool and Serve
Once baked, remove the cake from the oven and allow it to cool in the pan for 10 minutes. This cooling period is essential to prevent breaking when inverting. To serve, carefully flip the cake onto a serving plate, letting the caramel and apples flow beautifully over the top. Enjoy this warm treat, remembering to share the delightful flavors of the Classic Caramel Apple Upside Down Cake with loved ones!

Make Ahead Options

These Classic Caramel Apple Upside Down Cakes are perfect for meal prep enthusiasts! You can slice and arrange the apples and prepare the caramel base up to 24 hours in advance. Simply store the apple slices in an airtight container with a splash of lemon juice to prevent browning, and keep the caramel mixture in the refrigerator. When you’re ready to bake, just pour the caramel into the pan, arrange the apples, and mix the cake batter as instructed. This way, you’ll have a delightful dessert with minimal effort, ready to impress your guests with fresh, homemade flavors!

How to Store and Freeze Apple Upside Down Cake

Room Temperature: Store leftover apple upside down cake in an airtight container for up to 2 days to maintain freshness and moisture.

Fridge: If you want to keep it longer, refrigerate the cake in an airtight container for up to a week. This will help preserve its delicious flavors and texture.

Freezer: For longer storage, freeze slices of the cake in a freezer-safe container for up to 3 months. Wrap each slice tightly in plastic wrap before placing them in the container.

Reheating: To enjoy the cake again, reheat it gently in the oven at 350°F (175°C) for about 10-15 minutes, allowing the caramel to become gooey once more.

Expert Tips for Apple Upside Down Cake

Avoid Sinking: Ensure the batter is whipped until light and fluffy to prevent a sinking cake, which is crucial for a successful apple upside down cake.

Thin Apple Slices: Slice your apples thinly to allow even cooking; this will help them integrate beautifully with the caramel, enhancing flavor and texture.

Cool Before Inverting: Allow the cake to cool slightly in the pan before inverting to prevent breaking. This step guarantees a prettier presentation.

Perfect Caramel: For a smoother caramel base, avoid burning the butter and sugar mixture; keep the heat moderate and stir consistently while cooking.

Substitution Smart: If you’re out of some ingredients, don’t hesitate to substitute—margarine for butter, or almond milk for regular milk work well in this apple upside down cake.

What to Serve with Classic Caramel Apple Upside Down Cake

Bring warmth and joy to your table with complementary dishes that elevate the experience of this comforting dessert.

  • Vanilla Ice Cream: A classic pairing that adds creaminess and balances the sweet, sticky caramel. The cold ice cream contrasts beautifully with the warm cake.

  • Whipped Cream: Light and airy, a dollop of freshly whipped cream provides a delightful contrast to the rich apple topping. Its subtle sweetness enhances the overall flavor experience.

  • Crisp Cabbage Apple Salad: This refreshing salad introduces a crunch with crisp cabbage and tart apple slices, offering a vivid contrast to the cake’s soft texture. Tossed lightly in a tangy dressing, it brings vibrant color and extra flavor.

  • Hot Spiced Tea: The warming spices of a hot cup of spiced tea complement the cinnamon notes in the cake. The aromatic flavors create a cozy ambiance and make every bite feel even more indulgent.

  • Homemade Caramel Sauce: For the truly indulgent, drizzle some extra caramel sauce over your cake—because can there ever be too much caramel? This adds an extra layer of richness that fans of sugary delights will adore.

Apple Upside Down Cake Variations

Feel free to let your creativity shine by customizing this delightful apple upside-down cake!

  • Dairy-Free: Replace butter and milk with coconut oil and almond milk for a deliciously creamy alternative.
  • Gluten-Free: Use a gluten-free flour blend instead of all-purpose flour to cater to dietary needs without compromising flavor.
  • Fruity Twist: Substitute apples with fresh pears, peaches, or even pineapple to give a whole new flavor experience to your cake.
  • Nutty Crunch: Stir in chopped walnuts or pecans into the caramel mixture for extra texture and a satisfying crunch.
  • Spicy Kick: Add a pinch of nutmeg or ginger to the batter for a warm spice that complements the apples beautifully.
  • Sweetener Swap: Try using honey or maple syrup in place of granulated sugar for a natural sweetness that enhances the cake.
  • Chocolate Indulgence: Drizzle melted chocolate over the top after inverting for a decadent touch that can’t be resisted.
  • Boozy Delight: Incorporate a splash of rum or bourbon into the caramel for an elevated flavor profile that’ll impress your guests.

If you’re looking for more delicious ideas, consider pairing this cake with a refreshing Crisp Cabbage Apple salad for a delightful balance, or explore other sweet options like my favorite Apple Pie to keep the apple theme going! Let your taste buds guide you!

Apple Upside Down Cake Recipe FAQs

What type of apples should I use for this cake?
For the best flavor and texture, I recommend using medium-sized Granny Smith or Honeycrisp apples. These varieties provide the perfect balance of tartness and sweetness, but feel free to substitute with pears or peaches for a delightful twist on the classic recipe.

How should I store leftover Apple Upside Down Cake?
To maintain freshness, store your leftover apple upside down cake in an airtight container at room temperature for up to 2 days. If you’d like to keep it longer, refrigerate it for up to a week to preserve its wonderful flavors and moist texture.

Can I freeze Apple Upside Down Cake?
Absolutely! To freeze slices of your cake, wrap each piece tightly in plastic wrap and place them in a freezer-safe container. You can keep it frozen for up to 3 months. When you’re ready to enjoy it again, simply reheat the slices gently in the oven at 350°F (175°C) for about 10-15 minutes until warmed through.

Why did my cake sink in the middle?
If your cake sinks, it’s likely due to under-aerated batter. Be sure to cream the sugar and eggs together until they are light and fluffy. Pay attention to your mixing technique, as overmixing can also lead to a dense texture, which might result in sinking.

Is there a vegan option for this recipe?
Yes! To make a vegan version of the Apple Upside Down Cake, substitute the 2 large eggs with ½ cup of unsweetened applesauce or 2 tablespoons of flaxseed meal mixed with 6 tablespoons of water. Also, use almond milk or coconut milk in place of regular milk, and ensure to use vegan butter or coconut oil in the caramel layer.

Can I use different types of sugars for the cake?
Sure! For the caramel layer, both light and dark brown sugar work interchangeably, offering a similar sweetness. If you prefer a less processed option, you might also consider coconut sugar for a unique flavor profile. However, keep in mind that this might slightly alter the texture and color of your cake.

Apple Upside Down Cake Recipe FAQs

Apple Upside Down Cake

Irresistible Apple Upside Down Cake That Steals Hearts

Indulge in a delightful Apple Upside Down Cake that evokes nostalgia and comfort with each bite.
Prep Time 20 minutes
Cook Time 40 minutes
Cooling Time 10 minutes
Total Time 1 hour 10 minutes
Servings: 8 slices
Course: Dessert
Cuisine: American
Calories: 300

Ingredients
  

Caramel Layer
  • 3 medium Apples (Granny Smith or Honeycrisp)
  • 0.5 cup Unsalted Butter can substitute with margarine or coconut oil
  • 1 cup Brown Sugar light or dark brown sugar works
  • 1 teaspoon Ground Cinnamon vanilla or nutmeg can be alternatives
Cake Batter
  • 1.5 cups All-Purpose Flour substitute with gluten-free flour blend if needed
  • 1 teaspoon Baking Powder
  • 0.5 teaspoon Baking Soda
  • 0.5 teaspoon Salt
  • 1 cup Granulated Sugar
  • 2 large Eggs can use flaxseed meal or applesauce for vegan option
  • 1 teaspoon Vanilla Extract almond extract can be used as a substitute
  • 0.5 cup Milk almond milk or coconut milk for lactose-free option

Equipment

  • 9-inch round cake pan
  • mixing bowls
  • Saucepan
  • whisk

Method
 

Preparation
  1. Peel, core, and slice the apples into thin wedges.
  2. Melt the unsalted butter in a saucepan over medium heat, then incorporate brown sugar and cinnamon until smooth.
  3. Pour the caramel mixture into a greased 9-inch round cake pan.
  4. Arrange the apple wedges over the caramel in a circular pattern.
  5. Whisk together flour, baking powder, baking soda, and salt in one bowl. In another, cream sugar and eggs, then stir in vanilla and milk before combining wet and dry ingredients.
  6. Pour the batter over the apples in the pan and bake at 350°F (175°C) for about 40 minutes.
  7. Allow to cool in the pan for 10 minutes before inverting onto a serving plate.

Notes

Slice your apples thinly for even cooking. Cool the cake before inverting to prevent breaking. Substitute ingredients as needed for dietary preferences.

Delightful Elegant White Chocolate Mousse Tartlets for You!

As I whisked together the cream and white chocolate, a delightful cloud of sweetness enveloped my kitchen, whispering of indulgence. These Elegant White Chocolate Mousse Tartlets are not just a dessert; they’re a charming showstopper that can transform any gathering into a sweet celebration. With a buttery graham cracker crust cradling a silky mousse that simply melts on your tongue, they offer the perfect balance of lightness and richness. Not only are they a real crowd-pleaser, but they also allow you to impress your guests with minimal fuss. Trust me when I say, crafting these tartlets will take your dessert game to the next level. Curious about how to whip up these elegant delights? Let’s dive into the recipe!

Why Are These Tartlets A Must-Make?

Indulgent Flavor: The luscious white chocolate mousse envelops your taste buds in a creamy embrace, providing a rich yet airy dessert experience.

Effortlessly Elegant: With a buttery graham cracker crust and bright raspberry garnish, these tartlets elevate any dessert table without the need for extensive baking skills.

Perfect for Any Occasion: Whether it’s a garden party or a cozy dinner, these tartlets impress while remaining simple enough for last-minute gatherings.

Versatile Presentation: Dress them up with edible flowers or varied fruit toppings, and they’ll always shine as a stunning centerpiece.

Quick to Assemble: With minimal preparation and chilling time, these tartlets are a fantastic solution for busy bakers or unexpected guests.

Plus, if you’re on a chocolate kick, check out my recipes for Nutty Chocolate Date and Coffee Chocolate Truffles for more irresistible treats!

Ingredients for Elegant White Chocolate Mousse Tartlets

For the Crust
Graham Cracker Crumbs – Forms the crisp, buttery base; feel free to use store-bought or homemade for convenience.
Unsalted Butter – Binds the crust and adds a toasty flavor; keep it unsalted to manage the overall saltiness.

For the Mousse
White Chocolate – Provides creamy sweetness and depth; choose high-quality chocolate with at least 30% cocoa butter for a smooth texture.
Heavy Whipping Cream – Whipped to soft peaks for a light, airy mousse; don’t overwhip to maintain a silky consistency.
Cream Cheese – Stabilizes the mousse and adds a subtle tang to balance the sweetness; make sure it’s softened for easy blending.
Powdered Sugar – Sweetens without graininess; granulated sugar can be used in a pinch, but the texture will be less smooth.

For the Garnish
Fresh Raspberries – Offer a tart contrast and vibrant color; you can substitute with strawberries or mixed berries for decoration.
Caramel Sauce – Adds sweetness and a glossy finish; opt for homemade for a flavor boost, but store-bought works too.
Edible Flowers (optional) – Decorative touch for presentation; mint leaves or additional berries also make beautiful garnishes.

These Elegant White Chocolate Mousse Tartlets are not only delicious but also incredibly easy to put together, making them a delightful addition to any dessert table!

Step‑by‑Step Instructions for Elegant White Chocolate Mousse Tartlets

Step 1: Prepare the Crust
In a medium bowl, combine graham cracker crumbs with melted unsalted butter until evenly coated. This mixture should resemble wet sand. Press the mixture firmly into the bottom and sides of tartlet pans, creating a uniform layer. Refrigerate the crusts for 20 minutes to become firm and crisp, ensuring they hold their shape when filled.

Step 2: Melt the White Chocolate
Using a double boiler, melt chopped white chocolate over low heat, stirring continuously until it’s completely smooth. This process typically takes about 5-7 minutes. Be cautious not to overheat, as the chocolate can seize. Once melted, remove from heat and let it cool slightly while you prepare the mousse mixture.

Step 3: Whip the Cream
In a chilled mixing bowl, pour the heavy whipping cream. Using an electric mixer, whip on medium speed until soft peaks form, which should take around 2-3 minutes. Stop immediately to avoid overwhipping; the cream must remain fluffy to incorporate into the mousse. Set aside your beautifully whipped cream for later.

Step 4: Blend the Mousse Ingredients
In another bowl, beat the softened cream cheese with powdered sugar until smooth and creamy, about 2-3 minutes. Gradually incorporate the cooled melted white chocolate into the cream cheese mixture, mixing until fully combined. This step adds rich flavor and depth to your Elegant White Chocolate Mousse Tartlets.

Step 5: Combine Mousse and Whipped Cream
Gently fold the whipped cream into the white chocolate and cream cheese mixture until just combined. Use a spatula to carefully combine without deflating the whipped cream; you want the mousse to remain light and airy. The mixture should be smooth and creamy, a perfect base for filling your tart crusts.

Step 6: Fill the Tartlet Crusts
Spoon or pipe the white chocolate mousse into the chilled tartlet crusts, evenly distributing the mousse for a polished presentation. Fill each tartlet to the top, smoothing the surface with a spatula. Once filled, return the tartlets to the refrigerator and chill for at least 30 minutes, allowing the mousse to set beautifully.

Step 7: Garnish and Serve
When ready to serve, garnish each tartlet with fresh raspberries and a delicate drizzle of caramel sauce for sweetness. For an added touch of elegance, consider adding edible flowers if desired. These visual delights are now ready to impress your guests with the luxurious flavor and stunning presentation of your Elegant White Chocolate Mousse Tartlets.

Expert Tips for Elegant White Chocolate Mousse Tartlets

Choose Quality Chocolate: Using high-quality white chocolate ensures a silky and rich mousse. Cheaper brands can lead to a grainy texture that diminishes the dessert’s elegance.

Chill Thoroughly: After filling the tartlet crusts, allow them to chill for at least 30 minutes. This helps the mousse set properly for the best texture and flavor in your Elegant White Chocolate Mousse Tartlets.

Fold Gently: When mixing the whipped cream into the mousse, fold gently to maintain the delightful lightness. Avoid overmixing, which can deflate the airiness essential for a perfect mousse.

Don’t Overwhip: Keep an eye on the heavy cream while whipping. Stop as soon as soft peaks form to avoid turning it into butter, preserving the creamy consistency.

Experiment with Toppings: Feel free to get creative with the garnishes! While fresh raspberries are a wonderful choice, consider using seasonal fruits or edible flowers to personalize your Elegant White Chocolate Mousse Tartlets.

Perfect for Make-Ahead: These tartlets can be made a day in advance. Just add the toppings right before serving to keep everything fresh and looking beautiful!

How to Store and Freeze Elegant White Chocolate Mousse Tartlets

Fridge: Store the tartlets in an airtight container in the refrigerator for up to 2 days without toppings. This will help maintain their creamy texture and delicate flavor.

Freezer: If you want to freeze them, do so without toppings. Wrap each tartlet individually in plastic wrap and then place them in a freezer-safe container. They can be frozen for up to 1 month.

Reheating: Thaw frozen tartlets in the refrigerator overnight before serving. Add fresh raspberries and caramel just before enjoying to ensure the best taste and appearance.

Assembly Tips: For optimal freshness and presentation, it’s best to assemble the tartlets just before serving. This keeps the crust crispy and the toppings vibrant.

Make Ahead Options

These Elegant White Chocolate Mousse Tartlets are perfect for meal prep enthusiasts! You can prepare the graham cracker crust up to 24 hours in advance; simply press the mixture into the tartlet pans and refrigerate until firm. The white chocolate mousse can be made up to 3 days ahead, stored covered in the refrigerator. To maintain the mousse’s airy texture, carefully fold in the whipped cream right before filling the chilled crusts. When you’re ready to impress your guests, fill the crusts with the mousse and garnish with fresh raspberries and caramel sauce just before serving, ensuring they remain visually appealing and just as delicious as when freshly made!

Elegant White Chocolate Mousse Tartlets Variations

Feel free to let your creativity soar as you customize these delightful tartlets to suit your taste!

  • Citrus Zest:
    Add lemon or orange zest to the mousse for a refreshing burst of flavor. The citrusy aroma will elevate the sweetness beautifully.

  • Nutty Crust:
    Fold in crushed nuts, such as almonds or hazelnuts, into the graham cracker crust for a lovely crunch. This adds a divine texture that’s simply irresistible!

  • Berry Medley:
    Swap in strawberries or blueberries as a garnish to explore different flavor profiles. Each fruit brings a unique taste and color to every bite.

  • Chocolate Drizzle:
    Drizzle melted dark or milk chocolate over the mousse before adding toppings. This creates a delightful layering of flavor that’s sure to please chocolate lovers!

  • Mint Infusion:
    Incorporate peppermint extract into the mousse for an unexpected minty twist. A hint of mint complements the white chocolate luxuriously.

  • Spiced Delight:
    Sprinkle in a dash of cinnamon or nutmeg into the mousse. This warm spice makes for a comforting fall-inspired dessert.

  • Vegan Twist:
    Replace cream cheese with silken tofu and use dairy-free chocolate for an elegant vegan version. Your friends will be amazed that it’s plant-based!

  • Mini Tart Variation:
    Use mini phyllo cups instead of a traditional crust for bite-sized tartlets that are perfect for parties. These little treats will charm your guests with their cuteness!

These enhancements not only add an exciting touch to your dessert but transform them into a unique experience for you and your loved ones. For more inspiration, don’t forget to check out my recipes for Coconut Chocolate Rolls and Homemade Bake Chocolate!

What to Serve with Elegant White Chocolate Mousse Tartlets

Imagine a gathering where every bite is a delicate dance of flavors and textures, elevating your dessert experience to heavenly levels.

  • Mint Tea: This fragrant beverage offers a refreshing contrast to the creamy sweetness of the tartlets, cleansing the palate beautifully.

  • Sparkling Wine: The effervescence and acidity of sparkling wine cut through the richness of the mousse, creating a delightful balance in each bite.

  • Mixed Berry Salad: A vibrant mix of fresh berries dressed lightly in honey-lemon dressing enhances the tartlet’s flavors, adding a refreshing zest.

  • Chocolate-Covered Strawberries: These decadent treats pair beautifully, complementing the white chocolate with rich chocolate and fruity sweetness.

  • Vanilla Ice Cream: A scoop of creamy vanilla ice cream can provide a classic companion, adding a cool and smooth contrast to the delicate mousse.

  • Caramel Dipping Sauce: For those who crave extra sweetness, a warm caramel dip alongside the tartlets can make for a fun and indulgent experience.

  • Coffee or Espresso: The bold flavors of coffee or a shot of espresso elevate the dessert, adding depth while enhancing the sweetness of the tartlets.

Indulging in these pairings will create a symphony of flavors that perfectly complement your Elegant White Chocolate Mousse Tartlets.

Elegant White Chocolate Mousse Tartlets Recipe FAQs

How do I choose the right white chocolate?
For the best flavor and texture in your Elegant White Chocolate Mousse Tartlets, select high-quality white chocolate that contains at least 30% cocoa butter. Look for chocolate bars rather than chips, as they tend to melt smoother and create a creamier mousse. Avoid brands with excessive additives or fillers that can compromise taste.

How long can I store the tartlets?
You can store the tartlets in an airtight container in the refrigerator for up to 2 days without toppings. When stored properly, they will maintain their luscious texture and delightful flavor for that duration. Just remember to cover them gently to avoid any moisture buildup!

Can I freeze the tartlets?
Absolutely! To freeze the Elegant White Chocolate Mousse Tartlets, it’s best to do so without any toppings. Wrap each tartlet individually in plastic wrap, then place them in a freezer-safe container. They can stay frozen for up to 1 month. For serving, simply thaw them in the refrigerator overnight and add fresh raspberries and caramel just before enjoying!

What should I do if my mousse is too thick or grainy?
If your mousse turns out too thick, you may have overwhipped the cream or the chocolate may not have cooled sufficiently before mixing. To salvage it, you can gently fold in a small amount of extra whipped cream to lighten the texture. If it’s grainy, make sure to use high-quality chocolate next time, as cheaper brands can lead to a less smooth finish.

Are there any dietary considerations for these tartlets?
These Elegant White Chocolate Mousse Tartlets are not suitable for those with dairy allergies, as they contain heavy cream and cream cheese. If you’re looking to make them dairy-free, consider experimenting with alternatives like coconut cream and dairy-free cream cheese, though the final texture may differ. Always check for any cross-contamination if you’re serving guests with allergies.

How do I achieve the perfect mousse consistency?
To achieve a light and airy mousse consistency, it’s crucial to fold the whipped cream gently into the white chocolate and cream cheese mixture. Use a spatula and be careful not to overmix this step, as that will deflate the air you’ve just whipped in. It’s a delicate dance of mixing that will yield that beautiful cloud-like texture perfect for your tartlets.

Elegant White Chocolate Mousse Tartlets

Delightful Elegant White Chocolate Mousse Tartlets for You!

Indulge in these Elegant White Chocolate Mousse Tartlets, a perfect balance of lightness and richness that will impress any gathering.
Prep Time 30 minutes
Cook Time 7 minutes
Chilling Time 30 minutes
Total Time 1 hour 7 minutes
Servings: 12 tartlets
Course: Dessert
Cuisine: American
Calories: 250

Ingredients
  

For the Crust
  • 1 cup Graham Cracker Crumbs Store-bought or homemade
  • 4 tablespoons Unsalted Butter Melted
For the Mousse
  • 8 ounces White Chocolate High-quality, at least 30% cocoa butter
  • 1 cup Heavy Whipping Cream Whipped to soft peaks
  • 4 ounces Cream Cheese Softened
  • 1/2 cup Powdered Sugar Sweetens without graininess
For the Garnish
  • 1 cup Fresh Raspberries Can substitute with strawberries or mixed berries
  • 1/4 cup Caramel Sauce Homemade is preferred
  • Edible Flowers Optional

Equipment

  • mixing bowl
  • electric mixer
  • Double boiler
  • spatula
  • Tartlet Pans

Method
 

Preparation
  1. In a medium bowl, combine graham cracker crumbs with melted unsalted butter until evenly coated. Press into tartlet pans and refrigerate for 20 minutes.
  2. Melt chopped white chocolate over low heat in a double boiler, stirring continuously until smooth. Let cool slightly.
  3. In a mixing bowl, whip heavy cream on medium speed until soft peaks form, about 2-3 minutes.
  4. Beat softened cream cheese with powdered sugar in another bowl until smooth. Gradually add melted white chocolate until combined.
  5. Gently fold the whipped cream into the white chocolate and cream cheese mixture until just combined.
  6. Spoon or pipe the mousse into the chilled tartlet crusts and smooth the surface. Chill for at least 30 minutes.
  7. Garnish each tartlet with fresh raspberries and caramel sauce before serving.

Notes

These tartlets can be made a day in advance; add toppings just before serving for optimal freshness.

Oven-Braised Beer Brats with Apples & Onions for Cozy Nights

As the leaves begin to turn and the chill of autumn settles in, I find myself craving comfort foods that warm the soul. That’s when I whip up my Oven-Braised Beer Brats with Apples & Onions—a dish that’s as easy to prepare as it is inviting. This one-pan meal transforms juicy bratwursts into a rustic masterpiece, nestled in a sweet and savory blend of caramelized onions and apples. Not only is this recipe simple enough for weeknight dinners, but it also makes a great centerpiece for gatherings with family and friends. Plus, the delightful aroma that fills your kitchen will have everyone eagerly awaiting their first bite. So, ready to dive into a heartwarming taste of fall?

Why Are Oven-Braised Beer Brats Magical?

Comforting, Heartwarming Flavor: This dish perfectly captures the essence of fall with its rich flavors and cozy aromas that evoke nostalgic memories.
One-Pan Wonder: Say goodbye to excessive cleanup! Everything cooks in one pan, making it an ideal choice for busy weeknights or laid-back gatherings.
Versatile Delight: Feel free to swap bratwursts with turkey or chicken sausages, or customize with spices and sides like savory zucchini pancakes with fresh herbs for an extra touch.
Impressive Yet Simple: You’ll impress guests without spending hours in the kitchen—perfect for hosting!
Irresistible Aroma: The tantalizing scent of caramelized onions and apples sizzling away will draw everyone into the kitchen, sparking anticipation for your delicious creation!

Oven-Braised Beer Brats Ingredients

  • For the Base
    Olive Oil – Essential for sautéing vegetables; can be substituted with canola oil if needed.
    Butter – Adds richness to the dish; margarine is a great dairy-free alternative.
    Yellow Onions (2 large) – Sweet and caramelizes beautifully; feel free to use sweet onions for extra depth.
    Apples (2, Honeycrisp or Braeburn) – Provides natural sweetness to balance savory flavors; any firm, sweet variety works well.

  • For the Flavor
    Garlic (3 cloves, minced) – Enhances overall flavor; adjust more or less depending on your garlic affinity.
    Bratwursts (6) – The star of our dish; explore using chicken or turkey bratwursts for a lighter version.
    Beer (1 cup) – Fills the dish with rich flavor; opt for a mild lager or amber ale for best results.
    Beef Broth (1 cup) – Adds a savory depth; can substitute with vegetable broth for a vegetarian option.
    Dijon Mustard (2 tablespoons) – Provides a tangy kick to the braising liquid; yellow mustard works as a substitute if necessary.
    Salt and Freshly Ground Black Pepper – Season to taste; these staples are crucial for enhancing your dish’s flavor.

  • For the Finishing Touches
    Fresh Chopped Parsley (optional) – Use as a beautiful garnish to add color and freshness to your hearty meal.

Delight in the flavors of Oven-Braised Beer Brats with Apples & Onions, and let your kitchen fill with irresistible warmth and aroma!

Step‑by‑Step Instructions for Oven-Braised Beer Brats with Apples & Onions

Step 1: Preheat the Oven
Start by preheating your oven to 350°F (175°C). While the oven warms up, take out a large oven-safe skillet or Dutch oven to prepare for the cooking process. This will be the vessel where all the flavors come together in your Oven-Braised Beer Brats with Apples & Onions.

Step 2: Sauté Onions and Apples
In your preheated skillet, add a splash of olive oil and a pat of butter over medium heat. Once the butter is melted and sizzles, add the sliced onions and diced apples. Sauté them together for 20–25 minutes, stirring occasionally, until the onions are golden and the apples have softened, creating a deliciously aromatic base.

Step 3: Add Garlic
Once your onions and apples are nicely caramelized, it’s time to deepen the flavor. Stir in the minced garlic, cooking for just 1 minute until fragrant. This will enhance the sweet and savory profile of your Oven-Braised Beer Brats with Apples & Onions and prepare your base for the bratwursts.

Step 4: Incorporate Bratwursts
Nestle the bratwursts gently on top of the apple-onion mixture in the skillet. Ensure that they press down slightly into the flavors, allowing them to absorb the sweetness from the apples and the richness from the onions. This sets the stage for a hearty meal packed with flavor.

Step 5: Mix Liquid & Seasonings
In a separate bowl, whisk together the beer, beef broth, and Dijon mustard until well combined. Pour this flavorful mixture evenly over the bratwursts, ensuring everything is moistened. Season generously with salt and freshly ground black pepper to bring out the best in your Oven-Braised Beer Brats with Apples & Onions.

Step 6: Simmer
Before transferring to the oven, bring the mixture to a gentle simmer on the stovetop. This allows the flavors to meld beautifully, enhancing the taste of each ingredient before the final bake.

Step 7: Oven-Braise
Now, it’s time for the magic! Place the skillet uncovered in the preheated oven and braise for 30–40 minutes. Keep an eye on the bratwursts, and ensure they reach a minimum internal temperature of 160°F. This final cooking phase enhances the texture and infuses the bratwursts with the sweet-savory essence of the apples and onions.

Step 8: Garnish & Serve
Once finished, carefully remove the skillet from the oven. If desired, sprinkle with freshly chopped parsley for a touch of color. Serve your Oven-Braised Beer Brats with Apples & Onions hot, and enjoy this heartwarming dish that brings the flavors of autumn to your table.

Make Ahead Options

These Oven-Braised Beer Brats with Apples & Onions are fantastic for busy weeknights, allowing you to savor delicious homemade flavors with minimal effort! You can prepare the onion and apple mixture up to 24 hours in advance; simply sauté them as instructed, let cool, and refrigerate. You can also season your bratwursts and store them separately in the fridge, ensuring they stay fresh. When you’re ready to serve, combine the refrigerated components, pour the beer and broth mixture over them, and bake as instructed. This approach not only saves you time but also means dinner will be just as mouthwatering and comforting when served!

Expert Tips for Oven-Braised Beer Brats

  • Choose the Right Beer: Opt for a mild lager or amber ale for perfect flavor; darker or overly hoppy beers can overwhelm the dish.

  • Caramelization Is Key: Take your time when sautéing the onions and apples to deepen their sweetness; rushing this step may lead to a less flavorful mix.

  • Bratwurst Alternatives: For a lighter twist, don’t hesitate to swap bratwursts with chicken or turkey sausages while maintaining the same delicious braising method.

  • Perfect Timing: Ensure bratwursts reach an internal temperature of 160°F for safe consumption; using a meat thermometer helps avoid over or undercooking.

  • Serving Suggestions: Pair your Oven-Braised Beer Brats with crusty bread or creamy mashed potatoes to complete the cozy meal experience.

Oven-Braised Beer Brats with Apples & Onions Variations

Feel free to spice things up or make this dish your own with these delightful variations and substitutions!

  • Chicken Sausages: Swap bratwursts for chicken or turkey sausages for a lighter spin. It’s just as satisfying and perfect for a healthier take.
  • Spicy Kick: Add crushed red pepper flakes or diced jalapeños for an extra heat boost. This simple twist creates a vibrant contrast to the sweetness of apples.
  • Apple Variety: Experiment with different apple varieties, like Granny Smith for a tart twist or Fuji for added sweetness.
  • Broth Alternatives: Use vegetable broth instead of beef broth for a vegetarian-friendly dish. It retains all the comforting flavors you’ll love!
  • Herb Infusion: Toss in fresh herbs like thyme or rosemary while braising for an aromatic touch. It’ll elevate the flavor profile beautifully.
  • Sweet Maple Glaze: Drizzle maple syrup over the bratwursts before baking for a sweet twist that pairs wonderfully with savory and tangy flavors.
  • Savory Sides: Serve with buttered noodles, creamy polenta, or roasted vegetables for a delicious and balanced meal. You could even add a side of refreshing cucumber and carrot salad with a twist to brighten your plate.
  • Chutney Option: Top the finished dish with apple chutney or a spicy mustard for an added layer of flavor that everyone will love.

Whatever you choose, let your creativity shine in the kitchen! Happy cooking!

How to Store and Freeze Oven-Braised Beer Brats with Apples & Onions

Fridge: Store leftovers in an airtight container for up to 3 days. The flavors of the dish will continue to develop and become even more delicious.

Freezer: For longer storage, freeze the bratwursts in a freezer-safe container for up to 2 months. When ready to enjoy, thaw overnight in the fridge before reheating.

Reheating: Reheat in a skillet over medium heat, adding a splash of broth or beer to maintain moisture, or microwave in short intervals until heated through.

Serving Suggestions: When reheating, consider serving with fresh bread or a side of creamy mashed potatoes to recreate that cozy meal experience with your Oven-Braised Beer Brats with Apples & Onions.

What to Serve with Oven-Braised Beer Brats with Apples & Onions

As you prepare this delightful dish, think about complementary sides that elevate your cozy meal experience to new heights.

  • Creamy Mashed Potatoes: Their buttery texture contrasts beautifully with the savory bratwursts, soaking up the delicious braising liquid.
  • Roasted Brussels Sprouts: These add a delightful crunch and slightly bitter flavor, balancing the sweetness of the apples perfectly.
  • Crusty Bread: A hearty loaf is perfect for mopping up that rich sauce, ensuring none of that comforting flavor goes to waste.
  • Cabbage Slaw: A refreshing, tangy slaw provides a nice textural contrast, and its acidity cuts through the richness of the dish.
  • Savory Sauteed Greens: Chard or spinach cooked lightly with garlic adds a nutritious touch and complements the overall flavor profile.
  • Apple Crisp: For dessert, this warm, comforting treat echoes the dish’s apple element, leaving everyone satisfied and happy.
  • Mulled Wine: A warming drink infused with spices enhances the autumn vibes, making this meal feel even more festive.

Oven-Braised Beer Brats with Apples & Onions Recipe FAQs

What type of beer should I use for the best flavor?
Opt for a mild lager or amber ale when making Oven-Braised Beer Brats with Apples & Onions. These types provide a rich yet balanced flavor that complements the sweetness of the apples and onions. Avoid dark or overly hoppy beers, as they can overpower the dish.

How can I ensure my bratwursts are fully cooked?
To guarantee that your bratwursts are fully cooked, use a meat thermometer to check the internal temperature. They should reach at least 160°F (71°C). This ensures they’re safe to eat while maintaining their juicy texture. If you’re unsure, you can always cut one open to check if it’s cooked through.

What is the best way to store leftovers?
Store any leftover Oven-Braised Beer Brats with Apples & Onions in an airtight container in the fridge for up to 3 days. This allows the flavors to meld together even more, making your leftovers taste delicious. Always make sure to let the dish cool before sealing for storage.

Can I freeze this dish? If so, how?
Absolutely! To freeze your bratwursts, place the cooled dish in a freezer-safe container or heavy-duty freezer bags. It can be frozen for up to 2 months. When you’re ready to enjoy it again, thaw it overnight in the fridge, then reheat on the stovetop or in the oven, adding a splash of broth or beer to keep it moist.

Are there any dietary considerations I should be aware of?
Yes, if you want to make this dish suitable for those with dietary restrictions, consider using turkey or chicken bratwursts for a lighter option. Additionally, vegetable broth can be substituted for beef broth to create a vegetarian-friendly version. Always check labels to ensure all ingredients are safe for those with allergies.

What should I do if my onions and apples aren’t caramelizing properly?
If you find that your onions and apples are not caramelizing well, make sure that you are cooking them over medium heat and not overcrowding the pan. If there’s too much in the skillet, they will steam rather than caramelize. To fix this, try cooking them in batches if they seem overcrowded, and take your time. Ideally, they should cook for about 20–25 minutes until they’re golden brown and beautifully fragrant.

Oven-Braised Beer Brats with Apples & Onions

Oven-Braised Beer Brats with Apples & Onions for Cozy Nights

Oven-Braised Beer Brats with Apples & Onions is a comforting dish with rich flavors and cozy aromas perfect for autumn nights.
Prep Time 15 minutes
Cook Time 40 minutes
Total Time 55 minutes
Servings: 6 bratwursts
Course: Dinner
Cuisine: American
Calories: 350

Ingredients
  

For the Base
  • 2 tablespoons Olive Oil Essential for sautéing vegetables; can be substituted with canola oil.
  • 1 tablespoon Butter Adds richness to the dish; margarine is a great dairy-free alternative.
  • 2 large Yellow Onions Sweet and caramelizes beautifully.
  • 2 Apples Honeycrisp or Braeburn; provides natural sweetness.
For the Flavor
  • 3 cloves Garlic Minced; enhances overall flavor.
  • 6 Bratwursts Explore using chicken or turkey bratwursts for a lighter version.
  • 1 cup Beer Opt for a mild lager or amber ale.
  • 1 cup Beef Broth Adds a savory depth.
  • 2 tablespoons Dijon Mustard Provides a tangy kick.
  • Salt Season to taste.
  • Freshly Ground Black Pepper Season to taste.
For the Finishing Touches
  • Fresh Chopped Parsley Optional; use as a garnish.

Equipment

  • Large oven-safe skillet
  • Dutch oven

Method
 

Cooking Instructions
  1. Preheat your oven to 350°F (175°C).
  2. In your preheated skillet, add a splash of olive oil and a pat of butter over medium heat. Once melted, add sliced onions and diced apples. Sauté for 20–25 minutes until golden.
  3. Stir in minced garlic and cook for 1 minute until fragrant.
  4. Nestle the bratwursts on top of the apple-onion mixture.
  5. In a bowl, whisk together beer, beef broth, and Dijon mustard. Pour over bratwursts and season with salt and pepper.
  6. Bring mixture to a gentle simmer on the stovetop.
  7. Place skillet uncovered in the oven and braise for 30–40 minutes until bratwursts reach an internal temperature of 160°F.
  8. Remove from oven and garnish with parsley if desired. Serve hot.

Notes

This dish is easy to prepare and perfect for busy weeknights or gatherings. Serve with crusty bread or creamy mashed potatoes.

Irresistible Apple Crisp Cheesecake to Celebrate Fall Flavors

As the air turns crisp and the leaves paint the world in shades of amber, I find myself longing for comforting desserts that celebrate autumn. Enter the Apple Crisp Cheesecake—a heavenly blend of creamy cheesecake and spiced, caramelized apples, all nestled under a crunchy oat streusel. This delightful dessert not only captures the essence of fall but also serves as an easy way to impress friends and family at gatherings. With its rich texture and inviting warmth, it offers a delicious twist on traditional cheesecake while still being adaptable for gluten-free diets. So, are you ready to take your taste buds on a seasonal adventure with this irresistible Apple Crisp Cheesecake? Let’s dive into this baking journey together!

Why is this Apple Crisp Cheesecake special?

Fall Flavors: This Apple Crisp Cheesecake beautifully embodies the spirit of autumn with spiced, caramelized apples and warm cinnamon that wrap you in comfort.

Crowd-Pleaser: Perfect for potlucks or family gatherings, it’s a showstopper that will make everyone rave about your baking skills!

Versatile Options: Easily adapt it for gluten-free diets by using gluten-free graham crackers, or switch to pears for a refreshing twist.

Quick Steps: Despite its gourmet appearance, the recipe is straightforward, combining basic ingredients with simple steps that make baking a joy.

Deliciously Indulgent: The creamy cheesecake base paired with the crunchy oat streusel and luscious salted caramel drizzle creates a harmonious blend that’s truly irresistible!

Pair it with a scoop of vanilla ice cream or a drizzle of homemade salted caramel for an extra treat that complements the flavors perfectly!

Apple Crisp Cheesecake Ingredients

• Here’s everything you need to create this heavenly dessert!

For the Streusel

  • Rolled Oats – Provides the crunch; avoid quick oats for best texture.
  • Brown Sugar – Adds sweetness and caramel notes to the topping.
  • Cinnamon – Enhances the warm, cozy flavors of fall.
  • Flour – Helps bind the streusel together for a crumbly finish.
  • Unsalted Butter – Gives a rich flavor; use at room temperature for easy mixing.

For the Filling

  • Full Fat Cream Cheese – Essential for that dense, luscious cheesecake texture.
  • Granulated Sugar – Balances the tartness of the apples.
  • Sour Cream – Adds tanginess and moisture to the filling.
  • Eggs – Binds everything together; use large eggs for the best results.
  • Vanilla Extract – Enhances the overall flavor profile deliciously.
  • Cinnamon – Infuses warmth into the filling, making each bite wonderful.

For the Apples

  • Granny Smith Apples – Adds a lovely tartness; perfect for balancing sweetness.
  • Brown Sugar – Caramelizes beautifully with the apples for extra flavor.

For the Crust

  • Graham Cracker Crumbs – Forms a solid, buttery base; can substitute with digestive biscuits.
  • Sugar – Adds sweetness to the crust.
  • Unsalted Butter – A key ingredient that holds the crust together and adds richness.

This Apple Crisp Cheesecake brings the essence of fall into your kitchen—perfect for any gathering or cozy night in!

Step‑by‑Step Instructions for Apple Crisp Cheesecake

Step 1: Prepare the Streusel
Begin by combining rolled oats, flour, brown sugar, cinnamon, and melted unsalted butter in a mixing bowl. Use your fingers or a fork to mix until the mixture is crumbly and resembles coarse sand. Once combined, cover the bowl and refrigerate the streusel for at least 20 minutes, allowing it to set while you prepare the filling.

Step 2: Prepping the Apples
Next, peel and slice the Granny Smith apples into thin wedges. In a separate bowl, toss the apple slices with brown sugar and a sprinkle of cinnamon until evenly coated. This step will enhance the flavors of the apples as they caramelize. Refrigerate the tossed apples for about 15 minutes to let the flavors meld together.

Step 3: Make the Graham Cracker Crust
In another bowl, combine graham cracker crumbs, granulated sugar, and melted butter until fully mixed. Press the crumb mixture evenly into the bottom of a 9-inch springform pan to form a solid crust. Bake the crust in a preheated oven at 350°F for 10 minutes until lightly golden. Remove it from the oven and allow it to cool while you prepare the cheesecake filling.

Step 4: Mix the Cheesecake Filling
In a large mixing bowl, beat room temperature cream cheese until smooth, using an electric mixer on medium speed. Gradually add granulated sugar, mixing until well combined. Then, mix in sour cream and vanilla extract. Incorporate eggs one at a time, blending until each is fully mixed. The Apple Crisp Cheesecake filling should be creamy and well-blended without lumps.

Step 5: Assemble the Cheesecake
Carefully pour the cheesecake filling over the cooled graham cracker crust, spreading it evenly with a spatula. Gently layer the chilled apple mixture on top of the cheesecake filling, distributing the apples evenly. Finally, sprinkle the chilled streusel topping generously over the apples to create a lovely crunchy layer.

Step 6: Bake the Cheesecake
Prepare a water bath by placing the springform pan into a larger baking dish filled with hot water, ensuring it covers the outer edge of the cheesecake pan. Bake the Apple Crisp Cheesecake in a preheated oven at 325°F for 60-65 minutes, or until the edges are set, but the center still jiggles slightly. This method will keep it moist and avoid cracking.

Step 7: Cool and Chill
Once baked, turn off the oven, crack the door open, and let the cheesecake cool in the oven for about 1 hour. This gradual cooling helps prevent cracks. Afterward, remove the cheesecake from the water bath, cover, and refrigerate overnight to set completely and enhance the flavors.

Step 8: Serve and Enjoy
Before serving, top your chilled Apple Crisp Cheesecake with a generous drizzle of salted caramel sauce for added indulgence. Cut into slices and serve with a scoop of vanilla ice cream, if desired. This rich, creamy cheesecake with tender apples will surely be a hit at your gathering!

How to Store and Freeze Apple Crisp Cheesecake

Fridge: Store your Apple Crisp Cheesecake tightly wrapped in plastic wrap or in an airtight container for up to 5 days. This will help maintain its creamy texture and flavor.

Freezer: For longer storage, freeze individual slices or the entire cheesecake wrapped tightly in plastic wrap and aluminum foil. It can be frozen for up to 3 months.

Reheating: When ready to enjoy, simply thaw the cheesecake in the refrigerator overnight. For a warm treat, you can microwave each slice for 15-20 seconds; just be careful not to overheat!

Restoring Crispness: If the streusel loses its crunch during freezing, sprinkle some fresh oats or toast a new batch of streusel to top the cheesecake before serving.

Make Ahead Options

These Apple Crisp Cheesecake delights are perfect for busy home cooks looking to save time! You can prep the cinnamon streusel and sliced apples up to 24 hours in advance—just store each component in the refrigerator to maintain their freshness. Additionally, you can make the graham cracker crust up to 3 days ahead; be sure to tightly wrap it to keep it from becoming stale. When you’re ready to serve, simply mix the cheesecake filling and assemble your dessert! The flavors will meld beautifully, resulting in an equally delicious treat that’s ready when you are. With these make-ahead tips, impressing your family and friends becomes a breeze!

Apple Crisp Cheesecake Variations

Feel inspired to put your own spin on this delicious Apple Crisp Cheesecake and create something uniquely yours!

  • Gluten-Free: Swap the graham cracker crumbs with gluten-free graham crackers or almond flour for a tasty gluten-free delight.

  • Fruity Twist: Replace the apples with ripe pears or juicy peaches for a different seasonal flavor that’s equally delicious. The sweet and slightly tart notes will complement the cheesecake beautifully.

  • Nuts Galore: Add crushed walnuts or pecans to the streusel topping for an irresistible crunch that adds texture and nutty flavor to every bite.

  • Dairy-Free: Use vegan cream cheese along with coconut cream in place of sour cream for a delightful dairy-free version that still packs the creamy punch.

  • Cinnamon Spice: For a spicier kick, toss in a dash of nutmeg or allspice with your apples for an extra layer of autumnal warmth.

  • Chocolate Drizzle: Give a decadent twist by drizzling melted chocolate over the finished cheesecake before serving, adding a rich contrast to the apples and streusel.

  • Caramel Substitutes: Instead of salted caramel, try a drizzle of chocolate or a homemade butterscotch sauce to change up the flavor profile while still being indulgent.

This Apple Crisp Cheesecake is a blank canvas, ready for your personal touch! If you’re looking for more fabulous dessert ideas, consider trying out Strawberry Cheesecake Dump or an Easy Yummy Apple Pie. Each variation serves to ignite creativity in your fall baking!

Expert Tips for Apple Crisp Cheesecake

  • Room Temperature Ingredients: Ensure cream cheese, sour cream, and eggs are at room temperature for a smooth batter and better incorporation of ingredients.

  • Avoid Overmixing: When adding eggs to the filling, mix just until combined. Overmixing can introduce air bubbles, leading to cracks during baking.

  • Use a Water Bath: Baking your Apple Crisp Cheesecake in a water bath helps regulate temperature and retains moisture, preventing cracks and producing a creamy texture.

  • Cool Gradually: After baking, let the cheesecake cool slowly in the oven by cracking the door open. This prevents sudden temperature changes that can cause cracking.

  • Refrigerate Overnight: Allowing the cheesecake to chill overnight enhances flavors and improves the texture, making it easier to slice and serve.

  • Serve with Toppings: Consider pairing your cheesecake with vanilla ice cream or a drizzle of homemade salted caramel for an extra touch of indulgence!

What to Serve with Apple Crisp Cheesecake

Elevate your dessert experience with delightful pairings that enhance every bite of this creamy, spiced treasure.

  • Vanilla Ice Cream: The classic option that adds creaminess and a contrasting coldness, perfectly complementing the warm spices.
  • Salted Caramel Sauce: A luscious drizzle brings a rich sweetness and enhances the depth of flavors in the cheesecake.
  • Fresh Whipped Cream: Light and airy, it balances the cheesecake’s density, creating a harmonious texture on your palate.
  • Cinnamon Spiced Tea: A warm beverage that echoes the cheesecake’s cinnamon notes, making each sip cozy and inviting.
  • Pecan Pie Bars: A rich, nutty dessert that plays off the crunchy streusel topping, adding layers of flavor to your spread.
  • Apple Cider: Both warm and chilled versions bring a refreshing apple flavor that complements the cheesecake beautifully.

Imagine serving each slice of cheesecake alongside a scoop of vanilla ice cream and a drizzle of salted caramel—a comforting treat that draws everyone back for seconds!

Apple Crisp Cheesecake Recipe FAQs

What type of apples is best for Apple Crisp Cheesecake?
I recommend using Granny Smith apples for their tartness, which beautifully balances the sweetness of the cheesecake. If you prefer a sweeter flavor, feel free to substitute them with Gala apples instead!

How should I store the Apple Crisp Cheesecake?
You can store your Apple Crisp Cheesecake tightly wrapped in plastic wrap or in an airtight container in the refrigerator for up to 5 days. This keeps it fresh, flavorful, and creamy—all ready to enjoy whenever you like!

Can I freeze Apple Crisp Cheesecake?
Absolutely! To freeze your cheesecake, wrap it tightly in plastic wrap, followed by aluminum foil, ensuring no air is trapped inside. It can be frozen for up to 3 months. When you’re ready to eat, thaw it in the refrigerator overnight for best results.

What can I do if my cheesecake cracks during baking?
If your cheesecake cracks, don’t worry! This can often happen due to sudden temperature changes or overmixing. To prevent future cracks, remember to bake in a water bath, cool it gradually in the oven, and avoid overmixing when incorporating the eggs.

Is there a gluten-free option for the crust?
Yes! For a gluten-free Apple Crisp Cheesecake, simply substitute traditional graham cracker crumbs with gluten-free graham crackers or almond flour to create a delightful crust without gluten. It’s a delicious and adaptable choice for those with dietary needs.

How long should I let the cheesecake cool before refrigerating?
After baking the Apple Crisp Cheesecake, let it cool in the oven with the door slightly ajar for about 1 hour. This helps it to maintain a lovely texture without developing cracks. Once cooled, cover it and refrigerate overnight to set fully.

Apple Crisp Cheesecake

Irresistible Apple Crisp Cheesecake to Celebrate Fall Flavors

This Apple Crisp Cheesecake combines creamy cheesecake with spiced apples and crunchy streusel, perfect for fall gatherings.
Prep Time 30 minutes
Cook Time 1 hour 5 minutes
Cooling Time 1 hour
Total Time 2 hours 35 minutes
Servings: 12 slices
Course: Dessert
Cuisine: American
Calories: 350

Ingredients
  

For the Streusel
  • 1 cup Rolled Oats Avoid quick oats for best texture.
  • 1/2 cup Brown Sugar Adds sweetness and caramel notes.
  • 1 teaspoon Cinnamon Enhances warm fall flavors.
  • 1/2 cup Flour Helps bind the streusel.
  • 1/2 cup Unsalted Butter Use at room temperature.
For the Filling
  • 16 oz Full Fat Cream Cheese Essential for cheesecake texture.
  • 1 cup Granulated Sugar Balances the tartness of apples.
  • 1/2 cup Sour Cream Adds tanginess and moisture.
  • 3 large Eggs Binds ingredients together.
  • 1 teaspoon Vanilla Extract Enhances flavor.
  • 1 teaspoon Cinnamon Infuses warmth.
For the Apples
  • 4 Granny Smith Apples Adds tartness.
  • 1/2 cup Brown Sugar Caramelizes beautifully.
For the Crust
  • 1 1/2 cups Graham Cracker Crumbs Forms the base.
  • 1/4 cup Sugar Adds sweetness.
  • 1/2 cup Unsalted Butter Key for crust richness.

Equipment

  • mixing bowl
  • 9-inch springform pan
  • electric mixer
  • Baking Dish

Method
 

Preparation Steps
  1. Prepare the streusel by combining rolled oats, flour, brown sugar, cinnamon, and melted unsalted butter in a mixing bowl. Mix until crumbly and refrigerate for at least 20 minutes.
  2. Peel and slice the Granny Smith apples into thin wedges. Toss with brown sugar and cinnamon, then refrigerate for about 15 minutes.
  3. Make the graham cracker crust by mixing crumbs, sugar, and melted butter. Press into a 9-inch springform pan and bake at 350°F for 10 minutes.
  4. Beat cream cheese until smooth. Gradually add sugar, then mix in sour cream, vanilla, and eggs one at a time.
  5. Assemble the cheesecake by pouring the filling over the cooled crust and layering the apple mixture on top. Sprinkle streusel over the apples.
  6. Bake in a water bath at 325°F for 60-65 minutes until the edges are set.
  7. Cool in the oven for about 1 hour, then refrigerate overnight to set.
  8. Serve with a drizzle of salted caramel and enjoy!

Notes

Ensure all ingredients are at room temperature for better mixing. Allow cheesecake to chill overnight for best flavor and texture.

Dolly’s Chicken and Stuffing Casserole for Heartwarming Nights

As I opened the oven door, a wave of comforting aroma enveloped me, instantly transporting me to cherished family gatherings. Dolly’s Chicken and Stuffing Casserole is more than just a meal; it’s a warm embrace on a plate, rich with the tastes of tender chicken nestled beneath a crispy stuffing layer. This recipe is not only a breeze to whip up but also makes for an effortless make-ahead option, perfect for those hectic weeknights when you’d rather savor home-cooked goodness than resort to takeout. With its potential for gluten-free variations and the ability to use leftover turkey, this dish is versatile enough to please everyone at your table. Curious about how to bring a taste of Southern comfort to your home? Let’s dive into this delicious recipe!

Why is This Casserole a Must-Try?

Comforting, timeless flavors: Dolly’s Chicken and Stuffing Casserole brings a touch of Southern nostalgia to your dinner table, perfect for making memories.
Effortless preparation: With simple ingredients and minimal prep time, this dish is ideal for any home cook looking to savor a homemade meal without the hassle.
Versatile options: Whether you prefer turkey or need gluten-free solutions, this recipe adapts to fit your needs while ensuring delicious results every time.
Make-ahead convenience: Prepare it up to a day in advance, making weeknight dinners seamless and stress-free.
Crowd-pleaser appeal: Perfect for family gatherings or weekday dinners, everyone will love the combination of creamy chicken and crunchy stuffing.

Dolly’s Chicken and Stuffing Casserole Ingredients

For the Casserole Base
Cooked Chicken – Use rotisserie chicken for convenience or pre-cooked chicken for added flavor.
Cream of Chicken Soup – Adds creaminess and binds the casserole together; Greek yogurt offers a healthier alternative.
Sour Cream – Contributes tanginess and richness; swap with Greek yogurt for a lighter version.

For the Stuffing Layer
Stuffing Mix – Provides texture and flavor, and can be substituted with cornbread stuffing for a sweeter taste.
Chicken Broth – Moistens the stuffing and enhances flavor; opt for low-sodium broth for a healthier choice.
Butter – Enhances flavor and promotes a crispy topping; can be omitted but adds to browning.

Seasonings
Garlic Powder – Adds depth of flavor; adjust to suit personal taste preferences.
Onion Powder – Complements the dish beautifully; feel free to modify according to your liking.

Embrace the comfort of home cooking with Dolly’s Chicken and Stuffing Casserole, a dish that’s as delightful as it is satisfying!

Step‑by‑Step Instructions for Dolly’s Chicken and Stuffing Casserole

Step 1: Preheat the Oven
Begin by preheating your oven to 350°F (175°C). This step is crucial as a properly heated oven ensures your casserole cooks evenly, allowing the flavors to meld beautifully. Once the oven reaches the desired temperature, you’re ready to move on to preparing the creamy base of Dolly’s Chicken and Stuffing Casserole.

Step 2: Prepare the Creamy Chicken Mixture
In a large mixing bowl, combine shredded cooked chicken, cream of chicken soup, sour cream, and half of the chicken broth. Stir everything together until well blended, creating a creamy and rich mixture. This forms the comforting foundation of your casserole. The creamy base should have a smooth consistency and beautifully incorporate the flavors as you prepare to layer your dish.

Step 3: Assemble the Casserole
Spoon the creamy chicken mixture into a greased baking dish, spreading it evenly across the bottom. This will be the first layer of your casserole. Ensure that the mixture covers the entire base of the dish to allow for even cooking and flavor distribution. A greased dish helps in releasing the casserole easily once it’s done baking.

Step 4: Prepare the Stuffing Layer
Follow the package instructions to prepare the stuffing mix. Once ready, sprinkle the stuffing evenly over the creamy chicken layer in your baking dish. This layer forms a delightful texture contrast to the creamy base, promising a satisfying crunch once baked. Make sure to cover the chicken mixture entirely with the stuffing for the best results.

Step 5: Add the Finishing Touch
Drizzle melted butter over the top of the stuffing layer. This step is optional but recommended, as it promotes browning and enhances the flavor of the stuffing. The butter will help create a beautifully golden crispy layer that’s simply irresistible. Let the flavors soak in as you prepare to bake your casserole.

Step 6: Bake the Casserole
Place the assembled Dolly’s Chicken and Stuffing Casserole into your preheated oven and bake uncovered for 35 to 40 minutes. You’ll know it’s ready when the top is golden brown and the filling is bubbling at the edges. The aroma wafting through your kitchen will be a delicious indicator that comfort food is on its way!

Step 7: Check for Doneness
After baking, check for doneness by ensuring the casserole is bubbling around the edges and the center feels firm to the touch. If it’s not quite ready, return it to the oven for an additional 5–10 minutes. Patience here ensures that every bite of Dolly’s Chicken and Stuffing Casserole is perfectly cooked and satisfying.

Step 8: Cool and Serve
Once baked, let the casserole cool for a few minutes before slicing. This resting period allows the layers to set, making it easier to serve. Scoop out servings and feel the warmth of homemade cooking fill your home, ready to bring comfort to your dining experience!

How to Store and Freeze Dolly’s Chicken and Stuffing Casserole

Fridge: Store any leftovers in an airtight container for up to 3 days. To reheat, simply place the desired portion in the microwave or oven, adding a splash of broth to keep it moist.

Freezer: For longer storage, freeze the casserole tightly wrapped in plastic wrap and aluminum foil for up to 2 months. When ready to enjoy, thaw overnight in the refrigerator before reheating.

Make-Ahead: Prepare Dolly’s Chicken and Stuffing Casserole up to 24 hours in advance and refrigerate it before baking. It can save time on busy weeknights!

Reheating: To ensure the best texture, reheat in a preheated oven at 350°F (175°C) until heated through, about 20-25 minutes or until bubbly at the edges.

Dolly’s Chicken and Stuffing Casserole Variations

Let your creativity shine by customizing Dolly’s Chicken and Stuffing Casserole for your tastes and dietary needs!

  • Turkey Twist: Substitute turkey for chicken to utilize those holiday leftovers, bringing a festive twist to a classic dish. It’s a delightful way to keep those flavors alive and enjoy the season’s bounty!

  • Gluten-Free Option: Swap regular stuffing mix and chicken broth for gluten-free alternatives. This ensures everyone at the table can savor the comforting goodness without worry.

  • Low-Sodium Delight: Use low-sodium chicken broth and omit added salt to create a heart-healthier version, allowing you to indulge without the extra sodium. Your taste buds won’t even miss it!

  • Dairy-Free Delight: Keep it creamy by using a dairy-free cream of chicken soup and substitute sour cream with almond or coconut yogurt. Now, everyone can enjoy this warm, comforting casserole!

  • Veggie-Loaded: Add steamed vegetables like broccoli or carrots into the chicken mixture for a nutritious boost. This variation not only enhances flavor but also amps up the nutrition packed into each serving.

  • Cornbread Stuffing: For a sweeter touch, opt for cornbread stuffing instead of the traditional mix, creating a delightful contrast with the savory chicken base. It’ll have everyone asking for seconds!

  • Spicy Kick: Add crushed red pepper flakes or your favorite hot sauce to the chicken mixture for those who love a little heat. It’s an exciting way to elevate the comfort of this dish into something bold!

  • Herb Infusion: Toss in fresh herbs such as thyme or rosemary into the creamy mixture for a fragrant twist. This simple addition elevates the flavors and gives it that homemade touch that everyone loves.

With options like these, you’ll always find the perfect take on this heartwarming dish. And if you’re looking for more savory selections, check out these Savory Chicken Cheesy or Tropical Chicken Pineapple recipes!

Make Ahead Options

Dolly’s Chicken and Stuffing Casserole is perfect for busy home cooks looking to save time on hectic weeknights! You can prepare the casserole up to 24 hours in advance by assembling it completely and then covering it tightly with plastic wrap or aluminum foil. This method allows the flavors to meld beautifully while keeping the stuffing’s texture intact. When you’re ready to bake, simply remove it from the refrigerator and allow it to sit at room temperature for about 30 minutes before placing it in the preheated oven. For long-term storage, consider freezing it—this casserole keeps well for up to two months! Just remember to add a splash of broth before reheating to maintain moisture, ensuring every bite remains just as delicious as the first.

Expert Tips for Dolly’s Chicken and Stuffing Casserole

  • Avoid Sogginess: Use the recommended amount of broth to prevent a mushy stuffing layer. Too much liquid can lead to disappointment!

  • Cool Before Serving: Allow the casserole to rest for a few minutes after baking. This helps the layers set, making serving much easier and more appealing.

  • Use Leftovers Wisely: This dish is perfect for repurposing leftover turkey from holidays. Simply substitute turkey for chicken in Dolly’s Chicken and Stuffing Casserole for a delicious twist.

  • Right Baking Dish: Choose a suitable size baking dish to ensure even cooking. Overcrowding can hinder crispy surfaces while underfilling may lead to uneven layers.

  • Fresh Herb Boost: Add fresh herbs like thyme or parsley to the mixture for an aromatic lift. This enhances the comfort food experience while also adding freshness.

What to Serve with Dolly’s Chicken and Stuffing Casserole

Nothing complements a comforting casserole better than a selection of delightful side dishes that enhance its warmth and flavor.

  • Crispy Green Salad: A refreshing mix of greens with a tangy vinaigrette offers a perfect contrast to the rich casserole.

  • Steamed Broccoli: Bright green broccoli adds a nutritious crunch and a pop of color to your plate, harmonizing flavors beautifully.

  • Garlic Bread: Warm, crusty garlic bread is a wonderful way to soak up any delicious creamy sauce, making each bite even more satisfying.

  • Roasted Vegetables: A medley of seasonal roasted vegetables adds depth with gentle sweetness and textures that balance the casserole’s richness.

  • Apple Crisp: For dessert, a warm apple crisp drizzled with caramel brings a delightful end to your meal, echoing the comforting vibes of Southern cooking.

  • Sweet Tea or Iced Lemonade: Serve with classic Southern drinks to keep the vibe going strong and refresh your palate between bites.

No matter which options you choose, these pairings will create a delightful dining experience centered around Dolly’s Chicken and Stuffing Casserole!

Dolly’s Chicken and Stuffing Casserole Recipe FAQs

What type of chicken is best for this recipe?
Absolutely! Using cooked rotisserie chicken is a fantastic option for convenience, providing incredible flavor without any hassle. Alternatively, if you’re feeling adventurous, you can use leftover turkey to give the dish a delightful twist, particularly after the holidays.

How long can I store leftovers?
You can store any leftover Dolly’s Chicken and Stuffing Casserole in an airtight container in the refrigerator for up to 3 days. When you’re ready to savor those comforting flavors again, simply reheat in the microwave or oven, adding a splash of broth to maintain moisture.

What’s the best way to freeze the casserole?
Very easy! To freeze your casserole, tightly wrap it in plastic wrap followed by aluminum foil, ensuring no air can escape, which helps prevent freezer burn. It can be stored for up to 2 months. When you’re ready to enjoy it again, thaw overnight in the refrigerator before reheating, ensuring it returns to its delicious form.

How do I prevent soggy stuffing?
To prevent a soggy stuffing layer, be mindful of the amount of chicken broth you add. Stick to the recipe’s recommendations, and remember to leave the casserole uncovered while baking. The crisp surface and flavor concentration will bring joy to every bite!

Can I make this dish dairy-free?
Absolutely! For a dairy-free version of Dolly’s Chicken and Stuffing Casserole, replace the cream of chicken soup and sour cream with a non-dairy alternative, such as cashew cream or a dairy-free Greek yogurt. Also, using dairy-free butter will ensure you’re sticking to your dietary preferences without sacrificing that creamy deliciousness!

Can I make this casserole a day ahead of time?
Yes! You can prepare Dolly’s Chicken and Stuffing Casserole up to 24 hours in advance. Simply assemble everything in a greased baking dish, cover it, and refrigerate until you’re ready to bake. This pre-planning option is such a lifesaver on busy weeknights!

Dolly’s Chicken and Stuffing Casserole

Dolly’s Chicken and Stuffing Casserole for Heartwarming Nights

Dolly’s Chicken and Stuffing Casserole is a warm embrace on a plate, rich with comforting flavors perfect for heartwarming nights.
Prep Time 15 minutes
Cook Time 40 minutes
Cooling Time 5 minutes
Total Time 1 hour
Servings: 6 servings
Course: Dinner
Cuisine: Southern
Calories: 425

Ingredients
  

Casserole Base
  • 4 cups cooked chicken shredded
  • 1 can cream of chicken soup
  • 1 cup sour cream or Greek yogurt
Stuffing Layer
  • 1 box stuffing mix
  • 1 cup chicken broth low-sodium if preferred
  • 1/4 cup butter melted
Seasonings
  • 1 teaspoon garlic powder
  • 1 teaspoon onion powder

Equipment

  • Baking Dish
  • mixing bowl

Method
 

Preparation Steps
  1. Preheat the oven to 350°F (175°C).
  2. In a large mixing bowl, combine shredded cooked chicken, cream of chicken soup, sour cream, and half of the chicken broth. Stir until well blended.
  3. Spoon the creamy chicken mixture into a greased baking dish, spreading it evenly across the bottom.
  4. Prepare the stuffing mix according to package instructions and sprinkle it evenly over the creamy chicken layer.
  5. Drizzle melted butter over the top of the stuffing layer.
  6. Bake uncovered for 35 to 40 minutes, until the top is golden brown and the filling is bubbling at the edges.
  7. Check for doneness and return to the oven for an additional 5–10 minutes if necessary.
  8. Let the casserole cool for a few minutes before slicing and serving.

Notes

Perfect for repurposing leftover turkey and can be prepared up to 24 hours in advance and stored in the refrigerator before baking.

No Bake Caramel Apple Cheesecake Parfaits You’ll Adore

There’s something magical about fall—crisp leaves, cozy sweaters, and the comforting aroma of cinnamon wafting through the air. As the season shifts, I find myself wanting to create desserts that highlight its warm, inviting flavors, like these No Bake Caramel Apple Cheesecake Parfaits. The beauty of this layered delight lies in its effortless preparation; no oven is required! In just 25 minutes, you can whip up a creamy, dreamy dessert that combines sweet, spiced apples and velvety cheesecake, all wrapped in buttery graham cracker goodness. Perfect for gatherings or a quiet night at home, these parfaits offer the nostalgic taste of caramel apple pie without the fuss. So, are you ready to treat yourself to a fall-inspired indulgence that will have everyone coming back for seconds?

Why Are These Parfaits a Must-Try?

Simplicity makes these parfaits a breeze to prepare, with no baking required! Rich flavors from a perfect blend of creamy cheesecake, cinnamon-spiced apples, and luscious caramel will have your taste buds dancing. Versatility allows you to customize ingredients easily—swap in pears or berries for a twist! Time-saving preparation means you can enjoy this delightful dessert in just 25 minutes, leaving you with more time to savor the moment. Whether it’s a cozy family gathering or a festive celebration, these parfaits are sure to impress. Don’t miss out on the chance to enjoy a dessert that’s as much fun to make as it is to eat!

No Bake Caramel Apple Cheesecake Parfaits Ingredients

For the Graham Cracker Crust
Graham Crackers – Perfectly forms the crust base; try gluten-free options for dietary needs.
Unsalted Butter – Helps bind the graham crumbs together; ensure it’s softened for easy mixing.
Organic Sugar – Sweetens both the crust and cheesecake layer; substitute with any granulated sugar on hand.

For the Cheesecake Filling
Cream Cheese – Gives the creamy texture; remember to soften to avoid lumps.
Heavy Whipping Cream – Adds richness; keep it cold for the best whipping results.
Organic Light Brown Sugar – Enhances the caramel notes; feel free to use regular brown sugar instead.
Ground Cinnamon – Complements the apple flavor beautifully; don’t skip this for added warmth.
Sea Salt – Balances the overall sweetness for flavor depth.
Xanthan Gum – Acts as a thickening agent for the apple filling; optional, but recommended.
Vanilla Extract – Introduces aromatic richness; use pure vanilla for the best taste.

For the Apple Topping
Granny Smith Apples – Provides a tart contrast; you can use other tart varieties if preferred.
Organic Caramel Dip – Essential for delicious drizzling; homemade caramel works wonderfully too.

These No Bake Caramel Apple Cheesecake Parfaits are the epitome of fall-inspired sweet indulgence. With an array of flavors and creamy textures, they’re sure to become a favorite at your dessert table!

Step‑by‑Step Instructions for No Bake Caramel Apple Cheesecake Parfaits

Step 1: Prepare the Apple Filling
In a medium bowl, combine organic light brown sugar, ground cinnamon, sea salt, and xanthan gum to create a dry mixture. Chop the Granny Smith apples into small pieces, then add them to the bowl, along with the vanilla extract. Toss gently to coat the apples evenly. Pour the mixture into a saucepan and simmer over medium heat for 2 minutes, until the apples soften slightly. Let cool while you prepare the other layers.

Step 2: Make Graham Cracker Crust
In a food processor, pulse the graham crackers until they resemble fine crumbs. Transfer the crumbs to a mixing bowl and stir in melted unsalted butter and organic sugar until well combined. The mixture should feel slightly damp and resemble wet sand. Set this aside as you prepare the creamy cheesecake layer.

Step 3: Prepare Cheesecake Batter
In a large mixing bowl, beat softened cream cheese with organic sugar using an electric mixer on medium speed until smooth and creamy, which should take about 2 minutes. Add in the vanilla extract, mixing until incorporated. Next, pour in cold heavy whipping cream and continue to beat until the mixture thickens and holds stiff peaks, about 3-5 minutes. This luscious cheesecake filling is the star of your No Bake Caramel Apple Cheesecake Parfaits.

Step 4: Assemble Parfaits
To create beautiful layers in your parfaits, start by spooning 2 tablespoons of graham cracker crust into the bottom of serving cups or jars. Next, layer in a generous portion of the creamy cheesecake batter, smoothing it out with a spatula. Drizzle with organic caramel sauce for a sweet touch, then add a layer of the caramel apple filling. Repeat the layering process, finishing with a dollop of whipped cream on top.

Step 5: Garnish and Chill
After assembling your No Bake Caramel Apple Cheesecake Parfaits, sprinkle some remaining graham cracker crumbs on top for added texture. You can also arrange thin slices of fresh apples for a decorative touch. Cover the cups with plastic wrap and refrigerate for at least 30 minutes or until you’re ready to serve, allowing the flavors to meld together beautifully.

Expert Tips for No Bake Caramel Apple Cheesecake Parfaits

  • Apple Preparation: To keep your apple slices from browning, soak them in lemon juice mixed with water for about 5 minutes before using.

  • Cream Consistency: Make sure your heavy whipping cream is well-chilled before whipping; cold cream whips up better, giving you a fluffier cheesecake layer.

  • Layering Technique: For beautiful layers in your parfaits, use a piping bag to layer the cheesecake filling—this allows for precision and an eye-catching presentation.

  • Customize Toppings: Feel free to swap out the apples for other fruits; pears and berries work wonderfully! Just remember to adjust the sweetness as needed.

  • Serving Freshness: These No Bake Caramel Apple Cheesecake Parfaits are best served fresh or chilled but should not be frozen, as the texture may change.

Make Ahead Options

These No Bake Caramel Apple Cheesecake Parfaits are a fantastic choice for meal prep, saving you precious time on busy days! You can prepare the graham cracker crust and apple filling up to 24 hours in advance. Simply store the crust in an airtight container and the cooled apple filling in the fridge. The cheesecake batter, too, can be made ahead but should be assembled just before serving to maintain its fluffy texture. When ready to enjoy, layer the crust, cheesecake, and apple filling, finishing with whipped cream and a drizzle of caramel. With these simple steps, you’ll have a delightful dessert ready with minimal effort!

What to Serve with No Bake Caramel Apple Cheesecake Parfaits

Creating a beautiful and delicious meal is all about the perfect balance of flavors, textures, and presentations to elevate your dessert experience.

  • Spiced Apple Cider: Warm, aromatic cider with hints of cinnamon enhances the autumn ambiance and complements the apple flavor beautifully.

  • Vanilla Ice Cream: A scoop of creamy vanilla ice cream alongside adds a lovely contrast in temperature and a delightful richness that pairs well with the parfaits.

  • Whipped Cream Topping: Adding a dollop of homemade whipped cream elevates your parfait’s creaminess while providing a light, airy texture that cuts through the sweetness.

  • Ginger Snap Cookies: Serving these crunchy, spiced cookies as a side creates a lovely textural contrast, offering a satisfying crunch with each bite.

  • Pecan Pie Bars: Rich, gooey pecan pie bars bring nutty sweetness to the table, completing the fall theme with a special touch of deliciousness.

  • Pumpkin Spice Latte: Sipping on a cozy pumpkin spice latte alongside will warm your heart and perfectly balance the flavors of the cheesecake parfaits.

  • Chocolate Drizzle: A drizzle of chocolate sauce accents the dessert with a touch of indulgent decadence, enhancing both the visual appeal and flavor.

  • Fruit Salad: A refreshing fruit salad with berries and citrus offers a bright, zesty contrast, lightening the richness of the parfaits while celebrating fall fruits.

These pairing suggestions will complement your No Bake Caramel Apple Cheesecake Parfaits, creating a memorable meal that celebrates the flavors of the season and leaves your guests feeling satisfied!

No Bake Caramel Apple Cheesecake Parfaits Variations

Feel free to let your creativity shine and tailor these delightful parfaits to your taste!

  • Fruit Swaps: Swap out Granny Smith apples for tart pears or sweet peaches to create a new flavor profile that still celebrates the season.
  • Dairy-Free Option: Use vegan cream cheese and coconut whipped cream to make this dessert suitable for dairy-free friends, without sacrificing taste.
  • Gluten-Free Twist: Replace graham crackers with gluten-free cookie crumbs or crushed oats to accommodate gluten sensitivities.
  • Added Crunch: Sprinkle crushed toffee or nuts between layers for a delightful crunch that contrasts with the creamy cheesecake.
  • Spiced Up: Add a pinch of nutmeg or allspice to the apple filling for an additional layer of warmth and flavor that encapsulates fall.

These parfaits are incredibly versatile, much like the comforting flavors found in other fall favorites, such as Rustic Apple Walnut or Crisp Cabbage Apple.

  • Chocolate Drizzle: Elevate with a drizzle of chocolate sauce atop the whipped cream for those chocolate lovers in your life!

  • No-Bake Cheesecake Base: If you want to change the texture, use a traditional no-bake cheesecake recipe and let it set, then crumble it over the parfait layers for a different experience.

With all these options, every taste preference will be satisfied, turning these no-bake caramel apple cheesecake parfaits into a beloved family recipe. You’re sure to create something special each time!

Storage Tips for No Bake Caramel Apple Cheesecake Parfaits

  • Fridge: Store assembled parfaits in the refrigerator for up to 2 days. Cover them tightly with plastic wrap to keep them fresh and prevent odors from affecting the flavor.

  • Enjoy Fresh: For the best taste and texture, it’s recommended to enjoy the No Bake Caramel Apple Cheesecake Parfaits fresh. The layers remain beautifully distinct when eaten soon after preparation.

  • Reheating: These parfaits are best served chilled, so there’s no need for reheating. Simply take them out of the fridge and enjoy!

  • Ingredient Separation: If you need to prepare components ahead of time, store the apple filling and cheesecake batter separately in airtight containers for up to 2 days to maintain freshness.

No Bake Caramel Apple Cheesecake Parfaits Recipe FAQs

How do I select the best apples for the parfaits?
Absolutely! For these parfaits, Granny Smith apples are a fantastic choice due to their tartness, which beautifully contrasts the sweetness of the caramel and cheesecake. Look for apples that are firm, sturdy, and free of dark spots. If Granny Smith isn’t available, other tart varieties like Honeycrisp or Cortland also work wonderfully.

How should I store the parfaits?
Very! These parfaits can be kept in the refrigerator for up to 2 days. It’s best to cover them tightly with plastic wrap to keep them fresh and prevent any unwanted odors from affecting the flavor. However, they will taste best if enjoyed fresh, as the layers remain beautifully distinct when eaten soon after preparation.

Can I freeze the No Bake Caramel Apple Cheesecake Parfaits?
I often recommend that these parfaits not be frozen, as the texture of the cheesecake filling and the apple topping can change upon thawing. However, if you want to prepare components ahead of time, you can freeze the apple filling separately in an airtight container for up to 3 months. Just thaw it in the refrigerator overnight before assembling the parfaits.

What should I do if my whipped cream doesn’t thicken properly?
Don’t worry; this can happen! Ensure that your heavy whipping cream is super cold when you start whipping. Use a clean bowl and beaters, and whip until stiff peaks form, which should take about 3-5 minutes. If it still doesn’t thicken, it might be over-whipped, or the cream wasn’t cold enough. Instead, start over with freshly chilled cream.

Can pets eat the ingredients in these parfaits?
Very! While the parfaits are delicious for humans, remember that dairy and sweets aren’t great for pets. Cream cheese and heavy cream can cause stomach upset in cats and dogs. It’s best to enjoy these decadent No Bake Caramel Apple Cheesecake Parfaits yourself and keep them away from your furry friends!

What if someone has a gluten allergy?
Absolutely! You can easily make these parfaits gluten-free by substituting regular graham crackers with gluten-free graham crackers or oats blended into crumbs. Just make sure to check the labels as some brands may have cross-contamination.

No Bake Caramel Apple Cheesecake Parfaits

No Bake Caramel Apple Cheesecake Parfaits You’ll Adore

Delight in these No Bake Caramel Apple Cheesecake Parfaits, a fall favorite combining creamy cheesecake and spiced apples without any baking.
Prep Time 25 minutes
Cook Time 2 minutes
Chilling Time 30 minutes
Total Time 57 minutes
Servings: 4 parfaits
Course: Dessert
Cuisine: American
Calories: 350

Ingredients
  

For the Graham Cracker Crust
  • 9 sheets Graham Crackers Try gluten-free options for dietary needs.
  • 1/4 cup Unsalted Butter Ensure it's softened for easy mixing.
  • 1/4 cup Organic Sugar Substitute with any granulated sugar on hand.
For the Cheesecake Filling
  • 8 oz Cream Cheese Remember to soften to avoid lumps.
  • 1 cup Heavy Whipping Cream Keep it cold for the best whipping results.
  • 1/3 cup Organic Light Brown Sugar Feel free to use regular brown sugar instead.
  • 1/2 tsp Ground Cinnamon Don’t skip this for added warmth.
  • 1/4 tsp Sea Salt Balances the overall sweetness for flavor depth.
  • 1 tsp Xanthan Gum Optional, but recommended.
  • 1 tsp Vanilla Extract Use pure vanilla for the best taste.
For the Apple Topping
  • 2 medium Granny Smith Apples Provides a tart contrast; other tart varieties can be used.
  • 1/2 cup Organic Caramel Dip Homemade caramel works wonderfully too.

Equipment

  • Medium bowl
  • Food Processor
  • mixing bowl
  • electric mixer
  • spatula
  • Serving cups or jars
  • Saucepan
  • Piping bag

Method
 

Preparation Steps
  1. In a medium bowl, combine organic light brown sugar, ground cinnamon, sea salt, and xanthan gum. Chop the Granny Smith apples and add to the bowl with vanilla extract. Toss gently. Pour into a saucepan and simmer over medium heat for 2 minutes. Let cool.
  2. In a food processor, pulse the graham crackers into fine crumbs. Transfer to a mixing bowl, stir in melted unsalted butter and organic sugar until combined. Set aside.
  3. In a large mixing bowl, beat softened cream cheese with organic sugar on medium speed until smooth. Add vanilla extract and mix. Pour in cold heavy whipping cream and beat until thick and holds stiff peaks.
  4. In serving cups, spoon 2 tablespoons of graham cracker crust, layer with the cheesecake batter, drizzle with caramel sauce, and add a layer of apple filling. Repeat and finish with whipped cream.
  5. Sprinkle remaining graham cracker crumbs and arrange fresh apple slices. Cover with plastic wrap and refrigerate for at least 30 minutes.

Notes

For best results, serve fresh. Store in the refrigerator for up to 2 days, tightly covered.

Tiramisu Cookies: Soft, Chewy Delights for Coffee Lovers

The aroma of freshly brewed coffee mingles with sweet notes of cocoa as I pull the first batch of Tiramisu Cookies from the oven. These delightful treats transform the indulgence of traditional tiramisu into a handheld dessert that everyone can enjoy. With a soft, pillowy center and a dusting of cocoa powder, they’re not just easy to make but also kid-friendly, making them a perfect project for budding bakers and busy parents alike. Whether you’re hosting a coffee-themed gathering or simply craving a sweet pick-me-up, these Tiramisu Cookies are bound to impress, elevating your dessert game to new heights. Curious about how simple ingredients can create this crowd-pleasing delight? Let’s dive into the recipe!

Why Are Tiramisu Cookies So Irresistible?

Decadent Flavor: Each bite offers a delightful combination of rich espresso and creamy mascarpone, reminiscent of the classic tiramisu.
Effortless Preparation: With just a few simple steps, these cookies come together quickly, making them ideal for a last-minute treat.
Kid-Friendly Fun: Perfect for little hands to help, these cookies bring joy while baking together as a family.
Versatile Enjoyment: Serve these cookies with coffee, milk, or even a scoop of ice cream for an elevated dessert experience that caters to all tastes.
Crowd-Pleasing Appeal: Your guests will rave about the unique flavors, as these delightful cookies are sure to steal the spotlight at any gathering!

Tiramisu Cookies Ingredients

For the Cookie Dough
Unsalted Butter (1 cup, 2 sticks) – Adds richness and moisture; ensure it’s softened for proper creaming.
Granulated Sugar (1 cup) – Provides sweetness and helps create a tender cookie; can be replaced with brown sugar for a deeper flavor.
Large Eggs (2) – Binds the ingredients and adds moisture; use room temperature eggs for better mixing.
Vanilla Extract (2 teaspoons) – Enhances overall flavor; substitute with almond extract for a unique twist.
Espresso Powder/Instant Coffee (2 tablespoons) – Infuses intense coffee flavor; can substitute with strong brewed coffee if preferred.
Hot Water (2 teaspoons) – Dissolves coffee powder for seamless flavor integration.
All-Purpose Flour (2 cups) – Provides structure to the cookies; use gluten-free flour blend for a gluten-free version.
Baking Powder (½ teaspoon) – Leavens cookies for a lighter, fluffier texture.
Salt (½ teaspoon) – Balances sweetness and enhances flavors.
Mascarpone Cheese (½ cup) – Adds creaminess, emulating traditional tiramisu; cream cheese works as a substitute.

For the Finishing Touch
Cocoa Powder (¼ cup for dusting) – The final touch that brings elegance and flavor; opt for Dutch-process for a richer taste.

Step‑by‑Step Instructions for Tiramisu Cookies

Step 1: Preheat and Prepare
Begin by preheating your oven to 350°F (175°C). While it warms, line a baking sheet with parchment paper to ensure easy cookie removal later. This initial step sets the stage for your Tiramisu Cookies to bake perfectly, retaining their soft centers and getting those delightful golden edges that we all love.

Step 2: Cream Butter and Sugar
In a mixing bowl, combine softened unsalted butter and granulated sugar. Beat the mixture on medium speed for about 2–3 minutes until it is light and fluffy, creating a lovely texture that forms the base of your Tiramisu Cookies. You’ll notice the color lightening as air is whipped in, which helps create a tender and delightful cookie.

Step 3: Mix in Wet Ingredients
Dissolve the espresso powder in 2 teaspoons of hot water for a smooth flavor infusion. Add this mixture, along with the eggs and vanilla extract, to the creamed butter and sugar. Blend until everything is well combined, allowing those rich coffee notes to meld into the mixture, enriching the flavor of your cookies.

Step 4: Combine Dry Ingredients
In a separate bowl, whisk together all-purpose flour, baking powder, and salt. This mixture ensures an even distribution of leavening throughout the dough. Gradually add the dry ingredient blend to the wet mixture, mixing gently until just combined. Overmixing here can lead to tougher cookies, so aim for a unified dough that still retains a soft texture.

Step 5: Fold in Mascarpone Cheese
Gently fold in the mascarpone cheese, which adds that signature creamy richness reminiscent of traditional tiramisu. Be careful not to overmix; you want the dollops of creaminess to remain as a treat within the cookie dough. This step is essential for creating the delightful, indulgent experience that Tiramisu Cookies provide.

Step 6: Scoop the Dough
Using a tablespoon, scoop generous portions of dough onto your prepared baking sheet, ensuring to leave about 2 inches of space between each cookie. This spacing allows the Tiramisu Cookies to spread evenly while baking, resulting in that perfect chewy center coupled with lightly crisp edges.

Step 7: Bake the Cookies
Place the baking sheet in your preheated oven and bake the Tiramisu Cookies for 10–12 minutes. Look for golden edges and soft centers that set but are not fully firm. Keep a close eye; the cookies go from perfect to overbaked quickly, and a slightly underbaked cookie provides a delightful chew.

Step 8: Cool and Dust
Once baked, let the cookies cool on the baking sheet for about 5 minutes. This resting period allows them to set up before transferring to a wire rack. Once fully cool, dust the Tiramisu Cookies with cocoa powder using a fine-mesh sieve for a beautiful and elegant finish that mirrors the classic dessert they emulate.

Expert Tips for Tiramisu Cookies

  • Softened Butter: Make sure the butter is truly softened to avoid clumps and ensure a light, airy cookie texture.

  • Measure Carefully: Use a kitchen scale if possible for the flour; too much can lead to a dry cookie, so ensure accurate measurements.

  • Avoid Overmixing: Mix just until combined to maintain that soft and chewy center; overmixing can toughen the cookies.

  • Baking Time: Keep an eye on the cookies as they bake. Remove them when the edges are golden but the centers still look a bit soft; they’ll continue to firm up while cooling.

  • Cooling Tips: Give your cookies enough time to cool on the baking sheet before transferring them to a wire rack; this helps set their shape and texture.

  • Storage Method: Store your Tiramisu Cookies in an airtight container at room temperature to maintain their soft, chewy goodness for up to 3 days.

What to Serve with Tiramisu Cookies

These Tiramisu Cookies make for a delightful treat, especially when paired with complementary flavors to create a full dessert experience.

  • Rich Espresso: Brew a cup of your favorite espresso for an invigorating pairing. The bold coffee flavor harmonizes with the cookies’ espresso notes, enhancing the overall taste.
  • Ice Cream Scoop: A scoop of vanilla or chocolate ice cream adds a creamy contrast to the cookies’ softness. Combine the warm, chewy cookie with cold ice cream for a decadent treat.
  • Fresh Berries: A mix of strawberries or raspberries brings a bright, tart contrast that cuts through the sweetness. These fresh flavors rejuvenate the palate and add a pop of color to your dessert spread.
  • Cold Milk: Pour a chilled glass of milk alongside the cookies. This classic pairing complements the indulgence and makes each bite even more satisfying.
  • Chocolate Sauce Drizzle: A warm drizzle of chocolate sauce can elevate the cookies’ flavor with added richness. This sweet addition offers both decadence and visual appeal to your dessert table.
  • Mint Tea: Serve with a calming cup of mint tea to refresh flavor profiles and cleanse the palate after indulging in the sweet treats. This adds a soothing touch to your dessert experience.
  • Glass of Red Wine: Choose a light-bodied red wine that complements the chocolate and coffee flavors. This pairing adds a touch of elegance, perfect for a sophisticated evening.
  • Cocoa-Dusted Whipped Cream: Top some whipped cream lightly dusted with cocoa powder for a simple yet delightful garnish. This added creaminess beautifully mirrors the Tiramisu theme and enhances the dessert experience.

Tiramisu Cookies: Delicious Variations Await

Feel free to experiment with these delightful twists on Tiramisu Cookies to make the recipe your own!

  • Gluten-Free: Use a gluten-free flour blend to make these cookies safe for those with gluten intolerance. They’ll still taste deliciously indulgent!

  • Chocolate Delight: Stir in dark chocolate chunks or mini chocolate chips for a rich chocolatey experience that complements the coffee flavor perfectly.

  • Nutty Crunch: Add chopped walnuts or hazelnuts for a delightful crunch. The nutty texture will elevate the cookies and provide added depth to each bite.

  • Mocha Magic: Swap some of the espresso powder for cocoa powder to create a mocha-flavored cookie, blending the flavors of coffee and chocolate harmoniously.

  • Caramel Twist: Drizzle melted caramel over cooled cookies for an extra layer of sweetness. The gooey caramel pairs beautifully with the flavors in these cookies.

  • Cream Cheese Swap: Substitute mascarpone cheese with cream cheese for a tangy twist on the original recipe. This change adds a distinct flavor profile that many will love.

  • Spicy Kick: Add a pinch of cinnamon or cayenne pepper for a warm spice that contrasts beautifully with the sweetness of the cookies. This surprise element will intrigue your taste buds.

  • Cookie Sandwich: Make your Tiramisu Cookies into delightful sandwiches by spreading a layer of your favorite frosting or whipped cream between two cookies for an added treat.

And if you’re looking for more yummy cookie inspiration, don’t forget to check out these delicious recipes: Nutty Chocolate Date Cookies and Crunchy Nut and Seed Cookies with Dried Plums.

Make Ahead Options

These Tiramisu Cookies are perfect for busy home cooks looking to save time during the week! You can prepare the cookie dough up to 24 hours in advance by mixing all the ingredients, then cover it tightly and refrigerate. This not only enhances the flavors but also helps the dough firm up, making it easier to scoop later. For added convenience, the formed cookie dough balls can be frozen for up to 3 months. When you’re ready to bake, simply place the frozen dough directly onto a baking sheet and add an extra minute or two to the baking time. This means you can enjoy fresh, indulgent Tiramisu Cookies with minimal effort, all while maintaining their delightful flavor and soft texture!

How to Store and Freeze Tiramisu Cookies

Room Temperature: Store the cookies in an airtight container at room temperature for up to 3 days to keep them soft and fresh.

Freezer: For longer storage, freeze the cookies in a single layer on a baking sheet. Once solid, transfer them to a zip-top bag; they can last up to 2 months.

Thawing: When ready to enjoy, thaw the Tiramisu Cookies at room temperature for about 30 minutes before serving to restore their delightful texture.

Reheating: If you prefer warm cookies, pop them in the microwave for 10-15 seconds; this enhances the experience of their soft, chewy centers.

Tiramisu Cookies Recipe FAQs

What kind of espresso powder should I use for Tiramisu Cookies?
I recommend using a high-quality espresso powder for the richest flavor. Look for brands specifically labeled for baking or instant coffee that dissolves easily. If you can’t find espresso powder, strong brewed coffee can also work—just use about 4 tablespoons to maintain the coffee flavor!

How should I store Tiramisu Cookies to keep them fresh?
Store your Tiramisu Cookies in an airtight container at room temperature for up to 3 days. Keeping them sealed helps maintain their soft, chewy texture. If you want to keep them for a longer time, consider freezing them!

Can I freeze Tiramisu Cookies? If so, how?
Absolutely! To freeze your Tiramisu Cookies, first, place them in a single layer on a baking sheet and freeze until firm (about 1-2 hours). Then, transfer them to a zip-top freezer bag. They can be stored this way for up to 2 months. When you’re ready to enjoy them, simply thaw at room temperature for about 30 minutes or warm them in the microwave for a few seconds.

What should I do if my Tiramisu Cookies turn out too dry?
If your cookies are dry, it could be due to overmixing the dough or too much flour. Next time, ensure you are measuring your flour correctly—spoon it into your measuring cup rather than scooping it, which can compact the flour. Additionally, keep an eye on the baking time; taking them out a bit early can yield a softer, chewier result.

Can I make these Tiramisu Cookies gluten-free?
Yes, you can easily make these cookies gluten-free by substituting the all-purpose flour with a gluten-free flour blend. Make sure the blend you choose includes xanthan gum or another binding agent, as this will help maintain the cookies’ structure and texture.

Are Tiramisu Cookies safe for pets?
I always advise caution! Tiramisu Cookies contain ingredients like chocolate and caffeine from espresso, both of which are harmful to pets. It’s best to enjoy these delightful treats yourself and keep them out of reach from your furry friends.

Tiramisu Cookies

Tiramisu Cookies: Soft, Chewy Delights for Coffee Lovers

These Tiramisu Cookies combine coffee and cocoa flavors in a handheld dessert that delights everyone.
Prep Time 15 minutes
Cook Time 12 minutes
Cooling Time 5 minutes
Total Time 32 minutes
Servings: 24 cookies
Course: Dessert
Cuisine: Italian
Calories: 120

Ingredients
  

For the Cookie Dough
  • 1 cup Unsalted Butter softened
  • 1 cup Granulated Sugar can use brown sugar
  • 2 large Eggs room temperature
  • 2 teaspoons Vanilla Extract can substitute with almond extract
  • 2 tablespoons Espresso Powder/Instant Coffee can substitute with strong brewed coffee
  • 2 teaspoons Hot Water
  • 2 cups All-Purpose Flour or gluten-free flour blend
  • ½ teaspoon Baking Powder
  • ½ teaspoon Salt
  • ½ cup Mascarpone Cheese can use cream cheese
For the Finishing Touch
  • ¼ cup Cocoa Powder for dusting

Equipment

  • oven
  • mixing bowl
  • baking sheet
  • parchment paper
  • Sieve

Method
 

Step-by-Step Instructions for Tiramisu Cookies
  1. Preheat your oven to 350°F (175°C) and line a baking sheet with parchment paper.
  2. In a mixing bowl, combine softened unsalted butter and granulated sugar. Beat until light and fluffy, about 2-3 minutes.
  3. Dissolve the espresso powder in hot water. Add this mixture along with the eggs and vanilla extract to the creamed butter and sugar. Blend until well combined.
  4. In a separate bowl, whisk together all-purpose flour, baking powder, and salt. Gradually add this to the wet mixture, mixing gently until combined.
  5. Gently fold in the mascarpone cheese.
  6. Scoop generous portions of dough onto the prepared baking sheet, leaving 2 inches between each cookie.
  7. Bake for 10-12 minutes until the edges are golden and centers are soft.
  8. Let the cookies cool on the baking sheet for 5 minutes before dusting with cocoa powder and transferring to a wire rack.

Notes

Store in an airtight container at room temperature for up to 3 days.