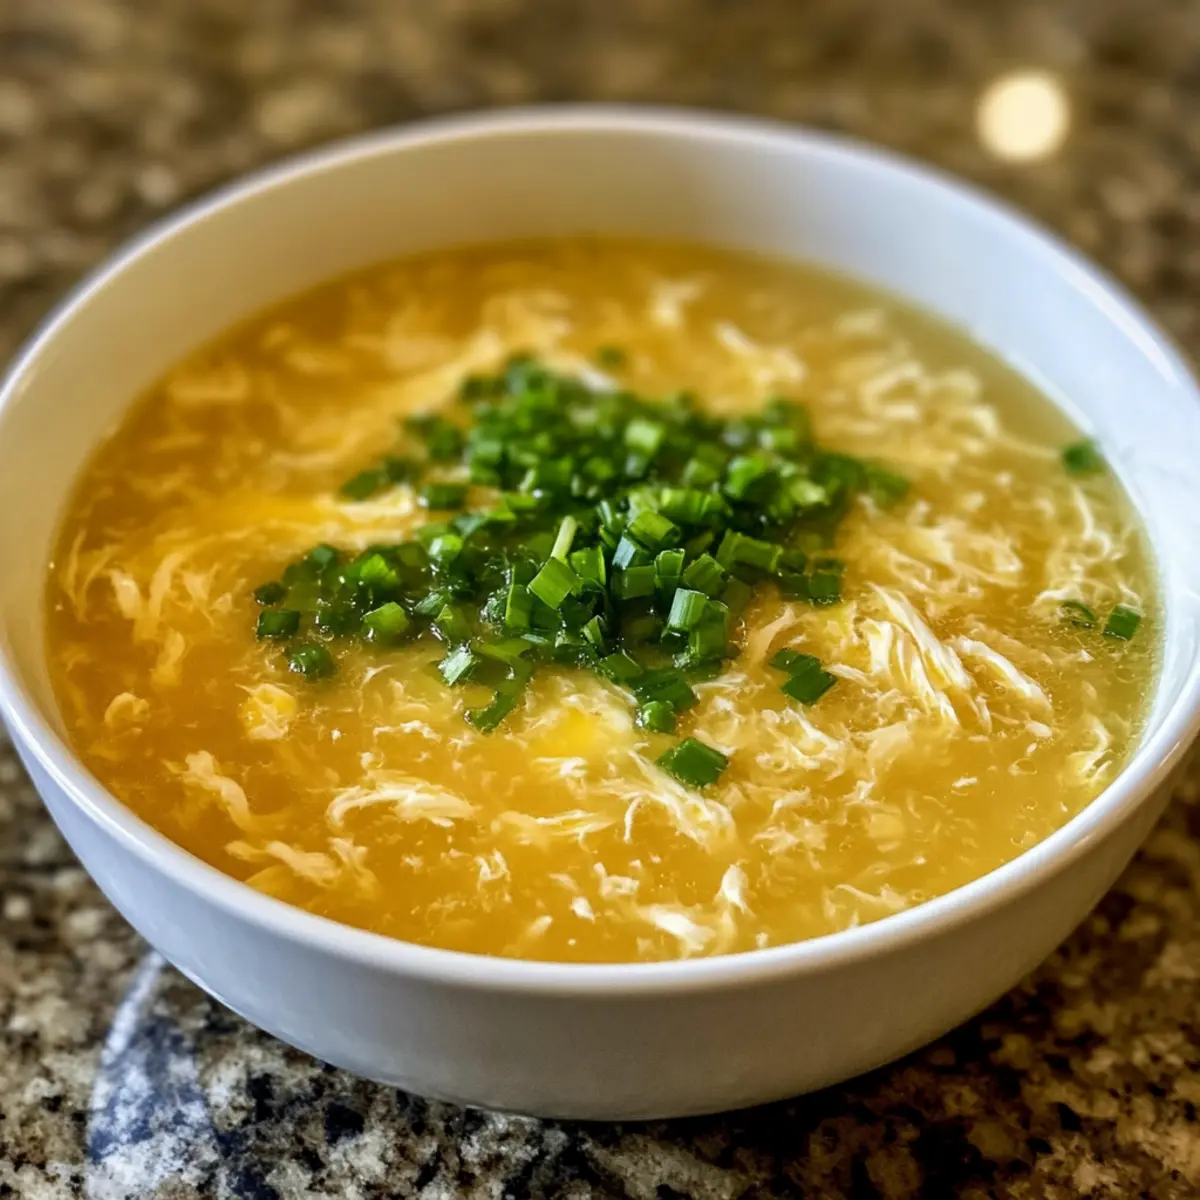
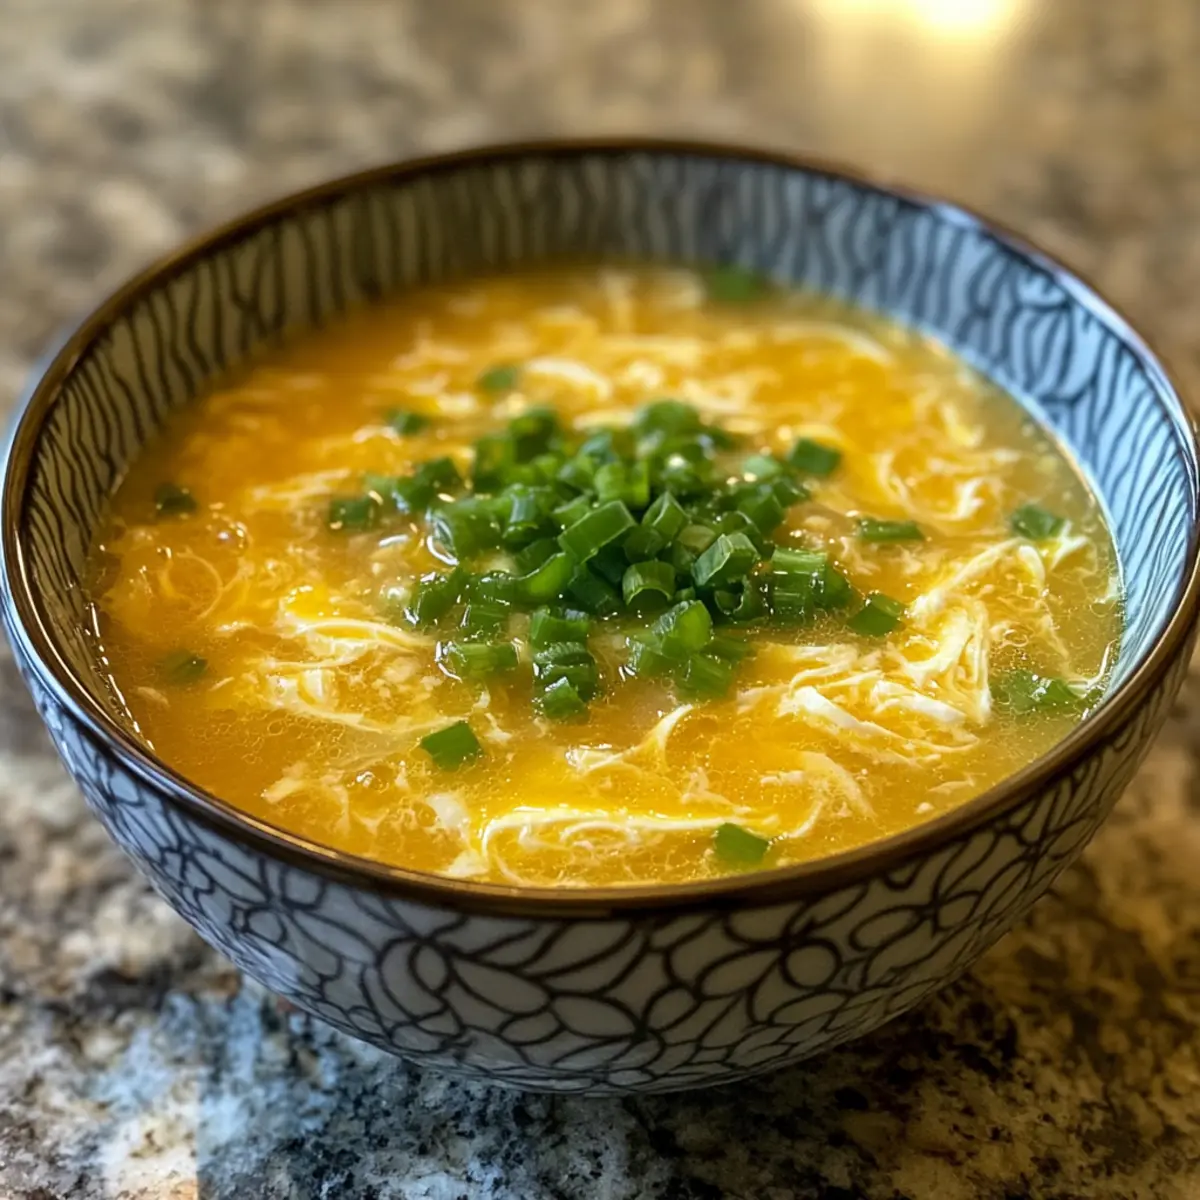
Delicious Halloween Hand Pies: Spooky Treats to Delight You

As autumn creeps in and Halloween decorations start to fill our homes, I can’t help but feel a rush of excitement for the spooky treats that await. There’s something magical about creating playful delights, and these Spooky Halloween Hand Pies are no exception! Shaped like ghosts, pumpkins, and mummies, they not only make for a fabulous centerpiece at any party but also serve as a fun family activity to get everyone involved in the kitchen. With customizable fillings ranging from sweet pumpkin to tangy cherry, these hand pies offer a delightful twist on classic desserts, proving that homemade treats can be both simple and festive. So, are you ready to frightfully impress your friends and family with these charming creations? Let’s dive in!

Why Are These Halloween Hand Pies a Must-Try?

Spooky Shapes: These hand pies come in the most fun shapes—ghosts, pumpkins, and mummies—that will bring joy to both kids and adults alike.

Customizable Fillings: Choose from pumpkin, cherry, or blueberry to cater to everyone’s taste preferences. Why not get adventurous with some variations before Halloween arrives?

Simple to Make: Whether you use homemade or store-bought crusts, the process is quick and friendly for any skill level.

Crowd-Pleasing Treats: Perfect for Halloween parties, cozy movie nights, or festive gatherings, these hand pies are sure to impress your guests!

Fun Family Activity: Get everyone involved in the kitchen! Assembling these pies can be a delightful bonding activity that adds to the festive spirit.

Halloween Hand Pies Ingredients

For the Crust
Pie Crusts – Either homemade or store-bought, ensure it’s cold for that perfect flaky texture.

For the Pumpkin Filling
Pumpkin Puree – ½ cup; adds a moist, flavorful base; homemade pumpkin filling is a great substitute.
Brown Sugar – 2 tablespoons; brings sweetness and richness to the mix.
Pumpkin Pie Spice – ¼ teaspoon; infuses warmth and a hint of spice; cinnamon and nutmeg can work as alternatives.
Ground Cinnamon – ¼ teaspoon; optional but recommended to enhance flavor.
Egg – 1, divided; use the yolk for filling and the white for an egg wash to achieve a golden finish.

For the Fruit Fillings
Cherry Pie Filling – ¾ cup; provides a sweet-tart burst; feel free to substitute with another fruit filling you love.
Blueberry Pie Filling – ¾ cup; gives a fruity sweetness that pairs so well with the crust. You can swap this with any berry filling for variety.

For the Glaze
Powdered Sugar – ½ cup; essential for sweetening the glaze.
Heavy Whipping Cream – 2 tablespoons; this helps create a thick, luscious glaze—using milk will lead to a runnier consistency.

With these ingredients, your Halloween Hand Pies are just a step away from making your festivities utterly delightful!

Step‑by‑Step Instructions for Halloween Hand Pies

Step 1: Prepare the Pumpkin Filling
In a medium bowl, combine the pumpkin puree, brown sugar, pumpkin pie spice, ground cinnamon, and the egg yolk. Stir these ingredients together until they form a smooth mixture, making sure the brown sugar is fully dissolved. This flavorful filling will be the heart of your Halloween Hand Pies, so set it aside while you work on the crust.

Step 2: Roll Out the Dough
On a clean, floured surface, roll out your pie crusts to about ⅛ to ¼ inch thick. Use a sharp knife or a cookie cutter to cut out fun shapes like pumpkins, ghosts, and mummies. Aim for a total of 12 pumpkins, 12 ghosts, and 4 mummies. This step will help create the perfect base for your Halloween Hand Pies, allowing you to get creative with spooky designs!

Step 3: Assemble the Pies
Take the cut-out dough shapes and begin filling them. For the pumpkins, place a spoonful of the pumpkin filling on half of the shapes, then cover with another shape and crimp the edges to seal. For the ghosts, fill with blueberry pie filling, pinch shut, and cut out eyes and mouths. Lastly, for the mummies, fill with cherry filling, crimp the edges, and add little strips of leftover dough to create bandages for a fun effect.

Step 4: Chill and Bake
Once assembled, place the hand pies in the freezer for about 10 minutes to help them hold their shape while baking. Preheat your oven to 400°F (200°C) during this time. After chilling, brush the tops with egg wash to give them a beautiful golden finish. Bake for 15 to 25 minutes until they puff up and turn golden brown, filling your kitchen with a heavenly aroma.

Step 5: Glaze and Cool
While the Halloween Hand Pies are baking, prepare the glaze by mixing powdered sugar and heavy whipping cream in a small bowl until smooth. Once the pies are out of the oven and have cooled slightly, brush the glaze over the top for an extra touch of sweetness. Add candy eyes to the mummies for a fun finishing touch, and allow the pies to cool completely before serving, ensuring that every bite is just as delightful as it looks!

Make Ahead Options

These Halloween Hand Pies are perfect for busy home cooks looking to save time during the spooky season! You can prepare the pie crusts and filling up to 24 hours in advance—just refrigerate them separately in airtight containers to maintain freshness. Additionally, assembled but unbaked pies can be frozen for up to 3 months. To keep the crust flaky, ensure they are frozen flat on a baking sheet before transferring to a freezer bag. When ready to bake, there’s no need to thaw; simply brush with egg wash and bake directly from the freezer as directed. This way, you can enjoy delicious Halloween Hand Pies with minimal effort on the big day!

Halloween Hand Pies: Creative Swaps

Feel free to get playful with your Halloween Hand Pies by experimenting with these fun and tasty variations.

  • Fruit Fillings: Switch cherry for apple or raspberry for a delightful surprise inside each pie.

  • Chocolate Delight: For a sweeter twist, opt for chocolate pudding as your filling, bringing a rich, festive flavor to the table.

  • Savory Option: Transform these sweet pies into a savory snack by using chicken pot pie filling, perfect for a different party vibe that everyone will love!

  • Icing Faces: Get creative with some colorful decorative icing to draw unique facial expressions on your spooky shapes!

  • Nutty Crunch: Add a tablespoon of chopped nuts (like pecans or almonds) to your fruit fillings for unexpected texture and flavor combinations.

  • Spiced Up: Enhance your pumpkin filling with a pinch of cayenne for a subtle spicy kick that will intrigue adventurous taste buds.

  • Sugar-Free Alternative: Use a sugar substitute for the glaze to make these health-friendly without compromising flavor.

  • Store-Bought Shortcuts: If time is of the essence, you can always grab store-bought fillings to save on prep time and still make a festive treat.

With these ideas in mind, you can truly customize your Halloween Hand Pies, making them uniquely yours. Try pairing your spooky creations with a Witches Brew Mocktail for the perfect festive treat!

Expert Tips for Halloween Hand Pies

Cold Dough: Always work with chilled dough: This ensures your Halloween Hand Pies have the ultimate flakiness and structure when baked.

Thick Fillings: Avoid runny fillings: Using thick fillings helps prevent leaks during the baking process, keeping your hand pies intact and delicious.

Chill Before Baking: Freeze assembled pies: Giving them a quick freeze for 10 minutes before baking helps maintain their shape and creates a crispier crust.

Watch Baking Time: Keep an eye on color: Bake until golden brown; overbaking can lead to a dry texture, while underbaking can leave them soggy.

Flavor Variations: Don’t hesitate to customize: Experiment with different fillings like chocolate or various fruit options for a uniquely festive twist on your Halloween Hand Pies.

How to Store and Freeze Halloween Hand Pies

Room Temperature: Store cooled Halloween Hand Pies in an airtight container at room temperature for up to 5 days to keep them fresh and delightful.

Fridge: You can refrigerate the pies for up to 9 days. Make sure they are covered well to prevent them from absorbing other odors.

Freezer: Unbaked Halloween Hand Pies can be frozen for up to 3 months. To bake, just preheat your oven and pop them in directly from the freezer—no thawing necessary!

Reheating: For reheating, place baked pies in a preheated oven at 350°F (175°C) for about 10 minutes to restore their crispy texture. Enjoy the warmth of your spooky treats!

What to Serve with Halloween Hand Pies?

Embrace the spirit of Halloween with delightful accompaniments that enhance your spooky treat experience.

  • Witches Brew Mocktail: This festive drink combines fruity flavors with a hint of fizz, creating a fun and seasonal pairing for your hand pies.

  • Black Magic Mocktail: A spooky blend of dark soda and fruit juice, it adds a mysterious twist to your Halloween spread, captivating both kids and adults.

  • Pumpkin Soup: Velvety and comforting, a warm pumpkin soup pairs beautifully with the sweetness of the hand pies, making for a cozy fall meal.

  • Spooky Salad: A fresh green salad with seasonal toppings like cranberries and pumpkin seeds provides a refreshing contrast to the rich hand pies.

  • Caramel Apples: These classic Halloween treats bring an extra crunch and sweetness that complements the delicious flavors of your hand pies.

  • Roasted Vegetables: A medley of roasted seasonal vegetables adds earthy flavors that balance the sweetness of the pies, creating a well-rounded meal.

  • Vanilla Ice Cream: Serve a scoop alongside the hand pies for a delightful dessert pairing. The creamy texture perfectly contrasts the flaky crust.

  • Hot Apple Cider: The warm, spiced notes of apple cider evoke fall comfort and enhance the festive atmosphere, making it a perfect drinkable pairing.

Halloween Hand Pies Recipe FAQs

What is the best way to choose ripe ingredients for my Halloween Hand Pies?
Absolutely! When selecting pumpkin puree, look for a can that has a label reading “100% pumpkin” without additives. For the fruit fillings, choose brands that list fruit as the first ingredient. Ripe fruits such as fresh blueberries or cherries should be plump and vibrant, avoiding any with dark spots or mushy textures.

How should I store my Halloween Hand Pies, and how long do they last?
You can store cooled Halloween Hand Pies in an airtight container at room temperature for up to 5 days. If you choose to refrigerate them, they’ll stay fresh for about 9 days. Just make sure they are covered to protect them from absorbing any other flavors or odors in the fridge.

Can I freeze my Halloween Hand Pies, and how do I do it properly?
Very! You can freeze unbaked Halloween Hand Pies for up to 3 months. To do this, assemble the pies and place them on a lined baking sheet. Freeze them until solid, then transfer them to a freezer-safe bag or container. When you’re ready to bake, preheat your oven and pop them in from the freezer—no need to thaw! Bake as per the instructions, but you may need to adjust the baking time slightly.

How can I troubleshoot soggy Halloween Hand Pies?
If your hand pies end up soggy, it could be due to a few reasons. Firstly, ensure you use thick, non-runny fillings to prevent leakage, which can lead to a soggy crust. Additionally, make sure to roll your dough thick enough—about ⅛ to ¼ inch works best. A quick freeze before baking can also help solidify any moist fillings and create a nice crisp on the crust. If all else fails, consider baking them a little longer to help dry out the moisture.

Are these Halloween Hand Pies safe for dogs or pets?
While the Halloween Hand Pies are delightful for humans, it’s best to keep them away from pets. The sugar content and some ingredients, such as certain spices, can be harmful to dogs. If you’re looking to include your furry friends in the festivities, consider making a separate batch of pet-friendly treats with safe ingredients like pure pumpkin and oats.

What if someone has a nut allergy – can I still make these Halloween Hand Pies?
Absolutely! The recipe is naturally nut-free, but it’s essential to double-check the labels on your ingredients, especially if you’re using store-bought pie crusts or fillings. Look for products that are labeled as nut-free to ensure that everyone can enjoy these spooky treats worry-free!

Halloween Hand Pies

Delicious Halloween Hand Pies: Spooky Treats to Delight You

These Halloween Hand Pies are delightful, spooky treats perfect for impressing friends and family.
Prep Time 30 minutes
Cook Time 25 minutes
Chill Time 10 minutes
Total Time 1 hour 5 minutes
Servings: 12 p pies
Course: Dessert
Cuisine: American
Calories: 250

Ingredients
  

For the Crust
  • 1 Pie Crusts Either homemade or store-bought, ensure it’s cold.
For the Pumpkin Filling
  • 0.5 cups Pumpkin Puree Adds a moist, flavorful base.
  • 2 tablespoons Brown Sugar Brings sweetness and richness.
  • 0.25 teaspoons Pumpkin Pie Spice Infuses warmth and a hint of spice.
  • 0.25 teaspoons Ground Cinnamon Optional but recommended.
  • 1 Egg Divided for filling and egg wash.
For the Fruit Fillings
  • 0.75 cups Cherry Pie Filling Provides a sweet-tart burst.
  • 0.75 cups Blueberry Pie Filling Gives fruity sweetness.
For the Glaze
  • 0.5 cups Powdered Sugar Essential for sweetening the glaze.
  • 2 tablespoons Heavy Whipping Cream Creates a thick glaze.

Equipment

  • mixing bowl
  • Rolling Pin
  • Cookie Cutters
  • baking sheet
  • oven

Method
 

Step-by-Step Instructions
  1. Prepare the Pumpkin Filling by combining pumpkin puree, brown sugar, pumpkin pie spice, ground cinnamon, and the egg yolk until smooth.
  2. Roll Out the Dough on a floured surface, cutting it into spooky shapes.
  3. Assemble the Pies by filling the shapes with pumpkin filling, blueberry filling, or cherry filling, and crimping the edges.
  4. Chill and Bake the assembled hand pies in the freezer for 10 minutes, then bake in a preheated oven at 400°F for 15 to 25 minutes.
  5. Glaze and Cool the pies with a mixture of powdered sugar and heavy cream and allow them to cool before serving.

Notes

Store the pies in an airtight container for up to 5 days at room temperature or 9 days in the fridge. Unbaked pies can be frozen for up to 3 months.

Savory Japanese Scotch Egg with Curry-Mayo Sauce Magic

As the sizzle of oil fills the kitchen, I can’t help but think how deliciously satisfying homemade food can be. Today, I’m excited to whisk you away on a culinary journey with my take on the Japanese Scotch Egg—an innovative fusion that marries the comforting flavors of a traditional British dish with a unique Japanese twist. Imagine a luscious, soy sauce marinated egg nestled in a seasoned pork dumpling filling, all enrobed in a crispy panko crust. This recipe isn’t just fun to make; it’s also perfect for impressing guests or simply indulging yourself after a long day. Plus, the tangy curry-mayo dipping sauce is the secret ingredient that elevates this dish to greatness. Ready to take your taste buds on an adventure? Let’s dive into this delectable recipe!

Why is this recipe a must-try?

Flavor Fusion: Experience an incredible amalgamation of British and Japanese cuisines, marrying savory pork with a soy sauce marinated egg.
Crispy Delight: Every bite delivers a satisfying crunch from the panko crust, creating a perfect contrast to the tender filling.
Effortless Elegance: Impress your guests without breaking a sweat—this dish is simple yet sophisticated.
Versatile Options: Choose from various fillings and dipping sauces to customize the recipe based on your preferences. Try it with the flavorful Inspired Cabbage Egg for another exciting twist!
Time-Saving Treat: Ideal for meal prep; whip these up in advance and simply fry when you’re ready to feast!
Crowd-Pleaser: Perfect as an appetizer for gatherings, this dish brings smiles and satisfied palates to any table.

Japanese Scotch Egg Ingredients

• Ready to create your delightful Japanese Scotch Egg masterpiece? Here’s everything you need!

For the Egg

  • Eggs – Essential for this recipe, soft-boiled eggs provide a deliciously runny yolk.

For the Pork Filling

  • Ground Pork – The star protein that brings richness; feel free to substitute with ground chicken or turkey for a leaner option.

For the Coating

  • Panko Breadcrumbs – These are perfect for achieving a crispy exterior; if you can’t find panko, standard breadcrumbs can work but with a different texture.

For the Marinade

  • Soy Sauce – Adds umami and depth to the marinated eggs; swap for tamari if you’re looking for a gluten-free alternative.

For the Dipping Sauce

  • Curry Powder – A key ingredient in the dipping sauce providing warmth—adjust the amount based on your spice preference.
  • Mayonnaise – Acts as the creamy base for your sauce; Greek yogurt can be used for a lighter version instead.

Step‑by‑Step Instructions for Japanese Scotch Egg

Step 1: Marinate Eggs
Begin by soft-boiling or hard-boiling your eggs for about 6-8 minutes for a runny yolk, or 10-12 minutes for a firmer center. Once boiled, immediately place the eggs in an ice bath for 5 minutes to stop the cooking process. Carefully peel the eggs, and marinate them in soy sauce for at least 30 minutes to infuse the rich umami flavor.

Step 2: Prepare Pork Filling
In a mixing bowl, combine ground pork with a pinch of salt, pepper, and any desired spices like garlic powder or ginger. Blend the mixture well for about 2-3 minutes until it’s sticky and slightly tacky. This adds a savory depth to your Japanese Scotch Eggs. Set the mixture aside to absorb the flavors while you prepare for the assembly.

Step 3: Assemble Scotch Eggs
Once the eggs have marinated, take a generous handful of the pork mixture and flatten it in the palm of your hand. Place a marinated egg in the center, gently folding the pork around the egg until evenly covered. Ensure there are no gaps and the pork clings well to create a uniform shape, forming the Japanese Scotch Egg that is tender yet flavorful.

Step 4: Coat with Panko
Prepare a shallow dish with panko breadcrumbs. Carefully roll each wrapped egg in the breadcrumbs, pressing lightly to ensure an even coating. Make sure your Japanese Scotch Egg is fully covered for a crispy finish. Place the coated eggs on a plate and let them rest for about 10 minutes; this helps the coating adhere better during frying.

Step 5: Fry
In a deep pan or a fryer, heat oil to around 350°F (175°C). Gently lower the coated eggs into the hot oil, frying in batches for about 4-5 minutes until they turn golden brown and crispy. Use a slotted spoon to turn them occasionally, ensuring an even cook. Once perfectly golden, remove the Japanese Scotch Eggs and let them drain on paper towels.

Step 6: Make Dipping Sauce
While the eggs are cooling slightly, whisk together mayonnaise and curry powder in a small bowl until smooth. Taste and adjust seasoning if necessary, adding more curry for a kick or a dash of salt to enhance flavors. This tangy curry-mayo sauce serves as a delightful accompaniment, marrying beautifully with the richness of the Japanese Scotch Egg.

Step 7: Serve
Slice each Japanese Scotch Egg in half, revealing the luscious, marinated egg center. Arrange the halves on a serving platter, accompanied by the curry-mayo dipping sauce. This presentation not only looks inviting but allows guests to savor each bite of the crunchy outer layer, savory pork filling, and creamy egg yolk. Enjoy this unique fusion experience!

Japanese Scotch Egg Variations

Feel free to let your creativity shine by customizing this dish to fit your taste and dietary preferences!

  • Dairy-Free: Substitute Greek yogurt in the dipping sauce with a dairy-free alternative, like avocado or hummus for creaminess without dairy.
  • Vegetarian: Try using mashed chickpeas or lentils mixed with spices as a filling for a delicious vegetarian twist.
  • Spicy Kick: Add a pinch of chili flakes to the pork filling or your dipping sauce for an extra burst of heat.
  • Herbed Twist: Incorporate finely chopped herbs like cilantro or green onion into the pork filling for an aromatic lift.
  • Miso Marinade: Swap soy sauce for a miso-based marinade for the eggs to introduce a new depth of flavor that’s delightfully savory.
  • Nutty Crunch: Toss some crushed nuts into the panko mixture for an added crunch that will elevate your dish!
  • Creative Dips: Enjoy these Scotch Eggs with various dipping sauces like sweet chili sauce or a zesty tzatziki for a different flavor profile.
  • Crispy Alternatives: Instead of panko, use crushed potato chips for a fun, crunchy coating that adds unexpected flavor!

While you’re experimenting, you might enjoy trying these with the refreshing Crunchy Cucumber Egg or to add some richness, make a quick Savory Cheese Egg. Happy cooking!

How to Store and Freeze Japanese Scotch Egg

Fridge: Store leftover Japanese Scotch Eggs in an airtight container for up to 3 days. Reheat in an air fryer or oven to restore their crispy texture.

Freezer: For longer storage, freeze uncoated Scotch Eggs. Wrap them tightly in plastic wrap and place in a freezer-safe bag for up to 3 months.

Reheating: When ready to enjoy, thaw in the fridge overnight, then reheat in an air fryer until warmed through and crispy.

Make-Ahead Tip: You can prepare the filling and marinate the eggs a day ahead, keeping the process smoother when you’re ready to fry.

What to Serve with Japanese Scotch Egg

Elevate your dining experience with delightful accompaniments that complement the rich flavors of this fusion dish.

  • Crispy Green Salad: Refreshing greens provide a crunchy contrast, lightening the richness of the Scotch egg. Toss with a tangy vinaigrette for a perfect match.
  • Steamed Edamame: These tender soybeans add a subtle, savory note that enhances the overall flavor profile, while also bringing a fun, interactive element to your meal.
  • Pickled Veggies: A small side of tangy pickles cuts through the richness and adds a burst of acidity that piques your palate for the next bite.
  • Coconut Rice: This subtly sweet, fragrant rice offers a soft texture that balances the crunchiness of the Scotch egg, creating a comforting plate.
  • Sake or Light Lager: Pairing your meal with a chilled glass of sake or a light lager enhances the umami without overwhelming the dish.
  • Miso Soup: A warm bowl of miso soup wraps the meal in an authentic Asian flair, introducing comforting flavors that harmonize beautifully with the Scotch egg.
  • Asian Slaw: Crunchy, colorful cabbage slaw dressed in sesame vinaigrette adds zest to your meal, combining freshness with delightful crunch.
  • Chocolate Mochi: Finish off with these chewy treats for dessert; they deliver a sweet, satisfying end to your meal while echoing the Japanese theme.

Expert Tips for Japanese Scotch Egg

  • Egg Precision: Make sure your eggs are at room temperature to avoid cracking during boiling. This allows for a smooth soft-boil and a perfect runny yolk.
  • Meat Texture: When preparing your ground pork filling, ensure it’s well-combined to achieve a uniform texture; this improves flavor and helps the pork hold together around the egg.
  • Coating Mastery: Press the panko breadcrumbs firmly onto the coated egg to ensure a crispy crunch when frying. This helps avoid any parts peeling off during cooking.
  • Oil Temperature: Maintain a steady oil temperature of 350°F for the best frying results. Too hot, and your Scotch eggs may burn; too cool, and they can become greasy.
  • Serving Fresh: For the best flavor and texture, serve your Japanese Scotch Eggs immediately after frying. However, they can be made ahead—just reheat them in an air fryer for that crispy finish!
  • Experiment Flavors: Feel free to play with spice levels in your curry-mayo sauce. A little more curry powder can add an exciting kick that enhances the overall dish.

Make Ahead Options

These Japanese Scotch Eggs are perfect for busy home cooks looking to save time! You can marinate the eggs up to 24 hours in advance; this allows the flavors to deepen, enhancing the umami richness. Additionally, you can prepare the pork filling and form the Scotch Eggs, then refrigerate them for up to 3 days prior to frying. To maintain the crispy texture, avoid coating them in panko until just before frying. When you’re ready to serve, simply coat the prepped eggs in panko and deep-fry them until golden brown. This method offers you the convenience of a delicious homemade appetizer with minimal last-minute effort, ensuring it’s just as delightful for you as it is for any guests!

Japanese Scotch Egg Recipe FAQs

What kind of eggs should I use for Japanese Scotch Egg?
I recommend using large, fresh eggs for the best results. Soft-boiled eggs deliver a luscious, runny yolk that contrasts beautifully with the savory pork filling. However, if you prefer a firmer texture, hard-boiled eggs work just as well.

How do I store leftover Japanese Scotch Eggs?
Store any leftover Scotch Eggs in an airtight container in the refrigerator for up to 3 days. When reheating, use an air fryer or conventional oven at 350°F to maintain the crispy texture for the best experience.

Can I freeze Japanese Scotch Eggs?
Absolutely! To freeze, prepare your Scotch Eggs but skip the frying step. Once formed, wrap each egg tightly in plastic wrap and place them in a freezer-safe bag. They can be stored for up to 3 months. When ready to enjoy, thaw in the fridge overnight and then fry from frozen at 350°F for about 6-8 minutes.

Why is my pork filling falling off the egg?
This can happen if the pork mixture isn’t compact enough. Ensure that you mix the ground pork with seasonings until it’s sticky and well-combined, and make sure to fully encase the egg when wrapping it. Also, pressing the panko breadcrumbs firmly onto the coated egg can help keep it intact during frying.

Is this recipe suitable for gluten-free diets?
Yes! You can make a gluten-free version of the Japanese Scotch Egg by replacing panko breadcrumbs with gluten-free breadcrumbs or crushed cornflakes. Additionally, using tamari instead of soy sauce for marinating the eggs will keep this dish gluten-free.

Can pets eat Japanese Scotch Eggs?
It’s best to avoid giving your pets any part of the Japanese Scotch Egg, especially due to the soy sauce used in marinating and spices in the pork filling. Always consult your veterinarian if you’re unsure about sharing human food with your furry friends!

Japanese Scotch Egg

Savory Japanese Scotch Egg with Curry-Mayo Sauce Magic

This Japanese Scotch Egg combines a soy sauce marinated egg with seasoned pork and crispy panko, offering a delicious fusion experience.
Prep Time 30 minutes
Cook Time 15 minutes
Marinating Time 30 minutes
Total Time 1 hour 15 minutes
Servings: 4 pieces
Course: Lunch
Cuisine: British, Japanese
Calories: 330

Ingredients
  

For the Egg
  • 4 large Eggs Soft-boiled for a runny yolk
For the Pork Filling
  • 1 pound Ground Pork Can substitute with ground chicken or turkey
For the Coating
  • 1 cup Panko Breadcrumbs Can use standard breadcrumbs for a different texture
For the Marinade
  • 1/4 cup Soy Sauce Use tamari for gluten-free option
For the Dipping Sauce
  • 1 tablespoon Curry Powder Adjust for spice preference
  • 1/2 cup Mayonnaise Greek yogurt can be used for a lighter version

Equipment

  • Deep pan or fryer
  • mixing bowl
  • slotted spoon
  • Ice bath container
  • Shallow dish

Method
 

Step-by-Step Instructions
  1. Marinate Eggs: Soft-boil eggs for 6-8 minutes. Place in an ice bath for 5 minutes, peel, and marinate in soy sauce for 30 minutes.
  2. Prepare Pork Filling: Combine ground pork with salt, pepper, and spices. Mix until sticky, about 2-3 minutes.
  3. Assemble Scotch Eggs: Flatten a handful of pork mixture, place a marinated egg in the center, and fold the pork around the egg.
  4. Coat with Panko: Roll each egg in panko breadcrumbs, ensuring even coverage, and let rest for 10 minutes.
  5. Fry: Heat oil to 350°F. Fry coated eggs for 4-5 minutes until golden brown, using a slotted spoon to turn them.
  6. Make Dipping Sauce: Whisk together mayonnaise and curry powder until smooth; adjust seasoning if necessary.
  7. Serve: Slice eggs in half, arrange on a platter with dipping sauce, and enjoy!

Notes

For best results, serve immediately after frying. Store leftovers in an airtight container for up to 3 days; reheat in an air fryer.

Ultimate Oreo Caramel Crunch Bars for Quick Sweet Cravings

With just four simple ingredients, I turned my kitchen into a sweet haven, crafting these delightful 4-Ingredient Gooey Oreo Caramel Crunch Bars. The moment you take a bite, the crunch of the Oreos melds beautifully with a creamy, gooey caramel center that will quickly whisk you away to dessert paradise. Perfect for both beginner bakers and seasoned pros, these bars are not just easy to make but are a guaranteed crowd-pleaser at your next gathering. Plus, they take minimal time to whip up, giving you more opportunities to share delicious treats with friends and family. Who can resist the charm of homemade desserts? Ready to elevate your baking game and explore how these mouthwatering bars come together? Let’s dive in!

Why are Oreo Caramel Crunch Bars irresistible?

Irresistible Sweetness: The perfect fusion of crunchy Oreos and gooey caramel creates a dessert experience like no other.
Quick and Simple: Made with just four ingredients, even novice bakers can master this treat in no time!
Crowd-Pleasing Appeal: These bars are a guaranteed hit at parties and bake sales, pleasing both kids and adults alike.
Endless Variation: Feel free to customize with nuts or flavored Oreos for a unique twist. For more inspiration, check out my Crunchy Nut Seed Cookies or explore the bright flavors of a Veggie Crunch Cucumber Salad.
Time-Saving Treat: Bake and chill these bars so quickly, providing last-minute dessert solutions when guests arrive!

Oreo Caramel Crunch Bars Ingredients

• To create these mouthwatering treats, gather just a few simple ingredients!

For the Base

  • Oreo Cookies – Provides the base with a rich chocolate flavor and crunchy texture; swap for gluten-free cookies if desired.
  • Salted Butter – Adds moisture and enhances flavor; use unsalted butter if you prefer a less salty base.

For the Filling

  • Carnation Caramel – This gooey center offers a sweet, sticky consistency; other caramel sauces can work but may alter the texture slightly.

For the Topping

  • White Chocolate Chips – Add creamy richness and sweetness; you can use dark or milk chocolate chips for a different flavor.
  • Extra Oreos – Broken into chunks for a crunchy topping; any similar chocolate cookie can serve as a substitute.

Step‑by‑Step Instructions for Oreo Caramel Crunch Bars

Step 1: Prepare the Base
Begin by crushing 200g of Oreo cookies in a food processor until they resemble fine crumbs. If you don’t have a processor, place the cookies in a zip-lock bag and crush them with a rolling pin. Combine the crumbs with 60g of melted salted butter in a bowl, mixing well until fully combined. Press this mixture firmly into a lined 8-inch square baking tin to create an even base.

Step 2: Layer the Caramel
Next, take 380g of Carnation caramel and pour it over the prepared Oreo base. Use a spatula to spread the caramel evenly across the surface, ensuring it reaches all corners of the base. This creates a deliciously gooey center for your Oreo Caramel Crunch Bars. Make sure to take your time, as an even layer will ensure a delightful texture when you slice the bars later.

Step 3: Add Toppings
Sprinkle 200g of white chocolate chips evenly over the caramel layer, followed by 14 broken Oreo pieces. The chocolate chips will melt into the caramel, adding extra richness and sweetness while the Oreo chunks provide a lovely crunchy texture. Ensure that the toppings are evenly distributed to provide a uniform flavor in every bite of your Oreo Caramel Crunch Bars.

Step 4: Bake
Preheat your oven to 180°C (160°C for fan ovens) or 350°F. Place the prepared baking tin in the oven and bake for approximately 30 minutes, or until the edges are golden and bubbling. Keep an eye on them as the baking time nears; you want the bars to firm up but not overbake. The enticing aroma of caramel and chocolate will fill your kitchen as they bake!

Step 5: Cool and Chill
Once baked, remove the tin from the oven and allow the bars to cool completely at room temperature. This is crucial to let the caramel firm up for easier slicing. Then, refrigerate the pan for at least 1 hour before cutting. Once chilled, use a sharp knife (warmed in hot water for clean cuts) to slice into squares. You’ll have perfectly portioned Oreo Caramel Crunch Bars ready to enjoy!

What to Serve with Oreo Caramel Crunch Bars

Elevate your dessert experience with delightful pairings that beautifully complement the luscious layers of these bars.

  • Vanilla Ice Cream: A scoop of creamy vanilla ice cream adds a cool contrast to the warm, gooey bars. It’s the perfect finishing touch for an indulgent dessert experience.

  • Chocolate Sauce: Drizzle rich chocolate sauce over each bar for an extra layer of sweetness that enhances the chocolatey goodness of the Oreos. This simple addition takes the treat to another level.

  • Fresh Berries: Serve with a handful of ripe strawberries or blueberries. Their tartness beautifully balances the sweetness and brings a burst of freshness to the plate.

  • Whipped Cream: A dollop of fluffy whipped cream on top creates a light, airy component that contrasts nicely with the dense, chewy bars.

  • Milk or Almond Milk: Pair these bars with a glass of cold milk—regular or dairy-free. The creaminess enhances the flavors, making it a nostalgic, comforting treat.

  • Coffee: Brew a cup of rich, aromatic coffee or espresso for a delightful pick-me-up. The bitter notes of coffee wonderfully offset the sweetness, making each bite more enjoyable.

  • Nutty Caramel Sauce: Swirl a nutty caramel sauce over the bars for added texture and flavor. The nuttiness adds another dimension to this already delicious dessert.

  • Salted Caramel Drizzle: A touch of salted caramel on top enhances the gooey, sweet caramel center, providing a delightful contrast that will keep you coming back for more.

Oreo Caramel Crunch Bars Variations

Feel free to get creative and make these bars your own with these fun twists!

  • Nutty Delight: For added flavor and crunch, mix in a layer of crushed nuts or sprinkle on top before baking. The combination of caramel and nuts is simply divine.

  • Chocolate Ganache Twist: Replace the caramel layer with chocolate ganache for an indulgently rich treat. This switch elevates the dessert to a chocolate lover’s dream.

  • Flavored Oreos: Use flavored Oreo varieties like Mint or Peanut Butter to surprise your taste buds and add unique layers of flavor. Each bite will take you on a delightful journey.

  • Cake Batter Fun: Mix a bit of dry cake mix into the crust for a fun cake batter flavor. It adds a playful twist and a unique texture to your bars.

  • Spicy Kick: Sprinkle a dash of cinnamon or cayenne pepper into the caramel for an unexpected and delightful kick. It’s a fantastic way to elevate the taste and keep everyone guessing.

  • Coconut Flakes: Add shredded coconut to the toppings for a tropical vibe. This simple switch adds a chewy texture that beautifully complements the Oreo crunch.

  • Dairy-Free Option: Swap the butter with coconut oil and use dairy-free chocolate chips for a delicious dairy-free version. It’s just as indulgent while catering to different dietary preferences!

  • Fruit Fusion: Mix in diced dried fruits like apricots or cranberries to the topping for a sweet and tangy burst of flavor. This addition enhances the overall texture, balancing the sweetness.

For even more dessert inspiration, consider trying out my delectable Sumptuous Lemon Caramel Cake or satisfy your sweet tooth with Caramel Milk Pudding. Enjoy the baking adventure!

Make Ahead Options

These Oreo Caramel Crunch Bars are a brilliant option for meal prep enthusiasts! You can prepare the base (Oreo crust) up to 24 hours in advance by mixing the crushed Oreos and melted butter, pressing it into the lined baking tin, and storing it covered in the fridge. For even greater convenience, layer the caramel over the crust and top with white chocolate chips and broken Oreos up to 3 days ahead; just hold off on baking until you are ready to enjoy. When you’re set to serve, simply bake as instructed, cooling them completely before slicing. This method ensures your bars maintain their delicious gooeyness while saving you valuable time during busy days!

How to Store and Freeze Oreo Caramel Crunch Bars

Fridge: Store your Oreo Caramel Crunch Bars in an airtight container in the refrigerator for up to one week. This keeps them fresh and ready for snacking!

Freezer: For longer storage, you can freeze the bars for up to three months. Wrap them tightly in plastic wrap or foil before placing them in a freezer-safe container to prevent freezer burn.

Thawing: When you’re ready to enjoy, simply transfer them to the fridge for several hours or leave them at room temperature for about 30 minutes to thaw.

Reheating: If you prefer a warm treat, gently reheat individual portions in the microwave for 10-15 seconds, just until the chocolate chips soften.

Expert Tips for Oreo Caramel Crunch Bars

  • Pack It Tight: Ensure the Oreo crust is firmly pressed into the baking tin to maintain its structure while baking. A loose crust may crumble when cut.

  • Cool Fully: Allow the bars to cool completely before refrigerating to help the caramel firm up, making slicing much easier and cleaner.

  • Warm Knife Trick: For the best slicing results, use a sharp knife warmed in hot water. This prevents the caramel from sticking and gives you clean edges.

  • Watch the Bake Time: Keep an eye on your bars while they bake. Oven temperatures can vary, and you want the edges nicely golden without overcooking the center.

  • Storage Savvy: Store your Oreo Caramel Crunch Bars in an airtight container in the refrigerator for up to a week. Freezing is also an option for longer storage!

Oreo Caramel Crunch Bars Recipe FAQs

How do I choose the best Oreos for this recipe?
Absolutely! Use classic Oreo cookies for the best flavor and texture. If you prefer, you can swap them for gluten-free cookies to accommodate dietary needs or opt for flavored Oreos like mint or peanut butter for a unique twist.

What’s the best way to store the Oreo Caramel Crunch Bars?
Store your delicious Oreo Caramel Crunch Bars in an airtight container in the refrigerator for up to one week. This keeps them fresh and ready for snacking any time you crave something sweet!

Can I freeze these bars? How?
Yes, you can freeze your Oreo Caramel Crunch Bars for up to three months! Simply wrap each bar tightly in plastic wrap or foil, then place them in a freezer-safe container. This prevents freezer burn and preserves their delightful taste. When you’re ready to enjoy, thaw them in the refrigerator for several hours or leave them at room temperature for about 30 minutes.

My caramel center is too runny; how can I fix this?
Very! If your caramel seems too runny, it might be because it hasn’t cooled enough after baking. Be sure to let the bars cool completely at room temperature before refrigerating. If you find they didn’t firm up, you can place the bars back in the fridge for an additional hour to help the caramel set.

Can I add nuts or other toppings to this dessert?
Absolutely! Feel free to add a layer of crushed nuts or toffee bits on top before baking for an extra crunch. Just be sure to adjust baking time if needed, as additional ingredients can alter crust firmness.

Are these bars safe for my pets?
It’s best to avoid giving these Oreo Caramel Crunch Bars to pets, particularly dogs, as chocolate and certain sugars can be harmful. Always stick to pet-safe treats to keep your furry friends happy and healthy!

Oreo Caramel Crunch Bars

Ultimate Oreo Caramel Crunch Bars for Quick Sweet Cravings

Indulge in these delightful Oreo Caramel Crunch Bars, perfect for satisfying sweet cravings with just four simple ingredients.
Prep Time 15 minutes
Cook Time 30 minutes
Cooling Time 1 hour
Total Time 1 hour 45 minutes
Servings: 12 bars
Course: Dessert
Cuisine: American
Calories: 250

Ingredients
  

For the Base
  • 200 g Oreo Cookies Crushed
  • 60 g Salted Butter Melted
For the Filling
  • 380 g Carnation Caramel
For the Topping
  • 200 g White Chocolate Chips Can substitute with dark or milk chocolate chips
  • 14 pieces Extra Oreos Broken into chunks

Equipment

  • Food Processor
  • Baking tin
  • spatula

Method
 

Preparation Steps
  1. Crush Oreo cookies in a food processor until fine crumbs. Mix with melted butter and press into a lined baking tin to create a base.
  2. Pour Carnation caramel over the prepared Oreo base and spread evenly with a spatula.
  3. Sprinkle white chocolate chips and broken Oreo pieces over the caramel layer evenly.
  4. Preheat oven to 180°C (or 350°F). Bake for approximately 30 minutes until golden and bubbling.
  5. Allow to cool completely and refrigerate for at least 1 hour before slicing into squares.

Notes

Store in an airtight container in the fridge or freeze for longer storage. For slicing, use a warm knife to achieve clean cuts.

Carrot Cake Cheesecake: Indulgent Flavor in Every Slice

As I flipped through my grandmother’s old recipe book, I stumbled upon a treasure: a Carrot Cake Cheesecake that promises to combine the best of both worlds. This delightful two-in-one dessert merges the moist, spiced goodness of traditional carrot cake with a creamy cheesecake layer that will leave your taste buds dancing. What’s even better? This easy-to-make treat not only impresses as a stunning centerpiece for any gathering but also brings a dose of sweet nostalgia that puts fast food to shame. Whether you’re looking to brighten a special occasion or simply enjoy a cozy night in, you’re in for a satisfying experience. Are you ready to whip up this indulgent masterpiece? Let’s get baking!

Why is Carrot Cake Cheesecake a Must-Try?

Indulgent Fusion: This recipe marries two beloved desserts, yielding a divine treat that combines moist carrot cake with creamy cheesecake.

Flavorful Spices: The use of aromatic spices like cinnamon and nutmeg elevates this dessert, making each bite a flavor explosion.

Crowd-Pleasing: Perfect for gatherings, this stunning cake is sure to leave guests asking for seconds.

Easy Preparation: With simple steps and common ingredients, it’s accessible even for novice bakers.

Versatile Options: Customize with nuts, or add fruits for a personalized touch—much like our delicious Refreshing Cucumber Carrot salad!

Carrot Cake Cheesecake Ingredients

For the Carrot Cake Layer

  • All-Purpose Flour – Provides structure to the carrot cake layer; can substitute with whole wheat or gluten-free flour.
  • Baking Soda & Baking Powder – These leavening agents create a light texture; ensure they are fresh for the best results.
  • Cinnamon & Nutmeg – Warm spices that enhance the flavor profile; freshly ground spices offer a better aroma.
  • Salt – Balances sweetness and enhances flavors in both layers.
  • Brown Sugar – Adds moisture and depth; can be partially substituted with coconut sugar for a healthier option.
  • Granulated Sugar – Provides sweetness to both the cake and cheesecake layers; consider reducing as carrots naturally sweeten.
  • Vegetable Oil – Keeps the carrot cake moist; coconut oil can be a great alternative.
  • Eggs – Bind ingredients and provide essential structure for both layers.
  • Vanilla Extract – Lends depth to the flavor; substitute with almond extract for a unique twist.
  • Grated Carrots – The hero of the cake layer, offering sweetness and moisture; freshly grated is crucial.
  • Chopped Walnuts or Pecans (optional) – Adds a delightful crunch; feel free to omit for a nut-free version.

For the Cheesecake Layer

  • Cream Cheese – Provides the essential creaminess; full-fat is recommended for the best texture.
  • Sour Cream – Contributes tang and creaminess; Greek yogurt can be used as a lower-calorie alternative.
  • Unsalted Butter – Used in optional frosting, adding creaminess and flavor; margarine can stand in if needed.

This Carrot Cake Cheesecake is a delightful way to indulge your sweet cravings with a beautiful blend of flavors. Get ready to impress your friends and family!

Step‑by‑Step Instructions for Carrot Cake Cheesecake

Step 1: Prepare Carrot Cake Batter
Preheat your oven to 325°F (163°C) and grease a 9-inch springform pan. In a large mixing bowl, whisk together the flour, baking soda, baking powder, cinnamon, nutmeg, and salt until well combined. In another bowl, mix the brown sugar, granulated sugar, vegetable oil, eggs, and vanilla extract until smooth. Gently fold in the grated carrots and chopped nuts, then incorporate the dry ingredients until just combined, taking care not to overmix.

Step 2: Prepare Cheesecake Batter
In a separate bowl, beat the cream cheese until smooth and creamy. Gradually add the granulated sugar, continuing to mix until well combined. Add the eggs one at a time, mixing gently after each addition. Finally, stir in the vanilla extract and sour cream until the cheesecake batter is smooth and creamy, ensuring there are no lumps that could affect the texture of the Carrot Cake Cheesecake.

Step 3: Assemble Layers
Layer half of the carrot cake batter into the prepared springform pan, smoothing it out evenly. Carefully spoon half of the cheesecake batter on top, spreading it to cover the cake layer. Repeat by adding the remaining carrot cake batter followed by the rest of the cheesecake batter. Use a knife to gently swirl through the layers, creating a marbled effect that adds visual appeal to the Carrot Cake Cheesecake.

Step 4: Bake
Place the assembled cake in the preheated oven and bake for 50-60 minutes, or until the center is set but still slightly jiggly. Once done, turn off the oven and leave the cheesecake inside with the door ajar for 10 minutes. This gentle cooling helps prevent cracks. Afterward, let the Carrot Cake Cheesecake cool completely at room temperature before refrigerating for at least 4 hours or overnight.

Step 5: Prepare Cream Cheese Frosting (optional)
While the cheesecake cools, prepare the optional cream cheese frosting. In a mixing bowl, beat softened cream cheese and unsalted butter together until creamy. Gradually add powdered sugar and a splash of vanilla extract, mixing until the frosting is light and fluffy. Once the Carrot Cake Cheesecake is chilled, you can spread this decadent frosting over the top for added indulgence.

Step 6: Serve
Carefully remove the Carrot Cake Cheesecake from the springform pan, allowing it to sit for a moment before slicing. Serve each slice garnished with a sprinkle of cinnamon or chopped nuts for an extra touch. The layers should be beautifully visible, showcasing the contrast between the creamy cheesecake and spiced carrot cake, making for an impressive dessert to share.

Make Ahead Options

These Carrot Cake Cheesecakes are perfect for busy home cooks looking to save time during the week! You can prepare the carrot cake layer up to 24 hours in advance; simply mix and refrigerate it in an airtight container. The cheesecake batter can also be prepped ahead and stored in the fridge for up to 3 days—just cover it tightly to maintain its freshness. When you’re ready to bake, layer the batters as instructed and bake as usual. This way, you’ll have a delicious dessert ready to impress with minimal effort, ensuring that each slice remains just as delightful as if freshly made.

What to Serve With Carrot Cake Cheesecake

Imagine rounding out your meal with delightful pairings that complement both the creamy and spiced elements of this indulgent dessert.

  • Fresh Berries: The tartness of strawberries or raspberries balances the sweetness of the cheesecake, adding a refreshing touch.
  • Cinnamon Ice Cream: A scoop melted alongside the cheesecake enhances the warm spice notes, creating a cozy, indulgent treat.
  • Toasty Nuts: Chopped walnuts or pecans scattered on top provide a satisfying crunch that contrasts beautifully with the smooth layers.
  • Creamy Whipped Topping: A dollop of whipped cream adds lightness and richness, making each bite feel extra indulgent and luxurious.
  • Spiced Chai Tea: A comforting cup of chai serves as a warm, aromatic contrast to the rich dessert, enhancing its spiced profile beautifully.
  • Caramel Drizzle: A drizzle of warm caramel sauce not only brings a sweet, luscious flavor but also adds visual appeal to this already stunning dish.
  • Chocolate Ganache: Pouring a silky layer of dark chocolate ganache makes the cheesecake a truly decadent experience, perfect for special occasions.
  • Almond Milk: For a lighter drink option, the subtle nuttiness of almond milk complements the flavors without overpowering them, rounding out the dessert experience.

Carrot Cake Cheesecake Variations

Feel free to get creative and make this Carrot Cake Cheesecake uniquely yours with these delightful adaptations!

  • Nut-Free: Omit the walnuts or pecans entirely for a completely nut-free version. Enjoy the smooth texture of the cheesecake without any nutty crunch.

  • Spiced Up: Add a pinch of cardamom or ginger for an extra layer of warmth and spice in the carrot cake layer. This twist gives your cheesecake a delightful kick!

  • Fruit-Enhanced: Incorporate crushed pineapple or raisins into the carrot cake batter for added moisture and sweetness. The fruit creates a beautiful balance with the spiced cake.

  • Gluten-Free: Substitute all-purpose flour with a gluten-free blend to make this dessert suitable for gluten-sensitive friends. Your guests will love it just as much!

  • Vegan Delight: Replace eggs with flaxseed meal and use dairy-free cream cheese and yogurt for a vegan-friendly version. Everyone can indulge in this tasty treat!

  • Flavor Variations: Swap vanilla extract for almond extract in the cheesecake layer for a nutty twist. This subtle change will elevate the flavor profile delightfully.

  • Topped with Fruity Goodness: Serve with fresh berries or a vibrant berry sauce for a colorful, delicious topping. This adds a nice tartness that complements the sweet cheesecake beautifully.

  • Caramel Drizzle: Drizzle warm caramel sauce over each slice before serving for an irresistible sweet accent. Who can resist that extra indulgence?

With these ideas, your Carrot Cake Cheesecake can take on new flavors that surprise and delight every time you serve it. For more delicious twists, check out our Crunchy Cabbage Carrot salad for a refreshing pairing!

How to Store and Freeze Carrot Cake Cheesecake

Fridge: Store the Carrot Cake Cheesecake covered with plastic wrap or in an airtight container for up to 5 days to maintain freshness and flavor.

Freezer: Wrap slices tightly in plastic wrap and foil before freezing for up to 2 months. This keeps the dessert delicious and prevents freezer burn.

Thawing: To enjoy your frozen cheesecake, simply thaw it in the refrigerator overnight before serving. This ensures a perfect texture when it’s ready to savor.

Reheating: While cheesecake is typically enjoyed chilled, you can warm individual slices slightly in the microwave for 10-15 seconds to enhance its creaminess.

Expert Tips for Carrot Cake Cheesecake

  • Avoid Overmixing: To ensure a perfectly smooth cheesecake batter, mix until just combined. Overmixing can lead to cracks as the cheesecake bakes.

  • Layer Carefully: When assembling, spoon the batters gently to maintain separation. This technique creates a beautiful marbled effect in your Carrot Cake Cheesecake.

  • Check Baking Time: The cheesecake will still be a bit jiggly in the center when done. Overbaking can lead to dryness; let it cool properly to set.

  • Cooling Method: Let the cheesecake cool gradually in the oven with the door ajar to prevent cracking. This gentle cooling helps maintain its creamy texture.

  • Upgrade Your Toppings: Don’t hesitate to enhance your serving with fresh fruit, whipped cream, or a drizzle of caramel for added flavor and visual appeal.

Carrot Cake Cheesecake Recipe FAQs

How do I select ripe ingredients for the Carrot Cake Cheesecake?
Absolutely! For the best flavor, choose fresh, firm carrots without dark spots or soft patches. The fresher the carrots, the sweeter and more vibrant your cake will be. Look for cream cheese that is fresh and not close to its expiration date for ideal creaminess.

What’s the best way to store leftover Carrot Cake Cheesecake?
Very! Store your Carrot Cake Cheesecake covered with plastic wrap or in an airtight container in the refrigerator for up to 5 days. This keeps it fresh and delicious, ensuring every bite remains as enjoyable as the first.

Can I freeze the Carrot Cake Cheesecake?
Absolutely! To freeze, slice the cheesecake and wrap each piece tightly in plastic wrap followed by aluminum foil. It can be stored in the freezer for up to 2 months. When you’re ready to enjoy, simply thaw the slices in the refrigerator overnight for the best texture.

What should I do if my cheesecake cracks while baking?
The more the merrier! If you notice cracks, it often means the cheesecake was overmixed or overbaked. Always mix your cheesecake batter just until combined and avoid baking for too long—look for a jiggly center. Cooling gradually in the oven with the door ajar can also help prevent cracks.

Are there any dietary considerations for making this cheesecake?
Yes! If you have nut allergies, you can easily omit walnuts or pecans from the recipe. For a gluten-free option, substitute the all-purpose flour with a gluten-free blend. Use low-fat cream cheese and Greek yogurt for a lighter version without compromising much on flavor or texture.

Carrot Cake Cheesecake

Carrot Cake Cheesecake: Indulgent Flavor in Every Slice

This Carrot Cake Cheesecake is a delightful indulgent dessert that marries moist carrot cake with a creamy cheesecake layer, perfect for any occasion.
Prep Time 30 minutes
Cook Time 1 hour
Cooling Time 4 hours
Total Time 5 hours 30 minutes
Servings: 12 slices
Course: Dessert
Cuisine: American
Calories: 350

Ingredients
  

For the Carrot Cake Layer
  • 2 cups All-Purpose Flour Can substitute with whole wheat or gluten-free flour.
  • 1 tsp Baking Soda Ensure they are fresh for the best results.
  • 1 tsp Baking Powder Ensure they are fresh for the best results.
  • 1 tsp Cinnamon Freshly ground spices offer a better aroma.
  • 0.5 tsp Nutmeg Freshly ground spices offer a better aroma.
  • 0.5 tsp Salt Balances sweetness and enhances flavors in both layers.
  • 1 cup Brown Sugar Can be partially substituted with coconut sugar for a healthier option.
  • 0.5 cup Granulated Sugar Consider reducing as carrots naturally sweeten.
  • 0.75 cup Vegetable Oil Coconut oil can be a great alternative.
  • 4 large Eggs Bind ingredients and provide essential structure for both layers.
  • 2 tsp Vanilla Extract Substitute with almond extract for a unique twist.
  • 2 cups Grated Carrots Freshly grated is crucial.
  • 1 cup Chopped Walnuts or Pecans Optional; feel free to omit for a nut-free version.
For the Cheesecake Layer
  • 16 oz Cream Cheese Full-fat is recommended for the best texture.
  • 1 cup Sour Cream Greek yogurt can be used as a lower-calorie alternative.
  • 0.5 cup Unsalted Butter Margarine can stand in if needed.

Equipment

  • 9-inch springform pan
  • mixing bowls
  • whisk
  • electric mixer

Method
 

Step-by-Step Instructions for Carrot Cake Cheesecake
  1. Preheat your oven to 325°F (163°C) and grease a 9-inch springform pan. In a large mixing bowl, whisk together the flour, baking soda, baking powder, cinnamon, nutmeg, and salt until well combined. In another bowl, mix the brown sugar, granulated sugar, vegetable oil, eggs, and vanilla extract until smooth. Gently fold in the grated carrots and chopped nuts, then incorporate the dry ingredients until just combined, taking care not to overmix.
  2. In a separate bowl, beat the cream cheese until smooth and creamy. Gradually add the granulated sugar, continuing to mix until well combined. Add the eggs one at a time, mixing gently after each addition. Finally, stir in the vanilla extract and sour cream until the cheesecake batter is smooth and creamy, ensuring there are no lumps that could affect the texture of the Carrot Cake Cheesecake.
  3. Layer half of the carrot cake batter into the prepared springform pan, smoothing it out evenly. Carefully spoon half of the cheesecake batter on top, spreading it to cover the cake layer. Repeat by adding the remaining carrot cake batter followed by the rest of the cheesecake batter. Use a knife to gently swirl through the layers, creating a marbled effect that adds visual appeal to the Carrot Cake Cheesecake.
  4. Place the assembled cake in the preheated oven and bake for 50-60 minutes, or until the center is set but still slightly jiggly. Once done, turn off the oven and leave the cheesecake inside with the door ajar for 10 minutes. This gentle cooling helps prevent cracks. Afterward, let the Carrot Cake Cheesecake cool completely at room temperature before refrigerating for at least 4 hours or overnight.
  5. While the cheesecake cools, prepare the optional cream cheese frosting. In a mixing bowl, beat softened cream cheese and unsalted butter together until creamy. Gradually add powdered sugar and a splash of vanilla extract, mixing until the frosting is light and fluffy. Once the Carrot Cake Cheesecake is chilled, you can spread this decadent frosting over the top for added indulgence.
  6. Carefully remove the Carrot Cake Cheesecake from the springform pan, allowing it to sit for a moment before slicing. Serve each slice garnished with a sprinkle of cinnamon or chopped nuts for an extra touch.

Notes

Avoid overmixing to ensure a perfectly smooth cheesecake batter and check baking time to prevent dryness.

Irresistible Cherry Chocolate Dip for Effortless Indulgence

“Can you believe how easy it is to whip up a dessert that feels indulgent yet takes just 15 minutes?” That’s exactly how I felt when I first made this Cherry Chocolate Dip, a creamy, no-bake treat that perfectly marries the sweetness of maraschino cherries with the rich depth of chocolate. Whether you’re hosting a gathering or just treating yourself on a quiet evening, this dip ticks all the right boxes. It’s not only quick to prepare but also a crowd-pleaser, sure to ignite smiles and spark conversations. You can even customize it with fresh cherries or different chocolates to match your cravings. Ready to take your snacking to the next level? Let’s dive into this delectable blend of flavors and fun!

Why is Cherry Chocolate Dip a Must-Try?

Easily Prepared: Whipping up this dip only takes 15 minutes, making it perfect for last-minute gatherings.
Irresistible Flavor Combination: Enjoy the delightful pairing of cherry sweetness with luxurious chocolate.
Versatile Delight: Customize with fresh cherries, dark chocolate, or even a dash of hazelnut extract to fit your mood.
Perfect for Any Occasion: Whether it’s a casual snack or a festive party, this dip brings joy to any setting.
No-Bake Convenience: Experience indulgence without turning on the oven, freeing up more time for fun!

Get ready to impress your guests or treat yourself to a delightfully sweet experience! For more easy dessert ideas, check out these Coffee Chocolate Truffles and Coconut Chocolate Rolls.

Cherry Chocolate Dip Ingredients

• Prepare to indulge with these must-have ingredients!

For the Dip

  • Cream Cheese – Provides creaminess and a rich texture; make sure it’s softened for smooth blending.
  • Powdered Sugar – Adds sweetness while stabilizing the dip; opt for sifted for a lump-free finish.
  • Maraschino Cherries – Offers vibrant color and sweetness; reserve the juice for added cherry flavor.
  • Cool Whip – Contributes lightness, making your dip airy and fluffy; store in the freezer until ready to use.
  • Vanilla Extract – Enhances the overall flavor, complementing the cherries and chocolate; never skip this delicious addition!
  • Almond Extract – Adds a subtle nutty undertone; adjust or omit based on your personal preference.
  • Mini Chocolate Chips – Sprinkle in chocolatey goodness throughout the dip, heightening its appeal and richness.

With these ingredients for the Cherry Chocolate Dip, your dessert will surely be a hit!

Step‑by‑Step Instructions for Cherry Chocolate Dip

Step 1: Beat the Cream Cheese
In a mixing bowl, combine softened cream cheese and use a hand mixer to beat until the mixture is smooth and creamy, about 2-3 minutes. Scrape down the sides to ensure no lumps remain, creating a velvety base for your Cherry Chocolate Dip. This step is essential for a luscious texture.

Step 2: Add Sweetness and Flavor
Gradually add in the powdered sugar along with the vanilla and almond extracts. Mix the ingredients together on low speed until they’re fully incorporated, about 1-2 minutes, creating a sweet and fragrant mixture. This will enhance the flavor profiles of the Cherry Chocolate Dip.

Step 3: Infuse Cherry Flavor
Pour in 2 tablespoons of the reserved cherry juice from the maraschino cherries and stir gently to combine. This infusion brings a delightful cherry essence to the dip while maintaining its creamy mixture. The color will become slightly pink, adding a lovely visual appeal as you prepare your Cherry Chocolate Dip.

Step 4: Fold in the Cool Whip
Gently fold in the Cool Whip using a rubber spatula until the mixture is light and fluffy, roughly 1-2 minutes. Be careful not to deflate the airy texture of the Cool Whip, as this will ensure the Cherry Chocolate Dip has a beautiful, creamy consistency that’s perfect for dipping.

Step 5: Incorporate Cherries and Chocolate Chips
Carefully mix in the chopped maraschino cherries and mini chocolate chips until evenly distributed throughout the dip, ensuring every bite contains delicious bursts of flavor. This step adds a rich, sweet dimension to your Cherry Chocolate Dip, making it irresistible.

Step 6: Chill for Best Flavor
Transfer the whipped Cherry Chocolate Dip to a serving bowl, smoothing the top with a spatula. Cover with plastic wrap and chill in the refrigerator for at least 30 minutes. Allowing it to sit will enhance the flavors, creating a deliciously satisfying dip that’s ready to impress your guests.

Storage Tips for Cherry Chocolate Dip

  • Fridge: Store the Cherry Chocolate Dip in an airtight container for up to 3 days. Make sure it’s well-sealed to keep it fresh and prevent it from absorbing any odors.
  • Freezer: For longer preservation, you can freeze the dip for up to 2 months. Store it in a freezer-safe container, and when ready to enjoy, thaw it in the fridge overnight before serving.
  • Stirring Before Serving: If you notice any separation after storing, gently stir the dip to reincorporate the ingredients before enjoying it again. This will help restore its delightful texture.
  • Make-Ahead Tips: You can prepare this dip up to 24 hours in advance. Chilling enhances the flavors, making it an excellent choice for parties or gatherings!

Make Ahead Options

This Cherry Chocolate Dip is a fantastic choice for busy home cooks looking to simplify meal prep! You can prepare the entire dip up to 24 hours in advance, allowing the flavors to meld beautifully. Simply follow the recipe up until chilling it in the refrigerator, ensuring you cover the bowl tightly with plastic wrap to prevent any drying out. When you’re ready to serve, you’ll just need to give it a gentle stir, as it may separate slightly during storage. Rest assured, your Cherry Chocolate Dip will be just as delicious, delightfully creamy, and ready to impress your guests with minimal last-minute hassle!

What to Serve with Cherry Chocolate Dip

Indulge in the perfect pairing possibilities that elevate your Cherry Chocolate Dip into a delightful spread for any occasion.

  • Graham Crackers: These crunchy, sweet companions provide a satisfying contrast to the creamy dip and are easily dunked for a fun treat.
  • Fresh Strawberries: Their juicy sweetness complements the chocolatey richness of the dip, bringing a burst of freshness with each bite.
  • Vanilla Wafers: Soft and sweet, these cookies add a nostalgic touch that harmonizes beautifully with the dip’s rich flavors.
  • Apple Slices: Crisp and tart, apple slices create a balanced flavor duo with the dip, perfect for those seeking a healthier option.
  • Pretzel Crisps: The salty crunch of pretzel crisps enhances the sweetness of the Cherry Chocolate Dip, providing a delightful contrast.
  • Mini Pudding Cups: Layer your dip with layers of chocolate or vanilla pudding for an enchanting dessert that’s pleasing to the eyes and the palate.
  • Chocolate Milkshake: Pair with a thick milkshake for a decadently indulgent treat, perfect for satisfying those sweet cravings.

Cherry Chocolate Dip Variations & Substitutions

Unlock your creativity and give this delightful Cherry Chocolate Dip your own personal touch!

  • Fresh Cherries: Replace maraschino cherries with fresh cherries for a natural flavor. Just remember to pit and chop them before mixing. Their juicy, sweet bite offers a delightful twist!

  • Dark Chocolate: Swap semi-sweet chocolate chips for dark chocolate chips to elevate the richness. This variation deepens the chocolate flavor, creating a more indulgent experience.

  • Nutty Crunch: Add chopped nuts like pecans or walnuts for a textural surprise. This not only adds crunch but also a lovely nutty flavor that complements the cherries beautifully.

  • Hazelnut Extract: Incorporate hazelnut extract instead of almond for a unique depth of flavor. The nutty essence pairs wonderfully with the chocolate and cherries, bringing a surprising twist to the dip.

  • Greek Yogurt: For a healthier option, replace part of the cream cheese with Greek yogurt for added tanginess and a creamy texture. This substitution cuts calories while maintaining that beloved creaminess.

  • Spicy Kick: For those who love heat, add a dash of cayenne pepper or chili powder to the mix. This unexpected zing will add a thrilling flavor contrast to the sweetness of the dip.

  • Fruit Spreads: Mix in a spoonful of cherry preserves or any fruit spread of your choice. This will enhance the cherry flavor and add an interesting layer of sweetness that everyone will love.

Crafting your version of this dip is as thrilling as the journey to find your favorite flavors! And if you’re in the mood for more delightful desserts, don’t miss out on making these scrumptious Nutty Chocolate Date bites or indulging in Coconut Chocolate Rolls.

Expert Tips for Cherry Chocolate Dip

  • Soften Cream Cheese: Make sure your cream cheese is at room temperature. This step prevents lumps and ensures a smooth, creamy dip.

  • Drain Cherries Well: Excess moisture from maraschino cherries can make your dip runny. Always drain and pat them dry before adding.

  • Cool Whip Technique: Gently fold in the Cool Whip rather than stirring vigorously to maintain its light and fluffy consistency in the Cherry Chocolate Dip.

  • Chill to Enhance Flavor: Refrigerate the dip for at least 30 minutes. Chilling allows the flavors to meld beautifully, enhancing the overall taste.

  • Customizable Ingredients: Feel free to experiment with using fresh cherries, dark chocolate, or different extracts to create a version of the Cherry Chocolate Dip that matches your taste preferences.

Cherry Chocolate Dip Recipe FAQs

What type of cherries should I use for the Cherry Chocolate Dip?
I recommend using maraschino cherries for their sweetness and vibrant color, which work beautifully in this dip. If you want a fresher taste, you can opt for fresh cherries, but be sure to add a tablespoon of cherry preserves for additional sweetness and color.

How should I store leftovers of Cherry Chocolate Dip?
Store your Cherry Chocolate Dip in an airtight container in the fridge for up to 3 days. It’s essential to seal the container well to keep the dip fresh and prevent any strange odors from affecting its flavor.

Can I freeze Cherry Chocolate Dip?
Absolutely! You can freeze the Cherry Chocolate Dip for up to 2 months. Make sure to place it in a freezer-safe container. When you’re ready to enjoy it again, thaw it in the fridge overnight and give it a gentle stir to bring back its creamy texture.

What can I do if my dip is too runny?
If your Cherry Chocolate Dip turns out too runny, the most likely culprit is excess moisture from the cherries. To fix this, you can add a bit more powdered sugar or even a small amount of cream cheese to help thicken it up. Just fold in the additional ingredients gently until the desired consistency is achieved.

Is this recipe suitable for those with allergies?
The Cherry Chocolate Dip contains dairy and may not be suitable for those with lactose intolerance or dairy allergies. For a dairy-free version, you can substitute the cream cheese with a dairy-free cream cheese alternative and use coconut whipped cream instead of Cool Whip. Always check labels for any other allergens.

How long before serving should I chill the Cherry Chocolate Dip?
I suggest chilling the dip for at least 30 minutes before serving. This allows the flavors to meld beautifully, giving you a more robust taste experience. If you can chill it longer, like up to a couple of hours, the flavors will deepen even further!

Cherry Chocolate Dip

Irresistible Cherry Chocolate Dip for Effortless Indulgence

This Cherry Chocolate Dip is a creamy, no-bake treat, ready in just 15 minutes for a delightful dessert experience.
Prep Time 15 minutes
Chill Time 30 minutes
Total Time 45 minutes
Servings: 8 servings
Course: Dessert
Cuisine: American
Calories: 180

Ingredients
  

For the Dip
  • 8 oz Cream Cheese Softened for smooth blending
  • 1 cup Powdered Sugar Sifted for a lump-free finish
  • 1 cup Maraschino Cherries Reserve the juice for added flavor
  • 1 8 oz Cool Whip Store in freezer until ready to use
  • 1 tsp Vanilla Extract Enhances overall flavor
  • 0.5 tsp Almond Extract Adjust or omit based on preference
  • 0.5 cup Mini Chocolate Chips Sprinkle in for added richness

Equipment

  • mixing bowl
  • hand mixer
  • rubber spatula
  • airtight container

Method
 

Preparation Steps
  1. In a mixing bowl, combine softened cream cheese and use a hand mixer to beat until smooth and creamy, about 2-3 minutes.
  2. Gradually add the powdered sugar along with vanilla and almond extracts. Mix on low speed for 1-2 minutes.
  3. Pour in 2 tablespoons of reserved cherry juice and stir gently to combine, until the dip adopts a pink hue.
  4. Gently fold in the Cool Whip using a rubber spatula until light and fluffy, about 1-2 minutes.
  5. Mix in the chopped maraschino cherries and mini chocolate chips until evenly distributed.
  6. Transfer the dip to a serving bowl, cover with plastic wrap, and chill in the refrigerator for at least 30 minutes.

Notes

Ensure all ingredients, especially cream cheese and Cool Whip, are at the right temperature for the best texture. The dip can be prepared up to 24 hours in advance for enhanced flavor.

Apple Crumble Chia Pudding: Your Cozy Fall Delight!

As the cool breeze ushers in the vibrant colors of fall, my kitchen fills with the warming aroma of spiced apples sizzling on the stove. This time of year, there’s nothing quite like curling up with a cozy breakfast, and my Apple Crumble Chia Pudding is the perfect solution for a hearty morning meal. Packed with fiber and fully vegan, this recipe not only simplifies your morning routine but also delights your taste buds with creamy chia seeds and a crunchy crumble topping. Whether you’re meal prepping for the week or seeking a comforting treat, this dish is a nourishing nod to autumn’s bounty. Ready to dive into a breakfast that tastes like apple pie but is effortlessly healthy? Let’s get cooking!

Why is this Apple Crumble Chia Pudding special?

Versatile and Creative: This recipe allows endless personalization—swap in your favorite fruits or nut alternatives to make it truly yours.
Irresistible Flavor: Warm, spiced apples combine with a creamy chia base, creating a taste sensation that perfectly encapsulates the essence of fall.
Meal Prep Friendly: Whip it up in advance and enjoy a healthy breakfast for days, making mornings a breeze!
Fiber-Packed Goodness: Loaded with fiber thanks to chia seeds and apples, it’ll keep you fuller for longer, making it a nutritious choice for everyone.
A Crowd-Pleaser: Whether served at brunch or as a cozy family breakfast, this dish is sure to impress, reminiscent of an indulgent apple pie! For other comforting dishes, check out the Rustic Apple Walnut or Apple Pie recipes.

Apple Crumble Chia Pudding Ingredients

• Get ready to create a cozy delight!

For the Chia Pudding Base

  • Chia Seeds – Provides soluble fiber and a unique texture; substitute with blended chia seeds for a smoother consistency.
  • Miso Paste – Adds depth and balances sweetness; can be omitted or replaced with extra salt.
  • Medjool Dates – Acts as a natural sweetener; dried apricots or other dried fruits are viable substitutes.
  • Spices (Cinnamon and Cardamom) – Contributes warming flavors synonymous with fall; apple pie spice mix can be used as a substitute.
  • Soy Milk – Used for added protein; oat milk or any favorite plant-based milk works too.
  • Yogurt (Soy) – Adds creaminess and tang; feel free to swap in any preferred yogurt variety.

For the Topping

  • Oats – Provides texture; use gluten-free oats for a GF variation, or replace with additional nuts if preferred.
  • Walnuts – Adds crunch and healthy fats; pecans or almonds can be alternatives or omit for a nut-free option.

For the Layering

  • Apples – Adds sweetness and texture; fresh bananas can substitute for stewed apples if you’re short on time.
  • Apple Butter – Enhances apple flavor concentration; if unavailable, 1/4 cup of sautéed apples can be blended as a substitute.

With these delightful ingredients in hand, you’re ready to savor the flavors of fall with the irresistible apple crumble chia pudding!

Step‑by‑Step Instructions for Apple Crumble Chia Pudding

Step 1: Blend the Base
In a blender, combine the yogurt, apple butter, Medjool dates, miso paste, vanilla, cinnamon, cardamom, and soy milk. Blend until the mixture is completely smooth, with a velvety texture. This creamy base forms the foundation of your luscious Apple Crumble Chia Pudding, so take a minute to ensure no lumps remain.

Step 2: Combine Chia Seeds
Pour the blended mixture into a medium bowl and stir in the chia seeds with a whisk. Allow this blend to sit for 5 minutes, during which the chia seeds will swell and thicken the mixture. After 5 minutes, whisk again to break up any clumps forming, ensuring an even, pudding-like consistency.

Step 3: Prepare the Crumble
For the crumble topping, add oats, walnuts, Medjool dates, and a pinch of salt to a food processor. Pulse the ingredients together until they reach a crumbly texture, resembling coarse breadcrumbs. This crunchy layer adds delightful contrast to the silky chia pudding and enhances the overall flavor of your Apple Crumble Chia Pudding.

Step 4: Sauté the Apples
In a skillet over medium-low heat, sauté the diced apples with a splash of maple syrup and a dash of cinnamon until they soften and become fragrant, about 5-7 minutes. Stir occasionally to evenly coat the apples in the spices and syrup, filling your kitchen with the warm scents of fall essential for this recipe.

Step 5: Layer the Pudding
In small jars or bowls, start layering your Apple Crumble Chia Pudding: first spoon in a layer of the chia pudding base, followed by a layer of the sautéed apples, and then sprinkle the crumble on top. Repeat the layers until you fill the jars, leaving a little room at the top for drizzles of extra apple butter or maple syrup if desired.

Step 6: Store and Enjoy
Seal your jars or bowls with lids and refrigerate for up to 3-4 days to allow the flavors to meld together beautifully. This makes your Apple Crumble Chia Pudding not only a delicious breakfast option but also a make-ahead treat that’s ready to grab and go throughout the week!

What to Serve with Apple Crumble Chia Pudding

Imagine a cozy morning transformed into a delightful spread that perfectly complements your creamy, fiber-packed pudding!

  • Cinnamon Apple Slices: Fresh apple slices dusted with cinnamon bring a crisp texture and enhance the warm apple flavors in the pudding.
  • Oatmeal Pancakes: Soft, fluffy pancakes make the perfect vessel for layering flavors, creating a delicious stack that integrates beautifully with the pudding.
  • Coconut Yogurt Parfait: Silky coconut yogurt adds a tangy touch and a luscious creaminess, contrasting wonderfully with the apple crumble chia pudding.
  • Maple Almond Milk: A glass of lightly sweetened almond milk offers a smooth sip that balances the dish’s rich textures and flavors.
  • Spiced Nut Granola: Crunchy, spiced granola on the side introduces additional crunch and nutty flavors that enhance the delightful crumble topping.
  • Warm Chai Tea: This comforting drink infuses cozy spices, echoing the pudding’s flavor profile while providing a soothing beverage option to start your day.
  • Vegan Scones: Light and flaky scones with a touch of cinnamon make a delightful pairing, perfect for those who crave a sweet complement alongside their pudding.

How to Store and Freeze Apple Crumble Chia Pudding

Fridge: Store your Apple Crumble Chia Pudding in airtight containers for up to 3-4 days, ensuring freshness while allowing the flavors to meld harmoniously.

Freezer: For longer storage, freeze the layers separately—chia pudding, sautéed apples, and crumble topping can be frozen for up to 2 months. Thaw in the fridge overnight before serving.

Reheating: If desired, gently reheat the apples on the stovetop and give the pudding a good stir before serving. Enjoy it warm or cold for a delightful experience!

Meal Prep-Friendly: This pudding is ideal for meal prepping; assemble your jars ahead of time for quick grab-and-go breakfasts throughout the week.

Make Ahead Options

These Apple Crumble Chia Puddings are perfect for busy home cooks looking to simplify their mornings! You can prepare the chia pudding mixture and layer it with the sautéed apples up to 3 days in advance. To do this, follow the first four steps of the recipe, then store the layered jars in the refrigerator to maintain freshness. To ensure the quality, cover them tightly with lids and avoid adding the crumble topping until just before serving. When you’re ready to enjoy, simply sprinkle the crumble on top and, if desired, drizzle with extra maple syrup or apple butter for that delicious finishing touch. This way, you can have a hearty, nutritious breakfast that’s just as delightful as when freshly made!

Expert Tips for Apple Crumble Chia Pudding

  • Perfect Blending: Use an immersion blender in a tall jar for easy mixing of the chia pudding base; fewer dishes to clean up later!
  • Clump-Free Consistency: Prevent clumping of chia seeds by whisking the mixture twice during the setting process— your Apple Crumble Chia Pudding will turn out creamy and smooth.
  • Adjustable Thickness: Feel free to adjust the liquid levels based on your desired pudding thickness; use more or less milk for a thicker or thinner consistency.
  • Quick Sautéing: To save time, sauté the apples in batches and chill them in the fridge to make layering even faster on busy mornings!
  • Flavor Enhancements: Add a pinch of nutmeg or ginger to the spice mix for a little extra warmth, creating an irresistible flavor profile in your pudding.
  • Creative Substitutions: Don’t hesitate to swap in your favorite fruits or nuts for the topping; it’s all about making the Apple Crumble Chia Pudding truly your own!

Apple Crumble Chia Pudding Variations & Substitutions

Feel free to add your personal touch to this recipe and explore delightful alternatives that amplify the cozy flavors!

  • Dairy-Free: Use coconut yogurt instead of soy yogurt for a tropical twist and a creamier texture.

  • Nut-Free: Replace walnuts with pumpkin seeds for a crunchy, nut-free alternative that still packs a nutritious punch. They add a nice bite without any nut concerns.

  • Fruit Forward: Experiment by layering with ripe pears or seasonal berries instead of apples to change the flavor profile while still celebrating fall’s harvest.

  • Extra Sweetness: For a sweeter pudding, replace some Medjool dates with maple syrup or agave nectar, adjusting to your taste preference.

  • Spice It Up: Add a touch of ginger or nutmeg alongside the cinnamon to deepen the warm flavor base in a way that feels extra comforting.

  • Protein Boost: Stir in some vegan protein powder into the chia base to make this pudding an even heartier breakfast choice, especially for post-workout recovery.

  • Texture Twist: Mix in a little ground flaxseed with the chia seeds for added texture and nutritional benefits, enhancing both crunch and healthiness.

Stay inspired in the kitchen, and for more delicious apple-infused ideas, check out our comforting Crisp Cabbage Apple or warm Caramel Milk Pudding recipes!

Apple Crumble Chia Pudding Recipe FAQs

How do I choose ripe apples for this recipe?
Absolutely! When selecting apples, look for firm apples without any dark spots or blemishes. Varieties like Honeycrisp or Fuji are excellent for their sweetness and texture. If you can give them a light squeeze and they feel firm and crisp, you’re in great shape!

What’s the best way to store Apple Crumble Chia Pudding?
Very good question! Store your Apple Crumble Chia Pudding in airtight containers in the refrigerator for up to 3-4 days. This keeps the flavors fresh while allowing the creamy chia base to mix beautifully with the stewed apples.

Can I freeze Apple Crumble Chia Pudding?
Absolutely! To freeze, it’s best to separate the layers; freeze the chia pudding, sautéed apples, and crumble topping in individual containers for up to 2 months. To enjoy, simply thaw overnight in the fridge and give the pudding a good stir before serving.

What should I do if my chia seeds clump together?
To avoid clumping, make sure to whisk the chia seeds into the blended mixture well. After 5 minutes, give it another whisk to break up any clumps. If clumps still form, you can gently blend the pudding again for a smooth consistency.

Is this recipe suitable for people with nut allergies?
Certainly! If you or someone you’re serving has a nut allergy, simply omit the walnuts from the crumble. You can replace them with additional oats or seeds, which will still give you a delightful crunch without the worry.

How can I adjust this recipe for a gluten-free diet?
Very easily! Just be sure to use gluten-free oats in the crumble topping, and check the labels on your yogurt and milk to ensure they are gluten-free as well. This way, everyone can enjoy the comfort of Apple Crumble Chia Pudding!

Apple Crumble Chia Pudding

Apple Crumble Chia Pudding

Apple Crumble Chia Pudding is a tasty fall breakfast that blends creamy chia seeds with spiced apples and a crunchy crumble for a healthy, vegan option.
Prep Time 15 minutes
Cook Time 20 minutes
Sitting Time 5 minutes
Total Time 40 minutes
Servings: 4 servings
Course: Breakfast
Cuisine: Vegan
Calories: 250

Ingredients
  

Chia Pudding Base
  • 1/2 cup Chia Seeds Provides soluble fiber
  • 1 tbsp Miso Paste Can be omitted
  • 3 pcs Medjool Dates Natural sweetener
  • 1 tsp Cinnamon Contributes warming flavors
  • 1 tsp Cardamom Contributes warming flavors
  • 1 cup Soy Milk Used for added protein
  • 1/2 cup Soy Yogurt Adds creaminess and tang
Topping
  • 1 cup Oats Provides texture
  • 1/2 cup Walnuts Adds crunch and healthy fats
Layering
  • 2 cups Apples Adds sweetness and texture
  • 1/4 cup Apple Butter Enhances apple flavor

Equipment

  • Blender
  • Medium bowl
  • Skillet
  • Food Processor

Method
 

Making the Pudding
  1. In a blender, combine the yogurt, apple butter, Medjool dates, miso paste, vanilla, cinnamon, cardamom, and soy milk. Blend until the mixture is completely smooth.
  2. Pour the blended mixture into a medium bowl and stir in the chia seeds with a whisk. Allow sitting for 5 minutes.
  3. Whisk again to break up any clumps forming.
Making the Topping
  1. Add oats, walnuts, Medjool dates, and a pinch of salt to a food processor. Pulse until crumbly.
Sautéing Apples
  1. Sauté diced apples with maple syrup and cinnamon in a skillet over medium-low heat until soft.
Layering the Pudding
  1. In jars, layer the chia pudding base, sautéed apples, and crumble topping.
  2. Repeat layers until jars are filled, leaving room for drizzles.
Storage Instructions
  1. Seal jars and refrigerate for up to 3-4 days.

Notes

Use an immersion blender for easy mixing and adjust milk for desired pudding thickness.

Delicious Homemade Cadbury Creme Bites for Sweet Celebrations

I once overheard my friend rave about the joys of indulging in homemade candy, which sparked a delightful challenge in my kitchen: creating my version of the beloved Cadbury Creme Eggs. That’s how these irresistible Homemade Cadbury Creme Bites were born! With a rich, creamy filling sandwiched between two layers of silky milk chocolate, they turn out to be surprisingly easy to prepare and a hit at gatherings. Not only do these bites make for the perfect Easter treat, but they’re also easy to transport, ensuring you can share a taste of love wherever you go. Whether you’re crafting them for a festive celebration or simply treating yourself, they’re bound to create sweet moments. Curious about how to whip up these delightful bites in your kitchen? Let’s dive in!

Why Make Cadbury Creme Bites?

Irresistible flavor: Each bite delivers a deliciously rich combination of creamy filling and smooth chocolate, reminiscent of your favorite Easter treat.

Effortless preparation: You don’t need to be a master chef; this recipe is simple and achievable, ensuring success for everyone.

Versatile gift option: Perfect for spring celebrations or as a sweet surprise for loved ones, these bites make for a delightful homemade gift!

Transport-friendly: Easy to store in mini cupcake liners, they are perfect for picnics or potlucks without compromising on taste.

For more fun candy creations, check out Grandmas Homemade Bites or explore Free Energy Bites for some guilt-free indulgence.

Crowd-pleaser: Anyone will love these bites—perfect for satisfying sweet cravings and impressing guests alike!

Cadbury Creme Bites Ingredients

For the Chocolate Coating
Milk Chocolate – Use high-quality baking chocolate for a rich flavor and smooth texture.

For the Cream Filling
Light Corn Syrup – Adds essential sweetness and helps create a luscious filling consistency.
Butter (Softened) – Contributes to the creamy richness; ensure it’s at room temperature for easy mixing.
Vanilla Extract – Enhances the overall flavor; opt for pure vanilla for the best results.
Powdered Sugar – Sweetens the filling and helps achieve the right texture.
Salt – A pinch balances sweetness and elevates the flavor profile.
Milk – Adjusts the consistency of the filling for a creamy texture.
Gel Food Coloring (Orange and Yellow) – Adds vibrant color to the yolk-like center; use sparingly for striking effects.

Note: These Homemade Cadbury Creme Bites are sure to become a cherished addition to your Easter celebrations and sweet treats arsenal!

Step‑by‑Step Instructions for Homemade Cadbury Creme Bites

Step 1: Prepare Baking Cups
Begin by lining 48 mini muffin cups with parchment paper liners. This step ensures that your Homemade Cadbury Creme Bites are easy to remove once they’re set. Make sure the liners are securely placed, as they will help hold the chocolate and filling perfectly in place during assembly.

Step 2: Melt Chocolate
In a microwave-safe bowl, place half of the milk chocolate and melt it in the microwave. Heat at 50% power in 30-second increments, stirring in between until the chocolate is smooth and fully melted. Be careful not to overheat; you want a glossy consistency that will coat the bottoms of the cups beautifully.

Step 3: Fill Bases
Using a small piping bag or spoon, pipe or pour a layer of the melted chocolate into each lined cup, covering the base thoroughly. Tap the tray gently on the countertop to smooth the chocolate and remove any air bubbles. Allow this base layer to sit at room temperature until it begins to set, about 10-15 minutes.

Step 4: Make Filling
In a mixing bowl, combine softened butter and light corn syrup. Mix them together until smooth, then gradually add powdered sugar, milk, vanilla extract, and a pinch of salt. Beat the mixture until you achieve a stiff yet creamy consistency, perfect for the filling of your Cadbury Creme Bites.

Step 5: Color the Filling
Divide the filling into two portions. Tint one portion with orange gel food coloring to achieve a vibrant yolk-like shade, and keep the other part white. Use small piping bags equipped with different tips for precise application, ensuring a beautiful presentation for your bites.

Step 6: Fill Chocolate Layer
Once the chocolate base is fully set, take the white filling and pipe it generously into each chocolate-lined cup, leaving a small well in the center. Follow this by adding a small dab of the orange filling to mimic the yolk. This layering creates the delightful look reminiscent of classic Cadbury Creme Eggs.

Step 7: Top with Chocolate
Melt the remaining milk chocolate in the microwave, following the same heating method as before. Once smooth, pipe this melted chocolate over the filled cups to cover them completely. Tap the tray again on the surface to smooth the tops for a professional finish on your Homemade Cadbury Creme Bites.

Step 8: Chill
Transfer the filled and topped chocolate bites to the refrigerator and allow them to chill for about 30 minutes, or until the chocolate is fully set. This chilling process ensures that your bites hold their shape and provides that delightful melt-in-your-mouth texture when you take a bite.

Expert Tips for Cadbury Creme Bites

  • Quality Ingredients: Choose high-quality chocolate and pure vanilla extract for richer flavors in your Cadbury Creme Bites; good ingredients make a big difference!

  • Piping Precision: Cut your piping bags to a moderate size. A too-large opening can lead to messy filling, while a too-small one can make it harder to fill.

  • Chill Properly: Allow adequate chilling time for your chocolate base and bites. Insufficient chilling may cause the filling to ooze out when you bite into them.

  • Avoid Overheating: When melting chocolate, microwave in small increments to avoid burning. Stirring frequently helps achieve a smooth consistency.

  • Add Variety: Experiment with flavors in your filling! A dash of almond or orange extract can provide a delightful twist to the traditional taste of Cadbury Creme Bites.

Make Ahead Options

These Homemade Cadbury Creme Bites are a fantastic option for meal prep, allowing you to enjoy the sweet delight without the last-minute rush! You can prepare the chocolate bases and filling up to 24 hours in advance. Simply pipe a layer of melted chocolate into the liners and refrigerate until firm. Prepare the filling and tint it as described—store it in airtight containers in the refrigerator to keep it fresh. When you’re ready to finish, just fill each chocolate layer with the filling and top with melted chocolate before chilling again. This way, your treats will be just as delicious and ready to impress at a moment’s notice!

How to Store and Freeze Cadbury Creme Bites

Room Temperature: Store Cadbury Creme Bites in an airtight container at room temperature for up to 3 days. This keeps them fresh without losing their delightful texture.

Fridge: If you prefer a chilled treat, refrigerate the bites in an airtight container for up to 2 weeks. This not only maintains their freshness but also enhances the creamy filling’s flavor.

Freezer: For longer storage, freeze the bites for up to 2 months. Place them in a single layer on a baking sheet until firm, then transfer to an airtight container, separating layers with parchment paper.

Reheating: When ready to enjoy, thaw the Cadbury Creme Bites in the fridge overnight. Enjoy at room temperature for the best melt-in-your-mouth experience!

What to Serve with Homemade Cadbury Creme Bites?

Indulging in these sweet delights creates an exciting opportunity to build a delightful meal around them!

  • Fluffy Pancakes: These light and airy pancakes make for a fantastic breakfast companion, balancing the rich sweetness of the bites while adding a comforting warmth.

  • Fresh Fruit Salad: A medley of vibrant, juicy fruits offers a refreshing contrast to the chocolatey richness, creating a perfect palate cleanser between bites.

  • Whipped Cream: Light and airy, a dollop of homemade whipped cream echoes the creamy filling while introducing a luscious texture that enhances each mouthful.

  • Mint Tea: The soothing herbal notes of mint tea provide a refreshing palate cleanser that complements the chocolate without overwhelming your taste buds.

  • Nutty Biscotti: Crunchy almond biscotti offers a delightful textural contrast, allowing you to enjoy the sweet bites alongside a satisfying crunch.

  • Sparkling Lemonade: Bright, bubbly lemonade invigorates the senses with its zesty, citrus flavors, making it a perfect partner for these decadent treats.

  • Chocolate-Covered Strawberries: Reinforcing the chocolate theme, these treats provide an elegant touch and a burst of freshness, perfect for an unexpected twist to your dessert table.

  • Easter Sugar Cookies: Deliciously sweet and festive, these cookies not only match the holiday spirit but also create a delightful variety of textures and flavors together with the bites.

  • Vanilla Ice Cream: A scoop of creamy vanilla ice cream gives a delightful contrast, melting smoothly alongside each bite and enhancing the flavor experience.

  • Coffee or Espresso: A rich cup of coffee balances the sweetness, offering a cozy vibe that rounds out the indulgence beautifully.

Cadbury Creme Bites Variations & Substitutions

Feel free to put your unique spin on these delightful treats for an even more personalized experience!

  • Chocolate Variants: Use dark or white chocolate for a different flavor profile and exciting new taste.

  • Flavor Enhancements: Infuse the filling with almond or orange extract for a delightful twist. It adds a fresh, surprising flavor that will intrigue your taste buds.

  • Coloring Alternatives: Get creative with various shades of food coloring to celebrate other holidays or themes. Imagine pastel colors for spring or vibrant hues for festive gatherings!

  • Nutty Crunch: Stir in some finely chopped nuts or crispy rice cereal into the chocolate coating for added texture.
    The extra crunch will beautifully contrast the velvety smooth filling.

  • Vegan Option: Substitute dairy chocolate with a high-quality vegan chocolate and use coconut cream in place of butter for a creamy filling. Deliciously dairy-free without losing any charm!

  • Reduced Sugar: Use sugar alternatives like stevia or erythritol in the filling to create a lower-sugar version without sacrificing the sweet experience.

  • Spicy Surprise: Add a pinch of cayenne pepper to the filling for a surprising kick. Just a dash creates an unexpected juxtaposition with the sweetness.

For more fun candy creations, check out Grandmas Homemade Bites or explore Free Energy Bites for some guilt-free indulgence!

Cadbury Creme Bites Recipe FAQs

How do I select the right chocolate for my Cadbury Creme Bites?
Absolutely! Choosing high-quality milk chocolate is key to a luscious, creamy flavor. Look for chocolates labeled as “baking chocolate” in your grocery store, as they generally have a higher cocoa content and better taste compared to regular candy bars. I often recommend brands that have a nice sheen and are smooth when melted.

What’s the best way to store Cadbury Creme Bites?
You can store your Cadbury Creme Bites in an airtight container at room temperature for up to 3 days. If you prefer them chilled, just pop them in the fridge where they can last up to 2 weeks. I find that refrigerating enhances the flavors beautifully! Just remember, when storing, to keep them away from strong-smelling foods, as chocolate can absorb odors.

Can I freeze Cadbury Creme Bites, and how do I do it properly?
Yes! You can freeze them for up to 2 months. To freeze, place the bites in a single layer on a baking sheet, allowing them to firm up initially in the freezer for about an hour. Then, transfer the bites to an airtight container, using parchment paper between layers to prevent sticking. When it’s time to enjoy, thaw them in the fridge overnight for the best texture experience!

What should I do if my chocolate doesn’t set properly?
Very! If your chocolate base doesn’t set, it may be because it was either not cooled sufficiently or was overheated while melting. Make sure to let the melted chocolate cool slightly before pouring it into the liners, then give it enough time at room temperature to firm up before adding the filling. If necessary, you can always pop them in the refrigerator to help with the setting.

Are these bites safe for kids and those with allergies?
These Homemade Cadbury Creme Bites contain common allergens like milk and butter, so if allergies are a concern, be sure to substitute with dairy alternatives as needed. For kids, just keep an eye on their portion sizes, as these bites are quite rich. I often make mini versions so they can indulge without overindulging!

Cadbury Creme Bites

Delicious Homemade Cadbury Creme Bites for Sweet Celebrations

Indulge in homemade Cadbury Creme Bites, a delightful treat perfect for celebrations and a hit at gatherings.
Prep Time 30 minutes
Cook Time 15 minutes
Chilling Time 30 minutes
Total Time 1 hour 15 minutes
Servings: 48 bites
Course: Dessert
Cuisine: American
Calories: 200

Ingredients
  

For the Chocolate Coating
  • 12 oz Milk Chocolate Use high-quality baking chocolate for a rich flavor.
For the Cream Filling
  • 1 cup Light Corn Syrup Adds essential sweetness.
  • 4 tbsp Butter (Softened) Ensure it's at room temperature.
  • 1 tsp Vanilla Extract Opt for pure vanilla for best results.
  • 2 cups Powdered Sugar Sweetens the filling.
  • 1 pinch Salt Balances sweetness.
  • 2 tbsp Milk Adjusts the consistency.
  • 1 few drops Gel Food Coloring (Orange and Yellow) Adds vibrant color to the yolk-like center.

Equipment

  • microwave-safe bowl
  • mixing bowl
  • Piping bags
  • Mini muffin cups

Method
 

Step-by-Step Instructions
  1. Begin by lining 48 mini muffin cups with parchment paper liners.
  2. In a microwave-safe bowl, place half of the milk chocolate and melt it at 50% power in 30-second increments until smooth.
  3. Use a small piping bag or spoon to pipe a layer of melted chocolate into each lined cup and tap to smooth.
  4. In a mixing bowl, combine softened butter and light corn syrup until smooth, then add powdered sugar, milk, vanilla extract, and salt.
  5. Divide the filling and tint one portion with orange gel food coloring.
  6. Pipe the white filling into the cups, leaving a well in the center, and add a dab of orange filling.
  7. Melt the remaining chocolate and pipe it over the filled cups to cover them fully.
  8. Transfer the bites to the refrigerator and chill for about 30 minutes.

Notes

These Homemade Cadbury Creme Bites are sure to become a cherished addition to your Easter celebrations and sweet treats arsenal!

Hearty Yukon Gold Potato and Ham Soup for Cozy Nights

As I stirred the bubbling pot on my stovetop, the rich aroma of Yukon Gold Potato and Ham Soup filled my kitchen, instantly bringing back memories of family gatherings and cozy dinners. There’s something magical about a warm bowl of soup on a chilly day; it’s the ultimate comfort food, effortlessly satisfying both the body and soul. This creamy soup is not only a delightful meal to whip up after a hectic day, but it’s also incredibly flexible—you can easily substitute different types of potatoes or skip the ham if you need to. Plus, it’s a recipe that tastes even better the next day, making it perfect for meal prep and hungry families. So, are you ready to dive into a bowl of nostalgia where every spoonful is a warm hug? Let’s get cooking!

Why is Yukon Gold Potato Soup a Must-Try?

Comforting warmth: This Yukon Gold Potato and Ham Soup wraps you in a cozy embrace, ideal for chilly evenings.
Flexible ingredients: It allows you to substitute ingredients based on what you have at home, whether you want to swap ham for chicken or choose different potato varieties.
Family-friendly: A hit with both kids and adults, this soup encourages conversations around the dinner table.
Easy preparation: It’s straightforward to whip up, making weeknight meals a breeze.
Meal prep friendly: This soup only gets better with time, making it perfect for leftovers or batch cooking. Serve it with some warm baguette or a side of Savory Onion Potato Pancakes for a complete meal that’s sure to satisfy everyone’s cravings!

Yukon Gold Potato and Ham Soup Ingredients

For the Soup

  • Yukon Gold Potatoes – They provide a creamy texture that’s perfect for this soup; substituting with Russets makes it even creamier.
  • Diced Ham – Adds savory flavor and protein; leftover ham works wonders, or use chicken stock for a ham-free version.
  • Chicken Broth – The soul of this soup, adding depth and flavor; choose low-sodium for control over salt levels.
  • Carrots – Sweetness and color; they balance the savory notes beautifully.
  • Onion – Offers foundational flavor and aroma, essential for a hearty soup.
  • Celery – Adds crunch and enhances the overall flavor profile; don’t skimp on it!
  • Garlic – A must for a burst of flavor; fresh garlic is best but garlic powder can work in a pinch.

For Thickening

  • Butter – Essential for creating a roux; it adds richness and helps thicken the soup.
  • Flour – Used with butter to thicken the soup; ensure you cook it lightly to avoid a raw taste.
  • Milk – Introduces creaminess; warm it before adding for the best results.
  • Cheddar Cheese – Brings a rich, cheesy flavor; feel free to adjust based on your preference or skip for a lighter option.

For Seasoning

  • Salt – Essential for enhancing the soup’s flavors; adjust to taste.
  • Pepper – Adds a touch of heat; freshly cracked is always better.
  • Parsley – Freshness and color; a lovely pop on top!
  • Thyme – Earthy notes that pair perfectly with the ham and potatoes; dried thyme works if fresh isn’t available.

This Yukon Gold Potato and Ham Soup recipe is flexible, allowing you to adjust and make it your own while still maintaining that comforting essence everyone loves!

Step‑by‑Step Instructions for Yukon Gold Potato and Ham Soup

Step 1: Heat the Base
In a large pot, heat 2 tablespoons of olive oil over medium-high heat until shimmering. Add diced carrots, chopped onion, and sliced celery, sautéing for 4-5 minutes or until the onions become translucent and fragrant. This creates a savory foundation for your Yukon Gold Potato and Ham Soup, filling your kitchen with warmth.

Step 2: Add Garlic and Seasonings
Stir in minced garlic along with salt, pepper, and thyme. Cook for an additional minute, allowing the garlic to release its aromatic qualities. The mixture should be fragrant and slightly softened, preparing the flavor base for your comforting soup.

Step 3: Pour in the Broth
Slowly pour in 6 cups of chicken broth while scraping the bottom of the pot to release any tasty bits stuck from sautéing. Then, add diced ham and cubed Yukon Gold potatoes to the pot. Bring the mixture to a simmer over medium heat, covering and reducing the heat. Cook for about 10 minutes until the potatoes are fork-tender.

Step 4: Create the Roux
In a separate saucepan, melt 4 tablespoons of butter over low heat. Once melted, whisk in 1/3 cup of flour, cooking for 1-2 minutes to form a roux. Gradually whisk in 2 cups of warm milk, heating it gently until the mixture thickens to a creamy consistency. This roux will add richness to your Yukon Gold Potato and Ham Soup.

Step 5: Combine and Finish
Stir the roux mixture into the pot of soup, combining thoroughly for a velvety texture. Next, add 1-2 cups of shredded cheddar cheese, mixing until the cheese melts completely. The soup should now have a rich, creamy consistency with a perfect balance of flavors.

Step 6: Serve and Garnish
Ladle the piping hot Yukon Gold Potato and Ham Soup into bowls and garnish with extra shredded cheese and freshly chopped parsley if desired. Serve immediately with warm, crusty bread or your favorite biscuits, and enjoy the cozy comforts of this hearty dish!

Variations & Substitutions for Yukon Gold Potato and Ham Soup

Feel free to get creative with this Yukon Gold Potato and Ham Soup, tailoring it to your taste preferences and pantry staples!

  • Dairy-Free: Substitute milk with almond or oat milk and skip the cheese for a lighter soup that still delivers creaminess.
    You won’t even miss the dairy; it’s all about how you blend those flavors together!

  • Extra Veggies: Add in fresh or frozen corn, peas, or green beans for delightful bursts of color and texture.
    This makes the soup not only heartier but also visually appealing—perfect for family dinners!

  • Spicy Kick: Toss in a pinch of red pepper flakes or a drizzle of sriracha for a lively heat that will warm you from the inside out.
    Just imagine that little extra zing as you take your first spoonful!

  • Herb Variations: Swap thyme for fresh dill or rosemary to give the soup a unique aromatic touch.
    Fresh herbs elevate any dish, transforming your comfort soup into something extraordinary.

  • Meat Swap: Use shredded rotisserie chicken or even turkey instead of ham for a lighter yet satisfying alternative.
    This is a great way to use up leftovers while still enjoying a filling meal.

  • Make it Chunky: For a heartier texture, reduce the number of potatoes or include larger potato chunks.
    This way, each bite feels substantial, reminding you of hearty family gatherings.

  • Vegetarian Option: Omit the ham and replace chicken broth with vegetable broth; add more herbs for enhanced flavor.
    Even meat lovers will appreciate this deliciously comforting version!

Transform your Yukon Gold Potato and Ham Soup with these ideas, and don’t forget to serve it alongside some Savory Chicken and Cheesy Potato Drumsticks for a meal that embraces every bit of comfort food goodness.

What to Serve with Creamy Yukon Gold Potato and Ham Soup

Experience the cozy comfort of a warm meal with delightful pairings that enhance your soul-nourishing soup.

  • Crusty French Bread: Perfect for dipping, its chewy exterior and soft interior soak up the creamy soup beautifully.
  • Flaky Buttermilk Biscuits: Light and buttery, these biscuits add a satisfying crunch, perfectly complementing the soup’s rich texture.
  • Mixed Green Salad: A refreshing side with vinaigrette balances the creaminess of the Yukon Gold Potato and Ham Soup, keeping the meal light and vibrant.
  • Garlic Breadsticks: Crispy and fragrant, they offer delightful bites that elevate each spoonful of soup, combining flavors beautifully.
  • Steamed Veggies: Brightly colored veggies like broccoli or green beans add freshness and texture, making for a well-rounded meal.
  • Savory Onion Potato Pancakes: Their crispy exterior adds a lovely contrast, pairing well with the creamy richness of the soup.
  • Herbed Cheese Platter: Serve with tangy cheese, olives, and crackers for a delightful starter that whets the appetite before the hearty soup.
  • Chardonnay or Lager: A chilled glass of white wine or a light beer offers a crisp contrast to the soothing warmth of the soup.

Expert Tips for Yukon Gold Potato and Ham Soup

  • Timing is Key: Take your time while cooking; rushing can lead to undercooked potatoes, compromising the soup’s texture.
  • Warm Milk Gradually: Always warm your milk before adding it to the roux to prevent curdling, ensuring a smooth, creamy Yukon Gold Potato and Ham Soup.
  • Cook Your Roux: Remember to cook your roux for 1-2 minutes to eliminate any raw flour taste, adding a lovely depth to your soup.
  • Use a Ham Bone: If using a ham bone, let it simmer in the broth for extra flavor; this adds a rich, savory depth to the soup.
  • Peeling Potatoes: Peel the Yukon Gold potatoes for a smoother texture in your soup—this small step makes a big difference!
  • Play with Seasonings: Feel free to add herbs like rosemary or smoked paprika for a twist, personalizing your Yukon Gold Potato and Ham Soup to your taste!

Storage Tips for Yukon Gold Potato and Ham Soup

Fridge: Store leftovers in an airtight container for up to 4 days. Refrigeration helps the flavors meld together beautifully, offering an even tastier Yukon Gold Potato and Ham Soup.

Freezer: Portion the soup into freezer-safe containers and freeze for up to 3 months. This way, you can easily enjoy a hearty meal anytime!

Reheating: To reheat, warm on the stovetop over medium-low heat, stirring occasionally. If the soup is too thick, add a splash of chicken broth or milk for a creamier consistency. You can also microwave individual servings, making it convenient for quick meals.

Make Ahead Options

These Yukon Gold Potato and Ham Soup is an excellent choice for meal prep enthusiasts! You can chop your vegetables and dice the ham up to 24 hours in advance, storing them in the refrigerator to save precious time during your busy weeknight cooking. For even better flavor, you can prepare the entire soup base, refrigerate it for up to 3 days, and then proceed with adding the roux and cheese just before serving. This method ensures your soup maintains its creamy texture and rich flavor. Simply reheat the soup on the stovetop over low heat, adding a splash of milk or broth if needed, and stir in the cheese until melted for that cozy, comforting taste everyone loves!

Yukon Gold Potato and Ham Soup Recipe FAQs

What type of potatoes should I use for Yukon Gold Potato and Ham Soup?
Absolutely, Yukon Gold potatoes are recommended for their creamy texture and ability to hold shape in soups. However, you can also use Russet potatoes for a creamier consistency. Just be cautious to avoid waxy potatoes like red or new potatoes, as they can create a less desirable texture.

How should I store leftovers of Yukon Gold Potato and Ham Soup?
Store your delicious Yukon Gold Potato and Ham Soup in an airtight container in the refrigerator for up to 4 days. As the flavors meld, the soup may taste even better on the second day! If you’d like to keep it longer, portion it out into freezer-safe containers for up to 3 months.

Can I freeze Yukon Gold Potato and Ham Soup?
Yes, you can freeze the soup! Cool it completely, then ladle it into freezer-safe containers, leaving a little space for expansion. To thaw, place it in the refrigerator overnight, and when ready to enjoy, reheat gently on the stovetop or in the microwave—just add a splash of broth or milk if it’s too thick.

What if my soup is too thick after reheating?
Very! If your Yukon Gold Potato and Ham Soup has thickened too much upon reheating, stir in a splash of chicken broth or warm milk until you reach your desired consistency. This not only helps with texture but keeps the soup creamy and delicious!

Are there any dietary considerations for Yukon Gold Potato and Ham Soup?
Certainly! If you have dietary restrictions or allergies, you can make a ham-free version by substituting the diced ham with extra vegetables or chicken stock. Additionally, if you’re managing lactose intolerance, opt for lactose-free milk and cheese or skip the dairy altogether, ensuring everyone at the table can enjoy this cozy soup!

What should I do if the soup has a raw flour taste?
If your Yukon Gold Potato and Ham Soup doesn’t taste as rich as you expected, it could be due to the roux not being cooked long enough. Ensure to cook the roux (butter and flour mix) for 1-2 minutes to eliminate any raw flour flavor, leaving you with a smooth and flavorful soup. Enjoy experimenting until you find that perfect balance!

Yukon Gold Potato and Ham Soup

Hearty Yukon Gold Potato and Ham Soup for Cozy Nights

This Yukon Gold Potato and Ham Soup is the ultimate comfort food, perfect for chilly nights with its rich flavors.
Prep Time 15 minutes
Cook Time 30 minutes
Total Time 45 minutes
Servings: 6 bowls
Course: Dinner
Cuisine: American
Calories: 350

Ingredients
  

For the Soup
  • 2 tablespoons Olive Oil
  • 4 cups Diced Yukon Gold Potatoes
  • 2 cups Diced Ham or use chicken stock for a ham-free version
  • 6 cups Chicken Broth choose low-sodium
  • 2 cups Carrots diced
  • 1 large Onion chopped
  • 1 cup Celery chopped
  • 3 cloves Garlic minced
For Thickening
  • 4 tablespoons Butter for the roux
  • 1/3 cup Flour for thickening
  • 2 cups Milk warm before adding
  • 1-2 cups Shredded Cheddar Cheese optional
For Seasoning
  • to taste Salt
  • to taste Pepper freshly cracked
  • 1/4 cup Parsley freshly chopped
  • 1 teaspoon Thyme dried or fresh

Equipment

  • Large pot
  • Saucepan
  • whisk

Method
 

Step-by-Step Instructions
  1. In a large pot, heat olive oil over medium-high heat until shimmering. Add diced carrots, chopped onion, and sliced celery, sautéing for 4-5 minutes until translucent.
  2. Stir in minced garlic along with salt, pepper, and thyme. Cook for an additional minute until fragrant.
  3. Slowly pour in chicken broth while scraping the bottom of the pot. Add diced ham and cubed Yukon Gold potatoes. Bring to a simmer and cover, cooking for about 10 minutes until fork-tender.
  4. In a separate saucepan, melt butter over low heat. Whisk in flour to form a roux. Gradually whisk in warm milk, heating until the mixture thickens.
  5. Stir the roux mixture into the pot of soup, adding shredded cheese and mixing until melted.
  6. Ladle hot soup into bowls and garnish with extra cheese and parsley. Serve immediately with bread.

Notes

Soups often taste better the next day, making this recipe great for leftovers and meal prep.

S’mores Cupcakes: Indulge in Nostalgic Campfire Bliss

As I sunk my teeth into another indulgent bite of these S’mores Cupcakes, I was hit by a wave of nostalgia—those warm summer nights spent around the campfire, roasting marshmallows to golden perfection. With a buttery graham cracker base, rich chocolate cake, and a cloud of toasted marshmallow frosting, this recipe will swiftly become your go-to indulgent dessert. These cupcakes aren’t just a treat; they’re a delightful comfort food that combines crunchy, gooey, and creamy textures, making them perfect for gatherings or simply satisfying a sweet craving. Plus, they’re easy to whip up, letting you bring a little fond memory of bonfire delights right to your kitchen. Curious how to recreate this nostalgic treat in cupcake form? Let’s dive into the recipe!

Why Are These S’mores Cupcakes Special?

Nostalgic Flavors: Each bite transports you back to cozy campfire nights, blending delicious childhood memories with an indulgent treat.
Simple to Create: Even novice bakers can master this recipe quickly, ensuring a hassle-free baking experience without sacrificing flavor.
Impressive Presentation: The toasted marshmallow frosting is not only delicious but visually stunning, making them perfect for any celebration.
Versatile Variations: Try different fillings like caramel or peanut butter for a unique twist; the possibilities are endless!
Crowd-Pleaser: These cupcakes are sure to be a hit at picnics, birthdays, or cozy gatherings—everyone loves a taste of s’mores! Want to conquer the art of making ganache? Check out our guide to flawless ganache for more tips!

S’mores Cupcakes Ingredients

For the Graham Cracker Crust
Graham cracker crumbs – Provides the classic base flavor and crunchy texture; feel free to use gluten-free graham cracker crumbs for a gluten-free version.
Melted butter – Binds the crust together; although coconut oil can be used for a vegan option, no direct substitutions are recommended.
Sugar – Sweetens the cupcake base and the graham cracker crust; using brown sugar adds a deeper flavor.

For the Cupcake Batter
All-purpose flour – Provides structure and stability; substitute with a 1:1 gluten-free flour blend for a gluten-free version.
Unsweetened cocoa powder – Imparts rich chocolate flavor; consider Dutch-process cocoa for a smoother taste.
Espresso powder – Enhances the chocolate flavor; can be omitted if unavailable.
Baking powder & baking soda – Essential leavening agents for a light texture.
Eggs – Bind ingredients and provide structure to the cupcakes.
Brown sugar – Adds moisture and a rich caramel-like flavor; can be substituted with coconut sugar for a lower glycemic index.
Neutral oil – Adds moisture; grapeseed oil was used in this recipe, but canola or vegetable oil are good alternatives.
Vanilla extract – Infuses warmth and adds depth of flavor to the mixture.
Buttermilk – Keeps the cupcake moist and tender; milk mixed with vinegar or lemon juice can work as a substitute.

For the Ganache Filling
Chocolate bars – Rich center filling; dark or milk chocolate can be interchanged based on personal preference.
Heavy cream – Used to create a smooth ganache; ensure it’s heated properly for best results.

For the Marshmallow Frosting
Egg whites – Create a light, fluffy texture for the frosting.
Corn syrup – Helps with the texture of the frosting; can be swapped with agave syrup in a pinch.
Cream of tartar – Stabilizes whipped egg whites; it’s fine to omit if not available, but the frosting may not hold as well.

Remember, these S’mores Cupcakes will not only delight your taste buds, but they will also revive fond memories of summer campfires every time you take a bite! Enjoy your baking!

Step‑by‑Step Instructions for S’mores Cupcakes

Step 1: Prepare the Muffin Pan
Start by preheating your oven to 350°F (177°C). While the oven warms up, line a standard muffin tin with cupcake liners, readying them for the graham cracker crust. This is where the nostalgic flavors of your S’mores Cupcakes will begin, setting the stage for your delicious creation.

Step 2: Make the Graham Cracker Crust
In a mixing bowl, combine the graham cracker crumbs, sugar, melted butter, and a pinch of salt. Mix until the texture resembles wet sand, then press this mixture into the bottom of each cupcake liner. Bake for about 5-6 minutes, or until the crust is slightly browned and holds together; this will provide a firm base for your cupcakes.

Step 3: Prepare the Cupcake Batter
In a separate bowl, sift together the all-purpose flour, cocoa powder, baking powder, baking soda, and espresso powder. In another bowl, whisk together the eggs, brown sugar, neutral oil, vanilla extract, and buttermilk until smooth. Gradually mix the dry ingredients into the wet, stirring gently until just combined—be careful not to overmix for fluffy S’mores Cupcakes!

Step 4: Bake Cupcakes
Using a scoop, fill each lined muffin cup about two-thirds full with the batter, making sure not to disturb the graham cracker crust below. Place the muffin tin in the preheated oven and bake for 16-18 minutes, or until a toothpick inserted into the center comes out clean. Once baked, remove the tin and let the cupcakes cool completely on a wire rack.

Step 5: Make Ganache Filling
While your cupcakes are cooling, heat the heavy cream in a small saucepan over medium heat until it just begins to simmer. Pour the hot cream over chopped chocolate bars in a bowl, letting it sit for a minute. Stir until the mixture is smooth and glossy, then refrigerate for about 30 minutes to allow it to firm up, creating a luscious ganache for filling.

Step 6: Make Marshmallow Frosting
To prepare the fluffy marshmallow frosting, combine the egg whites, sugar, and corn syrup in a heatproof bowl over a double boiler. Stir continuously until the sugar dissolves, around 4-5 minutes. Remove from heat and whip the mixture with an electric mixer until it becomes fluffy and glossy, achieving a beautiful marshmallow-like texture for topping your S’mores Cupcakes.

Step 7: Assemble Cupcakes
Once cooled, use a small knife or cupcake corer to remove the center of each cupcake, creating space for the ganache filling. Spoon in the chilled ganache and replace the tops gently. Next, pipe a generous swirl of the marshmallow frosting on top of each cupcake, creating fluffy peaks like toasted marshmallows.

Step 8: Toast the Frosting
Using a kitchen torch, carefully toast the marshmallow frosting until it’s golden brown and slightly melted—watch closely to avoid burning! For an extra touch, drizzle any remaining ganache over the top and sprinkle with additional crushed graham cracker crumbs for that delightful S’mores Cupcakes experience, reminiscent of campfire nights!

How to Store and Freeze S’mores Cupcakes

Airtight Container: Store your S’mores Cupcakes in an airtight container at room temperature for up to 3 days. This keeps their delightful textures intact and prevents them from drying out.

Refrigeration: If you want to extend their life, you can refrigerate cupcakes for up to a week. Just ensure they’re covered to avoid absorbing any other flavors lingering in your fridge.

Freezing: For longer storage, place cooled cupcakes (without frosting) in a freezer-safe container. They can be frozen for up to 3 months; just allow them to thaw at room temperature before frosting.

Reheating: To enjoy that fresh-baked warmth, briefly microwave frozen cupcakes for about 15-20 seconds. Add a dollop of freshly whipped marshmallow frosting, and it’ll be like their first day out of the oven!

S’mores Cupcakes: Flavorful Variations

Feel free to get creative and personalize your S’mores Cupcakes with these delightful twists that promise to elevate your baking experience!

  • Dairy-Free: Substitute heavy cream and butter with coconut cream and coconut oil for a rich, dairy-free twist.
  • Gluten-Free: Use gluten-free graham cracker crumbs and a 1:1 gluten-free flour blend to enjoy this recipe without the gluten.
  • Nutty Flavor: Enhance the cupcake batter by adding finely chopped nuts, such as walnuts or pistachios, for a satisfying crunch.
  • Caramel Drizzle: Layer caramel sauce inside the cupcakes for a sweet surprise that complements the chocolate and marshmallow perfectly.
  • Spiced Addition: Infuse warm spices like cinnamon or nutmeg in your graham cracker crust for an added dimension of flavor; these hints will warm your heart with every bite.
  • Peppermint Twist: For a festive touch, add a drop of mint extract to the batter or use peppermint-flavored chocolate bars for the ganache filling.
  • Heated Up: Add a pinch of cayenne pepper or finely chopped jalapeños to the batter to create an unexpected spicy profile that contrasts beautifully with the sweetness.
  • Alternative Frosting: Swap marshmallow frosting with a rich chocolate ganache or a light cream cheese frosting for a unique treat experience.

Embrace your creativity and make these cupcakes uniquely yours—each variation promises a deliciously fun experience! Don’t forget to explore our guide on baking perfect cupcakes to master the art of baking consistency.

Make Ahead Options

These S’mores Cupcakes are perfect for busy home cooks looking to save time during the week! You can make the graham cracker crust and bake the cupcakes up to 24 hours in advance; simply refrigerate them in an airtight container to maintain their moisture and softness. The fluffy marshmallow frosting can also be prepared a day ahead; just store it in the refrigerator and re-whip before piping it onto the cupcakes. Once assembled, the cupcakes can be stored at room temperature for up to 3 days. When ready to serve, toast the frosting just before enjoying to achieve that delightful golden-brown finish. This way, you’ll have scrumptious S’mores Cupcakes ready to impress with minimal last-minute effort!

What to Serve with S’mores Cupcakes

Elevate your dessert experience by pairing these S’mores Cupcakes with delightful sides that complement their nostalgic flavors.

  • Vanilla Ice Cream: The creamy, cool scoop contrasts beautifully with the rich chocolate and warm graham cracker textures, making every bite an indulgence.

  • Fruit Salad: A vibrant mix of seasonal fruits adds a refreshing contrast, balancing the sweetness of the cupcakes with bright and juicy flavors.

  • Chocolate Milkshake: For true chocolate lovers, a thick milkshake amplifies the rich chocolate notes in the cupcakes, creating a nostalgic diner-style treat.

  • Toasted Marshmallows: Toast some extra marshmallows on skewers for a fun, interactive dessert experience that echoes the classic campfire vibe.

  • Coffee or Espresso: The robust flavors of a freshly brewed cup enhance the chocolate, making each bite of your S’mores Cupcakes more decadent and satisfying.

  • Peanut Butter Cream: A smooth dollop of peanut butter cream on the side blends perfectly, adding a nutty richness that pairs wonderfully with the cupcake’s sweetness.

  • Cold Brewed Iced Coffee: For a refreshing twist, sip on some cold brew; its smooth, rich taste accentuates the cupcakes’ indulgent elements.

  • Chocolate Ganache Dip: Serve some extra ganache in a small bowl for dipping—the ultimate chocolate experience for those who want more indulgence.

Expert Tips for S’mores Cupcakes

  • Room Temperature Egg Whites: Ensuring your egg whites are at room temperature guarantees a fluffier marshmallow frosting, enhancing the overall texture of the S’mores Cupcakes.

  • Don’t Overmix: Mixing the batter too much can lead to dense cupcakes. Gently fold until just combined to keep them light and airy.

  • Timed Ganache Cooling: Allowing the ganache to chill adequately makes it easier to fill your cupcakes. Aim for a thicker consistency to avoid overflow.

  • Watch the Flame: When toasting the marshmallow frosting, use a low flame and move the torch constantly to prevent burning. A light golden color is perfect!

  • Custom Fillings: Feel free to play with ganache fillings by trying flavored chocolate bars. This could offer a fun twist and add richness to your S’mores Cupcakes.

S’mores Cupcakes Recipe FAQs

How do I pick the right graham crackers for the crust?
When choosing graham crackers, look for ones that are fresh without any dark spots or breaks. If you’re opting for a gluten-free version, many brands offer gluten-free graham cracker crumbs that retain the classic flavor and texture. You can also make your own crumbs from gluten-free cookies for added variety!

What’s the best way to store S’mores Cupcakes?
Absolutely! Store your S’mores Cupcakes in an airtight container at room temperature for up to 3 days. If you need to keep them longer, they can be refrigerated for up to a week, just make sure they are covered to prevent them from absorbing any unwanted flavors from your fridge.

Can I freeze S’mores Cupcakes?
Yes, you can freeze them! First, ensure the cupcakes are completely cooled. Place them without frosting in a freezer-safe container, separated by parchment paper. They will stay delightful for up to 3 months. When ready to enjoy, simply let them thaw at room temperature, and then frost them for that fresh taste!

What if my marshmallow frosting doesn’t get fluffy enough?
If your marshmallow frosting isn’t achieving the desired fluffiness, make sure your egg whites are at room temperature before whipping. Also, check that you’re whipping for long enough—aim for at least 5-7 minutes until it’s light and glossy. Adding a pinch of cream of tartar can also help stabilize the egg whites if you didn’t omit it!

Are there any dietary considerations for this recipe?
Very! This recipe can be adapted for various dietary needs. For a gluten-free version, simply swap in a 1:1 gluten-free flour blend and use gluten-free graham cracker crumbs. To make it vegan, use coconut oil instead of butter, and replace eggs with a flaxseed meal or aquafaba-based substitute. Always double-check chocolate bars as some may contain dairy!

How can I make sure my cupcakes are not too dry?
To keep your S’mores Cupcakes moist, always measure your flour using the scoop-and-level method—too much flour can lead to dryness. Additionally, using buttermilk helps maintain moisture. Be sure to monitor the baking time closely; pulling them out as soon as a toothpick comes out clean will prevent overbaking!

S’mores Cupcakes

S’mores Cupcakes: Indulge in Nostalgic Campfire Bliss

Delight in these S’mores Cupcakes, a nostalgic dessert that perfectly blends crunchy graham cracker, rich chocolate, and fluffy marshmallow frosting.
Prep Time 30 minutes
Cook Time 20 minutes
Cooling Time 30 minutes
Total Time 1 hour 20 minutes
Servings: 12 cupcakes
Course: Dessert
Cuisine: American
Calories: 250

Ingredients
  

Graham Cracker Crust
  • 1 cup Graham cracker crumbs gluten-free option available
  • 5 tablespoons Melted butter coconut oil can be used for vegan
  • 1/4 cup Sugar using brown sugar adds flavor
Cupcake Batter
  • 1 cup All-purpose flour can substitute with gluten-free blend
  • 1/2 cup Unsweetened cocoa powder or Dutch-process cocoa
  • 1 teaspoon Espresso powder optional
  • 1 teaspoon Baking powder
  • 1 teaspoon Baking soda
  • 2 Eggs
  • 3/4 cup Brown sugar or coconut sugar for lower glycemic
  • 1/2 cup Neutral oil grapeseed oil recommended
  • 1 teaspoon Vanilla extract
  • 1/2 cup Buttermilk milk with vinegar or lemon juice works
Ganache Filling
  • 8 ounces Chocolate bars dark or milk chocolate
  • 1/2 cup Heavy cream
Marshmallow Frosting
  • 2 Egg whites
  • 1/4 cup Corn syrup can use agave syrup
  • 1/4 teaspoon Cream of tartar optional

Equipment

  • muffin tin
  • mixing bowls
  • electric mixer
  • Double boiler
  • Kitchen torch

Method
 

Preparation
  1. Preheat oven to 350°F (177°C) and line a muffin tin with cupcake liners.
  2. In a bowl, mix graham cracker crumbs, sugar, melted butter, and salt until wet sand texture. Press into cupcake liners.
  3. Bake crust for 5-6 minutes until slightly browned.
  4. Sift flour, cocoa powder, baking powder, baking soda, and espresso powder in one bowl.
  5. In another bowl, whisk eggs, brown sugar, oil, vanilla, and buttermilk until smooth. Combine with dry ingredients, mixing gently.
  6. Fill each cupcake liner 2/3 full with batter and bake for 16-18 minutes until a toothpick comes out clean.
  7. Allow cupcakes to cool completely on a wire rack.
Filling and Frosting
  1. Heat heavy cream in a saucepan until simmering, pour over chocolate and stir until smooth. Refrigerate to firm up.
  2. For frosting, combine egg whites, sugar, and corn syrup over a double boiler. Stir until sugar dissolves and then whip until fluffy.
  3. Remove centers of cupcakes, fill with ganache, and top with marshmallow frosting. Toast frosting with kitchen torch until golden.

Notes

For the best results, ensure egg whites are at room temperature before whipping. Store in an airtight container for up to 3 days.

Thanksgiving Crunchwrap: Relish Your Leftovers in Style

As I scoured my kitchen post-Thanksgiving, I couldn’t help but feel a pang of uncertainty about what to do with the towering pile of leftovers. Enter the Thanksgiving Crunchwrap—a clever solution that turns your uneaten turkey, stuffing, and mashed potatoes into a crunchy, flavor-packed masterpiece. This delightful wrap not only showcases the mouthwatering essence of your holiday feast but also offers an easy, no-fuss way to savor every last bite without being stuck with the same old sandwich routine. With its crispy exterior and melty, savory filling, it’s perfect for a quick lunch or dinner, making it a true crowd-pleaser. Ready to elevate your leftovers into something extraordinary? Let’s dive into this fun and delicious recipe!

Why Make a Thanksgiving Crunchwrap?

Creative use of leftovers: This recipe transforms your uneaten turkey and sides into a delightful wrap that reinvents holiday favorites.

Crispy Texture: Enjoy a satisfyingly crunchy exterior while reveling in a warm, melty filling that’s bursting with flavor.

Quick and Easy: Perfect for busy days, this simple wrap comes together in just a few minutes, making it a great choice for lunch or dinner.

Customizable: Adjust the ingredients based on what you have on hand. Try adding sautéed veggies or different sauces for a personalized twist!

Crowd-Pleaser: This Thanksgiving Crunchwrap is a fun way to get everyone excited about leftovers. Serve with a side of homemade gravy for an unbeatable meal experience!

Thanksgiving Crunchwrap Ingredients

For the Wrap
Large Flour Tortillas – The sturdy base that holds all the delicious fillings together; you can swap for whole wheat or gluten-free tortillas if needed.
Leftover Mashed Potatoes – Provides a creamy texture and bulk; sweet potatoes or cauliflower mash are great alternatives.
Leftover Green Beans – Adds a nutritious, crunchy element; feel free to use other green veggies like broccoli instead.
Shredded Leftover Turkey – The star protein that delivers that festive flavor; chicken or ham can also work just as well.
Leftover Cranberry Sauce – Offers a tangy sweetness to balance the flavors; any fruit preserves or chutney can be substituted.
Leftover Stuffing – Contributes herby flavors and heartiness; any savory bread mixture will do the trick.
Shredded White Cheddar – Adds a decadent cheesy component; consider Monterey Jack or mozzarella for a different flavor profile.
Gravy (warmed, for serving) – Enhances moisture and flavor when drizzled on your wrap; broth or plant-based options can be used if gravy isn’t available.

Optional Add-Ins
Sautéed Onions or Peppers – These can provide extra flavor and texture; feel free to sprinkle in your favorites for a personalized touch.
Jalapeños or Chili Flakes – Add some heat if you like it spicy; these will bring a fun kick to your Thanksgiving Crunchwrap.
Alternative Sauces – Swap out gravy for ranch, BBQ, or even a drizzle of hot sauce for a unique twist on flavors.

Step‑by‑Step Instructions for Thanksgiving Crunchwrap

Step 1: Prepare Your Workspace
Begin by gathering all your leftover ingredients and equipment, including a large skillet, spatula, and a clean cutting board. Make sure your leftover mashed potatoes, turkey, and other components are all accessible and at room temperature. This will make the assembly process quick and efficient, setting the stage for your delicious Thanksgiving Crunchwrap.

Step 2: Assemble the Wrap
Lay a large flour tortilla flat on your cutting board. Start by spooning a layer of mashed potatoes in the center, followed by green beans, shredded turkey, cranberry sauce, stuffing, and a sprinkle of shredded white cheddar. Be mindful not to overfill; you want to ensure everything is contained within the tortilla’s edges for easy folding.

Step 3: Fold the Tortilla
Gently fold the edges of the tortilla towards the center to create a secure wrap. Start by bringing the left edge over, followed by the right edge, then the top and bottom edges to seal in the flavorful ingredients. Press down gently to secure the shape of your Thanksgiving Crunchwrap, making sure it’s tightly wrapped but not too bursting.

Step 4: Heat the Skillet
Preheat your skillet over medium heat for about 2 minutes. This step is crucial for achieving a crispy exterior on your Thanksgiving Crunchwrap. Once hot, carefully place the wrapped tortilla seam-side down in the skillet. Cook for approximately 3-4 minutes, or until the bottom is golden brown and crunchy, monitoring closely to avoid burning.

Step 5: Flip and Finish Cooking
Using a spatula, carefully flip the Thanksgiving Crunchwrap to the other side. Cook for an additional 3-4 minutes until that side is also golden brown and the cheese is melted. You’ll know it’s ready when you hear that satisfying sizzle and see a crisp outer layer—this is what makes the wrap so delicious!

Step 6: Serve with Gravy
Once both sides of the Thanksgiving Crunchwrap are cooked to golden perfection, remove it from the skillet and place it on a cutting board. Allow it to cool for a minute before slicing it in half. Serve warm with a side of warmed gravy for dipping, enhancing the flavors of your delightful creation!

What to Serve with Thanksgiving Crunchwrap

To complement the flavors of your crunchy masterpiece, consider these delightful pairings that will elevate your meal to new heights.

  • Homemade Gravy: Serve a side of warm, rich gravy for dipping, enhancing the flavors of your wrap and adding moisture.

  • Fresh Garden Salad: A crisp salad with mixed greens and a tangy vinaigrette adds a refreshing contrast to the warm crunchwrap. This pairing keeps your meal light and balanced.

  • Roasted Brussels Sprouts: The crunchy, caramelized edges of roasted Brussels sprouts bring a delightful texture and earthy flavor that perfectly complements the savory wrap.

  • Sweet Potato Fries: Crispy sweet potato fries add a hint of sweetness while keeping with the Thanksgiving theme, making for a fun and satisfying addition.

  • Apple Pie: For dessert, a slice of warm apple pie with a scoop of vanilla ice cream creates a nostalgic finish to your holiday-inspired meal.

  • Sparkling Cider: A glass of sparkling cider ties the meal together beautifully, offering a bubbly sweetness that pairs well with the flavors of the crunchwrap.

Whether you’re aiming for a fresh salad, a comforting side, or a sweet treat, these pairings will make your Thanksgiving Crunchwrap celebration feel complete and satisfying.

Make Ahead Options

These Thanksgiving Crunchwraps are a fantastic choice for meal prep! You can assemble the wraps up to 24 hours in advance by prepping all the fillings and layering them in the tortillas, then covering them tightly in plastic wrap or an airtight container to prevent them from drying out. For best results, store them in the refrigerator and keep the gravy separate until you’re ready to serve. When it’s time to enjoy your delicious wraps, simply heat a skillet over medium heat and cook the assembled crunchwraps for 3-4 minutes per side or until golden brown. With this make-ahead method, you’ll have a comforting and flavorful meal ready to serve with minimal effort!

Expert Tips for the Best Thanksgiving Crunchwrap

  • Preheat the Skillet: Make sure your skillet is hot before adding the wrap to achieve that perfect crispy texture without burning.

  • Don’t Overfill: Avoid the temptation to add too many fillings; this can lead to tearing. Remember, less is more for a secure wrap.

  • Customize Freely: Feel free to swap in different veggies or proteins—make the Thanksgiving Crunchwrap your own with what you have available!

  • Grilling Time: Ensure you give each side enough cooking time for a golden-brown finish. A little patience goes a long way in achieving that crunch!

  • Serve Fresh: For the best flavor and texture, enjoy the wrap right after cooking. Leftovers can be stored but won’t retain that delightful crispiness.

Thanksgiving Crunchwrap Variations

Feel free to adjust this recipe and make the Thanksgiving Crunchwrap your own with these delightful twists and substitutions!

  • Vegetarian Delight: Replace turkey with extra veggies like sautéed mushrooms or roasted butternut squash for a hearty, meat-free option.

  • Spicy Kick: Add sliced jalapeños or a sprinkle of chili flakes to boost the heat level for those who love a little spice in their life.

  • Cheesy Goodness: Swap the white cheddar for pepper jack cheese to introduce a zesty twist that enhances your crunchy wrap experience.

  • BBQ Flavor: Drizzle some BBQ sauce rather than gravy for a smoky flavor that brings a fun twist to your Thanksgiving leftovers.

  • Creamy Alternative: Use creamy ranch dressing instead of cranberry sauce for a tangy base that pairs wonderfully with the other fillings.

  • Crunchy Texture: Toss in some crushed tortilla chips or fried onions for an extra layer of crunch that contrasts beautifully with the softness of the other ingredients.

  • Sweet Swaps: Try using peach preserves or spiced apple butter in place of cranberry sauce for a sweet and fruity flavor explosion.

  • Wrap Varieties: Experiment with different types of tortillas—sundried tomato wraps or spinach tortillas can add a lovely color and flavor to your Thanksgiving Crunchwrap.

These suggestions can take your wrap to new heights, ensuring each bite remains as exciting as the last, so don’t hesitate to play around! Keep it easy and flavorful, and maybe enjoy it with a side of homemade gravy!

How to Store and Freeze Thanksgiving Crunchwrap

Fridge: Store leftover Thanksgiving Crunchwraps in an airtight container for up to 3 days. This helps maintain their texture and flavor for quick snacking later.

Freezer: For longer storage, wrap the crunchwraps individually in plastic wrap and then place them in a freezer-safe bag. They’ll keep well for up to 2 months.

Reheating: To enjoy, thaw in the fridge overnight, then reheat on a skillet over medium heat for about 4-5 minutes per side until crispy and heated through.

Wrap Carefully: If freezing, ensure each wrap is tightly sealed to prevent freezer burn and preserve the delightful flavors of your Thanksgiving Crunchwrap.

Thanksgiving Crunchwrap Recipe FAQs

How do I select the right tortillas for my Thanksgiving Crunchwrap?
Absolutely! Look for large flour tortillas that are pliable and free of tears. If you’re gluten-free or prefer a healthier option, whole wheat or gluten-free tortillas work wonderfully as substitutes. Ensure they are fresh to prevent breakage while wrapping.

What is the best way to store leftover Thanksgiving Crunchwraps?
You can store leftover Thanksgiving Crunchwraps in an airtight container in the fridge for up to 3 days. Make sure they’re completely cooled before sealing to avoid condensation, which can make them soggy. For best results, reheat them on a skillet to maintain their crispy texture.

Can I freeze Thanksgiving Crunchwraps?
Absolutely! To freeze, wrap each crunchwrap tightly in plastic wrap and then place them in a freezer-safe bag. They can be stored for up to 2 months. When you’re ready to enjoy, thaw them in the fridge overnight and reheat on a skillet over medium heat for 4-5 minutes per side until they’re crispy.

What should I do if my crunchwraps aren’t getting crispy?
Very! If your crunchwraps aren’t crispy enough, ensure your skillet is adequately preheated before cooking. Cook them on medium heat for the suggested time, flipping only once for even browning. If the filling is cold, you can also cover the skillet briefly to help heat the insides faster without compromising the crispy exterior.

Are there any dietary considerations I should keep in mind with this recipe?
Of course! If you have allergies, you can easily customize the ingredients. For instance, substitute dairy cheese with plant-based cheese for a vegan option, or swap out turkey for a vegetarian protein like quinoa. Always check food labels where necessary, especially with sauces or pre-made ingredients.

What if I don’t have all the leftover ingredients?
Don’t fret! This Thanksgiving Crunchwrap is super customizable! You can easily swap fillings based on what you have—like using leftover vegetables, different proteins, or even varieties of sauce. The more, the merrier when experimenting with flavors, so let your creativity shine!

Thanksgiving Crunchwrap

Thanksgiving Crunchwrap: Relish Your Leftovers in Style

Transform your Thanksgiving leftovers into a crunchy, flavorful wrap with this Thanksgiving Crunchwrap recipe.
Prep Time 10 minutes
Cook Time 10 minutes
Total Time 20 minutes
Servings: 2 wraps
Course: Lunch
Cuisine: American
Calories: 450

Ingredients
  

For the Wrap
  • 2 large Flour Tortillas can swap for whole wheat or gluten-free
  • 1 cup Leftover Mashed Potatoes sweet potatoes or cauliflower mash are great alternatives
  • 1 cup Leftover Green Beans feel free to use other green veggies like broccoli
  • 1 cup Shredded Leftover Turkey can substitute chicken or ham
  • 1/4 cup Leftover Cranberry Sauce any fruit preserves or chutney can be used
  • 1/2 cup Leftover Stuffing any savory bread mixture will do
  • 1 cup Shredded White Cheddar consider Monterey Jack or mozzarella
  • Gravy (warmed, for serving) broth or plant-based options can be used if no gravy
Optional Add-Ins
  • Sautéed Onions or Peppers add extra flavor and texture
  • Jalapeños or Chili Flakes for some heat
  • Alternative Sauces like ranch or BBQ for a unique twist

Equipment

  • large skillet
  • spatula
  • Cutting Board

Method
 

Step‑by‑Step Instructions for Thanksgiving Crunchwrap
  1. Prepare Your Workspace: Gather all leftover ingredients and equipment, ensuring they are at room temperature.
  2. Assemble the Wrap: Lay tortilla flat, add mashed potatoes, green beans, turkey, cranberry sauce, stuffing, and cheddar.
  3. Fold the Tortilla: Gently fold edges towards the center to seal in the ingredients.
  4. Heat the Skillet: Preheat skillet over medium heat and cook wrapped tortilla seam-side down for 3-4 minutes.
  5. Flip and Finish Cooking: Carefully flip the wrap and cook for another 3-4 minutes until golden brown.
  6. Serve with Gravy: Allow to cool slightly, slice in half, and serve warm with gravy for dipping.

Notes

Store leftovers in an airtight container for up to 3 days. For freezing, wrap individually and store in a freezer-safe bag for up to 2 months. To reheat, thaw overnight in the fridge and cook in a skillet until crispy.