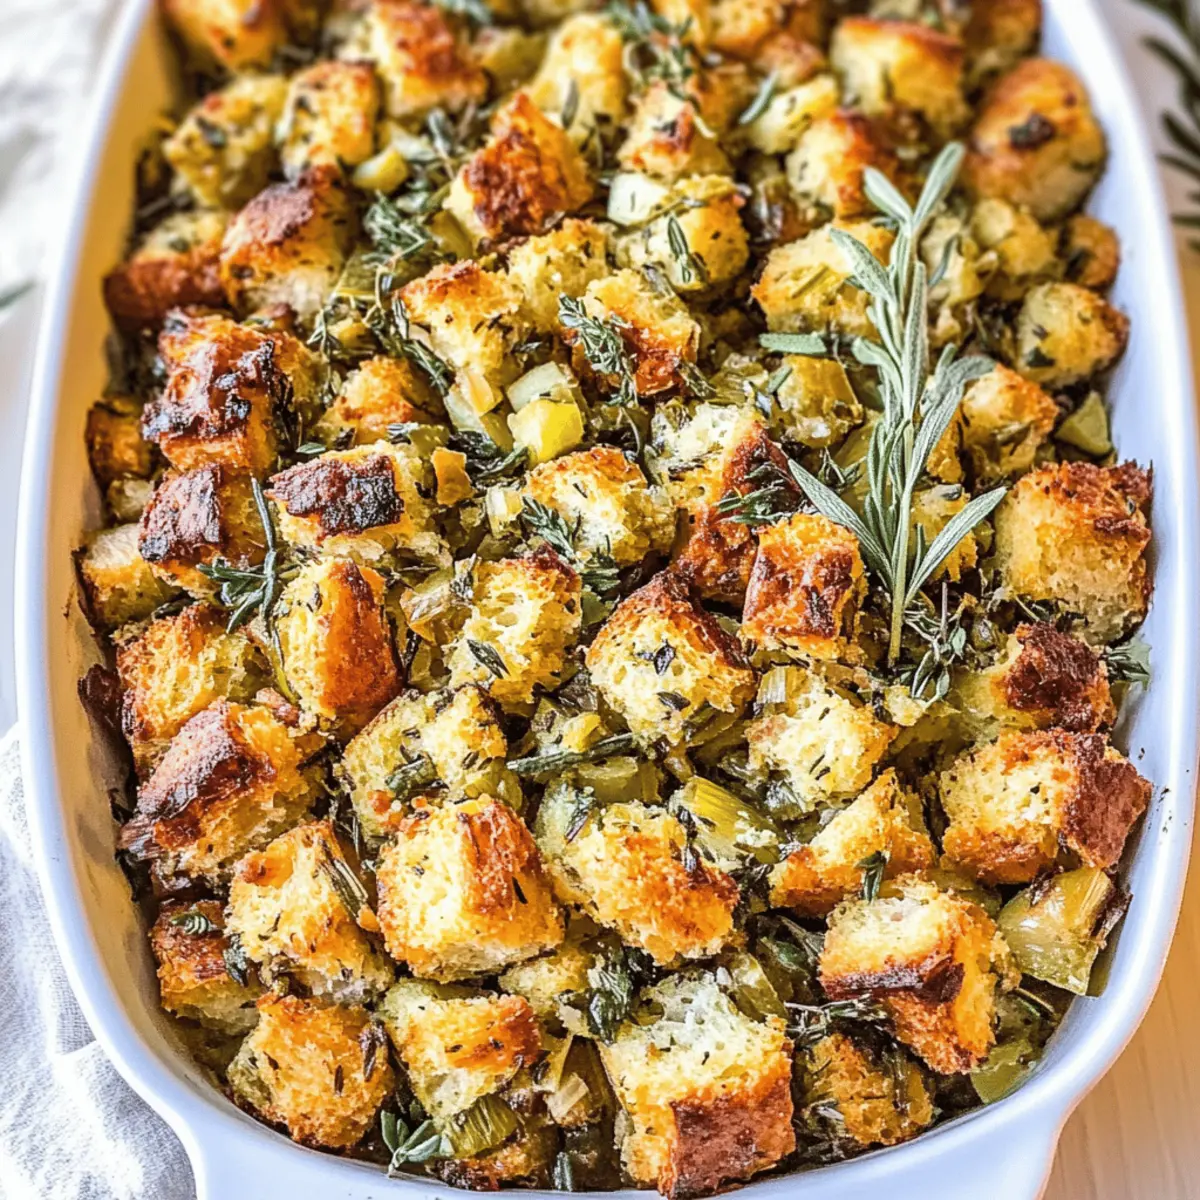
As I opened my kitchen door, the aroma of herbs and bread filled the air, instantly transporting me back to my grandmother’s cozy home on Thanksgiving Day. This is the memory I cherish when making my Classic Traditional Thanksgiving Stuffing, a recipe that marries simplicity with heartfelt tradition. With just a handful of ingredients like day-old bread, buttery onions, and fresh herbs, this stuffing recipe proves that comfort food doesn’t have to be complicated. It’s not only a crowd-pleaser but also perfectly adaptable for make-ahead meals, allowing you to savor stress-free holiday prep. So, are you ready to bring the essence of home to your table this season?

Why Is This Stuffing Recipe Special?
Heartwarming Tradition: This classic Thanksgiving stuffing recipe captures the essence of family gatherings, blending nostalgia with modern simplicity.
Easy-to-Make: With just a few essential ingredients, you’ll find it easy to whip up even on a busy holiday morning.
Versatile Option: Feeling adventurous? You can easily customize this dish by swapping in different herbs or even using cornbread for a unique twist.
Crowd-Pleasing Flavor: The combination of fresh herbs and buttery onions delivers a savory flavor profile that will have everyone coming back for seconds!
Make-Ahead Friendly: Prep this stuffing ahead of time to alleviate stress on the big day—just assemble and pop it in the oven when you’re ready.
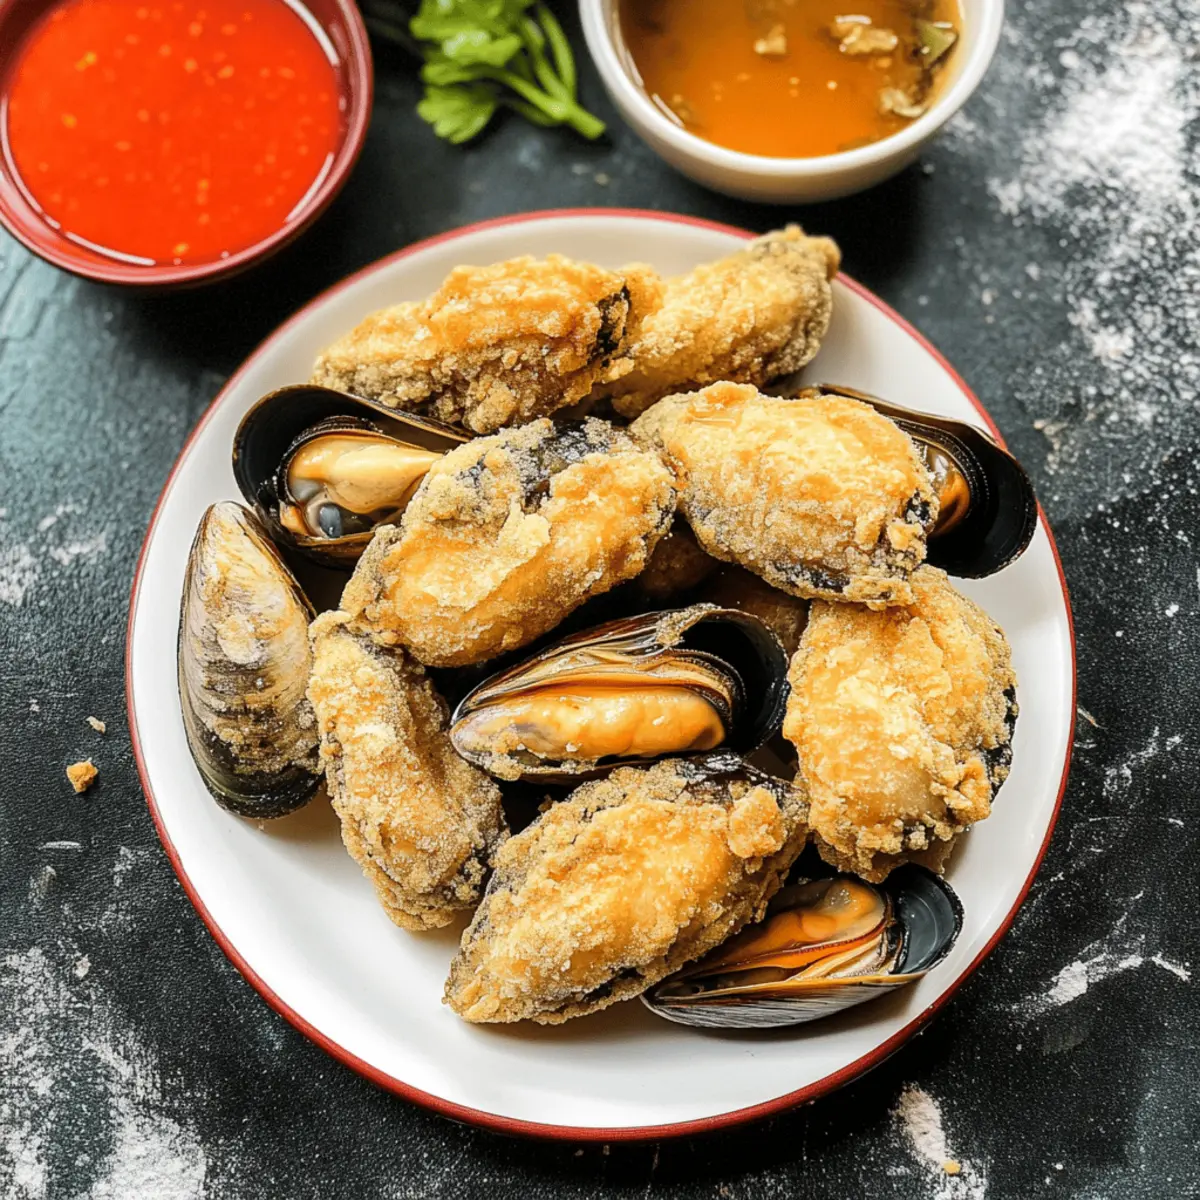
Don’t forget to pair it with your favorite sides, perhaps a warm bowl of Homemade Chicken Pot or a slice of Banana Bread Brownies for a complete holiday feast!
Stuffing Recipe Ingredients
For the Base
• Unsalted Butter – Adds richness and moisture to the stuffing.
• Day-Old White French Bread – Provides structure; must be dried to avoid mushiness. If fresh bread is used, toasting it first is essential.
• Sweet Vidalia or Yellow Onion – Adds sweetness and flavor; finely diced for better integration.
• Celery – Brings crunch and flavor; diced small for an even texture.
For the Herbs
• Italian Flat-Leaf Parsley – Fresh herb for brightness; finely minced to release its flavor.
• Fresh Sage Leaves – Essential for traditional flavor; finely minced for even distribution.
• Fresh Rosemary – Adds an aromatic pine-like flavor; ensure it’s minced well after removing tough stems.
• Fresh Thyme – Another herb that adds depth; minced to blend seamlessly.
For Seasoning
• Salt – Enhances all flavors; adjust based on the saltiness of the broth used.
• Pepper – Adds spice; tailor to your taste preference.
For Binding and Moisture
• Low-Sodium Chicken Broth – Provides moisture and flavor; divided between mixing and baking.
• Large Eggs – Act as a binding agent to keep the stuffing cohesive.
This stuffing recipe promises a warm, nostalgic flavor that will make your Thanksgiving feast a comforting delight!
Step‑by‑Step Instructions for Classic Traditional Thanksgiving Stuffing
Step 1: Prepare the Bread
Preheat your oven to 250°F (120°C). Spread the day-old white French bread cubes evenly on a baking sheet. Toast them for about 45 minutes, stirring halfway through, until they are dry and begin to look slightly golden. This drying step is crucial for achieving the right texture in your stuffing recipe, preventing it from being too soggy.
Step 2: Increase Oven Temperature
Once your bread cubes have dried, increase the oven temperature to 350°F (175°C). While the oven preheats, take a 9×13 inch baking dish and generously coat it with cooking spray to prevent sticking. This step is essential for ensuring your classic stuffing comes out easily and maintains its perfect shape during baking.
Step 3: Sauté the Vegetables
In a large skillet, melt ¾ cup of unsalted butter over medium heat. Add the finely diced sweet Vidalia onion and celery, sautéing for about 10 minutes until they are soft and translucent. Stir occasionally to prevent sticking and to develop the sweet, savory aroma that will infuse your stuffing recipe with flavor.
Step 4: Combine the Ingredients
In a large mixing bowl, combine the dried bread cubes with the sautéed onion and celery mixture. Add the finely minced herbs (parsley, sage, rosemary, thyme), salt, and pepper. Pour in 1¼ cups of low-sodium chicken broth, mixing everything gently but thoroughly until the bread is well-coated and begins to absorb the flavors.
Step 5: Prepare the Egg Mixture
In a separate bowl, whisk together the remaining low-sodium chicken broth with the large eggs until well combined. This mixture acts as a binding agent, ensuring that your stuffing recipe holds together beautifully. Pour the egg mixture over the bread mixture and fold it in gently, making sure all ingredients are fully integrated.
Step 6: Transfer to Baking Dish
Carefully transfer the stuffing mixture into your prepared baking dish, spreading it evenly. Dot the top with the remaining pieces of butter, which will melt and create a rich flavor formation during baking. Cover the dish tightly with aluminum foil to keep the moisture in as it cooks.
Step 7: Bake the Stuffing
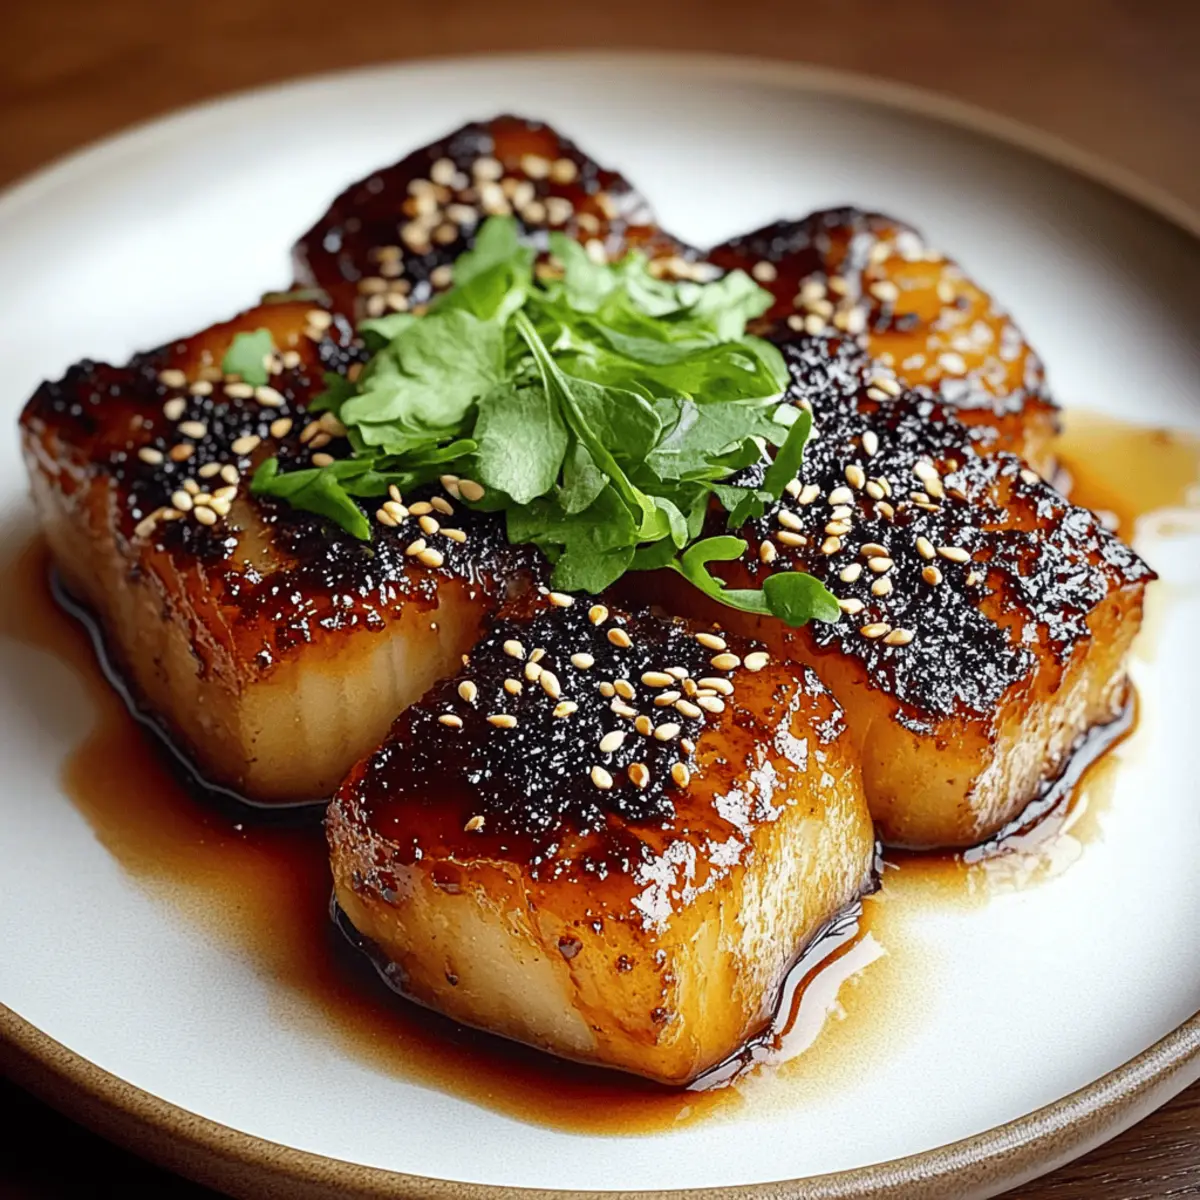
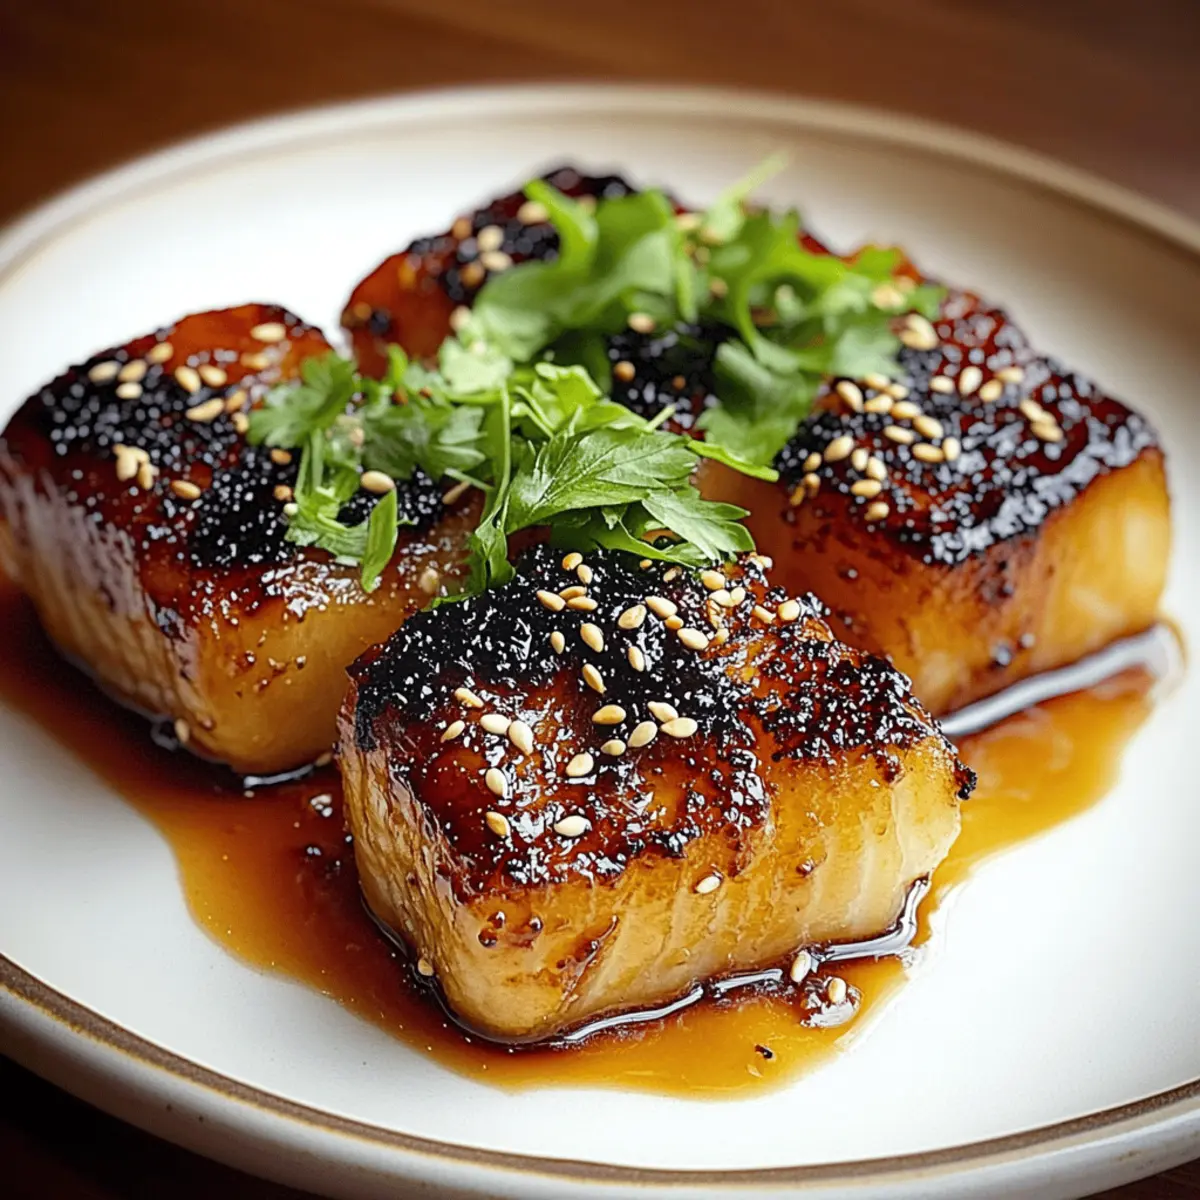
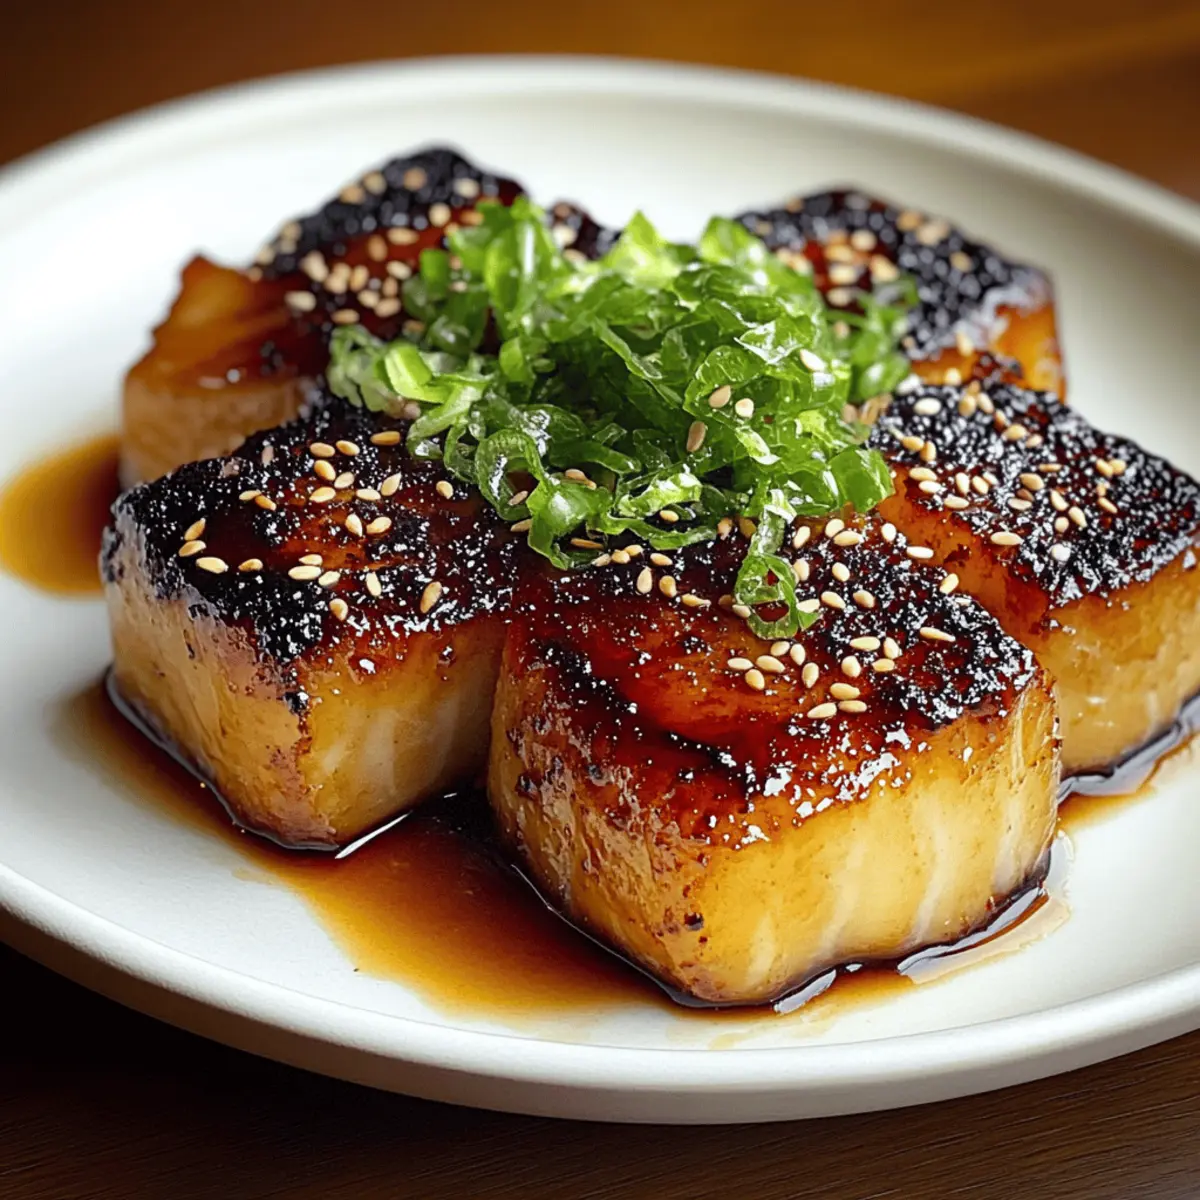
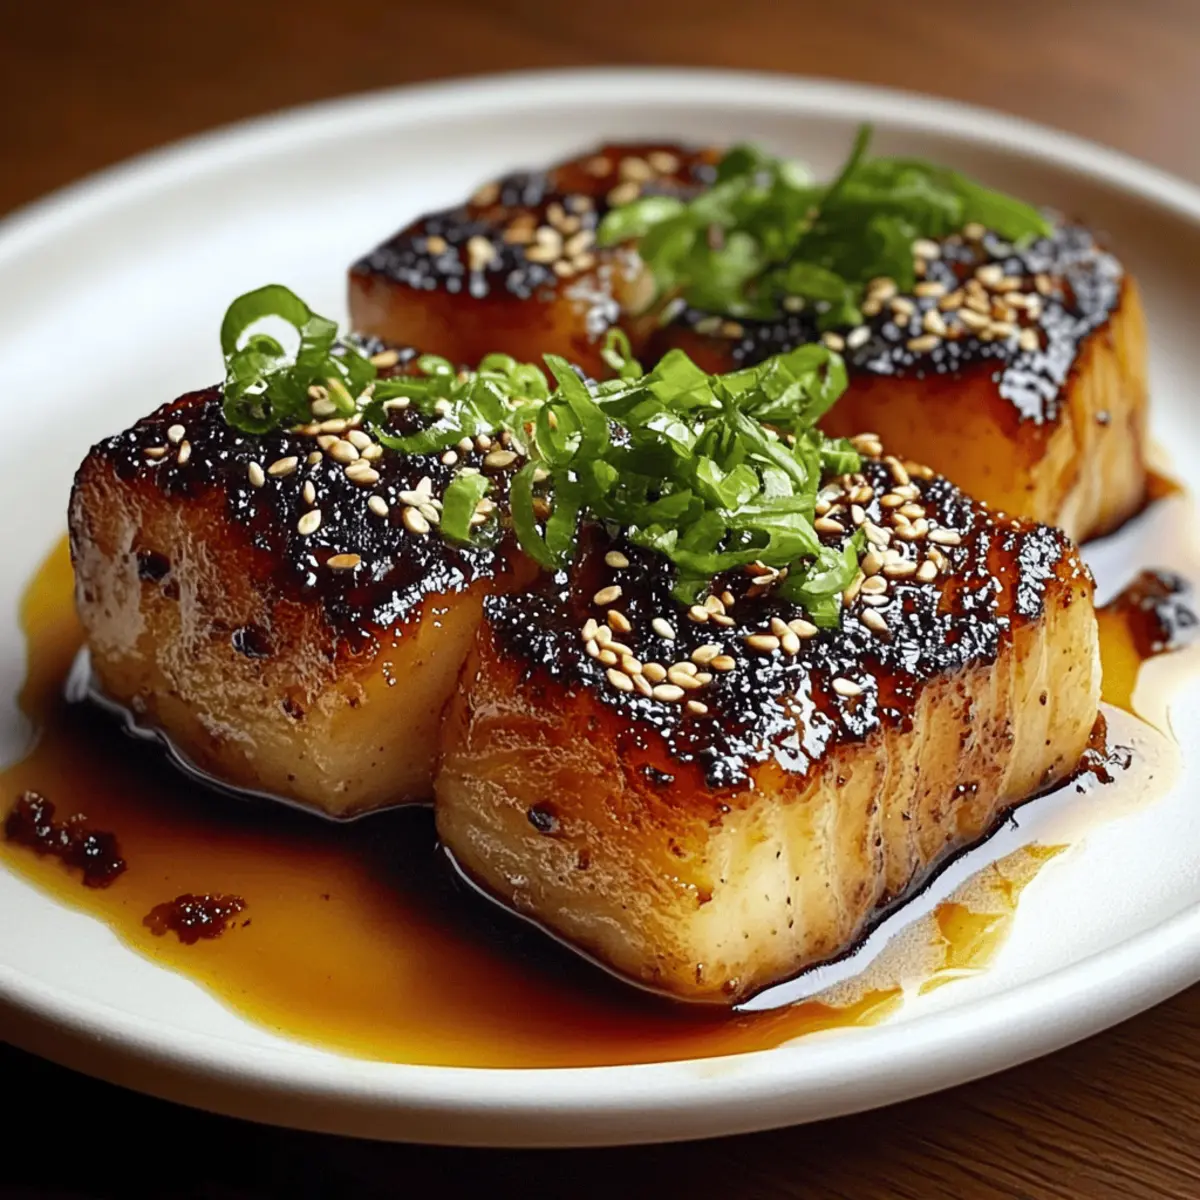
Place the covered baking dish in the preheated oven and bake for 40 minutes. After this time, carefully remove the foil to allow for a crispy topping. Bake uncovered for an additional 40-45 minutes, or until the top turns a beautiful golden brown and a toothpick inserted in the center comes out clean. This delightful contrast of crispy and soft is what makes your classic Thanksgiving stuffing irresistible!

Expert Tips for the Best Stuffing Recipe
-
Bread Choice Matters: Use very dry day-old bread for the best texture. If using fresh bread, ensure to toast it to avoid a mushy stuffing.
-
Herb Freshness: Opt for fresh herbs whenever possible to elevate the flavor profile of your stuffing recipe. Dried herbs won’t yield the same aromatic experience.
-
Taste Test Before Baking: Always sample your mixture before baking. Adjust seasoning to ensure balanced flavors; different broths may impact saltiness.
-
Moisture Control: If preparing ahead, add extra broth before baking to maintain moisture and keep your stuffing from being dry on the big day.
-
Golden Top Tip: For a perfectly crispy topping, uncover the stuffing during the last 40-45 minutes of baking—this creates a delightful contrast with the soft interior.
Make Ahead Options
These Classic Traditional Thanksgiving Stuffing is perfect for meal prep! You can assemble the stuffing up to 24 hours in advance—simply prepare it without baking. Store the unbaked stuffing in the refrigerator, ensuring to cover it tightly with foil or plastic wrap to maintain moisture and prevent drying out. To keep the stuffing just as delicious, consider adding a splash of chicken broth before baking to ensure it remains moist. When you’re ready to serve, preheat your oven and bake the stuffing directly from the fridge, allowing an extra 10-15 minutes of baking time until it reaches that irresistible golden brown on top. Enjoy the joy of stress-free holiday prep with this time-saving option!
How to Store and Freeze Stuffing Recipe
Fridge: Store any leftover stuffing in an airtight container in the fridge for up to 5 days. Reheat gently in the oven or microwave, adding a splash of broth if needed.
Freezer: You can freeze your stuffing for up to 3 months. Place it in a freezer-safe container or zip-top bag, removing as much air as possible.
Thawing: When ready to enjoy, thaw the stuffing overnight in the fridge. Reheat directly from frozen or after thawing, ensuring it reaches an internal temperature of 165°F.
Make-Ahead: If making ahead of time, assemble the stuffing but do not bake it. Cover and refrigerate for up to 2 days or freeze for later use to keep the flavors fresh and vibrant.
Stuffing Recipe Variations & Substitutions
Don’t hesitate to get creative with this classic stuffing recipe and make it your own!
-
Herb Swap: Try using fresh dill or tarragon instead of sage for a unique herbal twist. Both herbs bring a delightful freshness!
-
Grain-Free: Substitute the bread with a mix of cauliflower rice and nut flour for a low-carb, gluten-free option. It’ll bring a lovely texture and flavor depth.
-
Nutty Addition: Fold in chopped walnuts or pecans for added crunch and a nutty flavor that’ll surprise your taste buds in each bite.
-
Sweet & Savory: Mix in some dried cranberries or chopped apples for a hint of sweetness that perfectly balances the savory notes of the dish.
-
Spicy Kick: Add a dash of cayenne pepper or finely chopped jalapeños for a spicy kick, perfect for those who love a bit of heat in their meal.
-
Cornbread Base: Swap the French bread for cornbread to create a sweeter, moist stuffing. It pairs wonderfully with turkey and brings Southern flair!
-
Vegetable Boost: Amp up the veggies by including diced carrots, mushrooms, or bell peppers. This not only adds flavor but also enhances the nutritional profile.
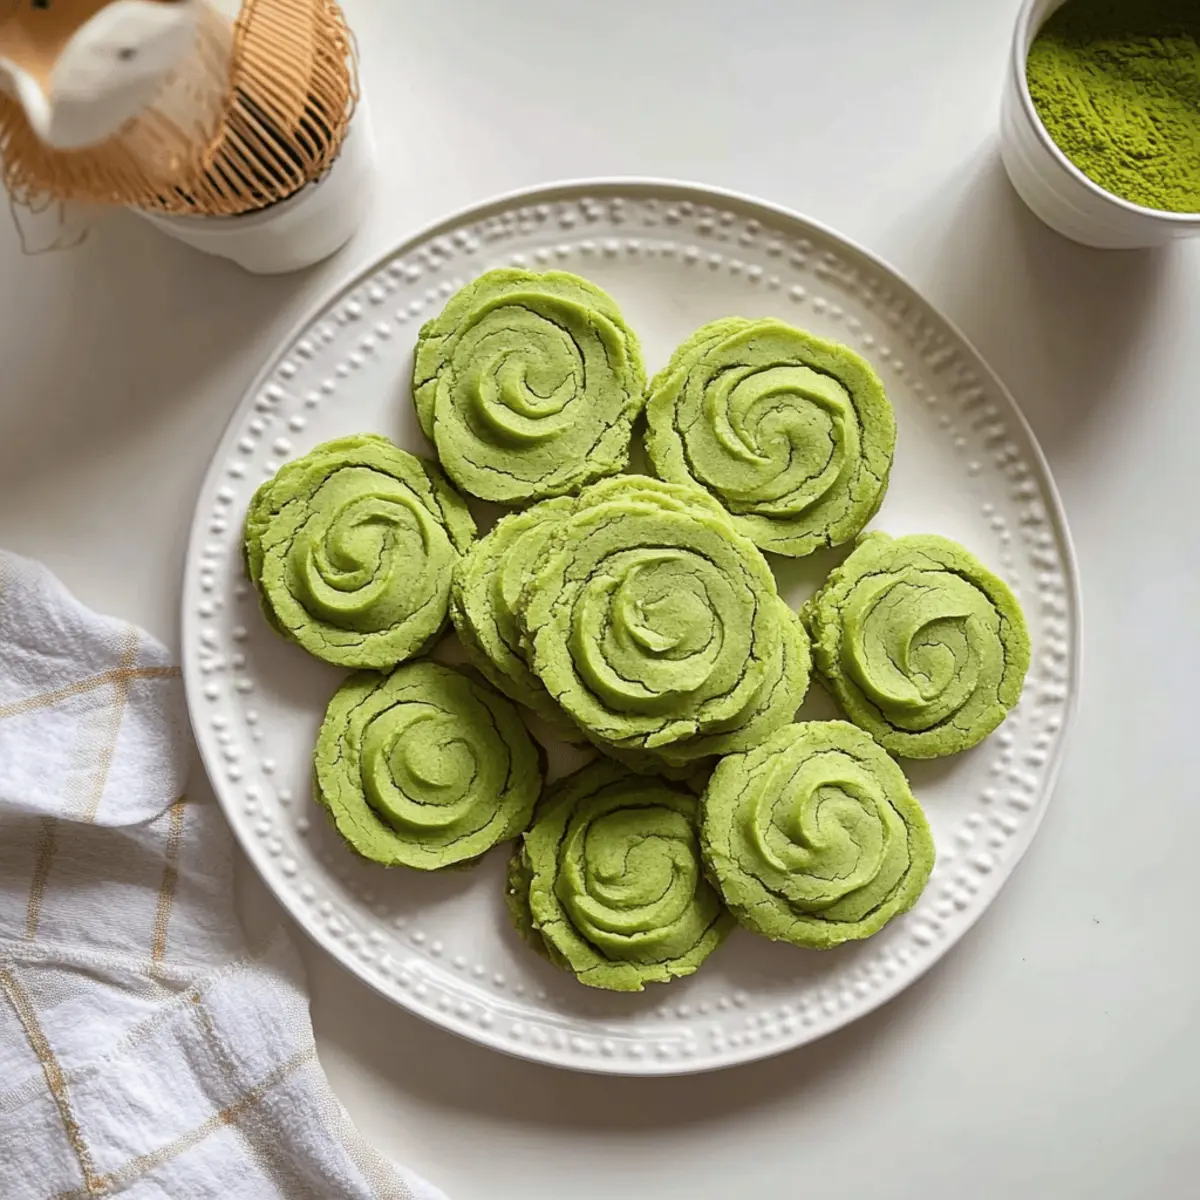
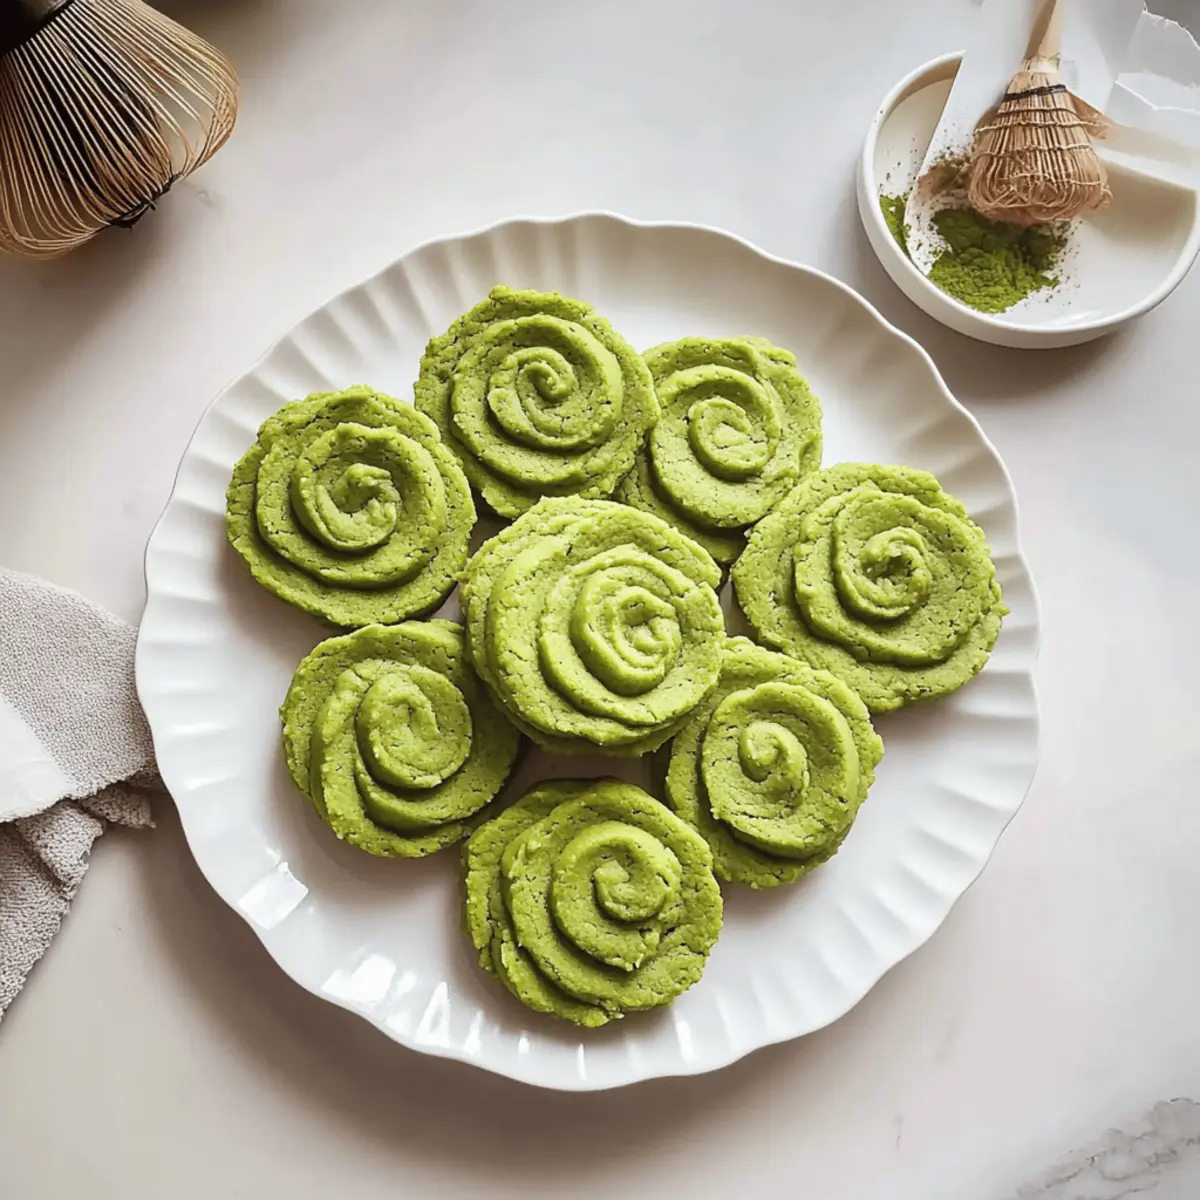
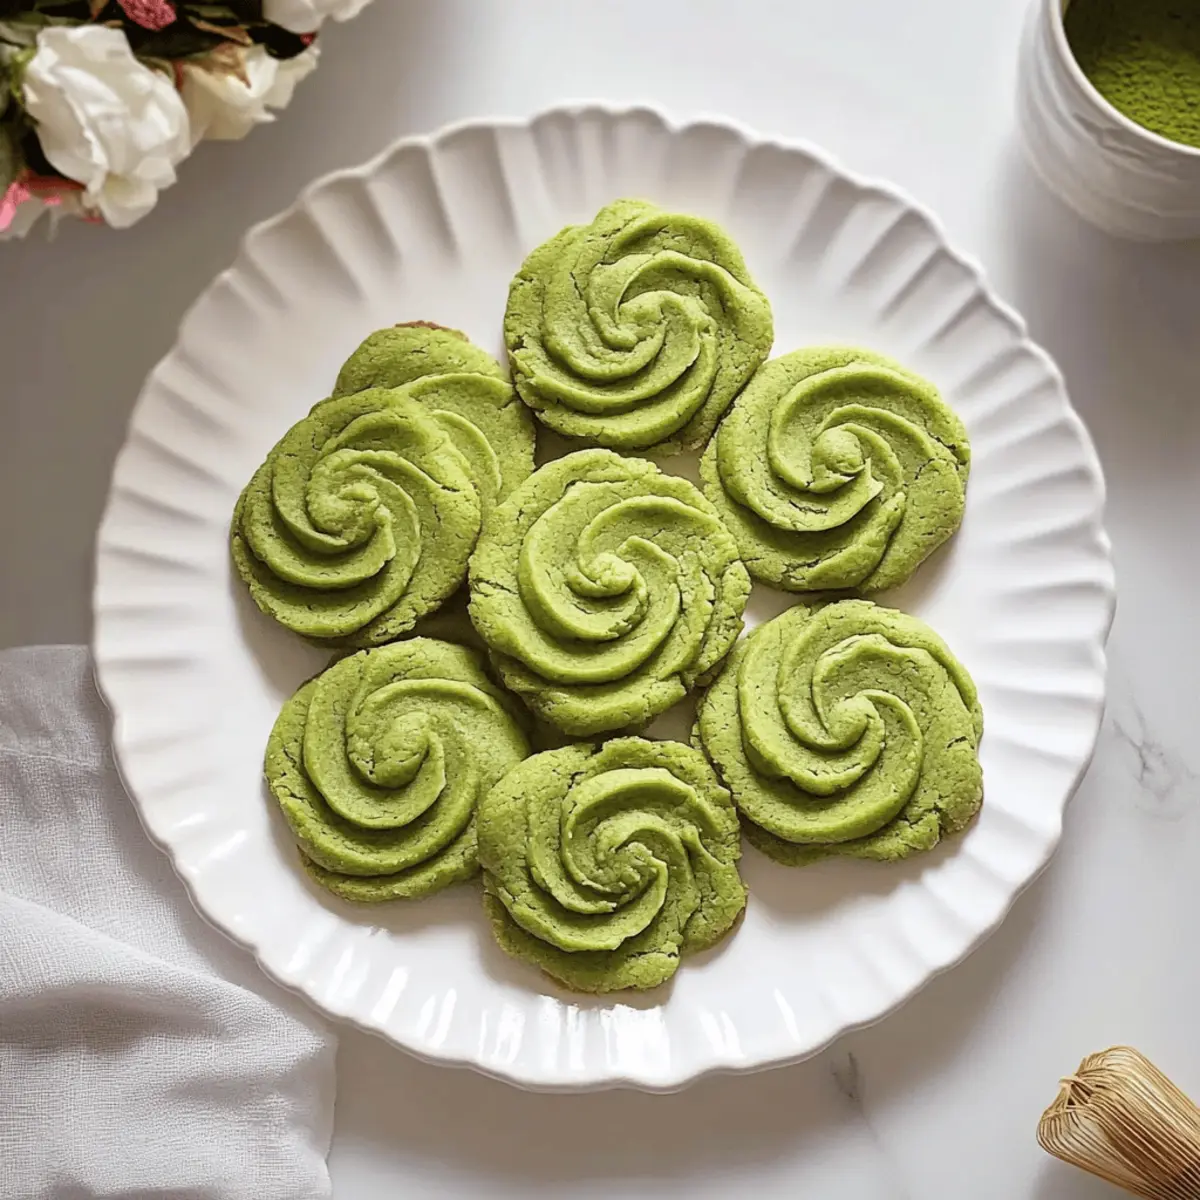
Don’t forget, this stuffing is also a delightful side alongside a hearty meal, such as a cozy bowl of Cabbage Carrot Patties or a slice of decadent Matcha Sponge Cake to round off your holiday feast!
What to Serve with Classic Traditional Thanksgiving Stuffing
A delightful Thanksgiving feast is more than just the stuffing; it’s about creating a symphony of flavors that warm the heart.
-
Roasted Turkey: The classic centerpiece, its savory juices bobbing with fresh herbs elevate the delicious flavors of the stuffing beautifully.
-
Cranberry Sauce: This tangy, sweet condiment cuts through the rich stuffing, providing a refreshing contrast that highlights your Thanksgiving meal.
-
Garlic Mashed Potatoes: Creamy and buttery, these mashed potatoes offer a smooth texture that complements the stuffing’s heartiness, making every bite a blissful experience.
-
Green Bean Almondine: The crispness of fresh green beans topped with toasted almonds adds a lovely crunch, balancing the soft stuffing perfectly.
-
Butternut Squash Soup: A warm bowl of creamy soup provides an inviting start to dinner, enhancing the cozy vibe while pairing nicely with your stuffing.
-
Apple Pie: End your meal on a sweet note with this iconic dessert; its warm spices harmonize with the stuffing, evoking the charm of holiday traditions.
-
Spiced Apple Cider: This comforting drink infuses your gathering with warmth, enhancing the home’s festive spirit and complementing the flavors of your meal.

Classic Traditional Thanksgiving Stuffing Recipe FAQs
How do I choose the right bread for this stuffing recipe?
Absolutely! Day-old white French bread is ideal because it has the perfect structure to absorb flavors without turning mushy. If you can only find fresh bread, toasting it in the oven at 250°F for about 45 minutes will help achieve the right texture before using it in your stuffing recipe.
How should I store leftover stuffing?
Very easy! Just place any leftover stuffing in an airtight container and store it in the fridge for up to 5 days. When you’re ready to eat, simply reheat it gently in the oven or microwave, adding a splash of broth if it feels a bit dry!
Can I freeze stuffing?
Absolutely! You can freeze your prepared stuffing for up to 3 months. Just transfer it to a freezer-safe container or zip-top bag, squeezing out as much air as possible to prevent freezer burn.
How do I reheat frozen stuffing?
When you’re ready to enjoy your frozen stuffing, thaw it overnight in the fridge. If you prefer, you can also reheat it directly from frozen—just make sure it reaches an internal temperature of 165°F. If it seems dry, add a little broth to keep it moist and flavorful!
What if my stuffing is too dry after baking?
Don’t worry! If you find your stuffing is a bit dry, simply add a bit of low-sodium chicken broth, mixing gently to incorporate. Avoid over-baking, which can create dryness. Consider removing the foil during the last 40-45 minutes of baking for a crispy golden top while ensuring the insides remain soft and buttery.
Is this stuffing recipe suitable for people with dietary restrictions?
Absolutely! To tweak this classic stuffing recipe for dietary needs, feel free to replace the chicken broth with a vegetable broth for a vegetarian option. Additionally, ensure your bread choice aligns with any allergen considerations, like gluten-free varieties, to cater to guests with specific dietary needs.
Savory Stuffing Recipe for Your Cozy Thanksgiving Feast
Ingredients
Equipment
Method
- Preheat your oven to 250°F (120°C). Spread the bread cubes on a baking sheet. Toast for 45 minutes, stirring halfway through.
- Increase the oven temperature to 350°F (175°C). Coat a 9x13 inch baking dish with cooking spray.
- In a skillet, melt the butter over medium heat. Add onion and celery; sauté for 10 minutes until soft.
- In a mixing bowl, combine bread cubes with sautéed onion and celery, herbs, salt, and pepper. Mix in chicken broth.
- Whisk together remaining chicken broth and eggs. Pour over the bread mixture and fold gently.
- Transfer the mixture to the baking dish, dot with remaining butter, and cover with foil.
- Bake covered for 40 minutes. Remove foil and bake for an additional 40-45 minutes until golden brown.