Irresistible Knafeh: Your New Favorite Middle Eastern Delight

As I savored my first bite of Knafeh, I could feel the warmth of traditions and flavors intertwining on my palate, transporting me straight to a bustling Middle Eastern market. This delightful dessert features a luscious layer of gooey sweet cheese nestled between crispy kataifi dough, creating a glorious contrast of textures. It’s wonderful how this cheesecake-like treat can bring people together, whether served hot, allowing the cheese to stretch beautifully, or chilled for a refreshing bite on a warm day. Preparing Knafeh not only amps up dessert presentations but also offers a delightful escape from the mundane fast-food routine. Who wouldn’t want to impress friends with this homemade gem? Curious about how to create this irresistible dish? Let’s dive in!

Why is Knafeh the Perfect Dessert?

Decadent Delights: Knafeh boasts a heavenly blend of crispy kataifi and gooey sweet cheese that will leave your taste buds singing.

Impressive Presentation: This dessert not only looks beautiful on a plate but is sure to be a stunning centerpiece at your next gathering.

Versatile Enjoyment: Whether you prefer it hot out of the oven or chilled from the fridge, Knafeh can be served in various ways to suit any occasion.

Cultural Experience: As a beloved dish across the Middle East, this dessert brings a touch of tradition and communal joy to your table.

Simple Ingredients: You likely have most of the ingredients on hand. For a deeper dive into Middle Eastern flavors, check out our guide on traditional dessert techniques.

Crowd Pleaser: Friends and family will be clamoring for seconds, making Knafeh the ultimate crowd-pleaser for your next get-together.

Knafeh Ingredients

• Ready to create this creamy, cheesy masterpiece? Here’s what you’ll need!

For the Syrup

  • Water – Provides the base for the syrup and balances sweetness.
  • Granulated Sugar – Sweetens the syrup, creating a lovely glaze.
  • Rose Water – Adds floral notes that characterize the dish; substitute with orange blossom water for a twist.
  • Lemon Juice – Optional, for balancing sweetness in the syrup.

For the Dough and Filling

  • Kataifi Dough – The star of Knafeh; its shreds give the dessert its signature texture. Can substitute with filo dough, but will yield a drier result.
  • Melted Butter – Binds kataifi pieces and adds richness to every bite.
  • Sweet Cheese – Core filling providing a creamy texture; fresh mozzarella or a mix of ricotta and mozzarella offers the best results.

For Garnish

  • Crushed Pistachios – Optional, these add delightful crunch and a nutty flavor to finish your presentation.
  • Kunafa Powdered Coloring – Optional, for traditional coloring; yellow food gel can be used instead for a visual boost.

Now that you have the essential Knafeh ingredients, you’re one step closer to making this irresistible Middle Eastern delight!

Step‑by‑Step Instructions for Knafeh

Step 1: Prepare Syrup
In a medium saucepan, combine 1 cup of water and 1 cup of granulated sugar over medium-high heat. Stir until the sugar dissolves completely, bringing the mixture to a gentle boil. Once dissolved, allow the syrup to simmer for about 10 minutes until slightly thickened. Remove from heat, then gently stir in 2 tablespoons of rose water and a splash of lemon juice. Set aside to cool.

Step 2: Prepare Kataifi
Take your thawed kataifi dough and cut it into smaller, manageable pieces using kitchen scissors. Place the cut kataifi in a large bowl and drizzle with 1 cup of melted butter. Toss and mix until each strand of dough is thoroughly coated, ensuring all pieces are glistening with butter. This will create the perfect crispy texture for your Knafeh.

Step 3: Assemble Layers
Grease a baking dish with additional melted butter. Begin layering half of the buttered kataifi into the bottom of the dish, pressing it down gently to create an even base. Next, take your sweet cheese, such as fresh mozzarella or a blend of ricotta, and spread it evenly over the kataifi layer, ensuring every inch is covered. Finally, layer the remaining kataifi on top, pressing it down slightly to compact the layers for baking.

Step 4: Bake
Preheat your oven to 350°F (175°C). Place the assembled Knafeh in the oven and bake for 40-50 minutes, or until the top is golden brown and bubbling. You’ll know it’s done when the edges are crisp and the center is heated through, filling your kitchen with a delightful aroma that promises sweetness to come.

Step 5: Cool & Invert
After baking, remove the Knafeh from the oven and let it cool for about 10 minutes. This cooling period is essential as it allows the dessert to set slightly. Carefully place a serving plate on top of the baking dish, and with a swift, confident motion, flip the dish upside down. Gently lift off the dish, revealing the beautifully golden Knafeh.

Step 6: Finish
To finish your Knafeh, generously pour the cooled rose water syrup over the warm dessert, allowing it to seep into the layers for maximum sweetness. For a finishing touch, sprinkle crushed pistachios on top for added flavor and a lovely crunch. Serve warm or cold, allowing everyone to indulge in this decadent Middle Eastern delight!

Expert Tips for Making Knafeh

  • Perfectly Coated Dough: Ensure that the kataifi dough is thoroughly coated in melted butter; this prevents dryness and helps achieve a delightful crispy texture when baked.

  • Cheese Moisture: Reduce moisture in the cheese by draining fresh mozzarella properly; excess liquid can lead to soggy Knafeh.

  • Syrup Timing: Pour the rose water syrup over the Knafeh while it’s still warm; this allows the layers to absorb the sweetness beautifully.

  • Inversion Technique: When inverting the Knafeh onto a serving plate, use one with raised edges to catch any overflow syrup, keeping your presentation tidy.

  • Serving Temperature: Experiment with serving Knafeh both hot and cold; each temperature offers a distinct tasting experience to enjoy this delectable Middle Eastern dessert.

Make Ahead Options

Preparing Knafeh in advance is a time-saver for those busy weeknights! You can assemble the layers up to 24 hours ahead; just cover the baking dish tightly with plastic wrap and refrigerate. This helps the kataifi absorb the butter and flavor, keeping it moist and delicious. Additionally, you can prepare the rose water syrup up to 3 days in advance—just store it in the refrigerator. When you’re ready to serve, bake the Knafeh straight from the fridge for about 10 extra minutes to ensure it’s heated through properly. Dropping this delightful dessert into your meal prep routine means you’ll have a stunning treat ready to impress your family or guests with minimal effort!

Knafeh: Sweet Variations Await

Feel free to get creative with your Knafeh and make it uniquely yours with these fun twists!

  • Cheese Swap: Use goat cheese for a tangy kick or experiment with a blend of cream cheese and mascarpone for a luscious feel.
    Embrace the creamy goodness and let your taste buds explore. A cheese swap can change the entire flavor profile!

  • Nutty Twist: Substitute crushed pistachios with walnuts or almonds to alter the topping while keeping that lovely crunch.
    Adding different nuts can introduce exciting flavors and textures, elevating your dessert experience!

  • Syrup Flavor Enhancements: Enhance the traditional syrup using vanilla or almond extract instead of rose water for a fragrant flair.
    These slight modifications can bring a new dimension to the classic sweetness of Knafeh.

  • Fruit Infusion: Layer in fresh berries or sliced bananas between the kataifi and cheese for a fruity surprise.
    Imagine the delightful burst of flavors adding a fresh twist to your dessert!

  • Spice it Up: Add a hint of cinnamon or cardamom to the kataifi mixture for a warm and fragrant upgrade.
    These spices will infuse an aromatic essence that celebrates traditional Middle Eastern flavors.

  • Gluten-Free Option: Consider using gluten-free pastry dough as an alternative to kataifi for a gluten-sensitive version.
    This way, everyone can enjoy Knafeh without missing out on the fun!

  • Choco Delights: Drizzle melted chocolate over the top or incorporate chocolate chips directly into the cheese filling.
    Chocolate lovers, rejoice! This variation merges your two favorite desserts into one irresistible treat.

  • Chilled Garnish: Serve each slice with a dollop of whipped cream or a scoop of vanilla ice cream for an extra indulgent touch.
    Imagine a luscious slice of Knafeh paired with a cold treat—pure bliss!

No matter how you choose to adapt your Knafeh, each variation promises to deliver a delicious experience that honors this beloved Middle Eastern delight!

Storage Tips for Knafeh

Fridge: Store leftover Knafeh in an airtight container in the refrigerator for up to 3 days. This will help maintain its texture and flavor.

Freezer: For longer storage, freeze Knafeh by wrapping it tightly in plastic wrap and then placing it in a freezer bag. It can last up to 2 months when frozen.

Reheating: To enjoy Knafeh again, reheat individual slices in the microwave for 30-60 seconds or in the oven at 350°F (175°C) for about 10 minutes until heated through.

Serving Tip: Whether served warm with syrup or chilled, a sprinkle of crushed pistachios adds a delightful crunch to your Knafeh.

What to Serve with Authentic Knafeh?

Delight in a full culinary experience by complementing your Knafeh with these delicious pairings.

  • Creamy Yogurt: Serve a dollop of tangy yogurt alongside to balance the sweetness, creating a refreshing contrast.

  • Mint Tea: This fragrant tea will enhance the floral notes of the Knafeh, creating a soothing and aromatic sip to enjoy.

  • Pistachio Baklava: Bring a taste of the Middle East to your table with this sweet and nutty treat that harmonizes beautifully.

  • Honey Drizzled Fruit: Fresh fruits like figs or oranges, drizzled with honey, offer a light and refreshing touch to complement Knafeh.

  • Spiced Coffee: Serve up a robust coffee infused with cardamom or cinnamon, perfect for cutting through the richness of the dessert.

  • Rose Water Sorbet: This cool, floral sorbet not only refreshes the palate but enhances the flavors of the Knafeh in a delightful way.

  • Nuts and Dried Fruits: A mix of almonds, walnuts, and dried apricots adds crunch and texture that elevates the sweet experience of your meal.

  • Mint Salad: A vibrant salad with fresh herbs and citrus will cleanse the palate, making room for that indulgent Knafeh.

These accompaniments will not only enhance your Knafeh delight but also create a memorable dining experience!

Knafeh Recipe FAQs

What type of cheese is best for Knafeh?
I recommend using fresh mozzarella or a combination of ricotta and mozzarella for Knafeh. This blend provides a creamy texture that complements the crispy kataifi dough beautifully. If you prefer a stronger flavor, feel free to experiment with other cheeses, but ensure they melt well.

How should I store leftover Knafeh?
Leftover Knafeh can be stored in an airtight container in the refrigerator for up to 3 days. This method helps to maintain its delightful texture and taste. Make sure to let it cool completely before placing it in the container to prevent moisture buildup.

Can I freeze Knafeh?
Absolutely! To freeze Knafeh, wrap it tightly in plastic wrap and place it in a freezer bag. It can be stored in the freezer for up to 2 months. When you’re ready to enjoy it, simply thaw it in the refrigerator overnight and reheat individual slices in the microwave for 30-60 seconds or in the oven at 350°F (175°C) for about 10 minutes.

Why is my Knafeh soggy?
A common reason for soggy Knafeh is excess moisture in the cheese. Before using fresh mozzarella, be sure to drain it to remove as much liquid as possible. Additionally, ensure that the kataifi dough is thoroughly coated with melted butter to create the best texture during baking.

How can I tell when Knafeh is done baking?
Your Knafeh is ready when it turns a beautiful golden brown and is bubbling at the edges, usually after about 40-50 minutes at 350°F (175°C). The aromatic smell will fill your kitchen, signaling that it’s time to take it out! Allow it to cool for about 10 minutes before inverting it for perfect serving.

Is Knafeh suitable for vegetarians?
Yes! Knafeh is made with vegetarian-friendly ingredients, so it’s an excellent dessert choice for vegetarians. However, always double-check the cheese products you’re using as some might contain animal rennet. Choose rennet-free varieties to ensure it meets your dietary preferences.

Knafeh

Irresistible Knafeh: Your New Favorite Middle Eastern Delight

Knafeh is a delightful Middle Eastern dessert featuring sweet cheese and crispy kataifi, perfect for any occasion.
Prep Time 30 minutes
Cook Time 50 minutes
Cooling Time 10 minutes
Total Time 1 hour 30 minutes
Servings: 8 slices
Course: Dessert
Cuisine: Middle Eastern
Calories: 350

Ingredients
  

Syrup Ingredients
  • 1 cup water
  • 1 cup granulated sugar
  • 2 tablespoons rose water can substitute with orange blossom water
  • 1 tablespoon lemon juice optional
Dough and Filling Ingredients
  • 1 pound kataifi dough can substitute with filo dough
  • 1 cup melted butter
  • 8 ounces sweet cheese fresh mozzarella or blend of ricotta and mozzarella recommended
Garnish Ingredients
  • 1/4 cup crushed pistachios optional
  • 1 tablespoon kunafa powdered coloring optional

Equipment

  • Medium saucepan
  • large bowl
  • Baking Dish
  • kitchen scissors

Method
 

Step-by-Step Instructions
  1. In a medium saucepan, combine 1 cup of water and 1 cup of granulated sugar over medium-high heat. Stir until the sugar dissolves completely, bringing the mixture to a gentle boil. Allow the syrup to simmer for about 10 minutes until slightly thickened. Remove from heat, then stir in 2 tablespoons of rose water and a splash of lemon juice. Set aside to cool.
  2. Take your thawed kataifi dough and cut it into smaller pieces using kitchen scissors. Place the cut kataifi in a large bowl and drizzle with 1 cup of melted butter. Toss until each strand is thoroughly coated.
  3. Grease a baking dish with additional melted butter. Begin layering half of the buttered kataifi into the bottom of the dish. Spread the sweet cheese evenly over the kataifi layer, followed by the remaining kataifi on top.
  4. Preheat your oven to 350°F (175°C). Place the assembled Knafeh in the oven and bake for 40-50 minutes, or until the top is golden brown and bubbling.
  5. After baking, remove the Knafeh from the oven and let it cool for about 10 minutes. Invert onto a serving plate.
  6. Pour the cooled rose water syrup over the warm dessert and sprinkle crushed pistachios on top. Serve warm or cold.

Notes

Ensure kataifi dough is well-coated in butter for the best texture; experiment with serving Knafeh hot or cold.

Matcha Marble Pound Cake: A Soft and Buttery Treat

As I whisk together the vibrant green matcha powder with creamy butter and sugar, I can’t help but smile at the thought of how this humble Matcha Marble Pound Cake will soon delight my friends and family. The harmonious dance of earthy matcha and sweet vanilla creates a dessert that’s not only visually stunning with its marbled appearance, but also offers a melt-in-your-mouth experience that’s simply irresistible. Plus, it’s an easy recipe that delivers big flavor without fuss, making it a perfect addition to any gathering or cozy afternoon tea. Ready to impress your taste buds? Let’s dive into crafting this delightful cake together!

Why is Matcha Marble Pound Cake a Must-Try?

Flavor Harmony: The pairing of earthy matcha with sweet vanilla creates a dessert experience that’s both unique and comforting.

Visually Stunning: Its marbled appearance makes it a showstopper for gatherings and special occasions.

Easy Preparation: With straightforward steps, this cake is perfect even for beginners or those short on time.

Versatile Options: Feel free to customize; swap matcha for cocoa powder for a chocolate twist or add nuts for added crunch!

For more delightful variations, check out my Sky Jelly Cake for a refreshing treat or indulge in a luxuriously soft Nutty Vanilla Cake.

Crowd-Pleasing Appeal: Whether enjoyed at a casual coffee gathering or a festive celebration, this cake will have everyone coming back for seconds.

Matcha Marble Pound Cake Ingredients

For the Batter

  • Matcha Powder – Adds that signature earthy flavor and vibrant green color; substitute with spirulina for color if needed.
  • All-Purpose Flour – The main structure for the cake; feel free to use a gluten-free blend for an alternative.
  • Granulated Sugar – Provides sweetness and moisture; coconut sugar can be used for a less refined option.
  • Butter – Essential for a rich flavor and moist texture; vegan butter works for a dairy-free version.
  • Eggs – Important for binding and creating a light texture; swap with flax eggs for a vegan option.
  • Baking Powder – Ensures the cake rises; a fresh batch will give you the best results.
  • Vanilla Extract – Enhances the overall flavor profile; try almond extract for a delicious twist.

Feel free to dive into this recipe, as the Matcha Marble Pound Cake is sure to become a family favorite!

Step‑by‑Step Instructions for Matcha Marble Pound Cake

Step 1: Preheat the Oven
Begin by preheating your oven to 350°F (175°C). While the oven is warming up, prepare a standard loaf pan by greasing it with butter or lining it with parchment paper. This ensures that the Matcha Marble Pound Cake releases easily after baking.

Step 2: Cream Butter and Sugar
In a mixing bowl, combine softened butter and granulated sugar. Using an electric mixer, beat them together on medium speed until the mixture becomes light and fluffy, around 3-5 minutes. This key step creates a beautiful base for your cake and will give it a wonderfully rich texture.

Step 3: Incorporate Eggs
Next, add the eggs one at a time, mixing well after each addition. This process allows the eggs to fully integrate, providing moisture and structure to your Matcha Marble Pound Cake. Beat until the mixture appears smooth and slightly thickened, which takes about 1-2 minutes.

Step 4: Mix Dry Ingredients
In a separate bowl, whisk together all-purpose flour and baking powder. Gradually add this dry mixture into the wet batter, alternating with milk. Begin and end with the flour mixture, mixing gently after each addition until just combined. Be careful not to overmix; stop when the batter is smooth with a few flour streaks remaining.

Step 5: Divide the Batter
Once your batter is ready, divide it evenly into two bowls. Stir in the matcha powder into one bowl until fully combined, creating a vibrant green batter. Leave the other bowl plain, which will be the vanilla portion. This creates the foundation for your beautiful marbled effect.

Step 6: Layer the Batter
Spoon the batters into the prepared loaf pan in alternating layers, starting with the vanilla batter. Make sure to dollop spoonfuls of matcha batter on top and then continue layering until both batters are used up. The combination of the two batters will create a stunning pattern.

Step 7: Create the Marble Effect
To achieve the lovely marbled effect, take a knife or a skewer and gently swirl it through the batters in the loaf pan. Make gentle zig-zag motions to avoid overmixing; this will allow the colors to intertwine beautifully without losing their distinctiveness.

Step 8: Bake the Cake
Place the loaf pan in the preheated oven and bake for 45-55 minutes. Check for doneness by inserting a toothpick into the center of the cake; it should come out clean or with a few moist crumbs. The top should be gently golden with a slight spring when lightly touched.

Step 9: Cool the Cake
Once baked, remove the Matcha Marble Pound Cake from the oven and let it cool in the pan for about 10 minutes. This cooling period helps it to firm up slightly, making it easier to transfer to a wire rack for complete cooling.

Step 10: Slice and Serve
After the cake has cooled completely, slice it with a sharp knife to reveal the beautiful marble pattern. Serve it as is or dust with powdered sugar for an elegant touch. Your delightful Matcha Marble Pound Cake is now ready to be enjoyed with friends and family!

How to Store and Freeze Matcha Marble Pound Cake

Room Temperature: Store your Matcha Marble Pound Cake in an airtight container at room temperature for up to 3 days to keep it fresh and moist.

Fridge: If you want to extend its shelf life, refrigerate the cake for up to a week. Ensure it’s wrapped tightly to prevent it from drying out.

Freezer: Freeze slices individually by wrapping them in plastic wrap, then place them in a zip-top bag for up to 3 months. Thaw at room temperature before serving.

Reheating: To enjoy warm slices, microwave for 10-15 seconds or place in a preheated oven at 350°F (175°C) for 5-7 minutes until warmed through.

Make Ahead Options

These Matcha Marble Pound Cakes are a lifesaver for busy home cooks! You can prepare the batter up to 24 hours in advance; simply combine the wet and dry ingredients, divide the batter, and add the matcha to one half. Store the prepared batter in an airtight container in the refrigerator to maintain freshness. When you’re ready to bake, just spoon the batters into your loaf pan, swirl to create that beautiful marble effect, and pop it in the oven. This way, you’ll enjoy the same moist, delicious results without the last-minute rush, making your baking experience as delightful as the cake itself!

Expert Tips for Matcha Marble Pound Cake

Quality Matcha: Ensure you’re using high-quality matcha powder to achieve the best flavor and vibrant color.

Avoid Overmixing: Be careful not to overmix the batter after adding dry ingredients; this can lead to a dense, heavy cake instead of a light Matcha Marble Pound Cake.

Cooling Time: Allow the cake to cool completely before slicing. This helps the texture improve and makes it easier to cut neat slices.

Swirling Technique: When creating the marble effect, use gentle zig-zag motions with a knife to maintain the distinct colors. Over-swirling can lead to a blended, less attractive appearance.

Storage Tips: Store leftover cake in an airtight container to keep it moist. It can last at room temperature for up to three days or in the fridge for up to a week.

Matcha Marble Pound Cake Variations

Feel free to explore these delightful twists that will make the Matcha Marble Pound Cake even more unique and enjoyable!

  • Chocolate Chip Boost: Add a handful of chocolate chips to the vanilla batter for a delightful chocolate-matcha harmony. The sweet morsels will melt slightly, creating pockets of gooey chocolate in every slice.

  • Cocoa Substitute: Swap out matcha completely for cocoa powder for a rich chocolate marble cake. The deep, dark chocolate flavor will mesmerize chocolate lovers while still giving you that beautiful marble effect.

  • Nutty Texture: Fold in chopped pistachios or walnuts for a delightful crunch. The nuts add a lovely contrast to the soft cake texture, making every bite even more satisfying!

  • Citrus Twist: Add a teaspoon of lemon zest or a splash of orange juice to brighten the flavors. The refreshing citrus notes cut through the richness, elevating the dessert to new heights.

  • Dairy-Free Option: For a vegan version, use plant-based butter and flax eggs. This substitution ensures everyone can enjoy the cake without missing out on its beloved flavors.

  • Fruity Addition: Top the cake with fresh berries for a burst of flavor and color. Strawberries, blueberries, or raspberries pair beautifully with matcha and add a fresh sweetness.

  • Spice It Up: Consider adding a pinch of cinnamon or a hint of cardamom to the vanilla batter. These warm spices will impart a comforting depth, enhancing the overall flavor of your cake.

  • Matcha Swirl Enhancements: Try mixing a little white chocolate into the matcha batter for extra creaminess. The sweet, delicate flavor perfectly complements the earthy matcha and creates another layer of decadence.

With these variations, your Matcha Marble Pound Cake will never be boring! Feel free to explore other delicious desserts, too, like this delightful Strawberry Cheesecake Dump Cake or my rich and flavorful Cream Cheese Cake. Enjoy your baking adventure!

What to Serve with Matcha Marble Pound Cake?

As you slice into the soft, buttery layers of this cake, imagine the delightful flavors of these complementary dishes that would elevate your dessert experience.

  • Whipped Cream: A dollop of freshly whipped cream contrasts perfectly with the moist cake, adding a light and airy touch.

  • Fruit Compote: A warm berry compote enhances the matcha’s earthiness, offering a delightful tart-sweet balance that brightens each bite.

  • Vanilla Ice Cream: Serve alongside a scoop of vanilla ice cream for a classic and indulgent pairing that melts beautifully into the cake.

  • Green Tea Latte: Embrace the matcha theme with a creamy green tea latte; the flavors will resonate, creating a harmonious experience.

  • Macarons: Delicate almond macarons with a vanilla or matcha filling can provide a delightful crunch and a touch of elegance to your table.

  • Chai Tea: The warm spices of chai tea make for a cozy drink choice, perfectly complementing the earthy flavors of the Matcha Marble Pound Cake.

The combination of textures and flavors will turn your simple cake into a memorable dessert experience, engaging both the palate and the senses.

Matcha Marble Pound Cake Recipe FAQs

What type of matcha powder should I use?
Absolutely use high-quality matcha powder to achieve the best flavor and color in your Matcha Marble Pound Cake. Look for ceremonial-grade matcha for a vibrant green hue and rich taste. Avoid low-quality matcha as it may have a bitter flavor and dull color.

How should I store leftover Matcha Marble Pound Cake?
The cake can be stored in an airtight container at room temperature for up to 3 days. If you want to keep it fresh longer, place it in the refrigerator where it can last for up to a week. Just be sure to wrap it tightly so it doesn’t dry out!

Can I freeze Matcha Marble Pound Cake, and if so, how?
Definitely! To freeze your Matcha Marble Pound Cake, slice it into individual portions for easier defrosting. Wrap each slice tightly in plastic wrap, then place them all in a zip-top freezer bag. You can freeze it for up to 3 months. When you’re ready to enjoy, simply thaw at room temperature, or microwave for 10-15 seconds for a quick treat!

What do I do if my cake comes out dense?
If your cake turns out dense, it’s likely due to overmixing the batter after adding the dry ingredients. I recommend mixing until just combined—with a few flour streaks still visible—to keep the texture light and airy. Also, check that your baking powder is fresh, as this can impact how well your cake rises!

Is this recipe suitable for people with allergies?
Yes, it can be! For a gluten-free version, substitute all-purpose flour with a gluten-free blend. If you’re accommodating dairy allergies, you can use vegan butter instead. Additionally, if someone has egg allergies, replace eggs with flax eggs (1 tablespoon of ground flaxseed mixed with 2.5 tablespoons of water for each egg). Always ensure to check ingredient labels to avoid cross-contamination!

Can pets eat Matcha Marble Pound Cake?
It’s best to keep this cake away from pets. While matcha is not toxic to dogs, the sugar and butter content can be harmful to their digestive systems. It’s always safer to stick to pet-friendly treats when it comes to feeding your furry friends.

Matcha Marble Pound Cake

Matcha Marble Pound Cake: A Soft and Buttery Treat

Matcha Marble Pound Cake is a visually stunning dessert that combines earthy matcha and sweet vanilla, delivering a melt-in-your-mouth experience.
Prep Time 15 minutes
Cook Time 55 minutes
Cooling Time 10 minutes
Total Time 1 hour 20 minutes
Servings: 10 slices
Course: Dessert
Cuisine: Japanese
Calories: 320

Ingredients
  

For the Batter
  • 1 cup Matcha Powder Adds that signature earthy flavor and vibrant green color; substitute with spirulina for color if needed.
  • 2 cups All-Purpose Flour The main structure for the cake; feel free to use a gluten-free blend for an alternative.
  • 1 cup Granulated Sugar Provides sweetness and moisture; coconut sugar can be used for a less refined option.
  • 1 cup Butter Essential for a rich flavor and moist texture; vegan butter works for a dairy-free version.
  • 3 large Eggs Important for binding and creating a light texture; swap with flax eggs for a vegan option.
  • 1 teaspoon Baking Powder Ensures the cake rises; a fresh batch will give you the best results.
  • 1 teaspoon Vanilla Extract Enhances the overall flavor profile; try almond extract for a delicious twist.

Equipment

  • Loaf pan
  • mixing bowl
  • electric mixer
  • whisk

Method
 

Step-by-Step Instructions
  1. Preheat your oven to 350°F (175°C) and prepare a standard loaf pan by greasing it or lining it with parchment paper.
  2. In a mixing bowl, combine softened butter and granulated sugar. Beat together on medium speed until light and fluffy, around 3-5 minutes.
  3. Add the eggs one at a time, mixing well after each addition until the mixture appears smooth and slightly thickened.
  4. In a separate bowl, whisk together flour and baking powder. Gradually add this dry mixture into the wet batter, alternating with milk.
  5. Divide the batter into two bowls. Stir in matcha powder into one bowl until fully combined, leaving the other plain.
  6. Spoon the batters into the prepared loaf pan in alternating layers, starting with the vanilla batter.
  7. To create the marble effect, use a knife or skewer and gently swirl it through the batters.
  8. Place the loaf pan in the oven and bake for 45-55 minutes until a toothpick comes out clean.
  9. Remove from the oven and let it cool in the pan for about 10 minutes before transferring to a wire rack.
  10. Once cooled, slice the cake and serve as is or dust with powdered sugar.

Notes

Ensure you're using high-quality matcha for the best flavor. Store leftovers in an airtight container to keep them moist.

Pistachio Chocolate Babka Pull Apart: A Sweet, Cozy Delight

You might think pulling apart a loaf of bread couldn’t evoke such joy, but the first time I shared a slice of my Pistachio Chocolate Babka Pull Apart, I witnessed pure bliss lighting up faces around the table. This isn’t just any dessert—it’s an adventure in texture and flavor, showcasing buttery dough enveloping rich chocolate and crunchy pistachios. By employing the tangzhong method, this delightful recipe ensures a soft, tender crumb that makes every bite a heavenly experience. Perfect for impressing guests or simply indulging during a quiet afternoon, this babka transforms ordinary moments into special memories. Are you ready to make something truly scrumptious and satisfy that sweet craving?

Why is this dessert a must-try?

Incredible flavors: The rich combination of silky chocolate and nutty pistachios creates an unforgettable taste sensation that your taste buds will adore.

Soft and Tender: Thanks to the tangzhong method, each bite features a delectably fluffy texture, ensuring you won’t be able to resist another slice.

Impressive presentation: The stunning swirls not only delight the palate but also make for an eye-catching centerpiece at gatherings and special occasions.

Versatile indulgence: Whether enjoyed at brunch with homemade pistachio butter or as an after-dinner treat, this babka suits any occasion perfectly.

Easily made ahead: Prepare this recipe in advance and store it for a quick, delightful dessert that will impress your guests.

Don’t forget to check out Homemade Bake Chocolate for more scrumptious inspirations!

Pistachio Chocolate Babka Pull Apart Ingredients

For the Dough
Bread Flour – Essential for structure; substitute with all-purpose flour, though texture may differ.
Sugar – Sweetens and aids browning; use brown sugar for a richer flavor.
Salt – Enhances taste and controls yeast; opt for fine sea salt.
Active Dry Yeast – Key for leavening; check for freshness for the best rise.
Whole Milk – Adds moisture and richness; swap for dairy-free alternatives if needed.
Egg – Provides structure; replace with aquafaba for a vegan version.
Unsalted Butter – Enriches the dough; coconut oil is a great dairy-free substitute.

For the Filling
Dark Chocolate – The heart of the filling; aim for 70% cacao for the best balance.
Powdered Sugar – Sweetens and thickens the filling; granulated sugar can be used, but may create a grainier texture.
Cocoa Powder – Intensifies the chocolate flavor; ensure it’s unsweetened for optimum taste.
Pistachios – Add crunch and nuttiness; interchange with walnuts or hazelnuts if desired.

For the Garnish
Water – Used for the tangzhong and sugar syrup; always use filtered water for the best quality.

This Pistachio Chocolate Babka Pull Apart recipe promises to bring joy to your kitchen and create cherished memories around the table!

Step‑by‑Step Instructions for Pistachio Chocolate Babka Pull Apart

Step 1: Prepare Tangzhong
In a medium saucepan, whisk together bread flour and water over medium heat. Cook the mixture for about 3-4 minutes, stirring constantly until it thickens into a smooth paste. Remove it from heat and let it cool completely; this tangzhong method helps ensure a soft and tender crumb in your Pistachio Chocolate Babka Pull Apart.

Step 2: Mix Dough
In a stand mixer, combine the cooled tangzhong with the remaining bread flour, sugar, salt, active dry yeast, whole milk, and egg. Mix on low speed until the dough is combined, then let it rest for 5 minutes. Gradually add in the softened unsalted butter, mixing for an additional 15 minutes until the dough turns smooth and elastic.

Step 3: Refrigerate Dough
Transfer the dough to a lightly oiled container and cover it securely with plastic wrap. Place it in the refrigerator for 8 to 12 hours overnight. This slow fermentation process enhances the flavor and texture of your Pistachio Chocolate Babka Pull Apart, ensuring it’s wonderfully rich and delicious.

Step 4: Make Filling
While the dough chills, prepare the chocolate filling by melting the dark chocolate and butter together in a heatproof bowl over simmering water. Once melted, mix in the sifted powdered sugar, cocoa powder, and a pinch of salt until smooth and fully combined, creating a luscious filling to elevate your babka.

Step 5: Shape Babka
After refrigerating the dough, roll it out into a large rectangle on a floured surface. Spread the rich chocolate filling evenly across the dough, then sprinkle with the toasted pistachios. Carefully roll the dough tightly into a log, slice it down the center, and twist the two halves together to create a beautiful braided shape.

Step 6: Proof
Place the braided babka in a greased loaf pan and cover it loosely with a clean kitchen towel. Let it rise in a warm, draft-free area for 60 to 90 minutes, or until it has puffed up significantly. This step is crucial for achieving a light and airy texture in your Pistachio Chocolate Babka Pull Apart.

Step 7: Bake
Preheat your oven to 350°F (180°C) while the dough rises. Bake the babka in your preheated oven for 30 to 35 minutes, or until the top is golden brown and its internal temperature reaches 190°F (88°C). An inviting aroma will fill your kitchen as it bakes perfectly.

Step 8: Syrup Finish
As the babka bakes, prepare a simple syrup by simmering equal parts water and sugar in a small saucepan until dissolved. Once the babka is out of the oven, brush this syrup generously over the warm babka to create a glossy finish and enhance its sweetness.

Step 9: Cool
Allow the Pistachio Chocolate Babka Pull Apart to cool for about 20 minutes in the pan. Then, carefully transfer it to a wire rack to cool completely. This final touch allows the sweet aroma and flavors to set, resulting in a scrumptious, share-worthy dessert.

Make Ahead Options

Preparing the Pistachio Chocolate Babka Pull Apart in advance is a fantastic way to save time and ensure a delightful dessert ready for your busy weeknights! You can mix the dough and refrigerate it for up to 24 hours before baking, which deepens the flavors beautifully. Additionally, shape the babka, cover it tightly, and freeze it for up to 3 days; just thaw it overnight in the fridge and allow it to proof for about 60-90 minutes before baking to achieve that perfect rise. To maintain its quality, ensure it’s wrapped well to prevent freezer burn. When ready to serve, bake and enjoy a scrumptious treat that feels freshly made with minimal effort!

Variations & Substitutions for Pistachio Chocolate Babka Pull Apart

Customize your Pistachio Chocolate Babka Pull Apart with these delightful twists that will tickle your taste buds.

  • Dairy-Free: Substitute whole milk with almond milk or coconut milk to keep it creamy without the dairy.
  • Nut-Free: Replace pistachios with sunflower seeds or pumpkin seeds for an equally crunchy texture in your filling. They add a satisfying crunch without the nuts!
  • Sweet Enhancements: Mix in a splash of vanilla or orange extract to the chocolate filling for a fragrant twist. Your babka will have deeper flavor notes that everyone will love.
  • Fruity Addition: Toss in a handful of dried cherries or cranberries with the pistachios for a slight tartness that beautifully contrasts the rich chocolate.
  • Spicy Kick: Add a pinch of cayenne pepper or ground cinnamon into the chocolate filling to give it a gentle heat and warmth. It’s an unexpected surprise that elevates your babka!
  • Coffee Lovers: For all you coffee enthusiasts, blend espresso powder into the chocolate filling to create a luscious mocha flavor that pairs beautifully with the chocolate.
  • Different Dough: Swap out bread flour for spelt flour for a nuttier profile and added nutrition, perfect for a hearty variation that’s still soft and fluffy.
  • Chocolate Variety: Experiment with white chocolate or milk chocolate instead of dark chocolate, catering to any sweet tooth! This creates a unique sweetness for fans of sweeter desserts.

While you’re at it, why not brighten your day with Nutty Chocolate Date or treat yourself to some Coffee Chocolate Truffles for more chocolatey bliss? Each variation can lead to new beloved family recipes! Happy baking!

How to Store and Freeze Pistachio Chocolate Babka Pull Apart

Room Temperature: Keep the babka covered at room temperature for up to 3 days. This protects the tender crust while preserving its delicious taste.

Fridge: For longer storage, wrap the babka tightly in plastic wrap and refrigerate for up to 5 days. This helps maintain moisture and extends its freshness.

Freezer: You can freeze the Pistachio Chocolate Babka Pull Apart for up to 3 months. Wrap it in plastic wrap followed by aluminum foil for maximum protection.

Reheating: To enjoy, thaw overnight in the fridge, then warm in a preheated oven at 350°F (180°C) for 10-15 minutes until heated through. This revives its delightful texture and flavor!

Expert Tips for Pistachio Chocolate Babka Pull Apart

  • Fresh Ingredients: Ensure your active dry yeast is fresh for optimal rise; expired yeast won’t provide the lift needed for fluffy babka.
  • Gentle Mixing: When combining the dough, avoid overmixing after adding the butter, as this could lead to a tough texture rather than the desired fluffy crumb.
  • Mind the Proofing: Watch for the dough’s puffiness during the proofing stage; over-proofing can result in a dense babka, so observe visual cues closely.
  • Correct Temperature: An instant-read thermometer can ensure your Pistachio Chocolate Babka Pull Apart is perfectly done—look for 190°F (88°C) internally.
  • Layering Wisely: When spreading the filling, avoid overfilling, as it may cause the dough to tear during shaping, compromising the beautiful swirl effect.

What to Serve with Pistachio Chocolate Babka Pull Apart

Enhance your delightful dessert experience by pairing the Pistachio Chocolate Babka Pull Apart with delicious accompaniments that complement its rich flavors.

  • Creamy Mashed Potatoes: The smooth and buttery texture of mashed potatoes provides a savory contrast that balances the sweetness of the babka.

  • Espresso or Strong Coffee: A bold cup of coffee cuts through the richness, highlighting the chocolate and nutty flavors in every bite.

  • Whipped Cream: Light and airy, a dollop of whipped cream offers a lovely cloud-like texture that pairs beautifully with each slice of babka.

  • Vanilla Ice Cream: The creaminess of vanilla ice cream melts into the warm babka, creating an indulgent experience of chocolate and nutty goodness.

  • Fresh Berries: A burst of juicy, tart berries adds a refreshing contrast, enhancing the overall flavor profile while providing a pop of color.

  • Chai Tea: The warm spices in chai tea elevate the flavors of the babka, making it a lovely pairing for cozy afternoons.

  • Chocolate Sauce: Drizzling rich chocolate sauce over the warm babka intensifies the chocolate experience, taking indulgence to the next level.

  • Caramel Sauce: The sweet, buttery notes of caramel complement the chocolate and pistachios, creating a luscious extra layer of flavor.

These pairings will ensure your Pistachio Chocolate Babka Pull Apart shines as the star of your dessert table!

Pistachio Chocolate Babka Pull Apart Recipe FAQs

How do I choose the right pistachios for the filling?
Absolutely! When selecting pistachios, look for ones that are bright green and plump. Avoid any that have dark spots or a musty smell as these can indicate they are stale. Ideally, choose roasted and unsalted varieties to enhance the flavors in your Pistachio Chocolate Babka Pull Apart.

How should I store leftovers and how long will they last?
To keep your babka fresh, store it in a covered container at room temperature for about 3 days. For longer storage, wrap it tightly in plastic wrap and refrigerate for up to 5 days. If you want to keep it even longer, you can freeze it for up to 3 months. Just ensure that it is well-wrapped to prevent freezer burn.

Can I freeze the Pistachio Chocolate Babka Pull Apart after baking?
Yes, here’s how! To freeze your babka, allow it to cool completely after baking. Then, wrap it tightly in plastic wrap followed by aluminum foil. This protects it from freezer burn and helps keep the flavors intact. When you’re ready to enjoy it, simply thaw it overnight in the refrigerator and warm it in the oven at 350°F (180°C) for about 10-15 minutes.

What should I do if my babka doesn’t rise properly?
Very important! If your babka doesn’t rise well, it could be due to inactive yeast. Make sure your yeast is fresh and that the water you use to activate it wasn’t too hot or too cold—ideal temperatures are around 100-110°F (38-43°C). If you see the dough doesn’t double in size during proofing, give it a little more time in a warm, draft-free area. If it still fails, you might need to start with fresh yeast.

Can I make the dough ahead of time?
Absolutely! You can prepare the babka dough ahead of time. After mixing, cover it and refrigerate it overnight (for 8-12 hours) to enhance its flavor. Alternatively, you can shape and freeze it before the final proof. Just ensure to thaw it in the fridge overnight before letting it rise and baking.

Is this recipe suitable for those with nut allergies?
It’s wonderful to be cautious! Unfortunately, this Pistachio Chocolate Babka Pull Apart does contain nuts. If you’re cooking for someone with nut allergies, I recommend substituting the pistachios with seeds like sunflower or pumpkin seeds for an alternate crunch without the added risk. Always double-check that your other ingredients are also nut-free.

Pistachio Chocolate Babka Pull Apart

Pistachio Chocolate Babka Pull Apart: A Sweet, Cozy Delight

Pistachio Chocolate Babka Pull Apart is a delightful dessert showcasing buttery dough filled with rich chocolate and crunchy pistachios.
Prep Time 30 minutes
Cook Time 35 minutes
Refrigeration Time 12 hours
Total Time 13 hours 5 minutes
Servings: 12 slices
Course: Dessert
Cuisine: American
Calories: 300

Ingredients
  

Dough Ingredients
  • 4 cups Bread Flour Essential for structure; substitute with all-purpose flour, though texture may differ.
  • 1/4 cup Sugar Sweetens and aids browning; use brown sugar for a richer flavor.
  • 1 teaspoon Salt Enhances taste and controls yeast; opt for fine sea salt.
  • 2 teaspoons Active Dry Yeast Key for leavening; check for freshness for the best rise.
  • 1 cup Whole Milk Adds moisture and richness; swap for dairy-free alternatives if needed.
  • 1 large Egg Provides structure; replace with aquafaba for a vegan version.
  • 1/2 cup Unsalted Butter Enriches the dough; coconut oil is a great dairy-free substitute.
Filling Ingredients
  • 8 oz Dark Chocolate The heart of the filling; aim for 70% cacao for the best balance.
  • 1/2 cup Powdered Sugar Sweetens and thickens the filling; granulated sugar can be used, but may create a grainier texture.
  • 1/4 cup Cocoa Powder Intensifies the chocolate flavor; ensure it's unsweetened for optimum taste.
  • 1 cup Pistachios Add crunch and nuttiness; interchange with walnuts or hazelnuts if desired.
Garnish Ingredients
  • 1/4 cup Water Used for the tangzhong and sugar syrup; always use filtered water for the best quality.

Equipment

  • Stand mixer
  • Medium saucepan
  • Heatproof Bowl
  • Loaf pan
  • Wire rack

Method
 

Step-by-Step Instructions
  1. Prepare Tangzhong: In a medium saucepan, whisk together bread flour and water over medium heat. Cook the mixture for about 3-4 minutes, stirring constantly until it thickens into a smooth paste. Remove it from heat and let it cool completely.
  2. Mix Dough: In a stand mixer, combine the cooled tangzhong with the remaining bread flour, sugar, salt, active dry yeast, whole milk, and egg. Mix on low speed until the dough is combined, then let it rest for 5 minutes. Gradually add in the softened unsalted butter, mixing for an additional 15 minutes until the dough turns smooth and elastic.
  3. Refrigerate Dough: Transfer the dough to a lightly oiled container and cover it securely with plastic wrap. Place it in the refrigerator for 8 to 12 hours overnight.
  4. Make Filling: While the dough chills, prepare the chocolate filling by melting the dark chocolate and butter together in a heatproof bowl over simmering water. Mix in the sifted powdered sugar, cocoa powder, and a pinch of salt until smooth.
  5. Shape Babka: Roll the dough out into a large rectangle on a floured surface. Spread the chocolate filling evenly across the dough and sprinkle with toasted pistachios. Roll the dough tightly into a log, slice it down the center, and twist the two halves together.
  6. Proof: Place the braided babka in a greased loaf pan and cover it loosely with a clean kitchen towel. Let it rise for 60 to 90 minutes or until it has puffed up significantly.
  7. Bake: Preheat your oven to 350°F (180°C). Bake the babka for 30 to 35 minutes or until the top is golden brown and its internal temperature reaches 190°F (88°C).
  8. Syrup Finish: Prepare a simple syrup by simmering equal parts water and sugar in a small saucepan until dissolved. Brush this syrup generously over the warm babka once out of the oven.
  9. Cool: Allow the babka to cool for about 20 minutes in the pan, then transfer to a wire rack to cool completely.

Notes

Ensure to use fresh ingredients for the best results and avoid overmixing the dough.

Savory Taiwanese Beef Rolls: Crispy Pancakes to Savor

As I stood in my kitchen, the warm aromas of ginger and braised beef enveloped me, instantly transporting me to the bustling streets of Taiwan. One bite of Taiwanese Beef Rolls can ignite memories of carefree afternoons indulging in savory snacks, and today, I’m excited to share this easy-to-prepare recipe that will bring those vibrant flavors to your home. These delightful crispy pancakes, filled with tender beef and fresh veggies, are perfect for quick lunches or serving at your next gathering. You’ll love how satisfying they are, delivering both comfort and a hint of adventure on every plate. Can you smell the hoisin sauce mingling with the scallions? Let’s roll up our sleeves and dive into cooking these irresistible Taiwanese Beef Rolls together!

Why are Taiwanese Beef Rolls so special?

Crispy, flaky goodness: These rolls feature perfectly crispy scallion pancakes that are incredibly satisfying.

Flavor explosion: With savory braised beef and a hint of sweetness from hoisin sauce, each bite is a delightful balance of flavors.

Quick preparation: They are simple to make, making them a fantastic option for busy weeknights or last-minute gatherings.

Crowd-pleaser: Your friends and family will rave about these rolls, just like they do for other favorites like Savory Beef Rolls and Crispy Mini Beef Pies.

Endless variations: Feel free to mix it up! Add veggies or swap proteins to create a version that suits everyone.

With their mouthwatering appeal and easy preparation, Taiwanese Beef Rolls are destined to become a new family favorite!

Taiwanese Beef Rolls Ingredients

For the Beef Filling
Beef Shank – The key protein for a rich flavor; you can also use brisket for variation.
Ginger – Fresh ginger adds aromatic spice; it’s best for an authentic taste.
Water – Essential for braising the beef; ensure it’s enough to cover the meat.
Rock Sugar – Adds sweetness; granulated sugar can be used as a substitute.
Cinnamon Stick – Infuses warm notes; be careful not to use too much.
Bay Leaf – Enhances depth of flavor; remember to remove it before serving.
Star Anise – Imparts a unique flavor; it’s optional if you prefer a milder taste.
Dried Tangerine Peel – Adds a citrus note; fresh zest works as a good substitute.
Whole Cloves – Contribute a delicate spiciness; use sparingly to prevent overwhelming flavors.
Sichuan Peppercorns – Offers a numbing spice kick; adjust based on your heat preference.
White or Black Peppercorns – Provides additional sharpness to the braise.
Garlic – Smashing it before adding releases more aroma and depth.

For the Pancakes
Scallion Pancakes – Use store-bought for convenience or make your own for that authentic touch.
Oil – Needed for frying; any neutral oil will give you the perfect crunch.

For Assembly
Cucumber – Julienned for a refreshing crunch; it pairs beautifully with beef.
Fresh Scallions – Chopped for garnishing; they add a fresh burst of flavor.
Cilantro – Optional garnish that enhances freshness; great if you love herbal notes.
Hoisin Sauce – A sweet and savory spread for the pancakes; it brings all the flavors together wonderfully.

With these ingredients, you’re on your way to creating irresistible Taiwanese Beef Rolls that bring the flavors of Taiwanese cuisine right to your dining table!

Step‑by‑Step Instructions for Taiwanese Beef Rolls

Step 1: Prepare the Beef
Begin by slicing the beef shank into 4-5 inch pieces, ensuring uniform sizes for even cooking. In a pot of boiling water, add the beef along with sliced ginger. Blanch for 30 seconds, then drain and rinse under cold water to remove impurities, setting the stage for a clean, rich flavor in our Taiwanese Beef Rolls.

Step 2: Braise the Beef
Return the blanched beef to a clean pot and add water until the pieces are submerged. Incorporate remaining ingredients: rock sugar, spices, garlic, Shaoxing wine, light soy sauce, and dark soy sauce. Bring to a boil, then reduce heat to a gentle simmer. Cover and cook for 1 hour or until the beef is fork-tender, allowing the flavors to meld beautifully.

Step 3: Chill the Beef
Once the beef is tender, remove it from heat and allow it to cool at room temperature for about 30 minutes. After cooling, transfer the beef to the refrigerator for at least 2 hours or preferably overnight. Chilling the beef enhances slicing the next day and ensures the flavors deepen for making the perfect Taiwanese Beef Rolls.

Step 4: Prepare the Pancakes
While the beef cools, cook your scallion pancakes according to package instructions until they are crispy and golden brown. Alternatively, make your own using the traditional dough for a homemade touch. Once done, keep the pancakes warm in a low oven to maintain their crispiness, which is crucial for the texture of the rolls.

Step 5: Assemble the Rolls
Thinly slice the chilled braised beef and prepare your julienned cucumber and chopped scallions. On each warm scallion pancake, spread a layer of hoisin sauce, followed by a sprinkle of fresh scallions and a few slices of beef and cucumber. This vibrant layering will ensure a delightful bite when you roll up the Taiwanese Beef Rolls.

Step 6: Roll and Serve
Carefully roll each pancake tightly, ensuring the filling stays inside. Once rolled, slice each roll in half diagonally for a beautiful presentation. Arrange the finished Taiwanese Beef Rolls on a serving platter, garnishing with additional chopped scallions and cilantro if desired. Serve immediately while still warm, allowing everyone to savor these delicious delights!

Make Ahead Options

These Taiwanese Beef Rolls are perfect for meal prep enthusiasts! You can braise the beef up to 24 hours in advance, allowing those rich flavors to deepen while saving you time on busy days. After braising, let the beef cool and refrigerate it for at least 2 hours, or overnight, to make slicing easier. The scallion pancakes can be cooked ahead and stored in an airtight container for up to 3 days; simply reheat them in a dry skillet to restore their crispiness before assembly. When ready to serve, spread hoisin sauce on each pancake, layer with the chilled beef and fresh veggies, roll them up, and enjoy restaurant-quality Taiwanese Beef Rolls with minimal effort!

Storage Tips for Taiwanese Beef Rolls

Fridge: Store cooked Taiwanese Beef Rolls in an airtight container for up to 2 days. This helps maintain freshness and prevents them from drying out.

Freezer: If you want to store the rolls longer, freeze them, tightly wrapped in plastic wrap or aluminum foil, for up to 3 months.

Reheating: Reheat in an oven at 350°F (175°C) for about 10-15 minutes to restore the crispiness of the pancakes. Avoid microwaving to maintain texture.

Assembling Fresh: For the best flavor and texture, consider assembling the rolls right before serving, using freshly cooked pancakes for that crispy delight.

Variations & Substitutions for Taiwanese Beef Rolls

Feel free to make this recipe your own by exploring delightful twists and substitutions that tickle your taste buds!

  • Beef Substitute: Swap out beef shank for brisket or pork for a different flavor profile while keeping the same comforting texture.
  • Vegan Option: Use tofu or mushrooms in place of beef, along with additional spices for an umami boost that satisfies plant-based cravings.
  • Spicy Kick: Add a dollop of sriracha or chili flakes in the hoisin sauce for an extra flavor burst that brings the heat.
  • Vegetable Medley: Toss in sliced bell peppers or carrots alongside cucumbers for vibrant crunch and color, elevating your rolls with lovely freshness.
  • Sauce Variations: Experiment with spicy chili paste or a homemade peanut sauce for dipping, offering an exciting flavor journey every time.
  • Herb Infusion: Add fresh basil or mint into the filling for an aromatic twist that will surprise and delight the senses.
  • Nutty Crunch: Sprinkle some chopped peanuts or sesame seeds inside the roll; their crunchiness adds a great texture contrast to the tender beef and crispy pancakes.
  • Rice Paper Wraps: For a lighter version, use rice paper instead of scallion pancakes, creating a delightful fresh roll option that’s equally satisfying.

Don’t forget to take a look at our other delicious recipes like Crispy Mini Beef Pies or Homemade Chicken Rolls. These variations will surely help you uncover new favorites!

Expert Tips for Taiwanese Beef Rolls

  • Chill the Beef: Ensure you chill the braised beef for at least 2 hours before slicing, as this creates cleaner cuts and enhances flavor.

  • Crispy Pancakes: Fry the scallion pancakes until they are golden brown for the best texture; a soggy pancake will dull the overall experience of the Taiwanese Beef Rolls.

  • Adjust Sauce Sweetness: Feel free to modify the amount of hoisin sauce based on your sweetness preference. Start light and add more if desired.

  • Customize Fillings: Don’t hesitate to experiment with different veggies or proteins to match your family’s taste; you can add bell peppers or swap beef with chicken.

  • Right Cooking Pot: Use a heavy pot for braising to ensure even heat distribution, preventing parts of the beef from becoming tough or overcooked.

What to Serve with Taiwanese Beef Rolls

Elevate your meal with delightful pairings that enhance the flavors of these savory bites.

  • Crispy Vegetable Spring Rolls: These add crunch and freshness, beautifully complementing the beef rolls with their lightness.

  • Sweet Chili Dipping Sauce: A drizzle of this sweet and spicy sauce can enhance the flavors, making each bite even more delicious.

  • Sesame Noodle Salad: Cold, refreshing noodles with sesame dressing offer a delightful contrast to the warm, crispy beef rolls, creating a beautiful balance.

  • Pickled Radishes: Their tangy crunch provides a zesty kick, perfectly pairing with the rich flavors of the beef while cleansing the palate.

  • Chilled Tofu Salad: Light and creamy, this salad brings a refreshing texture that nicely contrasts with the crispy pancakes and savory filling.

  • Mango Lassi: This creamy yogurt-based drink serves as a refreshing and sweet counterpoint, balancing the savory notes of the beef rolls beautifully.

  • Szechuan Green Beans: Their slight heat and garlic notes elevate the dining experience, adding a savory side that keeps every bite exciting.

  • Coconut Sticky Rice: A sweet, hearty side that contrasts perfectly with the savory flavors, enriching your meal with a satisfying texture.

With these pairings, your Taiwanese Beef Rolls will truly shine, creating a memorable feast that celebrates the dish’s vibrant flavors!

Taiwanese Beef Rolls Recipe FAQs

How do I select the right beef for Taiwanese Beef Rolls?
Absolutely! For the best flavor, I recommend using beef shank, which offers a rich, meaty taste essential for this dish. If you can’t find beef shank, brisket makes a great substitute. Look for meat that is bright red, marbled with some fat, and free from any dark spots or excessive moisture.

What is the best way to store leftover Taiwanese Beef Rolls?
You can store cooked Taiwanese Beef Rolls in an airtight container in the fridge for up to 2 days. To keep them as fresh as possible, avoid stacking them, as this can make the pancakes soggy. If you want to save them longer, wrap tightly in plastic wrap or aluminum foil and freeze for up to 3 months.

Can I freeze Taiwanese Beef Rolls? If so, how?
Yes, you can! To freeze Taiwanese Beef Rolls, first ensure they are completely cooled. Wrap them individually in plastic wrap and then place them in a freezer-safe bag or container. Make sure to remove as much air as possible before sealing. When ready to eat, thaw in the fridge overnight, then reheat in an oven at 350°F (175°C) for about 10-15 minutes to restore their crispy texture.

What should I do if my beef turns out tough or chewy?
Very good question! If your beef is tough, it might not have been braised long enough. Ensure you simmer it gently for at least 1 hour or until it’s fork-tender. If you’re ever in doubt, use a heavy pot to maintain even heat throughout the cooking process, which will help keep the meat juicy and tender.

Are there any dietary considerations with Taiwanese Beef Rolls?
Yes! If anyone in your household has allergies, particularly to soy or gluten, you can modify the sauces. Look for gluten-free soy sauce or tamari as a substitute, and replace hoisin sauce with a homemade blend of peanut butter, vinegar, and a touch of sweetness, if needed. As for pets, refrain from giving them anything with soy products or spices, as they can be harmful to animals.

Taiwanese Beef Rolls

Savory Taiwanese Beef Rolls: Crispy Pancakes to Savor

Savory Taiwanese Beef Rolls are filled with tender beef and fresh veggies, wrapped in crispy pancakes for a delightful bite.
Prep Time 30 minutes
Cook Time 1 hour
Cooling Time 2 hours
Total Time 3 hours 30 minutes
Servings: 4 rolls
Course: Dinner
Cuisine: Taiwanese
Calories: 350

Ingredients
  

For the Beef Filling
  • 1 lb Beef Shank or brisket for variation
  • 1 in Ginger fresh
  • 4 cups Water enough to cover the meat
  • 2 tbsp Rock Sugar or granulated sugar
  • 1 stick Cinnamon Stick use sparingly
  • 1 leaf Bay Leaf remove before serving
  • 1 star Star Anise optional
  • 1 tbsp Dried Tangerine Peel or fresh zest
  • 2 cloves Whole Cloves use sparingly
  • 1 tbsp Sichuan Peppercorns adjust for spice
  • 1 tbsp White or Black Peppercorns
  • 3 cloves Garlic smashed
For the Pancakes
  • 4 pancakes Scallion Pancakes store-bought or homemade
  • 2 tbsp Oil neutral for frying
For Assembly
  • 1 cup Cucumber julienned
  • 1/2 cup Fresh Scallions chopped
  • 1/4 cup Cilantro optional
  • 1/2 cup Hoisin Sauce

Equipment

  • pot
  • Stove
  • oven
  • Knife
  • Cutting Board

Method
 

Step-by-Step Instructions for Taiwanese Beef Rolls
  1. Begin by slicing the beef shank into 4-5 inch pieces. In a pot of boiling water, add the beef along with sliced ginger. Blanch for 30 seconds, then drain and rinse under cold water.
  2. Return the blanched beef to a clean pot and add water until submerged. Add rock sugar, spices, garlic, Shaoxing wine, light soy sauce, and dark soy sauce. Bring to boil, then simmer for 1 hour until fork-tender.
  3. Remove from heat and allow beef to cool at room temperature for about 30 minutes. Transfer to the refrigerator for at least 2 hours or overnight.
  4. Cook scallion pancakes according to package instructions until crispy and golden brown. Keep warm in a low oven.
  5. Thinly slice the chilled beef and prepare the cucumber and scallions. On each pancake, spread hoisin sauce, add scallions, beef, and cucumber. Layer vibrantly.
  6. Roll each pancake tightly, slice in half diagonally for presentation. Garnish with chopped scallions and cilantro if desired. Serve warm.

Notes

Chill the beef for cleaner cuts. Fry pancakes until golden for best texture. Customize fillings as desired.

Tropical Grouper with Spicy Coconut: A Quick Caribbean Twist

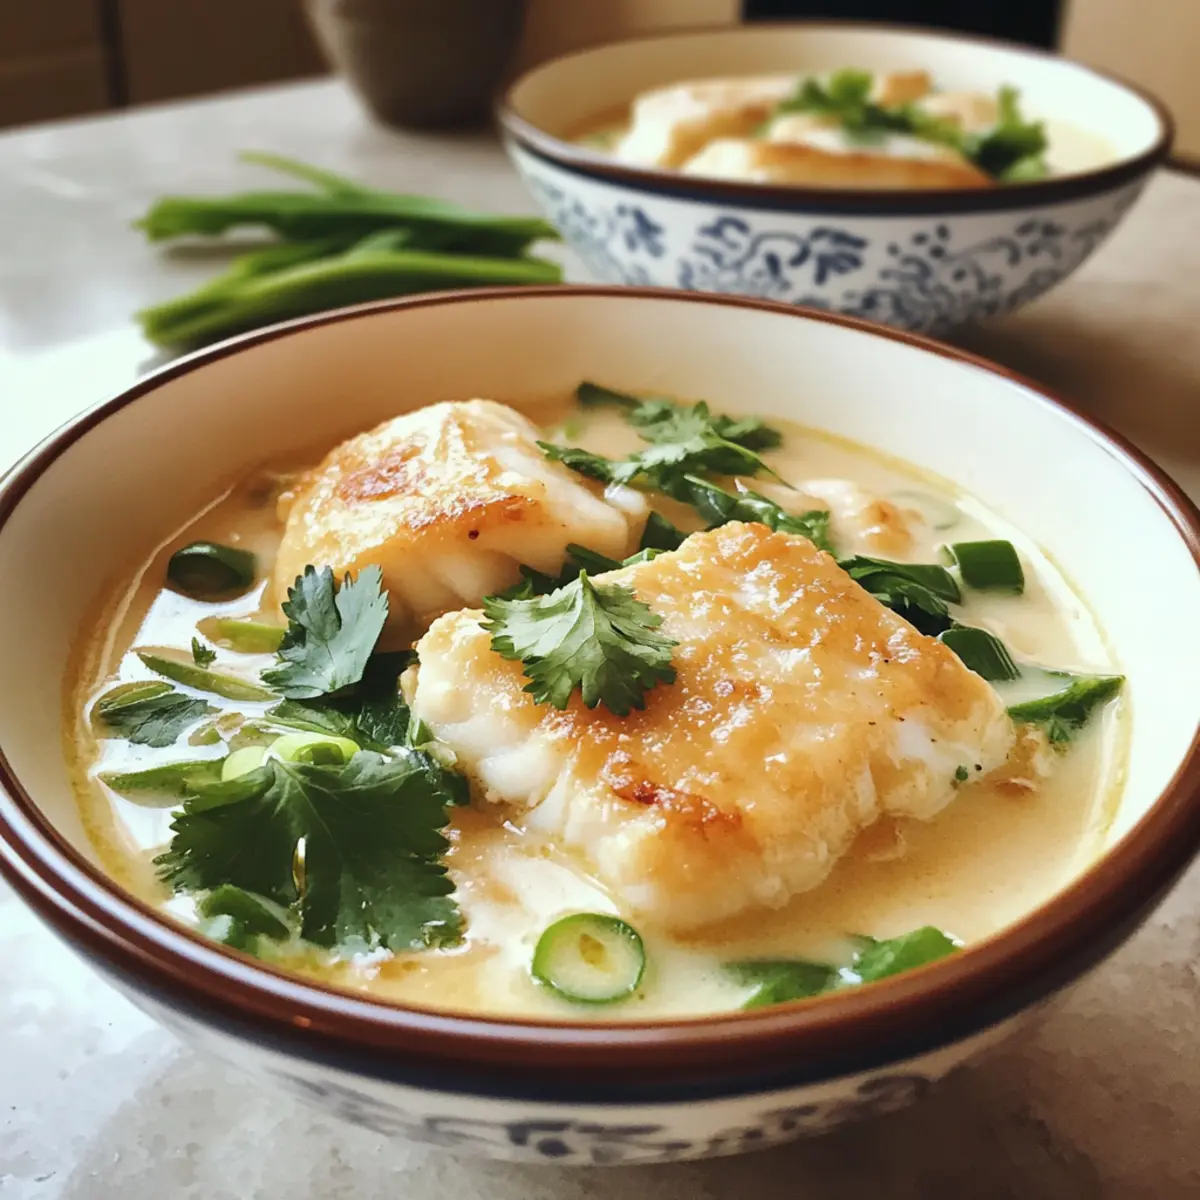
As I stood by the stove, the rich aroma of coconut and spices enveloped me like a warm hug, instantly transporting me to a sun-drenched Caribbean shore. This Tropical Grouper with Spicy Coconut recipe not only showcases the delightful flavors of the islands but is also incredibly quick to whip up, making it the perfect choice for busy weeknights. With its succulent grouper fillets swimming in a creamy coconut sauce with just the right amount of heat, you can elevate your dinners while impressing your guests. The best part? It’s entirely dairy-free, so everyone can indulge without a second thought. Are you ready to embark on this tropical culinary adventure? Let’s dive in!

Why is this Caribbean dish so special?

Simplicity at its finest: You’ll be amazed at how quickly this Tropical Grouper with Spicy Coconut comes together, perfect for both novice cooks and seasoned chefs alike!

Flavor explosion: The rich, creamy coconut sauce paired with the mild yet flaky grouper creates a heavenly combination that will transport your taste buds straight to the tropics.

Versatile recipe: Switch up your fish choice based on what’s fresh or your favorite—snapper or halibut work equally well.

Crowd-pleaser: Perfect for impressing guests or enjoying a cozy dinner at home, this dish is sure to elicit compliments at the dinner table.

Make-ahead option: Prepare the coconut sauce in advance for an even quicker meal; just reheat and serve over freshly cooked fish for a stress-free dinner.

It’s time to bring some Caribbean flair to your kitchen, and why not keep the tropical vibes going with a delightful side like Tropical Pineapple Soft or enjoy a zesty salad as a refreshing complement!

Tropical Grouper with Spicy Coconut Ingredients

For the Fish
Grouper fillets – Opt for fresh fillets for the best taste and texture.
Salt – Enhances the natural flavor; use sea salt for a touch of elegance.
Pepper – Adds a hint of warmth; adjust according to your taste preference.

For the Coconut Sauce
Coconut milk – This creates a rich base; ensure to shake well before measuring to combine the cream and liquid.
Chili (fresh or dried) – Provides the spice level you desire; feel free to remove the seeds for a milder flavor.
Vegetable oil (or preferred cooking oil) – Use for pan-frying the grouper; ensure it’s dairy-free to keep the dish friendly for all.

With these simple ingredients, you can embark on cooking your very own Tropical Grouper with Spicy Coconut! Get ready to enjoy a burst of Caribbean flavors right in your kitchen.

Step‑by‑Step Instructions for Tropical Grouper with Spicy Coconut

Step 1: Prepare the Coconut Sauce
In a medium skillet, heat a tablespoon of vegetable oil over medium heat. Once the oil is shimmering, add your chosen chili and sauté for about 1–2 minutes until fragrant. Pour in the creamy coconut milk and gently simmer for around 5 minutes, stirring occasionally, until the flavors meld beautifully and the sauce begins to thicken slightly.

Step 2: Season the Grouper
While the coconut sauce simmers, take your fresh grouper fillets and sprinkle them generously with salt and pepper on both sides. This simple seasoning is crucial, enhancing the natural flavors of the fish. Allow the seasoned fillets to rest for a few moments while you prepare to cook them, ensuring they absorb the flavorful seasoning.

Step 3: Cook the Grouper
In another skillet, heat 2 tablespoons of vegetable oil over medium-high heat until it shimmers. Carefully place the seasoned grouper fillets into the hot oil. Cook for about 3–4 minutes on each side until they develop a gorgeous golden crust and are firm to the touch, indicating they are cooked through. Use a spatula to flip the fillets gently to avoid breaking them apart.

Step 4: Serve and Enjoy
Once the grouper fillets are beautifully golden and cooked through, place them on serving plates. Spoon the luscious, spicy coconut sauce generously over the fillets, allowing the sauce to cascade around the edges. If you prefer a thicker sauce, simmer it for an additional minute before serving. This Tropical Grouper with Spicy Coconut is now ready to be enjoyed with your favorite sides.

Expert Tips for Tropical Grouper with Spicy Coconut

  • Choose Fresh Fish: Always opt for fresh grouper fillets to ensure the best flavor and texture; frozen fish can alter the dish’s quality.
  • Watch the Sauce: If your coconut sauce is too thin, simmer it on low heat for an extra minute to achieve the desired rich consistency.
  • Adjust Spice Levels: To tailor the heat to your preference, consider removing chili seeds or adding mild ingredients like bell peppers for a sweeter profile.
  • Don’t Rush the Cooking: Give the grouper fillets time to develop their golden crust, which enhances the overall flavor of your Tropical Grouper with Spicy Coconut.
  • Season Generously: Season both sides of the fish well with salt and pepper to amplify the grouper’s natural flavors and complement the coconut sauce.

How to Store and Freeze Tropical Grouper with Spicy Coconut

Fridge: Store any leftovers in an airtight container in the refrigerator for up to 3 days. Reheat gently on the stove to maintain flavor and texture.

Freezer: For longer storage, freeze the cooked grouper in a single layer, then transfer to a freezer-safe container for up to 3 months. Thaw in the fridge before reheating.

Coconut Sauce: The coconut sauce can be prepared ahead and kept in the fridge for up to 5 days. Reheat gently before serving with freshly cooked fish.

Reheating: When reheating, use low heat to avoid curdling the coconut milk, stirring frequently until warmed through. Enjoy your Tropical Grouper with Spicy Coconut anytime!

What to Serve with Tropical Grouper with Spicy Coconut

Elevate your dining experience by pairing this tropical delight with sides that harmonize its creamy richness.

  • Jasmine Rice: This fluffy rice is a classic companion, soaking up the delicious coconut sauce and adding a lightness to your meal.

  • Mixed Green Salad: A vibrant, refreshing salad filled with crunchy vegetables will cut through the richness of the sauce, offering a satisfying contrast.

  • Grilled Pineapple: The natural sweetness of grilled pineapple complements the spicy coconut, echoing tropical vibes and enhancing the overall flavor profile.

  • Black Bean Salad: Nutty black beans add texture and a hint of earthiness, making this salad a hearty and nutritious side that’s easy to prepare.

  • Roasted Veggies: Choose colorful seasonal vegetables roasted to perfection; their caramelized sweetness pairs beautifully with the dish’s spice.

  • Tropical Smoothie: For a refreshing beverage, sip on a fruity smoothie made with mango, pineapple, and coconut water to echo the tropical theme.

  • Mango Salsa: Bright and zesty, a fresh mango salsa enhances the grouper with a burst of flavor, adding an exciting pop of color to your plate.

  • Coconut Sorbet: Finish off your meal with a light, dairy-free coconut sorbet that’s as refreshing as a gentle ocean breeze, perfectly summing up your culinary journey.

Tropical Grouper with Spicy Coconut Variations

Feeling adventurous? Let your creativity shine as you customize this Tropical Grouper with Spicy Coconut recipe to suit your taste!

  • Different Fish: Swap out grouper for halibut or snapper for a delightful twist. Each brings its own flavor and texture, enhancing your dish’s personality!

  • Plant-Based Option: For a delightful vegan twist, substitute the fish with tofu or tempeh. Marinate these proteins in a bit of coconut milk for added depth.

  • Heat Level: Adjust the spice by using jalapeños for a bold flavor or bell peppers if you prefer a milder taste. Each option transforms the dish uniquely!

  • Herb Infusion: Add a burst of freshness by including cilantro or basil into the coconut sauce. Their aromatic notes elevate the tropical experience.

  • Creamy Avocado: Serve with sliced avocado on the side. Its buttery texture compliments the rich sauce and adds a satisfying contrast.

  • Coconut Rice: Pair your grouper with coconut rice for an extra indulgent experience that ties together the tropical theme beautifully.

  • Pineapple Salsa: Top your dish with a refreshing pineapple salsa for a fruity kick that perfectly balances the creamy flavors. It’s a sunny bite of paradise!

Whether you’re in the mood for something classic or ready to explore new flavors, these variations ensure your meal can always be a delightful adventure. And if you’re craving something refreshing on the side, you might enjoy the vibrant flavors of Tropical Pineapple Soft to complete your Caribbean feast!

Make Ahead Options

These Tropical Grouper with Spicy Coconut is ideal for meal prep, making your busy weeknights feel much less hectic! You can prepare the coconut sauce up to 3 days in advance; simply store it in an airtight container in the refrigerator to maintain its creamy texture. When you’re ready to serve, reheat the sauce gently over low heat while you cook the fresh grouper fillets, ensuring the dish is just as delicious as when you made it fresh. This way, you’ll enjoy perfect, tropical flavors without the rush, transforming weeknight dinners into a delightful culinary experience that feels special with minimal effort!

Tropical Grouper with Spicy Coconut Recipe FAQs

How do I choose fresh grouper fillets?
Absolutely! When selecting grouper fillets, look for those that have a mild scent of the sea, a firm texture, and a shiny appearance. Avoid fillets with dark spots or a dull surface, as these are signs of age. Fresh fish should also be free of any strong fishy smell; it should smell clean and ocean-like.

What’s the best way to store leftovers?
For sure! Store any leftovers of your Tropical Grouper with Spicy Coconut in an airtight container in the fridge for up to 3 days. It’s best to reheat gently on the stove or in the microwave to maintain the delicious flavors and texture. Just make sure to stir it a bit while reheating to prevent hot spots.

Can I freeze the cooked grouper?
Very much! To freeze your Tropical Grouper, allow it to cool completely. Place the cooked fillets in a single layer on a baking sheet until firm and then transfer them to a freezer-safe container or resealable bag. Your grouper can be stored for up to 3 months. When ready to eat, just thaw in the fridge overnight, then reheat gently on low heat.

What if my coconut sauce is too thin?
No problem! If you find your coconut sauce is too thin for your liking, simply simmer it over low heat for an additional minute or two. Stirring occasionally will help it thicken. You can also increase the heat slightly, but make sure to monitor it closely to avoid burning. A thicker consistency should make it more sumptuous over your grouper.

Are there dietary considerations I should be aware of?
Absolutely! This Tropical Grouper with Spicy Coconut is naturally dairy-free, making it a great choice for those with lactose intolerance. However, if you or your guests have shellfish allergies, please double-check all ingredients, especially any side dishes. Additionally, if you’re looking for a milder dish, feel free to skip the chili or use a bell pepper for flavor without the heat.

How long can I keep the coconut sauce in the fridge?
No worries! You can store the coconut sauce in the fridge for up to 5 days. Just be sure to keep it in an airtight container. When you’re ready to serve, gently reheat it on the stove, stirring frequently to avoid curdling the coconut milk. Enjoy the convenience of make-ahead sauce in your next meal!

Tropical Grouper with Spicy Coconut

Tropical Grouper with Spicy Coconut: A Quick Caribbean Twist

A quick and flavorful Tropical Grouper with Spicy Coconut recipe showcasing Caribbean flavors for busy weeknights.
Prep Time 10 minutes
Cook Time 15 minutes
Total Time 25 minutes
Servings: 4 servings
Course: Dinner
Cuisine: Caribbean
Calories: 300

Ingredients
  

For the Fish
  • 4 fillets Grouper Opt for fresh fillets for the best taste and texture.
  • 1 teaspoon Salt Enhances the natural flavor; use sea salt for a touch of elegance.
  • 1 teaspoon Pepper Adds a hint of warmth; adjust according to your taste preference.
For the Coconut Sauce
  • 1 cup Coconut milk Ensure to shake well before measuring to combine the cream and liquid.
  • 1 piece Chili Fresh or dried; provides the spice level you desire.
  • 2 tablespoons Vegetable oil Use for pan-frying the grouper; ensure it's dairy-free.

Equipment

  • Skillet
  • Stove

Method
 

Step-by-Step Instructions
  1. In a medium skillet, heat a tablespoon of vegetable oil over medium heat. Add your chosen chili and sauté for about 1–2 minutes until fragrant. Pour in the creamy coconut milk and gently simmer for around 5 minutes until the flavors meld beautifully.
  2. While the coconut sauce simmers, sprinkle your fresh grouper fillets generously with salt and pepper on both sides. Allow them to rest for a few moments to absorb the seasoning.
  3. In another skillet, heat 2 tablespoons of vegetable oil over medium-high heat. Carefully place the seasoned grouper fillets into the hot oil and cook for about 3–4 minutes on each side until they develop a golden crust.
  4. Once cooked, place the grouper fillets on serving plates and spoon the spicy coconut sauce generously over them, allowing it to cascade around the edges.

Notes

This recipe is perfect for impressing guests or enjoying a cozy dinner at home. Make ahead the coconut sauce for a quicker meal.

Cheddar Scallion English Muffin Bread That’ll Elevate Breakfast

The scent wafting through my kitchen brought me right back to those busy mornings filled with laughter and toast popping up from the toaster. Today, I’m excited to share my recipe for Cheddar Scallion English Muffin Bread—a delightful twist on your traditional breakfast staple. This savory loaf is a breeze to whip up, making it not only a fantastic choice for a cozy weekend baking project but also a perfect quick bread option for any weekday meal. With its crunchy crust and tender crumb, this bread creates irresistible nooks and crannies that are just begging to be slathered with butter or your favorite spread. Plus, you can easily mix in variations like buttermilk or different toppings, letting your creativity shine. Ready to dive into the delicious world of homemade bread? Let’s get started!

Why is This Bread a Must-Try?

Simplicity at Its Best: Effortlessly crafted, this Cheddar Scallion English Muffin Bread requires just a few ingredients and simple steps, perfect for home bakers of all skills.

Savory Richness: The blend of sharp cheddar and fresh scallions elevates each slice, offering a bold flavor profile that will impress breakfast guests and family alike.

Versatile Customization: Feel free to experiment with buttermilk substitutions or different cheeses like Gruyère; this recipe easily adapts to your taste preferences!

Perfectly Toastable: Those delightful nooks and crannies create a fantastic texture that’s ideal for toasting, making it a fantastic addition to any meal, breakfast or beyond.

Crowd-Pleasing Appeal: Whether served alongside soups or as a standalone treat, this bread promises to become a family favorite, just like my Homemade Bread Sunflower recipe!

Cheddar Scallion English Muffin Bread Ingredients

For the Batter

  • Coarse Yellow Cornmeal – Adds crunch and texture; substitute with fine cornmeal if needed.
  • Instant Yeast – Provides leavening; can substitute with active dry yeast but bloom it first in warm water.
  • Warm Water (110-115°F) – Activates the yeast; ensure it’s not too hot to avoid killing the yeast.
  • Granulated Sugar – Aids in yeast activation and adds slight sweetness; can be reduced or omitted if desired.
  • All-Purpose Flour – The base for structure; substitute with gluten-free flour for a gluten-free option.
  • Kosher Salt – Enhances flavor and regulates yeast activity; regular salt can be used but reduce the quantity slightly.
  • Fresh Cracked Black Pepper – Adds depth of flavor; omit for a milder taste.
  • Baking Soda – Works with buttermilk to add tenderness.
  • Chopped Scallions – Provides a fresh, onion-like flavor; leeks can be a substitute.
  • Grated Sharp Cheddar Cheese – Adds richness and flavor; swap with another cheese like Gruyère for variety.
  • Thick Buttermilk – Provides moisture and tang; mix yogurt with milk and vinegar as an alternative.
  • Vegetable Oil – Adds moisture; can be replaced with melted butter for added richness.

This Cheddar Scallion English Muffin Bread is a delightful twist on a classic favorite!

Step‑by‑Step Instructions for Cheddar Scallion English Muffin Bread

Step 1: Bloom the Yeast
In a small bowl, combine 1 cup of warm water (110-115°F) with 2 teaspoons of instant yeast and 1 tablespoon of granulated sugar. Stir lightly and let it sit for about 5-10 minutes, until the mixture appears frothy. This indicates that the yeast is activated and ready to help your Cheddar Scallion English Muffin Bread rise.

Step 2: Prepare the Pan
While waiting for the yeast to bloom, preheat your oven to 375°F. Grease a loaf pan with cooking spray or oil, then dust the bottom with coarse yellow cornmeal to give your bread a crunchy texture. This simple preparation will help create that ideal golden crust on your English muffin bread.

Step 3: Mix Dry Ingredients
In a large mixing bowl, whisk together 2 cups of all-purpose flour, 1 teaspoon of kosher salt, 1/2 teaspoon of baking soda, and 1/2 teaspoon of fresh cracked black pepper. Ensure the dry ingredients are well combined to distribute the salt and baking soda evenly throughout the batter, setting a flavorful foundation for your Cheddar Scallion English Muffin Bread.

Step 4: Add Flavors
Stir 1 cup of chopped scallions and 1 cup of grated sharp cheddar cheese into the dry ingredients. Mix until the cheese and scallions are evenly distributed throughout the flour mixture. This step infuses your bread with savory richness and vibrant flavors that will enhance every slice.

Step 5: Combine Wet Ingredients
Once the yeast mixture is frothy, add it to the dry ingredients along with 1 cup of thick buttermilk and 2 tablespoons of vegetable oil. Stir everything together until just combined, forming a shaggy dough. The moisture from the wet ingredients will bring the dry ingredients together, paving the way for a delicious Cheddar Scallion English Muffin Bread.

Step 6: Knead Dough
Transfer the dough to a floured surface or keep it in the mixing bowl, then knead with your hands or use a dough hook on low speed for 4-6 minutes. The dough should become soft, slightly wet, and elastic. If it feels too sticky, sprinkle a little extra flour as needed while maintaining its moisture—this consistency is key for your bread’s airy texture.

Step 7: Shape and Rest
Shape the dough into a loaf and place it into the prepared loaf pan. Sprinkle the top with a bit more cornmeal, cover it with a clean kitchen towel, and let it rise in a warm place for about 1 hour. The dough should double in size, creating those perfect nooks and crannies essential for an airy English muffin bread.

Step 8: Bake
After the dough has risen beautifully, place it in your preheated oven. Bake for 20-25 minutes, or until the top is golden brown and the bread sounds hollow when tapped. This step not only develops that delicious crust but also creates the delightful aroma of fresh Cheddar Scallion English Muffin Bread wafting through your kitchen.

Step 9: Cool
Once baked, remove the bread from the oven and let it cool in the pan for about 10 minutes. Using a knife, gently loosen the sides if necessary, then transfer the bread to a wire rack. Allow it to cool completely before slicing, as this will help maintain the loaf’s structure and texture, making each slice perfect for toasting.

Cheddar Scallion English Muffin Bread Variations

Feel free to get creative and customize your Cheddar Scallion English Muffin Bread to suit your taste preferences!

  • Plain Muffin Bread: Omit cheese and scallions for a classic English muffin bread that pairs well with any spread.

  • Spicy Twist: Substitute sharp cheddar with pepper jack cheese for a deliciously spicy version that packs a flavor punch. The heat complements the bread’s crunchy crust beautifully!

  • Herb Infusion: Mix in fresh herbs like dill or chives into the batter for an aromatic burst that enhances the savory profile, making each slice truly delightful.

  • Sourdough Base: Replace half the all-purpose flour with sourdough starter for a tangy twist. This swap adds depth and complexity to the flavor, creating a delightful experience.

  • Yogurt Alternative: Use a mix of yogurt with a splash of milk instead of buttermilk for a lighter and creamy texture that still keeps the moisture intact.

  • Cheese Swap: Try Gruyère or mozzarella instead of cheddar for a milder, creamier alternative that offers a different flavor experience. Each version brings its own unique charm to the table!

  • Add Veggies: Fold in finely diced bell peppers or spinach for added nutrition and a pop of color, transforming your bread into a veggie delight that everyone will love.

  • Berry Banana Bread: For a sweet twist, check out my Berry Banana Bread recipe! While it’s different from English muffin bread, it’s a delicious alternative when you’re in the mood for something sweet.

Get ready to enjoy this cozy bread with your custom touches, and watch how it becomes a new favorite in your baking repertoire!

What to Serve with Cheddar Scallion English Muffin Bread

Indulge in a delightful culinary experience by pairing your warm, savory bread with dishes that enhance its flavors and textures.

  • Creamy Tomato Soup: The vibrant tomato flavors complement the cheesy richness of the bread, making every bite feel comforting and hearty.

  • Garlic Herb Butter: Elevate your toast by spreading a luscious garlic herb butter on warm slices, adding a burst of savory aroma that’s irresistible.

  • Fresh Garden Salad: A crisp salad with mixed greens and a zesty vinaigrette provides a refreshing contrast to the hearty bread, balancing the meal perfectly.

  • Avocado Smash: The creaminess of ripe avocados paired with the bread’s crunch creates a delightful texture, ideal for brunch with friends.

  • Scrambled Eggs: Fluffy, buttery scrambled eggs bring a morning classic together, enhancing the savory flavor profile of the cheddar and scallions.

  • Crisp Bacon Strips: Pairing your English muffin bread with crunchy bacon provides a satisfying crunch, adding a salty kick that enhances the meal.

  • Fruity Jam: For a touch of sweetness, a dollop of your favorite fruit jam adds a delightful contrast, making it perfect for breakfast or afternoon snacks.

  • Sparkling Water or Mimosa: Refresh with a glass of sparkling water or a light mimosa, providing a bubbly, citrusy note that rounds out your delicious homemade feast.

Each of these pairings will create a memorable meal, highlighting the delightful characteristics of your Cheddar Scallion English Muffin Bread!

Expert Tips for Cheddar Scallion English Muffin Bread

  • Room Temp Buttermilk: Ensure your buttermilk is at room temperature; this helps activate the yeast and creates a better rise, resulting in a fluffier loaf.

  • Don’t Rush the Rise: Allow the dough to rise until it has doubled in size. Rushing this step can lead to a denser bread with fewer nooks and crannies.

  • Quality Ingredients Matter: Use fresh scallions and high-quality cheddar cheese. This will significantly enhance the flavor of your Cheddar Scallion English Muffin Bread.

  • Avoid Cutting Too Soon: Resist the urge to slice the bread until it has cooled completely; cutting too soon can cause it to lose its shape and moisture.

  • Knead with Care: Knead the dough just until it’s soft and slightly wet. Over-kneading can make the bread tough; you want it tender and airy!

Storage Tips for Cheddar Scallion English Muffin Bread

Room Temperature: Store the bread wrapped in plastic or in an airtight container for up to 3 days—this keeps it fresh and soft.

Freezer: For longer preservation, slice the Cheddar Scallion English Muffin Bread and freeze it in a freezer-safe bag for up to 3 months.

Reheating: Toast slices directly from the freezer or thaw in the fridge overnight before warming in the oven or toaster for a deliciously fresh taste.

Make Ahead Options

These Cheddar Scallion English Muffin Bread loaves are perfect for busy cooks looking to save time during the week! You can prepare the dough up to 24 hours in advance; just follow the instructions until the “Shape and Rest” step, then cover your loaf pan tightly and refrigerate. When you’re ready to bake, let it sit at room temperature for 30 minutes before popping it into the oven. For an even quicker option, you can bake the bread and store it in an airtight container at room temperature for up to 3 days. This way, you’ll have delicious homemade bread ready to toast and enjoy any time, just as tasty as when it was freshly baked!

Cheddar Scallion English Muffin Bread Recipe FAQs

What is the best way to select the scallions for this recipe?
Absolutely! Choose scallions that are bright green with firm, crisp stalks. Avoid any that are wilted or have dark spots, as these can affect the flavor and freshness of your Cheddar Scallion English Muffin Bread.

How should I store Cheddar Scallion English Muffin Bread?
For optimal freshness, wrap the bread in plastic wrap or store it in an airtight container at room temperature for up to 3 days. If you need to keep it longer, you can slice the bread and freeze it in a freezer-safe bag for up to 3 months.

Can I freeze this bread? If so, how?
Absolutely! To freeze your Cheddar Scallion English Muffin Bread, slice it once completely cooled. Place the slices in a single layer on a baking sheet and freeze until solid. Then, transfer the slices to a freezer-safe bag, removing as much air as possible. You can then toast slices directly from the freezer or thaw them in the fridge overnight.

What if my dough doesn’t rise?
Very! If your dough doesn’t rise, it may be due to inactive yeast or not enough warmth during the rising process. Ensure your warm water is at 110-115°F and that your yeast is fresh. If the dough is too dense, try placing it in a slightly warm area (like an oven set to its lowest temperature) to encourage rising.

Is this recipe suitable for someone with dietary restrictions?
Indeed! You can adjust this recipe to accommodate various dietary needs. For a gluten-free option, substitute the all-purpose flour with a gluten-free blend. If you’re avoiding dairy, you can use a dairy-free cheese alternative and mix yogurt with plant-based milk and vinegar in place of buttermilk. Always check ingredient labels for allergens!

What do I do if I don’t have buttermilk on hand?
No problem! If you don’t have buttermilk, you can easily make a substitute. Mix 1 cup of milk (dairy or non-dairy) with 1 tablespoon of vinegar or lemon juice. Let it sit for about 5-10 minutes until it thickens slightly. This quick alternative will work beautifully for your Cheddar Scallion English Muffin Bread!

Cheddar Scallion English Muffin Bread

Cheddar Scallion English Muffin Bread That'll Elevate Breakfast

A savory Cheddar Scallion English Muffin Bread recipe that's simple to make, perfect for breakfast.
Prep Time 15 minutes
Cook Time 25 minutes
Rising Time 1 hour
Total Time 1 hour 40 minutes
Servings: 12 slices
Course: Breakfast
Cuisine: American
Calories: 150

Ingredients
  

For the Batter
  • 1 cup Warm Water (110-115°F) Activates the yeast.
  • 2 teaspoons Instant Yeast Can substitute with active dry yeast.
  • 1 tablespoon Granulated Sugar Aids in yeast activation.
  • 2 cups All-Purpose Flour Base for structure.
  • 1 teaspoon Kosher Salt Enhances flavor.
  • 1/2 teaspoon Baking Soda Works with buttermilk.
  • 1/2 teaspoon Fresh Cracked Black Pepper Adds depth of flavor.
  • 1 cup Chopped Scallions Provides freshness.
  • 1 cup Grated Sharp Cheddar Cheese Adds richness.
  • 1 cup Thick Buttermilk Provides moisture.
  • 2 tablespoons Vegetable Oil Adds moisture.
  • 1/4 cup Coarse Yellow Cornmeal For dusting.

Equipment

  • Loaf pan
  • mixing bowl
  • whisk
  • kitchen towel
  • oven

Method
 

Step‑by‑Step Instructions
  1. In a small bowl, combine warm water with instant yeast and granulated sugar. Let it sit until frothy.
  2. Preheat your oven to 375°F and prepare a loaf pan with cooking spray and cornmeal.
  3. Whisk together all-purpose flour, kosher salt, baking soda, and cracked pepper in a mixing bowl.
  4. Stir in chopped scallions and grated cheddar cheese until evenly combined.
  5. Add the yeast mixture, buttermilk, and vegetable oil to the dry ingredients and mix until just combined.
  6. Knead the dough for 4-6 minutes until soft and elastic, adjusting flour as necessary.
  7. Shape the dough into a loaf, place in the prepared pan, cover with a towel, and let it rise until doubled in size.
  8. Bake for 20-25 minutes until golden brown and hollow-sounding when tapped.
  9. Cool in the pan for 10 minutes, then transfer to a wire rack to cool completely.

Notes

Use fresh ingredients for best flavor. Allow the bread to cool completely before slicing.

Vibrant Arroz Verde Recipe: Elevate Your Meal Game

There’s nothing like the vibrant hues of fresh ingredients to energize your cooking, and today we’re diving into the world of Arroz Verde, or Green Rice. This delicious dish, infused with the earthy warmth of poblano and jalapeño peppers and the bright notes of cilantro and parsley, will add that perfect splash of color to your dinner table. Not only is this Arroz Verde recipe a breeze to whip up, but it’s also a guilt-free, gluten-free delight that can transform any meal into a feast. Whether you’re looking for a healthy side dish to accompany your favorite protein or simply wanting to prep some meals in advance, this dish checks all the boxes. Ready to give your meals a flavorful upgrade? Let’s get cooking!

Why is Arroz Verde a Must-Try?

Vibrant Colors: This Arroz Verde is not just a feast for the taste buds; its stunning green hue will brighten up your plate.

Easy to Make: With straightforward steps, even novice cooks can impress their family and friends!

Healthy & Guilt-Free: Packed with fresh herbs and peppers, it’s a deliciously low-calorie addition to your meals.

Versatile Side Dish: Perfect alongside tacos, grilled chicken, or as a base for a burrito bowl, it accommodates any protein beautifully.

Meal Prep Friendly: Make a batch ahead of time and enjoy this delightful dish throughout the week while saving time in the kitchen!

Arroz Verde Ingredients

• Discover the fresh flavors of this Arroz Verde recipe!

For the Rice

  • Avocado Oil – Adds healthy fats and richness to the dish; substitute with olive oil or coconut oil if desired.
  • Lundberg Farms Long Grain White Rice – The base of the dish, providing a fluffy texture; use any long grain white rice if unavailable.

For the Peppers

  • Poblano Pepper – Contributes a mild, slightly smoky flavor; can substitute with green bell peppers for less spice.
  • Jalapeño Pepper – Adds a kick of heat; remove seeds for a milder flavor or use serrano pepper for more heat.

For Flavor

  • Chopped Onion – Provides savory depth; shallots can be used as a milder alternative.
  • Garlic – Enhances the overall flavor profile; fresh garlic is recommended, but garlic powder works in a pinch.

For Freshness

  • Cilantro – Offers brightness; swap with parsley for a different flavor or omit if preferred.
  • Parsley – Adds herbal notes; can substitute with extra cilantro or omit if desired.

For Cooking Liquid

  • Vegetable Broth – Infuses the rice with flavor; chicken broth can be used for a non-vegan option.

For Seasoning

  • Salt and Pepper – Essential for seasoning; adjust to taste.
  • Lime Juice – Adds acidity and brightness when serving; fresh lime is preferred for the best flavor.

Step‑by‑Step Instructions for Arroz Verde (Green Rice Recipe)

Step 1: Rinse the Rice
Begin by rinsing 1 cup of long grain white rice under cold water in a fine mesh sieve until the water runs clear. This crucial step removes excess starch, ensuring fluffy Arroz Verde. Allow the rice to drain thoroughly while you prepare the rest of the ingredients.

Step 2: Toast the Rice
In a large Dutch oven, heat 2 tablespoons of avocado oil over medium heat. Once the oil shimmers, add the drained rice and toast it, stirring occasionally, for about 10 minutes. You want the rice to become fragrant and slightly golden, creating a nutty base for your vibrant green rice dish.

Step 3: Blend the Herb Mixture
While the rice is toasting, prepare the flavorful herb mixture. In a blender, combine one chopped poblano pepper, one jalapeño pepper (seeds removed for less heat), one chopped onion, 2 cloves of garlic, and a handful each of cilantro and parsley. Pour in 3 cups of vegetable broth, reserving 1/4 cup. Blend until smooth for a uniformly vibrant mixture to give your Arroz Verde its fresh green hue.

Step 4: Combine Rice and Mixture
Once toasted, carefully pour the blended herb mixture over the rice in the Dutch oven, ensuring an even distribution. Add the reserved broth along with salt and pepper to taste, stirring well to combine all ingredients. This beautifully combines the flavors, prepping your Arroz Verde for cooking.

Step 5: Cook the Rice
Bring the entire mixture to a boil over medium-high heat. Once bubbling, reduce the heat to low and cover the pot with a tight-fitting lid. Allow the rice to cook undisturbed for 15-17 minutes, during which time it will absorb the vibrant flavors and moisture to ensure a perfect texture.

Step 6: Let it Rest
After the cooking time, turn off the heat but leave the pot covered for another 15 minutes. This resting period is essential for the rice to finish steaming, resulting in fluffy, perfectly cooked Arroz Verde that isn’t sticky or gummy.

Step 7: Fluff and Serve
Finally, use a fork to gently fluff the rice, breaking up any clumps and allowing steam to escape. Taste and adjust seasoning with more salt if desired. For an extra burst of freshness, drizzle with lime juice and garnish with additional cilantro before serving your delightful Arroz Verde alongside your favorite dishes.

Arroz Verde (Green Rice Recipe) Variations

Feel free to let your creativity shine as you customize this delightful dish to suit your taste!

  • Brown Rice: Use brown rice for a nuttier flavor and added fiber; just remember to adjust cooking times for perfect texture.
  • Herb Swaps: Try mixing in different herbs like fresh basil or mint for unique flavor twists that can brighten up your rice.
  • Texture Boost: Add cooked peas or sweet corn to enhance the texture and introduce a pleasant pop of sweetness that harmonizes beautifully with the rice.
  • Spice Level: If you like it hot, toss in a finely chopped serrano pepper along with the jalapeño for an extra kick that will thrill spice lovers!
  • Broth Variations: For a burst of flavor, try using a rich chicken broth to infuse non-vegan versions with deeper tastes, enhancing the dish’s overall depth.
  • Veggie Medley: Mix in other vegetables like diced bell peppers or zucchini for added nutrients and a pop of color that complements the green rice wonderfully.
  • Nutritional Yeast: For a cheesy flavor without dairy, sprinkle nutritional yeast on top just before serving; it brings an umami that elevates your Arroz Verde.
  • Lemon Zest: Brighten the dish with a hint of lemon zest instead of lime during serving; it’s a zesty surprise that pairs beautifully with the herbs!

As you explore these variations, don’t forget that more delicious ideas await in accompanying recipes like Sizzling Rice Wrapped creations for a wonderful culinary adventure!

What to Serve with Arroz Verde?

Elevate your dining experience by pairing Arroz Verde with a variety of delicious sides and drinks that complement its vibrant flavors.

  • Grilled Chicken: The smoky flavors of grilled chicken perfectly contrast with the fresh herbal notes in Arroz Verde, creating a balanced meal that’s satisfying.

  • Fish Tacos: Serve alongside flaky fish tacos topped with a tangy slaw for a delightful burst of textures and a nod to Mexican cuisine.

  • Black Beans: A hearty serving of black beans not only adds protein but also introduces rich, savory notes that enhance the dish’s freshness.

  • Guacamole: Creamy guacamole brings a deliciously irresistible texture and pairs beautifully with the spice of the Arroz Verde, making each bite delightful.

  • Roasted Veggies: The earthy sweetness of roasted vegetables like zucchini and bell peppers adds a lovely flavor contrast, rounding out your meal with a rainbow of colors that invites you to dig in.

  • Chilled Horchata: Enjoy a refreshing glass of horchata to cool down from the spiciness of your meal. Its cinnamon sweetness perfectly balances the flavors of Arroz Verde.

  • Churros with Chocolate Sauce: For dessert, indulge in crispy churros dipped in deep, rich chocolate sauce. It’s a sweet way to end a meal while reflecting the warmth of Mexican cuisine.

Expert Tips for Arroz Verde

  • Rinse Thoroughly: Rinsing the rice until the water runs clear is essential to prevent gummy Arroz Verde. This step washes away excess starch.
  • Do Not Stir: Avoid stirring the rice while it cooks; keeping the lid on ensures even cooking and retains moisture for fluffiness.
  • Control the Heat: If you prefer a milder dish, remove the seeds from the jalapeño and adjust pepper quantities according to your spice tolerance.
  • Blend Smoothly: Ensure the herb mixture is well-blended for consistent flavor throughout the rice; lumps can lead to uneven taste.
  • Resting Time: Allow the rice to rest covered after cooking; this is key to achieving fluffy, perfectly cooked Arroz Verde without excess moisture.

How to Store and Freeze Arroz Verde

Fridge: Keep your Arroz Verde in an airtight container for up to 4 days. Ensure it’s completely cooled before sealing to maintain freshness.

Freezer: For longer storage, freeze Arroz Verde in sealed freezer bags or containers for up to 3 months. Portion it out for easy meal prep!

Reheating: When ready to enjoy, reheat gently on the stove with a splash of vegetable broth to restore moisture. You’ll love that freshly-made flavor again!

Leftovers: This delicious Arroz Verde is perfect for meal prep; just remember to store properly to keep it as flavorful as the first serving.

Make Ahead Options

These Arroz Verde (Green Rice) are perfect for meal prep enthusiasts! You can prepare the herb mixture (poblano, jalapeño, onion, garlic, cilantro, parsley, and vegetable broth) up to 24 hours in advance; simply store it in an airtight container in the refrigerator. The rice can also be toasted a day ahead for convenient assembly. Just remember to refrigerate the herb mixture to maintain its vibrant color and flavor. When you’re ready to serve, combine everything according to the recipe instructions and allow it to cook fresh. This way, you’ll enjoy fluffy, flavorful Arroz Verde with minimal effort, making busy weeknights a breeze!

Arroz Verde (Green Rice) Recipe FAQs

How do I choose the right ripeness of peppers for Arroz Verde?
Absolutely! For the best Arroz Verde, select firm, vibrant poblano and jalapeño peppers without any dark spots or blemishes. A shiny exterior indicates freshness. If opting for the jalapeño, look for those that are slightly glossy and firm—this guarantees the perfect balance of heat.

How do I store leftover Arroz Verde?
Very! Allow your Arroz Verde to cool completely, then transfer it to an airtight container. It can safely be stored in the refrigerator for up to 4 days. Ensure the lid is tightly sealed to retain moisture and flavor. If you want to prepare ahead, consider making a larger batch!

Can I freeze Arroz Verde?
Absolutely! To freeze your Arroz Verde, cool it completely, then portion it out into freezer-safe bags or containers. Try to squeeze out as much air as possible before sealing to prevent freezer burn. It can be stored in the freezer for up to 3 months. When you’re ready to enjoy it again, simply reheat it gently in a pan with a splash of vegetable broth to retain its moisture and flavor.

What should I do if my rice turns out gummy?
This is an easy fix for future batches! Gummy rice typically results from excess starch; therefore, rinsing the rice until the water runs clear is essential. Also, remember not to stir the rice while cooking. This helps maintain the fluffiness you want for perfect Arroz Verde. For the next time, if you see it clumping together, fluff it gently with a fork once it’s done cooking.

Is Arroz Verde suitable for different diets?
Very! This Arroz Verde recipe is gluten-free and vegan, making it perfect for a variety of dietary needs. If you’re making this for someone with allergies, simply ensure that all ingredients are certified gluten-free, and feel free to adjust the peppers to cater to heat preferences. It’s a delightful option that can accompany a multitude of meals!

Arroz Verde (Green Rice Recipe)

Vibrant Arroz Verde Recipe: Elevate Your Meal Game

This Arroz Verde recipe brings together vibrant flavors and colors, making it a healthy and guilt-free addition to any meal.
Prep Time 10 minutes
Cook Time 30 minutes
Resting Time 15 minutes
Total Time 55 minutes
Servings: 6 servings
Course: Lunch
Cuisine: Mexican
Calories: 220

Ingredients
  

For the Rice
  • 2 tablespoons Avocado Oil Substitute with olive oil or coconut oil if desired.
  • 1 cup Lundberg Farms Long Grain White Rice Use any long grain white rice if unavailable.
For the Peppers
  • 1 Poblano Pepper Can substitute with green bell peppers for less spice.
  • 1 Jalapeño Pepper Remove seeds for a milder flavor or use serrano pepper for more heat.
For Flavor
  • 1 Chopped Onion Shallots can be used as a milder alternative.
  • 2 cloves Garlic Fresh garlic is recommended, but garlic powder works in a pinch.
For Freshness
  • 1 handful Cilantro Swap with parsley for a different flavor or omit if preferred.
  • 1 handful Parsley Can substitute with extra cilantro or omit if desired.
For Cooking Liquid
  • 3 cups Vegetable Broth Chicken broth can be used for a non-vegan option.
For Seasoning
  • Salt and Pepper Essential for seasoning; adjust to taste.
  • 1 tablespoon Lime Juice Fresh lime is preferred for the best flavor.

Equipment

  • Blender
  • Dutch oven
  • Fine Mesh Sieve

Method
 

Step-by-Step Instructions
  1. Rinse the rice under cold water in a fine mesh sieve until the water runs clear. Allow the rice to drain thoroughly.
  2. In a large Dutch oven, heat avocado oil over medium heat. Add the drained rice and toast it for about 10 minutes.
  3. Blend the poblano pepper, jalapeño pepper, onion, garlic, cilantro, parsley, and 3 cups of vegetable broth until smooth.
  4. Pour the blended herb mixture over the rice in the Dutch oven, add reserved broth, salt, and pepper, and stir well.
  5. Bring to a boil, then reduce to low heat and cover. Cook undisturbed for 15-17 minutes.
  6. After cooking, turn off the heat and let it rest covered for 15 minutes.
  7. Fluff the rice with a fork and drizzle with lime juice before serving.

Notes

Rinsing the rice thoroughly and avoiding stirring while cooking ensures fluffy Arroz Verde. Adjust peppers according to your spice preference.

Irresistible Carrot Cake Babka with Cardamom Cream Cheese Drizzle

As I pulled the warm Carrot Cake Babka from the oven, the air was filled with the comforting aromas of cinnamon and cardamom that instantly transported me to my grandmother’s kitchen during holiday gatherings. This indulgent dessert isn’t just a sweet treat; it’s a modern twist on a beloved classic, perfect for Rosh Hashanah or any celebration. Its fluffy, moist layers are enveloped in a spiced filling that captures the essence of traditional carrot cake, while the luscious cardamom cream cheese drizzle adds the perfect finishing touch. With just a bit of prep and some waiting time for the dough to rise, you can impress friends and family with a homemade dessert that’s both show-stopping and delightful. So, are you ready to discover how to create this stunning Carrot Cake Babka with Cardamom Cream Cheese Drizzle?

Why is this Carrot Cake Babka a must-try?

Unique Flavor Fusion: This recipe combines the beloved flavors of traditional carrot cake with the delightful twist of babka, making every bite a joyful surprise.
Aromatic Spice: Infused with warm cinnamon and cardamom, it elevates your dessert game and fills your kitchen with irresistible scents.
Impressive Presentation: Its braided design creates an eye-catching centerpiece, perfect for gatherings or holiday celebrations.
Time-Efficient: With minimal hands-on time, this indulgent treat requires only a bit of patience while the dough rises, ensuring you can spend time with loved ones.
Versatile Serving Options: Whether alongside a cup of coffee or as a star dessert at a holiday feast, it suits any occasion beautifully!
Cultural Connection: Each slice honors traditional Jewish flavors, making it a thoughtful choice for Rosh Hashanah celebrations while appealing to everyone.

Carrot Cake Babka Ingredients

This Carrot Cake Babka with Cardamom Cream Cheese Drizzle is made with everyday ingredients that come together to create a flavorful experience.

For the Dough

  • Active Dry Yeast – Essential for fluffiness; ensure freshness for optimal rise.
  • Warm Whole Milk – Adds moisture and richness; can be swapped for almond milk for a dairy-free version.
  • Granulated Sugar – Sweetens the dough and enhances browning; substitute coconut sugar for a healthier option.
  • All-Purpose Flour – Provides the structure; bread flour can be used for a slightly different texture.
  • Eggs – Acts as a binder and adds moisture; room-temperature eggs mix in better.
  • Kosher Salt – Elevates flavor; feel free to substitute with sea salt.
  • Unsalted Butter – Delivers rich flavor and tenderness; opt for dairy-free butter if needed.

For the Filling

  • Carrots, Shredded – Adds natural sweetness and moisture; make sure to thoroughly dry them after shredding.
  • Brown Sugar – Provides depth of flavor and moisture in the filling.
  • All-Purpose Flour (for filling) – Helps thicken and bind the filling.
  • Ground Cinnamon, Ginger, Nutmeg, Cloves, Cardamom – This warm spice blend enhances the overall flavor profile.
  • Chopped Toasted Walnuts – Adds delightful crunch and flavor; can replace with pecans or omit for a nut-free option.

For the Drizzle

  • Cream Cheese – Forms the creamy base for the drizzle, creating a smooth texture.
  • Powdered Sugar – Sweetens and thickens the drizzle to achieve the perfect consistency.
  • Milk (for drizzle) – Helps adjust the drizzle to your desired pouring consistency.

This delightful carrot cake babka is not just a dessert; it’s a loving tribute to tradition that will resonate with anyone at your table.

Step‑by‑Step Instructions for Carrot Cake Babka with Cardamom Cream Cheese Drizzle

Step 1: Make Dough
In a mixing bowl, combine 2 tablespoons of active dry yeast with 1 cup of warm whole milk and 2 tablespoons of granulated sugar. Let it sit for about 5–10 minutes until foamy. Gradually mix in 4 cups of all-purpose flour, 2 eggs, 1 teaspoon of kosher salt, and ½ cup of unsalted butter until the mixture is smooth and cohesive.

Step 2: First Rise
Lightly oil a large bowl and place the dough inside, covering it with a damp cloth. Allow it to rise at room temperature for 1.5–2 hours or refrigerate overnight for a slow rise of 12–24 hours. You’ll know it’s ready when the dough has doubled in size and feels light and airy to the touch.

Step 3: Prepare Filling
While the dough rises, prepare the filling. Pulse 2 cups of shredded carrots in a food processor until finely chopped, then squeeze out excess moisture with a clean kitchen towel. In a bowl, mix the carrots with ½ cup of brown sugar, 1 tablespoon of all-purpose flour, and 1 teaspoon each of cinnamon, ginger, nutmeg, cloves, and cardamom until well combined.

Step 4: Roll Dough
Once the dough has risen, punch it down and divide it into two equal pieces. Roll out one piece into a rectangle approximately 12×18 inches. Spread half of the carrot filling over the dough, then sprinkle with ½ cup of chopped toasted walnuts. Roll the dough tightly into a log, pinch the edges, and repeat with the second piece of dough.

Step 5: Shape Babka
Cut each log in half lengthwise, exposing the filling layers. Twist the two halves together, then place the twisted dough into a greased loaf pan. Cover with a cloth and let it rise for about 1 hour until puffy and nearly doubled.

Step 6: Bake
Preheat your oven to 350°F (175°C). Brush the tops of the babka loaves with an egg wash (1 beaten egg) for a beautiful glaze. Bake for 40–50 minutes until golden brown, and a toothpick inserted in the center comes out clean; internal temperature should reach 190°F (88°C).

Step 7: Make Drizzle
While the babka cools, prepare the cardamom cream cheese drizzle. In a bowl, blend 4 ounces of cream cheese, 2 tablespoons of unsalted butter, and 1 cup of powdered sugar. Add milk gradually until you reach your desired drizzle consistency.

Step 8: Cool and Drizzle
Allow the babkas to cool in the pans for 10 minutes, then transfer them to a wire rack to cool completely. Once cool, generously drizzle the cardamom cream cheese mixture over the babkas, allowing it to cascade over the tops for a delightful finish.

How to Store and Freeze Carrot Cake Babka

Room Temperature: Keep unglazed babkas in an airtight container at room temperature for up to 3 days; they are best enjoyed fresh.

Fridge: If you want to extend freshness, refrigerate the babka in a wrapped container for up to a week. Just note the texture may slightly change.

Freezer: To freeze, wrap the cooled babka tightly in plastic wrap and then foil, keeping it for up to 3 months. Thaw overnight in the fridge before enjoying.

Reheating: For a delightful experience, reheat slices in the microwave or oven to restore some warmth and softness, while maintaining the flavors of this Carrot Cake Babka with Cardamom Cream Cheese Drizzle.

What to Serve with Carrot Cake Babka with Cardamom Cream Cheese Drizzle

Elevate your dining experience by pairing this luscious babka with delightful sides that harmonize its warm spices and creamy finish.

  • Fresh Berries: The tartness of strawberries or raspberries adds a refreshing contrast to the sweetness of the babka, brightening every bite.
  • Whipped Cream: Light and airy, this classic accompaniment complements the rich cream cheese drizzle while adding a lovely texture.
  • Hot Tea: A fragrant cup of chai or herbal tea creates a soothing moment, enhancing the warm spices and inviting aromas from the babka.
  • Ice Cream: A scoop of vanilla bean or caramel ice cream introduces a creamy coldness that beautifully balances the warm dessert, creating a delightful contrast.
  • Nutty Granola: Sprinkle some homemade or store-bought granola for a satisfying crunch that pairs well with the soft babka and adds another layer of flavor.
  • Fruit Compote: A homemade apple or pear compote drizzled on top provides a sweet and fruity layer that enhances the spiced flavors in each slice.

Carrot Cake Babka Variations & Substitutions

Feel free to get creative and make this Carrot Cake Babka your own – there are so many delicious possibilities!

  • Nut-Free: Omit walnuts and replace with seeds like sunflower or pumpkin for a delightful crunch without the nuts.
  • Dairy-Free: Substitute both the cream cheese and butter with coconut cream or vegan butter to keep it indulgent and dairy-free.
  • Spice Up: Swap the cardamom for pumpkin spice to add a unique twist, while still capturing that cozy autumn vibe.
  • Sweeten the Deal: Use mashed bananas or unsweetened applesauce in place of some granulated sugar for a naturally sweetened filling. This can amplify the flavor and moisture beautifully.
  • Try Chocolate: Incorporate mini chocolate chips into the filling for an irresistible chocolate-caramel fusion with rich, spiced flavors. Picture it – every slice bursting with sweet surprise!
  • Fruit Additions: Fold in some raisins or dried cranberries for a fruity contrast that brings a delightful chewiness. You might even find this twist makes your babka sing!
  • Glaze Upgrade: Drizzle with melted dark chocolate instead of cream cheese for a decadent finish that chocolate lovers will adore.
  • Festive Shape: Instead of a loaf, form your babka into a wreath for added festivity, perfect for holiday gatherings, or use a bundt pan for a show-stopping effect when serving.

As you explore these variations, remember you can enjoy this indulgence at your holiday gatherings, just like when we gather around for comforting slices of moist cake. Don’t forget, you can also pair your slice of deliciousness with a warm cup of tea or coffee for a perfect treat any time!

Expert Tips for Carrot Cake Babka

  • Fresh Yeast Check: Ensure your active dry yeast is fresh by observing for foaming. Old yeast can lead to dense babkas.
  • Moisture Management: Properly dry your shredded carrots to avoid sogginess in the filling. Use a clean towel to squeeze out excess moisture.
  • Kneading Consistency: If your dough feels too sticky, gradually add more flour until it’s smooth and elastic. This will help achieve that perfect texture.
  • Cool Before Drizzling: Allow your babkas to cool completely before adding the cardamom cream cheese drizzle. This prevents the glaze from melting and ensures a beautiful finish.
  • Storage Suggestions: Store any leftovers at room temperature for up to three days. Enjoy fresh for the best flavor from this Carrot Cake Babka with Cardamom Cream Cheese Drizzle.

Make Ahead Options

These Carrot Cake Babkas with Cardamom Cream Cheese Drizzle are perfect for busy home cooks looking to save time during the hustle and bustle of festive gatherings! You can prepare the dough up to 24 hours in advance by letting it rise in the refrigerator, which also enhances its flavor. The filling can be made a day ahead as well; just store it in an airtight container in the fridge to keep it fresh. When you’re ready to bake, shape the babkas and allow them to rise for about 1 hour before baking them. This way, you’ll have freshly baked babkas that are just as delicious, yet less stressful to create on the day of your celebration!

Carrot Cake Babka with Cardamom Cream Cheese Drizzle Recipe FAQs

What should I look for when selecting carrots for the filling?
Choose fresh, firm carrots that have a vibrant orange color and no dark spots or blemishes. The fresher they are, the sweeter they’ll taste in your Carrot Cake Babka with Cardamom Cream Cheese Drizzle!

How should I store leftover Carrot Cake Babka?
Store unglazed babkas at room temperature in an airtight container for up to 3 days for optimal freshness. If you have leftovers, refrigerate them for up to a week; however, be aware that the texture may change slightly.

Can I freeze the Carrot Cake Babka?
Absolutely! Once the babka has cooled, wrap it tightly in plastic wrap and then in foil to prevent freezer burn. You can freeze it for up to 3 months. To enjoy, simply thaw it overnight in the fridge and warm it up before serving!

What can I do if my babka dough isn’t rising?
If your dough isn’t rising, it might be due to inactive yeast. To check, ensure your yeast is fresh. If the yeast didn’t foam during the initial step, the milk may have been too hot or too cold. For best results, use milk around 110°F, and ensure you’re in a warm environment for rising.

Can I make any substitutions for dietary restrictions?
Yes! You can swap whole milk for almond milk for a dairy-free option and use dairy-free butter instead of unsalted butter. If you need a nut-free version, skip the walnuts or replace them with sunflower seeds. Always check ingredient labels for allergens if cooking for someone with food sensitivities.

Carrot Cake Babka with Cardamom Cream Cheese Drizzle

Irresistible Carrot Cake Babka with Cardamom Cream Cheese Drizzle

This Carrot Cake Babka with Cardamom Cream Cheese Drizzle combines beloved flavors of carrot cake in a modern twist, perfect for celebrations.
Prep Time 30 minutes
Cook Time 45 minutes
Rising Time 2 hours
Total Time 3 hours 15 minutes
Servings: 12 slices
Course: Dessert
Cuisine: Jewish
Calories: 290

Ingredients
  

Dough Ingredients
  • 2 tablespoons Active Dry Yeast Ensure freshness for optimal rise.
  • 1 cup Warm Whole Milk Can be swapped for almond milk for dairy-free.
  • 2 tablespoons Granulated Sugar Substitute coconut sugar for a healthier option.
  • 4 cups All-Purpose Flour Bread flour can be used for a slightly different texture.
  • 2 Eggs Room-temperature eggs mix in better.
  • 1 teaspoon Kosher Salt Substitute with sea salt if preferred.
  • ½ cup Unsalted Butter Opt for dairy-free butter if needed.
Filling Ingredients
  • 2 cups Carrots, Shredded Thoroughly dry them after shredding.
  • ½ cup Brown Sugar Provides depth of flavor.
  • 1 tablespoon All-Purpose Flour (for filling) Helps thicken and bind the filling.
  • 1 teaspoon Ground Cinnamon Warm spice blend enhances flavor.
  • 1 teaspoon Ground Ginger
  • 1 teaspoon Ground Nutmeg
  • 1 teaspoon Ground Cloves
  • 1 teaspoon Ground Cardamom
  • ½ cup Chopped Toasted Walnuts Can replace with pecans or omit for nut-free.
Drizzle Ingredients
  • 4 ounces Cream Cheese Forms the creamy base for the drizzle.
  • 1 cup Powdered Sugar Sweetens and thickens the drizzle.
  • Milk Milk (for drizzle) Adjust for desired consistency.

Equipment

  • mixing bowl
  • Food Processor
  • Loaf pan
  • Wire rack

Method
 

Dough Preparation
  1. Combine yeast, warm milk, and granulated sugar in a mixing bowl. Let it sit for 5–10 minutes until foamy.
  2. Gradually mix in flour, eggs, salt, and butter until smooth and cohesive.
Rising
  1. Oil a large bowl, place the dough inside, and cover with a damp cloth. Let it rise for 1.5–2 hours.
  2. Alternatively, refrigerate overnight for a slow rise of 12–24 hours.
Filling Preparation
  1. Pulse shredded carrots in a food processor until finely chopped, then squeeze out excess moisture.
  2. Mix carrots with brown sugar, flour, and spices until well combined.
Rolling and Shaping
  1. Punch down the risen dough and divide it into two equal pieces. Roll out one piece into a rectangle.
  2. Spread half of the filling over the dough and sprinkle with walnuts. Roll tightly into a log.
  3. Cut each log in half lengthwise and twist the halves together.
  4. Place the twisted dough in a greased loaf pan and let rise for about 1 hour.
Baking
  1. Preheat the oven to 350°F (175°C). Brush tops with egg wash and bake for 40–50 minutes.
  2. Check for doneness with a toothpick; internal temperature should reach 190°F (88°C).
Making the Drizzle
  1. Blend cream cheese, butter, and powdered sugar in a bowl. Add milk gradually until desired consistency.
Finishing Touch
  1. Allow babkas to cool in pans for 10 minutes, then transfer to a wire rack to cool completely.
  2. Drizzle the cream cheese mixture generously over the babkas.

Notes

Store leftovers at room temperature for up to 3 days, or refrigerate for up to a week. Reheat slices for best flavor.

Cheddar Chive Waffles with Sausage Gravy for Cozy Mornings

A savory breakfast transformation awaits you with every golden bite of these Cheddar Chive Waffles topped with Rosemary Sausage Gravy. The delightful crunch paired with the wholesome richness of the herb-infused gravy creates a breakfast experience that tantalizes the taste buds. Not only is this recipe a quick prep option for busy mornings, but it also makes an irresistible crowd-pleaser for weekend brunches. Plus, who wouldn’t appreciate having extra waffles stashed in the freezer for those days when cooking feels like a mini crisis? As you dive into preparing these waffles, you’ll discover a whole world of savory possibilities, too—just imagine experimenting with more topping options or cheese variations! So, what flavors will you choose to elevate your waffle game?

Why are these waffles a breakfast game-changer?

Simplicity at its finest: These Cheddar Chive Waffles come together quickly, perfect for busy mornings or a satisfying brunch spread. Savory and satisfying: The delightful combination of cheese and chives creates a flavor explosion that’s sure to awaken your palate. Freezer-friendly: Make a double batch and stash some for effortless breakfasts throughout the week. Versatile toppings: Pair with various gravies, from the classic rosemary sausage to a lighter mushroom sauce—endless possibilities await! Crowd-pleaser: Whether you’re serving family or entertaining friends, these waffles are destined to impress.

Cheddar Chive Waffles Ingredients

• Discover the delicious components that make these waffles shine!

For the Waffles

  • All-Purpose Flour – Provides structure; easily replace it with a gluten-free flour blend to cater to dietary needs.
  • Kosher Salt – Enhances flavor; adjust according to your taste preferences for the perfect savory note.
  • Baking Powder – Acts as a leavening agent; make sure it’s fresh to ensure maximum fluffiness in your waffles.
  • Milk – Adds moisture; switch this out for any non-dairy alternative if needed.
  • Eggs – Essential for binding and moisture; for a vegan option, use flax eggs as a great substitute.
  • Butter (melted) – Infuses richness and flavor into the batter; can be replaced with oil for a dairy-free version.
  • Sharp Cheddar (grated) – Introduces a wonderful depth of flavor and texture; feel free to substitute with another hard cheese.
  • Fresh Chives (minced) – Brings freshness and flavor to the dish; scallions or other herbs work well as alternatives.

For the Rosemary Sausage Gravy

  • Ground Sausage – Adds heartiness; choose a spiced variety for extra flavor.
  • Rosemary (fresh or dried) – Infuses the gravy with aromatic notes; it pairs perfectly with the cheddar chive waffles.
  • Onion (finely chopped) – Enhances the gravy’s savory flavor; sauté until translucent for the best taste.
  • Flour – Thickens the gravy; use the same type as for the waffles or a gluten-free alternative.
  • Milk or Cream – Creates a rich, creamy texture; adjust depending on desired thickness.
  • Black Pepper – Adds a bit of heat; sprinkle generously for an extra kick in flavor.

These Cheddar Chive Waffles with Sausage Gravy offer a delectable twist on breakfast that you’ll want to keep making!

Step‑by‑Step Instructions for Cheddar Chive Waffles with Sausage Gravy

Step 1: Preheat Your Waffle Iron
Start by preheating your waffle iron to the manufacturer’s recommended setting, typically around medium-high heat. This allows the Cheddar Chive Waffles to achieve that coveted crispy exterior while remaining fluffy inside. A hot waffle iron ensures even cooking and perfect browning, resulting in mouthwatering waffles that are ready to be topped with the savory sausage gravy.

Step 2: Combine Dry Ingredients
In a large mixing bowl, whisk together 1½ cups of all-purpose flour, 1 teaspoon of kosher salt, and 1 tablespoon of baking powder until well combined. This mixture forms the base of your waffles. It’s crucial to ensure your baking powder is fresh for maximum fluffiness. The goal here is to create a uniform dry mixture that will give your Cheddar Chive Waffles their delightful texture.

Step 3: Mix Wet Ingredients
In another bowl, whisk together 1¾ cups of milk and 2 large eggs until fully combined. The mixture should be smooth, with both ingredients well incorporated. This step is essential as it adds moisture and binds the ingredients together, ensuring your waffles are light and airy. Once mixed, pour this wet mixture into the bowl of dry ingredients, seamlessly blending them together to create the batter.

Step 4: Incorporate Melted Butter
Melt 4 tablespoons of butter and let it cool slightly before adding it to the batter. Slowly stir the melted butter into the waffle batter until everything is just combined. It’s important not to overmix at this stage, as that could lead to dense waffles. The butter adds richness and flavor, making your Cheddar Chive Waffles even more irresistible.

Step 5: Fold in Cheese and Chives
Gently fold in 1 cup of grated sharp cheddar cheese and ⅓ cup of minced fresh chives into the batter. Use a spatula to combine, ensuring the cheese and chives are evenly distributed without overmixing. This adds bursts of flavor with every bite of your waffles. The combination of cheddar and chives elevates this dish, adding savory elements that complement the sausage gravy perfectly.

Step 6: Cook the Waffles
Carefully pour the batter onto the preheated waffle iron, filling it about three-quarters full to allow for rising. Cook the waffles for approximately 5-7 minutes, or until they are golden brown and crispy. Depending on your waffle iron, you might see steam escaping as they cook—this is a great sign! Once done, remove them carefully and set them aside while you prepare the sausage gravy.

Step 7: Prepare the Sausage Gravy
In a skillet, add 1 pound of ground sausage over medium heat. Cook for about 6-8 minutes, breaking it apart with a spatula until it’s browned and fully cooked. Stir in ¼ cup of finely chopped onion and continue cooking until the onion is soft and translucent, about 3-4 minutes. This flavorful base brings a homemade touch to your delicious Cheddar Chive Waffles.

Step 8: Thicken the Gravy
Once the sausage and onion are cooked, sprinkle in ¼ cup of all-purpose flour, stirring to create a roux. Gradually pour in 2 cups of milk or cream, whisking continuously until the gravy thickens, which should take about 5 minutes. Make sure there are no lumps remaining, and season with freshly ground black pepper to taste. This creamy gravy, rich with herbs, adds the perfect finish to your savory waffles.

Step 9: Serve and Enjoy
Stack your warm Cheddar Chive Waffles on a plate and generously ladle the rosemary sausage gravy over the top. You can garnish with additional chives for a fresh touch. Serving them hot ensures the waffles remain crispy, while the gravy adds a comforting richness. Dive into this delightful breakfast treat, and savor each mouthwatering bite!

Storage Tips for Cheddar Chive Waffles

  • Room Temperature: Allow the waffles to cool completely before storing them at room temperature in an airtight container for up to 2 days. This helps maintain their texture without getting soggy.

  • Fridge: Store the Cheddar Chive Waffles in an airtight container in the fridge for up to 3 days. Reheat in a toaster or microwave to restore their crispiness before serving.

  • Freezer: Freeze the waffles in a single layer on a baking sheet first, then transfer to a freezer bag for up to 2 months. This keeps them from sticking together for easy meal prep.

  • Reheating: To reheat from frozen, pop the Cheddar Chive Waffles directly into the toaster or oven until heated through and crispy, making for a quick breakfast or snack.

What to Serve With Cheddar Chive Waffles with Sausage Gravy

These comforting waffles deserve a delightful spread of sides and drinks to create a truly memorable dining experience.

  • Crispy Bacon: The salty crunch of bacon pairs perfectly with the savory waffles, bringing a familiar, satisfying flavor contrast. Whether you choose classic or applewood smoked, it adds a delicious touch.

  • Fresh Fruit Salad: A colorful medley of seasonal fruits brings a refreshing brightness to the table. The natural sweetness complements the savory elements beautifully, balancing each savory bite.

  • Soft Scrambled Eggs: Light and fluffy scrambled eggs are a great addition, providing a gentle creaminess that marries well with the cheddar flavor of the waffles. Add a sprinkle of chives for a lovely touch!

  • Spicy Roasted Potatoes: Crispy potatoes seasoned with a hint of spice offer a delightful crunch alongside the waffles. Their hearty texture adds an extra layer of satisfaction to your breakfast spread.

  • Maple Syrup: Drizzling a touch of maple syrup over the waffle creates an indulgent experience with a sweet-and-savory combination. Just imagine that first bite!

  • Herbed Yogurt Dip: A cool, herbed yogurt dip made with Greek yogurt, garlic, and fresh herbs serves as a refreshing contrast, enhancing the overall flavor experience of the savory dish.

  • Iced Herbal Tea: A lightly sweetened iced herbal tea brings a refreshing drink option that pairs well with the rich flavors of the waffles. A splash of lemon adds a bright note to this soothing beverage.

  • Coffee or Espresso: Starting your day with a hot cup of coffee or rich espresso beautifully complements the savory notes of your breakfast. The warmth and aroma will bring everything together!

Make Ahead Options

These Cheddar Chive Waffles with Sausage Gravy are perfect for meal prep enthusiasts! You can mix the batter and refrigerate it for up to 24 hours in advance, which prevents the waffles from becoming soggy. Additionally, prepare the rosemary sausage gravy ahead of time and store it in an airtight container in the fridge for up to 3 days—just reheat in a saucepan when ready to serve. To keep the waffles fresh, consider freezing them after cooking; they maintain their quality beautifully and can be reheated in a toaster or microwave. When you’re ready to enjoy this satisfying breakfast, simply heat the waffles, warm the gravy, and savor a delicious meal with minimal effort!

Cheddar Chive Waffles Variations

Feel free to explore exciting new flavors and textures with these variations! Your breakfast will never be boring again!

  • Gluten-Free: Use a mixture of 1 1/3 cups brown rice flour, 2/3 cup tapioca starch, and 1/4 cup potato starch for a fabulous gluten-free waffle experience.

  • Spice It Up: Replace some or all of the cheddar with pepper jack cheese for a delightful kick that adds a whole new dimension to your waffles.

  • Herb Garden: Experiment with different herbs like fresh dill or parsley to give each bite a refreshing twist; the unique flavors will brighten your meal.

  • Savory Combo: Try adding cooked, crumbled bacon or sausage directly into the waffle batter for an extra meaty bite—a true breakfast classic reimagined!

  • Mushroom Gravy: Instead of the traditional sausage gravy, drizzle your waffles with rich mushroom gravy for an earthy, satisfying variation that pairs beautifully.

  • Egg-topped: For a truly indulgent experience, serve your waffles with a perfectly cooked poached or fried egg on top; the runny yolk adds a sumptuous creaminess.

  • Pesto Infusion: Add a tablespoon of pesto to the batter for a burst of flavor; this Italian twist gives your waffles a delightful herbaceous note.

  • Veggie Surprise: Incorporate finely chopped spinach or roasted red peppers into the batter for added nutrition and flavor; these also bring a lovely burst of color to your plate.

With so many choices, you can keep your family excited about breakfast! For a delightful weekend brunch, consider pairing these savory waffles with a refreshing Cucumber-Carrot Salad or some Zucchini Pancakes. Enjoy your culinary adventures!

Expert Tips for Cheddar Chive Waffles

  • Preheat Perfectly: Ensure your waffle iron is fully heated before adding the batter. This step helps achieve that crispy exterior, making your Cheddar Chive Waffles delightful every time.
  • Avoid Overmixing: Gently fold the ingredients; overmixing can result in dense waffling. Aim for a light, airy batter for the best texture!
  • Freezer Magic: Prepare extra waffles and freeze them in a single layer before storing in a bag. This way, they keep their texture and can be quickly reheated for busy mornings.
  • Cheese Variations: Feel free to swap out sharp cheddar for other cheeses like gouda, which adds a unique flavor twist to your savory waffles.
  • Homemade Gravy Boost: For additional depth, consider adding a pinch of cayenne pepper or garlic powder to the sausage gravy; it elevates the flavor profile beautifully without overpowering it.

Cheddar Chive Waffles with Sausage Gravy Recipe FAQs

What type of cheese works best for these waffles?
Absolutely! Sharp cheddar is a standout, but feel free to experiment with other hard cheeses like gouda or pepper jack for a unique twist. The key is choosing a cheese that melts well and complements the savory flavors of the chives and sausage gravy.

How do I store leftover Cheddar Chive Waffles?
To keep your waffles fresh, allow them to cool completely before storing. You can keep them at room temperature in an airtight container for up to 2 days, or in the fridge for up to 3 days. Just reheat in a toaster or microwave to restore that delightful crispiness before serving!

Can I freeze Cheddar Chive Waffles? How?
Absolutely! To freeze, first place the cooked waffles in a single layer on a baking sheet and freeze until solid. Then, transfer them to a freezer bag and store for up to 2 months. When you’re ready to enjoy, simply pop them in the toaster or oven until heated through and crispy again.

What should I do if my batter is too thick?
If your waffle batter is thicker than expected, don’t worry! Just add a splash of milk, stirring gently until you achieve the desired consistency. A well-balanced batter results in lighter, fluffier waffles—just remember, don’t overmix it!

Can my pets eat Cheddar Chive Waffles?
While the ingredients appear tasty to us, it’s best to avoid giving Cheddar Chive Waffles to pets, especially due to the cheese and seasonings. Some dogs may handle dairy better than others, but chives can be harmful to them! Always check with your veterinarian if you’re unsure.

What if I don’t have any chives?
Very! If you don’t have chives on hand, you can substitute them with minced scallions or even fresh herbs like parsley or dill. They will still offer a wonderful flavor and freshness to your Cheddar Chive Waffles!

Cheddar Chive Waffles with Sausage Gravy

Cheddar Chive Waffles with Sausage Gravy for Cozy Mornings

Savor the delicious Cheddar Chive Waffles with Sausage Gravy, a breakfast game-changer perfect for busy mornings and weekend brunches.
Prep Time 15 minutes
Cook Time 30 minutes
Total Time 45 minutes
Servings: 4 waffles
Course: Breakfast
Cuisine: American
Calories: 350

Ingredients
  

For the Waffles
  • 1.5 cups all-purpose flour can replace with gluten-free flour
  • 1 teaspoon kosher salt adjust to taste
  • 1 tablespoon baking powder ensure freshness for fluffiness
  • 1.75 cups milk non-dairy alternative is fine
  • 2 large eggs or use flax eggs for vegan option
  • 4 tablespoons butter (melted) can be replaced with oil
  • 1 cup sharp cheddar (grated) or another hard cheese
  • 0.33 cups fresh chives (minced) can substitute with scallions or other herbs
For the Rosemary Sausage Gravy
  • 1 pound ground sausage spiced variety recommended
  • 0.25 cups onion (finely chopped) sauté until translucent
  • 0.25 cups flour gluten-free option is acceptable
  • 2 cups milk or cream adjust for desired thickness
  • 1 teaspoon black pepper add more for extra kick
  • 1 teaspoon rosemary (fresh or dried)

Equipment

  • waffle iron
  • Skillet
  • mixing bowl
  • whisk
  • spatula

Method
 

Waffle Preparation
  1. Preheat your waffle iron to medium-high heat.
  2. In a large bowl, whisk together flour, salt, and baking powder.
  3. In another bowl, whisk together milk and eggs until smooth.
  4. Pour the wet mixture into the dry ingredients and mix until just combined.
  5. Gently fold in melted butter, cheese, and chives into the batter.
  6. Pour batter onto preheated waffle iron and cook for 5-7 minutes.
Gravy Preparation
  1. In a skillet, cook ground sausage over medium heat until browned.
  2. Add chopped onion and sauté until soft.
  3. Stir in flour and cook for a minute.
  4. Gradually whisk in milk or cream and cook until gravy thickens.
  5. Season gravy with black pepper and serve over waffles.
Serving
  1. Stack warm waffles and ladle gravy over them before serving.

Notes

These waffles can be made ahead and stored in the freezer for quick breakfasts.

Crispy Celery Chopped Salad with Apricots & Gorgonzola Bliss

As I was rummaging through my fridge, I stumbled upon a bunch of celery that had been patiently waiting for its moment to shine. It struck me that this often-overlooked vegetable could steal the spotlight in a refreshing dish—enter the Celery Chopped Salad with Apricots, Gorgonzola, and Pecans. This salad is not just a quick prep; it’s a delightful way to enjoy crisp textures paired with the creamy richness of Gorgonzola and the sweetness of dried apricots. Perfect as a light lunch or as a vibrant side for your dinner, it shows that simple ingredients can create extraordinary results. Ready to give this recipe a try and discover how to elevate your salad game? Let’s dive in!

Why is this salad so special?

Simplicity at Its Best: The Celery Chopped Salad is a breeze to prepare, making it an ideal choice for busy weeknights.

Bursting with Flavor: Enjoy the creamy Gorgonzola combined with sweet apricots for a beautiful contrast that tantalizes your taste buds.

Crunchy Delight: The toasted pecans add a satisfying crunch, elevating the overall texture of this dish, making every bite a delight.

Versatile Options: Feel free to customize with your favorite nuts or swap out Gorgonzola for goat cheese to suit your palate. Pair it with a refreshing Cucumber Carrot Salad for a vibrant meal!

Meal Prep Friendly: This salad can be made ahead of time and stored—just keep the nuts separate until serving to maintain their crunch.

Crowd-Pleasing Serve: Perfect as a standalone dish or as a side to grilled meats, it’s bound to impress family and friends alike!

Celery Chopped Salad Ingredients

For the Salad

  • Celery – The star of the dish, delivering a fresh crunch and coolness. Substitution: Swap with rhubarb for a hint of tartness.
  • Pecans – Toast them to unlock their nutty flavor and add delightful crunch. Tip: Always toast right before using for the best texture.
  • Dried Apricots – These bring a natural sweetness that beautifully contrasts the tang of Gorgonzola. Substitution: Dried cherries or cranberries can work well if you’d like something different.
  • Gorgonzola Cheese – This creamy cheese adds richness and an irresistible tang. Substitution: Use goat cheese or feta for a milder flavor.
  • Shallot – Offers a subtle savory note without overwhelming the other ingredients.
  • Fresh Parsley – A fresh touch for garnish that brightens the dish.

For the Dressing

  • Lemon Juice – Adds zesty brightness to the salad.
  • Apple Cider Vinegar – Balances flavors and enhances freshness.
  • Extra-Virgin Olive Oil – Provides richness and a smooth consistency for the dressing.
  • Red Pepper Flakes – Optional heat; highly recommended for those who enjoy a little kick!
  • Kosher Salt & Fresh Cracked Black Pepper – Essential seasonings to taste.

This Celery Chopped Salad with Apricots, Gorgonzola, and Pecans is a fantastic way to make a salad shine at your table!

Step‑by‑Step Instructions for Celery Chopped Salad with Apricots, Gorgonzola, and Pecans

Step 1: Prepare the Celery
Begin by thinly slicing the celery stalks on a bias to enhance their presentation and texture. If the celery appears limp, soak the slices in a bowl of ice water for about 10 minutes to crisp them up, then drain well. This will ensure your celery chopped salad has that refreshing crunch.

Step 2: Toast the Pecans
In a dry skillet over medium heat, add the pecans and toast them for about 2-4 minutes, stirring frequently until they become fragrant and lightly golden. Keep a close eye on them to prevent burning! Once toasted, remove from heat and allow them to cool. Toasting adds a wonderful nuttiness that elevates the salad’s flavor.

Step 3: Combine the Ingredients
In a medium mixing bowl, combine the prepared celery, finely diced shallot, toasted pecans, chopped dried apricots, and crumbled Gorgonzola cheese. To this mixture, add the lemon juice, apple cider vinegar, extra-virgin olive oil, red pepper flakes, and a generous pinch of kosher salt and fresh cracked black pepper.

Step 4: Mix Well
Using a pair of salad tongs or a large spoon, gently toss all the ingredients together until they are evenly coated with the dressing. Make sure the Gorgonzola cheese is slightly broken up but distributed throughout the salad. This step is crucial for creating the perfect balance of flavors in your celery chopped salad.

Step 5: Garnish and Serve
Before serving, sprinkle freshly chopped parsley over the top of your salad to add a pop of color and freshness. Dish up the salad into vibrant bowls and serve immediately, or store covered in the fridge if making ahead of time. Just remember to add the pecans just before serving to maintain their delightful crunch!

What to Serve with Crispy Celery Chopped Salad with Apricots and Gorgonzola

Elevate your dining experience by pairing this refreshing salad with complementary dishes that enhance its delightful flavors and textures.

  • Grilled Chicken: Juicy, herb-marinated grilled chicken adds a savory depth that pairs perfectly with the tangy Gorgonzola and sweet apricots. The charred exterior contrasts beautifully with the salad’s crunch.

  • Quinoa Pilaf: Fluffy quinoa with herbs elevates the meal with wholesome protein and nutty flavors that enhance the fresh ingredients in the salad. A side of lightly dressed greens can add even more freshness.

  • Sweet Potato Wedges: Roasted sweet potato wedges offer a slightly sweet and creamy texture that balances the salad’s crunch. Serve them with a sprinkle of sea salt for an additional flavor kick.

  • Pesto Pasta: A light pesto pasta dish can bring a burst of basil and garlic that complements the Gorgonzola’s richness while keeping your palate energized.

  • Sparkling White Wine: A glass of chilled sparkling white wine creates a refreshing contrast to the salad’s flavors, making the entire meal feel celebratory.

  • Lemon Sorbet: For dessert, a refreshing lemon sorbet cleanses the palate and ties the meal together with its citrus notes, seamlessly transitioning from savory to sweet at the end of the dining experience.

Expert Tips for Celery Chopped Salad

  • Keep Celery Crisp: Always soak limp celery in ice water for about 10 minutes before slicing; this restores its refreshing crunch essential for your salad.

  • Toast Pecans Carefully: Toast pecans in a dry skillet over medium heat for 2-4 minutes. This step enhances their flavor, but be vigilant to avoid burning.

  • Balance Flavors: Don’t skip the salt and pepper—they are crucial for enhancing the flavors in your Celery Chopped Salad. Adjust seasoning to your taste.

  • Freshness is Key: For the best flavor, prepare the salad shortly before serving. If made in advance, store the pecans separately to preserve their crunch.

  • Try Cheese Alternatives: If Gorgonzola isn’t your favorite, use goat cheese or feta for a milder taste that still complements the other ingredients beautifully.

Variations & Substitutions for Celery Chopped Salad

Feel free to make this delightful Celery Chopped Salad with Apricots, Gorgonzola, and Pecans truly your own with these exciting tweaks!

  • Dairy-Free: Replace Gorgonzola with dairy-free cheese or avocado for creaminess without the dairy. This swap makes the salad accessible yet still indulgent.
  • Nut-Free: Swap pecans with sunflower seeds or pumpkin seeds. Both add crunch without the nuts, ensuring everyone can enjoy this salad.
  • Herb Twist: Add fresh dill or cilantro instead of parsley for a unique flavor boost. These herbs can completely change the profile of your salad, giving it a fresh splash!
  • Fruity Alternative: Use chopped fresh apples or pears instead of dried apricots for a fresher take. Their juicy sweetness will provide a delightful contrast to the crunchy texture.
  • Sweetness Boost: Drizzle a little honey or maple syrup over the salad before serving. This small touch will highlight the sweetness and round out the flavors beautifully.
  • Add Heat: Mix in finely chopped jalapeños or a dash of hot sauce for a spicy kick. This little twist will awaken your taste buds and add an exciting layer to your salad!
  • Grain Boost: Turn it into a grain bowl by adding cooked quinoa or farro. This addition will make your salad heartier and create a filling lunch option.
  • Dressing Variation: Swap apple cider vinegar for balsamic vinegar for a deeper, sweeter flavor. This small change can elevate the whole dressing experience!

For even more interesting salads, consider pairing this dish with a refreshing Cabbage Cucumber Salad or a colorful Cucumber Egg Salad for variety on your table!

Make Ahead Options

These Celery Chopped Salad with Apricots, Gorgonzola, and Pecans are perfect for busy home cooks looking to save time during the week! You can prepare the salad components—celery, shallots, dried apricots, and Gorgonzola—up to 3 days in advance, storing them in an airtight container in the refrigerator. To maintain freshness and crunch, keep the toasted pecans separate until serving time. When you’re ready to enjoy this delightful dish, simply toss all the prepped ingredients together with the dressing, which can also be made ahead. This way, you’ll have a refreshing salad ready in minutes, without losing any of its wonderful flavors!

How to Store and Freeze Celery Chopped Salad

Fridge: Store the salad in an airtight container for up to 4-5 days. Keeping it sealed helps maintain freshness, though it’s best to add the pecans just before serving to keep them crunchy.

Freezer: It’s not recommended to freeze the Celery Chopped Salad, as the texture of the celery and cheese may suffer after thawing. Enjoy fresh instead!

Reheating: If desired, lightly toss leftovers in a bowl to refresh after storing. There’s no need for cooking; just mix gently, and it will be ready to serve again!

Room Temperature: Ideally, this salad is best enjoyed chilled; however, if left out, consume within 2 hours for optimal freshness. Keep it away from direct sunlight to prolong its crispness.

Celery Chopped Salad with Apricots, Gorgonzola, and Pecans Recipe FAQs

How do I select the right celery?
Absolutely! When choosing celery, look for stalks that are firm, crisp, and have vibrant green leaves. Avoid any that appear wilted, limp, or have dark spots all over. This ensures your Celery Chopped Salad has the best texture and flavor.

How should I store the salad leftovers?
To keep your salad fresh, store it in an airtight container in the fridge for up to 4-5 days. Just remember to keep the toasted pecans separate until you are ready to serve again; adding them at the last moment preserves their crunch.

Can I freeze the Celery Chopped Salad?
I do not recommend freezing this salad. Freezing can negatively affect the crisp texture of the celery and the creaminess of the Gorgonzola. Instead, enjoy it fresh! If you find yourself with leftovers, try to consume them within a few days for the best experience.

What should I do if the salad seems too soggy?
If you find your salad has become soggy, it may be due to excess dressing or overmixing. To remedy it, you can try adding a handful of fresh celery or more toasted pecans for added crunch. Also, consider draining the salad briefly to remove some liquid before serving!

Can my pets safely eat this salad?
While celery is safe for dogs in moderation, avoid feeding them the Gorgonzola and pecans, as both may not be suitable for their diet. Always check with your vet if unsure about human food before offering it to your furry friends.

Is this salad suitable for someone with dairy allergies?
If you’re serving someone with dairy allergies, I recommend substituting the Gorgonzola with a vegan cheese option or simply omitting the cheese altogether. You can add an extra touch of flavor with herbs or lemon zest to enhance the taste without the dairy.

Celery Chopped Salad with Apricots, Gorgonzola, and Pecans

Crispy Celery Chopped Salad with Apricots & Gorgonzola Bliss

This Celery Chopped Salad with Apricots, Gorgonzola, and Pecans is a refreshing dish that delights with creamy and crunchy textures.
Prep Time 15 minutes
Cook Time 5 minutes
Total Time 20 minutes
Servings: 4 servings
Course: Lunch
Cuisine: American
Calories: 250

Ingredients
  

For the Salad
  • 4 stalks Celery Substitution: Swap with rhubarb for a hint of tartness.
  • 1 cup Pecans Tip: Always toast right before using for the best texture.
  • 1 cup Dried Apricots Substitution: Dried cherries or cranberries can work well.
  • 4 oz Gorgonzola Cheese Substitution: Use goat cheese or feta for a milder flavor.
  • 1 medium Shallot
  • 1 cup Fresh Parsley For garnish.
For the Dressing
  • 3 tbsp Lemon Juice
  • 2 tbsp Apple Cider Vinegar
  • 4 tbsp Extra-Virgin Olive Oil
  • 1/4 tsp Red Pepper Flakes Optional.
  • to taste Kosher Salt
  • to taste Fresh Cracked Black Pepper

Equipment

  • Skillet
  • mixing bowl
  • salad tongs

Method
 

Preparation Steps
  1. Begin by thinly slicing the celery stalks on a bias. Soak limp slices in ice water for about 10 minutes to crisp them up, then drain well.
  2. In a dry skillet over medium heat, add the pecans and toast them for about 2-4 minutes, stirring frequently until fragrant and lightly golden. Allow to cool.
  3. In a medium mixing bowl, combine the celery, diced shallot, toasted pecans, chopped dried apricots, and crumbled Gorgonzola. Add lemon juice, apple cider vinegar, olive oil, red pepper flakes, salt, and pepper.
  4. Gently toss all the ingredients together until evenly coated with the dressing. Ensure the Gorgonzola is slightly broken up but well distributed.
  5. Sprinkle chopped parsley over the salad before serving. Enjoy chilled or store in the fridge; add pecans just before serving.

Notes

Perfect as a standalone dish or as a vibrant side, this salad is best prepared fresh to maintain crunchiness and flavor.