Creamy French Lentil Soup for Cozy Nights at Home

The kitchen was filled with a delightful aroma, one that made my heart flutter with nostalgia. As a cozy meal, this Creamy French Lentil Soup quickly became a go-to for chilly evenings, warming not only my stomach but also my soul. Packed with earthy lentils and vibrant vegetables, it’s entirely vegan, making it a healthy option for those looking to embrace wholesome, homemade food. Best of all, the incredible cashew cream adds an unexpected richness, transforming this simple dish into indulgent comfort. Plus, it’s quick to prepare—ready in under an hour! Whether you’re treating yourself after a long day or impressing guests with your culinary skills, this soup is sure to please. Curious about the secret behind its delightful creaminess? Let’s dive into the recipe!

What Makes This Soup So Creamy?

Rich, Creamy Texture: The inclusion of cashew cream lifts this soup to a whole new level, providing a velvety finish that makes it feel indulgent yet healthy.

Nutritious Ingredients: Packed with fresh vegetables and protein-rich lentils, this recipe is as nutritious as it is delicious.

Quick and Easy: You can whip up this cozy vegan dish in under an hour, perfect for busy weeknights when you crave comfort food fast.

Versatile Base: The soup can be easily customized; swap Swiss chard for kale or add your favorite herbs to make it your own! Need a side? Pair it with Homemade Chicken Soup for a complete meal experience.

Crowd-Pleasing Comfort: Whether for a cozy family dinner or to impress guests, this dish satisfies everyone, making it a fantastic choice for any occasion.

French Lentil Soup Ingredients

• Let’s gather everything we need for this delightful dish!

For the Cashew Cream
Raw Cashews or Sunflower Seeds – Provides a creamy base for the soup. Substitution: Use sunflower seeds for a nut-free option.
Water – Used for blending the cashews into cream and adjusting soup consistency.

For the Soup Base
Extra-virgin Olive Oil (optional) – For sautéing vegetables. Substitution: Use vegetable broth to keep it oil-free.
Onion (or Leeks) – Adds sweetness and depth to the flavor profile. Prep Note: Diced or thinly sliced.
Garlic – Enhances flavor with its aromatic essence.
Fine Sea Salt – Essential for seasoning. Note: Adjust to taste.

For the Vegetables
Carrots – Adds sweetness and texture. Prep Note: Diced.
Celery – Contributes a fresh crunch and flavor base. Prep Note: Diced.
Diced Tomatoes – Introduces acidity and richness. Use canned for convenience.
Swiss Chard or Kale – Nutrient-dense greens that enhance the healthiness of the dish. Prep Note: Stemmed and chopped.

For Flavoring
Ground Cumin – Provides warm, earthy flavor.
Dried Thyme – Adds herbal notes to the soup.
Ground Turmeric – Gives a rich color and anti-inflammatory benefits.
Black Pepper – For seasoning.
White Wine Vinegar – Adds brightness and a hint of tang to the soup. Note: Adjust to taste.

For the Broth
French Green Lentils – The heart of the soup; they hold their shape well when cooked. Note: Rinse before using.
Low-Sodium Veggie Broth – Adds liquid and flavor without excess salt.

This collection of ingredients blends beautifully into the star of the show: your French Lentil Soup! Get ready to warm your heart and home with this cozy bowl of goodness!

Step‑by‑Step Instructions for French Lentil Soup

Step 1: Soak the Cashews
Begin by soaking 1 cup of raw cashews in water for 1-2 hours to soften them. If you’re short on time, using hot water will quicken the process to about 30-60 minutes. This step is essential for creating a creamy texture in your French Lentil Soup later on.

Step 2: Make the Cashew Cream
Once soaked, drain the cashews and transfer them to a blender. Add 1 cup of fresh water, then blend until smooth and creamy, which should take about 1-2 minutes. Set the cashew cream aside while you prepare the soup base, letting it thicken slightly as you cook.

Step 3: Sauté Aromatics
In a large Dutch oven or pot, heat 2 tablespoons of extra-virgin olive oil over medium heat. Add 1 diced onion and 3 minced garlic cloves with a pinch of salt, creating a fragrant base. Sauté for 4-6 minutes until the onion is translucent and softened, letting those delightful aromas rise.

Step 4: Add Vegetables
Next, stir in 2 diced carrots and 2 diced celery stalks, cooking for an additional 3-4 minutes. The vegetables should become slightly tender, infusing the French Lentil Soup with vibrant flavors and a touch of sweetness, enhancing your overall dish.

Step 5: Season with Spices
Sprinkle in 1 teaspoon of ground cumin, 1 teaspoon of dried thyme, and 1 teaspoon of ground turmeric, stirring until the spices become fragrant, which should take about 1 minute. This step adds depth to your French Lentil Soup and makes the air smell amazing as the spices bloom.

Step 6: Add Tomatoes and Lentils
Pour in 1 can of diced tomatoes with their juices, rinsed 1 cup of French green lentils, and 4 cups of low-sodium veggie broth. Stir to combine, then increase the heat to bring the mixture to a boil. Once bubbling, reduce to a simmer and cover the pot, allowing everything to meld beautifully.

Step 7: Simmer and Cook
Let the soup simmer uncovered for 30-35 minutes, stirring occasionally, until the lentils are tender but still hold their shape. Watch for the liquid to reduce slightly, creating a comforting and hearty texture of your French Lentil Soup as it comes together.

Step 8: Stir in the Greens
Once the lentils are cooked, stir in 2 cups of chopped Swiss chard or kale. Season with salt, black pepper, and 1 tablespoon of white wine vinegar, adjusting to taste. Cook for another 5 minutes until the greens are wilted and vibrant, adding nutrition and a pop of color.

Step 9: Serve Warm
Ladle your delicious French Lentil Soup into bowls and serve warm. If you have leftovers, store them in an airtight container in the fridge for up to 5 days or freeze for longer storage. Enjoy this cozy soup any time you need a nurturing, flavorful meal!

What to Serve with Creamy French Lentil Soup

Pair your cozy soup with delightful sides to create a satisfying meal experience.

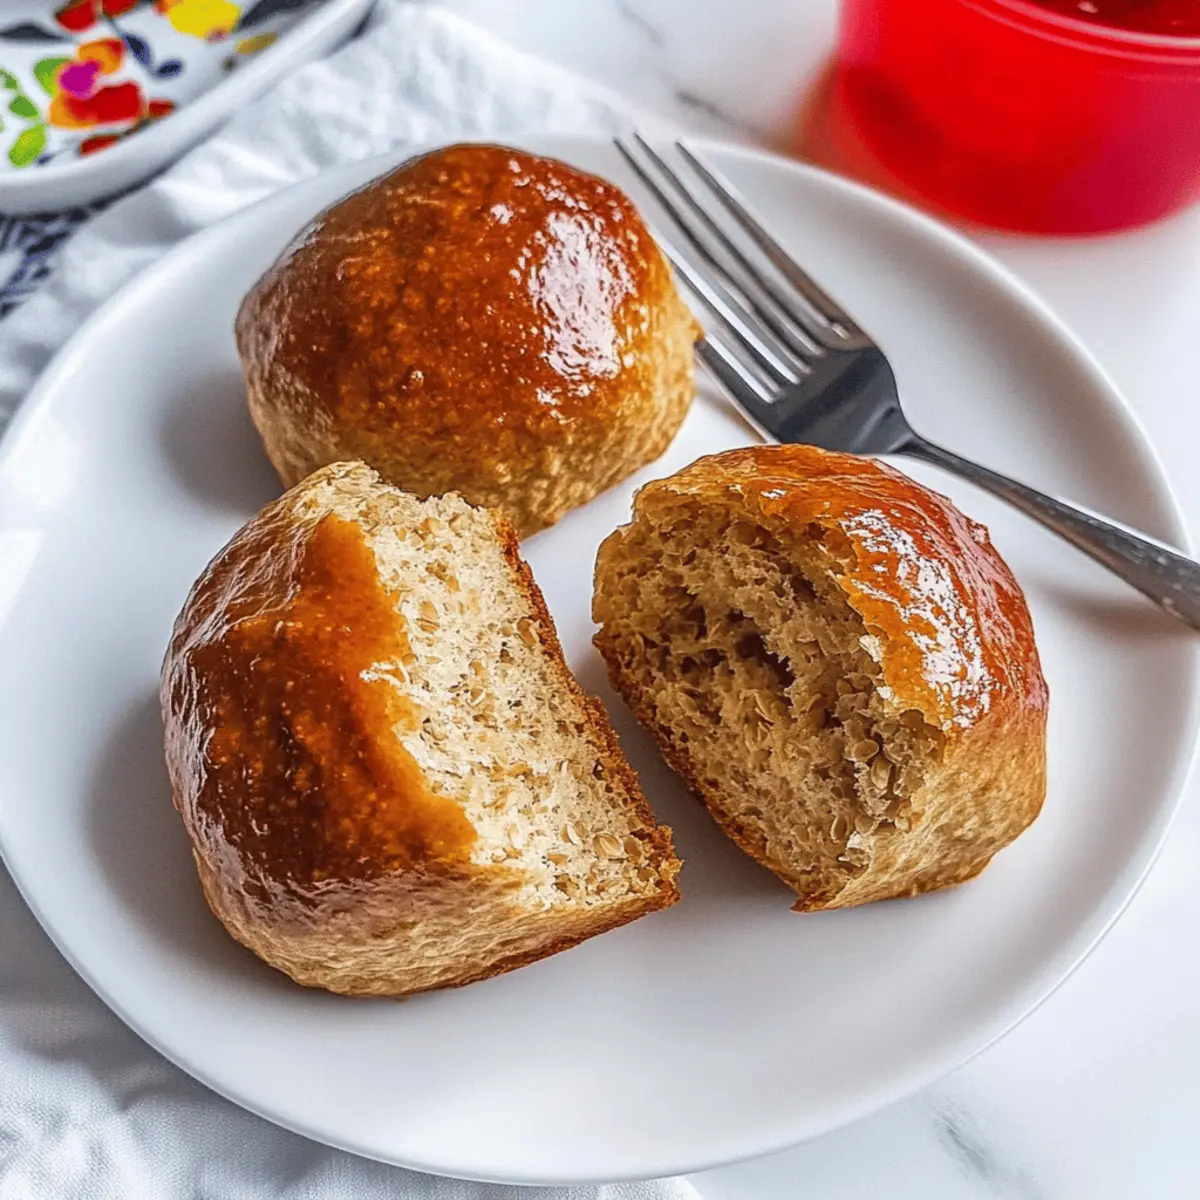
  • Crusty Whole Wheat Bread: The perfect vehicle for scoop and savoring every last drop of soup, adding a satisfying crunch.

  • Simple Green Salad: A fresh salad with mixed greens, cucumbers, and a light vinaigrette adds crispness and balances the dish’s creaminess perfectly.

  • Roasted Vegetables: Seasonal roasted vegetables bring caramelized sweetness and extra nutrients that complement the earthy flavors of the lentils.

  • Garlic Toast: This buttery delight adds a savory contrast, and the garlic aroma will linger as you enjoy your soup.

  • Quinoa or Brown Rice: A side of fluffy quinoa or brown rice not only enhances heartiness but also contributes a nutty flavor that matches beautifully.

  • Herbal Tea: A warm cup of herbal tea, like chamomile or mint, can soothe and enhance the entire dining experience with its aromatic qualities.

Each of these pairings combines textures and flavors to elevate your French Lentil Soup into a cozy, nourishing meal you won’t forget.

Expert Tips for French Lentil Soup

Soak Wisely: Make sure to soak your cashews well. This guarantees that the cashew cream blends smoothly, giving your French Lentil Soup that rich texture we love.

Fresh Lentils Required: Always check the freshness of your lentils. Older lentils can become mushy, transforming your soup’s texture. Rinsing them before use can help avoid skin shedding.

Season Gradually: When adding salt or vinegar, do so slowly. This helps you control the flavors, ensuring that the acidity in the French Lentil Soup enhances rather than overpowers it.

Watch the Cooking Time: Keep an eye on your lentils during cooking. Test them for doneness to ensure they remain tender yet intact, preventing a mushy soup.

Customize Your Greens: Feel free to swap out Swiss chard for kale or spinach, adding your favorite greens for an extra nutritional boost while keeping it delightful.

French Lentil Soup Variations

Feel free to get creative and customize your French Lentil Soup with these delightful variations that will cater to your taste and dietary needs!

  • Nut-Free: Replace cashews with sunflower seeds blended with water. This substitution ensures the creaminess remains while making it perfect for nut allergies.

  • Oil-Free: For a lighter option, skip the olive oil and use vegetable broth for sautéing. This keeps the flavors intact without any added fats.

  • Extra Greens: Toss in some spinach or collard greens along with the Swiss chard or kale for more vibrant nutrition and a pop of color in your soup.

  • Spicy Kick: If you enjoy a bit of heat, add a pinch of red pepper flakes or diced fresh chili peppers. They’ll give your soup an exciting boost, warming both your heart and soul!

  • Different Lentils: Try using red or brown lentils for a twist! Red lentils will create a creamier texture as they break down, while brown lentils add a hearty chew.

  • Herb Explosion: Don’t hesitate to enhance flavor with fresh herbs like parsley or cilantro. Just add them at the end for a refreshing, bright taste!

  • Flavor Fusion: Add a splash of coconut milk for a creamy twist that complements the earthy lentils beautifully. This Asian-inspired touch will amaze your taste buds!

  • Savory Topping: Top off your soup with toasted pumpkin seeds or fresh herbed croutons for crunch. They add a delightful texture contrast and elevate your meal!

These variations allow for endless possibilities, turning your creamy French lentil soup into a new creation each time! Feel free to pair this comforting bowl with Homemade French Fries or Garlic Butter French Fries for an extra special meal experience!

Make Ahead Options

These Creamy French Lentil Soup preparations are perfect for busy cooks seeking to save time during the week! You can chop your vegetables—onion, carrots, celery, and greens—up to 3 days in advance and store them in an airtight container in the fridge. Additionally, soak the cashews for your creamy base up to 24 hours ahead for a quick blend later. When you’re ready to serve, simply sauté your prepared aromatics, add the prepped veggies, stir in your rinsed lentils, and follow the remaining steps. This way, your soup retains its delicious quality while making your cooking process leaner and more efficient!

How to Store and Freeze French Lentil Soup

Fridge: Keep your French lentil soup in an airtight container for up to 5 days. Make sure it cools completely before sealing to maintain freshness.

Freezer: For longer storage, freeze the soup in portioned airtight containers or freezer bags for up to 3 months. Leave some space for expansion as the soup freezes.

Reheating: To enjoy frozen soup, thaw it in the refrigerator overnight. Reheat on the stove over medium heat, adding a splash of broth or water if needed to reach the desired consistency.

Airtight Guidance: Always ensure containers are sealed properly to prevent freezer burn and preserve the soup’s delightful flavors and creamy texture.

French Lentil Soup Recipe FAQs

How do I select ripe ingredients for this soup?
Absolutely! Fresh vegetables can elevate the flavor of your French Lentil Soup. Look for carrots with vibrant color and firm texture, avoiding ones that are soft or have dark spots. For onions, choose ones that feel heavy and have smooth skin; avoid sprouting or blemished onions. If you’re using Swiss chard, select leaves that are bright and crisp, steering clear of wilted or yellowing greens.

How should I store leftover soup?
Very good question! Allow your French lentil soup to cool completely before transferring it to an airtight container. It can be stored in the fridge for up to 5 days. When ready to enjoy, simply reheat it on the stove over medium heat, adding a splash of broth to restore its velvety consistency if needed.

Can I freeze French lentil soup?
Yes, you can! To freeze your French lentil soup, portion it into airtight containers or freezer bags, leaving some space for expansion—soup expands when it freezes. It can be stored in the freezer for up to 3 months. To reheat, thaw it in the refrigerator overnight, then warm it on the stove over low heat, adding broth as necessary to reach your desired creaminess.

What should I do if my lentils are mushy?
Common issue! If your lentils have turned mushy, it may mean they were overcooked or are simply old. To prevent this next time, make sure to check their freshness before cooking; older lentils can lose their firmness. When cooking, regularly check for doneness after the 25-minute mark to ensure they’re tender yet still intact.

Is this soup safe for pets?
Yes, but with caution! While the soup is healthy for humans, some ingredients may not be safe for pets. For example, garlic can be toxic to dogs and cats in large amounts. It’s best to avoid sharing leftover soup with your furry friends. Always consult your veterinarian regarding specific dietary concerns for your pets.

Are there any common allergens in this recipe?
Sure! This French lentil soup is vegan and gluten-free, making it a great option for many diets. However, peanuts or tree nuts (from the cashews) are present. If you or someone you are serving has a nut allergy, I recommend substituting the cashews with sunflower seeds to maintain that creamy texture without the allergens. Always double-check ingredient labels for any hidden allergens if you’re cooking for someone with specific dietary restrictions.

French Lentil Soup

Creamy French Lentil Soup for Cozy Nights at Home

Enjoy this Creamy French Lentil Soup, a comforting, vegan dish filled with earthy lentils and vibrant vegetables, perfect for chilly evenings.
Prep Time 15 minutes
Cook Time 35 minutes
Total Time 50 minutes
Servings: 4 bowls
Course: Dinner
Cuisine: French
Calories: 250

Ingredients
  

For the Cashew Cream
  • 1 cup Raw Cashews Substitution: Use sunflower seeds for a nut-free option.
  • 1 cup Water
For the Soup Base
  • 2 tablespoons Extra-virgin Olive Oil Substitution: Use vegetable broth to keep it oil-free.
  • 1 medium Onion Diced or thinly sliced.
  • 3 cloves Garlic
  • 1 teaspoon Fine Sea Salt Adjust to taste.
For the Vegetables
  • 2 medium Carrots Diced.
  • 2 medium Celery Stalks Diced.
  • 1 can Diced Tomatoes Use canned for convenience.
  • 2 cups Swiss Chard or Kale Stemmed and chopped.
For Flavoring
  • 1 teaspoon Ground Cumin
  • 1 teaspoon Dried Thyme
  • 1 teaspoon Ground Turmeric
  • 1 teaspoon Black Pepper
  • 1 tablespoon White Wine Vinegar Adjust to taste.
For the Broth
  • 1 cup French Green Lentils Rinse before using.
  • 4 cups Low-Sodium Veggie Broth

Equipment

  • Blender
  • Large Dutch Oven or Pot

Method
 

Step-by-Step Instructions for French Lentil Soup
  1. Soak the cashews in water for 1-2 hours to soften them.
  2. After soaking, drain the cashews and blend with 1 cup of water until smooth.
  3. In a large pot, heat olive oil over medium heat. Add diced onion and minced garlic, sautéing for 4-6 minutes.
  4. Stir in diced carrots and celery, cooking for an additional 3-4 minutes.
  5. Add cumin, thyme, and turmeric, stirring until fragrant (about 1 minute).
  6. Pour in diced tomatoes, rinsed lentils, and veggie broth. Bring to a boil, then reduce to simmer.
  7. Simmer uncovered for 30-35 minutes, stirring occasionally until lentils are tender.
  8. Stir in chopped greens, season with salt, pepper, and white wine vinegar. Cook for 5 minutes until greens are wilted.
  9. Ladle soup into bowls and serve warm. Store leftovers in an airtight container.

Notes

Soak cashews well for a smooth cream. Check lentil freshness to avoid mushiness. Control seasoning gradually to enhance flavors.

Baileys Cream Chocolate Chip Cookies for Ultimate Indulgence

As I stood in my kitchen, the sweet scent of melting chocolate mingled with a warm hint of Irish cream, it suddenly hit me—this is the way to elevate a classic dessert. Baileys Irish Cream Chocolate Chip Cookies are not just cookies; they are an invitation to indulge. With their soft, chewy texture and a delightful splash of creamy liqueur, these cookies are perfect for any occasion, whether you’re treating yourself after a long day or impressing friends at a gathering. Not only do they satisfy that sweet tooth while being irresistibly quick to whip up, but they also make your kitchen feel like a cozy bakery! Could there be a better way to spread joy with every bite? Dive in and let’s turn simple ingredients into something extraordinary!

Why Baileys Chocolate Chip Cookies Stand Out?

Decadent Indulgence: Imagine biting into a cookie where rich chocolate blends harmoniously with silky Baileys Irish Cream—the ultimate treat for chocolate lovers.

Quick & Easy: With just a few ingredients and simple steps, you can create these delightful cookies in no time.

Crowd-Pleasing Delight: Whether at a gathering or a cozy night in, these cookies will impress everyone—perfect for sharing!

Versatile Options: Feel free to swap out the Baileys for your favorite liqueur or mix in dried fruits for an exciting twist.

Perfect Texture: Soft and chewy with a slight crispness, each cookie melts in your mouth, leaving you longing for more.

Want to explore more delicious desserts? Check out these Nutty Apricot Cookies or try making some Chocolate Date Cookies!

Baileys Cream Chocolate Chip Cookies

For the Cookie Dough

  • Unsalted Butter – Provides richness; always use softened butter for a smooth mixture.
  • Brown Sugar – Adds moisture and a chewy texture thanks to its molasses content; don’t skip this for the perfect bite.
  • Granulated Sugar – Enhances sweetness and contributes to a slightly crisp exterior; balance is key!
  • Eggs – Essential for binding and moisture; large, room-temperature eggs work best.
  • Baileys Irish Cream – The star ingredient that adds creamy flavor and moisture; opt for high-quality for the best results.
  • Vanilla Extract – Boosts the overall flavor; pure vanilla extract is your best choice.
  • All-purpose Flour – Acts as the structure for the dough; measuring accurately ensures ideal texture.
  • Baking Soda – Helps the cookies rise, contributing to their lightness; don’t forget this crucial leavening agent.
  • Salt – Balances out the sweetness and enhances flavor; a small pinch can make all the difference.
  • Semi-Sweet Chocolate Chips – Provides that rich chocolatey goodness; feel free to swap for dark or milk chocolate if you prefer.
  • Chopped Pecans (optional) – Adds a delightful crunch; make sure to coarsely chop for the best texture.

Step‑by‑Step Instructions for Baileys Irish Cream Chocolate Chip Cookies

Step 1: Preheat and Prepare
Begin by preheating your oven to 350°F (175°C) and line two baking sheets with parchment paper to prevent sticking. This initial step ensures your cookies bake evenly and achieve that lovely golden color. While the oven heats, gather all your ingredients and have your mixing bowls ready to create the perfect Baileys Irish Cream Chocolate Chip Cookies.

Step 2: Cream the Butters and Sugars
In a large mixing bowl, combine 1 cup of softened unsalted butter, ¾ cup granulated sugar, and ¾ cup brown sugar. Use a hand mixer or stand mixer to beat the mixture on medium speed until it becomes light and fluffy, which should take about 2-3 minutes. This step introduces air to the dough, making your cookies soft and invitingly chewy.

Step 3: Incorporate Eggs and Flavorings
Next, add in 2 large room-temperature eggs, one at a time, beating well after each addition to ensure a smooth consistency. Then, mix in ¼ cup of Baileys Irish Cream and 1 teaspoon of vanilla extract until everything is fully combined. This will infuse your dough with the rich, creamy flavors that make these chocolate chip cookies truly indulgent.

Step 4: Combine Dry Ingredients
In a separate bowl, whisk together 2 ½ cups of all-purpose flour, 1 teaspoon of baking soda, and ½ teaspoon of salt. Gradually add this dry mixture to the wet ingredients in the large bowl, stirring gently until just combined. Be careful not to overmix, as this could lead to tougher cookies—aim for a thick and slightly sticky dough.

Step 5: Add Chocolate and Nuts
Now it’s time to fold in 2 cups of semi-sweet chocolate chips, which provide that delightful chocolaty goodness throughout your cookies. If you’re feeling adventurous, add ½ cup of chopped pecans for an extra crunch. Use a spatula to gently mix, ensuring that the chocolate and nuts are evenly distributed throughout the dough.

Step 6: Scoop and Shape
Using a cookie scoop or two tablespoons, scoop rounded balls of dough onto the prepared baking sheets, ensuring they are spaced about 2 inches apart to allow for spreading as they bake. The anticipation builds as you prepare to bake these delicious Baileys Irish Cream Chocolate Chip Cookies, making sure each scoop is uniform for even baking.

Step 7: Bake to Perfection
Place the baking sheets in the preheated oven and bake for 10-12 minutes. The edges should appear lightly golden while the centers remain a bit underbaked—they’ll continue to cook after removing to create that perfectly soft and chewy texture. Keep an eye on them to avoid overbaking, which could lead to a drier cookie.

Step 8: Cool and Enjoy
Once baked, remove the baking sheets from the oven and let the cookies cool on the sheets for about 5 minutes. This allows them to set and firm up slightly. After that, transfer them to a wire rack to cool completely. The final result is a batch of warm, gooey Baileys Irish Cream Chocolate Chip Cookies, just waiting to be enjoyed!

How to Store and Freeze Baileys Cream Chocolate Chip Cookies

  • Room Temperature: Keep cookies in an airtight container at room temperature for up to 1 week; this maintains their soft and chewy texture while keeping them fresh.
  • Fridge: For even longer freshness, store in the refrigerator for up to 2 weeks; just make sure they’re well-wrapped to prevent them from drying out.
  • Freezer: Freeze cookies in a single layer on a baking sheet, then transfer to a freezer-safe container. They can be stored for up to 3 months; thaw at room temperature or heat briefly in the microwave for a freshly baked taste.
  • Reheating: To enjoy that oven-fresh taste, reheat cookies in the microwave for 10-15 seconds or place them in a preheated oven at 350°F (175°C) for a few minutes until warm.

Expert Tips for Baileys Cream Chocolate Chip Cookies

  • Butter Matters: Use softened unsalted butter for smooth mixing; cold butter can make your cookies dense and heavy.

  • Don’t Overmix: Mix the dough until just combined to avoid tough cookies; overworking leads to a chewy texture instead of soft.

  • Watch Your Baking Time: Keep an eye on your cookies as they bake; underbaked centers create a delightful gooeyness, whereas overbaked ones become dry.

  • Even Scoops: Use a cookie scoop to ensure uniform cookie sizes; this helps them bake evenly and achieve that perfect golden color every time.

  • Customize Your Chocolate: Feel free to swap semi-sweet chocolate chips with dark, milk, or even white chocolate for your personalized twist on these creamy cookies.

  • Store Properly: Keep your Baileys Cream Chocolate Chip Cookies in an airtight container at room temperature. Enjoy them within a week for optimal freshness!

Make Ahead Options

These Baileys Irish Cream Chocolate Chip Cookies are perfect for busy home cooks who want to indulge with minimal effort! You can prepare the cookie dough up to 24 hours in advance by mixing all the ingredients together, scooping the dough onto parchment-lined baking sheets, and covering them tightly with plastic wrap before refrigerating. This will help develop rich flavors and maintain freshness. When you’re ready to bake, simply preheat your oven and pop the chilled dough straight into the oven; there’s no need to let it come to room temperature. To freeze, place the scooped cookie dough balls in a freezer-safe container for up to 3 months, pulling them out when that sweet craving strikes!

What to Serve with Baileys Irish Cream Chocolate Chip Cookies?

Transform your cookie experience into a delightful meal by exploring these delicious pairings that enhance every bite.

  • Fresh Milk: The classic companion that balances the sweetness of the cookies, making each bite even more comforting.
  • Rich Coffee: A smooth cup of coffee perfectly complements the creamy texture of the Baileys, enhancing their indulgent flavors.
  • Vanilla Ice Cream: Warm cookies atop a scoop of vanilla ice cream create a heavenly dessert, melding rich cookies with creamy delight.
  • Hot Chocolate: Create a cozy pairing by serving these cookies alongside a cup of rich hot chocolate for an extra indulgent treat.
  • Dessert Wine: A sweet dessert wine pairs beautifully, bringing out the chocolate and Baileys notes, perfect for those after-dinner moments.
  • Oranges or Berries: Fresh citrus or berries cut through the richness, providing a refreshing contrast while enhancing flavors in the cookies.
  • Cheese Platter: A selection of creamy cheeses creates an unexpected but delightful pairing, balancing sweetness with savory richness.
  • Chocolate Espresso Martini: For an adult twist, enjoy these cookies with a chocolate espresso martini, blending decadence with vivid flavors.

Variations & Substitutions for Cream Chocolate Chip Cookies

Feel free to get creative with these Baileys Chocolate Chip Cookies and customize them to fit your taste and dietary needs!

  • Flavored Liqueurs: Swap out the Baileys for your favorite flavored liqueur, such as hazelnut or orange for a delightful twist. This can introduce a fun, new dimension to each cookie bite.

  • Nut-Free Delight: Omit the chopped pecans or replace them with sunflower seeds for a nut-free version. It keeps your cookies crunchy while accommodating nut allergies!

  • Dried Fruits: Add a handful of dried cranberries or cherries for a tangy contrast to the rich chocolate. They’ll bring a pop of color and unexpected flavor to your cookies!

  • Dark Chocolate: Use dark chocolate chips instead of semi-sweet for an intensified flavor. This will elevate the indulgence, making each bite a decadent experience.

  • Vegan Adaptation: Replace butter with a vegan buttery spread and use flax eggs instead of regular eggs for a plant-based version. You won’t miss the dairy, and everyone can enjoy them!

  • Chili Chocolate: For a surprising kick, introduce a pinch of chili powder or cayenne with the dry ingredients. This unexpected heat will tantalize your taste buds!

  • Coconut Chocolate Chip Cookies: Incorporate shredded coconut for a tropical flair. The coconut pairs beautifully with the Baileys, creating a heavenly chewiness.

  • Chunky Combos: Add white chocolate chunks or butterscotch chips for an extra layer of sweetness and texture. These combinations will surprise and delight cookie lovers!

For more delicious ideas, why not try some Coconut Chocolate Rolls or tantalizing Coffee Chocolate Truffles? The possibilities for your Baileys Chocolate Chip Cookies are endless—so dive in and relish the joy of custom baking!

Baileys Irish Cream Chocolate Chip Cookies Recipe FAQs

How should I choose ripe ingredients for my cookies?
Absolutely! For the best Baileys Irish Cream Chocolate Chip Cookies, use unsalted butter that is softened to room temperature for easy mixing. Make sure your eggs are large and at room temperature—this helps them blend seamlessly into the dough. Additionally, opt for high-quality Baileys Irish Cream to enhance the flavor of your cookies.

What are the best storage methods for my cookies?
Store your Baileys Irish Cream Chocolate Chip Cookies in an airtight container at room temperature for up to 1 week. If you want to keep them fresh longer, you can refrigerate them, ensuring they stay moist for up to 2 weeks. Just wrap them well to prevent drying out!

Can I freeze Baileys Irish Cream Chocolate Chip Cookies?
Absolutely! To freeze your cookies, place them in a single layer on a baking sheet for about 1-2 hours until solid. Then transfer them to a freezer-safe container or a zip-top bag. They can be stored for up to 3 months. When you’re ready to enjoy them, simply thaw at room temperature or heat briefly in the microwave for that freshly baked taste!

What should I do if my cookie dough is too dry?
If you find your cookie dough is too dry, it may be due to overmeasuring the flour. To fix this, add a teaspoon of milk or an extra splash of Baileys Irish Cream to moisten it up. Mix gently until just combined; be careful not to overwork the dough, as this could lead to tough cookies.

Are there any dietary considerations to keep in mind?
Very! If you’re serving these cookies to friends or family, be aware that Baileys contains alcohol, which isn’t suitable for everyone. You can easily substitute the Baileys with a non-alcoholic flavored creamer if preferred. Additionally, check for any nut allergies if you choose to include pecans in your recipe.

How do I achieve the perfect texture for my cookies?
To get that ideal soft and chewy texture, remember not to overmix your dough when combining the wet and dry ingredients. Mix until just combined, and take them out of the oven when the edges are lightly golden but the centers appear slightly underbaked. They’ll continue to set as they cool!

Enjoy baking these delightful cookies!

Cream Chocolate Chip Cookies

Baileys Cream Chocolate Chip Cookies for Ultimate Indulgence

Indulge in the ultimate treat with these Cream Chocolate Chip Cookies, featuring rich chocolate and Baileys Irish Cream.
Prep Time 15 minutes
Cook Time 12 minutes
Cooling Time 5 minutes
Total Time 32 minutes
Servings: 24 cookies
Course: Dessert
Cuisine: American
Calories: 150

Ingredients
  

For the Cookie Dough
  • 1 cup unsalted butter softened
  • 3/4 cup brown sugar packed
  • 3/4 cup granulated sugar
  • 2 large eggs room temperature
  • 1/4 cup Baileys Irish Cream high-quality
  • 1 teaspoon vanilla extract pure
  • 2 1/2 cups all-purpose flour
  • 1 teaspoon baking soda
  • 1/2 teaspoon salt
  • 2 cups semi-sweet chocolate chips
  • 1/2 cup chopped pecans optional

Equipment

  • mixing bowls
  • hand mixer
  • Cookie scoop
  • Baking sheets
  • oven

Method
 

Step-by-Step Instructions for Baileys Irish Cream Chocolate Chip Cookies
  1. Preheat your oven to 350°F (175°C) and line two baking sheets with parchment paper.
  2. In a large mixing bowl, combine the butter, granulated sugar, and brown sugar. Beat until light and fluffy, about 2-3 minutes.
  3. Add in the eggs one at a time, mixing well after each addition. Then mix in the Baileys Irish Cream and vanilla extract.
  4. In a separate bowl, whisk together the flour, baking soda, and salt. Gradually add this dry mixture to the wet ingredients, stirring gently.
  5. Fold in the chocolate chips and optional chopped pecans until evenly distributed.
  6. Scoop rounded balls of dough onto the prepared baking sheets, spacing them about 2 inches apart.
  7. Bake for 10-12 minutes until the edges are lightly golden and the centers are slightly underbaked.
  8. Let the cookies cool on the sheets for about 5 minutes before transferring to a wire rack to cool completely.

Notes

Enjoy these cookies within a week for the best taste and texture. Store in an airtight container.

Easy 2-Ingredient Fluffy Flax Rolls for Guilt-Free Enjoyment

A delightful aroma wafts through the kitchen as I pull out a fresh batch of Easy 2-Ingredient Fluffy Flax Rolls, instantly reminding me of that cozy bakery down the street. With just flaxseed meal and baking powder, these rolls might seem simple, but they deliver a surprisingly fluffy texture that everyone in the family will love. Not only are they vegan, gluten-free, and oil-free, but they also make for a quick and healthy alternative to store-bought bread. Imagine slathering these airy delights with your favorite spreads or turning them into mini sandwiches for a satisfying lunch. Curious about how to whip up these scrumptious rolls yourself? Let’s dive in and get baking!

Why You’ll Crave These Flax Rolls?

Simplicity at its finest: With just two ingredients, these rolls are easy to prepare and require minimal effort.

Healthy alternative: Perfect for those looking for vegan, gluten-free, and oil-free options without sacrificing taste.

Fluffy texture: The unique combination of flaxseed meal and baking powder creates a light, airy delight that feels indulgent.

Versatile: Top these rolls with peanut butter, slather on jam, or use them as a sandwich base for a delightful lunch.

Time-saving: Bake a batch in just 30 minutes, making them an ideal option for quick meals or unexpected guests.

Wondering how delicious homemade bread can be? Pair these rolls with Homemade Chicken Rolls or create a delightful sweet treat utilizing them in Coconut Chocolate Rolls. Enjoy the wholesome goodness each bite offers!

Easy 2-Ingredient Fluffy Flax Rolls Ingredients

When making your Easy 2-Ingredient Fluffy Flax Rolls, you’ll find that simplicity is the name of the game!

For the Dough

  • Flaxseed Meal – A powerhouse of fiber and healthy fats, it provides the structure needed for our delightful rolls.
  • Baking Powder – This magical leavening agent creates the fluffy texture; make sure it’s fresh for the best rise!
  • Salt (optional) – A pinch can elevate the flavors; feel free to skip if you prefer.
  • Water – Essential for forming a cohesive dough; just the right amount will keep your rolls from becoming too wet.

Enjoy crafting these guilt-free rolls that suit your dietary needs while satisfying your cravings for homemade goodness!

Step‑by‑Step Instructions for Easy 2-Ingredient Fluffy Flax Rolls

Step 1: Preheat and Prepare
Begin by preheating your oven to 400°F (200°C). While the oven warms up, grab a muffin tin and spray all 12 cups with nonstick cooking spray, ensuring they’re well-coated. This will help your Easy 2-Ingredient Fluffy Flax Rolls release easily after baking and maintain their fluffy texture.

Step 2: Grind the Flaxseed Meal
Next, measure your flaxseed meal and place it in a blender or coffee grinder. Pulse until you achieve a fine flour consistency, which is crucial for light and airy rolls. This step typically takes about 1–2 minutes, and you’ll know it’s ready when it resembles a fine powder rather than coarse grains.

Step 3: Mix Dry Ingredients
In a large mixing bowl, combine the finely ground flaxseed meal and baking powder. If you’re opting for flavor enhancement, add a pinch of salt. Whisk the mixture thoroughly until well blended, ensuring the baking powder is evenly distributed for optimal fluffiness in your Easy 2-Ingredient Fluffy Flax Rolls.

Step 4: Combine with Water
Pour in the water while stirring the dry ingredients with a spatula or wooden spoon. Mix until a thick, gooey dough forms. Avoid adding extra water, as this can make the dough too wet and yield denser rolls. You want the dough to hold together without being overly sticky yet still pliable.

Step 5: Shape the Dough
With your hands, take portions of the dough and divide it into 12 equal pieces. To shape each piece into a ball, slightly dampen your hands to prevent sticking. Roll each portion until they are smooth and round, ensuring they are well-formed to ensure even baking of your Easy 2-Ingredient Fluffy Flax Rolls.

Step 6: Bake the Rolls
Carefully place each dough ball into the prepared muffin tin, spacing them evenly. Slide the muffin tin into the preheated oven and bake for 28-33 minutes. You’ll know they’re ready when the tops are golden brown and the rolls have puffed up beautifully, filling your kitchen with a delightful aroma.

Step 7: Cool Before Serving
Once baked, remove the muffin tin from the oven and allow the rolls to cool in the tin for about 15 minutes. This crucial step ensures they firm up a bit and makes it easier to transfer them without falling apart. After cooling, gently move the rolls to a wire rack and let them cool completely before serving.

Expert Tips for Easy 2-Ingredient Fluffy Flax Rolls

  • Finely Ground Flaxseed: Make sure your flaxseed meal is ground very finely. A coarse grind can lead to denser rolls that don’t achieve the desired fluffiness.

  • Check Baking Powder Freshness: Ensure your baking powder is fresh. Outdated powder may cause your Easy 2-Ingredient Fluffy Flax Rolls to flatten instead of rise beautifully.

  • Avoid Extra Water: Only add the amount of water specified. Adding too much can make the dough sticky, yielding rolls that are less airy.

  • Experiment with Flavors: Elevate your rolls by adding herbs, spices, or seeds. This simple technique can transform the flavor profile of your Easy 2-Ingredient Fluffy Flax Rolls.

  • No Convection Oven: Stick with standard baking settings. Convection cooking can lead to uneven baking, resulting in inconsistently baked rolls.

Easy 2-Ingredient Fluffy Flax Rolls Variations

Embrace your creativity by personalizing these delicious rolls to suit your taste preferences!

  • Herb-Infused: Add 1-2 tablespoons of dried herbs like oregano or rosemary for a flavor-packed twist. These fragrant additions elevate the rolls, making them perfect as a side dish or standalone snack.

  • Spicy Kick: Incorporate a dash of red pepper flakes or a sprinkle of cayenne to the dough for a zesty surprise. This fiery variation is perfect for those who love a little heat in their meals.

  • Garlic Lovers: Mix in garlic powder or finely minced fresh garlic to the dry ingredients for a robust flavor. Imagine enjoying these rolls warm with a hint of garlic enriching every bite.

  • Seeded Delight: Fold in chia seeds or sunflower seeds into the dough for an unexpected crunch. This variation not only enhances texture but also adds nutritional benefits to your rolls.

  • Nut-Free Creaminess: Swap the golden flaxseed meal for finely ground sunflower seed flour, maintaining that fluffiness without the nuts. This option is excellent for nut-free diets while keeping the taste divine.

  • Sweet Twist: Stir in a tablespoon of maple syrup or agave nectar to the mix if you’re in the mood for something sweet. These lightly sweetened rolls are perfect for breakfast or a tea time treat.

  • Savory Cheese: For a non-vegan version, fold in nutritional yeast to mimic a cheesy flavor without compromising its healthy profile. Enjoy this cheesy twist alongside your favorite homemade soups or salads.

  • Baking Sheet Hack: Instead of a muffin tin, try flattening the dough and baking on a lined baking sheet. You’ll create flat rolls that offer a perfect base for sliders or mini sandwiches, ideal for casual gatherings.

Whether you’re serving these rolls alongside a bowl of soup or using them as the base for a delightful sandwich, these variations will keep your meals exciting and full of flavor! If you’re looking for something extra to complement these rolls, consider a refreshing side such as Savory Beef Rolls or a lighter option like Cheesy Zucchini Rolls.

What to Serve with Easy 2-Ingredient Fluffy Flax Rolls

Imagine the delightful spread of flavors and textures that can accompany these airy rolls, transforming a simple meal into a dining experience.

  • Creamy Avocado Spread: A buttery layer of avocado adds richness and pairs beautifully with the light texture of the rolls.

  • Hearty Vegetable Soup: The refreshing taste of a vegetable soup harmonizes perfectly with the fluffy rolls, creating a warm and inviting meal.

  • Fresh Garden Salad: Crisp greens and colorful vegetables bring a refreshing contrast to the soft, fluffy texture, enhancing the overall meal experience. The vibrant flavors will dance on your palate!

  • Savory Hummus: Smooth, garlicky hummus makes for a lovely dip, allowing you to enjoy each roll by scooping it up. It’s a great way to add protein and flavor!

  • Chickpea Salad: Protein-packed chickpeas tossed with herbs and spices provide a delightful combination of textures, making your meal more satisfying.

  • Sweet Berry Jam: Slathering the rolls with a sweet fruit jam offers a delightful contrast to the hearty base. It’s the perfect touch for breakfast or a snack.

  • Herbal Tea or Infused Water: A refreshing drink infused with citrus or herbs complements the wholesome flavors of the rolls, adding a touch of elegance to your meal.

These pairings not only elevate your dining experience but also highlight the versatility of the Easy 2-Ingredient Fluffy Flax Rolls, making them a delightful centerpiece for any occasion!

How to Store and Freeze Easy 2-Ingredient Fluffy Flax Rolls

Room Temperature: Store your rolls in an airtight container at room temperature for up to 3 days to maintain their freshness and fluffy texture.

Fridge: For longer storage, place the rolls in the fridge where they can last for up to 2 weeks. Be sure to keep them in a sealed container to prevent drying out.

Freezer: Freeze your Easy 2-Ingredient Fluffy Flax Rolls for up to 6 months. Use freezer-safe bags or containers, separating each roll with parchment paper to make thawing easier.

Reheating: To enjoy them warm again, simply reheat in the oven at 350°F (175°C) for about 10 minutes or until heated through.

Make Ahead Options

These Easy 2-Ingredient Fluffy Flax Rolls are perfect for meal prep enthusiasts looking to save time during busy weeknights! You can mix the dry ingredients (flaxseed meal, baking powder, and optional salt) up to 3 days in advance; simply store the mixture in an airtight container in a cool, dry place. When you’re ready to bake, just add water to form the dough, shape it into balls, and proceed as directed. To maintain quality, be sure to keep the dough covered to prevent it from drying out. Bake the rolls fresh for a delightful taste that’s just as airy and fluffy, making it the ideal time-saving solution for delicious homemade bread!

Easy 2-Ingredient Fluffy Flax Rolls Recipe FAQs

What type of flaxseed meal should I use?
Absolutely! For the best flavor and texture, I recommend using golden flaxseed meal, as it has a milder taste compared to the darker variety. If all you have is dark flaxseed meal, it will work just fine; the texture and fluffiness of your rolls will remain intact.

How should I store my flax rolls?
To maintain their delightful softness, store the Easy 2-Ingredient Fluffy Flax Rolls in an airtight container at room temperature for up to 3 days. If you’re not planning on eating them right away, they can last in the fridge for up to 2 weeks. Just be sure to keep them sealed to prevent drying out!

Can I freeze these rolls?
Very! Freezing these rolls is a great option. After they’ve cooled completely, tuck them into freezer-safe bags or containers, making sure to separate each roll with parchment paper. This way, they won’t stick together when you thaw them. You can freeze them for up to 6 months!

What should I do if my rolls don’t rise well?
Don’t fret! If the rolls don’t rise properly, it’s likely due to outdated baking powder. Always check the freshness of your baking powder before starting. If you notice that the dough is too wet or sticky (which can happen with extra water), it might lead to denser rolls. Make sure to measure the water accurately to achieve the perfect dough.

Are these rolls safe for all diets?
Indeed! These Easy 2-Ingredient Fluffy Flax Rolls are vegan, gluten-free, oil-free, grain-free, and nut-free, making them a fantastic option for various dietary needs. However, if you have specific allergies or dietary concerns, always double-check the ingredients you choose, particularly with the baking powder, as some may contain traces of allergens.

Can I customize the flavor of my flax rolls?
You bet! One of the best things about these rolls is their versatility. If you seek a little extra flavor, feel free to experiment by mixing in herbs, spices, or seeds to the batter before baking. Popular choices include garlic powder, dried oregano, or even chia seeds – the more, the merrier!

Easy 2-Ingredient Fluffy Flax Rolls

Easy 2-Ingredient Fluffy Flax Rolls for Guilt-Free Enjoyment

Discover the delight of Easy 2-Ingredient Fluffy Flax Rolls, a simple and healthy bread alternative that is vegan and gluten-free.
Prep Time 10 minutes
Cook Time 30 minutes
Cooling Time 15 minutes
Total Time 55 minutes
Servings: 12 rolls
Course: Other
Cuisine: Vegan
Calories: 80

Ingredients
  

For the Dough
  • 1 cup Flaxseed Meal Ground finely for best results
  • 1 tbsp Baking Powder Ensure it’s fresh for best rise
  • 1 pinch Salt Optional
  • 1 cup Water Adjust as necessary for dough consistency

Equipment

  • oven
  • muffin tin
  • Blender or coffee grinder
  • mixing bowl

Method
 

Preparation Steps
  1. Preheat your oven to 400°F (200°C) and spray a muffin tin for 12 cups with nonstick cooking spray.
  2. Grind the flaxseed meal until it resembles a fine flour, which takes about 1-2 minutes.
  3. In a large mixing bowl, combine the ground flaxseed meal and baking powder, adding salt if desired.
  4. Pour water into the dry ingredients while stirring until a thick dough forms.
  5. Divide the dough into 12 equal pieces and shape each into a ball.
  6. Place each dough ball into the prepared muffin tin and bake for 28-33 minutes or until golden brown.
  7. Allow the rolls to cool in the tin for about 15 minutes before transferring to a wire rack.

Notes

Ensure flaxseed meal is finely ground for fluffy rolls. Store in an airtight container to maintain freshness.

Crab and Shrimp Stuffed Salmon: A Flavorful Low-Carb Feast

The first time I prepared Crab and Shrimp Stuffed Salmon, I enjoyed a symphony of flavors that transformed my kitchen into a seaside bistro. This dish effortlessly marries the sweet, succulent taste of seafood with a rich, creamy filling, making it the ideal centerpiece for any special occasion or a high-end weeknight dinner. Not only is this recipe low-carb and high-protein, perfect for those following keto or gluten-free diets, but it also offers an impressive presentation that will dazzle your family and friends. Imagine flaky salmon encasing a delightful blend of crab and shrimp, all seasoned to perfection. Are you ready to elevate your dinner game? Let’s dive into this delicious, luxurious experience!

Why is This Recipe a Must-Try?

Decadent Flavors: The combination of crab and shrimp inside flaky salmon creates an explosion of coastal flavor that is absolutely irresistible.
Easy to Prepare: With a simple filling and straightforward baking process, you can impress guests without extensive culinary skills.
Health Boost: Packed with omega-3s and high in protein, this dish supports heart health while aligning with keto and gluten-free dietary needs.
Versatile Options: Not a crab fan? Feel free to swap in canned crab or white fish for a delightful twist, or add greens for extra nutrition!
Stunning Presentation: Each plate is a visual treat, sure to catch the eye and elevate any meal from ordinary to extraordinary. Perfect paired with a side of lemon garlic asparagus or a refreshing salad!
Crowd Pleaser: Whether it’s a dinner party or a weeknight treat, this recipe is destined to delight and satisfy anyone at your table.

Crab and Shrimp Stuffed Salmon Ingredients

For the Filling
Cooked crab meat – Brings a sweet, briny flavor; canned crab is an easy alternative.
Cooked shrimp – Adds delightful texture and seafood goodness; can be swapped with mild white fish.
Cream cheese – Binds the mixture together with rich creaminess; try a plant-based option for dairy-free needs.
Parmesan cheese – Delivers deep flavor and richness; nutritional yeast is a great substitute for a dairy-free option.
Green onions – Provides fresh, mild onion flavor; can be replaced with shallots or chives for a similar taste.
Garlic – Infuses aromatic depth; fresh garlic enhances the flavor, but garlic powder works too.
Lemon juice – Brightens up the filling; lime juice can be used as an alternative.
Dijon mustard – Adds a tangy kick; can be omitted for a milder flavor.
Old Bay seasoning – A classic seafood seasoning that enhances flavors beautifully; Cajun seasoning can give it a spicy twist.
Fresh parsley – For garnishing and a touch of freshness; you might substitute dill or cilantro if you prefer.

For the Salmon
Salmon fillets – Essential for this recipe; choose skin-on or skin-off according to your preference.

For Cooking
Olive oil – Perfect for searing salmon; high-heat oils like avocado oil can also be used.
Salt and black pepper – Essential for seasoning; always adjust to suit your taste.

Remember, this Crab and Shrimp Stuffed Salmon will not only look stunning on your table but also tantalize your taste buds, blending luxurious flavors in every bite!

Step‑by‑Step Instructions for Crab and Shrimp Stuffed Salmon

Step 1: Preheat the Oven
Begin by preheating your oven to 375°F (190°C). This ensures the environment is hot enough for a perfect bake, resulting in flaky salmon. While the oven warms up, gather all your ingredients for the Crab and Shrimp Stuffed Salmon to streamline the cooking process.

Step 2: Prepare the Filling
In a mixing bowl, combine the cooked crab meat, chopped shrimp, cream cheese, Parmesan cheese, green onions, minced garlic, lemon juice, Dijon mustard, Old Bay seasoning, and chopped parsley. Stir until all ingredients are well-incorporated, creating a creamy, flavorful filling that will bring your salmon to life.

Step 3: Prepare the Salmon Fillets
Take each salmon fillet and gently cut a slit along one side, creating a pocket for the stuffing. Season both sides of the fillets generously with salt and black pepper, enhancing the overall flavor of the Crab and Shrimp Stuffed Salmon. Ensure the pockets are deep enough to hold the delicious filling without overstuffing.

Step 4: Fill the Salmon Pockets
Carefully spoon the seafood filling into each salmon pocket, using about a heaping tablespoon per fillet. Make sure to pack the stuffing gently to prevent the salmon from bursting while cooking, ensuring an even distribution of flavors throughout the dish.

Step 5: Sear the Salmon
In an oven-safe skillet, heat olive oil over medium-high heat until shimmering. Place the filled salmon fillets in the skillet, searing for about 2–3 minutes on each side, or until golden brown. This step adds a beautiful crust and depth of flavor to your Crab and Shrimp Stuffed Salmon that you’ll adore.

Step 6: Bake in the Oven
Once the salmon is seared, carefully transfer the skillet to the preheated oven. Bake for 12-15 minutes, watching for the salmon to flake easily with a fork. This ensures the fish is cooked through, while the stuffing remains creamy and flavorful.

Step 7: Garnish and Serve
Once cooked, remove the skillet from the oven and let the salmon rest for a few minutes. This helps retain its moisture. Before serving, garnish with fresh parsley and lemon wedges for an added touch of brightness. Now your Crab and Shrimp Stuffed Salmon is ready to be enjoyed!

Make Ahead Options

These Crab and Shrimp Stuffed Salmon are perfect for busy weeknights or meal prep enthusiasts! You can prepare the seafood filling up to 24 hours in advance, storing it in an airtight container in the refrigerator to lock in freshness. Additionally, you can cut pockets in the salmon fillets and season them ahead of time, keeping them wrapped in plastic wrap for up to 3 days. When you’re ready to cook, simply fill the salmon pockets with the chilled filling, then sear and bake as usual. This method ensures that your dish remains just as delicious while saving you precious time during busy evenings!

Crab and Shrimp Stuffed Salmon Variations

Consider adding a personal twist to this delightful dish and make it uniquely yours!

  • Leafy Greens: Add chopped spinach or kale to the filling for extra nutrients. The vibrant greens offer a fresh contrast to the rich seafood filling.

  • Smoked Salmon: Incorporate diced smoked salmon for a deeper, more complex flavor profile. This variation enhances the overall taste, making each bite a coastal experience.

  • Spicy Kick: For heat, mix in chopped jalapeño or a pinch of cayenne pepper. A little spice elevates the flavor, making it an exciting choice for those who crave a kick.

  • Breadcrumb Topping: If you’re not following a keto diet, consider adding a breadcrumb topping for a crunchy texture. This twist adds a delightful crispness that pairs well with the tender salmon.

  • Lemon-Dill Glaze: Drizzle a light lemon-dill sauce over the finished dish for a zesty flavor boost. It brings a refreshing brightness to complement the richness of the filling.

  • Different Seafood: Swap out crab for other seafood, like scallops or lobster, to create a luxurious filling. Each type of seafood has its own unique flavor that can transform the dish entirely.

  • Herb Infusion: Instead of parsley, use fresh dill or cilantro for a different herbaceous note. This subtle change can make a big difference in the overall taste experience.

By experimenting with these variations, you can tailor your Crab and Shrimp Stuffed Salmon to perfectly suit your taste. Don’t forget to pair it with sides such as lemon garlic asparagus or a crisp salad for a well-rounded meal!

What to Serve with Crab and Shrimp Stuffed Salmon

Pairing a delightful dish like this with the right sides elevates your dining experience into something extraordinary.

  • Lemon Garlic Asparagus: This vibrant vegetable side adds a refreshing, zesty crunch, making it a perfect complement to your rich salmon. The flavors intertwine deliciously, enhancing the seafood delight.

  • Cauliflower Mash: Creamy and buttery, cauliflower mash offers a low-carb alternative while still providing a comforting side. It absorbs the flavors from the salmon, making every bite heavenly.

  • Steamed Green Beans: Crisp and vibrant, steamed green beans introduce a nice texture contrast to the tender salmon. A sprinkle of sea salt accentuates their freshness and boosts the entire meal.

  • Quinoa Salad: Light and nutrient-dense, quinoa salad brings a nutty flavor and delightful chewiness, rounding out the meal beautifully. Toss in some cherry tomatoes and cucumbers for extra freshness.

  • Olive Oil Roasted Brussels Sprouts: These luscious sprouts, with their caramelized edges, add depth to your plate. Paired with a hint of balsamic, they complement the buttery seafood dish perfectly.

  • Crisp White Wine: A chilled glass of Sauvignon Blanc adds a refreshing touch. Its bright acidity cuts through the richness of the salmon, making for a truly balanced experience.

  • Tropical Fruit Salsa: Top your salmon with a mango or pineapple salsa for a hint of sweetness. The fruity acidity brightens up the dish, making each mouthful feel like a summer treat.

Expert Tips for Crab and Shrimp Stuffed Salmon

  • Avoid Overfilling: Don’t stuff the salmon pockets too much; a heaping spoonful per fillet is perfect to prevent bursting while cooking.
  • Fresh is Best: Use fresh crab and shrimp for the most flavorful filling; if frozen, ensure it’s fully thawed for optimal taste.
  • Sear for Texture: Skin-on salmon can produce beautifully crispy skin. Sear both sides before baking to lock in flavor and achieve a lovely golden crust.
  • Rest Before Slicing: Let the salmon rest for a few minutes after baking, this ensures juicier and more flavorful slices of your Crab and Shrimp Stuffed Salmon.
  • Experiment with Fillings: Feel free to add chopped spinach or even switch crab for mild white fish for a tasty twist on this versatile dish!
  • Watch Baking Time: Keep an eye on the salmon towards the end of the cooking time; overbaking can lead to dryness, and it should flake easily when done.

How to Store and Freeze Crab and Shrimp Stuffed Salmon

Fridge: Store any leftover Crab and Shrimp Stuffed Salmon in an airtight container in the refrigerator for up to 3 days. This keeps the flavors intact while maintaining freshness.

Freezer: If you want to freeze the stuffed salmon, wrap each fillet tightly in plastic wrap and then place in a freezer-safe bag. It can be frozen for up to 3 months—perfect for meal prep!

Reheating: When you’re ready to enjoy it again, thaw overnight in the fridge and reheat in a preheated oven at 350°F (175°C) for about 15-20 minutes, until warmed through.

Make-Ahead Tips: Prepare the filling ahead of time and store it in the fridge. You can stuff the salmon right before cooking to save time!

Crab and Shrimp Stuffed Salmon Recipe FAQs

What type of salmon is best for this recipe?
I recommend using fresh, skin-on salmon fillets for optimal flavor and texture. Skin-on fillets will also help hold the filling in place while cooking, providing that perfect sear and crispy skin experience. However, you can opt for skinless fillets if you prefer a simpler presentation!

How should I store leftovers of Crab and Shrimp Stuffed Salmon?
Store any leftover Crab and Shrimp Stuffed Salmon in an airtight container in the refrigerator for up to 3 days. This keeps it fresh while still retaining those delicious flavors. When reheating, just ensure it’s warmed through without overcooking it!

Can I freeze Crab and Shrimp Stuffed Salmon?
Absolutely! To freeze, wrap each filled salmon fillet tightly in plastic wrap and then place them in a freezer-safe bag. This will keep them fresh for up to 3 months. When you’re ready to enjoy, thaw them overnight in the fridge and then bake at 350°F (175°C) for about 15-20 minutes.

What should I do if my filling is too runny?
If your filling is too runny, try adding more cream cheese or even a few crushed crackers to help bind it together better. This will not only thicken the mixture but also give it a delightful texture that complements the salmon beautifully.

Can I modify the filling for dietary restrictions?
Of course! If you’re looking for dairy-free options, you can substitute cream cheese and Parmesan with plant-based alternatives. Additionally, if you’re avoiding shellfish, simply replace the crab and shrimp with cooked, flaky white fish like cod or tilapia for a satisfying and flavorful veggie option.

How can I tell when the salmon is perfectly done?
You’ll know your salmon is done when it flakes easily with a fork and reaches an internal temperature of 145°F (63°C). Be careful not to overbake, as this can lead to dry fish—aim for that perfect flakiness while keeping the filling creamy and delightful!

Crab and Shrimp Stuffed Salmon

Crab and Shrimp Stuffed Salmon: A Flavorful Low-Carb Feast

Enjoy a delicious and visually stunning Crab and Shrimp Stuffed Salmon, perfect for special occasions or a satisfying weeknight dinner.
Prep Time 15 minutes
Cook Time 15 minutes
Resting Time 5 minutes
Total Time 35 minutes
Servings: 4 servings
Course: Dinner
Cuisine: Seafood
Calories: 350

Ingredients
  

For the Filling
  • 1 cup cooked crab meat Canned crab is an easy alternative.
  • 1 cup cooked shrimp Can be swapped with mild white fish.
  • 8 oz cream cheese Try a plant-based option for dairy-free needs.
  • 1/2 cup parmesan cheese Nutritional yeast is a great substitute for a dairy-free option.
  • 2 pieces green onions Can be replaced with shallots or chives.
  • 2 cloves garlic Fresh garlic enhances the flavor.
  • 1 tbsp lemon juice Lime juice can be used as an alternative.
  • 1 tsp Dijon mustard Can be omitted for a milder flavor.
  • 1 tbsp Old Bay seasoning Cajun seasoning can give it a spicy twist.
  • 2 tbsp fresh parsley You might substitute dill or cilantro.
For the Salmon
  • 4 fillets salmon Choose skin-on or skin-off according to your preference.
For Cooking
  • 2 tbsp olive oil High-heat oils like avocado oil can also be used.
  • to taste salt Adjust to suit your taste.
  • to taste black pepper Adjust to suit your taste.

Equipment

  • oven
  • Skillet
  • mixing bowl

Method
 

Step-by-Step Instructions
  1. Preheat your oven to 375°F (190°C).
  2. In a mixing bowl, combine crab meat, shrimp, cream cheese, parmesan, green onions, garlic, lemon juice, mustard, Old Bay seasoning, and parsley.
  3. Cut a slit in each salmon fillet to create a pocket. Season with salt and black pepper.
  4. Spoon the filling into each salmon pocket and pack gently.
  5. Heat olive oil in a skillet over medium-high heat and sear the salmon for 2-3 minutes on each side.
  6. Transfer the skillet to the oven and bake for 12-15 minutes, until the salmon flakes easily.
  7. Garnish with parsley and lemon wedges before serving.

Notes

Store leftovers in an airtight container in the refrigerator for up to 3 days. Freeze for up to 3 months. Reheat in the oven at 350°F for 15-20 minutes.

Hearty Salmon Chowder: Your Creamy Comfort Food Fix

As I stirred the pot, a gentle wave of savory aroma enveloped my kitchen, instantly transporting me to cozy evenings by the fireplace. This Creamy Salmon Chowder is not just a dish; it’s a heartwarming embrace on a chilly night, blending tender salmon chunks with vibrant vegetables like carrots, celery, and potatoes. What I adore most about this chowder is how quickly it comes together, making it a perfect solution for busy weeknights while still offering a nourishing, omega-3-rich feast for the soul. With its creamy texture and adaptable ingredients, you can easily customize it to suit your taste. Whether you’re in the mood for a bold twist or a classic rendition, are you ready to dive into this delightful recipe?

Why is Salmon Chowder a Cozy Winner?

Comforting Warmth: This Salmon Chowder envelops you in a creamy embrace, making it your go-to dish for chilly nights.

Quick and Easy: With a simple preparation method, this recipe is ideal for those busy evenings when time is of the essence.

Flavor-Packed: The combination of fresh ingredients ensures each bite bursts with rich flavor, elevating your dining experience.

Endless Variations: Feel free to personalize your chowder! Swap out vegetables or adjust the creaminess to match your cravings—this dish truly adapts to your needs.

Nutrient-Dense Delight: Packed with omega-3s, this chowder not only satisfies hunger but nourishes your body as well.

Crowd Pleaser: Serve it alongside crusty bread, and watch it disappear at family gatherings or cozy evenings with friends! For more comforting recipes, check out our hearty winter soups.

Salmon Chowder Ingredients

For the Chowder Base
Olive Oil – Adds fat for sautéing; use butter for a different flavor.
Onion – Provides flavor base; can swap with shallots.
Celery – Contributes crunch and aroma; omit if unavailable.
Carrot – Adds sweetness and color; can replace with red pepper.
Garlic – Enhances overall flavor; fresh garlic preferred to garlic powder.
Chicken Broth – Adds depth of flavor; use vegetable broth for vegetarian option.
Milk – Creates creaminess; substitute with non-dairy milk for a lactose-free version.

For the Substance
Potatoes – Acts as starch to thicken; use sweet potatoes for a different taste.
Salmon Fillets – Main protein; fresh or smoked salmon can enhance flavor.
Corn Kernels – Adds sweetness and texture; frozen is acceptable.

For the Seasoning
Fresh Thyme – Provides herbal notes; substitute with dried thyme (but use less).
Salt and Pepper – Essential for seasoning; adjust to taste.
Fresh Parsley – Optional garnish; can substitute with other herbs like dill.
Lemon Juice – Optional for brightness; vinegar can be used as an alternative.

This Salmon Chowder is not just about nourishment—it’s a warm hug in a bowl, perfect for endless cozy nights!

Step‑by‑Step Instructions for Creamy Salmon Chowder

Step 1: Sauté the Vegetables
In a large pot, heat 2 tablespoons of olive oil over medium heat. Add diced onion, celery, and carrot, sautéing for about 5-7 minutes until they soften and the onion turns translucent. The vibrant colors of the vegetables will fill the kitchen with a welcoming aroma, setting the stage for your hearty Salmon Chowder.

Step 2: Add Garlic for Flavor
Incorporate 2 minced cloves of garlic into the pot and cook for an additional minute, stirring constantly until fragrant. You’ll know it’s ready when the garlic releases its aromatic scent, enhancing the flavor base of your chowder. This step is crucial as it adds depth to the dish.

Step 3: Combine Broth and Milk
Pour in 4 cups of chicken broth and 1 cup of milk, stirring vigorously to combine all the ingredients. Increase the heat slightly and bring the mixture to a gentle boil. The brothy concoction will start bubbling, promising a deliciously creamy texture in your Salmon Chowder.

Step 4: Add Potatoes to Thicken
Introduce 2 peeled and diced potatoes to the simmering broth mixture and return to a boil. Lower the heat to medium-low and let it simmer for 10-12 minutes, or until the potatoes are tender when pierced with a fork. This will create a hearty base that thickens your chowder beautifully.

Step 5: Fold in Salmon and Corn
Gently add 1 pound of diced salmon fillets and 1 cup of corn kernels to the pot. Cook for an additional 5-7 minutes, stirring occasionally until the salmon is cooked through and flakes easily with a fork. The salmon will become a prominent feature in your chowder, lending its flavors to the overall dish.

Step 6: Season and Enhance
Stir in a handful of fresh chopped thyme, along with salt and pepper to taste. Adjust the seasoning as needed, tasting the chowder to ensure it’s just right. The addition of thyme will give your Salmon Chowder a fresh, herbal note, elevating the dish to comforting perfection.

Step 7: Garnish and Serve
For an optional finishing touch, squeeze in some fresh lemon juice and sprinkle with parsley just before serving. Ladle the chowder into bowls, and enjoy the warm, creamy goodness. The vibrant colors and inviting aroma will not only warm your heart but also impress those you share it with.

Expert Tips for Salmon Chowder

  • Fresh is Best: Always opt for fresh salmon over frozen or canned for more vibrant flavor and better texture in your chowder.

  • Thickening Techniques: If you prefer a thicker chowder, use a cornstarch slurry or flour roux with your milk instead of dairy alone to enhance creaminess.

  • Season with Care: Taste as you go! Adjust salt and pepper based on your preference, especially after adding strong seasonings like thyme.

  • Vegetable Variations: Don’t hesitate to swap in seasonal vegetables like spinach or kale to boost nutrients without compromising flavor—make this salmon chowder your own!

  • Cream Alternatives: To keep it lighter, consider using non-dairy milk like almond or oat milk without sacrificing that creamy texture you crave.

  • Storage Wisdom: This chowder improves in flavor when stored overnight. Store leftovers in the fridge for up to three days and reheat gently for a quick meal.

How to Store and Freeze Salmon Chowder

Fridge: Store Salmon Chowder in an airtight container for up to 3 days. The flavors will improve as it sits!

Freezer: Portion cooled chowder into freezer-safe containers for up to 3 months. Thaw in the refrigerator overnight before reheating.

Reheating: Gently reheat on the stovetop or in the microwave until warmed through, adding a splash of milk if needed for creaminess.

Avoiding Curdling: When reheating, stir consistently over low heat to prevent the milk from curdling, ensuring a smooth, rich texture in your chowder.

Make Ahead Options

These Salmon Chowder preparations are perfect for busy home cooks looking to save time during the week! You can chop the vegetables (onion, celery, and carrot) and refrigerate them up to 3 days in advance, allowing flavors to develop without compromising quality. Additionally, the chowder itself can be made entirely the day before serving; just let it cool, store it in an airtight container, and refrigerate. To finish the chowder, gently reheat on the stove over low heat, adding any fresh herbs right before serving for that irresistible aroma. This way, you can enjoy a delicious homemade meal with minimal effort on hectic nights!

What to Serve with Creamy Salmon Chowder

Imagine a table filled with comforting aromas and vibrant colors, elevating your meal experience to new heights.

  • Crusty Bread: Perfect for dipping, this warm, chewy bread adds texture, soaking up the creamy goodness of the chowder.
  • Garlic Bread: Crisp and buttery with a hint of garlic, this classic side enhances the flavor profile while adding crunch to your meal.
  • Garden Salad: A light, refreshing salad with mixed greens and a zesty vinaigrette cuts through the richness of the chowder, providing a delightful contrast.
  • Steamed Green Beans: Tender-crisp green beans bring a fresh, vibrant element to your plate, complementing the creamy heartiness of the chowder beautifully.
  • Roasted Vegetables: A medley of roasted carrots, bell peppers, and zucchini adds a sweet, caramelized flavor that pairs perfectly with the chowder’s richness.
  • Sauvignon Blanc: This crisp white wine’s acidity brightens up the flavors in your chowder, making each bite more enjoyable and refreshing.
  • Lemon Tart: Finish on a sweet note! This zesty dessert offers a burst of citrus that echoes the lemonade hint in the chowder, cleansing your palate.

Salmon Chowder Variations & Substitutions

Feel free to explore these delightful substitutions and variations to tailor the salmon chowder to your preferences.

  • Dairy-Free: Use coconut milk instead of regular milk for a rich, tropical twist that keeps the chowder creamy and delicious.

  • Protein Swap: Try using canned tuna or cooked shrimp as an alternative to salmon, offering diverse flavors while maintaining a hearty base.

  • Vegetable Boost: Incorporate spinach, kale, or leeks for added nutrients and vibrant color, enhancing the dish’s overall appeal and health benefits.

  • Zesty Upgrade: For an extra zing, add diced jalapeño or a splash of hot sauce to spice things up and awaken your taste buds.

  • Gluten-Free: Ensure the chowder remains gluten-free by using a cornstarch slurry or gluten-free flour for thickening rather than traditional flour.

  • Sweet Potato Addition: Swap regular potatoes for sweet potatoes for a sweeter profile that complements the salmon’s richness beautifully.

  • Herb Infusion: Experiment with different herbs, like dill or parsley, to add freshness and aroma; try using fresh rosemary for an earthy note.

  • Broth Variation: Use seafood stock in place of chicken broth to deepen the umami flavor, aligning perfectly with the chowder’s seafood theme.

Each of these variations brings its unique flair to the classic salmon chowder, allowing you to create a meal that feels personal and comforting. Explore more ideas for cozy dinners with our collection of hearty winter soups!

Salmon Chowder Recipe FAQs

What kind of salmon should I use for the chowder?
Absolutely! Fresh salmon is the best choice for this chowder due to its vibrant flavor and flaky texture. However, if you’re in a pinch, you can also use smoked salmon for a bolder taste or frozen salmon, provided it’s thawed completely before cooking.

How long can I store leftover Salmon Chowder in the fridge?
Very! You can store your Salmon Chowder in an airtight container in the fridge for up to 3 days. The flavors actually improve overnight as they meld together, making it even more delicious for your next meal.

Can I freeze Salmon Chowder? If so, how?
Absolutely! To freeze, let your chowder cool completely, then portion it into freezer-safe containers or bags. It will keep well for up to 3 months. When you’re ready to enjoy it again, simply thaw it in the refrigerator overnight and reheat gently on the stove, adding a splash of milk if needed for creaminess.

What should I do if my chowder is too thick?
Not to worry! If your chowder ends up too thick, simply add more broth or milk gradually while stirring until you reach your desired consistency. Heat it gently to combine, and taste as you go to adjust the seasoning if necessary.

Are there any dietary considerations I should keep in mind?
Definitely! If you have seafood allergies or are cooking for someone who does, consider using smoked tofu or chickpeas as a protein alternative. For lactose intolerance, opt for non-dairy milk instead of regular milk to keep this creamy salmon chowder equally delicious.

How can I enhance the flavor of my Salmon Chowder?
Very! For a boost, you might incorporate a splash of white wine while the broth is simmering. Additionally, experimenting with spices like paprika or fresh herbs like dill and parsley can elevate the flavors beautifully. Don’t forget to taste and adjust as you go—this is your chowder, after all!

Salmon Chowder

Hearty Salmon Chowder: Your Creamy Comfort Food Fix

This Salmon Chowder is a creamy delight packed with salmon and vegetables, perfect for chilly nights.
Prep Time 15 minutes
Cook Time 30 minutes
Total Time 45 minutes
Servings: 4 bowls
Course: Dinner
Cuisine: American
Calories: 380

Ingredients
  

For the Chowder Base
  • 2 tablespoons Olive Oil Adds fat for sautéing; use butter for a different flavor.
  • 1 medium Onion Provides flavor base; can swap with shallots.
  • 2 stalks Celery Contributes crunch and aroma; omit if unavailable.
  • 1 medium Carrot Adds sweetness and color; can replace with red pepper.
  • 2 cloves Garlic Enhances overall flavor; fresh garlic preferred to garlic powder.
  • 4 cups Chicken Broth Adds depth of flavor; use vegetable broth for vegetarian option.
  • 1 cup Milk Creates creaminess; substitute with non-dairy milk for a lactose-free version.
For the Substance
  • 2 medium Potatoes Acts as starch to thicken; use sweet potatoes for a different taste.
  • 1 pound Salmon Fillets Main protein; fresh or smoked salmon can enhance flavor.
  • 1 cup Corn Kernels Adds sweetness and texture; frozen is acceptable.
For the Seasoning
  • 1 handful Fresh Thyme Provides herbal notes; substitute with dried thyme (but use less).
  • Salt and Pepper Essential for seasoning; adjust to taste.
  • 1 tablespoon Fresh Parsley Optional garnish; can substitute with other herbs like dill.
  • 1 tablespoon Lemon Juice Optional for brightness; vinegar can be used as an alternative.

Equipment

  • Large pot

Method
 

Step‑by‑Step Instructions for Creamy Salmon Chowder
  1. In a large pot, heat 2 tablespoons of olive oil over medium heat. Add diced onion, celery, and carrot, sautéing for about 5-7 minutes until they soften.
  2. Incorporate 2 minced cloves of garlic into the pot and cook for an additional minute, stirring constantly until fragrant.
  3. Pour in 4 cups of chicken broth and 1 cup of milk, stirring vigorously to combine all the ingredients. Increase the heat slightly and bring to a gentle boil.
  4. Introduce 2 peeled and diced potatoes to the simmering broth mixture and return to a boil. Lower the heat to medium-low and let it simmer for 10-12 minutes.
  5. Gently add 1 pound of diced salmon fillets and 1 cup of corn kernels to the pot. Cook for an additional 5-7 minutes until the salmon is cooked through.
  6. Stir in a handful of fresh chopped thyme, along with salt and pepper to taste. Adjust the seasoning as needed.
  7. For an optional finishing touch, squeeze in some fresh lemon juice and sprinkle with parsley just before serving.

Notes

This chowder improves in flavor when stored overnight. Store leftovers in the fridge for up to three days and reheat gently for a quick meal.

Crispy Fried Enoki Mushroom Delights – Your New Favorite Snack

As I walked through the bustling aisles of my local Asian market, a curious little package caught my eye—enoki mushrooms, with their delicate stems and tiny caps. I couldn’t resist the urge to bring them home and transform them into a crispy delight. This recipe for Fried Enoki Mushrooms is a game-changer, perfect for those moments when you crave a quick, satisfying snack. In under 30 minutes, you’ll have a crunchy, vegan-friendly appetizer that is irresistibly light yet packed with flavor. These mushrooms offer a beautiful contrast in texture, with a golden, crispy exterior encasing a tender interior. Whether you’re enjoying them solo or sharing with friends, this delightful dish is bound to become a new favorite. Ready to elevate your snacking game? Let’s get cooking!

Why are Fried Enoki Mushrooms so amazing?

Crispy Perfection: With their light and airy batter, these mushrooms achieve a delightful crunch that will satisfy any snack craving.

Flavor Explosion: The aromatic spices bring a depth of flavor, making these enoki mushrooms truly addictive.

Quick and Easy: Ready in under 30 minutes, they’re perfect for busy days or spontaneous gatherings with friends.

Vegan-Friendly: This recipe is not just delicious; it’s also vegan and gluten-free (with the right substitutions), making it a fantastic choice for everyone.

Versatile Serving: Enjoy them as a standalone snack or pair them with your favorite dipping sauces, such as spicy mayo or a zesty lemon dip.

Discover more delicious ideas like our Savory Potato Mushroom recipe to expand your cooking repertoire!

Fried Enoki Mushroom Ingredients

For the Batter

  • All-Purpose Flour – Adds essential structure to the crispy coating; can be swapped for gluten-free flour for a gluten-free option.
  • Potato Starch – Enhances the crunchiness of your fried enoki mushrooms; substitute with cornstarch if needed.
  • Baking Powder – Lightens the batter, creating that perfect puff during frying.
  • Salt – Amplifies the flavors of the enoki mushrooms and batter alike.
  • White Pepper – Infuses a subtle, earthy heat; black pepper works well as a replacement.
  • Garlic Powder – Offers a delightful aromatic flavor; fresh garlic is a fresh alternative but yields a different texture.
  • Paprika – Brings a lovely color along with a sweet, peppery flavor.
  • Cayenne Pepper – Adds a kick of heat; adjust based on your preference, or omit for a milder version.
  • Five-Spice Powder – Provides a fragrant and aromatic touch, reminiscent of classic Asian dishes.
  • Cold Sparkling Water – Creates a light and airy batter; tweak the amount for your ideal consistency.

For Frying

  • Neutral Oil – Choose vegetable or canola oil for frying to avoid overpowering flavors.

These simple yet essential ingredients will help you whip up an unforgettable batch of Fried Enoki Mushrooms that everyone will love!

Step‑by‑Step Instructions for Fried Enoki Mushroom

Step 1: Prepare Mushrooms
Begin by trimming the ends of the enoki mushrooms to remove any tough bits, then carefully slice them vertically into thin layers. This technique allows the mushrooms to fry evenly, ensuring each piece gets that delightful crispy texture. Set the prepared mushrooms aside while you heat your oil.

Step 2: Heat Oil
In a heavy-bottomed pot or deep fryer, pour in about 2–3 inches of neutral oil, such as vegetable or canola, and heat it to 375°F (190°C). Use a candy thermometer for accuracy, as getting the temperature right is crucial for achieving that perfect crispy exterior. You’ll know it’s ready when small bubbles form around the thermometer.

Step 3: Make the Batter
In a large mixing bowl, whisk together the all-purpose flour, potato starch, baking powder, salt, white pepper, garlic powder, paprika, and cayenne pepper. Gradually add in cold sparkling water, mixing until the batter is smooth and free of lumps. Aim for a slightly thick consistency that will cling well to the enoki mushrooms, enhancing their crispiness once fried.

Step 4: Dredge the Mushrooms
Take each bunch of the prepared enoki mushrooms and dip them into the batter, allowing the excess to drip off. Ensure each piece is well-coated, as this will give your Fried Enoki Mushrooms that irresistible crunch. Be gentle to maintain the delicate structure of the mushrooms as you prepare them for frying.

Step 5: Fry the Mushrooms
Carefully lower the battered enoki mushrooms into the hot oil, taking care not to overcrowd the pot. Fry them for about 1-2 minutes until they turn a beautiful golden brown and become ultra-crispy. Use a slotted spoon to remove them from the oil, letting any excess oil drain off, and place them on a wire rack to keep them crisp.

Step 6: Serve
Once the Fried Enoki Mushrooms are fried to perfection, sprinkle them lightly with salt and your favorite furikake seasoning if desired. Serve immediately while they’re still warm and crispy, accompanied by your choice of dipping sauces, such as spicy mayo or a tangy lemon dip for a pop of flavor.

Fried Enoki Mushroom Variations

Feel free to get creative with your fried enoki mushrooms and discover delightful twists on this delicious snack!

  • Gluten-Free: Substitute all-purpose flour with a gluten-free blend, ensuring a crisp coating without sacrificing flavor.

  • Spicy Kick: Add extra cayenne pepper or a splash of hot sauce to the batter for an exhilarating heat that enhances each bite.

  • Herb-Infused: Mix in dried herbs like oregano or thyme into the batter for an aromatic twist that pairs beautifully with the mushrooms.

  • Onion Powder Substitute: Swap garlic powder for onion powder to create a sweet yet savory flavor profile that adds depth.

  • Curry Flavor: Sprinkle in a teaspoon of curry powder for a unique and fragrant twist that transports you to exotic lands.

  • Crispy Cornmeal: For a crunchier texture, blend in some cornmeal with your flour for an added layer of crunchiness.

  • Nutty Flavor: Stir chopped nuts like almonds or cashews into the batter for an unexpected crunch and rich flavor.

  • Dipping Sauces Variety: Serve with different sauces such as tahini or a sweet-and-sour sauce for versatile flavor combinations.

Explore more delightful recipes like our Savory Potato Mushroom to elevate your culinary adventures!

Storage Tips for Fried Enoki Mushrooms

  • Room Temperature: Fried enoki mushrooms are best enjoyed fresh, but if you must leave them out, they can sit at room temperature for up to 1 hour.

  • Fridge: Store any leftovers in an airtight container in the refrigerator for up to 5 days. Be sure to seal them tightly to retain their flavors.

  • Freezer: For longer storage, freeze the fried enoki mushrooms in a single layer on a baking sheet before transferring them to a freezer-safe bag or container. They can last up to 3 months this way.

  • Reheating: To regain crispiness, reheat frozen or refrigerated fried enoki mushrooms in an air fryer or oven for about 5-10 minutes at 350°F (175°C) before serving. Enjoy the crunch!

Expert Tips for Fried Enoki Mushrooms

  • Temperature Check: Use a candy thermometer to ensure your oil is at 375°F (190°C). If it’s too cool, the mushrooms will absorb oil and become soggy.

  • Batter Consistency: If your batter appears too thick, gradually add more cold sparkling water until it reaches a smooth, pourable consistency. This is key for achieving crispy Fried Enoki Mushrooms.

  • Fry in Batches: Fry the mushrooms in small batches to avoid crowding, which can lower oil temperature and result in less crispy outcomes.

  • Immediate Serving: For the best texture, serve your fried mushrooms immediately. They lose their crispiness over time but can be reheated in an air fryer to restore their crunch.

  • Experiment with Flavors: Don’t hesitate to customize your spices. Try adding cumin or curry powder to the batter for unique flavor twists on your fried enoki mushrooms.

What to Serve with Crispy Fried Enoki Mushrooms?

Elevate your snacking experience with delightful pairings that complement the crispy bites of mushrooms.

  • Creamy Dipping Sauce: A rich, homemade ranch or garlic aioli perfectly contrasts the crunchy texture of the mushrooms.

  • Spicy Sriracha Mayo: The creamy, spicy kick of sriracha mayo works wonderfully to enhance the mushrooms’ mild flavor and add a delicious zing.

  • Zesty Lemon Wedges: A squeeze of fresh lemon brightens the flavors of the enoki mushrooms and adds a refreshing touch with each bite.

  • Vietnamese Nuoc Cham: This tangy dipping sauce, made with lime juice, sugar, and fish sauce, offers an addictive sweet and sour element that pairs beautifully with the fried texture.

  • Asian Slaw: A crunchy slaw with cabbage and carrots, dressed in a light sesame vinaigrette, adds a fresh crunch and balances rich flavors.

Pair the crispy fried enoki mushrooms with these delightful options, creating a delightful spread that your friends and family will love! Enjoy every crisp bite!

Make Ahead Options

These Crispy Fried Enoki Mushrooms are perfect for meal prep enthusiasts who crave a quick, satisfying snack! You can slice and prepare the enoki mushrooms up to 24 hours in advance, storing them in an airtight container in the refrigerator to maintain their freshness. The batter can also be mixed ahead of time and refrigerated for about 3 days—just stir in a bit more cold sparkling water before using to restore its consistency. When you’re ready to fry, simply heat the oil, dredge the prepared mushrooms in the cold batter, and fry as directed. This way, you’ll have delicious, restaurant-quality snacks with minimal effort, ideal for busy weeknights!

Fried Enoki Mushrooms Recipe FAQs

What’s the best way to select fresh enoki mushrooms?
Absolutely! When selecting enoki mushrooms, look for packages that feature firm, smooth, and intact stems with small caps. Avoid any bunches that show dark spots or excess moisture, as these can indicate spoilage. Fresh enoki mushrooms should feel crisp and firm to the touch—this is a sign they’re ready for frying!

How should I store leftover Fried Enoki Mushrooms?
After enjoying your crispy creation, any leftovers can be stored in an airtight container in the refrigerator for up to 5 days. Make sure the container is sealed properly to avoid moisture, which can make them soggy. When you’re ready to enjoy them again, simply reheat them in an air fryer or oven to restore that delightful crispness.

Can I freeze Fried Enoki Mushrooms?
Certainly! To freeze your Fried Enoki Mushrooms, first, allow them to cool completely. Arrange them in a single layer on a baking sheet and place it in the freezer for about 1-2 hours until they are frozen solid. Then, transfer the mushrooms to a freezer-safe bag or container. They’ll stay good for up to 3 months! When you’re ready to enjoy them again, reheat in an air fryer at 350°F (175°C) for about 5-10 minutes.

What if my batter is too thick or too thin?
Very! If you find your batter is too thick, you can gradually add more cold sparkling water until it reaches a smoother consistency, about 1-2 tablespoons at a time. On the flip side, if it seems too thin, adding a little extra flour or potato starch will help thicken it up. Keep mixing until you achieve that perfect batter consistency that clings well to the mushrooms!

Are Fried Enoki Mushrooms suitable for gluten-free diets?
Absolutely! To make Fried Enoki Mushrooms gluten-free, swap the all-purpose flour with a gluten-free flour blend, ensuring it has a good structure for frying. Additionally, check that your baking powder and other seasonings are also gluten-free. Enjoy delicious, crispy mushrooms that anyone can indulge in!

Can I use other types of mushrooms instead of enoki?
Of course! While this recipe celebrates the unique texture of enoki mushrooms, feel free to experiment with other varieties like shiitake or oyster mushrooms. Keep in mind, however, that cooking times may vary slightly depending on the mushroom’s size and moisture content, so adjust accordingly during frying. Happy cooking!

Fried Enoki Mushroom

Crispy Fried Enoki Mushroom Delights – Your New Favorite Snack

Discover the irresistible crunch of Fried Enoki Mushrooms, a quick vegan-friendly snack that transforms simple ingredients into crispy perfection.
Prep Time 10 minutes
Cook Time 15 minutes
Total Time 25 minutes
Servings: 4 servings
Course: Other
Cuisine: Asian
Calories: 160

Ingredients
  

For the Batter
  • 1 cup All-Purpose Flour can be swapped for gluten-free flour for a gluten-free option
  • 1/4 cup Potato Starch substitute with cornstarch if needed
  • 1 tsp Baking Powder lightens the batter
  • 1 tsp Salt amplifies flavors
  • 1/2 tsp White Pepper black pepper works well as a replacement
  • 1 tsp Garlic Powder fresh garlic alternative available
  • 1 tsp Paprika adds color and flavor
  • 1/4 tsp Cayenne Pepper adjust or omit for milder flavor
  • 1 tsp Five-Spice Powder provides fragrant touch
  • 1 cup Cold Sparkling Water adjust for ideal batter consistency
For Frying
  • 2-3 inches Neutral Oil vegetable or canola oil for frying
For Serving
  • Salt to taste
  • furikake seasoning optional
  • dipping sauces such as spicy mayo or a tangy lemon dip

Equipment

  • Heavy-bottomed pot
  • Candy thermometer
  • slotted spoon
  • mixing bowl

Method
 

Step-by-Step Instructions
  1. Begin by trimming the ends of the enoki mushrooms and slice them vertically into thin layers. Set aside.
  2. In a pot, pour in about 2–3 inches of neutral oil and heat to 375°F (190°C).
  3. In a bowl, whisk together the all-purpose flour, potato starch, baking powder, salt, white pepper, garlic powder, paprika, and cayenne pepper. Gradually mix in cold sparkling water until smooth.
  4. Dip the prepared enoki mushrooms into the batter, ensuring they're well-coated.
  5. Carefully lower the mushrooms into the hot oil and fry for 1-2 minutes until golden brown and crispy. Drain on a wire rack.
  6. Sprinkle with salt and furikake seasoning if desired. Serve warm with your choice of dipping sauces.

Notes

Serve immediately for the best texture. Can be reheated in an air fryer to restore crispiness.

Weasleys’ Dragon Roasted Nuts: Sweet and Spicy Crunch Delight

“Have you ever found yourself craving a snack that balances sweet and spicy, yet feels just a bit magical?” That’s exactly what you get with Weasleys’ Dragon Roasted Nuts. Inspired by the enchanting world of Harry Potter, this quick and easy recipe delivers a delightful crunch and an explosion of flavors. With customizable nut options, you can easily adapt the mix to suit your preferences, making it a crowd-pleaser for gatherings or cozy nights in. Not only is this gluten-free snack a fun twist on traditional munchies, but its combination of wholesome ingredients—like cashews, almonds, and a hint of fiery spices—makes it a healthy indulgence too. Ready to transform your snack time into a whimsical adventure? Let’s dive into this delightful recipe!

Why are these nuts so irresistible?

Crunchy Texture: The mix of cashews, almonds, pecans, and walnuts provides an addictive crunch that’s hard to resist.

Fiery Sweetness: With a blend of spices and honey, each bite delivers a flavor explosion that tantalizes your taste buds.

Customizable: Feel free to swap in your favorite nuts or adjust the spice levels to suit your heat tolerance.

Perfect for Sharing: These nuts work great as a party snack or a topper on salads, making them a go-to option for gatherings.

Quick & Easy: In just about an hour, you can whip up this gluten-free treat, comparable to your favorite store-bought options.

Inspired Fun: Channel your inner wizard with these Weasleys’ Dragon Roasted Nuts—a whimsical treat that brings a bit of magic to any occasion, perfect for themed nights or just as a delightful snack!

Weasleys’ Dragon Roasted Nuts Ingredients

For the Nut Blend

  • Cashews – Adds a creamy texture; use raw for a healthier option.
  • Almonds – Offers a delightful crunch; substitute with hazelnuts if desired.
  • Pecans – Provides a rich and buttery taste; optional but enhances the mix.
  • Walnuts – Contributes a robust flavor and added crunch to the blend.
  • Peanuts – Brings sweetness and extra crunch; omit for a Paleo-friendly snack.

For the Sweetness and Spice

  • Honey – Acts as a natural sweetener and binds the nuts; maple syrup is a great vegan alternative.
  • Spices (cinnamon, ginger, cloves, cumin, chili powder, red pepper flakes, black pepper, cayenne pepper) – Creates that fiery and sweet flavor profile; adjust for your heat preference.

For the Coating

  • Egg White – Ensures a glossy finish while binding the mixture; use aquafaba for a vegan option.

With these Weasleys’ Dragon Roasted Nuts ingredients in hand, you’re just a step away from creating a magical snack that’s sure to delight!

Step‑by‑Step Instructions for Weasleys’ Dragon Roasted Nuts

Step 1: Preheat the Oven
Begin by preheating your oven to 350°F (175°C) to set the stage for roasting. This temperature is perfect for creating a warm environment that brings out the flavors of the nuts while providing a delightful toastiness. Make sure your rack is in the middle position for even heat distribution.

Step 2: Combine the Nuts and Spices
In a large mixing bowl, combine your choice of cashews, almonds, pecans, walnuts, and peanuts. Add in the honey and your selection of spices, including cinnamon, ginger, and chili powder. Stir vigorously for about 2-3 minutes until all the nuts are evenly coated with the sweet and spicy mixture, ensuring an enjoyable flavor in every bite.

Step 3: Prepare for Baking
Line a baking sheet with parchment paper to prevent sticking and for easy cleanup. Spread the coated nut mixture onto the baking sheet in an even layer, making sure they’re not overcrowded. This will allow the heat to circulate around the nuts evenly, resulting in a perfectly roasted finish.

Step 4: Bake the Nuts
Place the baking sheet in the preheated oven and let the Weasleys’ Dragon Roasted Nuts bake for 45 minutes. Stir halfway through the baking time—around the 20-minute mark—ensuring that the nuts toast uniformly and develop a beautiful golden color. Look for a fragrant aroma as they near completion.

Step 5: Cool to Perfection
Once the baking time is complete, remove the nuts from the oven and allow them to cool entirely on the baking sheet. This cooling period is crucial for achieving that signature crunch. Do not rush this step, as it allows the honey glaze to harden slightly, locking in the flavor and texture you desire.

Step 6: Store for Later Enjoyment
Once cooled, transfer your Weasleys’ Dragon Roasted Nuts into an airtight container. Store them at room temperature for up to two weeks; this will help maintain their freshness and crunchy texture. Now, you’re all set to snack or share this magical treat with family and friends!

Expert Tips for Weasleys’ Dragon Roasted Nuts

  • Nut Choice: Select high-quality nuts; using a mix of raw and pre-roasted can enhance flavor and make this gluten-free recipe easier.
  • Whipped Egg White: Ensure your egg white is whipped to stiff peaks for a glossy finish—this helps the spices and honey bind perfectly.
  • Don’t Overcrowd: When spreading on the baking sheet, keep the nuts in a single layer to prevent steaming; this guarantees optimal crunch.
  • Adjust Spices: Customize the heat level by experimenting with spices; try adding more cayenne for kick or reduce chili powder for a milder flavor.
  • Cooling Time: Allow nuts to cool completely on the baking sheet—this vital step helps achieve that irresistible crunch in the Weasleys’ Dragon Roasted Nuts.

How to Store and Freeze Weasleys’ Dragon Roasted Nuts

Room Temperature: Store the nuts in an airtight container at room temperature for up to 2 weeks. Keeping them sealed helps maintain their delicious crunch and flavor.

Fridge: If you live in a humid environment, consider refrigerating them. This extends freshness for up to 3 weeks, but allow them to return to room temperature before enjoying for optimal crunch.

Freezer: For long-term storage, freeze the Weasleys’ Dragon Roasted Nuts in a freezer-safe container or bag for up to 3 months. Thaw in the refrigerator before serving.

Reheating: If you prefer warm nuts, reheat in the oven at 300°F (150°C) for about 5-10 minutes and enjoy that fresh-out-of-the-oven taste!

Weasleys’ Dragon Roasted Nuts Variations

Feel free to explore these delightful twists to make this recipe uniquely yours, adding your personal touch!

  • Nut-Free: Omit all nuts and substitute with seeds like pumpkin or sunflower for a crunchy snack.
    Enjoy the nutty flavors through savory spices instead!

  • Sweetener Swap: Replace honey with maple syrup or agave for a vegan alternative without sacrificing sweetness.
    It’s a wonderful way to cater to different dietary preferences.

  • Flavor Explosion: Add a dash of smoked paprika for a subtle smoky flavor that enhances the sweetness of the honey.
    It gives an exciting depth to your beloved nut mix!

  • Extra Crunch: Mix in some crushed pretzel pieces towards the last 15 minutes of baking for added texture.
    This crackle can elevate your snacking experience to a whole new level.

  • Spice Up the Heat: Add more cayenne pepper or a sprinkle of ghost pepper for an intense kick that heat lovers will adore.
    Just a little goes a long way in igniting those taste buds!

  • Herb Infusion: Introduce some finely chopped fresh rosemary or thyme for a unique herby contrast to the sweetness.
    This unexpected twist can make your recipe shine at gatherings!

  • Coconut Twist: Toss in some unsweetened shredded coconut for a hint of tropical flavor that brightens the nut blend.
    The chewiness complements the crunchy nuts beautifully!

  • Savory Option: Swap out honey for tahini and mix in a dash of soy sauce for a savory version that makes for a great snack.
    This can be a fun Asian-inspired twist to the classic recipe!

As you consider these variations, you may also enjoy pairing your Dragon Roasted Nuts with a soaring flavor of dishes like Chili Chicken Roasted for an adventurous culinary journey!

Make Ahead Options

Weasleys’ Dragon Roasted Nuts are a fantastic option for meal prep, making them ideal for busy weeknights or unexpected guests! You can prepare the nut and spice mixture up to 24 hours in advance. Simply combine the nuts, honey, and spices in a bowl and store them in an airtight container in the refrigerator to keep everything fresh. When you’re ready to bake, spread the mixture on a lined baking sheet and roast as directed. To ensure they maintain their delightful crunch, allow the nuts to cool completely before storing in an airtight container at room temperature. With these simple make-ahead tips, you’ll have delicious, homemade snacks available with minimal effort!

What to Serve with Weasleys’ Dragon Roasted Nuts

Looking to elevate your snacking experience? Pair these sweet and spicy bites with delightful accompaniments for a magical meal!

  • Creamy Hummus: This smooth dip provides a refreshing contrast to the crunchy nuts, making every bite a delightful experience.
  • Crisp Apple Slices: The natural sweetness and crunch of apples complement the spiciness of the nuts, balancing flavors perfectly.
  • Rich Chocolate Bark: Dark chocolate adds a decadent touch that enhances the sweet notes in the nuts, creating a satisfying treat.
  • Fresh Green Salad: A light salad dressed with citrus vinaigrette serves as a refreshing counterpoint to the robust flavors of the nuts.
  • Savory Cheese Platter: Combining various cheeses, crackers, and these nuts creates a fun, shareable spread that’s perfect for gatherings.
  • Chilled Sparkling Water: This fizzy drink refreshes the palate, rounding off each nutty bite with a clean sip.
  • Ginger Tea: The warmth of ginger tea enhances the spice blend in the nuts, making it an inviting pairing for cozy evenings.
  • Vanilla Yogurt: Adding a dollop of yogurt adds creaminess that complements the sweet and fiery flavors, creating a delightful contrast.
  • Toasted Coconut Chips: Their light, crunchy texture harmonizes beautifully with the mixed nuts, adding an exotic twist to your snack.

Weasleys’ Dragon Roasted Nuts Recipe FAQs

How do I select the best nuts for this recipe?
Absolutely! When choosing nuts, look for those that are fresh, shiny, and free from dark spots or blemishes, as these indicators suggest quality. Raw nuts will give you a healthier option, while pre-roasted nuts can save time. I often make this recipe with a mix of cashews and almonds for their taste and creaminess.

How should I store the Weasleys’ Dragon Roasted Nuts?
To keep your nuts deliciously crunchy and fresh, store them in an airtight container at room temperature for up to 2 weeks. If you live in a humid area, it’s best to refrigerate them, where they can last for about 3 weeks. Just make sure to let them return to room temperature before snacking for the best crunch.

Can I freeze the Weasleys’ Dragon Roasted Nuts?
Yes, you can! For long-term storage, transfer the cooled nuts to a freezer-safe bag or container. They will keep well for up to 3 months. When you’re ready to enjoy them, simply thaw them in the refrigerator overnight. If you prefer, you can reheat them in a 300°F oven for 5-10 minutes to restore that just-roasted flavor.

What if my nuts don’t come out crunchy?
Very good question! If your nuts aren’t crunchy, it could be due to overcrowding on the baking sheet or insufficient cooling time. Be sure to spread the nuts in a single layer. If they look soft after baking, pop them back in the oven for an additional 10 minutes. Cooling is vital—allow them to sit completely on the baking sheet to enhance their crunchiness!

Are Weasleys’ Dragon Roasted Nuts safe for pets?
No, these nuts aren’t safe for pets, particularly due to the spices and honey included. Spices like garlic and onion can be harmful to dogs, while certain nuts (like macadamias) can be toxic to them. Always keep any snacks meant for human consumption out of reach from your furry friends.

How can I make these nuts suitable for specific dietary needs?
The Weasleys’ Dragon Roasted Nuts can be easily modified! Omit the peanuts for a Paleo-friendly option, swap honey for maple syrup for a vegan alternative, and use aquafaba instead of egg whites for a completely plant-based mix. Adjust the spices based on your dietary preferences and heat tolerance!

Weasleys' Dragon Roasted Nuts

Weasleys' Dragon Roasted Nuts: Sweet and Spicy Crunch Delight

Weasleys' Dragon Roasted Nuts are a sweet and spicy snack perfect for sharing, inspired by Harry Potter's enchanting world.
Prep Time 15 minutes
Cook Time 45 minutes
Cooling Time 15 minutes
Total Time 1 hour 15 minutes
Servings: 6 servings
Course: Other
Cuisine: American
Calories: 230

Ingredients
  

For the Nut Blend
  • 1 cup Cashews Use raw for a healthier option.
  • 1 cup Almonds Substitute with hazelnuts if desired.
  • 1 cup Pecans Optional but enhances the mix.
  • 1 cup Walnuts Contributes a robust flavor.
  • 1 cup Peanuts Omit for a Paleo-friendly snack.
For the Sweetness and Spice
  • 1/4 cup Honey Maple syrup is a vegan alternative.
  • 1 tablespoon Spices Adjust mix of cinnamon, ginger, cloves, cumin, chili powder, red pepper flakes, black pepper, cayenne pepper to taste.
For the Coating
  • 1 large Egg White Use aquafaba for a vegan option.

Equipment

  • oven
  • mixing bowl
  • baking sheet
  • parchment paper

Method
 

Step-by-Step Instructions
  1. Preheat your oven to 350°F (175°C).
  2. Combine cashews, almonds, pecans, walnuts, and peanuts in a mixing bowl. Add honey and spices, stirring for 2-3 minutes until coated.
  3. Line a baking sheet with parchment paper and spread the nut mixture evenly on it.
  4. Bake in the oven for 45 minutes, stirring halfway through.
  5. Once baked, cool the nuts on the baking sheet.
  6. Store in an airtight container at room temperature for up to two weeks.

Notes

These nuts are customizable with different nuts and spice levels to suit preference.

Sticky BBQ Chicken Zucchini Boats: A Fun Low-Carb Delight

As I opened my fridge searching for inspiration, I stumbled upon a bounty of fresh zucchini that needed a purpose. That’s when the idea of Sticky BBQ Chicken Zucchini Boats was born—a delicious and healthy way to enjoy these vibrant veggies. This recipe is not only a low-carb powerhouse but also incredibly versatile, letting you swap proteins or add toppings to suit everyone’s taste. Whether you’re dashing through a busy weeknight or meal prepping for the days ahead, these boats are quick to assemble, family-friendly, and bursting with flavor! Who knew that something so simple could be so satisfying? Let’s dive into this delightful dish that’s sure to become a staple in your kitchen. Ready to explore the endless possibilities?

Why are Sticky BBQ Chicken Zucchini Boats amazing?

Flavor-Packed Perfection: Each bite of these zucchini boats is a delicious blend of savory BBQ chicken and gooey melted cheese, making them a hit with kids and adults alike.

Healthy & Low-Carb: With zucchini as the base, these boats keep your meal light and low in carbs without sacrificing flavor.

Customizable Goodness: Feel free to swap proteins like ground turkey or tofu, or experiment with toppings to create your perfect combo!

Quick & Easy: Assembling this dish takes no time at all, making it ideal for busy weeknights or effortless meal prep.

Crowd-Pleaser: Serve these at your next gathering, and watch your guests rave about how tasty low-carb can be! For a well-rounded meal, consider pairing them with a light salad for a refreshing crunch. Don’t miss out on trying these with other incredible recipes like Savory Chicken Cheesy or Honey Chili Chicken.

Sticky BBQ Chicken Zucchini Boats Ingredients

For the Zucchini Boats
Zucchini – A low-carb base, rich in vitamin C and potassium; try eggplant as a tasty alternative.
Olive Oil – Enhances flavor while brushing the zucchini; avocado oil also works well.

For the Filling
Shredded Chicken – A perfect protein source that’s flavorful and easy to mix; use rotisserie chicken for quick prep.
BBQ Sauce – Gives the filling a delightful sweetness and smoky touch; homemade BBQ sauce can be tailored to your taste.
Red Onion – Adds aromatic depth to the mix; consider green onions for a milder flavor.
Garlic Powder & Onion Powder – These seasonings ramp up the flavor; fresh versions can add even more intensity.
Salt and Pepper – Essential for seasoning; adjust according to your preference.

For the Topping
Cheddar Cheese – Brings a creamy richness; substitute with mozzarella or feta for a different twist.
Cilantro – Fresh herbs brighten up the dish; parsley is a good alternative if you want a change.
Optional Jalapeños – For a spicy kick; diced bell peppers can replace them for a milder option.

These Sticky BBQ Chicken Zucchini Boats are sure to be a hit; enjoy customizing them to create your family’s new favorite meal!

Step‑by‑Step Instructions for Sticky BBQ Chicken Zucchini Boats

Step 1: Preheat Oven
Begin by preheating your oven to 375°F (190°C). This temperature ensures that your Sticky BBQ Chicken Zucchini Boats will cook evenly, creating that perfect blend of tender zucchini and flavorful filling. While the oven heats up, gather your baking dish and prepare your ingredients, setting the stage for an effortless cooking experience.

Step 2: Prepare Zucchini
Wash the zucchini thoroughly, then halve each one lengthwise. Use a spoon to scoop out the seeds and create a hollowed-out boat shape, ensuring to leave enough flesh for support. Brush the insides of the zucchini with olive oil and season with salt and pepper to infuse flavors. These vibrant boats will serve as the perfect base for your savory filling.

Step 3: Mix Filling
In a mixing bowl, combine the shredded chicken, 3/4 cup of BBQ sauce, garlic powder, onion powder, chopped red onion, and half of the cilantro. Stir well until everything is evenly coated and well incorporated. The mixture should be aromatic and beautifully colorful, enticing your family with every whiff. This tasty filling will bring your Sticky BBQ Chicken Zucchini Boats to life.

Step 4: Stuff Zucchini
Take the prepared mixture and spoon it generously into each hollowed zucchini half, ensuring the filling is packed lightly. Aim for each boat to be filled right to the top but not overflowing. This step is important as it allows all the flavors to meld together during cooking. Watch as your boats take shape and fill with deliciousness!

Step 5: Top with Cheese
Drizzle the remaining BBQ sauce over the stuffed zucchini, ensuring to cover the filling just enough for added flavor. Next, sprinkle a generous amount of cheddar cheese on each boat, allowing it to melt beautifully during baking. If you’re craving a little heat, now is the time to add some optional jalapeños for an extra kick in every bite.

Step 6: Bake
Cover the baking dish with aluminum foil, which helps retain moisture and ensures your Sticky BBQ Chicken Zucchini Boats cook evenly. Place them in the preheated oven and bake for 25 minutes. Once done, carefully remove the foil and bake for an additional 10-15 minutes, watching for the cheese to become golden and bubbly, signaling that they’re ready to be enjoyed.

Step 7: Garnish & Serve
After baking, let your zucchini boats cool slightly for about five minutes. This cooling period enhances the flavors and makes handling easier. Once ready, garnish with the remaining cilantro and serve warm. The Sticky BBQ Chicken Zucchini Boats are now full of flavor and perfect for a delightful family meal—enjoy every delicious morsel!

What to Serve with Sticky BBQ Chicken Zucchini Boats

Pairing these delightful boats with the right sides will elevate your meal and leave everyone satisfied.

  • Light Garden Salad: A fresh blend of mixed greens and colorful veggies adds crunch and balances the dish’s richness.

  • Quinoa Salad: This protein-packed option with lemon and herbs complements the savory flavors while enhancing your meal’s nutritional profile.

  • Roasted Broccoli: Its nutty flavor and crisp texture provide a delightful contrast, making your plate visually appealing and satisfying.

  • Sweet Potato Fries: These sweet, crispy bites bring a fun and comforting element to your meal, enhancing the BBQ flavors with their inherent sweetness.

  • Garlic Bread: A warm slice of garlicky goodness makes the perfect side for scooping up any leftover filling, creating an inviting experience.

  • Mango Salsa: A vibrant, fruity salsa adds a refreshing kick that brightens the dish and offers a touch of sweetness to balance the savory components.

  • Chilled Sparkling Water: This refreshing drink option keeps the focus on the classic BBQ flavors while cleansing the palate after each delicious bite.

  • Chocolate Avocado Mousse: For dessert, this rich and creamy treat is a healthy way to satisfy your sweet tooth while staying aligned with your low-carb goals.

Sticky BBQ Chicken Zucchini Boats Variations

Feel free to get creative with your Sticky BBQ Chicken Zucchini Boats! They’re a blank canvas for your culinary imagination.

  • Protein Swap: Use ground turkey or seasoned tofu for a different twist on protein, making it more suitable for your dietary preferences. You can also combine chicken with some diced bell peppers for added flavor and crunch.

  • Cheese Alternatives: Try pepper jack for a spicy kick, or goat cheese for a tangy touch; it opens a whole new world of cheesiness!

  • Extra Veggies: Add some bell peppers, corn, or mushrooms to the filling for an even heartier texture. The added nutrients make each bite more satisfying.

  • Heat Levels: Love spice? Toss in some jalapeños for heat, or keep it mild by substituting with sweet bell peppers instead. Adjust to suit your family’s taste!

  • BBQ Sauce Variations: For a personalized flavor, mix in a splash of homemade BBQ sauce to take your taste up a notch. It’s a great way to infuse it with your favorite taste notes!

  • Herb Variations: If cilantro isn’t your thing, replace it with fresh parsley or omit it entirely for a different herb vibe. The flavor still shines brightly, no matter what!

  • Zucchini Alternatives: Swap zucchinis for eggplants or hearty bell peppers to change the profile of your dish entirely. Each option contributes its unique flavor and texture.

Remember, these Sticky BBQ Chicken Zucchini Boats are wildly customizable! Make sure to check out these fantastic dishes like Savory Chicken Cheesy or Tropical Chicken Pineapple for more inspiration.

How to Store and Freeze Sticky BBQ Chicken Zucchini Boats

Fridge: Store leftovers in an airtight container for up to 3 days. This keeps your Sticky BBQ Chicken Zucchini Boats fresh while allowing the flavors to meld further.

Freezer: If you want to save them for longer, these zucchini boats can be frozen for up to 2 months. Wrap them tightly in plastic wrap and place in a freezer-safe container to avoid freezer burn.

Reheating: For best results, reheat in the oven at 350°F (175°C) until warmed through, about 15-20 minutes. This method helps maintain the texture of the zucchini and cheese.

Serving Ideas: Consider pairing reheated boats with a fresh salad or quinoa rice for a delightful, wholesome meal that tastes just as good as when they were first made!

Expert Tips for Sticky BBQ Chicken Zucchini Boats

  • Keep Moisture In: Cover your zucchini boats with aluminum foil during the first part of baking to retain moisture, preventing them from drying out.

  • Taste as You Go: Before stuffing the zucchini, taste the filling mixture to ensure the flavors are to your liking. Adjust seasoning if necessary; a pinch more salt can make all the difference!

  • Avoid Soggy Zucchini: Scoop out just enough of the insides to create a sturdy boat. Leaving too much flesh can result in soggy boats, affecting the overall texture of your Sticky BBQ Chicken Zucchini Boats.

  • Customize With Confidence: Don’t hesitate to swap proteins or toppings. Using ground turkey or seasoned tofu can create a delicious variation while keeping the meal healthy and low-carb.

  • Let Them Cool: After baking, allow the zucchini boats to cool for a few minutes. This helps them set and makes serving easier, enhancing the flavors even further.

Make Ahead Options

These Sticky BBQ Chicken Zucchini Boats are perfect for busy home cooks looking to save time during the week! You can prep the filling (shredded chicken, BBQ sauce, and seasonings) up to 3 days in advance and store it in an airtight container in the refrigerator. The hollowed zucchini can also be prepared and brushed with olive oil and seasonings up to 24 hours ahead; just keep them covered to prevent browning. When you’re ready to serve, simply stuff the prepped zucchini with the filling, top with cheese, and bake as directed. This way, you’ll enjoy all the delicious flavors of these boats without the pre-dinner rush!

Sticky BBQ Chicken Zucchini Boats Recipe FAQs

How do I choose ripe zucchini for my Sticky BBQ Chicken Zucchini Boats?
Absolutely! Look for zucchini that is firm, glossy, and free from dark spots or blemishes. A medium-sized zucchini (about 6-7 inches long) typically offers the best balance of flavor and texture. If it’s overly large or soft, it may have a spongy texture and fewer nutrients.

What is the best way to store leftovers of Sticky BBQ Chicken Zucchini Boats?
For optimal freshness, store your leftovers in an airtight container in the refrigerator. They should stay fresh for about 3 days. Just make sure they are completely cooled before you seal them up to prevent condensation, which can create sogginess.

Can I freeze Sticky BBQ Chicken Zucchini Boats?
Very! To freeze, allow the zucchini boats to cool completely. Then, wrap them tightly in plastic wrap, ensuring no air pockets remain, and place them in a freezer-safe container. They can be frozen for up to 2 months. When you’re ready to enjoy, thaw them in the refrigerator overnight, then reheat in the oven at 350°F (175°C) for about 15-20 minutes.

What should I do if my filling is too dry or too wet?
If your filling turns out dry, consider adding a little more BBQ sauce or a splash of chicken broth to moisten it. If it’s too wet, try reducing the amount of BBQ sauce and adding some breadcrumbs to help absorb the excess moisture. Tasting the filling before stuffing will help ensure it’s just right!

Are there any dietary considerations for making Sticky BBQ Chicken Zucchini Boats?
Yes! For those with specific allergies, make sure to use gluten-free BBQ sauce if gluten is a concern. Additionally, for a low-carb alternative for children, you can swap out the shredded chicken for a plant-based option like seasoned tofu or lentils, which their tastebuds often embrace.

Can I make these Sticky BBQ Chicken Zucchini Boats ahead of time?
Definitely! You can prepare the zucchini by hollowing them out and storing them in the fridge. You can also mix your filling in advance. Just assemble and bake when you’re ready to serve. This makes mealtime efficient, especially on busy weekdays!

Sticky BBQ Chicken Zucchini Boats

Sticky BBQ Chicken Zucchini Boats: A Fun Low-Carb Delight

Sticky BBQ Chicken Zucchini Boats are a delicious and healthy low-carb dish perfect for any meal.
Prep Time 15 minutes
Cook Time 40 minutes
Cooling Time 5 minutes
Total Time 1 hour
Servings: 4 boats
Course: Dinner
Cuisine: American
Calories: 350

Ingredients
  

For the Zucchini Boats
  • 4 medium Zucchini A low-carb base, rich in vitamin C and potassium.
  • 2 tablespoons Olive Oil Enhances flavor while brushing the zucchini.
For the Filling
  • 2 cups Shredded Chicken Use rotisserie chicken for quick prep.
  • 3/4 cup BBQ Sauce Homemade BBQ sauce can be tailored to your taste.
  • 1 small Red Onion Consider green onions for a milder flavor.
  • 1 teaspoon Garlic Powder Fresh versions can add more intensity.
  • 1 teaspoon Onion Powder Fresh versions can add more intensity.
  • to taste Salt Adjust according to your preference.
  • to taste Pepper Adjust according to your preference.
For the Topping
  • 1 cup Cheddar Cheese Substitute with mozzarella or feta for a different twist.
  • 1/4 cup Cilantro Fresh herbs brighten up the dish.
  • to taste Jalapeños For a spicy kick.

Equipment

  • oven
  • Baking Dish
  • mixing bowl
  • spoon

Method
 

Instructions
  1. Preheat your oven to 375°F (190°C).
  2. Wash the zucchini thoroughly, halve each lengthwise, scoop out the seeds, and brush with olive oil. Season with salt and pepper.
  3. In a mixing bowl, combine the shredded chicken, BBQ sauce, garlic powder, onion powder, red onion, and half of the cilantro. Stir well.
  4. Spoon the mixture into each hollowed zucchini half, packing lightly.
  5. Drizzle remaining BBQ sauce over the stuffed zucchini and sprinkle with cheddar cheese. Add jalapeños if desired.
  6. Cover the baking dish with aluminum foil and bake for 25 minutes, then uncover and bake for an additional 10-15 minutes until cheese is golden.
  7. Let the boats cool for 5 minutes, garnish with remaining cilantro, and serve warm.

Notes

Store leftovers in an airtight container for up to 3 days. These zucchini boats can be frozen for up to 2 months in a freezer-safe container.

Limoncello Mascarpone Profiteroles: A Zesty Sweet Treat

It’s amazing how a single dessert can transport you to a sun-kissed Italian summer. Our Pistachio Ricotta Icebox Pie captures that essence with its creamy filling and delightful crunch, making it the perfect no-bake treat for those warm afternoons. As I whipped up this luscious pie, I couldn’t help but notice how effortlessly it comes together—ideal for both busy weeknights and impromptu gatherings. Not only is it incredibly simple to prepare, but it also serves as a charming centerpiece for dessert, dazzling your friends and family without spending hours in the kitchen. Are you ready to discover the magic of this refreshing pie? Let’s bring a little taste of Italy into your home!

Why is this pie a must-try?

Effortless Preparation: The beauty of this Pistachio Ricotta Icebox Pie lies in its no-bake simplicity, requiring just a few easy steps.
Creamy Indulgence: With a rich ricotta base combined with dreamy heavy cream, each slice is a velvety treat that melts in your mouth.
Flavorful Crunch: The pistachios add a delightful texture, elevating the experience to a whole new level of enjoyment.
Perfect for Gatherings: This show-stopping dessert not only impresses guests but is also a quick solution for those last-minute gatherings.
Versatile Options: It’s easy to customize—swap out nuts or add unique flavors for a personalized twist. This pie truly offers something for everyone! Enjoy it with a delightful cup of espresso or a refreshing drink to round off your meal.

Pistachio Ricotta Icebox Pie Ingredients

  • For the Crust

  • Graham Cracker Crust – Gives a delicious crunch and buttery flavor as the perfect base for your creamy filling.

  • For the Filling

  • Pistachios – Provide a delightful crunch and nutty flavor that elevates the creamy pie. Make sure to use shelled and unsalted for the best results.

  • Ricotta Cheese – Brings a smooth creaminess to the pie; overflow your taste buds with richness by substituting it with mascarpone.

  • Sugar – Adds just the right amount of sweetness; using powdered sugar helps it blend effortlessly into the filling.

  • Vanilla Extract – Sweetens the deal with its fragrant essence; swap with almond extract for a unique twist on the classic flavor.

  • Heavy Cream – Whipped to fluffy perfection, it lightens the filling and adds volume; consider coconut cream for a dairy-free delight.

This Pistachio Ricotta Icebox Pie not only brings bliss to your taste buds but also showcases your cooking prowess with such an easy preparation method!

Step‑by‑Step Instructions for Pistachio Ricotta Icebox Pie

Step 1: Prepare the Crust
Begin by crushing graham crackers into fine crumbs using a food processor or a rolling pin. In a mixing bowl, combine the crumbs with melted butter until they resemble wet sand. Press this mixture firmly into the bottom and up the sides of a 9-inch pie dish, forming an even layer. Chill the crust in the refrigerator for about 30 minutes to set.

Step 2: Make Filling
In a large bowl, add the ricotta cheese, powdered sugar, and vanilla extract. Use an electric mixer on medium speed to blend the ingredients until smooth and creamy, scraping down the sides as needed. This luscious filling will form the base of your Pistachio Ricotta Icebox Pie, so ensure there are no lumps.

Step 3: Whip Cream
In a separate bowl, pour in the heavy cream and beat it with an electric mixer on medium-high speed until stiff peaks form, usually around 3-5 minutes. This fluffy whipped cream will lighten your filling, making it airy and delightful. Be careful not to overwhip; look for a texture that holds its shape yet remains smooth.

Step 4: Fold Together
Gently fold the whipped cream into the ricotta mixture using a spatula. Make sure to incorporate it gradually; this helps maintain the lightness you achieved in the whipped cream. Continue folding until the two mixtures are well combined, creating a creamy blend for your Pistachio Ricotta Icebox Pie.

Step 5: Incorporate Pistachios
Chop the shelled pistachios into small pieces, then fold them into the filling mixture. This step adds a delightful crunch and nutty flavor to the creamy texture. Ensure the pistachios are evenly distributed throughout the filling for optimal taste and presentation.

Step 6: Assemble Pie
Carefully pour the filling into the chilled crust, using a spatula to spread it evenly. Smooth the top for a polished finish, ensuring that it’s level. The combination of your buttery crust and creamy filling will have everyone anticipating this delicious Pistachio Ricotta Icebox Pie.

Step 7: Chill
Cover the pie with plastic wrap and refrigerate for at least 4 hours, allowing it to set properly before serving. This chilling time is essential for the flavors to meld and the filling to firm up, creating a perfect slice. Garnish with extra pistachios or a dollop of whipped cream just before serving.

Make Ahead Options

These Pistachio Ricotta Icebox Pie preparations are perfect for busy home cooks looking to save time! You can prepare the graham cracker crust up to 24 hours in advance by chilling it in the refrigerator, ensuring it sets perfectly. The creamy filling can be made up to 3 days ahead; simply whip the cream and fold it into the ricotta mixture, then incorporate the pistachios just before serving to maintain their crunch. Store the pie covered in the fridge until you’re ready to serve. Garnish with additional pistachios or a dollop of whipped cream, and you’ll have a delightful dessert that’s just as delicious as if it were freshly made!

Expert Tips for Pistachio Ricotta Icebox Pie

  • Well-Drained Ricotta: Ensure your ricotta cheese is thoroughly drained to prevent a watery filling that could ruin the perfect slice.
  • Stiff Peaks Essential: When whipping the cream, aim for stiff peaks to achieve that light, airy texture that makes this no-bake pie so delightful.
  • Chill Time Matters: Don’t rush the chilling process—allow at least 4 hours in the fridge for the filling to set properly, ensuring a clean cut when serving.
  • Easy Slicing Trick: For a smooth slice, warm your knife under hot water before cutting into the pie; it’ll glide through the creamy filling beautifully.
  • Flavor Experimentation: Don’t hesitate to swap out pistachios with your favorite nuts or add a splash of lemon extract for a new twist on this delectable dessert.

Storage Tips for Pistachio Ricotta Icebox Pie

  • Fridge: Store any leftover pie in an airtight container or cover it tightly with plastic wrap for up to 3 days to keep it fresh and creamy.

  • Freezer: To freeze, slice the pie into individual pieces and wrap each slice in plastic wrap, then place them in a freezer-safe container for up to 2 months.

  • Thawing: When ready to enjoy, let the frozen slices thaw in the fridge for several hours or overnight for the best texture before serving.

  • Reheating: This Pistachio Ricotta Icebox Pie is best served cold, so no reheating is necessary—just garnish with extra pistachios for an elegant finish!

Pistachio Ricotta Icebox Pie Variations

Feel free to explore these delightful twists that can elevate your Pistachio Ricotta Icebox Pie and make it uniquely yours!

  • Nut Swap: Replace pistachios with walnuts or almonds for a different nutty flavor. Each nut brings its own personality to this creamy dream.
  • Chocolate Delight: Add chocolate chips or a layer of chocolate ganache on top for a rich, decadent twist. The combination of chocolate and pistachio creates a harmonious balance.
  • Fruit Fusion: Sprinkle fresh berries or sliced peaches on top before serving for a fruity contrast to your creamy filling. This adds a refreshing pop of color and flavor!
  • Dairy-Free Version: Swap ricotta and heavy cream for coconut cream and vegan cream cheese. You’ll still achieve that luscious texture while accommodating dietary preferences.
  • Citrus Boost: Experiment with flavored extracts like orange or lemon for a bright citrus twist to the filling. A hint of zest can truly awaken the flavors, making every bite a sunny delight!
  • Caramel Drizzle: Top with a homemade or store-bought caramel sauce for an added layer of sweetness and richness. The gooeyness will create an unforgettable dessert experience.
  • Mini Pies: For individual servings, create mini pie versions using a muffin tin and cut-out cookie crusts. These bite-sized treats are perfect for parties or gatherings!
  • Spice it Up: Add a pinch of cinnamon or cardamom to the filling for a warm spice twist that complements the nuts beautifully. This subtle change can elevate the whole dessert.

These variations invite creativity, so don’t hesitate to adapt the recipe to suit your taste buds! For more ways to spice up your desserts, check out our Flavor Boosting Tips that can truly transform your cooking adventures.

What to Serve with Pistachio Ricotta Icebox Pie?

Imagine delighting guests with a stunning dessert that leaves their taste buds dancing. The creamy richness of your Pistachio Ricotta Icebox Pie deserves perfect companions to round off the meal.

  • Fresh Berries: A medley of strawberries, raspberries, and blueberries adds a vibrant touch, enhancing the flavors with their tartness and sweetness.
  • Minty Greek Yogurt: Pair a dollop of tangy Greek yogurt mixed with fresh mint; this balance brings brightness and creaminess together.
  • Warm Chocolate Sauce: Drizzling warm chocolate sauce over each serving elevates the dessert experience, adding a luscious contrast to the refreshing pie.
  • Espresso or Coffee: A steaming cup of espresso or rich coffee complements the creamy flavors beautifully, making each bite more decadent.
  • Toasted Almonds: Scatter some crunchy toasted almonds for extra texture. Their mild flavor complements the pistachios while offering a satisfying crunch.
  • Lemon Sorbet: This refreshing, zesty sorbet is a cooling delight, cleansing the palate after each rich slice of pie.
  • Sparkling Water with Lemon: Enhance the dining experience by serving sparkling water with a twist of lemon, adding a bubbly freshness to the meal.
  • Delicate Fruit Tart: A light fruit tart serves as another dessert option, providing a contrast in texture and a burst of fruity flavor to keep things exciting.

Each of these suggestions enhances your Pistachio Ricotta Icebox Pie, creating a delightful dining experience that your guests will remember for years to come!

Pistachio Ricotta Icebox Pie Recipe FAQs

What type of pistachios should I use?
Absolutely! It’s best to use shelled and unsalted pistachios for your pie. This ensures you get the true nutty flavor without any added saltiness that can overwhelm the dessert. Look for bright green pistachios, as they indicate freshness and flavor.

How should I store leftover Pistachio Ricotta Icebox Pie?
You can store any leftovers in an airtight container or cover the pie tightly with plastic wrap for up to 3 days in the refrigerator. Keeping it sealed will help maintain its creamy texture while preventing it from absorbing any odors from the fridge.

Can I freeze this pie?
Yes, you can freeze your Pistachio Ricotta Icebox Pie! I recommend slicing it into individual pieces first, then wrapping each slice in plastic wrap. Place the wrapped slices in a freezer-safe container for up to 2 months. When you’re ready to enjoy, simply thaw in the refrigerator for several hours or overnight.

What if my ricotta cheese is watery?
If your ricotta cheese seems watery, it’s essential to drain it well before mixing. Place the cheese in a fine mesh strainer over a bowl and let it sit for about 15-20 minutes to remove excess moisture. This helps ensure your filling remains thick and creamy.

Are there any dietary considerations I should be aware of?
Definitely! This pie contains dairy due to the ricotta and heavy cream, which may not be suitable for those who are lactose intolerant or vegan. For a dairy-free version, you can substitute ricotta with a tofu-based alternative and use coconut cream instead of heavy cream. Always check with your guests for any allergies or dietary restrictions, as nuts are also included in this recipe.

Limoncello Mascarpone Profiteroles

Limoncello Mascarpone Profiteroles: A Zesty Sweet Treat

Discover the delightful Limoncello Mascarpone Profiteroles, a zesty sweet treat that captures the essence of Italian summers.
Prep Time 30 minutes
Cook Time 20 minutes
Chilling Time 4 hours
Total Time 4 hours 50 minutes
Servings: 8 profiteroles
Course: Dessert
Cuisine: Italian
Calories: 350

Ingredients
  

For the Crust
  • 1 cup Graham Cracker Crust Gives a delicious crunch and buttery flavor.
For the Filling
  • 1 cup Pistachios Shelled and unsalted for best results.
  • 1 cup Ricotta Cheese Substitute with mascarpone for richness.
  • 1/2 cup Sugar Powdered sugar helps blend effortlessly.
  • 1 teaspoon Vanilla Extract Can swap with almond extract.
  • 1 cup Heavy Cream Coconut cream for dairy-free option.

Equipment

  • mixing bowl
  • electric mixer
  • Food Processor
  • Pie dish

Method
 

Preparation Steps
  1. Crush graham crackers into fine crumbs. Combine with melted butter and press into a pie dish. Chill for 30 minutes.
  2. Blend ricotta, powdered sugar, and vanilla extract until smooth and creamy.
  3. Whip heavy cream until stiff peaks form, about 3-5 minutes.
  4. Fold whipped cream into the ricotta mixture gradually.
  5. Chop pistachios and fold into the filling mixture until evenly distributed.
  6. Pour filling into chilled crust and smooth the top evenly.
  7. Cover the pie and refrigerate for at least 4 hours to set.

Notes

Ensure ricotta is well-drained for best texture. Chill time is crucial for firm slices.

Shut Yo Mouth Sauce: Creamy Spice That Elevates Every Bite

There’s something magical about a sauce that can elevate a meal from ordinary to extraordinary. Let me introduce you to the vibrant world of Shut Yo Mouth Sauce—a creamy, tangy, and spicy concoction that transforms tacos, burgers, and even salads into culinary delights. This easy-to-make dipping sauce is crafted from pantry staples and supports a world of flavor variations, whether you prefer a mild kick or a fiery punch. One of its best features is how quickly it comes together—whisk it up in just minutes and let the flavors meld while you prepare your favorite dishes. Plus, with its versatility, you can tailor it to suit any palate or dietary need, making it a true kitchen staple. Are you ready to unleash a new favorite that guarantees a delicious experience no matter what you’re cooking?

Why is Shut Yo Mouth Sauce a Must-Try?

Unforgettable Taste: This sauce boasts a perfect blend of creamy, tangy, and spicy flavors that elevate any dish to gourmet status.

Quick Preparation: You’ll love how it comes together in minutes! Just whisk together your ingredients and let it chill while you plan your meal.

Versatile Customization: Adapt the spice levels to suit your tastes—whether you’re craving just a hint of heat or a fiery kick, it’s all up to you!

Meal Enhancer: This sauce is an excellent companion for appetizers or main courses. Use it as a dip for fries and onion rings or drizzle it over grilled meats and salads.

Diet-Friendly Options: You can easily make it lighter or vegan by swapping mayo for Greek yogurt or cashew cream, catering to various dietary preferences.

Don’t forget, you can experiment further with flavors like what I recommend in my Homemade French Sauce for added depth!

Shut Yo Mouth Sauce Ingredients

For the Base

  • Mayonnaise – A rich base for creaminess; substitute with Greek yogurt for a lighter version.
  • Dijon Mustard – Adds tangy zest; yellow mustard can be used in a pinch.
  • Apple Cider Vinegar – Offers the perfect acidity; white vinegar is a fine alternative.

For Flavoring

  • Garlic Powder – Enhances depth; fresh minced garlic gives a sharper kick if you prefer.
  • Onion Powder – Contributes savory notes; this can be omitted if you don’t have it on hand.
  • Smoked Paprika – Imparts a smoky richness; regular paprika can tone down the flavor if needed.

For Heat

  • Cayenne Pepper – Adds the spice; adjust the amount based on your heat preference.
  • Hot Sauce – Provides additional complexity; feel free to pick your favorite brand.

Finishing Touches

  • Salt & Black Pepper – Essential for flavor enhancement; adjust to your personal taste.
  • Honey or Sugar – Balances the heat with a touch of sweetness; use maple syrup for a vegan-friendly option.

This luscious Shut Yo Mouth Sauce will elevate your meals and introduce bold, tangy, and creamy flavors that leave everyone wanting more!

Step‑by‑Step Instructions for Shut Yo Mouth Sauce

Step 1: Combine the Base
In a medium bowl, use a whisk to blend together 1 cup of mayonnaise, 2 tablespoons of Dijon mustard, and 2 tablespoons of apple cider vinegar. Whisk until the mixture is smooth and creamy, with no lumps visible. This foundational step sets the stage for your vibrant Shut Yo Mouth Sauce, so take a moment to enjoy the lovely, rich texture you’ve created.

Step 2: Add the Spices
Next, sprinkle in 1 teaspoon of garlic powder, 1 teaspoon of onion powder, and 1 teaspoon of smoked paprika. Incorporate ½ teaspoon of cayenne pepper for that desired kick, along with a pinch of salt and black pepper. Stir the mixture well using your whisk, ensuring that all the spices are evenly distributed and the sauce takes on a beautiful, aromatic quality.

Step 3: Sweeten and Spice
Now, it’s time to elevate your Shut Yo Mouth Sauce further. Add your choice of hot sauce, about 1 tablespoon or more if you love heat, and 1 tablespoon of honey or sugar to balance the flavors. Stir until everything is well integrated and the sauce has a delightful, layered flavor profile. Feel free to taste and adjust for sweetness and spice to suit your personal preference.

Step 4: Chill and Meld Flavors
Cover the bowl with plastic wrap or transfer the sauce to an airtight container. Refrigerate for at least 30 minutes, allowing the flavors to meld beautifully. This resting period is crucial for rounding out the taste of your Shut Yo Mouth Sauce, so resist the urge to skip it!

Step 5: Serve Your Sauce
Once chilled, give your Shut Yo Mouth Sauce a good stir, then serve it as a delicious dip for fries, onion rings, or as a zesty drizzle on grilled meats and salads. Store any leftovers in the same airtight container in the refrigerator, where it will keep fresh for up to a week. Enjoy this versatile sauce with all your favorite meals!

Make Ahead Options

Shut Yo Mouth Sauce is perfect for meal prep enthusiasts! You can make this delicious sauce up to 24 hours in advance, allowing the flavors to deepen and meld together beautifully. To prep ahead, simply follow the recipe instructions through the chilling step, covering the bowl with plastic wrap or transferring it to an airtight container. This ensures the sauce maintains its creamy texture and flavorful profile. When you’re ready to serve, give it a quick stir and adjust seasoning if needed. With this make ahead option, you can streamline your cooking and enjoy restaurant-quality results with minimal effort on busy weeknights!

Expert Tips for Shut Yo Mouth Sauce

  • Resting is Key: Allowing the sauce to chill for at least 30 minutes is crucial; it enhances the flavors and creates a harmonious blend.

  • Texture Control: If you prefer a thinner sauce, simply mix in a splash of water or additional vinegar until you reach your desired consistency.

  • Taste Test: Always taste your sauce during preparation—adjust sweetness and spice levels as needed to ensure it complements your dishes perfectly.

  • Storage Best Practices: Use a clean spoon each time you scoop from the container to prevent bacterial growth and prolong the freshness of your Shut Yo Mouth Sauce.

  • Adapt the Heat: Don’t be afraid to experiment—try different hot sauces or adjust the cayenne pepper to find the perfect level of spice that suits your palate.

Variations & Substitutions for Shut Yo Mouth Sauce

Customize this delightful sauce to suit your palate and dietary needs—let your culinary creativity shine!

  • Dairy-Free: Replace mayonnaise with cashew cream or dairy-free yogurt for a creamy base that everyone can enjoy.
  • Spicy Twist: Explore different hot sauces or increase the cayenne pepper to create your preferred heat level, from mild to wild.
  • Vegan Version: Swap honey for agave syrup to maintain the sweetness while keeping your sauce plant-based.
  • Herbed Delight: Incorporate fresh herbs like chives or dill to elevate the flavor profile and add freshness to your sauce.
  • Extra Zing: Add a splash of fresh lemon or lime juice for a bright and zesty twist that complements the creamy elements beautifully.
  • Chipotle Flare: Blend in smoked chipotle powder instead of smoked paprika for a deeper, more complex smokiness that’s irresistible.
  • Savory Boost: Mix in a teaspoon of Worcestershire sauce for added umami and depth, perfect for enhancing savory dishes.
  • Fruit Infusion: For a surprising sweetness, consider adding a spoonful of mango or pineapple puree to make it fruity yet tangy.

With these variations, your Shut Yo Mouth Sauce can elevate every dish, much like a tangy drizzle on tacos or a dip for crispy fries. If you’re intrigued by creating more vibrant flavors, check out my Tropical Chicken Sauce for an adventurous twist!

What to Serve with Shut Yo Mouth Sauce

When you elevate meals with Shut Yo Mouth Sauce, you’ll want perfect pairings to create a delicious dining experience.

  • Crispy French Fries: Their golden crunch beautifully complements the creamy spice of the sauce. Dive in for a delightful flavor explosion!

  • Grilled Chicken Tenders: Juicy tenders drizzled with this sauce create a satisfying savory-sweet combo that everyone will adore.

  • Crispy Onion Rings: The crunchiness of onion rings paired with the tangy kick of Shut Yo Mouth Sauce makes for a heavenly appetizer.

  • Roasted Vegetables: The earthy flavors of roasted veggies, like carrots or bell peppers, meet the creamy richness, adding vibrant color and taste to your plate.

  • Tacos: Chicken, beef, or veggie tacos become life-altering when smothered with this sauce—a match made in culinary heaven.

  • Salads: Drizzle over fresh greens for a zesty twist. The sauce transforms simple salads into flavorful sensations with a creamy touch.

  • Chips & Veggie Dunks: Pair it with crispy chips or as a dip for fresh crunchy veggies to create a fun, family-friendly snack.

  • Refreshing Gazpacho: The tangy richness balances out cool soup flavors, enhancing every spoonful and providing a delightful twist on classic cold dishes.

  • Beer or Wine: If you’re in the mood for a drink, opt for a crisp lager or a light Sauvignon Blanc to complement the spice in the sauce while adding refreshing balance.

How to Store and Freeze Shut Yo Mouth Sauce

Fridge: Store your Shut Yo Mouth Sauce in an airtight container in the refrigerator for up to 1 week for optimal freshness.

Freezer: For longer storage, you can freeze the sauce in a freezer-safe container for up to 3 months. Just be sure to leave some space for expansion when it freezes.

Thawing: To use frozen sauce, thaw it in the fridge overnight; give it a good stir before serving, as some separation may occur.

Make Ahead: Feel free to whip up your Shut Yo Mouth Sauce a day in advance; the flavors will deepen and intensify beautifully overnight!

Shut Yo Mouth Sauce Recipe FAQs

What type of mayonnaise should I use for Shut Yo Mouth Sauce?
Absolutely! For the best flavor and creaminess, I recommend using a full-fat mayonnaise. However, if you’re looking to cut calories, Greek yogurt is a fantastic substitute that adds a lightness without sacrificing taste.

How should I store leftover Shut Yo Mouth Sauce?
Store your sauce in an airtight container in the refrigerator for up to one week. Always use a clean spoon when serving to maintain freshness and prevent bacterial growth.

Can I freeze Shut Yo Mouth Sauce?
Yes! You can freeze Shut Yo Mouth Sauce in a freezer-safe container for up to 3 months. Just make sure to leave a little space at the top of the container, as sauces can expand when frozen. When you’re ready to use it, thaw it in the fridge overnight and stir well before serving.

What can I do if the sauce is too spicy?
Very! If your sauce turns out spicier than you prefer, you can adjust it by adding a little more mayonnaise or Greek yogurt to soften the heat. Alternatively, stir in a teaspoon of honey or sugar to balance the spiciness with sweetness.

How can I tell if my sauce has gone bad?
Keep an eye out for any changes in color or texture, especially mold. If the sauce develops an off smell or shows dark spots all over, it’s time to toss it. Always trust your senses—fresh sauce should smell zingy and flavorful!

Is Shut Yo Mouth Sauce suitable for vegans?
Yes, it can be! Simply replace the mayonnaise with dairy-free yogurt or cashew cream. Use maple syrup instead of honey, and make sure to check your hot sauce for any animal products to keep it fully vegan-friendly. Enjoy experimenting!

Shut Yo Mouth Sauce

Shut Yo Mouth Sauce: Creamy Spice That Elevates Every Bite

Discover the magic of Shut Yo Mouth Sauce, a creamy, tangy, and spicy sauce that enhances every meal.
Prep Time 10 minutes
Chilling Time 30 minutes
Total Time 40 minutes
Servings: 8 servings
Course: Other
Cuisine: American
Calories: 100

Ingredients
  

For the Base
  • 1 cup mayonnaise or Greek yogurt for a lighter version
  • 2 tablespoons Dijon mustard yellow mustard can be used in a pinch
  • 2 tablespoons apple cider vinegar white vinegar is a fine alternative
For Flavoring
  • 1 teaspoon garlic powder or fresh minced garlic for a sharper kick
  • 1 teaspoon onion powder can be omitted if you don't have it
  • 1 teaspoon smoked paprika regular paprika can tone down the flavor
For Heat
  • ½ teaspoon cayenne pepper adjust based on your heat preference
  • 1 tablespoon hot sauce pick your favorite brand
Finishing Touches
  • to taste salt adjust to your personal taste
  • 1 tablespoon honey or sugar use maple syrup for a vegan option

Equipment

  • whisk
  • Medium bowl
  • air-tight container

Method
 

Combine the Base
  1. In a medium bowl, whisk together 1 cup of mayonnaise, 2 tablespoons of Dijon mustard, and 2 tablespoons of apple cider vinegar until smooth and creamy.
Add the Spices
  1. Sprinkle in 1 teaspoon each of garlic powder, onion powder, and smoked paprika, along with ½ teaspoon of cayenne pepper, salt, and black pepper. Stir well.
Sweeten and Spice
  1. Add 1 tablespoon of hot sauce and 1 tablespoon of honey or sugar. Stir until integrated.
Chill and Meld Flavors
  1. Cover the bowl with plastic wrap or transfer to an airtight container and refrigerate for at least 30 minutes.
Serve Your Sauce
  1. Once chilled, stir the sauce and serve as a dip for fries, onion rings, or drizzle over grilled meats and salads.

Notes

Store any leftovers in an airtight container in the refrigerator for up to a week.