Soft Christmas Peppermints – Melt-In-Your-Mouth Delights

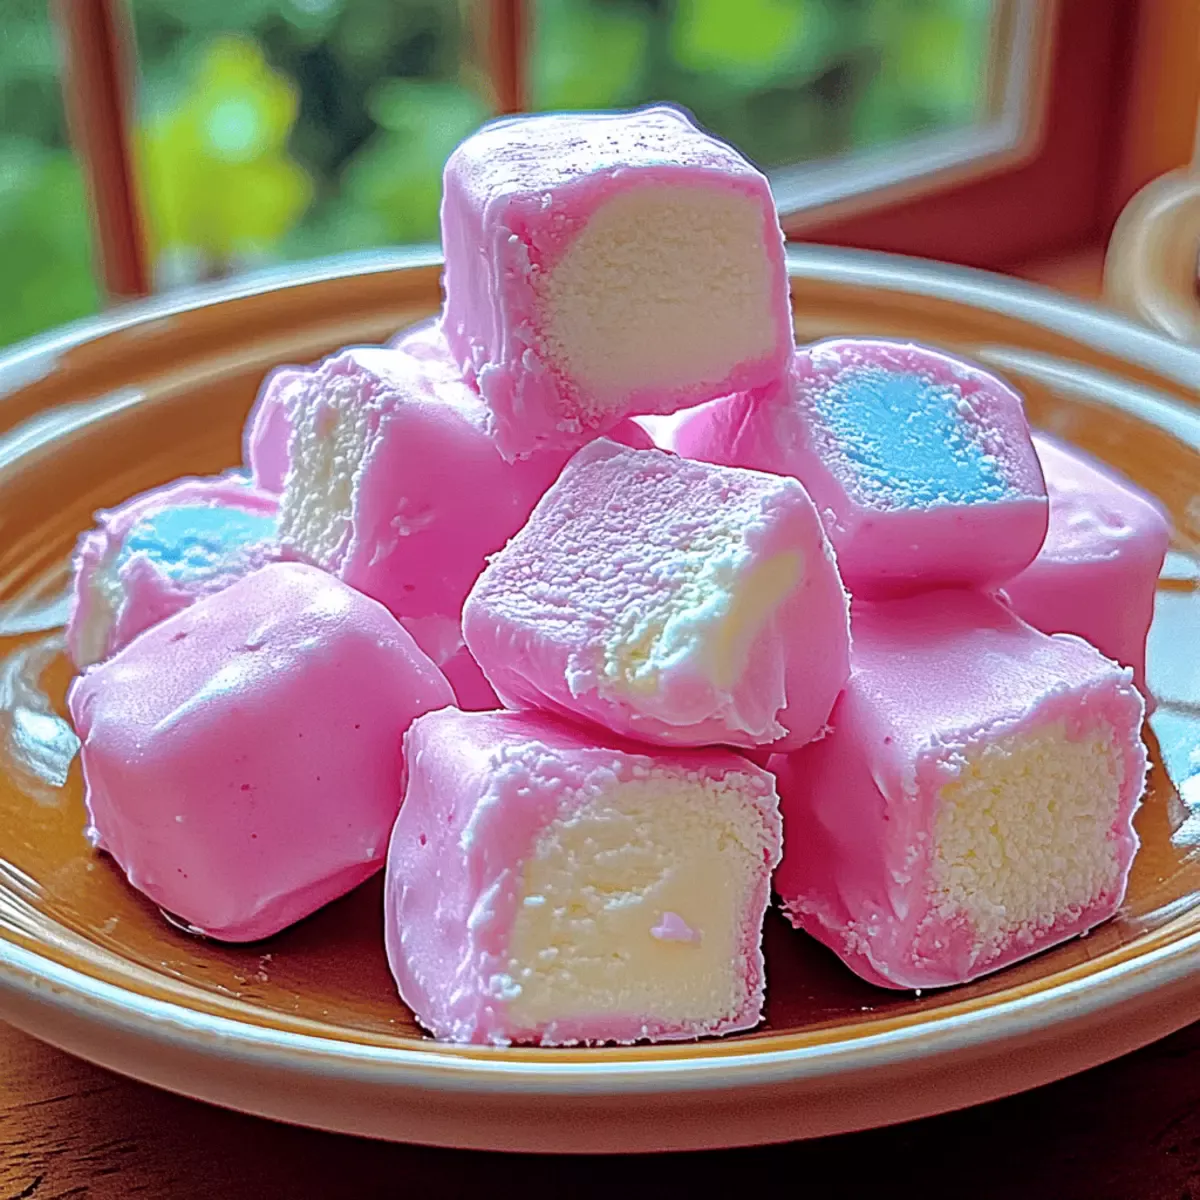
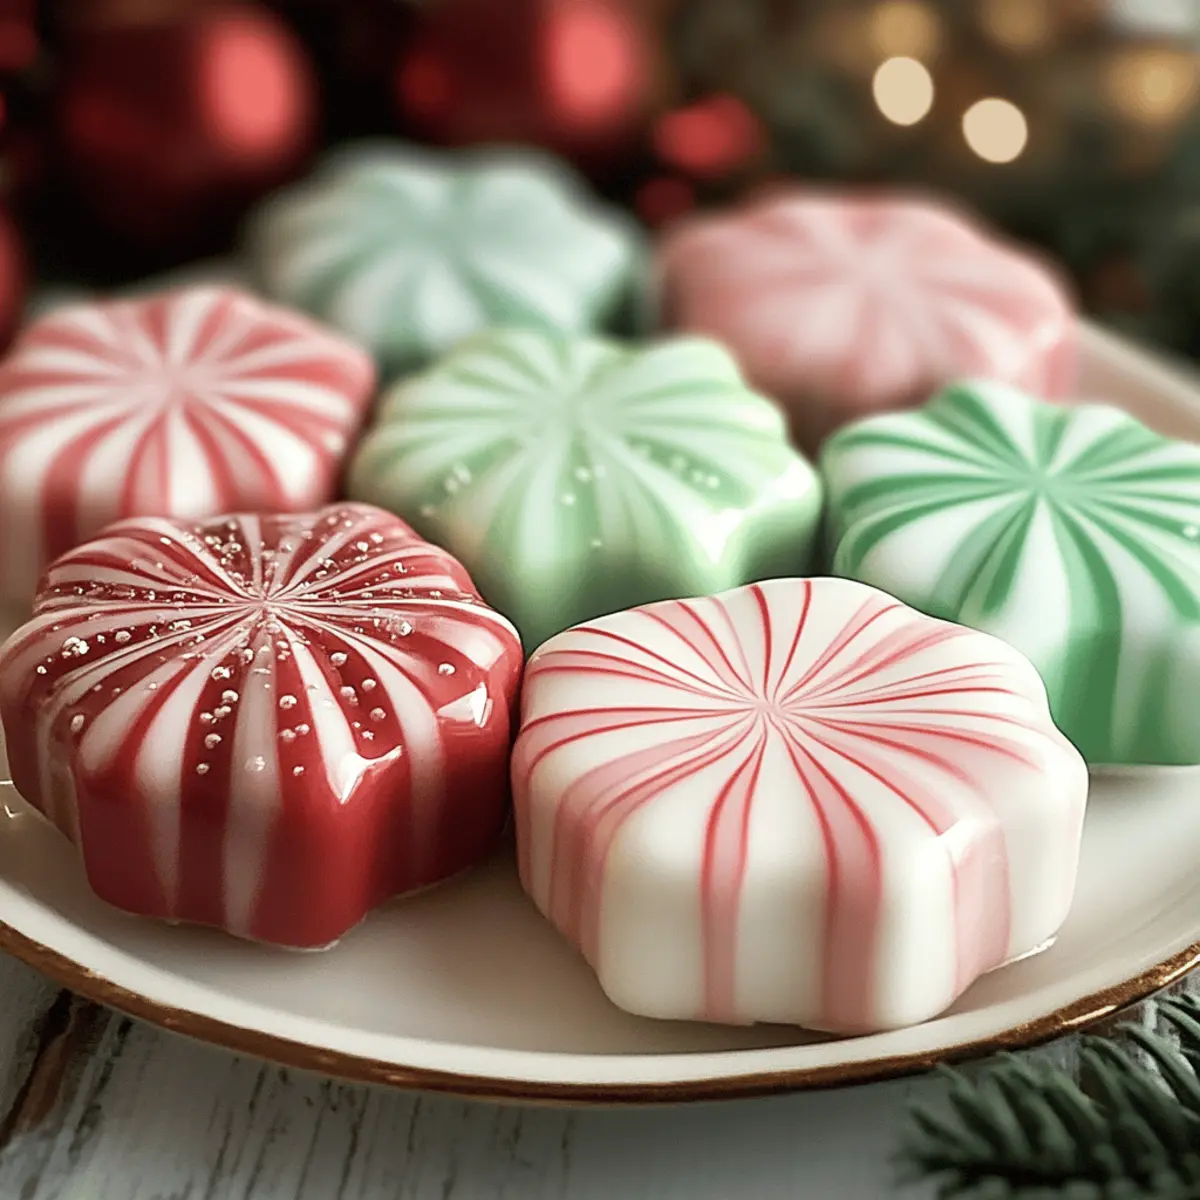
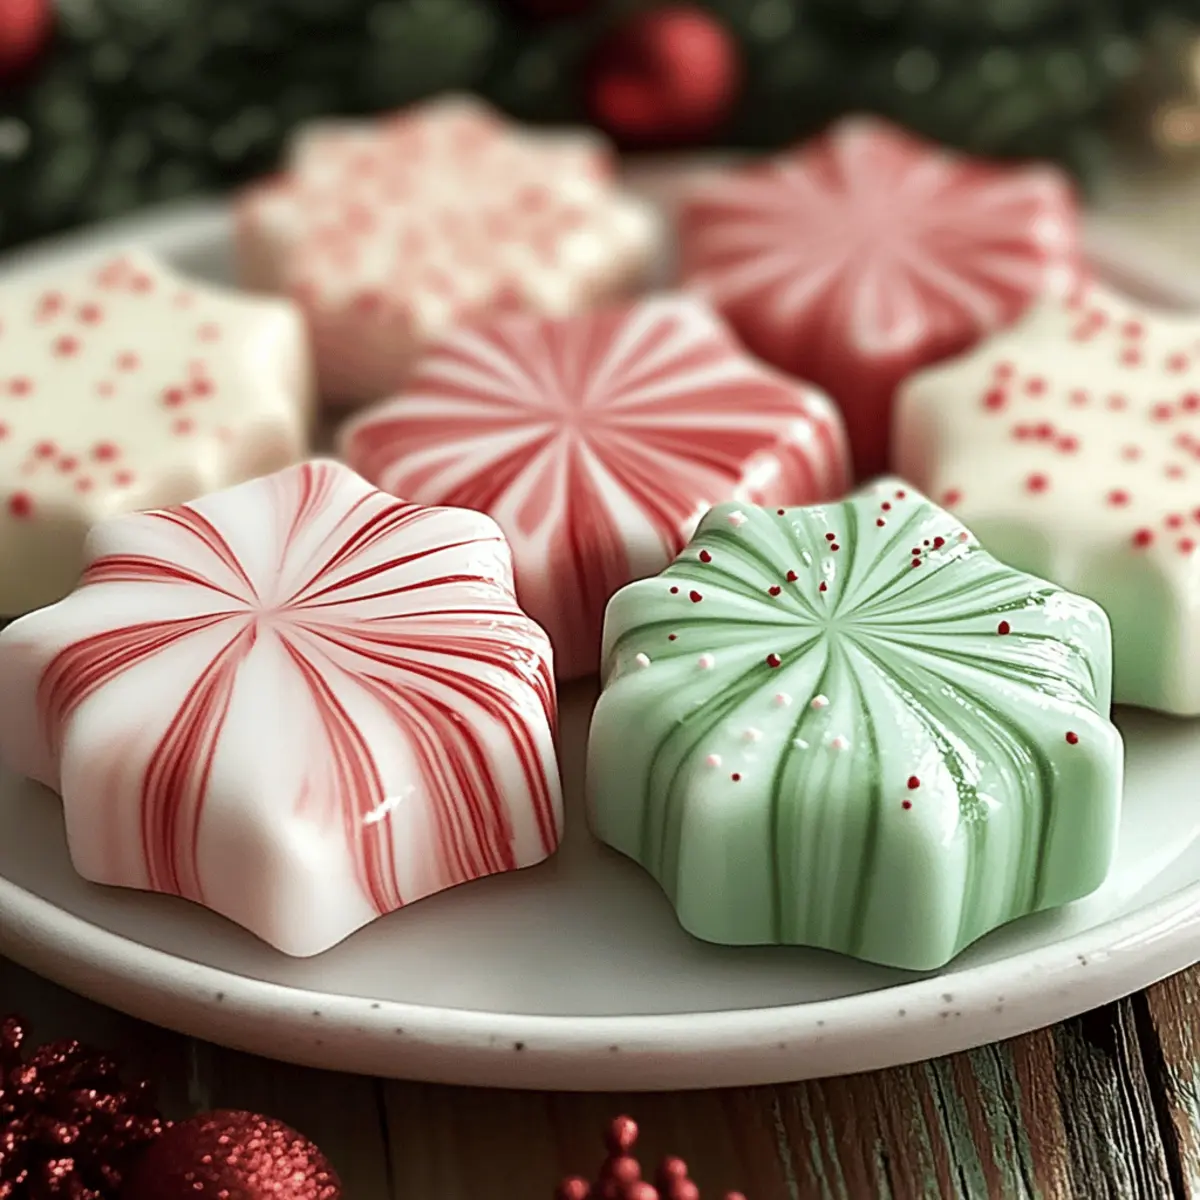
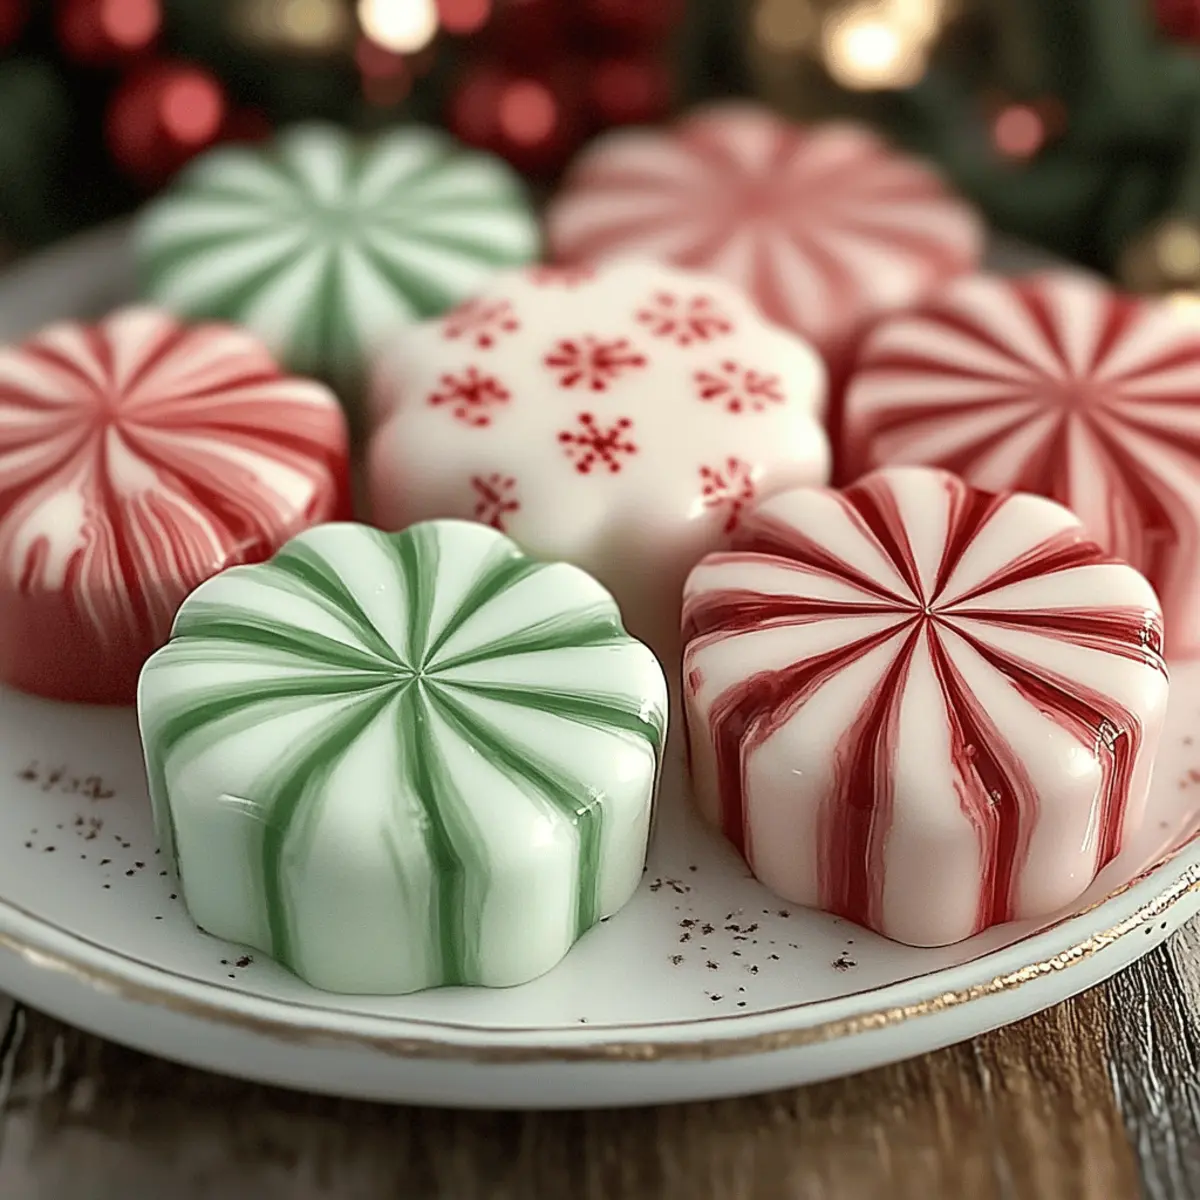
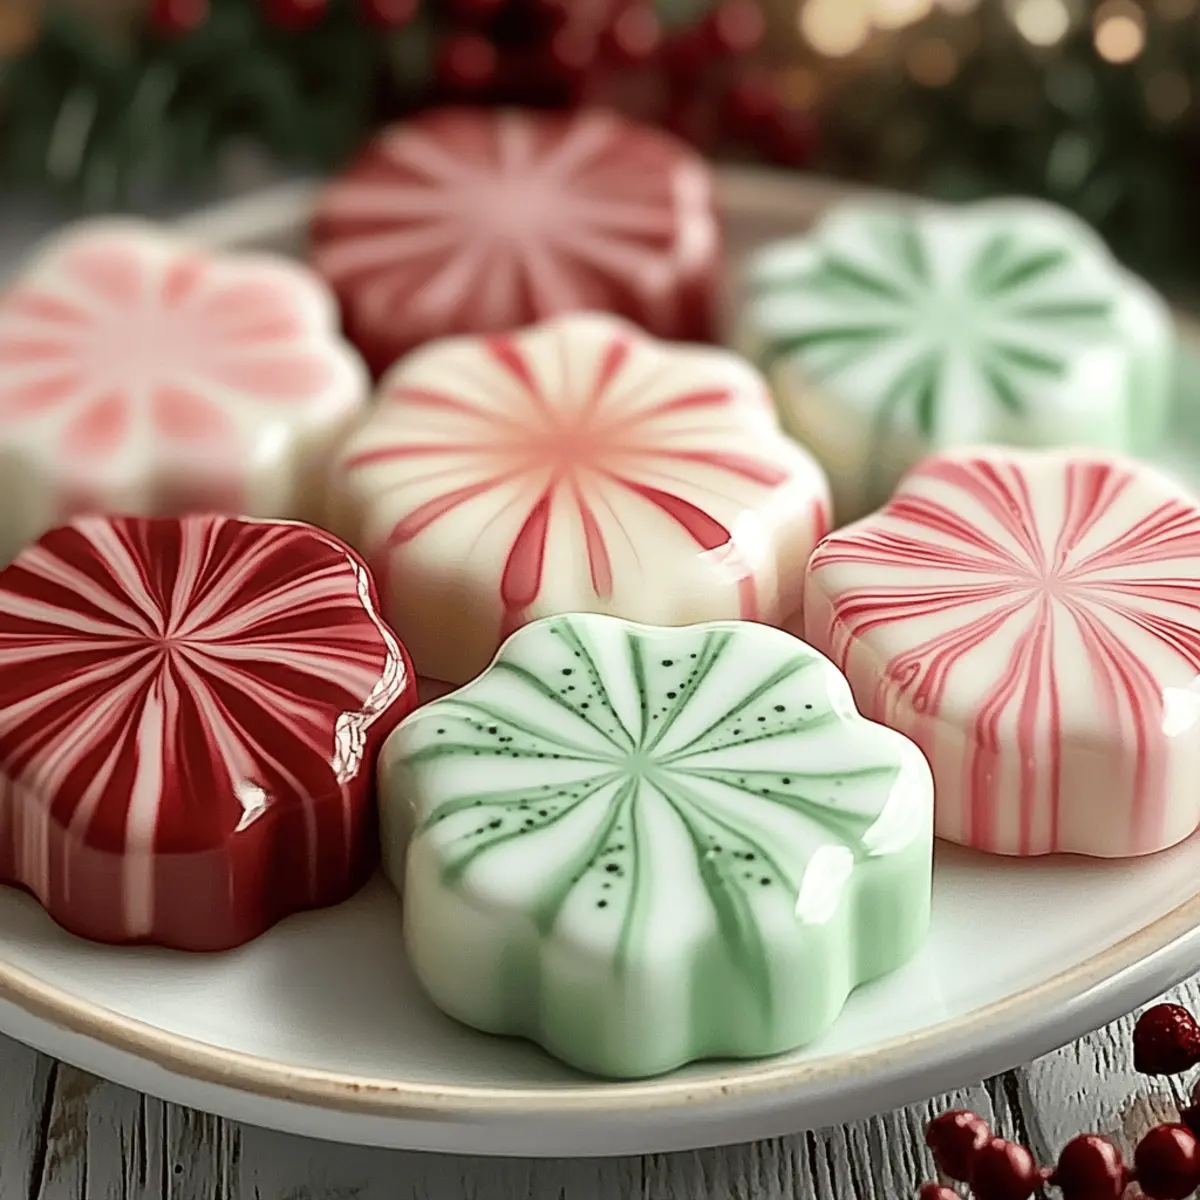
As I stood in my kitchen, the soothing scent of peppermint began to fill the air, instantly transporting me back to childhood holiday celebrations. There’s something undeniably special about making these Soft Christmas Peppermints—classic old-fashioned butter mints that are not only gluten-free and vegetarian but also delightfully easy to whip up. With their creamy, melt-in-your-mouth texture and refreshing minty flavor, these treats are a true crowd-pleaser, perfect for holiday gifting or simply brightening your festive table. Plus, they require no baking, allowing you to enjoy a stress-free cooking experience amidst the holiday hustle and bustle. Curious about how to create these nostalgic confections that capture the essence of Christmas? Let’s dive in!

Why Are Soft Christmas Peppermints Special?

Unforgettable nostalgia: These Soft Christmas Peppermints take you back to cherished holiday memories with every delightful bite.
Quick and easy: No baking is required! This simple recipe lets you whip up a batch in no time, leaving you more moments to enjoy.
Gluten-free and vegetarian: Perfect for all your guests, these treats cater to various dietary needs without compromising on taste.
Flavor versatility: Want to mix things up? You can easily substitute extracts for fun variations, adding a personal touch.
Gift-worthy presentation: These mints are not only delicious but also make lovely gifts when packaged in decorative jars or boxes. Try pairing them with other homemade delights like Cloud Soft Condensed for a delightful homemade gift basket!
Freshness guaranteed: Store them in an airtight container to maintain that melt-in-your-mouth texture, perfect for a week-long treat.

Soft Christmas Peppermints Ingredients

For the Mints
Sweetened Condensed Milk – Provides creaminess and sweetness; do not substitute with powdered milk as it lacks the necessary moisture.
Butter – Adds richness and a buttery flavor; for best results, use unsalted butter; margarine can be an alternative but may alter taste.
Powdered Sugar – Acts as the primary sweetener, giving the mints their structured consistency; substitutions are not recommended unless necessary.
Peppermint Extract – Infuses the mints with refreshing mint flavor; can be replaced with other extracts like vanilla or almond for different flavors.
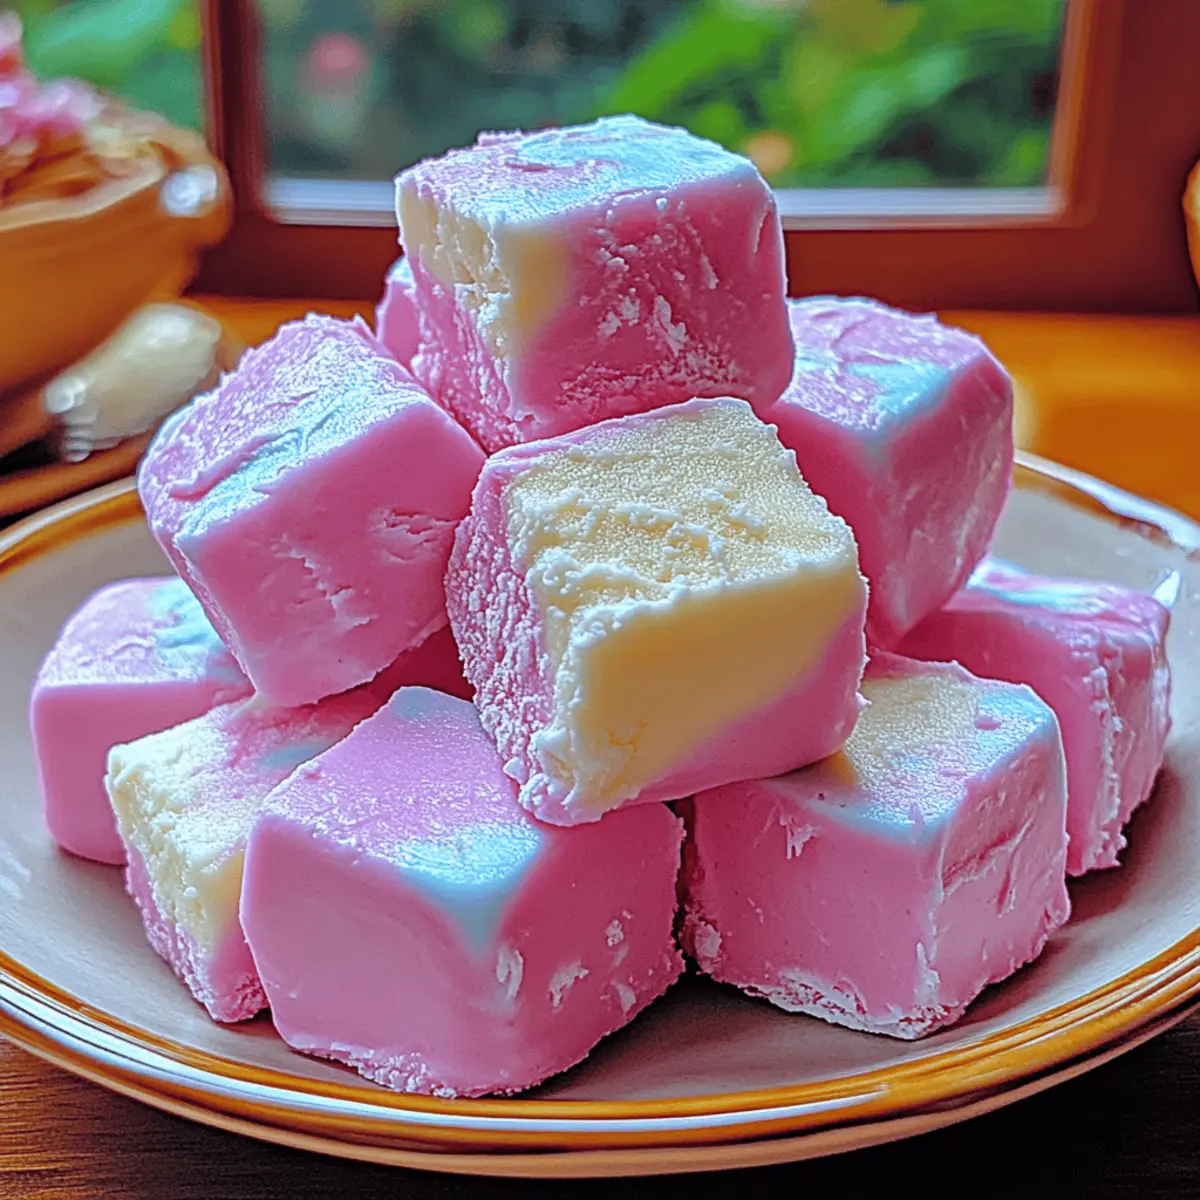
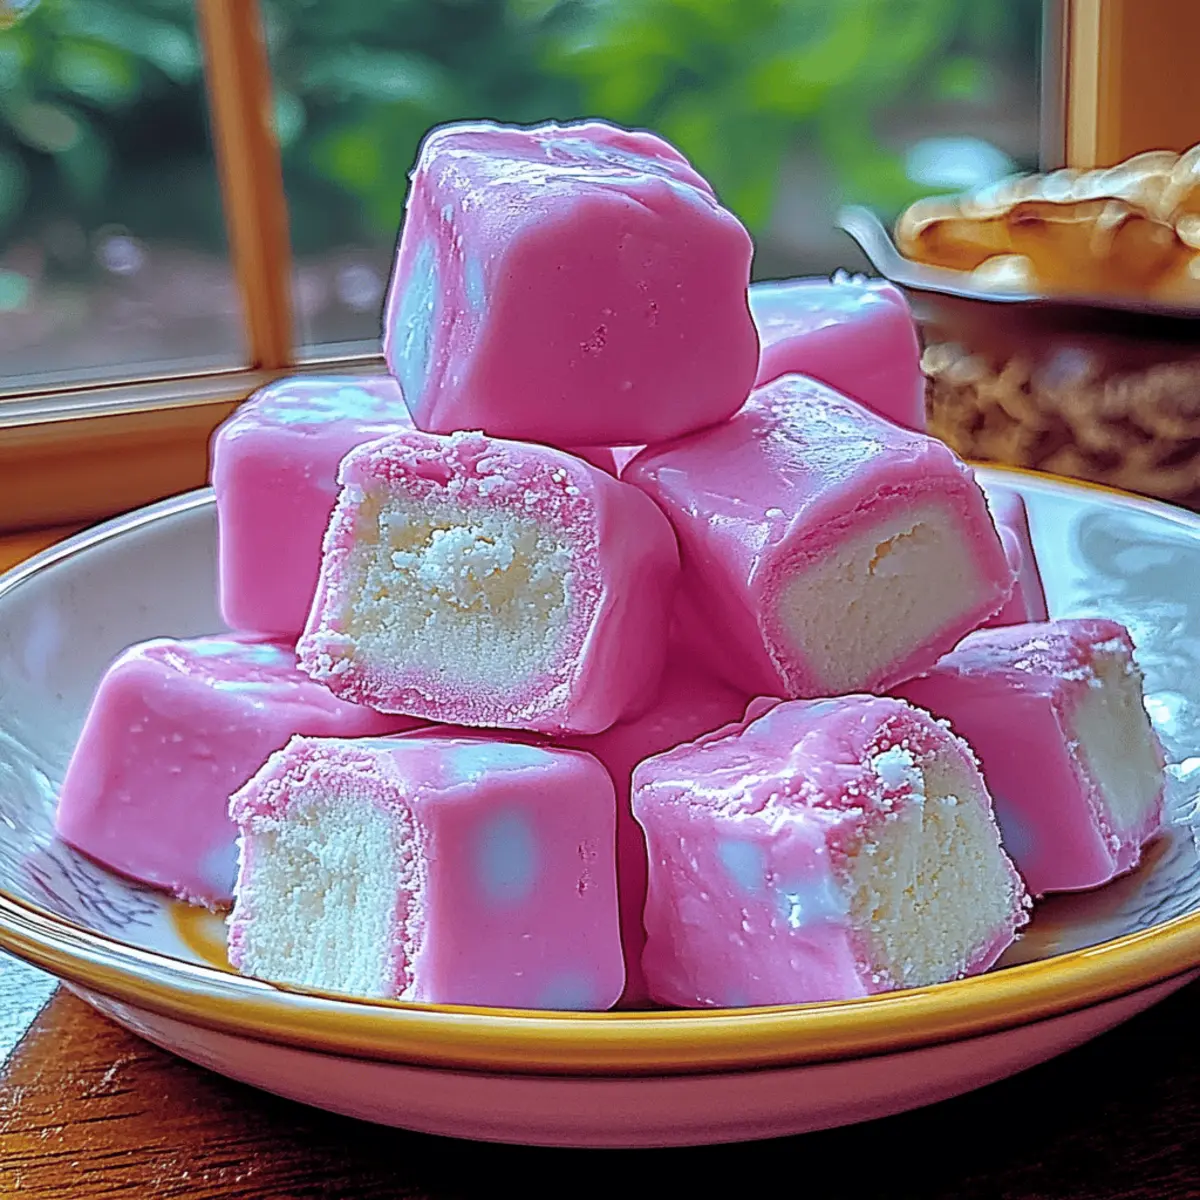
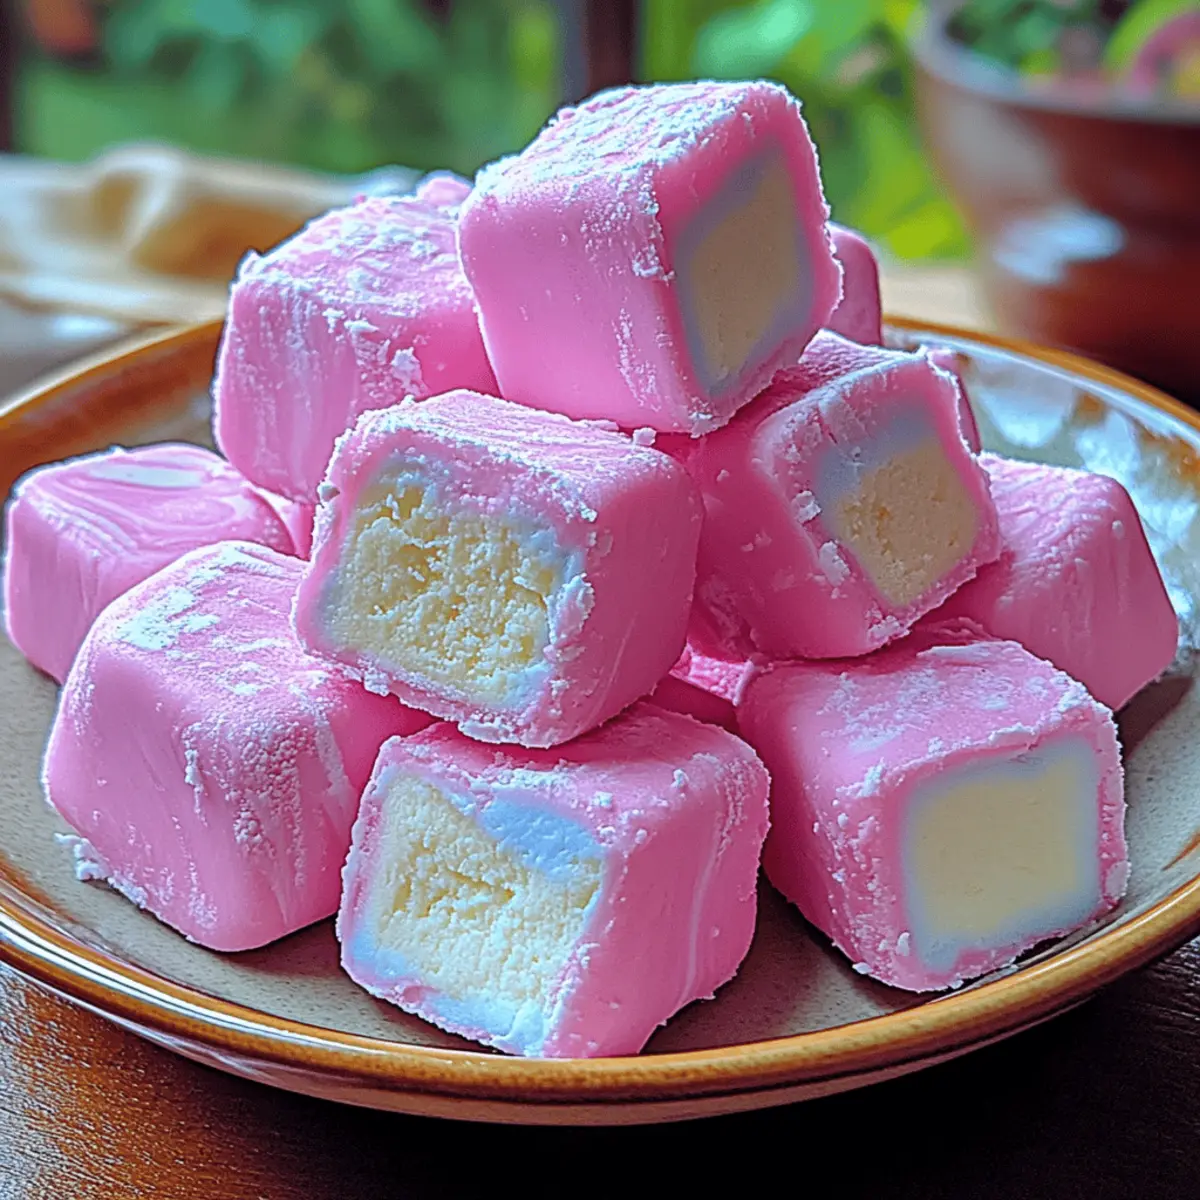
Food Coloring (optional) – Used to customize mints’ colors for a festive appeal; dividing the dough allows for creating various colored mints.

Step‑by‑Step Instructions for Soft Christmas Peppermints

Step 1: Combine the Base
In a large mixing bowl, blend together 1 can of sweetened condensed milk and ½ cup of softened unsalted butter using a hand mixer or whisk until the mixture is smooth and creamy. This should take about 2-3 minutes. You’ll know it’s ready when the butter is fully incorporated and there are no lumps left.

Step 2: Add the Sweetness
Gradually sift in 4 cups of powdered sugar while continuing to mix on low speed. This process should take about 3-5 minutes, allowing for each addition to mix thoroughly before adding the next. The final result should resemble a thick, dough-like consistency, ensuring the base for your Soft Christmas Peppermints is achieved.

Step 3: Infuse with Flavor
Stir in 1 teaspoon of peppermint extract and, if desired, a few drops of food coloring for festive hues. Use a spatula to fold these ingredients into the dough until evenly distributed, which may take 1-2 minutes. This step ensures that every mint has that delightful peppermint flavor and eye-catching color.

Step 4: Chill the Dough
If the dough feels too soft to handle, place it in the refrigerator for 10-15 minutes. This chilling time is essential for the dough to firm up, making it easier to shape into mints. You’ll know it’s ready when it feels slightly firmer to the touch without being overly hard.

Step 5: Shape the Mints
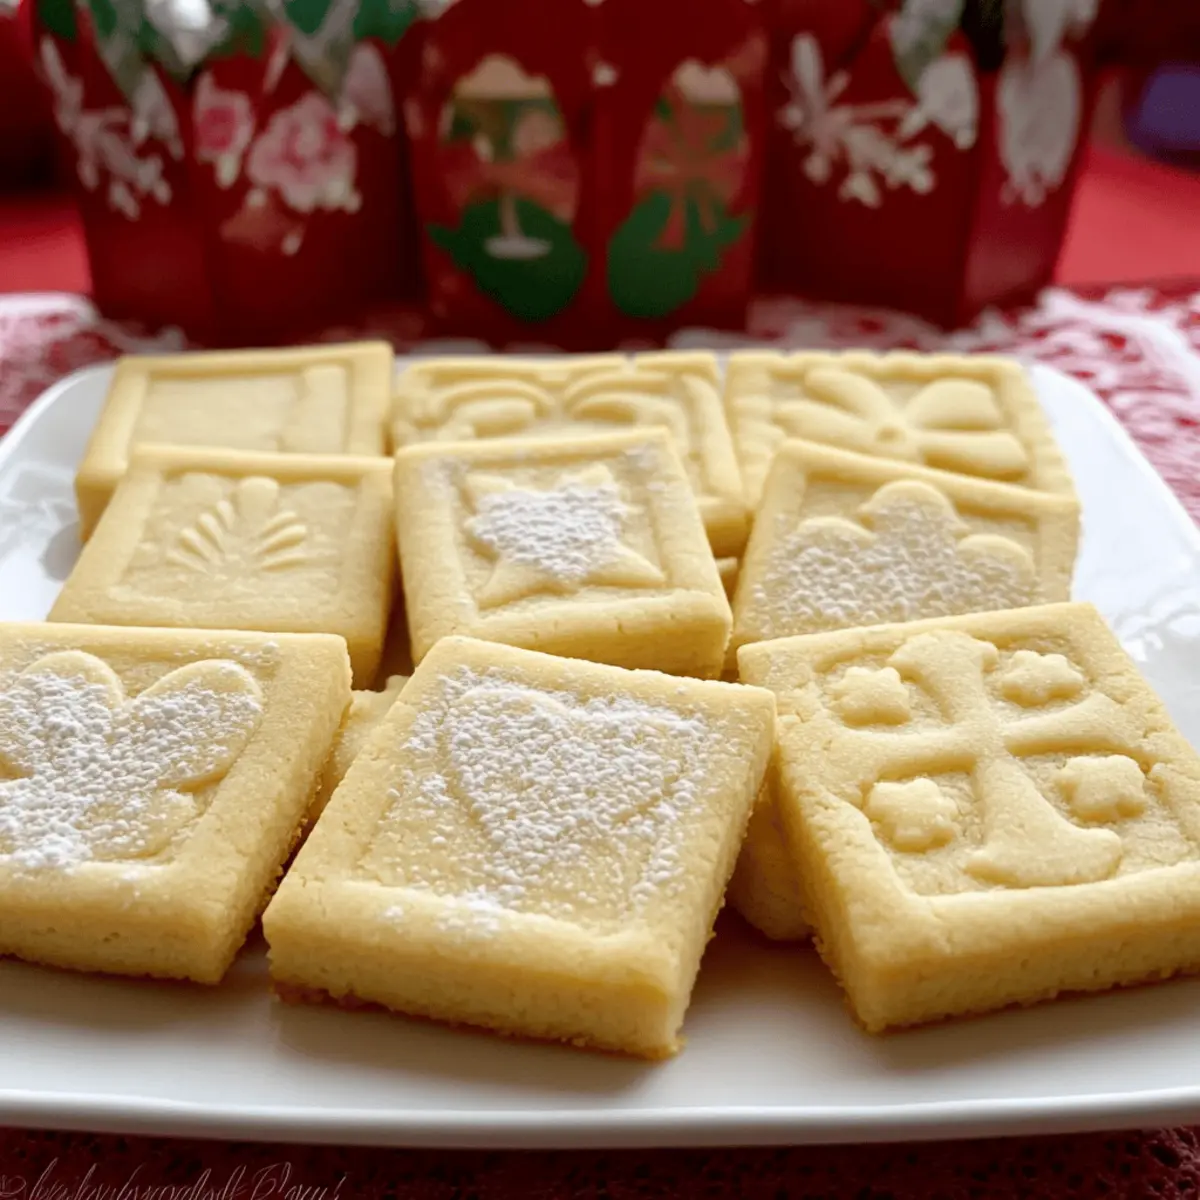
Once the dough is chilled, take small portions and roll them into balls about 1 inch in diameter. Alternatively, you can use cookie cutters for fun shapes. Ensure uniform sizes for even setting, placing them on a parchment-lined baking sheet. This step shapes your Soft Christmas Peppermints into delightful bite-sized treats.

Step 6: Let Them Set
Allow the shaped mints to set at room temperature for about 1 hour. During this time, the mints will firm up nicely. You’ll know they’re ready when they hold their shape without any sticky residue. This step is crucial for that perfect melt-in-your-mouth texture.

Step 7: Store for Freshness
After your Soft Christmas Peppermints have set, transfer them to an airtight container for storage. Keep them at room temperature to maintain their delightful texture. They can be enjoyed for up to one week, ensuring you have a festive treat ready to share or enjoy throughout the holiday season.

Expert Tips for Soft Christmas Peppermints

  • Perfect Consistency: Use room temperature butter for a smoother mixture; if too cold, it can lead to lumps in your Soft Christmas Peppermints.
  • Chill Wisely: If the dough is sticky, chill it longer—too soft mints can lose their shape during the setting process.
  • Flavor Swaps: Don’t hesitate to experiment! Replace peppermint extract with vanilla, almond, or even orange extract for unique flavors that cater to your family’s taste.
  • Presentation Matters: For a festive touch, roll finished mints in crushed peppermint candies or sprinkles before they set, adding an extra layer of flavor and fun.
  • Storage Tip: Keep mints in a cool, dark place to maintain freshness and prevent them from becoming too soft or misshapen.

Storage Tips for Soft Christmas Peppermints

Room Temperature: Store mints in an airtight container at room temperature for up to one week to maintain their melt-in-your-mouth texture and freshness.

Fridge: If you prefer your mints a bit firmer, refrigerate them for a couple of hours. Just ensure they are in an airtight container to prevent them from absorbing any odors.

Freezer: For longer storage, freeze the mints in a single layer on a baking sheet, then transfer to an airtight container. They can last up to 3 months; simply thaw at room temperature before serving.

Reheating: There’s no need to reheat these delightful Soft Christmas Peppermints, but if they become too soft, simply place them in the fridge for a short time to regain their structure.

Soft Christmas Peppermints Variations

Inviting you to create your own unique twist on these delightful treats will bring happiness to your holiday table.

  • Nut-Free: Substitute butter with coconut oil for a nut-free option while keeping that rich flavor intact.
  • Chocolate-Dipped: After setting, dip the mints in melted chocolate for a decadent treat that takes them to a whole new level. You can choose dark, milk, or white chocolate depending on your preference, resulting in a harmonious blend of flavors.
  • Flavored Extracts: Try almond or orange extract instead of peppermint for a delightful flavor twist. Each option creates a new dimension of taste, making every batch just as exciting as the last.
  • Festive Sprinkles: Roll mints in crushed peppermint candies or colorful sprinkles before they set for an eye-catching presentation. This adds texture and a pop of color, making your holiday treats irresistible.
  • Sugar-Free: Use sugar-free powdered sugar to accommodate dietary restrictions without losing sweetness. These treats still provide all the joy, perfect for those watching their sugar intake. For other low-sugar options, consider checking out my recipe for Tropical Pineapple Soft.
  • Mini Versions: Make bite-sized mints by rolling the dough into smaller balls for a perfectly poppable treat. This is great for parties, allowing guests to sample and enjoy without feeling guilty.
  • Herbal Infusion: Infuse the dough with crushed herbs like rosemary or thyme for an adventurous flavor that intrigues the palate. The herbal notes will create a sophisticated twist, showcasing your culinary creativity.
  • Swirled Colors: For a festive touch, divide the dough into portions and create swirls of color using different food colorings. Not only does this look vibrant, but it adds an element of fun to the classic mints!

Make Ahead Options

These Soft Christmas Peppermints are a fantastic choice for busy home cooks looking to streamline their holiday preparations! You can easily prepare the dough up to 24 hours in advance by following the first four steps of the recipe. Simply mix the sweetened condensed milk, butter, powdered sugar, and peppermint extract, then chill the dough. Once prepped, wrap it tightly in plastic wrap and refrigerate until you’re ready to shape the mints. When you’re ready to serve, roll the chilled dough into balls or use cookie cutters, let them set for about an hour, and you’ll have delicious, melt-in-your-mouth peppermint treats ready to impress your guests! By prepping in advance, you’ll save valuable time during the bustling holiday season without sacrificing flavor or quality.

What to Serve with Soft Christmas Peppermints

These delightful mints are perfect for brightening up your holiday table, and there are plenty of delicious accompaniments to enhance your festive experience.

  • Rich Hot Chocolate: This warm, creamy beverage adds a cozy touch and complements the minty freshness with its rich chocolate notes.
  • Gingerbread Cookies: Their spiced flavor pairs beautifully, offering a perfect contrast to the sweet peppermint, creating a nostalgic holiday treat platter.
  • Coffee or Espresso: The bitterness of coffee balances the sweetness of the mints, making for a delightful after-dinner treat. A perfect pairing for those who love a little caffeine kick with their sweets!
  • Fruit Platter: Fresh fruits like berries or oranges bring vibrant flavor and a refreshing contrast, balancing the richness of the mints and adding a pop of color to your spread.
  • Festive Cheese Board: Include mild cheeses like cream cheese or goat cheese; their creamy texture and subtle flavor enhance the overall taste experience alongside the mints.
  • Warm Apple Cider: Serve hot apple cider spiced with cinnamon to add a warm, aromatic layer to your holiday gathering—its fruity warmth beautifully complements the cooling peppermint flavor.
  • Chocolate Dipped Pretzels: Their salty crunch brings a delightful textural contrast, enhancing the sweetness of the mints and providing an irresistible snack combination.
  • Mini Cupcakes: Light and fluffy, these sweet bites can be frosted with mint or vanilla flavors, making them an ideal sweet companion to your peppermints while adding variety to your holiday treat table.

Soft Christmas Peppermints Recipe FAQs

How do I select the best ingredients for Soft Christmas Peppermints?
Absolutely! For your Soft Christmas Peppermints, using high-quality sweetened condensed milk and unsalted butter is key to achieving that rich, creamy texture. When choosing sweetened condensed milk, look for brands that specify a smooth consistency on the label. The butter should be at room temperature to avoid lumps in your mixture. Fresh peppermint extract can make a significant difference in flavor; consider using pure extracts for the best results.

How should I store my Soft Christmas Peppermints?
To maintain their delightful melt-in-your-mouth texture, keep your Soft Christmas Peppermints in an airtight container at room temperature. They will stay fresh for up to one week. If you prefer a firmer texture, you can refrigerate them, but make sure they are well-sealed to prevent absorbing any other odors.

Can I freeze Soft Christmas Peppermints?
Sure thing! To freeze your Soft Christmas Peppermints, start by laying them in a single layer on a baking sheet lined with parchment paper. Once they’ve frozen solid (about 1-2 hours), transfer them to an airtight container or freezer bag, placing parchment paper between layers if stacking. They can last for up to 3 months in the freezer. To enjoy, simply let them thaw at room temperature—easy as pie!

What should I do if my mints are too soft to shape?
Very! If your dough feels too soft to handle after mixing, a little chilling goes a long way. Place the bowl in the refrigerator for 10-15 minutes. This will firm up the dough, making it easier to roll into balls or shape with cookie cutters. If they still seem sticky, chilling for an additional few minutes can help achieve the perfect consistency.

Are Soft Christmas Peppermints safe for those with dietary restrictions?
Absolutely! These Soft Christmas Peppermints are gluten-free and vegetarian, making them suitable for a wide range of dietary needs. However, it’s always best to check product labels for allergens, especially with extracts and butter substitutes. If you’re preparing these for someone with a specific allergy, you can easily swap ingredients or leave out the food coloring to ensure they’re safe and enjoyable for everyone.

Can I change the flavor of Soft Christmas Peppermints?
You bet! One of the best parts about making Soft Christmas Peppermints is their versatility. You can swap the peppermint extract for almond, vanilla, or even orange for a delightful twist. Just keep the same quantity of extract to maintain balance in flavor and consistency. You might even consider adding a sprinkle of crushed peppermint candies or colored sugar for festive flair—make it fun!

Soft Christmas Peppermints

Soft Christmas Peppermints – Melt-In-Your-Mouth Delights

Soft Christmas Peppermints are classic butter mints that are gluten-free, vegetarian, and delightfully easy to make.
Prep Time 15 minutes
Chilling Time 15 minutes
Total Time 30 minutes
Servings: 20 mints
Course: Dessert
Cuisine: American
Calories: 50

Ingredients
  

For the Mints
  • 1 can Sweetened Condensed Milk Do not substitute with powdered milk
  • ½ cup Butter Use unsalted butter for best results
  • 4 cups Powdered Sugar Do not substitute unless necessary
  • 1 teaspoon Peppermint Extract Can replace with vanilla or almond extracts
  • as needed drops Food Coloring Optional for festive colors

Equipment

  • mixing bowl
  • hand mixer
  • spatula
  • parchment paper

Method
 

Step-by-Step Instructions
  1. In a large mixing bowl, blend together 1 can of sweetened condensed milk and ½ cup of softened unsalted butter using a hand mixer or whisk until the mixture is smooth and creamy.
  2. Gradually sift in 4 cups of powdered sugar while continuing to mix on low speed until the mixture resembles a thick dough-like consistency.
  3. Stir in 1 teaspoon of peppermint extract and if desired, a few drops of food coloring, folding until evenly distributed.
  4. If the dough feels too soft, place it in the refrigerator for 10-15 minutes to firm up.
  5. Take small portions of chilled dough and roll them into balls about 1 inch in diameter or use cookie cutters for fun shapes.
  6. Allow the shaped mints to set at room temperature for about 1 hour.
  7. Transfer the mints to an airtight container and store at room temperature for up to one week.

Notes

For a festive touch, roll finished mints in crushed peppermint candies or sprinkles before they set.

Fluffy Cotton Candy Fudge: A Sweet Nostalgic Treat for All

As I was rummaging through my pantry the other day, the thought struck me: how can I bring a touch of summer carnivals back into my kitchen? That’s when I decided to whip up a batch of Fluffy Cotton Candy Fudge. This sweet delight is not only a colorful feast for the eyes but also incredibly simple to make—ready in just 15 minutes! Perfect for parties or a nostalgic treat, this fudge melts in your mouth, capturing the essence of those carefree summer days. Plus, it’s easily customizable, whether you need a dairy-free option or wish to play with different colors and flavors. Are you ready to dive into this whimsical dessert that is bound to bring smiles all around?

Why is Fluffy Cotton Candy Fudge a Must-Try?

Nostalgic Flavor: This fudge brings back memories of summer carnivals with its sweet cotton candy taste.
Vibrant Colors: The playful pink and blue swirls not only look enticing but also make for a beautiful presentation at any gathering.
Quick & Easy: In just 15 minutes, you’ll have a delightful treat ready for sharing or enjoying solo!
Customizable Delight: Easily adjust ingredients for dietary preferences, including dairy-free options for vegans. Want inspirations? Check out our Mini Pancakes for another fun cooking adventure!
Crowd-Pleasing Treat: Perfect for parties, gifts, or simply a whimsical snack that everyone will adore.

Fluffy Cotton Candy Fudge Ingredients

For the Fudge Base

  • Sweetened Condensed Milk – Adds creaminess and sweetness; substitute with dairy-free condensed milk for a vegan option.
  • White Bark – Provides a smooth and creamy base; white chocolate can be used as a substitute if preferred.

For the Flavor and Color

  • Cotton Candy Flavoring – Imparts the distinct sweet flavor of cotton candy; available at specialty stores or online.
  • Light Blue Food Coloring Gel – Creates a vibrant color for visual appeal; adjust the number of drops for your desired shade.
  • Light Pink Food Coloring Gel – Similar to the blue for color customization; use as needed for vibrant hues.

This easy and colorful treat is just a few ingredients away—perfect for capturing the joy of summer right in your kitchen with your Fluffy Cotton Candy Fudge!

Step‑by‑Step Instructions for Fluffy Cotton Candy Fudge

Step 1: Prepare the Pan
Begin by lining an 8×8-inch baking pan with aluminum foil or parchment paper, allowing some overhang for easy removal later. Make sure the foil is smooth and tight against the corners to ensure a clean finish for your Fluffy Cotton Candy Fudge. Set the pan aside while you work on the fudge mixture.

Step 2: Melt the White Bark
In a microwave-safe bowl, break the white bark into small pieces for even melting. Microwave for 30 seconds at a time, stirring well after each interval until completely smooth and melted, which should take about 1 to 2 minutes total. This will create a creamy base for your fudge that gives it that delightful texture.

Step 3: Combine the Fudge Base
Once the white bark is melted, immediately stir in the sweetened condensed milk and the cotton candy flavoring. Mix well until you achieve a homogeneous and creamy mixture, free from lumps. This step is crucial for infusing the fudge with the sweet, nostalgic flavor that makes the Fluffy Cotton Candy Fudge so special.

Step 4: Divide and Color the Mixture
With the fudge base ready, divide the mixture evenly into two separate bowls. Add a few drops of light blue food coloring gel to one bowl and light pink food coloring gel to the other, mixing until you reach your desired vibrant shades. This colorful step enhances the fun aesthetics of your fluffy cotton candy fudge.

Step 5: Layer the Fudge Mixtures
Spoon dollops of the blue and pink fudge mixtures alternatively into the prepared pan. This creates a beautiful patchwork effect as you layer the colors, allowing for a vibrant visual appeal. Take your time to arrange the mixtures prettily, as this contributes to the delightful presentation of the finished fudge.

Step 6: Swirl the Mixtures
Using a toothpick or a skewer, gently swirl the blue and pink mixtures together to achieve a marbled look. Avoid overmixing, which may muddy the colors, and instead create soft waves to enhance the aesthetics of your Fluffy Cotton Candy Fudge. Enjoy the process as the colors blend into whimsical patterns!

Step 7: Chill the Fudge
Place the pan in the refrigerator and allow the fudge to chill for about 2 hours, or until it is firm to the touch. This step is essential for setting the fudge properly, ensuring that it holds its shape when cut and brings that melt-in-your-mouth experience that everyone loves.

Step 8: Cut and Serve
Once the fudge is set, carefully lift it out of the pan using the overhanging foil or parchment paper. Place it on a cutting board and slice it into bite-sized squares. Your Fluffy Cotton Candy Fudge is now ready to be enjoyed, and its vibrant colors and sweet flavor are bound to bring smiles all around.

How to Store and Freeze Fluffy Cotton Candy Fudge

Room Temperature: Store your fudge in an airtight container at room temperature for up to 1 week. This keeps it soft and delicious while preserving its vibrant colors.

Fridge: For extended freshness, refrigerate your Fluffy Cotton Candy Fudge in an airtight container for up to 2 weeks. It will be firmer but just as delightful!

Freezer: You can freeze the fudge for up to 3 months. Wrap individual pieces in plastic wrap and place them in a freezer-safe bag or container. Thaw in the fridge before serving.

Reheating: If desired, gently warm it in the microwave for a few seconds to soften. Enjoy your fudgy treat while reminiscing about those fun carnival moments!

Make Ahead Options

These Fluffy Cotton Candy Fudge squares are perfect for busy weeknights or special occasions when you want to save time! You can prepare the fudge mixture up to 24 hours in advance by following all the steps except for chilling. After combining the sweetened condensed milk, white bark, and cotton candy flavoring, store the mixture in an airtight container in the refrigerator. To maintain its creamy texture, avoid leaving it out at room temperature for too long. When you’re ready to serve, simply divide, color, layer, and chill the fudge mixture, allowing it to set for about 2 hours. Enjoy the same delicious, melt-in-your-mouth treat with minimal prep time!

What to Serve with Fluffy Cotton Candy Fudge

Transform your sweet indulgence into a delightful meal experience with these fun pairings.

  • Creamy Ice Cream: A scoop of vanilla or cotton candy-flavored ice cream adds a luscious creaminess, perfect for balancing the fudge’s sweetness.
  • Fruit Salad: Lighten up your dessert table with a refreshing mix of berries and melon that provides a juicy contrast and a hint of tartness. This is a fantastic way to incorporate freshness!
  • Sparkling Lemonade: The zesty effervescence of sparkling lemonade complements the rich, sweet flavors of the fudge while adding a playful touch to your gathering.
  • Chocolate-Dipped Pretzels: The salty crunch of pretzels dipped in chocolate creates a satisfying contrast to the soft, sweet fudge, making every bite an adventure.
  • Colorful Cupcakes: Consider serving assorted cupcakes frosted in bright colors to mirror the fudge’s vibrant hues, creating a visually appealing dessert spread.
  • Whipped Cream: A dollop of homemade or store-bought whipped cream enhances the fudge’s silky texture, bringing a lightness that elevates each bite.
  • Milkshake: Pair your fudge with a thick milkshake, perhaps a berry or vanilla blend, for a nostalgic twist reminiscent of classic diners.
  • Dairy-Free Yogurt: For a healthier option, serve a side of coconut or almond yogurt with a sprinkle of granola; it brings crunch and a delightful creaminess to your dessert experience.
  • Cotton Candy: For the ultimate carnival effect, add a fluffy cotton candy confection on the side as a playful garnish that ties back to the fudge’s flavor.
  • Fruit-Infused Water: Serve water infused with fresh fruits like lemon or strawberries for a light, refreshing drink that perfectly complements the sugary richness of your fudge.

Expert Tips for Fluffy Cotton Candy Fudge

  • Smooth Melting: Ensure the white bark is fully melted for a creamy fudge; stop microwaving just before it’s completely smooth and stir to finish the melting process.
  • Vibrant Colors: Use gel food coloring for bold hues; too much liquid food coloring can lead to a soggy mixture and affect your fudge consistency.
  • Cool Completely: Allow the fudge to chill until it’s fully set in the refrigerator; this guarantees clean slices and a perfect texture for your Fluffy Cotton Candy Fudge.
  • Plan Ahead: For best results, prepare your fudge a day in advance to enhance its flavor and texture while allowing ample chilling time.
  • Make It Your Own: Feel free to add fun mix-ins like colorful sprinkles or switch flavors to chocolate for a delightful twist on the classic cotton candy taste.

Fluffy Cotton Candy Fudge Variations

Feel free to explore the world of flavors and colors as you make this delightful fudge your own!

  • Dairy-Free: Substitute sweetened condensed milk with coconut or almond milk for a vegan option without losing creaminess. This twist lets everyone enjoy a slice!

  • Flavor Experimentation: Instead of cotton candy flavoring, try using vanilla extract or even chocolate for a decadent spin. Each flavor brings its unique charm, transforming your fudge into a new experience.

  • Color Without Coloring: For a more traditional look, omit the food coloring and keep it classic white. The smoothness of white fudge can be just as appealing, especially with festive sprinkles on top.

  • Crunch Factor: Mix in crushed nuts or colorful sprinkles to add texture to your fudge. This extra dimension makes each bite an adventure of flavor and crunch.

  • Fruity Delight: Introduce a hint of fruitiness by adding a few drops of raspberry or strawberry flavoring. This fruity twist pairs beautifully with the sweetness of the fudge.

  • Heat It Up: For some excitement, add a pinch of cayenne pepper or chili powder to give a sweet and spicy kick. It’s an unexpected surprise everyone will love!

  • Layered Magic: Instead of swirling the mixture, layer the fudge by first pouring a pink layer, then a blue layer on top for an eye-catching stacked effect. Each slice reveals beautiful stripes of color!

  • Easy Chocolate Swirls: Add melted chocolate drizzles on top for a rich contrast that combines the sweetness of cotton candy with the richness of chocolate. It’s a delightful pairing that elevates the fudge.

Consider trying these variations during your next kitchen adventure, and while you’re at it, check out our Two Ingredient Omelet or indulge in Mini Pancakes for more fun recipes that spark creativity!

Fluffy Cotton Candy Fudge Recipe FAQs

How do I select the best ingredients for Fluffy Cotton Candy Fudge?
Absolutely! For the best flavor and texture, look for high-quality sweetened condensed milk and white bark. Make sure the white bark is fresh and smooth—check for any signs of discoloration or clumps. If you’re going dairy-free, a good brand of dairy-free condensed milk works just as well, providing a similar creaminess.

What is the best storage method for Fluffy Cotton Candy Fudge?
Great question! Store the fudge in an airtight container at room temperature for up to 1 week. If you’d like it to last longer, refrigerate it in the same container for up to 2 weeks. Just make sure to give it a moment to come to room temperature before serving; this restores its melt-in-your-mouth texture.

Can I freeze Fluffy Cotton Candy Fudge, and how do I do it?
Definitely! To freeze your fudge, wrap each piece individually in plastic wrap—this helps maintain moisture. Then, place the wrapped pieces in a freezer-safe bag or container. It can be frozen for up to 3 months. When you’re ready to enjoy some, simply transfer the pieces to the refrigerator to thaw overnight. They’ll be delicious when you’re ready for a sweet treat!

What if my fudge didn’t set properly?
No problem at all! If your fudge is too soft or gooey, it may not have chilled long enough. To fix this, place it back in the refrigerator for an additional hour or two. If it’s still not setting, you could melt it down again and carefully stir in a little more melted white bark to adjust the consistency, then re-chill.

Are there any dietary considerations I should keep in mind for Fluffy Cotton Candy Fudge?
Very much so! This fudge can easily be adapted for different dietary needs. To make it vegan, simply use dairy-free sweetened condensed milk and ensure your white bark is free from dairy. Always check labels for allergens, especially if serving to others, to avoid issues with nuts or other ingredients. You want everyone to enjoy this nostalgic treat!

Fluffy Cotton Candy Fudge

Fluffy Cotton Candy Fudge: A Sweet Nostalgic Treat for All

Fluffy Cotton Candy Fudge is a delightful dessert that captures the nostalgic essence of summer carnivals.
Prep Time 15 minutes
Chill Time 2 hours
Total Time 2 hours 15 minutes
Servings: 16 squares
Course: Dessert
Calories: 120

Ingredients
  

For the Fudge Base
  • 1 can Sweetened Condensed Milk Substitute with dairy-free condensed milk for a vegan option.
  • 10 oz White Bark White chocolate can be used as a substitute.
For the Flavor and Color
  • 1 tsp Cotton Candy Flavoring Available at specialty stores or online.
  • 3 drops Light Blue Food Coloring Gel Adjust the number of drops for desired shade.
  • 3 drops Light Pink Food Coloring Gel Use as needed for vibrant hues.

Equipment

  • microwave-safe bowl
  • baking pan
  • Aluminum foil or parchment paper
  • Toothpick or skewer
  • Cutting Board

Method
 

Instructions for Fluffy Cotton Candy Fudge
  1. Prepare the pan by lining an 8x8-inch baking pan with aluminum foil or parchment paper.
  2. Melt the white bark in a microwave-safe bowl by microwaving for 30 seconds at a time until smooth.
  3. Combine the melted white bark with sweetened condensed milk and cotton candy flavoring until creamy.
  4. Divide the fudge base into two bowls and add blue food coloring to one and pink to the other.
  5. Layer spoonfuls of the blue and pink mixtures into the prepared pan alternatingly.
  6. Swirl the mixtures gently with a toothpick to create a marbled appearance.
  7. Chill the fudge in the refrigerator for about 2 hours until firm.
  8. Cut the set fudge into bite-sized squares and serve.

Notes

This fudge can be customized with different colors and flavors, and is perfect for parties or gifts.

Refreshing Hydrating Watermelon Smoothie with Cucumber Bliss

As the sun blazed down, I found myself yearning for something cool and revitalizing. That’s when it hit me—a Refreshing Hydrating Watermelon Smoothie with Cucumber! This divine blend utilizes sweet, juicy watermelon paired with the crisp refreshment of cucumber, creating the ultimate thirst-quencher. Not only is this smoothie delightfully easy to whip up, but it’s also packed with hydrating properties that make it perfect for hot summer days or after an intense workout. With just a handful of ingredients, you’ll have a quick, low-calorie treat that will leave you feeling replenished and satisfied. So, are you ready to blend up some bliss? Let’s dive into this refreshing recipe!

Why You’ll Love This Smoothie Recipe

Quick and Easy: With just five ingredients, this Refreshing Hydrating Watermelon Smoothie with Cucumber is a breeze to make, perfect for busy mornings or a sudden craving.
Hydrating Delight: The watermelon and cucumber combo not only tastes amazing but also delivers a refreshing hydration boost.
Low-Calorie: Enjoy a guilt-free, low-calorie treat that fits perfectly into any wellness plan.
Versatile Inspiration: Customize your smoothie by adding mint or switching to plant-based yogurt for a dairy-free option.
Crowd-Pleaser: Whether it’s brunch with friends or a post-workout refreshment, this recipe will wow anyone who tries it. Serve it alongside a Refreshing Cucumber Carrot salad to elevate your meal!

Refreshing Hydrating Watermelon Smoothie Ingredients

• Here’s everything you need to whip up this delicious smoothie!

For the Smoothie

  • Watermelon – The base of the smoothie; use fresh, ripe watermelon for maximum sweetness and hydration.
  • Cucumber – Adds a crisp texture; can substitute with zucchini if desired for a similar crunch.
  • Greek Yogurt – Provides creaminess and a protein boost; opt for coconut yogurt for a delightful dairy-free twist.
  • Honey or Agave Syrup – Sweetener to enhance flavor; adjust the amount based on your personal preference for sweetness.
  • Lemon Juice – Balances the sweetness with acidity; freshly squeezed juice is best for optimal flavor.

This Refreshing Hydrating Watermelon Smoothie with Cucumber is not just a treat; it’s a beautiful blend of flavors waiting to be explored!

Step‑by‑Step Instructions for Refreshing Hydrating Watermelon Smoothie with Cucumber

Step 1: Prepare Your Ingredients
Start by cutting fresh, ripe watermelon and cucumber into manageable chunks. Aim for pieces about 1-2 inches to ensure they blend smoothly. You’ll want approximately two cups of watermelon and half a cup of cucumber to achieve that perfect balance of sweetness and refreshment in your Refreshing Hydrating Watermelon Smoothie with Cucumber.

Step 2: Combine in the Blender
In a blender, add the prepared watermelon and cucumber chunks. Next, scoop in half a cup of Greek yogurt for creaminess, followed by a tablespoon of honey or agave syrup to sweeten the mix. Finally, squeeze in the juice of half a lemon to brighten the flavors. This combination will create a luscious, hydrating blend that feels like a sip of summer.

Step 3: Blend Until Smooth
Secure the lid on your blender and blend the mixture on high speed for about 1-2 minutes. Watch as the ingredients transform into a vibrant, smooth puree, ensuring no chunks remain. You want a silky consistency that’s both inviting and refreshing, characteristic of the ideal Refreshing Hydrating Watermelon Smoothie with Cucumber.

Step 4: Taste and Adjust Sweetness
Once blended, taste your smoothie to see if it meets your sweetness preference. If you desire a little more sweetness, add an extra drizzle of honey or agave syrup, and blend for another 10-15 seconds. This step ensures your smoothie is perfectly tailored to your liking while maintaining its refreshing essence.

Step 5: Serve Immediately
Pour the smoothie into chilled glasses for an extra cool treat. The vibrant pink color should be inviting, and the texture should be creamy yet drinkable. Serve immediately to preserve the fresh flavors and hydrating benefits, making your Refreshing Hydrating Watermelon Smoothie with Cucumber a delightful treat for any occasion.

Refreshing Hydrating Watermelon Smoothie Variations

Feel free to get creative and tailor this smoothie to your taste!

  • Dairy-Free: Replace Greek yogurt with coconut yogurt for a creamy, dairy-free option that still packs a punch of flavor. You won’t miss the dairy at all!

  • Minty Fresh: Add a handful of fresh mint leaves before blending for an aromatic twist that enhances the overall refreshment. It’s like a breath of fresh air in your smoothie!

  • Protein Boost: Stir in a scoop of your favorite protein powder for an extra nutritional kick, perfect for post-workout recovery. This twist adds staying power to your delicious drink.

  • Citrusy Zing: Swap lemon juice for lime juice for a different citrus touch. The tartness of lime adds a unique brightness that pairs beautifully with the sweetness of watermelon.

  • Tropical Vibes: Incorporate diced pineapple or mango for a fruity twist that transports you to a beach paradise. This variation lends more sweetness and tropical flavor to your smoothie!

  • Smoothie Bowl: For a thicker texture, reduce the liquid ingredients and blend to a thicker consistency, then pour it into a bowl and top with your choice of fruits and granola. A delicious and visually stunning breakfast!

  • Chili Kick: Add a pinch of cayenne pepper for a touch of heat. This surprising ingredient elevates the flavor profile and adds a fun kick to the refreshing sweetness.

  • Frozen Delight: Freeze the entire smoothie mixture and scoop out to enjoy as a refreshing sorbet on hot days. Quick, easy, and perfect for beating the heat!

And if you’re looking for more refreshing ideas, consider serving this alongside a Crisp Cabbage Cucumber Salad with Lemon Sesame Dressing. Happy blending!

Make Ahead Options

These Refreshing Hydrating Watermelon Smoothies with Cucumber are perfect for meal prep enthusiasts! You can chop your watermelon and cucumber and store them in an airtight container in the refrigerator for up to 24 hours. This preparation saves you time during busy mornings and keeps your ingredients fresh. When you’re ready to enjoy, simply blend the prepped ingredients with Greek yogurt, honey, and lemon juice. For optimal quality, combine everything just before serving to preserve that delightful freshness. Make ahead to sip on this hydrating smoothie anytime you need a refreshing pick-me-up after a long day or a workout!

Expert Tips for Refreshing Hydrating Watermelon Smoothie

  • Chill Factor: Freeze watermelon chunks before blending for an extra refreshing and frosty smoothie that keeps you cool.
  • Avoid Over-Blending: Blend just until smooth to prevent your smoothie from becoming too liquid; a silky texture enhances enjoyment.
  • Yogurt Variations: Adjust thickness by using less Greek yogurt for a lighter consistency or add more for a creamier texture in your Refreshing Hydrating Watermelon Smoothie with Cucumber.
  • Balance Sweetness: Always taste before serving; adding more honey or agave can enhance the flavor to suit your taste buds perfectly.
  • Garnish Ideas: For an appealing presentation, serve with cucumber slices or fresh mint leaves on top, enhancing both look and flavor.

How to Store and Freeze Refreshing Hydrating Watermelon Smoothie

Fridge: Store in an airtight container for up to 24 hours. Stir well before serving, as separation may occur.

Freezer: For longer storage, pour the smoothie into ice cube trays and freeze. This allows you to use the cubes in future smoothies or drinks!

Reheating: Not recommended for this smoothie; enjoy it cold for the best taste and refreshing experience.

Tip: If you’re planning to make extra, consider blending and freezing in single-serving portions to have a quick, hydrating treat ready whenever you need it!

What to Serve with Refreshing Hydrating Watermelon Smoothie with Cucumber

Elevate your smoothie experience with delightful pairings that harmonize flavors and textures, ensuring a fulfilling meal.

  • Greek Yogurt Parfait: Layered with granola and fresh fruit, this creamy parfait complements the smoothie’s refreshing qualities with hearty crunch and richness.

  • Minty Fruit Salad: A vibrant mix of seasonal fruits with fresh mint brightens the dish, echoing the refreshing hints in the watermelon smoothie.

  • Savory Avocado Toast: The creamy, buttery taste of avocado on whole grain bread creates a delicious contrast to the smooth drink, making for a balanced meal.

  • Zesty Quinoa Salad: Packed with veggies and a lemon vinaigrette, this salad introduces a hearty bite, enriching your meal while matching the smoothie’s vibrant flavor.

  • Chilled Cucumber Soup: This light and refreshing soup mirrors the main ingredient’s crispness; it’s a perfect appetizer to awaken your palate before enjoying the smoothie.

  • Lemonade Sparkler: A fizzy lemonade with a hint of mint or cucumber provides a refreshing contrast while keeping the bright flavors alive, ideal for sipping alongside the smoothie.

These pairings not only enhance the refreshing hydrating watermelon smoothie experience but also create a delightful medley on your dining table!

Refreshing Hydrating Watermelon Smoothie with Cucumber Recipe FAQs

How do I choose the right watermelon?
Absolutely! When selecting watermelon for your Refreshing Hydrating Watermelon Smoothie with Cucumber, look for a heavy watermelon that has a uniform shape without any dents or blemishes. The skin should be a deep green color, with a creamy yellow spot, indicating it ripened on the ground. Give it a gentle tap; a ripe watermelon sounds hollow!

How long does the smoothie last in the fridge?
Very! Your smoothie can be stored in an airtight container in the refrigerator for up to 24 hours. Just make sure to give it a good stir before serving, as it may separate after sitting. It’s best enjoyed fresh, but you’ll still get that refreshing taste the next day!

Can I freeze the smoothie for later?
Certainly! To freeze your Refreshing Hydrating Watermelon Smoothie, pour it into ice cube trays and freeze until solid. This allows you to pop out smoothie cubes whenever you desire a refreshing treat. Simply blend with a bit of liquid when you’re ready to enjoy one, keeping your smoothie choices open for a few months!

What if my smoothie is too thick?
Oh, no worries at all! If your smoothie turns out thicker than you like, you can simply add a splash of cold water or additional lemon juice and blend again until you reach your desired consistency. Alternatively, using less Greek yogurt during the blending process can help achieve a lighter texture overall.

Is this smoothie safe for pets?
While the ingredients are generally safe, it’s best to be cautious. Watermelon is safe for dogs in moderation, but avoid giving them any portion with seeds or rind. Cucumber is also safe, but keep in mind that not all pets digest fruits and vegetables well. Always check with your vet if you’re unsure.

What if I’m allergic to one of the ingredients?
Absolutely understandable! If you have allergies, consider substituting Greek yogurt with coconut yogurt to keep it dairy-free. You can adjust the sweetness using maple syrup instead of honey or opt for fresh mint leaves for added flavor without any allergens. This way, you can still enjoy the refreshing goodness of your smoothie!

Refreshing Hydrating Watermelon Smoothie with Cucumber

Refreshing Hydrating Watermelon Smoothie with Cucumber Bliss

Enjoy a Refreshing Hydrating Watermelon Smoothie with Cucumber, a delightful and revitalizing drink perfect for hot days.
Prep Time 10 minutes
Total Time 10 minutes
Servings: 2 cups
Course: Drinks
Cuisine: American
Calories: 150

Ingredients
  

For the Smoothie
  • 2 cups Watermelon use fresh, ripe watermelon
  • 0.5 cups Cucumber can substitute with zucchini if desired
  • 0.5 cups Greek Yogurt opt for coconut yogurt for dairy-free
  • 1 tablespoon Honey or Agave Syrup adjust based on preference
  • 0.5 lemons Lemon Juice freshly squeezed for optimal flavor

Equipment

  • Blender

Method
 

Step‑by‑Step Instructions
  1. Start by cutting fresh, ripe watermelon and cucumber into manageable chunks, about 1-2 inches.
  2. In a blender, add the prepared watermelon and cucumber chunks, followed by Greek yogurt, honey or agave syrup, and lemon juice.
  3. Blend on high speed for 1-2 minutes until smooth and creamy.
  4. Taste and adjust sweetness as needed, adding more honey or agave if desired.
  5. Pour into chilled glasses and serve immediately to enjoy the fresh flavors.

Notes

Store in an airtight container for up to 24 hours and stir before serving. Freeze for longer storage.

Delicious Marzipan Shortbread Cookies for Your Holidays

As the aromas of butter and almonds waft through the kitchen, I can’t help but feel a warm rush of nostalgia. Marzipan Shortbread Cookies are my ultimate holiday treat, combining that irresistible melt-in-your-mouth texture with the unmistakable sweetness of marzipan. This recipe isn’t just a delightful way to indulge—it’s also a quick and easy preparation that invites everyone to join in the fun of holiday baking. With only a handful of ingredients, you can whip up a batch that’s perfect for sharing, gifting, or savoring while sipping a cozy cup of tea. Plus, if you find yourself short on supplies, homemade marzipan is just a few steps away! Curious how to create these unforgettable cookies? Let’s get started!

Why make Marzipan Shortbread Cookies?

Irresistible Delight: Marzipan Shortbread Cookies promise a blend of buttery richness and sweet almond flavor that captivates your senses.

Quick and Easy: With just a handful of ingredients and simple steps, you’ll find whipping these up a breeze—even with homemade marzipan!

Festive Appeal: Perfect for sharing at holiday gatherings, these visually charming cookies are sure to impress guests and family alike.

Versatile Variations: Feel free to experiment by adding nuts or trying different flavor pastes for a delightful twist. Need more cookie inspiration? Don’t forget to check out our Chocolate Date Cookies or Nutty Apricot Cookies for your next bake!

Nostalgic Flavor: Each bite brings back wonderful memories, making these cookies a cherished addition to your holiday traditions.

Marzipan Shortbread Cookies Ingredients

For the Cookie Dough

  • All-Purpose Flour – Provides structure for the cookies, ensuring they hold their shape.
  • Unsalted Butter – Adds rich flavor and a tender texture; make sure it’s softened for easy blending.
  • Marzipan – Imparts a delightful almond flavor; if you’re missing it, homemade marzipan is a great substitute!
  • Granulated Sugar – Sweetens the dough perfectly, balancing the rich flavors.
  • Vanilla Extract – Elevates the overall taste and adds a lovely aroma to the cookies.
  • Egg Yolks – Bind the ingredients together and enrich the cookie’s flavor; they add that classic richness we love!
  • Salt – Balances the sweetness and enhances all the flavors in every scrumptious bite.
  • Almond Extract (optional) – Boosts the almond flavor if you’re a marzipan fanatic!

Each ingredient plays a crucial role in crafting these delectable Marzipan Shortbread Cookies, setting the stage for a memorable baking experience!

Step‑by‑Step Instructions for Marzipan Shortbread Cookies

Step 1: Mix the Dough
In a large mixing bowl, cream together the softened unsalted butter and granulated sugar until light and fluffy, about 3-4 minutes. Then, add in the flour, marzipan, vanilla extract, egg yolks, salt, and optional almond extract. Using a spatula or wooden spoon, gently mix until just combined, being careful not to overmix, as this will keep your Marzipan Shortbread Cookies tender.

Step 2: Chill the Dough
Once your dough is mixed, shape it into a flat disc and wrap it tightly in cling film. Place the wrapped dough in the refrigerator for at least 30 minutes. This chilling time is essential as it firms up the dough, making it easier to roll out later and ensuring that your cookies maintain their shape while baking.

Step 3: Roll Out the Dough
After the dough has chilled, preheat your oven to 350°F (175°C) and flour your clean work surface lightly. Remove the dough from the refrigerator, unwrap it, and roll it out to your desired thickness—around 1/4 inch is ideal for flavorful Marzipan Shortbread Cookies. Use cookie cutters or molds to cut out festive shapes, ensuring clear and clean edges for a beautiful presentation.

Step 4: Prepare for Baking
Arrange the cut-out cookies on a parchment-lined baking sheet, giving them some space as they will spread slightly during baking. As the cookies rest, give your oven a few minutes to ensure it’s fully preheated, which is crucial for achieving that perfectly golden color. Check the temperature before moving ahead to ensure a consistent bake.

Step 5: Bake the Cookies
Place the baking sheet in the preheated oven and bake the Marzipan Shortbread Cookies for 12-15 minutes, or until they are lightly golden around the edges. Keep a close eye on them towards the end to avoid over-baking, as these delicate cookies can turn quickly. Once baked, remove the cookies from the oven and let them cool on the sheet for a couple of minutes before transferring them to a wire rack.

Step 6: Final Touches
Allow the cookies to cool completely on the wire rack. Once cooled, you may opt to dust them with powdered sugar for a festive touch or even drizzle a simple glaze for an extra treat! These Marzipan Shortbread Cookies are now ready to be enjoyed as part of your holiday celebrations or shared with loved ones.

How to Store and Freeze Marzipan Shortbread Cookies

Room Temperature: Store cookies in an airtight container at room temperature for up to 1 week to maintain their fresh taste and texture.

Fridge: If you prefer, you can refrigerate the cookies, but be aware they may lose some of their tenderness. Consume within 5 days for best quality.

Freezer: For longer storage, wrap the cookies tightly in plastic wrap and then place them in a freezer bag. They can be frozen for up to 3 months.

Reheating: When ready to enjoy, thaw cookies at room temperature. For a warm treat, reheat in a 300°F (150°C) oven for about 5-7 minutes.

What to Serve with Marzipan Shortbread Cookies

These delightful cookies are perfect for creating a cozy and inviting holiday atmosphere around your kitchen table.

  • Creamy Hot Chocolate: The rich, chocolatey warmth pairs beautifully with the almond flavor, making every sip and bite a heavenly experience.

  • Spiced Chai Latte: With its aromatic spices, a chai latte complements the sweetness of the cookies while enhancing their festive appeal.

  • Fresh Fruit Salad: A mix of bright citrus and juicy berries adds a refreshing contrast, lightening up the richness of the cookies.

  • Vanilla Ice Cream: Serve warm cookies alongside a scoop of vanilla ice cream; the creamy contrast is simply irresistible!

  • Holiday Punch: A sweet and tangy fruit punch brings a festive zing, creating a party ambiance that’s perfect for sharing treats.

  • Nutty Biscotti: Crunchy and flavorful, biscotti provide a delightful texture contrast and is perfect for dunking alongside your cookies and a steaming cup of coffee.

  • Almond Tea: Enhance that almond flavor with a warm cup of almond tea, perfect for echoing the flavors of the marzipan in the cookies.

  • Shortbread Crumble Cake: Serve a slice of light crumble cake for an enhanced shortbread experience and a twist on textures.

  • Gingerbread Men: For a classic touch, pair these cookies with gingerbread men to enjoy the harmony of holiday flavors.

  • Dark Chocolate Drizzle: Consider drizzling melted dark chocolate on the cookies for an elegant finish and a delightful surprise in every bite.

Make Ahead Options

These Marzipan Shortbread Cookies are perfect for busy holiday bakers looking to save time! You can prepare the dough up to 24 hours in advance by mixing it and wrapping it tightly in cling film before refrigerating. This chilling not only makes rolling easier, but it also helps the flavors meld together beautifully. If you’re really ahead of the game, you can also cut the cookies into shapes and freeze them for up to 3 days—just place them on a parchment-lined tray in the freezer until solid, then transfer to an airtight container. When you’re ready to bake, simply take them out of the freezer while preheating the oven, and bake from frozen for an extra minute or two. This way, you can enjoy fresh-baked Marzipan Shortbread Cookies with minimal effort while preserving their delightful texture and flavor!

Tips for the Best Marzipan Shortbread Cookies

  • Ingredient Warmth: Use room temperature butter for easy mixing, ensuring your Marzipan Shortbread Cookies have that perfect tender texture.

  • Chill, Chill, Chill: Don’t skip chilling the dough! This step is crucial for keeping the cookies from losing shape during baking and achieving a flaky consistency.

  • Avoid Overmixing: Gently combine ingredients until just mixed; overmixing can lead to tough cookies instead of the delicate bite you desire.

  • Watch the Bake: Start checking the cookies at 12 minutes to avoid over-baking—aim for a light golden color for that classic shortbread look and flavor.

  • Presentation Matters: For a festive touch, consider dusting cooled cookies with powdered sugar or adding a drizzle of glaze to enhance your holiday cookie platter!

Marzipan Shortbread Cookies Variations

Feel free to explore these delightful twists to customize your Marzipan Shortbread Cookies!

  • Nutty Crunch: Add chopped pecans or walnuts for a satisfying crunch and rich flavor; just fold them into the dough before chilling. The added texture beautifully contrasts with the soft cookie, creating a truly memorable bite.

  • Chocolate Lovers: Swap some flour for cocoa powder to introduce a rich chocolate note; this delightful twist is perfect for those who adore chocolate and almonds together. You might just create a new holiday favorite!

  • Spiced Twist: Incorporate cinnamon or nutmeg into the dough for a hint of warmth; these spices bring an inviting aroma and a perfect seasonal touch to your cookies. Imagine the cozy feel they’ll create in your kitchen!

  • Citrus Zing: Add zest of orange or lemon for a refreshing citrus flavor; this bright addition awakens the almond notes and complements the sweetness of the marzipan beautifully. It’s a delicious way to brighten your holiday treats!

  • Almond Extract Boost: For a stronger almond flavor, simply increase the almond extract by an additional 1/4 teaspoon; you’ll enhance the marzipan essence, perfect for almandine enthusiasts.

  • Dried Fruit Delight: Fold in chopped dried cherries or cranberries for a pop of tartness and vibrant color; these will not only add flavor but also a festive flair to each cookie.

  • Decadent Drizzle: Drizzle melted dark chocolate over the cooled cookies for an indulgent touch; it adds a lovely contrast to the sweetness and presents beautifully on any cookie platter. You can also dust them with powdered sugar for an extra festive feel!

  • Homemade Marzipan: If you’re feeling adventurous, create your own homemade marzipan as a fun baking activity; combine 100 g slivered almonds, 100 g powdered sugar, 1 egg white, and 1/2 tsp almond extract for a truly personal touch. These cookies can spark conversation and admiration at gatherings!

As you bake and experiment, don’t forget to check out our other delightful treats like Crunchy Banana Seed Cookies and German Style Cookies for more inspiration during your holiday season!

Marzipan Shortbread Cookies Recipe FAQs

Can I use any type of marzipan for these cookies?
Absolutely! You can use store-bought marzipan or make your own at home using 100 g slivered almonds, 100 g powdered sugar, 1 egg white, and 1/2 tsp almond extract. This homemade version offers fantastic flavor and can be a fun activity to do with family or friends.

How should I store the Marzipan Shortbread Cookies?
Store your cookies in an airtight container at room temperature for up to 1 week. If you want them to last longer, you can refrigerate them for about 5 days, but keep in mind that refrigeration might make them a bit less tender.

Can I freeze Marzipan Shortbread Cookies?
Yes, you can! To freeze, wrap the cookies tightly in plastic wrap and then place them in a freezer bag. They can be stored in the freezer for up to 3 months. When you’re ready to enjoy them, simply thaw them at room temperature or reheat them in a 300°F (150°C) oven for about 5-7 minutes for a fresh-baked taste.

What should I do if my cookie dough is too crumbly?
If your dough seems too crumbly, it may need a bit more moisture. Gradually add a teaspoon of cold water or an extra egg yolk while mixing to bring it together. Make sure you’re not adding too much, as we want to maintain that tender shortbread texture!

Are Marzipan Shortbread Cookies suitable for those with nut allergies?
Since marzipan is made from almonds, these cookies are not suitable for those with nut allergies. However, you could experiment with other flavorings like vanilla or chocolate, but keep in mind that this will change the character of the cookies.

How do I know when my cookies are done baking?
Keep a close eye on them as they bake. They should turn a light golden color, and you can start checking for doneness around the 12-minute mark. Remember, over-baking can lead to tough cookies, so take them out as soon as they’re lightly golden around the edges!

Marzipan Shortbread Cookies

Delicious Marzipan Shortbread Cookies for Your Holidays

These Marzipan Shortbread Cookies combine buttery richness with sweet almond flavor—a perfect holiday treat.
Prep Time 15 minutes
Cook Time 15 minutes
Chilling Time 30 minutes
Total Time 1 hour
Servings: 24 cookies
Course: Dessert
Cuisine: Holiday
Calories: 150

Ingredients
  

For the Cookie Dough
  • 2 cups All-Purpose Flour
  • 1 cup Unsalted Butter softened
  • 1/2 cup Marzipan homemade if needed
  • 1/2 cup Granulated Sugar
  • 1 teaspoon Vanilla Extract
  • 2 large Egg Yolks
  • 1/4 teaspoon Salt
  • 1/2 teaspoon Almond Extract optional

Equipment

  • mixing bowl
  • parchment paper
  • Rolling Pin
  • Cookie Cutters
  • baking sheet

Method
 

Step-by-Step Instructions for Marzipan Shortbread Cookies
  1. Cream together the softened unsalted butter and granulated sugar until light and fluffy, about 3-4 minutes.
  2. Add in the flour, marzipan, vanilla extract, egg yolks, salt, and optional almond extract. Mix until just combined.
  3. Shape the dough into a flat disc, wrap in cling film, and refrigerate for at least 30 minutes.
  4. Preheat the oven to 350°F (175°C). Flour your work surface and roll out the dough to about 1/4 inch thickness.
  5. Cut out festive shapes with cookie cutters and arrange on a parchment-lined baking sheet.
  6. Bake for 12-15 minutes, until lightly golden around the edges. Let cool on the sheet for a couple of minutes, then transfer to a wire rack.
  7. Dust with powdered sugar or drizzle with glaze once cooled, if desired.

Notes

For best results, use room temperature butter and do not skip the chilling step to maintain cookie shape.

Delicious Mango Sticky Rice: A Sweet Taste of Thailand

As I stood in my kitchen, the air filled with the sweet aroma of ripe mangoes, I was reminded of the vibrant streets of Thailand where Mango Sticky Rice reigns supreme. This delightful dessert combines chewy, sticky rice embraced by a luscious, creamy coconut sauce, offering a comforting treat that’s both gluten-free and vegan. Not only is this recipe surprisingly easy to whip up, but it also transforms your dining table into an exotic getaway, perfect for impressing guests or savoring on a cozy night in. With a few simple ingredients and expert tips, you can create a dish that marries classic flavors with a modern touch. Are you ready to dive into the world of Thai cuisine and bring the taste of Thailand right to your home?

Why is Mango Sticky Rice a Must-Try?

Indulgent Flavors: This dish features sweet, sticky rice paired with rich coconut sauce, creating an irresistible combination that will transport your taste buds straight to Thailand.

Easy Preparation: With minimal ingredients and a simple process, even novice cooks can master this delightful dessert.

Vegan-Friendly: You’ll love that it’s not just gluten-free, but also vegan—perfect for guests with dietary restrictions.

Versatile: Enjoy this treat warm or at room temperature, making it an ideal dessert for any occasion. For variations, consider trying the Sizzling Rice Wrapped for a fun twist on flavors.

Crowd-Pleaser: Mango Sticky Rice appeals to everyone, whether you’re serving it at a dinner party or enjoying it as a sweet treat on a quiet night in.

Mango Sticky Rice Ingredients

For the Sticky Rice
Sticky Rice – Use glutinous or sweet rice for that authentic chewy texture.
Salt – A pinch enhances the overall flavor of the dish.

For the Coconut Sauce
Coconut Milk – Full-fat coconut milk delivers the richest flavor; avoid using only coconut cream.
Sugar – White granulated sugar is best to maintain sweetness and color; it’s a key ingredient in Mango Sticky Rice.
Cornstarch (Optional) – Helps thicken the sauce for a creamier consistency; adjust with water if needed.
Salt – Balances the sweetness of the coconut sauce.

For Serving
Ripe Mangoes – Choose Ataulfo or Tommy Atkins mangoes for optimal sweetness; ensure they’re perfectly ripe.
Toasted Sesame Seeds (Optional) – Adds a delightful crunch and visual appeal on top of the dish.

Step‑by‑Step Instructions for Mango Sticky Rice

Step 1: Soak the Rice
Begin by rinsing the glutinous rice under cold water until the water runs clear, about 2-3 minutes. Then, transfer the rice to a bowl and submerge it in water for at least 1 hour or overnight for a softer texture. Soaking the sticky rice is essential for achieving that perfect, chewy consistency in your delicious Mango Sticky Rice.

Step 2: Steam the Rice
After soaking, drain the rice and place it in a heatproof bowl lined with cheesecloth or in a bamboo steamer. Bring a pot of water to a boil and carefully place the bowl or steamer over the pot. Steam the rice for 20-25 minutes, until it becomes tender and sticky. You’ll know it’s ready when it appears slightly translucent and glistens under the light.

Step 3: Prepare the Sauce
While the rice is steaming, combine the full-fat coconut milk, sugar, and a pinch of salt in a saucepan over low heat. Stir gently until the sugar dissolves completely, without bringing it to a boil. If you prefer a creamier consistency, create a cornstarch slurry with a little water and add it to the mixture, stirring continuously until it thickens slightly, achieving a luscious coconut sauce to pair with your Mango Sticky Rice.

Step 4: Combine Rice and Sauce
Once the sticky rice is cooked, pour 1 cup of the warm coconut sauce over it, mixing gently to ensure the rice absorbs the flavors. Allow this mixture to cool slightly, letting the rice soak up the sweetness of the sauce. This step is essential for enhancing the overall taste of your Mango Sticky Rice.

Step 5: Serve
To serve, scoop a generous portion of the sticky rice onto a plate and arrange sliced ripe mangoes alongside. Drizzle the remaining coconut sauce over the top, allowing its creamy richness to enhance the dish. For an extra touch, sprinkle toasted sesame seeds on top, adding both texture and visual appeal to your delightful Mango Sticky Rice dessert.

Expert Tips for Mango Sticky Rice

Soaking Is Key: Always soak the sticky rice for at least 1 hour, or overnight for maximum chewiness—this is critical for perfect Mango Sticky Rice.

Steamer Substitution: If you lack a steamer, use a heatproof bowl placed in a saucepan. Make sure to cover it tightly to trap the steam.

Choosing Mangoes: Opt for Ataulfo or Tommy Atkins mangoes, as their sweetness balances the dish beautifully. Wait for them to ripen at room temperature.

Watch the Sauce: Heat the coconut sauce gently; avoid boiling as this can change its texture. A smooth sauce enhances the overall dish.

Thickening Option: If you want a creamier sauce, mix cornstarch with water before adding to the coconut milk, ensuring a luxe texture in your Mango Sticky Rice.

Mango Sticky Rice: Variations You’ll Love

Feel free to get creative with your Mango Sticky Rice—it’s all about personal touches that elevate this beloved dessert!

  • Colorful Twist: Black Glutinous Rice: Swap white sticky rice for black glutinous rice for a stunning visual contrast and nutty flavor. This variation adds intrigue to your dish, capturing the eye and the palate.

  • Creamy Sweetness: Sweetened Condensed Milk: Instead of sugar, use sweetened condensed milk for an extra rich coconut flavor. This creates an indulgent, luxurious sauce that even the most discerning sweet tooth will crave.

  • Mango Medley: Different Mango Varieties: Explore different types of mangoes like Haden or Kent for unique sweetness and flavor notes. Each addition brings a new personality to this classic dessert, making each bite a delightful experience.

  • Nutty Flavor: Toasted Coconut Flakes: Top with toasted coconut flakes instead of sesame seeds for a tropical crunch. The additional texture complements the creamy rice, enhancing each luscious scoop.

  • Spice It Up: Cinnamon or Cardamom: Add a touch of ground cinnamon or cardamom to the coconut sauce for warm, aromatic notes. A little spice can beautifully transform the flavor profile and make it feel festive.

  • Creamier Sauce: Coconut Cream Variation: Use pure coconut cream instead of regular coconut milk for a richer, creamier sauce. The indulgence will leave you dreaming of tropical beaches and sunny skies.

  • Extra Tropical: Pineapple or Passion Fruit: Incorporate diced pineapple or a drizzle of passion fruit on top for a tangy, refreshing twist. This addition will brighten the dish and balance the sweetness of the mango.

  • Chocolate Delight: Chocolate Sauce Drizzle: For a fusion twist, drizzle your Mango Sticky Rice with a light chocolate sauce. The combination of chocolate and coconut is a rich, enticing treat that’s surprising and satisfying.

For even more adventurous options, don’t forget to check out the delicious Sizzling Rice Wrapped if you’re feeling experimental with flavors!

What to Serve with Traditional Mango Sticky Rice

As you prepare to relish the sweet goodness of this Thai dessert, consider delightful accompaniments that elevate your dining experience.

  • Fresh Coconut Drink: The creamy, tropical flavors of fresh coconut water or coconut milk perfectly balance the dessert’s sweetness, making it a refreshing companion.

  • Tropical Fruit Salad: Combine various fruits like papaya, pineapple, and passion fruit for a vibrant, fresh side that adds a juicy burst to each bite of Mango Sticky Rice.

  • Thai Iced Tea: A sweet and aromatic beverage, Thai iced tea’s spiced richness complements the dessert and creates a harmonious blend of flavors.

  • Mango Sorbet: For a cool, fruity treat, mango sorbet mirrors the flavors of the Mango Sticky Rice and adds a textural contrast that’s simply delightful.

  • Toasted Coconut Flakes: Sprinkle some toasted coconut on top for added crunch and a deeper coconut flavor that harmonizes wonderfully with the dish.

  • Sesame Seed Cookies: These cookies offer a crisp texture and a nutty flavor that pairs beautifully with the creamy riice dessert while enhancing the overall experience.

With these pairing ideas, you’ll take your traditional Mango Sticky Rice to new heights, creating a full meal that celebrates the joy of Thai cuisine.

How to Store and Freeze Mango Sticky Rice

Fridge: Store leftover Mango Sticky Rice in an airtight container for up to 3 days. Keeping it covered helps maintain moisture while preventing it from absorbing other odors.

Freezer: For longer storage, freeze the sticky rice and coconut sauce separately in freezer-safe containers. It will last up to 2 months. Thaw in the fridge overnight before reheating.

Reheating: To enjoy, reheat the rice gently in the microwave or on the stovetop with a splash of coconut milk to restore creaminess. Avoid high heat, which can dry it out.

Assembly: If stored separately, combine the rice and sauce just before serving for the best taste and texture.

Make Ahead Options

These Mango Sticky Rice are perfect for busy home cooks looking to save time without sacrificing flavor! You can soak the sticky rice and refrigerate it up to 24 hours in advance—just make sure it’s well submerged in water to maintain moisture. Additionally, prepare the coconut sauce and store it in an airtight container in the fridge for up to 3 days; this allows the flavors to meld beautifully. When you’re ready to serve, steam the rice and combine it with the sauce as directed, adding fresh mango slices just before plating. Rest assured, with these prep tips, your Mango Sticky Rice will taste just as delicious and fresh!

Mango Sticky Rice Recipe FAQs

How do I choose ripe mangoes for this dessert?
Absolutely! Look for mangoes that give slightly under gentle pressure, indicating ripeness. Ataulfo mangoes are renowned for their sweetness and creamy texture, while Tommy Atkins are more fibrous but still delicious. If they have slight blemishes or dark spots, they’re perfectly ripe!

How should I store leftover Mango Sticky Rice?
Store your leftover Mango Sticky Rice in an airtight container in the fridge for up to 3 days. Keeping it sealed will help maintain its moisture. If you find the rice has dried out a bit, you can add a spoonful of coconut milk when reheating to bring it back to life!

Can I freeze Mango Sticky Rice, and how do I do it?
Very! To freeze, place the mango sticky rice and coconut sauce in separate freezer-safe containers. It’ll keep well for up to 2 months. When ready to enjoy, simply thaw in the refrigerator overnight. Reheat the rice gently over low heat, adding a splash of coconut milk for that creamy texture.

What if my coconut sauce doesn’t thicken?
No worries! If your coconut sauce is still too thin after heating, you can create a cornstarch slurry. Mix 1 tablespoon of cornstarch with 2 tablespoons of cold water until smooth. Stir it into the sauce over low heat, cooking for another 1-2 minutes until it thickens to your liking.

Is Mango Sticky Rice suitable for people with allergies?
Yes, Mango Sticky Rice is naturally gluten-free and vegan! However, always check labels on store-bought coconut milk to ensure there are no hidden allergens. For those with sesame allergies, simply omit the toasted sesame seeds garnishing for a safe, enjoyably sweet treat!

How can I enhance the flavors in my Mango Sticky Rice?
The more the merrier! You could add some pandan leaves while steaming the rice for an aromatic twist. A sprinkle of freshly grated coconut or a drizzle of sweetened condensed milk can also elevate the flavors beautifully while keeping it deliciously satisfying. Enjoy experimenting!

Mango Sticky Rice

Delicious Mango Sticky Rice: A Sweet Taste of Thailand

This Mango Sticky Rice recipe combines sweet, sticky rice and creamy coconut sauce, creating a delicious vegan dessert that transports you to Thailand.
Prep Time 1 hour
Cook Time 25 minutes
Soaking Time 1 hour
Total Time 2 hours 25 minutes
Servings: 4 servings
Course: Dessert
Cuisine: Thai
Calories: 350

Ingredients
  

For the Sticky Rice
  • 1 cup glutinous rice or sweet rice
  • 1 pinch salt
For the Coconut Sauce
  • 1 cup full-fat coconut milk avoid using only coconut cream
  • 1/4 cup sugar white granulated sugar is best
  • 1 tablespoon cornstarch optional, for thickening
  • 1 pinch salt to balance sweetness
For Serving
  • 2 medium ripe mangoes preferably Ataulfo or Tommy Atkins
  • 2 tablespoons toasted sesame seeds optional, for topping

Equipment

  • Bamboo steamer
  • Saucepan
  • Bowl
  • Cheesecloth

Method
 

Step-by-Step Instructions
  1. Begin by rinsing the glutinous rice under cold water until the water runs clear, about 2-3 minutes. Then, transfer the rice to a bowl and submerge it in water for at least 1 hour or overnight.
  2. After soaking, drain the rice and place it in a heatproof bowl lined with cheesecloth or in a bamboo steamer. Bring a pot of water to a boil and steam the rice for 20-25 minutes until tender and sticky.
  3. While the rice is steaming, combine the full-fat coconut milk, sugar, and a pinch of salt in a saucepan over low heat. Stir gently until the sugar dissolves completely without boiling.
  4. Once the sticky rice is cooked, pour 1 cup of the warm coconut sauce over it, mixing gently to ensure the rice absorbs the flavors. Allow it to cool slightly.
  5. To serve, scoop the sticky rice onto a plate and arrange sliced ripe mangoes alongside. Drizzle the remaining coconut sauce over the top and sprinkle toasted sesame seeds for garnish.

Notes

Soaking the rice is critical for achieving the perfect chewy texture. Choose ripe mangoes for the best sweetness.

Irresistibly Soft Jalapeno Popper Rolls Bursting with Flavor

The moment I pulled these Buttery Jalapeno Popper Rolls out of the oven, the warm, cheesy aroma wrapped around me like a cozy blanket. Each roll, golden and fluffy, is filled with a rich combination of cream cheese, crispy bacon, and a spicy kick of jalapeno that takes your taste buds on an unforgettable ride. These Jalapeno Popper Rolls are more than just an appetizer; they strike the perfect balance between comfort food and flavor, making them ideal for gatherings or as a lovely side to your favorite dishes. Plus, they’re surprisingly easy to make, allowing you to impress your guests without spending hours in the kitchen. Are you ready to elevate your snacking game with these delicious rolls? Let’s dive in!

Why Are These Rolls So Irresistible?

Flavor Explosion: Each bite of these Buttery Jalapeno Popper Rolls offers a delightful fusion of spices and creamy goodness, ensuring they satisfy any craving.

Bacon Bliss: The crispy bacon adds a savory note that perfectly complements the creamy cheese filling, making these rolls utterly scrumptious.

Effortless Preparation: With simple ingredients and straightforward steps, you’ll have these warm rolls ready in no time—perfect for last-minute gatherings!

Versatile Serving: Whether as a stand-alone appetizer or paired with a hearty soup or salad, these rolls fit seamlessly into any meal. If you love homemade recipes, you might also enjoy Homemade Chicken Rolls and Savory Beef Rolls.

Crowd-Pleaser: These rolls are always a hit at parties, impressing guests and family alike with their warm, cheesy filling and irresistible aroma.

Jalapeno Popper Rolls Ingredients

For the Dough

  • Whole Milk – Provides moisture and richness in the dough; can substitute with almond milk for a dairy-free option.
  • Granulated Sugar – Sweetens the dough and activates the yeast; honey or maple syrup works as a natural sweetener alternative.
  • Active Dry Yeast – The essential leavening agent helps the dough rise; you can use instant yeast without proofing as a shortcut.
  • Large Eggs – Adds structure and richness to the dough; use aquafaba for a vegan version.
  • All-Purpose Flour – The base structure of the dough; swapping for bread flour results in a chewier texture.
  • Kosher Salt – Enhances flavor while controlling yeast activity; sea salt is a suitable alternative.
  • Unsalted Butter – Brings richness and tenderness to the dough; margarine or coconut oil can be used for dairy-free needs.

For the Filling

  • Cream Cheese – Acts as a creamy base for the filling; alternativley, try Neufchâtel cheese or ricotta for variety.
  • Bacon – Infuses the filling with a smoky flavor; consider using turkey bacon or omitting it for a vegetarian delight.
  • Red Onion – Introduces sweetness and crunch; shallots or green onions work well as substitutes.
  • Jalapeno Pepper – Delivers that signature heat and flavor; feel free to replace with poblano for a milder option.
  • Chives – Offer a fresh, onion-like flavor to the filling; green onion tops can be a great substitute.
  • Garlic – Elevates the overall flavor profile; if fresh isn’t on hand, garlic powder can step in nicely.
  • White Cheddar Cheese – Melts beautifully, enhancing the filling’s creaminess; try Monterey Jack for a different melting experience.

For the Topping

  • Melted Butter – Adds a delicious finishing touch when brushed warm over the rolls; use olive oil for a lighter alternative.
  • Garlic – A flavorful addition that compliments the topping; consider roasted garlic for a sweeter, more mellow flavor.
  • Chives – Adds a pop of fresh flavor; green onion tops can replace if desired.
  • Salt – To sprinkle lightly for added flavor; sea salt enhances the taste even more.

These Jalapeno Popper Rolls come together with a wonderful blend of ingredients for a truly comforting experience!

Step‑by‑Step Instructions for Jalapeno Popper Rolls

Step 1: Dough Preparation
In a small bowl, whisk together 1 cup of warm milk (110°F) with 2 tablespoons of granulated sugar and 2 teaspoons of active dry yeast. Let the mixture sit for 5 minutes until it becomes foamy. In a separate bowl, crack 2 large eggs, whisking until smooth, and then combine them with the milk mixture, blending well.

Step 2: Mix Dry Ingredients
In a stand mixer bowl, whisk together 4 cups of all-purpose flour and 2 teaspoons of kosher salt. Gradually pour in the milk and egg mixture while using the dough hook attachment on low speed. Mix until the ingredients form a shaggy dough, ensuring all the flour is incorporated for your Jalapeno Popper Rolls.

Step 3: Kneading
Once the dough forms, add 1/2 cup of melted unsalted butter gradually while mixing. Increase the mixer speed to medium and knead the dough for about 1 minute before moving to medium-high speed for an additional 5 minutes. The dough should become soft and slightly tacky but will pull away from the sides of the bowl.

Step 4: First Rise
Transfer the dough to a lightly buttered bowl and cover it with plastic wrap. Place it in a warm area for approximately 1 hour or until the dough has doubled in size. You’ll know it’s ready when it feels pillowy and springs back slightly when gently pressed.

Step 5: Filling Preparation
While the dough rises, prepare the filling by mixing together 8 ounces of softened cream cheese, 1 cup of crumbled cooked bacon, 1/2 cup finely chopped red onion, 1 finely diced jalapeno pepper, 2 tablespoons of chopped chives, and 1 minced garlic clove until completely smooth and blended. Set aside to let the flavors meld.

Step 6: Roll-out Dough
After the dough has risen, punch it down gently to release the air. Roll it out on a floured surface into a rectangle about 10×15 inches. Spread the creamy filling evenly over the dough, leaving a small border around the edges, and sprinkle 1 cup of shredded white cheddar cheese evenly on top.

Step 7: Shape Rolls
Carefully roll the dough tightly into a log, starting from one of the long edges. Once rolled, use a sharp knife to cut the log into 12 equal pieces. Place the rolls cut side up in a greased 9×13-inch baking pan, spacing them slightly apart for even baking.

Step 8: Second Rise
Cover the pan with a clean towel and allow the rolls to rise again in a warm spot for about 1 hour, or until they have puffed up significantly. They should touch each other slightly when they’re ready to bake, creating that perfect soft texture in your Jalapeno Popper Rolls.

Step 9: Baking
Preheat your oven to 350°F (175°C). Once heated, bake the rolls for 25-30 minutes or until they turn a lovely golden brown on top. You’ll know they’re ready when a skewer inserted in the center comes out clean and the rolls sound hollow when tapped gently.

Step 10: Topping
While the rolls bake, melt 1/4 cup of unsalted butter and mix in 1 minced garlic clove, a sprinkle of salt, and 2 tablespoons of chopped chives. Once the rolls are out of the oven, brush the warm buttery topping over them generously for added flavor and to enhance their golden appearance before serving.

Helpful Tricks for Jalapeno Popper Rolls

  • Check Your Yeast: Ensure your active dry yeast is fresh by testing it with warm milk and sugar; it should foam up within 5 minutes to guarantee fluffy Jalapeno Popper Rolls.
  • Kneading Matters: Knead the dough until it’s soft and slightly tacky, but not overly sticky; this will help achieve the perfect texture in your rolls.
  • Flour for Success: When rolling out the dough, use flour on your surfaces and your hands; this prevents sticking and allows for easy shaping of the rolls.
  • Warm Environment: Make sure your dough rises in a warm spot; a cold environment will slow the rising process, affecting the final result of your Jalapeno Popper Rolls.
  • Even Baking: Space the rolls slightly apart in the baking pan to ensure even heat distribution; this will provide a beautifully golden and fluffy finish.

Make Ahead Options

These Jalapeno Popper Rolls are perfect for busy cooks looking to save time without sacrificing taste! You can prepare the dough and filling up to 24 hours in advance. Simply follow the recipe until the first rise, then cover your dough tightly and refrigerate it overnight. When you’re ready to bake, let it come to room temperature and complete the shaping and second rise before cooking. To maintain quality, ensure the rolls are covered well to prevent drying out. With just a little prep work, you can enjoy warm, cheesy goodness with minimal effort for your next meal or gathering!

How to Store and Freeze Jalapeno Popper Rolls

Fridge: Store leftover Jalapeno Popper Rolls in an airtight container for up to 3 days to maintain their fluffy texture and fresh taste.

Freezer: For longer storage, wrap the cooled rolls tightly in plastic wrap and place them in a freezer-safe bag. They can be frozen for up to 3 months without losing flavor.

Reheating: To enjoy them again, reheat the rolls in the oven at 350°F (175°C) for about 10-15 minutes, or microwave for 30-60 seconds until warmed through.

Serving Tip: Brush with butter and sprinkle some garlic and chives again before serving to revive their fresh, warm flavor!

What to Serve with Buttery Jalapeno Popper Rolls

Warm your guests’ hearts and taste buds with thoughtful pairings that elevate your gathering to new heights.

  • Creamy Tomato Soup: This classic pairing offers a rich and tangy contrast that complements the spiciness of the rolls, making each bite truly delightful.
  • Fresh Garden Salad: A crisp salad featuring mixed greens, cucumbers, and a light vinaigrette adds a refreshing balance to the savory rolls. It’s a simple way to brighten your meal!
  • Garlic Butter Pasta: The silky textures of garlic butter pasta provide a luscious experience alongside the rolls, creating a comforting, cozy dish perfect for family dinners.
  • Spicy Margarita: A zesty spicy margarita enhances the jalapeno flavor, giving your meal a fun twist. The sweetness of the drink beautifully balances the heat of the rolls.
  • Roasted Vegetable Medley: Roasted seasonal veggies bring earthy flavors and vibrant colors to your table, serving as a heart-healthy counterpart to the rolls.
  • Cheesy Quesadillas: For a true feast of flavor, serve warm quesadillas alongside. The melty cheese and crispy tortillas echo the deliciousness of the rolls while adding their own flair.
  • Chocolate Chip Cookies: For dessert, wrap up the meal with nostalgia by serving warm chocolate chip cookies, providing a sweet end to a savory spread.

Mix and match these suggestions to craft your perfect meal around those irresistible Buttery Jalapeno Popper Rolls!

Jalapeno Popper Rolls Variations

Feel free to unleash your creativity and tailor these delightful rolls to suit your taste preferences!

  • Dairy-Free: Substitute whole milk with almond milk and use dairy-free cream cheese for a delicious dairy-free version.
  • Spice it Up: Add a teaspoon of cayenne pepper or crushed red pepper flakes to the filling for an extra kick.
  • Herb Infusion: Mix in fresh herbs like cilantro or parsley for a bright, aromatic twist that enhances the flavor.
  • Different Cheeses: Experiment with pepper jack for a spicy flair or mozzarella for a milder, creamy filling. Each cheese provides its own unique texture and taste!
  • Vegetarian Delight: Replace bacon with sautéed mushrooms or spinach for a rich, satisfying veggie filling that everyone will enjoy.
  • Sweet Surprise: Blend in chopped jalapenos with roasted red peppers for a sweet and spicy surprise that elevates the flavor profile.
  • Mini Rolls: Roll the dough into smaller pieces for bite-sized appetizers that are perfect for entertaining. These mini versions are great for dipping!
  • Savory Fillers: Try adding cooked crumbled sausage or ham for a heartier filling that brings a savory depth to each bite.

Don’t forget to pair these rolls with your favorite dishes! They go perfectly alongside a warm bowl of soup, just like the Homemade Chicken Rolls, or as a side to vibrant salads like the Cheesy Zucchini Rolls. Enjoy experimenting!

Jalapeno Popper Rolls Recipe FAQs

How should I select jalapenos for the filling?
When picking jalapenos, choose firm, bright green peppers without any dark spots or wrinkles. The skin should be shiny, indicating freshness. Desiring more heat? Opt for slightly smaller peppers as they tend to be spicier!

What’s the best way to store leftover Jalapeno Popper Rolls?
After making your Jalapeno Popper Rolls, store any leftovers in an airtight container in the refrigerator for up to 3 days. This helps maintain their soft texture and flavor. Just remember to reheat them gently to enjoy that freshly baked taste again!

Can I freeze Jalapeno Popper Rolls for later?
Absolutely! To freeze your rolls, first let them cool completely. Wrap each roll tightly in plastic wrap and place them in a freezer-safe bag or container. They can be stored in the freezer for up to 3 months. When you’re ready to enjoy, thaw them in the fridge overnight and reheat as desired!

Why are my Jalapeno Popper Rolls not rising properly?
If your rolls aren’t rising, ensure that your yeast is fresh and has been activated correctly. The milk should be warm (around 110°F) when combining with sugar and yeast. If using instant yeast, simply blend it with your dry ingredients before adding liquids. A warm environment is crucial for rising—so find a cozy spot in your kitchen!

Are these Jalapeno Popper Rolls suitable for dietary restrictions?
These rolls can easily be adapted for various dietary preferences. For a dairy-free version, substitute whole milk with almond milk and use margarine or coconut oil instead of butter. If avoiding gluten, a gluten-free flour blend can work too. You can also skip the bacon for a vegetarian option and replace cream cheese with dairy-free alternatives. Enjoy experimenting!

How can I spice up my Jalapeno Popper Rolls?
For an extra flavor boost, leave the seeds in the jalapenos for more heat or mix in some pepper jack cheese for an added kick. Alternatively, consider adding chopped sun-dried tomatoes or roasted red peppers into the filling for delightful variations. The more, the merrier!

Jalapeno Popper Rolls

Irresistibly Soft Jalapeno Popper Rolls Bursting with Flavor

Delight in these Jalapeno Popper Rolls, featuring a cheesy filling and crispy bacon for a flavor-packed experience.
Prep Time 1 hour 30 minutes
Cook Time 30 minutes
Total Time 2 hours
Servings: 12 rolls
Course: Dinner
Cuisine: American
Calories: 250

Ingredients
  

Dough Ingredients
  • 1 cup Whole Milk can substitute with almond milk
  • 2 tablespoons Granulated Sugar honey or maple syrup works as an alternative
  • 2 teaspoons Active Dry Yeast instant yeast can be used without proofing
  • 2 large Eggs use aquafaba for vegan version
  • 4 cups All-Purpose Flour substitute with bread flour for chewier texture
  • 2 teaspoons Kosher Salt sea salt can be used as an alternative
  • 1/2 cup Unsalted Butter margarine or coconut oil can be used for dairy-free
Filling Ingredients
  • 8 ounces Cream Cheese or Neufchâtel cheese for variety
  • 1 cup Bacon can be substituted with turkey bacon or omitted
  • 1/2 cup Red Onion shallots or green onions can be used
  • 1 piece Jalapeno Pepper substitute with poblano for milder heat
  • 2 tablespoons Chives green onion tops are a good substitute
  • 1 clove Garlic garlic powder can be used if fresh isn't available
  • 1 cup Shredded White Cheddar Cheese Monterey Jack can be used instead
Topping Ingredients
  • 1/4 cup Melted Butter olive oil can be used as a lighter alternative
  • 1 clove Garlic roasted garlic can provide a sweeter flavor
  • 2 tablespoons Chives green onion tops can replace if desired
  • Salt sprinkle lightly for added flavor

Equipment

  • Stand mixer
  • baking pan
  • whisk
  • plastic wrap
  • oven

Method
 

Preparation Steps
  1. In a small bowl, whisk together warm milk, granulated sugar, and active dry yeast. Let sit for 5 minutes until foamy.
  2. In a separate bowl, whisk large eggs until smooth, then combine with milk mixture.
  3. In a stand mixer, whisk together all-purpose flour and kosher salt. Gradually pour in milk and egg mixture while using the dough hook on low speed.
  4. Once the dough forms, add melted unsalted butter while mixing. Knead for about 1 minute, then increase speed to medium-high for 5 minutes.
  5. Transfer dough to a lightly buttered bowl, cover with plastic wrap, and let rise in a warm area for about 1 hour or until doubled in size.
  6. Mix softened cream cheese, crumbled bacon, chopped red onion, diced jalapeno, chopped chives, and minced garlic until smooth.
  7. After the dough has risen, punch it down and roll it out on a floured surface into a rectangle. Spread the filling evenly over the dough and sprinkle shredded cheese on top.
  8. Roll the dough tightly into a log and cut into 12 equal pieces. Place rolls cut side up in a greased baking pan.
  9. Cover the pan with a towel and let rolls rise in a warm spot for about 1 hour until puffed up.
  10. Preheat oven to 350°F. Bake rolls for 25-30 minutes until golden brown. Test doneness with a skewer.
  11. Melt butter and mix in minced garlic, salt, and chopped chives. Brush warm topping over rolls before serving.

Notes

These Jalapeno Popper Rolls are best enjoyed warm and can be brushed with extra butter and seasoning before serving.

Best Baked Brie in Phyllo Dough for Irresistible Flavor

As the oven timer ticked down, the kitchen filled with a sublime aroma that instantly transported me to a cozy French bistro. This Warm Baked Brie in Flaky Phyllo Dough is my secret weapon for entertaining—it’s not only quick to prepare but a showstopper that makes every gathering feel special. Whether you’re hosting a festive soirée or simply craving a touch of comfort food, this appetizer is a crowd-pleaser that pleases even the pickiest of palates. Plus, it’s versatile enough to accommodate gluten-free or dairy-free diets with simple substitutions. Have you ever baked something that made your heart race with anticipation? Let’s dive in and discover how to create this irresistible delight!

Why is this Baked Brie a Must-Try?

Irresistible Flavor: Each bite combines creamy brie with sweet preserves, creating a flavor explosion.

Versatile Options: Easily tailor to your dietary needs – try gluten-free phyllo or dairy-free butter alternatives!

Quick Prep: With just a few simple steps, you can whip this up in under 30 minutes, making it perfect for unexpected guests.

Showstopper Presentation: The golden, flaky crust doesn’t just taste divine—it looks stunning on your appetizer table.

Crowd Pleaser: Whether you’re serving at a dinner party or a family gathering, this dish always garners rave reviews! Explore how you can make it your own with some delectable variation ideas.

Best Baked Brie in Phyllo Dough Ingredients

Get ready to discover the key components for the best baked brie in phyllo dough—your guests will be raving about this flavorful dish!

For the Cheese

  • Brie Cheese – Offers a rich, creamy texture; substituting with Camembert gives a similar delightful flavor.

For the Dough

  • Phyllo Dough – Creates a light, flaky crust; for a gluten-free alternative, go for gluten-free puff pastry or zucchini slices.

For the Coating

  • Butter – Adds an indulgent richness and aids in browning; you can use olive oil or coconut oil for a dairy-free version (3 tablespoons oil for every 4 tablespoons butter).

For the Sweetness

  • Fruit Preserves (1/3 cup) – Provides a delicious sweetness to contrast the cheese; use any flavor you love, such as fig, apricot, or raspberry.

Enjoy whipping up this fabulous appetizer that’s sure to impress your friends and family!

Step‑by‑Step Instructions for Best Baked Brie in Phyllo Dough

Step 1: Preheat the Oven
Begin by preheating your oven to 400ºF (200ºC) while you prepare the ingredients. This temperature is essential for achieving a beautifully golden and crispy outer layer for the Best Baked Brie in Phyllo Dough. A hot oven ensures that the phyllo dough cooks perfectly while the brie melts inside.

Step 2: Thaw the Phyllo Dough
Thaw the phyllo dough overnight in the refrigerator for optimal ease during assembly. If you forgot to thaw it, you can also leave it at room temperature for about 30 minutes, ensuring it remains pliable. Keeping it wrapped until you’re ready to use it prevents it from drying out—a crucial step for maintaining that flaky texture you’re after.

Step 3: Melt the Butter
In a small saucepan or microwave, melt 4 tablespoons of butter until it’s completely liquid. This buttery goodness is what will give the phyllo layers a rich flavor and a beautiful golden color as they bake. Keep it warm, as you will be brushing it on the phyllo sheets in the next steps.

Step 4: Prepare the Phyllo Sheets
Place the first sheet of phyllo on a clean, flat surface. Using a pastry brush, generously coat it with melted butter, making sure to cover it completely. This will help create that deliciously flaky characteristic of the Best Baked Brie in Phyllo Dough. Repeat this process with three more sheets, buttering each one except the last—this keeps the top layer nice and crisp.

Step 5: Assemble with Cheese and Preserves
Once you have your buttery phyllo layers ready, place the brie cheese at the center of the stacked sheets. Spoon your choice of fruit preserves directly on top of the brie, allowing the sweet flavors to meld beautifully with the creamy cheese. Feel free to be generous with the preserves for an extra delicious contrast.

Step 6: Fold the Phyllo Over the Brie
Carefully fold the phyllo sheets over the brie and preserves, tucking and sealing the edges as you go. Use the remaining melted butter to brush the folded tops, ensuring everything adheres nicely and adds to the overall flavor. This step is crucial in ensuring your Best Baked Brie in Phyllo Dough stays securely wrapped for baking.

Step 7: Bake the Wrapped Brie
Transfer your phyllo-wrapped brie to a baking sheet lined with parchment paper. Place it in the preheated oven and bake for 15–20 minutes, or until the phyllo is a deep, golden brown. Keep a close eye on it as it bakes; the visual cue of crispiness is key in preventing any over-browning while achieving that perfect flaky crust.

Step 8: Cool and Garnish
Once out of the oven, allow the Best Baked Brie in Phyllo Dough to cool for 3–5 minutes for safer handling. During this time, you can brainstorm how to garnish it—drizzling honey or sprinkling chopped nuts adds an extra touch! Serve warm alongside an assortment of crackers or sliced baguette for a delightful appetizer experience.

Make Ahead Options

These Best Baked Brie in Phyllo Dough are perfect for busy cooks looking to save time without compromising on flavor! You can prepare the entire assembly—layering the phyllo and wrapping the brie—up to 24 hours ahead of time; just cover it tightly with plastic wrap to prevent drying out. Keep it refrigerated until you’re ready to bake. When it’s time to serve, simply preheat your oven and bake for 15-20 minutes until golden brown. This method ensures that you’ll have a warm, gooey delight ready to impress your guests, making it a seamless addition to your meal prep routine!

How to Store and Freeze Best Baked Brie in Phyllo Dough

Fridge: Store leftover baked brie in an airtight container in the fridge for up to 3 days. Reheat gently in the oven to maintain the crispy texture.

Freezer: You can freeze the unbaked wrapped brie for up to 2 months. Just make sure it’s tightly wrapped in plastic wrap and then foil to prevent freezer burn.

Reheating: For the best results, reheat baked brie in the oven at 350°F (175°C) for about 10-15 minutes until warmed through. Avoid microwaving, as it can make the phyllo soggy.

Make-Ahead: Prepare everything up to the baking step, keep it covered in the fridge, and bake just before serving for fresh, hot enjoyment.

What to Serve with Warm Baked Brie in Flaky Phyllo Dough

Indulge your guests with a delightful array of complimentary dishes that elevate your baked brie experience and make every bite a celebration.

  • Crispy Crackers: Perfect for scooping up warm, gooey brie and preserves, adding a delightful crunch with each bite.

  • Sliced Baguette: The soft, chewy texture of freshly baked baguette pairs beautifully with the creamy brie, creating a perfect balance.

  • Fresh Fruit Platter: Juicy grapes, crisp apples, and sweet pears add a refreshing contrast to the rich flavors of the baked brie.

  • Mixed Green Salad: A light salad with a zesty vinaigrette cuts through the richness of the cheese, offering a refreshing palate cleanser.

  • Nuts and Honey: A sprinkle of toasted nuts with a drizzle of honey enhances both flavor and texture, providing a gourmet touch.

  • Chilled White Wine: A glass of Chardonnay or Sauvignon Blanc complements the earthy notes of the brie while enhancing the overall dining experience.

  • Rosemary Infused Olives: The savory flavor from rosemary-studded olives brings a Mediterranean twist and a delightful briny contrast to the dish.

Exploring these pairings helps you craft a heartwarming gathering centered around the best baked brie in phyllo dough, making your occasion memorable!

Expert Tips for the Best Baked Brie in Phyllo Dough

Work Quickly: Avoid the phyllo drying out by keeping it covered with a damp cloth while you work.

Layer Lovingly: Make sure to butter each layer of phyllo thoroughly—this is key to achieving that irresistible crispness in your Best Baked Brie in Phyllo Dough.

Keep It Even: Ensure even layering of phyllo to prevent uneven cooking, which could result in some parts undercooked and others overbaked.

Watch the Time: Set a timer and keep a close watch while baking to prevent over-browning; a deep golden color is what you want!

Let It Rest: Allow the baked brie to sit for a few minutes before serving; this enhances the flavor and makes it easier to slice.

Best Baked Brie in Phyllo Dough Variations

Feel free to make this crowd-pleasing dish your own with a few simple tweaks! Your taste buds are in for an adventure.

  • Gluten-Free: Swap phyllo dough for gluten-free puff pastry or even use thin slices of zucchini for a lighter option.
  • Dairy-Free: Substitute buttery goodness with coconut oil, and choose a dairy-free cheese alternative for a plant-based twist. Enjoy the rich flavors without compromise!
  • Herbed Delight: Add fresh herbs like rosemary or thyme to the preserves before spooning them over the cheese. This aromatic addition will elevate the flavor profile beautifully!
  • Spicy Kick: Incorporate a dash of crushed red pepper flakes into the preserves for a delightful warmth that contrasts with the richness of the brie.
  • Nutty Crunch: Scatter chopped nuts, like walnuts or pecans, on top of the brie before folding the phyllo. This adds a delightful crunch and depth of flavor.
  • Fruit Fusion: Mix different fruit preserves, such as combining fig and apricot for a unique, layered taste experience. You can’t go wrong with sweet and savory!
  • Caramelized Onions: Cook down onions until caramelized and layer them under the cheese. The sweetness of the onions pairs perfectly with the brie for an irresistible flavor.
  • Maple Syrup Drizzle: After baking, drizzle a hint of maple syrup over the top for an unexpected sweetness that delights the palate. Pair it with your favorite crackers and baguette for a complete serving!

Best Baked Brie in Phyllo Dough Recipe FAQs

How do I choose the right brie cheese?
Absolutely! When selecting brie cheese, look for wheels that are firm yet slightly soft to the touch, indicating ripeness. Avoid brie with dark spots all over, as this may signify spoilage. Fresh brie should have a pleasant aroma and a creamy interior. If you’re feeling adventurous, you can substitute it with Camembert, which offers a similarly rich and creamy flavor!

How should I store leftover baked brie?
Very! Leftover baked brie should be placed in an airtight container and stored in the refrigerator. It will last up to 3 days. When you’re ready to enjoy it again, just reheat it gently in the oven at 350°F (175°C) for about 10-15 minutes to regain its crispy texture—this way, you’ll skip the sogginess that comes with microwaving.

Can I freeze the baked brie?
Certainly! You can freeze the unbaked wrapped brie for up to 2 months. Be sure to wrap it tightly in plastic wrap and then in foil to prevent freezer burn. When you’re ready to bake it, there’s no need to thaw; simply pop it straight into the preheated oven. Just allow an additional 5 minutes of baking time if it’s frozen!

What are some common troubleshooting tips for baked brie?
If you find that the phyllo is browning too quickly, ease up on the baking time or lower the temperature slightly. If the cheese is not melting as expected, make sure you’re using good quality brie and evenly warming it. If the dough tears during assembly, don’t fret! Just layer more phyllo on top, as this will still create that delicious flaky texture.

Are there any dietary considerations for baked brie?
Of course! For those with gluten sensitivities, using gluten-free phyllo or even zucchini slices is an excellent alternative. If you’re wanting to go dairy-free, substitute the butter with coconut oil or olive oil. Be mindful of any allergies; always check ingredient labels for hidden allergens and adjust the recipe accordingly for the best, safe enjoyment.

Best Baked Brie in Phyllo Dough

Best Baked Brie in Phyllo Dough for Irresistible Flavor

Discover the irresistible flavor of the best baked brie in phyllo dough, an easy and crowd-pleasing appetizer.
Prep Time 15 minutes
Cook Time 20 minutes
Cooling Time 5 minutes
Total Time 40 minutes
Servings: 6 servings
Course: Appetizer
Cuisine: French
Calories: 250

Ingredients
  

For the Cheese
  • 1 wheel Brie Cheese Substitute with Camembert for a similar flavor.
For the Dough
  • 1 package Phyllo Dough Use gluten-free puff pastry or zucchini slices as alternatives.
For the Coating
  • 4 tablespoons Butter Or use olive oil/coconut oil (3 tablespoons oil for every 4 tablespoons butter).
For the Sweetness
  • 1/3 cup Fruit Preserves Any flavor like fig, apricot, or raspberry will work.

Equipment

  • oven
  • Pastry brush
  • baking sheet
  • Small saucepan

Method
 

Step-by-Step Instructions
  1. Preheat the oven to 400ºF (200ºC).
  2. Thaw phyllo dough overnight in the refrigerator or at room temperature for 30 minutes.
  3. Melt 4 tablespoons of butter in a saucepan or microwave.
  4. Coat the first sheet of phyllo with melted butter. Repeat with three more sheets, buttering each except the last.
  5. Place brie cheese in the center of the phyllo, add fruit preserves on top.
  6. Fold the phyllo over the brie and seals the edges. Brush with remaining melted butter.
  7. Bake in the oven for 15-20 minutes until golden brown.
  8. Cool for 3-5 minutes before serving. Garnish if desired.

Notes

Work quickly with phyllo dough to prevent drying. Keep each layer well buttered for the best crispiness.

Delicious Homemade Honey Buns Your Family Will Love

The aroma of freshly baked bread can transport you to your happiest memories, a cozy kitchen bustling with warmth and laughter. Today, I’m excited to share my recipe for Homemade Honey Buns—soft, sweet, and sticky delights that evoke that very feeling. Whether you choose to bake or fry them, the result is a melt-in-your-mouth treat that’s perfect for breakfast or a delightful dessert any time. Not only are these honey buns a wonderful way to enjoy time in the kitchen, but they’re also surprisingly easy to whip up, making them a great choice for both novice and seasoned bakers alike. So, are you ready to roll up your sleeves and create some delicious memories?

Why Are Homemade Honey Buns Special?

Unique flavor combinations: The blend of honey and cinnamon creates a sweet, heavenly aroma that fills your kitchen.

Two cooking methods: Whether you prefer a crispy bite from frying or a soft finish from baking, this recipe adapts to your cravings.

Quick and easy: With just a few simple ingredients, you can turn a leisurely morning into a special breakfast treat in no time.

Versatile options: Feel free to switch up the filling with nuts or chocolate chips, or try a different glaze for a new twist.

Perfect for sharing: These ooey-gooey honey buns are an instant crowd-pleaser, making them ideal for family gatherings or brunches. Try pairing them with a glass of milk or coffee for the ultimate experience!

Homemade Honey Bun Ingredients

  • For the Dough

  • All-Purpose Flour – Provides structure; you may need additional flour for rolling.

  • Granulated Sugar – Adds sweetness; can use brown sugar for a deeper flavor profile.

  • Instant Yeast – Responsible for leavening; instant yeast does not need to be bloomed unlike active yeast.

  • Salt – Balances flavor, enhancing the overall taste.

  • Warm Water (105°F-115°F) – Activates the yeast; ensure the temperature is correct to avoid killing it.

  • Honey – Imparts sweetness and flavor; warm it for easier mixing if too thick.

  • Large Egg – Acts as a binding agent and adds richness.

  • Vanilla Extract – Enhances flavor, adding depth to the dough.

  • Melted Shortening – Contributes tenderness and moisture; substitutable with butter but may alter the texture.

  • For Frying or Baking

  • Vegetable or Peanut Oil – Necessary for frying; maintain oil temperature between 350°F to 365°F for best results.

  • For the Filling

  • Cinnamon Sugar – (Granulated Sugar + Cinnamon) adds filling flavor; it’s a delightful sprinkle in each bite.

  • For the Glaze

  • Powdered Sugar – Forms the base of the glaze, creating a smooth finish.

  • Additional Honey, Melted Butter, Vanilla Extract, Salt – Enhances the glaze’s texture and flavor, making it extra tasty.

  • Warm Water – Used to adjust the glaze consistency for perfect application.

With these ingredients ready, you’re just a few steps away from creating Homemade Honey Buns that your family will adore!

Step‑by‑Step Instructions for Homemade Honey Buns

Step 1: Mix Dry Ingredients
In a large mixing bowl, combine 4 cups of all-purpose flour, 1/4 cup of granulated sugar, 2 tablespoons of instant yeast, and 1 teaspoon of salt. Whisk together until evenly incorporated. This forms the foundation for your Homemade Honey Buns. Set the bowl aside while you prepare the wet ingredients.

Step 2: Prepare Wet Ingredients
In a separate bowl, whisk together 1 cup of warm water (between 105°F-115°F), 1/4 cup of honey, 1 large egg, and 1 teaspoon of vanilla extract until well blended. Gradually add in 1/4 cup of melted shortening, ensuring everything is combined smoothly. This mixture will help create a soft dough for your honey buns.

Step 3: Combine Ingredients
Pour the wet mixture into the bowl with the dry ingredients. Mix with a wooden spoon or your hands until a sticky dough forms. Transfer the dough onto a lightly floured surface and knead for about 8 minutes. The dough should become smooth and elastic, ready for the first rise.

Step 4: First Rise
Place your kneaded dough in a lightly oiled bowl, turning it to coat. Cover it with a clean kitchen towel and let it rise in a warm place for about 1 to 2 hours, until it has nearly doubled in size. This is where the magic happens, creating the soft texture characteristic of Homemade Honey Buns.

Step 5: Prepare Filling
While the dough is rising, you can prepare the cinnamon sugar filling. In a small bowl, mix together 1/4 cup of granulated sugar with 1 tablespoon of ground cinnamon. This sweet blend will add delightful flavor to your honey buns when rolled within the dough.

Step 6: Shape Honey Buns
Once the dough has risen, punch it down to release the air and turn it out onto a floured surface. Roll it into a rectangle about 1/4 inch thick. Sprinkle the cinnamon sugar evenly over the surface. Roll the dough tightly into a log and slice it into about 12 equal pieces. Allow the slices to rise again for about 45 minutes.

Step 7: Fry or Bake
For frying, heat vegetable or peanut oil in a deep skillet to between 350°F to 365°F. Carefully place the honey buns in the hot oil, frying them until they are golden brown on both sides, roughly 2-3 minutes per side. Alternatively, preheat your oven to 350°F and bake the buns for 20-25 minutes, until they are golden and cooked through.

Step 8: Glaze
While your honey buns are still warm, it’s time to dip them in glaze. In a small bowl, combine 1 cup of powdered sugar with 2 tablespoons of melted butter, 2 tablespoons of honey, and enough warm water to achieve a smooth, pourable consistency. Drizzle or dip the warm buns into the glaze for a sweet finish.

Step 9: Cool
Transfer the glazed honey buns to a wire rack to cool slightly before serving. This step allows the glaze to set nicely while keeping the buns fluffy and moist. The delightful aroma will fill your kitchen, making it hard to resist diving into these sweet homemade treats!

Expert Tips for Homemade Honey Buns

  • Use Fresh Yeast: Ensure your instant yeast is fresh for maximum rise and fluffiness in your honey buns. Expired yeast can lead to dense buns.

  • Knead Gently: Knead the dough just until it becomes smooth and elastic; over-kneading can make the buns tough.

  • Perfect Proofing: Allow the dough to rise in a warm, draft-free area. If the dough hasn’t doubled in size, give it more time before proceeding!

  • Adjust Frying Temperature: If frying, maintain the oil temperature between 350°F and 365°F. Too hot or too cold can affect the texture of your homemade honey buns.

  • Personalize Your Fillings: Don’t hesitate to experiment! Add nuts, chocolate chips, or swap the glaze for something unique to make these honey buns your own masterpiece.

Homemade Honey Bun Variations

Feel free to get creative and make these honey buns truly your own with delightful twists and substitutions!

  • Butter Substitute: Replace shortening with butter for a richer flavor. It may alter the texture slightly, giving your buns a comforting taste of home.

  • Nutty Add-In: Fold in chopped nuts like walnuts or pecans into the filling for added crunch and depth. Imagine that satisfying texture as you bite into a warm bun!

  • Chocolate Lovers: Mix chocolate chips into the filling for a sweet surprise. The melted chocolate will add an extra layer of indulgence to each bite!

  • Flavored Glaze: Swap the traditional glaze for a chocolate or maple one to surprise your taste buds. A drizzle of melted chocolate will take these honey buns to a whole new level of deliciousness.

  • Dairy-Free Option: Use coconut oil instead of shortening for a dairy-free version. The flavors meld beautifully, resulting in tender, flaky buns that everyone can enjoy.

  • Spicy Kick: Add a pinch of cayenne or chili powder to the cinnamon sugar for a subtle heat that complements the sweetness perfectly. It’s an unexpected twist that just may become a favorite!

  • Fruit Filling: Incorporate dried fruits like raisins or cranberries into the dough for a wholesome touch. These little bursts of flavor will brighten up your honey buns and make them even more delightful!

  • Gluten-Free Adaptation: Substitute the all-purpose flour with a 1:1 gluten-free flour blend. Remember to check that all other ingredients are gluten-free, allowing everyone to indulge in these sweet treats!

For more delicious recipes to try, check out my Grandmas Homemade Bake or see how you can elevate your meals with Honey Chili Chicken. Happy baking!

Make Ahead Options

These Homemade Honey Buns are perfect for meal prep enthusiasts! You can prepare the dough and allow it to rise up to 24 hours in advance. Just mix the dry and wet ingredients as instructed, knead the dough, and then let it rise in the fridge instead of at room temperature. When ready to fry or bake, simply take the dough out, let it come to room temperature for about 30 minutes, shape the buns, and allow for a final rise of about 45 minutes. This method ensures that your honey buns are just as delicious, soft, and fluffy, saving you precious time on busy mornings or special occasions!

How to Store and Freeze Homemade Honey Buns

Room Temperature: Keep your homemade honey buns in an airtight container at room temperature for up to 5 days to maintain their soft and sticky texture.

Fridge: For longer shelf life, you can refrigerate the honey buns, but they may lose some moisture. Store them in an airtight container and consume within 1 week.

Freezer: Freeze individual honey buns by wrapping them tightly in plastic wrap and placing them in a freezer-safe bag. They can be stored for up to 3 months; simply reheat in the microwave for a warm treat!

Reheating: To enjoy your sweet creations, warm them in the microwave for about 15-20 seconds or reheat in the oven at 350°F for about 5-10 minutes to restore that delightful texture.

What to Serve with Homemade Honey Buns

There’s nothing quite like the sweet smell of freshly baked honey buns to elevate your breakfast or dessert table. Let’s create a delightful spread to enjoy alongside these warm, sticky treats.

  • Fresh Fruit Salad: A vibrant mix of berries, melons, and citrus cuts through the sweetness and adds a refreshing contrast.
  • Creamy Yogurt: Silky yogurt drizzled with honey complements the honey buns beautifully, offering a rich texture and a tangy note.
  • Savory Scrambled Eggs: Fluffy eggs seasoned with fresh herbs make for a wonderful savory balance to the sticky sweetness of the buns.
  • Hot Coffee or Tea: A steaming cup of coffee or herbal tea enhances the flavors, providing a cozy beverage option for breakfast or afternoon snack.
  • Maple Syrup: Drizzled over the buns or served on the side, this classic addition intensifies the sweet experience and invites indulgence.
  • Candied Nuts: Crunchy, sweet nuts such as pecans or walnuts add a delightful texture, creating a great contrast to the soft honey buns.
  • Chocolate Milkshake: A thick, chocolaty milkshake is a playful pairing; it’s a fun way to spoil yourself and your loved ones any time of day.
  • Cinnamon Apples: Warm, spiced apples can bring another layer of warmth and flavor, echoing the cinnamon in the honey buns for a deliciously harmonious pairing.

Homemade Honey Buns Recipe FAQs

How do I choose the right honey for my honey buns?
Absolutely! Opt for a light or medium honey for a milder flavor, as it will blend beautifully with the other ingredients. If you’re feeling adventurous, darker honey varieties can add a bolder flavor profile.

How should I store homemade honey buns?
Store your homemade honey buns in an airtight container at room temperature for up to 5 days. If you’d like, they can be refrigerated for up to a week. Just keep in mind that chilling may slightly affect their moisture level!

Can I freeze homemade honey buns?
Absolutely! To freeze, wrap the cooled honey buns individually in plastic wrap and place them in a freezer-safe bag. They’ll stay fresh for up to 3 months. For the best texture, reheat them in the microwave for 15-20 seconds or in the oven at 350°F for 5-10 minutes when you’re ready to enjoy!

What if my dough doesn’t rise properly?
If your dough isn’t rising, it might be that your yeast isn’t fresh or active. Make sure your warm water is between 105°F-115°F for optimal yeast activation. If you have used active yeast instead of instant, blooming it in warm water first can help. Give your dough a little more time to rise—sometimes it just needs a cozy, warm environment to do its magic!

Can I prepare the dough in advance?
Of course! You can prepare the dough ahead of time. After kneading, place it in an oiled bowl, cover it tightly, and refrigerate. When you’re ready to bake, let the dough come back to room temperature before shaping and rising, which may take about 1 hour.

Are there any allergens in homemade honey buns?
Yes, honey buns contain common allergens, including wheat (from the flour), eggs, and possibly dairy (depending on whether you use butter for the glaze). If you’re concerned about allergies, consider using gluten-free flour alternatives and egg substitutes!

Homemade Honey Bun

Delicious Homemade Honey Buns Your Family Will Love

These Homemade Honey Buns are soft, sweet, and a delightful breakfast treat that your family will adore.
Prep Time 30 minutes
Cook Time 25 minutes
Rising Time 2 hours 15 minutes
Total Time 3 hours 10 minutes
Servings: 12 buns
Course: Breakfast
Cuisine: American
Calories: 200

Ingredients
  

For the Dough
  • 4 cups All-Purpose Flour You may need additional flour for rolling.
  • 1/4 cup Granulated Sugar Can use brown sugar for deeper flavor.
  • 2 tablespoons Instant Yeast Does not need to be bloomed.
  • 1 teaspoon Salt Balances flavor.
  • 1 cup Warm Water 105°F-115°F to activate yeast.
  • 1/4 cup Honey Warm for easier mixing.
  • 1 large Egg Acts as a binding agent.
  • 1 teaspoon Vanilla Extract Enhances flavor.
  • 1/4 cup Melted Shortening Substitutable with butter.
For Frying or Baking
  • as needed Vegetable or Peanut Oil Maintain oil temperature between 350°F to 365°F.
For the Filling
  • 1/4 cup Cinnamon Sugar Mix granulated sugar with ground cinnamon.
For the Glaze
  • 1 cup Powdered Sugar Forms the base of the glaze.
  • 2 tablespoons Melted Butter Enhances glaze texture and flavor.
  • 2 tablespoons Honey
  • as needed cup Warm Water Adjusts glaze consistency.

Equipment

  • mixing bowl
  • Wooden Spoon
  • Rolling Pin
  • Skillet
  • Wire rack

Method
 

Preparation Steps
  1. In a large mixing bowl, combine 4 cups of all-purpose flour, 1/4 cup of granulated sugar, 2 tablespoons of instant yeast, and 1 teaspoon of salt. Whisk together until evenly incorporated.
  2. In a separate bowl, whisk together 1 cup of warm water, 1/4 cup of honey, 1 large egg, and 1 teaspoon of vanilla extract until well blended.
  3. Gradually add in 1/4 cup of melted shortening, ensuring everything is combined smoothly.
  4. Pour the wet mixture into the bowl with the dry ingredients. Mix until a sticky dough forms and knead for about 8 minutes.
  5. Place the dough in a lightly oiled bowl, cover it, and let it rise in a warm place for about 1 to 2 hours.
  6. Prepare the filling by mixing 1/4 cup of granulated sugar with 1 tablespoon of ground cinnamon.
  7. Once risen, roll the dough into a rectangle about 1/4 inch thick, sprinkle the cinnamon sugar, roll tightly into a log and slice into 12 equal pieces.
  8. Allow the slices to rise again for about 45 minutes.
  9. For frying, heat oil between 350°F to 365°F and fry honey buns for 2-3 minutes per side until golden brown. For baking, preheat oven to 350°F and bake for 20-25 minutes.
  10. While warm, dip or drizzle the honey buns with the glaze made from 1 cup powdered sugar, 2 tablespoons melted butter, 2 tablespoons honey, and warm water as needed.
  11. Transfer to a wire rack to cool slightly before serving.

Notes

Ensure to use fresh yeast for best results. Personalize your fillings as desired.

Irresistibly Fluffy Pesto Mozzarella Rolls to Delight Your Tastebuds

The aroma of fresh-baked bread fills the kitchen as I pull a tray of Fluffy Pesto Mozzarella Rolls from the oven, and I’m instantly transported to a cozy Italian café. These delightful rolls offer a warm embrace of herby pesto and melty cheese, perfect for anyone longing for a comforting homemade bread experience. As a passionate home chef, I love how quick and easy this recipe is, letting me whip up a batch in no time while feeling the joy of baking from scratch. Plus, they serve as a wonderful crowd-pleaser—perfect as an appetizer or accompanied by a rich marinara sauce. Are you ready to take your taste buds on a delicious journey and fill your home with the delightful scent of fresh bread?

Why Are These Rolls So Irresistible?

Homemade Delight: There’s something special about making your own bread; the fresh, warm aroma fills your home with love and comfort.
Versatile Variations: Whether you choose mozzarella or cheddar, feel free to experiment with your favorite cheeses for a personalized touch.
Quick and Easy: With straightforward steps, you’ll have fluffy rolls ready for your family in no time—perfect for busy evenings!
Crowd-Pleasing Appeal: These rolls are guaranteed to impress, making them an ideal starter for gatherings, just like Cheesy Zucchini Rolls or Savory Beef Rolls.
Comfort in Every Bite: Each roll delivers a melt-in-your-mouth experience with herby pesto intertwining with gooey cheese, making every bite a blissful moment.
Make-Ahead Convenience: Prep ahead by freezing the rolls before the final rise, ensuring fresh-baked goodness anytime you desire.

Treat yourself to this delightful recipe and discover how it can transform your dining experience!

Pesto Mozzarella Rolls Ingredients

For the Dough
Milk – Provides moisture and activates yeast; warm to ensure proper activation.
Active Dry Yeast – The magic leavening agent; ensure it froths before use for best results.
Caster Sugar – Adds sweetness and helps activate the yeast; granulated sugar works too.
Olive Oil – Contributes richness and moisture; extra virgin is preferred for flavor.
Salt – Enhances flavor and controls yeast activity; essential for dough’s structure.
All-Purpose Flour – Forms the backbone of the rolls; accurate measuring is key for best results.

For the Pesto
Fresh Basil Leaves – The heart of pesto, providing a fresh, herby punch; always use fresh for the best taste.
Extra Virgin Olive Oil – Adds richness to the pesto; crucial for a flavorful roll.
Garlic – Infuses depth and aroma into the pesto; fresh garlic is recommended for that strong flavor.
Lemon Juice – Balances the pesto’s flavors; adjust to your personal taste.
Salt and Pepper – Essential seasonings for pesto; customize according to your preference.

For the Filling
Freshly Shredded Mozzarella Cheese – Melts beautifully within the rolls; avoid pre-shredded for optimal melting.

Dive into the delightful realm of Pesto Mozzarella Rolls with these simple ingredients that promise incredible flavor and comfort in every bite!

Step‑by‑Step Instructions for Pesto Mozzarella Rolls

Step 1: Prepare the Yeast Mixture
Begin by warming 1 cup of milk until it’s warm but not scalding, around 110°F (43°C). Pour the warm milk into a mixing bowl and sprinkle 2 teaspoons of active dry yeast along with 1 tablespoon of caster sugar on top. Stir gently to combine, then let it sit for about 5-10 minutes until it becomes frothy, indicating that the yeast is active.

Step 2: Make the Dough
Once the yeast mixture is frothy, add 2 tablespoons of extra virgin olive oil and 1 teaspoon of salt to the bowl. Gradually incorporate 3 to 4 cups of all-purpose flour, mixing with a spoon or spatula until a sticky dough forms. Transfer the dough to a floured surface and knead for 3-4 minutes until it is smooth and elastic, then shape it into a ball.

Step 3: Let the Dough Rise
Place the kneaded dough in a lightly oiled bowl, turning it to coat. Cover the bowl with a clean kitchen towel and let it rise in a warm, draft-free area until it has doubled in size, approximately 1 to 2 hours. You’ll know it’s ready when the dough has a puffy appearance and feels airy to the touch.

Step 4: Prepare the Pesto
While the dough is rising, prepare the pesto. In a food processor, combine 2 cups of fresh basil leaves, ½ cup of extra virgin olive oil, 2 cloves of garlic, the juice of 1 lemon, and a pinch of salt and pepper. Blend until smooth, adjusting seasoning and oil to taste. Transfer the pesto to a bowl and refrigerate until you’re ready to use it.

Step 5: Roll Out the Dough
After the dough has risen, punch it down gently and transfer it to a floured surface. Roll the dough into a rectangle, approximately ¼ inch thick. Spread the prepared pesto evenly over the surface, leaving a small border around the edges. Sprinkle 1 to 1½ cups of freshly shredded mozzarella cheese over the pesto.

Step 6: Form the Rolls
Starting from one long edge, carefully roll the dough tightly into a log, ensuring the filling stays inside. Pinch the seams to seal, then cut the rolled dough into 9 equal pieces. Place each piece cut-side up in a greased 8-inch baking pan, ensuring a little space between each roll.

Step 7: Second Rise
Cover the pan with a towel and let the rolls rise for about 1 hour, or until they look puffed and cozy. You’ll notice the dough will expand, filling the spaces around each roll, creating a fluffy texture in your Pesto Mozzarella Rolls.

Step 8: Bake the Rolls
Preheat your oven to 350°F (180°C). Once the rolls have risen, uncover the pan and place it in the oven. Bake for 25-30 minutes or until the tops are golden brown, and the cheese is bubbly, filling your kitchen with a delightful aroma.

Step 9: Cool and Serve
After baking, remove the rolls from the oven and let them cool slightly in the pan. Once they’re cool enough to handle, serve them warm straight from the pan, allowing the melty cheese to draw everyone in with its comforting, herby goodness.

Expert Tips for Pesto Mozzarella Rolls

  • Fresh Ingredients: Always use fresh basil and garlic for your pesto. This enhances the flavor of the Pesto Mozzarella Rolls significantly, offering that authentic taste.

  • Dough Temperature: Ensure the milk is warm, not hot, to activate the yeast properly. Too hot will kill the yeast, leading to flat rolls.

  • Kneading Technique: Don’t rush the kneading process—aim for 3-4 minutes until smooth and elastic. This helps develop gluten for fluffy rolls.

  • Correct Cheese: Use freshly shredded mozzarella rather than pre-shredded. Avoid added starches that can prevent perfect melting in your delicious rolls.

  • Avoid Over-Filling: Be cautious when spreading pesto and cheese. Too much filling might ooze out during rising and baking but remember, that adds flavor too!

  • Storage Tips: If you have leftovers, store them in an airtight container in the fridge for up to 3-4 days, and reheat in the oven for the best taste.

Pesto Mozzarella Rolls Variations

Feel free to let your creativity shine as you adapt these rolls to suit your taste and dietary preferences!

  • Cheese Swap: Substitute mozzarella with cheddar or your favorite melting cheese for a flavor twist.

  • Herb Infusion: Incorporate fresh spinach or arugula into the pesto for a delightful variation on the classic flavor profile.

  • Garlic Lovers: Add an extra clove or two of garlic for a stronger aroma and taste that will tantalize your senses.

  • Savory Addition: Mix in cooked, crumbled bacon or chopped olives for an added savory dimension, elevating the rolls to new heights.

  • Spice Things Up: Sprinkle some red pepper flakes into the pesto for a hint of heat that adds excitement, perfect for those who crave a bit of spice!

  • Gluten-Free Version: Substitute all-purpose flour with a gluten-free flour blend to accommodate gluten sensitivity without compromising flavor.

  • Dairy-Free Alternative: Use a dairy-free cheese option and almond milk to make a delightful dairy-free version that everyone can enjoy.

  • Marinara Twist: Dip the rolls in homemade marinara sauce instead of spreading pesto for an Italian-inspired variation that’s equally delicious.

Explore these variations, and don’t hesitate to create your unique roll creation! Want to enjoy more homemade delights? Check out our Homemade Chicken Rolls or try the delightful Coconut Chocolate Rolls for a sweet treat!

Make Ahead Options

These Fluffy Pesto Mozzarella Rolls are perfect for meal prep enthusiasts! You can prepare the dough and form the rolls up to 24 hours in advance. Simply let the formed rolls rise until puffed, then cover tightly and refrigerate. When you’re ready to bake, allow them to sit at room temperature for about 30 minutes to re-activate before popping them in the oven. For longer storage, freeze the unbaked rolls for up to 3 months. Just place them directly into the oven from the freezer, adding an extra 5-10 minutes to the baking time. This way, you can enjoy fresh, homemade rolls just as delicious as when they were first made, all while saving precious time during busy weeknights!

What to Serve with Fluffy Pesto Mozzarella Rolls

There’s something magical about pairing these warm, fluffy delights with complementary flavors that elevate your meal experience.

  • Garlicky Marinara Sauce: Perfect for dipping, this robust sauce enhances the herby pesto flavors and adds a zesty kick. It’s the ultimate comfort food duo.
  • Crisp Caesar Salad: The crunch of fresh romaine, creamy dressing, and sharp Parmesan offers a refreshing balance to the tender rolls, making each bite exciting.
  • Roasted Vegetables: Seasoned seasonal veggies provide a satisfying contrast in texture, their caramelized sweetness harmonizing beautifully with the herby rolls.
  • Creamy Tomato Soup: A warm bowl of comforting tomato soup envelops the rolls in a cozy embrace, creating a nostalgic pairing many will love.
  • Homemade Coleslaw: The crunchy, tangy slaw introduces a playful freshness, providing a delightful contrast to the warm, cheesy goodness of the rolls.
  • Sparkling Lemonade: A chilled glass of lemony fizz cleanses your palate, making it a refreshing drink choice that complements the flavors of your meal.

Serve your Fluffy Pesto Mozzarella Rolls alongside these delectable options for a complete and heartwarming dining experience!

How to Store and Freeze Pesto Mozzarella Rolls

Fridge: Store leftover Pesto Mozzarella Rolls in an airtight container for up to 3-4 days; they will stay fresh and flavorful.

Freezer: Wrap each roll tightly in plastic wrap and place them in a freezer-safe bag for up to 2 months. Thaw in the fridge before reheating.

Reheating: For the best taste, reheat rolls in a preheated oven at 350°F (175°C) for about 10-15 minutes until warmed through and the cheese starts to melt again.

Make-Ahead Tip: Prepare the rolls in advance and freeze before the second rise; bake them fresh whenever you crave these delightful Pesto Mozzarella Rolls!

Pesto Mozzarella Rolls Recipe FAQs

How do I choose the best basil for pesto?
Absolutely! When selecting basil for your pesto, look for vibrant green leaves free from discoloration or dark spots. Fresh basil should have a strong aroma; the more fragrant, the better! I recommend using large, tender leaves as they blend well and enhance the pesto’s flavor.

How should I store leftover Pesto Mozzarella Rolls?
You can store leftover rolls in an airtight container in the fridge for up to 3-4 days. To keep them fresh, make sure they are sealed tightly to prevent them from drying out. When you’re ready to enjoy them again, simply reheat in a preheated oven at 350°F (175°C) for about 10-15 minutes—this will help restore their gooey, melty goodness!

Can I freeze Pesto Mozzarella Rolls?
Certainly! To freeze the rolls, wrap each one tightly in plastic wrap and place them in a freezer-safe bag. They can be stored in the freezer for up to 2 months. When you’re ready to enjoy them, thaw them in the fridge overnight, then reheat in the oven for about 10-15 minutes at 350°F (175°C) until everything is warm and the cheese is slightly melted again.

What if my dough doesn’t rise?
If your dough doesn’t rise, there could be a couple of reasons. First, check the yeast freshness; if it’s old or hasn’t been stored properly, it may not activate. Second, ensure the milk temperature was warm (around 110°F or 43°C) and not hot! If your dough is still flat after an hour, you might consider trying a different, fresh batch of yeast. Remember, sometimes dough just needs a little more time to rise, especially in cooler temperatures—patience is key!

Can I make these rolls vegetarian-friendly?
Absolutely! The Pesto Mozzarella Rolls are inherently vegetarian as they use basil, olive oil, garlic, and cheese. To ensure they fit within your vegetarian guidelines, check any additional ingredients you might add, like seasonings or sauces. Opt for options without animal-derived additives, and you’ll be all set for a delicious vegetarian treat.

How can I customize the filling for these rolls?
The more the merrier! Feel free to experiment with different cheese options beyond mozzarella, such as cheddar or feta, for a unique twist. You can also incorporate other herbs like parsley or arugula into the pesto to mix up those flavors. Just remember, less is often more—avoid overstuffing to maintain the structure of your rolls as they bake!

Pesto Mozzarella Rolls

Irresistibly Fluffy Pesto Mozzarella Rolls to Delight Your Tastebuds

Delight in the comforting flavors of homemade Pesto Mozzarella Rolls, perfect for lunch or as an appetizer.
Prep Time 1 hour
Cook Time 30 minutes
Rising Time 2 hours
Total Time 3 hours 30 minutes
Servings: 9 rolls
Course: Lunch
Cuisine: Italian
Calories: 200

Ingredients
  

Dough Ingredients
  • 1 cup milk warm
  • 2 teaspoons active dry yeast ensure frothy
  • 1 tablespoon caster sugar or granulated sugar
  • 2 tablespoons extra virgin olive oil for flavor
  • 1 teaspoon salt essential for structure
  • 3-4 cups all-purpose flour accurate measuring key
Pesto Ingredients
  • 2 cups fresh basil leaves use fresh for best taste
  • ½ cup extra virgin olive oil
  • 2 cloves garlic fresh recommended
  • 1 tablespoon lemon juice adjust to taste
  • to taste salt and pepper essential seasonings
Filling Ingredients
  • 1-1½ cups freshly shredded mozzarella cheese avoid pre-shredded

Equipment

  • mixing bowl
  • Food Processor
  • baking pan
  • Measuring cups
  • Measuring spoons
  • spatula
  • kitchen towel

Method
 

Step‑by‑Step Instructions
  1. Warm 1 cup of milk until around 110°F (43°C). Pour it into a mixing bowl and sprinkle 2 teaspoons of active dry yeast and 1 tablespoon of caster sugar on top. Stir gently, then let sit for about 5-10 minutes until frothy.
  2. Once frothy, add 2 tablespoons of extra virgin olive oil and 1 teaspoon of salt. Gradually mix in 3 to 4 cups of all-purpose flour until a sticky dough forms. Knead for 3-4 minutes until smooth and elastic, then shape into a ball.
  3. Place the dough in a lightly oiled bowl, cover with a clean kitchen towel, and let it rise in a warm area until doubled in size, about 1-2 hours.
  4. While the dough rises, prepare the pesto by blending 2 cups of fresh basil leaves, ½ cup of extra virgin olive oil, 2 cloves of garlic, the juice of 1 lemon, and a pinch of salt and pepper in a food processor until smooth. Refrigerate until use.
  5. After rising, punch down the dough and roll it into a rectangle, about ¼ inch thick. Spread the pesto over the surface and sprinkle 1 to 1½ cups of shredded mozzarella cheese.
  6. Tightly roll the dough from one edge into a log and seal the seams. Cut into 9 equal pieces and place cut-side up in a greased 8-inch baking pan.
  7. Cover the pan with a towel and let rolls rise for about 1 hour until puffy.
  8. Preheat oven to 350°F (180°C). Bake rolls for 25-30 minutes until golden brown and cheese is bubbly. Cool slightly before serving.

Notes

Store leftovers in an airtight container for 3-4 days. For best taste, reheat in oven at 350°F for 10-15 minutes.

Delicious Spinach & Feta Stuffed Salmon Pinwheels Made Easy

Amidst the flurry of everyday life, there’s something undeniably rewarding about crafting a meal that delights the senses. The secret to my latest culinary adventure? Spinach & Feta Stuffed Salmon Pinwheels. This elegant dish offers a perfect balance of tender, flaky salmon wrapped around a creamy filling of fresh spinach and tangy feta cheese. Not only does it come together in just 38 minutes, but it’s also a show-stopping centerpiece for any dinner table, whether for a cozy weeknight dinner or a festive gathering. Each bite is a celebration of nutritional goodness, bursting with omega-3 fatty acids and essential vitamins. Are you ready to elevate your dinner game and impress your loved ones? Let’s dive into this easy yet gourmet recipe that’s sure to become a household favorite!

Why are Spinach & Feta Pinwheels a must-try?

Irresistible flavors: The vibrant blend of herbs, spinach, and tangy feta creates a mouthwatering taste that leaves you wanting more.

Effortless sophistication: Impress guests with gourmet-style dishes without hours in the kitchen—these pinwheels are ready in just 38 minutes!

Nutrient-packed goodness: Loaded with omega-3 fatty acids from salmon and key vitamins from spinach, this dish is as healthy as it is delicious.

Quick prep time: Perfect for busy weeknights, these make-ahead pinwheels can be assembled in advance, so you can easily bake and serve whenever needed.

Versatile pairings: Serve alongside a fresh salad or roasted vegetables for a balanced meal your friends and family will love!

Spinach & Feta Stuffed Salmon Pinwheels Ingredients

For the Pinwheels

  • Salmon Fillet – Fresh salmon provides the best flavor and texture to elevate your Spinach & Feta Stuffed Salmon Pinwheels.
  • Fresh Spinach – Packed with nutrients; frozen spinach is a great substitute but be sure to squeeze out excess moisture.
  • Feta Cheese – Adds a creamy, tangy flavor; if you prefer milder tastes, consider using goat cheese or ricotta instead.
  • Olive Oil – Essential for brushing on the pinwheels before baking; melted butter can also add a rich touch.
  • Salt and Pepper – Don’t forget these simple seasonings to enhance all the delicious flavors in your dish.

Optional Garnish

  • Fresh Dill – A sprinkle of fresh dill adds a burst of flavor and makes your pinwheels even more visually appealing.
  • Lemon Juice – A squeeze of fresh lemon enhances freshness and balances the richness of the dish beautifully.

Step‑by‑Step Instructions for Spinach & Feta Stuffed Salmon Pinwheels

Step 1: Prepare the Filling
Start by finely chopping a generous amount of fresh spinach and crumbling feta cheese in a mixing bowl. Combine the spinach and feta together, ensuring they are well-mixed for even distribution. This creamy filling will be the star of your Spinach & Feta Stuffed Salmon Pinwheels, so take care to achieve the right consistency.

Step 2: Prep the Salmon
On a clean cutting board, carefully slice the salmon fillet horizontally, creating a flat piece that can easily be rolled. Season both sides with salt and pepper to enhance the flavor. For uniform cooking, gently pound the salmon with a mallet to an even thickness, ensuring it remains tender and flaky when baked.

Step 3: Assemble the Pinwheels
Spread the well-mixed spinach and feta filling evenly over the surface of the prepared salmon fillet. Starting from one end, tightly roll the salmon to enclose the filling. Secure the roll with toothpicks or kitchen twine, ensuring it holds its shape during the baking process. Your Spinach & Feta Stuffed Salmon Pinwheels are now ready for the oven!

Step 4: Bake the Pinwheels
Preheat your oven to 375°F (190°C). Brush the exterior of the pinwheels with olive oil, which will help achieve a golden crust while preventing dryness. Place the secured pinwheels in a greased baking dish, making sure they are arranged snugly. Bake for 15 to 18 minutes, or until the salmon is cooked through and flakes easily with a fork, indicating it’s perfectly done.

Step 5: Serve and Garnish
Once baked, carefully remove the toothpicks or twine from the Spinach & Feta Stuffed Salmon Pinwheels. For an elevated presentation, garnish with fresh dill or a squeeze of lemon juice to add a burst of flavor. Serve warm for a delightful dish that will impress your family and friends at any gathering!

How to Store and Freeze Spinach & Feta Stuffed Salmon Pinwheels

Refrigerator: Store any leftover Spinach & Feta Stuffed Salmon Pinwheels in an airtight container for up to 2 days to maintain freshness and flavor.

Freezer: If you wish to prepare them in advance, freeze assembled pinwheels (before baking) wrapped tightly in plastic wrap and aluminum foil for up to 3 months.

Thawing: To cook from frozen, thaw the pinwheels in the refrigerator overnight before baking as directed. This ensures even cooking.

Reheating: If you have leftovers, reheat in the oven at 350°F (175°C) for about 10-15 minutes until warmed through, helping retain that delightful texture.

What to Serve with Spinach & Feta Stuffed Salmon Pinwheels

Enhance your dining experience by complementing the delightful flavors of salmon with these tantalizing side dishes.

  • Creamy Mashed Potatoes: The velvety texture complements the flaky salmon, creating a satisfying contrast that’s simply irresistible.

  • Garlic Roasted Asparagus: The earthy crunch of asparagus elevates the meal, adding a burst of color and fresh flavor that balances well with the richness of the pinwheels.

  • Citrus Salad: A refreshing mix of mixed greens, oranges, and a light vinaigrette offers brightness and acidity, enhancing the dish’s depth without overpowering it.

  • Quinoa Pilaf: Packed with nutrients and a slight nuttiness, quinoa perfectly absorbs flavors from the salmon while providing a hearty base for your meal.

  • Lemon Herb Couscous: This light and zesty side dish harmonizes wonderfully with the fish, offering a lovely contrast to the creamy filling.

  • Chardonnay: A glass of chilled Chardonnay pairs exquisitely, with its crisp acidity cutting through the richness of the feta and salmon.

  • Tiramisu: Cap off your meal with this classic Italian dessert. The coffee and cocoa flavors provide a delectable finish that leaves guests raving.

Expert Tips for Spinach & Feta Stuffed Salmon Pinwheels

  • Fresh Salmon Choice: Always opt for fresh salmon fillets for the best flavor and texture. Frozen salmon can become mushy when cooked.
  • Avoid Soggy Filling: Make sure excess moisture is removed from thawed spinach to keep the filling creamy, not watery.
  • Uniform Thickness: Pound the salmon to an even thickness to ensure it cooks evenly, giving you tender, flaky results.
  • Secure Tight Rolls: Use toothpicks or kitchen twine to keep the pinwheels tightly rolled, preventing them from unraveling during baking.
  • Don’t Overbake: Keep an eye on the pinwheels to avoid overcooking; they should be flaky yet moist when finished, delivering a perfect Spinach & Feta Stuffed Salmon Pinwheels experience.
  • Herb Variations: Experiment with fresh herbs like dill or parsley for variation. This adds a refreshing twist to your pinwheels, enhancing their flavor!

Make Ahead Options

Spinach & Feta Stuffed Salmon Pinwheels are a fantastic meal prep choice for those busy weeknights! You can assemble the pinwheels up to 24 hours in advance. Simply prepare the filling and spread it over the salmon, then roll tightly and secure it. Store the assembled pinwheels in the refrigerator, covered tightly with plastic wrap to maintain moisture and prevent the salmon from drying out. When you’re ready to enjoy them, just preheat the oven to 375°F (190°C), brush with olive oil, and bake for 15-18 minutes. This way, you’ll have delicious, gourmet results with minimal effort and maximum flavor for your family gatherings!

Spinach & Feta Stuffed Salmon Pinwheels Variations

Feel free to explore exciting twists on your Spinach & Feta Stuffed Salmon Pinwheels—there’s so much room to personalize this dish!

  • Cheese Swap: Replace feta with goat cheese or ricotta for a creamier, milder filling.
  • Herb Infusion: Add fresh dill or parsley to the spinach mixture for an aromatic uplift.
  • Dairy-Free Delight: Use a dairy-free cream cheese alternative for a lighter, non-dairy option.
  • Zesty Kick: Incorporate a tablespoon of lemon zest into the spinach filling to brighten flavors.
  • Spicy Surprise: Add red pepper flakes or chopped jalapeños for a delightful heat that tantalizes the taste buds.
  • Vegetable Boost: Mix in chopped sun-dried tomatoes or artichoke hearts for added texture and flavor.
  • Grainy Texture: Sprinkle in some cooked quinoa for a nutty twist and added protein.
  • Unique Accompaniment: Serve alongside a mango salsa for a refreshing contrast to the savory pinwheels.

And if you’re looking for more ideas, why not try pairing your pinwheels with a crisp salad or some roasted vegetables? They complement the salmon beautifully and add a vibrant touch to your plate!

Spinach & Feta Stuffed Salmon Pinwheels Recipe FAQs

How do I choose fresh spinach?
When selecting fresh spinach, look for vibrant green leaves that are crisp and free from any dark spots or yellowing. Aim for spinach that feels firm and fresh to the touch. If using frozen spinach, make sure to thaw it completely and squeeze out as much moisture as possible to prevent the filling from becoming soggy.

What is the best way to store leftovers?
Store any leftover Spinach & Feta Stuffed Salmon Pinwheels in an airtight container in the refrigerator for up to 2 days. Be sure to cover them well to maintain their moisture and flavor. If you’re worried about them drying out, consider sliding a damp paper towel in the container to keep things from getting too dried out!

Can I freeze the pinwheels before cooking?
Absolutely! To freeze your assembled Spinach & Feta Stuffed Salmon Pinwheels, tightly wrap each one in plastic wrap and then in aluminum foil to prevent freezer burn. They can be stored in the freezer for up to 3 months. When you’re ready to cook, simply thaw them in the refrigerator overnight and bake as directed for a delicious meal at your convenience.

What should I do if the filling is too watery?
If you find your filling is too watery, which can occur with using thawed spinach, simply add a few tablespoons of breadcrumbs to absorb the excess moisture. Mix them in gently until you reach a consistency that can spread easily without dripping. Experimenting with the filling can also lead to delightful variations, so don’t hesitate to have fun!

Are there any dietary considerations for this recipe?
Certainly! This recipe contains fish and dairy, so if you or anyone you’re serving has allergies to seafood or dairy, consider substituting the salmon with a plant-based protein like tofu and using a dairy-free cheese alternative. Always check with your guests regarding allergies to ensure everyone can enjoy this delicious dish together!

How can I achieve even cooking for my salmon?
To ensure even cooking for your Spinach & Feta Stuffed Salmon Pinwheels, start by pounding the salmon to an even thickness before assembling. This helps the fish cook uniformly, providing a tender and flaky texture. Additionally, keep an eye on the cooking time, not exceeding it, as this can help retain moisture and enhance flavor.

Spinach & Feta Stuffed Salmon Pinwheels

Delicious Spinach & Feta Stuffed Salmon Pinwheels Made Easy

Try these Spinach & Feta Stuffed Salmon Pinwheels for a delicious dinner that impresses everyone.
Prep Time 20 minutes
Cook Time 18 minutes
Total Time 38 minutes
Servings: 4 pinwheels
Course: Dinner
Cuisine: Mediterranean
Calories: 250

Ingredients
  

For the Pinwheels
  • 1 pound Salmon Fillet Fresh salmon provides the best flavor and texture.
  • 2 cups Fresh Spinach Packed with nutrients; frozen spinach is a great substitute.
  • 4 ounces Feta Cheese Adds a creamy, tangy flavor.
  • 2 tablespoons Olive Oil Essential for brushing on the pinwheels.
  • 1 teaspoon Salt To enhance flavors.
  • 1 teaspoon Pepper To enhance flavors.
Optional Garnish
  • 1 tablespoon Fresh Dill For garnish.
  • 1 tablespoon Lemon Juice To enhance freshness.

Equipment

  • mixing bowl
  • Cutting Board
  • oven
  • Baking Dish
  • Toothpicks or kitchen twine

Method
 

Step‑by‑Step Instructions
  1. Prepare the Filling: Finely chop fresh spinach and crumble feta cheese in a mixing bowl. Combine for even distribution.
  2. Prep the Salmon: Slice the salmon fillet horizontally, season with salt and pepper, and pound to an even thickness.
  3. Assemble the Pinwheels: Spread filling over the salmon, roll tightly, and secure with toothpicks or twine.
  4. Bake the Pinwheels: Preheat oven to 375°F (190°C), brush with olive oil, place in a greased dish, and bake for 15 to 18 minutes.
  5. Serve and Garnish: Remove toothpicks, garnish with dill or lemon juice, and serve warm.

Notes

For best results, use fresh salmon and ensure spinach is dry before mixing.