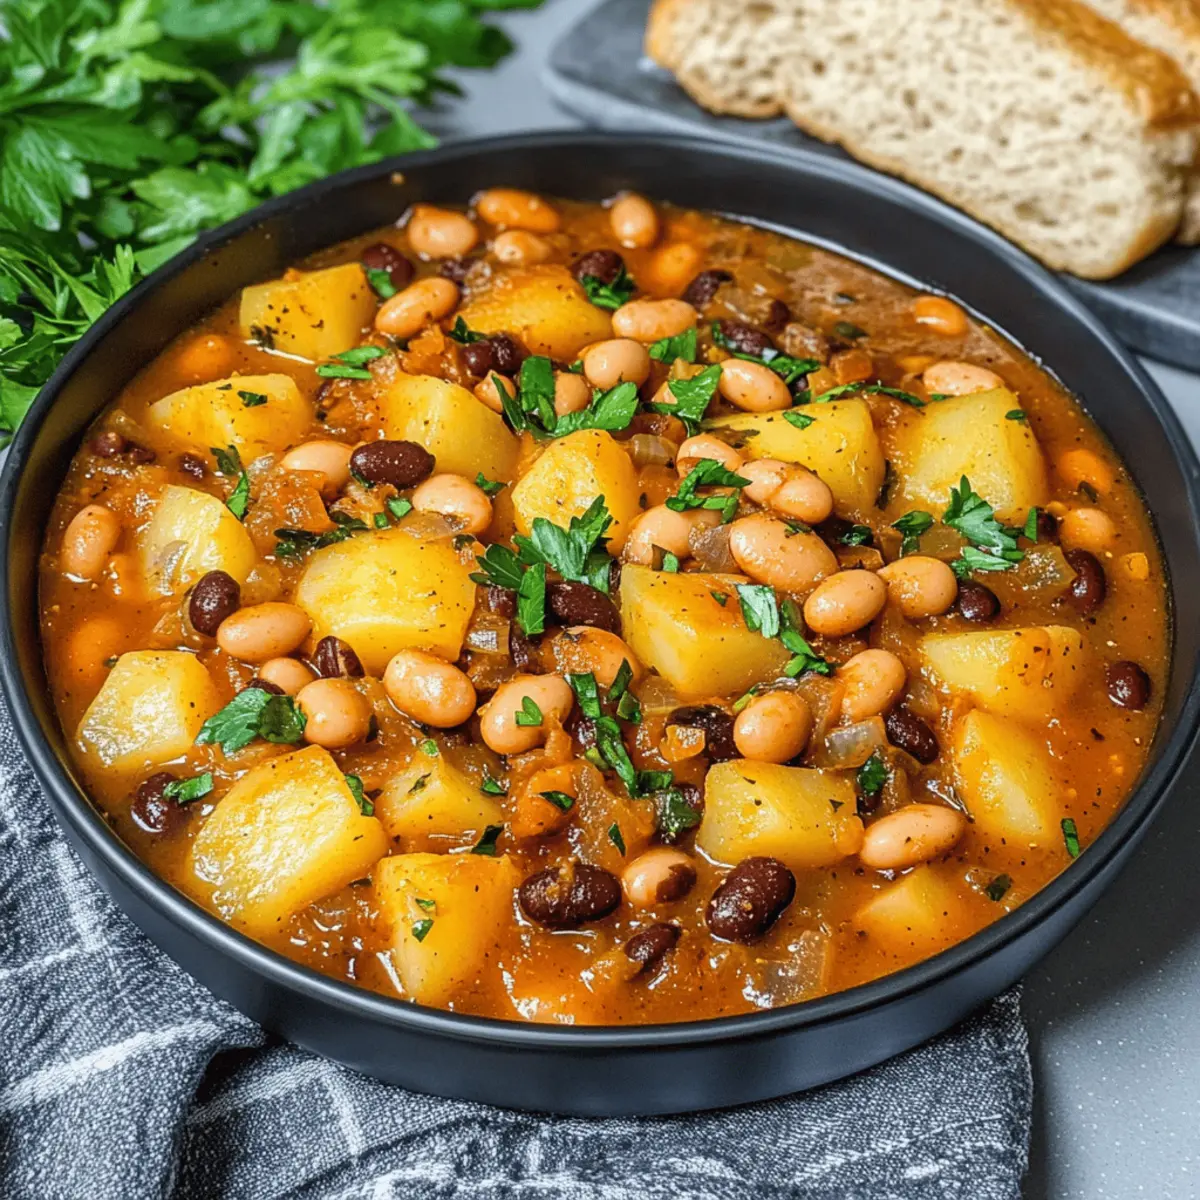
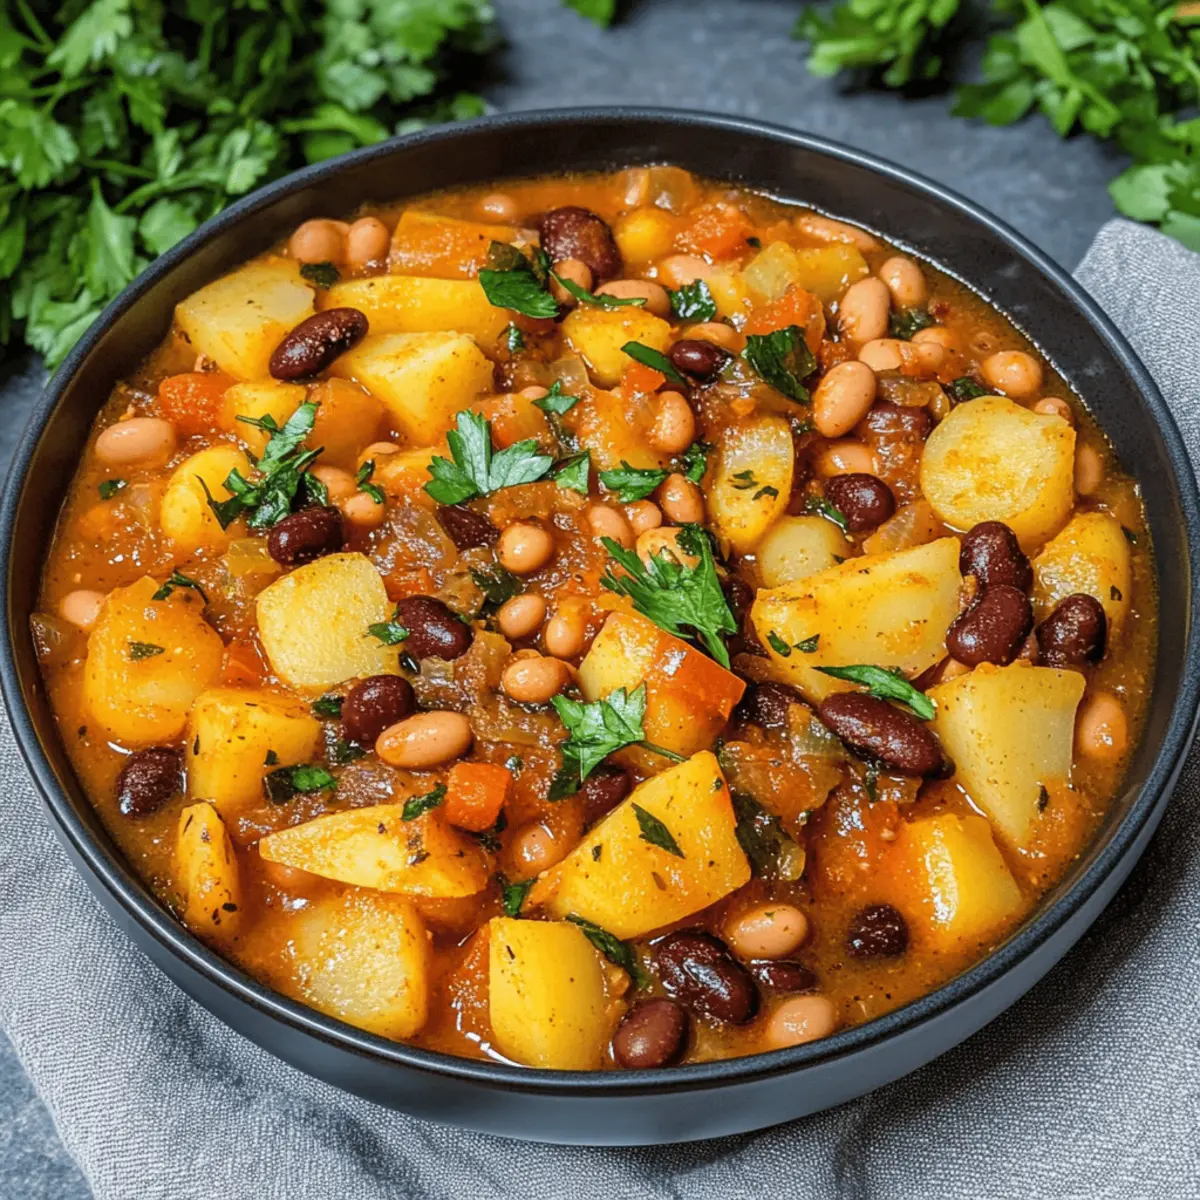
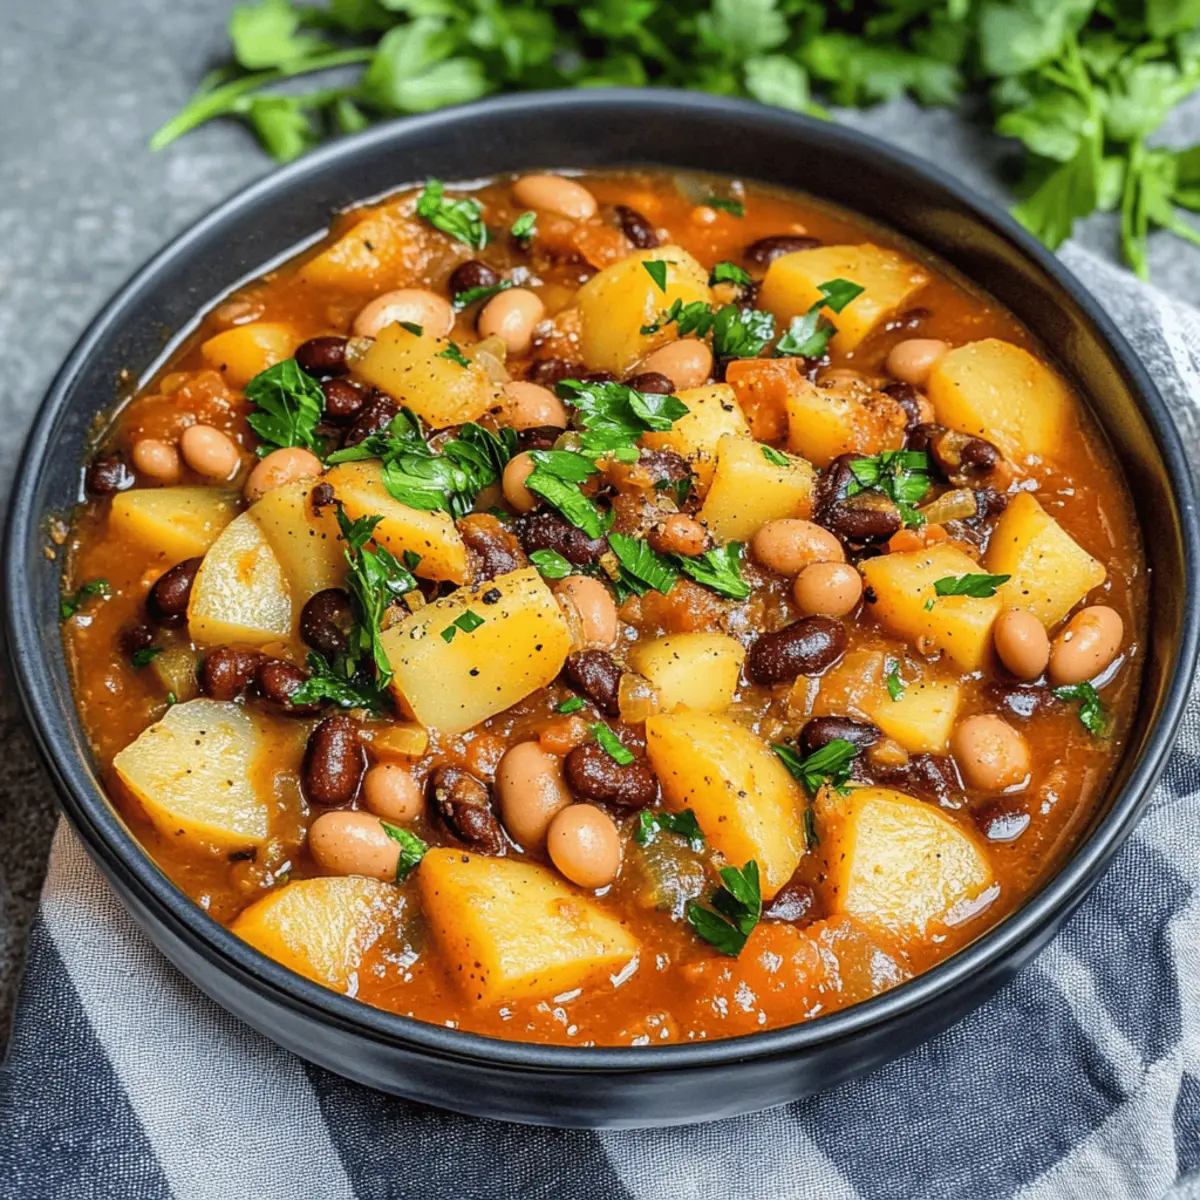
The moment the first chill of autumn hits, I find myself reaching for my favorite creation, a warm bowl of Cajun Bean and Potato Stew. This cozy dish wraps me in its smoky, spicy essence, perfectly tailored for those brisk evenings when comfort food is a must. What I love most is that this hearty, vegan one-pot meal not only satisfies my cravings but also keeps my kitchen tidy with minimal cleanup. With options to mix in various beans like cannellini or black for an extra protein boost, it’s adaptable to whatever I have on hand. Are you ready to dive into a bowl of comforting warmth?
Why is this Cajun Stew a Must-Try?
Heartwarming and Hearty: This Cajun Bean and Potato Stew is your perfect companion for chilly nights, offering a rich tapestry of flavors that warms the soul.
One-Pot Wonder: No need for complicated cleanup; every ingredient melds beautifully in about 30 minutes.
Versatile Options: Swap beans or add veggies like kale to tailor the stew to what you’ve got on hand, just like in my Savory Onion Potato Pancakes or Savory Zucchini Potato dishes.
Nutritious Comfort: Packed with protein and veggies, you’ll love how this stew nourishes without skimping on flavor.
Crowd-Pleasing Flavor: Smoky, spicy, and utterly vibrant, it’s bound to be a hit with family and friends, ensuring everyone leaves the table satisfied.
Cajun Bean and Potato Stew Ingredients
• Dive into the heart of flavor with these ingredients!
For the Base
- Olive oil – Essential for sautéing the vegetables; substitute with sunflower or canola oil, or use vegetable stock for an oil-free version.
- Onion – Adds foundational flavor to the stew, creating a savory base.
- Carrot – Offers a touch of sweetness and essential texture.
- Celery – Complements the overall flavor profile harmoniously.
- Garlic – Imparts a robust flavor; fresh cloves or minced work beautifully.
For the Seasoning
- Dried oregano – Enhances the dish with aromatic herbal notes.
- Red chili flakes – Perfect for adding the desired heat; adjust to your spice comfort.
- Smoked paprika – Elevates the smoky essence, key to the Cajun flavor.
- Chili powder – Further boosts the spice; a milder version can be used for less heat.
- Onion powder – Adds depth without altering texture.
- Dried thyme – Infuses a warm, earthy flavor.
For the Stew
- Diced tomatoes – Offers moisture and flavor; opt for high-quality canned tomatoes for the best results.
- Cannellini beans – The main protein source; feel free to swap with other beans as desired.
- Black beans – A lovely addition for enhanced texture and taste; alternatives can include pinto or kidney beans.
- Potatoes – Provides heartiness; Yukon Gold or other waxy types work wonders.
- Vegetable stock – Used to cook the stew and deepen the flavor.
For the Finish
- Fresh parsley – Sprinkle in at the end for a burst of freshness and color.
- Salt and pepper – Essential for seasoning, adjust to taste.
Prepare to cozy up with your delicious Cajun Bean and Potato Stew, packed with nutritious ingredients and all the comforting warmth you could ask for!
Step‑by‑Step Instructions for Cajun Bean and Potato Stew
Step 1: Sauté the Base Vegetables
In a heavy-bottomed pot, heat a generous drizzle of olive oil over medium heat. Add the chopped onions, diced carrots, and sliced celery, stirring frequently for 5–6 minutes until they soften and become fragrant. This forms the flavorful base of your Cajun Bean and Potato Stew, setting a delicious tone for the rest of the dish.
Step 2: Add Garlic and Mix in Spices
Stir in the minced garlic and let it cook for an additional minute, allowing the aroma to fill your kitchen. Next, add the dried oregano, red chili flakes, smoked paprika, chili powder, onion powder, and dried thyme. Mix everything well, ensuring the spices coat the vegetables, and cook for another minute until the mixture is fragrant and vibrant.
Step 3: Incorporate the Main Ingredients
Now, add the diced tomatoes to the pot, followed by rinsed cannellini beans and black beans. Gently fold in the cubed potatoes and pour in the vegetable stock. Stir everything together until well combined, creating a colorful medley that signals the heartiness of your Cajun Bean and Potato Stew.
Step 4: Bring to a Boil and Simmer
Increase the heat to bring the mixture to a rolling boil. Once boiling, lower the heat, cover the pot, and let it simmer for about 20 minutes. Stir occasionally until the potatoes are fork-tender, achieving a perfect balance of flavors and a comforting thickness in your stew.
Step 5: Finishing Touches and Serve
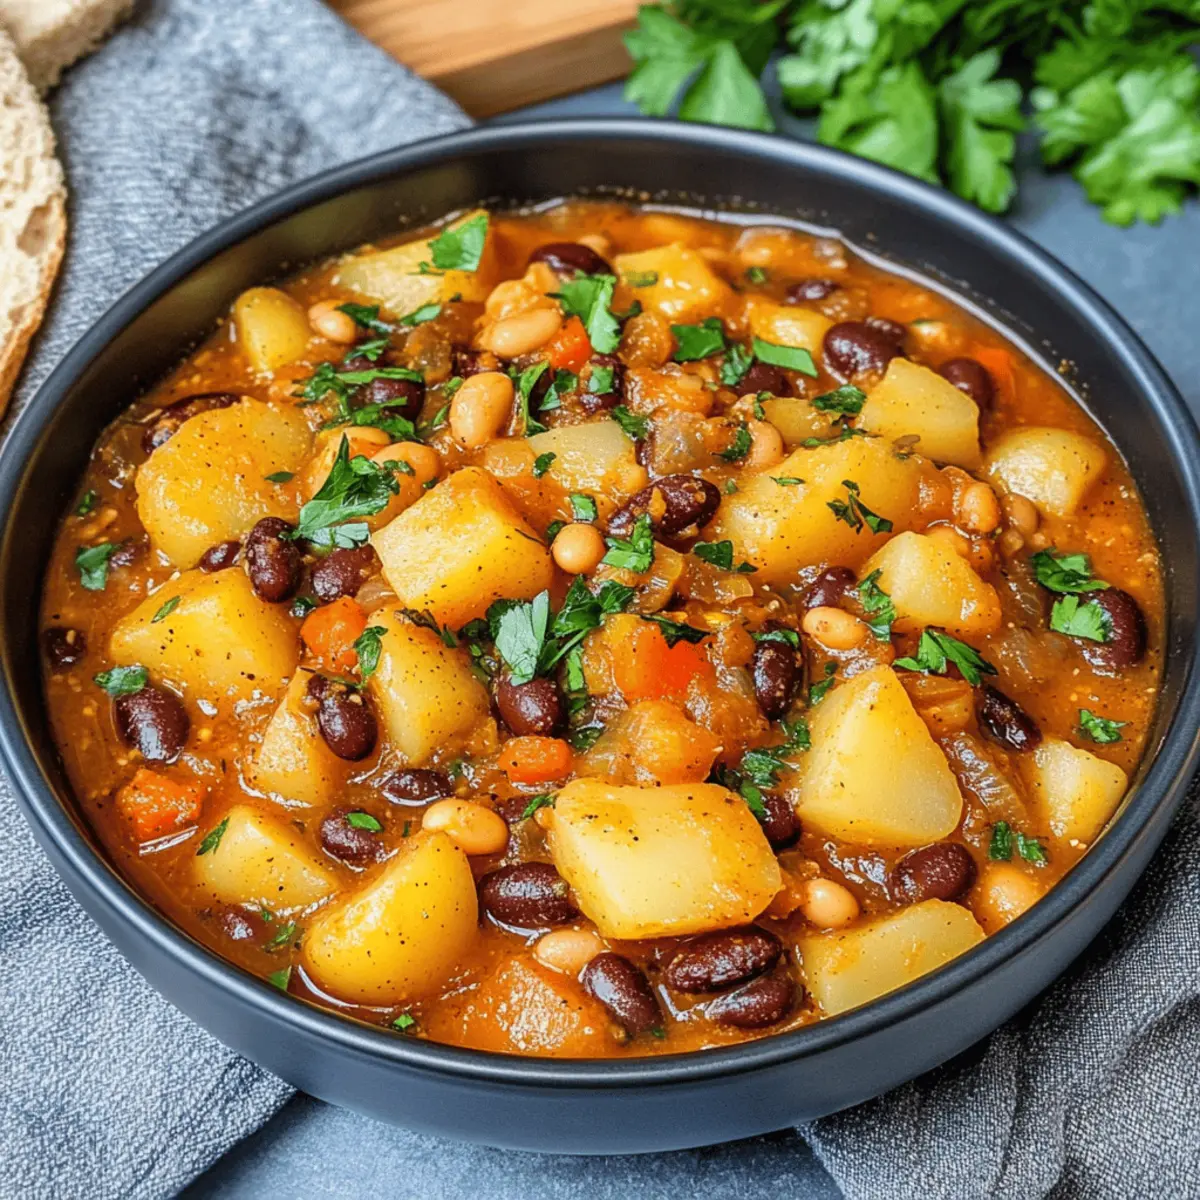
After simmering, mix in freshly chopped parsley for a burst of brightness. Taste your stew and adjust the seasoning with salt and pepper to suit your palate. Serve hot, along with crusty bread or over rice, and enjoy the warm, hearty embrace of your homemade Cajun Bean and Potato Stew.
Storage Tips for Cajun Bean and Potato Stew
Fridge: Store the stew in an airtight container for up to 4 days, ensuring it’s completely cooled before sealing to preserve freshness.
Freezer: The Cajun Bean and Potato Stew can be frozen for up to 3 months. Allow it to cool completely before transferring it to freezer-safe bags or containers, removing as much air as possible.
Reheating: Thaw in the fridge overnight and reheat gently on the stove over low heat, adding a splash of vegetable stock if needed for consistency. Stir occasionally until heated through.
Leftover Tips: Portion out individual servings for easy reheating and meal prep, making it a convenient option for busy days ahead.
What to Serve with Cajun Bean and Potato Stew
Elevate your dining experience by pairing this comforting stew with delightful sides that complement its rich flavors.
- Crusty Whole-Grain Bread: Perfect for dipping, this bread adds a hearty texture that absorbs the stew’s smoky goodness.
- Simple Green Salad: A fresh salad with mixed greens, cucumber, and a light vinaigrette balances the richness of the stew and refreshes the palate.
- Steamed Broccoli: Tender, vibrant broccoli brings a natural crunch and a splash of color, enhancing the overall experience.
- Basmati Rice: Soft and fluffy rice serves as a great base for the stew, soaking up all the flavorful broth.
Pair this hearty and warming dish with any of these options for a cozy, satisfying meal!
Make Ahead Options
These Cajun Bean and Potato Stew preparations are ideal for busy home cooks looking to save time during hectic weeknights! You can chop your vegetables and combine the spices up to 24 hours in advance; simply refrigerate them in an airtight container to maintain their freshness. Additionally, you can cook the entire stew and let it cool before storing it in the fridge for up to 3 days. When you’re ready to enjoy, reheat the stew gently on the stove; it will taste just as delicious! This way, you can savor a hearty meal with minimal effort, bringing warmth and comfort right to your dinner table.
Variations & Substitutions for Cajun Bean and Potato Stew
Feel free to customize this nourishing stew to suit your taste and pantry needs!
-
Bean Swap: Try using black-eyed peas or chickpeas for a delightful change in texture. Each bean brings its own rich flavor, enhancing your stew’s personality.
-
Seasonal Freshness: If tomatoes are in season, feel free to use fresh diced tomatoes instead of canned. Their vibrant flavor will elevate your stew immensely during warm months.
-
Leafy Greens: Add a handful of kale or spinach during the last few minutes of cooking. They’ll wilt down beautifully, providing added nutrients and a pop of color.
-
Spice It Up: For those who crave heat, toss in some diced jalapeños or a dash of your favorite hot sauce for an electrifying kick. It’s a fun way to tailor the stew to your palate!
-
Creamy Texture: Blend a portion of the stew after cooking to create a creamy consistency without using dairy. This gives it a heartier feel, while still maintaining that smoky, robust flavor.
-
Herb Infusion: Experiment with fresh herbs like cilantro or basil alongside parsley for a burst of aromatic goodness. Herbs can dramatically shift the flavor profile, making the dish feel fresh and unique.
-
Carb Options: Instead of traditional potatoes, feel free to use sweet potatoes or any root veggies you love. Sweet potatoes bring a lovely sweetness that wonderfully contrasts the spicy Cajun flavors.
-
Serving Suggestions: For a filling meal, serve over rice or alongside some crusty whole-grain bread, just like my wonderful Savory Broccoli and Potato Bake. You won’t regret adding more comfort to this cozy stew!
Expert Tips for Cajun Bean and Potato Stew
-
Ingredient Quality: Use fresh, high-quality produce to ensure a robust flavor. This is key in making your Cajun Bean and Potato Stew truly shine.
-
Bean Variations: Don’t hesitate to experiment with different beans! Try pinto or black-eyed peas for varied textures and flavors, allowing for a personalized stew experience.
-
Spice Level Adjustment: Start with a smaller amount of red chili flakes and gradually add more to avoid overwhelming heat. Each person’s spice tolerance can vary widely!
-
Cooking Method: For a quick version, use an Instant Pot—pressure cook for 3 minutes followed by a natural release to enhance the flavors while saving time.
-
Proper Storage: Ensure the stew cools before refrigerating to maintain freshness. It can last up to 4 days in the fridge and freezes beautifully for longer enjoyment.
Cajun Bean and Potato Stew Recipe FAQs
How do I select the best beans for my stew?
Absolutely! When selecting beans, look for those that are free of dark spots or debris, ensuring they are fresh and healthy. If possible, choose organic canned beans or soak dry beans overnight for the best texture and flavor. I often prefer cannellini and black beans for this stew due to their creamy consistency, but feel free to experiment with whatever you have on hand!
What is the best way to store leftovers of the stew?
Very! Keep your Cajun Bean and Potato Stew in an airtight container in the fridge for up to 4 days. Be sure to let it cool completely before sealing it to maintain its wonderful freshness. For longer storage, you can freeze it for up to 3 months in freezer-safe bags. Just remember to label them with the date for easy tracking!
Can I freeze the stew for later use?
Of course! To freeze your stew, let it cool completely, then scoop it into freezer-safe containers or bags. Ensure you remove as much air as possible before sealing to prevent freezer burn. When you’re ready to enjoy it again, just thaw it overnight in the refrigerator and reheat gently on the stove or in the microwave, adding a splash of vegetable stock if needed.
What if my stew turns out too thick?
No worries! If your stew seems thicker than you’d like, simply stir in some additional vegetable stock or water until you achieve your desired consistency. You can always add more liquid gradually, ensuring you don’t dilute the flavor too much. Just keep tasting and adjusting until you’re satisfied!
Are there any dietary considerations I should be aware of?
Definitely! This stew is vegan-friendly and is naturally free from animal products, making it suitable for those following a plant-based diet. If anyone you’re serving has specific allergies, make sure to check the ingredients of your canned goods, especially the beans and stock, as they can sometimes contain allergens. Always serve the dish with love and awareness of your guests’ needs!
How do I enhance the flavor of my Cajun Bean and Potato Stew?
Wonderful question! To elevate the flavor, try adding a splash of hot sauce just before serving or incorporate a squeeze of lemon for brightness. If you enjoy smoky flavors, a few drops of liquid smoke can take it to another level. A dash of Worcestershire sauce (vegan if necessary) can also add depth. Feel free to experiment and find combinations that resonate with your taste buds!
Cajun Bean and Potato Stew: A Cozy Vegan Comfort Classic
Ingredients
Equipment
Method
- In a heavy-bottomed pot, heat a generous drizzle of olive oil over medium heat. Add the chopped onions, diced carrots, and sliced celery, stirring frequently for 5–6 minutes until they soften and become fragrant.
- Stir in the minced garlic and let it cook for an additional minute. Next, add the dried oregano, red chili flakes, smoked paprika, chili powder, onion powder, and dried thyme. Mix everything well and cook for another minute until fragrant.
- Add the diced tomatoes, rinsed cannellini beans, black beans, and cubed potatoes. Pour in the vegetable stock and stir to combine.
- Increase the heat to bring the mixture to a rolling boil. Reduce the heat, cover the pot, and let it simmer for about 20 minutes, stirring occasionally until the potatoes are fork-tender.
- Mix in freshly chopped parsley and adjust the seasoning with salt and pepper to taste. Serve hot.