Cheesy Korean Pancakes: A Delicious Recipe to Try!

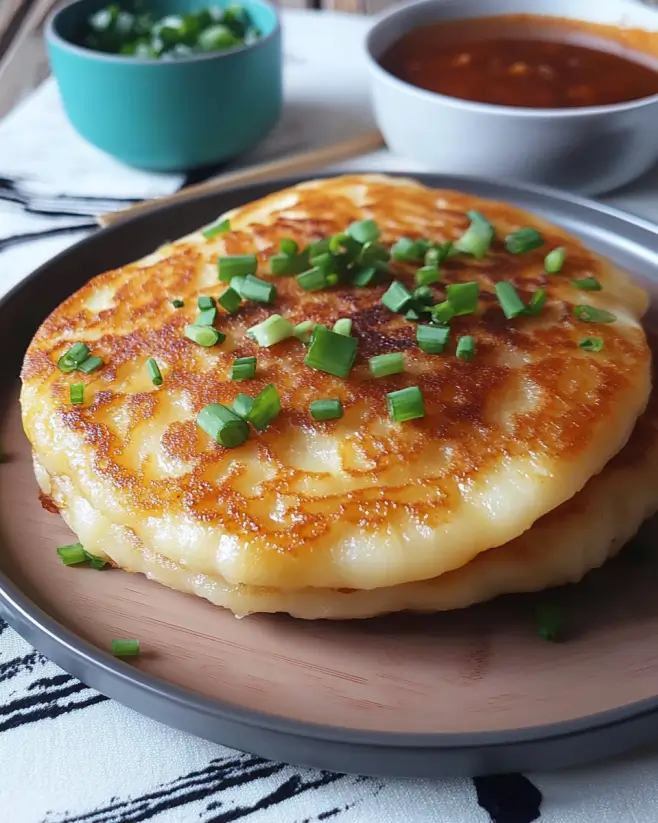
Introduction to Cheesy Korean Pancakes

There’s something magical about the aroma of pancakes sizzling in a skillet. It takes me back to lazy Sunday mornings, where breakfast was a family affair. Now, let’s bring that nostalgia to life with Cheesy Korean Pancakes! This dish is not just a quick solution for a busy day; it’s a delightful way to impress your loved ones. With a crispy exterior and a gooey, cheesy center, these pancakes are perfect for brunch or a snack. Trust me, once you try them, they’ll become a staple in your kitchen!

Why You’ll Love This Cheesy Korean Pancakes

Cheesy Korean Pancakes are a game-changer in the kitchen. They’re incredibly easy to whip up, making them perfect for those hectic weeknights. In just 30 minutes, you can serve a dish that’s not only delicious but also packed with flavor. The combination of cheese and fresh veggies creates a savory treat that pleases even the pickiest eaters. Plus, they’re versatile enough to enjoy any time of day!

Ingredients for Cheesy Korean Pancakes

Gathering the right ingredients is the first step to creating these delightful Cheesy Korean Pancakes. Here’s what you’ll need:

  • All-purpose flour: The base of your pancake, providing structure and a fluffy texture.
  • Water: Helps to create the batter consistency; feel free to use sparkling water for extra fluffiness.
  • Salt: Enhances the flavors, making every bite more delicious.
  • Garlic powder: Adds a savory depth that complements the cheese beautifully.
  • Shredded mozzarella cheese: The star of the show! It melts wonderfully, creating that gooey, cheesy goodness.
  • Chopped green onions: These bring a fresh, mild onion flavor that brightens the dish.
  • Chopped bell pepper (optional): For a pop of color and sweetness; feel free to skip or substitute with other veggies.
  • Vegetable oil: Essential for frying, ensuring your pancakes get that perfect golden crust.

For those who like a little heat, consider adding red pepper flakes to the batter. And if you’re feeling adventurous, experiment with different cheeses like cheddar or pepper jack for a unique twist. You can find the exact measurements at the bottom of the article, ready for printing!

How to Make Cheesy Korean Pancakes

Now that you have your ingredients ready, let’s dive into the fun part—making these Cheesy Korean Pancakes! Follow these simple steps, and you’ll be flipping pancakes like a pro in no time.

Step 1: Prepare the Batter

Start by grabbing a mixing bowl. Combine the all-purpose flour, water, salt, and garlic powder. Whisk it all together until the mixture is smooth and well combined. This batter is the foundation of your pancakes, so make sure there are no lumps. A smooth batter means a delightful texture!

Step 2: Add Cheese and Vegetables

Next, it’s time to bring in the flavor! Stir in the shredded mozzarella cheese, chopped green onions, and if you’re feeling adventurous, the optional bell pepper. Mix everything until it’s evenly distributed. The cheese will melt beautifully, creating that gooey goodness we all crave.

Step 3: Heat the Skillet

Heat a non-stick skillet over medium heat. Add a splash of vegetable oil, swirling it around to coat the bottom. This step is crucial for achieving that perfect golden crust. You want the oil to shimmer but not smoke—just the right balance!

Step 4: Cook the Pancakes

Pour about 1/2 cup of the batter into the skillet, spreading it into a circle about 1/2 inch thick. Cook for 3-4 minutes until the bottom is golden brown. Flip it over and cook for another 3-4 minutes until the other side is golden and the cheese is melted. The aroma will be irresistible!

Step 5: Repeat and Serve

Once your first pancake is done, remove it from the skillet and repeat with the remaining batter. Don’t forget to add more oil as needed to keep that golden crust coming! Serve your Cheesy Korean Pancakes warm, with a side of dipping sauce or soy sauce for an extra flavor kick.

Tips for Success

  • Make sure your skillet is hot enough before adding the batter for a crispy texture.
  • Don’t overcrowd the skillet; cook one or two pancakes at a time for even cooking.
  • For extra flavor, let the batter rest for 10 minutes before cooking.
  • Experiment with different vegetables to find your favorite combination.
  • Keep cooked pancakes warm in a low oven while you finish the batch.

Equipment Needed

  • Mixing bowl: A medium-sized bowl works best; a large one can be used if you prefer.
  • Whisk: A standard whisk is perfect, but a fork can do the job in a pinch.
  • Non-stick skillet: Essential for easy flipping; a cast-iron skillet can also work.
  • Spatula: A flat spatula helps in flipping the pancakes without breaking them.

Variations

  • Spicy Kick: Add a teaspoon of red pepper flakes to the batter for a fiery twist.
  • Cheese Lovers: Experiment with different cheeses like cheddar, pepper jack, or even feta for unique flavors.
  • Veggie Delight: Incorporate other vegetables such as grated zucchini, corn, or spinach for added nutrition and taste.
  • Gluten-Free Option: Substitute all-purpose flour with a gluten-free flour blend for a gluten-free version.
  • Herb Infusion: Mix in fresh herbs like cilantro or parsley to elevate the flavor profile.

Serving Suggestions

  • Dipping Sauce: Serve with soy sauce or a spicy dipping sauce for an extra flavor boost.
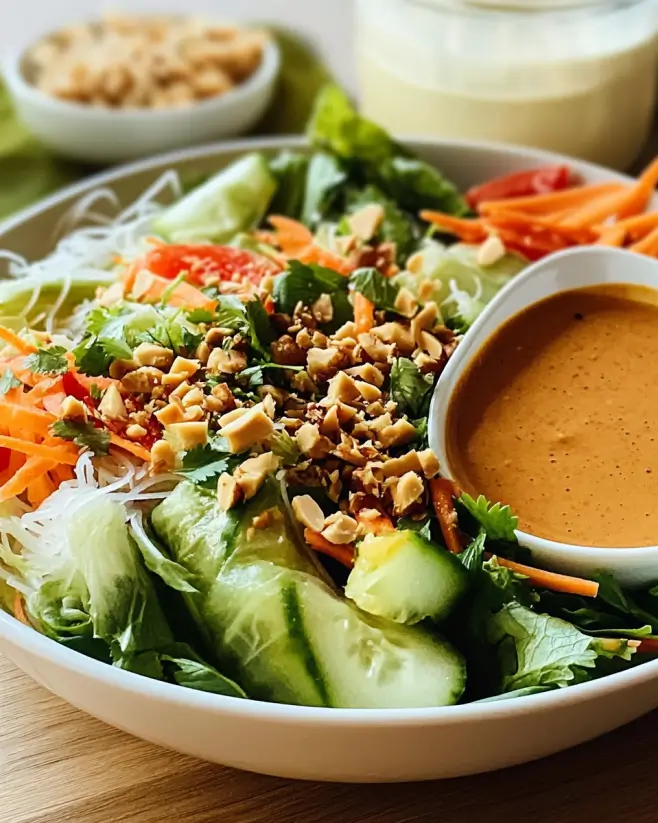
  • Fresh Salad: Pair with a light cucumber salad to balance the richness of the pancakes.
  • Drink Pairing: Enjoy with a cold beer or a refreshing iced tea.
  • Presentation: Garnish with extra green onions or sesame seeds for a pop of color.

FAQs about Cheesy Korean Pancakes

Can I make Cheesy Korean Pancakes ahead of time?

Absolutely! You can prepare the batter in advance and store it in the fridge for up to 24 hours. Just give it a good stir before cooking. This makes it a great option for meal prep!

What can I serve with Cheesy Korean Pancakes?

These savory pancakes pair wonderfully with soy sauce or a spicy dipping sauce. You can also serve them alongside a fresh salad or some pickled vegetables for a delightful contrast.

Can I freeze leftover pancakes?

Yes, you can freeze them! Just let the pancakes cool completely, then stack them with parchment paper in between. Store them in an airtight container for up to a month. Reheat in a skillet or microwave when you’re ready to enjoy!

What if I don’t have mozzarella cheese?

No worries! You can use any cheese you have on hand, like cheddar or pepper jack. Each cheese will bring its own unique flavor to the pancakes, so feel free to experiment!

Are Cheesy Korean Pancakes suitable for vegetarians?

Yes, they are! This recipe is vegetarian-friendly, making it a perfect choice for those looking for a meatless meal option. Enjoy the cheesy goodness without any guilt!

Final Thoughts

Cooking Cheesy Korean Pancakes is more than just preparing a meal; it’s about creating moments. The joy of flipping those golden pancakes, the aroma wafting through your kitchen, and the smiles around the table make it all worthwhile. Whether you’re enjoying them for breakfast, lunch, or a late-night snack, these pancakes bring comfort and satisfaction. Plus, they’re a fantastic way to get creative with flavors and ingredients. So, gather your loved ones, share a plate, and savor the deliciousness together. Trust me, once you make these, they’ll become a cherished recipe in your home!

Paul

Cheesy Korean Pancakes: A Delicious Recipe to Try!

Cheesy Korean Pancakes are a delicious and easy-to-make dish that combines the flavors of cheese and vegetables in a savory pancake.
Prep Time 10 minutes
Cook Time 20 minutes
Total Time 30 minutes
Servings: 4 servings
Course: Appetizer
Cuisine: Korean
Calories: 180

Ingredients
  

  • 1 cup all-purpose flour
  • 1 cup water
  • 1/2 teaspoon salt
  • 1/2 teaspoon garlic powder
  • 1/2 cup shredded mozzarella cheese
  • 1/2 cup chopped green onions
  • 1/4 cup chopped bell pepper optional
  • 1 tablespoon vegetable oil for frying

Method
 

  1. In a mixing bowl, combine the flour, water, salt, and garlic powder. Whisk until smooth and well combined.
  2. Stir in the shredded mozzarella cheese, chopped green onions, and bell pepper if using. Mix until evenly distributed.
  3. Heat a non-stick skillet over medium heat and add the vegetable oil, swirling to coat the bottom.
  4. Pour about 1/2 cup of the batter into the skillet, spreading it into a circle about 1/2 inch thick.
  5. Cook for 3-4 minutes until the bottom is golden brown, then flip and cook for another 3-4 minutes until the other side is golden and the cheese is melted.
  6. Remove from the skillet and repeat with the remaining batter, adding more oil as needed.
  7. Serve warm with dipping sauce or soy sauce on the side.

Notes

  • For a spicy kick, add a teaspoon of red pepper flakes to the batter.
  • Try using different types of cheese, such as cheddar or pepper jack, for varied flavors.

Korean Bean Sprout Salad: A Fresh and Flavorful Delight

Introduction to Korean Bean Sprout Salad

Growing up, my family often gathered around the table for meals that were as vibrant as they were delicious. One dish that always stood out was Korean Bean Sprout Salad. This fresh and flavorful delight is not just a side dish; it’s a quick solution for busy days or a light meal that impresses your loved ones. With its crunchy texture and savory dressing, it’s a perfect way to add a burst of flavor to any meal. Trust me, once you try this salad, it’ll become a staple in your kitchen!

Why You’ll Love This Korean Bean Sprout Salad

This Korean Bean Sprout Salad is a game-changer for anyone looking to whip up something quick and delicious. It takes just 15 minutes from start to finish, making it perfect for those hectic weeknights. The combination of fresh ingredients and a savory dressing creates a taste explosion that’s both satisfying and healthy. Plus, it’s vegan-friendly, so everyone can enjoy it without any fuss. What’s not to love?

Ingredients for Korean Bean Sprout Salad

Gathering the right ingredients is key to making a delicious Korean Bean Sprout Salad. Here’s what you’ll need:

  • Fresh bean sprouts: The star of the dish! They provide a crunchy texture and are packed with nutrients.
  • Sesame oil: This adds a rich, nutty flavor that elevates the salad. A little goes a long way!
  • Soy sauce: A staple in Korean cuisine, it brings a savory depth to the dressing.
  • Rice vinegar: This adds a touch of acidity, balancing the flavors beautifully.
  • Sugar: Just a hint of sweetness helps to round out the dressing. You can use honey or agave for a different twist.
  • Garlic: Minced garlic infuses the salad with a fragrant kick. Fresh is best, but you can use garlic powder in a pinch.
  • Sesame seeds: These tiny seeds add a delightful crunch and a nutty flavor. Toast them for an extra layer of taste!
  • Green onion: Finely chopped, they provide a fresh, mild onion flavor that complements the other ingredients.
  • Salt: Just a pinch to enhance all the flavors. Adjust to your taste!

For those looking to mix it up, consider adding thinly sliced cucumbers or carrots for extra crunch. If you like a bit of heat, a dash of gochugaru (Korean red pepper flakes) or a splash of sriracha can spice things up!

Exact quantities for these ingredients can be found at the bottom of the article, ready for printing. Happy cooking!

How to Make Korean Bean Sprout Salad

Creating a delicious Korean Bean Sprout Salad is a breeze! Follow these simple steps, and you’ll have a fresh, vibrant dish ready in no time. Let’s dive in!

Step 1: Blanch the Bean Sprouts

Start by bringing a pot of water to a rolling boil. Once it’s bubbling, toss in the fresh bean sprouts. Blanch them for about 2-3 minutes. You want them tender but still crisp. This quick cooking method helps maintain their bright color and crunch. After that, drain the sprouts and rinse them under cold water. This stops the cooking process and keeps them fresh!

Step 2: Prepare the Dressing

In a large mixing bowl, combine the sesame oil, soy sauce, rice vinegar, sugar, minced garlic, and a pinch of salt. Whisk everything together until the sugar dissolves. This dressing is the heart of the salad, balancing savory, sweet, and tangy flavors. Taste it! Adjust the seasoning if needed. A little more soy sauce or vinegar can make a big difference.

Step 3: Combine the Ingredients

Now, it’s time to bring it all together. Add the blanched bean sprouts to the bowl with the dressing. Gently toss them to ensure every sprout is coated in that delicious mixture. This step is crucial for flavor. You want each bite to be bursting with that savory goodness!

Step 4: Add Toppings

For the finishing touch, sprinkle sesame seeds and chopped green onions over the top. These not only add flavor but also a lovely presentation. The seeds provide a delightful crunch, while the green onions bring a fresh, mild onion flavor. Toss everything together one last time to combine.

Step 5: Let it Rest

Patience is key! Let the salad sit for at least 10 minutes before serving. This resting period allows the flavors to meld beautifully. Trust me, the wait is worth it. When you finally dig in, you’ll taste the harmony of flavors that have developed!

Tips for Success

  • Always rinse the bean sprouts thoroughly to remove any grit.
  • Don’t over-blanch the sprouts; they should remain crisp for the best texture.
  • Adjust the dressing to your taste; a little more vinegar can brighten the flavors.
  • For a more vibrant salad, use colorful toppings like shredded carrots or bell peppers.
  • Make it ahead of time; the salad tastes even better after sitting for a while!

Equipment Needed

  • Pot: A medium-sized pot for blanching the bean sprouts. A large saucepan works too.
  • Colander: For draining the sprouts after blanching. A fine mesh strainer can also do the job.
  • Mixing bowl: A large bowl for combining the dressing and sprouts. Any bowl will work!
  • Whisk or fork: For mixing the dressing. A spoon can work in a pinch.

Variations

  • Spicy Kick: Add a teaspoon of gochugaru or a splash of sriracha to the dressing for a fiery twist.
  • Crunchy Additions: Toss in thinly sliced cucumbers, carrots, or bell peppers for extra texture and color.
  • Protein Boost: Mix in some cooked tofu or edamame for a heartier salad that packs more protein.
  • Herb Infusion: Experiment with fresh herbs like cilantro or mint for a refreshing flavor profile.
  • Nutty Flavor: Incorporate chopped peanuts or cashews for an added crunch and nutty taste.

Serving Suggestions

  • Pair the salad with grilled chicken or fish for a balanced meal.
  • Serve it alongside steamed rice or quinoa for a wholesome side.
  • For drinks, try a light beer or a refreshing iced tea.
  • Garnish with extra sesame seeds for a beautiful presentation.

FAQs about Korean Bean Sprout Salad

Can I make Korean Bean Sprout Salad ahead of time?

Absolutely! This salad actually tastes better after sitting for a while. Just prepare it a few hours in advance and let it chill in the fridge. The flavors will meld beautifully, making each bite even more delicious.

Is Korean Bean Sprout Salad gluten-free?

Yes, it can be gluten-free! Just make sure to use gluten-free soy sauce or tamari in the dressing. This way, you can enjoy the salad without any worries.

What can I serve with Korean Bean Sprout Salad?

This salad pairs wonderfully with grilled meats, fish, or even as a side to a hearty rice bowl. It adds a refreshing crunch that complements rich dishes perfectly.

How long does Korean Bean Sprout Salad last in the fridge?

Stored in an airtight container, this salad can last up to 3 days in the fridge. Just give it a quick toss before serving to refresh the flavors!

Can I customize the dressing for Korean Bean Sprout Salad?

Definitely! Feel free to adjust the ingredients to suit your taste. Adding a bit of lime juice or swapping out the sugar for honey can create a unique twist on the classic dressing.

Final Thoughts

Making Korean Bean Sprout Salad is more than just preparing a dish; it’s about creating a moment of joy in your kitchen. The vibrant colors and fresh flavors bring a sense of excitement to any meal. Whether you’re enjoying it as a light lunch or serving it at a family gathering, this salad is sure to impress. Plus, it’s a fantastic way to introduce healthy eating without sacrificing taste. I hope this recipe becomes a beloved staple in your home, just as it has in mine. Happy cooking, and enjoy every crunchy bite!

Paul

Korean Bean Sprout Salad: A Fresh and Flavorful Delight

Korean Bean Sprout Salad is a fresh and flavorful dish that combines tender bean sprouts with a savory dressing, making it a perfect side dish or light meal.
Prep Time 10 minutes
Cook Time 5 minutes
Total Time 15 minutes
Servings: 4 servings
Course: Salad
Cuisine: Korean
Calories: 80

Ingredients
  

  • 2 cups fresh bean sprouts rinsed and drained
  • 1 tablespoon sesame oil
  • 1 tablespoon soy sauce
  • 1 teaspoon rice vinegar
  • 1 teaspoon sugar
  • 1 clove garlic minced
  • 1 teaspoon sesame seeds
  • 1 green onion finely chopped
  • Salt to taste

Method
 

  1. Bring a pot of water to a boil. Add the bean sprouts and blanch for 2-3 minutes until tender but still crisp. Drain and rinse under cold water to stop the cooking process.
  2. In a large mixing bowl, combine the sesame oil, soy sauce, rice vinegar, sugar, minced garlic, and a pinch of salt. Whisk until the sugar dissolves.
  3. Add the blanched bean sprouts to the bowl and toss gently to coat them in the dressing.
  4. Sprinkle the sesame seeds and chopped green onion over the top and toss again to combine.
  5. Let the salad sit for at least 10 minutes to allow the flavors to meld before serving.

Notes

  • For added crunch, include thinly sliced cucumbers or carrots.
  • To make it spicier, add a dash of gochugaru (Korean red pepper flakes) or a splash of sriracha to the dressing.

Matcha Pound Cake: Discover the Secrets to Perfection!

Introduction to Matcha Pound Cake

There’s something magical about the aroma of a freshly baked cake wafting through the kitchen. It takes me back to my childhood, where every birthday meant a special cake. Today, I want to share a delightful recipe for Matcha Pound Cake that’s not just a treat for the taste buds but also a feast for the eyes. This vibrant green cake is perfect for impressing your loved ones or simply enjoying a quiet moment with a cup of tea. With its moist crumb and rich flavor, it’s a quick solution for a busy day or a sweet ending to any meal.

Why You’ll Love This Matcha Pound Cake

This Matcha Pound Cake is a game-changer in the dessert world. It’s incredibly easy to whip up, making it perfect for those busy weeknights or last-minute gatherings. The vibrant green hue and unique flavor of matcha elevate it from ordinary to extraordinary. Plus, it’s a crowd-pleaser! Whether you’re serving it at a brunch or enjoying a slice with coffee, this cake is sure to impress.

Ingredients for Matcha Pound Cake

Gathering the right ingredients is the first step to creating a delicious Matcha Pound Cake. Here’s what you’ll need:

  • All-purpose flour: The backbone of your cake, providing structure and a tender crumb.
  • Baking powder: This leavening agent helps the cake rise, giving it that perfect fluffy texture.
  • Salt: A pinch enhances the flavors, balancing the sweetness of the cake.
  • Unsalted butter: Softened butter adds richness and moisture, making every bite melt in your mouth.
  • Granulated sugar: Sweetness is key! It not only sweetens but also contributes to the cake’s texture.
  • Large eggs: Eggs bind the ingredients together and add moisture, creating a tender crumb.
  • Matcha green tea powder: The star of the show! This vibrant powder infuses the cake with its unique flavor and stunning color.
  • Vanilla extract: A splash of vanilla rounds out the flavors, adding warmth to the cake.
  • Whole milk: This adds moisture and richness, ensuring your cake is tender and delicious.

For those looking to elevate their cake, consider adding chopped white chocolate or macadamia nuts for a delightful twist. You can also drizzle a simple glaze made from powdered sugar and milk over the cooled cake for an extra touch of sweetness. Exact measurements for these ingredients can be found at the bottom of the article, ready for printing!

How to Make Matcha Pound Cake

Step 1: Preheat and Prepare

Start by preheating your oven to 350°F (175°C). While it warms up, grab a 9×5-inch loaf pan and grease it with butter or cooking spray. Then, dust it lightly with flour. This ensures your Matcha Pound Cake releases easily after baking, giving you that perfect slice.

Step 2: Mix Dry Ingredients

In a medium bowl, whisk together the all-purpose flour, baking powder, and salt. This step is crucial as it evenly distributes the leavening agent and salt throughout the flour. A well-mixed dry blend sets the stage for a beautifully risen cake, so take your time here!

Step 3: Cream Butter and Sugar

In a large mixing bowl, cream the softened butter and granulated sugar together. Use an electric mixer on medium speed for about 3-4 minutes until the mixture is light and fluffy. This process incorporates air, which is essential for a tender, airy Matcha Pound Cake.

Step 4: Add Eggs and Matcha

Next, add the eggs one at a time, mixing well after each addition. This helps to create a smooth batter. Once all the eggs are in, add the matcha green tea powder and vanilla extract. Mix until everything is well combined, and the vibrant green color shines through!

Step 5: Combine Wet and Dry Ingredients

Gradually add the dry ingredients to the wet mixture, alternating with the whole milk. Start and end with the flour mixture. Mix gently until just combined. Overmixing can lead to a dense cake, so be careful! You want a smooth batter with a few lumps.

Step 6: Bake the Cake

Pour the batter into your prepared loaf pan, smoothing the top with a spatula. Bake in the preheated oven for 50-60 minutes. To check for doneness, insert a toothpick into the center. If it comes out clean, your Matcha Pound Cake is ready to shine!

Step 7: Cool and Serve

Once baked, allow the cake to cool in the pan for about 10 minutes. Then, carefully transfer it to a wire rack to cool completely. This step is vital for achieving that perfect texture. Slice and serve your Matcha Pound Cake when it’s cool, and enjoy every bite!

Tips for Success

  • Use room temperature ingredients for better mixing and a smoother batter.
  • Don’t skip the greasing and flouring of the pan; it ensures easy removal.
  • Check your cake a few minutes before the timer goes off to avoid overbaking.
  • Let the cake cool completely before slicing for cleaner cuts.
  • Store leftovers in an airtight container to keep it fresh and moist.

Equipment Needed

  • 9×5-inch loaf pan: Essential for shaping your cake. A round cake pan works in a pinch.
  • Mixing bowls: Use a large bowl for wet ingredients and a medium one for dry. Any sturdy bowls will do.
  • Electric mixer: Ideal for creaming butter and sugar. A whisk can work if you’re feeling adventurous!
  • Spatula: Perfect for scraping down the sides of the bowl and smoothing the batter.
  • Wire rack: Great for cooling the cake. A plate can substitute if you don’t have one.

Variations

  • Chocolate Matcha Pound Cake: Add ½ cup of cocoa powder to the dry ingredients for a delightful chocolate twist.
  • Gluten-Free Option: Substitute all-purpose flour with a gluten-free blend to make this cake suitable for gluten-sensitive friends.
  • Citrus Zest: Incorporate the zest of one lemon or orange into the batter for a refreshing citrus flavor that complements the matcha.
  • Nutty Delight: Fold in ½ cup of chopped walnuts or almonds for added texture and a nutty flavor.
  • Vegan Version: Replace eggs with flax eggs and use plant-based butter and milk for a delicious vegan alternative.

Serving Suggestions

  • Pair your Matcha Pound Cake with a dollop of whipped cream for a creamy contrast.
  • Serve alongside a cup of green tea or a rich coffee to enhance the flavors.
  • For a beautiful presentation, dust the top with powdered sugar or drizzle with a simple glaze.
  • Add fresh berries on the side for a pop of color and freshness.

FAQs about Matcha Pound Cake

What is matcha, and why is it used in this cake?

Matcha is a finely ground powder made from specially grown green tea leaves. It adds a unique flavor and vibrant color to the cake, making it not just delicious but visually appealing as well. Plus, it’s packed with antioxidants!

Can I use other types of flour for this Matcha Pound Cake?

Absolutely! You can experiment with almond flour or a gluten-free blend. Just keep in mind that the texture may vary slightly, so adjustments in baking time might be necessary.

How should I store leftover Matcha Pound Cake?

To keep your cake fresh, store it in an airtight container at room temperature for up to three days. For longer storage, wrap it tightly in plastic wrap and freeze it for up to a month.

Can I make this cake ahead of time?

Yes! This Matcha Pound Cake actually tastes better the next day as the flavors meld together. Just make sure to store it properly to maintain its moisture.

What can I serve with Matcha Pound Cake?

This cake pairs wonderfully with a cup of green tea or coffee. You can also serve it with whipped cream, fresh berries, or a drizzle of glaze for an extra touch of sweetness.

Final Thoughts

Creating this Matcha Pound Cake is more than just baking; it’s an experience that brings joy to both the cook and those who get to enjoy it. The vibrant green color and unique flavor make it a standout dessert that sparks conversation and delight. Whether you’re sharing it with friends or savoring a quiet moment alone, each slice is a reminder of the simple pleasures in life. So, roll up your sleeves, embrace the process, and let the aroma of this cake fill your kitchen. Trust me, the smiles it brings will be worth every moment spent in the kitchen!

Paul

Matcha Pound Cake: Discover the Secrets to Perfection!

A delicious and vibrant Matcha Pound Cake that combines the rich flavors of matcha green tea with a moist and tender crumb.
Prep Time 15 minutes
Cook Time 1 hour
Total Time 1 hour 15 minutes
Servings: 8 servings
Course: Dessert
Cuisine: Japanese
Calories: 210

Ingredients
  

  • 1 ½ cups all-purpose flour
  • 1 teaspoon baking powder
  • ½ teaspoon salt
  • ½ cup unsalted butter softened
  • 1 cup granulated sugar
  • 3 large eggs
  • 2 tablespoons matcha green tea powder
  • 1 teaspoon vanilla extract
  • ½ cup whole milk

Method
 

  1. Preheat your oven to 350°F (175°C). Grease and flour a 9x5-inch loaf pan.
  2. In a medium bowl, whisk together the flour, baking powder, and salt. Set aside.
  3. In a large mixing bowl, cream the softened butter and granulated sugar together until light and fluffy, about 3-4 minutes.
  4. Add the eggs one at a time, mixing well after each addition. Then, add the matcha powder and vanilla extract, mixing until combined.
  5. Gradually add the dry ingredients to the wet mixture, alternating with the whole milk. Start and end with the flour mixture, mixing until just combined.
  6. Pour the batter into the prepared loaf pan and smooth the top. Bake for 50-60 minutes, or until a toothpick inserted in the center comes out clean.
  7. Allow the cake to cool in the pan for 10 minutes, then transfer it to a wire rack to cool completely.

Notes

  • This recipe serves 8.
  • For a richer flavor, consider adding ½ cup of chopped white chocolate or macadamia nuts to the batter.
  • You can also drizzle a simple glaze made from powdered sugar and milk over the cooled cake for added sweetness.

Scallion Chicken Stir-Fry: A Quick and Flavorful Recipe!

Introduction to Scallion Chicken Stir-Fry

After a long day, the last thing I want is to spend hours in the kitchen. That’s where my go-to recipe, Scallion Chicken Stir-Fry, comes into play. It’s quick, flavorful, and perfect for those busy weeknights when you want something delicious without the fuss. The vibrant scallions add a fresh crunch, while the tender chicken soaks up all the savory goodness. This dish not only satisfies your hunger but also impresses anyone lucky enough to share the table with you. Let’s dive into this culinary adventure that’s as easy as it is delightful!

Why You’ll Love This Scallion Chicken Stir-Fry

This Scallion Chicken Stir-Fry is a lifesaver for anyone juggling a busy schedule. It’s not just quick to prepare; it’s bursting with flavor that will make your taste buds dance. The combination of tender chicken and fresh scallions creates a delightful harmony that’s hard to resist. Plus, it’s versatile enough to adapt to your pantry staples, making it a reliable choice for any night of the week.

Ingredients for Scallion Chicken Stir-Fry

Gathering the right ingredients is key to making a delicious Scallion Chicken Stir-Fry. Here’s what you’ll need:

  • Boneless, skinless chicken thighs: These are juicy and flavorful, perfect for stir-frying. You can also use chicken breasts if you prefer a leaner option.
  • Soy sauce: This adds a savory depth to the dish. For a gluten-free version, swap it out for tamari.
  • Sesame oil: A little goes a long way in adding that nutty flavor. It’s a staple in Asian cooking.
  • Cornstarch: This helps to tenderize the chicken and gives it a nice, crispy texture when cooked.
  • Vegetable oil: Used for frying, it has a high smoke point, making it ideal for stir-frying.
  • Scallions: These green beauties add a fresh crunch and a mild onion flavor. They’re the star of this dish!
  • Garlic: Minced garlic brings a fragrant aroma and enhances the overall taste.
  • Fresh ginger: This adds a zesty kick that complements the chicken beautifully.
  • Red pepper flakes (optional): If you like a bit of heat, sprinkle these in for an extra kick.
  • Salt and pepper: Essential for seasoning, adjust to your taste.
  • Cooked rice or noodles: Serve your stir-fry over these for a complete meal.

For exact measurements, check the bottom of the article where you can find everything listed for easy printing. Feel free to get creative with your ingredients based on what you have on hand!

How to Make Scallion Chicken Stir-Fry

Now that you have your ingredients ready, let’s get cooking! This Scallion Chicken Stir-Fry is straightforward and quick, making it perfect for a weeknight dinner. Follow these simple steps, and you’ll have a delicious meal on the table in no time.

Step 1: Marinate the Chicken

Start by placing the bite-sized chicken pieces in a large bowl. Add the soy sauce, sesame oil, cornstarch, and a pinch of salt and pepper. Mix everything well until the chicken is evenly coated. Marinating is crucial here; it infuses the chicken with flavor and helps tenderize it. Let it sit for at least 15 minutes. If you have more time, marinating longer will enhance the taste even more!

Step 2: Cook the Chicken

Heat the vegetable oil in a large skillet or wok over medium-high heat. Once the oil is shimmering, add the marinated chicken. Cook for about 5-7 minutes, stirring frequently. You want the chicken to be browned and cooked through. To ensure even cooking, spread the chicken out in a single layer as much as possible. This way, every piece gets that lovely sear!

Step 3: Add Aromatics

Once the chicken is cooked, it’s time to add the flavor boosters! Toss in the minced garlic, ginger, and red pepper flakes if you’re feeling adventurous. Stir-fry these aromatics for about 1-2 minutes until they become fragrant. Timing is key here; adding them too early can burn the garlic, which would ruin the dish. You want that perfect balance of flavor!

Step 4: Incorporate Scallions

Now, it’s time for the star of the show: the scallions! Add them to the skillet and stir-fry for another 2 minutes. You want them to be tender yet still vibrant green. This quick cooking time keeps their crunch and fresh flavor intact, making your dish visually appealing and delicious.

Step 5: Serve

Finally, it’s time to serve your Scallion Chicken Stir-Fry! Spoon it over a bed of cooked rice or noodles for a complete meal. Don’t forget to garnish with extra scallions if you like! Presentation matters, so arrange it nicely on the plate. A colorful dish is always more inviting, and trust me, your family or guests will appreciate the effort!

Tips for Success

  • Prep all your ingredients before starting to cook. It makes the process smoother and more enjoyable.
  • Don’t overcrowd the pan when cooking the chicken. This ensures even browning and prevents steaming.
  • Feel free to customize with your favorite vegetables like bell peppers or snap peas for added nutrition.
  • Use a high-quality soy sauce for the best flavor.
  • Keep an eye on the scallions; you want them tender but still bright green!

Equipment Needed

  • Large skillet or wok: A non-stick skillet works well too for easy cleanup.
  • Mixing bowl: Any bowl will do, but a larger one makes mixing easier.
  • Spatula or wooden spoon: Essential for stirring and flipping the chicken.
  • Measuring cups and spoons: Handy for precise ingredient measurements.

Variations

  • Vegetable-Loaded: Add bell peppers, broccoli, or snap peas for a colorful and nutritious twist.
  • Spicy Kick: Increase the red pepper flakes or add sliced fresh chili peppers for a fiery version.
  • Herb Infusion: Toss in fresh basil or cilantro at the end for an aromatic finish.
  • Low-Carb Option: Serve over cauliflower rice instead of traditional rice or noodles for a lighter meal.
  • Protein Swap: Substitute chicken with shrimp, tofu, or beef for a different flavor profile.

Serving Suggestions

  • Pair your Scallion Chicken Stir-Fry with steamed jasmine rice or lo mein noodles for a satisfying meal.
  • Serve with a side of crispy spring rolls or a fresh cucumber salad for added crunch.
  • For drinks, consider a light beer or a refreshing iced tea to complement the flavors.
  • Garnish with extra scallions or sesame seeds for a beautiful presentation.

FAQs about Scallion Chicken Stir-Fry

Can I use chicken breasts instead of thighs for this Scallion Chicken Stir-Fry?

Absolutely! Chicken breasts are a leaner option and will work just fine. Just be mindful that they may cook a bit faster, so keep an eye on them to avoid drying out.

What can I substitute for soy sauce in this recipe?

If you’re looking for a gluten-free alternative, tamari is a great choice. You can also use coconut aminos for a slightly sweeter flavor without the soy.

How can I make this dish spicier?

For a spicy kick, increase the amount of red pepper flakes or add fresh sliced chili peppers. You can also drizzle some sriracha on top before serving for an extra punch!

Can I add more vegetables to my Scallion Chicken Stir-Fry?

<pDefinitely! Feel free to toss in bell peppers, broccoli, or snap peas. Just add them when you incorporate the scallions to ensure they stay crisp and vibrant.

How do I store leftovers of this Scallion Chicken Stir-Fry?

Store any leftovers in an airtight container in the fridge for up to three days. Reheat in a skillet over medium heat for the best texture. Enjoy your delicious meal again!

Final Thoughts

Cooking Scallion Chicken Stir-Fry is more than just preparing a meal; it’s about creating a moment of joy in your kitchen. The vibrant colors and enticing aromas fill your home, making it feel warm and inviting. This dish is a reminder that delicious food doesn’t have to be complicated. With just a few simple ingredients, you can whip up something that delights the senses and brings loved ones together. Whether it’s a weeknight dinner or a special occasion, this stir-fry is sure to impress. So grab your skillet and let the flavors unfold!

Paul

Scallion Chicken Stir-Fry: A Quick and Flavorful Recipe!

A quick and flavorful Scallion Chicken Stir-Fry recipe that is perfect for a weeknight dinner.
Prep Time 15 minutes
Cook Time 10 minutes
Total Time 25 minutes
Servings: 4 servings
Course: Main Dish
Cuisine: Asian
Calories: 320

Ingredients
  

  • 2 pounds boneless skinless chicken thighs, cut into bite-sized pieces
  • 1/4 cup soy sauce
  • 2 tablespoons sesame oil
  • 1 tablespoon cornstarch
  • 1 tablespoon vegetable oil
  • 1 bunch scallions chopped (about 1 cup)
  • 4 cloves garlic minced
  • 1 tablespoon fresh ginger minced
  • 1/4 teaspoon red pepper flakes optional
  • Salt and pepper to taste
  • Cooked rice or noodles for serving

Method
 

  1. In a large bowl, combine the chicken pieces, soy sauce, sesame oil, cornstarch, and a pinch of salt and pepper. Mix well and let marinate for at least 15 minutes.
  2. Heat the vegetable oil in a large skillet or wok over medium-high heat. Add the marinated chicken and cook for about 5-7 minutes, stirring frequently, until the chicken is browned and cooked through.
  3. Add the minced garlic, ginger, and red pepper flakes (if using) to the skillet. Stir-fry for an additional 1-2 minutes until fragrant.
  4. Toss in the chopped scallions and cook for another 2 minutes until they are tender but still vibrant green.
  5. Serve the scallion chicken over cooked rice or noodles.

Notes

  • For a gluten-free version, use tamari instead of soy sauce.
  • Add vegetables like bell peppers, broccoli, or snap peas for extra nutrition and color.

Crab Bombs: Discover the Irresistible Recipe Today!

Introduction to Crab Bombs

Crab Bombs are more than just a delightful appetizer; they’re a ticket to flavor town! I remember the first time I tried these little gems at a friend’s gathering. The moment I bit into one, I was hooked. The creamy, cheesy crab filling paired with a crispy exterior is simply irresistible. Whether you’re hosting a game night or looking for a quick solution for a busy day, these bite-sized wonders are sure to impress. Plus, they’re easy to whip up, making them perfect for any occasion. Let’s dive into this delicious recipe together!

Why You’ll Love This Crab Bombs

Crab Bombs are the ultimate crowd-pleaser. They’re quick to prepare, taking just 40 minutes from start to finish. The combination of lump crab meat and creamy cheese creates a flavor explosion that’s hard to resist. Plus, they’re baked, not fried, so you can enjoy them guilt-free. Whether you’re entertaining guests or treating yourself, these little bites are sure to bring smiles all around!

Ingredients for Crab Bombs

Gathering the right ingredients is key to making these Crab Bombs a hit. Here’s what you’ll need:

  • Lump crab meat: The star of the show! Fresh or canned, it brings that sweet, oceanic flavor.
  • Cream cheese: This adds a rich, creamy texture that binds everything together beautifully.
  • Shredded cheddar cheese: For a sharp, tangy kick that complements the crab perfectly.
  • Green onions: These add a fresh crunch and a mild onion flavor that brightens the dish.
  • Worcestershire sauce: A splash of this adds depth and umami, enhancing the overall taste.
  • Garlic powder: A must for that aromatic punch that elevates the flavor profile.
  • Old Bay seasoning: This classic seafood seasoning brings a unique blend of spices that’s simply irresistible.
  • Black pepper: Just a pinch for a subtle heat that balances the richness.
  • Breadcrumbs: These create a crispy coating that adds texture and crunch to each bite.
  • Mayonnaise: It keeps the mixture moist and adds a creamy richness.
  • Lemon juice: A squeeze of this brightens the flavors and adds a refreshing zing.
  • Fresh parsley (optional): A sprinkle of this adds a pop of color and freshness to your presentation.

For those looking to mix things up, consider substituting the cheddar with pepper jack for a spicy twist. You can find all the exact measurements at the bottom of the article, ready for printing!

How to Make Crab Bombs

Creating Crab Bombs is a straightforward process that yields delicious results. Follow these simple steps, and you’ll have a plate of mouthwatering appetizers ready in no time!

Step 1: Preheat the Oven

Start by preheating your oven to 375°F. This step is crucial because it ensures even cooking. A hot oven helps the Crab Bombs achieve that golden-brown exterior while keeping the inside creamy and delicious.

Step 2: Mix the Ingredients

In a large mixing bowl, combine the lump crab meat, cream cheese, shredded cheddar, green onions, Worcestershire sauce, garlic powder, Old Bay seasoning, and black pepper. Mix gently with a spatula or your hands. Be careful not to break up the crab meat too much; you want those lovely chunks to shine through!

Step 3: Form the Crab Balls

Now it’s time to shape the mixture into balls. Use your hands to scoop out about 1 to 1.5 inches of the mixture. Roll it into a ball, making sure it’s compact but not too tight. This size is perfect for popping in your mouth and ensures they cook evenly.

Step 4: Coat with Breadcrumbs

Next, pour the breadcrumbs into a shallow dish. Roll each crab ball in the breadcrumbs until fully coated. This step is essential for achieving that crispy texture on the outside. It adds a delightful crunch that contrasts beautifully with the creamy filling.

Step 5: Prepare for Baking

Arrange the coated crab bombs on a greased baking sheet. Make sure to leave some space between each one. This allows hot air to circulate, ensuring they bake evenly and don’t stick together.

Step 6: Drizzle with Sauce

In a small bowl, mix the mayonnaise and lemon juice. Drizzle this mixture over the crab bombs before baking. This adds moisture and a zesty flavor that elevates the overall taste. Trust me; it’s a game-changer!

Step 7: Bake to Perfection

Place the baking sheet in the preheated oven and bake for 20-25 minutes. Keep an eye on them! You want them to be golden brown and heated through. If you like an extra crispy finish, broil them for an additional 2-3 minutes at the end.

Step 8: Cool and Serve

Once they’re out of the oven, let the Crab Bombs cool for a few minutes. This helps them set and makes them easier to handle. If you’re using fresh parsley, sprinkle it on top for a pop of color before serving. Enjoy your delicious creations!

Tips for Success

  • Use fresh lump crab meat for the best flavor; canned works too, but fresh is unbeatable.
  • Don’t overmix the crab mixture; you want those lovely chunks to shine through.
  • Chill the formed crab balls for 15 minutes before baking to help them hold their shape.
  • Experiment with different cheeses for unique flavors; pepper jack adds a nice kick!
  • Serve with a tangy dipping sauce for an extra flavor boost.

Equipment Needed

  • Mixing bowl: A large bowl for combining ingredients. A sturdy pot can work in a pinch.
  • Baking sheet: A standard baking sheet for even cooking. Use a cast iron skillet for a crispy finish.
  • Measuring cups and spoons: Essential for accuracy. Use a kitchen scale if you prefer weight measurements.
  • Spatula: For gentle mixing. A wooden spoon is a great alternative.
  • Cookie scoop: For uniform crab balls. Your hands will do just fine if you don’t have one!

Variations

  • Spicy Crab Bombs: Add a teaspoon of hot sauce to the mixture for a fiery kick that will wake up your taste buds.
  • Cheesy Crab Bombs: Swap out the cheddar for pepper jack or gouda for a richer, more complex flavor.
  • Herbed Crab Bombs: Mix in fresh dill or chives for an aromatic twist that complements the crab beautifully.
  • Gluten-Free Option: Use gluten-free breadcrumbs to keep these delicious bites suitable for gluten-sensitive friends.
  • Vegetarian Version: Replace crab meat with a mixture of artichokes and spinach for a tasty, meat-free alternative.

Serving Suggestions

  • Pair with a crisp salad: A light arugula or mixed greens salad complements the richness of the Crab Bombs.
  • Serve with dipping sauces: Try a tangy cocktail sauce or a zesty remoulade for added flavor.
  • Drink pairing: A chilled white wine or a light beer enhances the seafood experience.
  • Presentation: Arrange on a platter with lemon wedges and fresh parsley for a vibrant touch.

FAQs about Crab Bombs

Can I use imitation crab meat instead of lump crab meat?

Absolutely! While lump crab meat offers the best flavor and texture, imitation crab can work in a pinch. Just keep in mind that the taste will be different, but it’s still a tasty option for Crab Bombs.

How do I store leftover Crab Bombs?

Store any leftovers in an airtight container in the fridge for up to three days. To reheat, pop them back in the oven at 350°F until warmed through. This keeps them crispy and delicious!

Can I freeze Crab Bombs before baking?

Yes! You can freeze the formed crab balls before baking. Just place them on a baking sheet to freeze individually, then transfer to a freezer bag. When you’re ready to bake, cook them straight from the freezer, adding a few extra minutes to the baking time.

What can I serve with Crab Bombs?

Crab Bombs pair wonderfully with a variety of sides. Consider serving them with a fresh salad, some tangy dipping sauces, or even a light pasta dish. They’re versatile and can complement many flavors!

Are Crab Bombs gluten-free?

Yes, they can be gluten-free! Just make sure to use gluten-free breadcrumbs. This way, everyone can enjoy these delicious seafood bites without worry.

Final Thoughts

Making Crab Bombs is more than just cooking; it’s about creating moments. The joy of pulling a tray of golden, crispy bites from the oven is unmatched. Each bite bursts with flavor, bringing smiles to friends and family alike. Whether it’s a casual gathering or a special occasion, these little delights are sure to steal the show. Plus, the satisfaction of crafting something delicious from scratch is a reward in itself. So, roll up your sleeves, gather your ingredients, and let the magic of Crab Bombs transform your next meal into a memorable feast!

Paul

Crab Bombs: Discover the Irresistible Recipe Today!

Crab Bombs are delicious bite-sized appetizers made with lump crab meat and a creamy cheese mixture, baked to golden perfection.
Prep Time 15 minutes
Cook Time 25 minutes
Total Time 40 minutes
Servings: 6 servings
Course: Appetizer
Cuisine: American
Calories: 210

Ingredients
  

  • 1 pound lump crab meat
  • 1 cup cream cheese softened
  • 1/2 cup shredded cheddar cheese
  • 1/4 cup green onions finely chopped
  • 1 tablespoon Worcestershire sauce
  • 1 teaspoon garlic powder
  • 1 teaspoon Old Bay seasoning
  • 1/2 teaspoon black pepper
  • 1/2 cup breadcrumbs
  • 1/4 cup mayonnaise
  • 1 tablespoon lemon juice
  • 1/4 cup fresh parsley chopped (optional)
  • Cooking spray or oil for baking

Method
 

  1. Preheat your oven to 375°F.
  2. In a large mixing bowl, combine the lump crab meat, cream cheese, cheddar cheese, green onions, Worcestershire sauce, garlic powder, Old Bay seasoning, and black pepper. Mix gently until well combined.
  3. Using your hands, form the mixture into small balls, about 1 to 1.5 inches in diameter.
  4. Place the breadcrumbs in a shallow dish and roll each crab ball in the breadcrumbs until fully coated.
  5. Place the coated crab balls on a greased baking sheet.
  6. In a small bowl, mix together the mayonnaise and lemon juice, then drizzle this mixture over the crab bombs.
  7. Bake in the preheated oven for 20-25 minutes or until golden brown and heated through.
  8. If desired, broil for an additional 2-3 minutes for extra crispiness.
  9. Remove from the oven and let cool for a few minutes before serving. Garnish with fresh parsley if using.

Notes

  • For a spicier kick, add a teaspoon of hot sauce to the crab mixture.
  • You can substitute the cheddar cheese with pepper jack for a bolder flavor.

Lemon Panna Cotta: Delight Your Taste Buds Today!

Introduction to Lemon Panna Cotta

There’s something magical about a dessert that feels both indulgent and light at the same time. Lemon Panna Cotta is just that—a creamy delight that dances on your taste buds with a refreshing zing. I remember the first time I tried it at a quaint Italian restaurant, and I was instantly hooked. It’s the perfect solution for a busy day when you want to impress your loved ones without spending hours in the kitchen. With just a few simple ingredients, you can whip up this elegant treat that’s sure to leave everyone asking for seconds.

Why You’ll Love This Lemon Panna Cotta

This Lemon Panna Cotta is a game-changer for dessert lovers. It’s incredibly easy to make, requiring minimal effort and just a handful of ingredients. In about 15 minutes of prep, you can create a stunning dish that looks like it came straight from a fancy restaurant. The bright, zesty flavor of lemon combined with the creamy texture makes it a refreshing treat that’s perfect for any occasion. Trust me, your taste buds will thank you!

Ingredients for Lemon Panna Cotta

Gathering the right ingredients is the first step to creating your Lemon Panna Cotta masterpiece. Here’s what you’ll need:

  • Heavy cream: This is the base of your panna cotta, providing that rich, creamy texture.
  • Whole milk: It lightens the cream while still keeping the dessert luscious.
  • Granulated sugar: Sweetens the mixture, balancing the tartness of the lemon.
  • Pure vanilla extract: Adds a warm, aromatic flavor that complements the lemon beautifully.
  • Lemon zest: The bright, fragrant outer peel of the lemon infuses the dessert with vibrant citrus notes.
  • Fresh lemon juice: This is where the magic happens! It brings a refreshing tang that elevates the panna cotta.
  • Unflavored gelatin powder: This is the secret to achieving that perfect, wobbly texture.
  • Cold water: Used to bloom the gelatin, ensuring it dissolves properly.

For those looking to mix things up, consider these optional ingredients:

  • Greek yogurt: Swap half of the heavy cream for Greek yogurt for a lighter version that still tastes divine.
  • Fruit puree: Top your panna cotta with raspberry or strawberry puree for an extra burst of flavor and color.

Exact measurements for these ingredients can be found at the bottom of the article, ready for you to print and take to the kitchen!

How to Make Lemon Panna Cotta

Creating Lemon Panna Cotta is a delightful journey that’s easier than you might think. Follow these simple steps, and you’ll have a creamy, zesty dessert that will impress anyone. Let’s dive in!

Step 1: Bloom the Gelatin

Start by sprinkling the gelatin over the cold water in a small bowl. Let it sit for about 5 minutes. This process, known as blooming, ensures the gelatin dissolves smoothly later. Trust me, this step is crucial for that perfect texture!

Step 2: Heat the Cream Mixture

In a medium saucepan, combine the heavy cream, whole milk, granulated sugar, vanilla extract, and lemon zest. Heat this mixture over medium heat, stirring occasionally. You want it hot but not boiling. The aroma of vanilla and lemon will fill your kitchen, making it hard to resist sneaking a taste!

Step 3: Combine Gelatin and Lemon Juice

Once the cream mixture is hot, remove it from the heat. Stir in the bloomed gelatin until it’s fully dissolved. Then, add the fresh lemon juice. This is where the magic happens! The tangy lemon juice brightens the dessert, making it refreshing and delicious.

Step 4: Pour and Chill

Carefully pour the mixture into individual serving cups or ramekins. Allow them to cool to room temperature. Once cooled, cover with plastic wrap and refrigerate for at least 4 hours, or until set. Patience is key here, but the wait will be worth it!

Step 5: Serve and Garnish

When you’re ready to serve, run a knife around the edge of the panna cotta. Invert it onto a plate, or simply serve it in the cups. For a finishing touch, garnish with additional lemon zest or fresh berries. This adds a pop of color and flavor that will wow your guests!

Tips for Success

  • Make sure to bloom the gelatin properly; it’s essential for a smooth texture.
  • Use fresh lemons for the best flavor; bottled juice just doesn’t compare.
  • Don’t rush the chilling process; letting it set for at least 4 hours is key.
  • Experiment with garnishes like mint leaves or edible flowers for a stunning presentation.
  • For a fun twist, try adding a splash of limoncello to the mixture!

Equipment Needed

  • Medium saucepan: A sturdy pot for heating the cream mixture. A non-stick option works well.
  • Small bowl: For blooming the gelatin. Any mixing bowl will do.
  • Whisk: Essential for mixing ingredients smoothly. A fork can work in a pinch.
  • Measuring cups and spoons: For accurate ingredient measurements. A kitchen scale is a great alternative.
  • Ramekins or serving cups: Perfect for presentation. Any small dish can substitute.

Variations

  • Coconut Lemon Panna Cotta: Substitute half of the heavy cream with coconut milk for a tropical twist.
  • Herbed Lemon Panna Cotta: Infuse the cream with fresh herbs like basil or thyme for a unique flavor profile.
  • Chocolate Lemon Panna Cotta: Add melted dark chocolate to the mixture for a rich, decadent dessert.
  • Vegan Lemon Panna Cotta: Use coconut cream and agar-agar instead of gelatin for a plant-based version.
  • Spiced Lemon Panna Cotta: Incorporate a pinch of cardamom or ginger for a warm, aromatic touch.

Serving Suggestions

  • Pair your Lemon Panna Cotta with a light, crisp white wine like Pinot Grigio for a refreshing contrast.
  • Serve alongside a simple fruit salad to enhance the citrus notes.
  • For a stunning presentation, add a sprig of fresh mint or edible flowers on top.
  • Drizzle with a berry coulis for a splash of color and flavor.

FAQs about Lemon Panna Cotta

Can I make Lemon Panna Cotta ahead of time?

Absolutely! Lemon Panna Cotta is perfect for making in advance. Just prepare it the day before your event and let it chill overnight. This allows the flavors to meld beautifully, making it even more delicious!

What can I use instead of gelatin?

If you’re looking for a vegetarian option, try using agar-agar instead of gelatin. It’s derived from seaweed and works similarly to create that lovely wobbly texture. Just follow the package instructions for the right amount.

How do I store leftover Lemon Panna Cotta?

Store any leftovers in the refrigerator, covered with plastic wrap. It should stay fresh for up to three days. Just remember to enjoy it chilled for the best experience!

Can I add other flavors to my Lemon Panna Cotta?

Definitely! You can infuse your panna cotta with other flavors like lavender, ginger, or even a splash of limoncello for an adult twist. Just be sure to balance the flavors with the lemon for a harmonious dessert.

Is Lemon Panna Cotta gluten-free?

Yes! Lemon Panna Cotta is naturally gluten-free, making it a great dessert option for those with gluten sensitivities. Just double-check any garnishes or toppings to ensure they are also gluten-free.

Final Thoughts

Creating Lemon Panna Cotta is more than just making a dessert; it’s about crafting a moment of joy. The creamy texture and zesty flavor transport you to sunlit Italian piazzas, where every bite feels like a celebration. Whether you’re sharing it with family or impressing friends at a dinner party, this delightful treat brings smiles all around. Plus, the simplicity of the recipe means you can focus on what truly matters—enjoying good food and great company. So, roll up your sleeves and dive into this culinary adventure; your taste buds will thank you for it!

Paul

Lemon Panna Cotta: Delight Your Taste Buds Today!

Lemon Panna Cotta is a creamy and refreshing dessert infused with the bright flavors of lemon, perfect for any occasion.
Prep Time 15 minutes
Cook Time 10 minutes
Total Time 4 hours 25 minutes
Servings: 6 servings
Course: Dessert
Cuisine: Italian
Calories: 290

Ingredients
  

  • 2 cups heavy cream
  • 1 cup whole milk
  • 3/4 cup granulated sugar
  • 2 teaspoons pure vanilla extract
  • 2 tablespoons lemon zest about 2 lemons
  • 1/4 cup fresh lemon juice
  • 2 1/4 teaspoons unflavored gelatin powder
  • 3 tablespoons cold water

Method
 

  1. In a small bowl, sprinkle the gelatin over the cold water and let it sit for about 5 minutes to bloom.
  2. In a medium saucepan, combine the heavy cream, whole milk, sugar, vanilla extract, and lemon zest. Heat over medium heat, stirring occasionally, until the mixture is hot but not boiling.
  3. Remove the saucepan from heat and stir in the bloomed gelatin until fully dissolved. Add the fresh lemon juice and mix well.
  4. Pour the mixture into individual serving cups or ramekins. Allow to cool to room temperature, then cover with plastic wrap and refrigerate for at least 4 hours or until set.
  5. To serve, run a knife around the edge of the panna cotta and invert onto a plate, or serve directly in the cups. Garnish with additional lemon zest or fresh berries if desired.

Notes

  • For a lighter version, substitute half of the heavy cream with Greek yogurt.
  • Add a layer of fruit puree, such as raspberry or strawberry, on top of the panna cotta before serving for an extra burst of flavor.

Crispy Chicken Katsu Bowls with Tonkatsu Sauce made easy!

Introduction to Crispy Chicken Katsu Bowls with Tonkatsu Sauce

There’s something undeniably comforting about a warm bowl of Crispy Chicken Katsu Bowls with Tonkatsu Sauce.

This dish is not just a meal; it’s a hug in a bowl, perfect for those busy weeknights when you want to impress your loved ones without spending hours in the kitchen.

With its crunchy chicken, fluffy rice, and tangy sauce, it’s a delightful combination that satisfies both the palate and the soul.

Whether you’re a seasoned cook or just starting out, this recipe is your ticket to a delicious dinner that everyone will love.

Why You’ll Love This Crispy Chicken Katsu Bowls with Tonkatsu Sauce

Crispy Chicken Katsu Bowls with Tonkatsu Sauce are a game-changer for any home cook.

They come together in just 35 minutes, making them perfect for busy weeknights.

The satisfying crunch of the chicken paired with the savory sauce creates a flavor explosion that will have everyone asking for seconds.

Plus, it’s a versatile dish that can easily adapt to your family’s tastes, ensuring everyone leaves the table happy.

Ingredients for Crispy Chicken Katsu Bowls with Tonkatsu Sauce

To create these mouthwatering Crispy Chicken Katsu Bowls with Tonkatsu Sauce, you’ll need a handful of simple ingredients that pack a punch of flavor.

– **Boneless, skinless chicken breasts**: The star of the show! They’re tender and cook quickly, making them perfect for frying.

– **Panko breadcrumbs**: These Japanese-style breadcrumbs give the chicken that irresistible crunch. If you can’t find panko, regular breadcrumbs will work, but the texture won’t be quite the same.

– **All-purpose flour**: This helps the breadcrumbs stick to the chicken, creating a beautiful coating.

– **Large eggs**: They act as a binding agent, ensuring the panko adheres well to the chicken.

– **Salt and black pepper**: Essential for seasoning, they enhance the chicken’s natural flavors.

– **Garlic powder and onion powder**: These add depth and a savory kick to the breading.

– **Cayenne pepper (optional)**: For those who like a little heat, this spice adds a subtle kick without overwhelming the dish.

– **Vegetable oil**: Used for frying, it should have a high smoke point. Canola or peanut oil are great alternatives.

– **Cooked white rice**: The perfect base for your bowl, providing a fluffy texture that balances the crispy chicken.

– **Shredded cabbage**: Adds a refreshing crunch and a pop of color. You can substitute with coleslaw mix for added flavor.

– **Sliced green onions**: These provide a fresh, mild onion flavor that brightens up the dish.

– **Tonkatsu sauce**: A sweet and tangy sauce that ties everything together. If you can’t find it, a mix of ketchup and Worcestershire sauce can work in a pinch.

For exact measurements, check the bottom of the article where you can find everything listed for easy printing.

How to Make Crispy Chicken Katsu Bowls with Tonkatsu Sauce

Prepare the Chicken

To start, take your boneless, skinless chicken breasts and place them between two sheets of plastic wrap.

Using a meat mallet or a rolling pin, pound the chicken to an even thickness of about 1/2 inch.

This step is crucial for ensuring the chicken cooks evenly and stays juicy.

Don’t be shy; give it a good whack!

Once done, set the chicken aside and get ready for the next steps.

Set Up the Breading Station

Now, let’s create a breading station that will make your chicken katsu shine.

In one shallow dish, mix together the all-purpose flour, salt, black pepper, garlic powder, onion powder, and cayenne pepper.

In a second dish, beat the large eggs until they’re well combined.

Finally, pour the panko breadcrumbs into a third dish.

This setup will make the breading process smooth and efficient, so you can focus on frying.

Bread the Chicken

It’s time to coat that chicken!

Start by dredging each chicken breast in the flour mixture, shaking off any excess.

Next, dip it into the beaten eggs, letting any extra drip off.

Finally, coat the chicken thoroughly with the panko breadcrumbs, pressing gently to ensure they stick.

This triple-layered approach gives you that signature crispy texture that makes chicken katsu so irresistible.

Fry the Chicken

Heat about 1/4 inch of vegetable oil in a large skillet over medium heat.

You want the oil to reach around 350°F for perfect frying.

Carefully add the breaded chicken breasts to the hot oil, frying for about 4-5 minutes on each side.

Look for a golden-brown color and ensure the chicken is cooked through.

Once done, transfer the chicken to a paper towel-lined plate to drain any excess oil.

Assemble the Bowls

Now comes the fun part—assembling your bowls!

Start by dividing the cooked white rice among four bowls, creating a fluffy base.

Top each bowl with sliced chicken katsu, followed by a generous handful of shredded cabbage.

Drizzle with tonkatsu sauce for that sweet and tangy flavor.

Finish with a sprinkle of sliced green onions for a fresh touch.

Your Crispy Chicken Katsu Bowls are ready to be devoured!

Tips for Success

  • Make sure your oil is hot enough before frying; a drop of water should sizzle when it hits the oil.
  • Don’t overcrowd the skillet; fry in batches if necessary to maintain the oil temperature.
  • Let the chicken rest for a few minutes after frying to keep it juicy.
  • Experiment with different sauces or toppings to customize your bowls.
  • For extra crunch, consider double-breading the chicken.

Equipment Needed

  • Large skillet: A non-stick or cast-iron skillet works best for frying.
  • Meat mallet or rolling pin: To pound the chicken evenly.
  • Shallow dishes: For setting up your breading station.
  • Paper towels: Essential for draining excess oil after frying.
  • Cooking thermometer: To check oil temperature for perfect frying.

Variations

  • For a gluten-free option, use gluten-free panko breadcrumbs and flour.
  • Try swapping chicken for pork cutlets for a traditional tonkatsu experience.
  • Add a layer of avocado slices for a creamy texture that complements the crunch.
  • Incorporate different vegetables like shredded carrots or radishes for added color and nutrition.
  • Experiment with spicy mayo or sriracha for a kick instead of tonkatsu sauce.

Serving Suggestions

  • Pair your Crispy Chicken Katsu Bowls with a side of miso soup for a comforting meal.
  • Serve with pickled ginger to add a tangy contrast to the rich flavors.
  • A chilled Japanese beer or green tea complements the dish beautifully.
  • Garnish with sesame seeds for an extra touch of elegance.

FAQs about Crispy Chicken Katsu Bowls with Tonkatsu Sauce

Can I make Crispy Chicken Katsu Bowls with Tonkatsu Sauce ahead of time?

Absolutely! You can prepare the chicken and bread it in advance. Just fry it right before serving for that fresh, crispy texture. Store the cooked chicken in an airtight container in the fridge for up to two days.

What can I substitute for tonkatsu sauce?

If you can’t find tonkatsu sauce, a mix of ketchup and Worcestershire sauce works well. You can also try a blend of soy sauce, sugar, and a splash of vinegar for a similar flavor profile.

Is this recipe suitable for meal prep?

Yes! These bowls are perfect for meal prep. Just keep the components separate until you’re ready to eat. This way, the chicken stays crispy, and the rice doesn’t get soggy.

Can I bake the chicken instead of frying it?

Definitely! For a lighter option, bake the breaded chicken at 400°F for about 20-25 minutes, flipping halfway through. It won’t be as crispy as frying, but it’s a healthier alternative.

What sides pair well with Crispy Chicken Katsu Bowls?

Consider serving your bowls with a side of miso soup or a simple cucumber salad. Pickled ginger also adds a refreshing contrast to the rich flavors of the katsu.

Final Thoughts

Cooking Crispy Chicken Katsu Bowls with Tonkatsu Sauce is more than just preparing a meal; it’s about creating a moment of joy.

The satisfying crunch of the chicken, the fluffy rice, and the tangy sauce come together to form a dish that warms the heart.

Whether you’re sharing it with family or enjoying it solo after a long day, this recipe brings a sense of accomplishment and comfort.

So roll up your sleeves, embrace the process, and savor every bite.

Trust me, once you try this dish, it will become a staple in your kitchen!

Paul

Crispy Chicken Katsu Bowls with Tonkatsu Sauce made easy!

Crispy Chicken Katsu Bowls with Tonkatsu Sauce made easy!
Prep Time 15 minutes
Cook Time 20 minutes
Total Time 35 minutes
Servings: 4 servings
Course: Main Course
Cuisine: Japanese
Calories: 550

Ingredients
  

  • 2 boneless skinless chicken breasts (about 1 pound total)
  • 1 cup panko breadcrumbs
  • 1/2 cup all-purpose flour
  • 2 large eggs
  • 1 teaspoon salt
  • 1/2 teaspoon black pepper
  • 1/2 teaspoon garlic powder
  • 1/2 teaspoon onion powder
  • 1/4 teaspoon cayenne pepper optional
  • Vegetable oil for frying
  • 2 cups cooked white rice
  • 1 cup shredded cabbage
  • 1/4 cup sliced green onions
  • 1/4 cup tonkatsu sauce

Method
 

  1. Begin by preparing the chicken breasts. Place each chicken breast between two pieces of plastic wrap and pound them to an even thickness of about 1/2 inch using a meat mallet or rolling pin.
  2. Set up a breading station: In one shallow dish, combine the flour, salt, black pepper, garlic powder, onion powder, and cayenne pepper. In a second dish, beat the eggs. In a third dish, add the panko breadcrumbs.
  3. Dredge each chicken breast in the flour mixture, shaking off any excess. Dip it into the beaten eggs, allowing any excess to drip off, then coat it thoroughly with the panko breadcrumbs.
  4. In a large skillet, heat about 1/4 inch of vegetable oil over medium heat. Once the oil is hot (around 350°F), carefully add the breaded chicken breasts. Fry for about 4-5 minutes on each side, or until golden brown and cooked through.
  5. Once cooked, transfer the chicken to a paper towel-lined plate to drain excess oil. Let it rest for a few minutes before slicing it into strips.
  6. To assemble the bowls, divide the cooked rice among four bowls. Top each bowl with sliced chicken katsu, shredded cabbage, and a drizzle of tonkatsu sauce. Garnish with sliced green onions.

Notes

  • For a lighter option, you can bake the breaded chicken at 400°F for about 20-25 minutes, flipping halfway through.
  • Try adding pickled ginger or a side of miso soup for an authentic Japanese experience.

Balsamic Glazed Tofu with Roasted Vegetables Recipe Unveiled!

Introduction to Balsamic Glazed Tofu with Roasted Vegetables

There’s something magical about a dish that combines simplicity with flavor, and that’s exactly what you’ll find in this Balsamic Glazed Tofu with Roasted Vegetables.

Whether you’re racing against the clock after a long day or looking to impress friends at a weekend gathering, this recipe is your go-to solution.

The rich, tangy glaze perfectly complements the tender tofu and vibrant veggies, creating a meal that’s not just healthy but also incredibly satisfying.

Trust me, once you try this, it’ll become a staple in your kitchen rotation!

Why You’ll Love This Balsamic Glazed Tofu with Roasted Vegetables

This Balsamic Glazed Tofu with Roasted Vegetables is a game-changer for busy weeknights.

It’s quick to prepare, taking just 45 minutes from start to finish, and the flavors are out of this world.

The combination of sweet and tangy balsamic glaze elevates the dish, making it a hit with everyone at the table.

Plus, it’s a healthy option that doesn’t skimp on taste—what’s not to love?

Ingredients for Balsamic Glazed Tofu with Roasted Vegetables

Creating this delightful dish starts with gathering the right ingredients.

Here’s what you’ll need:

  • Firm tofu: The star of the show! It absorbs flavors beautifully and provides a satisfying texture.
  • Balsamic vinegar: This adds a rich, tangy sweetness that elevates the dish. Look for high-quality vinegar for the best flavor.
  • Soy sauce: A savory element that enhances the umami profile of the tofu. You can use low-sodium soy sauce if you prefer.
  • Maple syrup: This natural sweetener balances the acidity of the balsamic vinegar, creating a harmonious glaze.
  • Olive oil: Used for both marinating the tofu and roasting the vegetables, it adds richness and helps with browning.
  • Garlic powder: A must-have for that aromatic kick. Fresh garlic works too, but powder is convenient.
  • Onion powder: This adds depth to the marinade without overpowering the other flavors.
  • Black pepper: A simple seasoning that brings a bit of heat and enhances the overall taste.
  • Salt: Essential for bringing out the flavors in the dish. Adjust to your taste preference.
  • Mixed vegetables: I recommend bell peppers, zucchini, and broccoli for a colorful and nutritious mix. Feel free to swap in your favorites like carrots or asparagus!
  • Cooked rice or quinoa: These serve as a hearty base for your dish, soaking up the delicious glaze.

For those who want to get creative, consider adding sesame seeds or chopped green onions as a garnish.

You can find the exact measurements for each ingredient at the bottom of the article, ready for printing!

How to Make Balsamic Glazed Tofu with Roasted Vegetables

Creating this Balsamic Glazed Tofu with Roasted Vegetables is a straightforward process that yields delicious results.

Let’s break it down step by step.

Step 1: Preheat the Oven

Start by preheating your oven to 400°F (200°C).

This step is crucial because it ensures that your tofu and vegetables roast evenly, developing that perfect golden-brown color and crispy texture.

A hot oven helps lock in flavors and moisture, making your dish even more delightful.

Step 2: Prepare the Tofu

Next, take your block of firm tofu and drain it well.

Press it gently between paper towels to remove excess moisture.

Once it’s dry, cut the tofu into 1-inch cubes.

This size allows for even marinating and cooking, ensuring every bite is packed with flavor.

Step 3: Mix the Marinade

In a separate bowl, whisk together the balsamic vinegar, soy sauce, maple syrup, olive oil, garlic powder, onion powder, black pepper, and salt.

Each ingredient plays a role: the balsamic vinegar adds tang, while the maple syrup brings sweetness.

This marinade is what transforms the tofu into a flavor powerhouse.

Step 4: Marinate the Tofu

Pour the marinade over the cubed tofu and gently toss to coat.

Let it marinate for at least 15 minutes.

This waiting time is essential; it allows the tofu to absorb all those delicious flavors, making each bite a taste sensation.

Step 5: Prepare the Vegetables

While the tofu is soaking up the marinade, it’s time to prepare your vegetables.

Choose a colorful mix like bell peppers, zucchini, and broccoli.

Chop them into bite-sized pieces and toss them in a bowl with olive oil, salt, and pepper.

This simple seasoning enhances their natural flavors and ensures they roast beautifully.

Step 6: Roast the Tofu and Vegetables

Spread the marinated tofu and seasoned vegetables on a baking sheet lined with parchment paper.

Roast them in the preheated oven for 25-30 minutes.

Make sure to flip everything halfway through for even cooking.

You want the tofu to be golden and the vegetables tender yet slightly crisp.

Step 7: Serve and Enjoy

Once everything is roasted to perfection, it’s time to serve!

Spoon the balsamic glazed tofu and roasted vegetables over a bed of cooked rice or quinoa.

Drizzle any remaining marinade from the baking sheet on top for an extra flavor boost.

For a finishing touch, sprinkle sesame seeds or chopped green onions for added crunch and color.

Dig in and enjoy the delightful medley of flavors!

Tips for Success

  • Press the tofu well to remove excess moisture; this helps it absorb the marinade better.
  • Don’t skip the marinating time; even 15 minutes makes a difference in flavor.
  • Use a variety of colorful vegetables for a visually appealing dish.
  • Keep an eye on the roasting time; ovens can vary, so adjust as needed.
  • Experiment with different marinades or vegetables to keep things exciting!

Equipment Needed

  • Baking sheet: A standard sheet works, but a rimmed one prevents spills.
  • Parchment paper: This makes cleanup easy; aluminum foil is a good alternative.
  • Mixing bowls: Use any size; just ensure they’re large enough for tossing ingredients.
  • Whisk: A fork can do the job if you don’t have one.
  • Knife and cutting board: Essential for chopping tofu and veggies.

Variations

  • Spicy Kick: Add a teaspoon of red pepper flakes to the marinade for a spicy twist that will wake up your taste buds.
  • Herb Infusion: Incorporate fresh herbs like thyme or rosemary into the marinade for an aromatic flavor boost.
  • Different Proteins: Swap tofu for tempeh or seitan for a different texture and flavor profile while keeping it plant-based.
  • Seasonal Veggies: Use seasonal vegetables like asparagus in spring or butternut squash in fall for a fresh take on the dish.
  • Gluten-Free Option: Ensure your soy sauce is gluten-free or substitute with tamari for a gluten-free version.

Serving Suggestions

  • Rice or Quinoa: Serve the balsamic glazed tofu over fluffy rice or quinoa to soak up the delicious glaze.
  • Fresh Salad: Pair with a light green salad for a refreshing contrast.
  • Wine Pairing: A crisp white wine, like Sauvignon Blanc, complements the dish beautifully.
  • Garnish: Top with fresh herbs or a squeeze of lemon for added brightness.

FAQs about Balsamic Glazed Tofu with Roasted Vegetables

Can I use other types of tofu for this recipe?

Absolutely! While firm tofu works best for this Balsamic Glazed Tofu with Roasted Vegetables, you can also use extra-firm tofu for a denser texture. Just avoid silken tofu, as it won’t hold up during cooking.

How do I store leftovers?

Store any leftovers in an airtight container in the fridge for up to three days. Reheat in the oven or microwave before serving. The flavors will continue to meld, making it even tastier!

Can I make this dish ahead of time?

Yes! You can marinate the tofu a day in advance and store it in the fridge. Just roast the tofu and vegetables when you’re ready to serve. It’s a great meal prep option!

What can I substitute for balsamic vinegar?

If you don’t have balsamic vinegar, you can use red wine vinegar or apple cider vinegar. Just keep in mind that the flavor will be slightly different, but still delicious!

Is this recipe suitable for meal prep?

Definitely! This Balsamic Glazed Tofu with Roasted Vegetables is perfect for meal prep. It holds up well in the fridge and can be easily portioned out for quick lunches or dinners throughout the week.

Final Thoughts

Cooking this Balsamic Glazed Tofu with Roasted Vegetables is more than just preparing a meal; it’s about creating a moment of joy in your kitchen.

The vibrant colors and enticing aromas fill your space, making it feel alive.

Each bite is a delightful balance of flavors, reminding you that healthy eating can be both satisfying and delicious.

Whether you’re sharing it with family or enjoying a quiet dinner alone, this dish brings warmth and comfort.

So, roll up your sleeves, embrace the process, and let this recipe become a cherished part of your culinary journey!

Paul

Balsamic Glazed Tofu with Roasted Vegetables Recipe Unveiled!

A delicious and healthy recipe for Balsamic Glazed Tofu with Roasted Vegetables, perfect for a nutritious meal.
Prep Time 15 minutes
Cook Time 30 minutes
Total Time 45 minutes
Servings: 4 servings
Course: Main Dish
Cuisine: Vegan
Calories: 220

Ingredients
  

  • 1 block 14 oz firm tofu, drained and pressed
  • 1/4 cup balsamic vinegar
  • 2 tablespoons soy sauce
  • 2 tablespoons maple syrup
  • 1 tablespoon olive oil
  • 1 teaspoon garlic powder
  • 1 teaspoon onion powder
  • 1/2 teaspoon black pepper
  • 1/2 teaspoon salt
  • 2 cups mixed vegetables bell peppers, zucchini, and broccoli, chopped
  • 1 tablespoon olive oil for roasting
  • Cooked rice or quinoa for serving

Method
 

  1. Preheat your oven to 400°F (200°C).
  2. Cut the pressed tofu into 1-inch cubes and place them in a large bowl.
  3. In a separate bowl, whisk together balsamic vinegar, soy sauce, maple syrup, olive oil, garlic powder, onion powder, black pepper, and salt.
  4. Pour the marinade over the tofu cubes and gently toss to coat. Let it marinate for at least 15 minutes.
  5. While the tofu is marinating, prepare the vegetables. In another bowl, toss the chopped mixed vegetables with 1 tablespoon of olive oil, salt, and pepper.
  6. Spread the marinated tofu and the seasoned vegetables on a baking sheet lined with parchment paper.
  7. Roast in the preheated oven for 25-30 minutes, flipping halfway through, until the tofu is golden and the vegetables are tender.
  8. Serve the balsamic glazed tofu over cooked rice or quinoa, drizzling any remaining marinade from the baking sheet over the top.

Notes

  • For added flavor, sprinkle sesame seeds or chopped green onions on top before serving.
  • Substitute the mixed vegetables with your favorites, such as carrots, asparagus, or sweet potatoes, to customize the dish.

Creamy Mushroom Udon: A Delicious Comfort Recipe

Introduction to Creamy Mushroom Udon

There’s something magical about a bowl of Creamy Mushroom Udon that instantly warms the soul. Maybe it’s the rich, velvety sauce or the comforting embrace of udon noodles. I remember the first time I tried this dish; it felt like a hug on a chilly evening. This recipe is perfect for those busy days when you crave something delicious yet quick to whip up. Whether you’re impressing friends or treating yourself, this creamy delight is sure to become a favorite. Let’s dive into the world of flavors and textures that make this dish so special!

Why You’ll Love This Creamy Mushroom Udon

This Creamy Mushroom Udon is a game-changer for your weeknight dinners. It’s incredibly easy to make, taking just 30 minutes from start to finish. The rich, savory flavors will have your taste buds dancing, while the creamy texture wraps around each udon noodle like a warm blanket. Plus, it’s a vegetarian dish that doesn’t skimp on satisfaction, making it perfect for everyone at the table. You’ll be coming back for seconds!

Ingredients for Creamy Mushroom Udon

Gathering the right ingredients is the first step to creating your Creamy Mushroom Udon masterpiece. Here’s what you’ll need:

  • Udon noodles: These thick, chewy noodles are the star of the dish. They soak up the creamy sauce beautifully.
  • Olive oil: A splash of this adds richness and helps sauté the vegetables to perfection.
  • Onion: Diced onion brings a sweet, aromatic base to the dish, enhancing the overall flavor.
  • Garlic: Minced garlic adds a punch of flavor that elevates the dish to new heights.
  • Mushrooms: Sliced cremini or button mushrooms provide an earthy depth. Feel free to mix varieties for added texture.
  • Vegetable broth: This liquid gold infuses the sauce with savory goodness. You can use homemade or store-bought.
  • Heavy cream: The key to that luscious, creamy texture. For a lighter option, consider coconut milk or a plant-based cream.
  • Soy sauce: A splash of soy sauce adds umami and a hint of saltiness to balance the creaminess.
  • Sesame oil: Just a drizzle brings a nutty aroma that complements the mushrooms beautifully.
  • Salt and pepper: Essential for seasoning, these staples help bring all the flavors together.
  • Green onions: Sliced for garnish, they add a fresh crunch and a pop of color.
  • Sesame seeds: A sprinkle of these on top adds a delightful crunch and visual appeal.

For those looking to customize, consider adding cooked protein like chicken, shrimp, or tofu for a heartier meal. The exact quantities for each ingredient are available at the bottom of the article for easy printing.

How to Make Creamy Mushroom Udon

Now that you have all your ingredients ready, let’s get cooking! This Creamy Mushroom Udon comes together in just a few simple steps. Follow along, and soon you’ll be savoring a bowl of this comforting dish.

Step 1: Cook the Udon Noodles

Start by boiling a pot of water. Once it’s bubbling, add the udon noodles. Cook them according to the package instructions, usually around 8-10 minutes. You want them tender but still slightly chewy. Once done, drain the noodles and set them aside. This will be the base of your creamy creation!

Step 2: Sauté the Onions

In a large skillet, heat the olive oil over medium heat. Add the diced onion and sauté it until it turns translucent, about 5 minutes. This step is crucial; the onions will add a sweet, aromatic foundation to your dish. Stir occasionally to prevent them from browning too much.

Step 3: Add Garlic and Mushrooms

Next, stir in the minced garlic and sliced mushrooms. Cook them together for about 5-7 minutes. You want the mushrooms to become tender and browned, releasing their earthy flavors. The aroma will fill your kitchen, making it hard to resist sneaking a taste!

Step 4: Simmer with Broth

Pour in the vegetable broth and bring the mixture to a gentle simmer. Let it cook for about 3 minutes. This step allows the flavors to meld beautifully. You’ll notice the broth starting to thicken slightly, which is just what you want.

Step 5: Create the Creamy Sauce

Now, reduce the heat to low. Stir in the heavy cream, soy sauce, and sesame oil. Season with salt and pepper to taste. Allow the sauce to thicken for about 3-5 minutes. The creaminess will envelop the mushrooms, creating a rich sauce that’s simply irresistible.

Step 6: Combine Noodles and Sauce

It’s time to bring it all together! Add the cooked udon noodles to the skillet, tossing them gently to coat in the creamy sauce. Cook for an additional 2 minutes until everything is heated through. The noodles should be luxuriously coated, ready to be devoured.

Step 7: Serve and Garnish

Serve your Creamy Mushroom Udon hot, garnished with sliced green onions and a sprinkle of sesame seeds. This final touch adds a fresh crunch and a pop of color. Enjoy every bite of this comforting dish that’s sure to impress!

Tips for Success

  • Don’t overcook the udon noodles; they should be al dente for the best texture.
  • Feel free to experiment with different mushrooms for varied flavors.
  • For extra creaminess, let the sauce simmer a bit longer.
  • Always taste and adjust seasoning before serving.
  • Garnish just before serving to keep the green onions fresh and vibrant.

Equipment Needed

  • Large pot: For boiling the udon noodles. A deep skillet works too.
  • Skillet: A non-stick skillet is ideal for sautéing and simmering.
  • Wooden spoon: Perfect for stirring without scratching your skillet.
  • Measuring cups: For accurate ingredient portions, though eyeballing works in a pinch!

Variations

  • Protein Boost: Add cooked chicken, shrimp, or tofu for a heartier meal that packs a protein punch.
  • Spicy Kick: Incorporate a dash of chili oil or red pepper flakes for a spicy twist that elevates the flavor profile.
  • Vegetable Medley: Toss in some spinach, bok choy, or bell peppers for added nutrition and color.
  • Gluten-Free Option: Substitute udon noodles with gluten-free noodles or zucchini noodles for a lighter, gluten-free version.
  • Herb Infusion: Experiment with fresh herbs like basil or cilantro to add a fresh, aromatic touch to the dish.

Serving Suggestions

  • Side Salad: Pair with a light cucumber and sesame salad for a refreshing contrast.
  • Drink Pairing: Enjoy with a chilled glass of sake or a crisp white wine.
  • Presentation: Serve in deep bowls, allowing the creamy sauce to shine, and sprinkle extra sesame seeds for flair.

FAQs about Creamy Mushroom Udon

Can I make Creamy Mushroom Udon ahead of time?

Absolutely! You can prepare the sauce and cook the udon noodles in advance. Just store them separately in the fridge. When you’re ready to eat, reheat the sauce and toss in the noodles for a quick meal.

What type of mushrooms work best in this recipe?

Creamy Mushroom Udon is versatile! While cremini and button mushrooms are fantastic, you can also try shiitake or portobello for a deeper flavor. Mix and match for a fun twist!

Can I make this dish vegan?

Yes! To make a vegan version of Creamy Mushroom Udon, simply substitute the heavy cream with coconut milk or a plant-based cream. Ensure your vegetable broth is also vegan-friendly.

How can I add more protein to my Creamy Mushroom Udon?

For a heartier meal, consider adding cooked chicken, shrimp, or tofu. Just toss them in during the last few minutes of cooking to warm them through.

What can I serve with Creamy Mushroom Udon?

This dish pairs wonderfully with a light side salad or steamed vegetables. A chilled glass of sake or a crisp white wine complements the flavors beautifully!

Final Thoughts

Cooking Creamy Mushroom Udon is more than just preparing a meal; it’s about creating a moment of joy. The rich, creamy sauce enveloping the udon noodles brings comfort that feels like home. Each bite is a delightful blend of flavors and textures, perfect for sharing with loved ones or enjoying solo after a long day. This dish is a reminder that comfort food doesn’t have to be complicated. With just a few ingredients and simple steps, you can whip up a bowl of happiness that warms the heart and satisfies the soul. Dive in and savor every moment!

Paul

Creamy Mushroom Udon: A Delicious Comfort Recipe

Creamy Mushroom Udon is a delicious and comforting dish featuring udon noodles in a rich and creamy mushroom sauce.
Prep Time 10 minutes
Cook Time 20 minutes
Total Time 30 minutes
Servings: 4 servings
Course: Main Course
Cuisine: Japanese
Calories: 450

Ingredients
  

  • 8 ounces udon noodles
  • 2 tablespoons olive oil
  • 1 medium onion diced
  • 3 cloves garlic minced
  • 8 ounces mushrooms sliced (such as cremini or button)
  • 1 cup vegetable broth
  • 1 cup heavy cream
  • 1 tablespoon soy sauce
  • 1 teaspoon sesame oil
  • Salt and pepper to taste
  • 2 green onions sliced (for garnish)
  • Sesame seeds for garnish

Method
 

  1. Cook the udon noodles according to package instructions. Drain and set aside.
  2. In a large skillet, heat the olive oil over medium heat. Add the diced onion and sauté until translucent, about 5 minutes.
  3. Stir in the minced garlic and sliced mushrooms. Cook for another 5-7 minutes until the mushrooms are tender and browned.
  4. Pour in the vegetable broth and bring to a simmer. Let it cook for about 3 minutes.
  5. Reduce the heat to low and stir in the heavy cream, soy sauce, and sesame oil. Season with salt and pepper to taste. Allow the sauce to thicken for about 3-5 minutes.
  6. Add the cooked udon noodles to the skillet, tossing to coat them in the creamy sauce. Cook for an additional 2 minutes until heated through.
  7. Serve hot, garnished with sliced green onions and sesame seeds.

Notes

  • For a lighter version, substitute heavy cream with coconut milk or a plant-based cream alternative.
  • Add cooked protein such as chicken, shrimp, or tofu for a heartier meal.

Spring Roll Salad with Creamy Peanut Dressing is Amazing!

Introduction to Spring Roll Salad with Creamy Peanut Dressing

There’s something magical about a dish that feels light yet satisfying, and that’s exactly what you get with this Spring Roll Salad with Creamy Peanut Dressing. I remember the first time I tried a spring roll; the crunch of fresh veggies and the rich, nutty flavor of peanut sauce danced on my palate. This salad captures that essence, making it a perfect quick solution for busy days or a delightful dish to impress your loved ones. With vibrant colors and a burst of flavor, it’s not just a meal; it’s a celebration of freshness and taste.

Why You’ll Love This Spring Roll Salad with Creamy Peanut Dressing

This Spring Roll Salad with Creamy Peanut Dressing is a game-changer for anyone seeking a quick, healthy meal. It comes together in just 15 minutes, making it perfect for those hectic weeknights. The combination of fresh vegetables and a rich, creamy dressing creates a flavor explosion that’s both satisfying and guilt-free. Plus, it’s versatile enough to suit any dietary preference, ensuring everyone at the table will love it!

Ingredients for Spring Roll Salad with Creamy Peanut Dressing

Gathering the right ingredients is key to making this Spring Roll Salad with Creamy Peanut Dressing shine. Here’s what you’ll need:

  • Green cabbage: Shredded for a crunchy base, it adds a refreshing crunch and vibrant color.
  • Carrots: Grated for sweetness and texture, they bring a lovely orange hue to the mix.
  • Red bell pepper: Thinly sliced, it adds a sweet, juicy bite and a pop of color.
  • Cucumber: Also thinly sliced, it contributes a cool, crisp element that balances the flavors.
  • Cooked shrimp or chicken (optional): For those who want a protein boost, these options add heartiness to the salad.
  • Fresh cilantro: Chopped for a burst of herbal freshness, it elevates the dish with its unique flavor.
  • Green onions: Sliced for a mild onion flavor, they add a nice crunch and color contrast.
  • Creamy peanut butter: The star of the dressing, it provides richness and a nutty flavor that ties everything together.
  • Soy sauce: Adds umami depth to the dressing, enhancing the overall flavor profile.
  • Rice vinegar: A splash of acidity that brightens the dressing and balances the richness of the peanut butter.
  • Honey: For a touch of sweetness, it complements the savory elements beautifully.
  • Sesame oil: Just a hint adds a nutty aroma and flavor, making the dressing even more irresistible.
  • Water: To thin the dressing to your desired consistency, ensuring it coats the salad perfectly.

For those looking to customize, feel free to swap in your favorite veggies or even add tofu for a vegetarian option. You can find the exact quantities for each ingredient at the bottom of the article, ready for printing!

How to Make Spring Roll Salad with Creamy Peanut Dressing

Creating this Spring Roll Salad with Creamy Peanut Dressing is a breeze. Follow these simple steps, and you’ll have a vibrant, delicious dish ready in no time. Let’s dive in!

Step 1: Prepare the Vegetables

Start by washing all your vegetables thoroughly. Freshness is key here! Shred the green cabbage using a sharp knife or a mandoline for even slices. Grate the carrots for a sweet crunch. Thinly slice the red bell pepper and cucumber, ensuring they’re bite-sized. The colors of these veggies will make your salad pop, so don’t skimp on variety!

Step 2: Mix the Salad Ingredients

In a large bowl, combine the shredded cabbage, grated carrots, sliced red bell pepper, and cucumber. If you’re adding shrimp or chicken, toss those in too. Gently mix everything together with your hands or a large spoon. Be careful not to bruise the veggies; you want to keep that delightful crunch!

Step 3: Make the Creamy Peanut Dressing

In a separate small bowl, whisk together the creamy peanut butter, soy sauce, rice vinegar, honey, and sesame oil. This is where the magic happens! If the dressing feels too thick, add water one tablespoon at a time until it reaches your desired consistency. You want it smooth and pourable, but still rich in flavor.

Step 4: Combine Salad and Dressing

Drizzle the creamy peanut dressing over your salad mixture. Toss everything together gently until the veggies are well coated. If you have time, let the salad chill in the refrigerator for about 30 minutes. This allows the flavors to meld beautifully, making each bite even more delicious!

Tips for Success

  • Use fresh, crisp vegetables for the best flavor and texture.
  • Don’t skip the chilling step; it enhances the flavors significantly.
  • Adjust the dressing thickness to your liking by adding water gradually.
  • For extra crunch, top with crushed peanuts or sesame seeds.
  • Feel free to experiment with different proteins or veggies based on your preferences.

Equipment Needed

  • Large mixing bowl: A sturdy bowl for combining all your salad ingredients.
  • Small bowl: For whisking together the creamy peanut dressing.
  • Sharp knife: Essential for chopping and slicing your veggies.
  • Cutting board: A safe surface for all your prep work.
  • Whisk or fork: To mix the dressing smoothly.

Variations

  • For a vegetarian option, swap shrimp or chicken for tofu or chickpeas for added protein.
  • Add sliced avocado for a creamy texture and healthy fats.
  • Incorporate mango or pineapple for a sweet tropical twist.
  • Use different greens like kale or spinach for a unique flavor profile.
  • Spice it up with sliced jalapeños or a dash of sriracha in the dressing.

Serving Suggestions

  • Pair the salad with grilled chicken or shrimp for a heartier meal.
  • Serve alongside spring rolls or dumplings for a complete Asian-inspired feast.
  • Enjoy with a refreshing iced tea or a light beer to complement the flavors.
  • Garnish with extra cilantro or lime wedges for a vibrant presentation.

FAQs about Spring Roll Salad with Creamy Peanut Dressing

Can I make this salad ahead of time?

Absolutely! You can prepare the salad ingredients in advance and store them separately. Just add the creamy peanut dressing right before serving to keep everything fresh and crunchy.

Is this Spring Roll Salad suitable for meal prep?

Yes! This salad is perfect for meal prep. Just keep the dressing separate until you’re ready to eat. It stays fresh in the fridge for a few days, making it a great option for quick lunches.

Can I use other proteins in this salad?

Definitely! While shrimp and chicken are popular choices, feel free to use tofu, chickpeas, or even grilled beef for a different twist. The creamy peanut dressing pairs well with various proteins.

How can I make the dressing spicier?

If you like a kick, add a dash of sriracha or some red pepper flakes to the creamy peanut dressing. It’ll give your salad a delightful heat that complements the fresh veggies.

What can I serve with this salad?

This Spring Roll Salad with Creamy Peanut Dressing pairs wonderfully with grilled meats, spring rolls, or even a light soup. It’s a versatile dish that can complement many meals!

Final Thoughts

Creating this Spring Roll Salad with Creamy Peanut Dressing is more than just a cooking task; it’s an experience that brings joy to the table. Each vibrant ingredient tells a story, from the crunch of fresh veggies to the rich, nutty dressing that ties it all together. Whether you’re enjoying it as a light meal or serving it at a gathering, this salad is sure to impress. It’s a celebration of flavors and textures that can brighten any day. So, roll up your sleeves, dive in, and savor the delightful journey this dish offers!

Paul

Spring Roll Salad with Creamy Peanut Dressing is Amazing!

A refreshing and vibrant Spring Roll Salad topped with a creamy peanut dressing, perfect for a light meal or side dish.
Prep Time 15 minutes
Total Time 15 minutes
Servings: 4 servings
Course: Salad
Cuisine: Asian
Calories: 250

Ingredients
  

  • 2 cups green cabbage shredded
  • 1 cup carrots grated
  • 1 cup red bell pepper thinly sliced
  • 1 cup cucumber thinly sliced
  • 1 cup cooked shrimp or chicken chopped (optional)
  • 1/4 cup fresh cilantro chopped
  • 1/4 cup green onions sliced
  • 1/4 cup creamy peanut butter
  • 2 tablespoons soy sauce
  • 1 tablespoon rice vinegar
  • 1 tablespoon honey
  • 1 teaspoon sesame oil
  • 1-2 tablespoons water to thin the dressing

Method
 

  1. In a large bowl, combine the shredded cabbage, grated carrots, sliced red bell pepper, sliced cucumber, chopped shrimp or chicken (if using), chopped cilantro, and sliced green onions. Toss gently to mix the ingredients evenly.
  2. In a separate small bowl, whisk together the peanut butter, soy sauce, rice vinegar, honey, and sesame oil until smooth. If the dressing is too thick, add water one tablespoon at a time until you reach your desired consistency.
  3. Drizzle the creamy peanut dressing over the salad and toss until everything is well coated.
  4. Serve immediately or chill in the refrigerator for about 30 minutes to let the flavors meld before serving.

Notes

  • For a vegetarian option, omit the shrimp or chicken and add more vegetables or tofu.
  • Add crushed peanuts or sesame seeds on top for extra crunch and flavor.