Summer Berry Sheet Cake: A Delightful Party Dessert

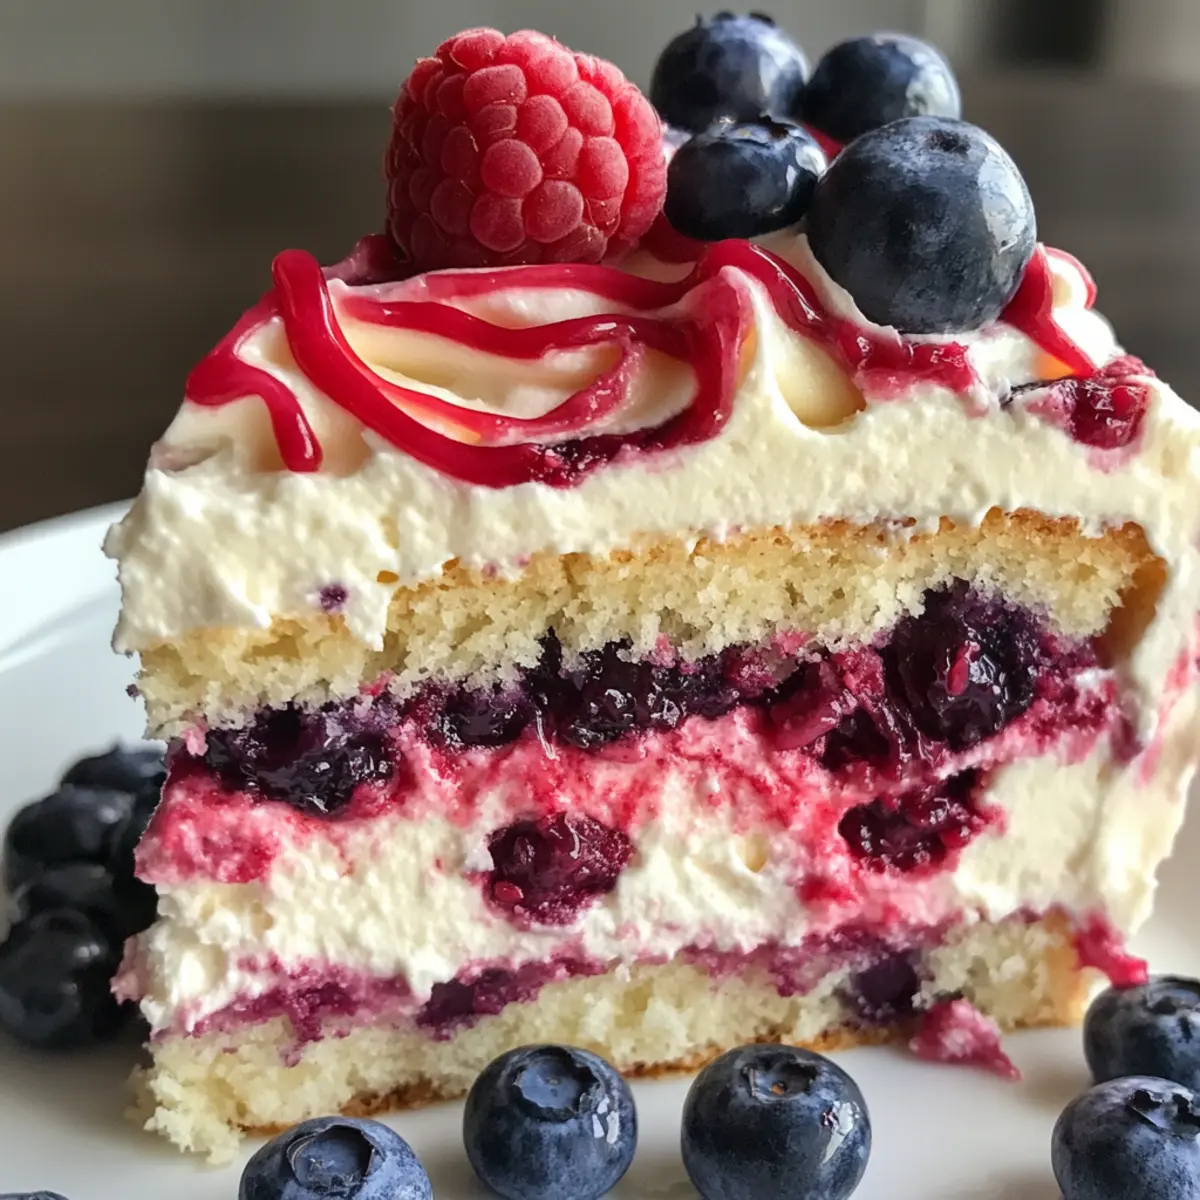
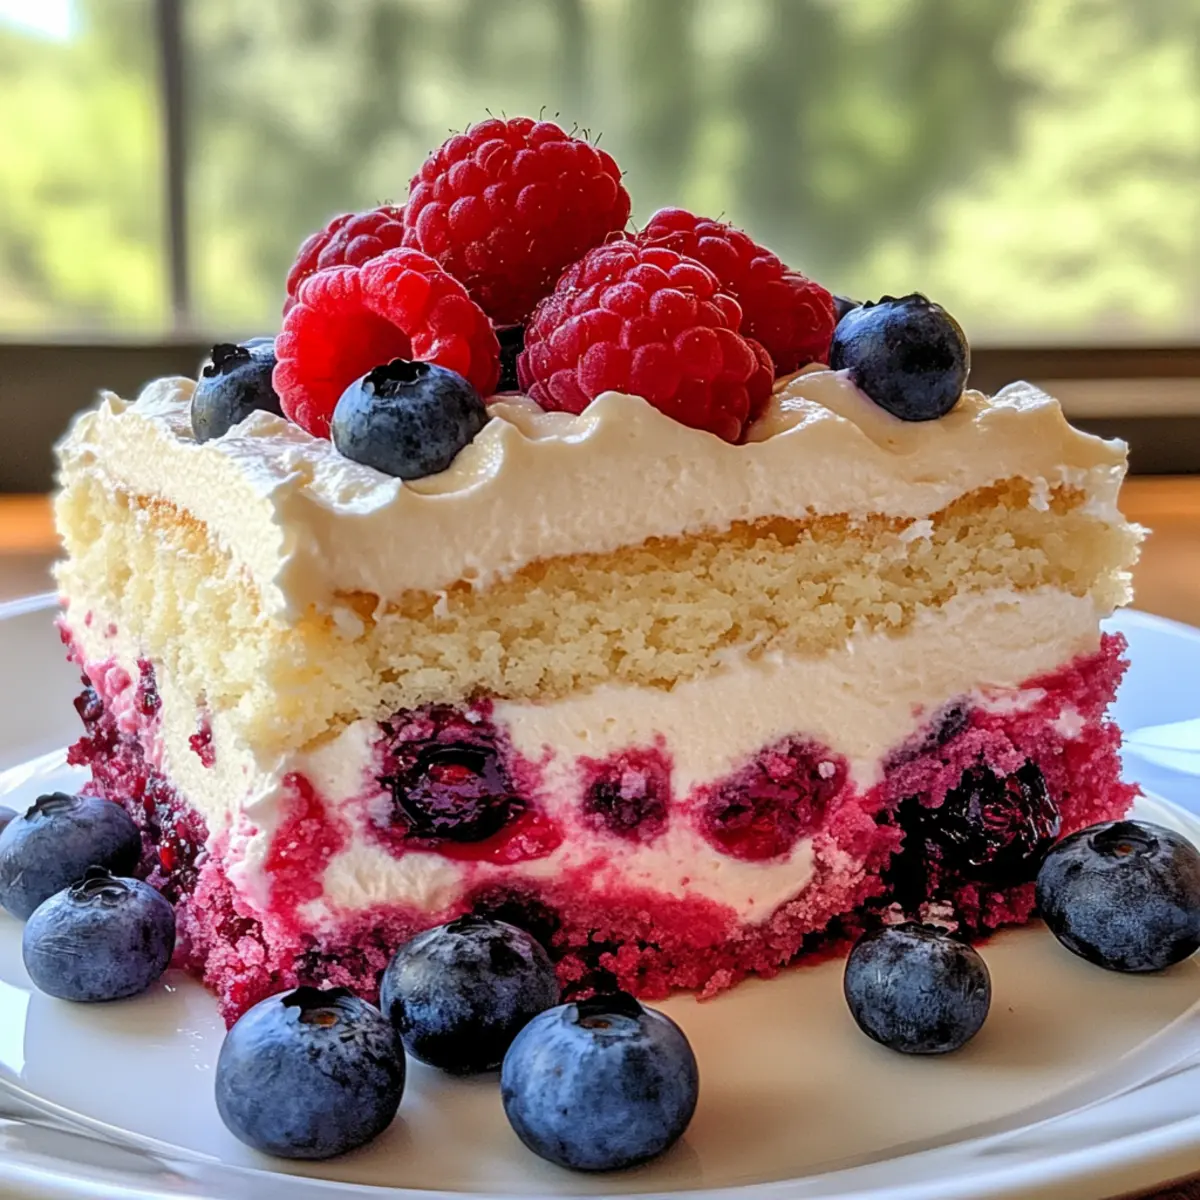
As I stood gazing at the vibrant colors of summer, I couldn’t help but think about the joy that a sweet, refreshing dessert brings to any gathering. That’s where my Easy Summer Berry Sheet Cake comes in — a delightful treat brimming with juicy raspberries and blueberries, all enveloped in a luscious cream cheese frosting. Perfect for summer parties and festive celebrations like the 4th of July, this recipe is not only quick to prepare but also a total crowd-pleaser. Imagine serving a stunning dessert that balances minimal effort with maximum flavor, leaving your guests reaching for seconds! Are you ready to create a dessert that captures the essence of summer? Let’s dive into this delicious recipe!

Why is this Summer Berry Cake a Must-Try?

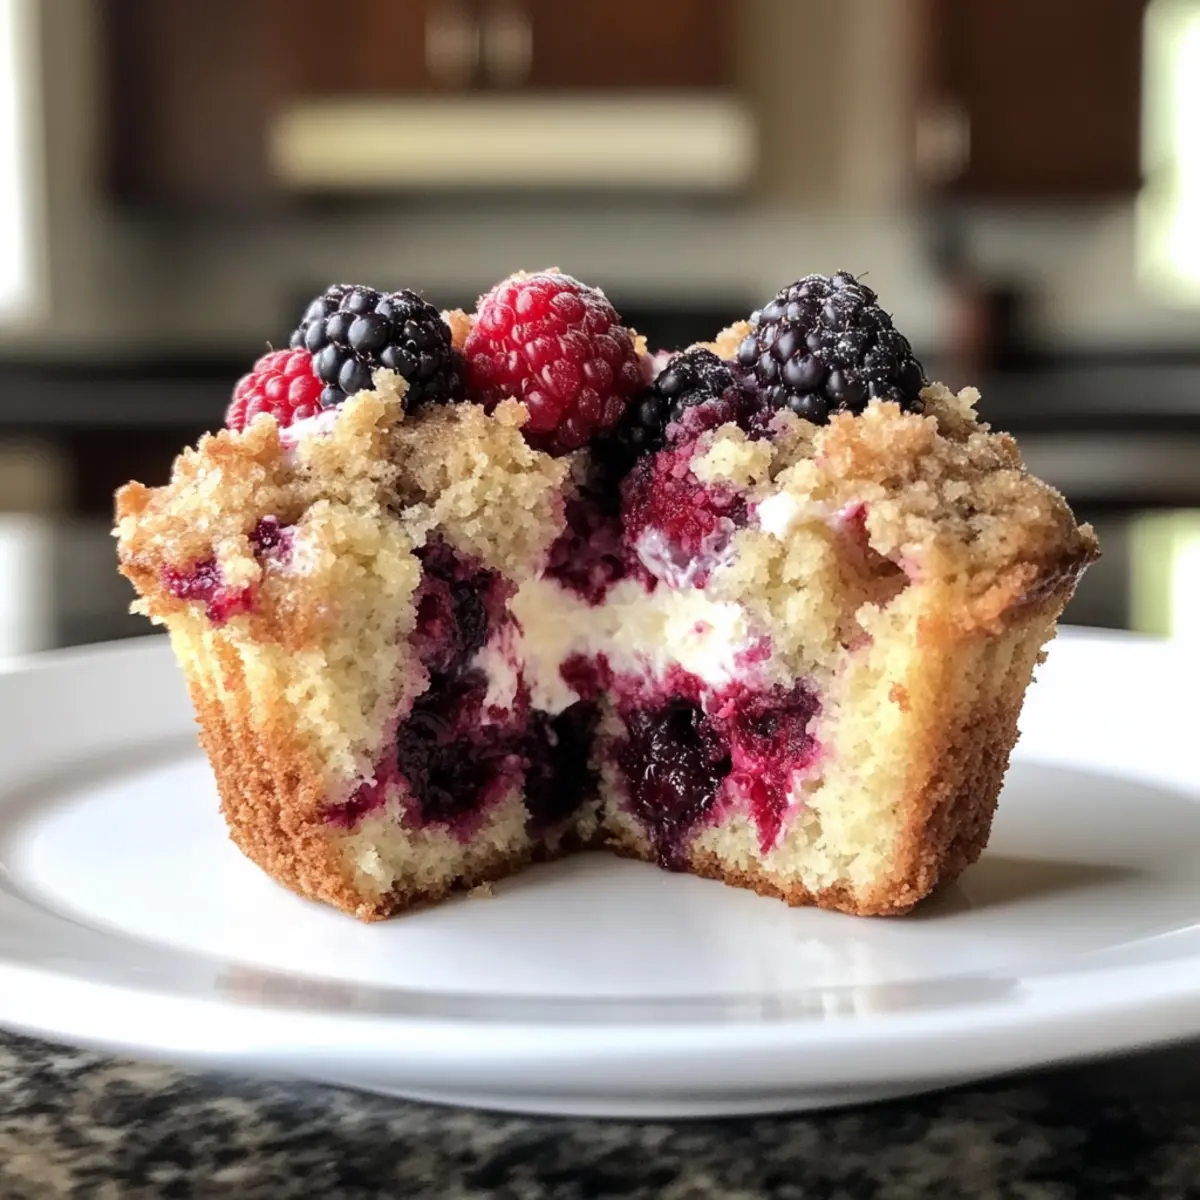
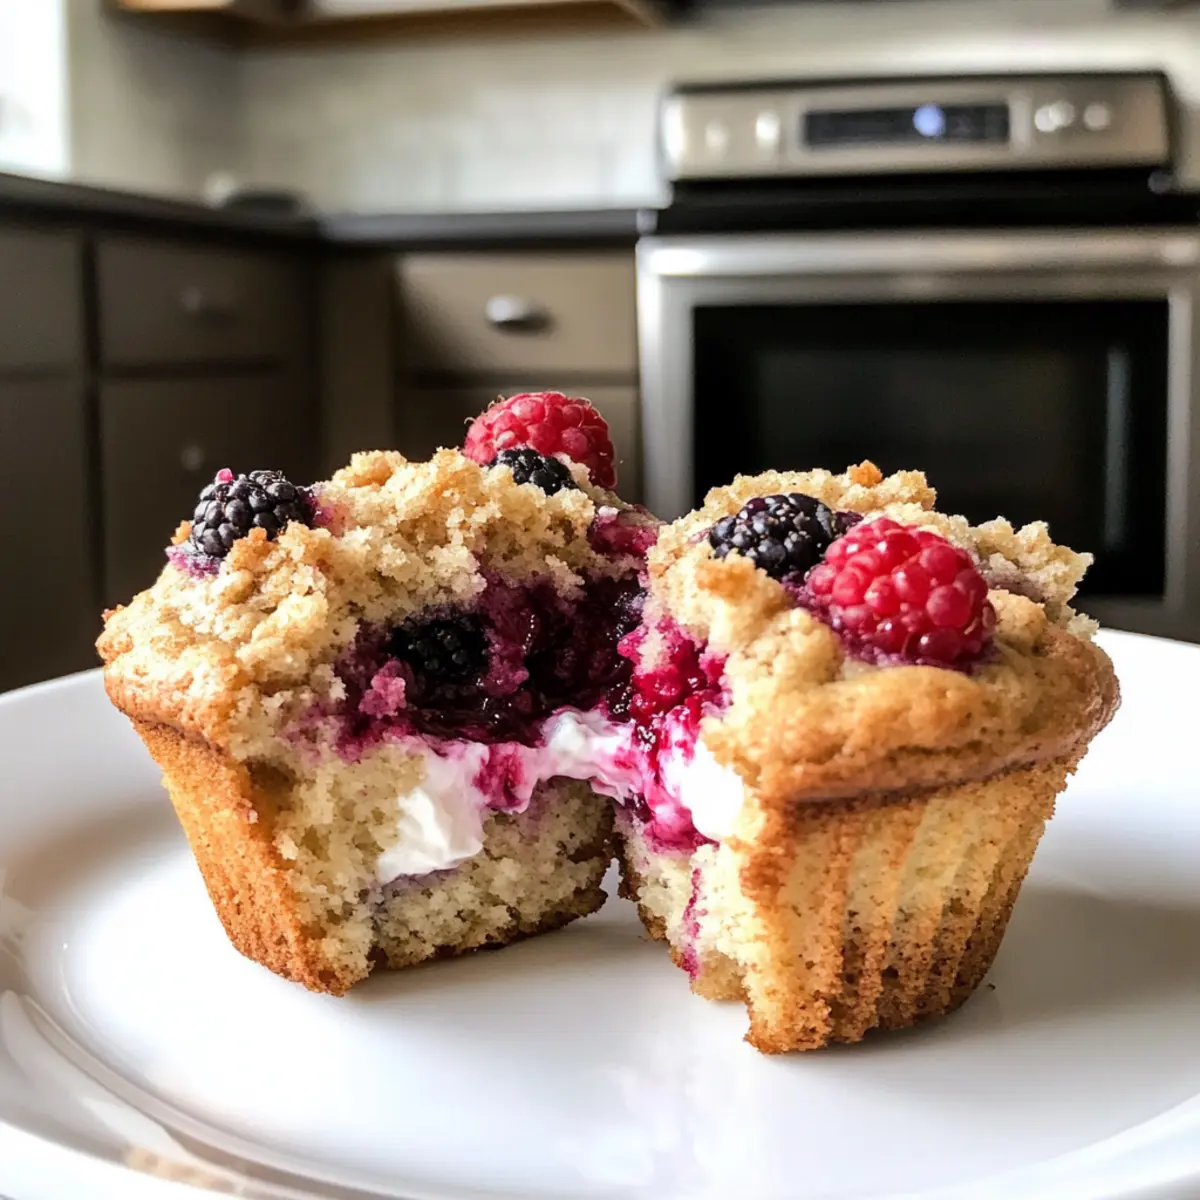
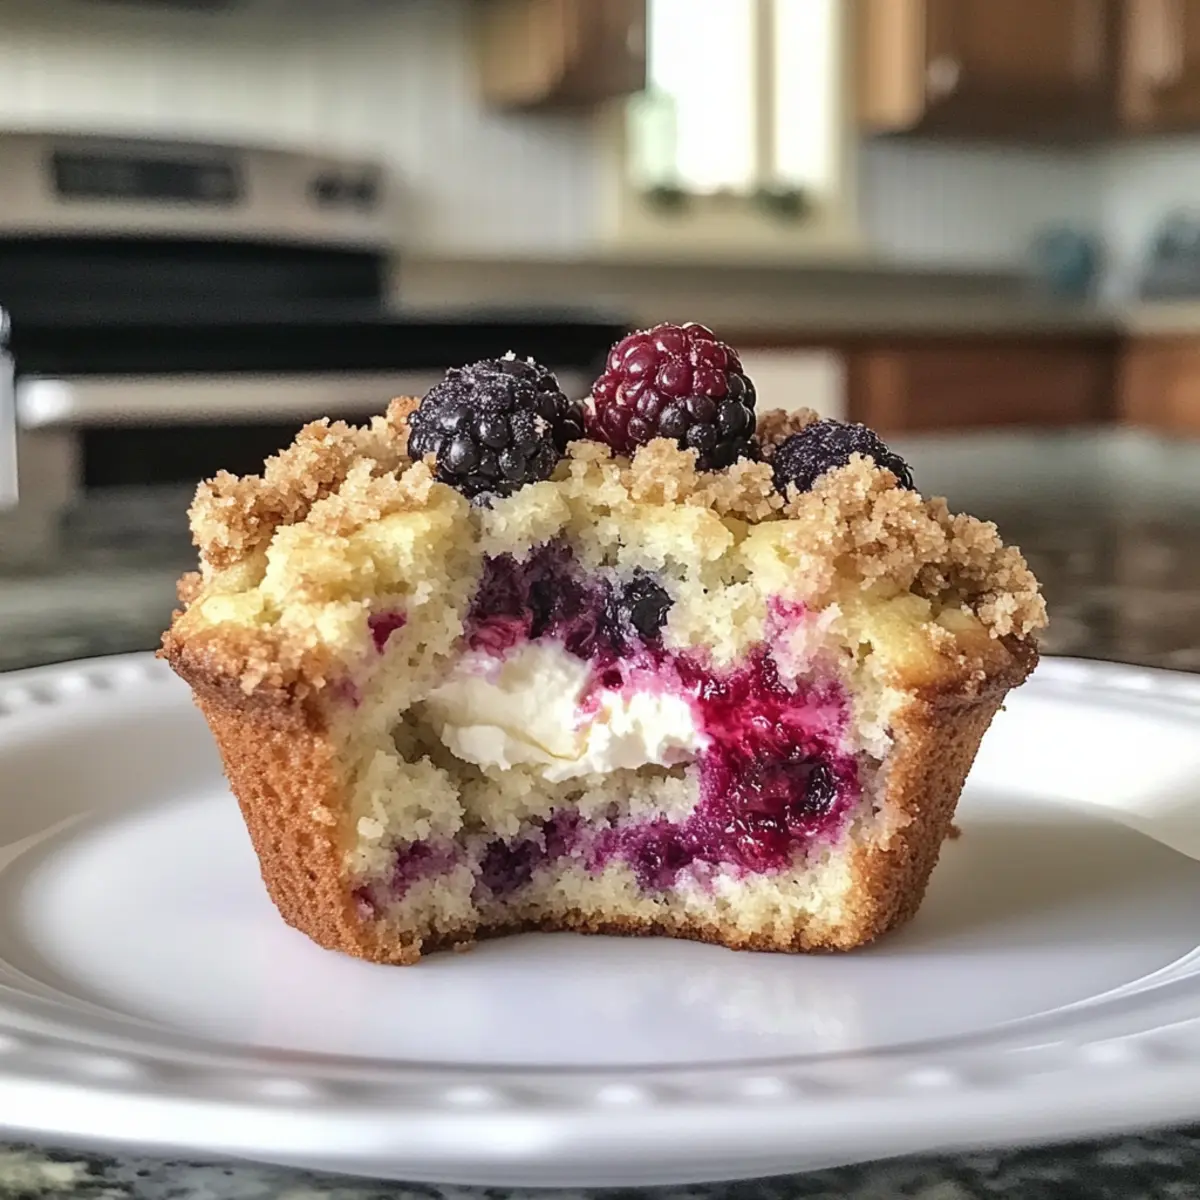
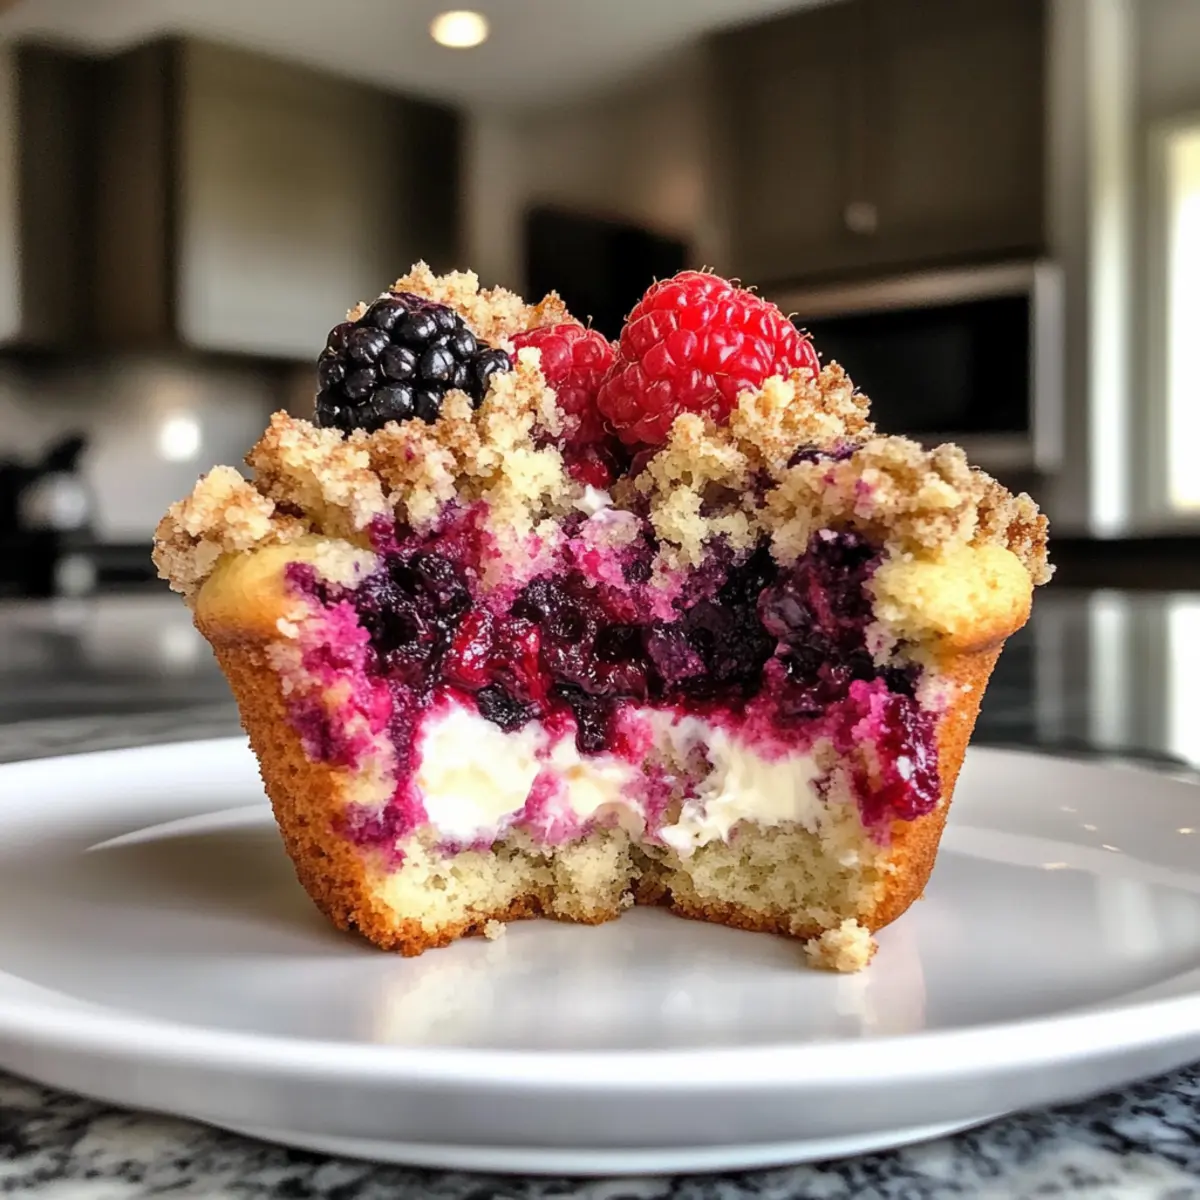
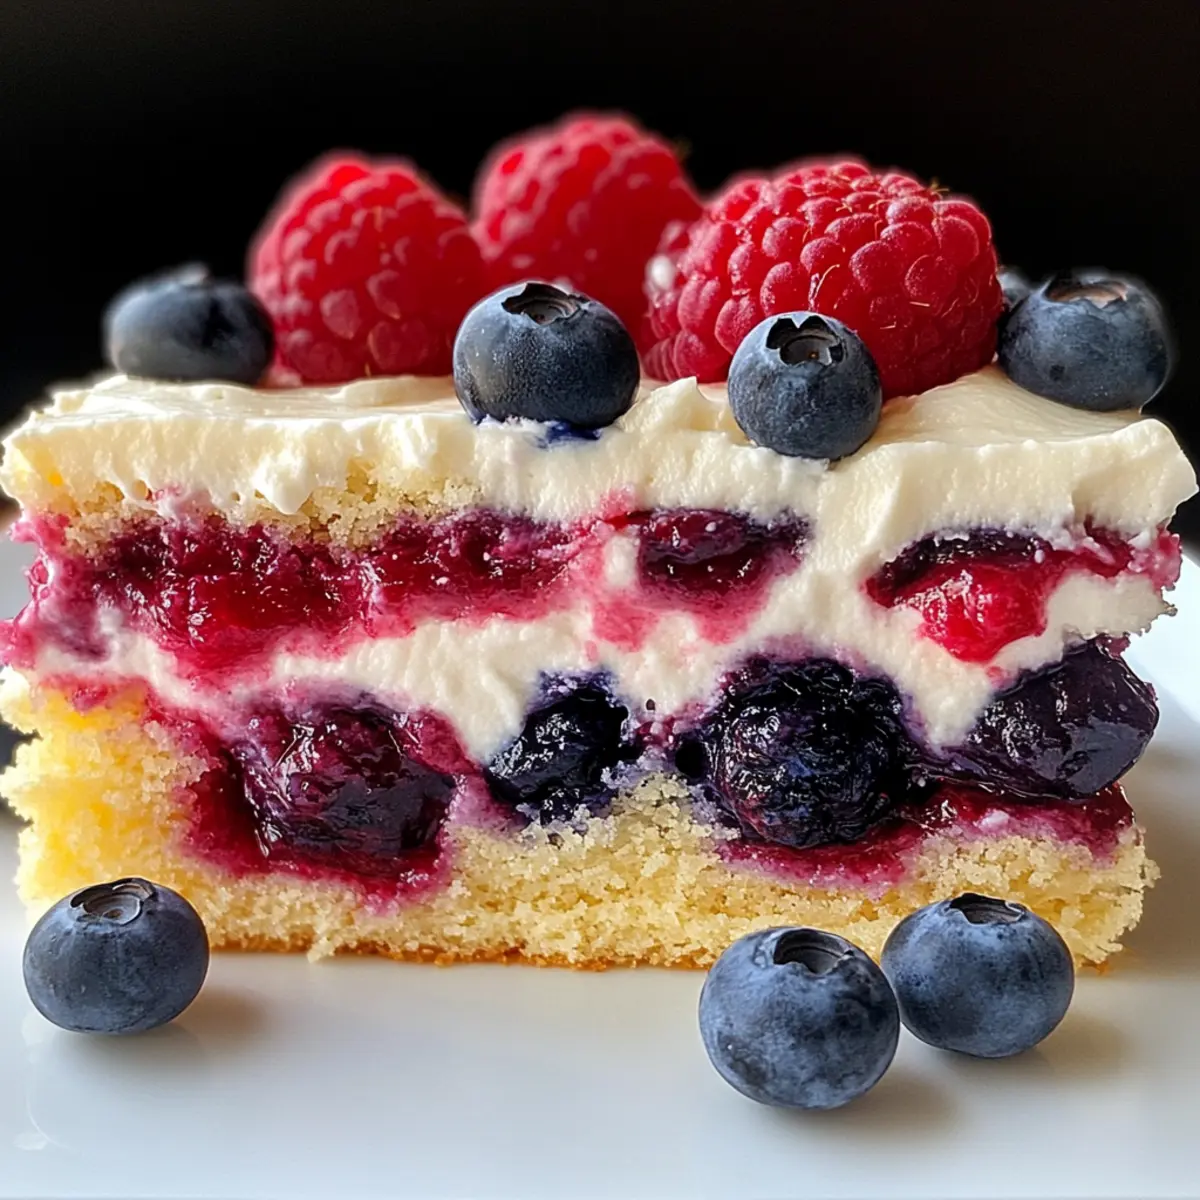
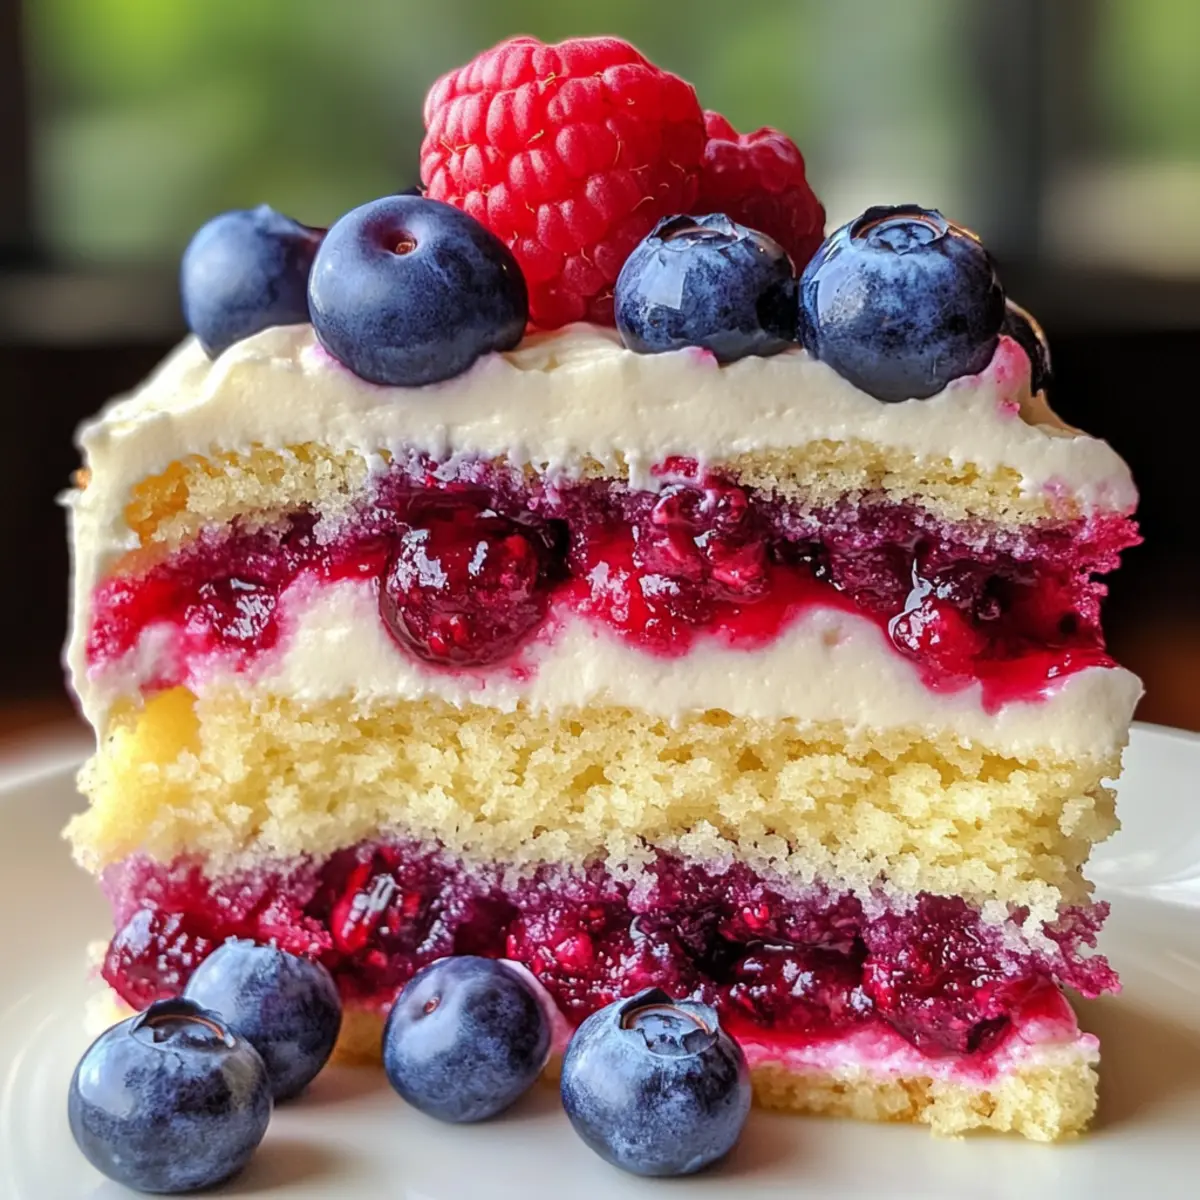
Vibrant, Colorful Presentation: This cake is a feast for the eyes, with luscious berries creating a beautiful, inviting design that draws everyone in.

Effortless Preparation: With just a few simple steps, you can whip up this cake in no time—perfect for busy summer days or spontaneous gatherings.

Deliciously Balanced Flavors: Juicy raspberries and blueberries paired with creamy frosting create a refreshing taste that perfectly complements summer vibes.

Perfect for Any Occasion: Whether it’s a BBQ, picnic, or holiday celebration, this dessert is bound to impress and satisfy your guests.

Make-Ahead Convenience: Prepare it ahead of time, allowing the flavors to meld, making it an easy option for stress-free entertaining.

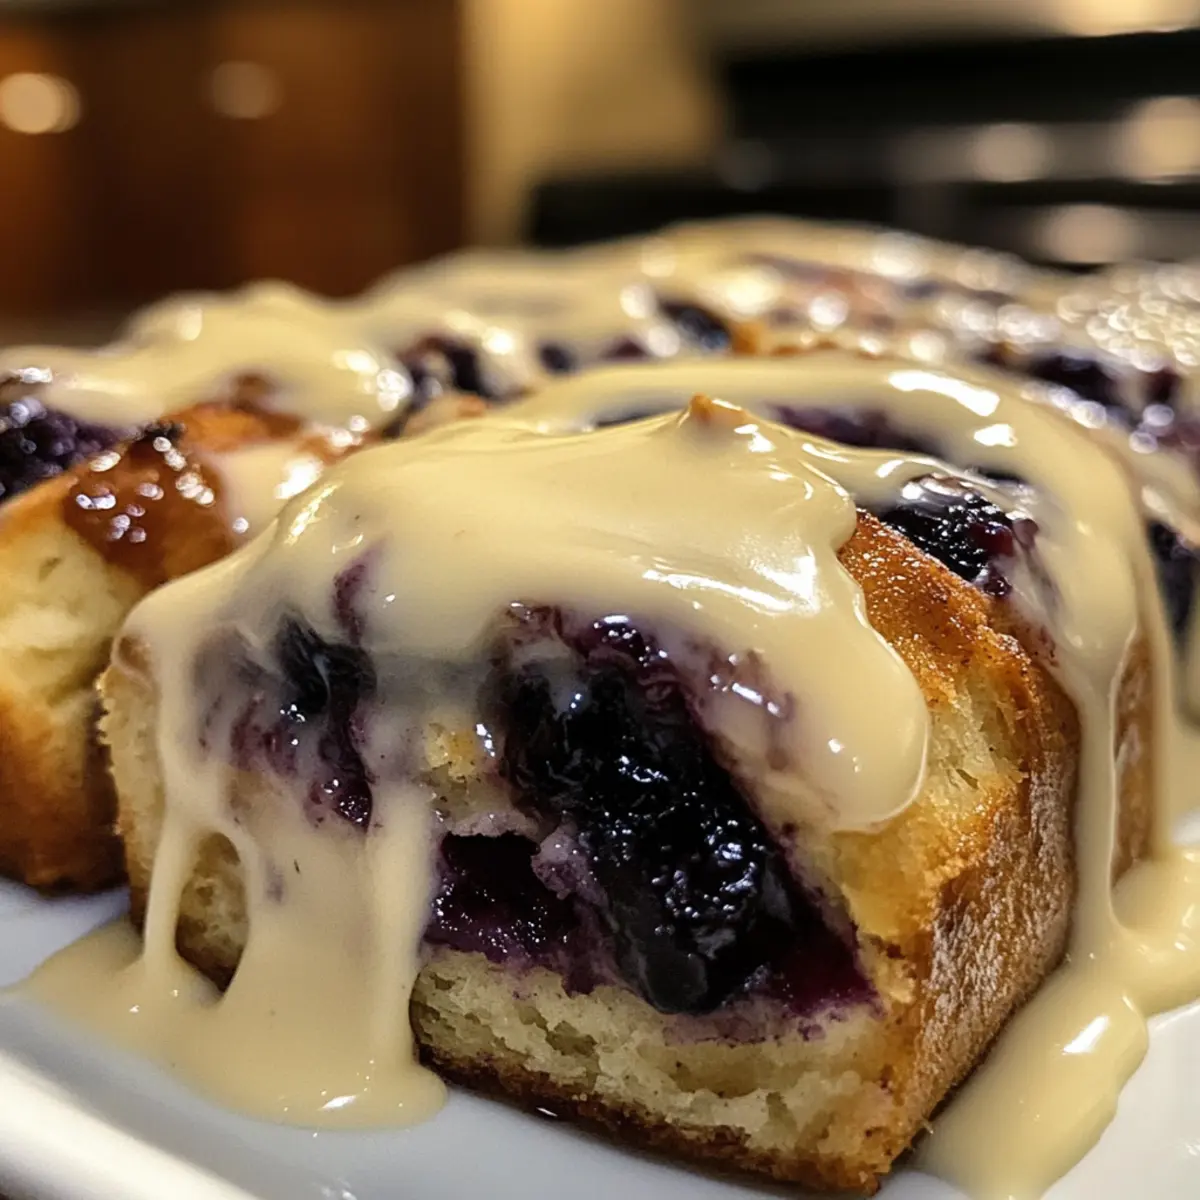
If you love berry desserts, be sure to check out my Berry Banana Cottage Cheese Bread for another delightful summer treat!

Summer Berry Sheet Cake Ingredients

For the Cake
Cake Mix – A white cake mix provides the best structure and sweetness for this easy dessert.
Blueberries – Fresh or frozen blueberries add natural sweetness and vibrant color; no thawing needed!
Raspberries – Cut large raspberries in half to enhance the tartness and visual appeal of the cake.

For the Frosting
Cream Cheese – This rich ingredient creates a creamy frosting; ensure it’s kept refrigerated to maintain freshness.
Heavy Whipping Cream – Whip it up for a light and airy texture in your frosting—feel free to substitute with Cool Whip!
Powdered Sugar – Sweetens the cream cheese frosting and helps achieve that perfect smooth texture.

For the Topping
Raspberry Topping – Use for a decorative swirl on top of the cake; warmed seedless jam can serve as a lovely alternative.

This Summer Berry Sheet Cake truly embodies the essence of summer—perfect for your next gathering!

Step‑by‑Step Instructions for Summer Berry Sheet Cake

Step 1: Prepare the Pan
Begin by preheating your oven to 350°F (175°C). While the oven heats up, grease a 9×13-inch baking pan with butter or non-stick spray, ensuring all corners are well-coated. This will help the cake release perfectly once baked, ensuring a beautiful presentation for your Summer Berry Sheet Cake.

Step 2: Mix the Batter
In a large mixing bowl, combine the cake mix with water, eggs, and oil according to the package directions. Gently fold in the fresh or frozen blueberries and halved raspberries, being careful not to crush the berries. This step adds freshness and sweetness, ensuring that every bite of your cake is packed with delightful berry flavor.

Step 3: Bake the Cake
Pour the luscious batter into your prepared baking pan, spreading it evenly. Place the pan in your preheated oven and bake for 30 to 35 minutes. Check for doneness by inserting a toothpick in the center; it should come out clean. Your cake will turn a light golden color, indicating it’s perfectly baked and ready for cooling.

Step 4: Cool the Cake
Once out of the oven, allow the Summer Berry Sheet Cake to cool in the pan for about 15 minutes. Then, carefully transfer it to a wire rack to cool completely. This step is crucial, as frosting a warm cake can cause the icing to melt and lose its structure, impacting the final presentation.

Step 5: Prepare the Frosting
While the cake cools, whip the heavy whipping cream in a medium bowl until soft peaks form. In another bowl, blend the cream cheese and powdered sugar until smooth. Gently fold the whipped cream into the cream cheese mixture, creating a light and fluffy frosting that will elevate your Summer Berry Sheet Cake.

Step 6: Frost the Cake
Once the cake is completely cool, spread a generous layer of the cream cheese frosting over the top. Use a spatula to create a smooth finish or add a decorative touch. For the final flourish, drizzle the raspberry topping or warmed seedless jam over the frosting, swirling it lightly to create a stunning visual effect for your cake.

Step 7: Serve and Enjoy
After frosting, allow the Summer Berry Sheet Cake to chill in the refrigerator for at least 30 minutes before serving. This helps the flavors meld and makes for a refreshing dessert. When ready, slice into squares and serve at your next gathering, ensuring a delightful and vibrant treat for all to enjoy!

Make Ahead Options

These Summer Berry Sheet Cakes are perfect for meal prep enthusiasts! You can prepare the cake batter up to 24 hours in advance by mixing the cake mix with the berries, then storing it covered in the refrigerator to maintain freshness. For even more convenience, the baked cake can be refrigerated for up to 3 days before frosting. Just ensure it’s completely cool before covering it with plastic wrap to prevent drying out. When you’re ready to serve, whip up the cream cheese frosting, which can also be made up to 2 days prior and refrigerated. Simply frost the chilled cake, add the raspberry topping, and you’ll delight everyone with a refreshing summer dessert that’s just as delicious as if made fresh!

What to Serve with Summer Berry Sheet Cake

Treat your loved ones to a delightful experience by pairing your cake with these delicious accompaniments that elevate every bite.

  • Light Whipped Cream: A dollop of freshly whipped cream adds an airy texture that enhances the fruity flavors beautifully. It’s an easy yet sophisticated touch.

  • Fresh Mint Leaves: Bright green mint leaves not only add a refreshing contrast but also elevate the presentation, giving your dessert a garden-fresh feel.

  • Creamy Vanilla Ice Cream: A scoop of smooth vanilla ice cream creates a delightful warm-and-cold contrast, making each bite of cake even more indulgent.

  • Berry Sorbet: A scoop of sorbet made from summer berries keeps things light and refreshing, harmonizing the berry flavors while adding an extra chill to your dessert.

  • Chocolate Shavings: For a touch of elegance, sprinkle dark chocolate shavings on top of your cake. They provide a beautiful contrast in flavor and texture.

  • Sparkling Lemonade: Pair this vibrant cake with a glass of cool sparkling lemonade for a refreshing drink that complements the fruity notes of the dessert perfectly.

  • Cheesecake Bars: For guests who adore a variety of textures, serving cheesecake bars on the side offers a creamy contrast that’s simply irresistible.

  • Grilled Peaches: Warm, caramelized peaches drizzled with honey echo the summer theme and provide a luscious, juicy side that pairs beautifully with your cake.

  • Herbed Tea: A cup of chilled herbal tea adds an aromatic element that refreshes the palate, making it a perfect pairing to balance the sweetness of the cake.

Expert Tips for Summer Berry Sheet Cake

Keep it Cool: Always refrigerate the cake since it contains cream cheese frosting, helping to maintain its structure and freshness.

Room Temperature Magic: Let the cake sit at room temperature for 15–20 minutes before serving for the best flavor and texture—this brings out the berry goodness beautifully!

Berries, Oh My: When mixing in the blueberries and raspberries, be gentle to avoid crushing them. This preserves their shape and vibrant color, enhancing the overall look of your Summer Berry Sheet Cake.

Make Ahead: For optimal taste, prepare this cake a day ahead and chill it in the fridge. It allows the flavors to meld, making it even more delightful for your guests!

Decorative Swirl: When topping with raspberry jam, warm it slightly to make it easier to drizzle. Swirling it into the frosting creates an inviting visual and adds extra sweetness!

Summer Berry Sheet Cake Variations

Feel free to let your creativity shine by personalizing this Summer Berry Sheet Cake with these delightful twists!

  • Berry Swaps: Replace blueberries and raspberries with blackberries or chopped strawberries for a fresh flavor profile.

  • Homemade Base: Use a homemade white or vanilla cake recipe instead of store-bought mix. This adds a personal touch and an extra layer of love.

  • Gluten-Free Option: Swap the regular cake mix with a gluten-free variety for a dessert everyone can enjoy!

  • Flavor Boost: Add a splash of vanilla extract to the frosting for a little extra warmth and depth of flavor. Each bite will be even more delightful.

  • Nutty Crunch: Sprinkle some chopped walnuts or pecans over the frosting for a crunchy texture that contrasts beautifully with the creaminess.

  • Citrus Zing: Incorporate some lemon or orange zest into the frosting for a refreshing citrus twist that brightens up each slice.

  • Heat It Up: For those who enjoy a kick, mix in a pinch of cayenne pepper or red pepper flakes to the berry layer for a surprising zing!

  • Decadent Drizzle: Drizzle melted chocolate over the top instead of raspberry topping for a rich twist that chocolate lovers will adore.

For more berry-inspired delights, check out my Blueberry Cream Cheese and Heavenly No-Bake Cake recipes!

How to Store and Freeze Summer Berry Sheet Cake

Fridge: Store the cake covered in the refrigerator for up to 4 days. This keeps the cream cheese frosting fresh and luscious while maintaining the cake’s moisture.

Freezer: For longer storage, the cake can be frozen for up to 2 months. Wrap it tightly in plastic wrap and aluminum foil to prevent freezer burn.

Thawing: When ready to enjoy, simply transfer the frozen Summer Berry Sheet Cake to the fridge to thaw overnight before serving.

Reheating: If you like your cake warm, microwave individual slices for about 10-15 seconds. Be careful not to overheat, as it may affect the texture!

Summer Berry Sheet Cake Recipe FAQs

How do I choose ripe berries for the Summer Berry Sheet Cake?
Absolutely! When selecting blueberries, look for plump, deep blue berries that are firm and dry, with no dark spots. For raspberries, choose those that are vibrant red, intact, and fragrant—avoid those with dark spots or mushiness. Fresh berries are recommended for the best flavor, but if you use frozen, there’s no need to thaw them before adding to the batter.

How should I store the Summer Berry Sheet Cake?
I recommend storing the cake covered in the refrigerator for up to 4 days. This storage method helps to keep the cream cheese frosting fresh and prevents the cake from drying out. Ensure it’s in an airtight container or wrapped tightly with plastic wrap to maintain its moisture and flavor.

Can I freeze Summer Berry Sheet Cake?
Yes! To freeze the cake, wrap it tightly in plastic wrap and then in aluminum foil to prevent freezer burn. It can be kept in the freezer for up to 2 months. When you’re ready to enjoy it, simply move the cake to the fridge to thaw overnight. For individual slices, you can microwave them for about 10-15 seconds for a warm treat!

What should I do if my cake is too dry?
If your Summer Berry Sheet Cake ends up too dry, there are a couple of strategies to salvage it. You can drizzle a simple syrup (made by boiling equal parts sugar and water until dissolved) over the cake to add moisture back in. Alternatively, you can serve it with whipped cream or a berry sauce to enhance the overall enjoyment.

Are there any dietary considerations for this recipe?
Great question! The Summer Berry Sheet Cake contains dairy from the cream cheese and heavy whipping cream, so it may not be suitable for those with lactose intolerance or dairy allergies. For a dairy-free option, you can use a dairy-free cream cheese alternative and substitute the heavy cream with a non-dairy whipped topping, ensuring everyone can enjoy this delightful dessert!

Can I modify the fruit used in the cake?
Very! You can definitely swap out the raspberries and blueberries with your favorite berries like blackberries or chopped strawberries. If you prefer a different flavor profile, consider mixing in peaches or cherries. Just remember to adjust measurements accordingly, and keep the fun of making the dessert alive by experimenting with your seasonal favorites!

Summer Berry Sheet Cake

Summer Berry Sheet Cake: A Delightful Party Dessert

This Summer Berry Sheet Cake is a vibrant dessert perfect for any gathering.
Prep Time 20 minutes
Cook Time 35 minutes
Cooling Time 15 minutes
Total Time 1 hour 10 minutes
Servings: 12 slices
Course: Dessert
Cuisine: American
Calories: 250

Ingredients
  

For the Cake
  • 1 box white cake mix
  • 1 cup blueberries fresh or frozen
  • 1 cup raspberries halved if large
For the Frosting
  • 8 oz cream cheese refrigerated
  • 1 cup heavy whipping cream can substitute with Cool Whip
  • 2 cups powdered sugar
For the Topping
  • 1 cup raspberry topping or warmed seedless jam

Equipment

  • 9x13 inch baking pan
  • mixing bowls
  • whisk
  • spatula

Method
 

Preparation Steps
  1. Preheat your oven to 350°F (175°C) and grease a 9x13-inch baking pan.
  2. In a large mixing bowl, combine the cake mix with water, eggs, and oil according to the package directions. Fold in blueberries and raspberries.
  3. Pour the batter into the prepared pan and bake for 30 to 35 minutes until a toothpick comes out clean.
  4. Let the cake cool in the pan for about 15 minutes before transferring to a wire rack to cool completely.
  5. While the cake cools, whip the heavy cream until soft peaks form. In another bowl, blend cream cheese and powdered sugar until smooth, then fold in the whipped cream.
  6. Once the cake is cool, spread the cream cheese frosting on top and drizzle with raspberry topping.
  7. Chill in the refrigerator for at least 30 minutes before serving. Slice and enjoy!

Notes

Refrigerate the cake to maintain its structure and freshness. Let it sit at room temperature for the best flavor before serving.

Irresistibly Moist Chocolate Zucchini Cake You’ll Love

As I stared at my countertop overflowing with zucchini from the garden, a lightbulb moment struck—why not turn these green wonders into a delightful dessert? Enter the star of the show: Chocolate Zucchini Cake. With its rich chocolatey flavor and hidden veggies, this moist cake is perfectly indulgent while veiling nutrition in every bite. Not only is it a creative way to use up those summer zucchinis, but this recipe also comes together in a snap, making it a fantastic option for spontaneous gatherings or lazy weekends. Whether you’re hunting for a nutritious treat or simply looking to impress at your next potluck, this cake will be a sure crowd pleaser. Curious about how to whip up this scrumptious sweet surprise? Let’s dive into the recipe!

Why Is This Cake So Special?

Moist, decadent delight: Imagine biting into a cake that’s not just rich in flavor but also incorporates hidden health benefits from zucchini.

Versatile: Whether you need a dairy-free or gluten-free option, this recipe is easy to adapt! Try swapping in dairy-free yogurt or a gluten-free flour mix to cater to your dietary needs.

Simplicity shines: The method is straightforward and perfect for bakers of all levels. In under an hour, you can impress friends and family with your baking skills!

Great for gatherings: This cake is an instant hit at parties, merging indulgence with a sneaky serving of veggies. Pair it with some whipped cream or ice cream for an extra special treat!

Creative possibilities: Feeling adventurous? Throw in some nuts or a sprinkle of cinnamon for a unique twist. Each bite offers dreamy chocolate goodness!

Chocolate Zucchini Cake Ingredients

Unlock the delectable secrets behind this irresistible dessert!

For the Cake Base

  • 2 cups grated zucchini – Adds moisture and tenderness to the cake; use fresh zucchini for the best results.
  • 2 cups all-purpose flour – Provides structure; ensure correct measuring to avoid a dense cake.
  • 1/2 cup unsweetened cocoa powder – Offers rich chocolate flavor; sift if lumpy for a smooth batter.
  • 1 tsp baking soda – Acts as a leavening agent to help the cake rise beautifully.
  • 1/2 tsp baking powder – Supports the leavening process, essential for achieving lift.
  • 1/2 tsp salt – Balances flavors and enhances the chocolate experience.

For Moisture & Sweetness

  • 1/2 cup vegetable oil – Adds richness; can be swapped with melted butter or a dairy-free alternative for a lighter version.
  • 1/2 cup melted butter – Contributes flavor; opt for plant-based butter for a dairy-free cake.
  • 1 3/4 cups granulated sugar – Provides just the right sweetness, ensuring a tender crumb.

For Binding & Flavor

  • 2 large eggs – Binds the ingredients together; using room temperature eggs helps with better mixing.
  • 1 tsp vanilla extract – Enhances the overall flavor, making each bite more luscious.
  • 1/2 cup sour cream or Greek yogurt – Adds moisture and tanginess; can be replaced with dairy-free yogurt or unsweetened applesauce for a lighter taste.

For Extra Indulgence

  • 1 cup semi-sweet chocolate chips (optional) – Introduces extra chocolatey richness; you can replace with dark chocolate chips for a deeper taste.

Dive into this Chocolate Zucchini Cake, where indulgence meets nutrition!

Step‑by‑Step Instructions for Chocolate Zucchini Cake

Step 1: Preheat the Oven
Begin by preheating your oven to 350°F (175°C). While the oven warms up, prepare a 9×13 inch baking pan by greasing and flouring it, or line it with parchment paper for easy removal later. Ensuring your oven is at the right temperature is crucial for a perfectly baked Chocolate Zucchini Cake.

Step 2: Grate the Zucchini
Using the fine side of a box grater, grate 2 cups of fresh zucchini and set it aside. Remember not to peel the zucchini, as the skin adds flavor and nutrients. If some extra moisture clings to the grated zucchini, lightly pat it with a paper towel to absorb a bit of water without squeezing out all that delightful moisture.

Step 3: Mix Dry Ingredients
In a medium bowl, whisk together the 2 cups of all-purpose flour, 1/2 cup of unsweetened cocoa powder, 1 teaspoon of baking soda, 1/2 teaspoon of baking powder, and 1/2 teaspoon of salt until uniform. This mixture forms the dry base and ensures that all leavening agents are evenly distributed, which is essential for a fluffy Chocolate Zucchini Cake.

Step 4: Combine Wet Ingredients
In a large mixing bowl, combine 1 3/4 cups of granulated sugar, 1/2 cup of melted butter, and 1/2 cup of vegetable oil. Mix them together until smooth, then add 2 large eggs, mixing in one at a time. Finally, stir in 1 teaspoon of vanilla extract and 1/2 cup of sour cream until fully incorporated, creating a rich, velvety base for your cake.

Step 5: Combine Dry and Wet Mixtures
Gradually fold the dry ingredient mixture into the wet mixture, being careful not to overmix to keep the cake light and airy. Once just combined, gently fold in the grated zucchini and, if using, 1 cup of semi-sweet chocolate chips. The batter should be thick, luscious, and speckled with chocolate goodness, ready to transform into a moist Chocolate Zucchini Cake.

Step 6: Pour into Pan
Carefully pour the batter into the prepared baking pan, using a spatula to smooth the top evenly. Make sure to spread it into the corners of the pan, ensuring that every piece of cake will rise beautifully and bake uniformly, resulting in a deliciously moist and rich Chocolate Zucchini Cake.

Step 7: Bake the Cake
Place the pan in the preheated oven and bake for about 35 to 45 minutes. Keep an eye on it, and to check for doneness, insert a toothpick into the center of the cake; it should come out clean or with a few moist crumbs. This step is vital for achieving that perfect cake-like texture.

Step 8: Cool Before Serving
Once baked, remove the Chocolate Zucchini Cake from the oven and let it cool in the pan for about 10 minutes. Afterward, transfer the cake to a wire rack to cool completely. This ensures that the cake sets properly and makes the texture perfectly tender when you slice into it.

What to Serve with Moist Chocolate Zucchini Cake?

Consider complementing your dessert experience with delightful pairings that elevate the joy of every bite.

  • Whipped Cream: Adds a light, airy sweetness that beautifully contrasts the dense, chocolatey cake. A dollop on top elevates every slice to new heights.
  • Vanilla Ice Cream: The creamy richness of vanilla ice cream creates a luscious pairing, perfectly balancing the chocolate flavor of the cake. Just imagine the delightful melting together!
  • Fresh Berries: Bright, tart berries like raspberries or strawberries provide a fresh contrast, adding a burst of flavor and color that enhances each mouthful.
  • Chocolate Ganache: Pouring a silky chocolate ganache on top intensifies the flavor and creates a luxurious finish that chocolate lovers will adore.
  • Espresso or Coffee: A warm cup of coffee or espresso complements the chocolate, enhancing the rich flavors in the cake. This pairing is perfect for those cozy gatherings!
  • Chopped Nuts: Sprinkling some toasted walnuts or pecans offers a delightful crunch that adds texture and a nutty flavor, making each bite a surprise.
  • Mint Leaves: A garnish of fresh mint leaves on the side provides an aromatic twist, lifting the chocolate flavor and adding visual flair.
  • Caramel Sauce: Drizzling caramel sauce over a slice introduces a sweet, buttery note that pairs wonderfully with the deep chocolate flavor, ideal for those who love decadence!

Chocolate Zucchini Cake Variations

Feel free to get creative and customize your Chocolate Zucchini Cake with these delightful variations that make your dessert experience even more enjoyable!

  • Dairy-Free: Substitute butter with more vegetable oil and use plant-based yogurt for a rich, dairy-free indulgence. You’ll be surprised how creamy this cake turns out!

  • Gluten-Free: Replace all-purpose flour with a gluten-free flour blend to cater to gluten sensitivities. Just ensure your mix includes xanthan gum for structure.

  • Nutty Twist: Add 1 cup of chopped nuts, like walnuts or pecans, for a fabulous crunch and to elevate the texture of your cake. The nutty addition pairs so well with the chocolate!

  • Spicy Kick: Mix in 1 teaspoon of cinnamon and a pinch of nutmeg to warm up the flavors. This twist adds an inviting aroma that fills your kitchen!

  • Espresso Boost: Enhance the chocolate flavor by incorporating 1 tablespoon of instant coffee granules into the dry ingredients. Coffee and chocolate are a match made in heaven!

  • Fruitful Addition: Toss in 1 cup of chopped fresh raspberries or cherries for a fruity burst of flavor. This addition brings a lovely color and tartness to balance the sweetness.

  • Saucy Surprise: Drizzle a chocolate ganache or caramel sauce over the cooled cake before serving for an extra layer of indulgence. This finishing touch makes for a spectacular presentation!

  • Chocolate Chunk Goodness: Instead of chocolate chips, chop up a bar of dark chocolate for moister chunks that melt divinely in each bite. You won’t want to go back once you try it!

Expert Tips for Chocolate Zucchini Cake

  • Moisture Matters: Grate your zucchini finely and avoid squeezing out all the moisture. This keeps the cake moist and tender.

  • Flour Technique: Use the spoon-and-level method when measuring flour to prevent a dense cake—too much flour can ruin your Chocolate Zucchini Cake.

  • Mixing Caution: Stir gently when combining wet and dry ingredients. Overmixing can lead to a tough texture, so stop as soon as they’re incorporated.

  • Cooling Time: Allow the cake to cool in the pan for at least 10 minutes, then transfer it to a wire rack. This ensures the perfect texture and prevents it from becoming soggy.

  • Taste Tweaks: Feel free to experiment with different add-ins, like nuts or spices, for a personalized flavor adventure. Each bite can surprise you!

How to Store and Freeze Chocolate Zucchini Cake

Room Temperature: Store at room temperature for up to 3 days, covered loosely with plastic wrap or in an airtight container to maintain moisture.

Fridge: For extended freshness, refrigerate the cake for up to 1 week. Place in an airtight container or wrap well with plastic wrap to prevent drying out.

Freezer: Freeze slices of Chocolate Zucchini Cake for up to 3 months. Wrap each slice tightly in plastic wrap and then in aluminum foil, or place in a freezer-safe container.

Reheating: To enjoy the cake again, thaw in the refrigerator overnight, then warm in the microwave for 10-15 seconds for a deliciously soft treat.

Make Ahead Options

These Chocolate Zucchini Cakes are perfect for busy cooks looking to save time! You can grate the zucchini and mix the dry ingredients up to 24 hours in advance—just store them separately in airtight containers in the refrigerator to maintain freshness. Additionally, you can combine the wet ingredients and refrigerate them for up to 3 days; this allows the flavors to meld beautifully. When you’re ready to bake, simply combine the wet and dry mixes, fold in the zucchini, and proceed with pouring the batter into your pan. This way, you’ll have a deliciously moist Chocolate Zucchini Cake with minimal effort, perfect for any occasion!

Chocolate Zucchini Cake Recipe FAQs

What type of zucchini should I use for the cake?
For the best flavor and texture, I recommend using young, firm zucchinis, preferably small to medium. They should be free from any dark spots or blemishes. Larger zucchinis can be watery and may have seeds that affect the cake’s moisture.

How should I store the Chocolate Zucchini Cake?
You can store the Chocolate Zucchini Cake at room temperature, covered loosely with plastic wrap, for up to 3 days. For a longer shelf life, refrigerate it in an airtight container for up to 1 week; this helps maintain its moistness.

Can I freeze the Chocolate Zucchini Cake?
Absolutely! To freeze the cake, cut it into individual slices and wrap each slice tightly in plastic wrap. Then, place them in a freezer-safe container to avoid freezer burn. The cake can be frozen for up to 3 months. When you’re ready to enjoy it, simply thaw in the refrigerator overnight.

What can I do if my cake turns out too dry?
If your Chocolate Zucchini Cake ends up dry, it may be due to an excess of flour. To prevent this, use the spoon-and-level method for measuring flour rather than scooping straight from the bag. If it’s already baked, serve it with a dollop of whipped cream or ice cream to add moisture and richness!

Are there any dietary considerations I should keep in mind?
Definitely! This cake can be easily made dairy-free by using plant-based butter and yogurt. Additionally, to make it gluten-free, substitute the all-purpose flour with a gluten-free flour blend. Always double-check ingredient labels to avoid allergens, especially if serving to guests with dietary restrictions.

How can I tell when the cake is done baking?
To check for doneness, insert a toothpick into the center of the cake. It should come out clean or with a few moist crumbs attached. The baking time typically ranges from 35 to 45 minutes, but ovens can vary, so keep an eye on it as it approaches the lower end of that range.

Chocolate Zucchini Cake

Irresistibly Moist Chocolate Zucchini Cake You’ll Love

This Chocolate Zucchini Cake is a rich, moist dessert that perfectly hides veggies while delighting your taste buds.
Prep Time 15 minutes
Cook Time 40 minutes
Cooling Time 10 minutes
Total Time 1 hour 5 minutes
Servings: 12 slices
Course: Dessert
Cuisine: American
Calories: 350

Ingredients
  

For the Cake Base
  • 2 cups grated zucchini Use fresh zucchini for the best results.
  • 2 cups all-purpose flour Ensure correct measuring to avoid a dense cake.
  • 1/2 cup unsweetened cocoa powder Sift if lumpy for a smooth batter.
  • 1 tsp baking soda Acts as a leavening agent.
  • 1/2 tsp baking powder Supports the leavening process.
  • 1/2 tsp salt Balances flavors.
For Moisture & Sweetness
  • 1/2 cup vegetable oil Can be swapped with melted butter.
  • 1/2 cup melted butter Opt for plant-based butter for a dairy-free cake.
  • 1 3/4 cups granulated sugar Provides sweetness.
For Binding & Flavor
  • 2 large eggs Using room temperature eggs helps.
  • 1 tsp vanilla extract Enhances the overall flavor.
  • 1/2 cup sour cream or Greek yogurt Can be replaced with dairy-free yogurt.
For Extra Indulgence
  • 1 cup semi-sweet chocolate chips (optional) Can replace with dark chocolate chips.

Equipment

  • 9x13 inch baking pan
  • mixing bowls
  • box grater
  • whisk
  • spatula

Method
 

Step-by-Step Instructions
  1. Preheat your oven to 350°F (175°C) and prepare a 9x13 inch baking pan by greasing and flouring it.
  2. Grate 2 cups of fresh zucchini and set aside, patting it dry if necessary.
  3. In a medium bowl, whisk together the dry ingredients: flour, cocoa powder, baking soda, baking powder, and salt.
  4. In a large bowl, mix sugar, melted butter, and vegetable oil until smooth, then add eggs, vanilla extract, and sour cream.
  5. Gradually fold the dry mixture into the wet mixture, ensuring not to overmix, then fold in the grated zucchini and chocolate chips.
  6. Pour the batter into the prepared pan and smooth the top.
  7. Bake for about 35 to 45 minutes, checking doneness with a toothpick.
  8. Let the cake cool in the pan for 10 minutes, then transfer to a wire rack to cool completely.

Notes

Feel free to experiment with different add-ins like nuts or spices for a personalized flavor adventure.

Whiskey Maple Bacon Burger: Sweet & Smoky Flavor Explosion

As I stood over the sizzling skillet, the aroma of crispy bacon mingled with the smoky notes of whiskey, instantly transporting me to a cozy backyard gathering. Today, I’m excited to share my mouthwatering Whiskey Maple Bacon Burger with you, a dreamy combination of flavors that’s perfect for any occasion, from casual weeknight dinners to summer barbecues. This recipe not only boasts a quick prep time, making it a fit for busy evenings, but it’s also a guaranteed crowd-pleaser that can be easily adapted for those with gluten-free or dairy-free needs. Imagine biting into a juicy burger topped with melty cheddar and a sweet, sticky glaze—how could you resist? Let’s dive into making this delightful creation together!

Why is this burger recipe a game-changer?

Flavor Explosion: The combination of whiskey and maple syrup creates a unique glaze that elevates every bite.
Versatile Options: Whether you’re gluten-free or dairy-free, you can still indulge in this delicious meal.
Quick & Easy: With a streamlined prep time, you’ll spend less time in the kitchen and more time enjoying great company.
Crowd-Pleaser: Serve this at your next BBQ or family gathering, and watch your guests rave about it! For more comfort food ideas, try my Savory Beef Bacon or Mini Cheeseburger Breads.

Whiskey Maple Bacon Burger Ingredients

For the Burger Patties

  • Ground Beef – Use a higher fat content for that juicy, flavorful bite.
  • Seasonings – Salt and pepper are musts, but feel free to add garlic powder for extra flavor.

For the Glaze

  • Whiskey (smooth variety) – This adds depth and a smoky note to the burger glaze; avoid overly smoky options that can overpower.
  • Maple Syrup – Provides a delightful sweetness that pairs perfectly with savory ingredients.

For the Toppings

  • Thick-Cut Bacon – Fry to crispy perfection, this adds delightful crunch and flavor.
  • Sharp Cheddar Cheese – Melts beautifully to enhance that savory profile; a dairy-free alternative can work if needed.

For the Sandwich Structure

  • Burger Buns – The vehicle for all these delicious components; swap for gluten-free buns or lettuce wraps if desired.

Each element of this Whiskey Maple Bacon Burger is crafted to enhance your dining experience, making it not only delicious but also adaptable for various dietary preferences!

Step‑by‑Step Instructions for Whiskey Maple Bacon Burger

Step 1: Prepare the Glaze
In a medium skillet, combine 1/2 cup of smooth whiskey with 1/2 cup of maple syrup. Bring the mixture to a gentle simmer over medium heat, stirring occasionally. Allow it to reduce for about 10 to 15 minutes until it thickens to a syrupy consistency, ensuring a perfect glaze for your Whiskey Maple Bacon Burger.

Step 2: Cook Bacon
While the glaze simmers, place 6 slices of thick-cut bacon in a cold skillet. Turn the heat to medium, allowing the fat to render evenly. Cook for approximately 8 to 10 minutes, flipping occasionally, until crispy. Remove the bacon and drain on paper towels, then toss it in the glaze for a stickier finish before setting aside.

Step 3: Form Patties
In a large bowl, gently combine 1 pound of ground beef with salt, pepper, and optional garlic powder. Be careful not to overwork the meat to keep the patties tender. Form the mixture into 4 equal patties, making a slight indentation in the center of each to help prevent bulging during cooking.

Step 4: Sear Patties
Using the same skillet from the bacon (add more oil if needed), heat it over medium-high heat. Carefully place the burger patties in the skillet and cook for about 4 to 5 minutes on each side, or until they develop a beautiful sear and reach your desired doneness.

Step 5: Add Cheese
In the last minute of cooking, place a slice of sharp cheddar cheese on each patty. Cover the skillet with a lid to help the cheese melt beautifully, creating a gooey topping for the Whiskey Maple Bacon Burger.

Step 6: Assemble Burgers
To assemble, scoop out your preferred burger buns and place a patty on each. Layer the crispy, glazed bacon on top of the cheese and drizzle with any extra glaze from the skillet. Serve these delightful Whiskey Maple Bacon Burgers immediately for an unforgettable meal.

What to Serve with Flavorful Whiskey Maple Bacon Burger?

Imagine sinking your teeth into a sumptuous burger, then discovering the perfect sides that elevate your meal to new culinary heights.

  • Crispy Sweet Potato Fries: The natural sweetness and crunch perfectly complement the burger’s smoky glaze.
  • Fresh Green Salad: A light salad with tangy vinaigrette brightens each bite and balances the hearty burger.
  • Creamy Coleslaw: The cool, crisp texture of slaw contrasts beautifully with the warm, savory flavors of the burger.
  • Grilled Corn on the Cob: Sweet and smoky, the grilled corn adds a fun, festive flair to your outdoor dining experience.
  • Loaded Nachos: Top tortilla chips with cheese, jalapeños, and avocado for a fun appetizer that pairs wonderfully with the bourbon flavors.
  • Garlic Parmesan Brussels Sprouts: Crispy Brussels sprouts tossed in garlic and parmesan offer savory richness that enhances the overall meal.

Each of these sides brings its own delightful flavors and textures, making your Whiskey Maple Bacon Burger an experience your guests will remember long after the last bite!

Whiskey Maple Bacon Burger Variations

Feel free to put your own spin on this delicious burger with these fun and tasty options!

  • Gluten-Free: Swap regular burger buns for gluten-free buns or try wrapping your burger in crisp lettuce leaves for a fresh twist.
    Experiencing a gluten-free lifestyle doesn’t mean sacrificing flavor—enjoy the same deliciousness with a lighter touch!

  • Dairy-Free: Use dairy-free cheese for a creamy alternative without the lactose.
    Whether you’re vegan or have lactose sensitivities, these options let everyone enjoy. Plus, the meltiness still shines through nicely!

  • Spicy Kick: Add sliced jalapeños or a sprinkle of red pepper flakes to the beef mixture for a fiery flavor boost.
    Those who enjoy a bit of warmth in their meal can elevate this burger into a spicy delight that ignites the taste buds!

  • Herb-Infused: Incorporate fresh herbs like parsley or cilantro into the burger mixture for a lively aroma and unique taste.
    Fresh herbs can make a delightful difference, lending an aromatic touch that makes each bite memorable.

  • BBQ Style: Mix in your favorite BBQ sauce with the glaze to create smoky sweet flavors that dance on your palate.
    This adds depth and enhances the overall flavor profile, transforming your burger into a summertime favorite.

  • Caramelized Onions: For added sweetness and depth, top your burger with rich, caramelized onions.
    These luscious onions can complement the glaze perfectly, creating layers of flavor that are simply irresistible.

  • Pineapple Twist: Top your burger with grilled pineapple for a tropical flavor explosion.
    This fruity addition melds wonderfully with the sweet glaze and smoky notes, bringing a delightful twist that transports your taste buds to paradise.

  • Mushroom Medley: Sauté mushrooms in the glaze before adding them on top of the burger for an earthy flavor boost.
    The mushrooms enhance richness and add a savory depth that takes these burgers to the next level.

No matter how you choose to customize your Whiskey Maple Bacon Burger, each variation is sure to impress your family and friends—perfect alongside sides like my Savory Beef Bacon or Mini Cheeseburger Breads!

Expert Tips for the Best Whiskey Maple Bacon Burger

Patty Perfection: Ensure you’re not overworking the ground beef; this keeps your Whiskey Maple Bacon Burger juicy and tender for every bite.

Glaze Monitoring: Keep an eye on the glaze as it reduces; too high of a heat can lead to burning, ruining that sweet flavor.

Resting Time: Allow your burgers to rest for a few minutes after cooking to maintain juiciness and enhance your bite experience.

Ideal Equipment: Use a heavy non-stick skillet or cast iron for optimal searing, ensuring that rich flavors develop without sticking.

Cheese Selection: Don’t hesitate to mix things up with cheeses; try different varieties if sharp cheddar isn’t available, or go for a dairy-free option if needed.

Make Ahead Options

These Whiskey Maple Bacon Burgers are perfect for busy weeknights and can truly save you time when prepped in advance! You can prepare the glaze (whiskey and maple syrup mixture) and store it in an airtight container for up to 3 days in the refrigerator. The patties can also be formed and kept wrapped in plastic wrap for up to 24 hours. To maintain the quality, be sure to keep them sealed to prevent drying out. When you’re ready to cook, simply cook the bacon and sear the patties as instructed, topping them with cheddar and assembling your burgers. This way, you’ll enjoy the same delicious flavors with minimal effort when it’s time to eat!

How to Store and Freeze Whiskey Maple Bacon Burger

Fridge: Store leftover Whiskey Maple Bacon Burger in an airtight container for up to 2 days, ensuring the patties and toppings stay fresh.

Freezer: If you want to enjoy your burgers later, wrap the patties tightly in plastic wrap and foil before placing them in an airtight bag. They can be frozen for up to 3 months.

Reheating: When ready to enjoy, thaw in the fridge overnight. Reheat in a skillet over low heat until warmed through, adding a splash of water to maintain moisture.

Bacon Storage: Keep any leftover glazed bacon in the fridge for up to 2 days. Reheat it briefly in the skillet or microwave before using it on your reheated burgers.

Whiskey Maple Bacon Burger Recipe FAQs

What kind of whiskey should I use for the glaze?
I recommend using a smooth variety of whiskey that complements the flavors without overpowering them. Avoid overly smoky or harsh options, as they can dominate the sweet maple syrup and reduce the overall balance of your Whiskey Maple Bacon Burger.

How long can I store leftover burgers in the fridge?
Leftover Whiskey Maple Bacon Burger can be stored in an airtight container for up to 2 days. To maintain optimal freshness, try to keep the patties and toppings separate until you’re ready to enjoy them again!

Can I freeze the burger patties? How?
Absolutely! To freeze your burger patties, wrap each one tightly in plastic wrap and then in foil to prevent freezer burn. Place them in an airtight bag and they’ll stay fresh for up to 3 months. When you’re ready to use them, thaw them in the fridge overnight before cooking.

What should I do if my glaze turns out too thin?
If your glaze isn’t thickening as desired, continue to simmer it over medium heat, stirring frequently. This allows excess moisture to evaporate, thickening the sauce. If it’s too thin after a longer simmer, consider mixing a bit of cornstarch with water and adding it to the glaze to help it thicken up quickly.

Are there any dietary considerations for this recipe?
Yes! For gluten-free options, swap regular burger buns for gluten-free varieties or use lettuce wraps instead. Likewise, if you’re looking for a dairy-free option, you can substitute sharp cheddar cheese with a dairy-free cheese product that melts well—there are great options available nowadays that won’t compromise your burger’s flavor!

Can I make the glaze ahead of time?
Certainly! You can prepare the whiskey and maple glaze in advance. After it cools, store it in an airtight container in the fridge for up to 5 days. Just give it a quick reheat and stir before using it on your burgers for that perfect sweet and smoky finish.

Whiskey Maple Bacon Burger

Whiskey Maple Bacon Burger: Sweet & Smoky Flavor Explosion

This Whiskey Maple Bacon Burger combines sweet and smoky flavors, making it a perfect dinner option that pleases crowds and adapts to dietary needs.
Prep Time 15 minutes
Cook Time 30 minutes
Resting Time 5 minutes
Total Time 50 minutes
Servings: 4 burgers
Course: Dinner
Cuisine: American
Calories: 600

Ingredients
  

For the Burger Patties
  • 1 pound ground beef Use a higher fat content for juiciness.
  • to taste salt
  • to taste black pepper
  • to taste garlic powder Optional for extra flavor.
For the Glaze
  • 1/2 cup whiskey Smooth variety recommended.
  • 1/2 cup maple syrup
For the Toppings
  • 6 slices thick-cut bacon Cook until crispy.
  • 4 slices sharp cheddar cheese Dairy-free alternative can be used.
For the Sandwich Structure
  • 4 buns burger buns Gluten-free buns or lettuce wraps can be substituted.

Equipment

  • Skillet
  • spatula
  • mixing bowl

Method
 

Step-by-Step Instructions
  1. In a medium skillet, combine whiskey and maple syrup. Bring to a gentle simmer and reduce for 10-15 minutes.
  2. Cook bacon in a cold skillet on medium heat for 8-10 minutes until crispy. Toss in glaze before removing.
  3. In a bowl, mix ground beef with seasonings, forming 4 patties with a slight indentation in the center.
  4. Sear patties in the same skillet for about 4-5 minutes per side until desired doneness.
  5. Add a slice of cheddar cheese on each patty in the last minute of cooking, covering to melt.
  6. Assemble the burgers with buns, patties, glazed bacon, and extra glaze, serving immediately.

Notes

Ensure ground beef isn't overworked for juicy patties. Monitor glaze to prevent burning; let burgers rest after cooking.

Berry Cream Cheese Muffins You’ll Adore for Breakfast Bliss

As I watched the vibrant hues of fresh blueberries and raspberries dance in my bowl, I felt a wave of inspiration wash over me. It wasn’t long before I found myself whipping up a batch of Berry Cream Cheese Muffins, each one promising the perfect balance of sweetness and creaminess. These incredible little treats are not only easy to make but also boast an ultra-moist texture thanks to the secret ingredient—Greek yogurt—adding a boost of protein as well. Perfect for lazy mornings or brunch gatherings, these muffins will surely impress your family and friends. Are you ready to elevate your muffin game? Let’s dive into this delightful recipe together!

Why Are These Muffins So Irresistible?

Moisture Meets Flavor: The secret to these muffins lies in the Greek yogurt, which creates an exceptionally moist texture. Creamy Center: The luscious cream cheese filling provides a delightful surprise in every bite. Berry Bliss: Bursting with fresh blueberries and raspberries, they’re a sweet treat you’ll crave again and again. Versatile Options: Feel free to swap in different fruits, from peaches to strawberries, to match the seasons. Quick and Easy: With simple ingredients and straightforward steps, you’ll have these ready to enjoy in no time—perfect for an effortless breakfast. Pair them with a hot cup of coffee or tea, just like with our Easy Stovetop Cheese and Green Onion Flatbread, and savor the moment!

Berry Cream Cheese Muffin Ingredients

Get ready to gather your essentials for these delightful Berry Cream Cheese Muffins!

For the Muffins

  • All-Purpose Flour – Gives structure; use whole wheat flour for a healthier twist.
  • Granulated Sugar – Adds sweetness; brown sugar can enhance flavor richness.
  • Light Brown Sugar – Contributes moisture and caramel notes; regular sugar works in a pinch.
  • Baking Powder – Essential for rise; ensure it’s fresh for best results.
  • Salt – Enhances flavor; a pinch of sea salt elevates your muffins.
  • Unsalted Butter – Brings richness; may substitute with vegetable or coconut oil.
  • Cream Cheese – Offers a smooth, creamy center; make sure it’s softened for easy mixing.
  • Greek Yogurt – Increases moisture and protein, ensuring fluffy muffins; you can use sour cream as an alternative.
  • Egg – Binds ingredients effectively and adds moisture; flax eggs are great for a vegan option.
  • Vegetable Oil – Adds extra moisture; melted coconut oil works well too.
  • Mixed Berries (Blueberries/Raspberries) – Adds vibrant flavor; fresh or frozen is perfect—don’t thaw!

For the Streusel Topping

  • All-Purpose Flour – Maintains structure for crumbly texture; can be replaced with oats for a different bite.
  • Granulated Sugar – Sweetens the topping; consider using brown sugar for added depth.
  • Salt – Balances sweetness; a pinch goes a long way.
  • Unsalted Butter – Fuses the crumbs; using cold butter creates a better texture.

These Berry Cream Cheese Muffins will leave you and your loved ones delighted! Whether you’re enjoying them warm at breakfast or as a sweet snack, don’t forget that secret ingredient—Greek yogurt—that takes these muffins to the next level.

Step‑by‑Step Instructions for Berry Cream Cheese Muffins

Step 1: Prepare Crumb Topping
In a medium bowl, combine ½ cup of all-purpose flour, ¼ cup of granulated sugar, and a pinch of salt. Drizzle in ¼ cup of melted unsalted butter, mixing with a fork until coarse crumbs form, resembling sand. Set this aside while you prepare the cream cheese filling and the muffin batter, allowing the crumbs to chill slightly for a better texture when baked.

Step 2: Make Cream Cheese Filling
In a separate bowl, beat together 8 ounces of softened cream cheese, ¼ cup of granulated sugar, 1 tablespoon of cornstarch, and 1 teaspoon of vanilla extract until the mixture is smooth and creamy. This delicious filling will become the delightful surprise inside your Berry Cream Cheese Muffins. Set aside each component to keep your muffin assembly organized and efficient.

Step 3: Prepare Muffin Batter
In a large mixing bowl, whisk together 2 cups of all-purpose flour, 1 tablespoon of baking powder, and a pinch of salt. In another bowl, combine 1 large egg with ¾ cup of granulated sugar, then add ¾ cup of Greek yogurt, ⅓ cup of vegetable oil, and 1 teaspoon of vanilla. Pour the wet ingredients into the dry ingredients and gently mix until just combined, ensuring you don’t overmix for light muffins.

Step 4: Add Berries
Gently fold in 1 cup of blueberries and 1 cup of raspberries into the muffin batter, taking care not to crush the berries to preserve their shape and freshness. This step will enhance your berry cream cheese muffins with vibrant fruity flavors. Reserve a handful of berries for topping later, ensuring each muffin is beautifully adorned for a stunning presentation.

Step 5: Assemble Muffins
Preheat your oven to 350°F (175°C) and line a muffin tin with paper liners. Spoon about 2 tablespoons of muffin batter into each liner, creating a small well in the center. Generously fill the well with the cream cheese mixture and top it off with a couple of the reserved berries and a sprinkle of crumb topping, which adds an inviting crunch to your berry cream cheese muffins.

Step 6: Bake
Carefully place the muffin tin in the preheated oven and bake for 30 to 35 minutes, or until the tops are golden brown and a toothpick inserted in the center comes out clean. Keep an eye on the muffins as they bake; you’ll know they’re ready when the kitchen fills with a delicious scent and the tops puff up beautifully.

Step 7: Cool
Once baked, remove the muffin tin from the oven and let the muffins cool in the pan for about 5 minutes. Then, transfer them to a wire rack to cool completely. This allows the muffins to set their structure while preventing sogginess so each bite maintains a perfect texture.

Step 8: Prepare Glaze
While your muffins are cooling, prepare a simple glaze by mixing 1 cup of powdered sugar with 2 tablespoons of milk in a small bowl, stirring until you reach your desired consistency. This sweet drizzle will bring an extra layer of flavor to your berry cream cheese muffins, adding a lovely finish that everyone will adore.

Make Ahead Options

These Berry Cream Cheese Muffins are perfect for busy mornings! You can prepare the muffin batter and the cream cheese filling up to 24 hours in advance. Simply mix the dry ingredients and set aside the wet ingredients separately in the refrigerator. The cream cheese filling can also be prepared and stored in an airtight container. When you’re ready to bake, combine the wet and dry ingredients, gently fold in your mixed berries, and assemble your muffins. This way, you achieve delightful freshness while saving precious time. For the best results, avoid overmixing and bake the muffins right before serving for that warm, homemade comfort.

Expert Tips for Berry Cream Cheese Muffins

  • Fresh Ingredients: Always use fresh berries and ensure your baking powder is up-to-date; this is key for the best rise and flavor in your Berry Cream Cheese Muffins.

  • Mix with Care: Avoid overmixing the batter; this can lead to dense muffins. Gently fold until just combined for a light and fluffy texture.

  • Chill the Topping: Let the crumb topping chill before baking, as this helps create a delightful crunch—key for the perfect muffin experience!

  • Room Temperature Cream Cheese: Make sure your cream cheese is at room temperature for easy mixing. Cold cream cheese can create lumps in the filling.

  • Serving Warm: For an extra treat, serve the muffins warm right out of the oven. The cream cheese center will be ooey-gooey, making them even more irresistible!

  • Store Wisely: Place leftover muffins in an airtight container at room temperature for up to one day, or refrigerate to keep them fresh for longer—perfect for snacking!

Berry Cream Cheese Muffin Variations

Feel free to unleash your creativity and customize these muffins to suit your taste buds!

  • Dairy-Free: Substitute Greek yogurt and cream cheese with coconut yogurt or vegan cream cheese for a deliciously dairy-free version.
  • Flavored Yogurt: Use flavored Greek yogurt, like vanilla or lemon, to add an extra layer of flavor that brightens your muffins.
  • Add Nuts: Incorporate chopped nuts, such as walnuts or pecans, for a delightful crunch and added texture in each bite.
  • Different Fruits: Try swapping out the berries for seasonal fruit like peaches, apples, or bananas, creating a whole new taste adventure!
  • Protein Boost: Add a scoop of your favorite protein powder to the dry ingredients for an extra protein punch that’ll keep you satisfied.
  • Zest it Up: Incorporate lemon or orange zest into the batter for a refreshing citrus note that pairs beautifully with the creaminess of the filling.
  • Spice it Right: Add warm spices like cinnamon or nutmeg to the batter for a cozy flavor twist—great for any season!
  • Chocolate Delight: Fold in mini chocolate chips along with the berries for a sweet and decadent treat that chocolate lovers will adore.

For more delicious muffin ideas, check out our Berry Banana Cottage and indulge in other delightful flavors!

What to Serve with Berry Cream Cheese Muffins

Indulging in Berry Cream Cheese Muffins can be a delightful experience, especially when paired with the right accompaniments to elevate your breakfast or snack time.

  • Fresh Fruit Salad: A colorful mix of seasonal fruits enhances the freshness of the muffins and adds a refreshing burst of flavor. Think sweet melons, juicy oranges, and tangy kiwi for a tropical twist.

  • Greek Yogurt Parfait: Layer creamy Greek yogurt with additional berries and a drizzle of honey. This not only complements the muffins but also ups the protein content, creating a wholesome breakfast bowl.

  • Coconut Chai Latte: The warm spices of chai perfectly balance the sweetness of the muffins, offering a cozy beverage that will awaken your senses. Sip on this while enjoying your muffins for a delightful morning ritual.

  • Honey Butter Spread: A dollop of honey butter on warm muffins takes them to the next level. The sweet, creamy glaze melts into every bite, enhancing the luscious cream cheese filling. It’s a match made in culinary heaven!

  • Savory Spinach and Feta Frittata: Pair these sweet muffins with a hearty frittata brimming with fresh vegetables and cheese. This contrast of savory and sweet makes for a well-rounded brunch spread that is sure to impress.

  • Iced Herbal Tea: For a lighter option, a chilled herbal tea infused with mint or hibiscus can offer a refreshing sip that complements the fruity goodness of the muffins without overwhelming their flavor.

  • Chocolate-Covered Strawberries: For those with a sweet tooth, serving chocolate-covered strawberries alongside your muffins creates a lovely, indulgent treat that combines both fruity and creamy elements deliciously.

  • Vanilla Almond Milkshake: A creamy, dreamy shake made with almond milk and vanilla is a fun, refreshing drink to serve with your muffins, adding a special twist to your breakfast table.

These pairings will enhance your experience with Berry Cream Cheese Muffins, rounding out a cozy breakfast or afternoon treat that will satisfy and delight everyone at your table.

Storage Tips for Berry Cream Cheese Muffins

Room Temperature: Store muffins in an airtight container at room temperature for up to 1 day to maintain their delightful freshness.

Fridge: If you plan to enjoy them longer, refrigerate in an airtight container for up to 5 days—great for prolonging that moist texture.

Freezer: For extended storage, freeze muffins in a zip-top bag with the air removed for up to 2 months. Thaw overnight in the fridge or at room temperature before enjoying.

Reheating: To warm after refrigeration or freezing, simply reheat in the microwave for 10-15 seconds or in a preheated oven at 350°F for about 5-7 minutes, ensuring that every bite of your Berry Cream Cheese Muffins is cozy and delicious!

Berry Cream Cheese Muffins Recipe FAQs

What type of berries works best in these muffins?
Absolutely! Fresh raspberries and blueberries are my go-to for these muffins because they provide a lovely burst of flavor, but you can also use blackberries or even strawberries. If using frozen berries, there’s no need to thaw them—just fold them into your batter directly for that moist, fruity goodness!

How can I ensure my muffins maintain their moisture when stored?
Very! To keep your Berry Cream Cheese Muffins fresh, store them in an airtight container at room temperature for up to 1 day. For longer storage, transferring them to the fridge in an airtight container can help extend their freshness for up to 5 days. Just make sure to let them cool completely before sealing them up!

Can I freeze these muffins for later enjoyment?
Certainly! To freeze your muffins, allow them to cool fully, then place them in a zip-top bag, removing as much air as possible. They can be stored in the freezer for up to 2 months. When you’re ready to savor them, simply thaw overnight in the refrigerator or at room temperature, then pop them in the microwave for 10-15 seconds to warm them up again.

What should I do if my muffins don’t rise correctly?
It’s essential to ensure your baking powder is fresh, as expired baking powder can lead to flat muffins. If this happens, check the expiration date and perhaps do a quick test by adding a little baking powder to water to see if it fizzes. Additionally, avoid overmixing your batter, which can lead to denser muffins. Gentle mixing is key for that light, fluffy texture.

Are these muffins suitable for those with dietary restrictions?
Yes! You can absolutely adjust this recipe for various dietary needs. For a gluten-free version, substitute all-purpose flour with a gluten-free blend. Those avoiding dairy can use a vegan cream cheese alternative and replace the Greek yogurt with unsweetened applesauce or a dairy-free yogurt. Always be mindful of any allergies when selecting your ingredients.

How should I prepare the cream cheese filling for the best results?
For the best cream cheese filling consistency, make sure to use room temperature cream cheese. This will allow you to mix in sugar and cornstarch smoothly, creating a creamy, lump-free filling. Simply beat the cream cheese until smooth, then mix in the sugar, cornstarch, and vanilla extract until well combined. This step ensures your filling is light and fluffy, perfectly complementing the muffins!

Berry Cream Cheese Muffins

Berry Cream Cheese Muffins You’ll Adore for Breakfast Bliss

These Berry Cream Cheese Muffins offer a delightful blend of sweetness and creaminess, perfect for breakfast bliss.
Prep Time 15 minutes
Cook Time 35 minutes
Cooling Time 5 minutes
Total Time 55 minutes
Servings: 12 muffins
Course: Breakfast
Cuisine: American
Calories: 250

Ingredients
  

For the Muffins
  • 2 cups All-Purpose Flour Use whole wheat flour for a healthier twist.
  • ¾ cup Granulated Sugar Brown sugar can enhance flavor richness.
  • ½ cup Light Brown Sugar Regular sugar works in a pinch.
  • 1 tablespoon Baking Powder Ensure it’s fresh for best results.
  • 1 teaspoon Salt A pinch of sea salt elevates your muffins.
  • ½ cup Unsalted Butter May substitute with vegetable or coconut oil.
  • 8 ounces Cream Cheese Make sure it’s softened for easy mixing.
  • ¾ cup Greek Yogurt You can use sour cream as an alternative.
  • 1 large Egg Flax eggs are great for a vegan option.
  • cup Vegetable Oil Melted coconut oil works well too.
  • 2 cups Mixed Berries (Blueberries/Raspberries) Fresh or frozen is perfect—don’t thaw!
For the Streusel Topping
  • ½ cup All-Purpose Flour Can be replaced with oats for a different bite.
  • ¼ cup Granulated Sugar Consider using brown sugar for added depth.
  • 1 teaspoon Salt A pinch goes a long way.
  • ¼ cup Unsalted Butter Using cold butter creates a better texture.

Equipment

  • muffin tin
  • mixing bowls
  • whisk
  • Fork

Method
 

Step-by-Step Instructions
  1. In a medium bowl, combine ½ cup of all-purpose flour, ¼ cup of granulated sugar, and a pinch of salt. Drizzle in ¼ cup of melted unsalted butter, mixing with a fork until coarse crumbs form. Set aside.
  2. In a separate bowl, beat together 8 ounces of softened cream cheese, ¼ cup of granulated sugar, 1 tablespoon of cornstarch, and 1 teaspoon of vanilla extract until smooth and creamy. Set aside.
  3. In a large mixing bowl, whisk together 2 cups of all-purpose flour, 1 tablespoon of baking powder, and a pinch of salt. In another bowl, combine 1 egg with ¾ cup of granulated sugar, then add ¾ cup of Greek yogurt, ⅓ cup of vegetable oil, and 1 teaspoon of vanilla. Pour the wet ingredients into the dry ingredients and mix until just combined.
  4. Gently fold in 1 cup of blueberries and 1 cup of raspberries, preserving their shape. Reserve a handful of berries for topping.
  5. Preheat your oven to 350°F (175°C) and line a muffin tin with paper liners. Spoon about 2 tablespoons of muffin batter into each liner and fill the center with the cream cheese mixture. Top with reserved berries and crumb topping.
  6. Bake for 30 to 35 minutes, or until the tops are golden brown and a toothpick comes out clean. Keep an eye on the muffins while baking.
  7. Once baked, let the muffins cool in the pan for 5 minutes, then transfer them to a wire rack to cool completely.
  8. Prepare a glaze by mixing 1 cup of powdered sugar with 2 tablespoons of milk until you reach your desired consistency. Drizzle over cooled muffins.

Notes

Store leftover muffins in an airtight container. For optimal freshness, enjoy within a day or refrigerate for longer storage.

Fried Chicken Sandwich Bliss: Crunchy, Juicy Homemade Goodness

A heavenly crunch, followed by a juicy explosion of flavor—this is what you can expect from my Ultimate Fried Chicken Sandwich with Homemade Sourdough-Potato Buns. As I sink my teeth into this sandwich, I’m whisked away to the vibrant food truck scene, where gourmet meets comfort food. What makes this recipe truly special is not just the crispy chicken thighs soaked in buttermilk, but the unique sourdough-potato buns that elevate each bite. Plus, it’s a crowd-pleaser that you can whip up quickly for a delicious dinner! If you’re ready to impress your family and friends—or just treat yourself to some Fried Chicken Sandwich Bliss—join me as we dive into this delectable creation, accompanied by tangy pickles and a creamy ranch slaw that ties everything together. Are you curious to discover just how easy it is to make this indulgent yet rewarding dish at home? Let’s get cooking!

Why is this Fried Chicken Sandwich irresistible?

Crunchy, Flavorful Pleasure: The fried chicken’s crispy exterior encases succulent, juicy meat that creates a delightful contrast in each bite.

Homemade Brilliance: The unique sourdough-potato buns are a game-changer, adding depth and flavor that store-bought options can’t rival.

Quick & Easy: With straightforward instructions, you can whip this up in no time, making it a perfect weeknight dinner.

Crowd-Pleasing Comfort: Friends and family will gather around the table for this delicious masterpiece, ensuring it’s a hit at your next gathering.

Versatile Pairings: Serve alongside crispy Cajun fries or a fresh salad for a complete meal that satisfies all cravings.

Fried Chicken Sandwich Ingredients

For the Chicken
Chicken Thighs – Juicy protein that stays moist during frying; substitute with chicken breasts for a leaner option.
Buttermilk – Tenderizes the chicken and adds rich flavor; use milk mixed with vinegar or lemon juice as a DIY buttermilk.
Smoky, Garlicky Hot Sauce – Finishes the sandwich with a flavorful kick; feel free to use your favorite hot sauce for customization.

For the Buns
Sourdough-Potato Buns – Provides unique flavor and texture that elevate the sandwich; store-bought brioche or regular hamburger buns are good alternatives if needed.

For the Toppings
Tangy Pickles – Adds acidity and crunch; you can choose dill or bread and butter pickles based on your taste.
Creamy Ranch Dressing – Balances out the spices with a cooling effect; you can opt for store-bought ranch or whip up a homemade version for extra freshness.

This Fried Chicken Sandwich is a true culinary gem, so gather your ingredients and get ready for a satisfying cooking experience!

Step‑by‑Step Instructions for Fried Chicken Sandwich Bliss

Step 1: Brine the Chicken
Begin by soaking the chicken thighs in a bowl of buttermilk mixed with desired seasonings, such as salt and pepper. Cover and refrigerate for at least 4 hours, or overnight for maximum tenderness. This step ensures the meat is well-seasoned and juicy, setting the foundation for your Fried Chicken Sandwich Bliss.

Step 2: Prepare the Buns
While the chicken brines, make your homemade sourdough-potato buns or prep store-bought ones. If using store-bought, slice them in half and toast them lightly on a skillet over medium heat until golden brown, about 2-3 minutes. This will add a delightful crunch that complements the crispy chicken.

Step 3: Heat the Oil
In a heavy-bottomed pot or deep skillet, pour enough oil to submerge the chicken (about 2-3 inches), and heat it to 350°F. Use a thermometer for accuracy. The right temperature is key for achieving that golden, crispy exterior without overly greasy chicken, inviting you to indulge in your Fried Chicken Sandwich Bliss.

Step 4: Fry the Chicken
Carefully add the brined chicken thighs to the hot oil, frying them for about 5-7 minutes per side until they reach a deep golden color and an internal temperature of at least 165°F. Use a slotted spoon to flip the chicken, ensuring even cooking while avoiding oil splatter. Once done, transfer the chicken to a wire rack to drain any excess oil.

Step 5: Assemble the Sandwich
To bring your Fried Chicken Sandwich Bliss together, start with a toasted bun. Layer on the crispy fried chicken, followed by tangy pickles and a generous spoonful of creamy ranch dressing. Finish with additional toppings if desired, then crown it with the top half of the bun, creating a hearty, mouthwatering sandwich.

Step 6: Serve and Enjoy
Serve your assembled fried chicken sandwich immediately while hot, showcasing its crunchy exterior and juicy interior. For an extra kick, drizzle on some smoky, garlicky hot sauce. Pair with crispy Cajun fries or a fresh salad for a complete meal that will have your family and friends coming back for more.

Expert Tips for Fried Chicken Sandwich Bliss

  • Proper Brining: Ensure the chicken is brined for at least 4 hours or overnight. This step is crucial for achieving moist, flavorful meat in your fried chicken sandwich.

  • Oil Temperature Check: Use a thermometer to monitor oil temperature at 350°F. Incorrect oil temperature can lead to greasy chicken instead of the desired crispy texture.

  • Use a Wire Rack: After frying, let the chicken rest on a wire rack rather than paper towels. This keeps the fried exterior crispy instead of soggy from trapped moisture.

  • Customize Your Buns: While homemade sourdough-potato buns elevate the sandwich, don’t hesitate to use good-quality store-bought options when time is short—just remember to toast them lightly for added crunch.

  • Revitalize Leftovers: If you have sandwich leftovers, reheat the chicken in the oven rather than the microwave. This retains the crunchy coating for a satisfying meal, embracing the essence of Fried Chicken Sandwich Bliss.

What to Serve with Fried Chicken Sandwich Bliss

A truly delightful meal experience awaits when you pair the perfect sides with your crispy, juicy sandwich.

  • Crispy Cajun Fries: The spicy kick and crunchy texture of these fries complement the savory flavors of the fried chicken, creating a satisfying contrast. Serve them with a side of tangy dipping sauce for an extra layer of flavor.

  • Coleslaw Medley: A refreshing, crunchy coleslaw balances the rich fried chicken, adding a zesty crunch that brightens your bite. Try adding apples or pineapples for a sweet twist!

  • Pickled Vegetables: The acidity from pickled cucumbers, carrots, or radishes cuts through the richness of the sandwich, elevating each mouthful and adding a burst of freshness.

  • Macaroni and Cheese: This creamy, cheesy side is pure comfort food and provides a delightful contrast in texture with its rich and velvety filling harmonizing beautifully with the crunch of the chicken.

  • Watermelon Salad: A sweet, juice-laden fruit salad complements the spiciness with its refreshing nature. Add a sprinkle of feta cheese and mint leaves for a vibrant touch!

  • Sweet Iced Tea: This classic drink brings a hint of sweetness, making it an ideal refreshing partner to counterbalance the richness of the fried chicken, creating an all-American meal.

  • Chocolate Chip Cookies: For a sweet ending, these warm, gooey cookies provide a familiar comfort and nostalgia that rounds off your meal perfectly. Enjoy them with a glass of cold milk for a delightful treat!

Make Ahead Options

These Fried Chicken Sandwiches are perfect for meal prep enthusiasts! You can brine the chicken thighs in buttermilk for up to 24 hours in advance, allowing them to absorb all that delicious flavor while ensuring they remain tender and juicy. Additionally, consider preparing the sourdough-potato buns beforehand; you can make and freeze them up to 3 days prior to assembly. Just remember to toast them fresh for the best texture when ready to serve. When it’s time to enjoy your Fried Chicken Sandwich Bliss, simply fry the brined chicken and assemble the sandwich with your pickles and ranch dressing. This way, you’ll whip up a tasty dinner in no time, perfect for busy weeknights!

How to Store and Freeze Fried Chicken Sandwich

Fridge: Store leftover fried chicken sandwich components separately in airtight containers for up to 3 days to maintain freshness and texture.

Freezer: For longer storage, freeze the cooked chicken thighs individually wrapped in plastic wrap, then sealed in a freezer bag for up to 3 months. Reheat directly from the freezer.

Reheating: To revive your fried chicken, reheat in the oven at 375°F until crispy, about 10-15 minutes, ensuring you regain the delicious crunch that defines the Fried Chicken Sandwich Bliss.

Buns: Keep homemade sourdough-potato buns in an airtight container at room temperature for up to 2 days or freeze them for up to a month, toasting fresh before serving.

Fried Chicken Sandwich Bliss Variations

Ready to take your Fried Chicken Sandwich to the next level? Let’s explore some exciting and delicious options to customize this beloved dish!

  • Vegetarian Twist: Substitute chicken with crispy cauliflower for a satisfyingly crunchy vegetarian option. Coat cauliflower in buttermilk and seasoned breadcrumbs for the best flavor!

  • Gluten-Free: Use gluten-free flour instead of regular flour for the chicken coating. This way, everyone can join in on Fried Chicken Sandwich Bliss!

  • Spicy Slaw: Instead of a creamy ranch slaw, try a spicy jalapeño slaw to give your sandwich a fiery kick. This adds a wonderful heat that perfectly complements the crispy chicken.

  • Flavorful Marinade: Marinate the chicken in your favorite hot sauce mixed with buttermilk for a punchier flavor. Let it soak overnight for an unforgettable taste experience.

  • Different Buns: Experiment with pretzel buns or whole wheat buns for a unique twist. Toast them lightly to keep that delicious crunch alive!

  • Savory Sauce: Drizzle your sandwich with a balsamic glaze or maple syrup to create a sweet-savory flavor profile that dances on your taste buds.

  • Cheese It Up: Add a slice of provolone or pepper jack cheese right before the chicken finishes frying. Let it melt into gooey perfection for an indulgent touch.

For more delicious chicken recipes, check out Homemade Chicken Pot or try the mouthwatering Honey Chili Chicken for a delightful change!

Fried Chicken Sandwich Recipe FAQs

What type of chicken is best for this sandwich?
Absolutely! While this recipe calls for juicy chicken thighs for their moisture and flavor, feel free to substitute them with boneless chicken breasts for a leaner option. Just remember that chicken breasts can cook quicker, so keep an eye on them while frying.

How should I store leftovers?
Store leftover components of your fried chicken sandwich separately in airtight containers in the fridge for up to 3 days. This helps maintain the crispy texture of the chicken and the freshness of the other ingredients.

Can I freeze the fried chicken?
Yes, you can! Wrap individual pieces of cooked chicken thighs tightly in plastic wrap, then place them in a freezer bag for up to 3 months. To reheat, place the frozen chicken directly in the oven at 375°F for about 10-15 minutes until crispy.

How can I tell when the chicken is properly cooked?
Great question! You should aim for the chicken to reach an internal temperature of 165°F. I recommend using a meat thermometer for the best accuracy. The exterior should be a beautiful golden brown, and the chicken should be juicy inside, making your Fried Chicken Sandwich Bliss all the more delectable.

What can I substitute for buttermilk?
No problem! If you run out of buttermilk, you can easily make your own by mixing 1 cup of milk (whole or low-fat) with 1 tablespoon of lemon juice or vinegar. Let it sit for about 5-10 minutes until it thickens slightly, then you’re all set to brine the chicken.

Are there any dietary considerations for this recipe?
Most definitely! This recipe is not gluten-free due to the use of flour in the frying process, and if you have any allergies, like an intolerance to dairy in buttermilk or ranch dressing, I recommend substituting those with appropriate alternatives. Always check labels for any pre-packaged items to ensure they meet your dietary needs.

Fried Chicken Sandwich Bliss

Fried Chicken Sandwich Bliss: Crunchy, Juicy Homemade Goodness

Experience Fried Chicken Sandwich Bliss with this crispy, juicy homemade sandwich featuring unique sourdough-potato buns.
Prep Time 30 minutes
Cook Time 20 minutes
Brining Time 4 hours
Total Time 4 hours 50 minutes
Servings: 4 sandwiches
Course: Chicken
Cuisine: American
Calories: 600

Ingredients
  

For the Chicken
  • 1 pound Chicken Thighs Can substitute with chicken breasts for a leaner option.
  • 2 cups Buttermilk Or milk mixed with vinegar or lemon juice.
  • 2 tablespoons Smoky, Garlicky Hot Sauce Use your favorite hot sauce.
For the Buns
  • 4 buns Sourdough-Potato Buns Store-bought brioche or hamburger buns can be used.
For the Toppings
  • 1 cup Tangy Pickles Dill or bread and butter pickles based on your taste.
  • 1 cup Creamy Ranch Dressing Store-bought or homemade.

Equipment

  • Heavy-bottomed pot
  • Skillet
  • Thermometer
  • Wire rack

Method
 

Step-by-Step Instructions
  1. Brine the Chicken by soaking the chicken thighs in buttermilk mixed with desired seasonings for at least 4 hours or overnight.
  2. Prepare the Buns by making homemade sourdough-potato buns or prepping store-bought ones, toasting them lightly if using store-bought.
  3. Heat the Oil to 350°F in a heavy-bottomed pot, enough to submerge the chicken.
  4. Fry the Chicken by adding the brined chicken thighs to the hot oil for about 5-7 minutes per side.
  5. Assemble the Sandwich by starting with a toasted bun, adding fried chicken, tangy pickles, and ranch dressing.
  6. Serve and Enjoy immediately while hot, optionally drizzling on some smoky, garlicky hot sauce.

Notes

Ensure proper brining for juiciness and correct oil temperature for crispy texture. Customize buns as desired and store leftovers properly.

Creamy Mashed Celery Potatoes That Make Comfort Food Shine

As I was browsing through my fridge one afternoon, fate intervened in the form of leftover celery and a couple of potatoes just begging to be transformed. That’s when I stumbled upon the idea for Creamy Mashed Celery Potatoes, a budget-friendly twist on an old classic I didn’t know I needed. With just a few simple ingredients, these mashed celery potatoes deliver comforting warmth while adding an unexpected crunch that keeps them interesting. Perfect for cozy weeknight dinners or impressing guests during holiday gatherings, this dish is a real crowd-pleaser without breaking the bank. Are you ready to elevate your side dish game? Let’s dive into this delightful recipe together!

Why Are Creamy Mashed Celery Potatoes Unique?

Budget-Friendly Delight: Enjoy a delicious side dish that won’t break the bank, making it perfect for anyone watching their budget.
Unexpected Flavor: The addition of celery introduces a subtle crunch and unique flavor that elevates standard mashed potatoes to something extraordinary.
Variations Galore: Whether you prefer Garlic Mashed Celery Potatoes with roasted garlic or a Cheesy Version with melted cheese, this recipe allows for creativity.
Easy to Make: With simple instructions, you won’t need to be a culinary expert to whip these up.
Crowd-Pleasing Comfort: This dish is sure to impress guests and family alike, making it the ideal companion for any gathering or weeknight dinner.
Can you taste the creamy goodness already? For a sweet finish, consider serving with a side of Vanilla Pudding!

Creamy Mashed Celery Potatoes Ingredients

For the Potatoes
Potatoes – 2 pounds russet or Yukon gold, peeled and cubed; they create a fluffy base that perfectly blends with the celery.
Celery – 2-3 stalks, finely diced; small cuts help it soften evenly and add a delightful crunch.

For the Creaminess
Butter – 3 tablespoons; it contributes rich creaminess, but you can substitute with margarine for a dairy-free option.
Milk – ½ cup (or more for desired creaminess); this adds moisture and smoothness, and using vegetable broth offers a lighter twist.

Seasoning Essentials
Salt – ½ teaspoon (or to taste); enhances flavor; feel free to adjust based on your dietary needs.
Black Pepper – ¼ teaspoon; it adds a touch of seasoning that can be adjusted to your liking.
Garlic Powder or Minced Garlic (optional) – adds an aromatic depth; incorporate this for extra flavor in your creamy mashed celery potatoes.

Step‑by‑Step Instructions for Creamy Mashed Celery Potatoes

Step 1: Boil Potatoes and Celery
In a large pot, add the peeled and cubed russet or Yukon gold potatoes along with the finely diced celery. Fill the pot with enough salted water to cover the ingredients. Bring it to a rolling boil over high heat and cook for 12-15 minutes, or until both potatoes and celery are fork-tender, ensuring a deliciously soft base for your creamy mashed celery potatoes.

Step 2: Drain Well
Once the vegetables are cooked, carefully drain the pot in a colander, allowing the steam to escape and excess moisture to be released. After draining, return the potatoes and celery back to the pot over low heat for about a minute. This will help evaporate any remaining water, ensuring your mashed mixture won’t be watery.

Step 3: Mash the Mixture
Off the heat, add the butter to the warm potatoes and celery, allowing it to melt into the mixture. Using a potato masher or a hand mixer, begin to mash the vegetables until smooth. Gradually pour in the milk, mixing continuously, until you reach your desired creaminess. This step creates the delightful texture in your creamy mashed celery potatoes.

Step 4: Season and Finish
Now it’s time to add flavor! Stir in the salt, black pepper, and optional garlic to the creamy mixture. Taste and adjust the seasoning to suit your preference, ensuring each bite of creamy mashed celery potatoes is flavorful and satisfying. Mix gently to combine without overworking the potatoes.

Step 5: Serve Warm
Transfer your beautifully creamy mashed celery potatoes to a serving bowl. For an appealing presentation, top with a pat of butter or sprinkle with fresh herbs like parsley or chives. Serve warm alongside your favorite dishes, and enjoy the comforting essence of this budget-friendly twist on classic mashed potatoes.

How to Store and Freeze Creamy Mashed Celery Potatoes

Fridge: Store leftover creamy mashed celery potatoes in an airtight container for up to 3 days. Reheat gently on the stovetop or in the microwave, adding a splash of milk for creaminess.

Freezer: These mashed potatoes freeze well for up to 2 months. Place in freezer-safe containers, leaving space for expansion. Thaw in the fridge overnight before reheating.

Reheating: To reheat, warm in a pot over low heat or microwave in short intervals. Stir occasionally and add milk or butter if needed for a smooth texture.

Room Temperature: Avoid leaving creamy mashed celery potatoes at room temperature for more than 2 hours to maintain freshness and quality.

What to Serve with Creamy Mashed Celery Potatoes

Transform your meal into a delicious spread that excites the senses and satisfies the heart.

  • Garlic Green Beans: These sautéed green beans bring a vibrant crunch that contrasts beautifully with the creamy texture of the potatoes. The garlic adds a savory depth, making each bite delightful.

  • Roasted Chicken: Juicy and golden, roasted chicken is a classic pairing that perfectly complements the earthy flavors of the mashed celery potatoes. A drizzle of gravy can tie both dishes together beautifully.

  • Creamy Coleslaw: The fresh, crisp elements of coleslaw balance the richness of the potatoes. Its tangy dressing provides a refreshing punch, making it a wonderful contrast to your mashed side.

  • Herb-Crusted Salmon: Flavorful herbs and the buttery essence of salmon add a touch of elegance to your meal, perfectly harmonizing with the subtle notes of celery in the potatoes.

  • Seared Brussels Sprouts: Crispy and caramelized Brussels sprouts offer an irresistible roasted flavor that enhances the hearty comfort of the mashed dish. The crunchy exterior and tender inside create an enticing juxtaposition.

  • Apple and Cinnamon Salad: Cool and crisp apples tossed with cinnamon add a sweet, refreshing touch that contrasts beautifully with the comforting warmth of creamy mashed celery potatoes.

  • Berry Crumble: End your meal on a sweet note with a warm berry crumble. Its fruity, slightly tart flavor complements the savory dish perfectly, creating a delightful blend of tastes.

  • Red Wine: A smooth red wine can elevate your dining experience. Its rich flavor profile pairs well with the creamy mashed celery potatoes, enhancing the overall warmth of the meal.

Make Ahead Options

These Creamy Mashed Celery Potatoes are a lifesaver for busy weeknights and can be prepped in advance, saving you valuable time. You can prepare the potato and celery mixture up to 24 hours ahead by following steps 1 and 2, and storing it in an airtight container in the refrigerator. To maintain quality, ensure it’s cooled completely before sealing. When you’re ready to enjoy, simply reheat the mixture gently over low heat, add the butter and milk, and follow steps 3 through 5 to finish. With this prep, you’ll have delicious, comforting mashed celery potatoes ready to impress your family or guests with minimal effort!

Creamy Mashed Celery Potatoes Variations

Customize your mashed celery potatoes with these exciting twists and swaps, adding your own flair to this classic comfort dish!

  • Garlic Mashed: Incorporate roasted or sautéed garlic for that comforting, aromatic kick. This adds a delightful richness, making every bite unforgettable.

  • Cheesy Delight: Fold in shredded cheddar or Parmesan for an indulgently creamy, cheesy flavor. Mixed well, the melted cheese brings warmth and coziness to the dish.

  • Herb Infusion: Mix in fresh herbs like parsley, thyme, or chives for an aromatic and colorful touch. It’s a fragrant twist that pairs beautifully with any meal.

  • Dairy-Free Option: Use margarine instead of butter and substitute milk with vegetable broth for a delicious, lighter version. You won’t miss the creaminess, and it’s perfect for those with dietary restrictions.

  • Spicy Kick: Toss in some red pepper flakes or a dash of hot sauce for a fiery celebration of flavors. This variation adds an unexpected zing that awakens the taste buds.

  • Mashed Sweet Potatoes: Swap half the russet potatoes with sweet potatoes for a touch of natural sweetness. The combination provides a lovely complexity that pairs beautifully with savory dishes.

  • Texture Boost: Fold in toasted breadcrumbs or crushed crackers before serving for an unexpected crunch. This textural contrast elevates your creamy mashed celery potatoes in a delightful way.

Don’t forget, these flavorful variations open a world of possibilities! For an irresistible dessert to complete your meal, consider whipping up some Vanilla Pudding or indulge in delightful Coconut Chocolate Rolls after your comforting side dish!

Expert Tips for Creamy Mashed Celery Potatoes

  • Chop Celery Finely: Ensuring the celery is finely diced allows it to cook evenly, marrying beautifully with the potatoes and enhancing the texture of your creamy mashed celery potatoes.
  • Avoid Overmixing: Be cautious not to overmix your potatoes when mashing; this can lead to a gluey texture. Aim for a smooth yet slightly chunky consistency.
  • Warm the Milk: Always warm your milk before adding it to the mixture. This helps achieve a smoother and creamier texture, making your mashed potatoes even more delightful.
  • Choose the Right Potatoes: For optimal creaminess, prefer Yukon gold potatoes, as their natural buttery flavor elevates your creamy mashed celery potatoes to new heights.
  • Adjust Seasoning: Taste your mixture as you go! The right balance of salt and pepper can make all the difference in enhancing the comforting flavors of your dish.

Creamy Mashed Celery Potatoes Recipe FAQs

What type of potatoes should I use for Creamy Mashed Celery Potatoes?
For the best results, I highly recommend using Yukon gold potatoes. Their natural buttery flavor creates a delightful base that perfectly blends with the celery, resulting in creamy mashed celery potatoes that are simply irresistible. If you can’t find Yukon gold, russet potatoes also work well and will provide a fluffy texture.

How should I store leftover creamy mashed celery potatoes?
To keep your creamy mashed celery potatoes fresh, store them in an airtight container in the fridge for up to 3 days. When it’s time to enjoy them again, simply reheat gently on the stovetop with a splash of milk for that creamy texture. It’s easy and ensures every bite is just as delicious!

Can I freeze creamy mashed celery potatoes?
Absolutely! To freeze, scoop the mashed potatoes into freezer-safe containers, leaving a bit of space at the top since they will expand as they freeze. They’ll last up to 2 months. When you’re ready to enjoy, simply thaw in the fridge overnight, then reheat on the stovetop, adding a little milk if they seem dry.

What if my mashed potatoes turn out gluey?
If your creamy mashed celery potatoes end up gluey, don’t worry! That’s often a result of overmixing. To avoid this next time, mash just until smooth but leave some small chunks for texture. If you’ve already mixed them too much, add a splash of warm milk and gently fold to loosen them a bit. Think of it as a delicious challenge!

Are creamy mashed celery potatoes safe for people with dietary restrictions?
Always a great question! For those watching their dairy intake, consider substituting butter with margarine or olive oil, and using vegetable broth in place of milk for a lighter option. Additionally, check for any allergies to celery or other ingredients. Feel free to adjust spices according to individual dietary needs while keeping the taste delightful.

What should I serve with creamy mashed celery potatoes?
These creamy mashed celery potatoes are a fantastic side dish! Pair them with roasted chicken, grilled vegetables, or pot roast for a comforting meal. They also complement holiday dishes beautifully—just imagine them alongside your turkey or ham!

Creamy Mashed Celery Potatoes

Creamy Mashed Celery Potatoes That Make Comfort Food Shine

Creamy Mashed Celery Potatoes are a budget-friendly twist on a classic side dish, offering a unique flavor and delightful texture.
Prep Time 10 minutes
Cook Time 15 minutes
Total Time 25 minutes
Servings: 4 servings
Course: Dinner
Cuisine: American
Calories: 200

Ingredients
  

For the Potatoes
  • 2 pounds russet or Yukon gold potatoes peeled and cubed
  • 2-3 stalks celery finely diced
For the Creaminess
  • 3 tablespoons butter can substitute with margarine for dairy-free
  • ½ cup milk use more for desired creaminess
Seasoning Essentials
  • ½ teaspoon salt or to taste
  • ¼ teaspoon black pepper
  • garlic powder or minced garlic optional for extra flavor

Equipment

  • Large pot
  • Colander
  • potato masher

Method
 

Step-by-Step Instructions
  1. In a large pot, add the peeled and cubed potatoes along with the finely diced celery. Fill the pot with enough salted water to cover the ingredients. Bring to a rolling boil and cook for 12-15 minutes, or until fork-tender.
  2. Carefully drain the pot in a colander, allowing steam to escape. Return the potatoes and celery to the pot over low heat for about a minute to evaporate remaining water.
  3. Off the heat, add the butter to the warm mixture, allowing it to melt. Mash the vegetables until smooth, gradually pouring in the milk until creamy.
  4. Stir in salt, black pepper, and optional garlic. Taste and adjust seasoning as desired. Mix gently to combine.
  5. Transfer to a serving bowl. Optionally top with a pat of butter or fresh herbs. Serve warm.

Notes

For best results, chop celery finely, avoid overmixing, warm milk before adding, and consider using Yukon gold potatoes for creaminess.

Savory Creamy Cajun Potato Salad: The Ultimate Side Dish Delight

As I stirred the vibrant mixture of vegetables and creamy dressing, a wave of excitement washed over me—this Creamy Cajun Potato Salad was destined to be the star of any gathering! With its silky baby potatoes and a smoky zing from Cajun seasoning, this dish is a delightful celebration of flavors that brings sunshine to your table. Not only is it a crowd-pleaser that pairs beautifully with everything from grilled meats to sandwiches, but it’s also a fantastic make-ahead option that lets you enjoy stress-free entertaining. You can whip this up in no time and store it in the fridge, allowing the flavors to meld into a taste sensation. Ready to elevate your picnic game with this irresistible recipe? Let’s dive in!

Why is This Potato Salad So Special?

Easy to Make: This Creamy Cajun Potato Salad is perfect for busy home cooks who want to impress with minimal effort.

Smoky Flavor Fusion: The unique Cajun seasoning provides a delightful twist, infusing each bite with bold, savory goodness.

Versatile Side Dish: Pair it with grilled meats, sandwiches, or make it the star of your picnic spread.

Make-Ahead Magic: Prepare in advance and let the flavors develop for a delicious, stress-free meal.

Colorful Crunch: With vibrant vegetables like bell peppers and celery, this salad not only tastes divine but also looks stunning on your table.

Elevate your gatherings with this crowd-pleaser, and don’t forget to check out other tasty sides like Zucchini Potato Fritters and Savory Onion Potato Pancakes!

Creamy Cajun Potato Salad Ingredients

For the Salad
Baby Potatoes – Serve as the base, providing a creamy texture when cooked; Yukon Gold or red potatoes are great substitutes.
Celery – Adds crunch and freshness, enhancing the overall texture of the salad.
Green Onions – Provide a mild onion flavor and a beautiful pop of color.
Red Bell Pepper – Contributes sweetness and vibrancy; you can also use yellow or green bell peppers for variety.
Fresh Parsley – Used as a garnish for added freshness and color.

For the Dressing
Mayonnaise – Adds creaminess and richness; Greek yogurt can be used for a lighter option.
Sour Cream – Provides tangy flavor and creaminess; feel free to substitute with yogurt.
Dijon Mustard – Adds a sharp, tangy zing that enhances the dressing.
Lemon Juice – Introduces acidity to balance the creaminess, with fresh lemon juice being the best choice.
Cajun Seasoning – Infuses the salad with a smoky, spicy kick, adjustable based on your spice preference.
Paprika – Adds color and mild flavor; optional for those who prefer less heat.
Garlic Powder & Onion Powder – Add depth and richness to the dressing.
Salt & Black Pepper – Essential for seasoning; adjust to your taste.

With these ingredients, you’re guaranteed to create a Creamy Cajun Potato Salad that’s bursting with flavors and textures, making it the highlight of any meal!

Step‑by‑Step Instructions for Creamy Cajun Potato Salad

Step 1: Cook the Potatoes
Begin by placing baby potatoes in a large pot and covering them with cold water. Add a generous pinch of salt, then bring the pot to a boil over medium-high heat. Once boiling, reduce the heat slightly and cook the potatoes for 10-12 minutes, until fork-tender. You’ll know they’re ready when a fork easily pierces through the tender flesh.

Step 2: Cool the Potatoes
After the potatoes are cooked, drain them in a colander and immediately rinse under cold running water to halt the cooking process. This step is crucial for ensuring your potatoes stay firm and don’t get mushy. Transfer the cooled potatoes to a large mixing bowl and let them sit to dry for a few minutes.

Step 3: Prepare the Dressing
In a separate mixing bowl, combine mayonnaise, sour cream, Dijon mustard, lemon juice, Cajun seasoning, paprika, garlic powder, and onion powder. Whisk these ingredients together until the mixture is smooth and creamy. The dressing should have a vibrant appearance and a delightful smell that hints at the zesty flavor awaiting your Creamy Cajun Potato Salad.

Step 4: Combine Ingredients
Once the potatoes have cooled, pour the creamy dressing over them in the bowl. Gently fold the mixture to ensure every potato is generously coated without breaking them. Then, add in the celery, green onions, and red bell pepper, continuing to fold until all the vegetables are well incorporated into the salad.

Step 5: Season and Chill
Sprinkle salt and black pepper to taste over your salad, adjusting based on your preference. Place the bowl in the refrigerator and let it chill for at least 1 hour, allowing the flavors of the Creamy Cajun Potato Salad to meld beautifully. This waiting time enhances the overall taste experience.

Step 6: Garnish and Serve
Before serving your delightful Creamy Cajun Potato Salad, give it a gentle stir to redistribute the dressing. Finally, garnish with fresh parsley to add a pop of color and freshness. Serve this vibrant salad with grilled meats or alongside your favorite picnic dishes for a truly inviting meal.

Make Ahead Options

This Creamy Cajun Potato Salad is an excellent make-ahead dish that saves you time on busy days! You can prepare the salad up to 24 hours in advance; simply cook and cool the potatoes, then mix them with the dressing, celery, green onions, and red bell pepper. Store it in an airtight container in the refrigerator to maintain freshness and flavor. To ensure the creaminess stays intact, if it seems dry after refrigeration, just fold in a little extra mayonnaise or sour cream before serving. When ready to enjoy, give it a gentle stir, garnish with fresh parsley, and delight in a satisfying meal that tastes just as delicious as when freshly made!

How to Store and Freeze Creamy Cajun Potato Salad

Fridge: Store leftovers in an airtight container for up to 3 days. This helps the flavors meld and keeps the salad fresh.

Freezer: For longer storage, freeze in a freezer-safe container for up to 2 months. Note that the texture may change, so add a little extra dressing upon thawing.

Reheating: If you want to enjoy your Creamy Cajun Potato Salad warm, let it thaw in the fridge overnight before gently reheating, adding extra mayo or sour cream as needed to restore creaminess.

Make-Ahead Tip: Prepare your salad a day in advance and refrigerate; this way, the flavors have time to develop, making it even more delicious!

Creamy Cajun Potato Salad Variations

Feel free to put your unique spin on this creamy delight and make it your own!

  • Colorful Potatoes: Use red or purple potatoes for a vibrant twist and an eye-catching presentation. The different hues will make your salad even more appealing!

  • Spicy Kick: Increase the Cajun seasoning or add a sprinkle of cayenne pepper for a fiery flavor boost. Just remember to taste as you go, adjusting to find your perfect heat level.

  • Veggie Additions: Mix in peas or corn for added sweetness and texture. Combine these ingredients for a delightful surprise in every bite!

  • Herb Variations: Try adding fresh dill or chives instead of parsley for a fresh herb twist. Each herb brings its own unique flavor profile, elevating your salad to new heights.

  • Creamy Alternatives: Swap out mayonnaise for avocado or cashew cream for a healthier, vegan option. This adds a creamy texture while keeping the flavor profile rich and delicious.

  • Nutty Crunch: Toss in slivered almonds or chopped walnuts for extra texture and crunch. The nutty flavors complement the creamy dressing beautifully.

  • Pickle Flavor: Incorporate diced dill pickles or relish for a tangy bite that pairs well with the creaminess. This is especially delightful if you enjoy a touch of sourness in your salads.

  • Zest It Up: Add a bit of lime zest alongside the lemon juice for an added layer of brightness. Citrus zest can uplift the flavor and add a refreshing note.

With these variations, your Creamy Cajun Potato Salad can match any mood or gathering! And while you’re at it, consider serving it alongside other crowd favorites like Savory Onion Potato Pancakes and colorful Garden Harvest Salad. Enjoy experimenting!

Expert Tips for Creamy Cajun Potato Salad

  • Potato Choice: Use Yukon Gold or red baby potatoes for the ideal creamy texture. Avoid starchy potatoes that may turn mushy.
  • Flavor Infusion: Let your Creamy Cajun Potato Salad sit in the fridge for at least an hour. This allows the flavors to meld beautifully, enhancing the dish.
  • Dressing Consistency: If the salad seems dry after chilling, fold in a bit more mayonnaise or sour cream to restore creaminess.
  • Prep in Advance: This salad is perfect for make-ahead meals. Prepare it a day in advance to streamline your cooking on busy days.
  • Cooling Potatoes: Always rinse your cooked potatoes under cold water. This step stops the cooking process and helps maintain their firm texture.

What to Serve with Creamy Cajun Potato Salad

Add a touch of joy to your meal experience by pairing your salad with delightful side dishes and beverages that complement its vibrant flavors.

  • Grilled Chicken: Juicy and smoky, grilled chicken enhances the Cajun spices in your potato salad while adding a satisfying protein component.

  • Corn on the Cob: The sweet crunch of corn-on-the-cob provides a fresh contrast, perfectly balancing the creamy texture of the salad with a seasonal touch.

  • Garlic Bread: Crunchy and buttery garlic bread offers an indulgent side that pairs harmoniously with the zesty flavors of the potato salad, making it a comforting combination.

  • Savory Coleslaw: The crunchy, tangy coleslaw adds a refreshing element to your meal while providing a nice crunch that enhances the rich creaminess of the salad.

  • Crisp Salad Greens: A light, mixed green salad with a tangy vinaigrette will cleanse the palate between bites, adding a fresh contrast to the creamy Cajun potato salad.

  • Lemonade or Iced Tea: Sipping on refreshing lemonade or sweet iced tea adds a cooling effect that perfectly complements the smoky, spicy notes of the potato salad.

With these pairings, transform your dining experience into a delightful feast that celebrates comfort and flavor!

Creamy Cajun Potato Salad Recipe FAQs

How do I choose the right potatoes for this salad?
Absolutely! For the best results, opt for Yukon Gold or red baby potatoes. These varieties hold their shape well and offer a creamy texture when cooked. Avoid starchy potatoes, as they may turn mushy in the salad.

How should I store leftover Creamy Cajun Potato Salad?
Very! To maintain freshness, store any leftovers in an airtight container in the refrigerator for up to 3 days. This not only keeps the salad safe to eat but allows the flavors to meld together beautifully over time.

Can I freeze this potato salad?
Certainly! You can freeze your Creamy Cajun Potato Salad in a freezer-safe container for up to 2 months. Just keep in mind that the texture might change slightly. When thawing, let it sit in the fridge overnight and consider adding a bit more dressing to restore creaminess.

What if the salad seems dry after refrigeration?
No worries! If you find your potato salad is a bit dry after chilling, simply fold in extra mayonnaise or sour cream to bring back its creamy consistency. Start with a tablespoon, mix gently and add more as needed until you achieve your desired texture.

Is this recipe safe for people with allergies?
Definitely! While this Creamy Cajun Potato Salad contains common allergens like mayonnaise and sour cream, you can easily make substitutions. For dairy-free options, consider using vegan mayonnaise and coconut yogurt. Always check with your guests about their specific dietary needs to ensure everyone can enjoy this versatile dish.

How long does it take for the flavors to meld after preparation?
Great question! It’s best to refrigerate your Creamy Cajun Potato Salad for at least 1 hour before serving, but overnight is even better. This resting time allows the dressing to infuse into the potatoes and vegetables, enhancing the overall flavor profile—your patience will be rewarded!

Creamy Cajun Potato Salad

Savory Creamy Cajun Potato Salad: The Ultimate Side Dish Delight

Creamy Cajun Potato Salad is a vivid, easy-to-make accompaniment that elevates any meal with its vibrant flavors.
Prep Time 15 minutes
Cook Time 12 minutes
Chilling Time 1 hour
Total Time 1 hour 27 minutes
Servings: 8 servings
Course: Lunch
Cuisine: American
Calories: 250

Ingredients
  

For the Salad
  • 2 pounds baby potatoes Yukon Gold or red potatoes are great substitutes.
  • 1 cup celery, chopped Adds crunch and freshness.
  • 1/2 cup green onions, sliced Provides mild onion flavor.
  • 1 cup red bell pepper, chopped Can substitute with yellow or green bell peppers.
  • 1/4 cup fresh parsley, chopped Used as a garnish.
For the Dressing
  • 1 cup mayonnaise Can substitute with Greek yogurt for lighter option.
  • 1/2 cup sour cream Feel free to use yogurt.
  • 2 tablespoons Dijon mustard Adds a sharp, tangy zing.
  • 2 tablespoons lemon juice Fresh lemon juice is best.
  • 1 tablespoon Cajun seasoning Adjust according to spice preference.
  • 1 teaspoon paprika Optional for those who prefer less heat.
  • 1 teaspoon garlic powder
  • 1 teaspoon onion powder
  • to taste salt Essential for seasoning.
  • to taste black pepper Essential for seasoning.

Equipment

  • Large pot
  • Colander
  • mixing bowl
  • whisk

Method
 

Step-by-Step Instructions
  1. Cook the Potatoes: Place baby potatoes in a large pot and cover with cold water. Add salt and bring to a boil over medium-high heat. Cook until fork-tender, about 10-12 minutes.
  2. Cool the Potatoes: Drain and rinse under cold water to halt cooking. Transfer to a mixing bowl and let dry.
  3. Prepare the Dressing: In a bowl, combine mayonnaise, sour cream, Dijon mustard, lemon juice, Cajun seasoning, paprika, garlic powder, and onion powder. Whisk until smooth and creamy.
  4. Combine Ingredients: Pour dressing over cooled potatoes, gently fold to coat. Add celery, green onions, and red bell pepper, folding until well mixed.
  5. Season and Chill: Sprinkle with salt and pepper to taste. Refrigerate for at least 1 hour.
  6. Garnish and Serve: Stir gently before serving and garnish with fresh parsley.

Notes

This salad is perfect for make-ahead meals. Prepare a day in advance to enhance flavor development.

Maple Garlic Bacon Chicken: A Sweet Savory Dinner Delight

As I stood in my kitchen, the savory scent of bacon sizzling filled the air, instantly transforming my space into a cozy haven. Today, I’m thrilled to share my Maple Garlic Bacon Chicken recipe, a delightful dish that beautifully combines sweet and savory flavors. This easy chicken dinner features juicy chicken thighs wrapped in crispy bacon and glazed with a sticky maple-garlic sauce—perfect for busy weeknights when you crave something truly satisfying. Not only will it impress your family or guests, but it’s also a fantastic way to elevate your dinner routine without spending hours in the kitchen. Ready to savor this irresistible combo of flavors? Let’s dive into the details of this culinary treat!

Why is This Chicken Recipe a Must-Try?

Irresistible Flavor: This dish combines the richness of bacon with the sweet depth of maple-garlic glaze, creating an unforgettable taste that will make your mouth water.

Easy Preparation: Even beginner cooks can master this recipe with simple steps, ensuring you can whip up a gourmet meal without fuss.

Versatile Pairing: It complements a variety of sides, from creamy mashed potatoes to roasted Brussels sprouts—the dinner options are endless!

Crowd-Pleaser: Perfect for family dinners or gatherings, this Maple Garlic Bacon Chicken is guaranteed to impress everyone at the table.

For a nourishing side, consider this Pure Nourishing Chicken Broth to enhance the experience!

Maple Garlic Bacon Chicken Ingredients

• Get ready to create a flavor-packed dish!

For the Chicken

  • Boneless Skinless Chicken Thighs – Tender and juicy, ideal for absorbing the glaze’s flavor.
  • Bacon – Adds smokiness and delicious flavor; swap for turkey bacon for a lighter option.

For the Glaze

  • Pure Maple Syrup – This provides the distinct sweetness that pairs perfectly with savory bacon.
  • Garlic (minced) – Fresh garlic adds aromatic depth; garlic powder can be used if needed.
  • Olive Oil – Ensures the glaze adheres well and increases moisture for the chicken.
  • Smoked Paprika – Adds smokiness and vibrant color, making your dish visually appealing.
  • Salt – Enhances all flavors in the dish beautifully.
  • Black Pepper – Offers a nice touch of heat; adjust according to your taste preference.

For Garnishing

  • Fresh Parsley (chopped) – Provides a pop of color and freshness to finish the dish beautifully.

Step‑by‑Step Instructions for Maple Garlic Bacon Chicken

Step 1: Preheat the Oven
Begin your cooking journey by preheating your oven to 400°F (200°C). This important step ensures that your Maple Garlic Bacon Chicken will bake evenly and develop that desirable crispy bacon texture. Get your baking sheet lined with parchment paper, ready to face the deliciousness to come!

Step 2: Prepare the Glaze
In a mixing bowl, whisk together the maple syrup, minced garlic, olive oil, smoked paprika, salt, and black pepper until well combined. This fragrant glaze will be the star of your dish. Set it aside for a moment, allowing the flavors to meld while you prepare the chicken thighs for wrapping.

Step 3: Prepare the Chicken Thighs
Pat the boneless skinless chicken thighs dry with paper towels. This step is crucial as it helps the bacon adhere better during cooking. Lay the chicken thighs flat on a clean cutting board, ensuring they are ready for their delicious bacon blanket.

Step 4: Wrap with Bacon
Take two slices of bacon and carefully wrap each chicken thigh, ensuring the bacon is tightly secured around the meat. Use toothpicks if necessary to hold everything in place. Feel the anticipation grow, as each thigh is now cloaked in savory goodness, ready to soak in that maple-garlic flavor.

Step 5: Arrange on Baking Sheet
Place the bacon-wrapped chicken thighs on the parchment-lined baking sheet, leaving slight space between them for even cooking. This arrangement lets the heat circulate freely, contributing to that crispy exterior. Your kitchen will soon be filled with an irresistible aroma!

Step 6: Brush with Glaze
Take half of the prepared maple-garlic mixture and brush it generously over the chicken thighs. This glaze will coat the meat beautifully, providing a sweet-savory finish once baked. Make sure to cover every surface for maximum flavor impact as these puppies hit the oven.

Step 7: Bake the Chicken
Slide the baking sheet into the preheated oven and bake the chicken thighs for 15 minutes. This initial baking phase allows the chicken to cook through and the bacon to render some fat. Keep an eye out for that tantalizing sizzle as the magic begins.

Step 8: Finish Baking and Glaze Again
After 15 minutes, take the baking sheet out and brush the remaining maple-garlic marinade over the chicken thighs. Return them to the oven for an additional 10-15 minutes or until the bacon turns crispy and the internal temperature of the chicken reaches a perfect 165°F (74°C). Your Maple Garlic Bacon Chicken is almost ready!

Step 9: Rest and Garnish
Once fully cooked, remove the baking sheet from the oven and let the chicken rest for about 5 minutes. This resting period allows the juices to redistribute within the chicken, ensuring every bite is juicy and delicious. Just before serving, garnish with chopped fresh parsley to elevate the presentation!

Expert Tips for Maple Garlic Bacon Chicken

  • Marinate for Flavor: To enhance the taste, consider marinating the chicken thighs in the maple-garlic sauce for 1-2 hours before cooking.

  • Crispy Bacon Trick: For perfectly crispy bacon without burning the glaze, turn on the broiler for the last 1-2 minutes of baking.

  • Use a Wire Rack: Elevate your baking sheet with a wire rack. This allows hot air circulation, ensuring even crispiness of the bacon.

  • Watch Your Timing: Thinner chicken breasts may require less cooking time, so keep an eye on them to avoid dryness.

  • Proper Resting: Allow the chicken to rest for 5 minutes before serving for juicier bites of your Maple Garlic Bacon Chicken.

Make Ahead Options

These Maple Garlic Bacon Chicken thighs are perfect for meal prep! You can marinate the chicken in the maple-garlic glaze up to 24 hours in advance, allowing the flavors to meld beautifully. Simply wrap the marinated chicken thighs in bacon and store them in an airtight container in the refrigerator until you’re ready to bake. This way, when it’s time to serve, just place the bacon-wrapped chicken on a baking sheet, brush with any leftover glaze, and pop them in the oven for about 25-30 minutes until crispy. This prepping technique not only saves time but also ensures a delicious restaurant-quality meal awaits you on busy weeknights!

Maple Garlic Bacon Chicken Variations

Customize your Maple Garlic Bacon Chicken to suit your taste and dietary needs, inviting new flavors to your table!

  • Turkey Bacon: Swap regular bacon for turkey bacon for a leaner option. You’ll still enjoy that smoky flavor with fewer calories.

  • Chicken Breasts: If you prefer a lighter cut, use boneless skinless chicken breasts instead of thighs. Adjust the cooking time for perfect juiciness.

  • Add Heat: For a spicy kick, mix in some cayenne pepper or crushed red pepper flakes into the glaze. It’ll elevate that sweet-savoriness to a whole new level!

  • Herb Infusion: Toss in fresh herbs like rosemary or thyme into the glaze for an aromatic twist that will brighten the dish. The pairing of these herbs with maple garlic is nothing short of delightful.

  • Glaze Variations: Try using honey or agave syrup instead of maple syrup for a different kind of sweetness. Each version offers a unique flavor profile while still maintaining that intricate glaze.

  • Vegetable Sides: Pair your dish with roasted veggies like Brussels sprouts or a vibrant salad drizzled with balsamic vinaigrette for a balanced meal. It adds color and extra nutrition to your table.

  • Savory Sauce: Consider drizzling a tangy balsamic reduction over the chicken before serving for a burst of flavor! This addition will make each bite melt in your mouth even more.

Looking for more inspiration? Consider serving alongside some Savory Chicken Cheesy Drumsticks or a bowl of comforting Honey Garlic Slow Cooked Ribs to create an unforgettable feast.

What to Serve with Maple Garlic Bacon Chicken

Creating a memorable meal is all about the perfect pairings that enhance each bite of your savory masterpiece.

  • Creamy Mashed Potatoes: This rich side adds a velvety texture that balances the bacon’s crunch, making every mouthful a delight.

  • Roasted Brussels Sprouts: Their slight bitterness and nutty flavor contrast beautifully with the sweet glaze, creating a complex flavor profile.

  • Crisp Side Salad: A fresh salad with mixed greens and vinaigrette brings brightness and acidity that cut through the richness of the chicken.

  • Honey Glazed Carrots: The sweetness of the carrots mirrors the maple glaze while imparting softness and a vibrant color to your plate.

  • Garlic Bread: A warm, crusty loaf is perfect for soaking up any leftover maple-garlic sauce, creating a comforting and satisfying side.

  • Chardonnay: A glass of chilled chardonnay adds a buttery depth that complements the savory notes of the bacon and the sweetness of the glaze beautifully.

  • Fruit Salad: A refreshing fruit salad provides a light and juicy counterpart, balancing the meal with its bright flavors and contrasting textures.

Enjoy any combination of these sides with your Maple Garlic Bacon Chicken to create a delightful and satisfying dining experience!

Storage Tips for Maple Garlic Bacon Chicken

Fridge: Store cooled leftovers in an airtight container for up to 3 days. This will help retain the flavor and moisture of the chicken.

Freezer: For long-term storage, freeze the cooked chicken in a sealed bag or container for up to 3 months. This way, you can enjoy your Maple Garlic Bacon Chicken even later!

Reheating: When ready to eat, reheat the chicken in the oven at 350°F (175°C) for 10-12 minutes or until warmed through. This method helps maintain the crispy bacon texture.

Room Temperature: Avoid leaving leftovers at room temperature for more than 2 hours to ensure food safety.

Maple Garlic Bacon Chicken Recipe FAQs

How do I select the best chicken thighs for this recipe?
Absolutely! When picking chicken thighs, look for pieces that are plump and have a good amount of marbling, indicating flavor and moisture. The skin should be intact, and the color should be a rich pink without any dark spots. If possible, buy organic or free-range for the best taste.

What is the best way to store leftovers of Maple Garlic Bacon Chicken?
To keep your leftovers fresh, cool the chicken completely before placing it in an airtight container. Store it in the refrigerator for up to 3 days. Ensure it’s well-sealed to maintain its flavor and prevent it from drying out!

Can I freeze cooked Maple Garlic Bacon Chicken?
Very! If you want to save this delicious chicken for later, wrap cooled pieces tightly in plastic wrap or foil before placing them in a freezer-safe bag. This method can preserve it for up to 3 months. When you’re ready to enjoy it again, thaw it in the refrigerator overnight, then reheat in the oven at 350°F (175°C) for about 10-12 minutes to regain that crispy bacon goodness!

What if my bacon isn’t getting crispy enough?
If you find your bacon isn’t crisping up as desired, don’t worry! Try switching your oven to broil for the last 1-2 minutes of cooking. Keep a close eye on it to prevent burning—the goal is a beautiful bronzed finish! If you used a wire rack during baking, it will help with air circulation and enhance the crisping effect.

Are there any dietary considerations for this recipe?
Certainly! This recipe contains gluten due to the bacon and does not accommodate specific dietary restrictions like vegetarianism. If you or anyone at your table has allergies, ensure to check ingredient labels. As an alternative, you can use turkey bacon or a vegetarian substitute for the chicken to suit different dietary needs. Just remember the cooking times might vary slightly!

How do I know when my chicken is fully cooked?
To ensure your chicken thighs reach perfect doneness, use a meat thermometer. The internal temperature should be 165°F (74°C). If you don’t have a thermometer, check that the juices run clear when pierced with a fork, and there is no pink in the meat. Letting the chicken rest for 5 minutes after baking also helps keep it juicy!

Maple Garlic Bacon Chicken

Maple Garlic Bacon Chicken: A Sweet Savory Dinner Delight

Maple Garlic Bacon Chicken is a sweet and savory dish featuring chicken thighs wrapped in bacon and glazed with a delicious maple-garlic sauce.
Prep Time 15 minutes
Cook Time 30 minutes
Resting Time 5 minutes
Total Time 50 minutes
Servings: 4 servings
Course: Dinner
Cuisine: American
Calories: 320

Ingredients
  

For the Chicken
  • 4 pieces Boneless Skinless Chicken Thighs Tender and juicy, ideal for absorbing the glaze's flavor.
  • 8 slices Bacon Adds smokiness and delicious flavor; swap for turkey bacon for a lighter option.
For the Glaze
  • 1/2 cup Pure Maple Syrup Provides distinct sweetness that pairs perfectly with savory bacon.
  • 3 cloves Garlic (minced) Fresh garlic adds aromatic depth; use garlic powder if needed.
  • 2 tablespoons Olive Oil Ensures the glaze adheres well and increases moisture for the chicken.
  • 1 teaspoon Smoked Paprika Adds smokiness and vibrant color.
  • 1 teaspoon Salt Enhances all flavors beautifully.
  • 1/2 teaspoon Black Pepper Offers a nice touch of heat; adjust according to your taste preference.
For Garnishing
  • 2 tablespoons Fresh Parsley (chopped) Provides a pop of color and freshness.

Equipment

  • oven
  • mixing bowl
  • baking sheet
  • parchment paper

Method
 

Cooking Instructions
  1. Preheat your oven to 400°F (200°C).
  2. In a mixing bowl, whisk together maple syrup, minced garlic, olive oil, smoked paprika, salt, and black pepper until well combined.
  3. Pat the chicken thighs dry with paper towels and lay them flat on a clean cutting board.
  4. Wrap each chicken thigh with two slices of bacon, securing them tightly around the meat.
  5. Place the bacon-wrapped chicken thighs on a parchment-lined baking sheet, leaving slight space between them.
  6. Brush half of the prepared glaze over the chicken thighs.
  7. Bake the chicken for 15 minutes.
  8. Brush the remaining glaze over the chicken thighs and bake for another 10-15 minutes until the bacon is crispy and chicken reaches 165°F (74°C).
  9. Remove from the oven and let the chicken rest for about 5 minutes. Garnish with chopped fresh parsley before serving.

Notes

Marinate chicken thighs in the maple-garlic sauce for 1-2 hours before cooking for enhanced flavor. Consider using a wire rack for even crispiness.

Blueberry Muffin Cinnamon Rolls That Melt in Your Mouth

As I pulled the warm, fluffy rolls from the oven, an aroma of cinnamon swirled through my kitchen, reminding me of lazy Sunday mornings filled with laughter and indulgence. Introducing my Blueberry Muffin Cinnamon Rolls with Cream Cheese Icing, a delightful marriage of two beloved breakfast treats that’ll elevate your brunch game! What I love about this recipe is not just its lovely soft texture, but also the sweet surprise of fresh blueberries tucked inside—making each bite a comforting burst of flavor. These rolls are quick to prepare and perfect for sharing, making them an ideal choice for family gatherings or special moments. Are you ready to transform your breakfast routine and impress everyone at the table? Let’s dive into the details!

Why Are These Rolls So Irresistible?

Heavenly Texture: The soft, fluffy dough paired with a gooey cinnamon filling creates a delightful mouthfeel. Deliciously Sweet: Each roll is bursting with juicy blueberries and a creamy icing that takes it over the top. Quick Prep Time: Ready in just a couple of hours, making it easy to enjoy as a spontaneous treat. Versatile Flavor: Enjoy them for breakfast or dessert, and customize the filling with different jams or nuts. Perfect for Sharing: Ideal for gatherings, these rolls will leave your guests begging for the recipe! Why not pair them with some Coconut Chocolate Rolls for an extra sweet spread?

Blueberry Muffin Cinnamon Roll Ingredients

For the Dough

  • Milk – Provides moisture and helps activate the yeast; substitute with almond or oat milk for a non-dairy version.
  • Active Dry Yeast – Leavens the dough, creating a fluffy texture; instant yeast can be substituted directly without activation.
  • Large Eggs – Adds richness and binds the ingredients; use flax eggs for a vegan alternative.
  • All-Purpose Flour – Structures the dough; can be swapped with a gluten-free flour blend for a gluten-free option.
  • White Granulated Sugar – Sweetens the dough and aids yeast activation; brown sugar can be used for a deeper flavor.
  • Salt – Enhances flavor and controls yeast activity; ensure it’s fine salt for even distribution.
  • Unsalted Butter – Contributes flavor and moisture; margarine or coconut oil can serve as a dairy-free substitute.

For the Filling

  • Brown Sugar – Adds sweetness and caramel notes; can be replaced with coconut sugar.
  • Ground Cinnamon – Gives essential flavor in both the filling and crumble; add nutmeg for a unique twist.
  • Blueberries – Fresh or frozen berries provide natural sweetness and moisture, while dried blueberries can intensify the flavor.

For the Crumble

  • Brown Sugar – Used in the crumble for sweetness and texture; coconut sugar is a good alternative.
  • Flour – Provides structure to the crumble; can be replaced with almond flour for a different texture.
  • Melted Butter – Binds the crumble together; use coconut oil for a dairy-free version.

For the Icing

  • Cream Cheese – Adds tanginess and creaminess to the icing; substitute with cashew cream for a dairy-free option.
  • Powdered Sugar – Sweetens the icing and gives it a smooth texture; adjust amount to taste.
  • Vanilla Extract – Enhances the flavor of the icing; use pure vanilla for the best result.

Unveiling this Blueberry Muffin Cinnamon Roll recipe is sure to delight your family and friends, creating cherished memories on any breakfast or brunch table!

Step‑by‑Step Instructions for Blueberry Muffin Cinnamon Rolls

Step 1: Dough Preparation
Begin by warming the milk to 110°F in a small saucepan, then sprinkle the active dry yeast and a bit of granulated sugar over the top. Let it sit for about 10 minutes until frothy. In a large mixing bowl, combine flour, remaining sugar, salt, eggs, and softened unsalted butter. Pour in the yeast mixture, then knead the dough for approximately 5 minutes until it is smooth and elastic.

Step 2: First Rise
Transfer the kneaded dough into a greased bowl, ensuring it’s well coated to prevent sticking. Cover it tightly with a clean kitchen towel or plastic wrap, and place it in a warm, draft-free area. Let it rise for about 1 hour, or until it has doubled in size, becoming puffy and airy with a slight sheen.

Step 3: Jam Preparation
While the dough rises, prepare the blueberry jam by combining fresh or frozen blueberries, granulated sugar, lemon juice, and cornstarch in a saucepan. Cook over medium heat, stirring frequently until the mixture thickens, about 5-7 minutes. Once thickened, remove it from the heat and set aside to cool while you move on to the crumble.

Step 4: Crumble Preparation
For the crumble, mix together brown sugar, flour, and ground cinnamon in a medium bowl. Pour in melted butter and stir until the mixture resembles coarse crumbs. Spread the crumble mixture onto a baking sheet and bake it in a preheated oven at 350°F for about 6 minutes, just until it’s lightly toasted. Remove from the oven and let it cool.

Step 5: Filling Preparation
In a mixing bowl, beat together softened butter, brown sugar, and ground cinnamon until fluffy and well combined. This will be your sweet filling. Make sure to spread it evenly over the rolled-out dough later to ensure every bite of your Blueberry Muffin Cinnamon Rolls has that delightful cinnamon flavor.

Step 6: Roll Assembly
Once the dough has risen, punch it down gently to release the air. Roll it out on a floured surface into a rectangle about ¼-inch thick. Spread the cinnamon filling over the dough, leaving a small border. Next, layer ¾ of the cooled blueberry jam over the filling, and sprinkle 1¼ cups of the cooled crumble on top. Carefully roll the dough into a log, slice it into equal pieces, and place them in a greased baking pan for a second rise.

Step 7: Baking
Preheat your oven to 375°F as the rolls undergo their second rise, which should last about 20 minutes. Once puffed, bake the Blueberry Muffin Cinnamon Rolls for 27-30 minutes or until they are golden brown and a toothpick inserted in the center comes out clean. The aroma of cinnamon and blueberries will fill your kitchen, setting the stage for a delicious treat.

Step 8: Icing Preparation
While the rolls are baking, prepare the cream cheese icing. In a medium bowl, beat together softened cream cheese and butter until smooth. Gradually add sifted powdered sugar, along with a splash of vanilla extract, mixing until the icing is creamy and spreadable. This rich icing will be the perfect finishing touch on your warm rolls.

Step 9: Finishing Touches
Once the Blueberry Muffin Cinnamon Rolls are out of the oven and slightly cooled, drizzle the cream cheese icing over the warm rolls. Top with the remaining blueberry jam and crumble for extra flavor and texture. Serve them warm, and watch as your family marvels at this delectable breakfast dish!

What to Serve with Blueberry Muffin Cinnamon Rolls

Imagine a delightful morning spread where the sweet aroma of baked goods fills the air, inviting everyone to gather around the table.

  • Fresh Fruit Salad: Light and tangy, a mix of ripe berries and zesty citrus complements the rolls beautifully, adding a refreshing touch.
  • Greek Yogurt Parfait: Creamy yogurt layered with granola and fruit provides a perfect balance to the sweetness of the cinnamon rolls.
  • Scrambled Eggs with Chives: Fluffy eggs with a hint of chive create a savory counterpoint, making for a hearty brunch.
  • Maple Bacon: The salty crunch of crispy bacon pairs wonderfully with the sweetness of the rolls, creating a satisfying flavor contrast.
  • Cold Brew Coffee: Smooth and rich, this beverage awakens your senses and enhances the overall brunch experience with every sip.
  • Mimosas: Light, bubbly, and citrusy, mimosas add an elegant touch to your brunch table, making it feel extra special.
  • Vanilla Ice Cream: For a decadent twist, serve a warm roll alongside a scoop of vanilla ice cream for an irresistible dessert experience.
  • Homemade Whipped Cream: A dollop of fresh whipped cream on top of the rolls takes the experience to the next level, adding a light creaminess.
  • Nutty Granola: Scattering some crunchy granola on your plate will provide an enjoyable texture contrast to the soft rolls, making each bite delightful.

Storage Tips for Blueberry Muffin Cinnamon Rolls

Room Temperature: Store in an airtight container at room temperature for up to 2 days to maintain freshness and flavor.

Fridge: If you want to keep them longer, refrigerate for up to 1 week in an airtight container. Just make sure to allow them to cool completely before sealing.

Freezer: For long-term storage, freeze the rolls individually wrapped in plastic wrap, then in a freezer bag for up to 3 months. Reheat directly from the freezer for a delightful treat anytime.

Reheating: To enjoy your blueberry muffin cinnamon rolls warm, reheat in the oven at 350°F for about 10 minutes or in the microwave for 15-30 seconds until heated through.

Blueberry Muffin Cinnamon Roll Variations

Feel free to make these blueberry muffin cinnamon rolls your own with these fun variations! Each twist will bring a delightful new experience to your table.

  • Nutty Delight: Add chopped pecans or walnuts to the filling for a pleasing crunch. Their earthy flavors complement the sweetness beautifully.

  • Zesty Lemon: Incorporate lemon zest into the filling and icing for a bright twist that elevates the flavor profile. The refreshing citrus will make your rolls pop!

  • Spiced Pumpkin: Replace blueberries with pumpkin puree and add pumpkin pie spice for a cozy autumn-inspired roll. It’s a delicious way to transition seasons.

  • Chocolate Hazelnut: Spread some chocolate hazelnut spread instead of cinnamon filling for a decadent treat that chocolate lovers will adore. The creamy, dreamy chocolate is simply irresistible!

  • Maple Glaze: Swap the cream cheese icing for a maple glaze made from powdered sugar and maple syrup for a unique twist; it pairs perfectly with the warm cinnamon.

  • Berry Medley: Use a mix of fresh raspberries, blackberries, and blueberries to create a vibrant flavor explosion in every bite. The contrast of textures is wonderful!

  • Coconut Cream: Substitute icing with a coconut cream topping made from whipped coconut milk and powdered sugar for a tropical flair that brings a taste of paradise.

  • Dairy-Free Wonder: For a fully dairy-free version, use almond milk, coconut oil, and cashew cream in your icing. Delightful flavor and moisture without the dairy!

With these variations, you can customize your rolls just the way you like! And if you’re in the mood for more deliciousness, why not try serving them alongside some Cheesy Zucchini Rolls or Savory Beef Rolls for a diverse brunch spread?

Make Ahead Options

These Blueberry Muffin Cinnamon Rolls are perfect for busy home cooks looking to save time during hectic mornings! You can prepare the dough and assemble the rolls up to 24 hours in advance. Simply follow the recipe steps to create the rolls, then cover the pan tightly with plastic wrap and refrigerate overnight. When you’re ready to serve, let the rolls sit at room temperature for about 30 minutes before baking, ensuring they rise perfectly. For even quicker meal prep, the filling can be made up to 3 days in advance and stored in the refrigerator. With these make-ahead tips, you’ll enjoy warm, gooey rolls that taste just as delicious as if they were fresh-baked!

Expert Tips for Blueberry Muffin Cinnamon Rolls

  • Kneading Care: Avoid over-kneading the dough; it should feel smooth and elastic. Overworking can make the final rolls too dense.
  • Dairy Temperature: Allow all dairy ingredients to come to room temperature before use for better integration into the dough.
  • Overnight Option: For a faster morning prep, assemble the rolls the night before, cover them in the fridge, and let them rise at room temperature before baking.
  • Cutting Technique: Use a serrated knife to slice the rolls, which prevents squishing the dough and keeps their fluffy structure intact.
  • Flavor Variations: Get creative! Consider adding nuts or trying other fruit jams with your blueberry muffin cinnamon rolls for a unique twist.

Blueberry Muffin Cinnamon Rolls Recipe FAQs

What kind of blueberries should I use?
Absolutely! Fresh blueberries are ideal for their juicy flavor, but frozen blueberries work well too. Just ensure they are not overly mushy when thawed. If using dried blueberries, they provide a more concentrated sweetness, but you may want to add a bit more moisture to the dough.

How should I store these cinnamon rolls?
To keep your Blueberry Muffin Cinnamon Rolls fresh, you can store them in an airtight container at room temperature for up to 2 days. For longer storage, place them in the fridge where they will last up to 1 week. Just make sure they cool completely before sealing to prevent condensation.

Can I freeze Blueberry Muffin Cinnamon Rolls?
Yes! For freezing, wrap each roll tightly in plastic wrap and place them in a freezer bag. They will keep well for up to 3 months. When you’re ready to enjoy, simply reheat them directly from the freezer at 350°F for about 10 minutes, or in the microwave for 15 to 30 seconds.

What is the best way to reheat cinnamon rolls?
To reheat without drying them out, use the oven! Preheat it to 350°F and warm the rolls for about 10 minutes. If you’re in a hurry, the microwave is an easy alternative; just heat for about 15-30 seconds until they’re warm and gooey again.

Can I make these rolls vegan or gluten-free?
Yes, they can be easily adapted! For a vegan version, substitute the eggs with flax eggs and use almond or oat milk. You can use a gluten-free flour blend in place of all-purpose flour for those needing a gluten-free option. Just ensure all other ingredients are also gluten-free.

What if my dough doesn’t rise?
That can be frustrating! Ensure that your yeast is fresh; expired yeast won’t activate. If your dough doesn’t rise, it could be due to cold temperature. To encourage rising, place the bowl in a warm area, like near a preheated oven or in a sunny spot, and let it rise longer if necessary. Patience is key!

Blueberry Muffin Cinnamon Rolls

Blueberry Muffin Cinnamon Rolls That Melt in Your Mouth

Delight in these Blueberry Muffin Cinnamon Rolls, a perfect blend of sweetness and soft texture for a delightful breakfast experience.
Prep Time 1 hour
Cook Time 30 minutes
Rise Time 1 hour
Total Time 2 hours 30 minutes
Servings: 12 rolls
Course: Breakfast
Cuisine: American
Calories: 350

Ingredients
  

Dough Ingredients
  • 1 cup Milk Can substitute with almond or oat milk.
  • 2 teaspoons Active Dry Yeast Can substitute with instant yeast.
  • 2 large Eggs Use flax eggs for vegan option.
  • 4 cups All-Purpose Flour Can use gluten-free flour blend.
  • 1/2 cup White Granulated Sugar Brown sugar can be used.
  • 1 teaspoon Salt Use fine salt for even distribution.
  • 1/2 cup Unsalted Butter Margarine or coconut oil can serve as a dairy-free substitute.
Filling Ingredients
  • 1/2 cup Brown Sugar Can be replaced with coconut sugar.
  • 2 teaspoons Ground Cinnamon Add nutmeg for a unique twist.
  • 1 cup Blueberries Fresh or frozen berries are fine.
Crumble Ingredients
  • 1/2 cup Brown Sugar Coconut sugar is a good alternative.
  • 1 cup Flour Almond flour can be used for a different texture.
  • 1/4 cup Melted Butter Use coconut oil for dairy-free.
Icing Ingredients
  • 8 ounces Cream Cheese Cashew cream can be used for dairy-free.
  • 2 cups Powdered Sugar Adjust amount to taste.
  • 1 teaspoon Vanilla Extract Use pure vanilla for best results.

Equipment

  • mixing bowl
  • Saucepan
  • baking pan
  • oven
  • whisk

Method
 

Dough Preparation
  1. Warm the milk to 110°F, sprinkle yeast and sugar, let sit 10 mins until frothy.
  2. In a bowl, combine flour, remaining sugar, salt, eggs, and butter. Add yeast mixture and knead for 5 mins.
First Rise
  1. Transfer kneaded dough to a greased bowl, cover, and let rise for 1 hour until doubled.
Jam Preparation
  1. Combine blueberries, sugar, lemon juice, and cornstarch over medium heat, stir until thickened (5-7 mins). Cool.
Crumble Preparation
  1. Mix brown sugar, flour, and cinnamon. Add melted butter, mix until coarse crumbs. Bake at 350°F for 6 mins.
Filling Preparation
  1. Beat butter, brown sugar, and cinnamon until fluffy for the filling.
Roll Assembly
  1. Punch dough down, roll into a rectangle. Spread filling, layer blueberry jam and crumble, then roll and slice.
Baking
  1. Preheat oven to 375°F, let rolls rise for 20 mins, then bake for 27-30 mins until golden.
Icing Preparation
  1. Beat cream cheese and butter until smooth. Gradually add powdered sugar and vanilla, mix until creamy.
Finishing Touches
  1. Drizzle icing over warm rolls, top with remaining jam and crumble. Serve warm.

Notes

These rolls keep well and can also be frozen for later enjoyment. Serve fresh for best taste.

Cheesy Funeral Potatoes: Your New Favorite Comfort Dish

“Who doesn’t love a dish that feels like a warm hug?” I whispered as I caught a glimpse of a cheesy casserole bubbling away in the oven. Cheesy Funeral Potatoes are more than just a side dish; they’re the ultimate comfort food, perfect for family gatherings and festive celebrations. This creamy potato casserole, bursting with melted cheese and golden, crunchy topping, transforms any simple meal into a memorable occasion. With easy preparation and guaranteed crowd-pleasing results, you’ll find this indulgent dish quickly becomes a beloved favorite at your table. So, are you ready to create something that ensures happy bellies and empty plates? Let’s dive right in!

Why Are Cheesy Funeral Potatoes So Loved?

Comforting goodness: This casserole is a warm hug in every bite, bringing nostalgia and joy to gatherings!
Quick and easy: With minimal prep time, you’ll have this deliciously cheesy dish ready before you know it.
Crowd-pleaser: Perfect for any event, these potatoes will steal the show and leave everyone asking for seconds.
Versatile additions: Feel free to incorporate vegetables or meats, like in these Cheesy Zucchini Rolls or Savory Chicken Cheesy options, making it your own!
Make-ahead magic: Assemble it the day before for effortless entertaining! Serve alongside your favorite main dish, and you’re all set!
Dive in and enjoy the creamy, crunchy perfection of Cheesy Funeral Potatoes; your taste buds will thank you!

Cheesy Funeral Potatoes Ingredients

• Prepare to create the ultimate comfort food with these essential ingredients!

For the Casserole
Frozen Diced Hashbrowns – Provides the starchy base; ensure they are slightly thawed to avoid excess moisture.
Cream of Chicken Soup – Acts as a binding agent, adding creaminess; consider using a low-sodium version for less salt.
Sour Cream – Adds tanginess and depth; Greek yogurt can be used for a healthier option.
Melted Butter – Enhances flavor and richness; use unsalted butter for better control over salt levels.
Sharp Cheddar Cheese – Offers a robust, cheesy flavor; substitute Monterey Jack for a milder taste.
Dried Onion Flakes – Adds savory depth; you can substitute with sautéed fresh onions.
Salt and Black Pepper – Basic seasonings to enhance flavor; adjust according to your taste preferences.

For the Topping
Crushed Cornflakes – Provides a crunchy topping; panko bread crumbs can be used for a different texture.
Melted Butter (for topping) – Binds the cornflakes and adds extra richness.

With these ingredients in hand, you’re set to create your own irresistible dish of Cheesy Funeral Potatoes, sure to delight family and friends alike!

Step‑by‑Step Instructions for Cheesy Funeral Potatoes

Step 1: Preheat and Prepare
Begin by preheating your oven to 350°F (175°C). While it’s warming up, take a moment to grease a 9×13-inch baking dish with butter or cooking spray. This ensures your Cheesy Funeral Potatoes won’t stick and makes for easy serving later. Set this dish aside while you work on the casserole mixture.

Step 2: Mix the Base Ingredients
In a large mixing bowl, whisk together the sour cream, cream of chicken soup, melted butter, and dried onion flakes until smooth. Season this mixture with salt and black pepper, adjusting to taste. You want a creamy base that envelops the potatoes, so ensure it’s well-combined before adding in the stars of the show!

Step 3: Fold in Hashbrowns and Cheese
Next, add the slightly thawed frozen diced hashbrowns and sharp cheddar cheese to the mixing bowl. Using a large spatula, gently fold the ingredients together until each hashbrown is coated in the creamy mixture. This step is crucial for achieving that rich flavor throughout the Cheesy Funeral Potatoes, so be thorough yet gentle!

Step 4: Spread into Baking Dish
Carefully pour the potato mixture into your prepared baking dish, spreading it evenly with the spatula. Ensure the mixture is level for even cooking and presentation. As you do this, the scents of creamy potatoes and cheese will be irresistible—just wait until it’s baked!

Step 5: Prepare the Crunchy Topping
In a small bowl, mix the crushed cornflakes with a tablespoon of melted butter until they are well combined. This mixture will create a delightful crunchy topping, so sprinkle it generously over the potato layer in your baking dish. Make sure it’s evenly distributed for texture in every bite of your Cheesy Funeral Potatoes.

Step 6: Bake to Perfection
Place the baking dish in your preheated oven and bake for 40-50 minutes. Look for the edges to be bubbling and the topping to turn a lovely golden brown—this indicates that the cheesy goodness is ready to be unveiled. Your kitchen will be filled with a mouthwatering aroma during this time!

Step 7: Cool Before Serving
Once out of the oven, let your Cheesy Funeral Potatoes sit for about 5 minutes before serving. This resting time allows the casserole to firm up enough to hold its shape when you scoop it out. The comforting blend of creamy potatoes and crunchy topping is sure to be a hit at your table!

What to Serve with Cheesy Funeral Potatoes?

Create a comforting and delightful meal by pairing these cheesy delights with other tasty dishes that round out your dining experience.

  • Glazed Ham: A classic pairing that complements the richness of the potatoes while adding a sweet contrast.

  • Roasted Chicken: Juicy, herb-seasoned chicken adds a savory touch, balancing the creamy texture of the casserole.

  • Green Bean Almondine: This dish introduces a fresh, crisp element and vibrant color to your plate, enhancing visual appeal.

  • Garden Salad: A light and refreshing salad with a zesty vinaigrette cleanses the palate, ensuring every bite of cheesy goodness shines.

  • Baked Cornbread: This mildly sweet baked good perfects the comfort food vibe and complements the salty richness of the casserole beautifully.

  • Creamy Coleslaw: The tangy crunch adds just the right zest, balancing the creaminess of the Cheesy Funeral Potatoes.

  • Cranberry Sauce: A spoonful of this tart condiment elevates the flavors, cutting through the richness and adding brightness to the meal.

Time to set the table and enjoy a delightful meal that guarantees happy hearts and satisfied taste buds!

Make Ahead Options

Cheesy Funeral Potatoes are perfect for busy weeknights and can easily be prepared in advance! You can assemble the entire casserole up to 24 hours ahead of time. Simply cover it tightly with plastic wrap and refrigerate. To maintain quality, make sure the hashbrowns are only slightly thawed to prevent excess moisture. When you’re ready to bake, simply remove the wrap and pop it into a preheated oven at 350°F (175°C) for about 50-60 minutes until bubbly and golden brown. This way, you’ll be serving this comforting dish with minimal effort, ensuring delicious results and happy bellies at your table!

How to Store and Freeze Cheesy Funeral Potatoes

Fridge: Store any leftovers of your Cheesy Funeral Potatoes in an airtight container for up to 3 days. Reheat in the oven at 350°F (175°C) until warmed through to retain that yummy texture.

Freezer: For longer storage, freeze the casserole after assembly but before baking. Wrap tightly in plastic wrap and then aluminum foil. It can be frozen for up to 2 months—just remember to label it!

Thawing: When ready to cook, thaw the frozen Cheesy Funeral Potatoes in the fridge overnight. Bake as directed, adding an extra 10-15 minutes to the cooking time, ensuring deliciously cheesy goodness!

Reheating: If reheating from chilled (not frozen), place in the oven at 350°F (175°C) for about 20-25 minutes or until heated through, keeping the crunchy topping intact.

Expert Tips for Cheesy Funeral Potatoes

Thawed Hashbrowns: Always ensure hashbrowns are just thawed, not fully frozen, to prevent excess moisture in your casserole.

Bake for Crispiness: For a perfect crunch, bake the casserole instead of using a slow cooker, which can lead to a soggy topping.

Seasoning Adjustment: Be mindful of the sodium in your cream of chicken soup—adjust salt and pepper to taste accordingly to keep flavors balanced.

Crunchy Topping: If using crushed cornflakes, mix them with melted butter thoroughly to achieve that ultimate crispy texture in your Cheesy Funeral Potatoes.

Make Ahead: Prep the casserole a day in advance and store it in the fridge; bake it fresh for stress-free entertaining!

Cheesy Funeral Potatoes Variations & Substitutions

Feel free to experiment and tailor this dish to your family’s tastes—every bite can be a delightful surprise!

  • Vegetable Boost: Add cooked spinach or broccoli for a nutritious twist. It’s a colorful addition that brings extra flavor and health benefits.

  • Meaty Mix: Stir in cooked chicken or ham to make the casserole heartier. This twist transforms it into a main dish that’s perfect for satisfying hungry guests.

  • Creamy Alternative: Substitute Greek yogurt for sour cream for a healthier, protein-packed option. This swap maintains creaminess while reducing fat content.

  • Cheese Change: Replace sharp cheddar with Monterey Jack for a milder flavor. It’s a fantastic alternative that still delivers the creamy goodness you expect.

  • Crunchy Topping Variation: Use panko breadcrumbs instead of crushed cornflakes for an extra crisp. This change offers a delightful crunch that enhances each savory spoonful.

  • Spice it Up: Add jalapeños or your favorite hot sauce for a spicy kick. Heat adds an exciting layer to this comforting dish.

  • Make-Ahead Magic: Prepare the casserole a day before and refrigerate for effortless entertaining. You’ll be thankful for this time-saving option when hosting!

  • Freeze for Later: Assemble and freeze before baking, perfect for busy days. Just thaw overnight and bake—it’s like having a homemade meal ready to go!

Explore these variations to make your Cheesy Funeral Potatoes even more delightful, and don’t forget that you can always pair this dish with other fan favorites like Cheesy Fries or Potato Fritters Cheesy for a comforting feast!

Cheesy Funeral Potatoes Recipe FAQs

What type of hashbrowns should I use for Cheesy Funeral Potatoes?
It’s best to use frozen diced hashbrowns for this recipe. Make sure they are slightly thawed before mixing to avoid excess moisture, which can make your casserole watery. If you can’t find diced ones, hashbrown patties can be chopped into small pieces and work just as well!

How should I store leftovers of Cheesy Funeral Potatoes?
You can store any leftovers in an airtight container in the refrigerator for up to 3 days. When reheating, simply pop them back in the oven at 350°F (175°C) to warm through, which helps retain that scrumptious texture.

Can I freeze Cheesy Funeral Potatoes?
Absolutely! You can freeze the casserole after assembling it but before baking. Wrap it tightly in plastic wrap followed by aluminum foil to protect it from freezer burn, and it will last for up to 2 months. Just remember to label your creations for easy identification later!

How do I thaw and bake frozen Cheesy Funeral Potatoes?
To thaw, place your frozen casserole in the refrigerator overnight. When you’re ready to bake, remove it from the fridge and bake as directed, adding an extra 10-15 minutes to the cooking time. This way, you’ll ensure that the potatoes cook through while the cheese gets all melty and delicious!

Are there any dietary considerations for Cheesy Funeral Potatoes?
Yes! If you’re cooking for someone with dietary restrictions, consider using low-sodium cream of chicken soup and Greek yogurt instead of sour cream for a lighter option. If anyone has dairy allergies, you can experiment with dairy-free cheese and cream soups available on the market. Always check ingredient labels to ensure they meet dietary needs.

What if my casserole doesn’t come out crispy?
If your Cheesy Funeral Potatoes aren’t crispy, it could be because the hashbrowns were too wet from being frozen. Next time, ensure they are slightly thawed and well-drained. Also, make sure to bake rather than slow cook for the best crispy topping. Keep the topping evenly distributed and mixed thoroughly with melted butter to maximize crunch!

Cheesy Funeral Potatoes

Cheesy Funeral Potatoes: Your New Favorite Comfort Dish

Cheesy Funeral Potatoes are the ultimate comfort food, perfect for gatherings and celebrations.
Prep Time 15 minutes
Cook Time 50 minutes
Cooling Time 5 minutes
Total Time 1 hour 10 minutes
Servings: 8 servings
Course: Dinner
Cuisine: American
Calories: 300

Ingredients
  

For the Casserole
  • 1 package Frozen Diced Hashbrowns ensure they are slightly thawed
  • 1 can Cream of Chicken Soup consider using low-sodium version
  • 1 cup Sour Cream Greek yogurt can be used for a healthier option
  • 1/2 cup Melted Butter use unsalted butter for better control over salt
  • 2 cups Sharp Cheddar Cheese substitute Monterey Jack for milder taste
  • 1 tablespoon Dried Onion Flakes can substitute with sautéed fresh onions
  • 1 teaspoon Salt adjust to taste
  • 1 teaspoon Black Pepper adjust to taste
For the Topping
  • 2 cups Crushed Cornflakes panko bread crumbs can be used for different texture
  • 1 tablespoon Melted Butter binds the cornflakes

Equipment

  • 9x13-inch baking dish
  • mixing bowl
  • spatula
  • whisk
  • Small bowl

Method
 

Step‑by‑Step Instructions
  1. Preheat your oven to 350°F (175°C) and grease a 9x13-inch baking dish with butter or cooking spray.
  2. In a large mixing bowl, whisk together the sour cream, cream of chicken soup, melted butter, and dried onion flakes until smooth.
  3. Add the slightly thawed frozen diced hashbrowns and sharp cheddar cheese, and gently fold until coated.
  4. Pour the mixture into the prepared baking dish and spread evenly.
  5. Mix crushed cornflakes with melted butter and sprinkle over the potato layer.
  6. Bake for 40-50 minutes until edges are bubbling and topping is golden.
  7. Let sit for 5 minutes before serving.

Notes

Make-ahead magic: Assemble a day before for easy entertaining.