As I stood in my kitchen, a box of bright, colorful Fruity Pebbles caught my eye, beckoning to be transformed into something magical. That’s how my journey began with this delightful no-bake dessert: Fruity Pebbles Sushi. Perfect for sharing and utterly fun to make, this whimsical treat offers a much-needed break from quick fix meals, inviting creativity and playfulness back into snack time. Not only is it a fantastic project for kids and family gatherings, but it also comes together quickly, making it a breeze for those busy days. With endless possibilities for fillings like Nutella or shredded coconut, each roll becomes a personalized work of art. So why not roll up your sleeves and join me in crafting a sweet treat that’s as enjoyable to make as it is to eat? What variations will you dream up?

Why Is Fruity Pebbles Sushi So Fun?
Uniqueness: This no-bake treat transforms a classic breakfast cereal into a playful dessert, sparking joy for both kids and adults.
Creativity Encouraged: With every roll, your imagination can run wild—use different fillings like Nutella or shredded coconut for a personal touch.
Quick Prep Time: Perfect for busy days, this recipe comes together in minutes, providing a sweet escape from traditional fast food.
Crowd-Pleasing Delight: Ideal for parties, it’s a colorful snack that will be the talk of the gathering. Serve with Rainbow Fruity Tapioca for a festive treat combo!
Customizable Flavors: Switch up the cereals to suit your taste. Whether you choose Cocoa Pebbles or Trix, every version is deliciously unique!
Fruity Pebbles Sushi Ingredients
For the Base
• Fruity Pebbles Cereal – the star of the show, offering a sweet crunch; try Cocoa Pebbles for a chocolatey twist.
• Marshmallows – ensure they are fresh for optimal texture; they bind everything together in this fun dessert.
• Butter – a little grease helps when handling the sticky mixture; it also prevents sticking to surfaces.
For the Fillings
• Nutella – adds a rich, chocolatey surprise; perfect for pairing with the fruity cereal.
• Mini Chocolate Chips – a fun and extra sweet addition that kids adore; use these for a delightful crunch.
• Shredded Coconut – gives a tropical flair; it’s a wonderful complement to the fruity flavors.
Optional Toppings
• Colored Gummies – add a festive touch for holidays or parties; they can be rolled into the sushi for an exciting finish.
• Sprinkles – because who doesn’t love a little extra color and joy? Perfect for birthdays and celebrations!
Step‑by‑Step Instructions for Fruity Pebbles Sushi
Step 1: Melt Marshmallows
In a large pot over low heat, combine 4 cups of fresh marshmallows with 2 tablespoons of butter. Stir continuously until the mixture is completely melted and smooth, about 5 minutes. Be cautious to keep the heat low to prevent burning. Once fully melted, remove the pot from the heat to prepare for the exciting next step in creating your Fruity Pebbles Sushi.
Step 2: Mix with Cereal
Immediately add 6 cups of Fruity Pebbles cereal to the melted marshmallow mixture. Use a spatula to gently fold and mix the cereal into the gooey marshmallow until evenly coated, about 2-3 minutes. The colors should pop as they blend together. Working quickly is essential here, as the mixture starts to firm up as it cools.
Step 3: Prepare the Rolling Surface
Lay a large piece of parchment paper on your countertop or a clean baking sheet. Grease your hands generously with butter to prevent the sticky mixture from adhering to your skin. Carefully transfer the Fruity Pebbles mixture onto the parchment, spreading it evenly into a rectangular shape about ½ inch thick. This will serve as the base for your colorful sushi roll.
Step 4: Apply Optional Fillings
Once your mixture is spread out, it’s time to get creative! Spoon any desired optional fillings like Nutella, mini chocolate chips, or shredded coconut over the surface. Use a spatula to spread them evenly without disturbing the Fruity Pebbles base. This layer adds delightful surprises to your Fruity Pebbles Sushi, so feel free to customize it to your taste!
Step 5: Form the Sushi Roll
Starting from one end of the parchment paper, gently lift the edge and begin rolling the mixture tightly away from you. Press it firmly but carefully to maintain the shape. Roll it until you reach the opposite edge, ensuring the fillings are secured inside. Once rolled up, place the log seam-side down on the parchment to stabilize its shape.
Step 6: Slice and Serve
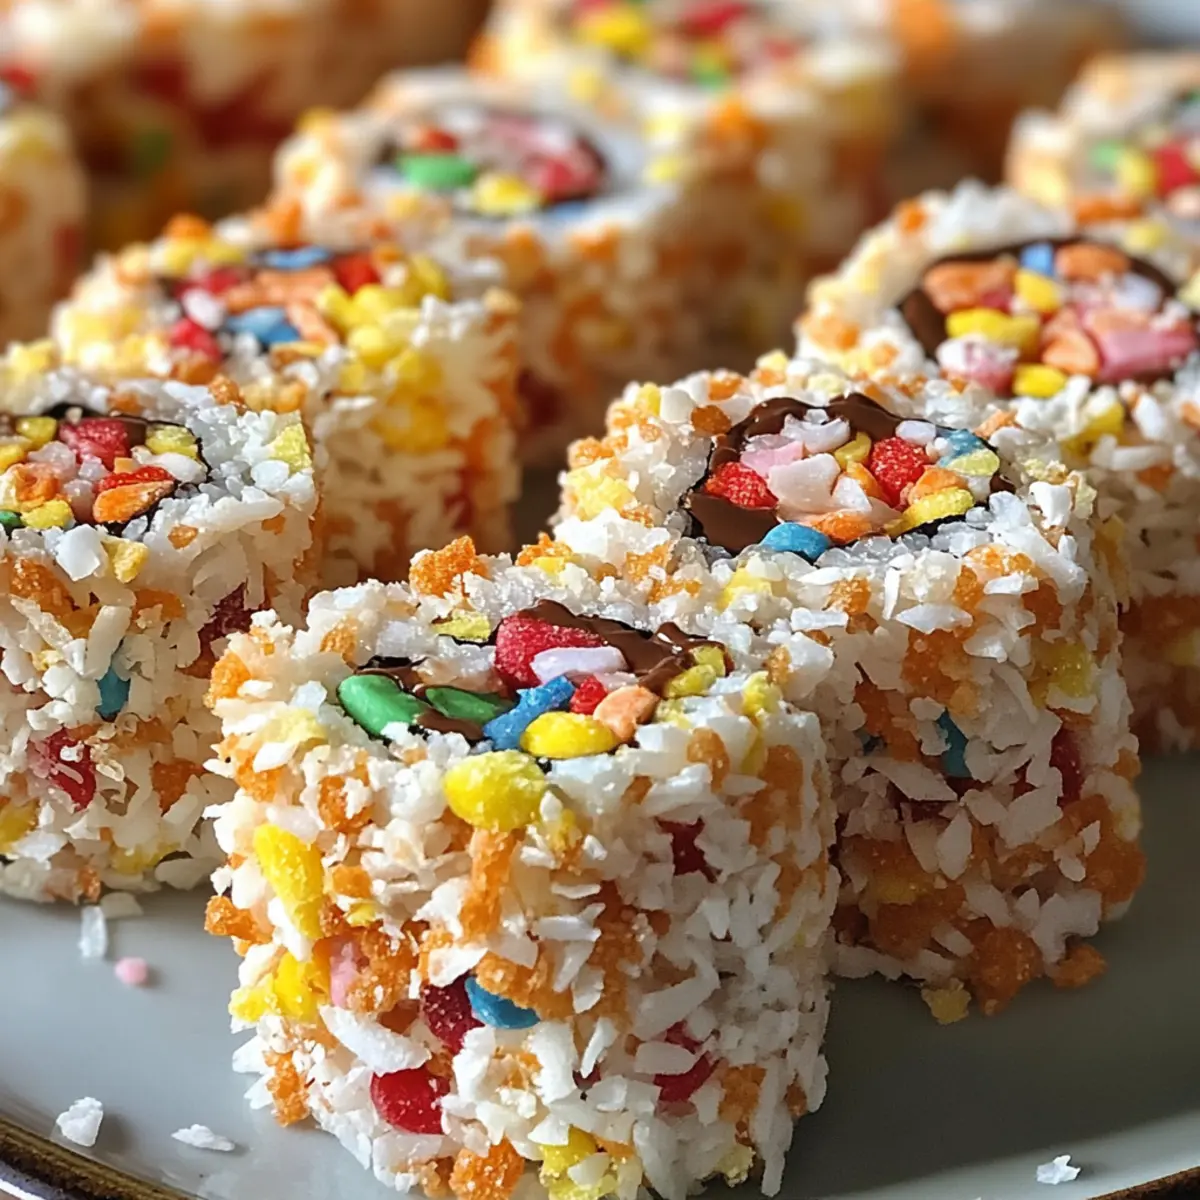
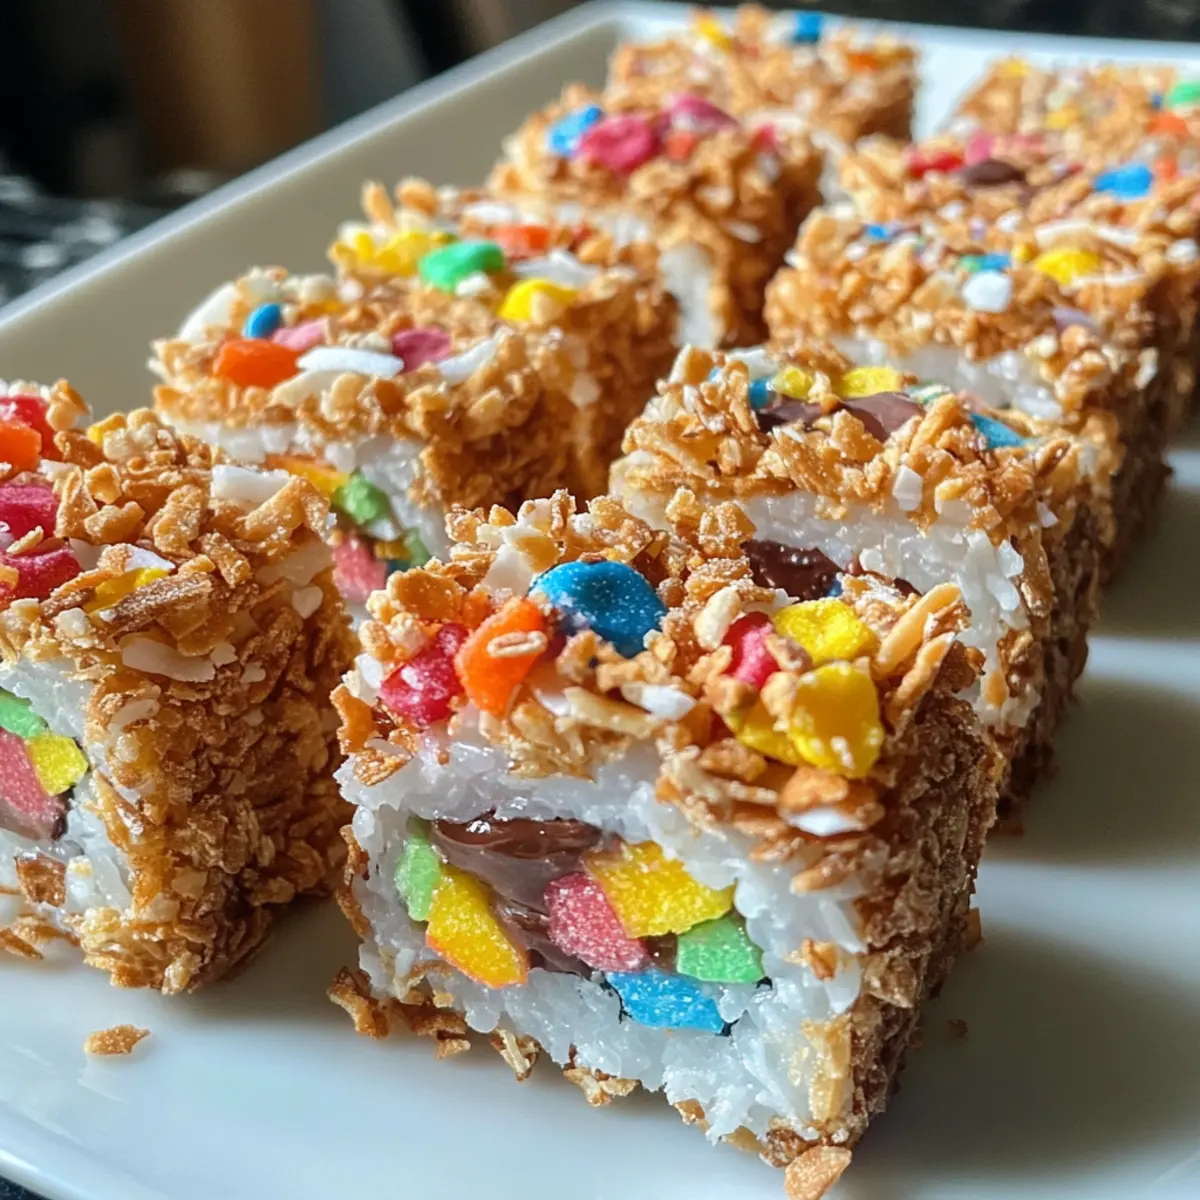
Using a sharp knife, slice the sushi log into bite-sized pieces, resembling classic sushi rolls. Aim for 1-inch thick slices to showcase the colorful filling. Arrange the pieces on a platter for a vibrant presentation. Your beautiful Fruity Pebbles Sushi is now ready to be enjoyed by family and friends—perfect for parties or just a fun afternoon treat!

Fruity Pebbles Sushi Variations
Embrace your creativity and tailor this whimsical dessert to your taste buds with these exciting variations!
-
Chocolatey Delight: Use Cocoa Pebbles instead of Fruity Pebbles for a rich, chocolatey twist. The deep cocoa flavor pairs beautifully with sweet marshmallows.
-
Nutty Surprise: Swap in peanut butter as a filling for a creamy, nutty contrast to the crunch of the cereal. This brings a lovely richness to each bite, making it utterly satisfying.
-
Tropical Vibes: Incorporate shredded coconut for an exotic flair. This addition not only enhances the texture but also complements fruity flavors, transporting you to a sunny beach.
-
Colorful Gummies: Add a layer of colorful gummies inside the roll for a playful surprise. Cut them into small pieces, and they’ll give each bite a chewy burst of sweetness. Ideal for fun celebrations!
-
Fiery Kick: For those who love a bit of heat, sprinkle some chili powder on the Nutella filling before rolling. It creates an unexpected but delightful spicy-sweet combo that’s sure to impress adventurous eaters.
-
Cereal Mash-Up: Experiment with different cereals like Rice Krispies or Trix for a delightful crunch and unique flavor profiles. Each cereal offers a fun texture and taste twist!
-
Rainbow Explosion: Use multicolored sprinkles on the outside for a festive look, especially if serving at a party. The added crunch and visual appeal will be a hit with kids.
-
S’mores Style: Fill the sushi with mini marshmallows and chocolate chips, and top it off with crushed graham crackers. It’s like making s’mores without the campfire!
Feel free to get inspired and mix these ideas for your next creation! For a refreshing drink alongside your sweet treat, try some delicious Rainbow Fruity Tapioca for a colorful combo.
Expert Tips for Fruity Pebbles Sushi
• Work Quickly: The marshmallow mixture firms up fast, so assemble your Fruity Pebbles Sushi without delay to maintain flexibility.
• Use Fresh Ingredients: Ensure your marshmallows are fresh to achieve the perfect binding and texture in your no-bake sushi.
• Butter Your Hands: Greasing your hands with butter makes rolling the sushi easier and prevents sticky fingers when shaping the log.
• Customize Fillings: Experiment with various fillings like Nutella or shredded coconut for unique flavor combinations that suit your taste.
• Store Properly: Keep leftover sushi pieces in an airtight container at room temperature for up to three days to maintain freshness.
How to Store and Freeze Fruity Pebbles Sushi
Room Temperature: Store pieces in a single layer in an airtight container at room temperature for up to 3 days to keep them fresh and chewy.
Refrigerator: If you prefer a chilled treat, you can refrigerate the Fruity Pebbles Sushi for up to 5 days. Just ensure it’s in an airtight container to prevent drying out.
Freezer: For longer storage, freeze individual slices wrapped in plastic wrap followed by a layer of aluminum foil for up to 1 month. Thaw overnight in the fridge before serving.
Reheating: While Fruity Pebbles Sushi is best enjoyed cold, if you prefer a warm version, microwave it briefly (about 10 seconds) to soften before indulging.
What to Serve with Fruity Pebbles Sushi?
A delightful treat calls for equally charming accompaniments that enhance the fun and flavor.
- Fresh Fruit Salad: A bowl of vibrant mixed fruits adds a refreshing, juicy contrast to the sweet, chewy sushi.
- Yogurt Parfait: Layer creamy yogurt with granola and berries for a deliciously healthy side that balances the sweetness perfectly.
- Chocolate Milkshake: This indulgent drink offers a nostalgic pairing that echoes the playful flavors of the Fruity Pebbles, making it a hit for all ages.
- Rainbow Sprinkles: Sprinkle some over your sushi for a whimsical touch that enhances both presentation and enjoyment—perfect for festive occasions!
- Mini Ice Cream Cones: Serve these alongside to create a fun, customizable dessert experience. Guests can scoop or dip their sushi into their favorite flavors.
- Sparkling Water with Fruit Slices: Refreshing and light, this drink brightens the palate, enhancing the colorful and vibrant experience of your Fruity Pebbles Sushi!
Make Ahead Options
These Fruity Pebbles Sushi are a fantastic choice for meal prep, allowing you to enjoy a fun and colorful dessert with minimal fuss on busy days! You can prepare the Fruity Pebbles mixture and roll it into a log up to 24 hours in advance. After forming the roll, wrap it tightly in parchment paper, then place it in an airtight container to maintain its freshness. When you’re ready to serve, simply slice the log into bite-sized pieces, and your delightful sushi will be just as delicious! To ensure the best texture, store it at room temperature and avoid refrigerating, as cold temperatures can affect the chewiness of the marshmallows. Enjoy the ease and excitement of having these treats ready to go!
Fruity Pebbles Sushi Recipe FAQs
How do I choose the right Fruity Pebbles?
Absolutely! When selecting Fruity Pebbles for your sushi, look for a box that’s vibrant and has no broken pieces. The freshness of the cereal matters; check the expiration date to ensure crispness. If you’re up for trying something different, Cocoa Pebbles or Rice Krispies are fantastic substitutions that give a unique twist.
What’s the best way to store leftover Fruity Pebbles Sushi?
Very! To keep your leftover Fruity Pebbles Sushi fresh, store it in a single layer in an airtight container at room temperature for up to 3 days. If you want to extend the life, refrigerate it for up to 5 days. Just remember to ensure it’s tightly sealed to prevent it from drying out.
Can I freeze Fruity Pebbles Sushi? If so, how?
Absolutely! For freezing, wrap individual slices of Fruity Pebbles Sushi tightly in plastic wrap, then add a layer of aluminum foil to protect against freezer burn. You can freeze them for up to 1 month. When you’re ready to enjoy, simply thaw the slices overnight in the fridge.
What should I do if my marshmallow mixture hardens too quickly?
I often recommend working quickly once your marshmallow mixture is off the heat! If it does harden, you can gently reheat it on low heat while stirring continuously until it softens again. Just be cautious not to burn it, and consider adding a tiny bit of butter or water to help loosen the mixture up.
Are there any allergy concerns I should be aware of?
Very! Fruity Pebbles are typically gluten-free, but it’s essential to check the packaging for allergen details, especially if you’re cooking for someone with allergies. Additionally, be aware of the fillings you use; Nutella may contain hazelnuts, while other fillings like chocolate chips or coconut could pose additional allergy risks.
Can I make Fruity Pebbles Sushi ahead of time?
Absolutely! You can prepare your Fruity Pebbles Sushi a day in advance. Just follow the recipe and store it properly in an airtight container. This way, you can have a fun and vibrant dessert ready for events like birthday parties or family gatherings, allowing you to enjoy the festivities more!
Vibrant Fruity Pebbles Sushi: A Fun No-Bake Treat for Everyone
Ingredients
Equipment
Method
- In a large pot over low heat, combine 4 cups of fresh marshmallows with 2 tablespoons of butter. Stir continuously until melted and smooth, about 5 minutes.
- Add 6 cups of Fruity Pebbles cereal to the melted marshmallow mixture. Gently fold and mix until evenly coated, about 2-3 minutes.
- Lay a large piece of parchment paper on your countertop and grease your hands with butter. Transfer the mixture onto the parchment, spreading it evenly into a rectangular shape about ½ inch thick.
- Spoon any desired fillings like Nutella, mini chocolate chips, or shredded coconut over the surface and spread them evenly.
- Starting from one end of the parchment paper, gently lift the edge and begin rolling the mixture tightly away from you. Roll until you reach the opposite edge and place seam-side down.
- Using a sharp knife, slice the sushi log into bite-sized pieces. Arrange the pieces on a platter for a vibrant presentation.