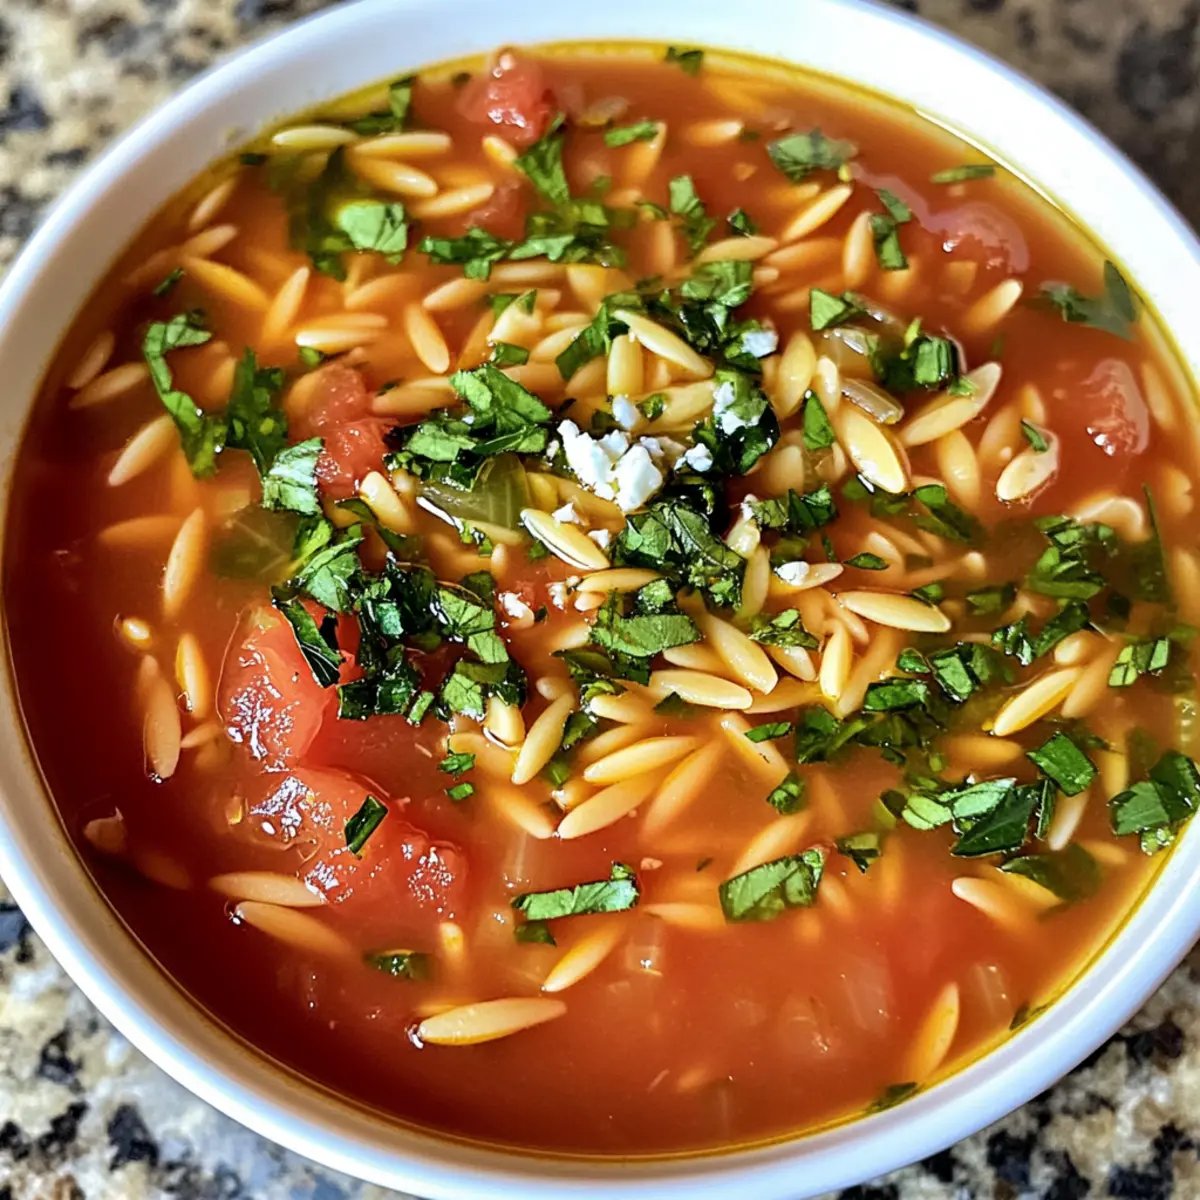
Chewy Peanut Butter Spider Cookies for a Spooktacular Treat

In the kitchen, chaos can often lead to unexpected delights, especially when the spooky season rolls around! With Halloween just a whisper away, I can’t help but feel excited about creating a festive treat that captures both the playful spirit and deliciousness of the season. Enter my Peanut Butter Spider Cookies! This whimsical recipe combines the creamy, nutty flavor of classic peanut butter blossoms with eerie yet adorable spider decorations made of Whoppers and chocolate ganache. The best part? They’re quick to whip up and guaranteed to be a hit at any Halloween gathering, enchanting kids and adults alike. Ready to bake up some cuteness with a creepy twist? Let’s dive in!

Why Are These Cookies So Fun?

Delightfully Spooky: These Peanut Butter Spider Cookies are perfect for adding a playful touch to your Halloween festivities. Kids and adults alike will enjoy the eerie yet cute spider decorations.

Quick and Easy: With straightforward steps, these cookies can be whipped up in no time, ensuring you’re not stuck in the kitchen while others enjoy the party.

Rich Flavor: The combination of creamy peanut butter and chocolate offers a delightful contrast that makes each bite utterly satisfying.

Creative Variation: Feel free to get creative by swapping out the Whoppers for other candies or adjusting the nut butter for a personalized twist! For more festive ideas, check out my Chocolate Date Cookies.

Party Perfect: Whether for a Halloween gathering or a themed dessert table, these cookies are sure to be a crowd-pleaser, inviting smiles all around.

Peanut Butter Spider Cookies Ingredients

Get ready to create spooktacular treats!

For the Cookie Base

  • All-purpose flour – Provides the structure for a delightful chew; opt for gluten-free flour if needed.
  • Baking soda – A key leavening agent; check freshness for the best rise.
  • Baking powder – Adds lightness; don’t skip for that perfect texture.
  • Salted butter (softened) – Brings richness and moisture; unsalted gives you more salt control.
  • Granulated sugar – Contributes sweetness and texture; brown sugar can add moisture if desired.
  • Brown sugar – For a deep, chewy texture; either light or dark will work.
  • Egg – Binds the dough together and keeps cookies moist; substitute with a flaxseed egg for a vegan version.
  • Creamy peanut butter (not natural) – Packs flavor and moisture; crunchy peanut butter offers a fun texture variation.
  • Vanilla extract – Elevates the flavor; almond extract can be a suitable substitute.

For the Spider Decorations

  • Whoppers (44 pieces) – Create the fun spider bodies and heads; feel free to swap for other chocolate malt candies.
  • Semi-sweet chocolate chips (1 cup) – Used for the spider legs; dark chocolate chips can add a richer touch.
  • White cake decorating gel (1 small tube) – Perfect for adding creepy crawly eyes; royal icing or melted white chocolate also works well.
  • Granulated sugar (¼ cup for rolling) – Gives a sweet crunch to the cookies; can be omitted if you prefer less sweetness.

These Peanut Butter Spider Cookies will not only satisfy your sweet tooth, but they will also add a fun, festive flair to your Halloween festivities!

Step‑by‑Step Instructions for Peanut Butter Spider Cookies

Step 1: Preheat Your Oven
Begin by preheating your oven to 375°F (190°C) to ensure it’s hot and ready for baking. Meanwhile, prepare two baking sheets by lining them with parchment paper; this will prevent sticking and make cleanup easier later. A warm oven is crucial for achieving the perfect soft and chewy texture in your Peanut Butter Spider Cookies.

Step 2: Mix the Dry Ingredients
In a medium bowl, whisk together the all-purpose flour, baking soda, and baking powder until evenly combined. This blending is essential to evenly distribute the leavening agents throughout your Peanut Butter Spider Cookies. Set this dry mixture aside, allowing the flavors to meld while you prepare the wet ingredients.

Step 3: Cream the Butter and Sugars
In another large bowl, use an electric mixer to cream together the softened salted butter, granulated sugar, and brown sugar until the mixture is light and fluffy—about 2-3 minutes. Then, add the creamy peanut butter and continue mixing until everything is smooth and well combined. The buttery richness will help create delicious cookies!

Step 4: Incorporate the Egg and Vanilla
Add the egg and vanilla extract to the butter mixture, and mix on low speed until just combined. The egg helps bind the ingredients and provides moisture, while the vanilla enhances the flavor profile of your Peanut Butter Spider Cookies. Don’t overmix; you want a tender dough for your spooky treats!

Step 5: Combine Wet and Dry Mixtures
Gradually add the dry ingredients to the wet mixture, mixing on low speed until fully incorporated. Be careful not to overmix; you want to ensure your Peanut Butter Spider Cookies remain soft and chewy. Once the dough is combined, it should be thick and slightly sticky, ready for shaping.

Step 6: Shape the Cookies
Using a cookie scoop or your hands, take about 2 tablespoons of dough and roll it into a ball. Once shaped, gently roll each ball in granulated sugar to create a sweet crust. Place them evenly spaced on the prepared baking sheets, giving them room to spread while baking.

Step 7: Bake Until Golden
Bake the cookies in your preheated oven for 8-10 minutes, or until the edges are slightly golden while the centers appear soft. Keep an eye on them, as you want the cookies to appear lightly underbaked for that irresistible chewy texture typical of Peanut Butter Spider Cookies.

Step 8: Add the Whoppers
Quickly remove the cookies from the oven and press a Whopper into the center of each cookie to create the body and head of the spiders. Allow the cookies to cool on the baking sheets for a few minutes before transferring them to a wire rack. This slight cooling helps set the candies without melting them.

Step 9: Melt the Chocolate for Legs
In a microwave-safe bowl, melt the semi-sweet chocolate chips in 15-30 second intervals, stirring frequently until completely smooth. Once melted, transfer the chocolate to a piping bag or a plastic bag with a corner snipped off. This will allow you to easily pipe the spider legs onto your cooled cookies, adding a fun finishing touch.

Step 10: Pipe on the Legs and Eyes
With the melted chocolate, pipe legs extending from the Whoppers on each cookie, forming creepy spider shapes. Use the white cake decorating gel to dot on eyes directly above the Whopper heads. For an extra festive touch, add nonpareils for an even more whimsical look to your Peanut Butter Spider Cookies.

Peanut Butter Spider Cookies Variations

Feel free to put your personal twist on these delightful treats with these fun options!

  • Gluten-Free: Use a 1:1 gluten-free flour blend to make these cookies suitable for gluten-sensitive pals without sacrificing taste.

  • Dairy-Free: Substitute the butter with vegan butter or coconut oil, and use dairy-free chocolate chips for a completely dairy-free delight. They’ll be so yummy you won’t even miss the dairy!

  • Nut-Free: Swap peanut butter for sunflower seed butter to create a nut-free alternative that’s just as tasty. These cookies will be a hit at school parties!

  • Extra Chewy: Add an additional egg yolk to the dough for a richer, chewier texture that makes every bite pure bliss. It’s all about achieving that perfect softness!

  • Flavor Boost: Mix in a pinch of cinnamon or a dash of sea salt to elevate the flavor profile, creating that perfect balance of rich and sweet.

  • Mini Versions: For fun bite-sized treats, use a smaller scoop of dough and create “mini spiders” that are perfect for kids or gatherings. A little whimsical fun goes a long way!

  • Other Candies: Experiment with different candies for spider decoration like gummy worms or chocolate-covered pretzels, bringing creativity and excitement to your Halloween baking.

Don’t forget to showcase these festive delights at your next gathering or try serving them alongside other delicious options like German Style Cookies for a delightful treat selection!

Make Ahead Options

Preparing Peanut Butter Spider Cookies ahead of time is a fantastic way to streamline your Halloween festivities! You can mix the dough and refrigerate it for up to 24 hours, which helps the flavors develop and makes the cookies even more delicious. Once ready to bake, simply scoop the chilled dough, roll into balls, and coat with granulated sugar before placing them on the baking sheets. If you want to decorate in advance, bake the cookies and allow them to cool completely; then, store them in an airtight container for up to 3 days. Finish the cookies by adding the Whoppers and piping on the chocolate legs just before serving to ensure they remain fresh and delightful!

Storage Tips for Peanut Butter Spider Cookies

Room Temperature: Store your Peanut Butter Spider Cookies in an airtight container for up to 5 days to keep them soft and chewy.

Fridge: If you prefer, you can refrigerate the cookies in an airtight container for up to 1 week, but this may change their texture slightly, making them firmer.

Freezer: Freeze cookies in a single layer, then transfer to an airtight container or freezer bag for up to 3 months to preserve their delicious flavors. Just allow them to thaw at room temperature before enjoying!

Reheating: To enjoy a fresh-out-of-the-oven taste, briefly microwave the cookies for 10-15 seconds before serving.

What to Serve With Peanut Butter Spider Cookies

These delightful treats are perfect for a Halloween gathering, and pairing them with the right accompaniments can elevate your festive experience.

  • Spooky Milkshakes: Creamy vanilla or chocolate milkshakes with a touch of food coloring create a fun, festive drink that pairs beautifully with the rich peanut butter cookies.

  • Pumpkin Spice Latte: The warm flavors of pumpkin spice complement the chewy texture of the cookies, making every bite feel like a cozy embrace.

  • Caramel Sauce Drizzle: A simple drizzle of warm caramel over each cookie adds an irresistible sweetness that enhances the peanut butter flavor.

  • Chocolate-Dipped Pretzels: The crunch and saltiness of pretzels contrast wonderfully with the soft, sweet cookies, offering a delightful textural experience.

  • Autumn Fruit Platter: Fresh apples, pears, and grapes provide a refreshing balance to the rich cookies, creating a well-rounded treat spread for your Halloween party.

  • Gingerbread Cookies: Mix in some festive cheer with spicy gingerbread cookies; their warmth complements the peanut butter while enhancing the seasonal theme.

  • Spooky Fruit Punch: A fruity punch garnished with gummy spiders or eyeballs adds a fun and festive drink option that kids will love alongside the cookies.

  • Halloween-themed Cupcakes: Serve cute, themed cupcakes that mirror the fun of your cookies, creating a vibrant dessert table kids will adore.

Expert Tips for Peanut Butter Spider Cookies

  • Prevent Overbaking: Keep an eye on the cookies and remove them when the edges are golden but the center looks slightly underbaked. This ensures a soft, chewy texture typical of Peanut Butter Spider Cookies.

  • Check Dough Consistency: If the dough is too sticky to handle, chill it for about 10-15 minutes. This helps in rolling them into balls easily without sticking to your hands.

  • Chocolate Melting: Melt chocolate chips in short bursts, stirring in between, to prevent overheating and burning. This ensures a smooth piping consistency for the spider legs.

  • Creative Decorations: Don’t limit yourself to Whoppers! Consider using gummy candies or pretzels for unique spider creations. Be adventurous with your Peanut Butter Spider Cookies!

  • Storage Tips: To maintain freshness, store cookies in an airtight container at room temperature. If storing longer, freeze them but be gentle with the chocolate legs as they may get fragile.

Peanut Butter Spider Cookies Recipe FAQs

What kind of peanut butter should I use for these cookies?
I recommend using creamy peanut butter that isn’t natural, as it provides the best flavor and texture for these Peanut Butter Spider Cookies. If you want a bit more crunch, feel free to swap in some crunchy peanut butter for a delightful variation!

How should I store leftover cookies?
Store your Peanut Butter Spider Cookies in an airtight container at room temperature for up to 5 days to maintain their scrumptious softness. If you’d like them to last longer, freeze them in a single layer first, then transfer them to a freezer-safe bag for up to 3 months. Just remember that the chocolate legs may become fragile after freezing.

Can I freeze the cookie dough before baking?
Absolutely! To freeze your cookie dough, scoop the dough into balls and place them on a lined baking sheet. Freeze until solid, then transfer the dough balls into a freezer-safe bag, labeling with the date. You can bake them straight from the freezer by adding an extra minute or two to the baking time!

What if my cookies spread too much while baking?
If your Peanut Butter Spider Cookies spread too much during baking, it could be due to the butter being too warm or the dough not being chilled. To prevent this, always use softened butter rather than melted and chill the dough for about 10-15 minutes before scooping and baking. This helps maintain their shape beautifully!

Are these cookies safe for pets?
While these cookies are absolutely delightful for humans, be cautious about sharing with your furry friends. Peanut butter is generally safe, but chocolate can be toxic to dogs. If you want to treat your pet, consider setting aside some dough before adding any chocolate or candy decorations. Always consult with your vet regarding new treats!

How can I ensure my cookies don’t dry out?
To keep your Peanut Butter Spider Cookies moist and chewy, avoid overbaking them! Keep an eye on the timer; they should be removed when the edges are just golden but the centers look slightly underbaked. Also, store them properly in an airtight container to lock in that delightful chewiness!

Peanut Butter Spider Cookies

Chewy Peanut Butter Spider Cookies for a Spooktacular Treat

Delight in these Peanut Butter Spider Cookies, a whimsical and delicious treat perfect for Halloween festivities.
Prep Time 15 minutes
Cook Time 10 minutes
Cooling Time 5 minutes
Total Time 30 minutes
Servings: 12 cookies
Course: Dessert
Cuisine: American
Calories: 150

Ingredients
  

For the Cookie Base
  • 2 cups all-purpose flour opt for gluten-free flour if needed
  • 1 teaspoon baking soda check freshness for best rise
  • 1 teaspoon baking powder don't skip for perfect texture
  • 1 cup salted butter (softened) unsalted gives you more salt control
  • 1 cup granulated sugar brown sugar can add moisture if desired
  • 1 cup brown sugar either light or dark will work
  • 1 large egg can substitute with a flaxseed egg for vegan version
  • 1 cup creamy peanut butter (not natural) crunchy peanut butter offers fun texture
  • 1 teaspoon vanilla extract almond extract can be a substitute
For the Spider Decorations
  • 44 pieces Whoppers can swap for other chocolate malt candies
  • 1 cup semi-sweet chocolate chips dark chocolate chips can add richness
  • 1 small tube white cake decorating gel royal icing or melted white chocolate also works
  • ¼ cup granulated sugar gives a sweet crunch; can be omitted for less sweetness

Equipment

  • oven
  • mixing bowls
  • electric mixer
  • Cookie scoop
  • Baking sheets
  • Piping bag

Method
 

Step-by-Step Instructions
  1. Preheat your oven to 375°F (190°C) and line two baking sheets with parchment paper.
  2. In a medium bowl, whisk together the all-purpose flour, baking soda, and baking powder.
  3. In a large bowl, cream together the softened salted butter, granulated sugar, and brown sugar until light and fluffy.
  4. Add the creamy peanut butter, egg, and vanilla extract, mixing until combined.
  5. Gradually add the dry ingredients to the wet mixture, mixing on low speed until fully incorporated.
  6. Shape about 2 tablespoons of dough into a ball and roll in granulated sugar before placing on the baking sheets.
  7. Bake for 8-10 minutes, until the edges are golden and centers are slightly soft.
  8. Press a Whopper into the center of each cookie and cool briefly on the baking sheets.
  9. Melt the semi-sweet chocolate chips and pipe spider legs onto cooled cookies.
  10. Pipe eyes with white cake decorating gel above the Whopper heads.

Notes

Store cookies in an airtight container for up to 5 days. For best texture, consume fresh or freeze for later enjoyment.

Chubby Hubby Cookies: Sweet & Salty Bliss in Every Bite

The moment you take your first bite of Chubby Hubby Cookies, you’ll quickly wish you had a whole batch to yourself. These delectable cookies fuse soft, chewy peanut butter with the satisfying crunch of pretzels and rich chocolate chunks, creating a perfect harmony between sweet and salty. Not only are they a delightful distraction from fast food jams, but they can also be whipped up in no time, making them the ultimate treat for any gathering or a cozy night in. Whether you’re baking solo or with the family, these cookies promise to deliver pure joy that will have everyone asking for seconds. Are you ready to level up your cookie game? Let’s dive into the deliciousness!

Why Are Chubby Hubby Cookies So Irresistible?

Decadent Flavor Explosion: With intertwining notes of creamy peanut butter, rich chocolate, and crunchy pretzels, each bite offers a delightful surprise.

Time-Saving Treat: Whip these up in just a little over 30 minutes; they’re perfect for unexpected guests or a treat for yourself.

Family-Friendly Fun: Get everyone involved in the baking process—mixing, folding, and scooping dough makes for fun memories!

Versatile Variations: Switch semi-sweet chocolate for dark or exchange pretzels for nuts; creativity is your only limit!

Serve Warm: Enjoying these cookies fresh out of the oven with a cold glass of milk creates an unbeatable experience.

If you love cookies with unexpected flavors, check out our Nutty Apricot Cookies for another delightful twist!

Chubby Hubby Cookies Ingredients

Get ready to make these indulgent cookies that everyone will love!

For the Cookie Base

  • Unsalted Butter (1/2 cup or 113g) – Adds richness and moisture; substitute with salted butter only if omitting extra salt.
  • Brown Sugar (3/4 cup or 150g) – Provides depth of flavor and moisture; can substitute with coconut sugar for a hint of caramel flavor.
  • Granulated Sugar (1/4 cup or 50g) – Adds sweetness and assists with cookie spread; no direct substitutes.
  • Creamy Peanut Butter (3/4 cup or 185g) – Essential for structure and flavor; use conventional types for best results, as natural versions may yield crumbly cookies.
  • Large Egg (1) – Binds ingredients and adds moisture; best at room temperature.
  • Vanilla Extract (1 tsp) – Enhances flavor profile; no substitutions recommended.
  • All-Purpose Flour (1 1/4 cups or 150g) – Provides structure; for gluten-free, use a 1:1 baking blend.
  • Baking Soda (1/2 tsp) – Essential leavening agent for cookie rise; no alternatives.
  • Baking Powder (1/4 tsp) – Another leavening agent to ensure fluffy cookies; no alternatives.
  • Salt (1/4 tsp) – Enhances flavors while being reduced due to salty pretzels; opt for unsalted varieties for less saltiness.

For the Crunch and Sweetness

  • Semi-Sweet Chocolate Chips or Chunks (1 cup or 175g) – Adds gooeyness; opt for milk chocolate for a sweeter taste.
  • Pretzel Twists (1 cup or 60g, broken into 1/2-inch chunks) – Provide a crunchy texture; use mini twists or sticks and avoid pretzel dust.

Now that you have all the ingredients for the delectable Chubby Hubby Cookies, it’s time to get baking! Enjoy this sweet and salty delight that’s sure to impress family and friends.

Step‑by‑Step Instructions for Chubby Hubby Cookies

Step 1: Preheat the Oven
Begin by preheating your oven to 350°F (175°C). This ensures the cookies will bake evenly and achieve that perfect chewy texture. While the oven heats up, prepare your baking sheet by lining it with parchment paper to prevent sticking and make cleanup a breeze.

Step 2: Cream the Sugars and Butter
In a large mixing bowl, combine the softened unsalted butter, brown sugar, and granulated sugar. Using a hand mixer or a stand mixer, beat the mixture on medium speed until it becomes light and fluffy, about 3-5 minutes. This creamy base is essential for the rich flavor profile of your Chubby Hubby Cookies.

Step 3: Add Wet Ingredients
Next, mix in the creamy peanut butter, large egg, and vanilla extract to the creamed butter and sugars. Continue blending until the mixture is smooth, ensuring everything is evenly incorporated. This luxurious blend of ingredients gives the cookies their signature sweetness and nutty richness.

Step 4: Combine the Dry Ingredients
In a separate bowl, whisk together the all-purpose flour, baking soda, baking powder, and salt. Gradually add this dry mixture to the wet ingredients, mixing on low speed until just combined. Be careful not to overmix; you want your Chubby Hubby Cookies to retain their desirable chewy texture.

Step 5: Fold in Chocolate and Pretzels
Gently fold in the semi-sweet chocolate chips and broken pretzel pieces into the cookie dough. Use a spatula for this step to keep the ingredients intact and avoid overworking the dough. The combination of gooey chocolate and crunchy pretzels elevates these cookies into an indulgent treat.

Step 6: Scoop the Dough
Using a generous 2-tablespoon measure or cookie scoop, drop the dough onto the prepared baking sheet, leaving enough space between each scoop for spreading. Aim for about 2 inches apart, as the cookies will expand while baking. You should have about 12-15 cookie dough mounds ready for the oven.

Step 7: Bake the Cookies
Place the baking sheet in the preheated oven and bake for 10-12 minutes. Keep an eye on them; you want the edges to be golden brown, while the centers look slightly underbaked. This contrast in texture is what makes Chubby Hubby Cookies so irresistible once cooled!

Step 8: Cool and Enjoy
After baking, let the cookies cool on the baking sheet for about 5 minutes. This helps them set without becoming too firm. Once slightly cooled, gently transfer them to a wire rack to cool completely. Enjoy your warm, chewy cookies with a glass of milk or indulge in their sweet and salty perfection on their own!

Make Ahead Options

Chubby Hubby Cookies are an ideal choice for meal prep, allowing you to enjoy their delightful flavors without the last-minute rush! You can prepare the cookie dough up to 24 hours in advance by mixing all the ingredients as instructed and storing it in an airtight container in the refrigerator. This helps maintain freshness and ensures your cookies are just as delicious when baked. When you’re ready to indulge, simply scoop the chilled dough onto a baking sheet and bake for an additional 1-2 minutes. This way, you can savor warm, chewy cookies anytime, making them perfect for busy weeknights or unexpected guests!

How to Store and Freeze Chubby Hubby Cookies

Room Temperature: Store cookies in an airtight container at room temperature for up to 2 days for optimal freshness and texture.

Freezer: Chubby Hubby Cookies can be frozen for up to 3 months. Place them in a single layer on a baking sheet, freeze until firm, then transfer to a freezer bag.

Cookie Dough: If you want to make ahead, freeze the cookie dough balls. Just add 1-2 minutes to your baking time when baking from frozen.

Reheating: To enjoy your cookies warm, simply microwave them for about 10-15 seconds; this will bring back that delightful gooeyness.

What to Serve with Chubby Hubby Cookies

Indulging in Chubby Hubby Cookies is a treat, but what can elevate your delightful experience even further?

  • Cold Glass of Milk: A classic pairing that enhances the cookies’ sweetness while complementing the rich flavors with its creamy, coolness.

  • Vanilla Ice Cream: The creamy texture of vanilla ice cream balances the chewiness of the cookies, making each mouthful a dreamy combination of flavors.

  • Fresh Berries: Juicy strawberries or raspberries add a burst of freshness and a tart contrast, perfectly cutting through the richness of the cookies.

  • Decadent Hot Chocolate: This warm, chocolatey drink pairs beautifully with cookies, inviting a cozy moment perfect for chilly days.

  • Caramel Sauce Drizzle: Drizzling warm caramel over your cookie takes the sweet and salty to a new level, intensifying the treat’s indulgence.

  • Coffee or Espresso: The bold flavors of coffee enhance the rich chocolate and nutty notes of the cookies, making it an inviting adult treat.

  • Nutty Trail Mix: Serve a side of nutty trail mix for a crunchy, savory companion, balancing the sweetness of the cookies splendidly.

  • Salted Pretzel Sticks: For an unexpected twist, these salty snacks mirror the cookie’s ingredients, creating harmony in flavor and texture.

  • Simple Fruit Salad: A light, refreshing fruit salad adds a burst of color and natural sweetness that pairs deliciously with the chewy cookies.

When it comes to enjoying Chubby Hubby Cookies, the right accompaniments can create a delightful experience tailored to your taste buds.

Expert Tips for Chubby Hubby Cookies

  • Choose the Right Peanut Butter: Use conventional creamy peanut butter like Jif or Skippy for the best texture; natural varieties may lead to crumbly cookies.

  • Don’t Overmix the Dough: Gently fold in the chocolate chips and pretzels to maintain the chewiness; overmixing can lead to a tough texture.

  • Watch the Baking Time: Keep an eye on your cookies as they bake; slightly underbaked centers will result in a softer, chewy Chubby Hubby Cookie.

  • Cool Properly: Allow cookies to cool on the sheet for a few minutes before transferring them to a wire rack; this helps them set and stay moist.

  • Chill if Needed: If your dough feels too soft due to warm kitchen temperatures, chill it in the refrigerator for 30 minutes before baking for better consistency.

Chubby Hubby Cookies Variations & Substitutions

Feel free to let your creativity shine by customizing your Chubby Hubby Cookies with these delightful variations!

  • Dark Chocolate: Swap semi-sweet chocolate for dark chocolate for a richer, deeper flavor that adds a touch of sophistication.
  • Nutty Twist: Replace the pretzels with crushed nuts for a different crunch; walnuts or pecans work beautifully here. The added nutty flavor will elevate the cookie experience.
  • Almond Butter: Use almond butter instead of peanut butter for a unique flavor twist, perfect for almond lovers. This will create an equally delightful but different texture.
  • Coconut Flakes: Add 1/2 cup of shredded coconut to the dough for a tropical twist that pairs wonderfully with the chocolate.
  • Spice it Up: Add a dash of cinnamon or a pinch of cayenne pepper to the dough for a warm, spicy hit. This unexpected warmth will make your cookies unforgettable.
  • Chewy Oatmeal: Stir in 1/2 cup of quick oats for a chewy texture and a wholesome feel. Oats complement the chocolate and peanut butter beautifully.
  • Mini Marshmallows: Toss in mini marshmallows for a gooey, s’mores-like element that takes cookie indulgence to another level. The more gooey, the better!
  • Caramel Swirl: Drizzle caramel sauce on top of the cookies just before baking for a sweet surprise that everyone will love. This will add both flavor complexity and an appealing look.

And if you’re looking for more cookie inspiration, don’t miss our Nutty Apricot Cookies or try the unique flavors of our Banana Seed Cookies for delightful variety!

Chubby Hubby Cookies Recipe FAQs

How do I select the best peanut butter for Chubby Hubby Cookies?
Absolutely! For the best texture, I recommend using conventional creamy peanut butter like Jif or Skippy. Natural types, while healthier, can make the cookies crumbly and affect their overall structure. Stick with the conventional for a perfectly soft and chewy cookie!

How should I store my Chubby Hubby Cookies?
You can keep your cookies in an airtight container at room temperature, where they’ll stay fresh for up to 2 days. If you want them to last longer, consider freezing them! Just stack them in a single layer in a freezer-safe bag, and they will be good for up to 3 months.

Can I freeze the cookie dough for Chubby Hubby Cookies?
Absolutely! You can freeze the dough balls before baking for added convenience. Simply scoop your cookie dough onto a baking sheet and freeze until solid, then transfer the frozen balls into a freezer bag. When you’re ready to bake, just add an extra 1-2 minutes to the baking time and enjoy freshly baked cookies anytime!

What should I do if my cookie dough is too soft?
Very! If your cookie dough is too soft due to a warm kitchen, simply chill it in the refrigerator for about 30 minutes. This will firm up the dough, making it easier to scoop and shape. It’s a helpful trick to ensure perfectly round cookies with the right texture!

Can my pets eat these cookies?
No, it’s important to keep Chubby Hubby Cookies away from pets, especially dogs. The chocolate and peanut butter can be harmful to them. Always opt for pet-safe treats if you want to spoil your furry friends!

How do I know when my cookies are done baking?
The secret is to watch the edges! Bake your cookies for 10-12 minutes until the edges are beautifully golden brown, while the centers should look slightly underbaked. This contrast ensures a chewy texture once cooled, leading to a delightful bite!

Chubby Hubby Cookies

Chubby Hubby Cookies: Sweet & Salty Bliss in Every Bite

Chubby Hubby Cookies offer a delightful blend of sweet and salty flavors with peanut butter, chocolate, and pretzels.
Prep Time 15 minutes
Cook Time 12 minutes
Cooling Time 5 minutes
Total Time 32 minutes
Servings: 12 cookies
Course: Dessert
Cuisine: American
Calories: 200

Ingredients
  

For the Cookie Base
  • 1/2 cup Unsalted Butter Adds richness and moisture; substitute with salted butter only if omitting extra salt.
  • 3/4 cup Brown Sugar Provides depth of flavor; can substitute with coconut sugar for a hint of caramel flavor.
  • 1/4 cup Granulated Sugar Adds sweetness; no direct substitutes.
  • 3/4 cup Creamy Peanut Butter Essential for structure and flavor; use conventional types for best results.
  • 1 Large Egg Binds ingredients; best at room temperature.
  • 1 tsp Vanilla Extract Enhances flavor profile; no substitutions recommended.
  • 1 1/4 cups All-Purpose Flour Provides structure; for gluten-free, use a 1:1 baking blend.
  • 1/2 tsp Baking Soda Essential leavening agent for cookie rise; no alternatives.
  • 1/4 tsp Baking Powder Another leavening agent for fluffy cookies; no alternatives.
  • 1/4 tsp Salt Enhances flavors; opt for unsalted varieties for less saltiness.
For the Crunch and Sweetness
  • 1 cup Semi-Sweet Chocolate Chips or Chunks Adds gooeyness; opt for milk chocolate for a sweeter taste.
  • 1 cup Pretzel Twists (broken into 1/2-inch chunks) Provides a crunchy texture; avoid pretzel dust.

Equipment

  • mixing bowl
  • Hand mixer or stand mixer
  • baking sheet
  • parchment paper
  • spatula
  • Cookie scoop

Method
 

Step-by-Step Instructions
  1. Preheat your oven to 350°F (175°C) and line a baking sheet with parchment paper.
  2. In a large mixing bowl, combine softened unsalted butter, brown sugar, and granulated sugar. Beat on medium speed until light and fluffy, about 3-5 minutes.
  3. Mix in creamy peanut butter, large egg, and vanilla extract until smooth.
  4. In a separate bowl, whisk together all-purpose flour, baking soda, baking powder, and salt. Gradually add to the wet ingredients on low speed until just combined.
  5. Gently fold in semi-sweet chocolate chips and broken pretzel pieces using a spatula.
  6. Using a cookie scoop, drop dough onto the prepared baking sheet, leaving 2 inches between each.
  7. Bake for 10-12 minutes until edges are golden brown; centers should be slightly underbaked.
  8. Let cookies cool on the baking sheet for about 5 minutes before transferring to a wire rack.

Notes

Choose conventional peanut butter and avoid overmixing to maintain the chewiness. Store in an airtight container.

Savory Grilled Octopus with Smoky, Charred Perfection

As I stood on my patio, inhaling the irresistible aroma of charred seafood wafting through the air, I couldn’t help but feel an overwhelming sense of celebration. That’s when I realized that grilled octopus is more than just a dish; it’s a culinary adventure that transports your taste buds straight to the Mediterranean. This Grilled Octopus recipe captures that perfect balance of smoky flavor and tender texture, making it not only a delightful centerpiece for any gathering but also a healthy, gluten-free option that even non-seafood lovers will enjoy. When you bring this effortlessly impressive dish to the table, you’re not just feeding hungry guests; you’re sharing a piece of culture and enjoyment. Ready to elevate your next meal with a special twist? Let’s dive in!

Why is Grilled Octopus a Must-Try?

Irresistible Flavor: The smoky, charred perfection of grilled octopus will have your taste buds dancing with joy. Nutritious Delight: Packed with protein and low in fat, this dish is a guilt-free indulgence. Easy Preparation: With a straightforward process, you’ll impress your guests without stress! Endless Variations: Try spicy, Greek, or citrus herb twists for unique flavors. Crowd Pleaser: It’s a seafood delight that even non-seafood eaters will love. Dive into this culinary adventure and explore more with our Greek style or Asian-inspired variations!

Grilled Octopus Ingredients

• Let’s prepare to create this delightful dish!

For the Grill

  • Octopus – This meaty ingredient provides a rich flavor; choose fresh or high-quality frozen for the best results.
  • Olive Oil – Essential for marinating and grilling; it adds a luxurious richness—avocado oil works too if you prefer a mild taste.
  • Lemon Juice – The perfect acidity for balancing flavors; lime juice is a suitable alternative for a zesty twist.
  • Fresh Herbs (e.g., parsley, oregano) – These aromatic notes add freshness; dried herbs can be substituted, but remember to use less as they’re more potent.
  • Salt and Pepper – Basic seasonings critical to enhancing flavors; for an extra touch, consider using sea salt.

For Serving

  • Extra Olive Oil – Drizzling more olive oil just before serving enhances the dish’s richness.
  • Lemon Wedges – A squeeze of fresh lemon juice at the end elevates the overall brightness.

Prepare these ingredients, and you’ll be on your way to creating a truly stunning grilled octopus that dazzles the palate and warms the heart!

Step‑by‑Step Instructions for Grilled Octopus

Step 1: Pre-Tenderize the Octopus
Start by bringing a large pot of salted water to a boil. Carefully add the octopus, and reduce the heat to a gentle simmer. Allow it to cook for 40-60 minutes, until it becomes tender enough to pierce easily with a fork. Once done, remove the octopus from the water and let it cool for a few moments before cutting it into smaller pieces for grilling.

Step 2: Prepare Marinade
In a spacious mixing bowl, whisk together olive oil, freshly squeezed lemon juice, chopped herbs, salt, and pepper. Ensure the mixture is well combined to infuse flavors. Once it’s ready, add the cooled octopus pieces to the bowl, making sure each piece is generously coated in the marinade. Allow it to marinate for at least 1 hour, giving the flavors time to develop.

Step 3: Heat the Grill
Preheat your grill to high heat (around 450°F to 500°F). As the grill heats up, make sure the surface of the marinated octopus is dry to help achieve that perfect char. Use paper towels to gently pat the surface if necessary. Having the grill ready will ensure a quick sear that locks in the flavors of your grilled octopus.

Step 4: Grill the Octopus
Once the grill is hot, carefully place the octopus pieces onto the grates. Grill each side for 3-5 minutes, watching closely for a good char to form. The octopus should develop vibrant grill marks and be slightly crispy on the outside while remaining tender within. Once both sides are charred, remove the pieces from the grill and let them rest for a moment.

Step 5: Serve
To serve your beautifully grilled octopus, arrange the pieces on a platter. Drizzle with extra olive oil for added richness, and squeeze fresh lemon juice over the top for a burst of brightness. Pair it with your choice of sides like crusty bread or a vibrant salad for a complete meal that highlights the delightful flavors of your grilled octopus creation.

Grilled Octopus Variations & Substitutions

Feel free to unleash your creativity and customize this delightful dish with these exciting variations!

  • Spicy Twist: Add chili paste or harissa into the marinade to crank up the heat, perfect for spice lovers.
  • Greek Style: Toss the grilled octopus with crumbled feta, Kalamata olives, and cherry tomatoes — think Mediterranean feast!
  • Asian-Inspired: Marinate with soy sauce, sesame oil, and grated ginger for a delightful twist; the umami flavor will be irresistible.
  • Citrus Herb: Replace lemon juice with orange or lime juice in the marinade for a uniquely bright flavor that freshens the palate.
  • Smoky Paprika: Include smoked paprika in your marinade for a warm, smoky flair that complements the charred octopus beautifully.
  • Herb Fusion: Experiment with different fresh herbs such as cilantro or dill for a fresh and aromatic twist — the sky’s the limit!
  • Grilled Veggies: Serve it atop grilled vegetables like zucchini or bell peppers for a colorful presentation and added texture.
  • Chimichurri Drizzle: Top with a homemade chimichurri sauce for an herby punch that harmonizes wonderfully with the octopus.

Why not explore and enhance your culinary experience? Discover the deliciousness of our Greek style or Asian-inspired variations for an even more delightful meal!

How to Store and Freeze Grilled Octopus

  • Room Temperature: Grilled octopus is best enjoyed fresh, but if left out for a short time, it can stay at room temperature for up to 2 hours before needing refrigeration.
  • Fridge: Store leftovers in an airtight container in the refrigerator for up to 2 days. Ensure it is properly covered to retain moisture and flavor in your delicious grilled octopus.
  • Freezer: If you need to store for longer, freeze portions wrapped tightly in plastic wrap and then placed in a freezer bag for up to 3 months. Thaw in the fridge before reheating.
  • Reheating: Gently reheat the octopus on a grill or in a pan over medium heat to avoid rubberiness. A splash of olive oil can help revive its flavor and texture.

Make Ahead Options

Grilled octopus is a fantastic option for busy home cooks looking to save time during the week! You can pre-tenderize the octopus and marinate it up to 24 hours in advance. Simply boil the octopus until tender, let it cool, and then store it in a sealed container with your marinade in the refrigerator. To maintain quality, make sure the octopus is adequately coated in the marinade to prevent drying out. When you’re ready to enjoy this savory grilled octopus, just preheat your grill and grill the marinated pieces for about 3-5 minutes on each side until charred. You’ll have a delicious dish ready with minimal effort!

What to Serve with Perfectly Grilled Octopus?

When it comes to creating the perfect meal, side dishes can elevate the experience and add more delightful flavors to your table.

  • Crusty Bread:
    A warm, crusty bread is perfect for soaking up the grilled octopus’s rich olive oil and lemon juice. It provides a satisfying crunch to complement the tender seafood.

  • Mediterranean Salad:
    Crisp greens, cherry tomatoes, and feta cheese tossed in a tangy dressing make a refreshing contrast to the smoky octopus. The bright, herbaceous flavors will enhance the overall dining experience.

  • Roasted Vegetables:
    Seasoned with herbs, roasted veggies like zucchini and bell peppers bring a sweet, caramelized element that balances the charred flavor of the octopus. Their vibrant colors add a beautiful touch to your plate.

  • Zesty Rice Pilaf:
    A lemon or herb-infused rice pilaf adds a light, fluffy side that meshes wonderfully with the dish’s bold flavors. The comforting texture of the rice serves as a perfect canvas for the seafood.

  • Herbed Quinoa:
    Nutty quinoa tossed with fresh herbs is a nutritious, gluten-free side that enhances the meal’s health quotient. Its chewy texture and earthy flavor complement the octopus beautifully.

  • Chilled White Wine:
    A crisp, chilled Sauvignon Blanc or Pinot Grigio pairs wonderfully with grilled octopus. The wine’s acidity cuts through the richness, making every bite taste even better.

  • Lemon Sorbet:
    Finish your meal on a bright note with a refreshing lemon sorbet. Its cool, tangy profile cleanses the palate and offers a sweet yet zesty conclusion to your dining adventure.

Expert Tips for the Best Grilled Octopus

  • Pre-Tenderize Effectively: Always boil the octopus first to ensure it achieves that tender, melt-in-your-mouth texture. Skipping this step can lead to a rubbery bite.
  • Pat Dry for Char: Make sure the octopus is completely dry before grilling. A wet surface will hinder the chance of achieving that beautiful, smoky char you desire.
  • Marinate Generously: Marinating enhances the flavor significantly. If time is tight, a quick brush with olive oil, salt, and pepper can still work wonders in your grilled octopus preparation.
  • Monitor Cooking Time: Be cautious not to over-grill. The goal is a quick sear, just enough to lock in the flavors without toughening up the octopus.
  • Season After Grilling: For an additional flavor boost, sprinkle a touch of salt once the octopus is off the grill. This enhances the final taste!

Grilled Octopus Recipe FAQs

How do I know if my octopus is fresh?
Look for octopus with shiny, moist skin and a vibrant color. Avoid any that have a fishy odor or dark spots all over, which could indicate spoilage. Fresh or frozen octopus should be firm to the touch and free from any unpleasant smells.

What is the best way to store leftover grilled octopus?
Absolutely! Store leftovers in an airtight container in the refrigerator for up to 2 days. Make sure to cover it properly to retain moisture and flavor. If you’re planning to keep it for longer, consider freezing. Just wrap portions tightly in plastic wrap, then place them in a freezer bag, where they can last up to 3 months.

Can I freeze grilled octopus?
Yes, you can! After grilling, let the octopus cool completely. Wrap individual portions tightly in plastic wrap, then place them in a freezer bag labeled with the date. Thaw in the refrigerator before reheating. Gently warm it on a grill or in a pan over medium heat, adding a splash of olive oil if desired to enhance the flavor and texture.

What should I do if my grilled octopus is tough?
If your octopus comes out tough, it likely hasn’t been tenderized properly. Always boil it for 40-60 minutes before grilling to ensure a tender bite. To salvage overcooked octopus, slice it thin and serve it in a flavorful sauce or juice to mask the toughness, or add it to a salad where other ingredients can balance the texture.

Is grilled octopus safe for people with seafood allergies?
Unfortunately, grilled octopus is not suitable for individuals with seafood allergies. It’s crucial to avoid shellfish and fish products altogether if these allergies are present. Always double-check ingredients in marinades and side dishes as well, as they may contain seafood derivatives.

Can I use frozen octopus for this recipe?
Absolutely! Fresh is often best, but high-quality frozen octopus works just as well for this dish. Just ensure you thaw it properly in the refrigerator overnight before using it. Follow the same boiling method for tenderness, and you’ll achieve delicious results!

Grilled Octopus

Savory Grilled Octopus with Smoky, Charred Perfection

This Grilled Octopus recipe captures smoky flavor and tender texture, making it a culinary adventure that even non-seafood lovers will enjoy.
Prep Time 1 hour
Cook Time 1 hour
Marinating Time 1 hour
Total Time 3 hours
Servings: 4 servings
Course: Dinner
Cuisine: Mediterranean
Calories: 250

Ingredients
  

For the Grill
  • 2 pounds Octopus Choose fresh or high-quality frozen for the best results.
  • 1/2 cup Olive Oil Essential for marinating and grilling; avocado oil works too.
  • 1/4 cup Lemon Juice Perfect acidity for balancing flavors; lime juice is a suitable alternative.
  • 1 cup Fresh Herbs e.g., parsley, oregano; dried herbs can be substituted.
  • 1 teaspoon Salt Basic seasoning critical to enhancing flavors.
  • 1 teaspoon Pepper Basic seasoning to enhance flavors.
For Serving
  • 2 tablespoons Extra Olive Oil To drizzle just before serving.
  • 2 pieces Lemon Wedges For squeezing fresh juice over the top.

Equipment

  • grill
  • Large pot
  • mixing bowl

Method
 

Step-by-Step Instructions for Grilled Octopus
  1. Start by bringing a large pot of salted water to a boil. Carefully add the octopus and reduce heat to a gentle simmer. Cook for 40-60 minutes until tender enough to pierce easily with a fork.
  2. In a spacious mixing bowl, whisk together olive oil, freshly squeezed lemon juice, chopped herbs, salt, and pepper. Coat the cooled octopus pieces in the marinade and marinate for at least 1 hour.
  3. Preheat your grill to high heat (around 450°F to 500°F). Ensure the surface of the marinated octopus is dry to help achieve that perfect char.
  4. Place the octopus pieces onto the grates of the hot grill. Grill each side for 3-5 minutes, watching closely for a char to form.
  5. Arrange the grilled octopus pieces on a platter. Drizzle with extra olive oil and squeeze fresh lemon juice over the top before serving.

Notes

For the best results, follow the tips for pre-tenderizing the octopus and ensuring it is dry before grilling.

Ground Beef Halloween Stuffed Peppers for a Spooky Family Feast

As the leaves turn and the air gets crisp, I find myself loading up on festive recipes that bring some spooktacular fun to the dinner table. Among my favorites are these adorable Ground Beef Halloween Stuffed Peppers that turn a hearty meal into a delightful activity for the whole family. Each pepper transforms into a playful jack-o’-lantern, filled with a savory blend of ground beef and rice that ensures both kids and adults leave the table satisfied. Not only are they a crowd-pleaser, but they also offer a nutritious twist to traditional Halloween fare, making them perfect for those looking to swap out fast food for something homemade. Curious to see how these pumpkins come to life in your kitchen?

Why are these stuffed peppers a hit?

Family-Friendly Fun: These Ground Beef Halloween Stuffed Peppers are an engaging way to involve the whole family in cooking, sparking creativity with their playful jack-o’-lantern designs.
Hearty and Satisfying: Filled with a savory mixture of ground beef and rice, these peppers deliver a hearty meal that keeps everyone full and happy.
Nutritious Twist: Unlike typical Halloween treats, these peppers pack a nutritional punch, making them a smart choice for health-conscious families.
Versatile Ingredients: Customize the filling with your favorite proteins and grains – try ground turkey for a lighter touch or quinoa for a gluten-free option!
If you’re inspired by this, check out my Savory Beef Bacon or whip up some Heirloom Beef Pancakes for another delicious meal.

Ground Beef Halloween Stuffed Peppers Ingredients

For the Peppers
Bell Peppers – These provide the perfect outer layer to create your jack-o’-lanterns; consider hollowed-out zucchinis for a low-carb option.

For the Filling
Ground Beef – This hearty protein brings richness and flavor; feel free to swap with ground turkey or plant-based meat for a lighter meal.
Rice – Acts as a satisfying filler that adds substance; use brown rice for extra nutrition or quinoa for a gluten-free alternative.
Onion – Adds sweetness and depth to your mixture; yellow or white are best, but you can skip it if you prefer.
Garlic – Enhances the aroma and flavor of the filling; garlic powder works just fine if you don’t have fresh on hand.
Spices (e.g., paprika, pepper) – These bring warmth and dimension; adjust according to your taste, adding cayenne for a kick or Italian herbs for variety.

Step‑by‑Step Instructions for Ground Beef Halloween Stuffed

Step 1: Preheat the Oven
Begin by preheating your oven to 375°F (190°C). This temperature ensures that your Ground Beef Halloween Stuffed Peppers bake evenly and achieve that perfect tender texture. While the oven heats, clear a space on your counter to gather all your ingredients and cooking utensils for a smoother prep process.

Step 2: Prepare the Peppers
Carefully cut the tops off of each bell pepper, setting them aside for later use. With a spoon, gently remove the seeds and any inner membranes, creating a hollow space that’s ready to be filled. You’ll want the peppers to stand upright, so try selecting ones that have a flat base for stability during baking.

Step 3: Sauté the Aromatics
In a large skillet over medium heat, add a drizzle of olive oil and toss in the chopped onion and minced garlic. Sauté these ingredients for about 5 minutes, stirring occasionally, until they become fragrant and the onion turns translucent. This step will infuse your Ground Beef Halloween Stuffed Peppers with a robust flavor foundation.

Step 4: Cook the Ground Beef
Add the ground beef to the skillet, breaking it apart with a spatula as it cooks. Keep stirring for about 8-10 minutes until the beef is fully browned and no pink remains. Sprinkle in your chosen spices like paprika and pepper, mixing well to ensure every bite of the beef is seasoned perfectly before proceeding to the next step.

Step 5: Mix in the Rice
Once your ground beef is cooked, stir in the pre-cooked rice until everything is evenly combined. Make sure the rice is hot, as this will enhance the filling’s texture and flavor. Continue cooking for an additional 2 minutes, allowing the ingredients to meld together and the aromas to deepen, making your Ground Beef Halloween Stuffed Peppers even more enticing.

Step 6: Fill the Peppers
Using a spoon, carefully fill each hollowed bell pepper with the beef and rice mixture. Pack it slightly to ensure a hearty filling, but leave a little room at the top. Repeat this process until all the peppers are filled, ensuring each one contains an equal mixture of the savory goodness.

Step 7: Arrange for Baking
Place the stuffed peppers upright in a sturdy baking dish, ensuring they have enough space to bake without tipping over. If desired, add a splash of broth to the bottom of the dish, which will keep your Ground Beef Halloween Stuffed Peppers moist and flavorful as they bake. Cover the dish with aluminum foil to create a steamy environment.

Step 8: Bake the Peppers
Slide the baking dish into the preheated oven and bake for 30-35 minutes. You’ll know they’re done when the peppers are tender and the filling is hot throughout. The skins should be slightly wrinkled, giving that inviting autumnal look that matches the Halloween theme perfectly.

Step 9: Create Jack-o’-Lantern Faces
If you want to add a touch of spooktacular fun, once the peppers are out of the oven and slightly cooled, use a small paring knife to carve playful jack-o’-lantern faces on the sides. This festive touch will not only charm the family but also make your Ground Beef Halloween Stuffed Peppers the star of the table!

Ground Beef Halloween Stuffed Variations

Customize your Ground Beef Halloween Stuffed Peppers to fit your family’s tastes and dietary needs with these fun ideas!

  • Dairy-Free: Use a vegan cheese substitute or skip cheese altogether to make this dish dairy-free while still delicious.
  • Protein Swap: Try shredded chicken or cook up a mixture of black beans and corn for a nourishing vegetarian option.
  • Hot and Spicy: Add diced jalapeños or a splash of hot sauce to the filling for an exciting spicy kick that heat-lovers will appreciate.
  • Cheesy Delight: Mix in your favorite cheese, like mozzarella or cheddar, right into the filling for added creaminess that melts beautifully.
  • Veggie-Packed: Load the filling with chopped vegetables such as zucchini, spinach, or corn to boost both nutrition and texture in your peppers.
  • Herb Infusion: Fresh herbs like cilantro or parsley can add bright flavors and freshness to the filling, transforming the taste profile.
  • Cauliflower Rice: For a low-carb alternative, substitute the rice with cauliflower rice, adding a unique texture while keeping the meal light.
  • Quinoa Boost: Swap out regular rice for quinoa to make your Ground Beef Halloween Stuffed Peppers gluten-free and even more nutritious.

If you’re looking for more inspired dinners, be sure to check out my Mini Beef Pies for a quick treat or enjoy some hearty Heirloom Beef Pancakes that the whole family will love!

What to Serve with Ground Beef Halloween Stuffed Peppers

As you dive into this festive meal, think about delightful accompaniments that will round out the experience and create a warm, inviting table for all to enjoy.

  • Sweet Cornbread: The subtly sweet and moist texture of cornbread complements the savory stuffed peppers perfectly. It adds a cozy element that screams comfort food.

  • Fresh Garden Salad: A crisp salad packed with colorful veggies provides a refreshing contrast to the rich filling. Toss in a light vinaigrette to enhance those fresh flavors.

  • Roasted Seasonal Vegetables: A medley of roasted carrots, Brussels sprouts, and butternut squash adds an earthy sweetness and brings beautiful autumn colors to your plate.

  • Garlic Breadsticks: Soft, buttery breadsticks coated in garlic and herbs offer a delightful and satisfying way to scoop up every last bit of beefy goodness.

  • Pumpkin Soup: Start the meal with a warm bowl of spiced pumpkin soup for an extra seasonal touch. Its creamy texture and warm spices pair beautifully with the stuffed peppers.

  • Apple Cider: Enjoy a glass of chilled apple cider to refresh your palate. The crispness of the cider beautifully balances the hearty flavors from the peppers.

  • Chocolate Chip Cookies: Conclude with warm chocolate chip cookies for a sweet, nostalgic finish. Their gooey center provides a comforting end to a spooky Halloween meal.

Expert Tips for Ground Beef Halloween Stuffed Peppers

  • Pepper Selection: Choose firm, evenly-sized bell peppers to ensure uniform cooking and easy stuffing. Avoid any with soft spots for best results.

  • Don’t Overcook: Be mindful of baking time; overcooked peppers become mushy and lose their appealing shape. Keep an eye on them around the 30-minute mark.

  • Enhance Flavor: Adding a splash of broth or tomato sauce in the baking dish not only infuses moisture but also enriches the overall flavor of your Ground Beef Halloween Stuffed Peppers.

  • Carving Tips: For creating jack-o’-lantern faces, a small paring knife works best. Let the peppers cool slightly before carving to prevent burns and achieve better control.

  • Make-Ahead Option: Prep the peppers a day in advance and refrigerate them until you’re ready to bake. Increase baking time by 5-10 minutes if baking from cold.

  • Try New Fillings: Don’t hesitate to experiment with different fillings! Ground turkey, quinoa, or even a mix of vegetables can give the dish a fun twist while keeping it family-friendly.

Make Ahead Options

These Ground Beef Halloween Stuffed Peppers are perfect for meal prep, saving you time during the busy festivities! You can prepare the filling (ground beef, rice, onion, and spices) and stuff the peppers up to 24 hours in advance. Simply cover the filled peppers with plastic wrap and refrigerate them until you’re ready to bake. To maintain their quality, ensure the peppers are well-sealed to prevent moisture loss. When you’re ready to enjoy, simply preheat your oven and bake the stuffed peppers for about 30-35 minutes, allowing for a few extra minutes if baking directly from the fridge. This way, you’ll have a delightful Halloween dinner with minimal effort!

How to Store and Freeze Ground Beef Halloween Stuffed Peppers

Fridge: Store any leftover stuffed peppers in an airtight container in the refrigerator for up to 3 days, preserving their delicious flavor and texture.

Freezer: To freeze, wrap each ungarnished pepper tightly in plastic wrap and place them in a freezer-safe bag or container. They can be frozen for up to 3 months.

Reheating: Thaw overnight in the fridge before reheating. Bake at 350°F (175°C) for about 20-25 minutes until heated through.

Make-Ahead: You can prep the Ground Beef Halloween Stuffed Peppers a day in advance, assembling them and storing them uncooked in the fridge. Just remember to increase baking time slightly if cooking from cold.

Ground Beef Halloween Stuffed Peppers Recipe FAQs

How do I choose the best bell peppers for stuffing?
Absolutely! Look for firm, brightly colored bell peppers without soft spots or blemishes. The ideal peppers should have a good base to stand upright without tipping over, so choose ones with a flat bottom for better stability while baking.

What’s the best way to store leftover stuffed peppers?
Store any leftover Ground Beef Halloween Stuffed Peppers in an airtight container in the refrigerator. They’ll stay fresh for up to 3 days, allowing you to enjoy a delicious meal later in the week without losing flavor or texture.

Can I freeze these stuffed peppers? If so, how?
Yes, you can freeze your Ground Beef Halloween Stuffed Peppers! Just wrap each ungarnished pepper tightly in plastic wrap, and then place them in a freezer-safe bag or container. They can be frozen for up to 3 months. For reheating, thaw them overnight in the fridge and bake at 350°F (175°C) for about 20-25 minutes until heated through.

What if my stuffed peppers turn out too soft after baking?
If your peppers are too soft, it might have been due to overbaking. Ensure you keep an eye on them, especially around the 30-minute mark. If you want to maintain a firm texture, you can reduce baking time or add a splash of broth in the dish to help retain moisture without overcooking.

Are these stuffed peppers suitable for dietary restrictions?
Absolutely! You can easily adapt the recipe to cater to a variety of dietary preferences. Swap the ground beef for ground turkey, chicken, or a vegetarian mix of black beans and corn. Additionally, using brown rice or quinoa makes them healthier for gluten-free diets. Always check for any allergies related to the ingredients you choose.

Ground Beef Halloween Stuffed

Ground Beef Halloween Stuffed Peppers for a Spooky Family Feast

Enjoy these Ground Beef Halloween Stuffed Peppers, a fun and hearty meal perfect for the spooky season.
Prep Time 20 minutes
Cook Time 35 minutes
Total Time 55 minutes
Servings: 4 peppers
Course: Dinner
Cuisine: American
Calories: 350

Ingredients
  

For the Peppers
  • 4 pieces Bell Peppers Hollowed-out zucchinis can be used for a low-carb option.
For the Filling
  • 1 pound Ground Beef Can be swapped with ground turkey or plant-based meat.
  • 1 cup Rice Use brown rice for extra nutrition or quinoa for a gluten-free option.
  • 1 medium Onion Yellow or white onions are best.
  • 2 cloves Garlic Garlic powder can be used if fresh is not available.
  • to taste Spices (e.g., paprika, pepper) Adjust according to preference.

Equipment

  • Skillet
  • Baking Dish
  • oven
  • spoon
  • Knife

Method
 

Step‑by‑Step Instructions for Ground Beef Halloween Stuffed
  1. Preheat your oven to 375°F (190°C).
  2. Cut the tops off each bell pepper and remove seeds and membranes.
  3. In a skillet over medium heat, add olive oil, chopped onion, and minced garlic. Sauté for 5 minutes.
  4. Add ground beef to the skillet and cook for 8-10 minutes until fully browned. Season with spices.
  5. Stir in the pre-cooked rice and heat through for 2 minutes.
  6. Fill each hollowed bell pepper with the beef and rice mixture.
  7. Place stuffed peppers in a baking dish and cover with aluminum foil.
  8. Bake for 30-35 minutes until peppers are tender.
  9. Carve jack-o'-lantern faces on the cooled peppers if desired.

Notes

These stuffed peppers can be prepared a day in advance and stored in the refrigerator until ready to bake.

Mouthwatering Kanom Jeeb: Authentic Thai Dumplings to Savor

As I walked through a vibrant Thai market, the enticing aroma of steamed dumplings wrapped in silky dough led me right to a food stall serving Kanom Jeeb. This delightful dish has quickly become one of my all-time favorites, and for good reason! Authentic Kanom Jeeb, with its tender filled pockets of pork (or shrimp, if you prefer), is not only a showstopper at gatherings but also surprisingly simple to make at home. The beauty lies in its quick prep time and endless customization, allowing you to craft the perfect filling for any palate. Whether you’re a novice or a seasoned chef, these dumplings are bound to impress your family and friends. Ready to dive into the heavenly world of Thai cuisine? Let’s get started on this culinary adventure!

Why Are Kanom Jeeb So Irresistible?

Delicate, Savory Perfection: Kanom Jeeb brings a unique blend of flavors that dance on your palate, making each bite a journey through Thai cuisine.

Versatile Fillings: Whether you crave juicy pork, succulent shrimp, or a fresh veggie mix, this recipe easily adapts to your taste preferences, ensuring everyone at the table is satisfied.

Quick and Easy: This dish is perfect for busy evenings, needing just a bit of time to prepare, yet it yields impressive results that will wow friends and family.

Authentic Experience: Enjoy an authentic taste of Thailand right in your home kitchen, reflecting the rich culinary traditions that have evolved over centuries.

Crowd-Pleaser: These dumplings are a guaranteed hit at any gathering, and are especially delightful with a range of dipping sauces—try pairing them with a homemade wonton dipping sauce!

Get ready to savor the delicious atmosphere of Thailand with every bite of these delightful Kanom Jeeb!

Kanom Jeeb Ingredients

• Dive into authentic flavors with these essential ingredients for Kanom Jeeb!

For the Filling

  • Ground Pork – This serves as the heart of the filling; you can swap it with ground chicken, shrimp, or tofu for variety.
  • Egg – Functions as a binder; easily omit for a vegan version.
  • Coriander Roots – Essential for that authentic Thai taste; if unavailable, use coriander stems instead.
  • Black Peppercorns – Adds depth; freshly ground is best for robust flavor.
  • Garlic – Enriches the filling with a warm taste; feel free to adjust based on your flavor preference.
  • Carrots (Finely Diced) – Brings sweetness and color; substitute bell peppers for a different texture.
  • Green Onions (Finely Chopped) – Provides freshness; shallots can be a great replacement.
  • Dried Shiitake Mushrooms – Enhances umami flavor after soaking; fresh mushrooms can be used too.
  • Golden Mountain Sauce – A key flavor enhancer; soy sauce offers a gluten-free alternative.
  • White Sugar – Balances flavors pleasantly; coconut sugar can lend a more authentic sweetness.
  • Oyster Sauce – Adds rich complexity; switch to mushroom sauce for a vegetarian option.
  • Cornstarch – Helps firm the filling; tapioca starch works as it substitutes well.

For the Wrappers

  • Dumpling Wrappers – Crucial for encasing the filling; available at Asian markets or easily homemade for gluten-free needs.

For the Extra Flavors

  • Sesame Oil – Infuses nuttiness; use olive oil for a lighter twist.
  • Garlic Oil – Optional but adds a layer of flavor when greasing wrappers.
  • Crispy Fried Garlic – Offers a delightful crunch; it’s optional but truly enhances the dish when served.

Now that you have the ingredients at your fingertips, let’s dive into creating these tantalizing Kanom Jeeb!

Step‑by‑Step Instructions for Kanom Jeeb

Step 1: Prepare the Spice Mixture
Start by pounding the coriander roots, black peppercorns, and garlic in a mortar and pestle until they form a smooth paste, releasing their aromatic flavors. This should take about 3–5 minutes. The mixture will become fragrant and slightly fibrous. This spice blend is key to infusing the filling for your Kanom Jeeb with authentic Thai flavors.

Step 2: Mix the Sauce
In a medium bowl, combine the Golden Mountain sauce, white sugar, sesame oil, and oyster sauce. Stir well until the sugar dissolves completely, creating a smooth and flavorful sauce. This mixture takes just a minute or two to prepare but is essential for balancing the flavors in your Kanom Jeeb filling.

Step 3: Prepare the Filling
In a large mixing bowl, blend the ground pork, egg, and tapioca starch into the sauce mixture. Mix until you achieve a smooth and cohesive filling, which should take about 3 minutes. Be careful not to over-mix, as you want the texture to remain tender. This flavorful filling is what makes your Kanom Jeeb irresistible!

Step 4: Incorporate Spices and Vegetables
Gently fold the previously prepared spice mixture into the pork blend along with the finely diced carrots, green onions, and soaked Shiitake mushrooms. This step should take around 2 minutes. Ensure everything is well combined, and the veggies distribute evenly, introducing bursts of flavor and texture to each bite of your dumplings.

Step 5: Shape the Dumplings
To form your Kanom Jeeb, place a wonton wrapper over a teaspoon and add a small spoonful of the filling in the center. Moisten the edges of the wrapper lightly with water, then fold and seal it to create a crescent shape. Aim to ensure there are no air pockets, which could cause the dumplings to burst while steaming. Repeat until all filling is used, this will take about 15 minutes.

Step 6: Steam the Dumplings
Line a steamer basket with parchment paper to prevent sticking and arrange the dumplings in a single layer, ensuring they aren’t touching. Steam the Kanom Jeeb for about 10–12 minutes over boiling water, until the wrappers become translucent and the filling is cooked through. The dumplings should look tender and slightly glossy when done, showcasing their deliciousness.

Step 7: Serve and Enjoy
Once steamed, carefully remove the Kanom Jeeb from the steamer and transfer them to a serving platter. They are best served hot with a side of your favorite dipping sauces such as soy sauce or Thai sweet chili sauce. This final presentation will enhance the experience as you savor the delightful flavors of these Thai dumplings.

Expert Tips for Authentic Kanom Jeeb

  • Fresh Ingredients: Use fresh herbs and spices for the best flavor; dried ingredients can dull the taste of your Kanom Jeeb.
  • Wonton Wrapper Care: Avoid tearing the wrappers by handling them gently; lay them flat and work quickly to prevent drying out.
  • Don’t Over-Mix: Blend the filling until just combined; over-mixing can make the texture tough, detracting from the delectable experience.
  • Check for Doneness: Ensure the dumplings are steamy and the wrappers are translucent; undercooked dumplings may have an unpleasant texture.
  • Customize Fillings: Feel free to mix up the filling ingredients; adding spices like chili paste can give your Kanom Jeeb an exciting kick.

Make Ahead Options

These Kanom Jeeb are perfect for busy home cooks looking to save time without sacrificing taste! You can prepare the dumpling filling up to 24 hours in advance; simply mix the ground pork and spices, then refrigerate in an airtight container. For even quicker meal prep, shape the dumplings and refrigerate them for up to 3 days. Just make sure to use parchment paper between layers to prevent sticking. When you’re ready to serve, steam the dumplings straight from the fridge for about 10-12 minutes until they’re translucent and cooked through—just as delicious as when freshly made! Enjoy the convenience of having these delightful Thai dumplings ready at a moment’s notice!

What to Serve with Authentic Kanom Jeeb?

Experience a delightful culinary adventure as you complement the tenderness of these Thai dumplings with a variety of mouthwatering dishes.

  • Thai Sweet Chili Sauce: This tangy and slightly spicy sauce enhances the flavor of the Kanom Jeeb, offering a zesty contrast to the savory filling.
  • Jasmine Rice: Fluffy, aromatic jasmine rice serves as a perfect base, balancing the rich flavors of the dumplings while adding a subtle sweetness.
  • Crisp Asian Salad: A fresh salad with crunchy vegetables and a light sesame dressing adds a refreshing crunch, elevating the meal’s texture and flavors.
  • Spicy Ginger Tea: The warmth from spicy ginger tea balances the savory notes of the dumplings, creating a comforting drink experience to enjoy with your meal.

Pairing these delightful options with your Kanom Jeeb will create a harmonious meal that captivates the senses! Each component adds its own flair, making your dining experience truly unforgettable.

How to Store and Freeze Kanom Jeeb

Fridge: Refrigerate cooked Kanom Jeeb in an airtight container for up to 2 days. Ensure they are completely cooled before sealing to maintain freshness.

Freezer: For longer storage, freeze unsteamed Kanom Jeeb on a tray until firm, then transfer to a freezer bag. They can be stored for up to 3 months.

Reheating: To reheat, steam frozen dumplings directly from the freezer for about 12–15 minutes until heated through. This preserves their texture and flavor beautifully.

Serving: Always serve Kanom Jeeb warm for the best experience, paired with your favorite dipping sauces for an added burst of flavor.

Kanom Jeeb Variations & Substitutions

Feel free to let your creativity shine by customizing your Kanom Jeeb to suit your taste preferences!

  • Gluten-Free: Use rice paper wrappers instead of traditional dumpling wrappers for a fantastic gluten-free version. The texture will be slightly different, but equally delightful!
  • Vegetarian: Swap the pork with a flavorful mix of mushrooms, tofu, and vegetables. This combination enhances the umami profile while keeping it satisfying for your veggie-loving friends.
  • Spicy Kick: Fold in sriracha or chili paste into the filling for an extra layer of heat. This adds an exciting dimension to your dumplings, perfect for those who crave spice!
  • Flavorful Oils: Replace sesame oil with infused garlic oil for a deeper taste. It gives a lovely aroma and flavor, elevating your Kanom Jeeb to another level.
  • Herbal Infusions: Add finely chopped mint or Thai basil to the filling. These fresh herbs bring an aromatic twist that pairs beautifully with the savory notes.
  • Savory Twist: Incorporate finely chopped water chestnuts into the filling for an added crunch. They provide a refreshing bite that contrasts nicely with the soft dumpling.
  • Dipping Sauce Variations: Experiment with different sauces like sweet chili, peanut sauce, or a tangy lime vinaigrette to complement your Kanom Jeeb. A homemade wonton dipping sauce could also add a delicious finishing touch!
  • Batch Cooking: Prepare a larger batch of fillings and freeze in portions. This allows you to quickly whip up fresh dumplings anytime you have a craving.

With these variations, you can explore a multitude of flavors and textures, making your Kanom Jeeb a unique masterpiece every time! Enjoy this versatile dish your way!

Kanom Jeeb (Thai Steamed Dumplings) Recipe FAQs

How do I select the right ingredients for Kanom Jeeb?
Absolutely! For the best results, choose fresh, high-quality ingredients. Look for bright green coriander roots or stems, firm pork, and vibrant carrots at your local market. When picking mushrooms, opt for dried Shiitake mushrooms that are plump and fragrant, as these will enhance the umami flavor significantly once soaked.

How should I store leftover Kanom Jeeb?
You can store cooked Kanom Jeeb in an airtight container in the refrigerator for up to 2 days. Ensure they’ve cooled completely before sealing, as this helps retain their delightful texture. For an even longer shelf life, consider freezing them—just make sure to allow them to cool before freezing.

Can I freeze unsteamed Kanom Jeeb? What’s the process?
Very much yes! To freeze unsteamed Kanom Jeeb, arrange the formed dumplings on a tray lined with parchment paper without letting them touch each other. Freeze until solid (this usually takes about an hour), then transfer them to a Ziploc bag or an airtight container. They can be stored for up to 3 months. When you’re ready to enjoy, steam them directly from the freezer for about 12–15 minutes until thoroughly heated.

What should I do if my dumplings are bursting during steaming?
To prevent bursting, it’s crucial to seal the dumplings tightly without any air pockets when shaping them. If they’re still bursting, check that you aren’t overstuffing them: each dumpling should have just enough filling to be full but not over the edge. Always moisten the edges well to ensure they stick together!

Are there any dietary considerations for Kanom Jeeb?
The beauty of Kanom Jeeb lies in its versatility. If you provide it to guests with dietary restrictions, you can easily create gluten-free options by using specially made gluten-free dumpling wrappers. For those managing egg allergies, simply omit the egg from the filling without sacrificing too much texture. If you’d like to make them vegetarian, substitute pork with a mixture of sautéed vegetables, tofu, or even a meat alternative such as tempeh.

Can I customize the fillings for my Kanom Jeeb?
The more the merrier! Feel free to switch things up based on your preferences. For instance, instead of pork, you can use finely chopped shrimp or a mix of your favorite veggies like bell peppers and broccoli. Experiment with adding spices such as chili paste for a kick or mix in herbs like basil for a fresh twist. The possibilities are endless!

Kanom Jeeb

Mouthwatering Kanom Jeeb: Authentic Thai Dumplings to Savor

Delight in authentic Kanom Jeeb, flavorful Thai dumplings filled with your choice of pork or shrimp.
Prep Time 30 minutes
Cook Time 12 minutes
Total Time 42 minutes
Servings: 4 dumplings
Course: Other
Cuisine: Thai
Calories: 80

Ingredients
  

For the Filling
  • 1 lb Ground Pork or ground chicken, shrimp, or tofu
  • 1 large Egg omit for vegan
  • 3 pieces Coriander Roots or use stems if unavailable
  • 1 tsp Black Peppercorns freshly ground for best flavor
  • 3 cloves Garlic adjust to flavor preference
  • 1 cup Carrots (Finely Diced) substitute with bell peppers for variety
  • 1 cup Green Onions (Finely Chopped) shallots can also be used
  • 1 cup Dried Shiitake Mushrooms soak before use
  • 2 tbsp Golden Mountain Sauce soy sauce is a gluten-free alternative
  • 1 tbsp White Sugar or coconut sugar for authentic sweetness
  • 1 tbsp Oyster Sauce for vegetarian use mushroom sauce
  • 2 tbsp Cornstarch or tapioca starch
For the Wrappers
  • 1 pkg Dumpling Wrappers available at Asian markets or homemade
For the Extra Flavors
  • 1 tbsp Sesame Oil or olive oil
  • 1 tbsp Garlic Oil optional
  • 1 tbsp Crispy Fried Garlic optional, enhances flavor

Equipment

  • steamer basket
  • mixing bowl
  • mortar and pestle

Method
 

Preparation Steps
  1. Prepare the spice mixture by pounding coriander roots, black peppercorns, and garlic until smooth.
  2. Mix the Golden Mountain sauce, white sugar, sesame oil, and oyster sauce in a bowl until dissolved.
  3. Blend the ground pork, egg, and tapioca starch into the sauce mixture for a smooth filling.
  4. Gently fold in the spice mixture, diced carrots, green onions, and soaked mushrooms into the pork blend.
  5. Shape dumplings by placing filling onto a wrapper, moistening edges, folding, and sealing.
  6. Steam dumplings in a lined steamer basket for 10-12 minutes until translucent and filling is cooked.
  7. Serve hot with your favorite dipping sauces.

Notes

Use fresh ingredients for best flavor. Handle wonton wrappers gently to avoid tearing.

Garlic Butter Mussels Appetizer That Impresses in Minutes

As I stood in my kitchen, the delightful aroma of garlic wafted through the air, instantly transforming my home into a charming eatery. Today, I’m sharing my recipe for a sensational Garlic Butter Mussels Appetizer that’s not only a feast for the senses but also incredibly quick to whip up in under 25 minutes! These tender mussels, cloaked in rich garlic butter and crowned with a crispy Parmesan topping, bring a taste of coastal indulgence straight to your dinner table. Whether you’re entertaining guests or treating yourself to a luxurious night in, this dish is a guaranteed crowd-pleaser that’s high in protein and low in fat. How often do you get to impress loved ones with a restaurant-quality dish that’s simple enough for a weeknight? Ready to dive into the sea of flavors and learn how to create this delectable dish?

Why Are Garlic Butter Mussels a Must-Try?

Quick and Easy: With just 25 minutes needed from start to finish, you’ll serve up this stunning appetizer in no time.

Elevated Flavors: The garlic butter melds with the fresh mussels, creating an irresistible aroma and taste that will have everyone craving more.

Crowd-Pleaser: Perfect for gatherings, this dish is bound to impress guests without requiring hours of prep or complicated cooking techniques.

Customizable: Feel free to switch out cheeses or add spices, allowing you to personalize this dish to suit any palate. For more inspiration, check out my seafood recipes.

Nutrient-Dense Delight: Enjoy a high-protein, low-fat meal that’s not only delicious but also health-conscious. Satisfying cravings is now guilt-free!

Mussels Appetizer Ingredients

• For a delightful start to your cooking journey, below are the essential ingredients for this Mussels Appetizer.

For the Mussels
Mussels – The star of the dish; ensure they are fresh and tightly closed for the best flavor.

For the Garlic Butter
Butter – Use unsalted for better control over seasoning and to enhance the richness.
Garlic – Fresh is best for maximum flavor; garlic powder can be a quick substitute if necessary.
Parmesan Cheese – Adds a crispy topping; feel free to substitute with Romano or nutritional yeast for a dairy-free option.
Parsley – Freshness and color boost; swap with chives or omit if you’re in a pinch.
Lemon Zest – Brightens the overall flavor; if you don’t have lemon, vinegar can offer similar acidity.

Seasoning
Salt and Pepper – Essential for enhancing the dish’s overall taste; adjust to suit your preference.

Step‑by‑Step Instructions for Garlic Butter Mussels Appetizer

Step 1: Clean Mussels
Begin by rinsing your fresh mussels under cold water, scrubbing off any dirt or sand with a brush. Be sure to remove the beards, which are the fibrous bits sticking out. Discard any mussels that are cracked or remain open when tapped, as these are no longer fresh. This step is crucial for ensuring a clean and tasty Garlic Butter Mussels Appetizer.

Step 2: Steam Mussels
In a large pot, add ¼ cup of water and bring it to a gentle simmer. Carefully place the cleaned mussels inside, cover the pot, and steam for 3-4 minutes. Keep an eye out for mussels that open; these are ready to go! Discard any mussels that do not open, as they should not be eaten. This steaming step gives your mussels a tender texture, setting the stage for a flavorful dish.

Step 3: Prepare Garlic Butter
While the mussels are steaming, mix together softened unsalted butter, finely minced garlic, grated Parmesan cheese, fresh parsley, lemon zest, and a sprinkle of salt and pepper in a bowl. Use a fork to blend these ingredients into a creamy mixture. This garlic butter will become the rich and savory topping for your mussels, enhancing the delightful flavors of this appetizer.

Step 4: Arrange Mussels
Once steamed, carefully remove the mussels from the pot and place them on a baking sheet. Discard the empty top shells and gently loosen the mussels from their bottom shells, placing them back on the half shells. This makes it easy to spoon on that delicious garlic butter mixture and ensures a beautiful presentation for your Garlic Butter Mussels Appetizer.

Step 5: Top and Broil
Spoon the prepared garlic butter mixture generously over each mussel, ensuring they are well-coated. Preheat your broiler to high and carefully place the baking sheet under the broiler. Broil for 2-4 minutes, watching closely for the butter to bubble and turn lightly golden. This quick broiling step adds a wonderful crispy topping to your mussels, making them irresistible.

Step 6: Serve
Once broiled to perfection, carefully remove the baking sheet from the oven. Arrange the hot mussels on a serving platter and garnish with extra parsley, if desired. Serve your Garlic Butter Mussels Appetizer immediately, paired with crusty bread for dipping into that delectable garlic butter sauce. Enjoy the fruits of your labor and the compliments from your loved ones!

Mussels Appetizer Variations & Substitutions

Feel free to play around with this mussels appetizer recipe and make it your own by trying these delicious adaptations!

  • Seafood Twist: Swap mussels with clams for a different shellfish experience, or use shrimp for a heartier bite.

  • Dairy-Free: Try nutritional yeast instead of Parmesan for a cheesy flavor without dairy. It works wonders in the garlic butter too!

  • Herbal Boost: Replace parsley with fresh basil or cilantro to bring a vibrant zest to this dish. The aroma will be simply enchanting!

  • Spicy Kick: Add a pinch of red pepper flakes or a drizzle of hot sauce over the top before broiling for a delightful heat.

  • Citrus Medley: Incorporate lime zest along with the lemon for a zippy, tropical twist that brightens the dish even more.

  • Broth Infusion: Instead of steaming in water, use white wine or seafood broth for added depth of flavor. Your kitchen will smell divine as it cooks!

  • Cheesy Variation: Experiment with other cheeses like Gruyère or feta for a unique flavor profile that still elevates the dish beautifully.

  • Moules Frites Style: Serve mussels alongside crispy fries for a classic moules frites dish inspired by European bistros, perfect for a filling meal.

These variations let you tailor the recipe to your taste and dietary preferences. For more creative seafood ideas, feel free to explore my selection of seafood recipes!

Tips for the Best Mussels Appetizer

  • Fresh Mussels Only: Always choose fresh mussels that are tightly closed or will close when tapped. Discard any that are cracked or open to ensure safety and flavor.

  • Garlic Perfection: Use fresh garlic for the best aroma and taste. If necessary, garlic powder can substitute, but fresh will always elevate your mussels appetizer.

  • Don’t Overcrowd: When steaming, make sure mussels aren’t overcrowded in the pot. This ensures that each mussel steams evenly and opens fully.

  • Watch the Broiler: Broiling time can vary significantly, so stay nearby to monitor your mussels. This prevents burning and ensures the perfect crispy topping.

  • Cleanup Tip: Consider lining your baking sheet with foil or parchment paper. It makes for easier cleanup and helps keep the mussels from sticking to the pan.

Make Ahead Options

These Garlic Butter Mussels Appetizer are fantastic for meal prep! You can prepare the garlic butter mixture up to 3 days in advance; simply combine softened butter, minced garlic, grated Parmesan, parsley, lemon zest, and seasoning in a bowl and store it in an airtight container in the refrigerator. This will save you valuable time on busy weeknights! When you’re ready to serve, just clean and steam the mussels (this should be done shortly before serving to ensure freshness), then top them with the prepped garlic butter and broil for 2-4 minutes until bubbly and lightly golden. By prepping ahead, you’ll have a delicious dish that feels just as special, saving you from the temptation of fast food!

How to Store and Freeze Mussels Appetizer

Fridge: Store any leftover Garlic Butter Mussels in an airtight container in the fridge for up to 2 days. Reheat gently in the oven or microwave to maintain their tenderness.

Freezer: While it’s best to enjoy mussels fresh, you can freeze them in an airtight container for up to 1 month. Defrost overnight in the fridge before reheating.

Reheating: To reheat, place mussels in a baking dish with a splash of water or broth, cover with foil, and warm in a 350°F oven for about 10 minutes, ensuring they don’t dry out.

What to Serve with Garlic Butter Mussels Appetizer

Imagine a table set for a delightful evening, where the air is filled with the aroma of garlic and the joy of shared moments.

  • Crusty Baguette: Perfect for sopping up that savory garlic butter, offering a satisfying crunch that contrasts wonderfully with the tender mussels.

  • Light Green Salad: A refreshing side that balances the richness of the mussels; think crisp romaine tossed with a zesty lemon vinaigrette.

  • Garlic Bread: Extending the garlic theme, this buttery, toasty goodness pairs flawlessly with mussels, making every bite divine.

  • Chilled White Wine: A glass of Sauvignon Blanc or Pinot Grigio elevates the meal, complementing the briny flavor of the mussels while keeping the atmosphere light and elegant.

  • Roasted Asparagus: For a nutritious touch, serve asparagus seasoned simply with olive oil and salt. Its crisp texture and earthy taste harmonize beautifully with the seafood.

  • Herbed Quinoa: Light yet filling, fluffy quinoa tossed with fresh herbs adds a lovely grain element that absorbs the garlic butter’s richness; it’s a delightful twist on traditional sides.

  • Lemon Sorbet: Conclude the meal with a refreshing lemon sorbet. Its bright acidity cleanses the palate, leaving a lasting impression.

Elevate your dining experience by pairing these delightful sides with your Garlic Butter Mussels Appetizer!

Garlic Butter Mussels Appetizer Recipe FAQs

How do I choose fresh mussels?
Absolutely! When selecting mussels, look for ones that are tightly closed or ones that close when lightly tapped. Discard any mussels that are cracked or remain open, as they are not fresh. Additionally, fresh mussels should have a clean, briny scent and a firm feel.

How should I store leftover mussels?
Any leftover Garlic Butter Mussels can be stored in an airtight container in the refrigerator for up to 2 days. It’s important to consume them within this timeframe to enjoy their freshness. When reheating, do so gently in the oven or microwave to keep them tender and flavorful.

Can I freeze mussels once cooked?
While it’s best to enjoy mussels fresh, you can freeze them for up to 1 month. To freeze, place the mussels in an airtight container or a heavy-duty freezer bag, ensuring excess air is removed. When you’re ready to enjoy them again, defrost them overnight in the refrigerator before reheating.

What if some mussels don’t open during cooking?
Not to worry! If some mussels do not open after steaming, it’s crucial to discard those, as they are no longer safe to eat. This ensures that you only enjoy the freshest and most delectable mussels in your Garlic Butter Mussels Appetizer.

Is this recipe suitable for anyone with seafood allergies?
If you or your guests have seafood allergies, it’s best to avoid this dish altogether. Mussels, like all shellfish, can trigger allergic reactions in sensitive individuals. Always check for allergies before serving seafood recipes to ensure everyone’s safety.

Can I prepare the garlic butter in advance?
Very much so! You can prepare the garlic butter mixture up to 2 days in advance. Simply store it in an airtight container in the refrigerator. When you’re ready to use it, let it come to room temperature before spooning it over the mussels for a hassle-free prep.

Mussels Appetizer

Garlic Butter Mussels Appetizer That Impresses in Minutes

A quick and easy Mussels Appetizer, cloaked in garlic butter, impressive enough for any gathering.
Prep Time 10 minutes
Cook Time 15 minutes
Total Time 25 minutes
Servings: 4 mussels
Course: Other
Cuisine: Seafood
Calories: 220

Ingredients
  

For the Mussels
  • 2 pounds Mussels Fresh and tightly closed
For the Garlic Butter
  • 4 tablespoons Butter Unsalted
  • 4 cloves Garlic Fresh, minced
  • 1 cup Parmesan Cheese Grated, can substitute with Romano
  • 2 tablespoons Parsley Fresh, chopped
  • 1 teaspoon Lemon Zest Can substitute with vinegar
  • to taste Salt
  • to taste Pepper

Equipment

  • Large pot
  • baking sheet
  • brush
  • mixing bowl
  • Fork

Method
 

Step-by-Step Instructions
  1. Clean the mussels under cold water, removing dirt, sand, and any mussels that are cracked or open.
  2. In a pot, add ¼ cup of water and steam the cleaned mussels for 3-4 minutes until they open.
  3. Mix together butter, garlic, Parmesan cheese, parsley, lemon zest, salt, and pepper in a bowl.
  4. Remove mussels from the pot, arrange on a baking sheet, discarding empty shells and loosening the mussels from their bottom shells.
  5. Spoon the garlic butter mixture over each mussel, then broil for 2-4 minutes until golden.
  6. Remove from the oven, garnish and serve immediately with crusty bread.

Notes

For storage, keep in an airtight container in the fridge for up to 2 days or freeze for 1 month.

Peanut Butter Candy Corn Pizza: A Fall Treat Delight

The crisp autumn air fills my kitchen with a sense of nostalgia, where the scent of baking cookies intertwines with the excitement of Halloween approaching. Today, I’m thrilled to share my Peanut Butter Candy Corn Pizza, a fun twist on dessert that celebrates the season’s sweetness. This delightful recipe combines the chewy goodness of peanut butter cookie dough with layers of gooey marshmallows, crunchy roasted peanuts, and the vibrant, festive pop of candy corn. Not only is it quick to prepare, making it ideal for busy fall afternoons, but it’s also a crowd-pleaser at seasonal gatherings. Perfect for those who crave homemade treats, this playful dessert will have everyone asking for seconds. Ready to impress your friends and family with this eye-catching dish? Let’s dive in!

Why Is This Recipe a Season Favorite?

Uniqueness, this Peanut Butter Candy Corn Pizza is not your average dessert; it combines the delightful tastes of fall with a playful twist. Easy to make, even novice bakers can whip up this treat in under an hour. Crowd-pleaser, the vibrant colors and rich flavors will have your guests coming back for more. Versatile, you can easily swap ingredients for different twists, such as using Reese’s Pieces or other seasonal candies. Storage-friendly, leftovers can be kept for up to three days, making it a perfect make-ahead dessert for gatherings. If you love this seasonal vibe, check out my Garlic Butter French fries for a savory pairing or consider the delightful Zucchini Oatmeal Pizza for more fall fun!

Peanut Butter Candy Corn Pizza Ingredients

For the Cookie Base

  • Refrigerated Peanut Butter Cookie Dough – This serves as the delightful foundation, rich in peanut flavor; you can use homemade or gluten-free versions if desired.

For the Topping

  • Miniature Marshmallows – When melted, they add a luscious, gooey sweetness; regular marshmallows can work too, just cut them smaller for better melting.
  • Dry Roasted Peanuts – They provide a satisfying crunch and nutty taste; mixed nuts can be used as a substitute or omit them for a nut-free option.
  • Candy Corn – A festive seasonal treat that brings bright color and unique sweetness; feel free to swap with other colorful candies like M&M’s for a fun twist.
  • Reese’s Pieces – These add an extra layer of peanut flavor and rich chocolate crunch; chocolate chips can also be a simple alternative.

Step‑by‑Step Instructions for Peanut Butter Candy Corn Pizza

Step 1: Preheat and Prepare
Begin by preheating your oven to 375°F (190°C). While it’s warming up, take a 10-inch round pan and generously grease it with nonstick spray to ensure your Peanut Butter Candy Corn Pizza comes out easily after baking. Make sure your oven is fully heated before moving on to the next step, as this is crucial for achieving the perfect cookie base.

Step 2: Press the Cookie Dough
Unwrap the refrigerated peanut butter cookie dough and evenly press it into the prepared pan. Use your fingers or a spatula to spread it out until it covers the entire bottom uniformly, ensuring there are no holes. Once accomplished, place the pan in the oven and bake for approximately 12 minutes, or until the cookie base is set and slightly golden around the edges.

Step 3: Mix Toppings
While the cookie base is baking, grab a mixing bowl and combine the miniature marshmallows, dry roasted peanuts, and candy corn. Stir these ingredients together gently until they’re well mixed, ensuring all components are evenly distributed. This delightful mixture will become the sweet topping for your Peanut Butter Candy Corn Pizza once the cookie base is out of the oven.

Step 4: Assemble the Toppings
After the cookie base has finished baking, carefully remove it from the oven. Immediately sprinkle the marshmallow, peanut, and candy corn mixture evenly over the warm cookie base, ensuring all areas are covered. This allows the marshmallows to melt perfectly into the warm cookie when returning to the oven for an additional 3 minutes, softening beautifully.

Step 5: Broil for Perfect Toast
Next, keep a close eye on your oven as you switch the setting to broil and return the pizza back for a quick minute. This step is crucial for lightly toasting the tops of the marshmallows; watch closely to prevent burning. The marshmallow should puff up and turn golden brown, creating that delightful toasted flavor that’s essential for your Peanut Butter Candy Corn Pizza.

Step 6: Add Reese’s Pieces
Once the marshmallows are perfectly toasted, remove the pan from the oven and immediately sprinkle the Reese’s Pieces over the warm surface. Gently press them down into the marshmallow layer for a secure hold. The warmth will slightly melt the chocolate, allowing them to adhere nicely to the pizza, enhancing both flavor and presentation.

Step 7: Cool and Slice
Allow your Peanut Butter Candy Corn Pizza to cool completely in the pan before slicing. This will prevent the toppings from sliding off and help the cookie set nicely. When ready, run a knife under hot water for a few moments to make cutting easier; this technique will prevent sticking and give you clean, beautiful slices to serve.

Expert Tips for Peanut Butter Candy Corn Pizza

  • Press Firmly: Ensure you press the cookie dough firmly and evenly into the pan for a sturdier base that bakes uniformly.

  • Watch the Broil: Keep a vigilant eye while broiling the marshmallows, as they can burn in a matter of seconds.

  • Use a Wet Knife: For perfectly clean slices, run your cutting knife under hot water before slicing through the sticky marshmallow topping.

  • Layer Creatively: Don’t hesitate to adjust toppings based on what’s available; using different candy can develop new taste experiences with your Peanut Butter Candy Corn Pizza.

  • Cool Completely: Allow the pizza to cool fully in the pan to prevent the toppings from sliding off when you slice it.

  • Store Wisely: Keep leftover slices in an airtight container at room temperature for up to three days to maintain freshness.

Peanut Butter Candy Corn Pizza Variations

Feel free to get creative with your Peanut Butter Candy Corn Pizza and explore these delightful twists!

  • Nut-Free: Swap out dry roasted peanuts for sunflower seeds to ensure a nut-free version that still packs a crunchy punch.
    Make it for school events or gatherings where allergies are a concern. Everyone will enjoy the same great taste!

  • Gluten-Free: Choose gluten-free peanut butter cookie dough to make this dessert accessible to those with gluten sensitivities. The flavors remain deliciously intact, ensuring that everyone can savor this treat.

  • Seasonal Twist: Replace candy corn with mini marshmallow pumpkins or ghost-shaped candies for a festive touch. This adds a fun Halloween vibe to your pizza!

  • Layer it Up: Enhance the texture by adding a layer of crushed graham crackers before topping your pizza. This adds a subtle crunch reminiscent of s’mores, making it even more indulgent.

  • Chocolate Lovers: Opt for dark chocolate chips instead of Reese’s Pieces to deepen that chocolatey flavor while keeping the sweetness alive. It’ll elevate your dessert experience to new heights!

  • Caramel Drizzle: Drizzle some warm caramel sauce over the top right before serving for an extra layer of sweetness and decadence. It pairs perfectly with the peanut butter base!

  • Spicy Kick: Add a tiny pinch of cayenne pepper or chili powder to the cookie dough for a surprising heat that contrasts deliciously with the sweetness. It’s an adventurous twist for those who like a kick!

  • Vegan Version: Use a plant-based cookie dough, coconut cream, and dairy-free chocolate alternatives to cater to vegan diets while still enjoying this delightful dessert.

For a savory side to balance the sweetness, don’t forget to check out my Garlic Butter French fries, or if you’re in the mood for more seasonal fun, try the delicious Zucchini Oatmeal Pizza that’s a hit with every family. Embrace the variations and let your creativity shine!

Storage Tips for Peanut Butter Candy Corn Pizza

  • Room Temperature: Keep your leftover Peanut Butter Candy Corn Pizza in an airtight container for up to 3 days to maintain its freshness and enjoy the delightful flavors.

  • Refrigerator: If you prefer to keep your treat for longer, store it in the fridge for up to 5 days. Just ensure it’s tightly wrapped to avoid drying out.

  • Freezer: For extended storage, you can freeze slices for up to 2 months. Wrap each slice in plastic wrap and place them in a freezer-safe bag.

  • Reheating: To enjoy warm slices, simply microwave for 15-20 seconds or pop them in the oven at 350°F (175°C) for about 5-10 minutes until warmed through.

Make Ahead Options

These Peanut Butter Candy Corn Pizzas are a fantastic option for busy cooks looking to simplify their meal planning! You can prepare the cookie base up to 24 hours in advance by baking it and allowing it to cool completely before covering it with plastic wrap and storing it at room temperature. The topping mixture of marshmallows, peanuts, and candy corn can also be assembled a day ahead; just keep it in an airtight container to maintain freshness. When you’re ready to serve, sprinkle the topping over the cookie base and broil for that delectable golden finish. This make-ahead approach ensures your dessert tastes just as delicious while saving you valuable time!

What to Serve with Peanut Butter Candy Corn Pizza

Indulge your senses with a warm, delightful feast that marries the sweet nostalgia of fall with comforting textures and vibrant flavors.

  • Creamy Vanilla Ice Cream: The cool creaminess of vanilla ice cream perfectly balances the warm, chewy cookie base, enhancing each bite with a delightful contrast. It’s a classic choice that never fails to elevate a dessert experience.

  • Pumpkin Spice Latte: Embrace the essence of autumn with this popular coffee drink. Its cozy spices complement the sweetness of the Peanut Butter Candy Corn Pizza, creating a warm and inviting atmosphere perfect for gatherings.

  • Warm Apple Crisp: Tender, spiced apples topped with a crunchy oat topping add a refreshing tartness to the sweet flavors of the pizza. This hearty dessert option invites cozy conversations around the table.

  • Milk Chocolate Dipped Strawberries: The sweet and tart strawberries provide a refreshing bite, paired beautifully with the rich peanut butter and candy toppings for a textural delight. They also add a lovely visual contrast to your dessert spread!

  • Cinnamon Sugar Pretzels: Salty, slightly sweet, and cinnamon-dusted, these pretzels introduce a fun crunch and a satisfying chew that complements the soft elements of the pizza. Perfect for snacking while enjoying a slice of dessert.

  • Chai Tea: With its aromatic spices and warmth, chai tea offers a comforting complement that balances the sweetness of the Peanut Butter Candy Corn Pizza. Sip it alongside a slice for a cozy afternoon treat.

  • Caramel Sauce: A drizzle of rich caramel adds an extra layer of indulgence. The gooey texture pairs beautifully with the marshmallows while enhancing the overall sweetness in each bite.

  • Chocolate Milkshake: This decadent shake serves as a delightful drinkable treat that mirrors the pizza’s flavors. Thick and creamy, it’s perfect for those craving another sweet element in their meal.

  • Maple Pecan Muffins: Adding these muffins introduces a nutty warmth that harmonizes with the peanut butter base while giving an extra dose of fall flavors to your dessert experience.

  • Hot Cocoa: Rich, chocolatey hot cocoa rounds out a cozy dessert table. This warm beverage pairs nicely with the peanut butter and candy toppings, perfect for sipping on cold autumn evenings.

Peanut Butter Candy Corn Pizza Recipe FAQs

What kind of cookie dough should I use for the base?
Absolutely! I recommend using refrigerated peanut butter cookie dough for a soft and rich foundation, but feel free to substitute with homemade dough or a gluten-free version if needed.

How should I store leftovers?
To keep your Peanut Butter Candy Corn Pizza fresh, store leftovers in an airtight container at room temperature for up to 3 days. If you’d like it to last longer, refrigerate for up to 5 days, making sure it’s tightly wrapped to prevent drying out.

Can I freeze Peanut Butter Candy Corn Pizza?
Yes, you can absolutely freeze this delicious dessert! Wrap individual slices tightly in plastic wrap and place them in a freezer-safe bag. They will stay good for up to 2 months. When you’re ready to enjoy, just thaw at room temperature or heat in the microwave for a quick treat!

What should I do if the marshmallows burn while broiling?
If your marshmallows start to burn while broiling, don’t panic! Simply remove the pan from the oven immediately and let the pizza cool for a moment. For next time, try keeping a close eye on the oven, or position the rack a bit lower to prevent the marshmallows from getting too close to the heating element.

Are there any dietary considerations I should keep in mind?
Great question! This recipe contains nuts (peanuts) and sugar, so check for any allergies among your guests. If needed, you can make it nut-free by substituting peanuts with sunflower seeds and using nut-free candy options. Also, be mindful of portion sizes due to the high sugar content.

Can I make this dessert ahead of time?
Very much so! You can prepare the Peanut Butter Candy Corn Pizza a day in advance. I recommend baking it and letting it cool completely, but for best texture, slice it just before serving to maintain the cookie’s softness and prevent toppings from sliding off. Enjoy!

Peanut Butter Candy Corn Pizza

Peanut Butter Candy Corn Pizza: A Fall Treat Delight

This Peanut Butter Candy Corn Pizza is a fun and festive dessert ideal for fall gatherings.
Prep Time 15 minutes
Cook Time 15 minutes
Cooling Time 10 minutes
Total Time 40 minutes
Servings: 8 slices
Course: Dessert
Cuisine: American
Calories: 200

Ingredients
  

For the Cookie Base
  • 1 package Refrigerated Peanut Butter Cookie Dough homemade or gluten-free versions can be used
For the Topping
  • 2 cups Miniature Marshmallows or cut regular marshmallows smaller for better melting
  • 1 cup Dry Roasted Peanuts or mixed nuts for a substitute
  • 2 cups Candy Corn can be swapped with other colorful candies
  • 1 cup Reese's Pieces or chocolate chips as an alternative

Equipment

  • 10-inch round pan
  • mixing bowl
  • spatula
  • Knife

Method
 

Step-by-Step Instructions for Peanut Butter Candy Corn Pizza
  1. Preheat your oven to 375°F (190°C) and grease a 10-inch round pan with nonstick spray.
  2. Press the peanut butter cookie dough evenly into the prepared pan and bake for approximately 12 minutes.
  3. Mix the miniature marshmallows, dry roasted peanuts, and candy corn in a bowl until well combined.
  4. Sprinkle the topping mixture over the warm cookie base and return to the oven for another 3 minutes.
  5. Switch the oven to broil and toast the tops of the marshmallows for about 1 minute, being careful not to burn.
  6. Remove from the oven and sprinkle Reese's Pieces over the top, pressing them down slightly.
  7. Allow to cool completely before slicing for clean cuts.

Notes

Keep leftovers in an airtight container at room temperature for up to 3 days. Optionally refrigerate or freeze for longer storage.

Melt-in-Your-Mouth Nutella Raspberry Crumble Cake Bliss

As I took a moment to savor a slice of this Nutella Raspberry Crumble Cake, I couldn’t help but be transported back to my childhood kitchen, where my mother would whip up simple delights that filled our home with warmth. This one-bowl recipe brings together the lusciousness of creamy Nutella and the tartness of fresh raspberries, creating a blissfully uncomplicated dessert perfect for any occasion. Not only does it require minimal cleanup, but it also makes for a great last-minute treat when friends drop by or a charming addition to lunch boxes. With just a few ingredients, you’ll have a satisfyingly tender cake that’s sure to impress! Curious about how to recreate this mouthwatering experience in your own kitchen? Let’s dive into the recipe!

Why You’ll Love This Nutella Cake

Simplicity at Its Best: This one-bowl recipe makes preparation a breeze, allowing you to enjoy baking without the mess.

Irresistible Flavor: The combination of creamy Nutella and tart raspberries creates a blissful balance that’s simply delightful.

Perfectly Textured: Enjoy a soft, tender cake topped with a crumbly layer—it’s a treat for both the eyes and the taste buds!

Versatile Delight: Experiment with substitutions like chocolate spread or different berries to keep your desserts exciting.

Crowd-Pleasing: This cake appeals to everyone—serve it warm with ice cream or chilled for a refreshing treat. Don’t forget to check out my tips for a Nutty Vanilla Cake or a Strawberry Cheesecake Dump for more delicious dessert options!

Nutella Raspberry Crumble Cake Ingredients

For the Batter

  • Butter (6 oz) – Provides moisture and richness; Can substitute with margarine if needed.
  • Raw Sugar (6 oz) – Sweetness and texture; Granulated sugar can be used as a substitute.
  • Eggs (2 small) – Binding agent that adds moisture and fluffiness; Flax eggs can be used for a vegan option.
  • Self-Raising Flour (2 cups) – Structure and lift; For a gluten-free option, use a gluten-free flour blend; if in the US, add 1 extra tablespoon.

For the Filling

  • Nutella (½ cup) – Delivers flavor and moisture; Replace with chocolate spread for a different taste.
  • Fresh Raspberries (1 cup) – Adds tartness and texture; Frozen raspberries can be used if fresh are unavailable.

For the Topping

  • Flaked Coconut (½ cup) – Enhances texture and flavor; Omit for a nut-free version.

Step‑by‑Step Instructions for Nutella Raspberry Crumble Cake

Step 1: Preheat the Oven
Begin your baking journey by preheating your oven to 170°C (340°F). This temperature ensures that your Nutella Raspberry Crumble Cake bakes evenly and achieves that lovely golden crust. While the oven warms up, gather your mixing bowls and prepare your 9-inch round baking tin with parchment paper to prevent sticking.

Step 2: Melt the Butter
In a medium saucepan, melt 6 ounces of butter over low heat, ensuring it’s just melted and not bubbling. Once melted, allow it to cool slightly, then transfer it to a large mixing bowl. Stir in 6 ounces of raw sugar until well combined, creating a smooth mixture that glistens with sweetness and richness.

Step 3: Mix in Eggs and Flour
Crack in 2 small eggs into the buttery sugar blend, whisking until the mixture is frothy. Gradually add 2 cups of self-raising flour to the bowl, mixing until a soft dough forms. This process should take a couple of minutes, and you’ll want to see a cohesive, slightly sticky dough without any dry flour remaining.

Step 4: Shape the Base
Take about ¾ of your dough and press it evenly into the bottom of your lined baking tin. Use your fingers to spread it out smoothly, ensuring it reaches the edges. Bake this base in the preheated oven for 15 minutes, or until it’s just beginning to set and turn light golden, which will create a sturdy foundation for your delicious filling.

Step 5: Prepare the Coconut Mixture
While the base is baking, take the reserved dough and mix it with ½ cup of flaked coconut in a clean bowl. Gently combine these ingredients with your hands or a spatula until the coconut is evenly distributed throughout the dough. This will add a delightful texture to the topping.

Step 6: Assemble the Cake
Once the base has baked, take it out of the oven and spread ½ cup of Nutella over the warm base, creating an even layer. Next, scatter 1 cup of fresh raspberries atop the Nutella. Their tartness will beautifully complement the sweetness of the Nutella, creating a delicious contrast that you’ll love.

Step 7: Crumble the Topping
Pinch off small pieces of the coconut dough and crumble them over the raspberry layer. It’s okay if it doesn’t cover completely; the gaps will add a rustic charm. Ensure the crumbles are evenly distributed to provide that crispy topping once baked.

Step 8: Bake the Crumble Cake
Return the assembled Nutella Raspberry Crumble Cake to the oven and bake for an additional 20 minutes. You’ll know it’s ready when the top is golden brown and the cake is slightly puffed. Your kitchen will be filled with an irresistible aroma, signaling that something delicious is on its way!

Step 9: Cool and Serve
After baking, allow the cake to cool in the tin for about 10-15 minutes before transferring it to a wire rack. This cooling period is essential for achieving clean slices. Slice your Nutella Raspberry Crumble Cake into wedges and serve it warm or let it cool completely for a delightful treat at any time of the day.

Storage Tips for Nutella Raspberry Crumble Cake

  • Room Temperature: Keep the cake in a sealed container at room temperature for up to 3 days to maintain its moisture and flavor.

  • Fridge: If you prefer to store the cake longer, refrigerate it in an airtight container for up to a week. Make sure it’s properly wrapped to prevent it from drying out.

  • Freezer: This Nutella Raspberry Crumble Cake can be frozen for up to 3 months. Wrap it tightly in plastic wrap and then in aluminum foil before placing it in the freezer.

  • Reheating: When ready to enjoy, thaw it in the fridge overnight and reheat slices in the microwave for about 15-20 seconds or enjoy it cold for a refreshing treat!

Nutella Raspberry Crumble Cake Variations

Feel free to customize your Nutella Raspberry Crumble Cake and make it uniquely yours with these delightful variations!

  • Nut-Free: Omit the flaked coconut to create a safer option for those with nut allergies. This alteration results in a cake that still retains its rich flavor without compromising texture.

  • Vegan Delight: Substitute the eggs with flax eggs (1 tablespoon of flaxseed meal mixed with 2.5 tablespoons of water per egg) for a delicious vegan version. This small swap can help you share the joy of baking with everyone!

  • Alternative Sweeteners: Switch raw sugar with honey or maple syrup for a natural, honey-like sweetness. Just remember to reduce the overall liquid in the recipe slightly to maintain proper consistency.

  • Berry Twist: Try mixing in or replacing fresh raspberries with blueberries or strawberries for a fruity change of pace! Each berry provides a unique flavor profile that will keep your dessert journey exciting.

  • Chocolate Lovers: For more intense chocolateiness, replace Nutella with a rich chocolate ganache. This addition will elevate your cake to a luxurious dessert perfect for special occasions.

  • Adding Crunch: Toss in some chopped walnuts or pecans into your crumble topping for an added crunch. The nutty flavor enhances the overall taste and texture, making every bite even more satisfying.

  • Spice It Up: Add a pinch of cinnamon or nutmeg for an aromatic fall twist. This simple spice twist can transform your cake into a cozy treat for chilly evenings.

Don’t forget to check out the delightful simplicity of a Cloudy Sky Jelly Cake or the rich flavors of a Matcha Sponge Cake for more inspiration!

Expert Tips for Nutella Raspberry Crumble Cake

  • Precise Measurements: Use a reliable kitchen scale to measure ingredients accurately, especially for flour, to ensure consistent results in your Nutella Raspberry Crumble Cake.

  • Perfect Butter Temperature: Make sure the melted butter is warm but not hot, as overheating can cook the eggs, affecting the batter’s texture.

  • Cooling Time Matters: Allow the cake to cool adequately before slicing; warm cakes can crumble and result in messy servings. Patience pays off for that perfect slice!

  • Layering Wisely: When spreading Nutella and adding raspberries, be gentle to maintain the integrity of the soft base; this helps avoid unwanted mixing and ensures distinct flavors.

  • Explore Variations: Don’t hesitate to experiment with different nut spreads or fruits to customize your Nutella Raspberry Crumble Cake, keeping your dessert game exciting and enjoyable!

Make Ahead Options

These Nutella Raspberry Crumble Cake options are perfect for busy home cooks looking to save time! You can prepare the dough up to 24 hours in advance; simply make the base and crumbles, then refrigerate them in airtight containers. To maintain quality, avoid assembling the cake until just before baking to keep the raspberries fresh. If you’re short on time, consider assembling the cake but refrigerate it—just allow 10 minutes of extra baking time if it’s chilled. When you’re ready to serve, spread Nutella over the pre-baked base, layer with fresh raspberries, crumble the dough on top, and pop it in the oven for a delightful dessert that’s just as delicious as when freshly made!

What to Serve with Nutella Raspberry Crumble Cake

Pairing your masterpiece with the right accompaniments can elevate your Nutella Raspberry Crumble Cake experience from delightful to divine.

  • Vanilla Ice Cream: The classic choice! A scoop of creamy vanilla ice cream adds a cooling contrast to the warm cake, enhancing its rich flavors.

  • Fresh Whipped Cream: Light and airy, whipped cream provides a luscious, off-set sweetness that beautifully complements the tart raspberries and Nutella.

  • Fresh Berries: A side of mixed fresh berries brings out the fruity notes in your cake while adding a refreshing burst of flavor and color to your plate.

  • Caramel Sauce Drizzle: A warm drizzle of caramel adds a sweet and buttery element that pairs perfectly with the nuttiness of Nutella and the tart raspberries.

  • Coffee or Espresso: Enjoying a slice with a cup of freshly brewed coffee or a rich espresso enhances the chocolate notes, creating an indulgent afternoon treat.

  • Chilled Sparkling Water: Lightly flavored sparkling water can cleanse your palate, making each bite of the cake shine through, especially during warmer seasons.

  • Chocolate Ganache Glaze: For extra chocolatey goodness, a drizzle of chocolate ganache can take your Nutella Raspberry Crumble Cake to new levels of decadence.

With these delightful options, you’ll create a complete sensory experience that friends and family will cherish!

Nutella Raspberry Crumble Cake Recipe FAQs

How do I choose ripe raspberries for this cake?
Absolutely! When selecting raspberries, look for vibrant, plump berries with a deep color and no dark spots, as these indicate freshness. You want them to be firm yet slightly yielding to the touch. If possible, opt for berries that are in season, as they will be sweeter and more flavorful.

What’s the best way to store leftover Nutella Raspberry Crumble Cake?
Very good question! To keep your delicious cake fresh, store it in a sealed container at room temperature for up to 3 days. If you want to extend its life, refrigerate it in an airtight container, where it will stay scrumptious for up to a week.

Can I freeze Nutella Raspberry Crumble Cake?
Absolutely! This cake freezes beautifully. Wrap it tightly in plastic wrap and then in aluminum foil to protect it from freezer burn. When stored properly, it can last for up to 3 months. To enjoy, just thaw it overnight in the fridge before serving, or you can indulge in a slice straight from the freezer if you’re feeling adventurous!

What should I do if my cake crumbles when slicing?
If your Nutella Raspberry Crumble Cake crumbles while slicing, don’t worry—this can happen! Always ensure your cake has cooled completely before cutting, as warm cakes tend to be more fragile. Use a sharp knife, and for best results, warm the knife slightly under hot water (then dry off) for easier slicing.

Are there any dietary considerations for this cake?
Very much so! This recipe contains dairy and eggs; however, you can easily modify it for dietary restrictions. For a vegan version, substitute the eggs with flax eggs (1 tablespoon of ground flaxseed mixed with 3 tablespoons of water for each egg) and use a plant-based butter. Make sure to check the labels on the Nutella or
chocolate spread you’re using, as they can contain dairy. Always prioritize your allergies and dietary needs when baking!

Nutella Raspberry Crumble Cake

Melt-in-Your-Mouth Nutella Raspberry Crumble Cake Bliss

This Nutella Raspberry Crumble Cake features a delightful balance of creamy Nutella and tart raspberries, creating an irresistible dessert.
Prep Time 20 minutes
Cook Time 35 minutes
Cooling Time 15 minutes
Total Time 1 hour 10 minutes
Servings: 8 slices
Course: Dessert
Cuisine: American
Calories: 300

Ingredients
  

For the Batter
  • 6 oz Butter Can substitute with margarine if needed.
  • 6 oz Raw Sugar Granulated sugar can be used as a substitute.
  • 2 small Eggs Flax eggs can be used for a vegan option.
  • 2 cups Self-Raising Flour For gluten-free option, use gluten-free flour blend.
For the Filling
  • 0.5 cup Nutella Replace with chocolate spread for a different taste.
  • 1 cup Fresh Raspberries Frozen raspberries can be used if fresh are unavailable.
For the Topping
  • 0.5 cup Flaked Coconut Omit for a nut-free version.

Equipment

  • Medium saucepan
  • Large mixing bowl
  • 9-inch round baking tin

Method
 

Step-by-Step Instructions
  1. Preheat your oven to 170°C (340°F) and prepare your 9-inch round baking tin with parchment paper.
  2. Melt 6 ounces of butter in a medium saucepan over low heat. Allow it to cool slightly before mixing with 6 ounces of raw sugar until smooth.
  3. Incorporate 2 small eggs into the mixture, whisking until frothy. Gradually mix in 2 cups of self-raising flour until a soft dough forms.
  4. Press about ¾ of your dough into the bottom of the lined baking tin and bake for 15 minutes until light golden.
  5. Mix the reserved dough with ½ cup of flaked coconut until evenly distributed.
  6. Spread ½ cup of Nutella over the baked base and scatter 1 cup of fresh raspberries on top.
  7. Crumble the coconut dough over the raspberry layer, ensuring even distribution.
  8. Bake the assembled cake for an additional 20 minutes until the top is golden brown.
  9. Cool in the tin for 10-15 minutes before transferring to a wire rack. Slice and serve warm or cool.

Notes

Use precise measurements and allow the cake to cool adequately before slicing for clean servings. Experiment with different nut spreads or fruits for variety.

Cheesy Halloween Breadstick Bones That Wow Every Guest

As I stood in my kitchen, the aroma of baking dough mingled with a sense of festive excitement, it struck me how the simplest recipes can leave a lasting impression. Enter these Cheesy Halloween Breadstick Bones, a spooky delight that blends culinary creativity with party fun! Perfectly crafted for Halloween gatherings, they offer a whimsical twist on the ordinary breadstick—golden brown on the outside and ooey-gooey on the inside. These vegetarian snacks not only come together in just 30 minutes, but they also pair splendidly with a vibrant marinara dip that looks delightfully “bloody.” Whether you’re entertaining little ghosts or grown-up ghouls, these breadstick bones are the perfect way to elevate your celebratory spread. Curious to dive into a recipe that will surely become your new go-to for Halloween festivities? Let’s get baking!

Why Are These Breadstick Bones a Must-Make?

Irresistible Fun: These Cheesy Halloween Breadstick Bones are not just snacks—they’re an adventure! Perfect for bringing a smile to both kids and adults.

Quick & Easy: With only 30 minutes needed, you can whip these up last minute for surprise guests or planned parties.

Endless Customization: Whether you prefer adding herbs for extra flavor or switching to vegan cheese, these breadsticks adapt to suit everyone’s tastes.

Gooey Goodness: The combination of mozzarella and Parmesan creates a delectable melt-in-your-mouth experience that will leave everyone asking for more.

Perfect Party Pleaser: They pair excellently with various dips, like our spooky marinara sauce, ensuring they’ll never go out of style at your gatherings.

Cheesy Halloween Breadstick Bones Ingredients

For the Breadsticks

  • Pizza Dough – This is the base ingredient for the breadsticks; you can also use gluten-free dough if needed.
  • Butter – Adds richness and helps with browning; try using garlic butter for an extra flavor kick.
  • Parmesan Cheese – Provides a crispy, savory layer; freshly grated is best for maximum flavor.
  • Mozzarella Cheese – Creates that perfect stretchy cheese pull; using freshly shredded ensures optimal melting.

For the Dipping Sauce

  • Marinara Sauce – A fun and “bloody” dip that makes these Cheesy Halloween Breadstick Bones even more appealing; feel free to substitute with your favorite sauce.

These ingredients come together to create a delightful Halloween appetizer that’s sure to impress your guests!

Step‑by‑Step Instructions for Cheesy Halloween Breadstick Bones

Step 1: Preheat and Prepare
Begin by preheating your oven to 400°F (200°C). While the oven warms up, line two baking sheets with parchment paper and dust them lightly with flour. This will prevent the Cheesy Halloween Breadstick Bones from sticking and ensure they bake evenly, creating that perfect golden color we’re aiming for.

Step 2: Shape the Dough
Take your pizza dough and divide it into equal pieces. Roll each piece into an 8-inch rope, making the ends slightly thicker than the center to mimic the shape of a bone. This attention to detail will give your spooky snacks character and texture, ensuring they look as fun as they taste!

Step 3: Form Bone Shapes
To create the bone effect, snip a 1-inch cut at each end of the rolled ropes and gently pull the tips apart. This will help form the distinct bone shape. Carefully place these shaped dough pieces on your prepared baking sheets, ensuring they have space to expand while baking.

Step 4: Brush and Sprinkle
Once all your bone-shaped dough is arranged, brush them generously with melted butter, which will yield a delicious, golden-brown crust. Next, sprinkle a layer of freshly grated Parmesan cheese on top of each, enhancing the flavor and providing a delightful crispy texture in each Cheesy Halloween Breadstick Bone.

Step 5: Bake for Golden Perfection
Slide the baking sheets into your preheated oven and bake for 15 minutes. Keep an eye on the breadsticks as they bake; you’ll know they’re ready when they puff up and turn lightly golden. This is the moment when your kitchen will start to smell heavenly!

Step 6: Add the Gooey Topping
After the initial baking time, remove the breadsticks from the oven. Generously sprinkle shredded mozzarella cheese on top of each, making sure they’re well-covered for that delightful gooey effect. Place them back in the oven and bake for an additional 5-7 minutes until the cheese is melted and bubbly, creating a truly irresistible finish.

Step 7: Serve with a Spooky Dip
Once your Cheesy Halloween Breadstick Bones are hot, golden, and ooey-gooey, remove them from the oven. Serve them warm on a festive platter, ideally accompanied by a bowl of marinara sauce in the center to create that deliciously “bloody” dip. This presentation adds to the spooky allure while ensuring everyone can enjoy the delightful combination!

Cheesy Halloween Breadstick Bones Variations

Feel free to put your own twist on these delightful breadstick bones and make them even more enchanting for your Halloween gatherings!

  • Dairy-Free: Use vegan cheese alternatives to make these bone-shaped treats suitable for those avoiding dairy. It’s amazing how plant-based options can still be creamy and delicious.

  • Herb-Infused: Adding dried herbs like rosemary or oregano to the dough will elevate the flavor profile and add a fragrant touch that complements the cheesy goodness.

  • Spicy Surprise: Mix in some crushed red pepper flakes or jalapeño slices for a delightful heat that surprises in every bite. It’s a thrilling twist for those who love a little kick!

  • Cheesy Loaded: Layer some shredded cheddar or pepper jack cheese on top along with the mozzarella for an extra cheesy experience that will please every cheese lover.

  • Vegetable Boost: Fold in finely chopped spinach or sun-dried tomatoes into the dough to add a burst of color and nutrition. This not only enhances visual appeal but also packs a nutritious punch!

  • Garlic Lovers: Brush the dough with garlic-infused olive oil instead of regular melted butter. This will deliver a tantalizing aroma and flavor that garlic enthusiasts will adore.

  • Gluten-Free: Use a gluten-free pizza dough to make these spoooky snacks accessible for everyone at your gathering. It’s just as fun without the gluten!

  • Sweet Heat: For a fun dessert twist, after baking, drizzle a spicy honey or a touch of sriracha over the cheesy bones. It transforms your appetizer into a playful sweet and spicy treat!

These variations are perfect for pairing with delightful dips, like our Cheesy Fries or Cheesy Zucchini Rolls, ensuring your Halloween spread is as vibrant as it is delicious!

Make Ahead Options

These Cheesy Halloween Breadstick Bones are perfect for meal prep, allowing you to enjoy spooky snacks without the last-minute rush! You can shape the bones and freeze them for up to 3 days in advance before baking. Simply prepare the dough, form the bone shapes, and arrange them on a parchment-lined baking sheet. Cover the tray with plastic wrap and pop them in the freezer. When it’s time to serve, bake them directly from frozen for about 18-22 minutes. This way, you can achieve that golden-brown crust and gooey cheese exactly as intended while saving precious time on Halloween night!

Expert Tips for Cheesy Halloween Breadstick Bones

  • Dough Temperature: Let the dough come to room temperature before rolling out. This makes it easier to shape those fun bones without tearing!

  • Cheese Choice: Stick with freshly shredded mozzarella for that perfect gooey pull. Pre-packaged cheese often contains anti-caking agents that can affect melt quality.

  • Butter Brushing: Don’t skimp on the melted butter! A generous brush not only adds flavor but also helps achieve that delightful golden-brown color.

  • Shape Consistency: Keep your bone shapes uniform in size for even baking. This ensures a consistent texture and looks great on the platter!

  • Freezing for Later: If you want to prep ahead, shape the breadsticks and freeze them before baking. Bake from frozen, adding a few extra minutes to the cooking time.

  • Try Flavored Dough: Infuse the dough with garlic or rosemary to elevate the flavor. It’s a small touch that enhances the deliciousness of your Cheesy Halloween Breadstick Bones!

What to Serve with Cheesy Halloween Breadstick Bones

Elevate your Halloween gathering with delightful accompaniments that enhance the spooktacular experience of these cheesy delights.

  • Creepy Cauliflower and Cheese Dip: This cheesy, creamy dip adds a delightful contrast of texture and flavor, perfect for pairing with your bone-shaped breadsticks.

  • Festive Fruit Platter: A mix of seasonal fruits like pomegranates, grapes, and oranges brings freshness and a splash of color, balancing the savory goodness of your breadsticks.

  • Spooky Stuffed Peppers: Miniature bell peppers filled with spicy cheese blend add a colorful, playful element to your platter, ensuring every bite is a fun adventure.

  • Ghoulish Guacamole: Avocado mixed with cilantro and lime brings a creamy, zesty dip that complements the warmth of the cheesy breadsticks wonderfully. Serve it alongside a sprinkle of eerie green herbs for effect!

  • Pumpkin Soup Shooter: A warm, velvety pumpkin soup served in shot glasses provides a seasonal flair, enhancing the Halloween theme while offering a savory contrast.

  • Chilling Chili: A mild chili with legumes adds heartiness and a touch of warmth to your spread. It pairs beautifully for a dip and serves those who crave a little extra comfort.

These pairings not only satisfy the taste buds but also amplify the fun of your spooky celebrations!

How to Store and Freeze Cheesy Halloween Breadstick Bones

  • Room Temperature: Store leftover Cheesy Halloween Breadstick Bones in an airtight container for up to 2 days, ensuring they remain soft and fresh for snacking.

  • Fridge: For longer storage, keep them in the fridge for up to 3 days. Reheat in the oven for a few minutes to restore their gooey texture.

  • Freezer: Freeze unbaked Cheesy Halloween Breadstick Bones after shaping. Store them in a freezer-safe bag for up to 3 months. Bake directly from frozen, adding a few extra minutes to the baking time.

  • Reheating: To reheat, place leftover breadsticks in a preheated oven at 350°F (175°C) for about 5–10 minutes, or until warmed through and the cheese is melty again.

Cheesy Halloween Breadstick Bones Recipe FAQs

How do I know if my pizza dough is ripe enough to use?
Absolutely! Pizza dough should be soft and pliable, not overly sticky or dry. If you can stretch it without it tearing, you’re good to go! On the other hand, if it feels tough, let it rest for about 10-15 minutes to warm up, making it easier to work with.

What’s the best way to store leftover Cheesy Halloween Breadstick Bones?
For room temperature storage, keep your leftover breadsticks in an airtight container for up to 2 days. If you’d like them to last longer, refrigerate them for up to 3 days. Reheating is easy—just pop them in a 350°F (175°C) oven for about 5-10 minutes to bring back that gooey goodness!

Can I freeze the Cheesy Halloween Breadstick Bones?
Certainly! After shaping, freeze the unbaked breadsticks by laying them on a baking sheet until solid, then transfer them to a freezer-safe bag. They’ll keep well for up to 3 months. When you’re ready to enjoy, bake them straight from the freezer, allowing an extra few minutes for cooking.

What should I do if my cheese isn’t melting properly?
Very! Ensure you’re using freshly shredded mozzarella cheese for the best melting quality. Avoid pre-packaged options with anti-caking agents, which can lead to uneven melting. If you’re still having trouble, try adding a touch of olive oil to the cheese before sprinkling it on your breadsticks—it helps improve the melt.

Are these Cheesy Halloween Breadstick Bones safe for everyone to eat?
Absolutely! These breadsticks are vegetarian-friendly and can easily be tailored to various dietary needs. For a dairy-free option, simply substitute the cheese with vegan alternatives. Just remember to check labels for any potential allergens if serving guests with allergies.

What’s a fun variation for these Cheesy Halloween Breadstick Bones?
You can get creative by adding different herbs to the dough! Try mixing in fresh garlic or dried Italian herbs like oregano and basil. This customization enhances the flavor profile while keeping that spooky, fun form intact. Plus, it’s a great way to cater to different taste preferences at your Halloween gathering!

Cheesy Halloween Breadstick Bones

Cheesy Halloween Breadstick Bones That Wow Every Guest

Cheesy Halloween Breadstick Bones are a spooky delight perfect for Halloween gatherings, blending culinary creativity with party fun!
Prep Time 10 minutes
Cook Time 15 minutes
Additional Baking Time 7 minutes
Total Time 30 minutes
Servings: 8 breadsticks
Course: Other
Cuisine: American
Calories: 150

Ingredients
  

For the Breadsticks
  • 1 package Pizza Dough Gluten-free dough can be used.
  • 4 tablespoons Butter Use garlic butter for extra flavor.
  • 1 cup Parmesan Cheese Freshly grated is best.
  • 2 cups Mozzarella Cheese Freshly shredded for optimal melting.
For the Dipping Sauce
  • 1 cup Marinara Sauce Substitute with your favorite sauce.

Equipment

  • oven
  • Baking sheets
  • parchment paper
  • Rolling Pin

Method
 

Step-by-Step Instructions
  1. Preheat your oven to 400°F (200°C). Line two baking sheets with parchment paper and dust lightly with flour.
  2. Divide the pizza dough into equal pieces and roll each into an 8-inch rope.
  3. Snip a 1-inch cut at each end of the ropes and pull the tips apart to form the bone shape.
  4. Brush the shaped dough with melted butter and sprinkle Parmesan cheese on top.
  5. Bake in the preheated oven for 15 minutes until golden.
  6. Sprinkle shredded mozzarella on top and bake for an additional 5-7 minutes until melted.
  7. Serve warm with marinara sauce for dipping.

Notes

Tip: Let the dough sit at room temperature for better shaping. Use freshly shredded cheese for the best results.

Crunch Roll Sushi: Your New Favorite Easy Sushi Recipe

With a satisfying crunch that turns every bite into a celebration, Homemade California Crunch Roll Sushi is my go-to when craving something vibrant and fun. This sushi variety takes the traditional approach and flips it on its head by using fully cooked ingredients, making it unbelievably approachable for anyone, even if you’re a total newbie in the kitchen! You won’t believe how easy it is to throw together this customizable, comforting dish that can easily impress friends or family. Plus, the ability to personalize fillings like creamy avocado or crispy cucumber means you can truly make it your own. Are you ready to roll up something delicious? Let’s dive into the world of sushi-making together!

Why is Crunch Roll Sushi a Game Changer?

Simplicity in preparation makes this Crunch Roll Sushi perfect for beginners; you’ll be amazed at how quickly you can whip it up. Flavor-packed layers of imitation crab and creamy avocado marry perfectly with the crunchy topping, delivering satisfaction in every bite. Endless customization allows you to personalize each roll, whether you prefer spicy mayo or fresh cucumbers. Enjoyable for all, this sushi appeals to everyone, from sushi skeptics to seasoned chefs. If sushi isn’t your usual jam, you might also relish a delightful Veggie Crunch Cucumber salad as a side! Ready to impress? Let’s get rolling!

Crunch Roll Sushi Ingredients

For the Sushi Rice
Sushi rice – The star of the roll, providing the perfect sticky base.
Water – Essential for cooking the sushi rice to a fluffy texture.
Seasoned rice vinegar – A splash adds that classic sushi flavor.

For the Filling
Imitation crab – Offers the traditional taste of sushi without any raw fish worry.
Avocado – Adds a creamy texture; can be swapped for cream cheese for a richer bite.
Cucumber – Brings freshness and crunch; carrots can be a colorful alternative.

For the Wrap
Nori sheets – The seaweed that holds it all together; opt for sushi-grade for best results.

For the Topping
Spicy mayo – A zesty drizzle that completes your Crunch Roll Sushi; eel sauce makes a sweet substitute.
Crunchy toppings (panko breadcrumbs, French fried onions, or tempura flakes) – Choose your favorite for an extra layer of texture and visual appeal!

Now that you have gathered all the ingredients for your Crunch Roll Sushi, it’s time to unleash your inner sushi chef!

Step‑by‑Step Instructions for Crunch Roll Sushi

Step 1: Prepare Sushi Rice
Start by rinsing 1 cup of sushi rice under cold water until the water runs clear, removing excess starch. Next, combine the rinsed rice with 1¼ cups of water in a rice cooker or saucepan. Cook the rice according to your appliance instructions. Once cooked, let it steam for 10 minutes off heat, then gently fold in seasoned rice vinegar while the rice is still warm.

Step 2: Set up Workstation
Gather your ingredients and arrange your nori sheets, prepared sushi rice, fillings (imitation crab, avocado, cucumber), and sauces on a clean surface. Lay down a bamboo sushi mat, wrapping it in plastic wrap to prevent sticking. This organized setup will streamline the rolling process for your delicious Crunch Roll Sushi.

Step 3: Roll Sushi
Moisten your fingers to prevent rice sticking as you scoop a thin layer of sushi rice onto the shiny side of the nori, spreading it evenly, leaving a 1-inch border at the top. Carefully flip the nori over so the rice is facing down, then place your fillings horizontally across the center. Using the sushi mat, roll tightly from the bottom, applying gentle pressure to form a compact roll.

Step 4: Add Crunch
With the roll formed, brush the top with spicy mayo or eel sauce for added flavor. Sprinkle your choice of crunchy toppings—like panko breadcrumbs, French fried onions, or tempura flakes—on top, gently pressing down to ensure they stick. This will provide the signature crunch to your Crunch Roll Sushi, enhancing both flavor and texture.

Step 5: Slice & Serve
To slice the roll, use a sharp knife moistened with water to prevent sticking. Cut the roll into even pieces, about 1 inch thick, using a gentle sawing motion to achieve clean edges. Arrange the slices on a plate and drizzle with extra spicy mayo or eel sauce, if desired. Pair with soy sauce, pickled ginger, and wasabi for a perfect finish!

Make Ahead Options

Homemade California Crunch Roll Sushi is a breeze to prepare ahead of time, making it an ideal choice for busy weeknights or entertaining guests. You can pre-cook the sushi rice up to 24 hours in advance and store it in the refrigerator, ensuring it remains moist by covering it with a damp paper towel. Additionally, you can slice your fillings (like avocado and cucumber) and store them in airtight containers for up to 3 days. When you’re ready to assemble, simply roll the sushi and add your crunchy toppings just before serving for maximum freshness. This way, you’ll have a delightful meal ready to enjoy with minimal effort!

What to Serve with Homemade California Crunch Roll Sushi

Elevate your sushi experience with delightful pairings that bring out the best of your Homemade Crunch Roll Sushi.

  • Creamy Avocado Salad: This fresh salad complements the sushi’s creamy fillings, enhancing your meal’s texture and flavor profile.
  • Pineapple Cucumber Salad: The sweet and tangy notes contrast beautifully with the savory sushi, adding freshness and crunch to your plate.
  • Miso Soup: Warm, umami-rich miso soup balances the sushi’s flavors and provides a comforting, traditional touch to the meal.
  • Edamame: Lightly salted edamame serves as a delightful snack, offering protein and a satisfying pop that contrasts with the sushi’s soft texture.
  • Japanese Pickles: The tangy crunch of pickled vegetables cleanses the palate between bites, making for an adventurous eating journey.
  • Green Tea: Sipping on fragrant green tea adds a calming element, perfectly harmonizing with the flavors of the sushi and promoting digestion.
  • Dessert Option: Cherry Cream Cheese Danish provides a sweet ending to your meal, contrasting the savory notes of your sushi while delighting the senses.
  • Soy Sauce Dipping Bowl: A classic choice, a small bowl of soy sauce brings an essential saltiness that enhances each bite of your Crunch Roll Sushi. Enjoy experimenting with different flavors!

Crunch Roll Sushi: Easy Variations to Try

Get creative and make this Crunch Roll Sushi your own with these fun and flavorful tweaks!

  • Veggie Delight: Swap in marinated tofu or tempeh for a delicious vegan option, bursting with plant-based protein and flavor.
    Explore the harmony of tastes as you combine fresh veggies for a refreshing twist.

  • Mango Magic: Add a slice of ripe mango for a sweet and juicy surprise inside your roll.
    The tropical fruit’s subtle sweetness beautifully complements the creamy avocado!

  • Shrimp Tempura: For those looking for an extra crunch, throw in some crispy shrimp tempura for a delightful flavor explosion.
    The combination of textures goes perfectly with the delicate sushi rice!

  • Cauliflower Rice: Make it low-carb by substituting traditional sushi rice with cauliflower rice.
    This clever swap maintains that satisfying bite while keeping it light and nutritious.

  • Spicy Options: Amp up the heat by infusing sriracha into your spicy mayo or adding jalapeño slices directly into the filling.
    Let your taste buds ignite with each spicy roll—just a little goes a long way!

  • Crunchy Inclusivity: Incorporate different crunchy toppings like French fried onions or crushed tempura flakes for added texture.
    Experiment with combinations to find your ultimate crunch level!

  • Swap Out Cucumber: Use bell peppers or radishes instead for an exciting crunch with a hint of sweetness.
    This simple swap brightens up the flavor profile and adds delightful color to your sushi!

  • Asian-Inspired Fillings: Take inspiration from other Asian dishes and add hoisin sauce, pickled gingery daikon, or even quick-pickled carrots.
    These unique additions will elevate your Crunch Roll Sushi to gourmet status.

So why not explore these variations? If you’re looking for something a bit different, try pairing your sushi alongside a light and refreshing Crunchy Cabbage Carrot salad to complete the meal. There’s no limit to what you can create!

Expert Tips for Crunch Roll Sushi

Rinse Thoroughly: Rinse sushi rice until the water is clear to avoid mushiness during cooking. This ensures you have the right texture for your Crunch Roll Sushi.

Spread Evenly: When layering rice on the nori, make sure it’s spread evenly and not too thick. This prevents issues when rolling and avoids overfilling.

Cut Nori to Size: If your nori sheets are too large for your sushi mat, cut them to size. This will make rolling much easier and more manageable.

Gentle Slicing: Use a well-moistened knife with a gentle sawing motion to cut the sushi roll. This helps achieve clean slices and maintains the roll’s structure.

Customize Fillings: Don’t hesitate to play with fillings! Adding different ingredients can enhance the flavor and make your Crunch Roll Sushi truly unique!

Storage Tips for Crunch Roll Sushi

  • Room Temperature: Enjoy your Crunch Roll Sushi fresh! If left out, consume it within 2 hours to maintain quality and food safety.
  • Fridge: Store any leftover sushi in an airtight container in the fridge for up to 1 day. The rice may lose some texture but will still be delicious.
  • Freezer: For longer storage, wrap the sushi tightly in plastic wrap and then place in a freezer-safe bag. It can be frozen for up to 2 weeks, though freshness may diminish.
  • Reheating: To enjoy frozen sushi, thaw in the fridge overnight. Avoid reheating in the microwave to preserve the texture; eat it cold or at room temperature for best flavor.

Crunch Roll Sushi Recipe FAQs

How do I select the best sushi rice?
Absolutely! Look for short-grain sushi rice as it provides the perfect sticky texture essential for rolling. When shopping, make sure it’s labeled as “sushi rice” or “Calrose rice.” Different types can affect the final result; the stickier, the better!

What is the best way to store leftover Crunch Roll Sushi?
For the best taste, store leftover sushi in an airtight container in the fridge for up to 1 day. While the rice may lose its ideal texture, it will still taste delicious. Make sure to consume it within this time frame to enjoy its fresh flavors!

Can I freeze my Crunch Roll Sushi?
Yes, you can! To freeze, wrap the sushi tightly in plastic wrap, then place it in a freezer-safe bag. It can be frozen for up to 2 weeks. To serve, thaw it in the refrigerator overnight and enjoy it cold or at room temperature. Avoid using a microwave to reheat as it can alter the texture.

What if my sushi rolls are falling apart when cutting?
No worries! This can happen if your rolls are overfilled or if the sushi rice isn’t sticky enough. Ensure you’re using the right rice and don’t overstuff! If you’re having trouble, try rolling in a few extra layers of nori next time to help contain the fillings.

Can I make this Crunch Roll Sushi vegan-friendly?
Very much so! Swap out the imitation crab for marinated tofu for a great vegan alternative. Additionally, experiment with other fillings like various veggies or fruits, such as mango, which can add delightful flavors while keeping it plant-based.

Is there any allergen information to consider for this recipe?
It’s important to acknowledge that imitation crab may contain fish and is often mixed with wheat, so folks with shellfish or gluten allergies should tread carefully. Always check labels for any specific allergens, or choose alternatives that suit dietary needs.

Crunch Roll Sushi

Crunch Roll Sushi: Your New Favorite Easy Sushi Recipe

Crunch Roll Sushi offers a satisfying crunch in every bite, ideal for sushi beginners and customizable with various fillings.
Prep Time 30 minutes
Cook Time 20 minutes
Resting Time 10 minutes
Total Time 1 hour
Servings: 4 rolls
Course: Lunch
Cuisine: Japanese
Calories: 250

Ingredients
  

For the Sushi Rice
  • 1 cup sushi rice provides the perfect sticky base
  • 1.25 cups water essential for cooking the sushi rice
  • 2 tablespoons seasoned rice vinegar adds classic sushi flavor
For the Filling
  • 1 cup imitation crab traditional taste without raw fish
  • 1 whole avocado adds creaminess
  • 1 whole cucumber provides freshness and crunch
For the Wrap
  • 4 sheets nori sheets holds the roll together
For the Topping
  • 2 tablespoons spicy mayo completes the flavor
  • 1 cup crunchy toppings like panko breadcrumbs or tempura flakes

Equipment

  • rice cooker
  • bamboo sushi mat
  • sharp knife

Method
 

Step-by-Step Instructions
  1. Rinse sushi rice under cold water until clear. Combine with water and cook in a rice cooker or saucepan.
  2. Gather ingredients, arranging nori sheets, prepared sushi rice, fillings and sauces on a clean surface.
  3. Moisten fingers and scoop a thin layer of sushi rice on the shiny side of nori. Flip nori and add fillings in the center.
  4. Brush the roll top with spicy mayo, and sprinkle chosen crunchy toppings, ensuring they stick.
  5. Use a moistened knife to cut the roll into even pieces, arranging them on a plate to serve.

Notes

Customize fillings to enhance flavor and make your Crunch Roll Sushi unique! Maintain freshness by enjoying it within 2 hours or store properly.